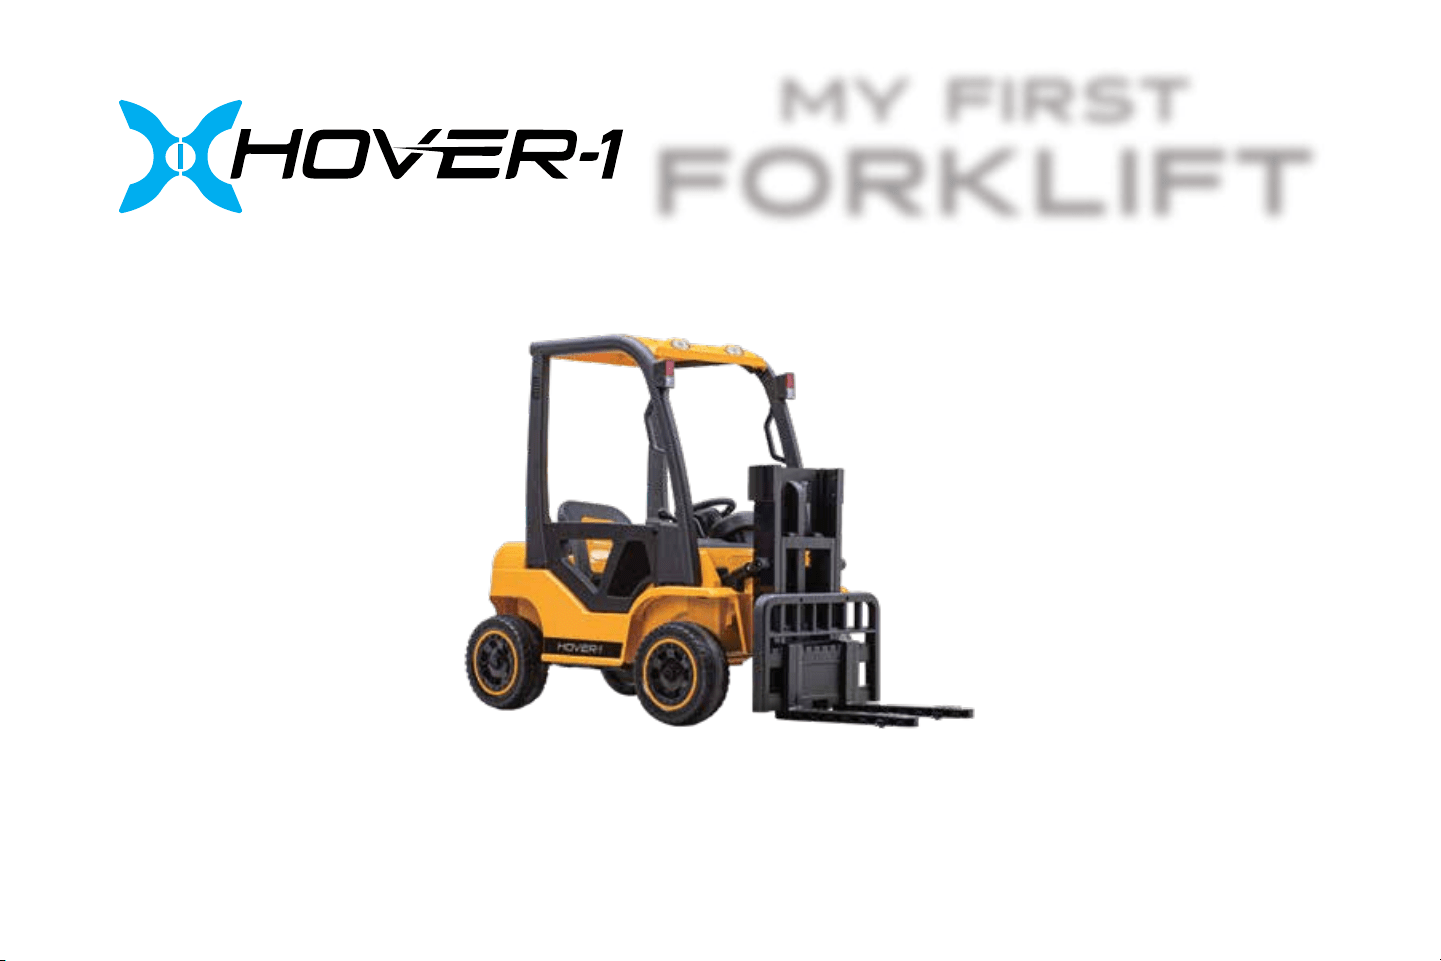
MY FIRST
FORKLIFT
OPERATION MANUAL
H1-FLFT

2
3
This manual is designed to give you the information you need for the safe operation and maintenance of your Hover-1
My First Forklift. Please read it thoroughly before operating your My First Forklift.
My First Forklift Diagram
Parts List
Assembly
Controls
Riding Your My First Forklift
Care & Maintenance
Pre-Ride Checklist
Warnings
Saftey Precautions
FCC Statement
Warranty
4
5 - 6
7-13
14
15
16-17
18
19
20-21
22
23
TABLE OF CONTENTS PAGES
INTRODUCTION
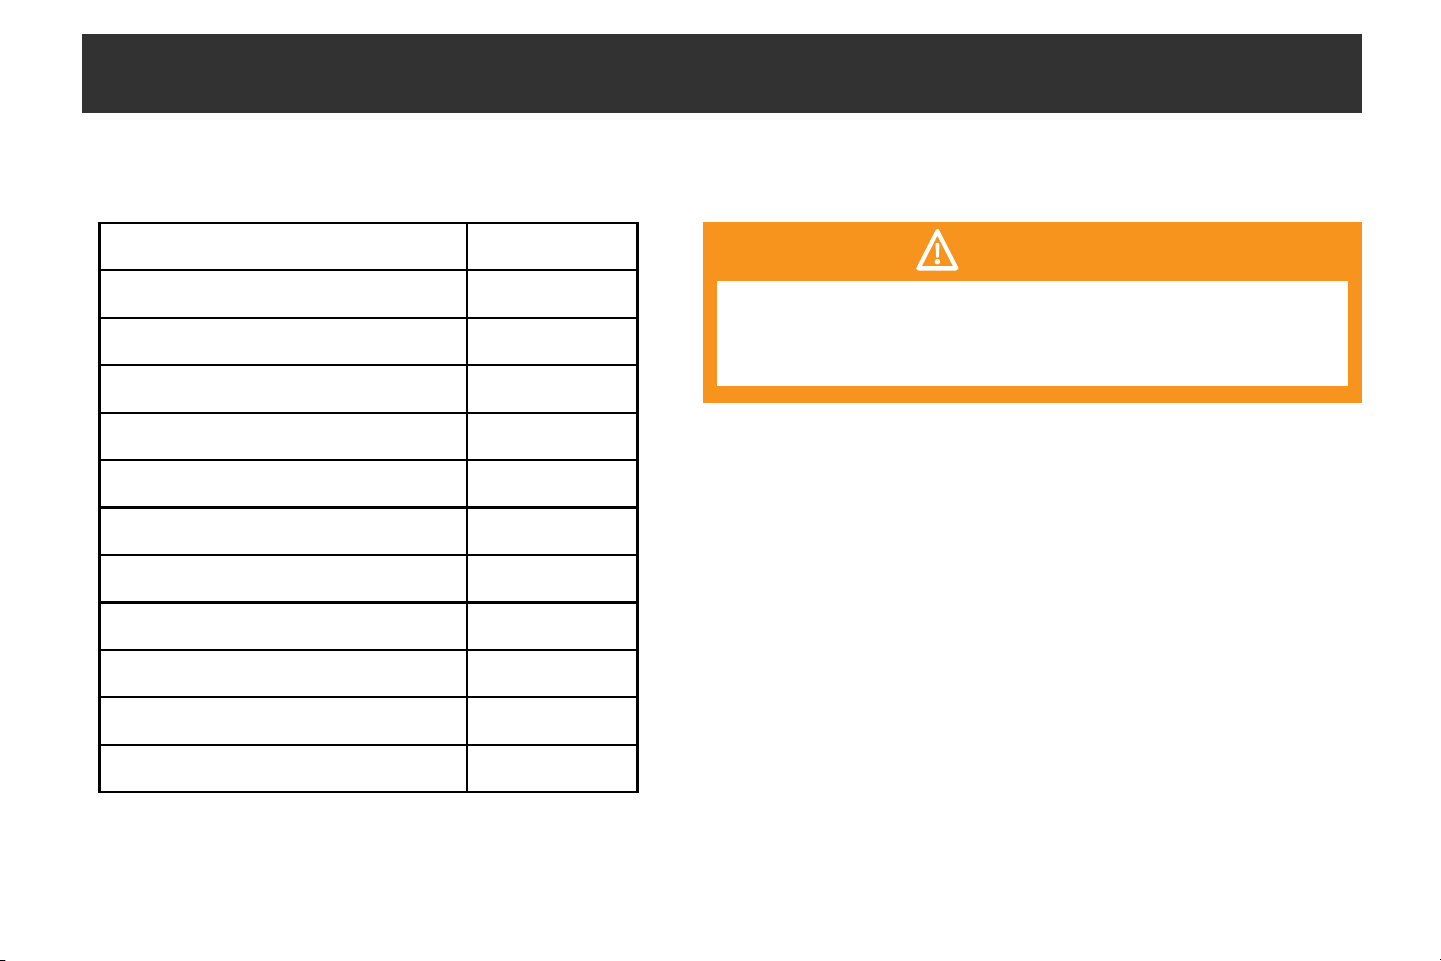
WARNING
Make sure you read this complete manual before operating
your My First Forklift. Failure to follow its guidelines could lead
to serious injury or death.
4
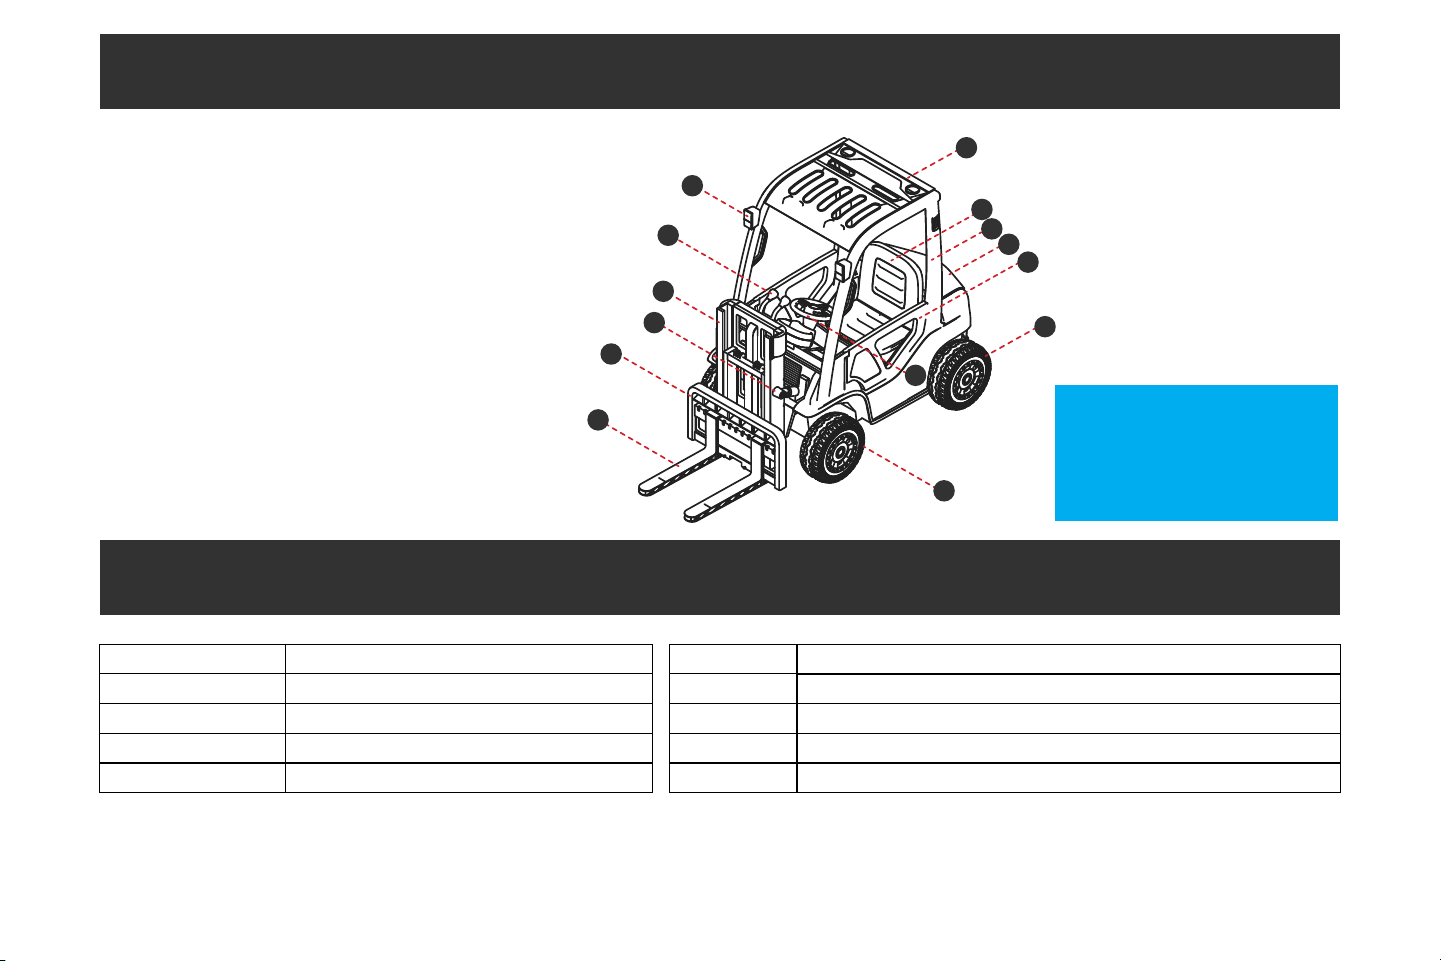
MY FIRST FORKLIFT DIAGRAM
SPECIFICATIONS
Battery 12V/10Ah
Brushless Motor 80W (dual 40W motors)
Rider Age Range 3+
Max Rider Weight 66 lbs (30 kg)
Max Lifting Weight 25 lbs (11 kg)
Dimensions 57.5” x 24.8” x 39.8” (146 x 63 x 101 cm)
Speed 3 mph (4.8 km/h)
Usage Time Up to 2 hours
Charge Input AC: 110V - 220V Output DC: 12V-1000m
Range 3 miles
1. Front Fork
2. Fork Frame
3. Front Fork Link
4. Front Fork Lift
5. Lever
6. Headlight
7. Roof
8. Seat
9. Door Frame
10. Trunk Lid
11. Door
12. Rear Wheel
13. Steering Wheel
14. Front Wheel
Please visit
www.hover-1.com/troubleshoot
to request replacements for
missing or defective parts
1
2
3
4
5
6
7
8
9
10
11
12
13
14
5
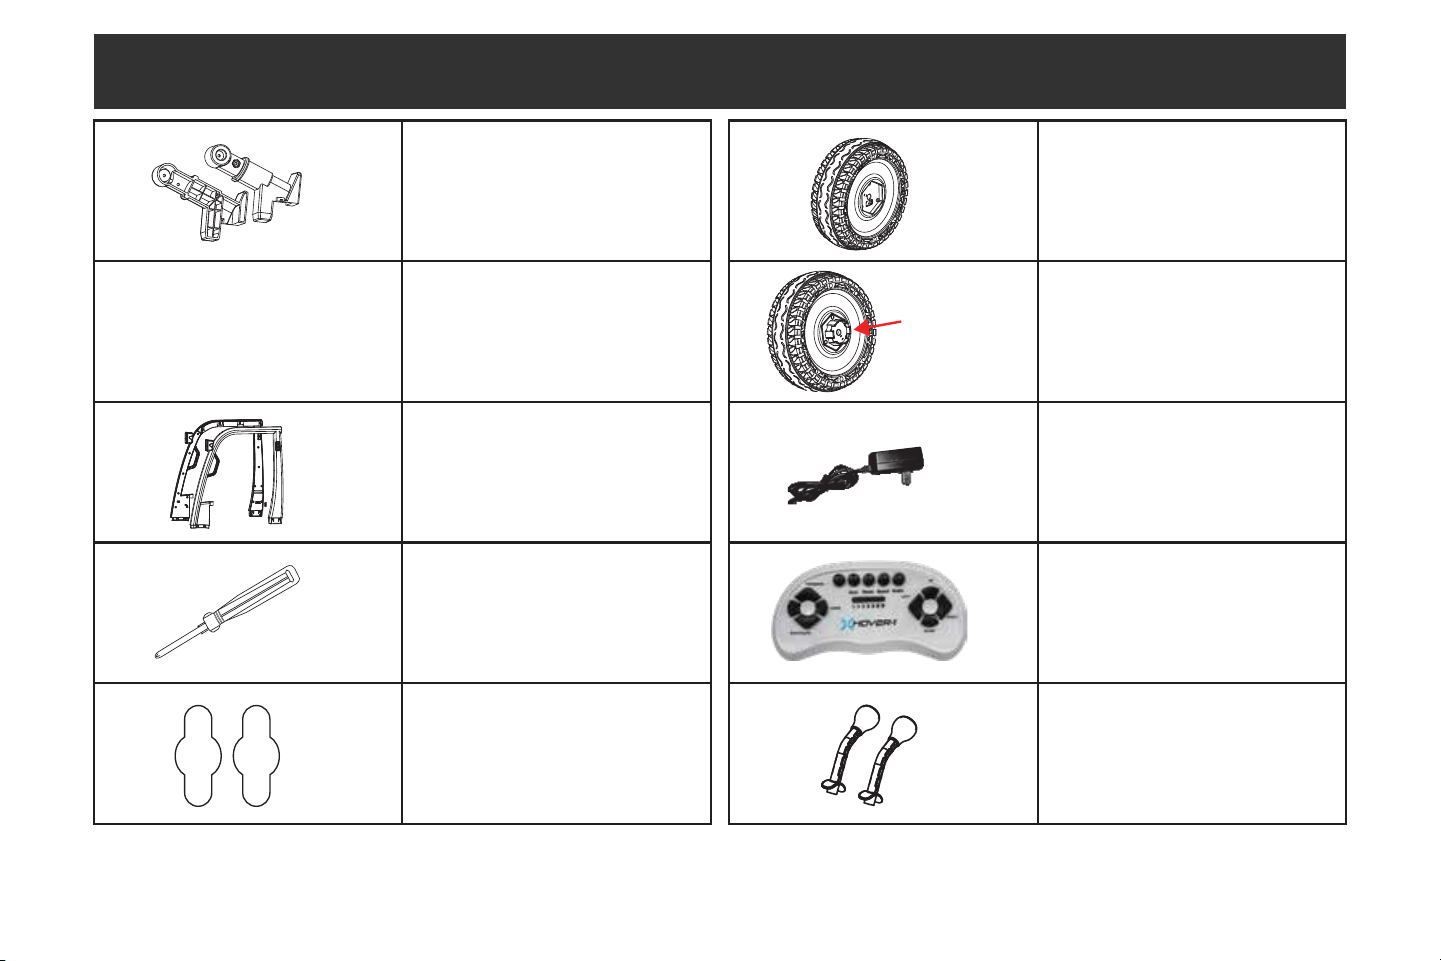
(2) Front Fork Links
(4) Wheel Covers
(2) Door Frames
(1) Screwdriver
(2) Spanners
(2) Front Wheels
(2) Rear Wheels
(1) Charging Cable
(1) Remote Control
(2) Levers
PARTS LIST
Drive
Gear
6
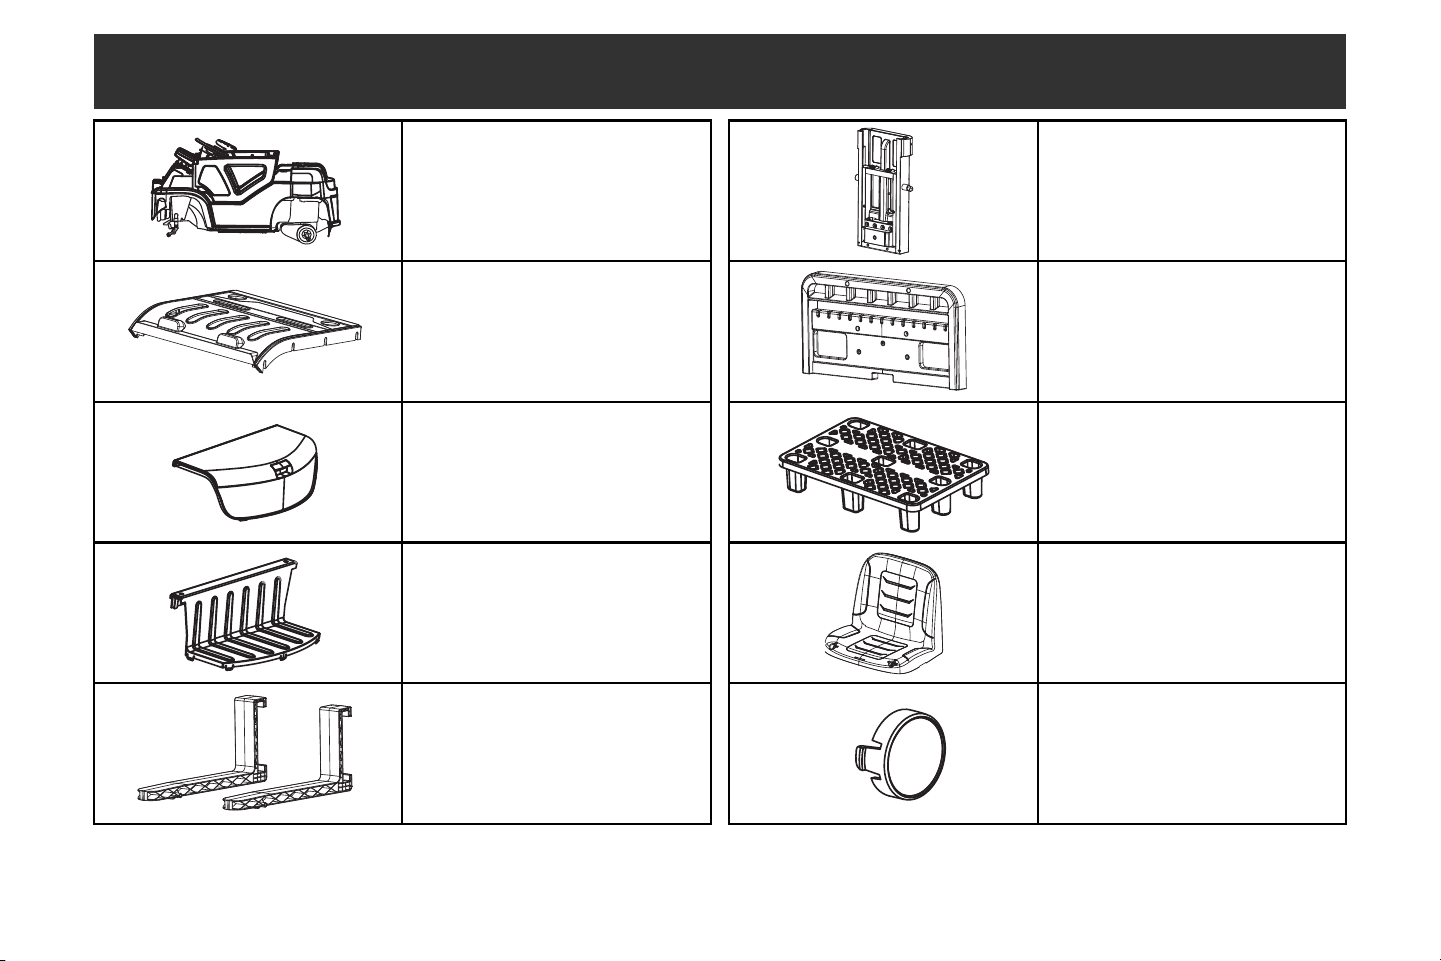
(1) Body
(1) Roof
(1) Trunk Lid
(1) Trunk
(2) Front Forks
(1) Front Fork Lifter
(1) Fork Frame
(1) Toy Pallet
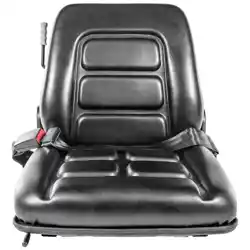
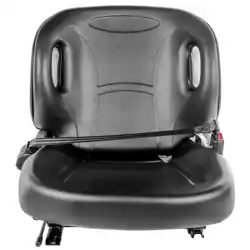
(1) Seat
(4) Wheel Covers
PARTS LIST
7
CARE & MAINTENANCE
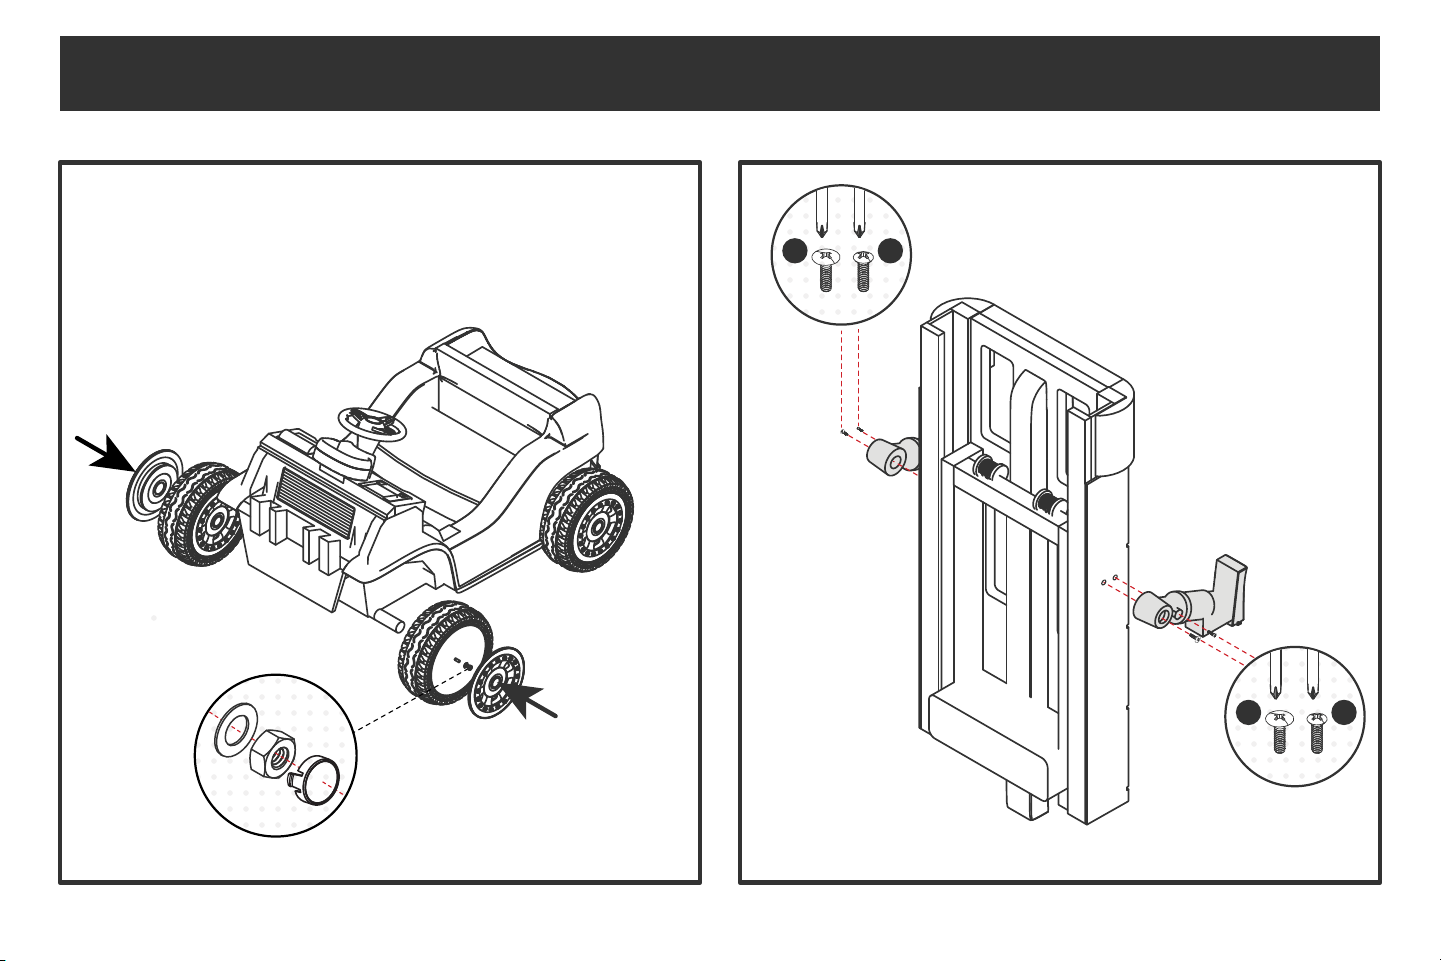
ASSEMBLING YOUR MY FIRST FORKLIFT
x2 x2
MediumLarge
x2 x2
MediumLarge
8
x4
x6
A
B C
Medium
Medium
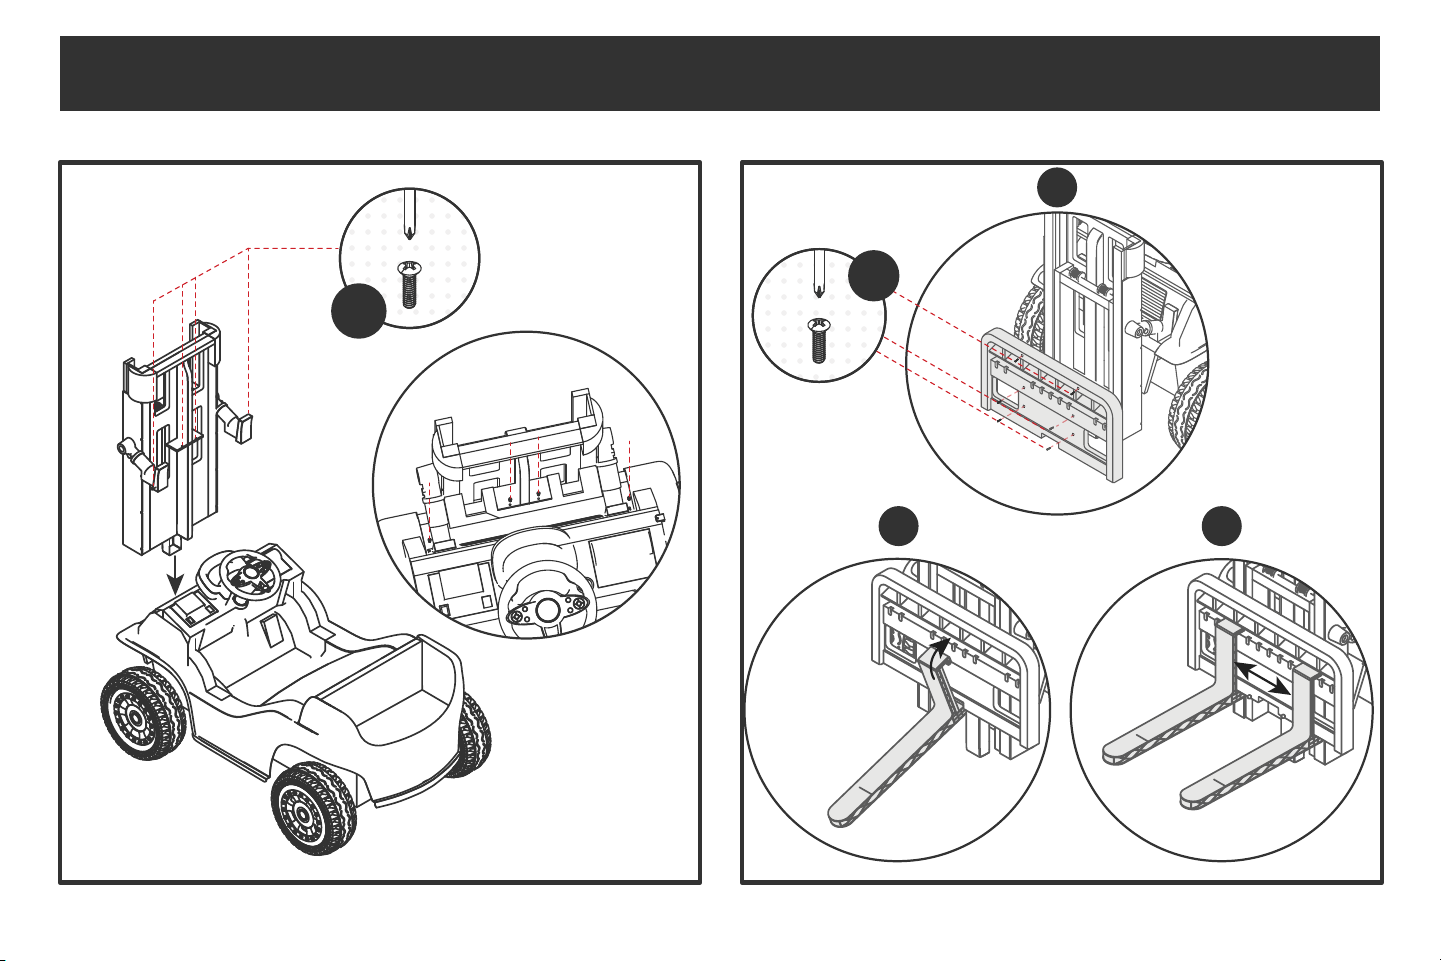
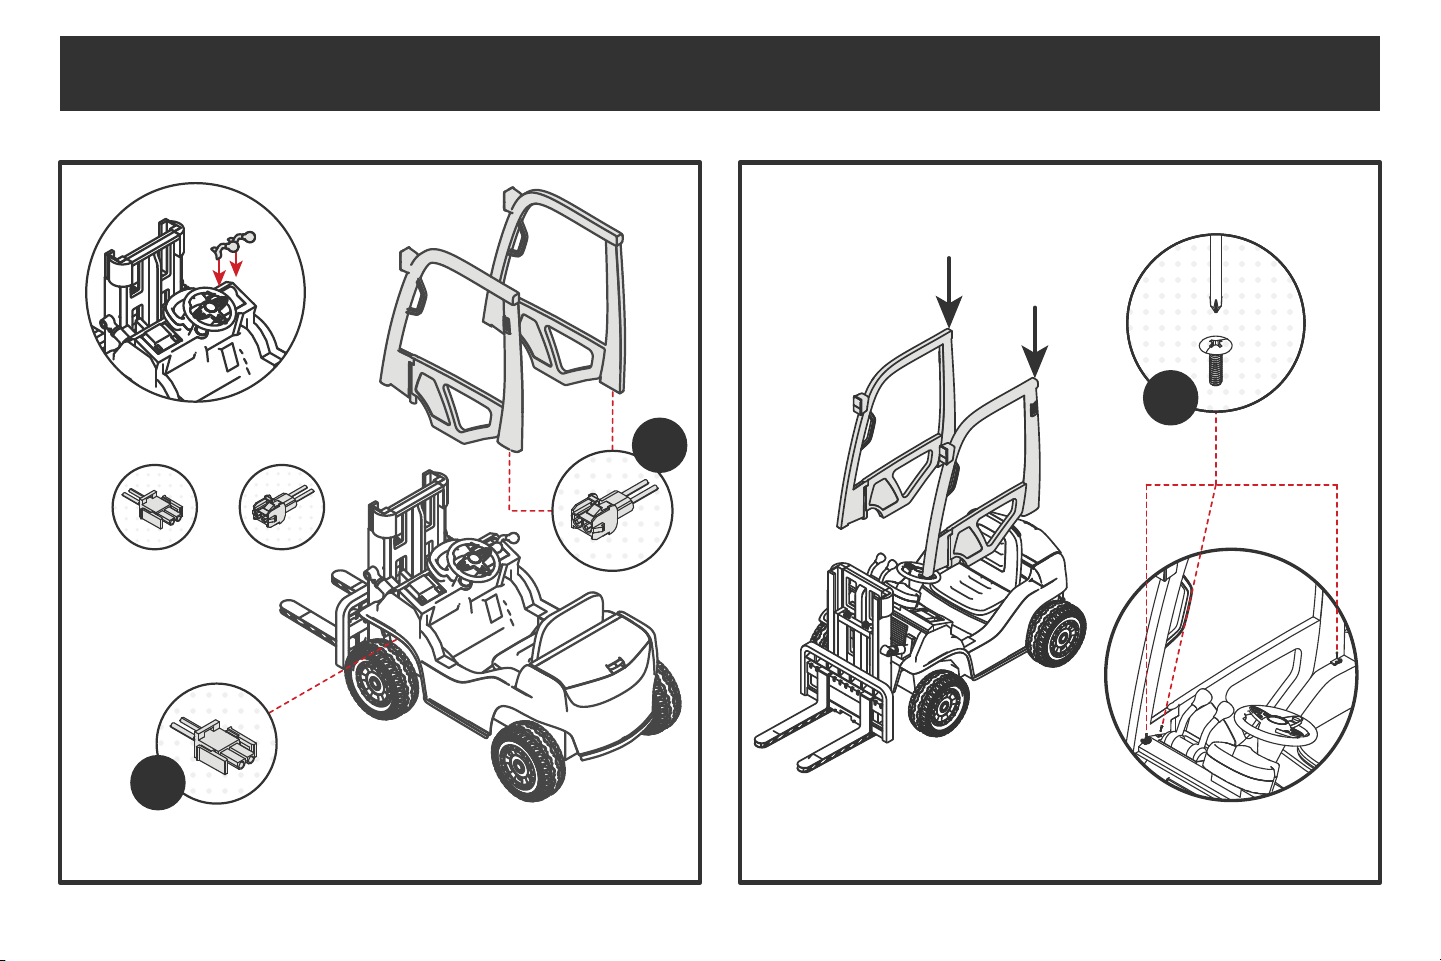
ASSEMBLING YOUR MY FIRST FORKLIFT
Attach each fork at
the middle of the lift.
Attach the top piece
of the fork, then the
bottom piece.
Once a fork is
attached, slide
it to the side
and repeat.
9
x2
x2
Small
CARE & MAINTENANCE
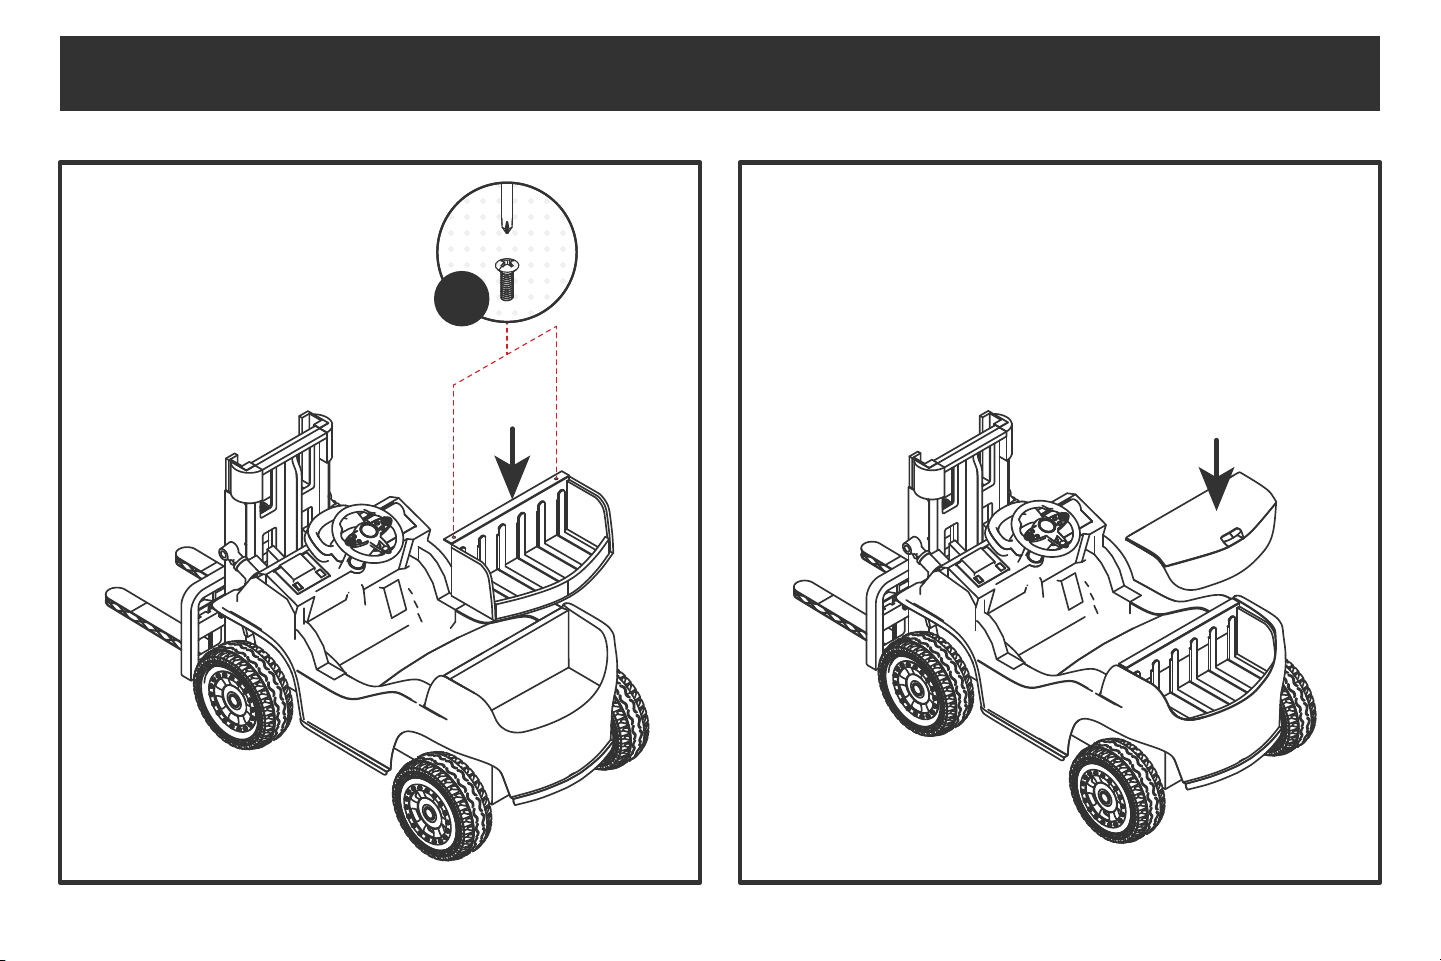
ASSEMBLING YOUR MY FIRST FORKLIFT
10
CARE & MAINTENANCE
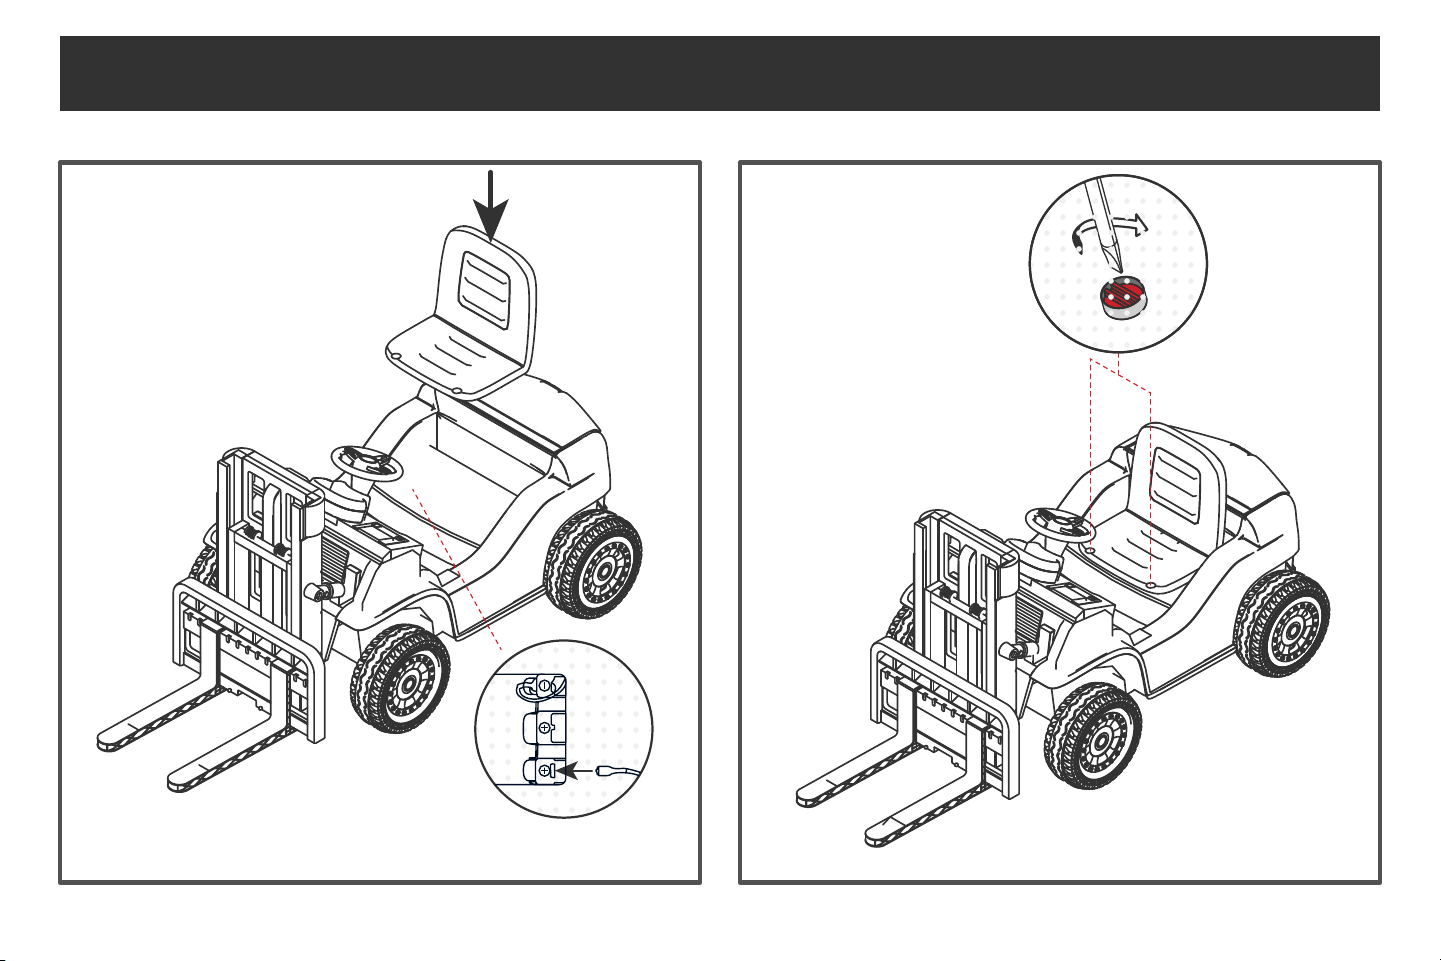
ASSEMBLING YOUR MY FIRST FORKLIFT
Note: Before installing the seat, connect
the red wire to the battery socket.
11
Large
CARE & MAINTENANCE
ASSEMBLING YOUR MY FIRST FORKLIFT
Note: As you install the doors, you will need
to connect the wiring under the front fenders.
+
x2
x2
x6
12
CARE & MAINTENANCE
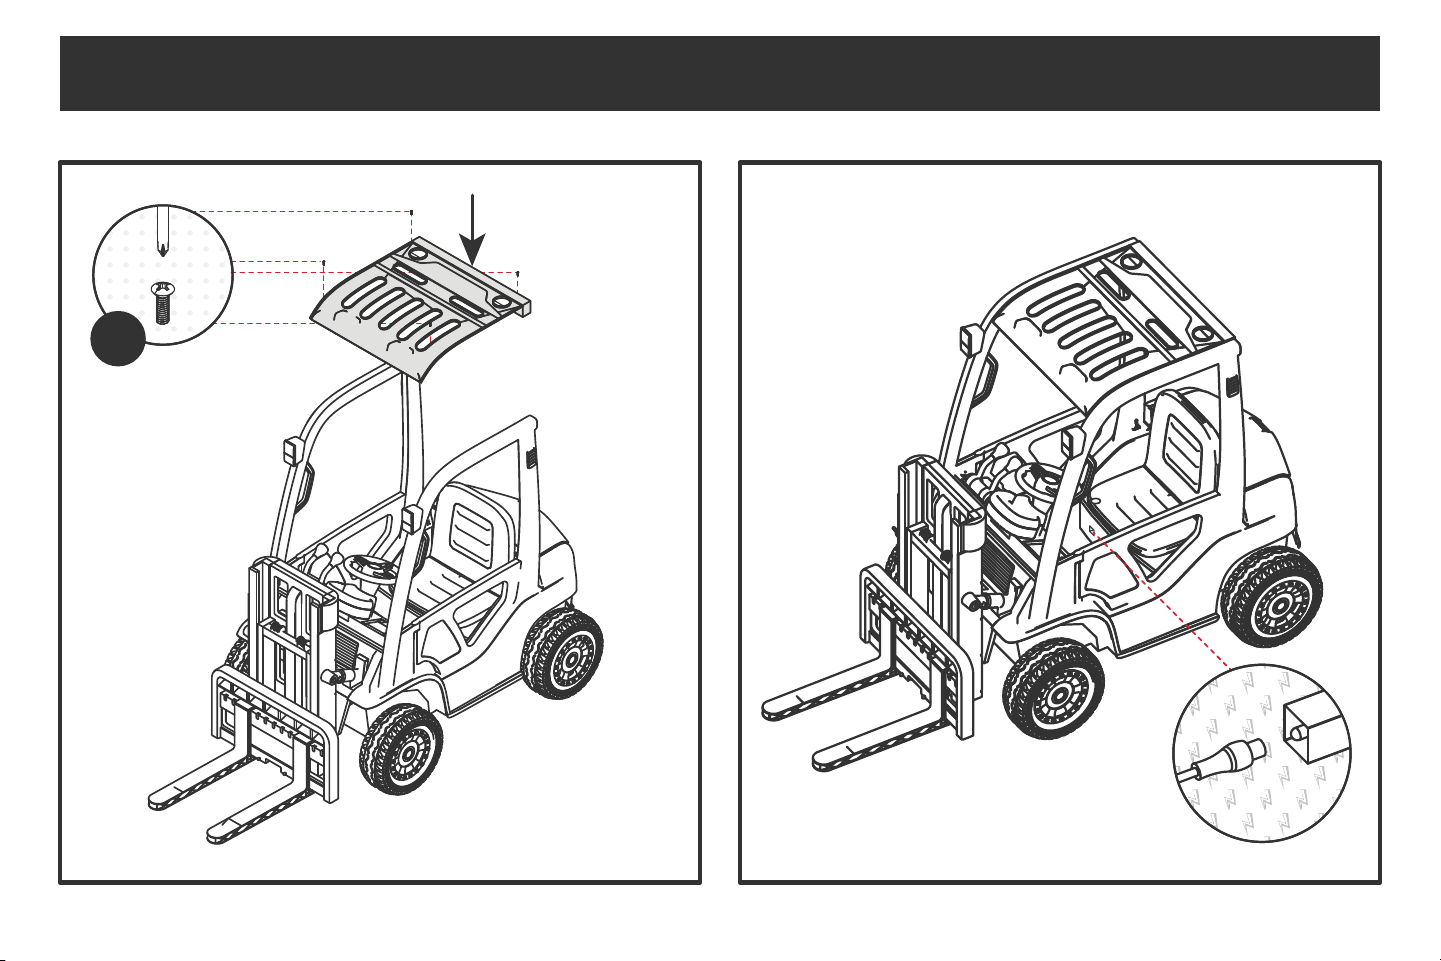
ASSEMBLING YOUR MY FIRST FORKLIFT
The charging port is located near the seat. Make sure you charge the
forklift while it is turned o. Fully charge the battery before your first use.
The charger will light up green when the forklift is fully
charged. Do not overcharge the battery.
Small
x4
13
CARE & MAINTENANCE
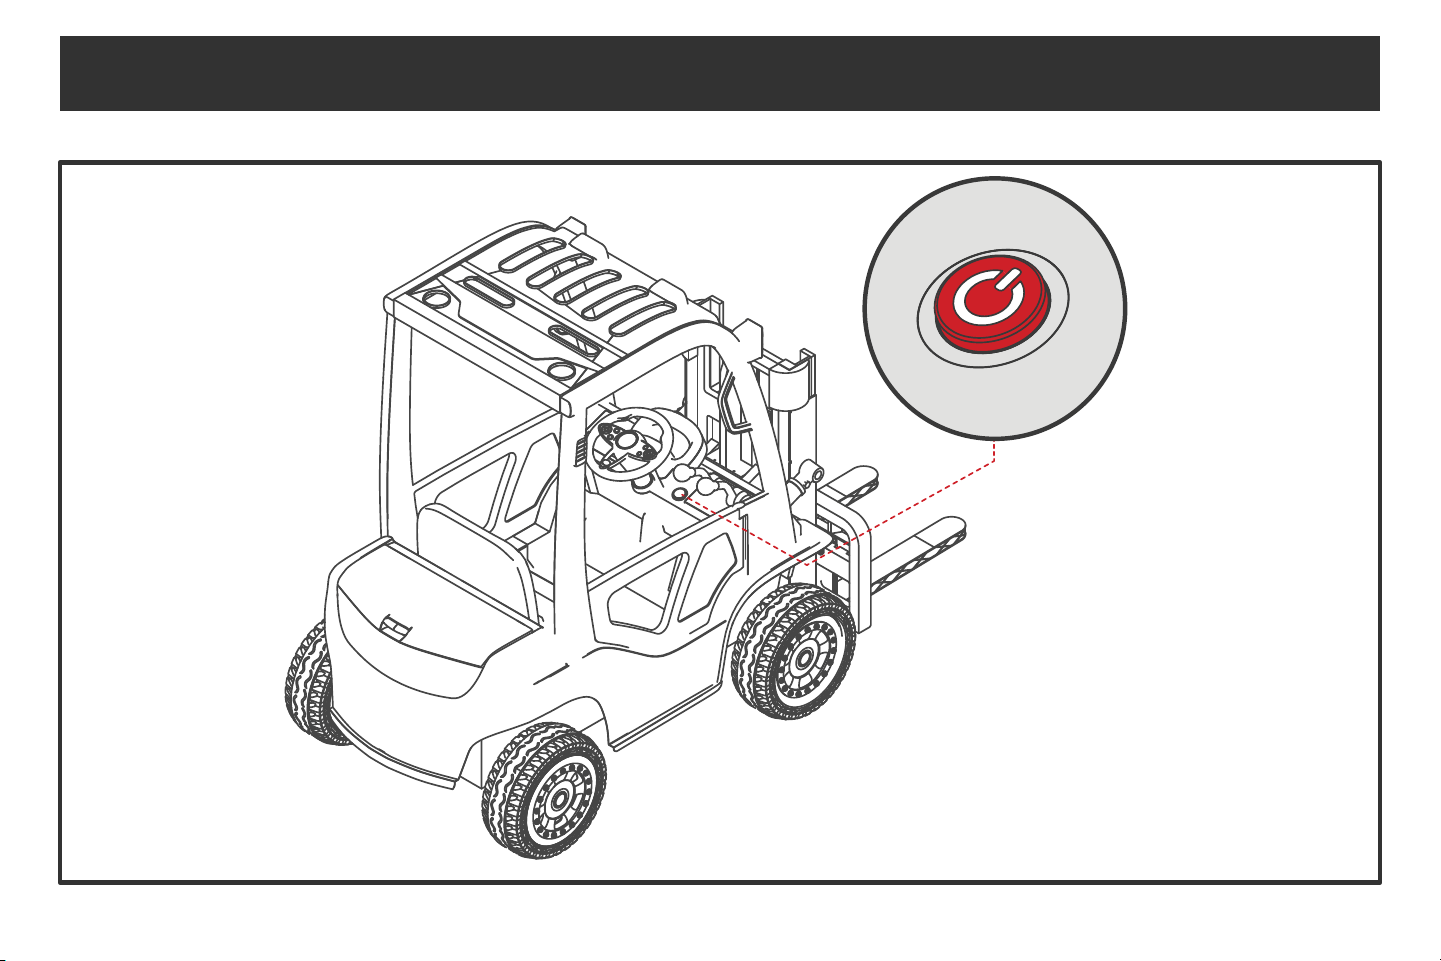
ASSEMBLING YOUR MY FIRST FORKLIFT
The My First Forklift should look like this when the
assembly process is complete. Press the red power
button to turn it on and get started!
14
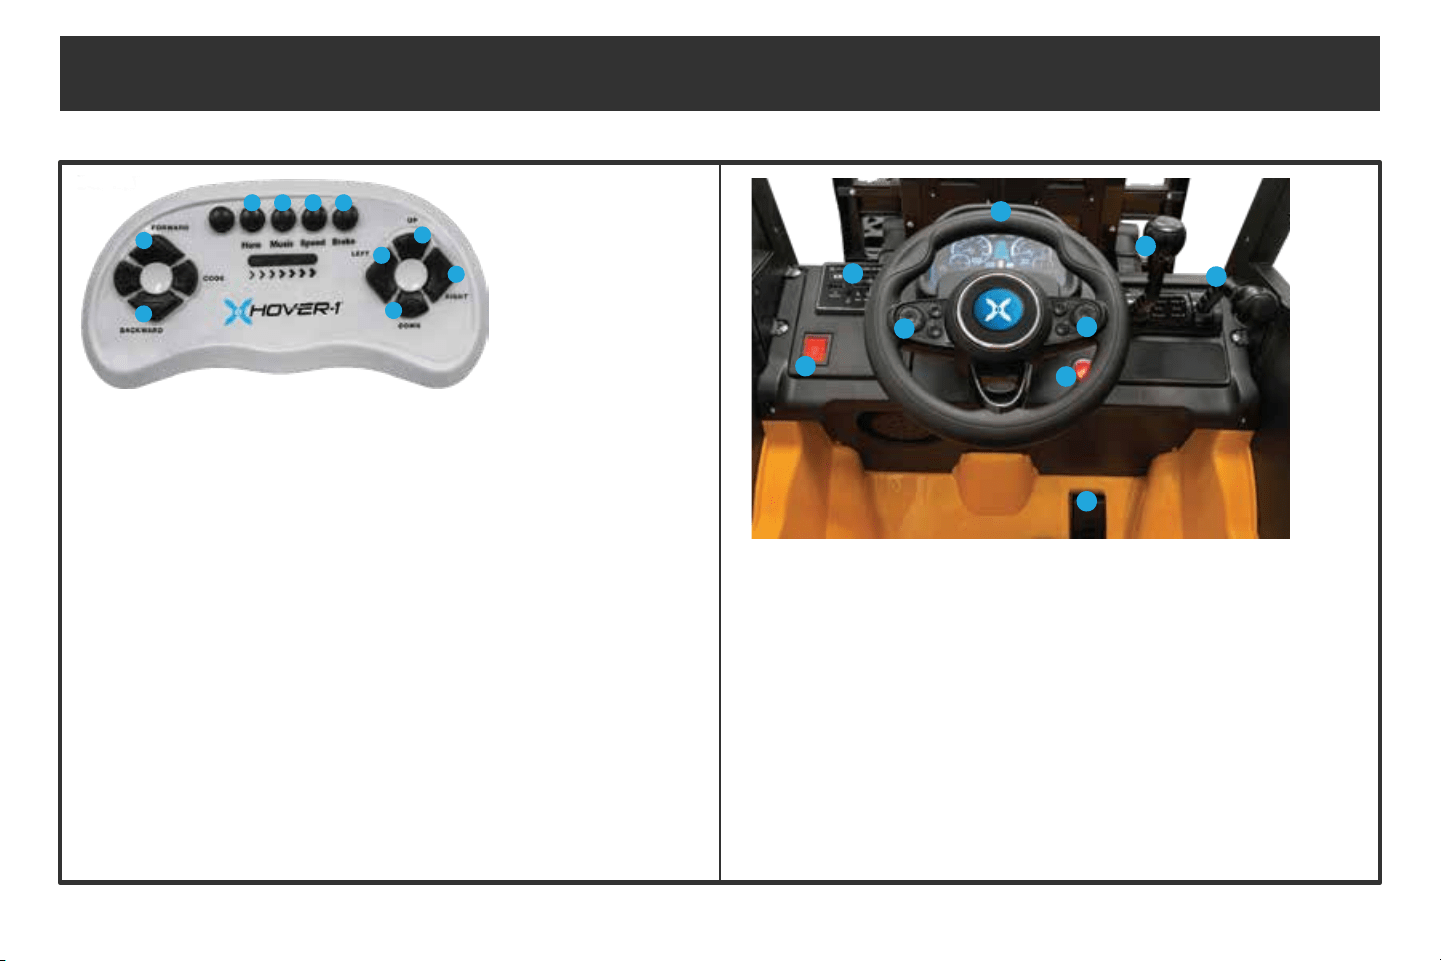
2. MUSIC PLAYER
Plays sounds, music, mp3, and displays
battery life
1. LIGHTS
Turns the lights on/o
4. STEERING WHEEL
Rotate the wheel to turn the vehicle left and right
3.HORN
Press to sound the horn. Hold to decrease
the volume of the horn and music
5. MUSIC
Press to play music tracks. Hold to
increase the volume of the horn and music
6. POWER ON/OFF
Press to power the vehicle on/o
7. THROTTLE/REVERSE
Push up to move forward
Pull down to reverse
8. FORK LOAD UP/DOWN
Push up to lift load
Pull down to lower load
9. GAS PEDAL
Press to accelerate the vehicle
CONTROLS
1. HORN
Press for the horn sound. Hold
to decrease the volume of the horn
and music
2. MUSIC
Press for music tracks. Hold
to increase the volume of the horn
and music
5. FORWARD
Moves the vehicle forward
3. SPEED
Press to change speed
modes:
1 Light = Slow
2 Lights = Medium
3 Lights = Fast
6. BACKWARD
Moves the vehicle backward
4. BRAKE
Stops the vehicle
8. RIGHT
Turns the vehicle right
10. DOWN
Lowers the fork load
7. UP
Lifts the fork load
9. LEFT
Turns the vehicle left
1
5
8
10
7
9
6
2 3 4
If the remote is not pairing to the forklift, follow these instructions:
1. Turn o the forklift and remove the batteries from the remote, then put the batteries back in.
2. Press and hold the code button on the remote while turning on the forklift.
3. When the remote begins to flash, release the code button. The remote should now be paired.
* If the remote’s lights flash when pressing any button, replace the batteries.
PAIR REMOTE TO FORKLIFT
1
2
3
4
5
6
7
8
9

Ensure your Hover-1 My First Forklift is fully assembled and correctly installed with screws secured tightly in place. Failure to do so may result
in damage to the vehicle and serious bodily harm or death.
After reviewing the pre-ride checklist, follow the steps below to begin riding your Hover-1 My First Forklift.
1. Sit in the vehicle and buckle the seatbelt.
2. Press the power button to turn the vehicle on.
3. Firmly grip the steering wheel. Apply your foot to the gas pedal or push up on the throttle/reverse lever to accelerate.
4. To reverse, pull the throttle/reverse lever down.
5. Push the fork load lever up to lift the fork up.
6. Pull the fork load lever down to lower the fork.
7. Press the leftmost button on the steering wheel to sound the horn. Press the rightmost button on the steering wheel to play music.
8. Hold the horn button to decrease the volume of the horn and music. Hold the music button to increase the volume of the horn and music.
9. Turn the headlights on or o with the headlight button on the left side of the dashboard.
RIDING YOUR MY FIRST FORKLIFT
15

16
CARE & MAINTENANCE
• Only use the charger and battery specified by the manufacturer. The charging port is located under the seat.
• Before charging, check the charger, battery, and plug for any damage. If anything is damaged, stop using the vehicle until it is repaired.
• Do not turn the vehicle on while charging and don’t turn the battery upside down.
• While charging, the charger will warm up. If the charger does not warm up, the charger, battery, or circuit may have failed.
1. Before use, check to ensure the My First Forklift is in good condition. Check for damage to the battery, wires, and other parts of the
forklift. Check to ensure all screws are tight and that there are no potential safety hazards in the operation area. If any damage is
found, stop using the vehicle until all damage is repaired.
2. If the remote control is not used for an extended period of time, it is recommended that you remove the batteries to avoid battery
leakage, corrosion of the circuit board, and/or damage to the remote control.
3. The vehicle should be parked indoors or covered with waterproof tarp to avoid water damage.

17
CARE & MAINTENANCE
4. Keep the forklift away from furnaces, heaters, and direct sunlight. Plastic parts may melt. When charging,
keep the forklift and battery away from flammable materials to prevent fires.
5. Charge the battery immediately after use to maintain battery capacity. Charging should always be performed by an adult. Fully
charge the battery before storing the forklift away for extended periods of time. Pull out the red main line and charge the battery once
a month to prolong the battery life.
6. Use a dry, soft cloth to wipe the vehicle, or use a non-wax furniture polish to wipe the plastic parts to achieve a smooth surface eect.
Do not use chemical solvents to wipe the plastic parts of the vehicle. Do not clean the vehicle with soap and water. Do not drive the
vehicle in rainy or snowy weather. Water will damage the motor, circuit system, and battery.
7. When the vehicle is not in use, be sure to turn o the power and turn all switches to the "stop" or "o" position.
8. All repairs should be performed by a professional.

18
PRE-RIDE CHECKLIST
Ensure that your My First Forklift is in proper working order each time you ride. If a part of the My First Forklift does not function correctly, please
contact our Customer Support Center.
• Ensure the battery is fully charged before riding your My First Forklift.
• Ensure that the screws on the My First Forklift wheels are secured before each ride.
HOVER-1 MY FIRST FORKLIFT OPERATION
It is important that you fully understand all the functions of your My First Forklift. If these functions are not used correctly, you will not have full
control of your My First Forklift.

19
WARNINGS
1. When operating the vehicle remotely, the distance between children and adults should not exceed 33 feet.
2. The remote control is meant to be used by adults only. Keep out of reach of children.
3. Before operating the vehicle via remote control, read the manual carefully. Practice using the remote control with the vehicle empty.
Only after you are familiar with the controls should a child ride in the vehicle.
4. Keep o of public roads. This remote controlled vehicle is prohibited to share roads with motor vehicles.
5. Keep the remote control away from moisture and rain to avoid water damage.
6. Batteries should only be charged under adult supervision.
7. Dead batteries should be removed and properly recycled.
8. Replace the remote control batteries if the vehicle fails to operate at a distance of less than 9 feet between the operator and the
vehicle.
CAUTION: RIDING IN WET WEATHER
Do not ride your My First Forklift in wet weather, as there are electronic components in the vehicle that may be damaged if exposed to water
or moisture.
20
SAFETY PRECAUTIONS
WARNING
Any vehicle that does not work properly can cause you to lose
control. Inspect the entire forklift thoroughly before every ride,
and do not ride it until any problems have been corrected.
WARNING
Do not ride a My First Forklift with a part that is damaged.
Replace the damaged part before riding.
21
1. It is strictly forbidden to use this product on roads and highways, unless your local laws state otherwise. You
must wear a safety helmet and other necessary protective gear when riding your My First Forklift.
2. Due to the nature of the product, the assembly pieces should be checked before every ride to avoid an
accident while riding.
3. Do not make sharp turns, as you may drift and overturn the My First Forklift, which can result in injury to
yourself and/or damage the unit.
WARNING
To reduce the risk of injury, adult supervision is required.
Never use in roadways, near motor vehicles, on or near
steep inclines or steps, near swimming pools, or other
bodies of water. Always wear shoes, and never allow more
than one rider at a time.
SAFETY PRECAUTIONS

22
This device complies with Part 15 of the FCC Rules. Operation is subject to the following two conditions:
(1) This device may not cause harmful interference, and (2) this device must accept any interference received, including interference
that may cause undesired operation.
Please note that changes or modifications not expressly approved by the party responsible for compliance could void the user’s
authority to operate the equipment.
FCC INSTRUCTIONS FOR A CLASS B DIGITAL DEVICE OR PERIPHERAL
Note: This equipment has been tested and found to comply with the limits for a Class B digital device, pursuant to Part 15 of the FCC
Rules. These limits are designed to provide reasonable protection against harmful interference in a residential
installation. This equipment generates, uses and can radiate radio frequency energy and, if not installed and used in
accordance with the instructions, may cause harmful interference to radio communications. However, there is no guarantee that
interference will not occur in a particular installation. If this equipment does cause harmful interference to radio or television reception,
which can be determined by turning the equipment o and on, the user is encouraged to try to correct the interference by one or
more of the following measures:
• Reorient or relocate the receiving antenna.
• Increase the separation between the equipment and receiver.
• Connect the equipment into an outlet on a circuit dierent from that to which the receiver is connected.
• Consult the dealer or an experienced radio/TV technician for help.
FCC ID: 2AANZFLFT
FCC STATEMENT

23
Manufacturer: DGL Group, Ltd.
2045 Lincoln Highway, Edison NJ 08817
TEL: 732-692-5000
For warranty information, please visit us at www.hover-1.com
WARRANTY

@RideHover1
@RideHover1
@Hover1Rideables
www.hover-1.com