
MICROWAVE OVEN
Use & Care Guide
For questions about features, operation/performance, parts, accessories or service, call: 1-800-422-1230,
or visit our website at www.kitchenaid.com/owners.
In Canada, call: 1-800-807-6777 or visit our website at www.kitchenaid.ca/owners.
W11695420A
KMCS122RPS*, KMCS122RBS*
Models / Modelos
HORNO MICROONDAS
Manual de uso y cuidado
Si tiene preguntas sobre funciones, funcionamiento, rendimiento, piezas, accesorios o servicio técnico,
llame al: 1-800-422-1230,o bien, visite nuestro sitio web en www.kitchenaid.com/owners.
En Canadá, llame al: 1-800-807-6777 o visite nuestro sitio web en
www.kitchenaid.ca/owners.

2
TABLE OF CONTENTS ÍNDICE
MICROWAVE OVEN SAFETY ........................................................3
INSTALLATION INSTRUCTIONS ...................................................5
Unpacking ....................................................................................5
Location Requirements ................................................................5
Electrical Requirements ...............................................................5
PARTS AND FEATURES ................................................................6
Turntable ....................................................................................... 6
Microwave Oven Control .............................................................6
Keypad Instructions .....................................................................7
Display ........................................................................................11
Standby mode ............................................................................11
Start ............................................................................................11
Quick Start/Add 30seconds ......................................................11
Stop/Unlock ...............................................................................11
To use Non-Sensor Menu ..........................................................11
Clock ..........................................................................................11
Timer ...........................................................................................11
Tones ON/OFF............................................................................11
Cooking End ...............................................................................11
To use Sensor Menu ..................................................................11
MICROWAVE OVEN USE .............................................................12
Food Characteristics ..................................................................12
Cooking Guidelines ....................................................................12
Cookware and Dinnerware.........................................................13
Aluminum Foil and Metal ...........................................................13
Cooking Menu, Sensor Cooking ................................................13
Popcorn ...................................................................................... 13
Potato .........................................................................................14
Reheat ........................................................................................14
Soften .........................................................................................14
Melt .............................................................................................14
Weight Defrost ............................................................................15
Steam Clean ...............................................................................15
Keep Warm ................................................................................. 15
MICROWAVE OVEN CARE ..........................................................16
General Cleaning ........................................................................16
TROUBLESHOOTING ..................................................................17
ASSISTANCE OR SERVICE .........................................................18
In the U.S.A. ...............................................................................18
In Canada ...................................................................................18
Replacement Parts .....................................................................18
Built-In Kits .................................................................................18
SEGURIDAD DEL HORNO MICROONDAS ................................19
INSTRUCCIONES DE INSTALACIÓN .........................................21
Desempaque ..............................................................................21
Requisitos de ubicación .............................................................21
Requisitos eléctricos ..................................................................21
PIEZAS Y CARACTERÍSTICAS ...................................................22
Bandeja giratoria ........................................................................22
Control del horno microondas ...................................................22
Instrucciones del teclado ...........................................................23
Pantalla .......................................................................................27
Modo Standby ...........................................................................27
Start (Inicio).................................................................................27
Quick Start/ Add 30seconds
(Iniciorápido/ Agregar30segundos) .........................................27
Stop/Unlock (Parar/Desbloquear) ..............................................27
Para utilizar el menú sin sensor .................................................27
Clock (Reloj) ...............................................................................27
Timer (Temporizador) .................................................................27
Tones ON/OFF (ENCENDIDO/APAGADOdelostonos) ............27
Fin de la cocción ........................................................................27
Para utilizar el menú del sensor .................................................27
USO DEL HORNO MICROONDAS ..............................................28
Características de los alimentos ................................................28
Pautas para cocinar ...................................................................28
Utensilios de cocina y vajilla ......................................................29
Papel de aluminio y metal ..........................................................29
Menú de cocción, Cocción por sensor .....................................29
Popcorn (Palomitas de maíz) .....................................................29
Potato (Papa) ..............................................................................30
Reheat (Recalentar) ....................................................................30
Soften (Ablandar) ........................................................................30
Melt (Derretir) ..............................................................................30
Weight Defrost (Descongelado por Peso)..................................31
Steam Clean (Limpieza con Vapor) ............................................ 31
Keep Warm (Mantener Caliente) ................................................31
CUIDADO DEL HORNO MICROONDAS ....................................32
Limpieza general ........................................................................32
SOLUCIÓN DE PROBLEMAS......................................................33
ASISTENCIA O SERVICIO TÉCNICO .........................................34
En EE.UU. ...................................................................................34
En Canadá ..................................................................................34
Piezas de repuesto .....................................................................34
Juegos para empotrar ................................................................34
3
MICROWAVE OVEN SAFETY
You can be killed or seriously injured if you don't immediately
You
can be killed or seriously injured if you don't
follow
All safety messages will tell you what the potential hazard is, tell you how to reduce the chance of injury, and tell you what can
happen if the instructions are not followed.
Your safety and the safety of others are very important.
We have provided many important safety messages in this manual and on your appliance. Always read and obey all safety
messages.
This is the safety alert symbol.
This symbol alerts you to potential hazards that can kill or hurt you and others.
All safety messages will follow the safety alert symbol and either the word “DANGER” or “WARNING.”
These words mean:
follow instructions.
instructions.
DANGER
WARNING
When using electrical appliances basic safety precautions should be followed, including the following:
IMPORTANT SAFETY INSTRUCTIONS
SAVE THESE INSTRUCTIONS
WARNING: To reduce the risk of burns, electric shock,
fire, injury to persons, or exposure to excessive microwave
energy:
■
Read all instructions before using the microwave oven.
■ Read and follow the specific “PRECAUTIONS TO AVOID
POSSIBLE EXPOSURE TO EXCESSIVE MICROWAVE
ENERGY” found in this section.
■ The microwave oven must be grounded. Connect only to
properly grounded outlet. See “GROUNDING
INSTRUCTIONS” found in the “INSTALLATION
INSTRUCTIONS” section.
■
Install or locate the microwave oven only in accordance
with the provided Installation Instructions.
■
Some products such as whole eggs in the shell and
sealed containers - for example, closed glass jars - are
able to explode and should not be heated in the
microwave oven.
■
Use the microwave oven only for its intended use as
described in the manual. Do not use corrosive chemicals
or vapors in the microwave oven. This type of oven is
specifically designed to heat, cook, or dry food. It is not
designed for industrial or laboratory use.
■
As with any appliance, close supervision is necessary
when used by children.
■ Do not operate the microwave oven if it has a damaged
cord or plug, if it is not working properly, or if it has been
damaged or dropped.
■ The microwave oven should be serviced only by qualified
service personnel. Call an authorized service company for
examination, repair, or adjustment.
■ Do not cover or block any openings on the microwave oven.
■ Do not store this microwave oven outdoors. Do not use the
microwave oven near water - for example, near a kitchen
sink, in a wet basement, near a swimming pool, or similar
locations.
■ Do not immerse cord or plug in water.
■ Keep cord away from heated surfaces.
■ Do not let cord hang over edge of table or counter.
■ See door surface cleaning instructions in the “Microwave
Oven Care” section.
■ To reduce the risk of fire in the oven cavity:
– Do not overcook food. Carefully attend the microwave
oven when paper, plastic, or other combustible materials
are placed inside the oven to facilitate cooking.
– Remove wire twist-ties from paper or plastic bags before
placing bags in oven.
– If materials inside the oven ignite, keep oven door closed,
turn oven off, and disconnect the power cord, or shut off
power at the fuse or circuit breaker panel.
– Do not use the cavity for storage purposes. Do not leave
paper products, cooking utensils, or food in the cavity when
not in use.

4
IMPORTANT SAFETY INSTRUCTIONS
SAVE THESE INSTRUCTIONS
■ Liquids, such as water, coffee, or tea are able to be
overheated beyond the boiling point without appearing to be
boiling. Visible bubbling or boiling when the container is
removed from the microwave oven is not always present.
THIS COULD RESULT IN VERY HOT LIQUIDS
SUDDENLY BOILING OVER WHEN THE CONTAINER IS
DISTURBED OR A SPOON OR OTHER UTENSIL IS
INSERTED INTO THE LIQUID.
To reduce the risk of injury to persons:
– Do not overheat the liquid.
– Stir the liquid both before and halfway through heating it.
– Do not use straight-sided containers with narrow necks.
– After heating, allow the container to stand in the microwave
oven for a short time before removing the container.
– Use extreme care when inserting a spoon or other utensil
into the container.
PRECAUTIONS TO AVOID POSSIBLE EXPOSURE TO
EXCESSIVE MICROWAVE ENERGY
(a) Do not attempt to operate this oven with the door open
since open-door operation can result in harmful exposure
to microwave energy. It is important not to defeat or
tamper with the safety interlocks.
(b) Do not place any object between the oven front face and
the door or allow soil or cleaner residue to accumulate on
sealing surfaces.
(c) Do not operate the oven if it is damaged. It is particularly
important that the oven door close properly and that there
is no damage to the:
(1) Door (bent),
(2) Hinges and latches (broken or loosened),
(3) Door seals and sealing surfaces.
(d) The oven should not be adjusted or repaired by anyone
except properly qualified service personnel.
This device complies with Part 18 of the FCC Rules.
5
INSTALLATION INSTRUCTIONS
Unpacking
1. Empty the microwave oven of any packing materials.
2. Clean the inside with a soft, damp cloth.
3. Check for damage, such as:
n A door that is not lined up correctly,
n Damage around the door, or
n Dents on the interior or exterior of the microwave oven.
If there is any damage, do not operate the microwave
oven until a designated service technician has checked
itandmade any needed repairs.
NOTE: To avoid damage to the microwave oven, do not remove
microwave inlet cover. See the “Parts and Features” section.
Location Requirements
IMPORTANT: The control side of the microwave oven is the
heavy side. Handle the microwave oven gently. The weight of the
microwave oven is over 35lbs (15.9kg).
n Place the microwave oven on a cart, counter, table, or shelf
that is strong enough to hold the microwave oven and the
food and utensils you place inside it.
n The microwave oven should be at a temperature above
50°F (10°C) for proper operation.
NOTE: Some models can be built into a wall or cabinet by using
one of the trim kits listed in the “Assistance or Service” section.
n Do not block the exhaust vents or air intake openings. Allow
a few inches of space at the back and side of the microwave
oven where the exhaust vents are located. Blocking the
exhaust vents could cause damage to the microwave oven
as well as poor cooking results.
n Make sure the microwave oven legs are in place to ensure
proper airow. If vents are blocked, a sensitive thermal
device may automatically turn the microwave oven off. The
microwave oven should work properly once it has cooled.
Electrical Requirements
Observe all governing codes and ordinances.
Required:
n A 120V, 60Hz, AC only, 15A or 20A electrical supply with a
fuse or circuit breaker.
Recommended:
n A time-delay fuse or time-delay circuit breaker.
n A separate circuit serving only this microwave oven.
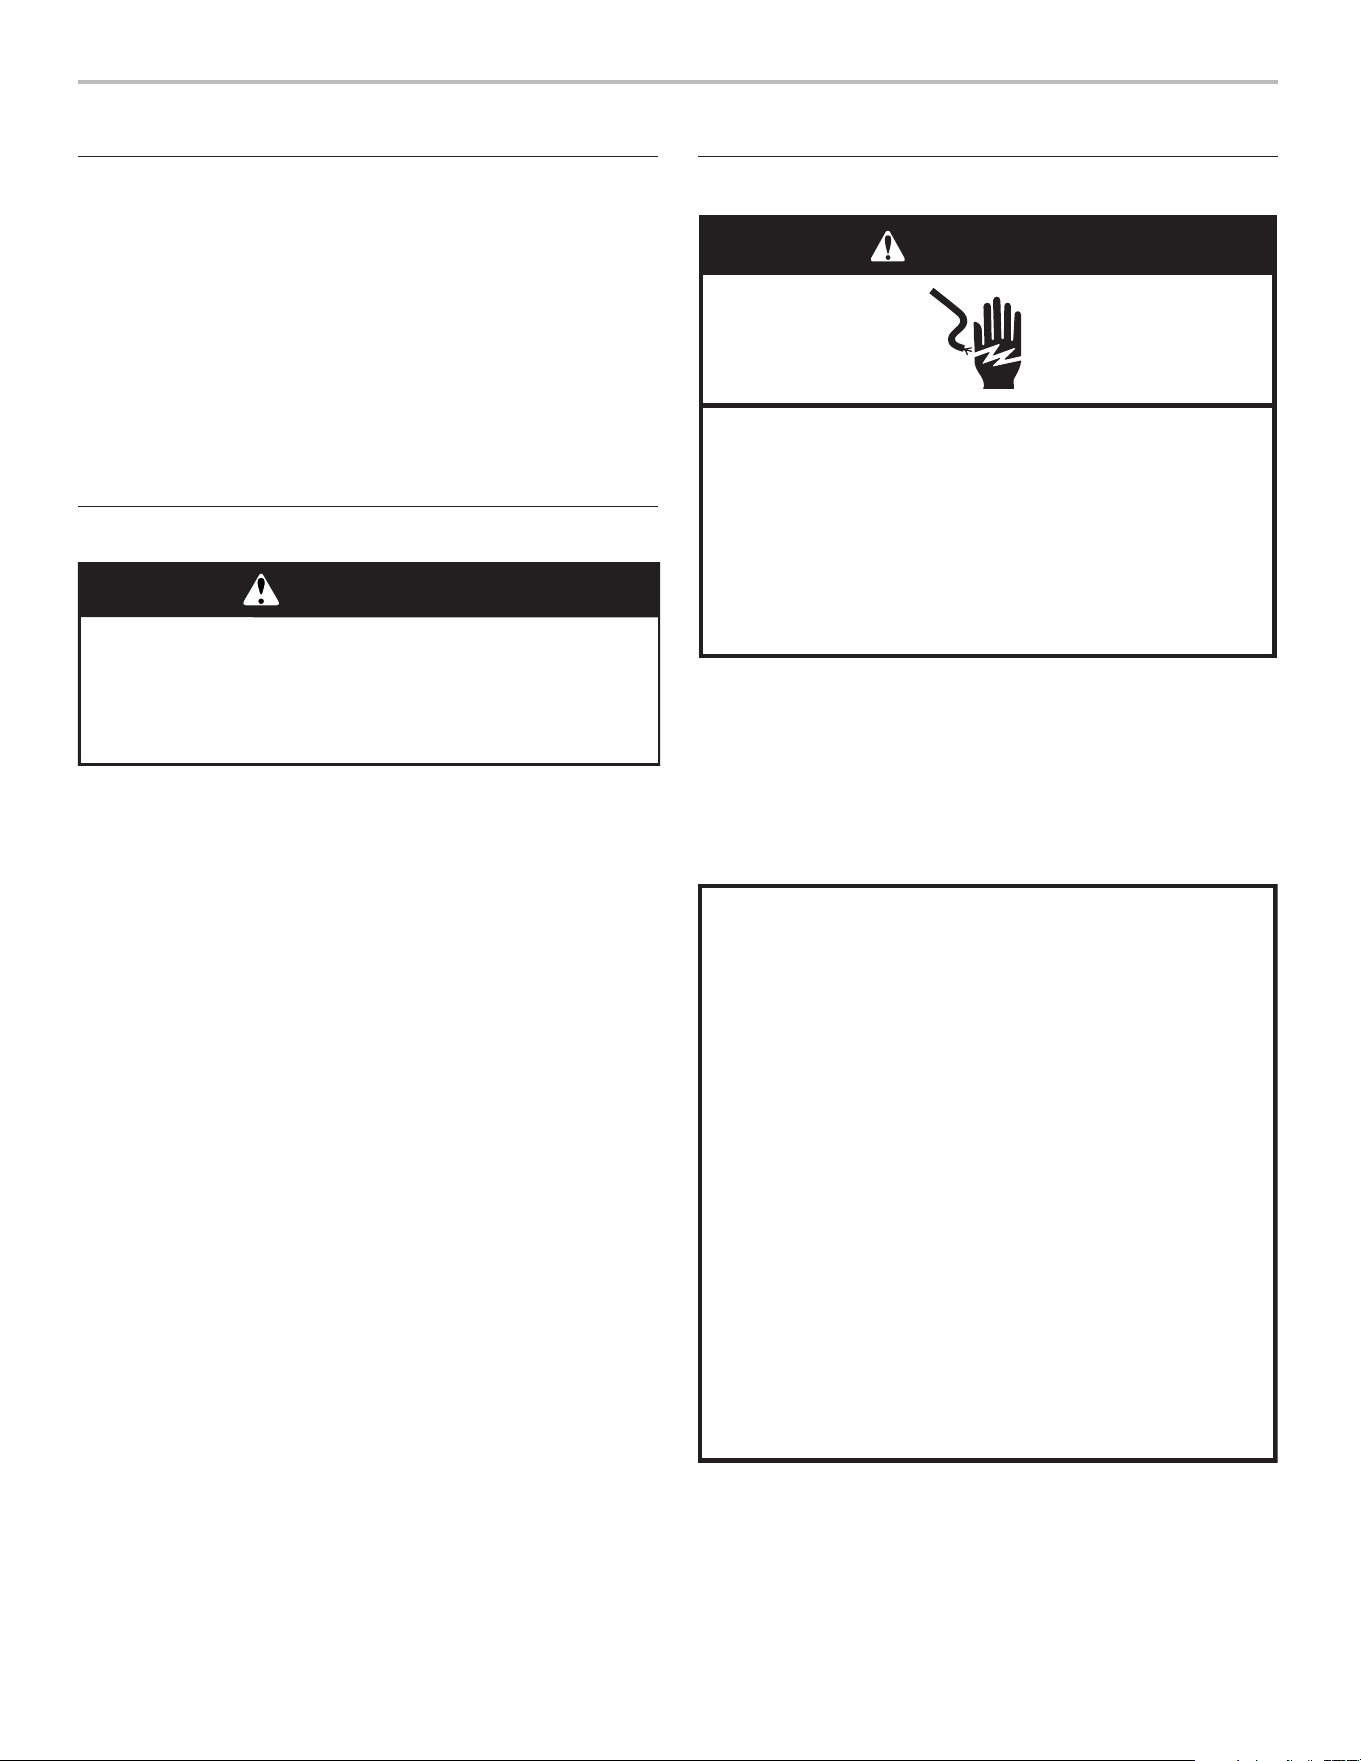
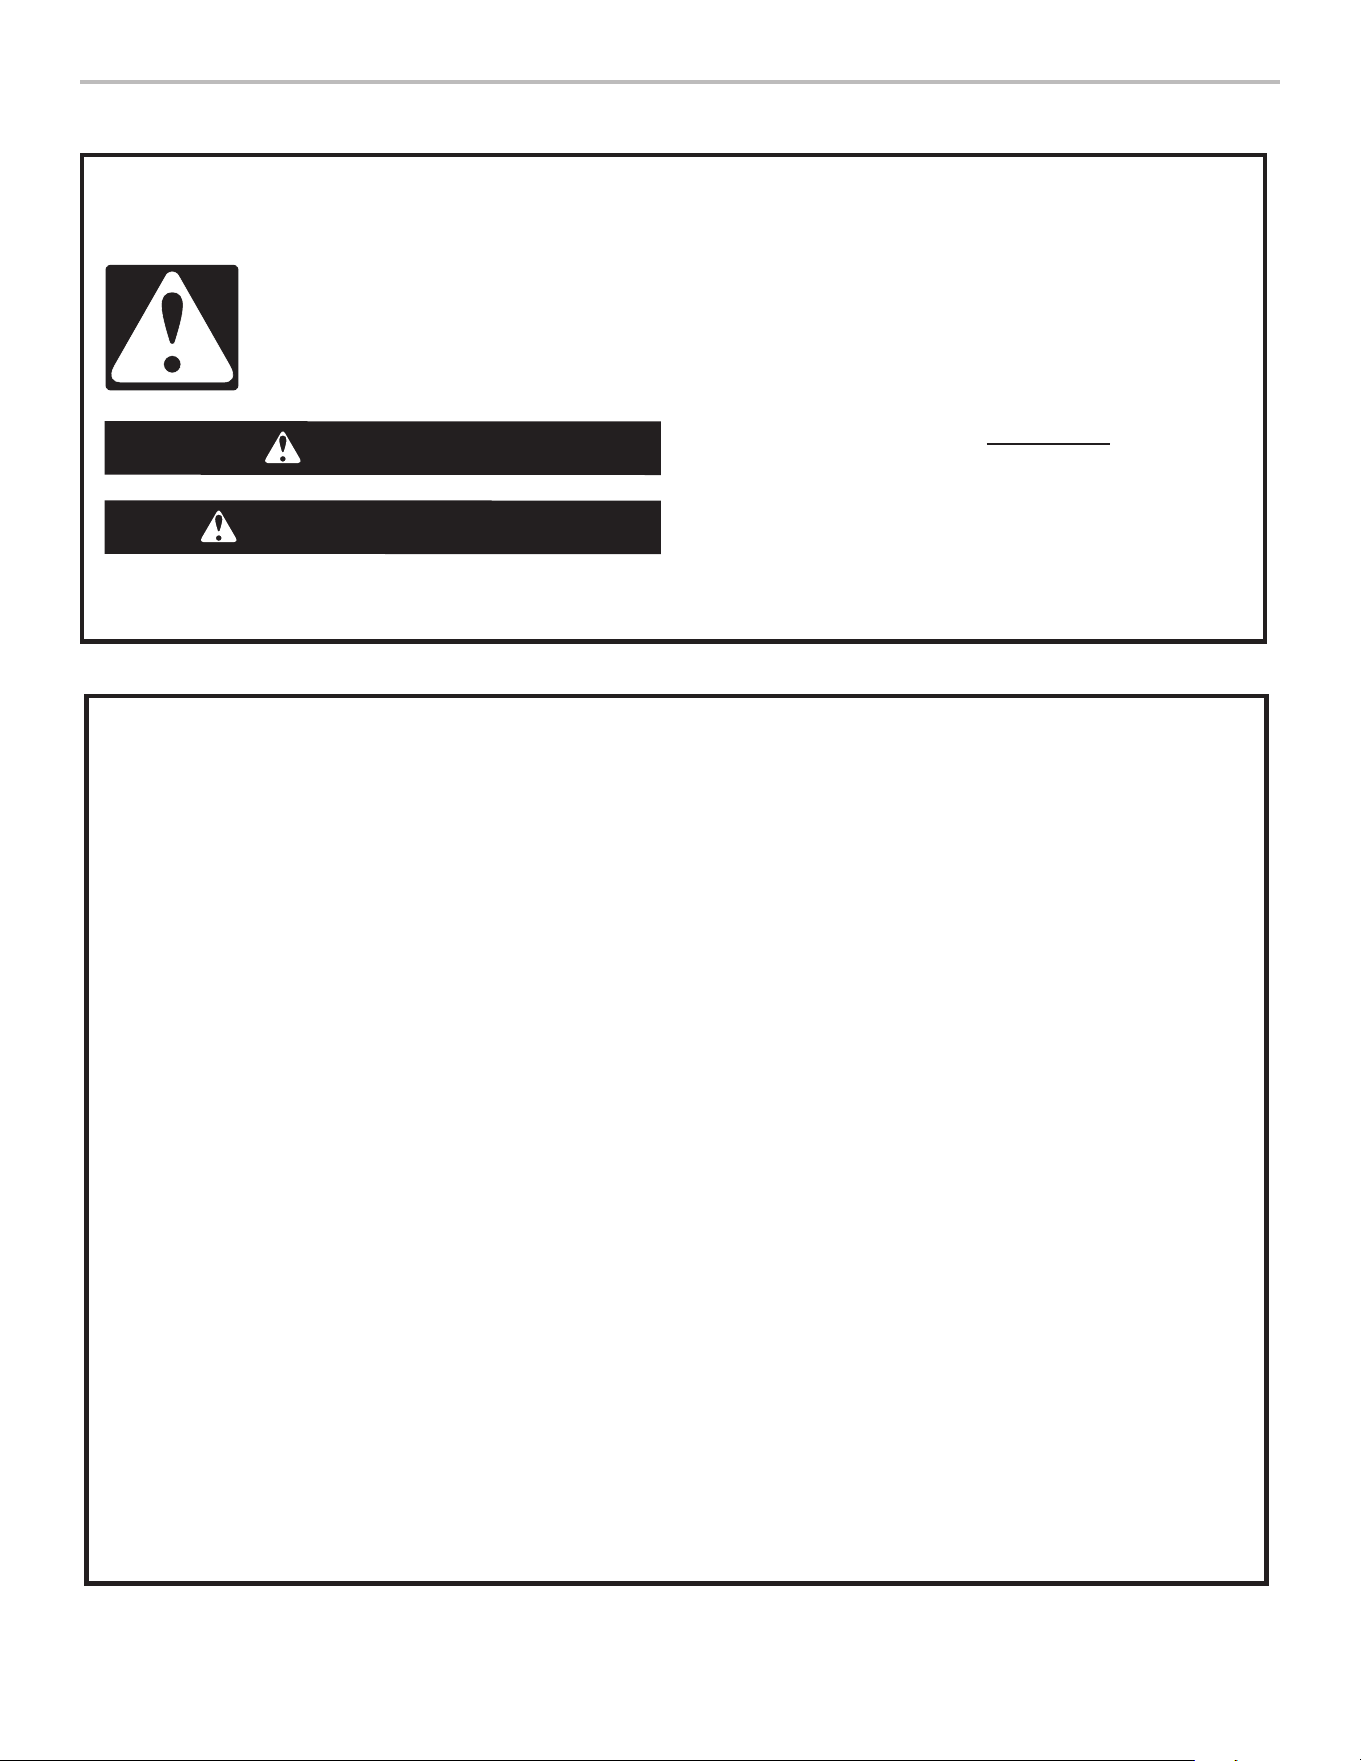
Electrical Shock Hazard
Plug into a grounded 3 prong outlet.
Do not remove ground prong.
Do not use an adapter.
Do not use an extension cord.
Failure to follow these instructions can result in death,
fire, or electrical shock.
WARNING
GROUNDING INSTRUCTIONS
SAVE THESE INSTRUCTIONS
■
For all cord connected appliances:
The microwave oven must be grounded. In the event of
an electrical short circuit, grounding reduces the risk of
electric shock by providing an escape wire for the electric
current. The microwave oven is equipped with a cord
having a grounding wire with a grounding plug. The plug
must be plugged into an outlet that is properly installed
and grounded.
WARNING: Improper use of the grounding plug can
result in a risk of electric shock. Consult a qualified
electrician or serviceman if the grounding instructions are
not completely understood, or if doubt exists as to whether
the microwave oven is properly grounded.
Do not use an extension cord. If the power supply cord is
too short, have a qualified electrician or serviceman install
an outlet near the microwave oven. A short power supply
cord is provided to reduce the risks resulting from becoming
entangled in or tripping over a longer cord.
WARNING
Excessive Weight Hazard
Use two or more people to move and install
microwave oven.
Failure to do so can result in back or other injury.
6
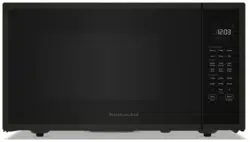
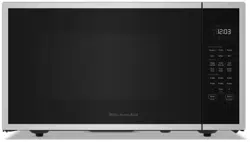
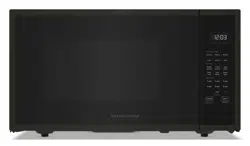
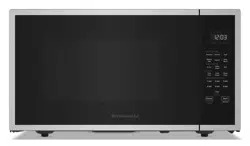
PARTS AND FEATURES
This manual may cover several different models. The model you
have purchased may have some or all of the features shown
here. The appearance of your particular model may differ slightly
from the illustrations in this manual.
*NOTE: To avoid damage to the microwave oven, do not remove
microwave inlet cover. See the “Parts and Features” section.
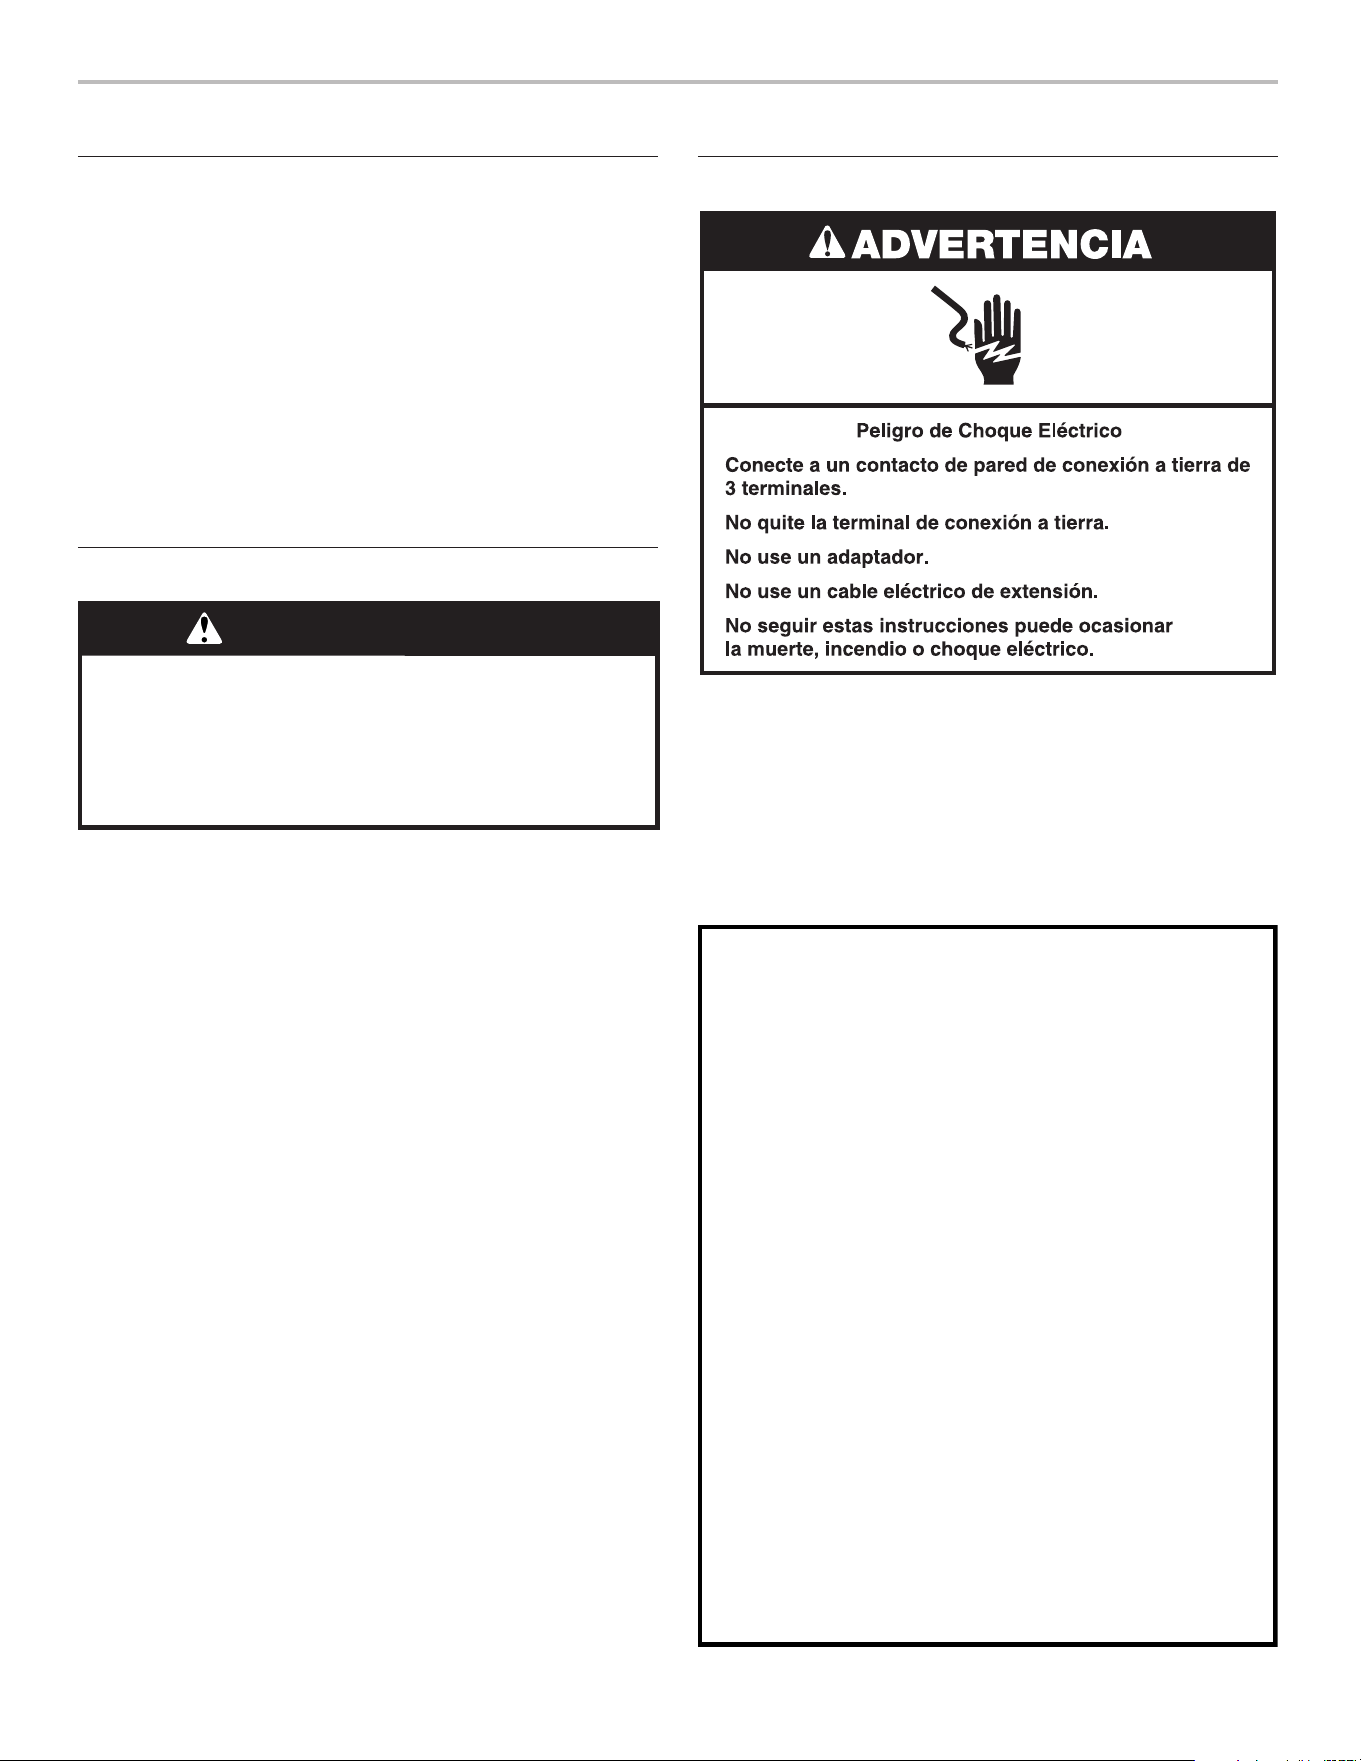
Turntable
The turntable can rotate in either direction to help cook food
more evenly. For best cooking results, do not operate the
microwave oven without having the turntable in place. See the
“Assistance or Service” section to reorder any of the parts.
To Install:
1. Place the support on the microwave oven cavity bottom.
2. Place the turntable on the support.
Fit the raised, curved wedges in the center of the turntable
bottom between the three spokes of the hub. The rollers on
the support should t inside the turntable bottom ridge.
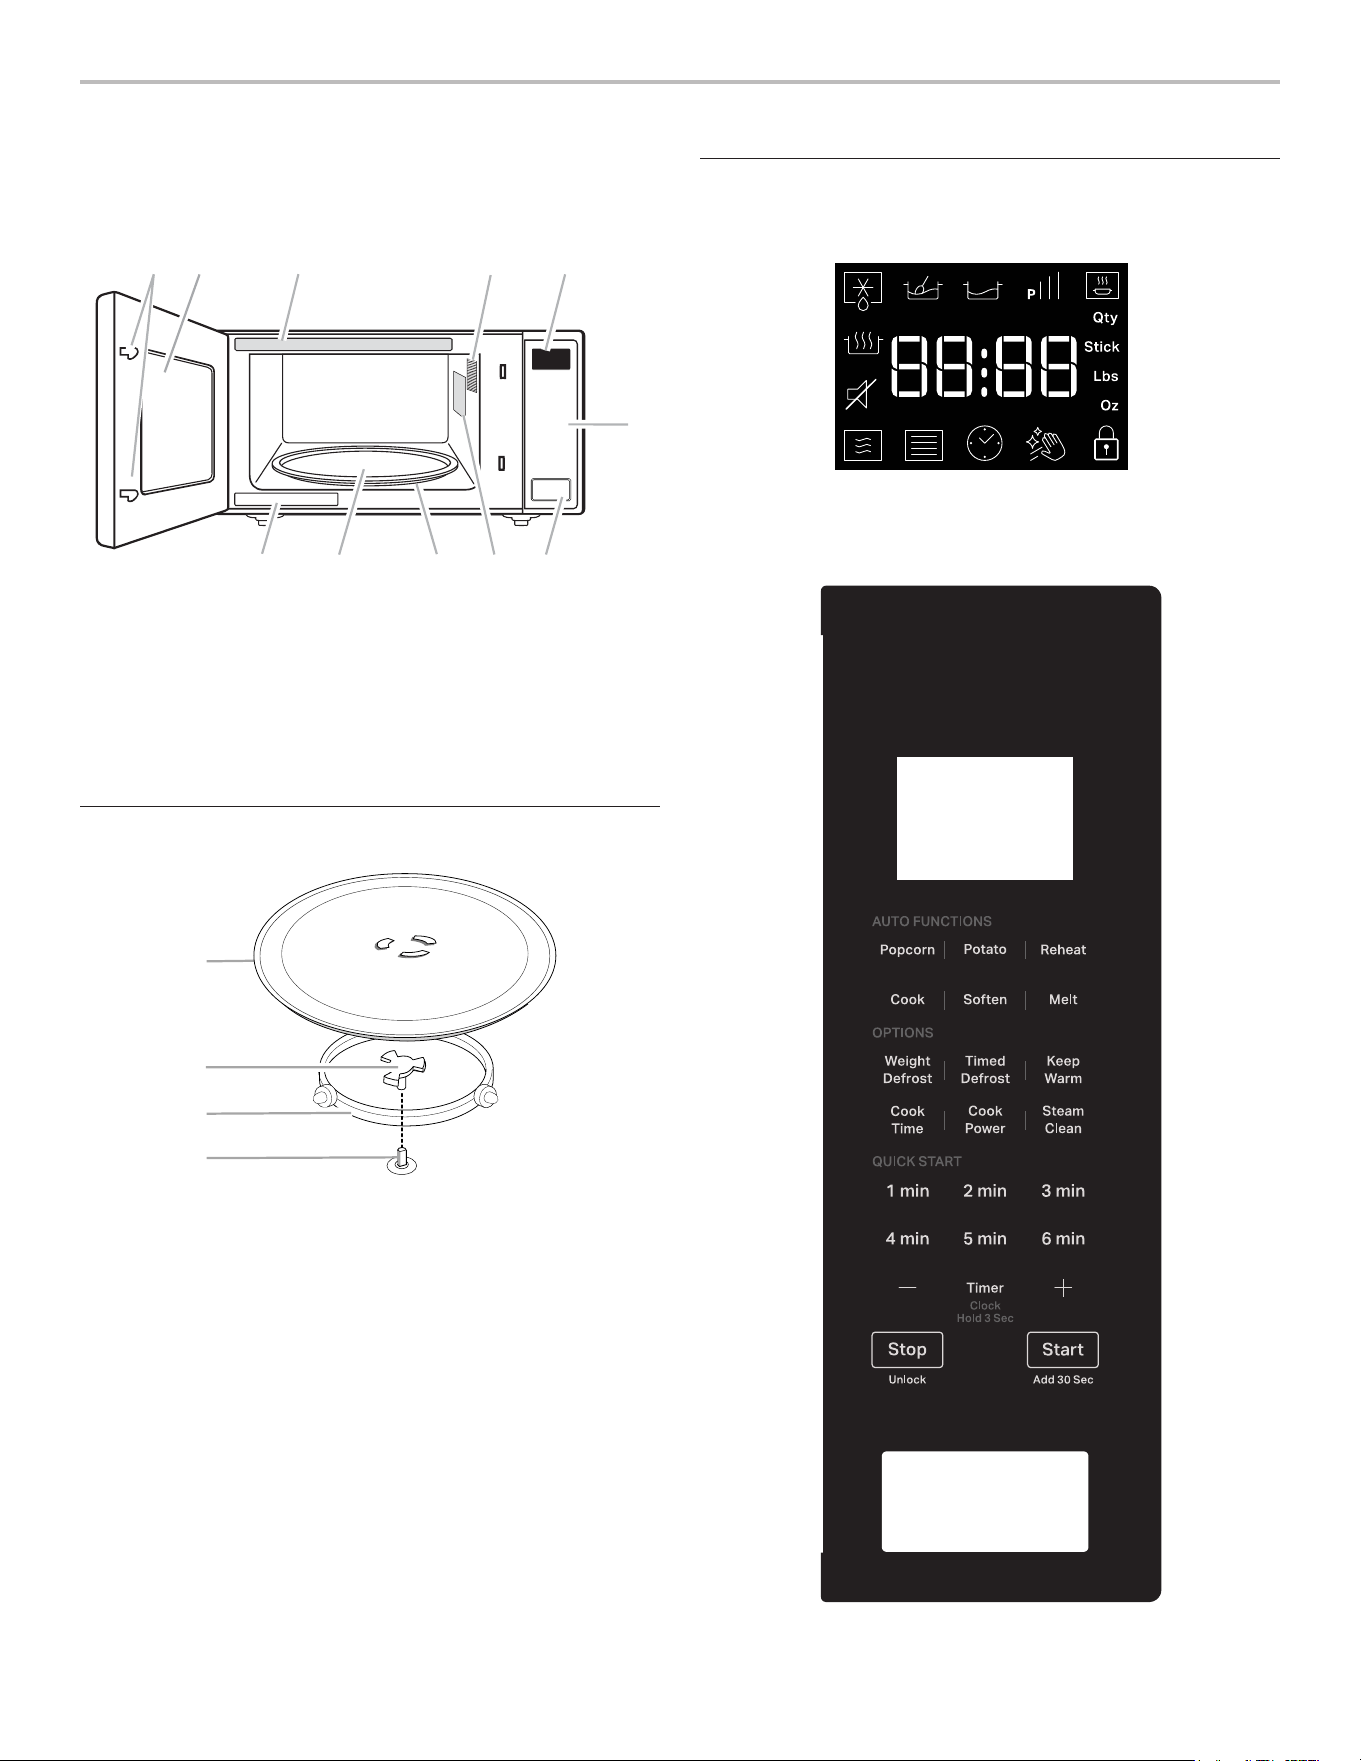
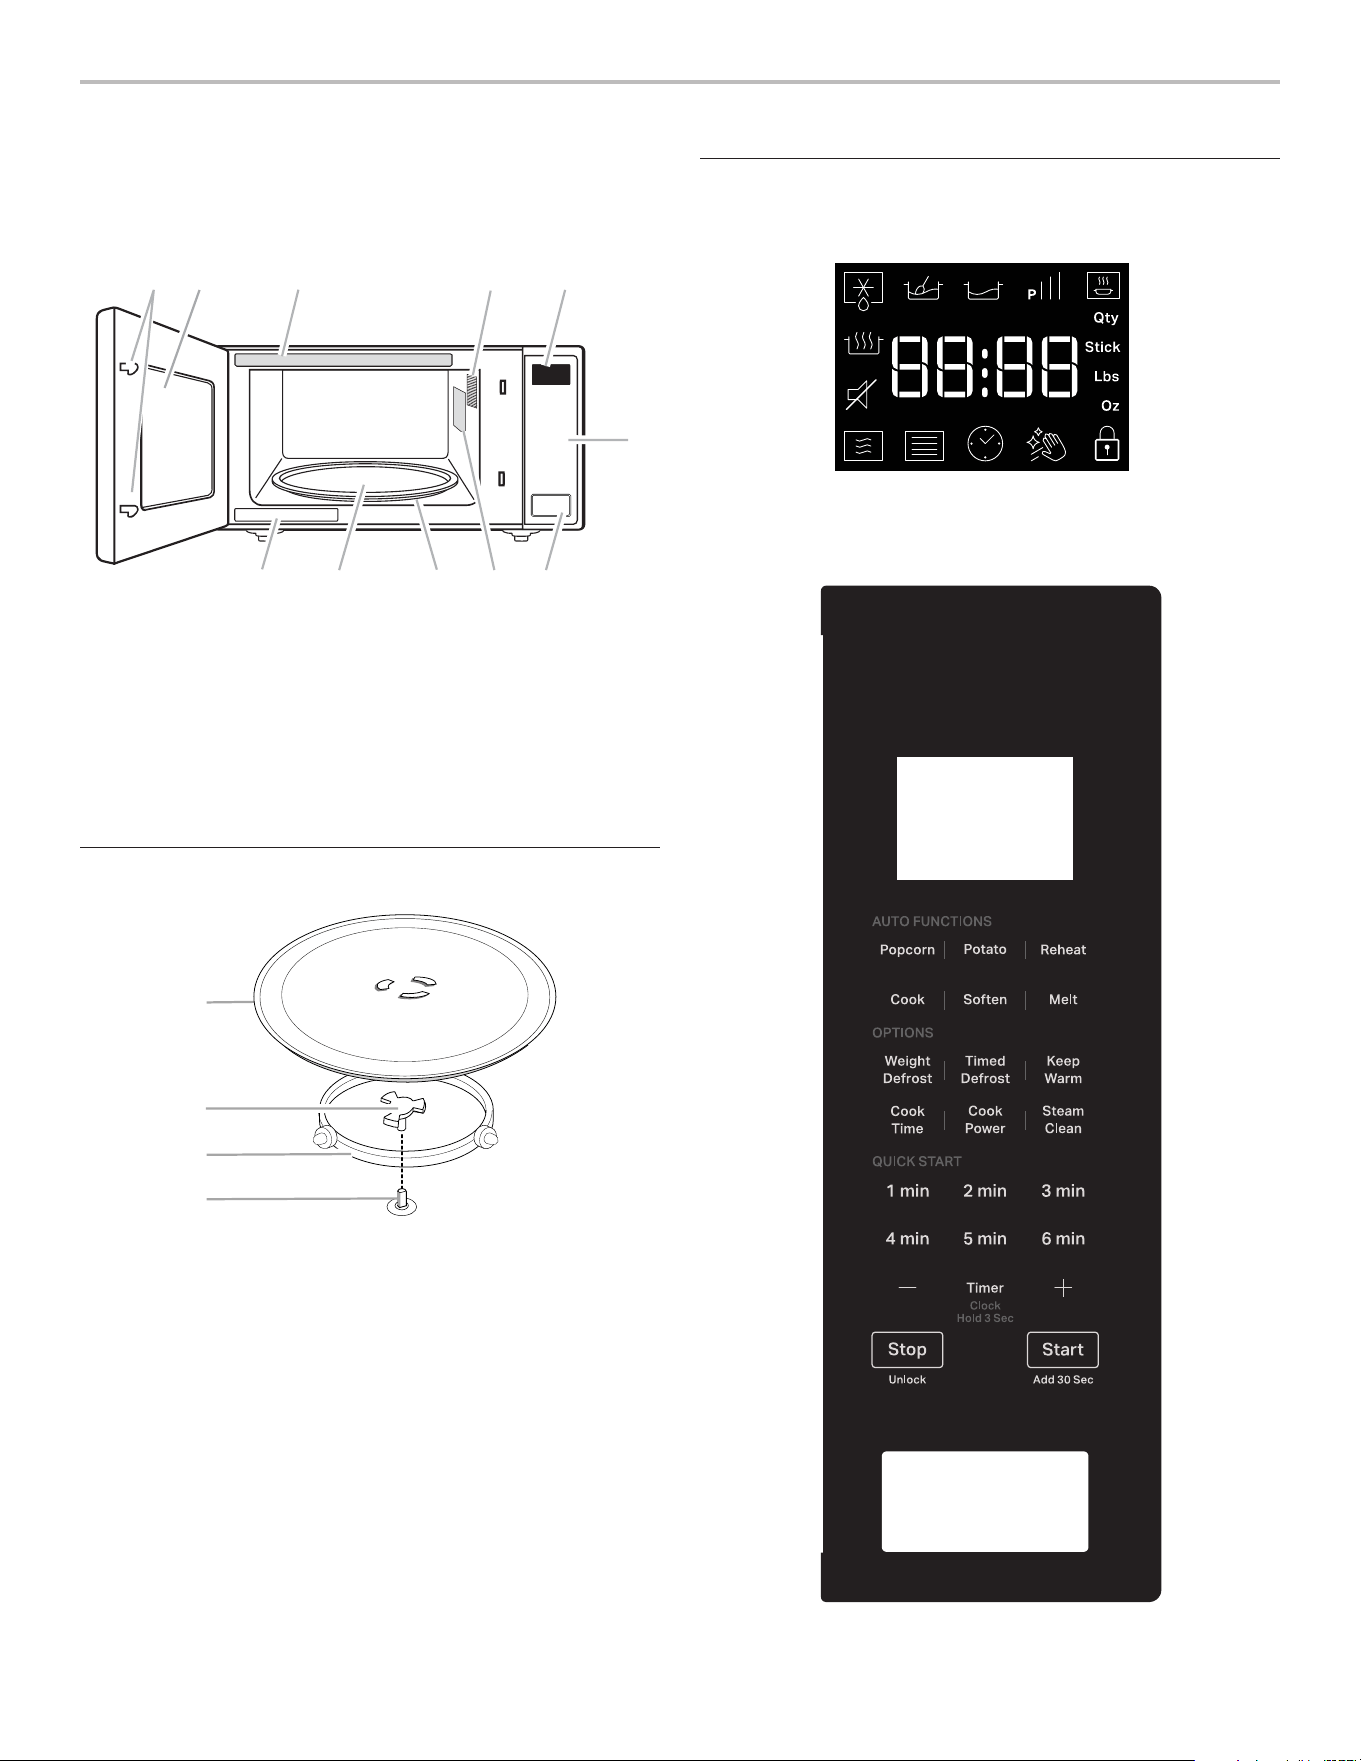
Microwave Oven Control
A. Door lock system
B. Window
C. Cooking guide label
D. Microwave oven light
E. Display
F. Control panel
G. Door open door release button
H. Microwave inlet cover*
I. Removable turntable support
J. Glass turntable
K. Model and serial number plate
A
B
C
D
A. Turntable
B. Hub
C. Support
D. Shaft
C EA
GK J
B D
H I
F
Defrost
Soften
Melt
Power
Reheat Menu
Quantity
Keep Warm
Tone ON/OFF
Weight - Lbs
Weight - Ounce
Microwave
Door Lock
Cook
Timer/
Steam
Menu
Clock
Clean

7
Keypad Feature Instructions
Timer
(Clock Hold
3sec)
Hold to Set the Clock To set the clock, follow the instructions below:
1. Press Timer for 3seconds to enter the clock setting.
2. Press the “+/-” button to set the hour, press Start button to
conrm.
3. Press the “+/-” button to set the minute.
4. Press Start button.
NOTE: The microwave oven must be in standby. It will also appear
every time the product is plugged in. The screen shows “12 Hr”
(“12” ashing), use “+/-” to change 12 or 24hour format, press Start
to conrm; then the screen shows “12:00”.
Timer
(Clock Hold
3sec)
Set Kitchen Timer The kitchen timer functions like a stop watch. To set the kitchen
timer, following the instructions below:
1. Press Timer button.
2. Press “+/-” button to enter desired time.
3. Press Start button.
NOTE: While the Timer countdown is active in the display, touch
Stop/Unlock to stop the Timer. The timer does not start or stop the
microwave oven.
Start
(Add 30sec)
Add 30Seconds The button Start can be used in two ways:
1. To start the microwave by cooking for 30seconds with full power
in standby mode.
2. To increase a cooking time using increments of 30seconds. Each
press adds 30seconds.
Start
(Add 30sec)
Start Function Press the Start button to start any cooking function. If cooking is
interrupted by opening the door, touch the Start button after the door
is closed again to resume the cycle.
Stop
(Unlock)
Microwave Pause/Stop Function The Stop/Unlock button stops any microwave oven function except
for the clock.
The microwave oven will also turn off when the door is opened. When
the door is opened, the element(s) will turn off, but the microwave
oven light will remain on. Close the door and touch the Start button
to resume the preset cycle.
Keypad Instructions

8
Keypad Feature Instructions
Stop
(Unlock)
2-Step Door Opening This microwave comes with the added feature of a 2-step door
opening functionality to avoid unintended access.
The Stop/Unlock button can be used to pause/cancel the function
during or after cook time.
The Stop/Unlock button can be used for 2-step door opening:
1. Once you set the cooking time and press the Start button, the
Door Lock icon will appear on the display.
2. To open the microwave:
n Press Stop (Unlock).
n Press door release button.
NOTE: Once you press the Stop/Unlock button to stop/pause any
function, the Door Lock icon will disappear for 10seconds and you
will be able to press the door release button to open the door.
The Door Lock icon will reappear after 10seconds and require you to
repeat steps 1 and 2 to open the door.
NOTE: When the machine is powered on after plug-in, the 2-Step
Door function will not be triggered. If a cooking cycle starts after
the door closes, then 2 steps are required to open the door. Once
the 2 steps have been used to open the door, if the door closes and
no cooking power is applied, then you can open the door by just
pressing the door release button.
NOTE: This microwave comes with the added feature of a 2-step
door opening functionality to avoid unintended access. When
children do not have access to the appliance, there is a disable
function if the 2-step functionality is not needed.
Disable/Enable 2-step door function operation on the display
Steps to disable the 2-step door function operation:
1. After pressing the Stop/Unlock button for 3seconds, “DI:_0” will
show on the display.
2. After pressing the “+” button, “DI:_1” will show on the display.
3. Press the Start button to conrm.
NOTE: DI (Disable)
NOTE: If you unplug the microwave, it will remember the last
operation. You will not need to disable or enable the 2 step door
function again.
Steps to enable the 2-step door function operation:
1. After pressing the Stop/Unlock button for 3seconds, “EA:_0” will
show on the display.
2. After pressing the “+” button, “EA:_1” will show on the display.
3. Press the Start button to conrm.
NOTE: EA (Enable)
IMPORTANT: Disabling this feature should only be done when the
owner is certain and children are not present.
1min-6min Quick Start Default power is full in this function (P100).
“Press 1min, 2min... or 6min to start with the time mentioned on the
button.”
Cook Time Set Manual Cooking Press “Cook Time” button to set manual cooking time. The default
power level is 100%. Press “+/-” button/1min-6min to set the
cooking time, follow the instructions below:
1. Press “Cook Time” button, “0:15” will show on the display.
2. Press “+/-” button/1min-6min to adjust the cooking time.
3. Press Start button to start.
NOTE: Press the “Power” button to increase/decrease power levels
in cyclic way P10 P20 P30………..P100.

9
Keypad Feature Instructions
Cook Power Set Manual Cooking Press “Cook Power” button to set manual power. The default power
level is 100%. Press the “Cook Power” button or “+/-” button to
change power level.
For example, to set the time to 2:30in 90% power:
1. Press “Cook Power” button, P100 will show on the display.
2. Press-button to decrease power level to 90% (P90 on display).
3. Press Start button to conrm and jump to cooking time setting,
default “0:15” will show on the display.
4. Press “+/-” button to adjust the cooking time to “2:30”.
5. Press Start button.
Weight Defrost Automatic Defrost The Auto Defrost function helps that frozen food. To defrost, follow
the instructions below:
1. Press “Weight Defrost” button, P1 will show on display.
2. Press “Weight Defrost” button or “+/-” button to select the
desired food class.
3. Press Start button to conrm, display will show the default
weight.
4. Press “+/-” button to adjust desired weight.
5. Press Start button.
Timed Defrost Manual Defrost Defrost power has been set, select defrost cooking time:
1. Press “Timed Defrost” button, default time “0:30” will show in the
display.
2. Press “+/-” button to adjust defrost cooking time.
3. Press Start button.
Reheat Reheat To reheat using preset functions, follow the instructions below:
1. Press “Reheat” button, the “P1” will show on the display.
2. Use “+/-” button or “Reheat” to select a food category.
See the Reheat section in this guide for the food category or
reference sticker on the front plate of the microwaves.
3. Press Start button.
4. Sensor Cooking (except Sauce, Soap and Beverage): A sensor in
the microwave oven detects humidity released from the food as it
heats and adjusts the cook time accordingly.
(When selecting Sauce, Soup and Beverage the display will show
the default weight. Press “+/-” button to adjust desired weight.
Press the Start button.
Popcorn Popcorn To use the popcorn preset, follow the instructions below:
1. Press “Popcorn” button repeatedly to select the bag size
(3.0 or 3.5oz).
2. Press Start button.
Potato Potato cooking To use the potato preset, follow the instructions below:
1. Press “Potato” button repeatedly to select L (Large) or
S (Small) potato size.
2. Press Start to conrm, press “+/-” to adjust quantity.
3. Press Start button.

10
Keypad Feature Instructions
Cook Auto cook For Cook mode, it is not necessary to set the time and power, follow
the instructions below:
1. Press “Cook” button, the “P1” will show on the display.
2. Use “+/-” button or “Cook” to select a food category. See the
Cook section in this guide for the food category or reference
sticker on the front plate of the microwave.
3. Press Start button.
4. Sensor Cooking: a sensor in the microwave oven detects
humidity released from the food as it heats and adjusts the cook
time accordingly.
(For non-sensor cooking, the display will show the default weight.
Press “+/-” button to adjust desired weight. Press the Start
button.)
NOTE: During the cooking process, the display will show to Turn
or Add Food (for some food only), press the Stop/Unlock button
to trigger the unlock function and add or turn the food using door
release button to open the door. By pressing the Stop/Unlock button
again will stop the cooking function and microwave oven will switch
to Standby mode.
Soften Soften The Soften function is used to soften food. To use:
1. Press “Soften”, the display will show “P1”.
2. Use “Soften” button or “+/-” button to select a food category,
see the Soften section in this guide for the food category or
reference the sticker on the front plate of microwave. Press Start
button to conrm.
3. Use “+/-” button to adjust the quantity.
4. Press Start button.
Melt Melt The Melt function is used to melt food. To use:
1. Press “Melt”, the display will show “P1”.
2. Use “Melt” button or “+/-” button to select a food category, see
the Melt section in this guide for the food category or reference
the sticker on the front plate of microwave. Press Start button to
conrm.
3. Use “+/-” button to adjust the quantity.
4. Press Start button.
Keep Warm Keep Warm The function allows to keep your dishes warm. To use:
1. Press “Keep Warm” button, default time “30:00” will show on the
display.
2. Press “Keep Warm” or “+/-” button to select 15minutes,
30minutes, 45minutes, or 60minutes.
3. Press Start button.
NOTE: The Keep Warm cycle last for a duration of 15minutes
(default 30minutes), the maximum time is 60minutes.
Each 15minutes cycle, microwave will be turned on 1.5minutes,
then cavity lamp and fan are off, only the countdown time is shown.
Steam Clean Auto cleaning cycle The cleaning cycle will help to clean the microwave oven cavity.
1. Place 1cup of water (~250mL) on the middle of the cavity.
2. Press “Steam Clean” button, default “13:00” time will show on
display.
3. Press Start button to start the function.
After nishing the heat-up cycle (3minutes), the cavity lamp and
fan will be off and display will show the countdown time.
NOTE: Please follow Tips and Suggestions in Steam Clean section.
Tone ON/OFF Turn on or off beep sound The function allows to turn on or off the beep sound:
1. Press Steam Clean button and hold for 5seconds to put into
mute, the Tone Off icon will be shown on display.
2. Hold the button again for 5seconds to turn on the sound.

11
Display
When power is rst supplied to the microwave oven, “12Hr” will
appear in the display. User can press Timer/Clock button or
“+/-” button to toggle between 12 Hr or 24 Hr within 10seconds.
Press Start button to conrm. If the “12:00” appears in the
display at any other time, a power failure has occurred. Reset
the clock if needed. See the “Clock” section.
Standby mode
When no functions are being used, the microwave oven will
switch to Standby mode.
After function selection, press the Stop/Unlock button to exit the
function selection. If you again press the Stop/Unlock button it
will be a invalid, as cooking mode is not activated.
When cooking mode is activated and the user presses the
Stop/Unlock button, the Stop/Unlock functions will be triggered
at the same time. Press the Stop/Unlock button again to cancel
the function and return to Standby mode.
Start
The Start button begins any function. If non-sensor cooking
isinterrupted by opening the door, pressing Start button will
resume the cycle.
NOTE: To avoid unintentional operation of the microwave oven,
a cooking function cannot be started if the microwave oven door
has been closed for about 1minute. The word “door” willappear
in the display until the door is opened and closed.
Quick Start/Add 30seconds
In standby mode, pressing Start button automatically starts
the microwave oven at 100% power for 30seconds and adds
30seconds of cook time, with each additional touch of the
control. Time may be added to any manual cooking cycle in
30second increments, at the moment power level, by pressing
Start button during cooking.
Stop/Unlock
The Stop/Unlock button clears any incorrect command and
cancels any program during cooking. Press the Stop/Unlock
button to stop the cycle. It will not erase the time of day.
The microwave oven will also turn off when the door is opened.
Close the door and press Start to resume the cycle.
To use Non-Sensor Menu
(Popcorn, Potato)
1. Place food on the turntable and close the door.
2. Touch desired menu control. The rst programmed amount
will appear in the display. Touch control keypad repeatedly or
touch number keypads to change quantity.
3. Touch Start. When the cycle ends, “END” will appear in the
display and the end-of-cycle tone will sound.
4. Touch Stop/Unlock or open the door to clear the display.
Clock
To Set:
The microwave oven must be in standby.
1. Press Timer/Clock button for 3seconds to enter clock
setting. It will also appear every time the product is plugged
into the power source, or power is back after a power fail.
2. Press “+/-” button to set the hour.
3. Press Start button to conrm.
4. Press “+/-” button to set the minute.
5. Press Start button to conrm the setting.
Timer
To Set:
1. Press Timer/Clock button.
2. Press “+/-” button to enter desired time.
3. Press Start button. When the set time ends, the end-of-timer.
4. When the Timer countdown is achieve in the display, tone
will sound. Press Stop/Unlock to stop the timer.
NOTE: The Timer does not start or stop the microwave oven.
The function can be set only in Standby mode.
Tones ON/OFF
This function allows the user to activate/deactivate all the
sounds played by the appliances, includes button press,
warnings, alarm, even end audio feedback.
Press Steam Clean button and hold for 5seconds to put into
mute, hold the button again for 5seconds to turn on the sound.
Cooking End
When the cooking is nished, the display will show the text
“END”. A reminder acoustic beep will signal.
1. After the Cooking End, If you press the Stop/Unlock button,
takes out the food and closes the door again, the interface
will display the clock, it will switch to 1-step door opening.
2. If you will not remove the food within 30minutes, it will
consistently display “END” for 30minutes, and automatically
return to standby mode and unlock after 30minutes and it
will switch to 1-step door opening.
To use Sensor Menu
(Reheat, Cook Menu)
1. Place food on the turn table and close the door.
2. Touch the desired menu control.
3. Touch Start, the running segment animation will appear
in the display. The microwave oven will start and sensor
cooking will begin.
The running segment will remain in the display until the
sensor has determined the remaining cook time.
4. When the cycle end, “END” will appear in the display and the
end-of-cycle tones will sound.
5. Touch Stop/Unlock or open the door to clear the display.
(NOTE: Sauce, Soup, Beverage in Reheat Menu without using
Sensor cooking).

12
MICROWAVE OVEN USE
A magnetron in the microwave oven produces microwaves which
reect off the metal oor, walls, and ceiling and pass through the
turntable and appropriate cookware to the food. Microwaves are
attracted to and absorbed by fat, sugar, and water molecules
in the food, causing them to move, producing friction and heat
which cooks the food.
n To avoid damage to the microwave oven, do not lean on or
allow children to swing on the microwave oven door.
n To avoid damage to the microwave oven, do not operate
microwave oven when it is empty.
n Baby bottles and baby food jars should not be heated in
microwave oven.
n Clothes, owers, fruit, herbs, wood, gourds, and paper,
including brown paper bags and newspaper, should not be
dried in the microwave oven.
n Parafn wax will not melt in the microwave oven because it
does not absorb microwaves.
n Use oven mitts or pot holders when removing containers
from microwave oven.
n Do not overcook potatoes. At the end of the recommended
cook time, potatoes should be slightly rm. Let potatoes
stand for 5minutes. They will nish cooking while standing.
n Do not cook or reheat whole eggs inside the shell. Steam
buildup in whole eggs may cause them to burst, requiring
signicant cleanup of microwave oven cavity. Cover
poachedeggs and allow a standing time.
Food Characteristics
When microwave cooking, the amount, size and shape,
startingtemperature, composition, and density of the food
affectcookingresults.
Amount of Food
The more food heated at once, the longer the cook time
needed.Check for doneness and add small increments
oftimeifnecessary.
Size and Shape
Smaller pieces of food will cook more quickly than larger pieces,
and uniformly shaped foods cook more evenly than irregularly
shaped food.
Starting Temperature
Room temperature foods will heat faster than refrigerated foods,
and refrigerated foods will heat faster than frozen foods.
Composition and Density
Foods high in fat and sugar will reach a higher temperature and
will heat faster than other foods. Heavy, dense foods, such as
meat and potatoes, require a longer cook time than the same
size of a light, porous food, such as cake.
Cooking Guidelines
Covering
Covering food helps retain moisture, shorten cook time, and
reduce spattering. Use the lid supplied with cookware. If a
lid isnot available, wax paper, paper towels, or plastic wrap
approved for microwave ovens may be used. Plastic wrap
should be turned back at one corner to provide an opening to
vent steam. Condensation on the door and cavity surfaces is
normal during heavy cooking.
Stirring and Turning
Stirring and turning redistribute heat evenly to avoid overcooking
the outer edges of food. Stir from outside to center. If possible,
turn food over from bottom to top.
Arranging
If heating irregularly shaped or different-sized foods, arrange
the thinner parts and smaller-sized items toward the center. If
cooking several items of the same size and shape, place them
ina ring pattern, leaving the center of the ring empty.
Piercing
Before heating, use a fork or small knife to pierce or prick foods
that have a skin or membrane, such as potatoes, egg yolks,
chicken livers, hot dogs, and sausage. Prick in several places
toallow steam to vent.
Shielding
Use small, at pieces of aluminum foil to shield the thin pieces
of irregularly shaped foods, bones and foods such as chicken
wings, leg tips, and sh tails. See the “Aluminum Foil and Metal”
section rst.
Standing Time
Food will continue to cook by the natural conduction of heat
even after the microwave cooking cycle ends. The length of
standing time depends on the volume and density of the food.

13
Cookware and Dinnerware
Cookware and dinnerware must t on the turntable. Always
use oven mitts or pot holders when handling because any dish
may become hot from heat transferred from the food. Do not
use cookware and dinnerware with gold or silver trim. Use the
following chart as a guide, then test before using.
Material Recommendations
Aluminum Foil,
Metal
See the “Aluminum Foil and
Metal”section.
Browning Dish Bottom must be at least 3/16"
(5mm) above the turntable. Follow
manufacturer’srecommendations.
Ceramic Glass,
Glass
Acceptable for use
China,
Earthenware
Follow manufacturer’s recommendations.
Melamine Follow manufacturer’s recommendations.
Paper: Towels,
Dinnerware,
Napkins
Use non-recycled and those approved by
the manufacturer for microwave oven use.
Plastic: Wraps,
Bags, Covers,
Dinnerware,
Containers
Use those approved by the manufacturer
for microwave oven use.
Pottery and Clay Follow manufacturer’s recommendations.
Silicone
Bakeware
Follow manufacturer’s recommendations.
Straw, Wicker,
Wooden
Containers
Do not use in microwave oven.
Wax Paper Acceptable for use
To Test Cookware or Dinnerware for Microwave Use:
1. Place cookware or dinnerware in microwave oven with 1cup
(250mL) of water beside it.
2. Cook at 100% cooking power for 1minute.
Do not use cookware or dinnerware if it becomes hot and the
water stays cool.
Aluminum Foil and Metal
Always use oven mitts or pot holders when removing dishes
from the microwave oven.
Aluminum foil and some metal can be used in the microwave
oven. If not used properly, arcing (a blue ash of light) can
occurand cause damage to the microwave oven.
OK for Use
Racks and bakeware supplied with the microwave oven (on
some models), aluminum foil for shielding, and approved meat
thermometers may be used with the following guidelines:
n To avoid damage to the microwave oven, do not allow
aluminum foil or metal to touch the inside cavity walls,
ceiling,or oor.
n Always use the turntable.
n To avoid damage to the microwave oven, do not allow
contact with another metal object during microwave cooking.
Do Not Use
Metal cookware and bakeware, gold, silver, pewter, non-approved
meat thermometers, skewers, twist ties, foil liners such as
sandwich wrappers, staples, and objects with gold or silver trim
or a metallic glaze should not be used in the microwave oven.
Cooking Menu, Sensor Cooking
The microwave oven has been programmed with common
microwave foods, their quantities, cook powers, and cook times.
Use the following chart as a guide for preset cooking.
Item Food Category Quantity
P1 Fresh Vegetables
From room temperature.
Put food into microwave safe
dish. Add 2 tablespoons water
to 1-2cups, add 4 tablespoons
water to 3-4cups. Cover the
dish, leaving an air ventilation. Stir
and let stand 2-3minutes after
cooking.
1-4cups
(Sensor cooking)
P2 Frozen Vegetables
From frozen temperature. Place
in microwave-safe container. Add
2 tablespoons water to 1-2cups,
add 4 tablespoons water to
3-4cups. Cover the dish, leaving
an air ventilation. Stir and let stand
3minutes after cooking.
1-4cups
(Sensor cooking)
P3 Oatmeal
Place in microwave-safe container
and add water depends on
package directions adds water
cover with plastic wrap and fold
back one edge about 1/4" (6mm)
to make a vent. Place container
in the center of the oven. After
cooking stir with spoon or whisk
until uniform.
1-4cups
(Sensor cooking)
P4 Frozen Entrée
Remove entrée from package and
loosen lm covering on 3 sides of
the container leaving one of the
short sides still attached. Loosely
cover with lm.
Allow the 10.5 and 20oz (297 and
567g) entrees to stand 3minutes.
Allow the 38 and 60oz (1.1 and
1.7kg) entrees to stand 5minutes.
10oz, 20oz,
40oz, 60oz
(283g, 567g,
1.1kg, 1.7kg)
Popcorn
3.0 or 3.5oz bags.
– Do not use regular paper bags or glassware
– Pop only one package of popcorn at a time.
– Follow manufacturer’s instructions when using a microwave
popcorn popper.
– Listen for popping to slow to one pop every 1 or 2seconds,
and then stop the cycle.
– Do not reppop unpopped kernels.
– For best results, use fresh bags of popcorn.
– Cooking results may vary by brand and fat content.
NOTE: Follow the instructions provided by the microwave
popcorn manufacture.

14
Potato
Item Food Category Quantity
L-Large Enter 1-4 pieces, 8-10oz
(227-283g) each. Pierce
each potato several times
with a fork. Place on paper
towel on turntable center.
Let stand 5minutes after
cooking.
1, 2, 3, 4 pieces/1
piece
S-Small
Potato
Enter 1-16 pieces, 4-7oz
(110-200g) each. Pierce
each potato several times
with a fork. Place a paper
towel on turntable center.
Let stand 5minutes after
cooking.
1-16 pieces/1 piece
Reheat
Times and cooking powers have been preset for reheating a
number of food types.
Use the following chart as a guide.
Item Food Category Quantity
P1 Dinner plate
Place food on plate. Cover with
plastic wrap and vent. Let stand
2-3minutes after reheating.
10-15oz
(283-425g)
(Sensor Cooking)
P2 Sauce
Place in microwave-safe container.
Cover with plastic wrap and vent.
Stir and let stand 2-3minutes after
reheating.
1, 2, 3, 4cups
P3 Soup
Place in microwave-safe container.
Cover with plastic wrap and vent.
Stir and let stand 2-3minutes after
reheating.
1, 2, 3, 4cups
P4 Beverage
Do not cover.
1, 2, 3, 4cups
P5 Reheat Pizza
Place on paper towel lined
microwave-safe plate.
1-3 sliced, 4oz
(113g) per slice
(Sensor cooking)
Soften
Soften function may be used to soften your food. Times and
cooking powers have been preset for a number of food types.
Use the following chart as a guide.
Item Food Category Quantity
P1 Butter
Unwrap and place in
microwave-safe container.
0.5-2.0 sticks/0.5 stick
P2 Ice-cream
Place ice-cream container
on turntable.
16-64oz/16oz
(454g-1.8kg/454g)
P3 Cream Cheese
Unwrap and place in
microwave-safe container.
3oz, 8oz
(85g, 227g)
P4 Brown Sugar
Place in microwave-safe
container.
3oz, 8oz
(85g, 227g)
P5 Frozen Juice
Remove lid.
8oz, 12oz
(227g, 340g)
P6 Caramel Dip
Remove lid from caramel
dip and place in center of
microwave oven.
8oz, 16oz
(227g, 454g)
Melt
Melt function may be used to melt your food. Times and cooking
powers have been preset for a number of food types. Use the
following chart as a guide.
Item Food Category Quantity
P1 Butter
Unwrap and place in
microwave-safe container
0.5-2.0 sticks/
0.5 stick
P2 Chocolate Chips
Place in microwave-safe container
4-12oz/4oz
(113-340g/113g)
P3 Cream Cheese
Unwrap and place in
microwave-safe container
8oz, 16oz (227g,
454g)
P4 Caramel Dip
Unwrap and place in
microwave-safe container
8oz, 16oz
(227g, 454g)
15
Weight Defrost
– For optimal result, food should be 0oF (-18oC) or colder when
defrosting.
– Unwrap foods and remove lids (from fruit juice) before
defrosting.
– Shallow packages will defrost more quickly than deep blocks.
– Separate food pieces as soon as possible during or at the
end of the cycle for more even defrosting.
– Foods left outside the freezer for more than 20minutes or
frozen ready-made food should not be defrosted using the
Defrost feature but should be defrosted manually.
– Use small pieces of aluminum foil to shield parts of food such
as chicken wings leg tips, and sh tails. See the “Aluminum
Foil and Metal” section rst.
– Times and cooking powers have been preset for defrosting a
number of food types.
Item Food Category Weight
P1 Poultry 0.5lbs-6.6lbs/0.1lbs
P2 Meat 0.5lbs-6.6lbs/0.1lbs
P3 Fish 0.5lbs-6.6lbs/0.1lbs
DEFROST PREPARATION CHART
POULTRY
Chicken: whole and cut up
Cornish hens
Turkey: breast
Place in a microwave safe
container, chicken breast
side up. Remove giblets
from whole chicken.
MEAT
Beef: ground, steaks, roast,
stew
Lamb: stew and chops
Pork: chops, ribs, roasts,
sausage
The narrow or fatty areas of
irregular-shaped cuts should
be shielded with foil before
defrosting.
Do not defrost less than
1/4lb (113g) or two 4oz
(113g) patties.
Place all meats in a
microwave-safe container.
FISH
Fillets, Steaks, Whole, Shellsh
Place in a microwave-safe
container.
Steam Clean
This automatic cleaning cycle will help you to clean the
microwave oven cavity and to remove unpleasant odors.
Before starting the cycle:
1. Put 250mL water into a container (see our re commendations
in the below section “Tips and suggestions”).
2. Place the container directly on the middle of the cavity.
To Start The Cycle:
1. Press the Steam Clean button, the cleaning cycle duration
will be visible on the display.
2. Press the Start button to start the func tion.
When The Cycle Is Finished:
1. Press the Stop/Unlock button.
2. Remove the container.
3. Use a soft cloth or a paper towel with mild detergent to clean
the interior surfaces.
Tips and suggestions:
For a better cleaning result, it is recommended to use a
container with a diameter of 17-20cm, and a height that is lower
than 6.5cm.
It is recommended to use a container of light plastic material that
is suitable for the micro wave.
As the container will be hot after the cleaning cycle is completed,
it is recommended to use a heat resistant glove when removing
the container from the microwave.
For a better cleaning effect and removal of un pleasant odors,
add some lemon juice or vine gar to the water.
Keep Warm
This function allows you to keep your dishes warm.
1. Touch “Keep Warm” button.
2. Press “+/-” button to select suitable time, then press Start
button to start.
Default time is 30minutes, maximum time is 60minutes.
Food
Weight
Container
Temperature Container
Tuna
Noodle
Casserole
4cups
(880g)
165°F
(73.8°C)
Microwave safe dish

16
General Cleaning
IMPORTANT: Before cleaning, make sure all controls are off and
the microwave oven is cool. Always follow label instructions on
cleaning products.
Soap, water, and a soft cloth or sponge are suggested unless
otherwise noted.
MICROWAVE OVEN CAVITY
To avoid damage to the microwave oven cavity, do not use
soap-lled scouring pads, abrasive cleaners, steel-wool pads,
gritty washcloths, or some recycled paper towels.
To avoid damage to stainless steel models, rub in direction
ofgrain.
The area where the microwave oven door and frame touch
whenclosed should be kept clean.
Average soil
n Mild, nonabrasive soaps and detergents:
Rinse with clean water and dry with soft, lint-free cloth.
Heavy soil
n Mild, nonabrasive soaps and detergents:
Heat 1cup (250mL) of water for 2 to 5minutes in microwave
oven. Steam will soften soil. Rinse with clean water and dry
with soft, lint-free cloth.
Odors
n Lemon juice or vinegar:
Heat 1cup (250mL) of water with 1tbs (15mL) of either
lemon juice or vinegar for 2 to 5minutes in microwave oven.
Microwave Inlet Cover
To avoid arcing and microwave oven damage, the microwave
inlet cover (see the “Parts and Features” section) should be
keptclean.
n Wipe with wet cloth.
MICROWAVE OVEN DOOR AND EXTERIOR
The area where the microwave oven door and frame touch when
closed should be kept clean.
n Mild, nonabrasive soaps and detergents:
Rinse with clean water and dry with soft, lint-free cloth.
n Glass cleaner and paper towels or nonabrasive plastic
scrubbing pad:
Apply glass cleaner to towel, not directly to surface.
Stainless Steel (on some models)
To avoid damage to microwave oven door and exterior, do not
use soap-lled scouring pads, abrasive cleaners, steel-wool
pads, gritty washcloths, or some paper towels. Rub in direction
of grain.
n Stainless steel cleaner (not included):
See “Assistance or Service” section to order.
n All-purpose cleaner:
Rinse with clean water and dry with soft, lint-free cloth.
n Vinegar for hard water spots.
CONTROL PANEL
n Sponge or soft cloth and water:
Dampen sponge with water and wipe panel. Dry with
softcloth.
n To avoid damage to the control panel, do not use chemical
or abrasive cleansers.
TURNTABLE
Replace turntable immediately after cleaning. Do not operate the
microwave oven without the turntable in place.
n Mild cleanser and scouring pad
n Dishwasher
CONVECTION AND GRILL RACKS
Dishwasher cleaning is not recommended .To avoid damage to
the convection and grill racks, do not use abrasive cleansers or
scrubbers.
n Mild soap, water, and washcloth.
MICROWAVE OVEN CARE

17
If you experience Recommended Solutions
Nothing will operate Check the following:
n Household fuse or circuit breaker: If a household fuse has blown or a circuit breaker has tripped,
replace the fuse or reset the circuit breaker. If the problem continues, call an electrician.
Microwave oven will
not operate
Check the following:
n Magnetron: Try to heat 1cup (250mL) of cold water for 2minutes at 100% cooking power. If water
does not heat, try the steps in the bullets below. If microwave oven still does not operate, call for
service.
n Door: Firmly close door. On some models, if a packaging spacer is attached to the inside of the door,
remove it, then rmly close door.
If a message about the door appears in the display, the door has been closed for 5minutes or more
without the microwave oven being started. This occurs to avoid unintended starting of the microwave
oven. Open and close the door, then start the cycle.
n Stop (Unlock): Make sure Stop/Unlock is OFF. Make sure Demo mode (onsome models) is OFF.
Microwave oven
makes humming
noise
n This is normal and occurs when the power supply in the magnetron cycles on.
Microwave oven door
looks wavy
n This is normal and will not affect performance.
Turntable will not
operate
Check the following:
n Turntable: Make sure turntable is correct side up and is sitting securely on the turntable support.
Seethe “Turntable” section.
n Turntable support: Remove turntable. Remove and clean turntable hub, support, and rollers. Replace
hub, support, and turntable. Place 1cup (250mL) of water on the turntable, then restart microwave
oven. If it still is not working, call for service. See the “Assistance or Service” section. Do not operate
the microwave oven without turntable and turntable support working properly.
Turntable alternates
rotation directions
n This is normal and depends on motor rotation at the beginning of the cycle.
Display shows
messages
n A ashing “0:00” means there has been a power failure. Reset the clock.
Display shows time
countdown, but the
microwave oven is not
operating
Check the following:
n Timer: See the “Timer” section.
Tones are not
sounding
Check the following:
n Tones: See the “Tones” section.
Cooking times seem
too long
Check the following:
n Cooking power: See the “Microwave Cooking Power” section.
n Amount of food: Larger amounts of food need longer cooking times.
n Voltage: Have a qualied electrician check the electrical system in the home.
Odor coming from
microwave oven
during convection
and/grill cooking
n This is normal for the rst few convection and/or grills cycles. The odor will dissipate with repeated
use.
TROUBLESHOOTING
First try the solutions suggested here. If you need further assistance or more recommendations that may help you avoid a service call,
refer to the warranty page in this manual, or visit www.kitchenaid.com/owners.
Contact us by mail with any questions or concerns at the address below:
In the U.S.A.:
KitchenAid Brand Home Appliances
Customer eXperience Centre
553 Benson Road
Benton Harbor, MI 49022-2692
In Canada:
KitchenAid Brand Home Appliances
Customer eXperience Center
220-6750 Century Ave.
Mississauga, Ontario L5N 0B7
Please include a daytime phone number in your correspondence.

18
ASSISTANCE OR SERVICE
If you need service:
For information on warranty, please visit
www.kitchenaid.com/owners.
If you need replacement parts:
If you need to order replacement parts, we recommend that you
use only factory specied parts. These factory specied parts
will t right and work right because they are made with the same
precision used to build every new KitchenAid appliance.
To locate factory specied parts in your area, call us or your
nearest KitchenAid designated service center.
In the U.S.A.
Call the KitchenAid Customer eXperience Center toll-free:
1-800-422-1230 or visit our website at
www.kitchenaid.com/owners.
Our consultants provide assistance with:
n Scheduling of service. KitchenAid appliances designated
service technicians are trained to fulll the product warranty
and provide after-warranty service anywhere in the United
States.
n Features and specications on our full line of appliances.
n Referrals to local KitchenAid appliance dealers.
n Installation information.
n Use and maintenance procedures.
n Accessory and repair parts sales.
n Specialized customer assistance (Spanish speaking, hearing
impaired, limited vision, etc.).
For further assistance:
If you need further assistance, you can write to KitchenAid with
any questions or concerns at:
KitchenAid Brand Home Appliances
Customer eXperience Center
553 Benson Road
Benton Harbor, MI 49022-2692
Please include a daytime phone number in your correspondence.
In Canada
Call the KitchenAid Customer eXperience Center toll-free:
1-800-807-6777 or visit our website at
www.kitchenaid.ca/owners.
Our consultants provide assistance with:
n Scheduling of service. KitchenAid appliances designated
service technicians are trained to fulll the product warranty
and provide after-warranty service anywhere in Canada.
n Features and specications on our full line of appliances.
n Referrals to local KitchenAid appliance dealers.
n Use and maintenance procedures.
n Accessory and repair parts sales.
For further assistance:
If you need further assistance, you can write to KitchenAid with
any questions or concerns at:
KitchenAid Brand Home Appliances
Customer eXperience Centre
220-6750 Century Ave.
Mississauga, Ontario L5N 0B7
Please include a daytime phone number in your correspondence.
Replacement Parts
Glass Turntable
Part Number W11664476
Turntable Support and Rollers
Part Number W11664467
Turntable Hub
Part Number W11664468
Built-In Kits
This counter top microwave oven can be built in by using one of
the following trim kits*. These kits are available from the dealer
or can be ordered by kit model number. See the “Assistance or
Service” section for the toll-free number.
Kit Size Kit Model Numbers/Color
27" (68.6cm) MTK1627PZ/MTK1627PV
30" (76.2cm) MTK1630PZ/MTK1630PV
*The built-in trim kits can be installed over any (electric or gas)
built-in wall oven, up to 30" (76.2cm).
19
SEGURIDAD DEL HORNO MICROONDAS
Si no sigue las instrucciones de inmediato, usted puede
morir o sufrir una lesión grave.
Si no sigue las instrucciones, usted puede morir o sufrir
una lesión grave.
Todos los mensajes de seguridad le dirán el peligro potencial, le dirán cómo reducir las posibilidades de sufrir una lesión y lo
que puede suceder si no se siguen las instrucciones.
Su seguridad y la seguridad de los demás es muy importante.
Hemos incluido muchos mensajes importantes de seguridad en este manual y en su electrodoméstico. Lea y obedezca siempre
todos los mensajes de seguridad.
ADVERTENCIA
PELIGRO
Este es el símbolo de alerta de seguridad.
Este símbolo le llama la atención sobre peligros potenciales que pueden ocasionar la muerte o una lesión a
usted y a los demás.
Todos los mensajes de seguridad irán a continuación del símbolo de advertencia de seguridad y de la palabra
“PELIGRO” o “ADVERTENCIA”. Estas palabras significan:
Al utilizar aparatos eléctricos, se deben seguir las precauciones básicas de seguridad, entre las que se incluyen las siguientes:
INSTRUCCIONES IMPORTANTES DE SEGURIDAD
GUARDE ESTAS INSTRUCCIONES
ADVERTENCIA:
Para minimizar el riesgo de
quemaduras, choque eléctrico, incendio, lesiones a las
personas o exposición a energía de microondas excesiva:
■
Lea todas las instrucciones antes de usar el horno
microondas.
■
Lea y siga las “PRECAUCIONES PARA EVITAR LA
POSIBLE EXPOSICIÓN A ENERGÍA DE MICROONDAS
EXCESIVA” específicas que se muestran en esta
sección.
■
El horno de microondas deberá estar conectado a tierra.
Conéctelo solamente a un contacto debidamente
conectado a tierra. Consulte las “INSTRUCCIONES DE
CONEXIÓN A TIERRA” en esta sección y en las
“INSTRUCCIONES DE INSTALACIÓN”.
■
Instale o ubique el horno microondas únicamente según
las instrucciones de instalación proporcionadas.
■
Algunos productos, como los huevos enteros con cáscara
y los contenedores cerrados (por ejemplo, los frascos de
vidrio cerrados) pueden explotar y, por ese motivo, no se
deben calentar en el horno microondas.
■
Utilice el horno microondas solo para su uso previsto
como se indica en este manual. No utilice químicos
corrosivos o vapores en el horno microondas. Este tipo
de horno se encuentra diseñado específicamente para
calentar, cocinar o secar alimentos.
■
Como con cualquier aparato, si lo utilizan niños se
necesita una estrecha supervisión.
■
No use el horno microondas si el cable o enchufe se
encuentran dañados, no está funcionando
adecuadamente o ha sufrido daños o caídas.
■
Solo personal calificado debe realizar el mantenimiento del
horno microondas. Comuníquese con alguna empresa de
servicio autorizada para su examen, reparación o ajuste.
■
No cubra ni bloquee ninguna abertura del horno
microondas.
■
No use el horno de microondas cerca del agua – por
ejemplo, cerca de un fregadero, en un sótano húmedo, o
cerca de una piscina o lugares similares.
■
No sumerja el cable ni el enchufe en agua.
■
Mantenga el cable lejos de las superficies calientes.
■
No deje que el cable cuelgue del borde de la mesa o del
mostrador.
■
Vea las instrucciones de limpieza de la superficie de la
puerta en la sección “Cuidado del horno microondas”.
■
Para reducir el riesgo de incendio en la cavidad del horno:
– No recueza los alimentos. Vigile el horno microondas si
utiliza papel, plástico u otros materiales combustibles
dentro de este para facilitar la cocción.
– Retire las amarras de alambre de las bolsas de papel o
plástico antes de introducirlas en el horno.
– Si algún material se prende fuego dentro del horno,
mantenga la puerta cerrada, apague el horno y
desenchúfelo o corte la corriente en el panel de fusibles o
del disyuntor.
– No deje productos de papel, utensilios de cocina o
alimentos en la cavidad cuando no se encuentre en uso.

20
INSTRUCCIONES IMPORTANTES DE SEGURIDAD
GUARDE ESTAS INSTRUCCIONES
■ Los líquidos, como el agua, café o té, se pueden
sobrepasar del punto de ebullición sin que parezca que
están hirviendo. La ebullición o las burbujas visibles no se
encuentran siempre presentes al retirar el contenedor del
horno microondas. ESTO PUEDE TENER COMO
RESULTADO LÍQUIDOS MUY CALIENTES QUE
HIERVEN REPENTINAMENTE AL MOVER EL
CONTENEDOR O INSERTAR UNA CUCHARA U OTRO
UTENSILIO EN EL LÍQUIDO.
A fin de reducir el riesgo de lesiones personales:
– No caliente el líquido más de lo necesario.
– Revuelva el líquido antes y mientras se calienta.
– No utilice contenedores de una pieza con cuello delgado.
– Después de calentarlo, deje reposar el contenedor en el
horno de microondas por unos momentos antes de retirarlo.
– Tenga extremo cuidado al insertar una cuchara u otro
utensilio en el contenedor.
PRECAUCIONES PARA EVITAR LA POSIBLE
EXPOSICIÓN A ENERGÍA EXCESIVA DE MICROONDAS
(a) No intente operar este horno con la puerta abierta ya que
esto puede resultar en exposición nociva a energía de
microondas. Es importante no forzar o impedir la
operación de las trabas de seguridad.
(b) No ponga ningún objeto entre la cara frontal del horno y
la puerta y no permita que se acumule polvo o residuos
de limpiadores en las superficies de sellado.
(c) No opere el horno si éste está dañado. Es particularmente
importante que la puerta del horno cierre correctamente y
que no haya daño en:
(1) La puerta (torcida),
(2) Bisagras y seguros (rotos o flojos),
(3) Sellos de la puerta y superficies de sellado.
(d) El horno no debe ser ajustado o reparado por nadie,
excepto personal de servicio calificado.
Este dispositivo cumple con la sección 18 de las reglas de FCC.
21
INSTRUCCIONES DE INSTALACIÓN
Desempaque
1. Retire todo el material de empaque del interior del horno
microondas.
2. Limpie el interior con un paño suave húmedo.
3. Revise si hay daños, como:
n Una puerta que no esté alineada correctamente,
n Daños alrededor de la puerta, o
n Abolladuras en el interior o el exterior del horno
microondas.
Si hay algún daño, no use el horno microondas hasta que
un técnico de servicio designado lo haya revisado y hecho
cualquier reparación necesaria.
NOTA: Para evitar daños al horno microondas, no retire la
cubierta de la entrada. Consulte la sección “Piezas y funciones”.
Requisitos de ubicación
IMPORTANTE: El lado de los controles del horno microondas es
el lado pesado. Manipule el horno microondas con delicadeza.
El peso del horno microondas supera las 35 libras (15,9 kg).
n Coloque el horno microondas en un carro, mostrador, mesa
o estante lo suciente fuerte como para sostener el horno
microondas y la comida y los utensilios que se coloquen en
el interior.
n El horno microondas deberá estar a una temperatura de más
de 50°F (10°C) para que funcione adecuadamente.
NOTA: Algunos modelos pueden empotrarse en la pared o en un
gabinete utilizando uno de los juegos de adorno que guran en
la sección “Asistencia o servicio técnico”.
n No bloquee los ductos de escape ni los oricios de entrada
de aire. Deje algunas pulgadas de espacio en la parte
posterior y a los lados del horno microondas en donde
se encuentran los ductos de escape. Si los ductos de
escape se bloquean, se podrían producir daños en el horno
microondas, así como resultados de cocción decientes.
n Asegúrese de que las patas niveladoras estén en su lugar
para garantizar el ujo de aire adecuado. Si los ductos se
bloquean, un mecanismo térmico sensible podría apagar el
horno microondas automáticamente. El horno microondas
deberá funcionar correctamente una vez que se haya
enfriado.
Requisitos eléctricos
Respete todas las normativas y reglamentos vigentes.
Se necesita:
n Un suministro eléctrico de 120V, 60Hz, CA solamente,
de15A o 20A con fusible o disyuntor.
Se recomienda:
n Un fusible o un disyuntor retardador.
n Un circuito separado que preste servicio solamente a este
horno microondas.
INSTRUCCIONES PARA
LA CONEXIÓN A TIERRA
GUARDE ESTAS
INSTRUCCIONES
■
Para todos los aparatos electrodomésticos de
conexión con cable:
El horno de microondas debe estar conectado a tierra. En
caso de que se produzca un cortocircuito, la conexión a
tierra reduce el riesgo de electrocución por medio de un
alambre de escape para la corriente eléctrica. El horno de
microondas está equipado con un cable que tiene un
alambre de conexión a tierra con un enchufe para
conexión a tierra. El enchufe debe estar conectado a un
tomacorriente que está correctamente instalado y
conectado a tierra.
ADVERTENCIA: El uso incorrecto del enchufe
para la conexión a tierra puede resultar en riesgo de
electrocución. Consulte con un electricista o técnico
calificado si las instrucciones para conexión a tierra no se
entienden bien o si hay alguna duda con respecto a la
correcta conexión a tierra del horno de microondas.
No use un cable de extensión. Si el cable de suministro
eléctrico es muy corto, haga que un electricista o técnico
calificado instale un tomacorriente cerca del horno de
microondas.
ADVERTENCIA
Peligro de Peso Excesivo
Use dos o más personas para mover e instalar el horno
de microondas.
No seguir esta instrucción puede ocasionar una
lesión en la espalda u otro tipo de lesiones.
22
PIEZAS Y CARACTERÍSTICAS
Este manual puede cubrir varios modelos diferentes. El modelo
que adquirió puede tener algunas o todas las funciones que
aparecen a continuación. La apariencia de su modelo en
particular puede ser ligeramente diferente de las ilustraciones en
este manual.
*NOTA: Para evitar daños al horno microondas, no retire la
cubierta de la entrada. Consulte la sección “Piezas y funciones”.
Bandeja giratoria
La bandeja giratoria puede rotar en ambas direcciones para
ayudar a cocinar los alimentos de manera más pareja. Para
obtener resultados de cocción óptimos, no utilice el horno
microondas sin la bandeja giratoria en su lugar. Consulte la
sección “Asistencia o servicio técnico” para volver a pedir
alguna de las piezas.
Para instalar:
1. Coloque el soporte en la base de la cavidad del horno
microondas.
2. Coloque la bandeja giratoria sobre el soporte.
Las líneas curvas elevadas del centro de la parte inferior de
la bandeja giratoria deben encajarse entre los tres rayos del
eje. Los rodillos del soporte deben encajar dentro del canal
debajo de la bandeja giratoria.
Control del horno microondas
A. Sistema de bloqueo de la
puerta
B. Ventana
C. Etiqueta con guía de cocción
D. Luz del horno microondas
E. Pantalla
F. Panel de control
G. Botón de apertura de puerta
H. Cubierta de entrada del
microondas*
I. Soporte desmontable de
bandeja giratoria
J. Bandeja giratoria de vidrio
K. Placa de número de modelo y
de serie
A
B
C
D
A. Bandeja giratoria
B. Centro
C. Soporte
D. Eje
C EA
GK J
B D
H I
F
Defrost
Soften
Melt
Power
Reheat Menu
Quantity
Keep Warm
Tone ON/OFF
Weight - Lbs
Weight - Ounce
Microwave
Door Lock
Cook
Timer/
Steam
Menu
Clock
Clean

23
Teclado Función Instrucciones
Timer (Temporizador)
(Clock Hold
3sec [Mantener
presionado Clock por
3seg])
Mantenga presionado para
congurar el reloj
Para ajustar el reloj, siga las instrucciones a continuación:
1. Presione Timer (Temporizador) por 3segundos para ingresar a los
ajustes del reloj.
2. Presione el botón “+/-” para ajustar la hora, presione el botón Start
(Inicio) para conrmar.
3. Presione el botón “+/-” para ajustar el minuto.
4. Presione el botón Start (Inicio).
NOTA: El horno microondas debe estar en modo de espera. También
aparecerá cada vez que se conecte el producto. La pantalla muestra
“12Hr” (“12” parpadea), use “+/-” para cambiar el formato de 12 o
24horas, presione Start (Inicio) para conrmar; luego la pantalla muestra
“12:00”.
Timer (Temporizador)
(Clock Hold
3sec [Mantener
presionado Clock por
3seg])
Congurar el temporizador
decocina
El temporizador de cocina funciona como un cronómetro. Para
congurar el temporizador de cocina, siga las instrucciones a
continuación:
1. Presione el botón de Timer (Temporizador).
2. Presione el botón “+/-” para introducir la hora deseada.
3. Presione el botón Start (Inicio).
NOTA: Cuando la cuenta regresiva del temporizador está activa en
la pantalla, toque Stop/Unlock (Parar/Desbloquear) para parar el
temporizador. El temporizador no pone en marcha ni detiene el horno
microondas.
Start (Inicio)
(Add 30sec [Agregar
30segundos])
Agregar 30segundos El botón Start (Inicio) puede utilizarse de dos maneras:
1. Para poner en marcha el microondas cocinando durante
30segundos a plena potencia en modo de espera.
2. Para aumentar el tiempo de cocción con incrementos de
30segundos. Cada pulsación añade 30segundos.
Start (Inicio)
(Add 30sec [Agregar
30segundos])
Función de inicio Presione el botón Start (Inicio) para iniciar cualquier función de cocción.
Si se interrumpe la cocción al abrir la puerta, toque el botón Start (Inicio)
después de cerrar la puerta nuevamente para reanudar el ciclo.
Stop (Parar)
(Unlock
[Desbloquear])
Función pausar/parar
delmicroondas
El botón Stop/Unlock (Parar/Desbloquear) detiene todas las funciones
del horno microondas, con excepción del reloj.
El horno microondas también se apagará cuando la puerta se abra.
Cuando se abra la puerta, los elementos se apagarán pero la luz del
horno microondas seguirá encendida. Cierre la puerta y toque el botón
Start (Inicio) para reanudar el ciclo.
Instrucciones del teclado

24
Teclado Función Instrucciones
Stop (Parar)
(Unlock
[Desbloquear])
Apertura de puerta de 2pasos Este microondas viene con la función añadida de una funcionalidad de
apertura de puerta de 2pasos para evitar el acceso no deseado.
El botón Stop/Unlock (Parar/Desbloquear) puede usarse para pausar la
función durante el tiempo de cocción o cuando este nalice.
El botón Stop/Unlock (Parar/Desbloquear) puede usarse para la
apertura de puerta de 2pasos:
1. Una vez que establezca el tiempo de cocción y presione el botón
Start (Inicio), aparecerá el ícono de puerta cerrada en la pantalla.
2. Para abrir el microondas:
n Presione Stop (Parar) (Unlock [Desbloquear]).
n Presione el botón para abrir la puerta.
NOTA: Una vez que presione el botón Stop/Unlock (Parar/Desbloquear)
para parar/pausar cualquier función, desaparecerá el ícono de puerta
cerrada por 10segundos y podrá presionar el botón para abrir la puerta.
Volverá aparecer el ícono de puerta cerrada después de 10segundos y
necesitará repetir los pasos 1 y 2 para volver a abrirla.
NOTA: Cuando la máquina se enciende después de enchufarla, la
función de puerta de 2pasos no se activará. Si un ciclo de cocción
comienza después de que se cierra la puerta, se requieren 2pasos para
abrir la puerta. Una vez que se hayan utilizado los 2pasos para abrir la
puerta, si ésta se cierra y no se aplica energía para cocinar, puede abrirla
simplemente presionando el botón de apertura de la puerta.
NOTA: Este microondas viene con la función añadida de una
funcionalidad de apertura de puerta de 2pasos para evitar el acceso
no deseado. Cuando los niños no tienen acceso al electrodoméstico,
hay una función de desactivación si no se necesita la funcionalidad de
2pasos.
Deshabilitar/habilitar la operación de la función de puerta de
2pasos en la pantalla
Pasos para desactivar el funcionamiento de la función de puerta de
2pasos:
1. Después de presionar el botón Stop/Unlock (Parar/Desbloquear)
durante 3segundos, se mostrará “DI:_0” en la pantalla.
2. Después de presionar el botón “+”, aparecerá “DI:_1” en la pantalla.
3. Presione el botón Start (Inicio) para conrmar.
NOTA: DI (DESACTIVAR)
NOTA: Si desconecta el microondas, recordará la última operación. No
necesitará desactivar o activar de nuevo la función de 2pasos de la
puerta.
Pasos para activar el funcionamiento de la función de puerta de 2pasos:
1. Después de presionar el botón Stop/Unlock (Parar/Desbloquear)
durante 3segundos, se mostrará “EA:_0” en la pantalla.
2. Después de presionar el botón “+”, aparecerá “EA:_1” en la pantalla.
3. Presione el botón Start (Inicio) para conrmar.
NOTA: EA (ACTIVAR)
IMPORTANTE: La desactivación de esta función solo debe realizarse
cuando el propietario esté seguro y los niños no estén presentes.
1min-6min Inicio rápido La potencia predeterminada es completa en esta función (P100).
“Presione 1min, 2min o 6min para comenzar con el tiempo
mencionado en el botón”.
Cook Time (Tiempo
de Cocción)
Congurar la cocción Presione el botón “Cook Time” (Tiempo de Cocción) para ajustar el
tiempo de cocción manual. El nivel de potencia predeterminado es
100%. Presione el botón “+/-”/1min-6min para ajustar el tiempo de
cocción, siga las instrucciones siguientes:
1. Presione el botón “Cook Time” (Tiempo de Cocción), en la pantalla
aparecerá “0:15”.
2. Presione el botón “+/-”/1min-6min para ajustar el tiempo de
cocción.
3. Presione el botón Start (Inicio) para comenzar.
NOTA: Presione el botón “Power” (Potencia) para aumentar/disminuir los
niveles de potencia de forma cíclica P10 P20 P30...........P100.

25
Teclado Función Instrucciones
Cook Power
(Potencia
deCocción)
Congurar la cocción Presione el botón “Cook Power” (Potencia de Cocción) para ajustar
el encendido manual. El nivel de potencia predeterminado es 100%.
Presione el botón Cook Power (Potencia de Cocción) o el botón “+/-”
para cambiar el nivel de potencia.
Por ejemplo, para congurar el tiempo a 2:30 con 90% de potencia.
1. Presione el botón Cook Power (Potencia de Cocción), en la pantalla
aparecerá P100.
2. Presione el botón - para reducir el nivel de potencia al 90% (P90 en
la pantalla).
3. Presione el botón Start (Inicio) para conrmar y pasar al ajuste del
tiempo de cocción, por defecto aparecerá “0:15” en la pantalla.
4. Presione el botón “+/-” para ajustar el tiempo de cocción a “2:30”.
5. Presione el botón Start (Inicio).
Weight Defrost
(Descongelado
porPeso)
Descongelado automático La función Descongelado automático ayuda a descongelar los alimentos
congelados. Para descongelar, siga las instrucciones a continuación:
1. Presione el botón “Weight Defrost” (Descongelado porPeso), en la
pantalla aparecerá P1.
2. Presione el botón “Weight Defrost” (Descongelado porPeso) o el
botón “+/-” para seleccionar la clase de alimento deseada.
3. Presione el botón Start (Inicio) para conrmar, la pantalla mostrará el
peso por defecto.
4. Presione el botón “+/-” para ajustar el peso deseado.
5. Presione el botón Start (Inicio).
Timed Defrost
(Descongelado
Programado)
Descongelado manual Se ha ajustado la potencia de descongelación, seleccione el tiempo de
descongelación:
1. Presione el botón “Timed Defrost” (Descongelado Programado), en
la pantalla aparecerá el tiempo por defecto “0:30”.
2. Presione el botón “+/-” para ajustar el tiempo de descongelación.
3. Presione el botón Start (Inicio).
Reheat (Recalentar) Recalentar Para recalentar con las funciones preestablecidas, siga las instrucciones
a continuación:
1. Presione el botón “Reheat” (Recalentar), en la pantalla aparecerá
“P1”.
2. Utilice el botón “+/- o” “Reheat” (Recalentar) para seleccionar una
categoría de alimentos.
Consulte la sección Recalentar de esta guía para conocer la
categoría de alimentos o el adhesivo de referencia en la placa frontal
de los microondas.
3. Presione el botón Start (Inicio).
4. Cocción por sensor (excepto Salsa, Sopa y Bebida): Un sensor en el
horno microondas detecta la humedad que se libera de los alimentos
mientras se calientan y ajusta el tiempo de cocción en consecuencia.
(Al seleccionar Salsa, Sopa y Bebida la pantalla mostrará el peso por
defecto. Presione el botón “+/-” para ajustar el peso deseado. Pulse
el botón Start (Inicio).
Popcorn
(Palomitasde maíz)
Palomitas Para usar el preajuste Popcorn (Palomitas de maíz), siga las
instrucciones a continuación:
1. Presione repetidamente el botón “Popcorn” (Palomitas de maíz) para
seleccionar el tamaño de la bolsa (3,0 o 3,5oz).
2. Presione el botón Start (Inicio).
Potato (Papa) Cocinar papas Para usar el preajuste Potato (Papa), siga las instrucciones a
continuación:
1. Presione repetidamente el botón “Potato” (Papa) para seleccionar el
tamaño L (Grande) o S (Pequeño) de la papa.
2. Presione Start (Inicio) para conrmar, presione “+/-” para ajustar la
cantidad.
3. Presione el botón Start (Inicio).

26
Teclado Función Instrucciones
Cook (Cocción) Cocción automática Para el modo Cook (Cocción), no es necesario ajustar la hora y la
potencia, siga las instrucciones siguientes:
1. Presione el botón “Cook” (Cocción), en la pantalla aparecerá “P1”.
2. Utilice el botón “+/-” o “Cook” (Cocción) para seleccionar una
categoría de alimentos. Consulte la sección Cocción de esta guía
para conocer la categoría de alimentos o el adhesivo de referencia
en la placa frontal del microondas.
3. Presione el botón Start (Inicio).
4. Cocción por sensor: un sensor en el horno microondas detecta la
humedad que se libera de los alimentos mientras se calientan y
ajusta el tiempo de cocción en consecuencia.
(Para la cocción sin sensor, la pantalla mostrará el peso por
defecto. Presione el botón “+/-” para ajustar el peso deseado.
Pulse el botón Start [Inicio]).
NOTA: Durante el proceso de cocción, la pantalla mostrará “Turn or
Add Food” (Girar o Agregar alimentos) (solo para algunos alimentos),
presione el botón Stop/Unlock (Parar/Desbloquear) para activar la
función de desbloqueo y agregue o gire los alimentos usando el botón
para abrir la puerta. Cuando presiona el botón Stop/Unlock
(Parar/Desbloquear) de nuevo se detendrá la función de cocción y el
horno microondas cambiará a modo de espera.
Soften (Ablandar) Ablandar La función Soften (Ablandar) se utiliza para ablandar los alimentos.
Forma de uso:
1. Presione “Soften” (Ablandar), la pantalla mostrará “P1”.
2. Utilice el botón “Soften” (Ablandar) o el botón “+/-” para
seleccionar una categoría de alimentos, consulte la sección
Ablandar para ablandar de esta guía para conocer la categoría
de alimentos o consulte el adhesivo en la placa frontal del
microondas. Presione el botón Start (Inicio) para conrmar.
3. Utilice el botón “+/-” para ajustar la cantidad.
4. Presione el botón Start (Inicio).
Melt (Derretir) Derretir La función Melt (Derretir) se utiliza para derretir alimentos. Forma de uso:
1. Presione “Melt” (Derretir), la pantalla mostrará “P1”.
2. Utilice el botón “Melt” (Derretir) o el botón “+/-” para seleccionar
una categoría de alimentos, consulte la sección Derretir para
ablandar de esta guía para conocer la categoría de alimentos o
consulte el adhesivo en la placa frontal del microondas. Presione el
botón Start (Inicio) para conrmar.
3. Utilice el botón “+/-” para ajustar la cantidad.
4. Presione el botón Start (Inicio).
Keep Warm
(Mantener Caliente)
Mantener caliente La función permite mantener calientes sus platos. Forma de uso:
1. Presione el botón “Keep Warm” (Mantener Caliente), en la pantalla
aparecerá la hora predeterminada “30:00”.
2. Presione “Keep Warm” (Mantener Caliente) o el botón “+/-”
paraseleccionar 15 minutos, 30 minutos, 45 minutos o 60minutos.
3. Presione el botón Start (Inicio).
NOTA: El ciclo Keep Warm (Mantener Caliente) tiene una duración
de 15 minutos (por defecto 30 minutos), el tiempo máximo es de
60minutos.
Cada ciclo de 15 minutos, el microondas se encenderá 1,5 minutos,
después la lámpara de la cavidad y el ventilador se apagarán, solo se
mostrará el tiempo de la cuenta regresiva.
Steam Clean
(Limpieza con Vapor)
Ciclo de limpieza automática El ciclo de limpieza ayudará a limpiar la cavidad del horno microondas.
1. Ponga 1 taza de agua (~250 mL) en el centro de la cavidad.
2. Presione el botón “Steam Clean” (Limpieza con Vapor), en la
pantalla aparecerá la hora predeterminada “13:00”.
3. Presione el botón Start (Inicio) para iniciar la función.
Después de terminar el ciclo de calentamiento (3 minutos); la
lámpara de la cavidad y el ventilador se apagarán y la pantalla
mostrará el tiempo de cuenta regresiva.
NOTA:
Siga los consejos y sugerencias de la sección Limpieza con vapor.
Tone ON/OFF
(ENCENDIDO/
APAGADO
delostonos)
Activar o desactivar el pitido La función permite activar o desactivar el sonido del pitido:
1. Presione el botón Steam Clean (Limpieza con Vapor) y manténgalo
presionado durante 5 segundos para silenciarlo, en la pantalla
aparecerá el icono de tono apagado.
2. Mantenga presionado el botón de nuevo durante 5 segundos para
activar el sonido.

27
Pantalla
Cuando se suministre energía eléctrica al horno microondas por
primera vez, aparecerá en la pantalla “12 Hr”. El usuario puede
presionar el botón Timer/Clock (Temporizador/Reloj) o el botón
“+/-” para alternar entre 12 o 24 horas en 10segundos.
Presione el botón Start (Inicio) para conrmar. Si aparece en la
pantalla “12:00” en cualquier otro momento, se ha producido un
corte de corriente. Vuelva a congurar el reloj si es necesario.
Consulte la sección “Reloj”.
Modo Standby
Cuando no se esté utilizando ninguna función, el horno
microondas pasará al modo de espera.
Después de seleccionar la función, presione el botón
STOP/Unlock (PARAR/Desbloquear) para salir de la selección de
funciones. Si vuelve a presionar el botón STOP/Unlock
(PARAR/Desbloquear) será inválido, ya que el modo de cocción
no está activado.
Cuando el modo de cocción está activado y el usuario presione
el botón STOP/Unlock (PARAR/Desbloquear), estas funciones
iniciarán al mismo tiempo. Presione el botón STOP/Unlock
(PARAR/Desbloquear) de nuevo para cancelar la función y
regresar al modo de espera.
Start (Inicio)
El botón Start (Inicio) iniciará cualquier función. Si se interrumpe
la cocción sin sensor al abrir la puerta, al presionar el botón
Start (Inicio) se reanudará el ciclo.
NOTA: Para evitar el funcionamiento no intencional del horno
microondas, una función de cocción no se puede poner en
marcha si la puerta del horno microondas ha estado cerrada
por aproximadamente 1 minuto. La palabra “door” (puerta)
aparecerá en la pantalla hasta que la puerta se abra y se cierre.
Quick Start/ Add 30seconds
(Iniciorápido/ Agregar30segundos)
En el modo de espera, al presionar Start (Inicio) el horno
microondas arranca automáticamente al 100% de potencia
durante 30 segundos y añade 30 segundos de tiempo de
cocción, con cada pulsación adicional del control. Sepuede
añadir tiempo a cualquier ciclo de cocción manual en
incrementos de 30 segundos, en el nivel de potencia del
momento, presionando el botón Start (Inicio) durante la cocción.
Stop/Unlock (Parar/Desbloquear)
El botón Stop/Unlock (Parar/Desbloquear) borrará cualquier
comando incorrecto y anulará cualquier programa durante la
cocción. Presione el botón Stop/Unlock (Parar/Desbloquear)
para parar el ciclo. No se borrará la hora del día.
El horno microondas también se apagará cuando la puerta se abra.
Cierre la puerta y presione Start (Inicio) para reanudar el ciclo.
Para utilizar el menú sin sensor
(Popcorn, Potato [Palomitas de maíz, Papa])
1. Ponga la comida en la bandeja giratoria y cierre la puerta.
2. Toque el control de menú deseado. Aparecerá en la pantalla
la primera cantidad programada. Toque el teclado de control
repetidamente o toque los teclados numéricos para cambiar
la cantidad.
3. Toque Start (Inicio). Cuando termine el ciclo, “END” (FIN) en
la pantalla y sonará el tono de n de ciclo.
4. Toque Stop/Unlock (Parar/Desbloquear) o abra la puerta
para despejar la pantalla.
Clock (Reloj)
Para ajustar:
El horno microondas debe estar en modo de espera.
1. Presione el botón Timer/Clock (Temporizador/Reloj) durante
3 segundos para entrar en la conguración del reloj. También
aparecerá cada vez que el producto se conecte a la fuente
de energía, o cuando esta regrese después de una falla.
2. Presione el botón “+/-” para ajustar la hora.
3. Presione el botón Start (Inicio) para conrmar.
4. Presione el botón “+/-” para ajustar los minutos.
5. Presione el botón Start (Inicio) para conrmar el ajuste.
Timer (Temporizador)
Para ajustar:
1. Presione el botón Timer/Clock (Temporizador/Reloj).
2. Presione el botón “+/-” para introducir la hora deseada.
3. Presione el botón Start (Inicio). Cuando naliza el tiempo
programado, el n de temporizador.
4. Cuando la cuenta atrás del temporizador se alcance en la
pantalla, sonará un tono. Presione el botón Stop/Unlock
(Parar/Desbloquear) para parar el temporizador.
NOTA: El temporizador no pone en marcha ni detiene el horno
microondas. La función se puede congurar solo en el modo de espera.
Tones ON/OFF
(ENCENDIDO/APAGADOdelostonos)
Esta función le permite al usuario activar o desactivar
todos los sonidos que reproducen los electrodomésticos,
incluye pulsación de botón, advertencias, alarma e incluso
retroalimentación de audio nal.
Mantenga presionado el botón Steam Clean (Limpieza con Vapor)
por 5 segundos para ponerlo en silencio, vuelva a mantenerlo
presionado por 5 segundos para volver a encender el sonido.
Fin de la cocción
Cuando termine la cocción, la pantalla mostrará el texto “End”
(Fin). Se emitirá un pitido acústico recordatorio.
1. Después de terminada la cocción, si presiona el botón
Stop/Unlock (Parar/Desbloquear), saca la comida y vuelve
a cerrar la puerta, la interfaz mostrará el reloj, cambiará a la
apertura de puerta de un paso.
2. Si no saca la comida en 30 minutos, mostrará consistentemente
“END” (FIN) por 30 minutos y regresará automáticamente al
modo en espera y se desbloqueará después de 30 minutos y
cambiará a la apertura de puerta de un paso.
Para utilizar el menú del sensor
(Menú Reheat, Cook [Recalentar, Cocinar])
1. Coloque la comida en la bandeja giratoria y cierre la puerta.
2. Toque el control de menú deseado.
3. Toque Start (Inicio), la animación del segmento en marcha
aparecerá en la pantalla. El horno microondas se pondrá en
marcha y comenzará la cocción por sensor.
El segmento en marcha permanecerá en la pantalla hasta que
el sensor haya determinado el tiempo de cocción restante.
4. Cuando termine el ciclo, aparecerá “END” (FIN) en la pantalla
y sonará el tono de n de ciclo.
5. Toque Stop/Unlock (Parar/Desbloquear) o abra la puerta
para despejar la pantalla.
(NOTA: Salsa, Sopa, Bebida en el menú Reheat (Recalentar) sin
utilizar la cocción por sensor).

28
USO DEL HORNO MICROONDAS
El magnetrón del horno microondas produce microondas que se
reejan del piso de metal, las paredes y el techo y atraviesan la
bandeja giratoria y los utensilios adecuados hasta los alimentos.
La grasa, el azúcar y las moléculas de agua de los alimentos
atraen y absorben las microondas, que los hace mover y
producir la fricción y el calor que cocinan los alimentos.
n Para evitar daños al horno microondas, no se apoye en la
puerta ni permita que los niños jueguen con ella.
n Para evitar daños al horno microondas, no lo haga funcionar
vacío.
n Los biberones y los tarros de comida para bebé no se deben
calentar en el horno microondas.
n No se debe secar en el horno microondas ropa, ores, fruta,
hierbas, madera, calabazas ni papel, incluidas las bolsas de
papel marrón y el papel de periódico.
n La cera de parana no se derretirá en el horno porque no
absorbe las microondas.
n Use guantes para hornear o agarraderas para retirar
recipientes del horno microondas.
n No recueza las papas. Al cabo del tiempo de cocción
recomendado, las papas deberán estar ligeramente rmes.
Déjelas reposar durante 5minutos. Se terminarán de cocinar
durante el reposo.
n No cocine ni recaliente huevos enteros dentro de la cáscara.
La acumulación de vapor en los huevos enteros hacer que
exploten y se requiera una limpieza importante de la cavidad
del horno microondas. Cubra los huevos escalfados y
déjelos reposar por cierto tiempo.
Características de los alimentos
Al cocinar con microondas, la cantidad, el tamaño y la forma,
la temperatura de inicio, la composición y la densidad de los
alimentos afectan los resultados de la cocción.
Cantidad de alimentos
Cuanto mayor sea la cantidad de alimentos que se
caliente simultáneamente, más tiempo de cocción se
necesitará.Verique el grado de cocción y agregue breves
incrementos de tiempo si fuera necesario.
Tamaño y forma
Los pedazos de alimentos más pequeños se cocinarán con
mayor rapidez que los pedazos grandes y los alimentos de
forma pareja se cocinarán con mayor uniformidad que los de
forma irregular.
Temperatura inicial
Los alimentos que estén a temperatura ambiente se calentarán
con mayor rapidez que los refrigerados y los alimentos
refrigerados se calentarán con mayor rapidez que los
congelados.
Composición y densidad
Los alimentos con alto contenido de grasa y de azúcar
alcanzarán mayor temperatura y se calentarán con mayor
rapidez que otros alimentos. Los alimentos pesados y densos,
como la carne y papas necesitan un tiempo de cocción más
prolongado que el mismo tamaño de alimentos con densidad
ligera y porosa como los pasteles o tortas.
Pautas para cocinar
Cubrir
Cubrir los alimentos ayuda a retener la humedad, acortar el
tiempo de cocción y producir menos salpicaduras. Use la tapa
provista con los utensilios de cocina. Si no tiene una tapa,
puede usar papel de cera, toallas de papel o envoltorios de
plástico aptos para hornos microondas. Los envoltorios de
plástico se deben doblar en una esquina para proporcionar una
abertura para que salga el vapor. La condensación en la puerta
y en las supercies de la cavidad es normal durante una cocción
intensa.
Revolver y voltear los alimentos
Al revolver y voltear los alimentos, el calor se redistribuye
uniformemente y se evita recocer los bordes exteriores de los
alimentos. Revuelva de afuera hacia el centro. De ser posible, dé
vuelta los alimentos de abajo hacia arriba.
Disponer los alimentos
Al calentar alimentos de tamaño irregular o de diversos tamaños,
las partes más delgadas y los alimentos más pequeños deben
disponerse hacia el centro. Al cocinar varios alimentos del
mismo tamaño y forma, colóquelos en círculo, dejando vacío el
centro del círculo.
Pinchar los alimentos
Antes de calentar, use un tenedor o un cuchillo pequeño para
pinchar o hacer piquetes en los alimentos que tienen cáscara o
piel, como las papas, yemas de huevo, hígados de pollo, perros
calientes y salchichas. Perfore en varios lugares para dejar que
salga el vapor.
Proteger los alimentos
Use pedazos pequeños y planos de papel de aluminio para
proteger las partes delgadas de alimentos de forma irregular,
huesos y alimentos como las alas de pollo, puntas de patas de
pollo y colas de pescado. Consulte primero la sección “Papel de
aluminio y metal”.
Tiempo de reposo
Los alimentos continuarán cocinándose por la conducción
natural del calor aún después de terminado el ciclo de cocción
por microondas. La duración del tiempo de reposo depende del
volumen y la densidad de los alimentos.
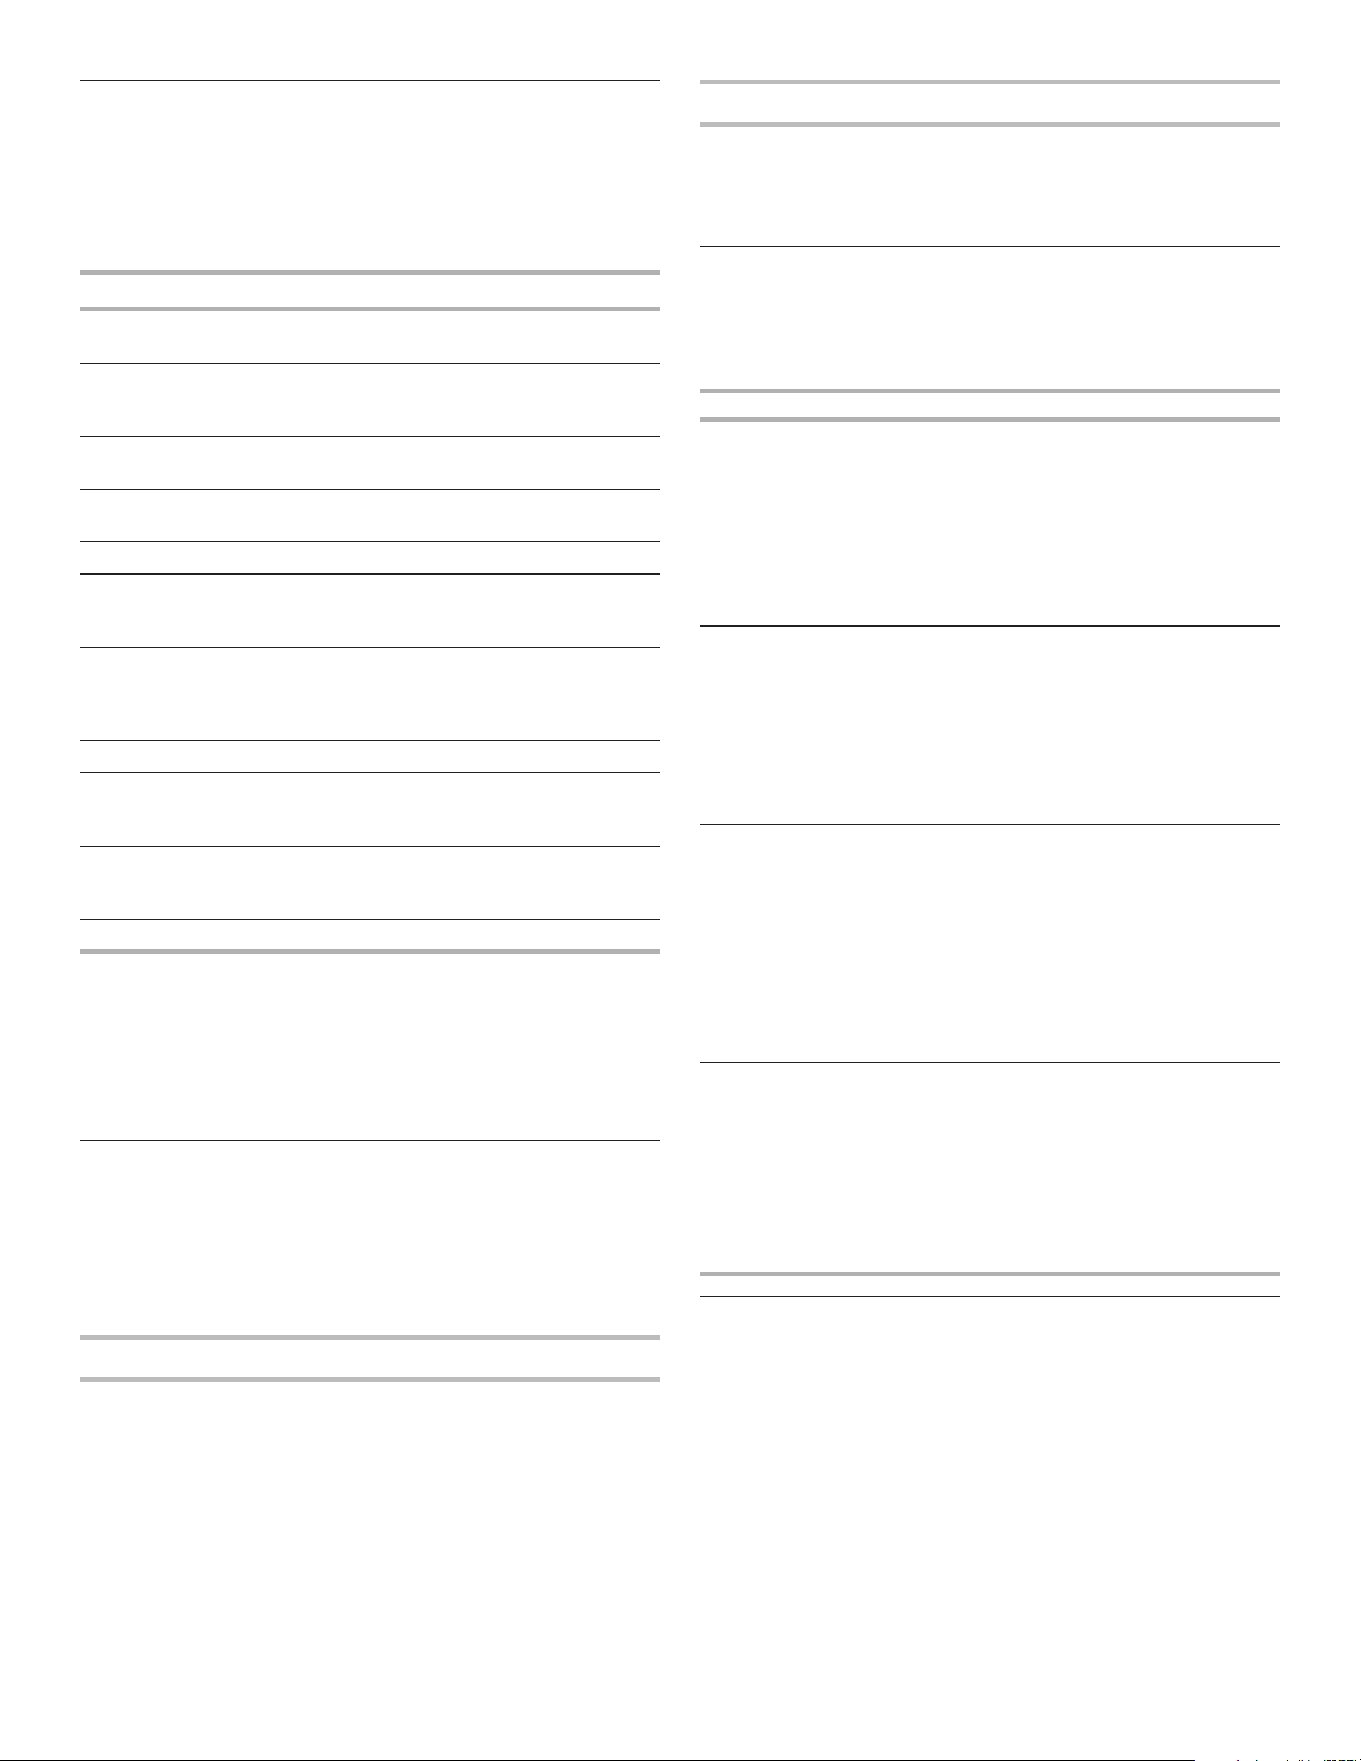
29
Utensilios de cocina y vajilla
Los utensilios de cocina y la vajilla deben caber en la bandeja
giratoria. Siempre use guantes para hornear o agarraderas para
manipular los utensilios, ya que cualquier plato puede calentarse
por el calor transferido de los alimentos. No use utensilios ni
vajilla con bordes dorados o plateados. Use el cuadro siguiente
a modo de guía y luego pruebe los utensilios antes de utilizarlos.
Material Recomendaciones
Papel de aluminio,
metal
Consulte la sección “Papel de aluminio y
metal”.
Plato para dorar El fondo debe estar al menos a 3/16”
(5mm) por encima de la bandeja giratoria.
Siga las recomendaciones del fabricante.
Vidrio de
cerámica, vidrio
Se puede usar
Porcelana, loza de
barro
Siga las recomendaciones del fabricante.
Melamina Siga las recomendaciones del fabricante.
Papel: Toallas,
vajilla, servilletas
Use papel no reciclado y los que el
fabricante apruebe como aptos para horno
microondas.
Plástico:
Envoltorios,
bolsas, cubiertas,
vajilla, recipientes
Use los que el fabricante apruebe como
aptos para horno microondas.
Cerámica y arcilla Siga las recomendaciones del fabricante.
Utensilios para
hornear de
silicona
Siga las recomendaciones del fabricante.
Recipientes de
paja, de mimbre y
de madera
No los use en el horno microondas.
Papel de cera Se puede usar
Para probar los utensilios de cocina o la vajilla que se
usarán en el microondas:
1. Coloque los utensilios de cocina o vajilla en el horno
microondas con 1 taza (250 mL) de agua al lado.
2. Cocine a una potencia del 100% durante un minuto.
No use el utensilio de cocina ni la vajilla si se pone caliente y el
agua permanece fría.
Papel de aluminio y metal
Siempre use guantes para hornear o agarraderas al retirar los
recipientes del horno microondas.
El papel de aluminio y algunos tipos de metal pueden usarse
en el horno microondas. Si no se usan debidamente, pueden
producir chispas (ráfagas azules de luz) y causar daños al horno
microondas.
Uso permitido
Las rejillas y los utensilios para hornear provistos con el horno
microondas (en algunos modelos), el papel de aluminio para
protección y los termómetros para carne aprobados se pueden
utilizar teniendo en cuenta las siguientes pautas:
n Para evitar daños al horno microondas, no permita que el
papel de aluminio o el metal toquen las paredes, el techo o
el piso de la cavidad interior.
n Siempre use la bandeja giratoria.
n Para evitar daños al horno microondas, evite el contacto con
otros objetos metálicos durante la cocción por microondas.
Uso no permitido
No se deben utilizar en el horno microondas utensilios de
cocina y de hornear metálicos, oro, plata, peltre, termómetros
para carne no aprobados, pinchos, precintos, forros de papel
metálico como envoltorios para emparedados, grapas y objetos
con bordes de oro o plata con glaseado metálico.
Menú de cocción, Cocción por sensor
El horno microondas ha sido programado con alimentos
comunes que se pueden poner en microondas, sus cantidades,
potencias y tiempos de cocción.
Use la siguiente tabla como guía para la cocción programada.
Elemento Categoría de alimento Cantidad
P1
Verduras frescas
De temperatura ambiente.
Ponga los alimentos en un plato apto
para microondas. Añada 2 cucharadas
de agua a 1-2 tazas, añada 4
cucharadas de agua a 3-4 tazas. Cubra
el plato y deje ventilación de aire.
Revuelva y deje reposar 2 o 3 minutos
después de la cocción.
1-4 tazas
(Cocción por
sensor)
P2
Verduras congeladas
A partir de la temperatura de
congelación. Coloque en un recipiente
apto para microondas. Añada 2
cucharadas de agua a 1-2 tazas, añada
4 cucharadas de agua a 3-4 tazas.
Cubra el plato y deje ventilación de
aire. Revuelva y deje reposar 3minutos
después de la cocción.
1-4 tazas
(Cocción por
sensor)
P3
Avena
Colóquelo en un recipiente apto para
microondas y añada agua según las
instrucciones del envase. Añada agua,
cúbralo con envoltorio de plástico
y doble un borde hacia atrás unas
1/4" (6 mm) para hacer un oricio de
ventilación. Coloque el recipiente en
el centro del horno. Tras la cocción,
remueva con una cuchara o batidor
hasta que quede uniforme.
1-4 tazas
(Cocción por
sensor)
P4
Plato principal congelado
Retire el entrante del envase y aoje el
lm que lo recubre en 3 de sus lados,
dejando uno de los lados cortos aún
pegado. Cubra sin apretar con lm.
Deje reposar los entrantes de 10,5 y
20 oz (297 y 567 g) durante 3 minutos.
Deje reposar los entrantes de 38 y
60 oz (1,1 y 1,7 kg) durante 5 minutos.
10 oz, 20 oz,
40 oz, 60 oz
(283 g, 567 g,
1,1 kg,
1,7kg)
Popcorn (Palomitas de maíz)
Bolsas de 3 o 3,5oz.
– No use bolsas de papel común ni utensilios de vidrio.
– Haga reventar un solo paquete de palomitas de maíz a la vez.
– Cuando use un recipiente especial para preparar palomitas de
maíz en microondas, siga las instrucciones del fabricante.
– Escuche hasta que se reduzca la velocidad del proceso de
estallado a uno cada 1 o 2 segundos; después, detenga el ciclo.
– No trate de hacer estallar de nuevo los granos que no estallaron.
– Para obtener resultados óptimos, use bolsas de maíz para
estallar frescas.
– Los resultados de la cocción pueden variar según la marca y el
contenido de grasa.
NOTA: Siga las instrucciones que proporciona el fabricante de
palomitas de maíz para microondas.
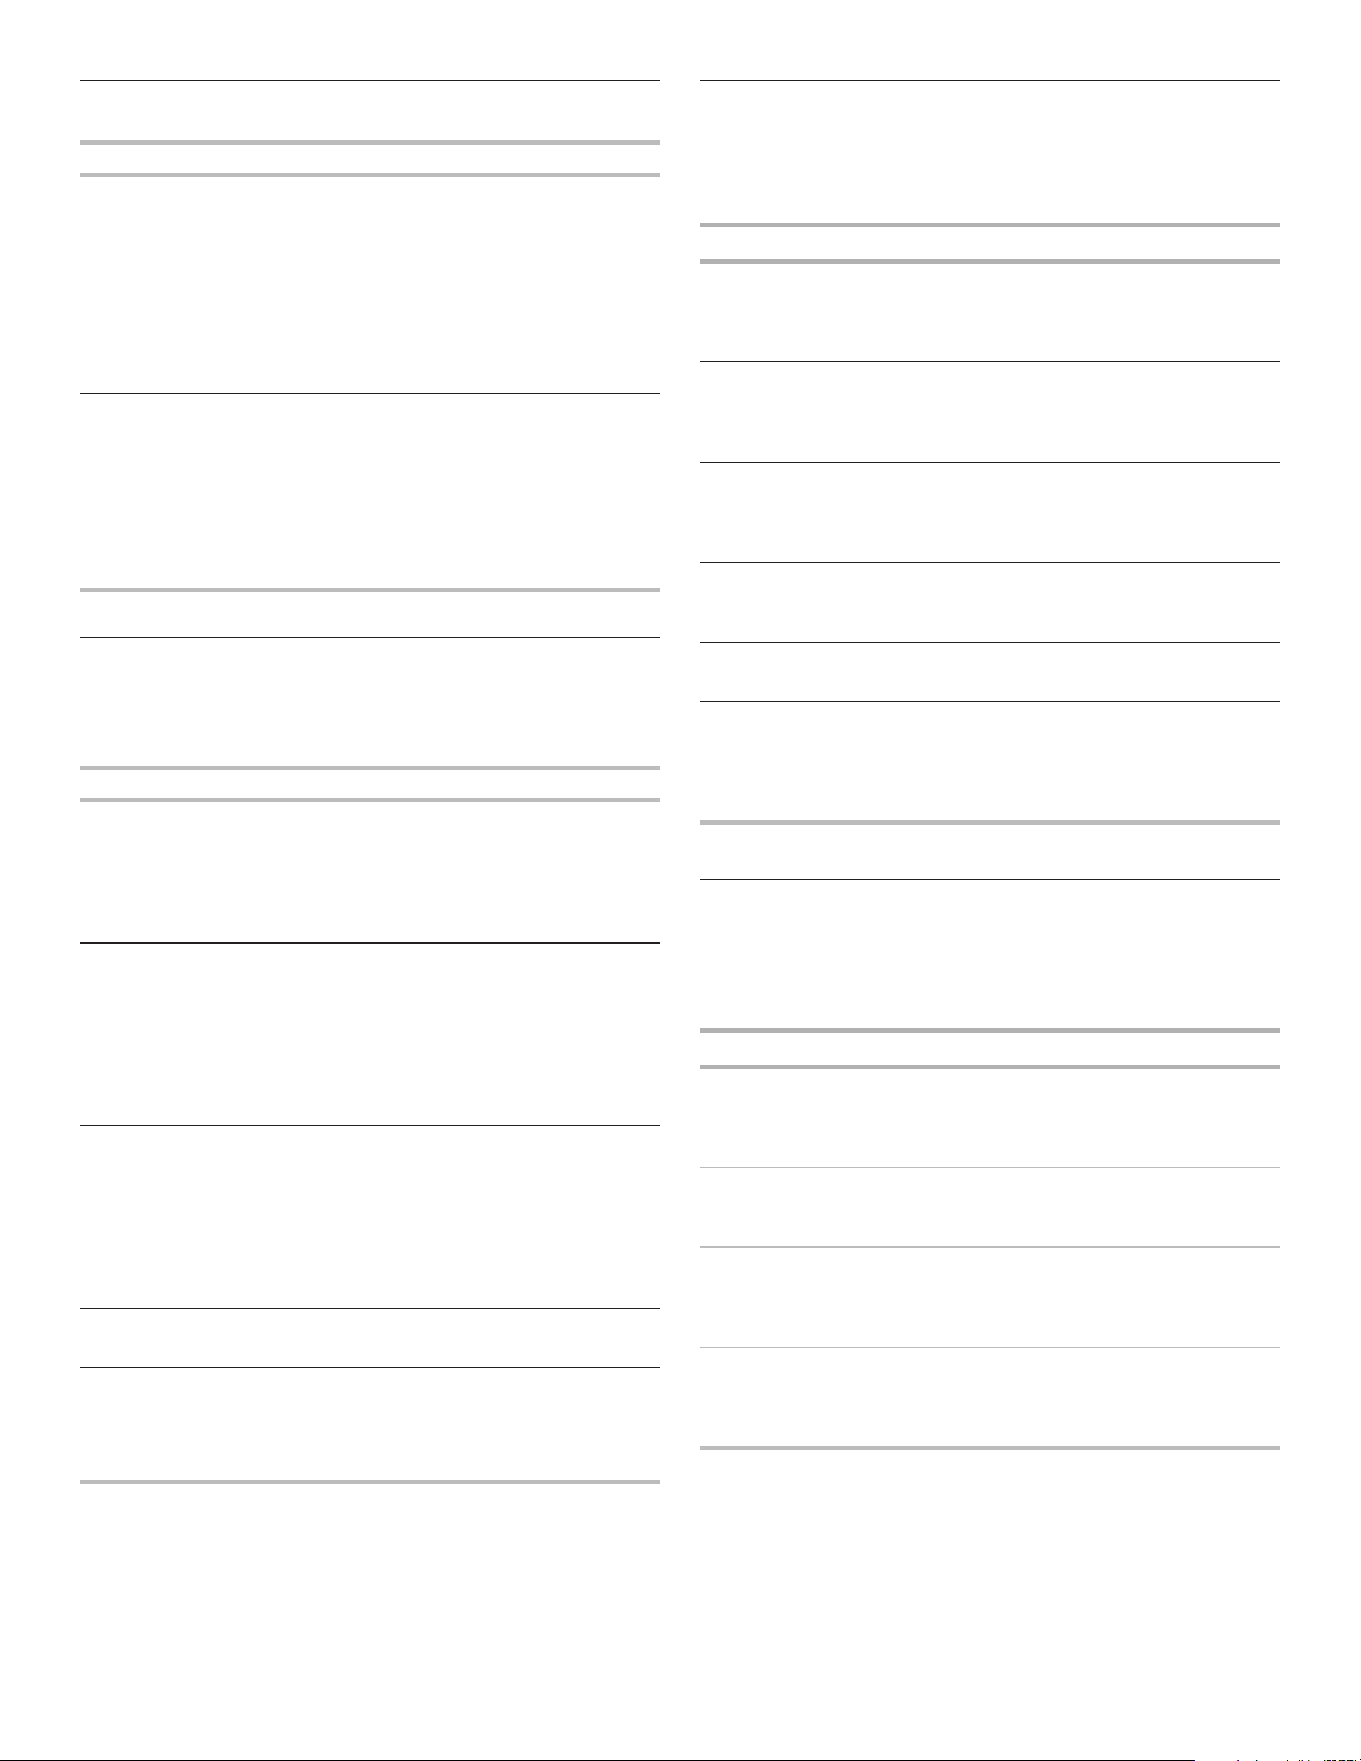
30
Potato (Papa)
Elemento Categoría de alimento Cantidad
L-Grande Ingrese de 1 a 4 piezas,
8-10 oz (227-283 g) cada
una. Pinche cada papa
varias veces con un
tenedor. Coloque sobre
una toalla de papel, sobre
el centro de la bandeja
giratoria. Deje reposar
5minutos después de la
cocción.
1, 2, 3, 4 piezas/
1 pieza
S-Papa
pequeña
Ingrese de 1 a 16 piezas,
4-7 oz (110-200 g) cada
una. Pinche cada papa
varias veces con un
tenedor. Coloque una toalla
de papel sobre el centro de
la bandeja giratoria. Deje
reposar 5minutos después
de la cocción.
1-16 piezas/1 pieza
Reheat (Recalentar)
Se han ajustado previamente tiempos y potencias de cocción
para recalentar varios tipos de alimentos.
Utilice la siguiente tabla como guía.
Producto Categoría de alimento Cantidad
P1 Plato principal
Coloque el alimento en un plato.
Cubra con un envoltorio de
plástico y perfore un oricio de
ventilación. Deje reposar por 2 a
3 minutos después de recalentar.
10-15oz
(283-425g)
(Cocción por
sensor)
P2 Salsa
Coloque en un recipiente apto
para microondas. Cubra con
un envoltorio de plástico y
perfore un oricio de ventilación.
Revuelva y deje reposar
2 o 3 minutos después de
recalentar.
1, 2, 3, 4 tazas
P3 Sopa
Coloque en un recipiente apto
para microondas. Cubra con
un envoltorio de plástico y
perfore un oricio de ventilación.
Revuelva y deje reposar
2 o 3 minutos después de
recalentar.
1, 2, 3, 4 tazas
P4 Beverage (Bebidas)
No cubra.
1, 2, 3, 4 tazas
P5 Recalentar pizza
Colóquela en un plato apto para
microondas cubierto con una
toalla de papel.
1-3 rebanadas,
4 oz (113 g)
por rebanada
(cocción por
sensor)
Soften (Ablandar)
La función Soften (Ablandar) puede utilizarse para ablandar los
alimentos. Se han ajustado previamente tiempos e intensidades
de cocción para varios tipos de alimentos. Utilice la siguiente
tabla como guía.
Producto Categoría de alimento Cantidad
P1 Mantequilla
Retire el envoltorio y
coloque en un recipiente
apto para microondas.
0,5-2,0 barritas/
0,5 barritas
P2 Helado
Coloque el recipiente
con helado en la bandeja
giratoria.
16-64oz/16oz
(454g-1,8kg/454g)
P3 Queso crema
Retire el envoltorio y
coloque en un recipiente
apto para microondas.
3 oz, 8 oz
(85 g, 227 g)
P4 Azúcar moreno
Coloque en un recipiente
apto para microondas.
3 oz, 8 oz
(85 g, 227 g)
P5 Zumo congelado
Retire la tapa.
8 oz, 12 oz
(227 g, 340 g)
P6 Salsa de caramelo
Retire la tapa de la salsa
de caramelo y colóquela
en el centro del horno
microondas.
8 oz, 16 oz
(227 g, 454 g)
Melt (Derretir)
La función Melt (Derretir) puede utilizarse para derretir sus
alimentos. Se han ajustado previamente tiempos e intensidades
de cocción para varios tipos de alimentos. Utilice la siguiente
tabla como guía.
Producto Categoría de alimento Cantidad
P1 Mantequilla
Retire el envoltorio y coloque
en un recipiente apto para
microondas.
0,5-2,0
barritas/
0,5 barritas
P2 Chispas de chocolate
Coloque en un recipiente apto
para microondas.
4-12 oz/4 oz
(113-340g/
113 g)
P3 Queso crema
Retire el envoltorio y coloque
en un recipiente apto para
microondas.
8oz, 16oz
(227g, 454g)
P4 Salsa de caramelo
Retire el envoltorio y coloque
en un recipiente apto para
microondas.
8 oz, 16 oz
(227 g, 454 g)

31
Weight Defrost (Descongelado por Peso)
– Para un resultado óptimo, los alimentos deben estar a 0°F
(-18°C) o más fríos cuando se descongelen.
– Quite el envoltorio de los alimentos y retire las tapas (de los
jugos de fruta) antes de descongelar.
– Los paquetes poco profundos se descongelarán con más
rapidez que los bloques profundos.
– Separe los trozos de alimentos lo antes posible, durante o al
nal del ciclo, para lograr un descongelado más uniforme.
– Los alimentos que quedan fuera del congelador más
de 20minutos o los alimentos listos para consumir
congelados no se deben descongelar con la función Defrost
(Descongelar) sino manualmente.
– Use pedazos pequeños de papel de aluminio para proteger
partes de los alimentos como las alas y las puntas de las
patas del pollo y las colas de los pescados. Consulte primero
la sección “Papel de aluminio y metal”.
– Se han ajustado previamente tiempos y potencias de cocción
para descongelar varios tipos de alimentos.
Elemento
Categoría de
alimento
Peso
P1 Aves 0,5 lb-6,6 lb/0,1 lb
P2 Carne 0,5 lb-6,6 lb/0,1 lb
P3 Pescado 0,5 lb-6,6 lb/0,1 lb
TABLA DE PREPARACIÓN PARA DESCONGELADO
AVES
Pollo: entero y en trozos
Gallinas Cornish
Pavo: pechuga
Coloque en un recipiente
apto para microondas,
con la pechuga mirando
hacia arriba. Retire las
menudencias del pollo
entero.
CARNE
Carne de res: molida, bistecs,
asados, estofados
Cordero: estofado y chuletas
Cerdo: chuletas, costillas,
asados, salchichas
Las zonas angostas o con
grasa de los cortes de forma
irregular deben protegerse
con papel de aluminio antes
de descongelar.
No descongele menos
de 1/4 lb (113 g) o dos
hamburguesas de 4 oz
(113 g).
Coloque todas las carnes
en un recipiente apto para
microondas.
PESCADO
Filetes, bistecs, enteros,
mariscos
Coloque en un recipiente
apto para microondas.
Steam Clean (Limpieza con Vapor)
Este ciclo de limpieza automático le ayudará a limpiar la cavidad
del horno microondas y eliminar los olores desagradables.
Antes de iniciar el ciclo:
1. Ponga 250 mL de agua en un recipiente (consulte nuestras
recomendaciones en la sección “Consejos y sugerencias” a
continuación).
2. Coloque el recipiente directamente en el centro de la
cavidad.
Para iniciar el ciclo:
1. Presione el botón Steam Clean (Limpieza con Vapor), la
duración del ciclo de limpieza será visible en la pantalla.
2. Presione el botón Start (Inicio) para iniciar la función.
Cuando el ciclo termine:
1. Presione el botón Stop/Unlock (Parar/Desbloquear).
2. Retire el recipiente.
3. Utilice un paño suave o una toalla de papel con un
detergente suave para limpiar las supercies interiores.
Consejos y sugerencias:
Para un mejor resultado de limpieza, se recomienda utilizar un
recipiente con un diámetro de 17-20 cm y una altura inferior a
6,5 cm.
Se recomienda utilizar un recipiente de material plástico ligero
apto para microondas.
Como el recipiente estará caliente después de que se complete
el ciclo de limpieza, se recomienda usar un guante resistente al
calor al sacar el recipiente del microondas.
Para un mejor efecto de limpieza y eliminación de olores
desagradables, agregue un poco de jugo de limón o vinagre al
agua.
Keep Warm (Mantener Caliente)
Esta función le permite mantener sus platos calientes.
1. Toque el botón “Keep Warm” (Mantener Caliente).
2. Presione el botón “+/-” para seleccionar la hora adecuada
y, a continuación, presione el botón Start (Inicio) para
comenzar.
El tiempo por defecto es de 30 minutos, el tiempo máximo
es de 60 minutos.
Alimentos
Recipiente
de peso
Temperatura Recipiente
Atún
Fideos
Cacerola
4 tazas
(880 g)
165 °F (73,8 °C) Plato apto para
microondas

32
Limpieza general
IMPORTANTE: Antes de la limpieza, asegúrese de que todos los
controles estén apagados y que el horno microondas esté frío.
Siempre siga las instrucciones de las etiquetas de los productos
de limpieza.
Se sugiere usar agua, jabón y un paño o una esponja suave, a
menos que se indique otra cosa.
CAVIDAD DEL HORNO MICROONDAS
Para evitar daños en la cavidad del horno microondas, no use
estropajos precargados con jabón, limpiadores abrasivos,
estropajos de lana de acero, paños de lavar ásperos o algunas
toallas de papel reciclado.
Para evitar daños en los modelos de acero inoxidable, frote en la
dirección de la veta.
Se debe mantener limpia la zona donde la puerta del horno
microondas hace contacto con el marco cuando está cerrada.
Suciedad promedio
n Jabones y detergentes suaves, no abrasivos:
Enjuague con agua limpia y seque con un paño suave que
no deje pelusa.
Suciedad profunda
n Jabones y detergentes suaves, no abrasivos:
Caliente 1taza (250mL) de agua durante 2 a 5minutos en el
horno microondas. El vapor ablandará la suciedad. Enjuague
con agua limpia y seque con un paño suave que no deje
pelusa.
Olores
n Jugo de limón o vinagre:
Caliente 1taza (250mL) de agua con 1cucharada (15mL)
de jugo de limón o vinagre durante 2 a 5minutos en el horno
microondas.
Cubierta para la entrada microondas
Para evitar que se produzcan arcos y el horno microondas
se dañe, la cubierta de la entrada microondas (vea “Piezas y
funciones”) debe mantenerse limpia.
n Limpie con un paño húmedo.
PUERTA Y EXTERIOR DEL HORNO MICROONDAS
Se debe mantener limpia la zona donde la puerta del horno
microondas hace contacto con el marco cuando está cerrada.
n Jabones y detergentes suaves, no abrasivos:
Enjuague con agua limpia y seque con un paño suave que
no deje pelusa.
n Limpiavidrios y toallas de papel o un estropajo plástico no
abrasivo:
Aplique el limpiador de vidrios a la toalla, no lo haga
directamente sobre la supercie.
Acero inoxidable (en algunos modelos)
Para evitar daños a la puerta y el exterior del horno microondas,
no use estropajos que vienen precargados con jabón, productos
de limpieza abrasivos, estropajos de metal, paños ásperos o
ciertas toallas de papel. Frote en la dirección de la veta.
n Limpiador de acero inoxidable (no incluido):
Vea la sección “Asistencia o servicio técnico” para hacer
pedidos.
n Limpiador de uso general:
Enjuague con agua limpia y seque con un paño suave que
no deje pelusa.
n Vinagre para manchas de agua dura.
PANEL DE CONTROL
n Esponja o paño suave y agua.
Humedezca la esponja con agua y pásela por el panel.
Seque con un paño suave.
n Para evitar daños en el panel de control, no use sustancias
químicas ni limpiadores abrasivos.
BANDEJA GIRATORIA
Vuelva a colocar la bandeja giratoria de inmediato después de
la limpieza. No ponga a funcionar el horno microondas sin la
bandeja giratoria en su lugar.
n Producto de limpieza suave y estropajo
n Lavavajillas
PARRILLAS DE CONVECCIÓN Y DE ASAR
No se recomienda lavar en lavavajillas. Para evitar daños en
las parrillas de convección y de asar, no utilice limpiadores
abrasivos ni estropajos.
n Jabón suave, agua y paño de lavar.
CUIDADO DEL HORNO MICROONDAS

33
Si experimenta lo
siguiente
Soluciones recomendadas
Nada funciona Revise lo siguiente:
n Fusible o disyuntor de la casa: Si hay un fusible de la casa fundido o se disparó el disyuntor, reemplace el
fusible o restablezca el disyuntor. Si el problema continúa, llame a un electricista.
El horno microondas
no funciona
Revise lo siguiente:
n Magnetrón: Intente calentar una taza (250 mL) de agua fría durante 2 minutos al 100% de potencia
de cocción. Si el agua no se calienta, pruebe los pasos que se enumeran a continuación. Si el horno
microondas aún no funciona, llame para solicitar servicio técnico.
n Puerta: Cierre la puerta con rmeza. En algunos modelos, si hay un separador de empaque sujeto al
interior de la puerta, retírelo y, después, cierre la puerta con rmeza.
Si aparece en la pantalla un mensaje acerca de la puerta, la puerta ha estado cerrada durante 5minutos
o más sin que se haya puesto a funcionar el horno. Esto sucede para evitar que el horno microondas se
ponga en marcha accidentalmente. Abra y cierre la puerta; luego, inicie el ciclo.
n Stop (Parar) (Unlock [Desbloquear]): Asegúrese de que Stop/Unlock (Parar/Desbloquear) esté apagado.
Asegúrese de que el Demo mode (Modo de Demostración) (en algunos modelos) esté desactivado.
El horno microondas
emite zumbidos
n Esto es normal y ocurre cuando se activa el suministro eléctrico del magnetrón.
La puerta del horno
microondas parece
ondulada
n Esto es normal y no afecta el funcionamiento.
La bandeja giratoria
no funciona
Revise lo siguiente:
n Bandeja giratoria: Cerciórese de que la bandeja giratoria tenga el lado correcto hacia arriba y que esté
debidamente asentada en su soporte. Consulte la sección “Bandeja giratoria”.
n Soporte de la bandeja giratoria: Quite la bandeja giratoria. Quite y limpie el eje, el soporte y los rodillos
de la bandeja giratoria. Vuelva a colocar el eje, el soporte y la bandeja giratoria. Coloque 1taza (250mL)
de agua en la bandeja giratoria; después, vuelva a poner a funcionar el horno microondas. Si todavía no
funciona, solicite servicio. Consulte la sección “Asistencia o servicio técnico”. No ponga a funcionar el
horno microondas si la bandeja giratoria y su soporte no están funcionando bien.
La bandeja giratoria
gira en ambas
direcciones de
manera alternada
n Esto es normal y depende de la rotación del motor al comienzo del ciclo.
La pantalla muestra
mensajes
n Si aparece “0:00” de manera intermitente, signica que ha habido un corte de corriente. Restablezca el
reloj.
La pantalla muestra la
cuenta regresiva pero
el horno microondas
no está funcionando
Revise lo siguiente:
n Timer (Temporizador): Consulte la sección “Temporizador”.
Las señales audibles
no suenan
Revise lo siguiente:
n Tones (Tonos): Consulte la sección “Tonos”.
Los tiempos de
cocción parecen
demasiado
prolongados
Revise lo siguiente:
n Potencia de cocción: Consulte la sección “Potencia de cocción del microondas”.
n Cantidad de alimentos: Las cantidades más grandes de alimentos requieren de tiempos de cocción más
largos.
n Tensión: Solicite que un electricista calicado compruebe el sistema eléctrico de su casa.
Olor procedente del
horno microondas
durante la cocción y
asado por convección
n Esto es normal durante los primeros ciclos de convección y/o asado. El olor desaparecerá con el uso
repetido.
SOLUCIÓN DE PROBLEMAS
Pruebe primero las soluciones sugeridas aquí. Si necesita asistencia adicional o más recomendaciones que puedan ayudarle a evitar
una llamada al servicio técnico, consulte la página de la garantía de este manual o visite www.kitchenaid.com/owners.
Si tiene preguntas o dudas, contáctenos por correo a la dirección que aparece a continuación:
En los EE.UU.:
KitchenAid Brand Home Appliances
Customer eXperience Centre
553 Benson Road
Benton Harbor, MI 49022-2692
En Canadá:
KitchenAid Brand Home Appliances
Customer eXperience Center
220-6750 Century Ave.
Mississauga, Ontario L5N 0B7
Incluya en su correspondencia un número de teléfono en el que se le pueda localizar durante el día.

34
ASISTENCIA O SERVICIO TÉCNICO
Si necesita servicio:
Para obtener información sobre la garantía, visite
www.kitchenaid.com/owners.
Si necesita piezas de repuesto:
Si necesita pedir piezas de repuesto, recomendamos que
use únicamente piezas especicadas de fábrica. Las piezas
especicadas de fábrica encajarán correctamente y funcionarán
bien ya que están confeccionadas con la misma precisión
empleada en la fabricación de todos los electrodomésticos
KitchenAid nuevos.
Para encontrar piezas especicadas de fábrica en su zona,
llámenos o llame al centro de servicio técnico designado por
KitchenAid más cercano.
En EE.UU.
Llame al KitchenAid Customer eXperience Center sin costo
alguno al:
1-800-422-1230, o visite nuestro sitio web en
www.kitchenaid.com/owners.
Nuestros consultores ofrecen ayuda con:
n Programación de servicio. Los técnicos de servicio
designados de KitchenAid están capacitados para
cumplir con la garantía del producto y proveer servicio
una vez que la garantía caduque en cualquier lugar de los
EstadosUnidos.
n Características y especicaciones de nuestra línea completa
de electrodomésticos.
n Referencias a distribuidores locales de electrodomésticos
KitchenAid.
n Información sobre la instalación.
n Procedimientos de uso y mantenimiento.
n Venta de accesorios y repuestos.
n Asistencia al cliente especializada (idioma español,
deciencias de audición, visión limitada, etc.).
Para obtener más asistencia:
Si necesita asistencia adicional, puede escribir a KitchenAid con
sus preguntas o dudas a:
KitchenAid Brand Home Appliances
Customer eXperience Center
553 Benson Road
Benton Harbor, MI 49022-2692
Incluya en su correspondencia un número de teléfono en el que
se le pueda localizar durante el día.
En Canadá
Llame al KitchenAid Customer eXperience Center sin costo
alguno al:
1-800-807-6777 o visite nuestro sitio web en
www.kitchenaid.ca/owners.
Nuestros consultores ofrecen ayuda con:
n Programación de servicio. Los técnicos de servicio
designados para electrodomésticos KitchenAid están
capacitados para cumplir con la garantía del producto
y proveer servicio una vez que la garantía caduque en
cualquier lugar de Canadá.
n Características y especicaciones de nuestra línea completa
de electrodomésticos.
n Referencias a distribuidores locales de electrodomésticos
KitchenAid.
n Procedimientos de uso y mantenimiento.
n Venta de accesorios y repuestos.
Para obtener más asistencia:
Si necesita asistencia adicional, puede escribir a KitchenAid con
sus preguntas o dudas a:
KitchenAid Brand Home Appliances
Customer eXperience Centre
220-6750 Century Ave.
Mississauga, Ontario L5N 0B7
Incluya en su correspondencia un número de teléfono en el que
se le pueda localizar durante el día.
Piezas de repuesto
Bandeja giratoria de vidrio
Pieza número W11664476
Soporte y rodillos de la bandeja
giratoria
Pieza número W11664467
Eje de bandeja giratoria
Pieza número W11664468
Juegos para empotrar
Este horno microondas para mostrador se puede empotrar
usando uno de los siguientes juegos de adorno*. Estos juegos
se pueden adquirir con el distribuidor o se pueden pedir por el
número de modelo del juego. Consulte la sección “Asistencia o
servicio técnico” para obtener el número gratuito.
Tamaño del juego
Números de modelo del juego/
Color
27" (68,6 cm) MTK1627PZ/MTK1627PV
30" (76,2 cm) MTK1630PZ/MTK1630PV
*Los juegos de adorno para empotrar pueden instalarse sobre
cualquier horno (eléctrico o a gas) empotrado en la pared de
hasta 30" (76,2 cm).

35
NOTES

36
NOTES

37
NOTES

38
NOTES

39
NOTES

W11695420A
01/24
®
/™ ©2024 KitchenAid. All rights reserved. The design of the stand mixer is a trademark in the U.S. and elsewhere.
Used under license in Canada.
Todos los derechos reservados. El diseño de la batidora es una marca comercial en EE. UU. y en otros países.
Usado bajo licencia en Canadá.