
I worked really hard
on this manual -
so please read it.
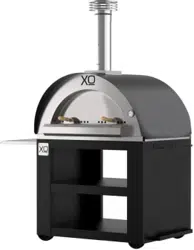
XOPIZZA_GAS
GAS FIRED PIZZA/HEARTH OVENS

2
APPLIANCE

Before You Get Started
4 - 7
8 - 12
3
where things are
please read and follow
all safety instructions
Record your serial number
Your safety matters
Dimensions
Using Your Oven
Handy Tips
Installation
Gas Connection
Lighting the Gas Oven
Wood-Fired Optional Use
Set Up and operation wood-fired
16
More Cooking
Cooking tips
13 - 15
20
All The Rest
Warranty
Obtaining service
Maintenance & FAQs
Changing the battery & Cleaning
Frequently Asked Questions
17 - 19
4
XOPIZZA1GAS | XOPIZZA4GAS
GAS-FIRED PIZZA/HEARTH OVENS
2
this is the model
covered in this
book
record your serial number
here in case you need it later

5
your safety matters
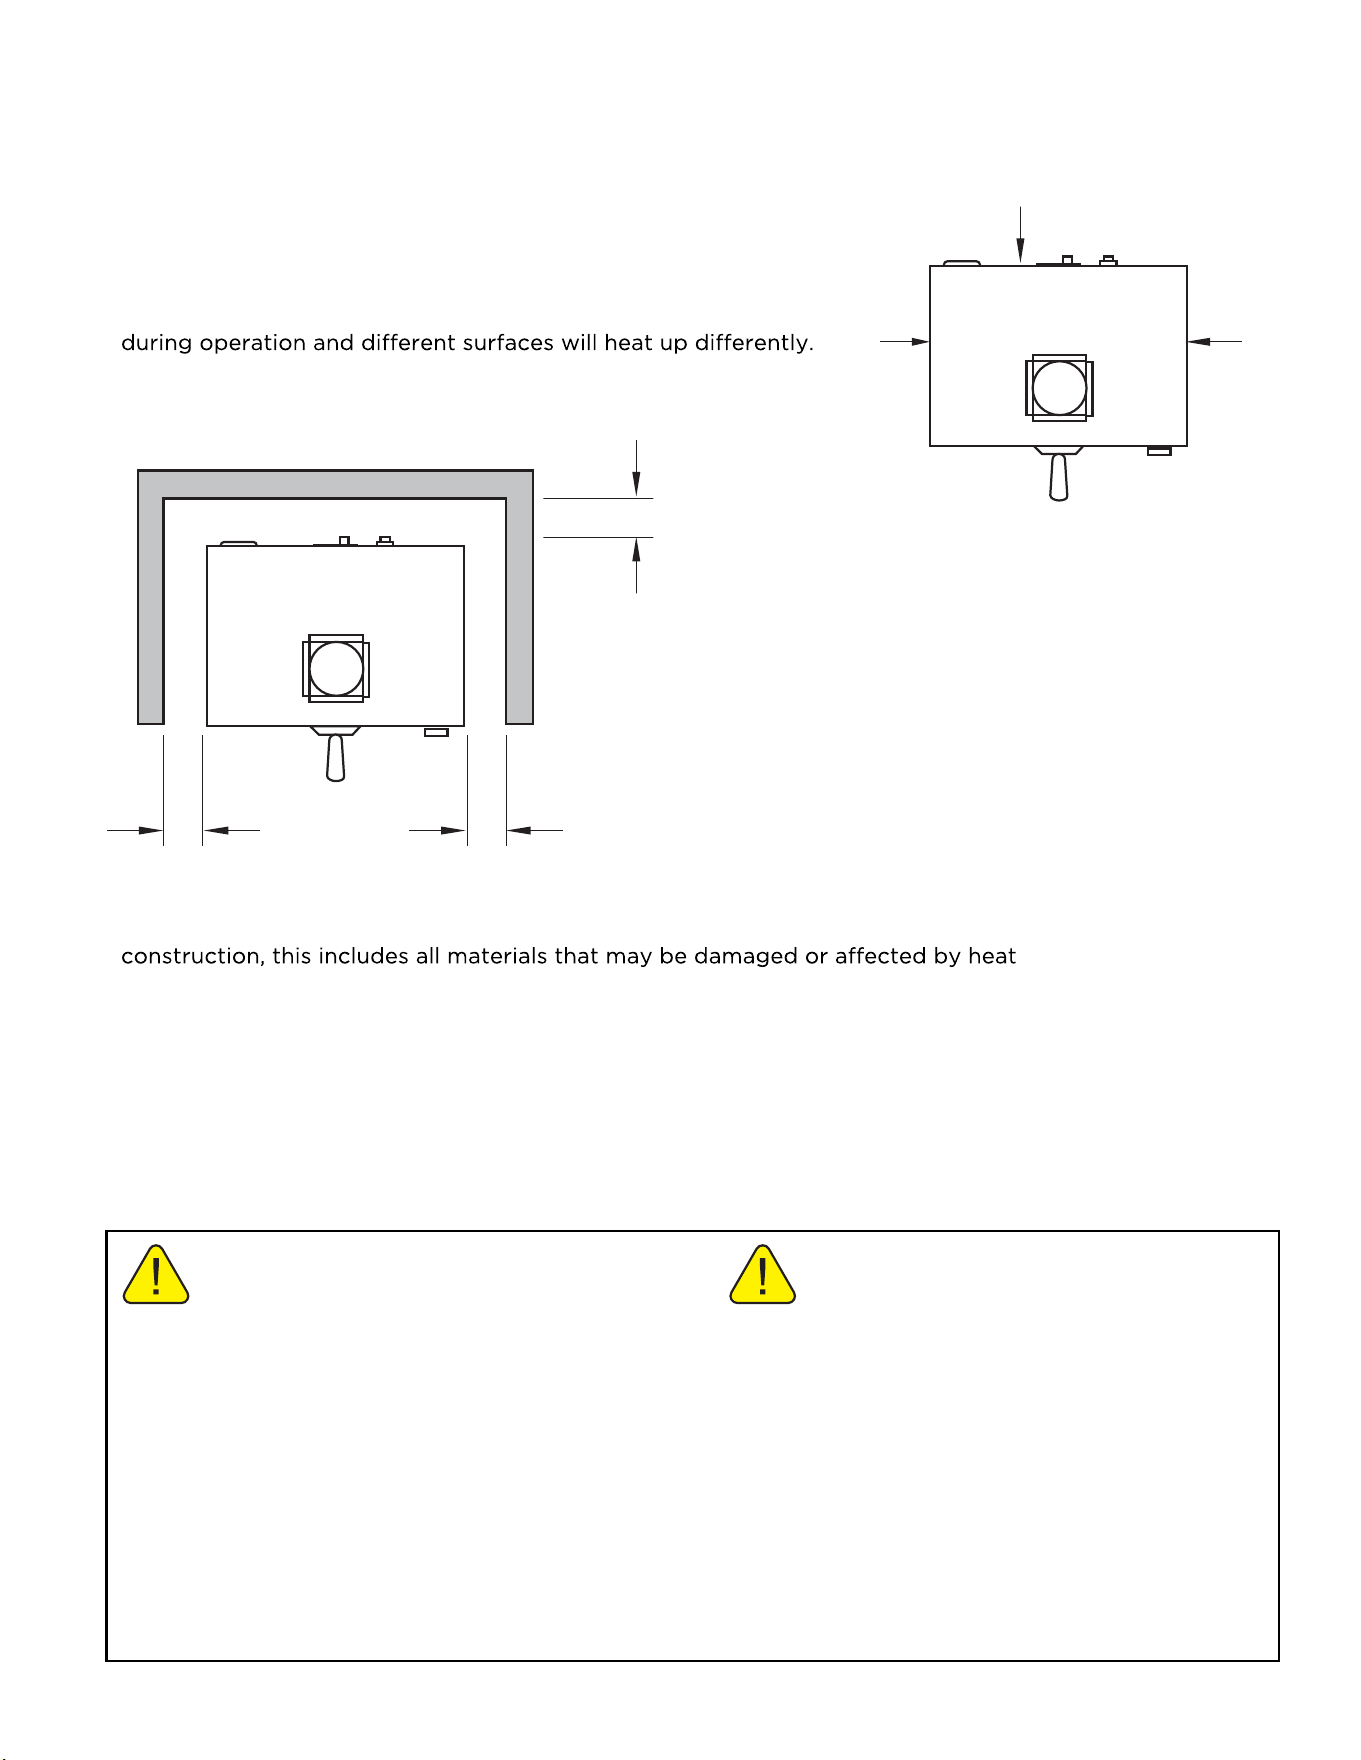
P osition the oven on a flat, level, fireproof surface where it is protected from strong winds.
Sparks may be ejected from the oven during operation - make certain to rem ove any materials
which are flammable or may be damaged by hot sparks from the vicinity of the oven.
THIS APPLIANCE GENERATES EXTREME HIGH TEMPERATURES. Always use caution when
lighting or using your oven. FAILURE TO FOLLOW THESE INSTRUCTIONS COULD RESULT
IN SERIOUS PROPERTY DAMAGE, BODILY INJURY OR DEATH.
SAVE THESE INSTRUTIONS FOR REFERENCE.
CAUTION: ONLY USE THIS OVEN OUTDOORS IN A WELL VENTILATED AREA ONLY.
Do not use in a garage, building, breezeway, or any other enclosed area.
Keep the oven on a secure, level surface at all times.
Do not use oven within three feet of any combustible material.
Combustible materials include, but are not limited to, wood or treated wood decks, patios
and porches.
Use only cooking materials, containers, utensils, gloves and pot holders etc designed for high
temperatures.
KEEP CHILDREN AND PETS OUT OF REACH WHILE THE OVEN IS IN USE.
Please read the entire manual before you install thi soven. Contact your local building or fire ocial
about restrictions and installation inspection in your area.
FOR YOUR SAFETY: Do not store or use gasoline or other flammable vapors or liquids in the
vicinity of this or any other appliance. Always keep the area under and around this appliance free
and clear of any and all combustible materials.
Outer oven surfaces can reach temperatures above 120°F.
Keep all combustible materials beyond a three (3) foot minimum radius of the oven.
CAUTION: When being used, place the oven at a safe minimum distance from flammable
materials or any other substance that can be damaged by heat.
OVENS MUST BE PLACED ON LEVEL, FIREPROOF SURFACES WITH ENOUGH LOAD BEARING
CAPACITY TO ACCOMODATE 150 lbs.
Never move the oven while in use.
If using the wood fired option,
BURN DRY, WELL SEASONED HARDWOOD ONLY AS FUEL..
You cannot burn gas and wood at the same time. Do not use your oven to burn other materials.
assistance of a professional skilled in the installation of wood burning stoves. Do not use indoors!
This oven is designed for outdoor use in a well-ventilated area and is not intended for and should
never be used as a heater. If used indoors, toxic fumes will accumulate and cause serious bodily
injury or death.
For use beneath any structure, consult your code ocial as to local regulations and enlist the

6
your safety matters cont.
IF YOU ARE USING THE WOOD BURNING OPTION - THE BURNER MUST BE OFF
AND THE METAL BURNER COVER MUST BE IN PLACE. FOLLOW THE ADDITIONAL
INSTRUCTIONS BELOW:
To extinguish the gas burner, follow the instructions on page 11, turning the control knob all the way
clockwise.
To extinguish a wood fire, place the door into the oven mouth sealing the oven and allow the fire to
burn itself out. NEVER THROW WATER ONTO THE FIRE.
IF BURNING WOOD, LEAVE THE DOOR CLOSED FOR AT LEAST 30 MINUTES AFTER THE FIRE
GOES OUT EXERCISE CAUTION OPENING THE DOOR AFTERWARD. THE RE-INTRODUCTION
OF AIR SUDDENLY CAN CAUSE THE FIRE TO BURST BACK INTO FLAME.
Avoid excessively large wood fires which cause flames to come back out the door. If this occurs
close the door until the flames die down.
Do not throw wood into the oven, damage to the interior may result. Place wood using tongs and/or
fire proof gauntlets designed for that purpose.
Burn only well seasoned, dry hardwood. Never burn pressure treated, laminated or finished wood.
Never use chipped or wood pellet products. Never use softwood such as pine or fir.
NEVER BURN CHARCOAL, COAL OR ARTIFICIAL LOGS. NEVER USE STARTER/LIGHTER FLUID,
KEROSENE, OILS, GASOLINE, OR ANY OTHER ACCELERANTS.
When cooking dishes that may contain grease or oils, use caution to avoid spills which could ignite.
Keep a safe distance of at least 24” away from the front of the oven when lighting.
If the oven has been used in wood fired mode, after the oven and burned debris are completely cold
carefully remove all ash from the interior using a metal shovel and place in a metal, fire-proof container
for 2-3 days to ensure any embers are completely out before disposing of safely in accordance with
any local requirements.
NEVER PLACE ANY SEALED TINS, CANS OR CONTAINERS IN A HOT OVEN. AS THE CONTENTS ARE
HEATED, BUILDING PRESSURE CAN RESULT IN AN EXPLOSION HAZARD.
IN THE EVENT OF A GREASE FIRE - CLOSE THE DOOR AND WAIT FOR THE FIRE TO BE COMPLETELY
EXTINGUISHED. WARNING - RE-OPENING THE DOOR TOO SOON MAY CAUSE THE FIRE TO RE-
IGNITE.
NEVER BURN WOOD IN THE OVEN WHILE OPERATING THE GAS BURNER.
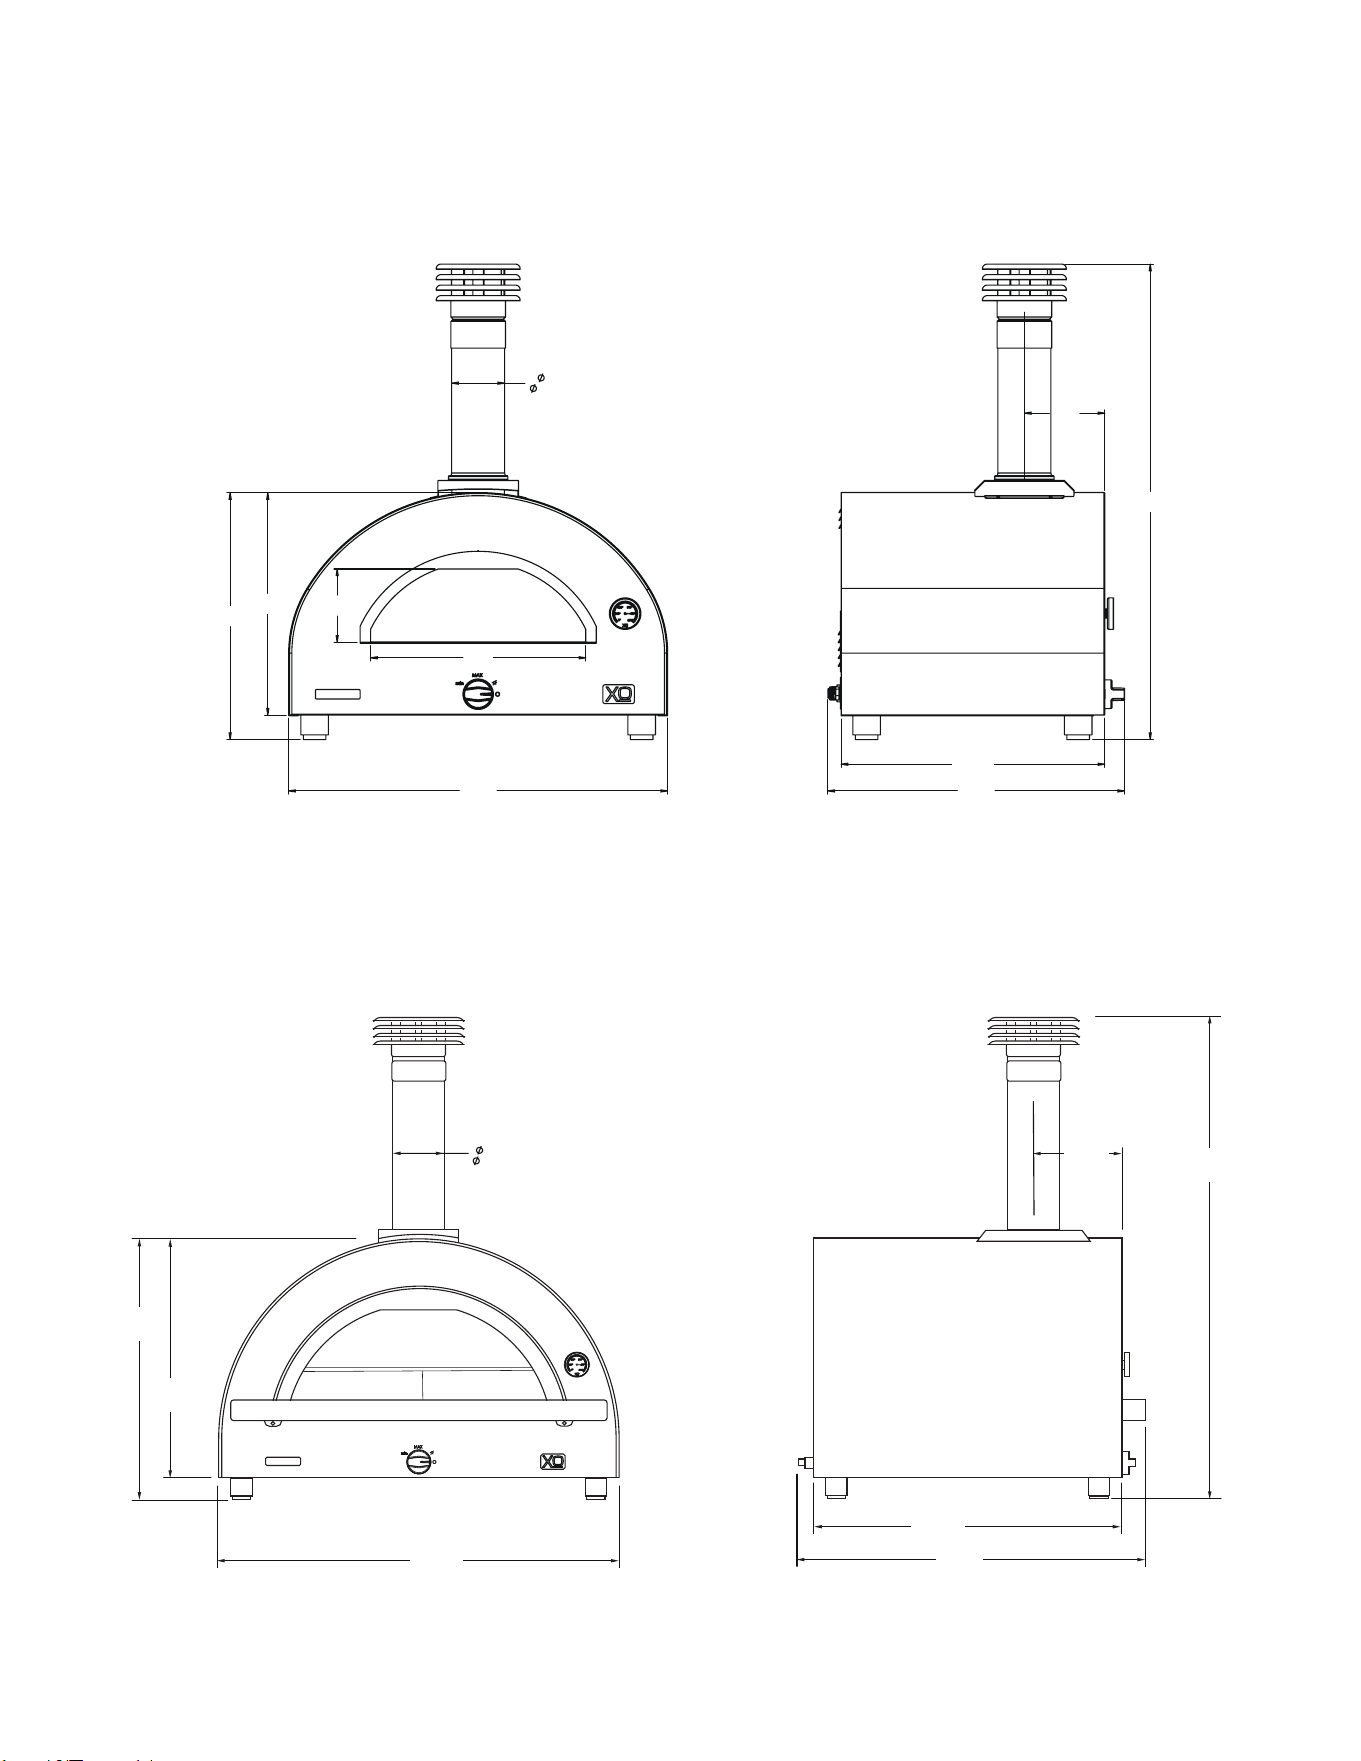
dimensions
7
4''
(
10cm)
5.5''
(14cm)
16.14''
(41cm)
16.69''
(42cm)
18.53''
(47cm)
28.43''
(72.2cm)
22.26''
(56.5cm)
19.78''
(502.8cm)
6.04''
(15cm)
35.7''
(90.58cm)
39.45''
(100.2cm)
33.9''
(86cm)
30.43''
(77.3cm)
8.73''
(22.17cm)
5.12''
(
13cm)
25.8''
(65.5cm)
23.65''
(60cm)
47.66''
(121.1cm)
XOPIZZA1GAS_
XOPIZZA4GAS_
8
handy tips
Some parts have a plastic film on them that prot
ects them during manuf
acture.
Remove all of this protective film before any assembly or use. This will prevent it
from getting trapped between parts during assembly.
Failure to remove the plastic will result in it “Baking” on to the surface making it
If you are having trouble removing the plastic film, warm the surface with a hair
dryer. Do not use a scraper or knife as this will scratch the surface.
When cleaning your oven, do not use scouring pads or metal scrapers - this can
damage the finish of your oven.
To clean your oven exterior, use warm soapy water with a mild, non-abrasive cleaner.
Some parts of the oven may experience discoloration from the high temperatures,
Your XO Oven can be used throughout the year. However, during cold months when
the outside temperature is near or below freezing heat the oven, slowly allowing the
unit to warm up gradually. Rapid temperature changes can thermally shock parts
of the oven resulting in premature stress cracking particularly of the ceramic hearth.
Chips and hairline cracks in the refractory will normally form over time and these
Always close the oven door when not in use - this will help prevent rain and other
elements from entering the oven. It is also recommended the oven be covered.
9
installation
LOCATION:
Use this oven outdoors in a well ventilated area only.
The outer surfaces of the oven can reach HIGH TEMPERATURES
Always assume all surfaces are HOT and exercise appropriate
care. Use hot pads and insulated gloves in handling.
CAUTION:
Position the oven a minimum distance of 10 inches
from all non-combustible walls and from any other
equipment. When installing the gas oven, the gas
regulator must be accessible for maintenance or gas
changes.
The GAS ISOLATION VALVE MUST BE READILY
ACCESSSIBLE.
CAUTION:
Locate the oven a safe distance (a minimum of 3 feet or 1 meter) from all flammable materials or
CAUTION:
Place the oven on a flat, stable surface to prevent it from moving during use.
COUNTER TOP OVENS SHOULD BE PLACED ON FIXED TABLES OR TABLES WITH LOCKING WHEELS
OR OTHER FIREPROOF SURFACES WITH ADEQUATE LOAD-BEARING CAPACITY (+150 lbs).
IF NEEDED, ADJUST THE LEGS TO LEVEL THE SUPPORTING SURFACE.
ANY FLAMMABLE MATERIAL SHOULD BE KEPT AT LEAST 3 FEET (1 METER) AWAY FROM THE OVEN.
10”
10”
TOP VIEW
10”
TOP VIEW
176 F
176 F 104 F
o
o
o
WARNING! CALIFORNIA PROPOSITION 65
1. The burning of gas cooking fuel generates some by-products which are on the
list of substances which are known by the State of California to cause cancer or
reproductive harm.
2. California law requires businesses to warn customers of potential exposure to such
substances. To minimize exposure to the substances, always operate this unit
according to the use and care instructions found in this manual. Be certain to provide
adequate ventilation when cooking.
3. Warning: Handling the brass material on this product exposes you to lead, a chemical
known to the state of California to cause cancer, birth defects or other reproductive
harm. (Wash hands after handling this product.)
4. For more information go to this website: www.p65warning.ca.gov
10
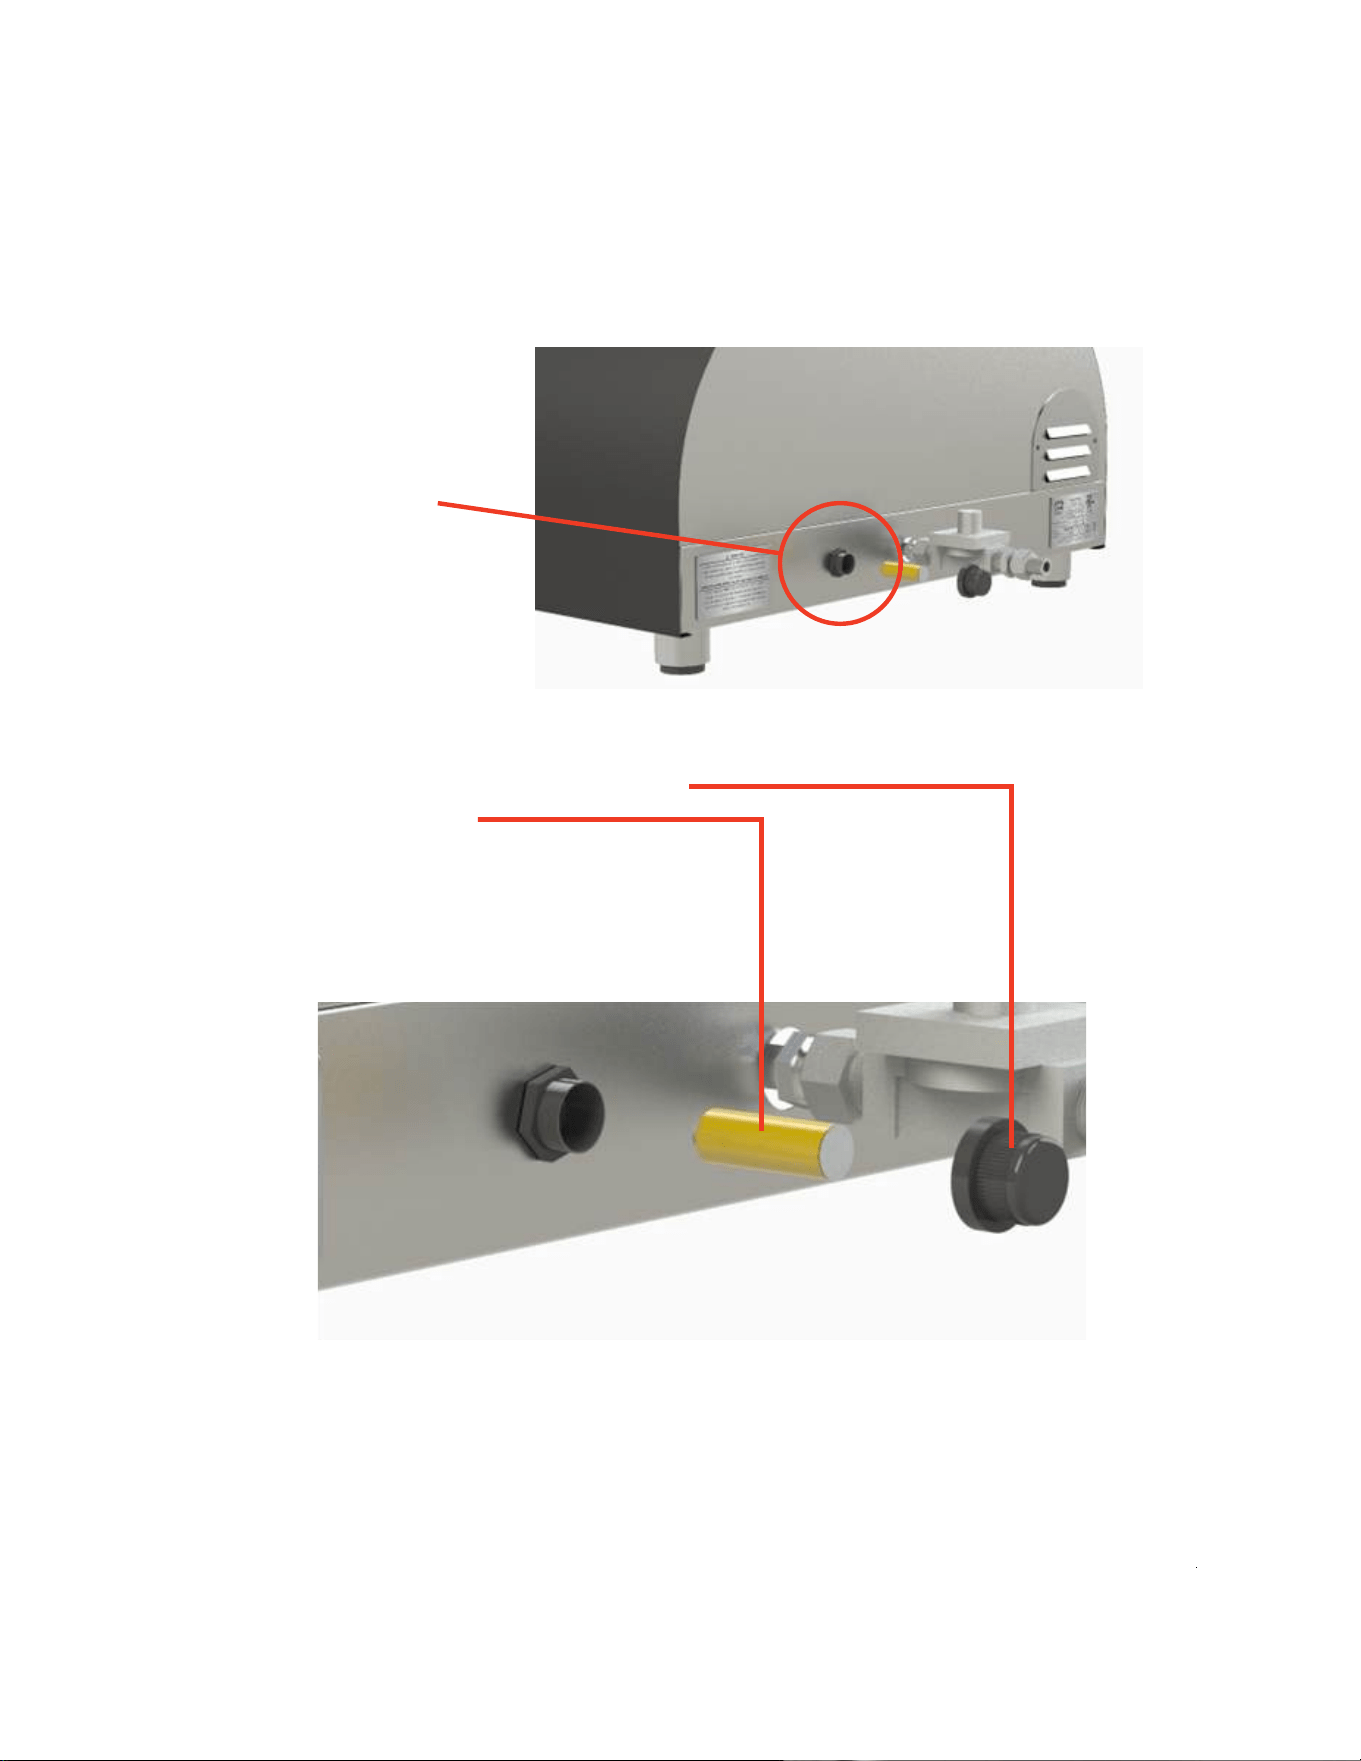
gas connection
Make certain that the
burner at the rear of the oven using teflon tape to seal all threaded connections.
Connect the gas line to the SOURCE SIDE of the regulator.
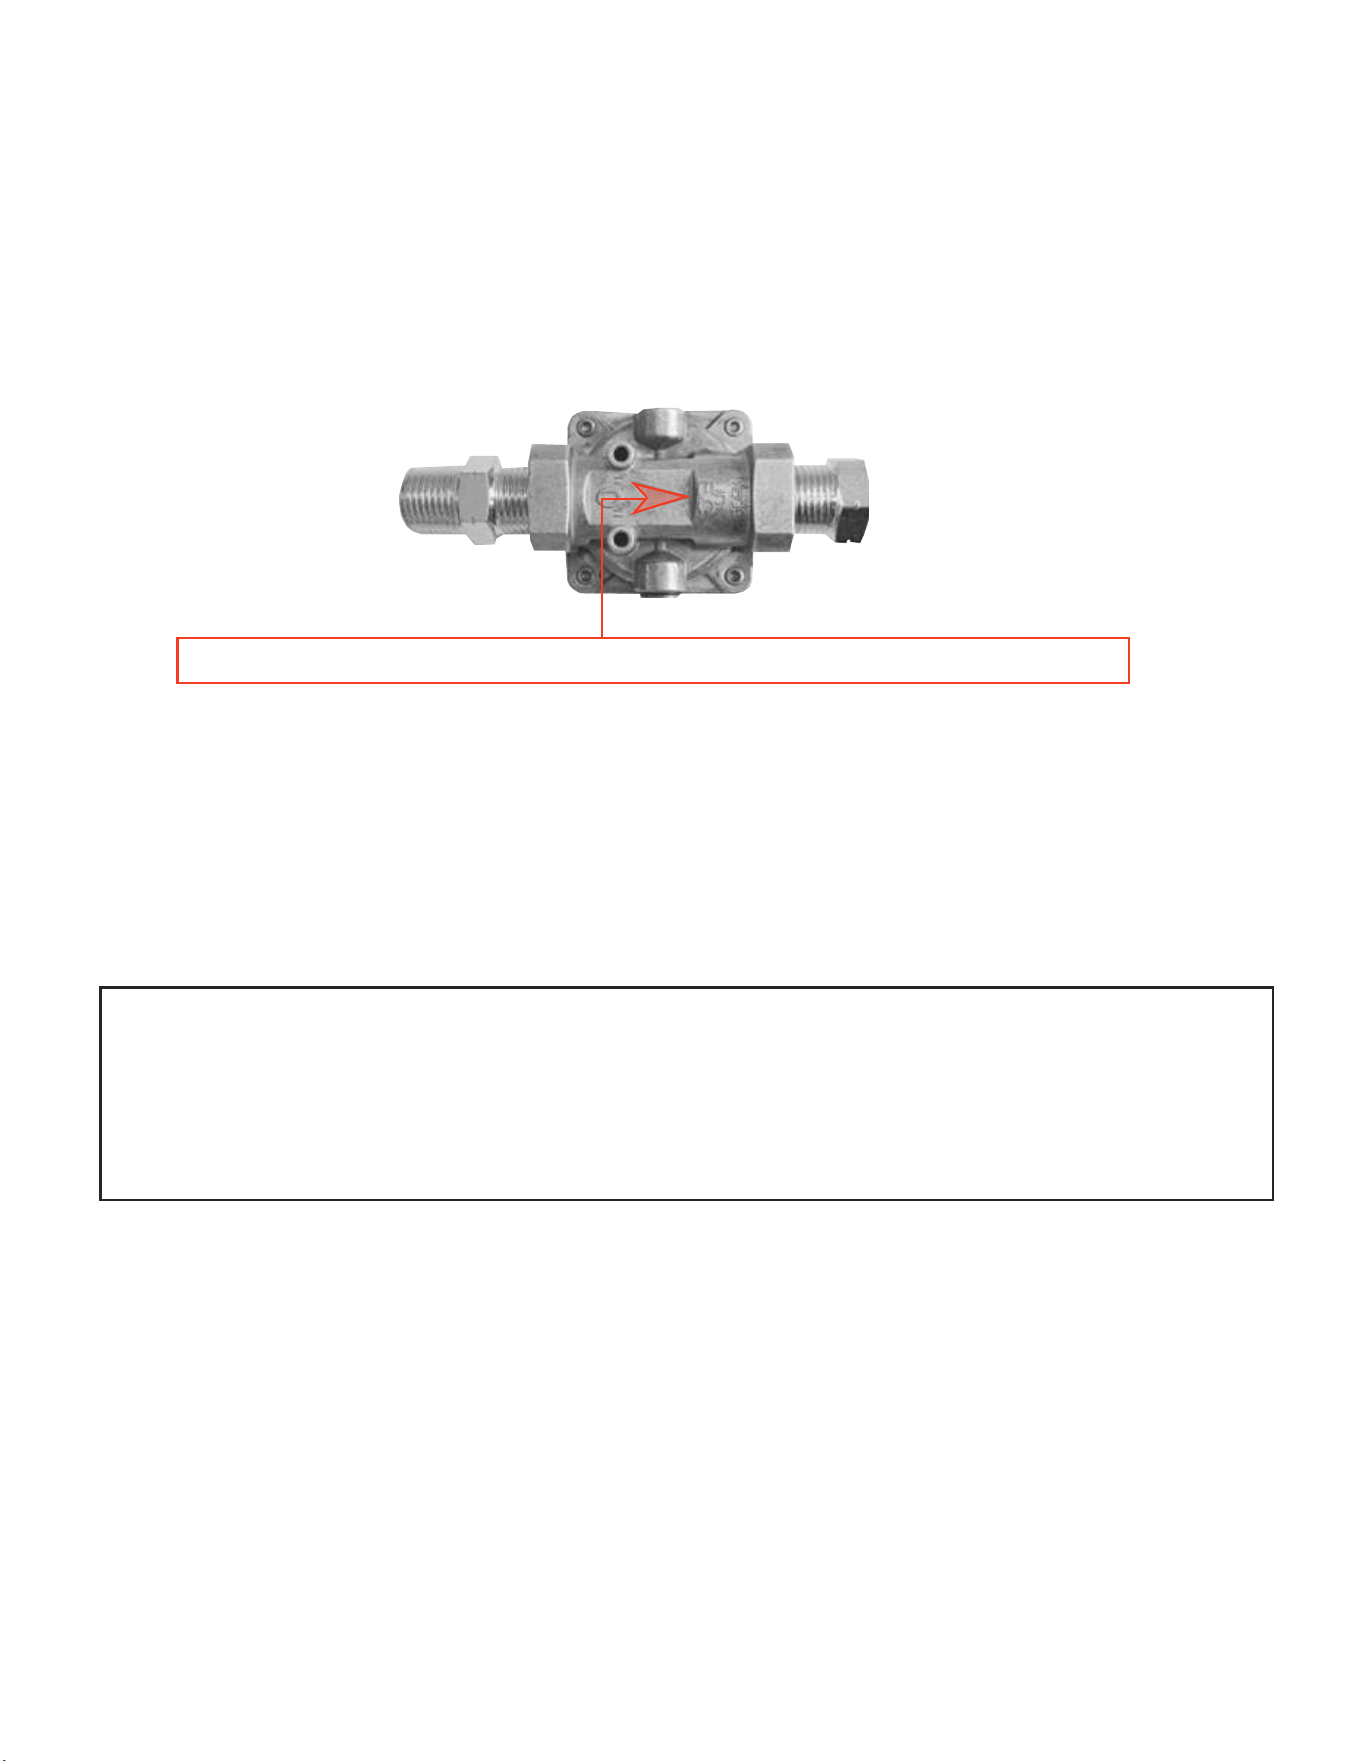
Make sure the Gas Regulator is connected in the correct direction to the oven burner.
The regulator and Gas Isolation Valves MUST be readily accessible.
Control Knob is in the Full OFF Position. Connect to the regulator supplied to the
CAUTION: Gas Regulators permit gas flow in one direction only.
Your oven arrives set to burn either PROPANE or NATURAL GAS which is specified at time of
purchase. Only connect to that type of fuel. If your model number ends with the letter “L” it
is set up to burn propane. If your model number ends with the letter “N” it is set up to burn
natural gas. Using the incorrect type of fuel will result in a dangerous condition.
Your oven can be converted, however, this service should only be performed by experienced,
professional technicians. Some states and jusidictions require that connection to a gas source
must be done by a licensed installer.
NOTICE: COMMONWEALTH OF MASSACHUSETTS
1. Massachusetts requires all gas be installed using a plumber or gas fitter carrying the
appropriate Massachusetts license.
2. All permanently-installed natural gas or propane installations require a “T” handle type
manual gas valve be installed in the gas supply line to this appliance.
3. This does not apply to portable propane installations using a 20 pound cylinder
BEFORE USING CHECK ALL CONNECTIONS FOR GAS LEAKS.
Never test for leaks with an open flame.
Prior to first use, at the beginning of each season, or every time your LP Gas tank is changed,
you must check for gas leaks.
FOLLOW THESE THREE IMPORTANT STEPS:
1. Make a soap solution by mixing one part liquid detergent and one part water.
2. Turn the Control Knob to the full OFF position, then turn the gas ON at source.
3. Apply the soap solution to all gas connections. If bubbles appear in the soap solution
connections are not properly sealed. Check each fitting - tighten or repair as needed.
SOURCE OVEN
Flow Directional Arrow Is Embossed In The Bottom Of The Regulator

11
lighting the oven cont.
The knob shown in the OFF position.
NOTE: ALWAYS PUSH THE KNOB IN WHILE TURNING.
2. Press the burner knob and while holding it in -
turn the knob counter-clockwise to the IGNITE
position. Continue holding the knob in for 10
seconds after the pilot flame lights.
This will give the thermocouple safety feature
time to heat up. Releasing the knob too early
may cause the flame to go out. If this occurs
turn the knob to the OFF position and wait
5 minutes for gas to dissipate before attempting
to re-light the burner.
3. After the pilot flame remains lit, turn the knob
counter-clockwise to the “ ” position. This
will turn the burner on full power.
4. To reduce the burner, continue to turn the knob
counter-clockwise toward the “ ” position.
clockwise back to the IGNITE position.
OFF position. Then close the gas supply valve.

12
lighting the oven cont.
NOTE:
Lighting the flame for the
first time or after it has
cooled could take time and
possibly a few attempts due
to air in the supply line.
Be patient as the gas makes
its way to the burner.
After lighting: Partially close the oven door to preheat the cooking chamber.
Preheat the oven for 25 minutes to allow the fire bricks to get the desired temperature.
Use a laser thermometer to check the oven floor temperature. The floor should reach
the temperature of 600°-700°F to make thin crust pizza.
COOKING TEMPERATURES
FOR YOUR SAFETY:
- Do not close the door when the oven is lit with the flame at the maximum position.
You must leave a 1-2” gap all the way around the oven opening to ensure adequite air
for combustion.
- Do not exceed the temperature limit of 1000°F / 500°C.
- Never attempt to disconnect the gas pipe or other fittings when using the oven.
- Never move the oven while the burner is operating or while the oven is hot.
Pizza
662-752 °F
350-400 °C
Meat & Fish
572 °F
300 °C
Potatoes & Vegetables
392 °F
200 °C
Bread & Cakes
392 °F
200 °C
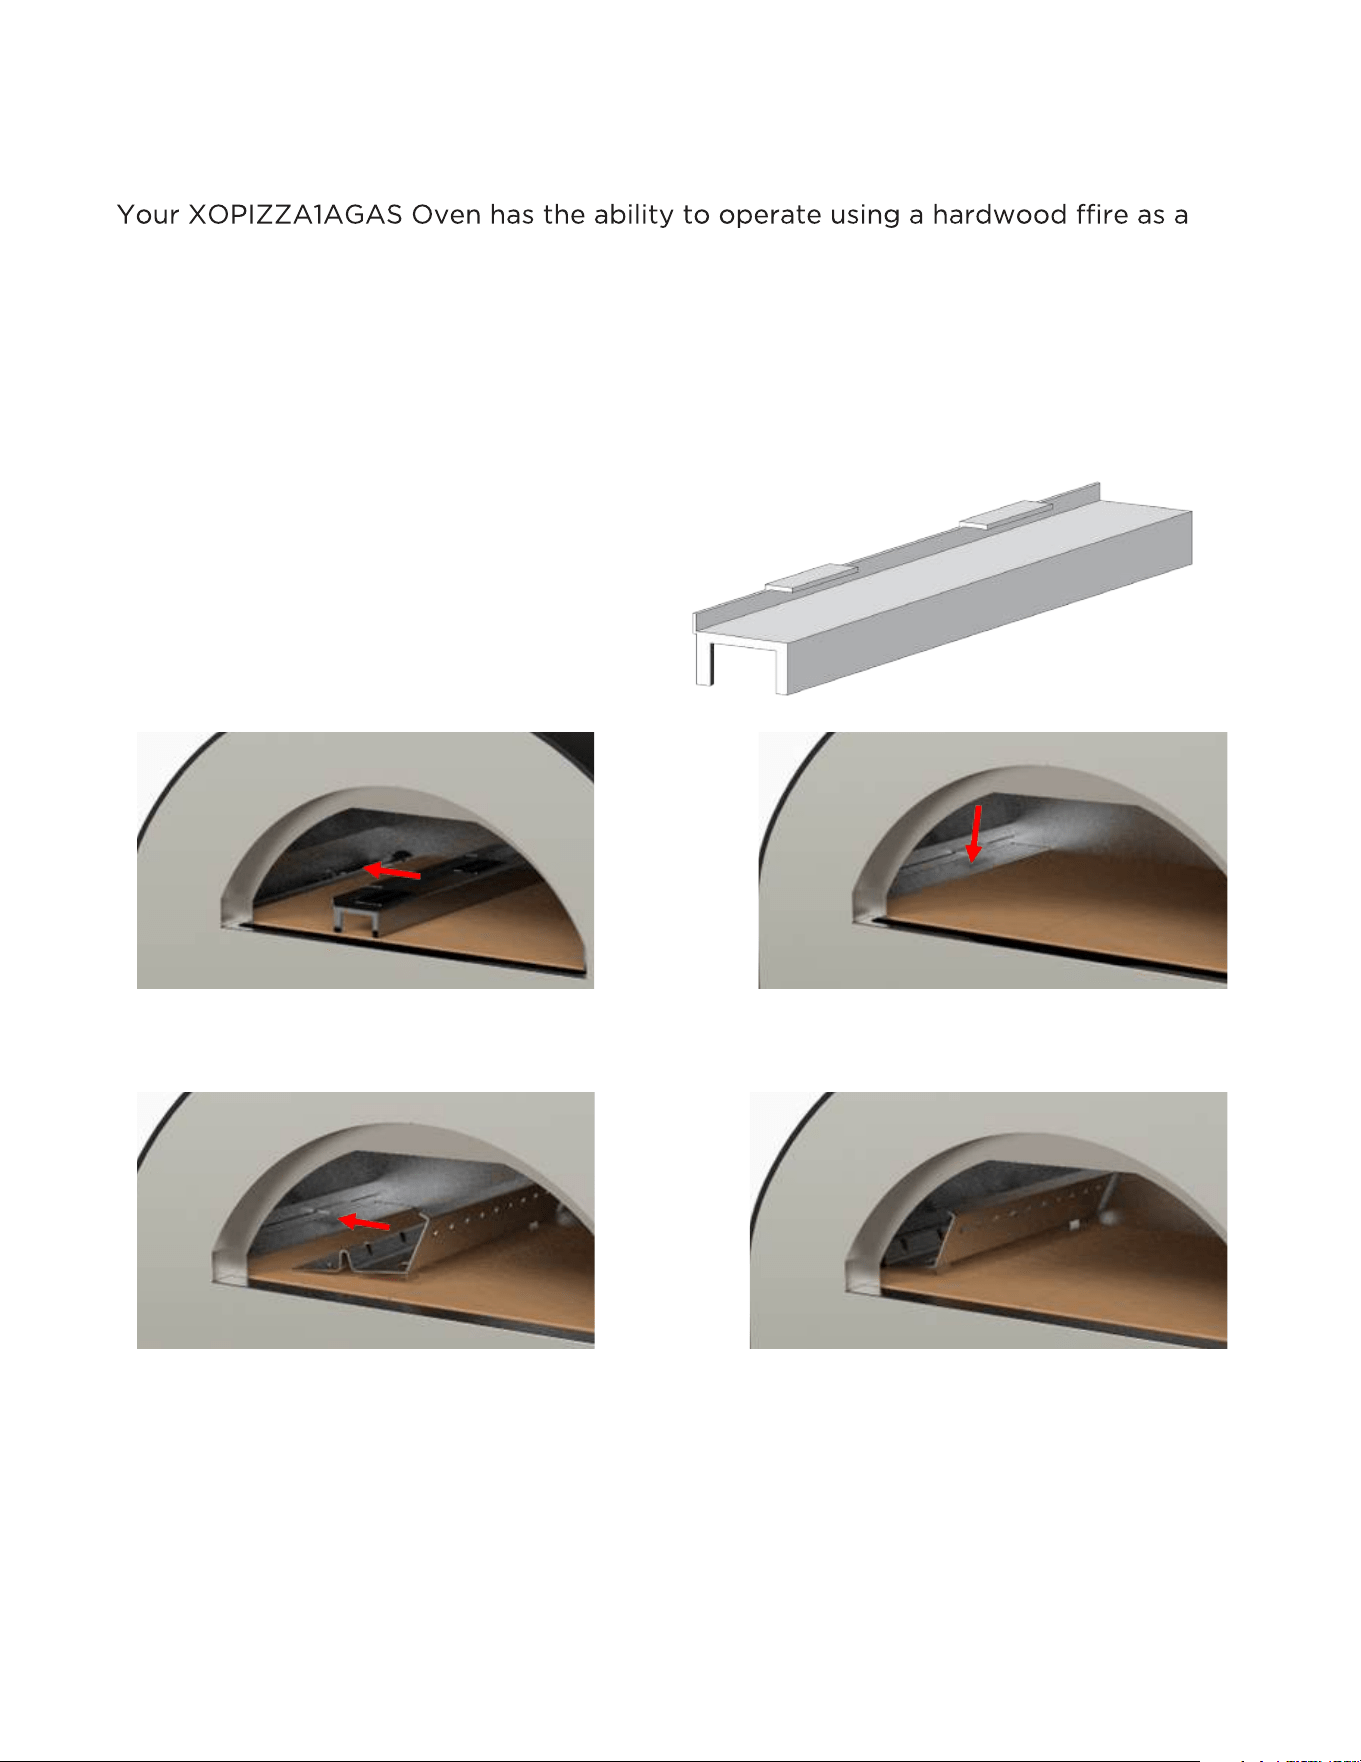
wood-fired option
heat source. In order to use this option, perform the following steps:
1. TURN OFF THE GAS AT THE SOURCe BY CLOSING THE ISOLATION VALVE
LOCATED AT THE TANK OR GAS SUPPLY LINE.
2. MAKE CERTAIN THAT THE INTERIOR OF THE OVEN IS SWEPT CLEAN OF ALL
ASH AND DEBRIS.
3. INSTALL THE BURNER COVER
SUPPLIED WITH THE OVEN OVER
THE BURNER SO THAT IT LAYS
FLAT AND COVERS THE BURNER
COMPLETELY
Install the fire grate (supplied with the oven).
BURN HARDWOOD ONLY. NEVER USE FLAMMABLE LIQUIDS OR CHARCOAL.
If cooking pizza directly on the oven floor - build the fire directly in the center of the
oven. After approximately 20 minutes, use the fire grate to collect the burning wood,
embers and hot coals and move them to the left hand side of the oven.
CAUTION: SEVERE BURN HAZARD. Use fire-rated gloves and long handled pliers or
vise grips to move the fire grate safely.
13
14
TYPES OF WOOD MATTER
Hardwood comes from deciduous trees that lose their leaves in winter. These include oak, walnut,
maple, beech, ash, hickory and many more varieties.
The most important requirement is to use hardwood which is dry and well seasoned. If the wood is
wet or green, it will be harder to light, produce more smoke and will not generate as much heat while
burning. If you hear a “hissing” sound while burning, it is an indicator that the wood is still green.
Do Not Use Softwood like pine, fir or spruce. Softwood contains resins and sap that can leave a sticky
residue. It burns faster and produces less heat. it can also pop and spark scattering ash on the food.
like apple or cherry for example can be very aromatic.
MANAGING TEMPERATURE
the top of the dome. Cooking in a wood-fired oven has a learning curve just like a charcoal BBQ.
Always preheat your oven prior to use. If you are cooking directly on the hearth (such as pizza) build
your fire in the center and heat the floor first. If you are baking or roasting - you may wish to build
your fire to the side and not let the oven get as hot.
Once yu achieve your desired temperature feed the fire small to medium sized pieces of wood every
10-15 minutes to maintain a reletively consistent temperature.
On cold or windy days expect longer heat up and cooking times.
wood-fired option
LIGHTING THE OVEN
Build your fire in the mouth of the oven using dry, seasoned hardwood witth crumpled newspaper or
an approved firestarter. NEVER USE ACCELERANTS TO START YOUR FIRE.
Use a log positioned sideways to evenly push the wood straight back into the center of the oven floor.
Remove the sideways log and your fire is ready to light using a long match, long reach lighter or torch.
Allow the fire to burn robustly for approximately 20 minutes. The air temperature should be about 650
the floor temperature once you move the fire to the left side (Floor temperature should be about 750 )
Use the wood grate (included) to contain the fire, sweep the floor clean and you are ready to cook.
o
o

15
wood-fired option
Generally, cooking in a wood-fired oven is done by cooking the the foods that require the highest
temperature and have the shortest cooking times first such as pizza. As the oven cools, other foods
would follow such as grilled meats, then roasted vegetables, fish and finally breads or desserts.
OPEN DOOR COOKING
Open door cooking is the most common method where an active flame is present. Fire needs oxygen
to burn well. Use this method for dishes that require high heat, such as pizza.
CLOSED DOOR COOKING
Closed door cooking is used for cooking dishes longer at lower temperatures such as baking or roasting.
Closing or partially closing the oven door helps to reduce the flame and regulate temperature.
For baking let the fire die down and keep the door open 1” - 2”.
This will allow the embers to continue to glow and help maintain temperature. Avoid large flames while
baking or roasting. Small flames with a good bed of embers is preferred. It is also advisable to place a
small container of water in the oven to maintain humidity. The container must be stainless steel, cast iron,
terracotta or similar material that is suitable for the high temperatures of the oven.
TO EXTINGUISH A WOOD FIRE - CLOSE THE DOOR TIGHTLY AND ALLOW A WOOD FIRE TO BURN
ITSELF OUT. AFTER THE FIRE IS COMPLETELY OUT, REMOVE THE ASH WITH A METAL SHOVEL AND
PLACE IT OUTSIDE IN A FIREPROOF CONTAINER.
ALLOW THE ASH TO REMAIN THERE 2-3 DAYS BEFORE PROPERLY DISPOSING OF IT.
DO NOT REMOVE THE METAL BURNER COVER UNTIL ALL ASH HAS BEEN SWEPT OUT CLEAN.
Tips For Cooking Using The Oven As A Wood-Fired Appliance:
WARNING: Never Burn Wood While Using The Gas Burner
Cooking in a wood burning oven requires more of a learning curve than a gas oven. Cooking times can
vary based on the size of and type dishes being prepared.
16
more cooking
The XOPIZZA1GAS pizza/hearth oven was designed and built in Italy to cook perfect, Italian pizza in
beautiful homes like yours. The ceramic refractory hearth stone floor of the oven can reach temperatures
of 750 F in as little as 15 to 20 minutes, allowing you to create authentic pizza cooked to perfection.
For Neopolitan style pizza lovers, the insulated refractory floor of the oven allows cooking at temperatures
up to 850 F without burning the bottom of the crust.
The generous size cooking chamber and hearth are capable of cooking a personal size pizza.
The XOPIZZA1GAS is engineered and built to perform.
CONVECTION COOKING
The curved dome of the interior oven chamber is designed to have the fire banked to the left side allowing
the flames to curl up and over the cooking zone creatiing a natural convection cooking environment. Like
other convection cooking systems, this results in decreased cooking times.
RADIANT COOKING
During the pre-heating process heat is stored in the refractory materials of the oven. During cooking -
this heat is radiated back to the food from every direction.
CONDUCTIVE COOKING
Heat stored in the ceramic refractory floor of the oven is directly transferred to the food or dishes placed
upon it. Pizza and bread are cooked directly from below sitting on the hot hearth stone. Other dishes
prepared in cast iron or terracotta cookware adsorb heat and transfer it directly just as they would on a
stove top.
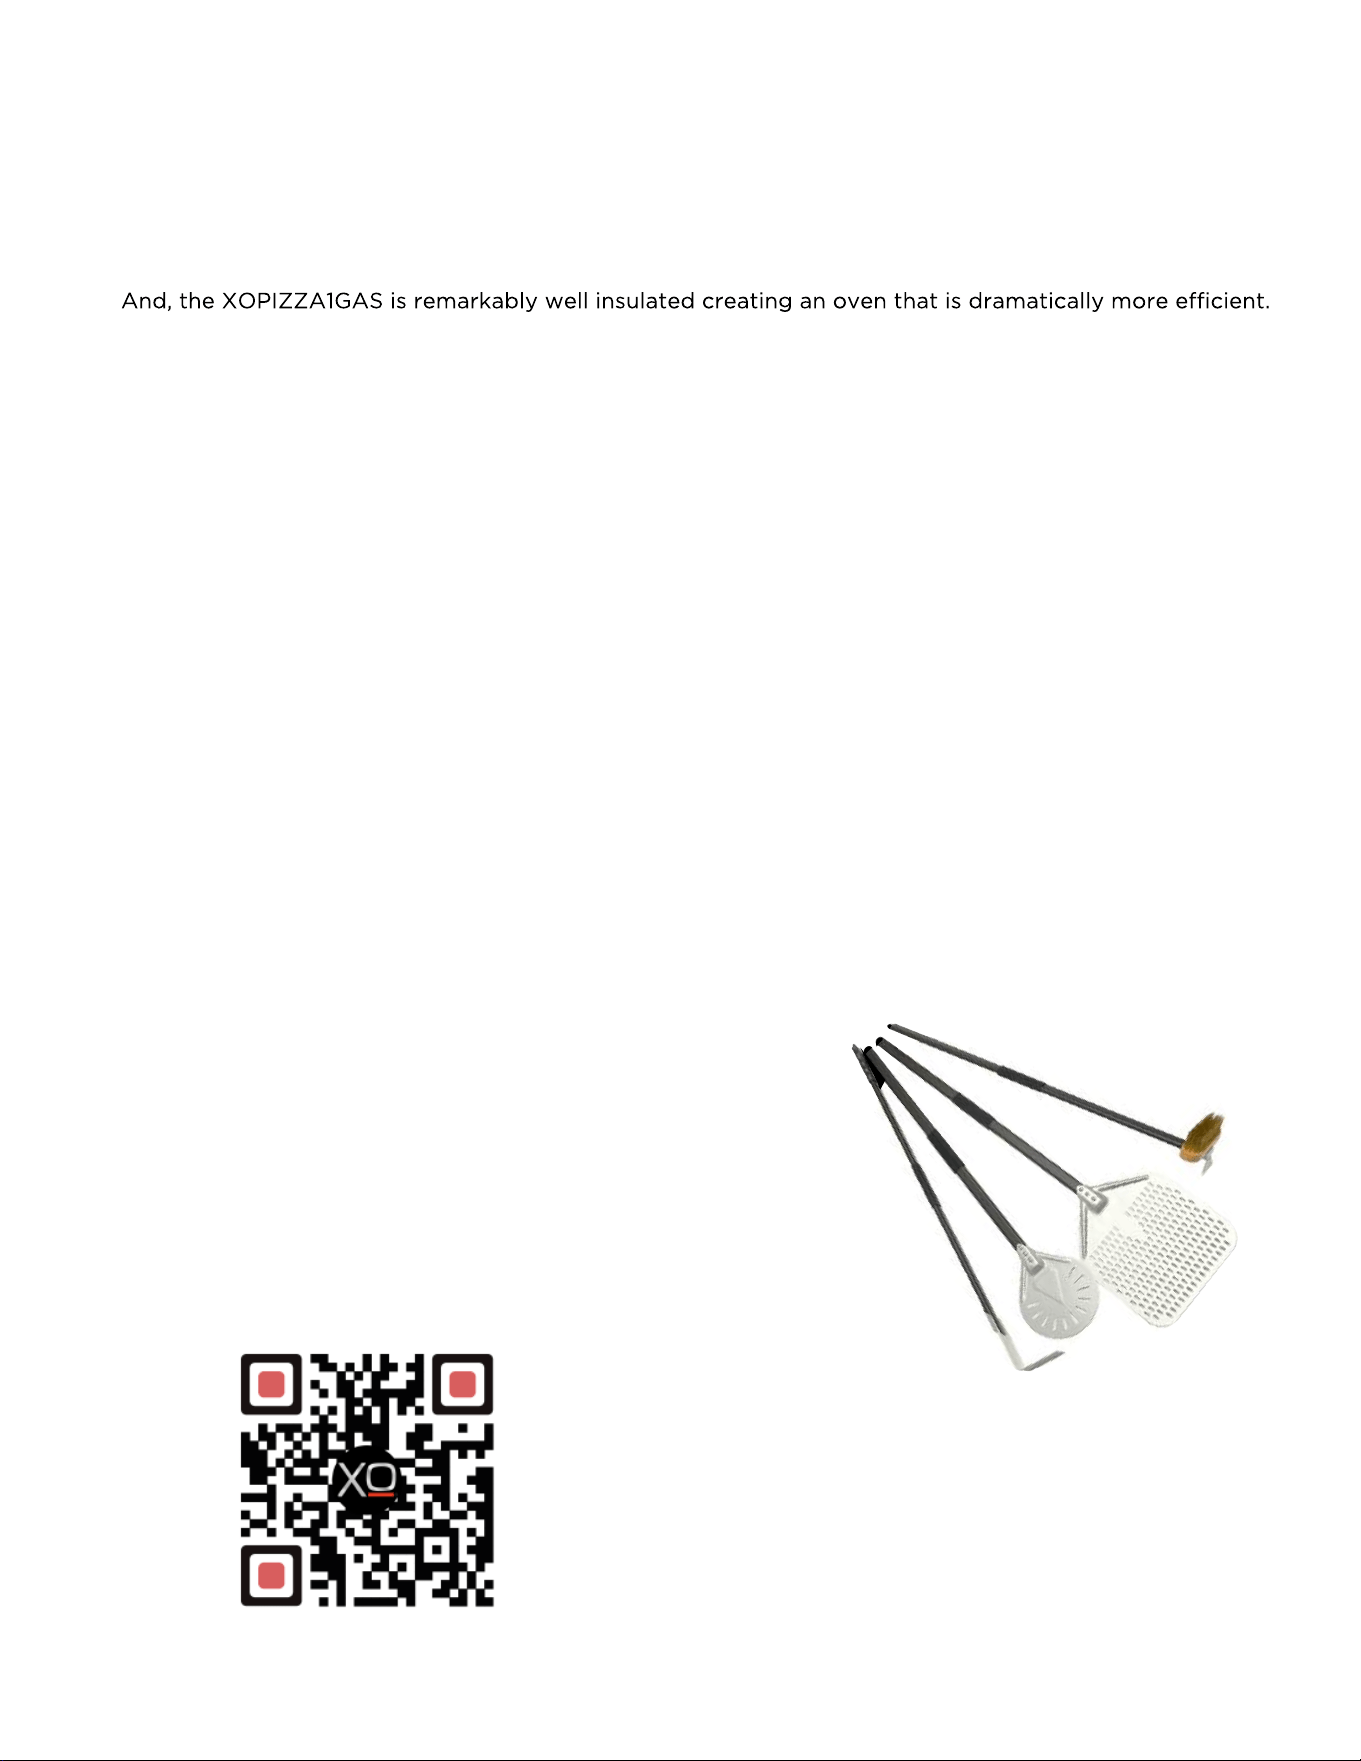
OPTIONAL COOKING TOOLS (XOPIZZATOOL4)
XO has an optional set of tools specifically designed to
assist you in cooking with your new oven. The four tool
set which includes a large peel for adding or removing
pizza from the oven, a small diameter peel for periodically
rotating food as it cooks, a scraper for removing degris
and a brush for clearing the hearth.
LEARN MORE ABOUT YOUR NEW XO PIZZA OVEN
BY SCANNING THIS QR CODE
changing the battery
The elecrtric spark ignition is generated by a AA Battery accessed at the rear of the
oven.
BATTERY ACCESS
To replace the battery - unscrew the CAP
Remove the old BATTERY
Install the new battery and
Replace the cap
17

18
a little tlc
MAINTAINING YOUR XOPIZZA1GAS OVEN
CLEANING THE EXTERIOR
Clean the exterior of yuor oven with warm soapy water and a mild non-abrasive cleaner.
Never use scrubbing pads or scrapers which can scratch and mar the finish.
CLEANING THE INTERIOR
Periodically check the chimney for obstructions and remove any ash or soot build up that may have
accumulated in the flue pipe.
If used in wood-fied mode, once a fire has been completely extinguished, use a metal shovel to careully
place the ashes in a metal bucket or fire-proof container. Leave this outdoors in a safe location for 2-3
days to ensure that all embers are completely extinguished. Once the ashes are completely out and cold,
dispose of them properly in accordance with local regulations.
Never leave ash or burned wood in the oven where it will absorb moisture.
DO NOT REMOVE THE BURNER COVER UNTIL ALL ASH HAS BEEN REMOVED FROM THE OVEN.
Your XOPIZZA!GAS is a self-cleaning oven. Any cheese, toppings or spills from a pizza, roasts or other
dishes will be carbonized by the high operating temperatures of the oven and are easily sweep away as
ash.
When used as a woo-fied appliance, some of the hot embers can be placed directly on an area that
requires cleaning and allowed to burn there for several minutes. Then sweep the fire back in place on
the left side of the oven. Afterwards, sweep the hearth clean when you are done.

19
faqs
QUESTION: Why does my oven produce a lot of smoke?
Check to make certain the wood is not wet or green. If you hear a hissing noise while burning - that is an
indicator that the wood is not dry.
Do not burn softwood or birch with the bark on.
Make certain that you have robust flames. Smoke is a byproduct of incomplete combustion. Build up the
fire with small dry wood and see if it clears.
QUESTION: Why does the top of my pizza cook but not the crust?
Preheat your oven floor longer. The chamber may be hot but the oven floor has not had enough time to
come up to a proper baking temperature.
If you are using parchment paper, remove it as soon as you can move the pizza without sticking.
QUESTION: What about tools or cooking utensils?
The three tools you will need are a large pizza peel for adding and removing food, a smaller round peel
for rotating dishes while in the oven and a brush used for removing ash and manipulating the fire.
You may want additional accessories later based on your cooking preferences.
QUESTION: What kind wood should I use?
Burn dry, seasoned hardwood only, such as; oak, maple, apple, elm, beech, cherry, ash, hickory, chestnut -
there are many varieties available. Remember to remove the bark from birch before burning and avoid
softwoods such as pine, spruce or fir.
QUESTION: How do I clean by oven?
Refer to page 13 for instructions on cleaning the interior and exterior of your oven.
QUESTION: How long does it take to cook?
Once the oven has been properly pre-heated (650 - 750 F) it only takes about 2-3 minutes to cook pizza.
Roasting is done once the oven temperature drops to about 450 F.
Baking is done last after the oven temperature has had an opportunity to drop. This permits bread to rise
without burning.
Remember to rotate dishes periodically sa the bake or roast to ensure they are cooking and browning
evenly.
o o
o
QUESTION: What else can I cook beside pizza?
Virtually anything you might roast or bake in a conventional oven; sausage, poultry, fish, vegetables,
bread, cookies, desserts and much more. Remember because of higher temperatures most cooking
times will be reduced.
Even the best appliances occasionally need the attention and care of a qualified service
technician. At EMC Service, we see to it that service representatives and installers have
much more than just a cursory glance at a service manual. Our service and installation
training, complete with manufacturer representatives working with live appliances, trains
and certifies participants so that they may better fully diagnose a service issue.
Complementing their education is access to blow-up diagrams of every product as well
as a fully stocked parts warehouse and repair workshop. Rush parts delivery is available
We are all committed to ensuring the best experience with our products at every level.
CALL 973-403-8900 -or- VIST US ONLINE AT WWW.XOAPPLIANCE .COM
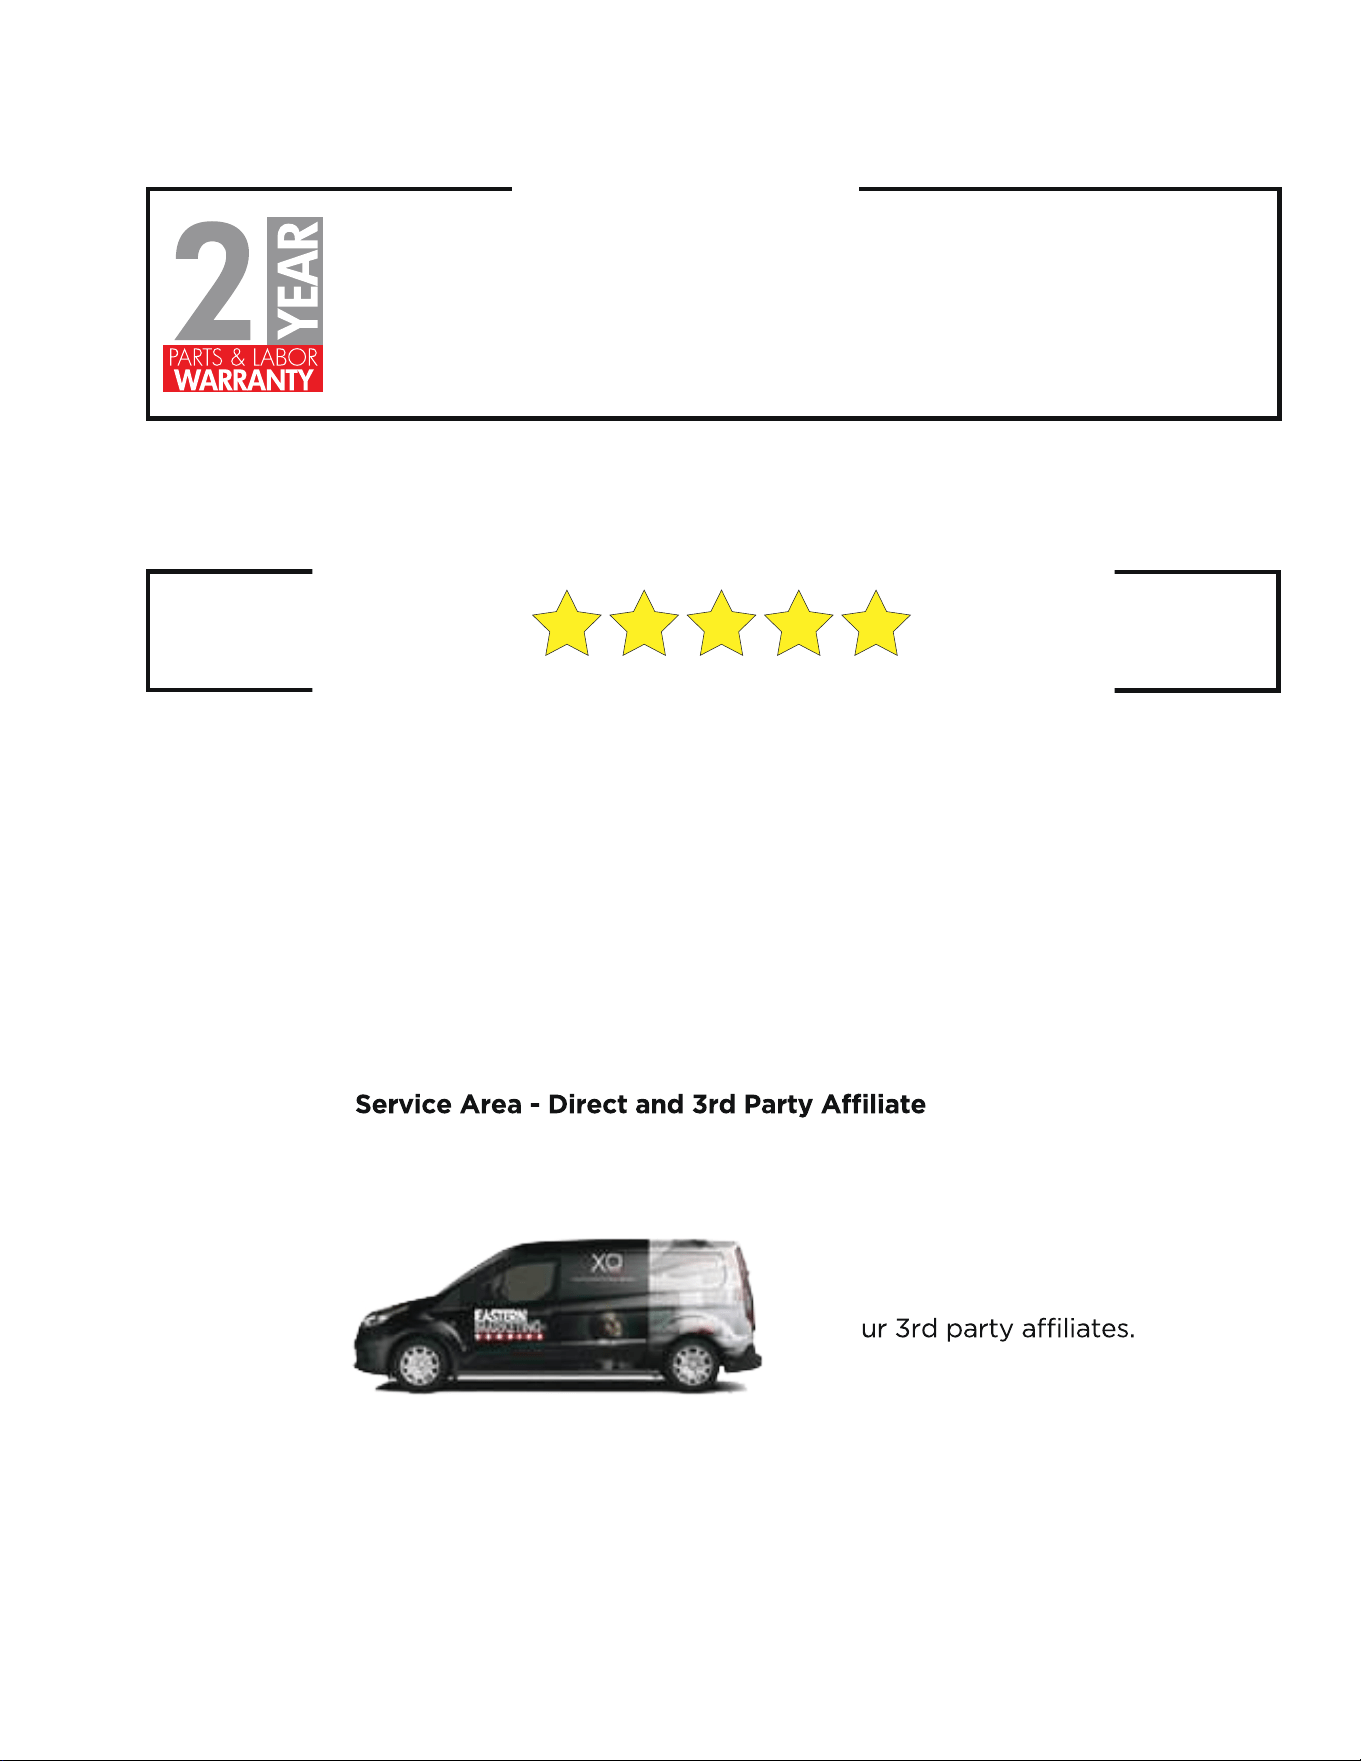
Award-Winning Luxury Appliance Service
SERVICE THAT EXCEEDS EXPECTATIONS
Eastern Marketing Service provides professional, factory trained
field service and support in the Northeast / Mid-Atlantic states.
All other markets are served
This capable team has the full support from Eastern Marketing
Service Team. Service Training, Parts, Tech Help Line and quick
warranty payments.
Your XOPIZZA4 oven is covered by a 2 Year Parts and Labor Warranty.
Should your oven require service either within warranty or beyond, call
the number below or reach out to us on-line.
THE WARRANTY
by o