INSTRUCTION FOR PRIVACY TENT
MODEL:KP280B
Technical Support and E-Warranty Certificate www.vevor.com/support
R
We continue to be committed to provide you tools with competitive price.
"Save Half", "Half Price" or any other similar expressions used by us only represents an
estimate of savings you might benefit from buying certain tools with us compared to the
major top brands and does not necessarily mean to cover all categories of tools offered by
us. You are kindly reminded to verify carefully when you are placing an order with us if you
are actually saving half in comparison with the top major brands.

1
Have product questions? Need technical support? Please feel free to
contact us:
Technical Support and E-Warranty Certificate www.vevor.com/support
NEED HELP? CONTACT US!
This is the original instruction, please read all manual instructions carefully
before operating. VEVOR reserves a clear interpretation of our user manual. The
appearance of the product shall be subject to the product you received. Please
forgive us that we won't inform you again if there are any technology or software
updates on our product.
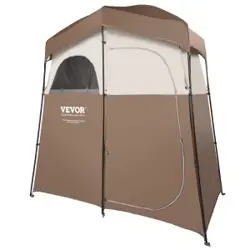
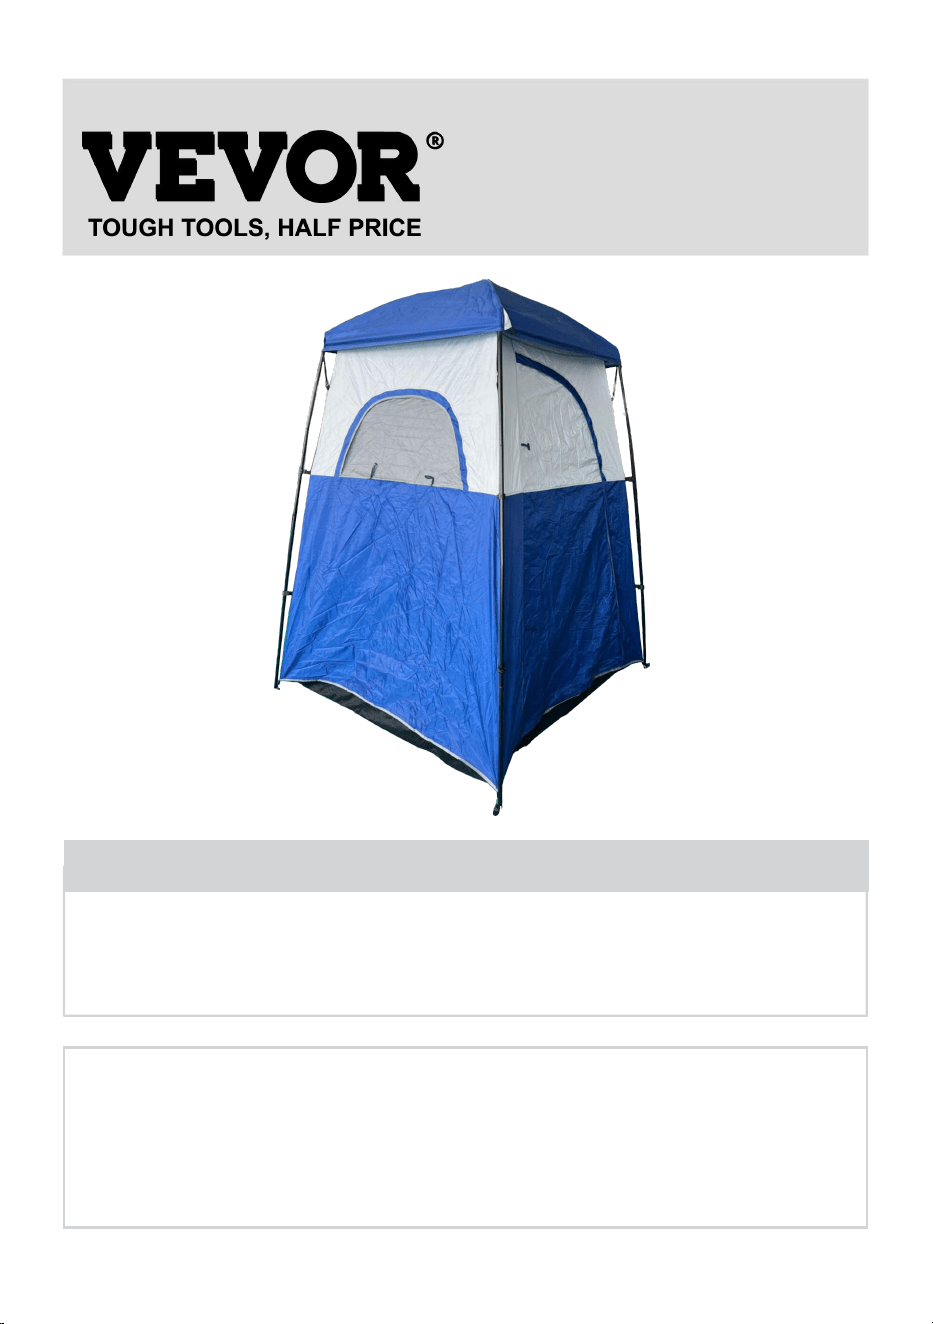
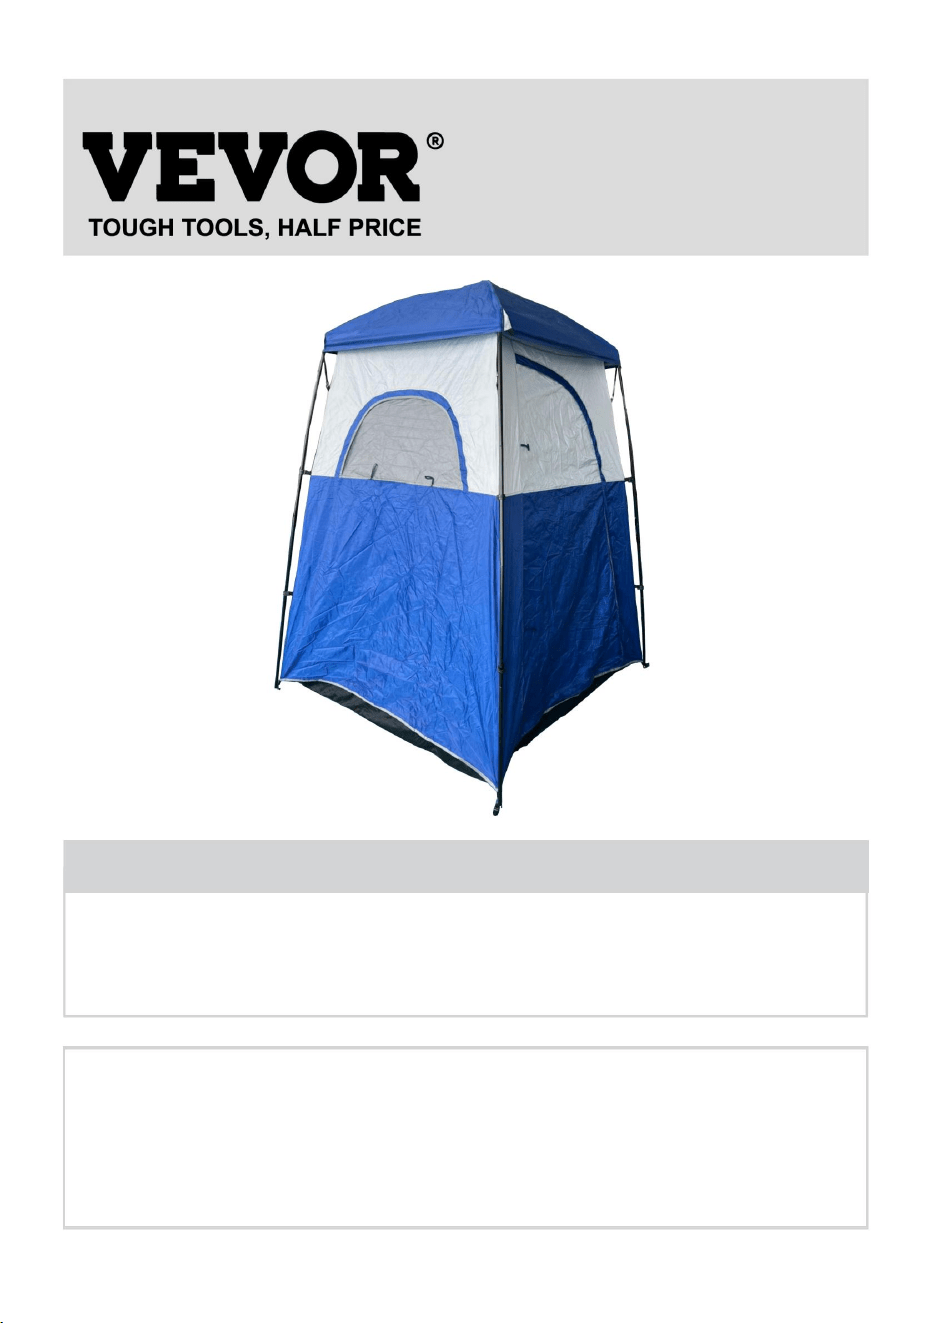
PRIVACY TENT
KP280BR

2
1. NOTICE Please retain instructions for future
needs.
1.Keep clear of overhead power lines.
2.Do not set up your tent under trees because of potential lightning strikes or
failing tree limbs in inclement weather.
3.For best results in windy conditions, position the narrow end of the tent into the
wind.
4.Do not drop the tent.
5.Do not bounce the tent bag on its end to remove the tent, as these actions may
damage the frame.
6.This recreational product requires a minimum of two people to assemble it.
7.Under no circumstances should this product be used to cover automobiles,
marine products or similar items.
8.CAUTION: Avoid pinch points when opening and closing the tent frame.
2. SPECIFICATIONS
Model KP280BR
Product Size 66x66x87in
Color
Brown
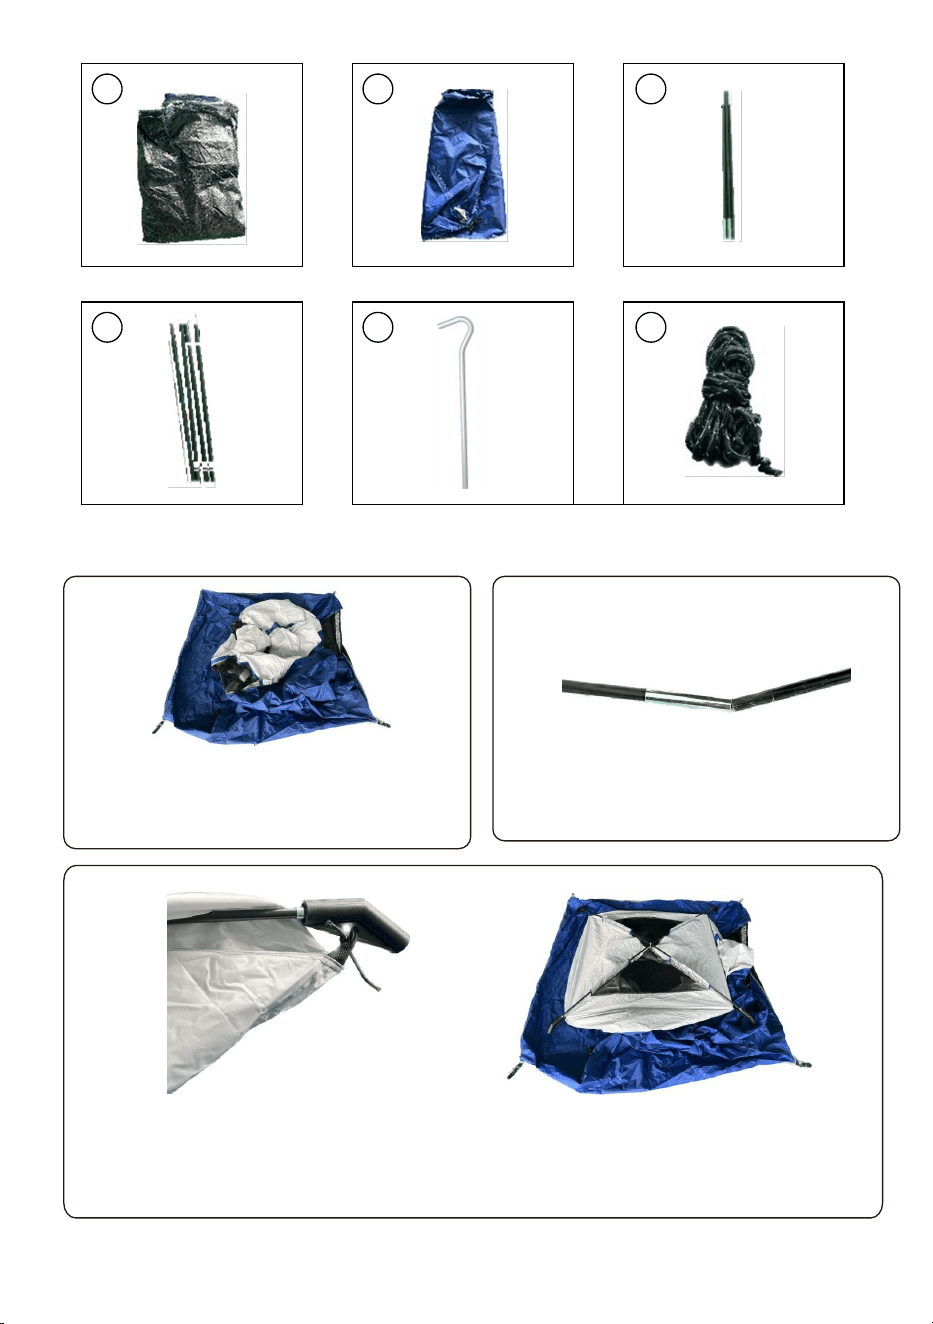
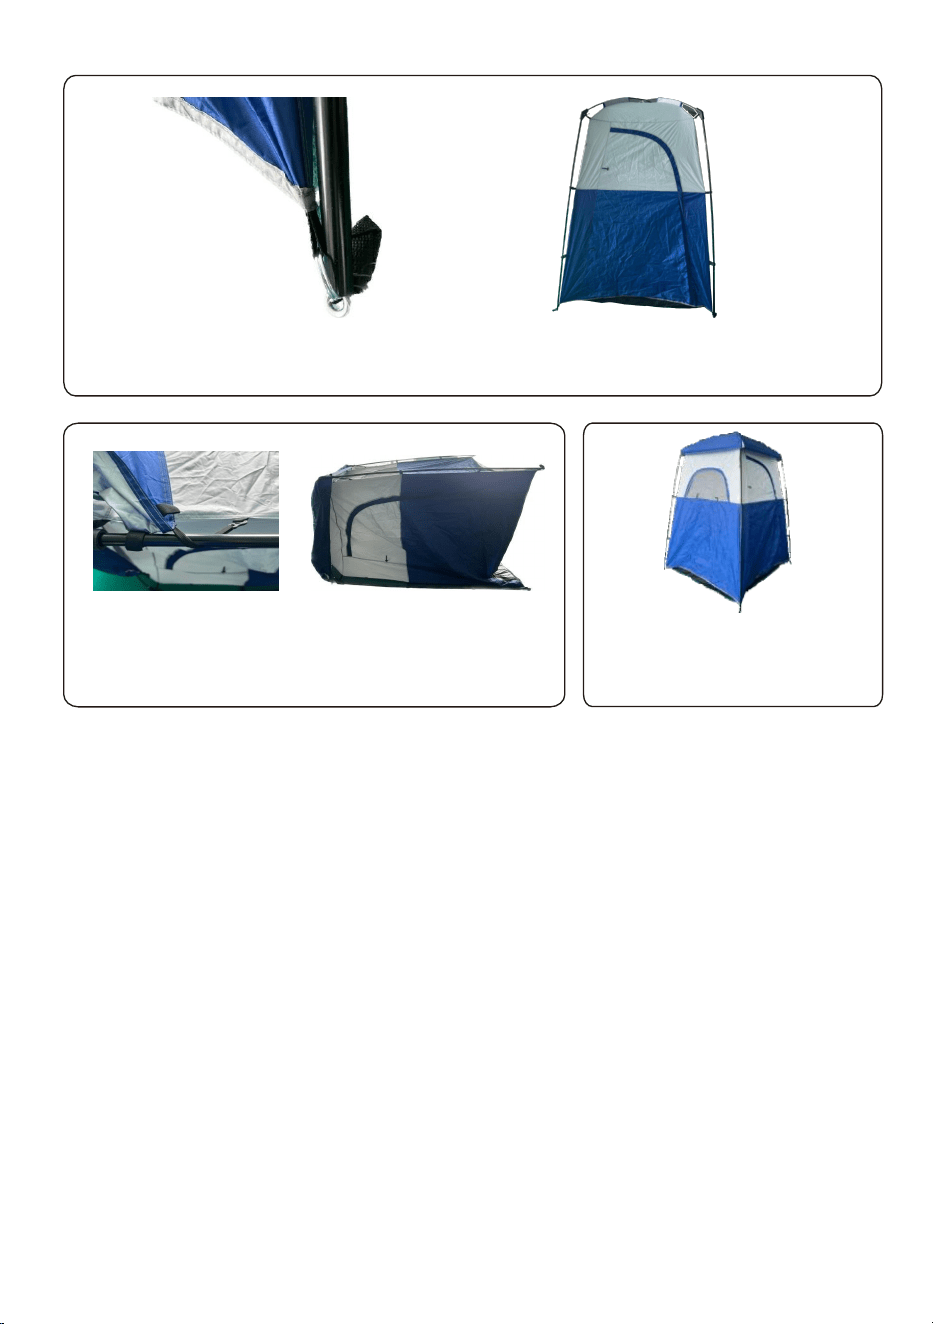
3. COMPONENTS
3
4. Installation Steps
1.Unpack the tent and all of its parts.
Unfold the tent and lay it in the
respective area.
2.Connect tent
poles.
3.Thread two poles through the holes in the tarp at the top of the tent and
insert each end into the holes in the plastic connectors at the corners. Make
sure the two poles are in an "x" shape.
8pcs
5
2pcs
6
4pcs
4
1pc
1
1pc
2
2pcs
3
4
5. Put the tent down and fix the rain fly to the
tent as shown in the picture.
6. Put the tent up. Finally ,
secure the tent with hooks
and ropes.
Imported to USA: Sanven Technology Ltd. Suite 250, 9166 Anaheim Place,
Rancho Cucamonga, CA 91730
4.Insert one end of the four poles into the plastic connector at the top of the
tent and one end into the
p
lu
g
at the corner of the tent.


Technical Support and E-Warranty Certificate
www.vevor.com/support

R
MODELL:KP280B
Wir sind weiterhin bestrebt, Ihnen Werkzeuge zu wettbewerbsfähigen Preisen anzubieten.
„Sparen Sie die Hälfte“, „Halber Preis“ oder andere ähnliche Ausdrücke, die wir verwenden, stellen nur eine
Schätzung der Ersparnis dar, die Sie beim Kauf bestimmter Werkzeuge bei uns im Vergleich zu den großen
Topmarken erzielen können, und decken nicht unbedingt alle von uns angebotenen Werkzeugkategorien ab.
Wir möchten Sie freundlich daran erinnern, bei Ihrer Bestellung bei uns sorgfältig zu prüfen, ob Sie im Vergleich
zu den großen Topmarken tatsächlich die Hälfte sparen.
ANLEITUNG FÜR SICHTSCHUTZZELT
Technischer Support und E-Garantie-Zertifikat www.vevor.com/support
Machine Translated by Google

Machine Translated by Google

Brauchen Sie Hilfe? Kontaktieren Sie uns!
Dies ist die Originalanleitung. Bitte lesen Sie alle Anweisungen sorgfältig durch, bevor Sie
das Gerät in Betrieb nehmen. VEVOR behält sich eine klare Auslegung unserer Bedienungsanleitung
vor. Das Erscheinungsbild des Produkts richtet sich nach dem Produkt, das Sie erhalten haben.
Bitte verzeihen Sie uns, dass wir Sie nicht erneut informieren, wenn es Technologie- oder Software-
Updates für unser Produkt gibt.
Technischer Support und E-Garantie-Zertifikat www.vevor.com/support
Sie haben Fragen zu unseren Produkten? Sie benötigen technischen Support? Dann kontaktieren
Sie uns gerne:
KP280BR
Sichtschutzzelt
1
Machine Translated by Google

7. Dieses Produkt darf unter keinen Umständen zum Abdecken von Autos, Schiffsprodukten oder ähnlichen
Gegenständen verwendet werden.
4. Lassen Sie das Zelt nicht fallen.
5.Wippen Sie die Zelttasche nicht auf das Ende, um das Zelt zu entfernen, da dies
1. Halten Sie Abstand zu Freileitungen.
Produktgröße 66x66x87 Zoll
den Rahmen beschädigen.
Farbe
3.Für optimale Ergebnisse bei windigen Bedingungen positionieren Sie das schmale Ende des Zeltes in die
Modell KP280BR
Wind.
2.Bauen Sie Ihr Zelt nicht unter Bäumen auf, da dort Blitzeinschläge möglich sind oder
8. ACHTUNG: Vermeiden Sie Quetschstellen beim Öffnen und Schließen des Zeltrahmens.
Abreißen von Ästen bei schlechtem Wetter.
6. Für den Zusammenbau dieses Freizeitprodukts sind mindestens zwei Personen erforderlich.
Braun
Bedürfnisse.
2. SPEZIFIKATIONEN
HINWEIS Bitte bewahren Sie die Anleitung für später auf.
1.
3. KOMPONENTEN
2
Machine Translated by Google

4. Installationsschritte
3
2 Stück
8 Stück
1. Packen Sie das Zelt und alle seine Teile aus.
2. Zelt verbinden
2 Stück
4 Stück
1 Stück
1 Stück
Stangen.
3. Fädeln Sie zwei Stangen durch die Löcher in der Plane oben am Zelt und stecken Sie jedes Ende in die Löcher in den
Kunststoffverbindern an den Ecken. Stellen Sie sicher, dass die beiden Stangen eine „X“-Form haben.
Falten Sie das Zelt auseinander und legen Sie es im
entsprechenden Bereich aus.
1
5
3
2
4
6
Machine Translated by Google

4
6. Zelt aufstellen. Zum Schluss
das Zelt mit Haken befestigen
und Seile.
5. Stellen Sie das Zelt ab und befestigen Sie das Regendach
wie in der Abbildung gezeigt am Zelt.
4. Stecken Sie ein Ende der vier Stangen in den Kunststoffverbinder oben am Zelt und ein Ende in
den Stecker an der Zeltecke.
Importiert in die USA: Sanven Technology Ltd. Suite 250, 9166 Anaheim Place, Rancho Cucamonga,
CA 91730
Machine Translated by Google

Machine Translated by Google

Technischer Support und E-Garantie-Zertifikat
www.vevor.com/support
Machine Translated by Google

R
MODÈLE:KP280B
«Économisezlamoitié»,«Moitiéprix»outouteautreexpressionsimilaireutiliséeparnousnereprésente
qu'uneestimationdeséconomiesquevouspourriezréaliserenachetantcertainsoutilscheznouspar
rapportauxgrandesmarquesetnecouvrepasnécessairementtouteslescatégoriesd'outilsquenous
proposons.Nousvousrappelonsdebienvouloirvérifiersoigneusementlorsquevouspassezunecommande
cheznoussivouséconomisezréellementlamoitiéparrapportauxgrandesmarques.
Nouscontinuonsànousengageràvousfournirdesoutilsàdesprixcompétitifs.
INSTRUCTIONPOURLATENTEDECONFIDENTIALITÉ
Assistancetechniqueetcertificatdegarantieélectroniquewww.vevor.com/support
Machine Translated by Google

Machine Translated by Google
Vousavezdesquestionssurnosproduits?Vousavezbesoind'assistancetechnique?N'hésitezpasà
nouscontacter:
Assistancetechniqueetcertificatdegarantieélectroniquewww.vevor.com/support
Ils'agitdelanoticed'utilisationd'origine.Veuillezlireattentivementtoutesles
instructionsdumanuelavantdel'utiliser.VEVORseréserveledroitd'interpréterclairement
notremanueld'utilisation.L'apparenceduproduitdépendduproduitquevousavezreçu.
Veuilleznousexcuser,nousnevousinformeronsplusencasdemiseàjourtechnologique
oulogicielledenotreproduit.
BESOIND'AIDE?CONTACTEZNOUS!
TENTED'INTIMITÉ
KP280BR
1
Machine Translated by Google

8.ATTENTION:évitezlespointsdepincementlorsdel’ouvertureetdelafermetureducadredelatente.
vent.
KP280BR
3.Pourdemeilleursrésultatsdansdesconditionsventeuses,placezl'extrémitéétroitedelatentedansle
Modèle
66x66x87pouces
endommagerlecadre.
Couleur
4.Nelaissezpastomberlatente.
5.Nefaitespasrebondirlesacdetentesursonextrémitépourretirerlatente,carcesactionspeuvent
Tailleduproduit
1.Tenezvousàl’écartdeslignesélectriquesaériennes.
7.Ceproduitnedoitenaucuncasêtreutilisépourcouvrirdesautomobiles,desproduitsmarinsoudesarticles
similaires.
6.Ceproduitrécréatifnécessiteunminimumdedeuxpersonnespourl'assembler.
Brun
branchesd'arbresdéfaillantesencasd'intempéries.
2.N'installezpasvotretentesousdesarbresenraisondesrisquesdefoudreou
AVISVeuillezconserverlesinstructionspouruneutilisationultérieure.
besoins.
1.
3.COMPOSANTS
2.CARACTÉRISTIQUES
2
Machine Translated by Google

4.Étapesd'installation
3
4pièces 8pièces
1.Déballezlatenteettoutessespièces.
Dépliezlatenteetplacezladanslazoneprévueàcet
effet.
2pièces
2pièces
1pièce
1pièce
3.Enfilezdeuxpoteauxdanslestrousdelabâcheenhautdelatenteetinsérezchaqueextrémitédanslestrousdesconnecteurs
enplastiqueauxcoins.Assurezvousquelesdeuxpoteauxsontenformede«X».
poteaux.
2.Connecterlatente
3
6
1
2
4
5
Machine Translated by Google

4
6.Montezlatente.Enfin,fixezla
tenteavecdescrochets
5.Posezlatenteetfixezledoubletoitàlatentecomme
indiquésurlaphoto.
4.Insérezuneextrémitédesquatrepoteauxdansleconnecteurenplastiquesituéenhautdela
tenteetuneextrémitédanslaprisesituéeaucoindelatente.
ImportéauxÉtatsUnis:SanvenTechnologyLtd.Suite250,9166AnaheimPlace,Rancho
Cucamonga,CA91730
etdescordes.
Machine Translated by Google

Machine Translated by Google

Assistancetechniqueetcertificatdegarantie
électroniquewww.vevor.com/support
Machine Translated by Google

INSTRUCTIE VOOR PRIVACYTENT
R
MODEL:KP280B
Technische ondersteuning en e-garantiecertificaat www.vevor.com/support
"Save Half", "Half Price" of andere soortgelijke uitdrukkingen die wij gebruiken, geven alleen een schatting van de
besparingen die u kunt behalen door bepaalde gereedschappen bij ons te kopen in vergelijking met de grote
topmerken en betekent niet noodzakelijkerwijs dat alle categorieën gereedschappen die wij aanbieden, worden
gedekt. Wij herinneren u eraan om zorgvuldig te controleren of u daadwerkelijk de helft bespaart in vergelijking met
de grote topmerken wanneer u een bestelling bij ons plaatst.
Wij streven er voortdurend naar om u gereedschappen tegen concurrerende prijzen te leveren.
Machine Translated by Google

Machine Translated by Google

Technische ondersteuning en e-garantiecertificaat www.vevor.com/support
Heeft u vragen over het product? Heeft u technische ondersteuning nodig? Neem dan gerust
contact met ons op:
HULP NODIG? NEEM CONTACT MET ONS OP!
KP280BR
PRIVACYTENT
1
Dit is de originele instructie, lees alle handleidingen zorgvuldig door voordat u het
product gebruikt. VEVOR behoudt zich een duidelijke interpretatie van onze
gebruikershandleiding voor. Het uiterlijk van het product is afhankelijk van het product
dat u hebt ontvangen. Vergeef ons dat we u niet opnieuw zullen informeren als er
technologie- of software-updates voor ons product zijn.
Machine Translated by Google

5. Laat de tentzak niet op zijn kant stuiteren om de tent te verwijderen, omdat dit schadelijk kan zijn.
4.Laat de tent niet vallen.
het frame beschadigen.
Productgrootte
Kleur
66x66x87in
3. Voor het beste resultaat bij winderige omstandigheden plaatst u het smalle uiteinde van de tent in de
Model KP280BR
wind.
8. LET OP: Vermijd knelpunten bij het openen en sluiten van het tentframe.
2. Zet uw tent niet op onder bomen vanwege mogelijke blikseminslagen of
afbrekende takken van bomen bij slecht weer.
6. Voor de montage van dit recreatieproduct zijn minimaal twee personen nodig.
Bruin
7. Dit product mag onder geen beding worden gebruikt om auto's, maritieme producten of
soortgelijke items af te dekken.
1. Blijf uit de buurt van bovengrondse elektriciteitskabels.
behoeften.
2. SPECIFICATIES
LET OP Bewaar de instructies voor toekomstige
1.
3. COMPONENTEN
2
Machine Translated by Google

4. Installatiestappen
4 stuks 8 stuks
2 stuks
Vouw de tent uit en leg deze op de gewenste
plek neer.
2 stuks
1. Pak de tent en alle onderdelen uit.
1 stuk
1 stuk
2. Sluit de tent aan
palen.
3. Rijg twee stokken door de gaten in het zeil aan de bovenkant van de tent en steek elk uiteinde in de gaten in
de plastic connectoren op de hoeken. Zorg ervoor dat de twee stokken een "x"-vorm hebben.
1
4
3
2
6
5
3
Machine Translated by Google

4
6. Zet de tent op. Maak de tent
tot slot vast met haken
en touwen.
5. Zet de tent neer en bevestig de regenkap aan de tent
zoals op de afbeelding is aangegeven.
4. Steek één uiteinde van de vier stokken in de kunststof connector aan de bovenkant van de
tent en het andere uiteinde in de stekker op de hoek van de tent.
Geïmporteerd naar de VS: Sanven Technology Ltd. Suite 250, 9166 Anaheim Place, Rancho
Cucamonga, CA 91730
Machine Translated by Google

Machine Translated by Google

Technische ondersteuning en e-garantiecertificaat
www.vevor.com/support
Machine Translated by Google

MODELL: KP280B
R
"Spara hälften", "halva priset" eller andra liknande uttryck som används av oss representerar
bara en uppskattning av besparingar du kan dra nytta av att köpa vissa verktyg hos oss jämfört
med de stora toppmärkena och betyder inte nödvändigtvis att täcka alla kategorier av verktyg som
erbjuds av oss. Du påminns vänligen om att noggrant kontrollera när du gör en beställning hos oss
om du faktiskt sparar hälften i jämförelse med de främsta stora varumärkena.
Vi fortsätter att vara engagerade i att ge dig verktyg till konkurrenskraftiga priser.
INSTRUKTION FÖR SEKRETESSTÄLT
Teknisk support och e-garanticertifikat www.vevor.com/support
Machine Translated by Google

Machine Translated by Google

Teknisk support och e-garanticertifikat www.vevor.com/support
Har du produktfrågor? Behöver du teknisk support? Kontakta oss gärna:
Detta är den ursprungliga instruktionen, läs alla instruktioner noggrant innan
du använder den. VEVOR reserverar sig för en tydlig tolkning av vår användarmanual.
Utseendet på produkten är beroende av den produkt du fått. Ursäkta oss att vi inte
kommer att informera dig igen om det finns någon teknik eller mjukvaruuppdateringar
på vår produkt.
BEHÖVER HJÄLP? KONTAKTA OSS!
KP280BR
INTEGRITETSTÄLT
1
Machine Translated by Google

2. Sätt inte upp ditt tält under träd på grund av potentiella blixtnedslag eller
vind.
KP280BR
3. För bästa resultat i blåsiga förhållanden, placera den smala änden av tältet i tältet
Modell
skada ramen.
66x66x87tum
Färg
5. Studsa inte tältpåsen på dess ände för att ta bort tältet, eftersom dessa åtgärder kan göra det
4. Tappa inte tältet.
Produktstorlek
1. Håll dig borta från kraftledningar.
7. Denna produkt får under inga omständigheter användas för att täcka bilar, marina produkter
eller liknande föremål.
6. Den här fritidsprodukten kräver minst två personer för att montera den.
Brun
sviktande trädgrenar i dåligt väder.
8. VARNING: Undvik klämpunkter när du öppnar och stänger tältramen.
behov.
3. KOMPONENTER
OBSERVERA Spara instruktionerna för framtida bruk
1.
2. SPECIFIKATIONER
2
Machine Translated by Google

4. Installationssteg
3
4 st
1. Packa upp tältet och alla dess delar.
8 st
Fäll ut tältet och lägg det i
respektive område.
2 st
2 st
1 st
1 st
2.Anslut tältet
3. Trä två stolpar genom hålen i presenningen överst på tältet och stick in
vardera änden i hålen i plastanslutningarna i hörnen. Se till att de två polerna
har en "x"-form.
stolpar.
1
6
3
2
4
5
Machine Translated by Google

4
6. Sätt upp tältet. Fäst slutligen
tältet med krokar
Importerad till USA: Sanven Technology Ltd. Suite 250, 9166 Anaheim Place, Rancho
Cucamonga, CA 91730
5. Sätt ner tältet och fäst regngylfen i tältet enligt bilden.
4. Sätt in ena änden av de fyra polerna i plastkontakten längst upp på tältet och ena änden i
kontakten i hörnet av tältet.
och rep.
Machine Translated by Google

Machine Translated by Google

Teknisk support och e-garanticertifikat
www.vevor.com/support
Machine Translated by Google

R
MODELO:KP280B
"Ahorrelamitad","mitaddeprecio"ocualquierotraexpresiónsimilarqueutilicemossolorepresenta
unaestimacióndelahorroquepodríaobteneralcomprarciertasherramientasconnosotrosen
comparaciónconlasprincipalesmarcasynonecesariamentesignificaquecubratodaslascategoríasde
herramientasqueofrecemos.Lerecordamosque,alrealizarunpedidoconnosotros,verifique
cuidadosamentesirealmenteestáahorrandolamitadencomparaciónconlasprincipalesmarcas.
Seguimoscomprometidosabrindarleherramientasaprecioscompetitivos.
INSTRUCCIONESPARACARPADEPRIVACIDAD
Soportetécnicoycertificadodegarantíaelectrónicawww.vevor.com/support
Machine Translated by Google

Machine Translated by Google

Soportetécnicoycertificadodegarantíaelectrónicawww.vevor.com/support
¿Tienepreguntassobreelproducto?¿Necesitaasistenciatécnica?Nodudeenponerseencontacto
connosotros:
Estassonlasinstruccionesoriginales,leaatentamentetodaslasinstrucciones
delmanualantesdeutilizarelproducto.VEVORsereservaunainterpretaciónclarade
nuestromanualdeusuario.Laaparienciadelproductoestarásujetaalproductoque
recibió.Perdónenospornoinformarlenuevamentesihayactualizacionesdetecnología
osoftwareennuestroproducto.
¿NECESITAAYUDA?¡CONTÁCTENOS!
KP280BR
TIENDADEPRIVACIDAD
1
Machine Translated by Google

2
necesidades.
3.COMPONENTES
AVISOConservelasinstruccionesparafuturasconsultas.
1.
2.ESPECIFICACIONES
2.Nomontestutiendadecampañadebajodelosárbolesporlaposibilidaddequecaiganrayoso
viento.
KP280BR
3.Paraobtenermejoresresultadosencondicionesdeviento,coloqueelextremoangostodelatiendaenel
Modelo
dañarelmarco.
66x66x87pulgadas
Color
5.Norebotelabolsadelatiendadecampañasobresuextremopararetirarlatiendadecampaña,yaqueestasaccionespueden
4.Nodejecaerlatienda.
Tamañodelproducto
1.Manténgasealejadodelíneaseléctricasaéreas.
7.Bajoningunacircunstanciaesteproductodebeutilizarseparacubrirautomóviles,productosmarinos
oartículossimilares.
6.Esteproductorecreativorequiereunmínimodedospersonasparaensamblarlo.
Marrón
ramasdeárbolesquesecaendebidoalmaltiempo.
8.PRECAUCIÓN:Evitelospuntosdepinzamientoalabrirycerrarelmarcodelatienda.
Machine Translated by Google

4.Pasosdeinstalación
3
4piezas
1.Desembalelatiendaytodassuspartes.
8piezas
Despliegalatiendadecampañaycolócalaenellugar
correspondiente.
1pieza
2piezas
2piezas
1pieza
polos.
3.Pasedospostesporlosagujerosdelalonaenlapartesuperiordelatiendaeinsertecadaextremoenlosagujerosdelos
conectoresdeplásticoenlasesquinas.Asegúresedequelosdospostestenganformade"x".
2.Conectarlatienda
1
6
3
2
4
5
Machine Translated by Google

4
6.Montarlatiendadecampaña.Porúltimo,
asegurarlatiendadecampañaconganchos.
ImportadoaEE.UU.:SanvenTechnologyLtd.Suite250,9166AnaheimPlace,Rancho
Cucamonga,CA91730
5.Desmontelatiendayfijeeltoldoalatiendacomo
semuestraenlaimagen.
4.Inserteunextremodeloscuatropostesenelconectordeplásticoenlapartesuperior
delatiendayunextremoenelenchufeenlaesquinadelatienda.
ycuerdas.
Machine Translated by Google

Machine Translated by Google

Soportetécnicoycertificadodegarantía
electrónicawww.vevor.com/support
Machine Translated by Google

ISTRUZIONI PER LA TENDA PRIVACY
R
MODELLO:KP280B
Supporto tecnico e certificato di garanzia elettronica www.vevor.com/support
"Risparmia la metà", "Metà prezzo" o qualsiasi altra espressione simile da noi utilizzata rappresenta
solo una stima del risparmio che potresti ottenere acquistando determinati utensili con noi rispetto
ai principali marchi principali e non significa necessariamente coprire tutte le categorie di utensili da
noi offerti. Ti ricordiamo gentilmente di verificare attentamente quando effettui un ordine con noi se
stai effettivamente risparmiando la metà rispetto ai principali marchi principali.
Continuiamo a impegnarci per fornirvi strumenti a prezzi competitivi.
Machine Translated by Google

Machine Translated by Google

HAI BISOGNO DI AIUTO? CONTATTACI!
Hai domande sui prodotti? Hai bisogno di supporto tecnico? Non esitare a contattarci:
Supporto tecnico e certificato di garanzia elettronica www.vevor.com/support
Modello KP280BR
TENDA PER LA PRIVACY
1
Questa è l'istruzione originale, si prega di leggere attentamente tutte le istruzioni
del manuale prima di utilizzare. VEVOR si riserva una chiara interpretazione del nostro
manuale utente. L'aspetto del prodotto sarà soggetto al prodotto ricevuto. Vi preghiamo
di perdonarci se non vi informeremo di nuovo se ci sono aggiornamenti tecnologici o
software sul nostro prodotto.
Machine Translated by Google

6. Per montare questo prodotto ricreativo sono necessarie almeno due persone.
66x66x87 pollici
Marrone
1.Tenersi lontani dalle linee elettriche aeree.
7. In nessun caso questo prodotto deve essere utilizzato per coprire automobili, prodotti marini o articoli simili.
8. ATTENZIONE: evitare punti di schiacciamento durante l'apertura e la chiusura della struttura della tenda.
2. Non montare la tenda sotto gli alberi a causa dei potenziali fulmini o
rami degli alberi che cadono a causa del maltempo.
3. Per ottenere risultati ottimali in condizioni ventose, posizionare l'estremità stretta della tenda nella
Modello Modello KP280BR
vento.
5. Non far rimbalzare la borsa della tenda sulla sua estremità per rimuovere la tenda, poiché queste azioni potrebbero
4. Non far cadere la tenda.
danneggiare il telaio.
Dimensioni del prodotto
Colore
esigenze.
2. SPECIFICHE
AVVISO Si prega di conservare le istruzioni per il futuro
1.
3. COMPONENTI
2
Machine Translated by Google

4. Fasi di installazione
4 pezzi 8 pezzi
2 pezzi
Aprire la tenda e disporla nell'area prevista.
2 pezzi
1. Disimballare la tenda e tutti i suoi componenti.
1 pz.
1 pz.
3. Infilare due pali attraverso i fori del telo nella parte superiore della tenda e inserire ciascuna estremità nei
fori dei connettori di plastica agli angoli. Assicurarsi che i due pali siano a forma di "x".
pali.
2.Collegare la tenda
1
4
3
2
6
5
3
Machine Translated by Google

4
6. Montare la tenda. Infine, fissare
la tenda con i ganci
e corde.
5. Smontare la tenda e fissare il telo antipioggia alla
tenda come mostrato in figura.
4. Inserire un'estremità dei quattro pali nel connettore di plastica nella parte superiore
della tenda e l'altra estremità nella spina nell'angolo della tenda.
Importato negli USA: Sanven Technology Ltd. Suite 250, 9166 Anaheim Place, Rancho
Cucamonga, CA 91730
Machine Translated by Google

Machine Translated by Google

Supporto tecnico e certificato di garanzia
elettronica www.vevor.com/support
Machine Translated by Google

R
MODEL:KP280B
„Oszczędź połowę”, „Połowa ceny” lub inne podobne wyrażenia używane przez nas stanowią
jedynie szacunkowe oszczędności, jakie możesz uzyskać, kupując u nas określone narzędzia w
porównaniu z głównymi markami i niekoniecznie oznaczają one objęcie wszystkich kategorii narzędzi
oferowanych przez nas. Uprzejmie przypominamy, aby dokładnie sprawdzić, czy składając u nas
zamówienie faktycznie oszczędzasz połowę w porównaniu z głównymi markami.
Nadal staramy się oferować Państwu narzędzia w konkurencyjnych cenach.
INSTRUKCJA DOTYCZĄCA NAMIOTU PRYWATNOŚCI
Wsparcie techniczne i certyfikat gwarancji elektronicznej www.vevor.com/support
Machine Translated by Google

Machine Translated by Google

Wsparcie techniczne i certyfikat gwarancji elektronicznej www.vevor.com/support
Masz pytania dotyczące produktu? Potrzebujesz wsparcia technicznego? Skontaktuj się z
nami:
To jest oryginalna instrukcja, przed użyciem należy uważnie przeczytać wszystkie
instrukcje. VEVOR zastrzega sobie jasną interpretację naszej instrukcji obsługi. Wygląd
produktu będzie zależał od produktu, który otrzymałeś. Prosimy o wybaczenie, że nie
poinformujemy Cię ponownie, jeśli w naszym produkcie pojawią się jakiekolwiek aktualizacje
technologiczne lub oprogramowania.
POTRZEBUJESZ POMOCY? SKONTAKTUJ SIĘ Z NAMI!
KP280BR
NAMIOT PRYWATNOŚCI
1
Machine Translated by Google

7. W żadnym wypadku nie należy używać tego produktu do przykrywania samochodów, produktów
morskich lub podobnych przedmiotów.
4. Nie upuść namiotu.
5. Nie uderzaj pokrowcem namiotu o jego koniec, aby go zdjąć, ponieważ czynności te mogą
1. Trzymaj się z dala od napowietrznych linii energetycznych.
Rozmiar produktu 66x66x87 cali
uszkodzić ramę.
Kolor
3. Aby uzyskać najlepsze rezultaty w wietrznych warunkach, umieść węższy koniec namiotu w
Model KP280BR
wiatr.
2. Nie rozstawiaj namiotu pod drzewami ze względu na ryzyko uderzeń piorunów lub
8. UWAGA: Unikaj przytrzaśnięć podczas otwierania i zamykania stelaża namiotu.
łamanie się gałęzi drzew w wyniku złej pogody.
6. Do montażu tego produktu rekreacyjnego potrzebne są co najmniej dwie osoby.
Brązowy
wymagania.
2. SPECYFIKACJE
UWAGA Prosimy o zachowanie instrukcji na przyszłość.
1.
3. SKŁADNIKI
2
Machine Translated by Google

4. Kroki instalacji
3
2 szt.
8szt
1. Rozpakuj namiot i wszystkie jego części.
2. Podłącz namiot
1 szt.
4 szt.
2 szt.
1 szt.
Polacy.
3. Przeciągnij dwa drążki przez otwory w plandece na górze namiotu i włóż każdy
koniec do otworów w plastikowych łącznikach na rogach. Upewnij się, że dwa drążki
mają kształt „x”.
Rozłóż namiot i rozłóż go w
odpowiednim miejscu.
1
5
3
2
4
6
Machine Translated by Google

4
6. Rozłóż namiot. Na koniec
zabezpiecz namiot haczykami.
i liny.
5. Rozłóż namiot i przymocuj tropik do namiotu,
jak pokazano na rysunku.
4. Włóż jeden koniec czterech słupków do plastikowego łącznika znajdującego się na górze
namiotu, a drugi koniec do korka znajdującego się w rogu namiotu.
Importowane do USA: Sanven Technology Ltd. Suite 250, 9166 Anaheim Place,
Rancho Cucamonga, CA 91730
Machine Translated by Google

Machine Translated by Google

Wsparcie techniczne i certyfikat gwarancji
elektronicznej www.vevor.com/support
Machine Translated by Google