-1-
1.Introduction
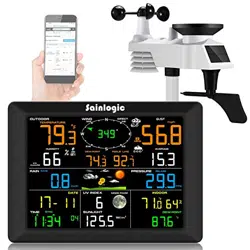
Thank you for your purchase of the WS0355 Professional WIFI
Wireless Weather Station. The following user guide provides
step by step instructions for installation, operation and
troubleshooting.
2.Warnings and Cautions
Warning: Any metal object may attract a lightning strike,
including your weather station mounting pole. Never install the
weather station in a storm.
Warning: Installing your weather station in a high location
may result in injury or death. Perform as much of the initial
check out and operation on the ground and inside a building or
home. Only install the weather station on a clear, dry day.
3.Getting Started
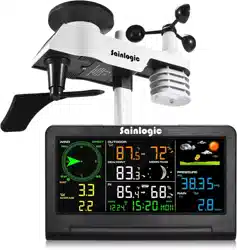
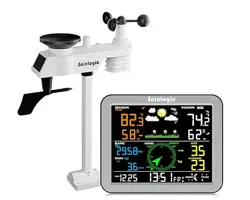
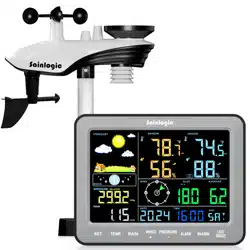
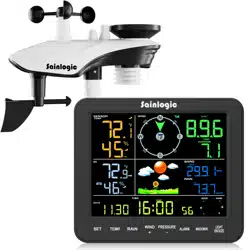
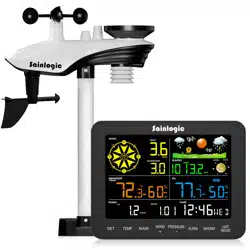
The WS0355 weather station consists of a display console, a
sensor array with Integrated Outdoor Sensor, and mounting
hardware.
3.1 Parts List
The weather station consists of the following parts (as
referenced in Figure 1 ).

-2-
QTY
Item Image
1
Display Console
Frame Dimensions :
7.56x4.76x0.79inch
(192x121x20mm)
LCD Dimensions:
6.7x3.1inch (171x78mm)
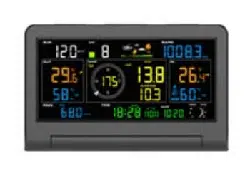
3.4 Display Console
3.4.1 Layout of Display Console
The following illustration shows display console features in
normal mode as below :
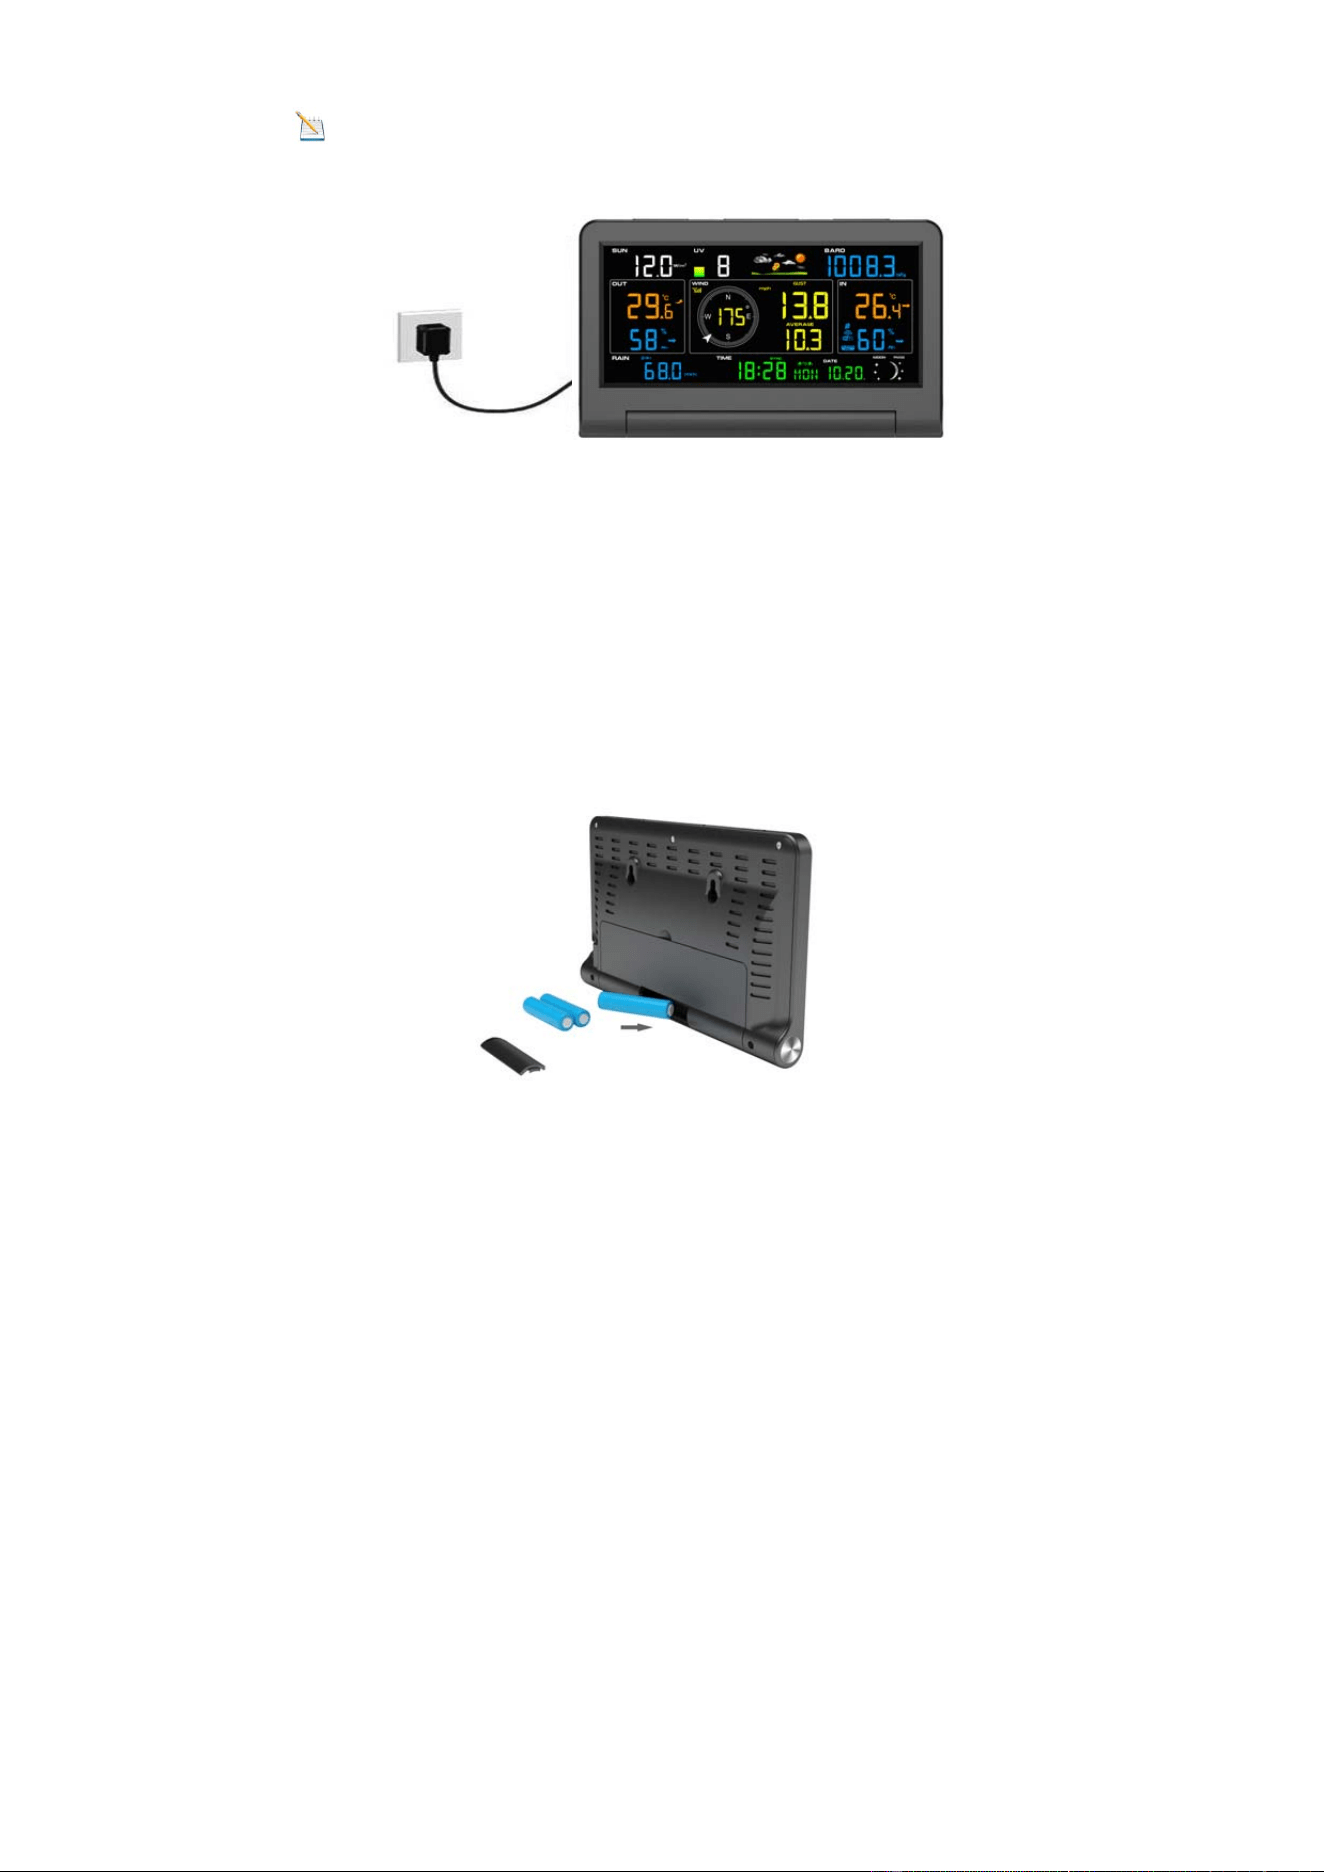
3.4.2 Setup the Display Console
1. Plug in the display console with power adapter. BL ON
will display in the time area for three seconds when powered
up.
-3-
Note: It is recommended to plug in the power adapter to
reduce the battery consumption and extend the service life
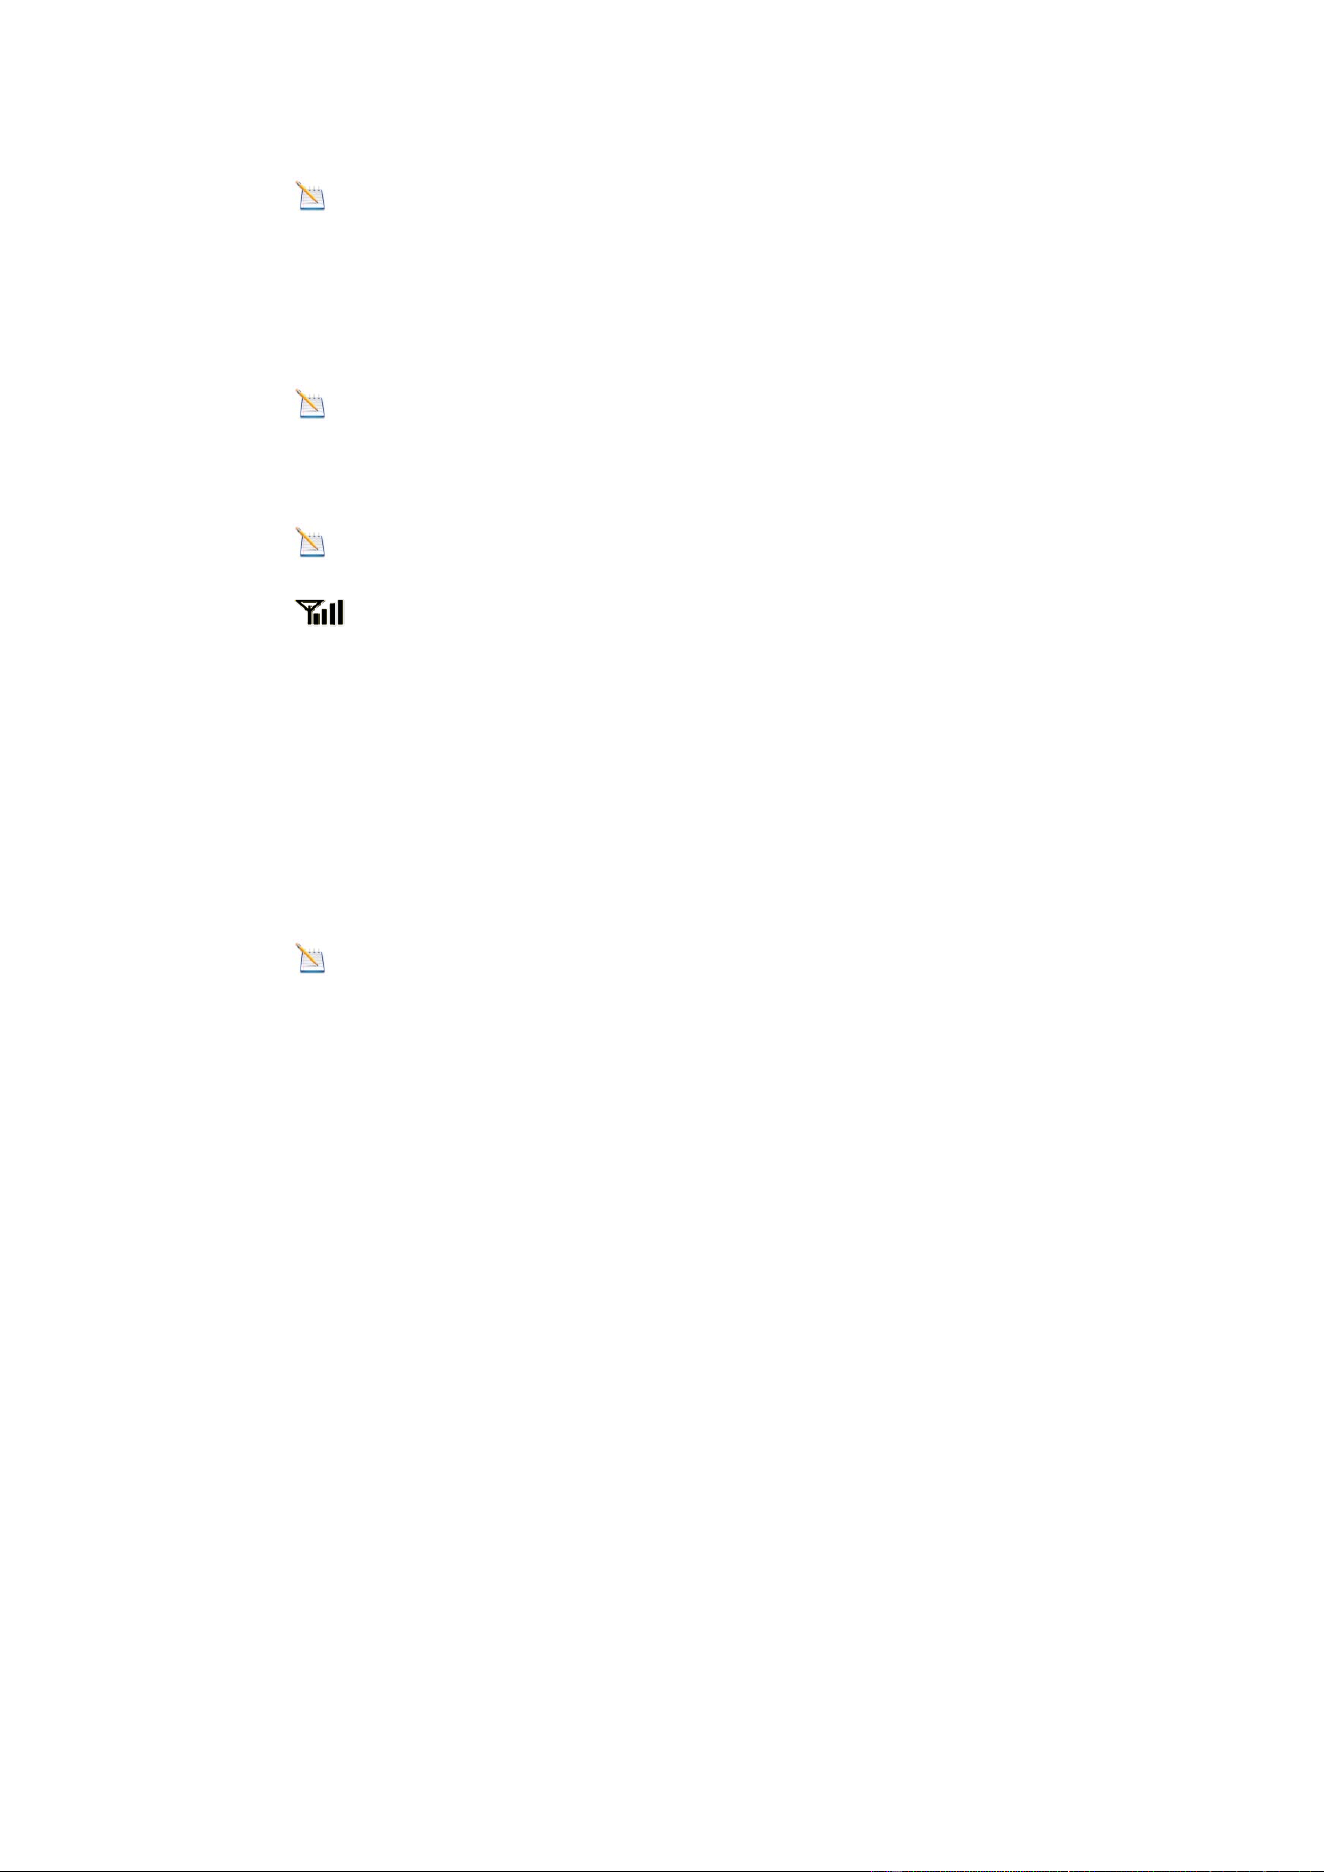
2. Display Console Batteries Installation
Remove the battery door on the back of the display, as shown
in Figure 7. Install three AAA (alkaline or lithium)) batteries.
The display will beep once and layout of display will light up for
a few seconds to verify all segments are operating properly.
Note: The transmitter of Wifi2.4G & other wireless functions
can not work when using the battery.
Figure 7
-4-
Recover the battery door, and unfold out the desk stand to
place the console in the upright position
Note: The battery is a back-up of weather station console,
saving console settings when powered off from adaptor
3.4.3 Connect Sensors with Display Console
Once the display console is powered up, it will automatically
scan all the nearby Integrated Outdoor sensors.
Note: Do not press any button until all the remote sensors
report in the display screen, otherwise the display console will
terminate to connect with remote sensors.
Note: While in the search mode, the remote search icon
will be constantly displayed until all the measured values
received. The console will automatically switch to the normal
mode from which all further settings can be performed.
When connected with the Integrated Outdoor Sensor, the
measured value (Outdoor temperature, humidity, wind speed,
wind direction, wind gust and average, rainfall, UV and
Sunlight index, Dew point and feels like) will show up on the
display console.
Note: Make sure that the distance between weather station
sensors and display console should be within 10ft (3m) to 100ft
(30m). If the weather s tation sensors is too close or too far
away, it may not receive a proper signal.

-5-
5. Display Console Operation
7.1 Quick Display Mode
Note: The display console has five keys for easy operation:
MAX/MIN/- key, ALARM key, SET key, CHANNEL/+ and
SNOOZE/LIGHT key.
Note: To exit the Quick Display Mode at any time, press the
SNOOZE key of the display console.
While in Normal Mode, press (do not hold) the SET key to
enter the Quick Display Mode as follows:
once for time, time/week and second
Twice for rainfall
three for pressure
four for outdoor temperature
1. Time, Time/Week and Second. Press the CHANNEL/+ or
MAX/MIN/- key to toggle between time, time/week and second.
2. Rainfall. Press the CHANNEL/+ or MAX/MIN/- key to toggle
between 1h, 24h, week, month and total.
To clear the total rain, press the CHANNEL/+ or MAX/MIN/-
button until total rain is displayed. The total rain will flash.
Press and hold the SET button for five seconds until total rain
reads 0.0.
3. Absolute Pressure and Relative Pressure. Press the
CHANNEL/+ or MAX/MIN/- key to toggle between absolute
pressure and relative pressure.

-6-
4. Outdoor Temperature. Press the CHANNEL/+ or
MAX/MIN/- key to toggle between outdoor temp, dew point,
and feels like.
7.2 Set (Program) Mode
While in Normal Mode, press and hold the SET key for at
least three seconds to enter the Set Mode. The f irst setting will
begin flashing. You can press the SET key again to skip any
step, as defined below.
Note: In the Set mode, press the CHANNEL/+ key or
MAX/MIN/- key to change or scroll the setting value. Hold the
CHANNEL/+ key or MAX/MIN/- key for three seconds to
increase/decrease rapidly.
Note: To exit the Set mode at any time, press the SNOOZE
button of the display console.
1. 12/24 Hour Format (default: 12h). Press the SET key
again to adjust the 12/24 hour format setting (FMT). Press the
CHANNEL/+ key or MAX/MIN/- key to change between 12
hour and 24 hour format.
2. Change Hour. press the SET key again to set the hour.
Press the CHANNEL/+ key or MAX/MIN/- key to adjust the
hour up or down. During afternoon hours the PM icon will
display.
3. Change Minute. Press the SET key again to set the minute.
Press the CHANNEL/+ key or MAX/MIN/- key key to adjust the
minute up or down.

-7-
4. Date Format (default: M-D). Press the SET key again to
enter the Day/Month format mode. Press the CHANNEL/+ or
MAX/MIN/- key to switch between M-D,D-M.
5. Change Month. Press the SET key again to set the
calendar month. Press the CHANNEL/+ key or MAX/MIN/- key
to adjust the calendar month.
6. Change Day. Press the SET key again to set the calendar
day. Press the CHANNEL/+ key or MAX/MIN/- key to adjust
the calendar day.
7. Change Year. Press the SET key again to set the calendar
year. Press the CHANNEL/+ key or MAX/MIN/- key to adjust
the calendar year.
8. Max/Min Clearing (default: ON). Press the SET key again
to set the Max/Min clearing mode (CLR). The Max/Min can
be programmed to c lear daily (at midnight) or manually. Press
the CHANNEL/+ key or MAX/MIN/- key to switch between ON
(Clears 24h) and OFF (Manually).
9. Temperature Units of Measure (default: °F):. Press the
SET key again to change the temperature units of measure.
Press the CHANNEL/+ key or MAX/MIN/- key to switch
between °F and °C units of measure.
10. Wind Speed Units of Measure (default: mph). Press the
SET key again to change the wind speed units of measure .
Press the CHANNEL/+ key or MAX/MIN/- key to toggle the
wind speed units between m/s, km/h, mph, knots bft or ft/s.
11. Rainfall Units of Measure (default: in). Press the SET
key again to change the Rainfall units of measure. Press
CHANNEL/+ key or MAX/MIN/- key to toggle the rainfall units
between mm and inch.

-8-
12. Sunlight Display Units (default: W/
㎡
). Press the SET
key again to change the sunlight units of measure. Press the
CHANNEL/+ key or MAX/MIN/- key to toggle the sunlight units
between , W/
㎡
, fc or lux.
13. Barometric Pressure Display Units(default: InHg).
Press the SET key again to change the pressure units of
measure. Press the CHANNEL/+ key or MAX/MIN/- key to
toggle the pressure units between mmhg, inHg or hPa.
14. Pressure Threshold Setting (default level 2). Press the
SET key again to change the pressure threshold. Press the
CHANNEL/+ key or MAX/MIN/- key to change pressure
threshold 2 hPa to 4 hPa. (For detailed information of this part
please refer to 10.5)
15. Weather Icons Setting (default: partly cloudy). Press
the SET key again to change the initial weather icon. Press the
CHANNEL/+ key or MAX/MIN/- key to select the initial weather
icon of Sunny, Cloudy, Partly Cloudy or Rainy. (For detailed
information of this part please refer to 10.2)
16. Time SYNC(default: ON). Press the SET key again to set
the network time sync. Press the CHANNEL/+ key or
MAX/MIN/- key to switch between SYNC time ON/OFF of
measure. Synchronize the time of the device with WiFi.
17. Location Division. (default: Northern Hemisphere).
Press the SET key again to change the location division. Press
the CHANNEL/+ key or MAX/MIN/- key to toggle the position
of the earth Northern Hemisphere (NOR) or Southern
Hemisphere (NOR). (Refer to 5.0 Final Installation of Sensors)
7.3 Sensor Search Mode

-9-
If Integrated Outdoor Transmitter data is lost, touch and hold
the CHANNEL/+ button for 3 seconds, the search icon will be
displayed constantly for 3 minutes. Once the signal is
reacquired, the remote search icon will turn off, and the
current values will be displayed.
7.4 Max/Min Viewing and R eset Mode
7.4.1 Max Record Viewing and Reset
In normal mode, press (do not hold) the MAX/MIN/- key, the
MAX icon will be displayed in date area.
Press the SET key to view max values of rainfall (1h, 24h,
week or month), wind gust and average, UV and sunlight,
pressure (ABS or REL), outdoor temperature and humidity
(feels like or dew point) and indoor temperature and humidity
.
Press the MAX/MIN/- key for three seconds to clear all Max
values.(Rainfall, wind speed, wind gust, pressure, UV and
Sunlight, temperature and humidity maximum values).
Press the SNOOZE key to exit the min/max checking and reset
mode, return to normal display mode.
Note: The Maximum values will display the current values
after reset.
7.5.2 Min Record Viewing and Reset
Press the MAX/MIN/- key again (do not hold), the MIN icon will
be displayed. Press the SET key to view min values of

-10-
pressure (ABS or REL), outdoor temperature and humidity
(feels like or dew point), and indoor temperature and humidity
.
Press the MAX/MIN/- key for three seconds to clear all Min
values.(pressure, temperature and humidity minimum values).
Press the SNOOZE key to exit the min/max checking and reset
mode, return to normal display mode.
Note: The Minimum values will display the current values
after reset.
7.5 Snooze Mode
If the alarm sounds, and you wish to silence the alarm, press
the SNOOZE key. The alarm icon will continue to flash and the
alarm will silence for five minute.
Press any key (MAX/MIN/-, SET, ALARM, CHANNEL/+)to
permanently exit the SNOOZE mode.
7.6 Backlight Mode
7.6.1 Adjustable Brightness of Backlight
There are 3 levels of brightness of display backlight. When the
backlight is on with adapter, press SNOOZE key to switch
between the 3 levels.

-11-
In the brightest backlight of 3 levels, press the SNOOZE key to
turn off the backlight.
When backlight is off with adapter, press the SNOOZE key and
thebacklightwillturnonfor3levels adjustable backlight.
Note: If the display console plugged into AC adapter power,
the time area will display BL ON and the backlight will remain
on. It is not recommended leaving the display backlight on for
a long period of time when operating on batteries only, or the
batteries will run out quickly.
Note: The backlight operation is different when operating
on batteries to save power.
8. Alarm Mode
The weather station includes the following alarms:
8.1 Alarm Triggered
Time (Alarm 1 and Alarm 2)
Outdoor Temperature
Outdoor Humidity
Outdoor Dew Point
Outdoor Feels Like
Temperature
Wind Gust
Wind Average
1h Rainfall
24 Hour Rainfall
Absolute Pressure
Relative Pressure
Indoor Temperature
Indoor Humidity
UV Index
Sunlight

-12-
When an alarm condition is exceed, the alarm icon will flash
(visual) and the alarm beeper will sound (audible). To
silence the beeper, press any key.
8.2 View High/Low Alarms Value
To view the current alarm settings, press the ALARM key to
enter the alarm mode. HI AL 1 will be displayed in the date
area. At the same time Alarm 1 time and HI alarm parameters
of indoor temperature and humidity, outdoor temperature and
humidity, 1h rainfall, wind gust, wind average, absolute
pressure, UV index, Sunlight are displayed.
Press SET key to view Alarm 2 time and HI alarm parameters
of, 24h rainfall, outdoor dew point, feels like and relative
pressure.
Press ALARM key again to view the LOW alarms along with
the alarm clock time in the same way as HI alarms.
Press ALARM key again to return to normal mode.
Note: Press the SNOOZE key at any time to return to the
normal mode in HI/Low alarm mode.
8.3 Setting the Alarms
Press ALARM key to enter the alarm mode.
Press and hold the SET key for three seconds. The first alarm
parameter will begin flashing (alarm hour).

-13-
To save the alarm setting and proceed to the next alarm
parameter, Press (do not hold) the SET key.
To adjust the alarm parameter, press the CHANNEL/+ key or
MAX/MIN/- key to increase or decrease the alarm settings, or
press and hold the CHANNEL/+ key or MAX/MIN/- key for
three seconds to increase or decrease the alarm settings
rapidly.
Press the ALARM key to turn on (the alarm icon will appear )
and off the alarm.
Press the SNOOZE key twice at any time to return to the
normal mode. After 30 seconds of inactivity, the alarm mode
will time out and return to normal mode.
The following is a list of the individual alarm parameters that
are set (in order):
1.Alarm hour(alarm 1)
2.Alarm minute(alarm 1)
3.Alarm hour(alarm 2)
4.Alarm minute(alarm 2)
5.Wind Gust HI alarm
6.Wind average HI alarm
7. Wind Direction Alarm
8.Outdoor temp HI alarm
9.Outdoor temp low alarm
10.Outdoor humidity HI alarm
11.Outdoor humidity low alarm
12.Outdoor feels like HI alarm
13.Outdoor feels like low alarm
14.Outdoor dew point HI alarm
15.Outdoor dew point low alarm
16.Rainfall (1h) HI alarm
17.Rainfall (24h) HI alarm
18.Absolute pressure HI alarm
19.Absolute pressure low alarm
20.Relative pressure HI alarm
21.Relative pressure low alarm
22.Indoor temperature HI alarm
23.Indoor temperature low alarm
24.Indoor humidity HI alarm
25.Indoor humidity low alarm
26.Sunlight HI alarm
27.UV Index HI alarm

-14-
Note: To prevent repetitive temperature alarming, there is a
0.9 °F(0.5°C) tolerance band. For example, if you set the high
alarm to 80.0°F(26.7°C) and silence the alarm, the alarm icon
will continue to flash until the temperature falls below 80.0°F
(26.7°C), at which point, the alarm will reset and must increase
above 80.0°F(26.7°C) to activate again.
Note: To prevent repetitive alarming of humidity, there is a
4% tolerance band in humidity alarm. For example, if you set
the high alarm to 60% and silence the alarm, the alarm icon
will continue to flash until the humidity falls below 56%, at
which point, the alarm will reset and must increase above 60%
to activate again.
8.4 Alarm and Key Beeper ON/OFF
In normal mode, press and hold the ALARM key for three
seconds to toggle the BZ ON (beeper on) or BZ OFF (beeper
off) depending on the current setting.
Display console return to normal mode without any operation
in three seconds.
9. Optional Calibration Mode
Note: The calibrated value can only be adjusted on the
display console.The outdoor remote sensor(s) always displays
the un-calibrated or measured value.

-15-
Note: The measured humidity range is between 10% and
99%. Humidity cannot be accurately measured outside of this
range. Thus, the humidity cannot be calibrated below 10% or
above 99%.
The purpose of calibration is to fine tune or correct for any
sensor error associated with the devices margin of error. The
measurement can be adjusted from the console to calibrate to
a known source.
Calibration is only useful if you have a known calibrated source
you can compare it against, and is optional. This section
discusses practices, procedures and sources for sensor
calibration to reduce manufacturing and degradation errors.
Do not compare your readings obtained from sources such as
the internet, radio, television or newspapers. They are in a
different location and typically update once per hour.
The purpose of your weather station is to measure conditions
of your surroundings, which vary significantly from location to
location.
9.1 Calibration of Temperature Mode
In normal mode, press and hold the SET and CHANNEL/+
keysatthesametimeforfivesecondstoenterthetemp
calibration mode. The indoor temperature will begin flashing.
Press the CHANNEL/+ key or MAX/MIN/- key to increase or
decrease the temperature reading (in increments of 0.1). Press

-16-
and hold the CHANNEL/+ key or MAX/MIN/- key for three
seconds to increase or decrease rapidly.
Press the ALARM key to reset current value.
Press the SET key switch to outdoor temp calibration mode.
To exit the temperature calibration mode at any time, press the
SNOOZE/LIGHT or SET button on the top of the display
console. If no operation is performed, the calibration mode will
timeout in 30 seconds.
9.2 Calibration of Humidity Mode
In normal mode, press and hold the SET and MAX/MIN/- keys
at the same time for five seconds to enter into the humidity
calibration mode. The indoor humidity will begin flashing.
Press the CHANNEL/+ key or MAX/MIN/- key to increase or
decrease the humidity reading (in increments of 1%). Press
and hold the CHANNEL/+ key or MAX/MIN/- key for three
seconds to increase or decrease rapidly.
Press the ALARM key to reset current value.
Press the SET key switch to outdoor humidity calibration
mode.

-17-
To exit the humidity calibration mode at any time, press the
SNOOZE/LIGHT or SET button on the top of the display
console. If no operation is performed, the calibration mode will
timeout in 30 seconds.
Note: The Humidity is a difficult parameter to measure
accurately and drifts over time. The calibration feature allows
you to zero out this error. To calibrate humidity, you will need
an accurate source, such as a sling psychrometer or
Humidipaks One Step Calibration kit.
9.3 Calibration of Sensors Mode
In normal mode, press and hold the SET and ALARM keys at
the same time for five seconds to enter the pressure, wind gust,
rainfall and sunlight calibration mode. The letter “CAL” will
appear at the bottom of the screen.
Press the SET key to skip over a parameter to the next.
Absolute Pressure Calibration
In the calibration mode, the “ABS” symbol will display at the
pressure section, the absolute pressure value will flash. (The
default value is 0.00 inHg)
Press the CHANNEL/+ key or MAX/MIN/- key to increase or
decrease the absolute pressure value (in increments of 0.01
inHg).
Press and hold the CHANNEL/+ or MAX/MIN/- key for three
seconds to increase or decrease rapidly.
Press the ALARM key to reset current value.

-18-
Example: The calibrated pressure sources measure 28.37
inHg. The display c onsole pressure reads 28.75 inHg.
Offset = 28.37 - 28.75 = - 0.38 inHg
Relative Pressure Calibration
In the calibration mode, press the SET key again, the “REL”
symbol will display at the pressure section, the relative
pressure value will flash. (The default value is 0.00 inHg)
Press the CHANNEL/+ key or MAX/MIN/- key to increase or
decrease the relative pressure value (in increments of 0.01
inHg).
Press and hold the CHANNEL/+ or MAX/MIN/- key for three
seconds to increase or decrease rapidly.
Press the ALARM key to reset current value.
Example: The calibrated pressure sources measure 25.00
inHg. The display c onsole pressure reads 24.85 inHg.
Offset = 25.00 - 24.85 = 0.15 inHg
Note: The display console displays two different pressures:
absolute (measured) and relative (corrected to sea-level).
To compare pressure conditions from one location to another,
meteorologists correct the pressure to sea-level conditions.
Because the air pressure decreases as you rise in altitude, the
sea-level corrected pressure (the pressure your location would

-19-
be at if located at sea-level) is generally higher than your
measured pressure.
Thus, your absolute pressure may read 28.62 inHg (969 mb) at
an altitude of 1000 feet (305 m), but the relative pressure is
30.00 inHg (1016 mb).
The standard sea-level pressure is 29.92 in Hg (1013.2hpa).
This is the average sea-level pressure around the world.
Relative pressure measurements greater than 29.92 inHg
(1013.2hpa) are considered high pressure and relative
pressure measurements less than 29.92 inHg are considered
low pressure.
To determine the relative pressure for your location, locate an
official reporting station near from you (the internet is the best
source for real-time barometer conditions, such as the website
of Weather.com or Wunderground.com), and set your weather
station to match the official reporting station.
Wind Speed C alibration
In the calibration mode, press the SET button again and the
wind speed value will flash (the default is 1.00).
Press the CHANNEL/+ key or MAX/MIN/- key to adjust the
wind speed calibration factor from 0.75 to 1.25, where:
Calibrated Wind Speed = Calibration factor x Measured Wind
Speed
Press and hold the CHANNEL/+ or MAX/MIN/- key for three
seconds to increase or decrease rapidly.

-20-
Press the ALARM key to reset current value.
Note: The wind gust is also affected by t he wind speed
calibration factor.
Discussion: Wind speed and wind gust are adversely
affected by installation constraints. The rule of thumb is to
install the weather station four times the distance of the height
of the tallest obstruction (for example, a 6 m house would
require an installation 24 m away).
In many instances, due to trees and other obstructions, this is
not possible. The wind speed calibration allows you to correct
for these obstructions.
In addition to installation challenges, wind speed bearings (any
moving part) wears over time. To c orrect for wear, the
correction value can be increased until the wind cups must be
replaced.
Without a calibrated source, wind speed is a difficult parameter
to measure. We recommend using a calibrated wind meter and
constant, high speed fan.
Rain Calibration
In the calibration mode, press the SET button again and the
rain value will flash (the default is 1.00).
Press the CHANNEL/+ key or MAX/MIN/- key to adjust the
rain calibration factor from 0.75 to 1.25, where:
Calibrated Rain = Calibration factor x Measured Rain

-21-
Press and hold the CHANNEL/+ or MAX/MIN/- key for three
seconds to increase or decrease rapidly.
Press the ALARM key to reset current value.
Discussion: The rain collector is calibrated at the factory
based on the funnel diameter. The bucket tips every 0.01” of
rain (referred to as resolution). The accumulated r ainfall can
be compared to a sight glass rain gauge with an aperture of at
least 4 ”.
Note: that debris and insects can collect inside the tipping
mechanism (they make a good spiders nest). Carefully remove
the funnel and inspect the tipping mechanism for debris prior
to calibration.
Sunlight Calibration
In the calibration mode, press the SET button again and the
sunlight value will flash (the default is 1.00).
Press the CHANNEL/+ key or MAX/MIN/- key to adjust the
rain calibration factor from 0.75 to 1.25, where:
Calibrated Sunlight = Calibration factor x Measured Sunlight
Press and hold the CHANNEL/+ or MAX/MIN/- key for three
seconds to increase or decrease rapidly.
Press the ALARM key to reset current value.
-22-
To exit the Sensor calibration mode at any time, press the
SNOOZE/LIGHT button on the display console. If no operation
is performed, the calibration mode will timeout in 30 seconds.
10. Other Features of Display Console
10.1 Weather Forecasting
Note: The weather forecast or pressure tendency is based
on the rate of change of barometric pressure. In general, when
the pressure increases, the weather improves (sunny to partly
cloudy) and when the pressure decreases, the weather
degrades (cloudy to rain).
The weather forecast is an estimation or generalization of
weather changes in the next 24 to 48 hours, and varies from
location to location. The tendency is simply a tool for projecting
weather changing conditions and is never to be relied upon as
an accurate method to predict the weather.
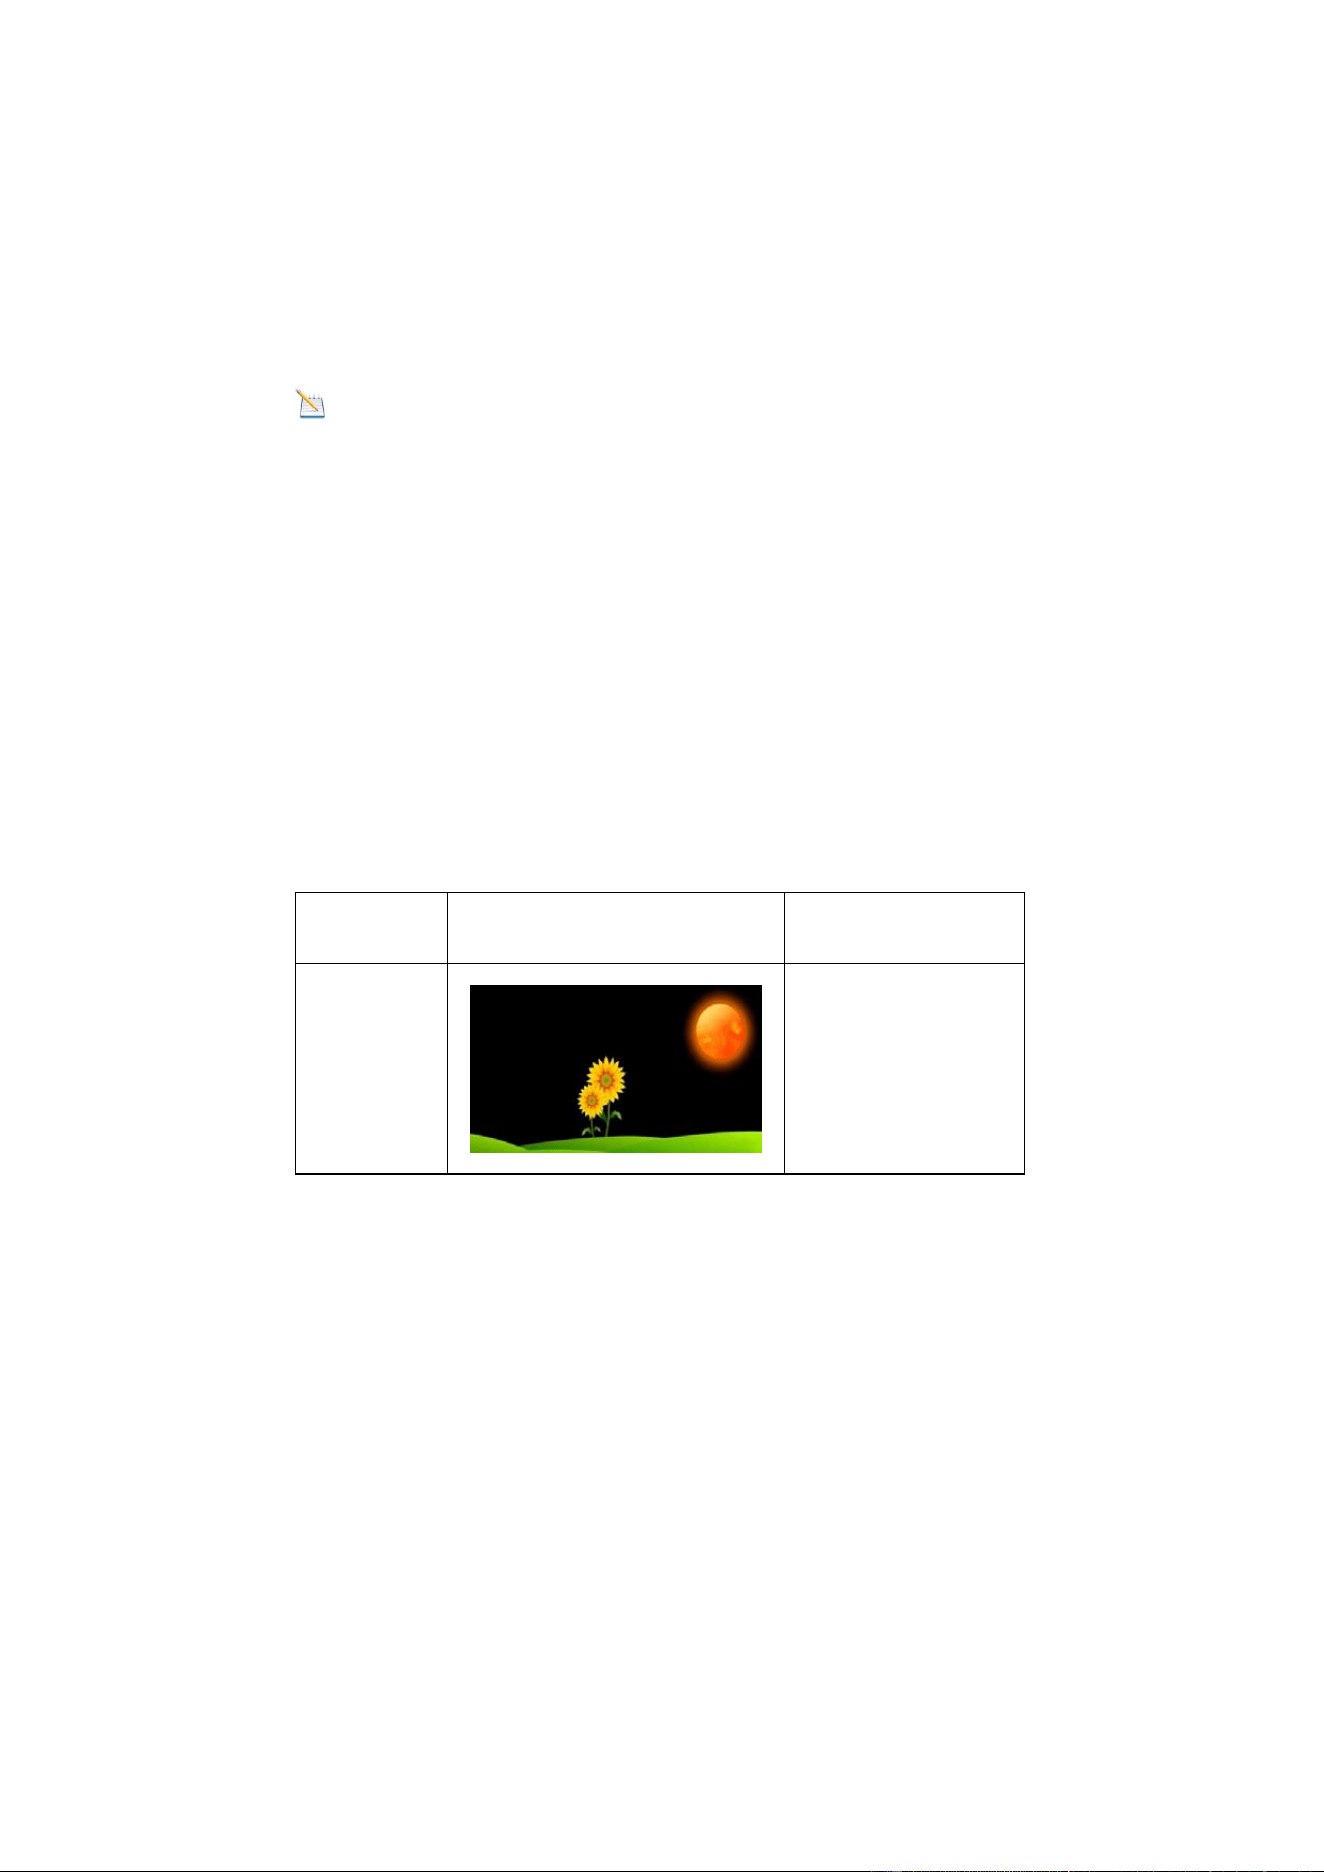
10.2 Weather I cons
Condition Icon Description
Sunny
Pressure is rising
and the previous
condition is partly
cloudy.
-23-
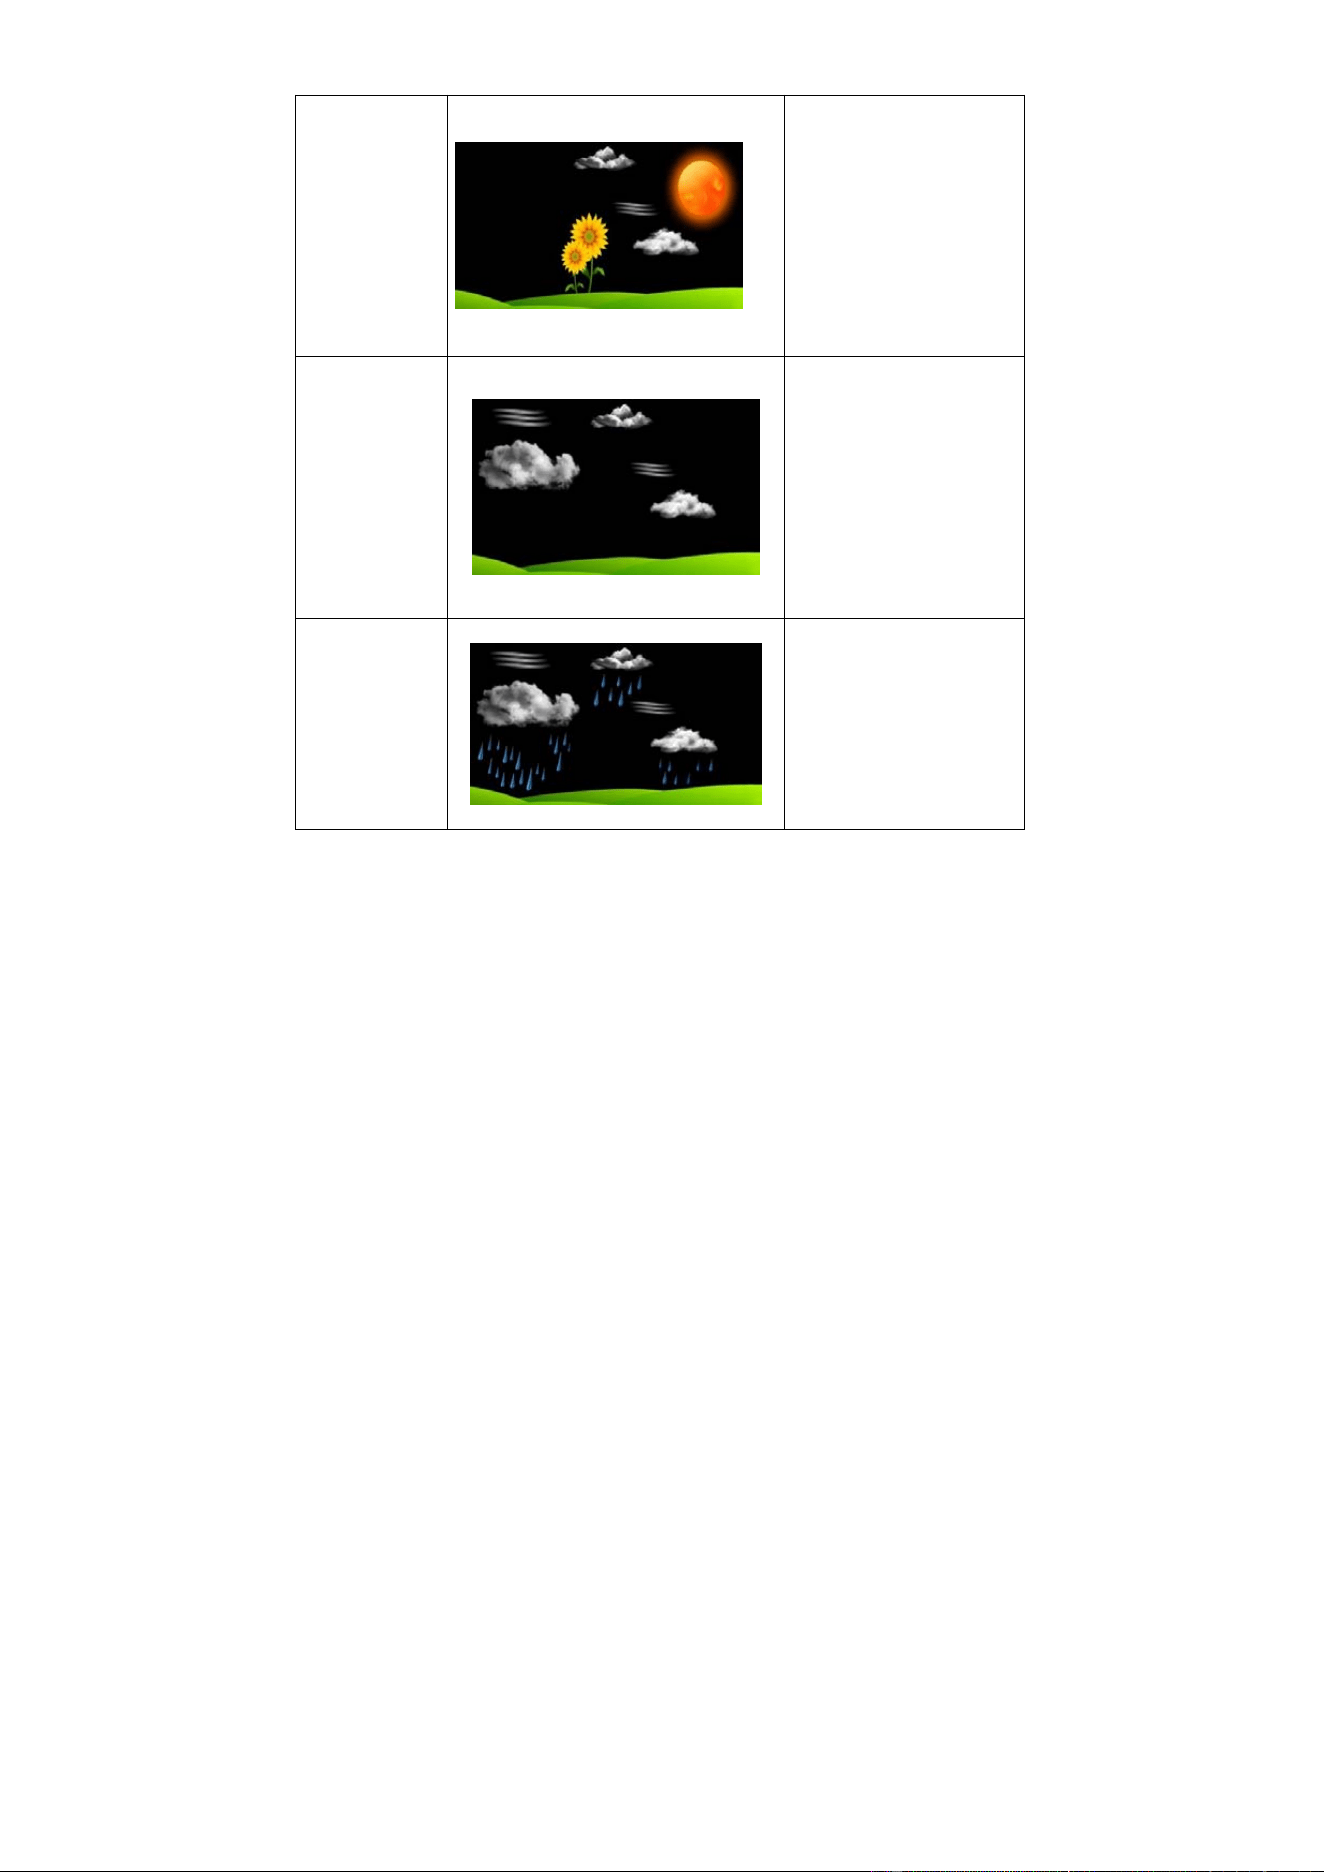
Partly
Cloudy
Pressure is falling
and the previous
condition is sunny
or Pressure is
rising and the
previous condition
is cloudy
Cloudy
Pressure is falling
and the previous
condition is partly
cloudy or Pressure
is rising and the
previous condition
is rainy.
Rainy
Pressure is falling
and the previous
condition is cloudy
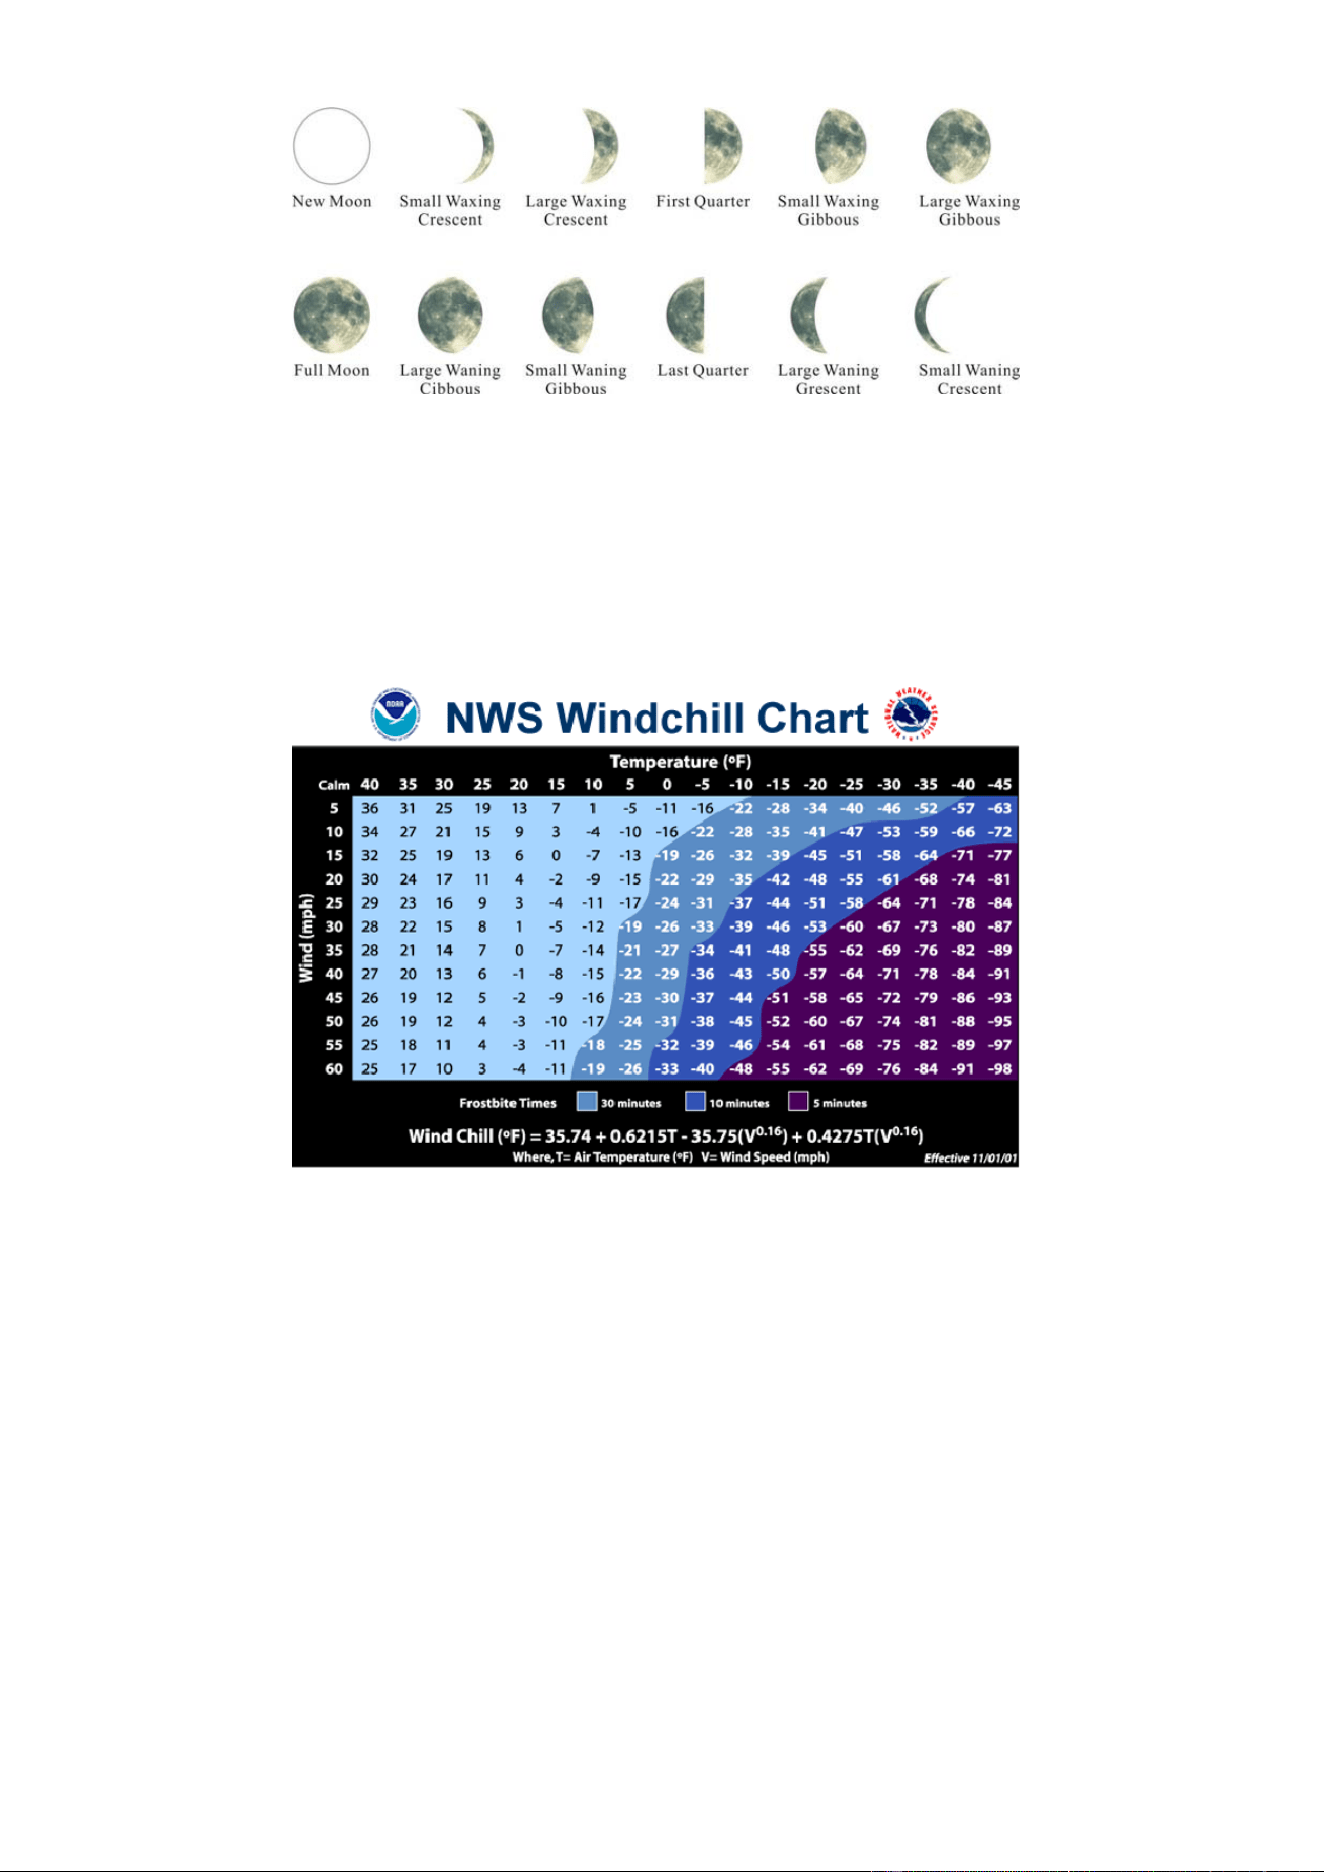
10.3 Moon Phase
The following moon phases are displayed based on the
calendar date.
-24-
10.4 Feels Like Temperature
Feels like temperature is a combination of Heat Index and
Wind Chill.
1. Temperatures less than 4.4°C(40°F), the wind chill is
displayed, as shown in the National Weather Service Wind
Chill Table below:
-25-
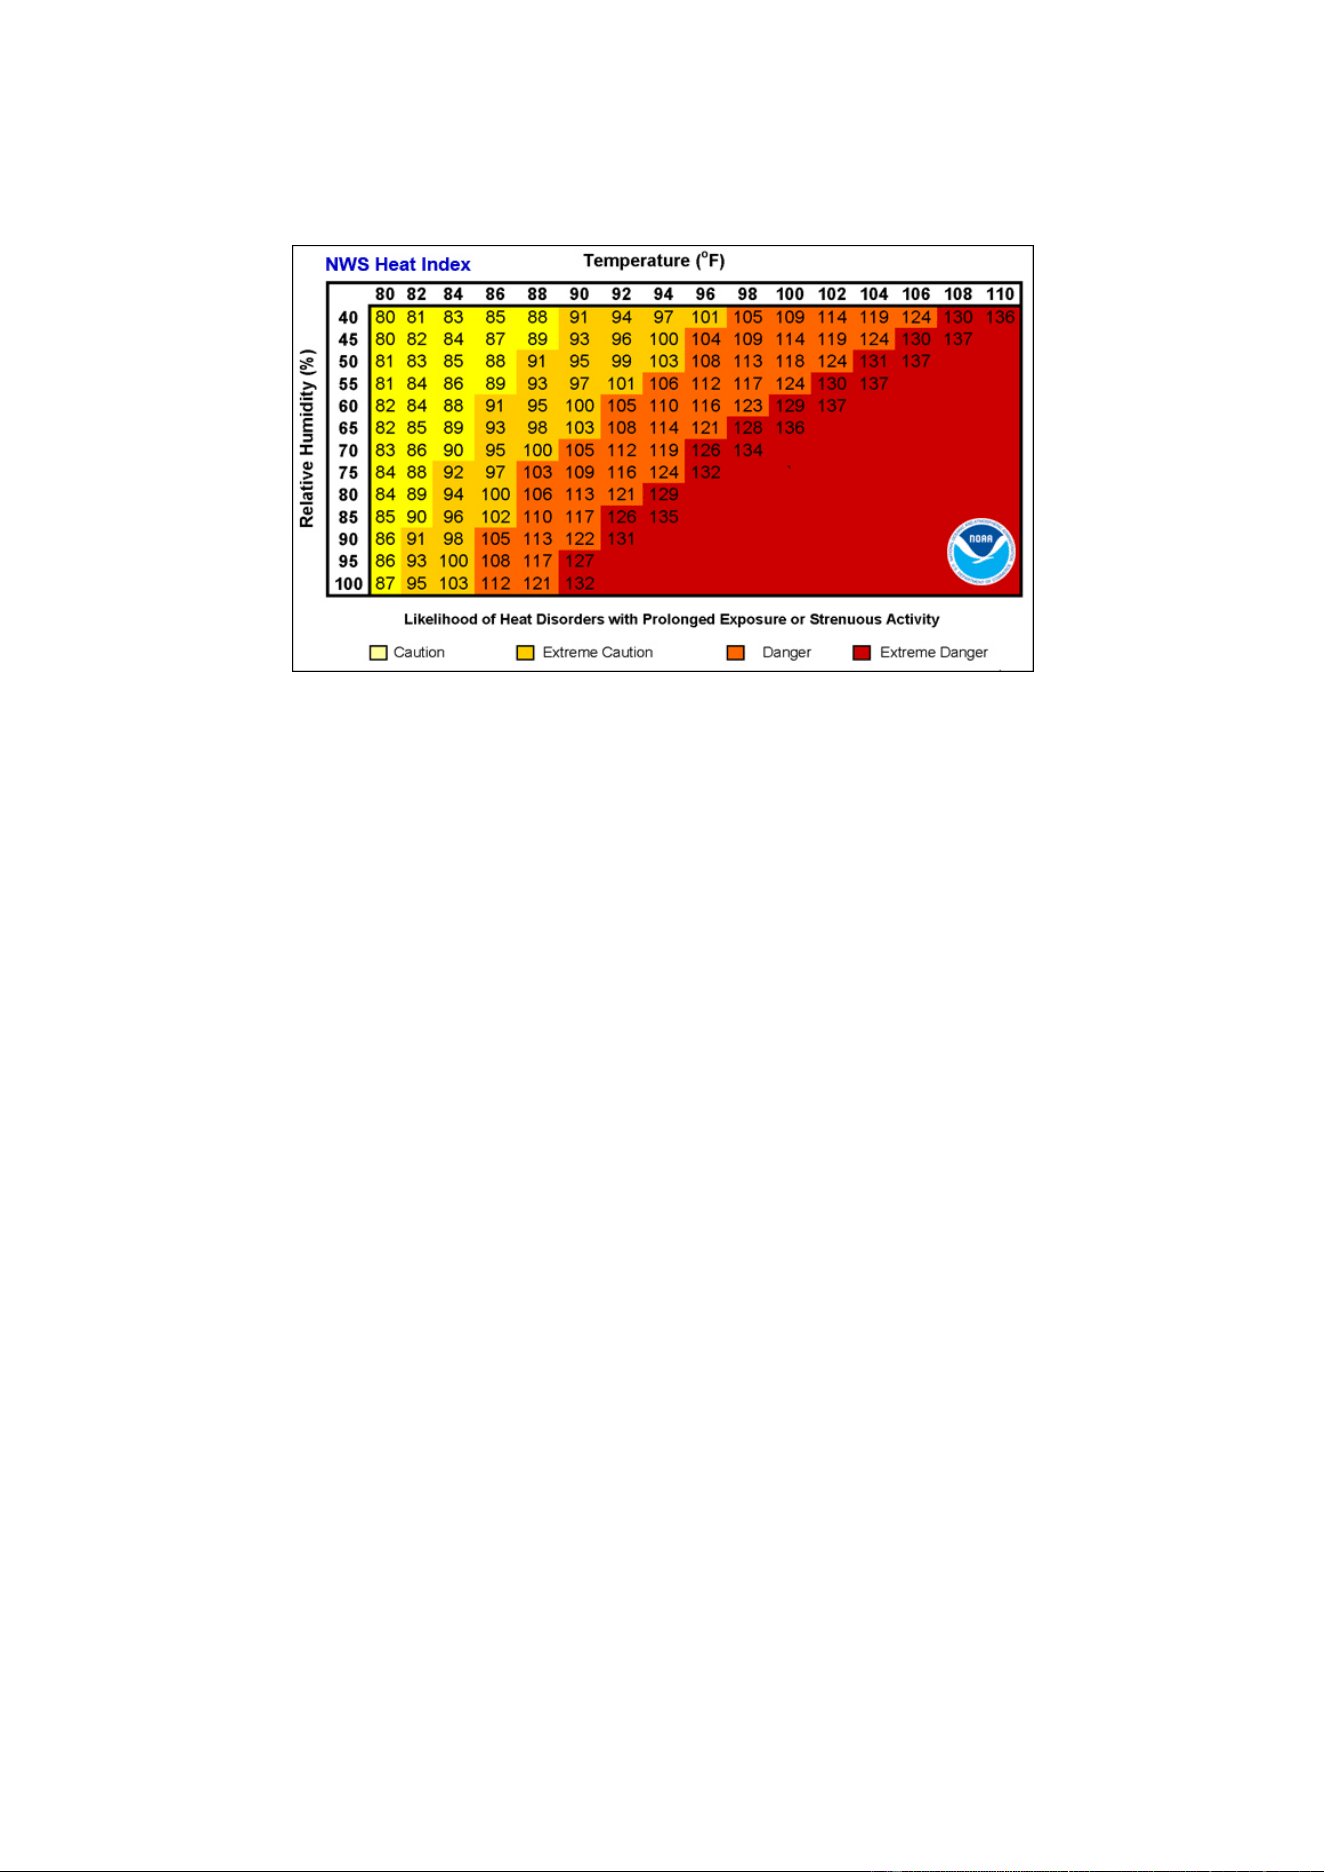
2. Temperatures greater than 26.7°C(80°F), the heat index
is displayed, as shown in the National Weather Service Heat
Index Table below:
10.5 Pressure Threshold Setting
The pressure threshold (the negative or positive rate of change
of pressure signifying a change in the weather) can be
adjusted from 2 hPa to 4 hPa (default level 2 hPa).
The lower the level pressure threshold setting, the higher
sensitivity for weather forecast changes. Locations that
experience frequent changes in air pressure require a higher
setting compared to locations where the air pressure is
typically stagnant.
10.6 Restore Factory Default

-26-
To reset the display console to factory default (WiFi network,
Weather server and display), press the MAX/MIN/- key while
plugging in power adaptor at the same time (Take out batteries
before starting the reset operation).
FCC Statement
Statement according to FCC part 15.19:
This device complies with part 15 of the FCC rules. Operation is
subject to the following two conditions:
1. This device may not cause harmful interference.
2. This device must accept any interference received,
including interference that may cause undesired
operation.
Statement according to FCC part 15.21:
Modifications not expressly approved by this company could void
the us e r's authority to operate the equipment.
Statement according to FCC part 15.105:
NOTE: This equipment has been tested and found to comply with
the limits for a Class B digital device, pursuant to Part 15 of the FCC
Rules. These limits are designed to provide reasonable protection
against harmful interference in a residential installation. This
equipment generates, uses and can radiate radio frequency energy
and, if not installed and used in accordance with the instructions,
may cause harmful interference to radio communications.
However, there is no guarantee that interference will not occur in a
particular installation. If this equipment does caus e harmful
interference to radio or television reception, which can be
determined by turning the equipment off and on, the user is

-27-
encouraged to try to correct the interference by one or more of the
following measures:
•
Reorient or relocate the receiving antenna.
•
Increase the separation between t he equipment and receiver.
•
Connect the equipment into an outlet on a circuit different
from that to which the receiver is connected.
•
Consult the dealer or an experienced radio/TV technician for
help.
Warning:
The user should be 20CM away from the p roduct when it is
used.