USER MANUAL
Before using, please read the operating instructions carefully to
ensure proper application and achieve satisfactory results.
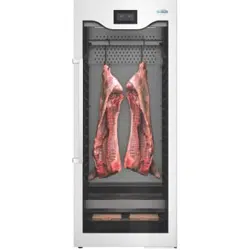
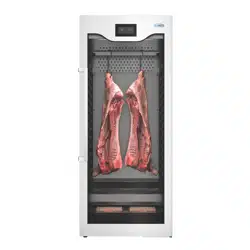
KoolMore Commercial Dry Ager
Refrigerator
Models: KM-AGER17
DRY AGER

Stay informed with the latest information
for your KoolMore Appliance.
If you need any assistance or have questions, our customer
support team is here to help.
SAFETY
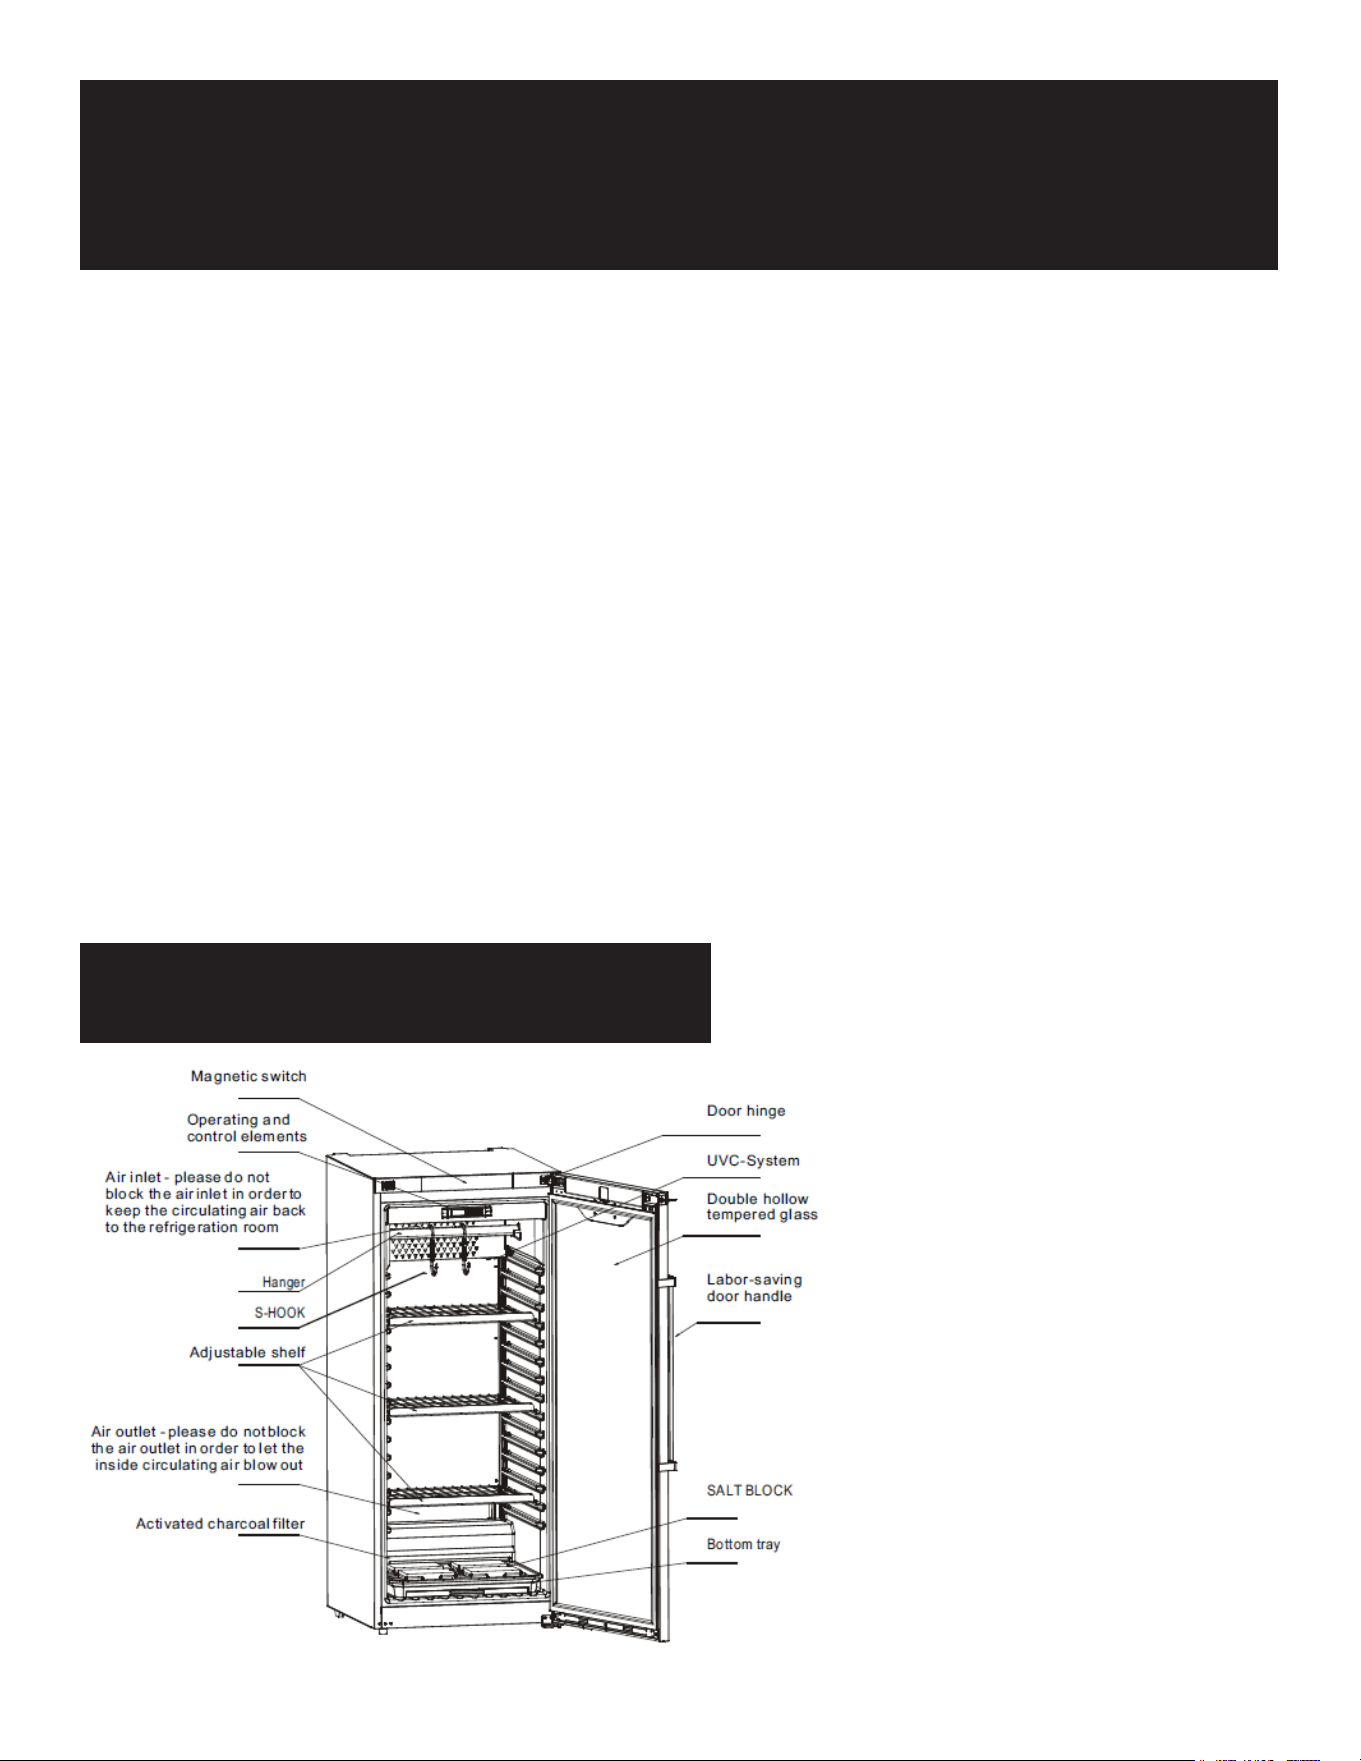
PARTS
1. Handle with Care
2. Unplug the wall socket rst.
3. Never tilt the refrigerator over 45 degrees during handling.
4. Always place the refrigerator in a dry location.
5. Keep at least 4 inches of space around the refrigerator for proper air circulation.
6. Insucient space can decrease refrigeration eciency.
7. Ensure the refrigerator is in a well-ventilated area.
8. After handling, wait for 2 hours before plugging it in and starting it.
9. Do not place the refrigerator in direct sunlight or near any heat sources, as this can reduce its cooling eciency.
10. Do not place any heavy items on top of the refrigerator.
11. Do not make holes in the refrigerator or place any items on top of it.
12. Place the refrigerator on a at and solid surface to prevent noise and vibration.
13. The power supply should be 110-120V, 60Hz single-phase AC with an exclusive three-pin receptacle.
14. Do not let the refrigerator share a socket with other appliances. This can cause the cable to overheat and may result in
a re.
15. Do not break or damage the cables, as this can cause current leakage and may result in a re.
16. Do not ush the refrigerator surface with water, as this can cause current leakage and may result in a re.
17. Do not put ammable or explosive items like ether, gasoline, alcohol, adhesive, or other dangerous products inside or
near the refrigerator.
18. Do not spray ammable substances like paint or coating near the refrigerator, as this can cause a re.
19. After a power break or unplugging the refrigerator, wait at least 5 minutes before plugging it in and starting it again.
20. Do not store medicine inside the refrigerator.
Operation
Before use:
• Clean the inside of the product with a mild disinfectant.
• Plug the device into a 110-120V socket.
• The temperature and humidity are already set to 1.5°C and 82% humidity, which are the perfect
settings for dry-aging beef and pork.
• The meat for dry-aging must be fresh, ideally no more than 5 days after slaughtering. Even vacu-
um-matured meat can be used, but for a maximum of 14 days (please remove the packaging foil).
• Open the food package and remove the foil. Place the meat on the stainless steel plate and put
the plate inside the device. Check every 2-3 days to see if there is water in the plate. If there is,
please remove it.
• The maximum load capacity of shelves is 20kg for individual pieces. Optional hooks and support
racks are available for hanging steak with a length of 0.5-0.9 meters.
• Always wear protective gloves when handling meat. No one should ever touch the meat without
gloves.
• The perfect maturing time is between 25-28 days, but more than 4 weeks is also possible.
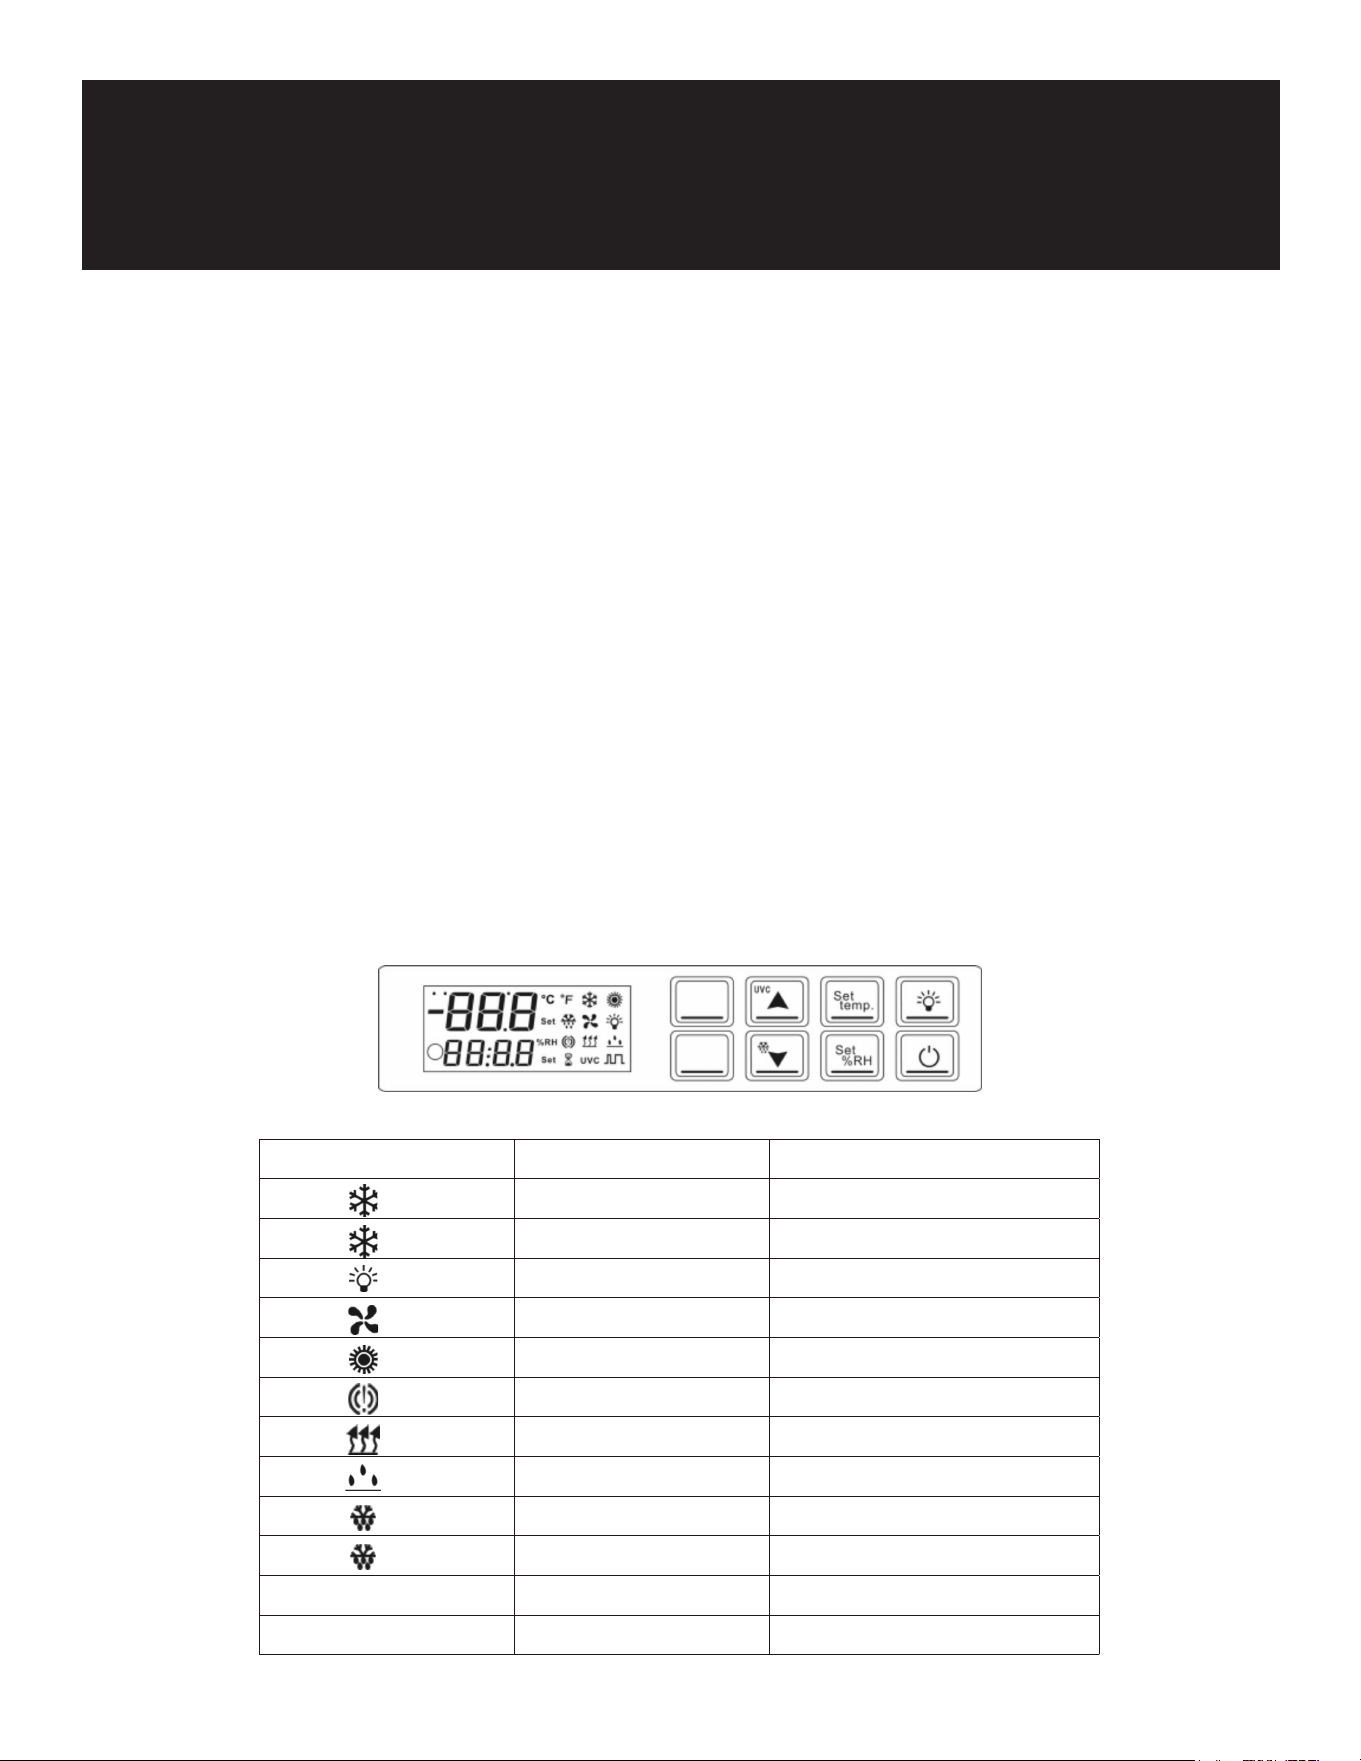
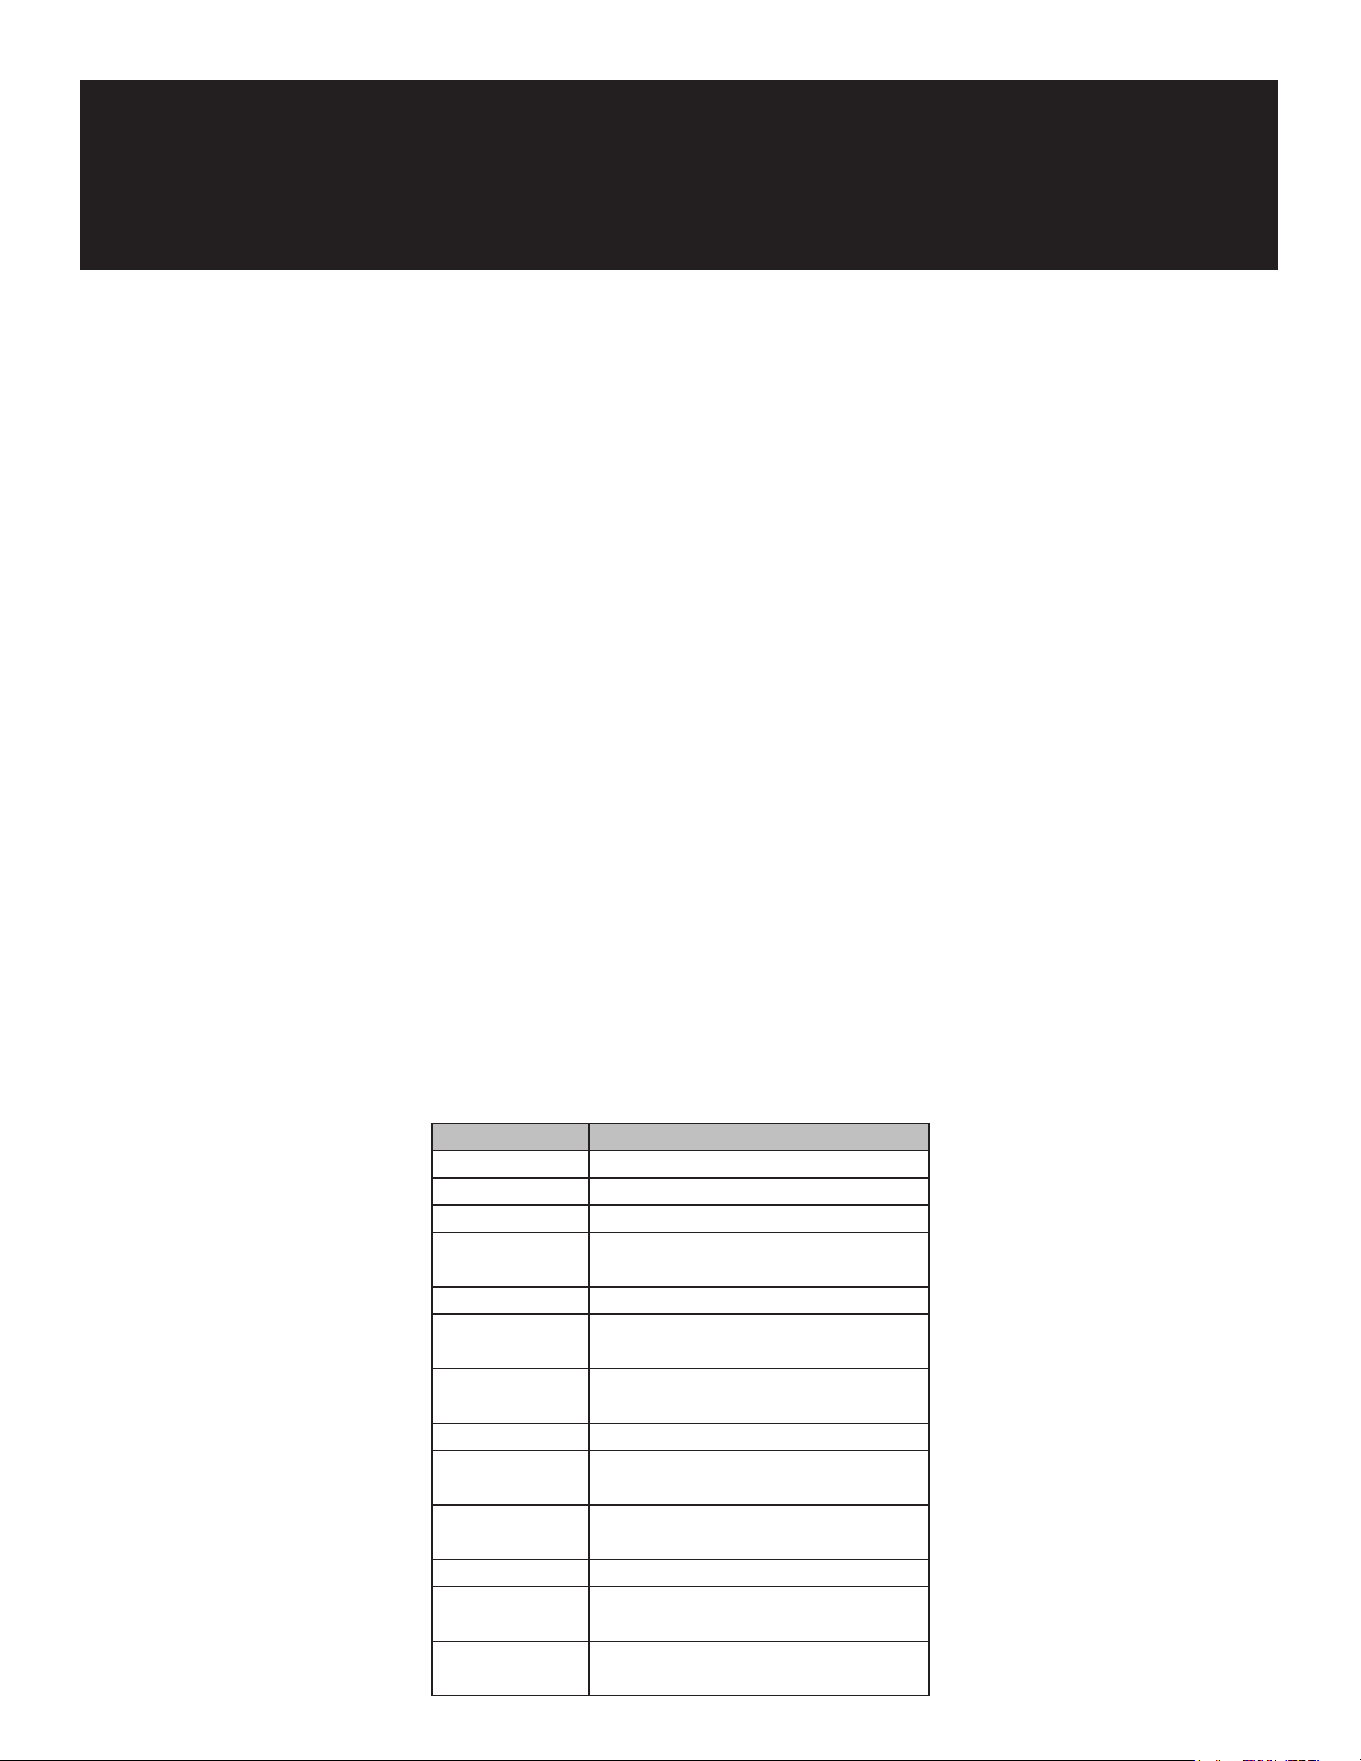
Digital Temperature Controller:
Operating and Control Settings
LED/SYMBOL
MODE FUNCTION
ON COOLING
FLASHING Delay Cool
ON Light working
ON Fans running
ON Heating active
ON Acoustic Alarm
ON Dehumidification
ON Humidification
ON Defrost Active
FLASHING Defrost
UVC ON UVC-Desinfection active
UVC FLASHING UVC alarm
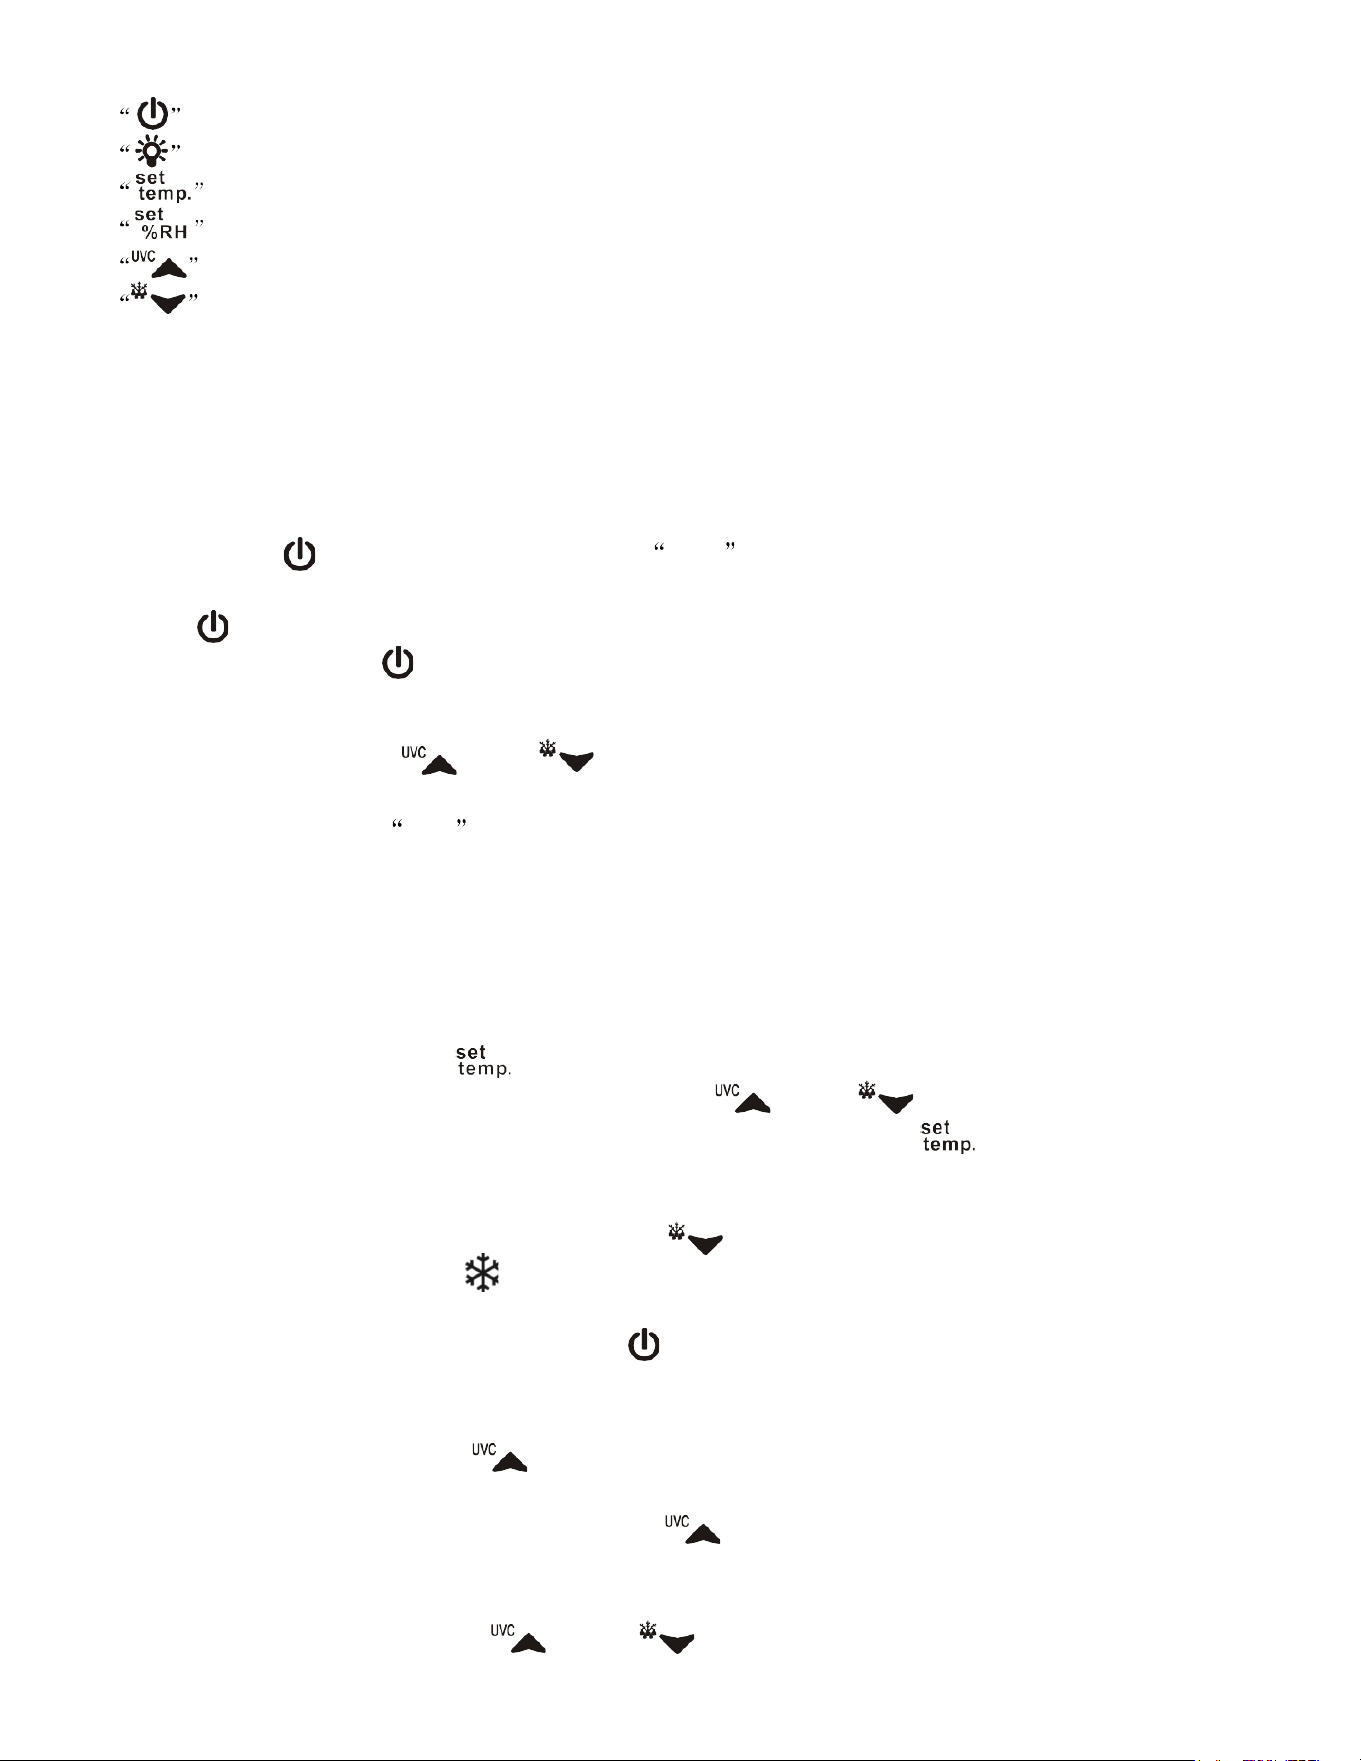
:Power ON/OFF
:LED lights on and off.
:View / change the temperature settings.
:View / change humidity settings / select or conrm parameter settings.
:Short
press to increase temperature and humidity setting / long press UVC to turn on and off.
:Short press to reduce temperature and humidity setting / long press to defrost manually.
Controller operating instructions
1. Power on and off operation:
Press the button " " once for 5 seconds and the OFF symbol is displayed. After 5 seconds, the
compressor is turned off.All relays are deactivated, only the indicator light is on.
Press the " " key to start the system directly and enter normal operation mode; in the standby state,
pressing other keys except " " key is invalid.
2. Key lock / unlock operation:
In the power on state, press " " and " " and hold together, for a minimum of 3 seconds, POF
appears for a few seconds.(POF=OFF parameter)
After the key is locked, the POF character will be displayed for all operations except the "" key and "UVC"
key function.
In the locked state, press "" and "" at the same time. After 3 seconds, the humidity area ashes and
displays "PON" for 3 seconds, indicating that it is unlocked.
3. Temperature setting operation:
In the power on state, press the "
" key briey to enter the temperature setting state. The
temperature setting value and "SET" icon ash, press the " " or "
" key to change the
temperature setting value, release the key without pressing or pressing the "
" key within 1 minute,
exit the temperature setting, save the setting value and return to the normal power on state.
4. Manual defrosting operation:
IN the normal power on state, Hold down the button " " for a min 2 seconds. it will enter the
manual defrosting mode, and the " " icon will be on. After entering the defrosting mode, if the
defrosting exit condition is met, it will exit the defrosting mode directly.
Under the working state of defrosting, press the "
" key once to exit defrosting directly and return to
normal working condition.
5. UVC on/off operation instructions:
Under normal start-up state, press " " for at least 5 seconds, start UVC ultraviolet disinfection. The
"UVC" indicator is on, which represents disinfection work.
When UVC ultraviolet disinfection lamp is on, press " " for at least 5 sec, and turn off UVC
disinfection lamp.
One key reset operation:
In the normal power on state, press " " and " " keys at the same time, and the buzzer will
sound for a long time after 3 seconds, indicating that all parameters are restored to factory set value.
Error Code Reason for Error Code Alarm Reset
"P1" Temperature probe failure After the probe returns to normal, the alarm will stop
automatically.
"P2" Defrost probe failure
"P3" Humidity probe failure
"HA" High temperature alarm When the temperature returns to the normal value
(correction of return difference) or defrosting is started, the
alarm will stop automatically.
"LA" Low temperature alarm
"HHA" High humidity alarm When the humidity returns to the normal value (correction of
return difference), the alarm will stop automatically.
"HLA" Low humidity alarm
"dA" Door switch alarm The alarm stops automatically after closing the door.
Alarm Signal Instructions:
The alarm message will be displayed all the time until the alarm is reset. Once the buzzer alarm is
detected, press the power key to eliminate the buzzer (mute).
Cautions:
Shorten the door open time and reduce the frequency of opening the door to maintain a cold tem-
perature inside the refrigerator.
Never block the air suction and outlet. Keep air circulation and refrigeration eciency.
Do not overcrowd food as it will affect cooling. Adjust the rack height for proper food storage.
Cool hot food down to room temperature before placing it in the refrigerator.
Try to minimize the number of times you open the refrigerator and keep it closed in case of a pow-
er outage.
Only a qualied service person should repair a damaged power cable using special tools.
Never touch the compressor to avoid burns.
This appliance is not intended for use by individuals (including children) with reduced physical,
sensory, or mental capabilities, or lack of experience and knowledge, unless supervised by some-
one responsible for their safety.
Children should be supervised to ensure they do not play with the appliance.
Do not store explosive substances like aerosol cans with ammable propellants in this appliance.
During normal operation, the noise level does not exceed 70dB(A).
The maximum shelf load is 18kg.
The appliance is designed for use in ambient temperatures of 60.8°F-80.6°F.
To avoid damage or other problems, do not store any corrosive food in this product.
Avoid placing the appliance in direct sunlight or near cookers, radiators, or similar heat sources.
Energy consumption depends on the environment (e.g., ambient temperature).
Dust accumulation increases energy consumption. Clean the condenser on the back of the prod-
uct at least once a year using a vacuum cleaner.
When transporting or using the product above 4921 feet above sea level, the insulating glass on
the door may break due to the decrease in atmospheric pressure. The edges of the broken glass
are sharp and can cause serious injury.
Maintenance
Notice:
• Regularly clean the refrigerator and perform periodic maintenance.
• Always unplug the socket before performing maintenance.
• Do not use damaged plugs or loose sockets to prevent electric shock or short circuits.
• Never ush the refrigerator. Do not use alkaline detergents, soap, gasoline, acetone, or brushes.
Clean outside:
Use a soft cloth dipped in neutral detergent (such as dish detergent) to clean the outside of the refrig-
erator. Then wipe it with a dry soft cloth.
Clean inside:
• Remove the racks for cleaning with water.
Shutdown for a long time:
• Remove all food and unplug the wall socket.
• Thoroughly clean both the inside and outside of the refrigerator and leave the door open to dry
completely.
• The glass is fragile. Keep it away from children.
• Clean the condensate tray and wipe it dry.
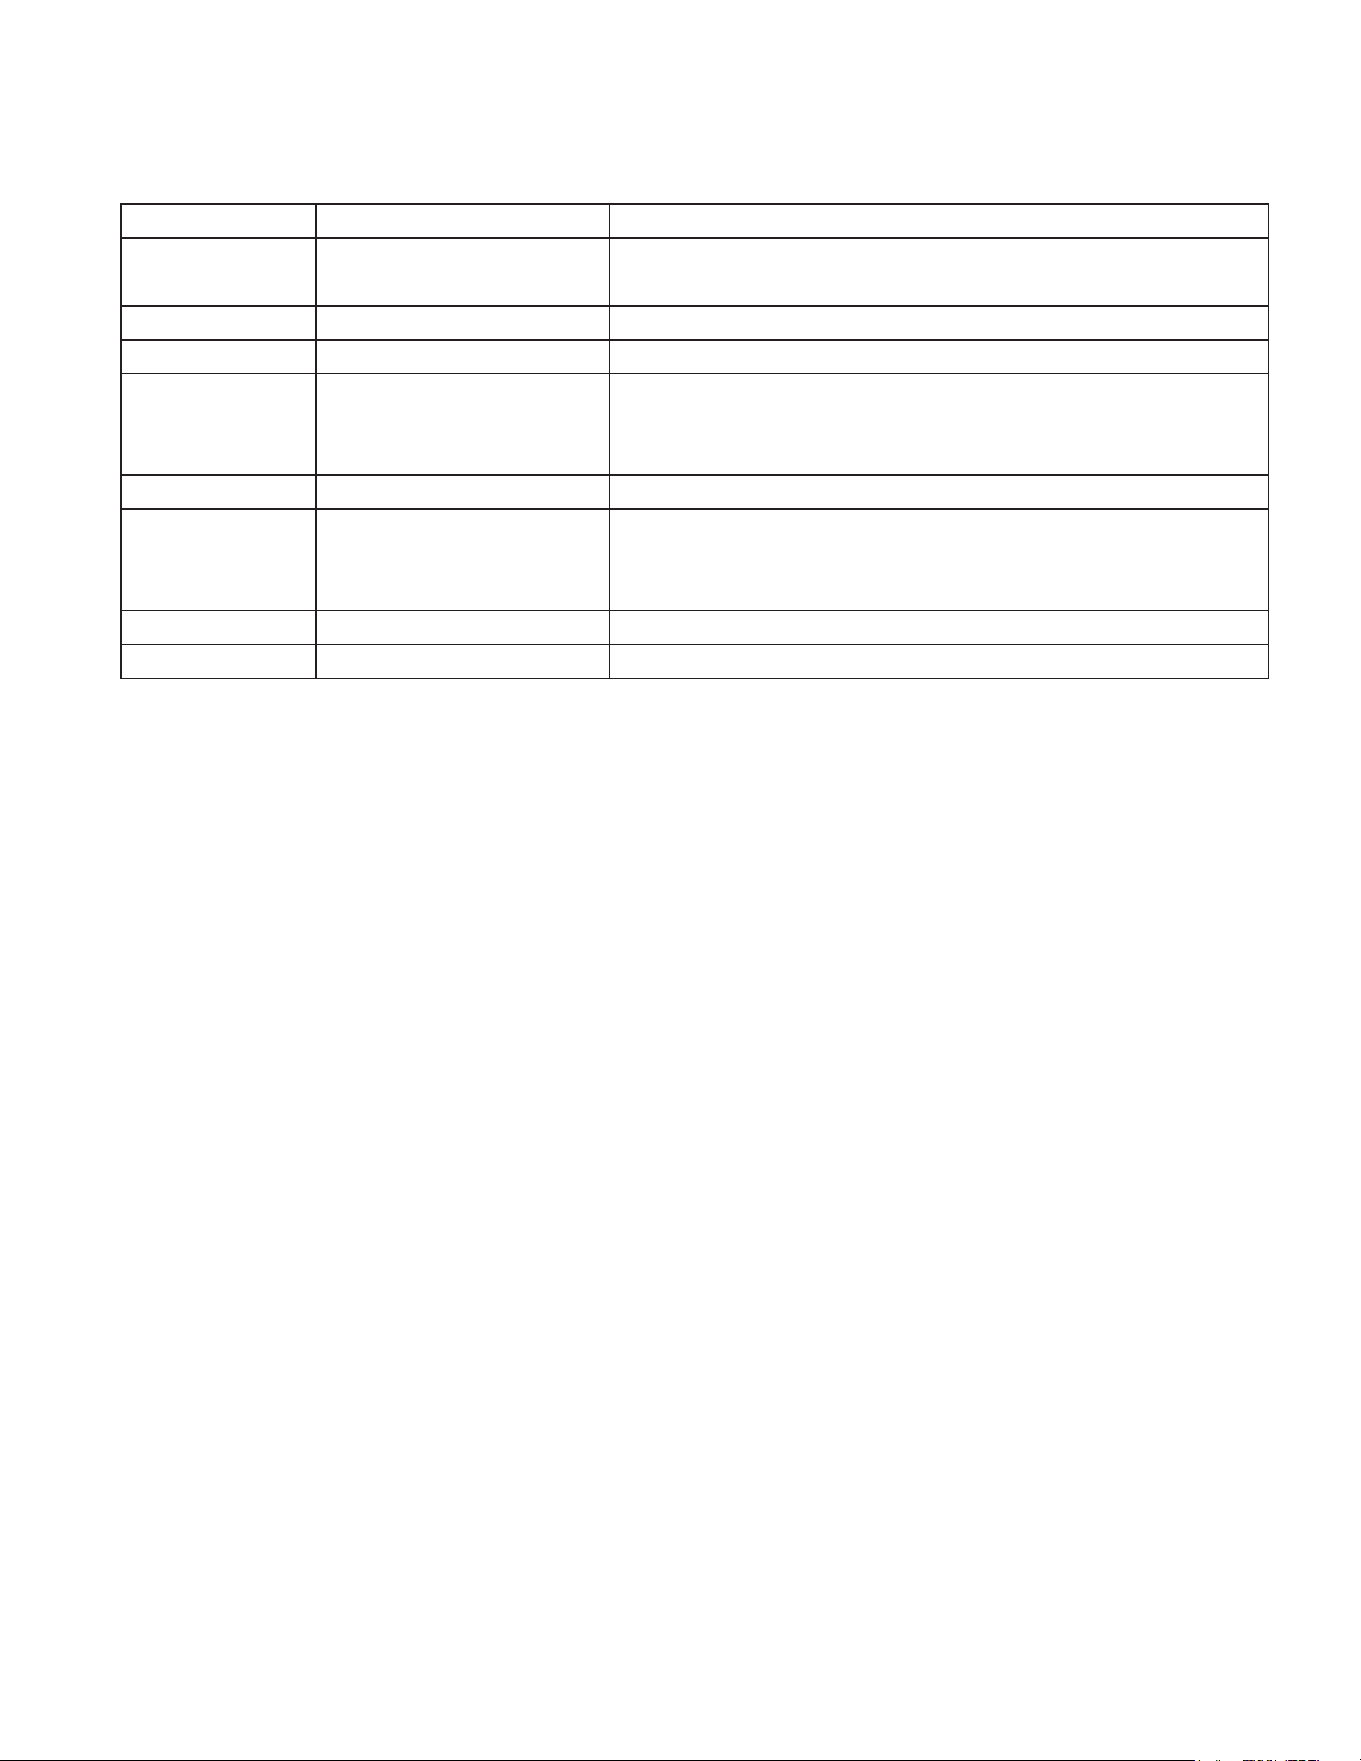
TROUBLESHOOTING
Trouble Cause and Remedy
No refrigeration - Is the plug in the socket well?
- Is the fuse broken?
- Is there no power?
Unsatisfactory
refrigeration
- Is it under direct sunlight? Is there
any heat source nearby?
- Is the surrounding ventilation bad?
- Does the door close well? Does the
door open for a long time?
- Is the door seal strip deformed or
damaged?
- Is food congested or too much?
- Does food block the air suction or
outlet?
- Regulate the temperature controller.
Much noise - The refrigerator is not level.
- The refrigerator contacts the wall or
other matter.
- There is a loose part in the
refrigerator.

WARRANTY
LIMITED WARRANTY
Koolmore Supply, Inc. extends a limited warranty to the original purchaser, guaranteeing that this Koolmore
product is free from manufacturing defects in material or workmanship for one year from the date of
purchase.
Should you discover any such defect within the warranty period, Koolmore Supply, Inc., reserves the right to
repair or replace the product without charge, or to cover the cost of replacement parts and repair labor needed
to correct defects present at the time of purchase or resulting from regular usage, when the appliance has been
installed, operated, and maintained as per the instructions provided.
At its sole discretion, Koolmore Supply Inc. may decide to replace the product. In such an event, your replace-
ment
appliance will carry the warranty for the remaining term of the original unit's warranty period.
This warranty is valid exclusively to the original purchaser of the product and only applicable within the United
States. The warranty commences from the date of original consumer purchase. Proof of the original purchase
date will be required to obtain service under this warranty.
Under this limited warranty, your sole and exclusive remedy will be product repair, as outlined above. All
services must be provided by a Koolmore-designated service company.
To claim warranty or request repair service:
Email support@koolmore.com. Please include your name, address, phone number, warranty repair request,
and a copy of your proof of purchase receipt. Alternatively, visit koolmore.com and use the contact us page. A
Koolmore customer service representative will promptly arrange service for your appliance.
We thank you for choosing Koolmore.
WARRANTY EXCLUSIONS
This limited warranty will not cover:
1. Failure of the product to perform during power failures or interruptions,
or due to inadequate electrical service.
2. Damage incurred during transportation or handling.
3. Damage caused by accidents, vermin, lightning, winds, re, oods, or acts of God.
4. Damage resulting from accidents, alterations, misuse, abuse, improper installation, repair, or maintenance.
This includes using any external device that alters or converts the voltage or frequency of
electricity.
5. Unauthorized product modications, repairs by unauthorized centers, or use of non-approved
replacement parts.
6. Abnormal cleaning and maintenance not aligned with the user's manual.
7. Use of incompatible accessories or components.
8. Any costs associated with repairs or replacements under these excluded circumstances shall be the
responsibility of the consumer.