
INSTANT
®
SOLO CAFÉ
COFFEE MAKER
USER MANUAL
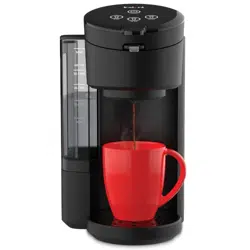
to your new Instant Solo Café Coffee Maker!
Brew a delicious cup of café-quality coffee quickly and in your
own home!
Get started with your new Solo Café Coffee Maker!
.
Welcome
Before using your Instant Solo Café, read all instructions, including
the Safety Information on page 2 and Warranty on pages 15. Failure
to follow the safeguards and instructions may result in personal
injury and/or property damage.

CONTENTS
Important safeguards 2
What’s in the box 5
Your Instant Solo Café Coffee Maker 6
Before you brew 8
Brewing coffee 10
Care, cleaning, storage 12
Descaling / Removing mineral deposits 13
Learn more 14
Accessories 14
Warranty 15
Notes 17
2
User Manual
Failure to adhere to safety instructions may result in personal
injury and/or property damage and may void your warranty.
READ ALL INSTRUCTIONS
Before using your Instant Solo Café, please read all instructions,
including the Safety Information below. Keep this manual for reference.
Placement
• DO operate the appliance on a stable, non-combustible, level surface.
• DO NOT place the appliance on or near a gas or electric burner, or
in an oven.
• DO NOT begin brewing without placing a mug or cup on the drip tray
plate. Always make sure the mug or cup is large enough to hold the
hot liquid.
General Use
• DO NOT use this coffee maker outdoors.
• DO NOT fill the water tank with mineral water, milk or other liquids.
Only fill the water tank with clean, cold water.
• DO NOT let the coffee maker operate without water.
• DO NOT use the appliance for anything other than its intended use.
Not for commercial use. For household use only.
• DO regularly inspect the appliance and power cord.
• DO NOT leave the appliance exposed to sun, wind, and/or snow.
• DO operate and store the appliance above 32°F / 0°C.
• DO NOT allow children to operate the appliance; close supervision is
required when any appliance is used near children.
• DO NOT let children play with this appliance.
• DO NOT force the coffee pod into the appliance. Only use pods
intended for this appliance.
• DO NOT open the top cover during the brew process; water is extremely
hot and there is risk of personal injury and/or property damage.
IMPORTANT
SAFEGUARDS

3
User Manual
• DO NOT touch hot surfaces.
• DO use handles or knobs.
The use of an accessory not evaluated for use with this appliance may
cause injuries or property damage.
Care and Storage
• DO unplug from outlet when not in use and before cleaning. Allow
the appliance to cool before putting on or taking off parts, and
before cleaning the appliance.
• DO NOT store any materials in the brewing chamber when not in use.
Power Cord
A short power-supply cord is used to reduce the risk resulting from it
being grabbed by children, becoming entangled in, or tripping over a
longer cord.
Spilled liquids from this coffee maker can cause serious burns.
Keep appliance and cord away from children.
• DO NOT let the power cord touch hot surfaces or open flame,
including the stovetop.
• DO NOT use with power converters or adapters, timer switches or
separate remote-control systems.
• DO NOT use an extension cord.
• DO NOT let the power cord hang over the edge of tables or counters.
• DO unplug your coffee maker by grasping the plug and pull from the
outlet. Never pull from the power cord.
This appliance has a polarized plug, with one blade wider than the
other. To reduce the risk of electric shock:
• ONLY plug the power cord into a grounded electrical outlet.
• DO NOT attempt to modify the plug. If it does not fit into the outlet,
contact a qualified electrician.
Electrical Warning
The coffee maker contains electrical components that are an electrical
shock hazard. Failure to follow these instructions may result in electric
shock, personal injury and/or property damage.
4
User Manual
To protect against electrical shock, personal injury and/or
property damage:
• To reduce the risk of fire, electric shock, other personal injury and/
or property damage, DO NOT remove the bottom cover. No user-
serviceable parts inside. Repair should be done by authorized
service personnel only.
• To disconnect, turn any controls to the OFF position and remove
plug from power source. Always unplug when not in use, as well
as before adding or removing parts or accessories, and before
cleaning. To unplug, grasp the plug and pull from the outlet. Never
pull from the power cord.
• DO regularly inspect the appliance and power cord. DO NOT
operate the appliance if the power cord or plug is damaged, or
after the appliance malfunctions or is dropped or damaged in any
manner. For assistance, contact Customer Care by email at
support@instanthome.com.
• DO NOT attempt to repair, replace or modify components of the
appliance, as this may cause electric shock, fire, other personal
injury and/or property damage, and will void the warranty.
• DO NOT tamper with any of the safety mechanisms, as this may
result in personal injury and/or property damage.
• DO NOT immerse power cord, plug or the appliance in water or
other liquid.
• DO plug this appliance into a polarized outlet one way. This appliance
has a polarized plug, and one blade is wider than the other.
• DO NOT use the appliance in electrical systems other than
120 V ~ 60 Hz for North America.
SAVE THESE INSTRUCTIONS
Failure to adhere to safety instructions may result in personal
injury and/or property damage and may void your warranty.
5
User Manual
WHAT’S IN THE BOX
Instant Solo Café Single-serve Coffee Maker
Illustrations are for reference only and may differ from the actual product.
Remember to recycle!
We designed this packaging with sustainability in mind. Please recycle
everything that can be recycled where you live. Be sure to keep this
User Manual for reference.
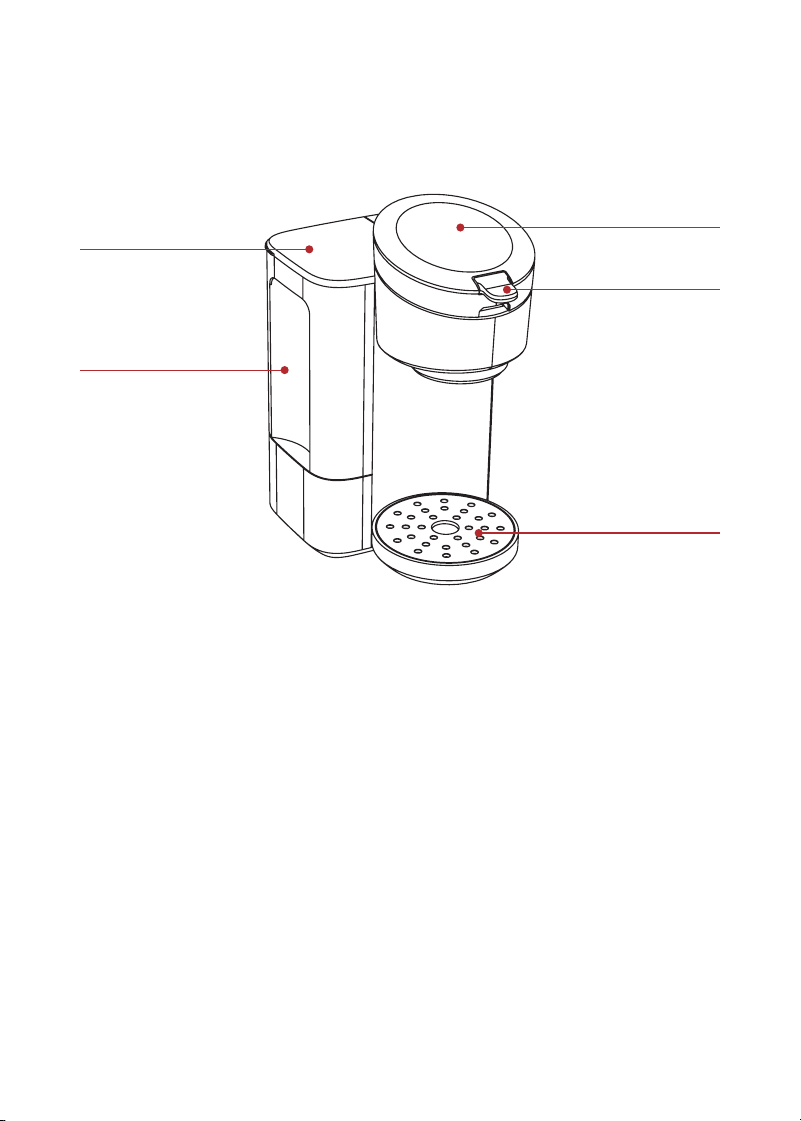
Water tank lid
Water tank
Removable from the
Instant Solo Café base
LED panel
Brewing lid latch
Drip tray
Removable
6
User Manual
YOUR INSTANT SOLO CAFÉ COFFEE MAKER
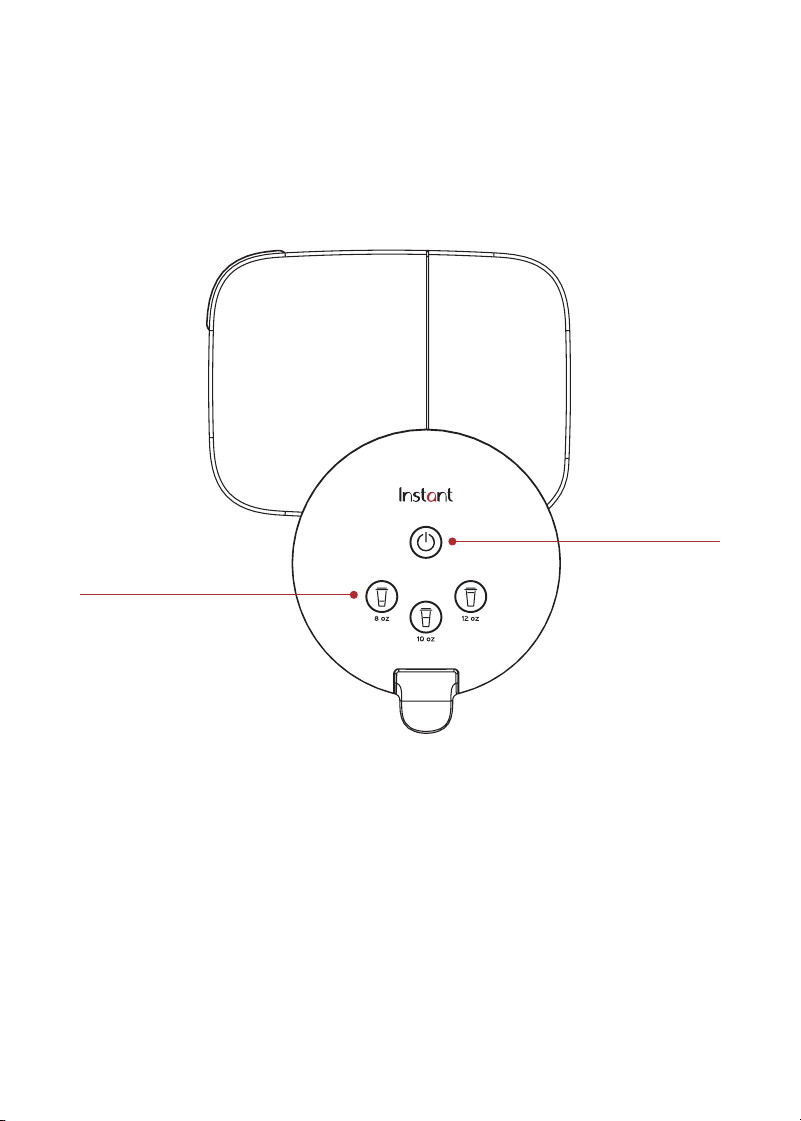
Control panel
Here’s a look at the simple-to-use, easy-to-read Instant Solo Café
Coffee Maker control panel.
Power
On/Off
Serving size
8 oz
10 oz
12 oz

7
User Manual
Plugging in your Instant Solo Café Coffee Maker
Plug in your Instant Solo Café and press the power button to turn it on.
The LED buttons will light up.
After 30 minutes of inactivity, your coffee maker will enter standby
mode. The LED control panel will dim. After another 2 hours of
inactivity, the LED panel will shut off.
High Altitude Mode
If you live at higher altitudes (over 5,000 feet above sea level) be sure
to activate High Altitude Mode so your coffee maker works properly.
If you’re using the Instant Solo Café at +5,000 feet sea level, enable
High Altitude Mode before you brew.
To turn High Altitude Mode on
1. Make sure your Instant Solo Café is on.
2. Press and hold the 8 oz and 10 oz buttons for 3 seconds.
3. Wait until the 8 oz and 10 oz buttons blink twice.
To turn High Altitude Mode off
1. Make sure your Instant Solo Café is on.
2. Press and hold the 8 oz and 10 oz buttons for 3 seconds.
3. Wait until the 8 oz and 10 oz buttons blink three times.
Water Empty Alert
Your Instant Solo Café will let you know when the water tank is empty:
• When the water tank is empty, the unit will beep, brewing will stop,
and the control panel buttons will flash.
• To end the alert, press any button or open the lid.
• Once you’ve ended the alert, refill the water tank. Then you can
start a new brewing session.

8
User Manual
BEFORE YOU BREW
Initial setup
1. Pull the Instant Solo Café and all accessories out of the box.
2. Remove all packaging materials from within and around the Instant
Solo Café.
3. Place your Instant Solo Café on a dry, stable, and level surface.
4. Lift the water tank up and remove the foam cushion from
underneath the water tank.
5. Place water tank back on the coffee maker base.
6. Plug in your Instant Solo Café.
Initial washing
1. Lift the water tank up to remove from Instant Solo Café.
2. Handwash the water tank with warm water and dish soap. Rinse
with warm, clear water.
3. Wipe the water tank and accessories with a clean, dry cloth.
4. With a damp cloth, wipe down the coffee maker base and
control panel.
First cleaning cycle
Before you brew your first cup of coffee, clean your Instant Solo Café.
Run the following cleaning program without a coffee pod.
1. Lift the water tank from the back of the coffee maker and remove
the water tank lid.
2. Fill the reservoir with cold water to the MAX line as indicated on
the water tank.
3. Place a large mug which can hold at least 10 oz of liquid onto the
drip tray, beneath the spout.

9
User Manual
4. Ensure the brewing lid is closed and securely latched. Press the
8 oz button. The button will flash as the water heats.
5. The 8 oz button will illuminate, and the coffee maker begins a
brewing cycle. Hot water will pour from the brew spot. Once the
brewing cycle ends and water stops dripping from the spout,
discard water from the mug.
To stop brewing at any time, touch 8 oz again.
6. Place the empty mug back on the drip tray.
7. Press the 10 oz button. The button will flash as the water heats.
8. The 10 oz button will illuminate, and the coffee maker begins a
brewing cycle. Hot water will pour from the brew spot. Once the
brewing cycle ends and water stops dripping from the spout,
discard water from the mug.
To stop brewing at any time, touch 10 oz again.
Be careful: Brewing reaches high temperatures. DO NOT touch the
brewing housing unit or spout during the brewing process.

10
User Manual
BREWING COFFEE
Once you’ve cleaned your Instant Solo Café Coffee Maker and water
tank, and you’ve first run cleaning program, you can begin brewing a
delicious cup of coffee.
High Altitude Mode
If you live at higher altitudes (over 5,000 feet above sea level) be sure
you follow these instructions, so your coffee maker works properly. See
page 8 for instructions.
Using coffee pods
The Instant Solo Coffee Maker brews delicious coffee from the following:
• Instant
®
Compostable Coffee Pods
• K-Cup
®
Pods
• Coffee pods compatible with K-Cups
• Instant Reusable Pod (sold separately at instanthome.com)
With the Reusable Pod, you can brew using your own ground coffee
beans. Use 2 tablespoons of medium to medium-fine ground coffee in
the reusable pod, and insert the pod just as you would a coffee pod.
How to brew coffee
Prep
1. Fill the water tank up to the MAX fill line.
DO NOT attempt to brew if the water level is below the MIN fill line.
Brew
1. Lift the brewing lid latch and place the coffee pod in the brewing
housing container.
2. Close the brewing lid, ensuring it is securely latched.
*K-Cup is a registered trademark of Keurig Green Mountain, Inc. Use of the K-Cup trademark
does not imply any affiliation with or endorsement by Keurig Green Mountain, Inc.

11
User Manual
3. Select the desired amount of coffee you would like to brew by
pressing the 8 oz, 10 oz or 12 oz buttons. The selected button will
flash while water heating cycle begins.
You can stop brewing at any time by pressing the selected cup size again.
4. The selected brewing cup size LED will remain illuminated when
the coffee maker starts brewing. Soon, hot water will pour from the
brew spout.
5. When the water stops dripping from the spout, lift the lid latch and
discard the coffee pod.
6. Enjoy your freshly brewed cup of coffee.
Be careful: Brewing reaches high temperatures. DO NOT touch the
brewing housing unit or spout during the brewing process. Touching
hot surfaces may result in personal injury and/or property damage.
12
User Manual
CARE, CLEANING, STORAGE
Clean your Instant Solo Café Coffee Maker regularly to ensure the
best possible flavor and to prevent mineral deposits from building up
in the coffee maker.
Always unplug the coffee maker and let it cool to room temperature
before cleaning. Never use metal scouring pads, abrasive powders, or
harsh chemical detergents on any of the coffee maker’s parts.
Let all parts dry thoroughly before use, and before storage.
Instant Solo Café Parts
and Accessories
Cleaning methods and instructions
Water tank Remove the tank and handwash with dish soap
and warm water.
Drip tray Can be removed and washed by hand with dish
soap and warm water or placed in the top rack of
a dishwasher.
Coffee maker / LED panel Use a damp dish cloth to clean the outside of the
coffee maker and LED panel
Power cord DO NOT fold power cord when storing.
Be careful: The coffee maker contains electrical components.
To avoid fire, electric shock, or personal injury:
• Hand wash only.
• DO NOT rinse or immerse the coffee maker, power cord, or plug in
water or other liquids.

13
User Manual
DESCALING / REMOVING
MINERAL DEPOSITS
With regular use minerals may accumulate in the coffee maker, which
can affect the temperature and strength of your brew.
To make sure your coffee maker stays in tip top shape, descale it
regularly to keep minerals deposits from building up.
After 300 cycles, the 10 oz and 12 oz buttons flash to remind you to
clean and descale your coffee maker.
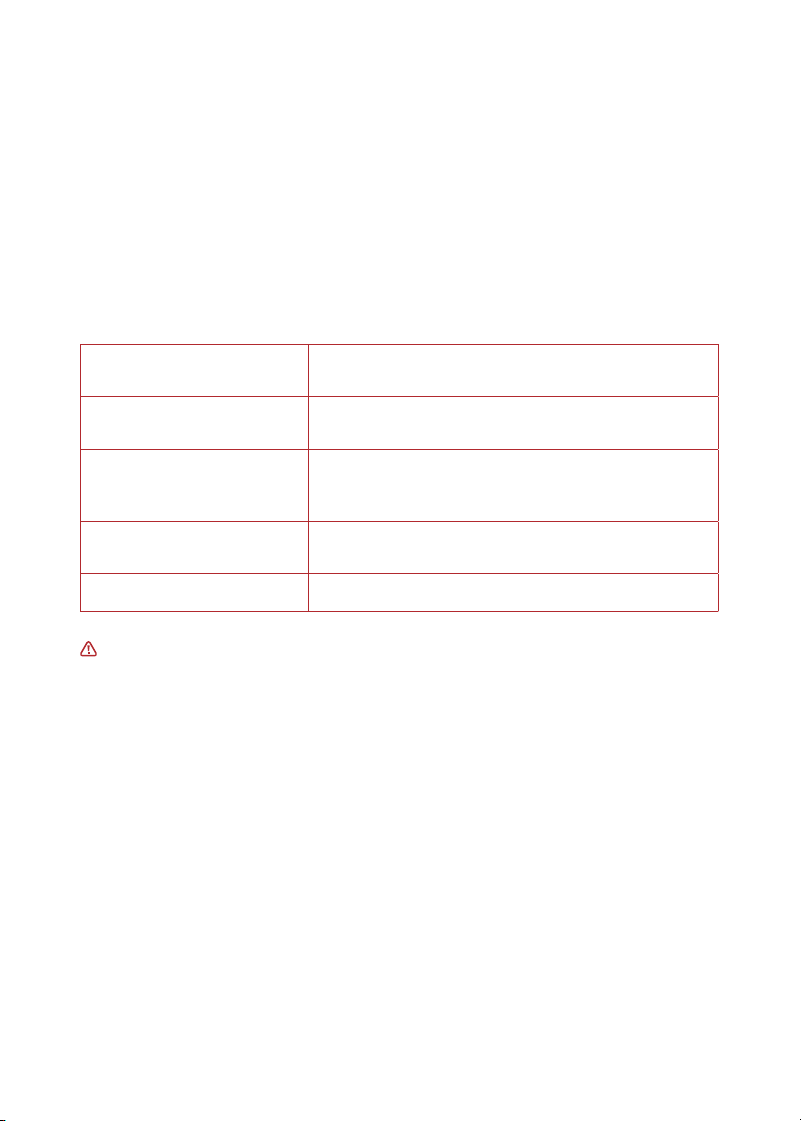
Descaling Solution Ratio
Cleaner Cleaner to water ratio
Household descaling solution 1:4
Citric acid 3:100
1. Combine cleaner and water as shown in the table above.
2. Remove any used coffee pods from the brewing housing unit and
keep it empty during the cleaning cycle.
3. Fill the water tank to the MAX line with the cleaning mixture.
4. Place a large container beneath the drip nozzle.
5. Touch and hold the 10 oz and 12 oz buttons for 3 seconds.
The cleaning mixture runs through the appliance until the water tank is empty.
6. Discard the cleaning mixture from the container and place the
emptied container beneath the drip nozzle.
7. Rinse the water tank and fill to the MAX line with cool, clean water.
8. Touch and hold the 10 oz and 12 oz buttons for 3 seconds.
The cleaning mixture runs through the appliance until the water tank is empty.
9. Discard water produced from coffee maker.
Be careful: Hot water is used for descaling. To avoid risk of personal
injury and/or property damage, the container must be large enough to
hold the entire contents of the water tank (40 oz / ~ 1183 mL).
14
User Manual
LEARN MORE
There’s a whole world of Instant
®
Solo Café information and help just
waiting for you. Here are some of the most helpful resources.
Register your product
Instanthome.com/register
Contact Consumer Care
In the Instant Brands Connect App
Instanthome.com/customer-care-center
support@instanthome.com
Instant Brands
®
Connect App
Instanthome.com
iOS and Android app stores
Replacement parts and accessories
Instanthome.com
Join the community
Product specifications
Model Volume Wattage Power Weight Dimensions
SSCM-1100 40 oz /
1182.9 mL
water tank
1250 W 120V /
60Hz
5.0 lb
2.27 kg
in: 12.4 H X 7.3 W X 10.3 D
mm: 315 H X 185 W X 262 D
ACCESSORIES
Part Part number
Instant Reusable Coffee Pod with Handle 310-0137-01

15
User Manual
WARRANTY
One (1) Year Limited Warranty
This One (1) Year Limited Warranty applies to purchases made from authorized retailers
of Instant Brands LLC (“Instant Brands”) by the original appliance owner and is not
transferable. Proof of original purchase date and, if requested by Instant Brands, return
of your appliance, is required to obtain service under this Limited Warranty. Provided the
appliance was used in accordance with the use & care instructions, Instant Brands will,
in its sole and exclusive discretion, either: (i) repair defects in materials or workmanship;
or (ii) replace the appliance. In the event that your appliance is replaced, the Limited
Warranty on the replacement appliance will expire twelve (12) months from the date of
receipt. Failure to register your product will not reduce your warranty rights. The liability
of Instant Brands, if any, for any allegedly defective appliance or part will not exceed the
purchase price of a comparable replacement appliance.
What is not covered by this warranty?
• Products purchased, used, or operated outside of the United States and Canada.
• Products that have been modified or attempted to be modified.
• Damage resulting from accident, alteration, misuse, abuse, neglect, unreasonable
use, use contrary to the operating instructions, normal wear and tear, commercial
use, improper assembly, disassembly, failure to provide reasonable and necessary
maintenance, fire, flood, acts of God, or repair by anyone unless directed by an
Instant Brands representative.
• Use of unauthorized parts and accessories.
• Incidental and consequential damages.
• The cost of repair or replacement under these excluded circumstances.
EXCEPT AS EXPRESSLY PROVIDED HEREIN AND TO THE EXTENT PERMITTED BY
APPLICABLE LAW, INSTANT BRANDS MAKES NO WARRANTIES, CONDITIONS OR
REPRESENTATIONS, EXPRESS OR IMPLIED, BY STATUTE, USAGE, CUSTOM OF TRADE
OR OTHERWISE WITH RESPECT TO THE APPLIANCES OR PARTS COVERED BY THIS
WARRANTY, INCLUDING BUT NOT LIMITED TO, WARRANTIES, CONDITIONS, OR
REPRESENTATIONS OF WORKMANSHIP, MERCHANTABILITY, MERCHANTABLE QUALITY,
FITNESS FOR A PARTICULAR PURPOSE OR DURABILITY.

16
User Manual
Some states or provinces do not allow for: (1) the exclusion of implied warranties of
merchantability or fitness; (2) limitations on how long an implied warranty lasts; and/or
(3) the exclusion or limitation of incidental or consequential damages; so these
limitations may not apply to you. In these states and provinces, you have only the implied
warranties that are expressly required to be provided in accordance with applicable
law. The limitations of warranties, liability, and remedies apply to the maximum extent
permitted by law. This limited warranty gives you specific legal rights, and you may also
have other rights which vary from state to state or province to province.
Product Registration
Please visit
www.instanthome.com/register to register your new Instant Brands
appliance. Failure to register your product will not diminish your warranty rights. You
will be asked to provide the store name, date of purchase, model number (found on the
back of your appliance) and serial number (found on the bottom of your appliance) along
with your name and email address. The registration will enable us to keep you up to date
with product developments, recipes and contact you in the unlikely event of a product
safety notification. By registering, you acknowledge that you have read and understand
the instructions for use, and warnings set forth in the accompanying instructions.
Warranty Service
To obtain warranty service, please contact our Consumer Care Department by email
to
support@instanthome.com. You can also create a support ticket online at
www.instanthome.com. If we are unable to resolve the problem, you may be asked to
send your appliance to the Service Department for quality inspection. Instant Brands
is not responsible for shipping costs related to warranty service. When returning your
appliance, please include your name, mailing address, email address, phone number,
and proof of the original purchase date as well as a description of the problem you are
encountering with the appliance.
17
User Manual
NOTES

In Canada, distributed by
Instant Brands Inc.
400-1565 Carling Avenue
Ottawa, ON K1Z 8R1
In U.S., distributed by
Instant Brands LLC
3025 Highland Parkway, Suite 700
Downers Grove, IL 60515 U.S.
instanthome.com
© 2023 Instant Brands
140-6321-01
Art release date
04/17/2023
INSTANT and INSTANT BRANDS
are registered trademarks
of Instant Brands