*You can adjust the sensitivity in Camera Settings > Detection > Wake-up Sensitivity.
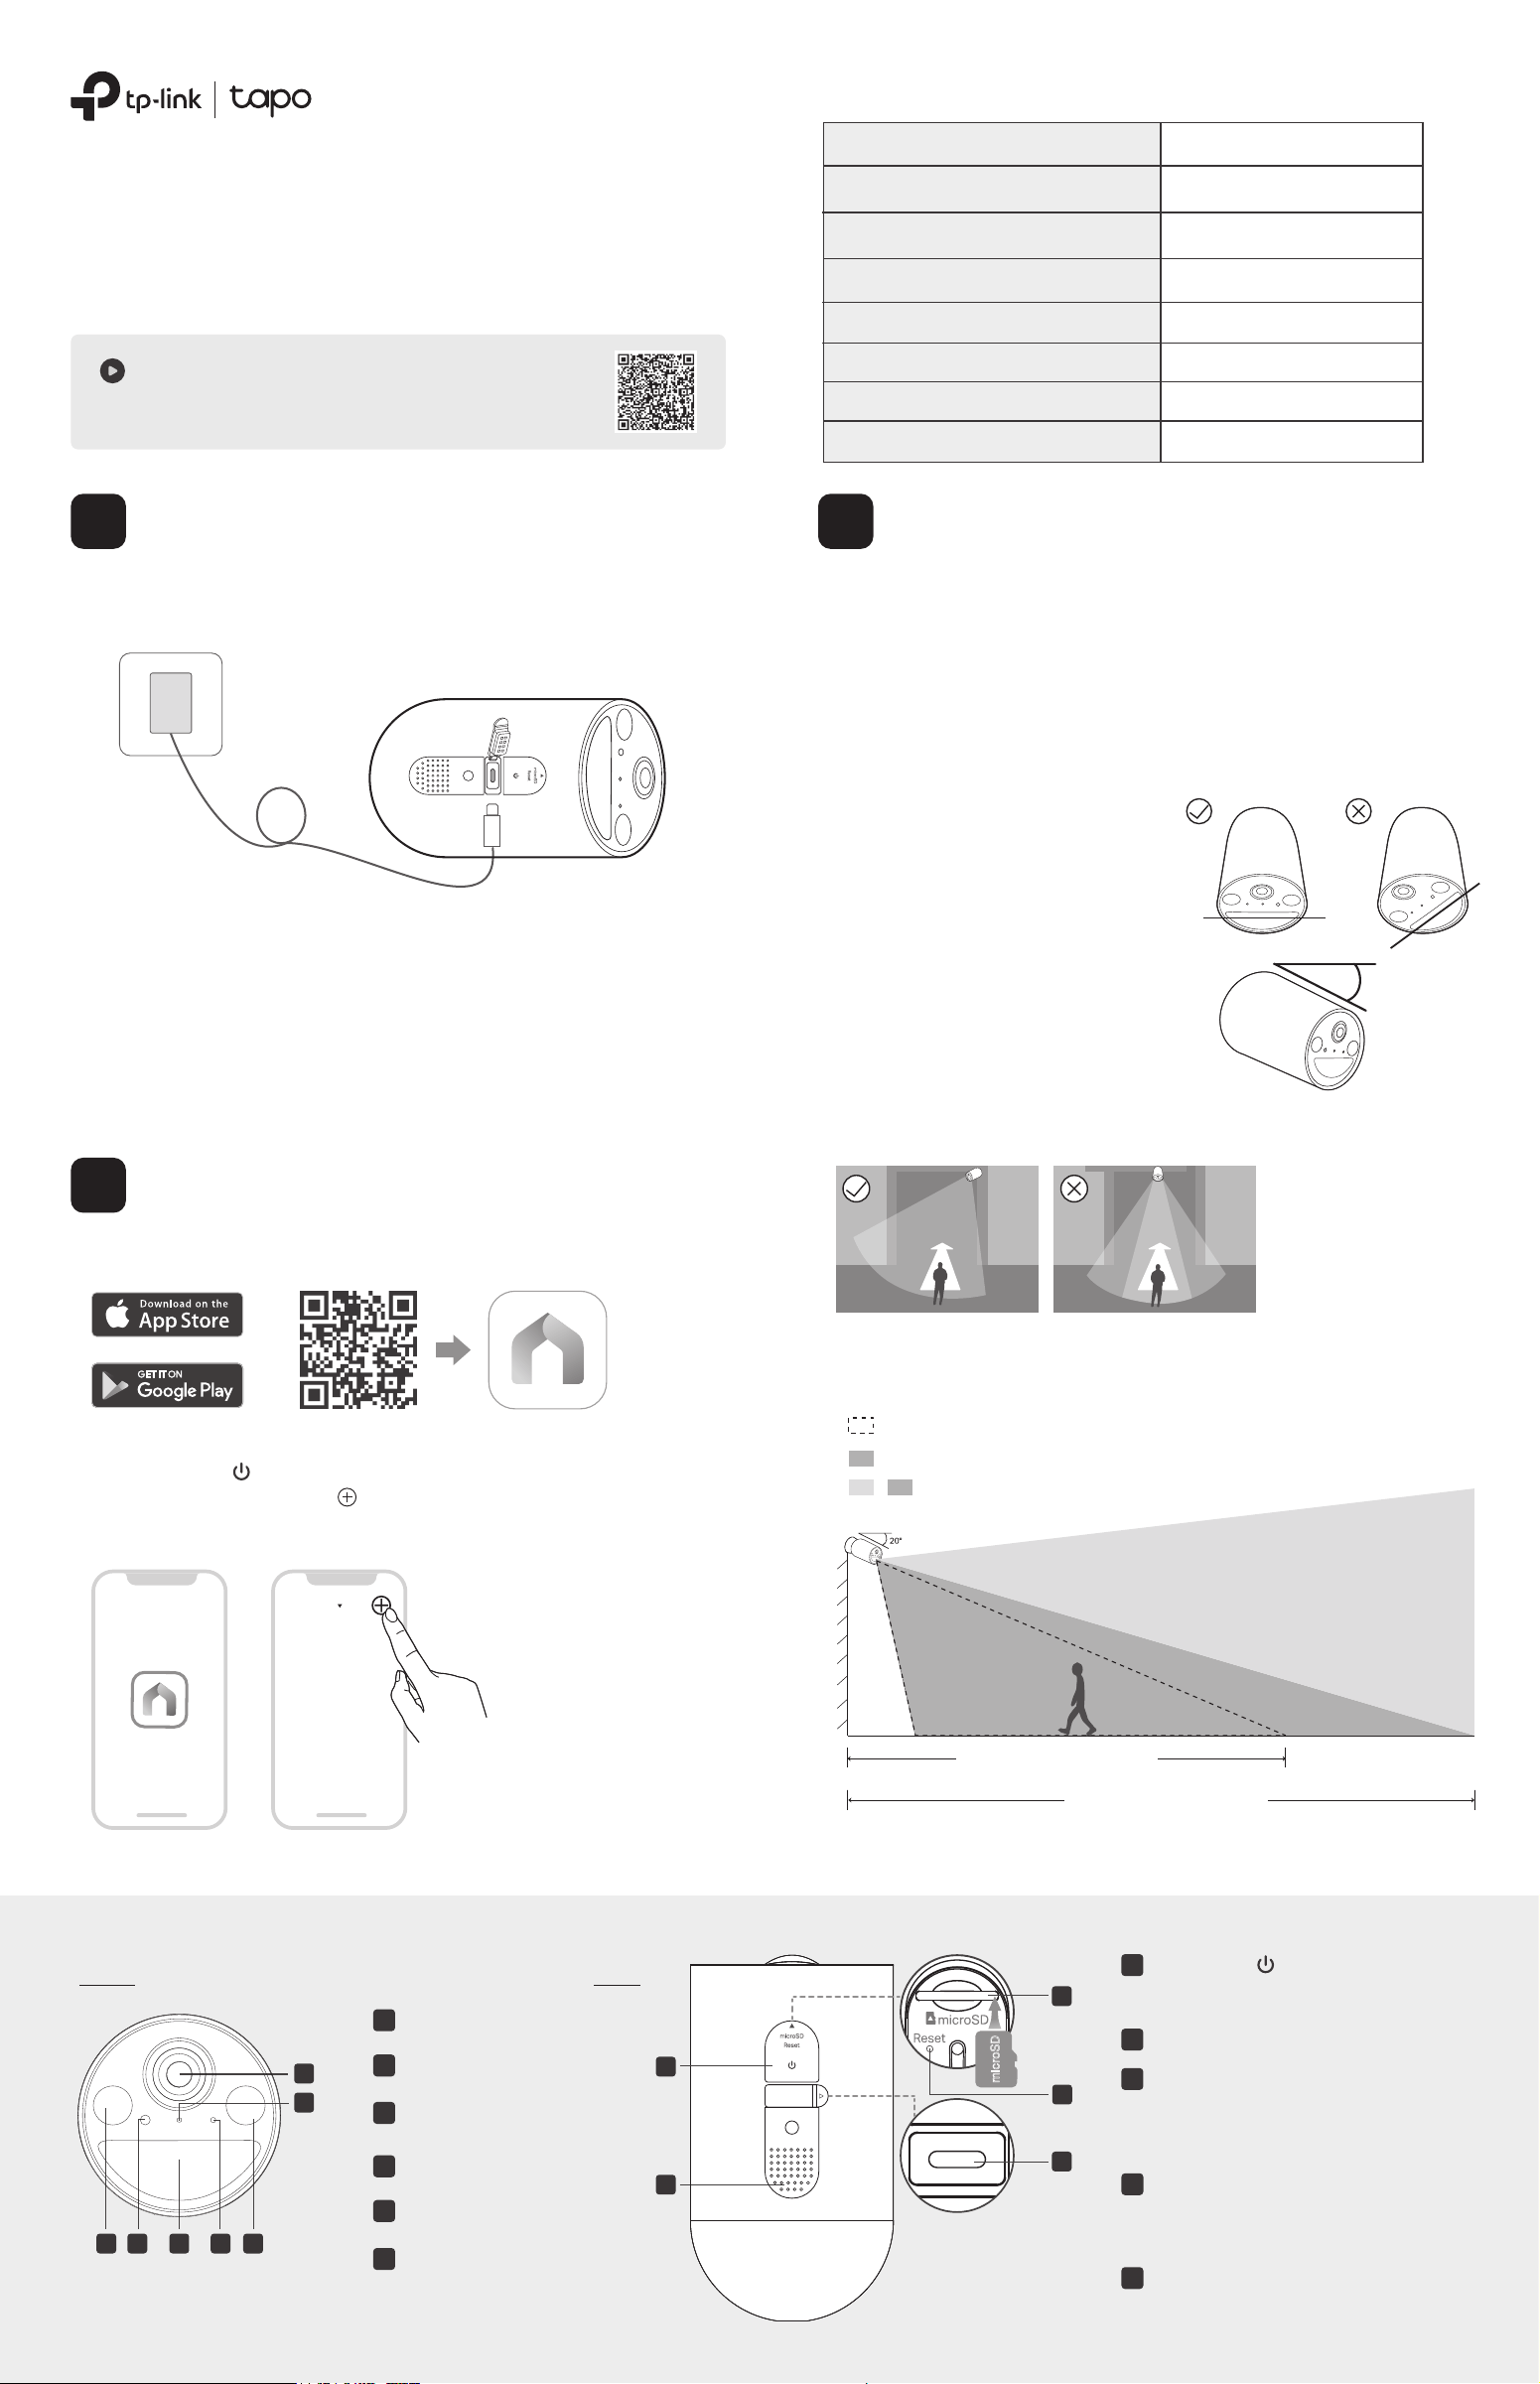
The FOV and PIR detection zone shown is based on camera mounted at 7.2 ft/2.2 m.
PIR Detection Zone (Default Wake-up Sensitivity*)
PIR Detection Zone (Highest Wake-up Sensitivity*)
Camera Field of View
+
23 ft / 7 m
(Default Wake-up Sensitivity)
30 ft / 9 m
(Highest Wake-up Sensitivity)
Height:
7-10 ft
(2-3 m)
3. Do not place the camera upside down.
4. Keep the motion sensor level for best
results.
5. Tilt the camera downwards at an angle
of about 20°.
Blinking red and green
Blinking red slowly
Solid amber
Blinking red quickly
Solid red
Blinking amber quickly for 3 seconds
Solid green
Blinking green quickly
Starting up
Plugging in USB charger
Connected to the cloud
Ready for setup
Connecting to Wi-Fi
Connected to Wi-Fi
Camera resetting
Camera updating
Camera Status LED Indication
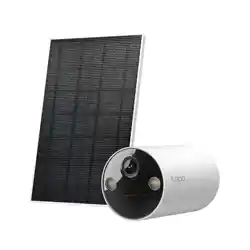
Solar-Powered Security Camera Kit
Quick Start Guide
*Images may dier from actual products.
Note:
1. Peel o lm from the camera before use.
2. Charge the battery using the USB cable in the package. Inappropriate cables may result in slow
charging or failure to charge.
3. Warning: Do not tear o the silicone part by force as it may aect the waterproof performance.
4. When you plug in the USB charger, the LED should blink amber quickly for 3 seconds. If not,
make sure the power is running and check your connection.
5. Keep the ports rmly covered when not in use to ensure waterproof performance.
6. The camera may not power up after falling. Plug in the USB charger to power it on again.
7. Check the battery status on the Tapo app after setup.
1. Get the Tapo app from the App Store or Google Play, and log in.
OR
The battery comes partially charged. We recommend that you fully charge
the battery before use. This will take about ve and a half hours.
2. Press and hold on your camera for about 3 seconds to turn it on.
Open the Tapo app, tap the button in the app, and select your model.
Then follow the app instructions to set up your camera.
1. Avoid placing behind glass. Glass will obstruct the motion
sensor of your camera.
2. Choose a proper location to mount your camera, or it will be
triggered too often by false alarms.
• Avoid pointing the camera directly at swaying trees.
• Avoid pointing the camera directly at vehicles and pedestrians on
the road.
• Avoid pointing the camera directly at street lamps and sunlight.
6. Mount your camera to the side so that movement goes across the
lens’ eld of view to better trigger motion detection and AI detection.
*Do not mount facing the
direction of movement.
Appearance
Front Side
5
6
1 2 3 4 1
10
11
USB Type-C Charging Port
9
microSD Card Slot
8
Speaker
7
Power Button
Open the cover. Insert a microSD card*
and initialize it on the Tapo app for local
recording.
Reset Button
Press and hold for 5s: Reset Wi-Fi while keep
other settings.
Press and hold for 10s: Reset to factory settings.
Open the cover for USB charging.
*microSD card not included.
Press and hold for about 3 seconds to
turn on/o the camera.
Motion Sensor
Spotlights
Light Sensor
6
Status LED
5
Lens
4
Microphone
3
1
2
Charge the Battery
1
Set Up the Camera
2
Camera Mounting Tips
3
My Home
7. For optimal detection performance, we recommend mounting
the camera 7-10 ft (2-3 m) above the ground.
9
10
11
8
7
microSD
USB Type-c
5V 2A
USB Charger
20°
7100001135 REV1.2.0 ©2025 TP-Link
Setup Video
Scan QR code or visit
https://www.tp-link.com/support/setup-video/#cloud-cameras
Back Side
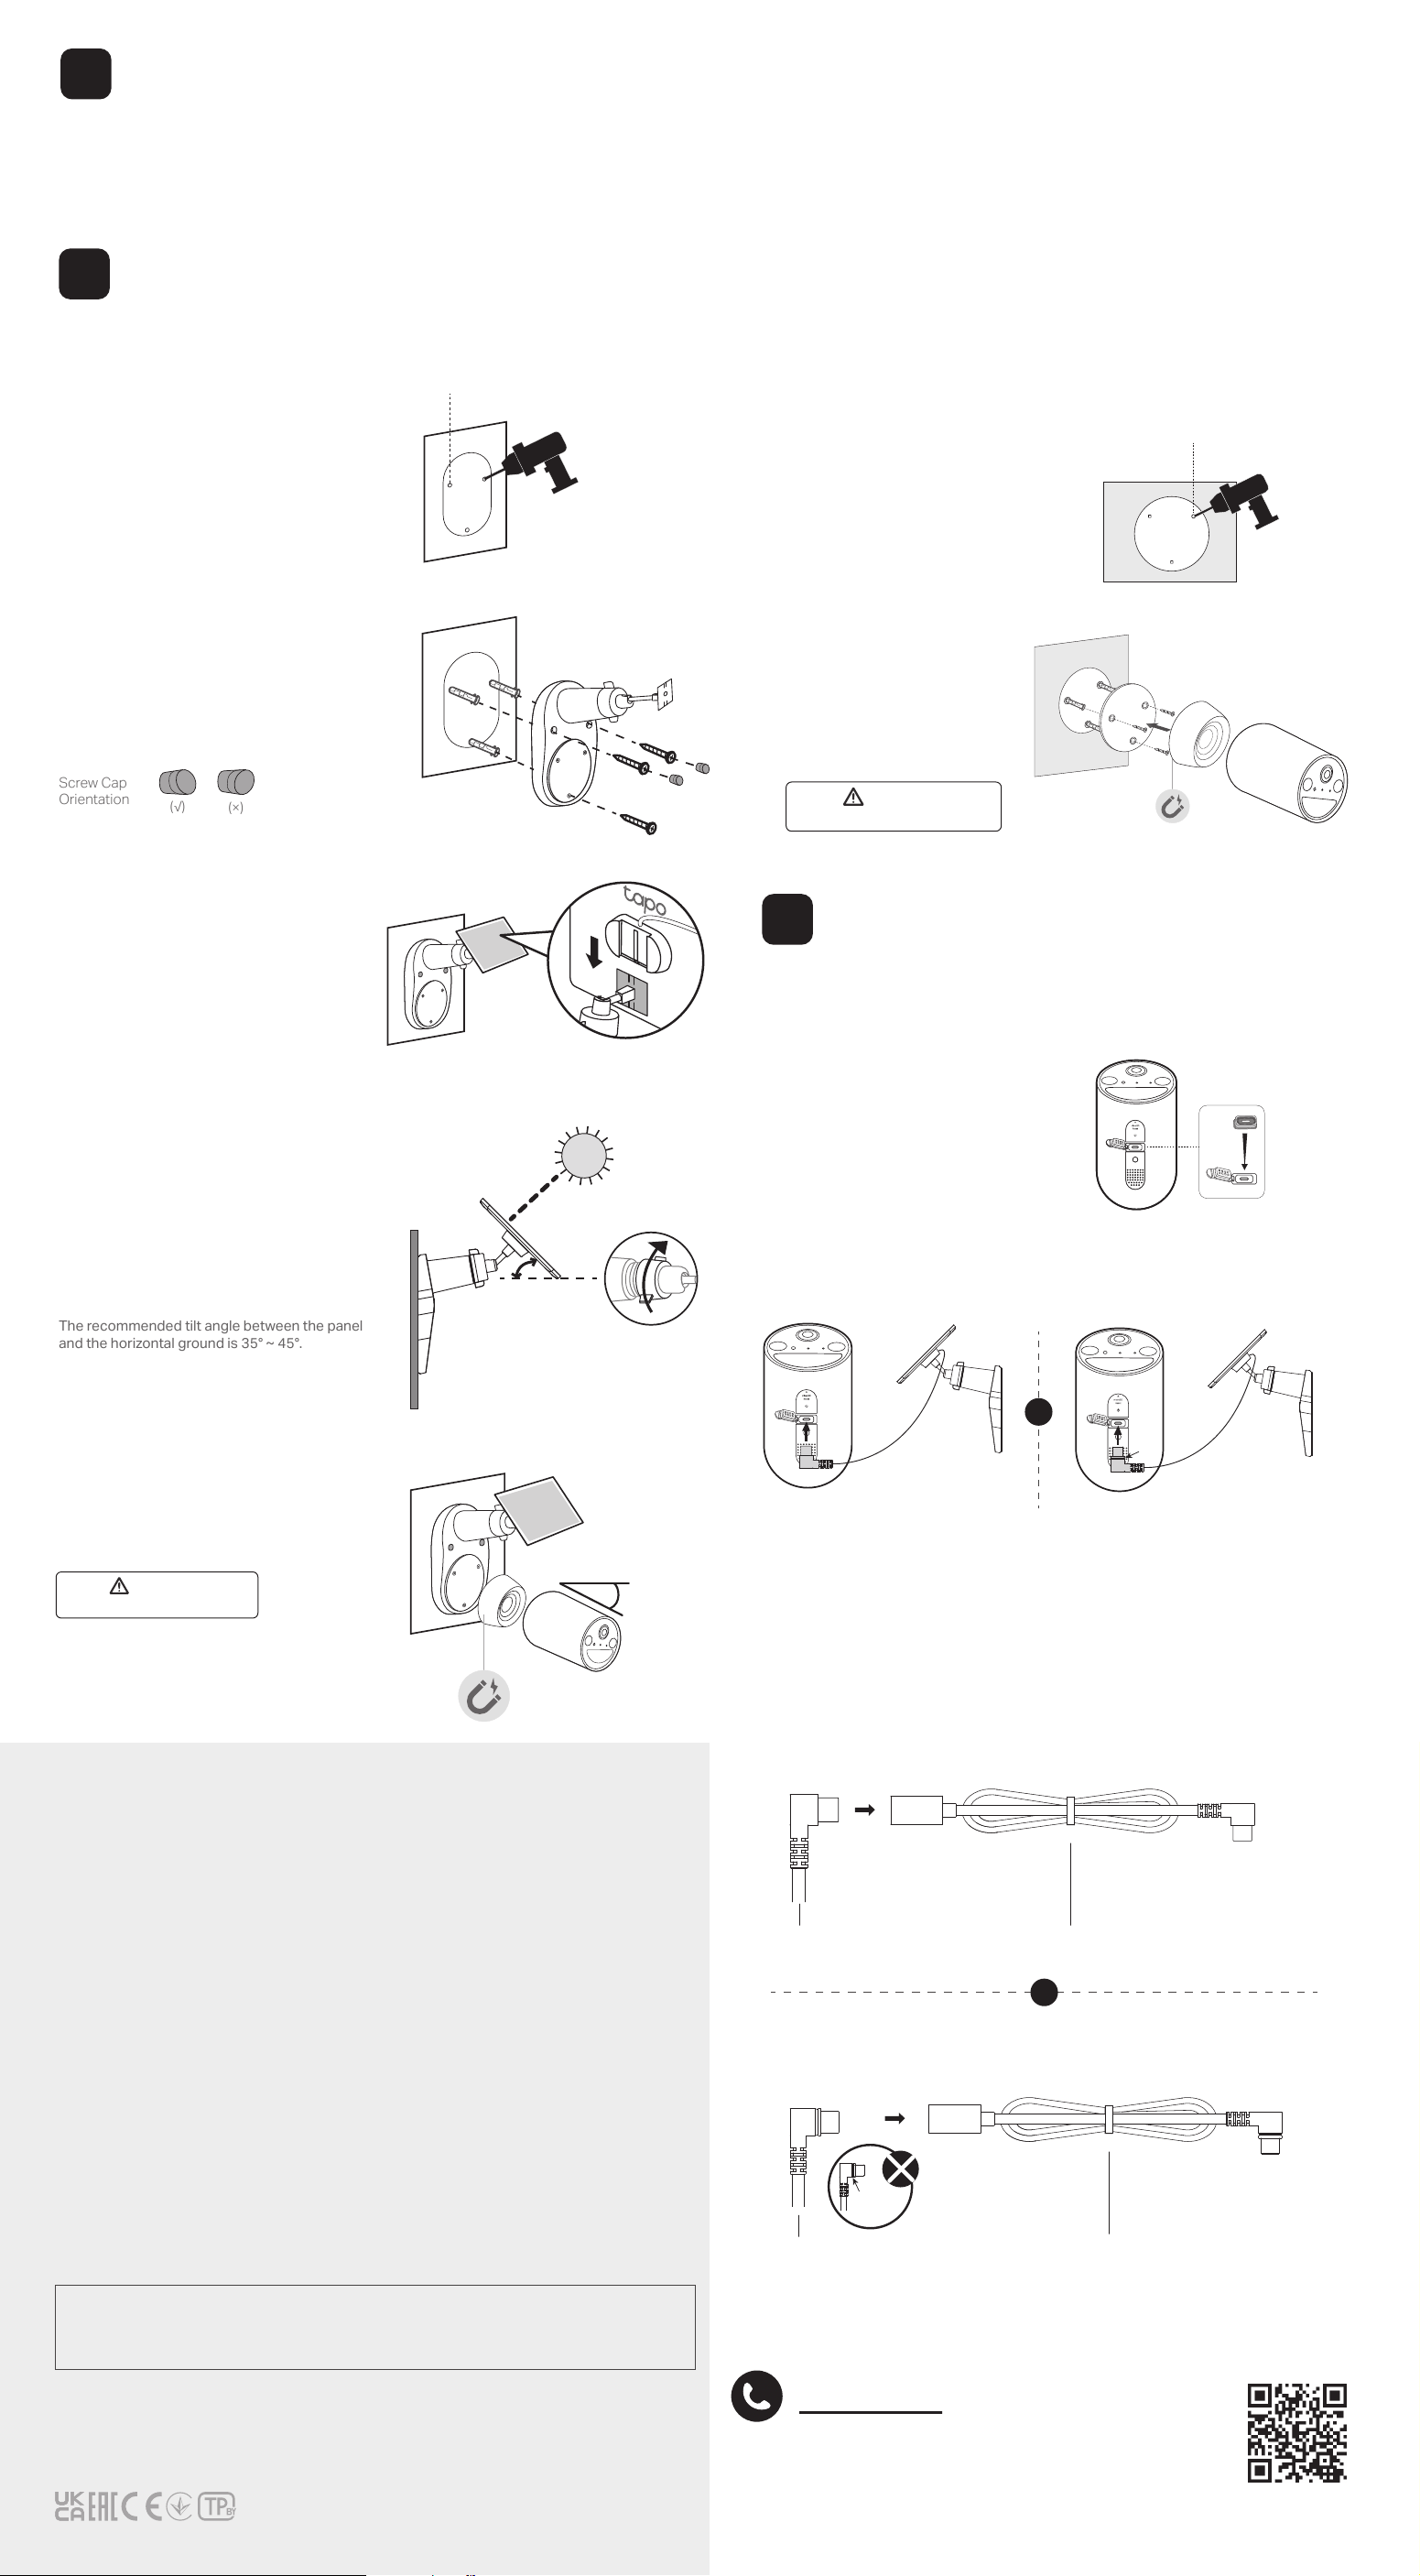
1. Drill Holes
Stick the mounting template to a solid and
level wall surface. Drill three screw holes
according to the template.
Φ=6 mm (15/64 in.)
2. Mount Bracket
Insert three wall anchors into the
holes and use the mounting screws to
ax the solar panel bracket over the
anchors. Then, insert two screw caps
into the upper screw holes.
3. Install the Solar Panel
Slide the solar panel onto the mounting
bracket until it clicks into place.
4. Adjust Solar Panel Angle
Loosen the adjustable screw, tilt the solar
panel to adjust the angle, and then tighten
the adjustable screw.
The recommended tilt angle between the panel
and the horizontal ground is 35° ~ 45°.
5. Attach Camera & Adjust Angle
Magnetically attach the camera to the metal
plate. Tilt the camera downwards at an angle
of about 20°.
20°
Safety Information
(√)
(×)
Screw Cap
Orientation
For Solar Panel:
• Keep the device away from re or hot environments. DO NOT immerse in water or any other liquid.
• Do not attempt to disassemble, repair, or modify the device. If you need service, please contact us.
TP-Link hereby declares that the device is in compliance with the essential requirements and other relevant provisions of directives
2014/30/EU, 2014/35/EU, 2011/65/EU and (EU)2015/863.
The original EU declaration of conformity may be found at https://www.tapo.com/en/support/ce/
TP-Link hereby declares that the device is in compliance with the essential requirements and other relevant provisions of the Electromagnetic
Compatibility Regulations 2016 and Electrical Equipment (Safety) Regulations 2016.
The original UK declaration of conformity may be found at https://www.tapo.com/support/ukca/
For Camera:
• This equipment shall be installed at a height of less than 2 meters (6.5 feet). At 2 meters (6.5 feet) or higher, we recommend using a wall mount
bracket (not included) to mount your camera to the wall.
• This equipment can be powered only by equipments that comply with Power Source Class 2 (PS2) or Limited Power Source (LPS) dened in
the standard of IEC 62368-1.
• Do not use damaged charger or USB cable to charge the device.
• Do not use any other chargers than those recommended.
• Do not use the device where wireless devices are not allowed.
• Adapter shall be easily accessible.
• Use only power supplies which are provided by manufacturer and in the original packing of this product. If you have any questions, please don't
hesitate to contact us.
• Keep the device away from re or hot environments. DO NOT immerse in water or any other liquid.
• Do not disassemble, repair or modify the product.
• Do not place near automatically controlled devices such as re alarms. Radio waves emitted from this product may cause such devices to
malfunction resulting in an accident.
• Observe restrictions on using wireless products in fuel depots, chemical plants or when blasting operations are in progress.
• Do not use liquid to clean the product. Only use a dry cloth.
• Never put metal objects inside the product. If a metal object enters the product turn o the circuit breaker and contact an authorised
electrician.
• This equipment shall be installed at a height of less than 2 meters (6.5 feet).
• This product is not intended to be used when providing medical care. Consult the manufacturer of any personal medical devices, such as
pacemakers or hearing aids to determine if they are adequality shielded from external RF (radio frequency) energy.
• Do not use this product in health care facilities. Hospitals or health care facilities may be using equipment that could be sensitive to external RF
energy.
• Do not place heavy objects on top of the product.
• When you leave the product unused for a long time unplug the product from the power outlet.
• This product may interfere with other electronic products such as TV, radios, personal computers, phones or other wireless devices.
• Operating Temperature: -20°C ~ 45°C (-4°F ~ 113°F)
• Adapter should be used indoors where the ambient temperature is lower than or equal to 40°C.
Please read and follow the above safety information when operating the device. We cannot guarantee that no accidents or damage will
occur due to improper use of the device. Please use this product with care and operate at your own risk.
TP-Link hereby declares that the device is in compliance with the essential requirements and other relevant provisions of directives
2014/53/EU, 2009/125/EC, 2011/65/EU and (EU)2015/863.
The original EU declaration of conformity may be found at https://www.tapo.com/support/ce
TP-Link hereby declares that the device is in compliance with the essential requirements and other relevant provisions of the Radio Equipment
Regulations 2017.
The original UK declaration of conformity may be found at https://www.tapo.com/support/ukca/
CAUTION!
Avoid replacement of a battery with an incorrect type that can defeat a safeguard.
Avoid disposal of a battery into re or a hot oven, or mechanically crushing or cutting of a battery, that can result in an explosion.
Do not leave a battery in an extremely high temperature surrounding environment that can result in an explosion or the leakage of
ammable liquid or gas; Do not leave a battery subjected to extremely low air pressure that may result in an explosion or the leakage of
ammable liquid or gas.
Support
For technical support, the user guide, FAQs, warranty
and more, please visit https://www.tapo.com/support/
35°-45°
Strong Magnet. Crushing Hazard.
CAUTION
Option 1: Mount Solar Panel & Camera
Mounting Options
5
Use the appropriate waterproof gasket when connecting the solar panel to
your camera. The gasket protects your camera from exposed moisture and
dust that may damage the camera.
1. Install Waterproof Gasket
Insert the waterproof gasket into the
camera’s charging port. Ensure that the
gasket is tightly sealed.
Connect to the Camera
6
Option 2: Mount Camera Individually
Strong Magnet. Crushing Hazard.
CAUTION
2. Install Camera
Insert 3 anchors into the
holes and use the screws to
ax the metal plate over
the anchors. Then attach
the camera to the plate.
Stick the mounting template to
the desired mounting place.
Drill 3 holes according to the
template.
1. Drill Holes
Φ=6 mm (15/64 in.)
You can detach the metal plate from the solar panel bracket for camera
individual use.
The position and tilt angle of the solar panel greatly aect the solar eciency.
1. Choose a location where the solar panel gets the most sunlight throughout the year. Regularly wipe the panel to remove dust and debris.
2. Position the panel south-facing in the Northern Hemisphere or north-facing in the Southern Hemisphere. The recommended tilt angle between the panel
and the horizontal ground is 35° ~ 45°.
Solar Panel Mounting Tips
4
Black
Ring
2. Power On Camera
Connect the solar panel by inserting the connector into the charging port until snug.
Use extension cable if the power cable is too short...
Verison A: Without Black Ring
Verison B: With Black Ring
Verison B: Remove black ring then connect
Note:
If you see a black ring on the connector, ensure it's properly installed.
Both versions oer the same waterproof performance.
OR
If you see a black ring on the connector, remove the black ring rst.
Insert the connector (without the black ring) into the extension until snug, and
use the appropriate gasket when connecting the solar panel to your camera.
Extension Cable
Extension Cable
Verison A: Connect Directly
Black Ring
Solar Panel Connector
OR
Solar Panel Connector