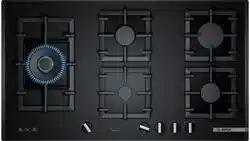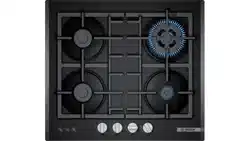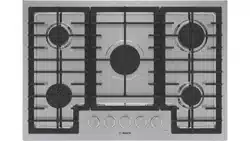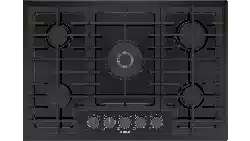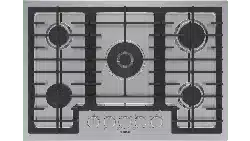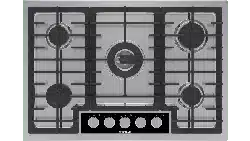

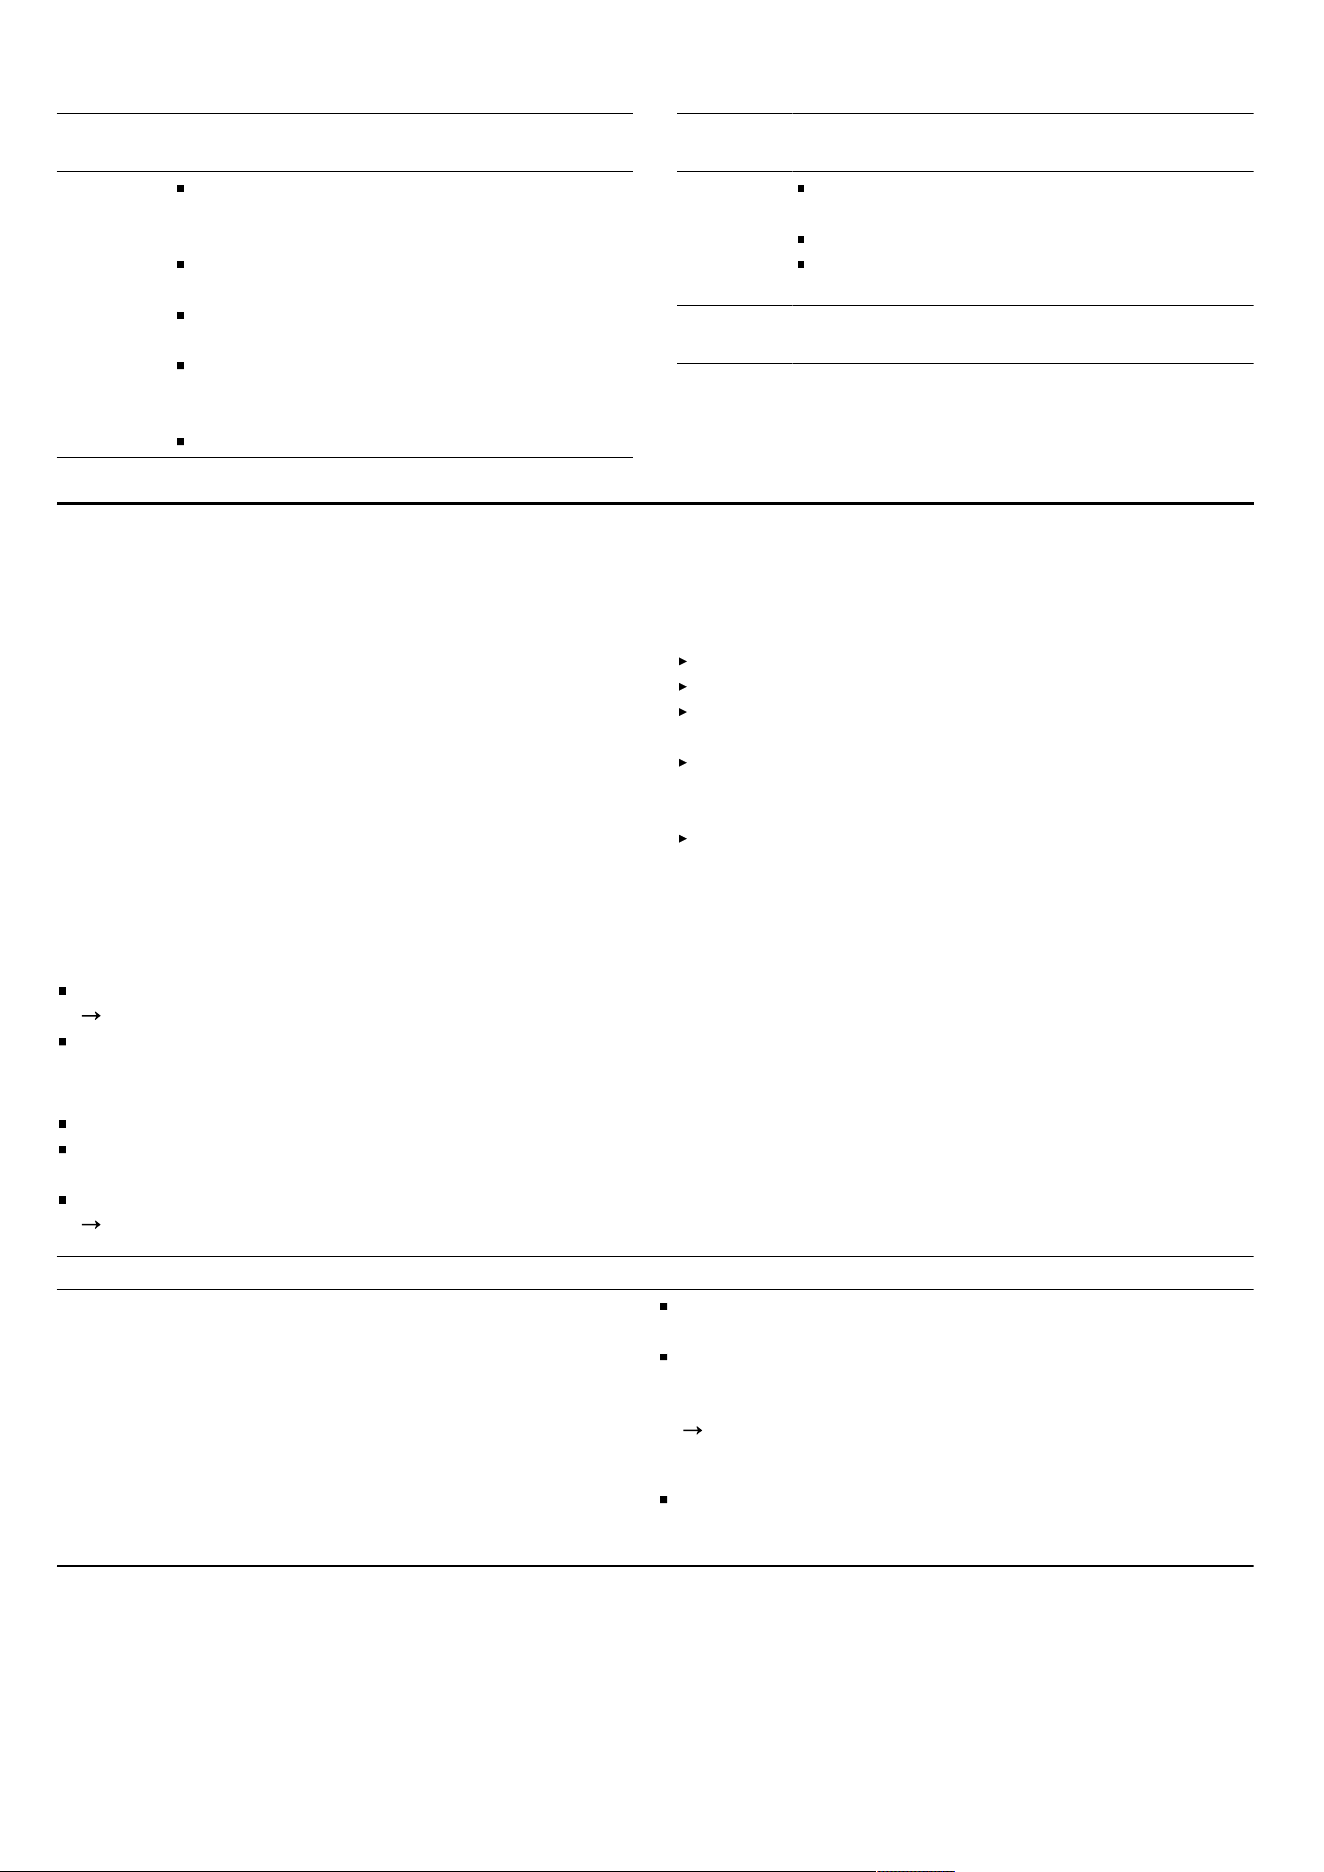
PCS7A.I9.A
A
BC
D EH
D
1
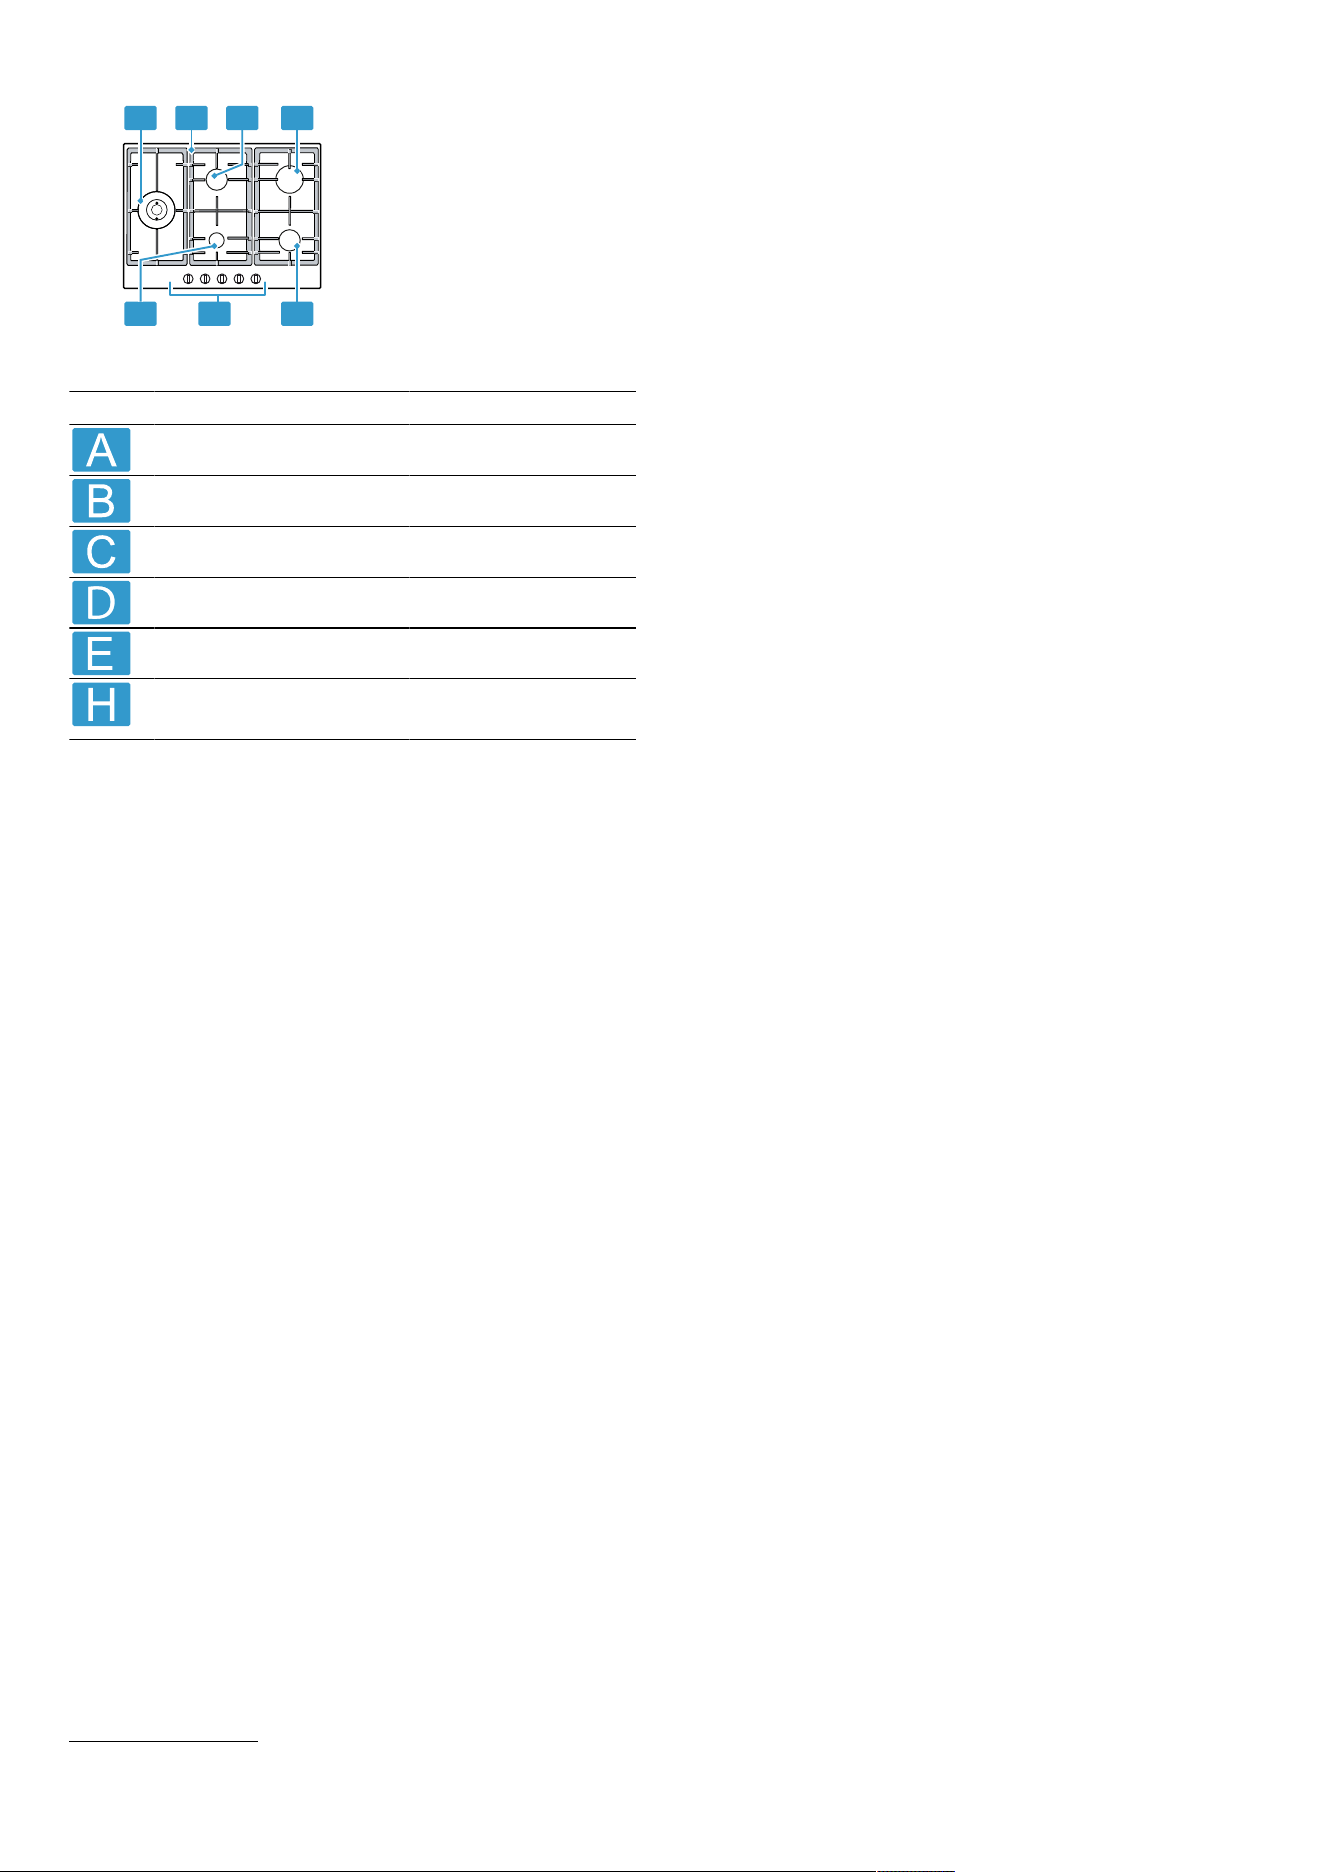
Component
Pan support -
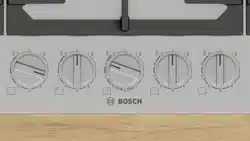
Control knob -
Economy burner
3.50 / 4.00MJ
Standard-output burner
6 / 6.85MJ
High-output burner
11.00 / 11.00MJ
Dual-wok multi-crown
burner
16.00 / 19.50MJ
1
The images shown in these instructions are for guidance only.
2

Table of contents en
You can find additional information and explanations online.
Scan the QR code on the title page.
Table of contentsTable of contents
INFORMATION FOR USE
1 Safety ........................................................................ 3
1.4 Safe installation .................................................... 3
2 INSTALLATION INSTRUCTIONS ........................... 6
3 Preventing material damage ................................ 10
4 Environmental protection and saving energy .... 11
5 Familiarising yourself with your appliance ........ 11
6 Accessories ........................................................... 12
7 Basic operation ..................................................... 13
8 Cookware ............................................................... 14
9 Recommended settings for cooking .................. 14
10 Cleaning and servicing ...................................... 15
11 Troubleshooting ................................................. 16
12 Service ................................................................. 17
13 Customer Service ............................................... 18
14 Disposal ............................................................... 18
Safety 1 Safety
This cooktop is approved for use with Natural
Gas and Universal LPG.
Leave these instructions with the owner.
DO NOT MODIFY THIS APPLIANCE.
1.1 General information
¡ Read this instruction manual carefully.
¡ Keep the instruction manual and the product
information safe for future reference or for
the next owner.
¡ Do not connect the appliance if it has been
damaged in transit.
1.2 Intended use
The appliance can only be used safely if it is
correctly installed according to the safety in-
structions. The installer is responsible for en-
suring that the appliance works perfectly at its
installation location.
CAUTION‒Risk of injury!
This appliance is for cooking purposes only.
It shall not be used for other purposes, for
example room heating.
Only use this appliance:
¡ In accordance with these instructions for in-
stallation and use.
¡ For cooking purposes.
¡ Under supervision. Never leave the appli-
ance unattended when cooking for short
periods.
¡ In a private household and in a domestic en-
vironment.
¡ Up to an altitude of max. 2000m above sea
level.
This appliance is not suitable for use in a mar-
ine craft, caravan or mobile home.
DO NOT USE THIS APPLIANCE AS A SPACE
HEATER.
DO NOT USE IN FREEZING CONDITIONS.
Do not use this appliance with an external
timer or a remote control.
Do not use this appliance outdoors.
Call the after-sales service if you want to con-
vert your appliance to a different type of gas.
1.3 Restriction on user group
This appliance may be used by children aged
8 or over and by people who have reduced
physical, sensory or mental abilities or inad-
equate experience and/or knowledge,
provided that they are supervised or have
been instructed on how to use the appliance
safely and have understood the resulting
dangers.
Do not let children play with the appliance.
Children must not perform cleaning or user
maintenance unless they are at least 15 years
old and are being supervised.
Keep children under the age of 8 years away
from the appliance and power cable.
1.4 Safe installation
Follow these safety instructions when installing
the appliance.
¡ Read the installation instructions carefully.
3

en Safety
"Installation instructions", Page6
¡ The appliance can only be used safely if it is
correctly installed according to the safety in-
structions. The installer is responsible for en-
suring that the appliance works perfectly at
its installation location.
WARNING‒Risk of explosion!
Escaping gas may cause an explosion.
All Installation, connection, regulating and
conversion work to a different gas type must
be carried out by an authorised professional
while taking into account the respective ap-
plicable regulations and legal requirements
as well as the regulations regarding the local
electricity and gas suppliers. Special atten-
tion must be paid to the provisions and
guidelines that are applicable for the ventila-
tion. For conversion work to a different gas
type, we recommend that you call the after-
sales service.
¡ Before any work is carried out on the appli-
ance, switch off the power supply and the
gas supply.
¡ Ensure that the kitchen is sufficiently ventil-
ated, in particular when operating the gas
cooking appliance.
¡ Do not connect the appliance to an exhaust
gas system for combustion products.
¡ This appliance is not suitable for use in a
marine craft, caravan or mobile home.
¡ The warranty applies only when using the
appliance as intended.
¡ Before installing the appliance, check that
the local conditions of the supplier are com-
patible with the appliance settings specified
on the rating plate (type of gas and pres-
sure, power, voltage).
¡ Secure the power cord to the cabinet to pre-
vent it from touching hot parts of the oven or
cooktop.
¡ Connect the appliance to the power supply
using the earth.
¡ Do not make any changes to the inside of
the appliance. If required, contact our tech-
nical customer service.
1.5 Safe use
WARNING‒Risk of explosion!
Escaping gas may cause an explosion.
WHAT TO DO IF YOU SMELL GAS OR IF
THERE ARE FAULTS IN THE GAS INSTALLA-
TION
Do not try to light the appliance.
Immediately shut off the gas supply or close
the gas cylinder valve.
Immediately extinguish all naked flames and
cigarettes.
Do not operate any light switches or appli-
ance switches.
Do not pull any plugs out of any sockets.
Do not use any telephones or mobile
phones within the building.
Open windows and ventilate the room.
Call the after sales service or the gas sup-
plier.
If you cannot reach your gas supplier, call
the fire department.
Escaping gas may cause an explosion.
Small amounts of gas can collect over a
longer period of time and ignite.
Close the safety valve for the gas supply
when the appliance is out of use for pro-
longed periods.
Escaping gas may cause an explosion.
If the liquefied gas bottle is not upright, lique-
fied propane/butane can enter the appliance.
Intense darting flames may therefore escape
from the burners. Components may become
damaged and start to leak over time so that
gas escapes uncontrollably.
Always use liquefied gas bottles in an up-
right position.
WARNING‒Risk of poisoning!
Using the gas cooking appliance leads to a
build-up of heat, moisture and combustion
products in the room where the appliance is
installed.
Ensure that the kitchen is sufficiently ventil-
ated, in particular when operating the gas
cooking appliance.
If the appliance is used intensively and for
prolonged periods, ensure that there is addi-
tional ventilation so that the combustion
products are safely fed to the outside, e.g. if
using existing ventilation equipment, set a
higher performance level and, at the same
time, ensure that the air is replaced with
fresh air in the room where the appliance is
installed.
Consult specialist personnel when installing
additional ventilation equipment.
WARNING‒Risk of fire!
Leaving fat or oil cooking on an unattended
hob can be dangerous and may lead to fires.
Never leave hot oil or fat unattended.
4

Safety en
Never attempt to extinguish a fire using wa-
ter; instead, switch off the appliance and
then cover with a lid or a fire blanket.
The appliance becomes very hot.
DO NOT USE OR STORE FLAMMABLE MA-
TERIALS IN THE APPLIANCE STORAGE
DRAWER OR NEAR THIS APPLIANCE.
DO NOT SPRAY AEROSOLS IN THE VICIN-
ITY OF THIS APPLIANCE WHILE IT IS IN OP-
ERATION.
Hob covers can cause accidents, for example
due to overheating, catching fire or materials
shattering.
Do not use hob covers.
When gas burners are in operation without any
cookware placed on them, they can build up a
lot of heat. The extractor hood above it may
become damaged or catch fire.
Only operate the gas burners with cookware
on them.
The appliance becomes very hot, fabrics and
other objects may ignite.
Keep fabrics (e.g. garments or curtains)
away from the flames.
Never reach over the flames.
Do not place combustible objects (e.g. tea
towels or newspapers) on, next to or behind
the appliance.
Escaping gas may ignite.
If the burner does not ignite after
10seconds, turn the control knob to the
"Off" position and open the door or window
in the room. Do not attempt to re-ignite the
burner for at least one minute.
In the event of the burner flames being acci-
dentally extinguished, turn off the burner
control. Do not attempt to re-ignite the
burner for at least one minute.
Food may catch fire.
The cooking process must be monitored. A
short process must be monitored continu-
ously.
WARNING‒Risk of burns!
The accessible parts can become hot during
operation.
Small children should be kept away from the
appliance.
Hob guards may cause accidents.
Never use hob guards.
Empty cookware becomes extremely hot when
set on gas burners that are operating.
Never heat up empty cookware.
The appliance becomes hot during operation.
Allow the appliance to cool down before
cleaning.
WARNING‒Risk of electric shock!
Incorrect repairs are dangerous.
Repairs to the appliance should only be car-
ried out by trained specialist staff.
Only use genuine spare parts when repairing
the appliance.
If the power cord of this appliance is dam-
aged, it must be replaced by the manufac-
turer, the manufacturer's Customer Service
or a similarly qualified person in order to pre-
vent any risk.
If the appliance or the power cord is damaged,
this is dangerous.
Never operate a damaged appliance.
Never pull on the power cord to unplug the
appliance. Always unplug the appliance at
the mains.
If the appliance or the power cord is dam-
aged, immediately unplug the power cord or
switch off the fuse in the fuse box and turn
off the gas supply.
Call customer services.
Page18
An ingress of moisture can cause an electric
shock.
Do not use steam- or high-pressure cleaners
to clean the appliance.
The insulation on cables of electrical appli-
ances may melt if it touches hot parts of the
appliance.
Never bring electrical appliance cables into
contact with hot parts of the appliance.
WARNING‒Risk of injury!
Faults or damage to the appliance and repairs
that have not been carried out correctly are
dangerous.
Never switch on the appliance if there is a
fault with it.
If the appliance is faulty, unplug the mains
plug or switch off the fuse in the fuse box.
Shut off the gas supply and call the after
sales service.
Always have repairs carried out to the appli-
ance and damaged gas lines replaced by
trained, specialist personnel.
Cookware that is not the right size, or that is
damaged or incorrectly positioned may cause
serious injuries.
See the notes on cookware.
5
en Installation instructions
When switching on the burner, sparks are gen-
erated in the ignition plugs.
Never touch the ignition plugs while the
burner is being lit.
If a control knob is too stiff to turn or it is
loose, it must no longer be used.
Contact our after-sales service immediately
to have the control knob repaired or re-
placed.
WARNING‒Danger: Magnetism!
Caution: Magnetic field
Attention for persons with pacemakers
Permanent magnets are integrated in the con-
trol element bases and the control elements.
Magnets may affect electronic implants, e.g.
heart pacemakers or insulin pumps.
Persons with electronic implants must stand
at least 10cm away from the magnetic con-
trol element bases and control elements.
Never carry the control element base and
the control elements on your body.
WARNING‒Risk of suffocation!
Children may put packaging material over their
heads or wrap themselves up in it and suffoc-
ate.
Keep packaging material away from chil-
dren.
Do not let children play with packaging ma-
terial.
Children may breathe in or swallow small
parts, causing them to suffocate.
Keep small parts away from children.
Do not let children play with small parts.
Installation instructions2 Installation instructions
Observe this information when installing the appliance.
2.1 Statutory requirements
This installation must conform with the following:
Manufacturer’s Installation instructions
Local Gas Fitting Regulations
Municipal Building Codes
Refer to AS/NZS 5601.1 for Gas Installations
S.A.A. Wiring Code
Local Electrical Regulations
Any other statutory regulations
2.2 Preparing to install
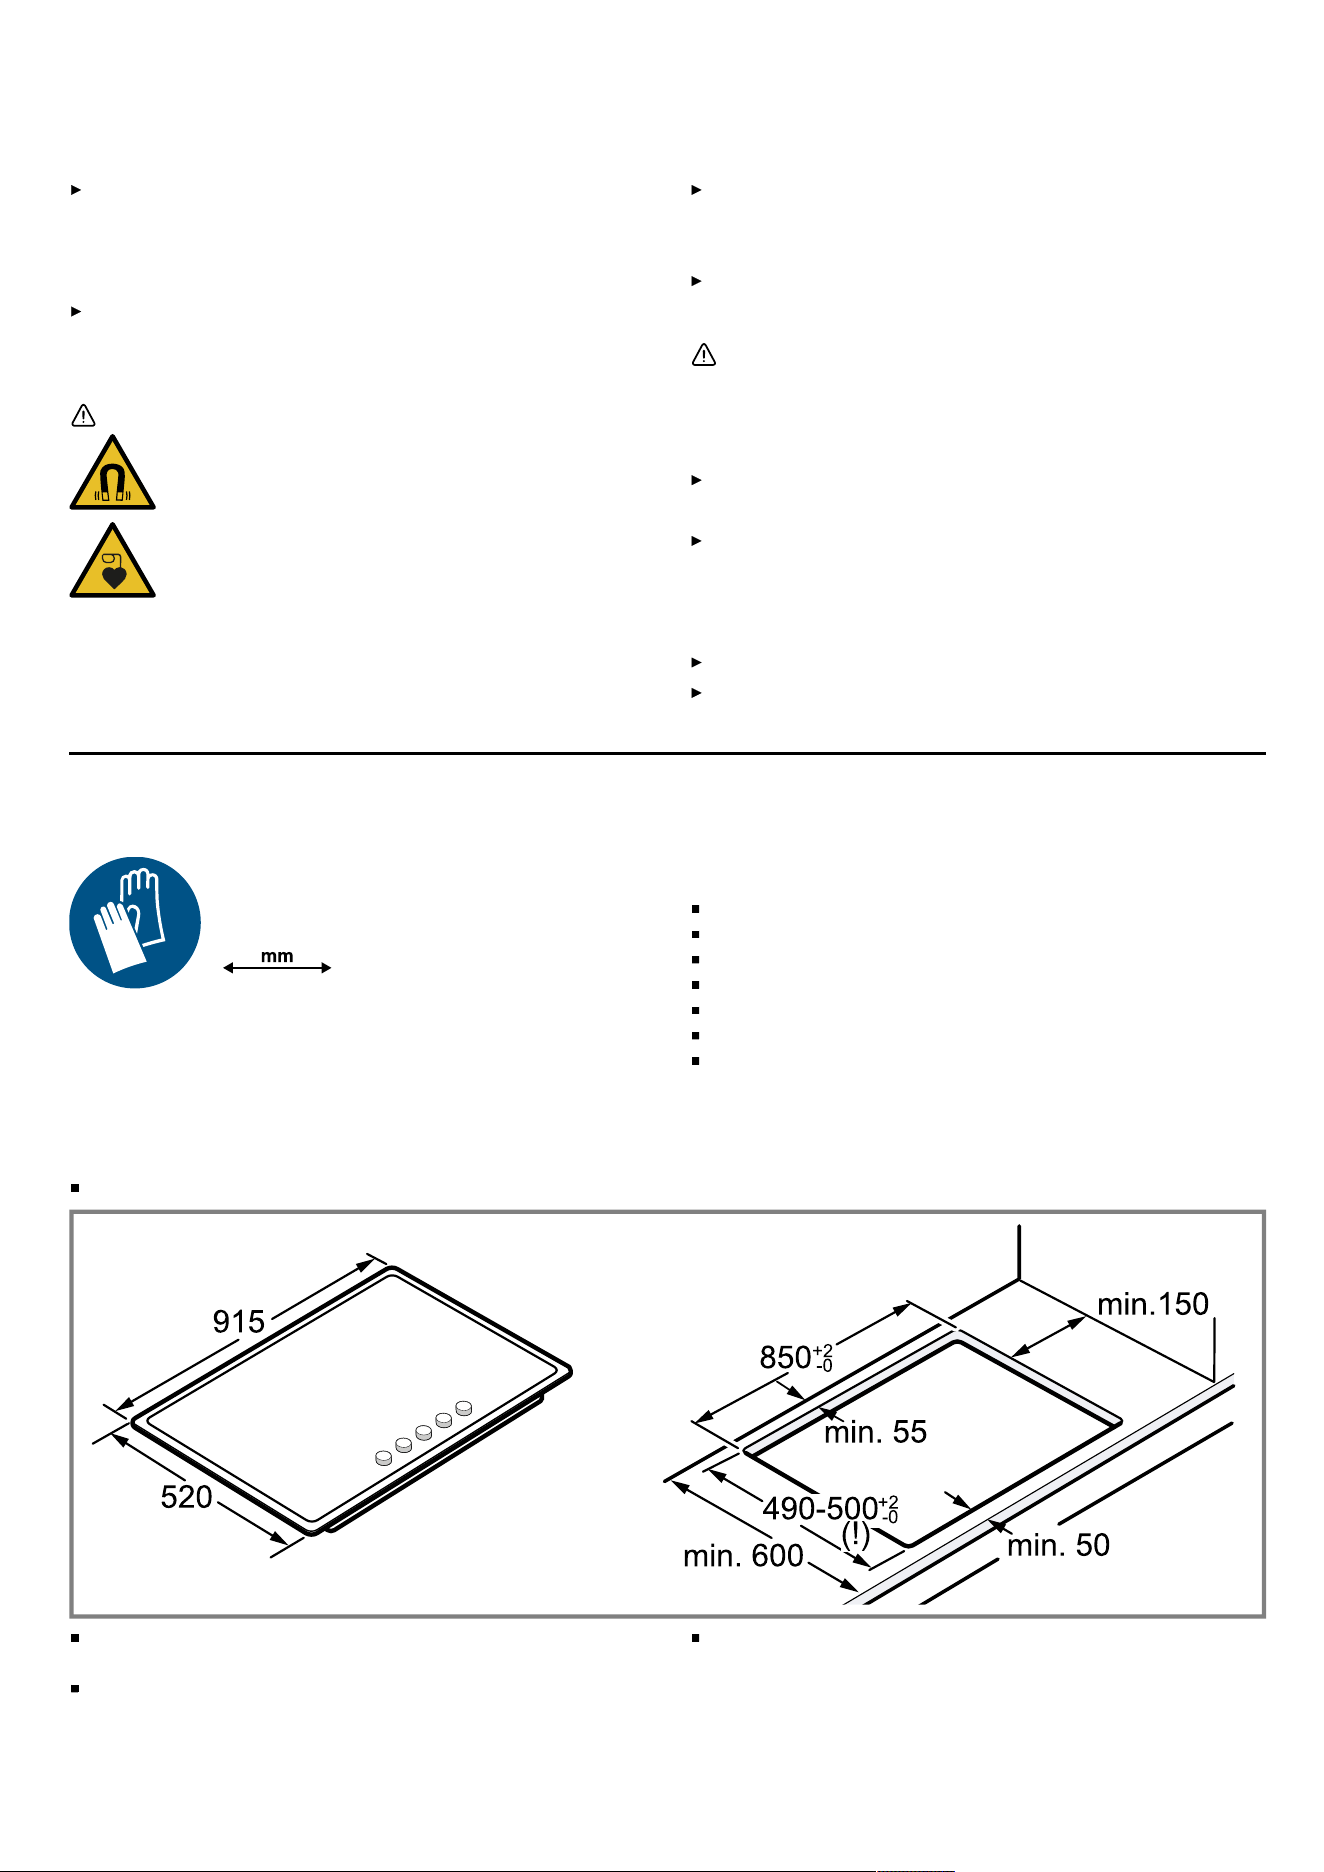
These built-in cooktops are intended to be inserted in a worktop cutout.
Make a cut-out in the worktop with the required dimensions.
In recesses of 500mm, the appliance must be in-
stalled on the front edge of the recess.
Seal the cut surfaces of wooden work surfaces with a
special glue seal to protect them from moisture.
Any adjoining vertical wall surface situated within
200mm from the edge of any cooktop burner must
be a suitable non-combustible material for the entire
length of the cooktop, in accordance with clause
6.10.1.2 of AS/NZS 5601.1.
6
Installation instructions en
2.3 Clearances
A range hood fitted above the top must be installed
according to the installation instructions for the range
hood. A minimum distance of 650mm is required for
a range hood and 750mm for an exhaust fan.
Any combustible construction above the cooktop
must be at least 650mm above the top of the trivet
and no construction shall be within 340mm above
the top of the burner.
Height of the pan support above the worktop surface:
up to 60mm.
A minimum depth of 50mm from the top of the work-
top surface must be provided for the appliance.
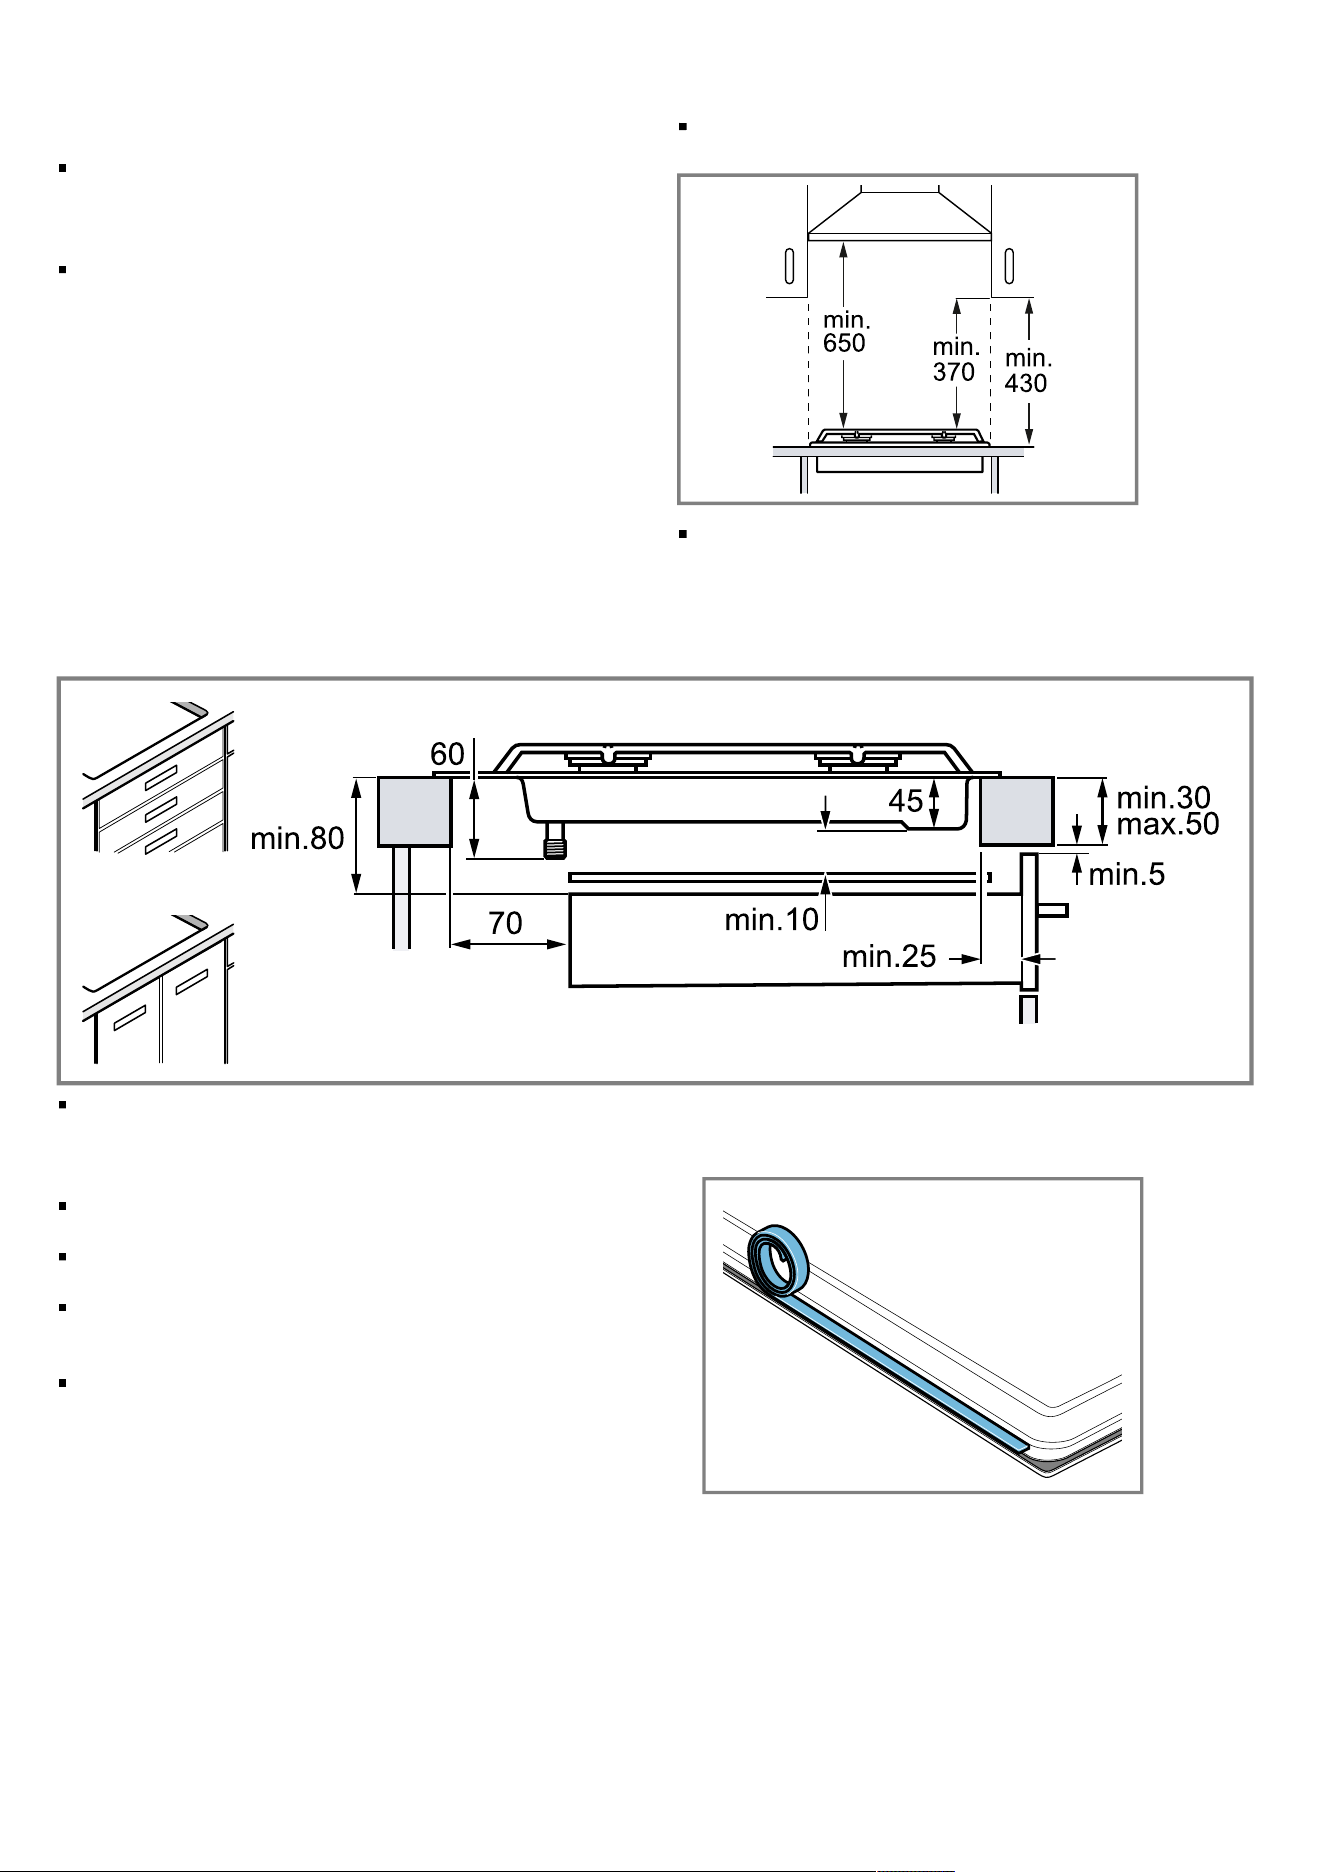
2.4 Shield
If the base of the hotplate can be touched, fit a protecting shield.
The shield must be at least 10mm from the lowest
part of the hotplate and must be capable of with-
standing the appliance temperatures. Minimum thick-
ness of worktop is 30mm.
The shield material must be mdf or similar with min-
imum thickness of 12mm.
The shield overall dimensions must be 560mm wide
x 480mm deep.
Provide cutout in right hand rear of shield of 80mm
wide x 80mm deep to provide for gas regulator /
LPG connection fitting.
After installation of the shield the clearance around
the top and sides of shield will allow adequate ventila-
tion. Ensure the side and top clearances are not ob-
structed.
2.5 Positioning the appliance
Note: Do not use silicone to bond the appliance to the
worktop.
1.
Position the cooktop with the upper side facing down
on a flat, stable surface.
2.
Apply the adhesive seal supplied to the lower edge of
the cooktop. The adhesive seal prevents the penetra-
tion of liquids.
7
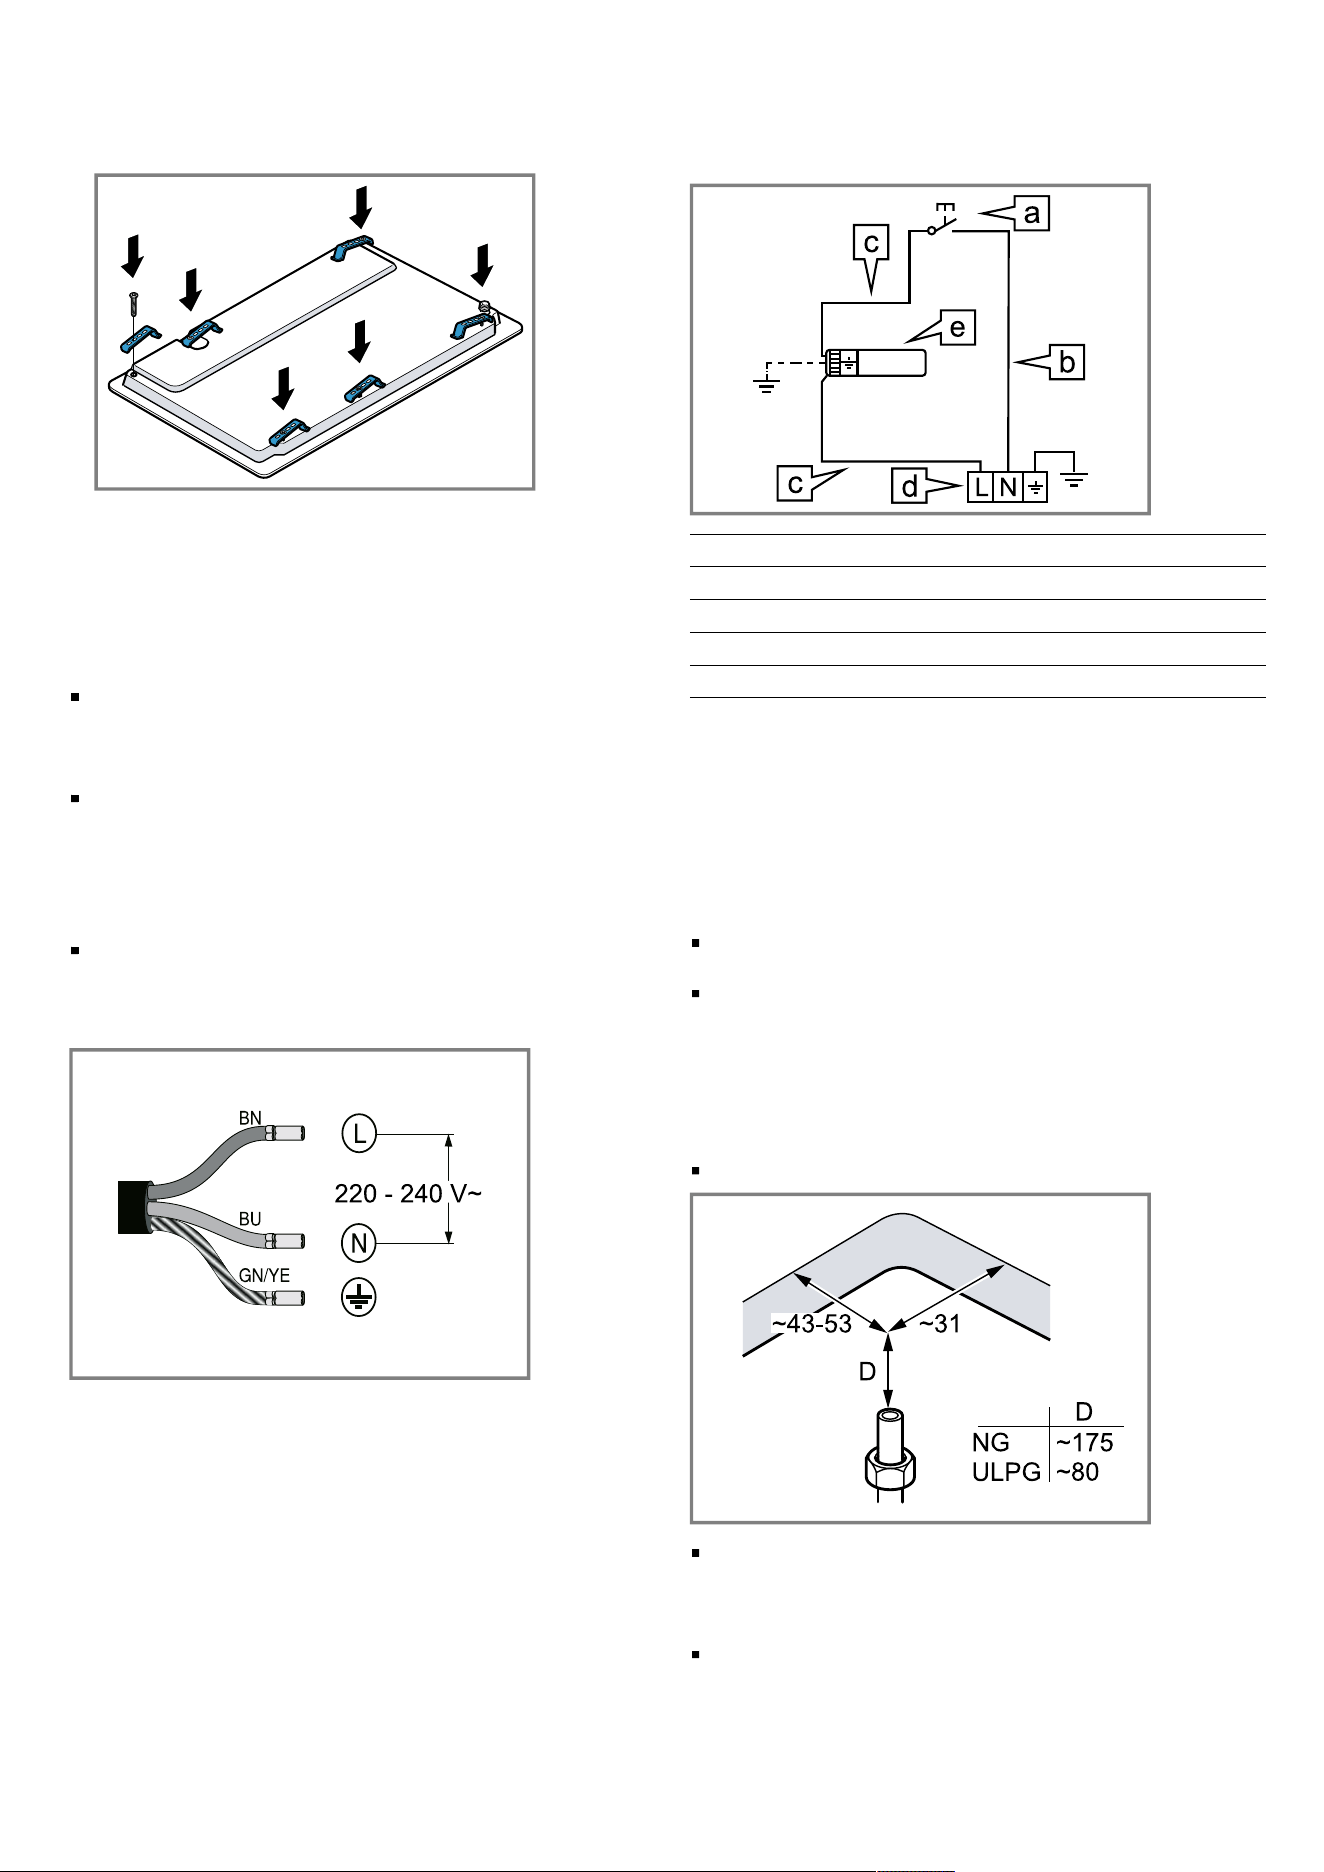
en Installation instructions
3.
Screw the brackets supplied into the specified posi-
tion so that they can turn freely.
4.
Turn the brackets and tighten them fully.
The position of the brackets depends on the worktop
thickness.
2.6 Electrical connection
Follow the instructions for electrical connection.
An electrical 10amp socket needs to be within 1m
of the hotplate to allow electrical connection. The
socket must remain accessible after installation of the
appliance.
This appliance is connected to the mains (240VAC)
by means of the connecting lead. The connecting
lead must be fixed to the kitchen unit to prevent it
from coming into contact with hot parts of the cook-
top or an oven installed underneath and remain ac-
cessible after installation of the cooktop.
This appliance must be earthed. When connecting the
cooktop ensure that the earth wire is connected first
and that all wires are connected to the correct termin-
als.
Wiring diagram
Observe the wiring diagram.
a Switch
b Blue wire
c Brown wire
d Terminal
e Ignition module
2.7 Gas connection
Only an officially authorised technician should connect
the appliance.
Before connecting the gas
Observe any special conditions imposed by local suppli-
ers (utilities).
During the planning stage, consider the position of
supply connections.
The cooktop must be connected to the gas supply
with upstream connection of an isolation valve in ac-
cordance with the respectively valid regulations. We
recommend that the isolation valve be fitted prior to
the cooktop to enable isolation of cooktop from gas
supply. The valve must be easily accessible at all
times.
Position of the inlet connection
Check whether the local connection conditions (gas
type) are compatible with the unit’s setting. The spe-
cifications of this cooktop are stated on the data label
located on the bottom of the cooktop base.
A duplicate data label is supplied for adhesion to an
accessible location near the hotplate if the data label
on the base of the hotplate cannot be accessed when
the hotplate is installed.
8

Installation instructions en
Gas connection R 1/2
1.
Fit the seal and the connecting piece R1/2 to the
gas connection on the appliance.
– Direction of gas flow is indicated on the rear of the
regulator.
– a: Pressure test point.
Connecting the unit to the gas line
The supply connection point shall be accessible with the
appliance installed.
Tip: Make sure that all connections performed are free
of leakage. Use pipe compound or thread sealant, prop-
erly threaded pipes and careful assembly procedure so
that there is no cross threading and so on, which might
cause damage or leakage.
The manufacturer does not accept any liability for leak-
age on connections performed by the installer or if the
L-tube is moved or twisted.
Refer to AS/NZS 5601.1 for piping size details.
Remove plastic cap from gas supply line prior to in-
stallation.
There are two ways to carry out the connection to the
main gas line:
– Connect with rigid pipe as specified in AS/NZS
5601.1.
– Connect with flexible hose. The hose assembly
must comply with AS/NZS 1869, 10mm ID, class
B or D, no more than 1.2m long and installed in
accordance with AS/NZS 5601.1.
Note
If installing with a hose assembly:
Ensure that the hose assembly is restrained from ac-
cidental contact with the flue outlet of an underbench
oven.
Ensure that the hose does not contact the hot sur-
faces of the hotplate, oven, dishwasher or any other
appliance that may be installed underneath or next to
the hotplate.
The hose should not be subjected to abrasion, kink-
ing or permanent deformation.
The hose should be able to be inspected along its
entire length with the cooktop in the installed position.
Unions compatible with the hose fittings must be
used and all connections tested for gas leaks.
Before leaving
It should be expressly noted that we cannot accept any
liability for direct or indirect damage caused by wrong
connection, leakage or improper installation.
Check all connections for gas leaks with soap and
water. DO NOT use a naked flame for detecting
leaks.
Ignite all burners both individually and concurrently to
ensure correct operation of gas valves, burners and
ignition.
Turn gas taps to low flame position and observe sta-
bility of the flame for each burner individually and all
together.
Adhere the duplicate data plate to an accessible loca-
tion near the hotplate.
When satisfied with the hotplate, instruct the user on
the correct method of operation.
In case the appliance fails to operate correctly after
all checks have been carried out, refer to the author-
ised service provider in your area.
When being repaired, the appliance must always be dis-
connected from the mains supply; if required, notify our
customer service.
2.8 Converting the cooktop from Natural Gas
to ULPG
All work involved in installation, setting and adaptation
to a different gas type must be carried out by a licensed
gas fitter and must comply with current regulations and
the conditions laid down by the local gas company.
Before conversion the cooktop must be disconnected
from the electricity and gas valves must be turned to the
OFF position.
Adjusting the taps
1.
Turn the rotary knobs to the minimum power position
and pull them out.
2.
With the tip of the screwdriver, push down on the flex-
ible rubber holder to access the bypass screw.
Never remove the sealing ring. The sealing rings pre-
vent liquids and dirt from finding their way into the ap-
pliance and impairing its ability to function properly.
3.
Adjust the bypass screws:
A: For ULPG, the bypass screws must be tightened
properly.
9
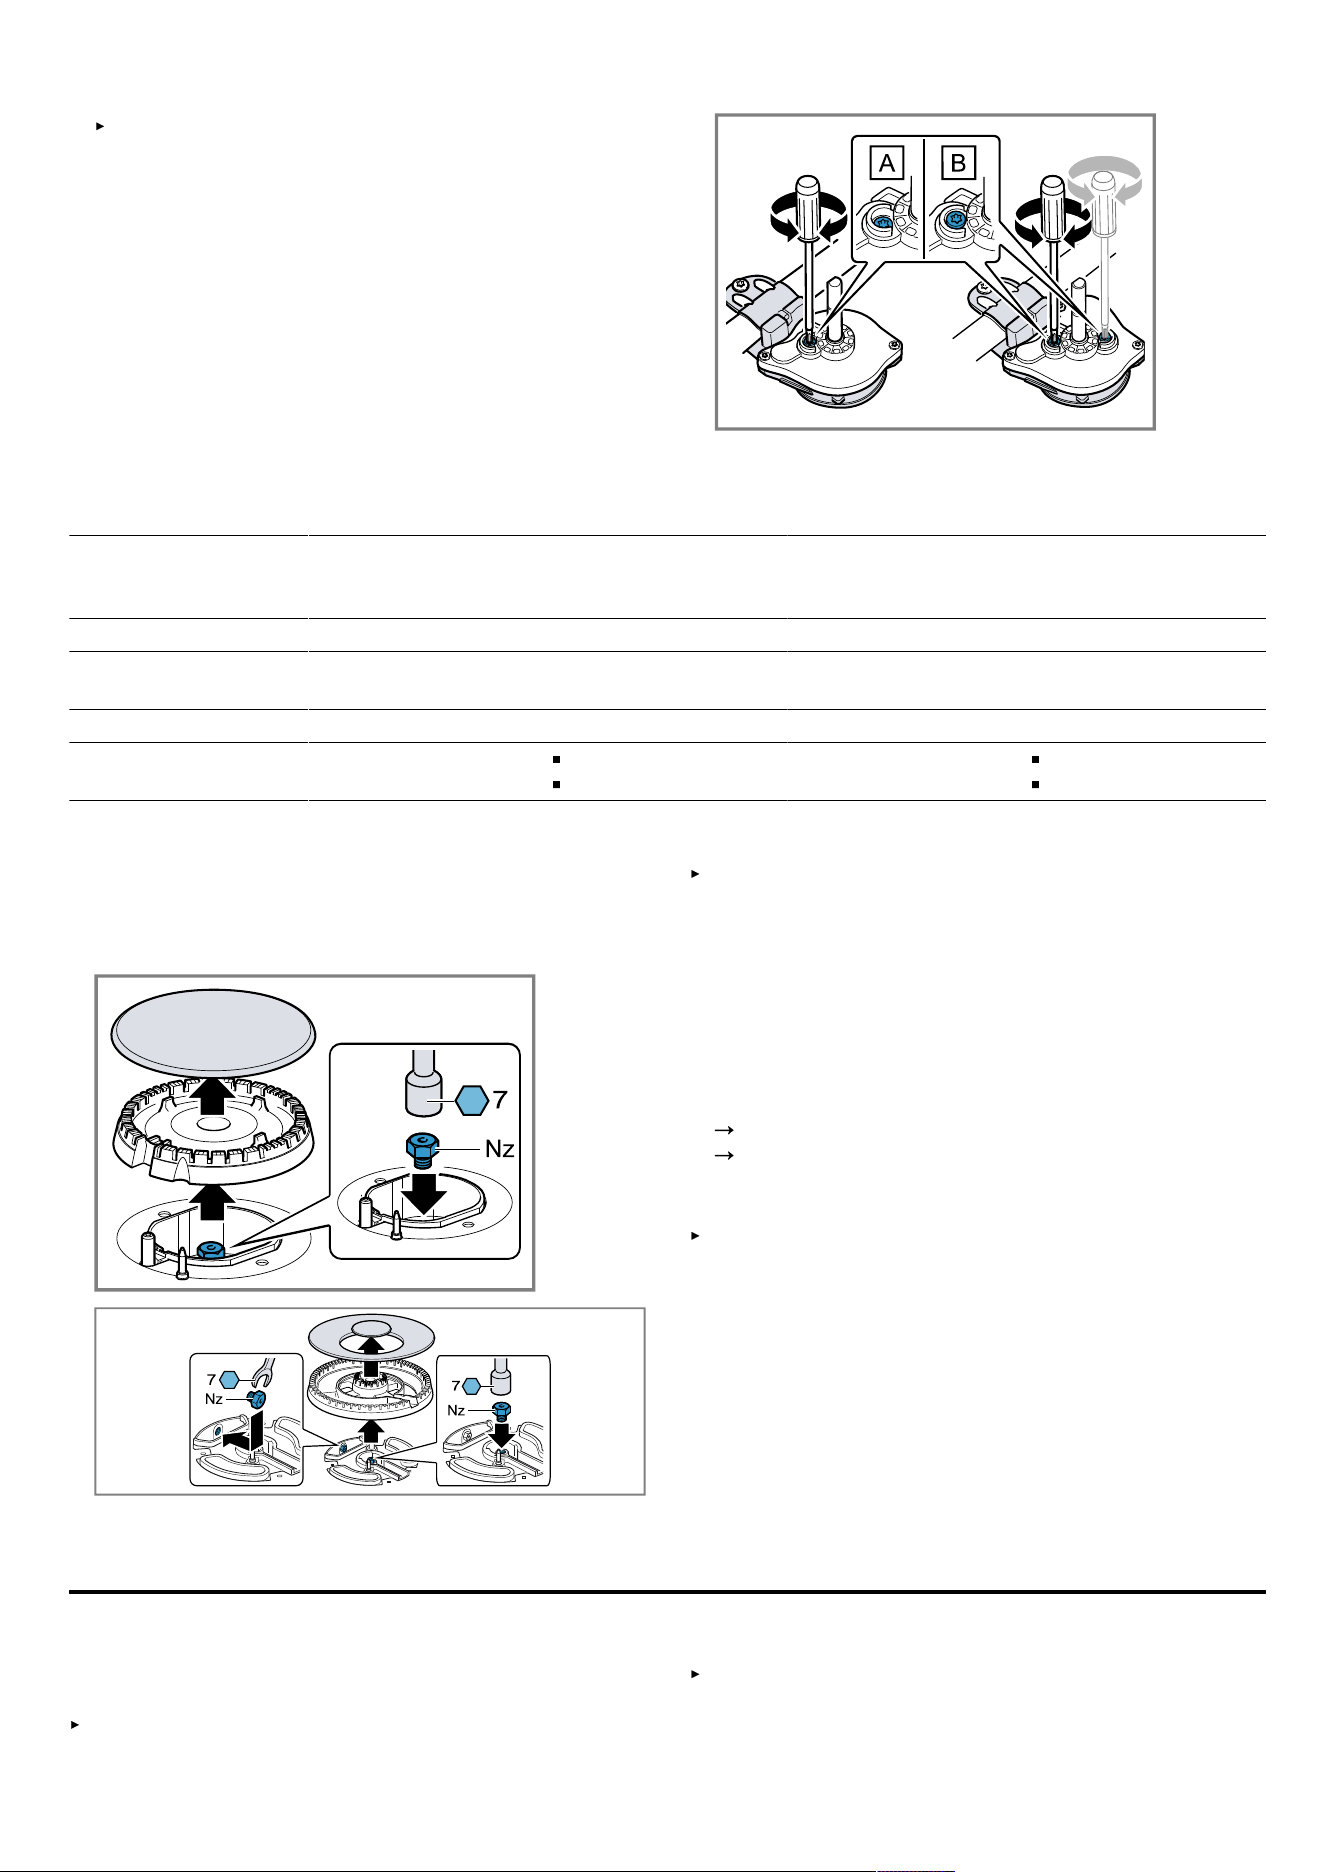
en Preventing material damage
B: For Natural Gas, the bypass screws must finish
flush with the fitting.
Injectors
Request change-over injectors from our customer service deparment. Refer injector chart below for sizes.
Burner NG
Hourly gas con-
sumption (MJ)
NG
Injector mark
ULPG
Hourly gas con-
sumption (MJ)
ULPG
Injector mark
Economy burner 4.00 88 3.50 50
Standard-output
burner
6.85 116 6.00 66
High-output burner 11.00 153 11.00 87
Dual-wok multi-crown
burner
19.50 Outer flame: 190
Inner flame: 77
16.50 Outer flame: 100
Inner flame: 45
Replacing the injectors
1.
Remove all pan supports, burner caps and distribut-
ors.
2.
Replace the nozzles using the appropriate wrench
and tighten them carefully to guarantee the seal.
Ensure that the nozzle does not become detached
during removal or fastening.
Reinstalling the appliance
Install the appliance components in reverse order.
Checking if equipment is working
1.
Check that turning the rotary knob between the posi-
tion for maximum power and the position for min-
imum power does not cause the burner to go out or
result in backfire.
2.
If the gas flow from the burner is not correct, check
whether the nozzle and the position of the bypass
screw are correct.
"Injectors", Page10
"Adjusting the taps", Page9
Documenting the gas type conversion
Attach the sticker showing the new gas type near to
the rating plate.
Preventing material damage3 Preventing material damage
ATTENTION
A build-up of heat may damage the appliance.
Never cover the stainless steel gas cooktop, for ex-
ample with aluminium foil or oven protectors.
Only use the accessories specified.
10
Environmental protection and saving energy en
Heat can cause damage to adjacent appliances or kit-
chen units.
If the appliance is in operation for an extended period,
heat and moisture will be generated.
Open a window or switch on an extractor hood lead-
ing to the outside.
A build-up of heat may damage the appliance.
Do not use two burners or heat sources to heat one
single item of cookware.
Do not use griddle plates, clay pots, etc. for a long
time at full power.
Do not use large pots which can deflect flame onto
the cooktop.
Do not remove the pan support and enclose the
burner with a wok stand as this will concentrate and
deflect heat onto the cooktop.
Do not place anything, for example, flame tamer or
asbestos mat, between pan and pan support as seri-
ous damage to the appliance may result.
A build-up of heat may damage the controls.
Do not use a large item of cookware on burners that
are close to the control knobs.
If a control knob is in the wrong position, this could lead
to malfunctions.
Always turn the control knob to the "Off" position
when the appliance is not being used.
Handling the cookware roughly may damage the sur-
face of the appliance.
Handle the cookware on the cooktop carefully.
Acidic liquids, such as lemon juice or vinegar, may dam-
age the surface of the appliance.
Do not leave acidic liquids on the cooktop.
Environmental protection and saving energy4 Environmental protection and saving energy
4.1 Saving energy
If you follow these instructions, your appliance will use
less energy.
Choose a burner roughly the same size as your pan.
Centre the cookware on the hob.
Tip: Cookware manufacturers often give the upper dia-
meter of the saucepan. It is often larger than the base
diameter.
Unsuitable cookware or incompletely covered cook-
ing zones consume a lot of energy.
Cover saucepans with suitable lids.
Cooking without a lid consumes considerably more
energy.
Lift lids as infrequently as possible.
When you lift the lid, a lot of energy escapes.
Use a glass lid.
You can see into the pan through a glass lid without
having to lift it.
Use cookware that is suitable for the quantity of food.
Large items of cookware containing little food need
more energy to heat up.
Cook with only a little water.
The more water that is contained in the cookware, the
more energy is required to heat it up.
Turn down to a lower power level early on.
If you use an ongoing power level that is too high,
you will waste energy.
4.2 Disposing of packaging
The packaging materials are environmentally compatible
and can be recycled.
Sort the individual components by type and dispose
of them separately.
Familiarising yourself with your appliance5 Familiarising yourself with your appliance
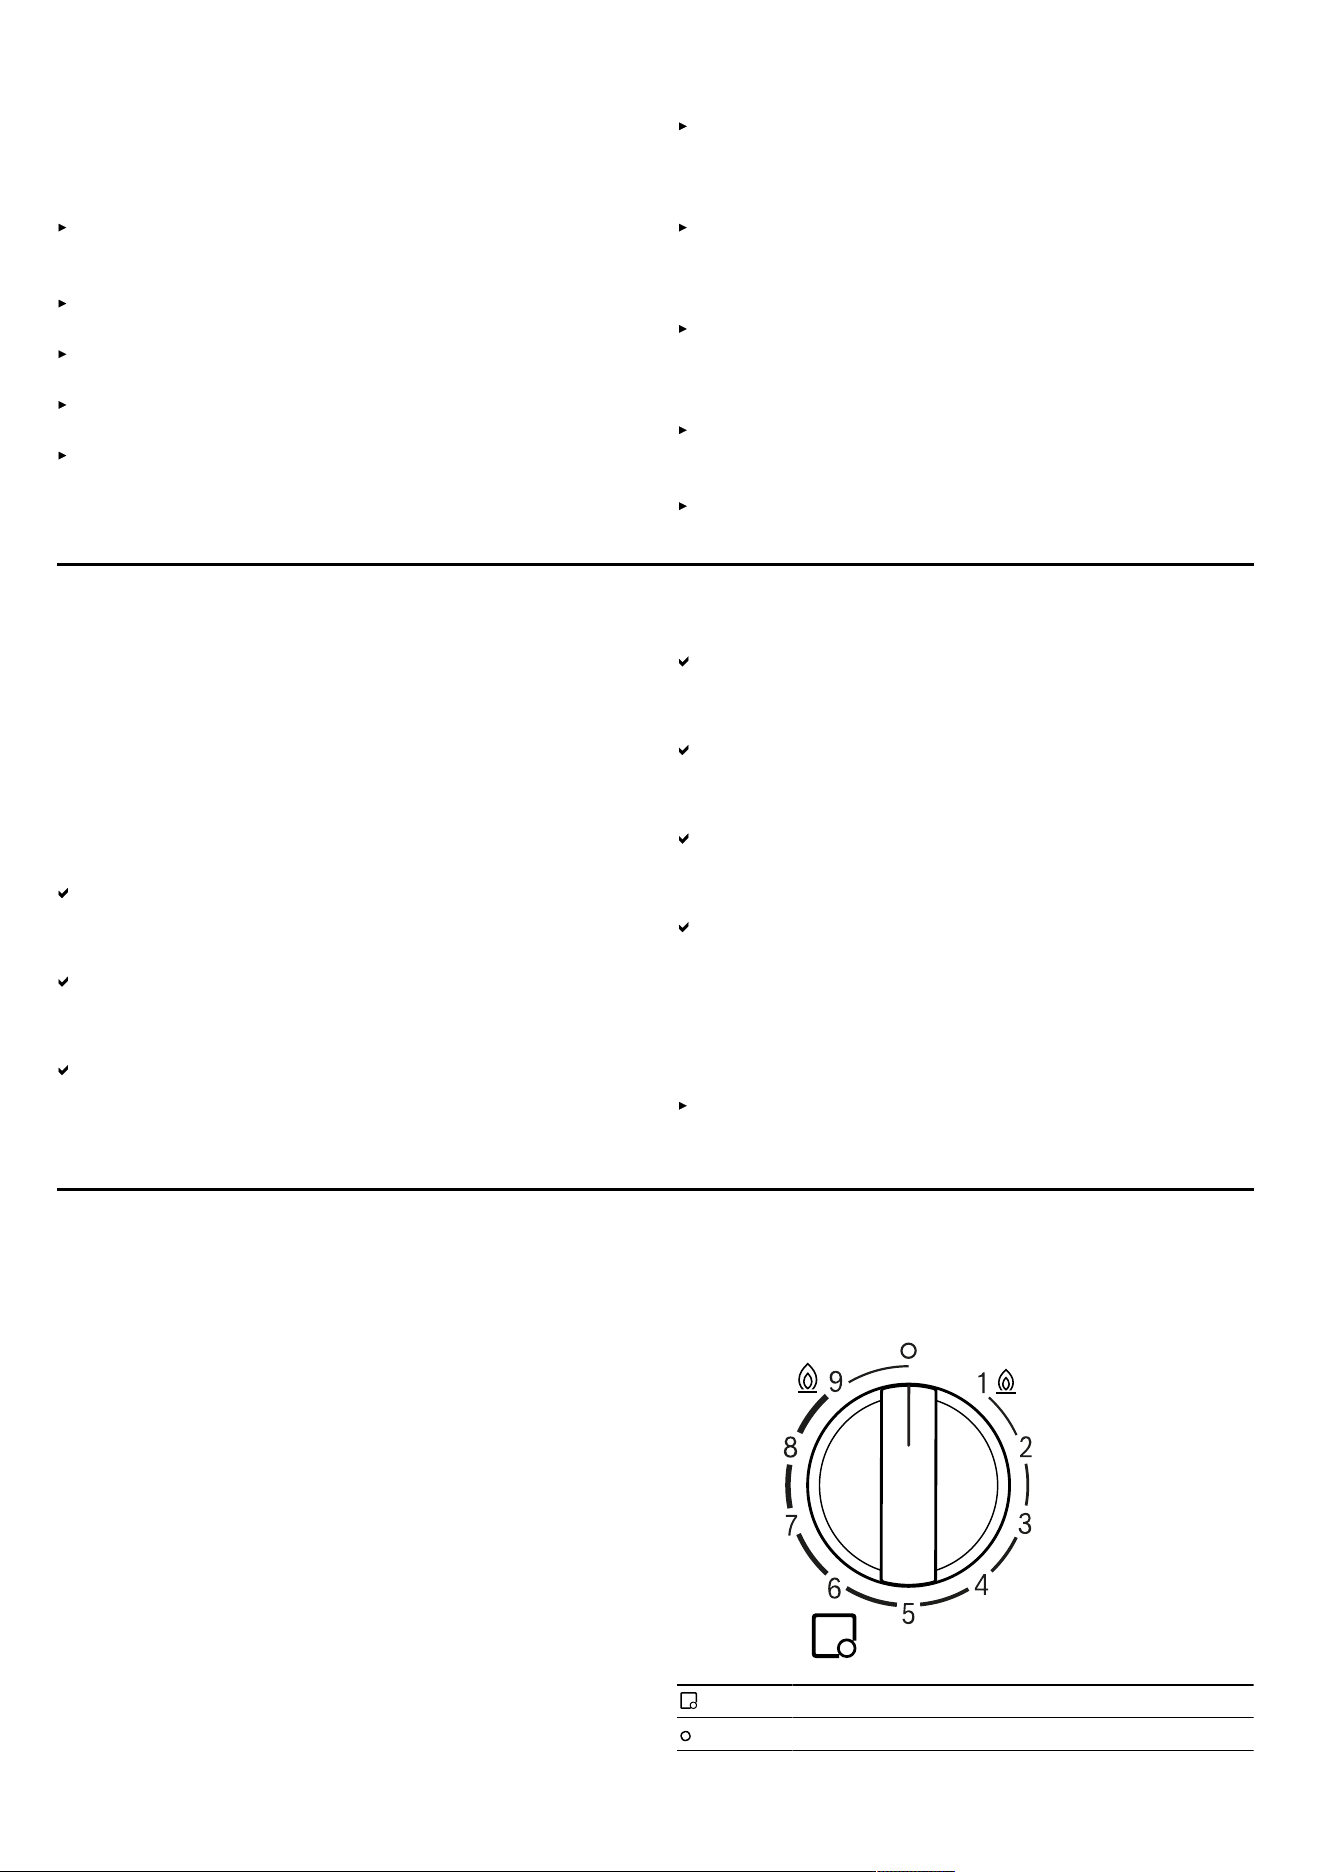
5.1 Control knob
You can use the control panel to configure all functions
of your appliance and to obtain information about the
operating status.
You can use the control knobs to set the flame height to
different power levels.
Burner assigned to the control knob.
Burner off.
11
en Accessories
9 Highest power setting and electric ignition of
the burner.
1 Lowest power setting.
Dual-wok multi-crown burner
With the dual-wok multi-crown burner, you can regulate
the inner and outer flames independently of each other.
Power
level
Meaning
9 Inner and outer flame on full power.
4 Outer flame on minimum, inner flame on full
power.
3 Inner flame on full power.
1 Inner flame on minimum power.
Removable control knob
You can remove the appliance's control knob.
The control knob is magnetic and connected to the
control knob base .
Remove the control knob upward.
Note: Never remove the control knob base and its
holder . Only Customer Service can reinsert the con-
trol knob base and its holder.
To put the control knob back on, press it on at its ori-
ginal position.
Tip: The magnets can interfere with magnetic data carri-
ers, TV sets and displays. Keep magnetic data carriers,
e.g., credit cards or other cards with magnetic strips, TV
sets and monitors away from the device's control knob.
5.2 Burner
You can find an overview of the parts of the burner here.
2
3
1
4
Burner cover
Burner cup
Thermocouple for the flame monitoring
Ignition plug
5.3 Pan supports
Insert the pan supports correctly.
→Page2
Place the cookware correctly on the pan supports.
Never place the cookware directly on the burner.
Always carefully remove the pan supports. When mov-
ing a pan support, the pan supports next to it may also
move.
Tip: You can remove the metal residue that remains
when some items of cookware are moved on the pan
support by cleaning it properly.
"Cleaning and servicing", Page15
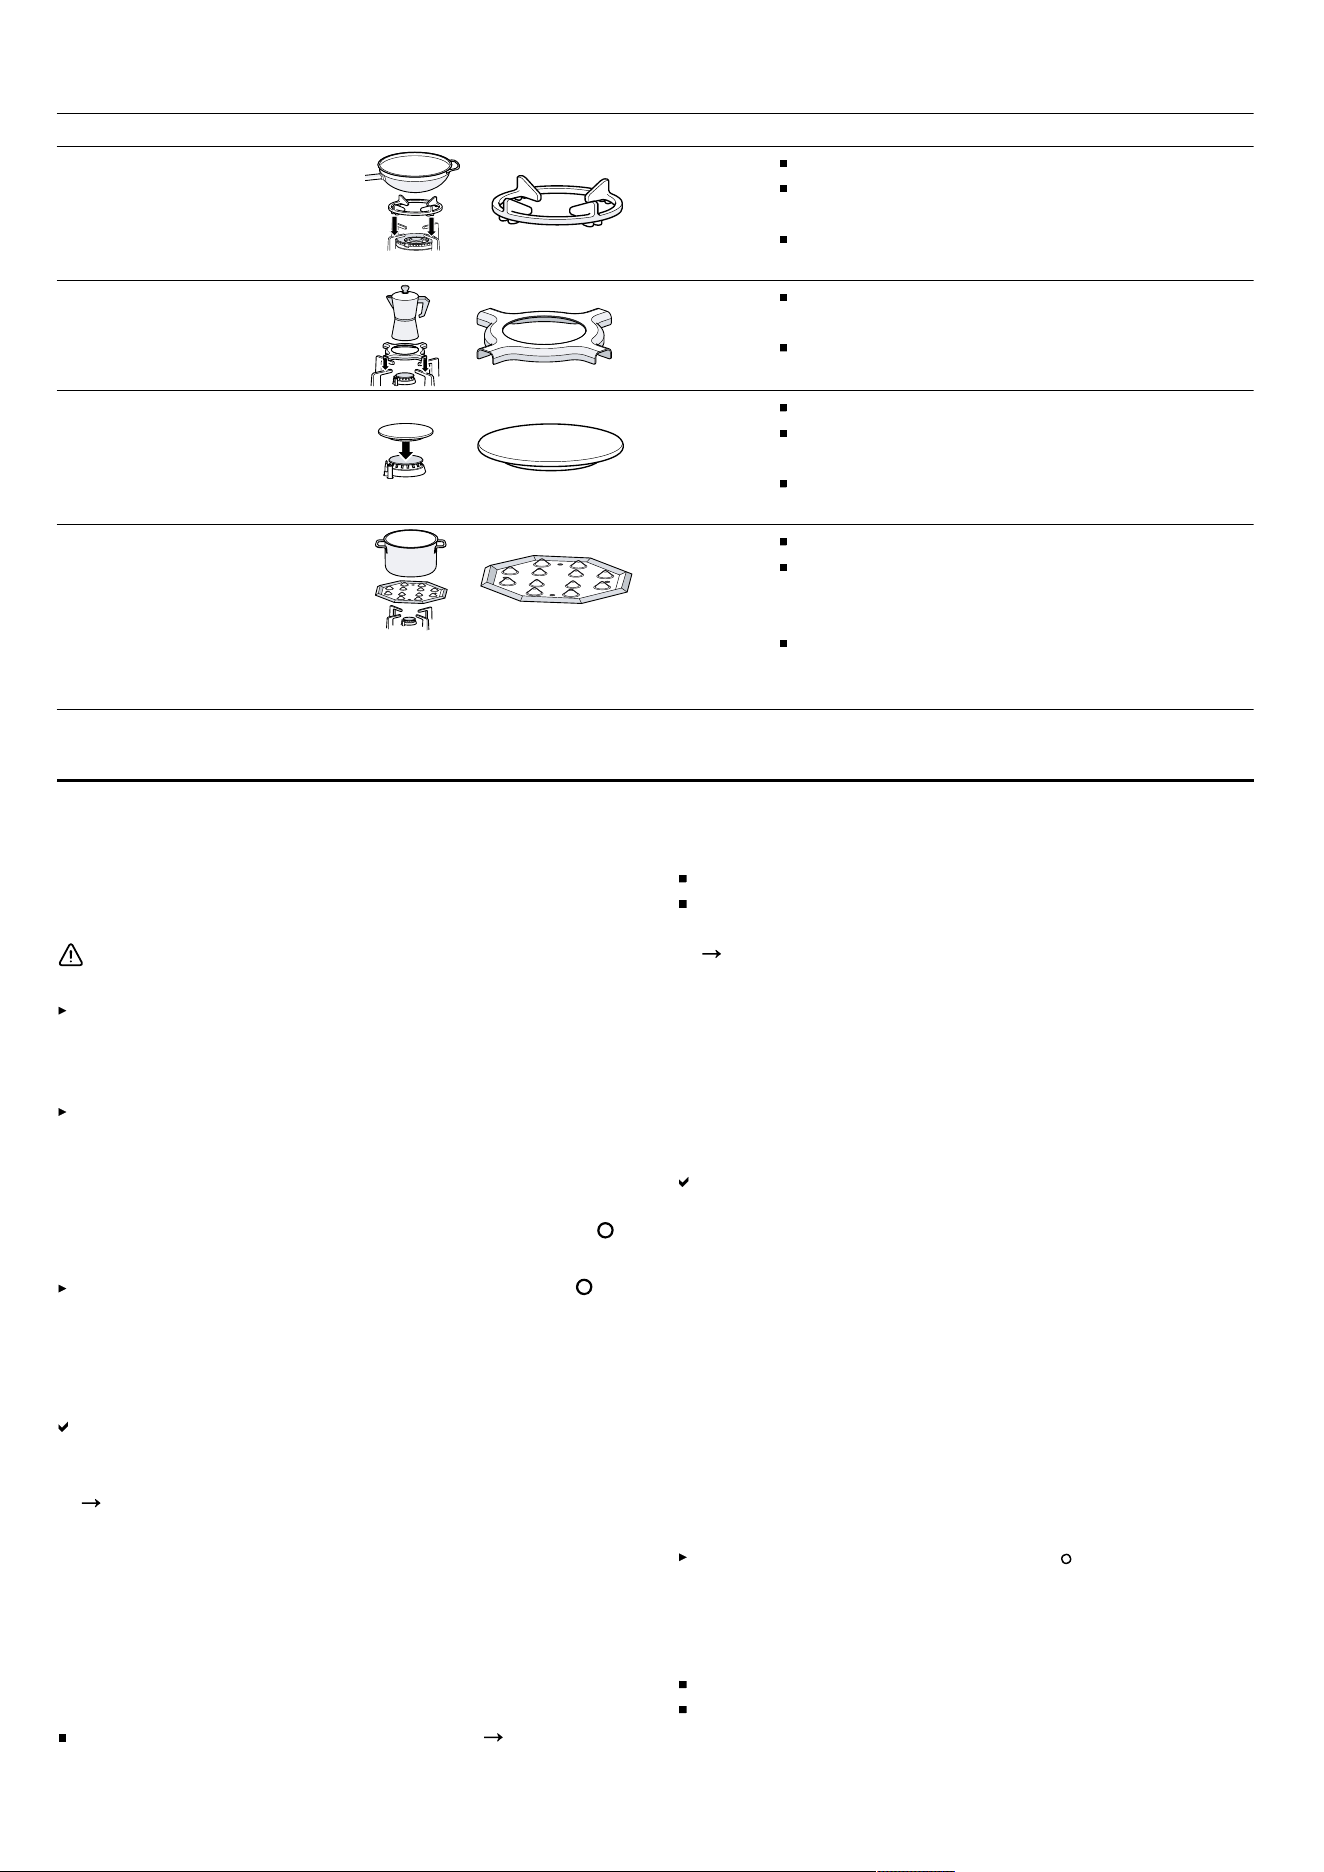
Accessories6 Accessories
You can buy accessories from the after-sales service, from specialist retailers or online. Only use original accessor-
ies, as these have been specifically designed for your appliance.
Accessories vary from one appliance to another. When purchasing accessories, always quote the exact product
number (E no.) of your appliance.
Page18
You can find out which accessories are available for your appliance in our catalogue, in the online shop or from our
after-sales service.
www.bosch-home.com
12
Basic operation en
Accessories Description Use
Additional wok grid Only use on the multi-crown burner.
Always use for cookware with a rounded
base.
Recommended in order to extend the ser-
vice life of the appliance.
Additional espresso maker
grid
Only use on the burner with the lowest
power setting.
Use with cookware with a diameter smaller
than 12.
Simmer cap Secure this above the economy burner cap.
Use only with the lowest power setting of
the burner.
Place the cookware on the pan support,
never directly on the simmer cap.
Simmer plate Use for cooking on a low heat.
Place it on the pan support with the bumps
facing up – never place it directly on the
burner.
Use the economy burner or the standard-
output burner. If you have multiple standard-
output burners, use the rear burner.
Basic operation7 Basic operation
7.1 Igniting a gas burner
The cooktop has automatic ignition of the burners.
WARNING‒Risk of fire!
Escaping gas may ignite.
If the burner does not ignite after 10seconds, turn
the control knob to the "Off" position and open the
door or window in the room. do not attempt to re-ig-
nite the burner for at least one minute.
In the event of the burner flames being accidentally
extinguished, turn off the burner control and do not at-
tempt to re-ignite the burner for at least one minute.
ATTENTION
If you turn the control knob directly between position
and1, malfunctions may occur.
For this reason, never turn directly from position to
position 1 or vice versa.
1.
Press the control knob for the selected burner and
turn it anti-clockwise to the highest level.
Keep the control knob pressed in.
For all of the burners, sparks are generated and the
flame ignites in the selected burner.
2.
Wait a few seconds and release the control knob.
"Safety system", Page13
3.
Turn the control knob to the required position.
4.
If the burner does not ignite, turn the control knob to
the off position and repeat the steps described
above. This time, hold the control knob down for
longer (up to 10 seconds).
Note
Take the following information into account to ensure
that the appliance works correctly:
The burner parts and the pan supports
Page12
must be inserted correctly.
Do not swap the burner caps around.
The burner holes and grooves must be clean to en-
sure a correct flame.
"Cleaning recommendations", Page15
7.2 Safety system
The safety system (thermocouple) prevents the flow of
gas if the flames accidentally go out. To ignite the
burner, you must activate the system that enables the
gas flow.
1.
Ignite the burner without releasing the control knob.
The flame ignites.
2.
Press and hold the control knob for a further four
seconds.
7.3 Igniting a gas burner manually
In the event of a power cut, you can light the burners
manually.
1.
Press the control knob for the selected burner and
turn it anti-clockwise to the highest level.
2.
Hold a lighter or a flame (lighter, match, etc.) against
the burner.
7.4 Switching off a burner
Turn the control knob clockwise to .
7.5 Normal behaviour during operation
This behaviour is normal for the appliance:
Slight hissing noise from the ignited burner.
Release of odours when using the appliance for the
first time. These odours disappear after a short time.
13
en Cookware
An orange flame is normal. This is due to dust in the
environment, spilled liquids, etc.
Popping noise a few seconds after the burner is
switched off. This is caused by switching on the
safety system.
"Safety system", Page13
Cookware8 Cookware
This information has been provided to help you save en-
ergy and avoid damaging your cookware.
8.1 Suitable cookware
Only use cookware with a suitable diameter. The cook-
ware must not protrude over the edge of the hob.
Never use small cookware on large burners. The flames
must not touch the sides of the cookware.
Burner Minimum dia-
meter of the
cookware base
(cm)
Maximum dia-
meter of the
cookware base
(cm)
Wok multi-crown
burner
22 30
High output
burner
20 26
Standard output
burner
14 22
Economy burner 12 16
Only use cookware with a concave base on the multi-
crown burner.
The hob must have a multi-crown burner and addi-
tional wok grid.
The additional wok grid must be correctly inserted.
"Accessories", Page12
8.2 Using cookware
The selection and positioning of the cookware affects
the safety and energy efficiency of your appliance.
"Saving energy", Page11
WARNING‒Risk of fire!
Flammable objects may ignite.
Maintain a distance of at least 50mm between the
cookware and flammable objects.
Note: When using some items of cookware, a tempor-
ary, slight deformation of the stainless steel cooking sur-
face may occur. This is normal and does not affect the
functionality of the appliance.
Do not use deformed
cookware. Only use cook-
ware with a thick, flat
base.
Deformed cookware is not
stable on the cooktop and
may tip over.
Place the cookware right
in the centre of the burner.
The cookware may tip over
if it is not placed in the
centre of the burner.
Place the cookware cor-
rectly on the pan supports.
The cookware may tip over
if you place it directly on
the burner.
Recommended settings for cooking9 Recommended settings for cooking
You can use the control knobs on the appliance to set
the flame height incrementally to different power levels
from 1 to 9.
The cooking times and power levels may vary depend-
ing on the type of food, its weight and quality, on the
type of gas used, and on the material from which the
cookware is made.
Tips
Cooking tips
– When cooking soups, creams, lentils or chickpeas,
add all of the ingredients to the cookware at the
same time.
– For pan-fried dishes, heat the oil up first. As soon
as you have started frying, keep the temperature
constant and adjust the power level as required.
When preparing several portions, wait until the rel-
evant temperature has been reached again. Turn
the food regularly.
To reduce the cooking time:
– Use a pressure cooker to cook creams and pulses.
If you are using a pressure cooker, follow the man-
ufacturer's instructions.
– The water must be boiling before you add pasta,
rice or potatoes. Then adjust the power level in or-
der to continue boiling.
– Always use a lid when cooking rice and potatoes.
Power
level
Preparing meals
9 Bringing water to the boil
Baking in a bain-marie: Sponge, blanc-
mange, bread pudding.
Frying at a high temperature: Asian
dishes.
7-9 Starting the cooking process: Pasta,
soups, creams, paella, pulses, rice pud-
ding.
Deep-fat frying in oil: Tempura vegetables,
croquettes, chips, potato omelettes, escal-
ope, frozen food, baked items.
Frying with a little oil: French omelette,
steak, well-done sirloin steak, strogonoff.
Frying, searing: Vegetables, meat.
14
Cleaning and servicing en
Power
level
Preparing meals
4-6 Continuing the cooking process: Pasta,
soups, creams, paella, pulses, rice pud-
ding.
Deep frying with a little oil: Hamburgers,
sausages, grilled salmon, rissoles.
Stew, pot roast: Ragout, goulash, rata-
touille.
Cooking at a medium temperature:
Cheese sauce, béchamel, carbonara,
Neapolitana sauce, blancmange, crepes.
Defrosting: Frozen food.
Power
level
Preparing meals
1-3 Finishing cooking: Paella rice, pulses, rice
pudding.
Steaming: Fish, vegetables.
Heating and keeping warm: Ready-to-eat
meals.
1 Melting: Butter, chocolate, butter, gelatine,
honey, caramel.
Cleaning and servicing10 Cleaning and servicing
To keep your appliance working efficiently for a long
time, it is important to clean and maintain it carefully.
10.1 Cleaning product
You can obtain suitable cleaning products from after-
sales service or the online shop
www.bosch-home.com
.
ATTENTION
Unsuitable cleaning products may damage the surfaces
of the appliance.
Do not use harsh or abrasive detergents.
Do not use steel wool or scouring sponges.
Do not use a knife or sharp objects to remove dried-
on food remnants from the cooktop.
Do not use knives or sharp objects to clean the con-
nection between the metal and the glass or alu-
minium plate wit.
Do not use steam-cleaning appliances.
10.2 Cleaning recommendations
Clean all parts of the appliance after each use.
Notes
Read the information on the cleaning agents.
"Cleaning product", Page15
The high temperatures of the multi-crown burner can cause the stainless steel surface to discolour slightly. This is
normal.
General information:
Allow the appliance to cool down before cleaning.
After cleaning, dry all parts of the appliance completely using a soft cloth. Surface damage may occur if there are
still drops of water or residual moisture at the beginning of the cooking process.
Reattach the parts of the appliance properly, making sure that the surfaces are not damaged.
"Familiarising yourself with your appliance", Page11
Component Recommended cleaning method Please note
Appliance surface Clean using a sponge and soapy
water.
Use stainless steel cleaner regu-
larly for stainless steel surfaces.
Stainless steel cleaner is avail-
able from customer service.
Wipe up spilled liquids immediately. This prevents food
residues from burning.
The control elements can be removed for easier clean-
ing. Never remove the control element base or its
holder.
"Removable control knob", Page12
After cleaning, check the correct position of the control
element bases and holders.
Do not use stainless steel cleaner in the area around
the control elements. Stainless steel cleaners may re-
move screen-printed displays.
15
en Troubleshooting
Component Recommended cleaning method Please note
Control elements Clean using a damp sponge cloth
and hot soapy water.
The control elements can be removed for easier clean-
ing. Never remove the plinth for the control elements or
its holder.
"Removable control knob", Page12
Do not clean it in the dishwasher or immerse it in water,
as this may damage it.
Do not use abrasive or corrosive products, such as cit-
ric acid, vinegar, aggressive cleaning agents or glass
ceramic cleaners.
Pan supports Cleaning by hand:
Scrub with a non-metallic brush
or a non-scratching scouring
sponge and soapy water.
Cleaning in the dishwasher:
Clean at a maximum temperat-
ure of 60°C.
Carefully remove the pan supports.
Carefully clean the area around the rubber pads. If the
rubber pads come loose, the pan support may scratch
the hob.
Cleaning in the dishwasher:
Use cleaning agents recommended by the dishwasher
manufacturer.
Preclean the pan supports if they are particularly dirty.
As soon as the washing process is finished, remove the
pan supports from the dishwasher and remove any re-
sidual moisture.
Tip: The pan supports may discolour during use and
cleaning. This discolouration does not affect their use.
Burner Scrub with a non-metallic brush
or a non-scratching scouring
sponge and soapy water.
Do not clean in the dishwasher.
Do not mix up the burner lids.
Gently move the burner lid back and forth until it locks
into the projections on the burner.
Burner cover Remove any stubborn dirt. Use a paste made from baking powder and lemon juice
or vinegar and flour.
Leave it to work for 30-60 minutes before rinsing and
polishing.
After cleaning, the flame looks orange.
Thermocouples/igni-
tion plugs
Clean using a small non-metallic
brush.
Clean carefully. Thermocouples and ignition plugs are
sensitive.
Do not moisten the thermocouple and the ignition plug.
If there is excessive moisture, the burner may not light.
Troubleshooting11 Troubleshooting
You can rectify minor faults on your appliance yourself. Read the troubleshooting information before contacting after-
sales service. This will avoid unnecessary costs.
WARNING‒Risk of injury!
Improper repairs are dangerous.
Repairs to the appliance should only be carried out by trained specialist staff.
If the appliance is defective, call Customer Service.
"Customer Service", Page18
WARNING‒Risk of electric shock!
Improper repairs are dangerous.
Repairs to the appliance should only be carried out by trained specialist staff.
Only use genuine spare parts when repairing the appliance.
If the power cord of this appliance is damaged, it must be replaced by the manufacturer, the manufacturer's Cus-
tomer Service or a similarly qualified person in order to prevent any risk.
16

Service en
11.1 Malfunctions
Fault Cause and troubleshooting
The general electrical operation is
impaired.
The circuit breaker is faulty.
Check the circuit breaker in the fuse box.
The circuit breaker or one of the residual-current circuit breakers has been
triggered.
In the fuse box, check whether the circuit breaker or one of the residual-current
circuit breakers has been triggered.
The mains plug of the power cord is not plugged in.
Connect the appliance to the power supply.
There has been a power cut.
Check whether the lighting in your room or other appliances are working.
Automatic ignition is not working. Food remnants or dirt are located between the ignition plug and the burner.
Clean the space between the ignition plugs and burners.
Burner parts are wet.
Carefully dry the burner parts.
The burner parts are positioned incorrectly.
Correctly position the burner parts.
The appliance is not earthed or has not been connected correctly, or the earth
cable is damaged.
Contact an electrician.
The burner flame is not uniform. The burner parts are positioned incorrectly.
Correctly position the burner parts.
Openings on the burner are soiled.
Clean and dry the openings on the burner.
The gas does not appear to be
flowing normally or there is no
gas being produced at all.
The gas supply has been shut off by the intermediate valves.
Open the intermediate valves.
There is a smell of gas in the kit-
chen.
The control knob is open.
Close the control knob.
The gas pipe to the appliance is leaking.
1.
Close the main gas tap.
2.
Ventilate the room.
3.
Immediately call an authorised installer, who can inspect the gas system and
issue an installation certificate.
4.
Do not use the appliance until you are sure that gas is not leaking from the in-
stallation or the appliance.
The burner switches off as soon
as you release the control knob.
Control knob not pressed down long enough.
1.
Keep the control knob pressed down for a few seconds after ignition.
2.
Press the control knob down firmly.
Openings on the burner are soiled.
Clean and dry the openings on the burner.
Service12 Service
DO NOT MODIFY THIS APPLIANCE. Only authorized
personnel from the Service Centre are qualified to work
on the appliance.
Any of the following are considered to be abnormal op-
eration and may require servicing:
Yellow tipping of the cooktop burner flame.
Sooting up of cooking utensils.
Burners not lighting properly.
Gas valves, which are difficult to turn.
In case the appliance fails to operate correctly, contact
the authorised service provider in your area.
17
en Customer Service
Customer Service13 Customer Service
Detailed information about the warranty period and the
warranty conditions in your country is available via the
QR code on the enclosed document on service con-
tacts and warranty conditions, from our customer ser-
vice or on our website.
If you contact Customer Service, you will require the
product number (E-Nr.) and the production number (FD)
of your appliance.
You can find the contact details for our customer ser-
vice via the QR code on the enclosed document on ser-
vice contacts and warranty conditions or on our website.
13.1 Product number (E-Nr.) and production
number (FD)
You can find the product number (E-Nr.) and the pro-
duction number (FD) on the appliance's rating plate.
The rating plate can be found:
on the appliance certificate.
on the lower section of the hob.
Make a note of your appliance's details and the Cus-
tomer Service telephone number to find them again
quickly.
Disposal14 Disposal
14.1 Disposing of old appliance
Valuable raw materials can be reused by recycling.
1.
Unplug the appliance from the mains.
2.
Cut through the power cord.
3.
Close the main gas tap.
4.
Dispose of the appliance in an environmentally
friendly manner.
Information about current disposal methods are avail-
able from your specialist dealer or local authority.
This appliance is labelled in accordance
with European Directive 2012/19/EU
concerning used electrical and elec-
tronic appliances (waste electrical and
electronic equipment - WEEE).
The guideline determines the framework
for the return and recycling of used ap-
pliances as applicable throughout the
EU.
18

Thank you for buying a
Bosch Home Appliance!
Register your new device on MyBosch now and profit directly from:
• Expert tips & tricks for your appliance
• Warranty extension options
• Discounts for accessories & spare-parts
• Digital manual and all appliance data at hand
• Easy access to Bosch Home Appliances Service
Free and easy registration – also on mobile phones:
www.bosch-home.com/welcome
Looking for help?
You'll find it here.
Expert advice for your Bosch home appliances, help with problems
or a repair from Bosch experts.
Find out everything about the many ways Bosch can support you:
www.bosch-home.com/service
Contact data of all countries are listed in the attached service directory.
BSH Hausgeräte GmbH
Carl-Wery-Straße 34
81739 München, GERMANY
www.bosch-home.com
A Bosch Company
*8001328637*
8001328637 (050520)
en