

2
About your device
AXIS S4000 Rack Recorder is a network video recorder with surveillance-class hard drives. It also includes a USB
3.0 port for easy export of video footage. The recorder comes in three models – 8 TB, 16 TB and 32 TB.
AXIS S4000

3
Get started
Access your device
Find the device on the network
To find Axis devices on the network and assign them IP addresses in Windows®, use AXIS IP Utility or
AXIS Device Manager Extend. Both applications are free and can be downloaded from axis.com/support.
For more information about how to find and assign IP addresses, go to How to assign an IP address and access
your device.
Browser support
You can use the device with the following browsers:
Chrome
TM
Edge
TM
Firefox
®
Safari
®
Windows
®
✓ ✓ * *
macOS
®
✓ ✓ * *
Linux
®
✓ ✓ * *
Other operating
systems
* * * *
✓: Recommended
*: Supported with limitations
Open the device's web interface
1. Open a browser and type the IP address or host name of the Axis device.
If you do not know the IP address, use AXIS IP Utility or AXIS Device Manager Extend to find the device
on the network.
2. Type the username and password. If you access the device for the first time, you must create an
administrator account. See .
For descriptions of all the controls and options in the device’s web interface, see .
Create an administrator account
The first time you log in to your device, you must create an administrator account.
1. Enter a username.
2. Enter a password. See .
3. Re-enter the password.
4. Accept the license agreement.
5. Click Add account.
Important
The device has no default account. If you lose the password for your administrator account, you must reset
the device. See .
AXIS S4000
4
Secure passwords
Important
Use HTTPS (which is enabled by default) to set your password or other sensitive configurations over the
network. HTTPS enables secure and encrypted network connections, thereby protecting sensitive data, such
as passwords.
The device password is the primary protection for your data and services. Axis devices do not impose a password
policy as they may be used in various types of installations.
To protect your data we strongly recommend that you:
• Use a password with at least 8 characters, preferably created by a password generator.
• Don’t expose the password.
• Change the password at a recurring interval, at least once a year.
Make sure that no one has tampered with the device software
To make sure that the device has its original AXIS OS, or to take full control of the device after a security attack:
1. Reset to factory default settings. See .
After the reset, secure boot guarantees the state of the device.
2. Configure and install the device.
Web interface overview
This video gives you an overview of the device’s web interface.
To watch this video, go to the web version of this document.
Axis device web interface
Get started with AXIS Camera Station Edge
Note
Internet access is required during the system setup.
1.
2.
3.
4.
5.
When the installation is done:
• All Axis devices in the system have the latest AXIS OS.
• All devices have a password.
• Recording using the default settings is active.
• You can use remote access.
AXIS S4000

5
Register a My Axis account
1. Register a My Axis account at axis.com/my-axis/login.
2. Choose one of the multi-factor authentication (MFA) methods Authenticator App (TOTP) or Email and
follow the on-screen instructions. MFA is a security system that adds another layer of verification to
ensure the user’s identity.
Install the hardware
1. Install your camera hardware.
2. Connect the recorder to your network via the LAN port.
3. Connect the cameras to an external PoE switch.
4. Connect the computer to the same network as the recorder.
5. Connect the power supply to the recorder.
Important
You must first connect the power cord to the recorder, and then connect the power cord to the power outlet.
6. Wait a few minutes for the recorder and cameras to boot up before proceeding.
CAUTION
Keep the recorder in a well ventilated environment and with plenty of empty space around the recorder to
avoid overheating.
Install AXIS Camera Station Edge
1. Go to axis.com/products/axis-camera-station-edge and click Download.
2. Open the setup file and follow the setup assistant.
3. Sign in with your My Axis account.
Create a site
1. Start AXIS Camera Station Edge.
2. Sign in with your My Axis account.
3. Click Create new site and give the site a name.
4. Click Next.
5. Select the devices you want to add to your site.
6. Click Next.
7. Select storage.
8. Click Next.
9. Click Install and wait while AXIS Camera Station Edge configures the devices.
The configuration can take several minutes.
When the installation is done:
• All Axis devices in the system have the latest AXIS OS.
• All devices have a password.
• Recording using the default settings is active.
• You can use remote access.
Install the mobile app
For Android
AXIS S4000

6
Click Download or scan the following QR Code®.
For iOS
Click Download or scan the following QR Code.
Open the AXIS Camera Station Edge mobile app and log in with your Axis credentials.
If you don’t have a My Axis account, you can go to axis.com/my-axis to register a new account.
QR Code is a registered trademark of Denso Wave Incorporated in Japan and other countries.
Get started with AXIS Camera Station Pro
Add your recorder
Note
AXIS Camera Station removes recordings from any previous system when you add the recorder to a new
system.
1. Go to Configuration > Devices > Add devices.
2. Select your recorder in the list and click Add. If your recorder is not listed, use Manual search to find it
manually.
3. Use the default settings and click Next.
4. Set your password for storage encryption. Click Next. You need this password to access the recorder
hard drive outside AXIS Camera Station or when the recorder is reset to factory default settings from the
device’s web interface.
5. Go to Configuration > Devices > Other devices and check the recorder has been added.
6. Go to Configuration > Storage > Management and check the recorder has been added to the storage
list.
AXIS S4000

7
Add devices and select the recorder as recording storage
1. Go to Configuration > Devices > Add devices.
2. Select your devices in the list and click Add. If your devices are not listed, use Manual search to find
them manually.
3. Use the default settings and click Next.
4. Manually select the recorder from the Recording storage drop-down list and click Install.
Note
The recorder will not be selected as recording storage if you select Automatic.
5. Go to Configuration > Storage > Selection. Click your devices and check that the recording storage is
the recorder.
Configure recordings
1. Go to Configuration > Storage > Selection and select your device.
2. Configure Retention time.
– Select Unlimited retention time to keep recordings until the storage becomes full.
– Select Limited and set the maximum number of days to keep recordings.
3. Click Apply.
Note
Fallback recording is enabled by default to store the recordings on your recorder when the connection
between AXIS Camera Station and the recorder is lost. See Fallback recording.
AXIS S4000

8
Configure your device
Change the RAID level
CAUTION
Changing the RAID level reformats the file system and deletes all data from your disks.
1. In the device web interface, go to System > Storage.
2. Under Tools, select Change RAID level and click Use tool.
3. Select a RAID level and click Next.
4. Select Encrypt the disk and type your password. Click Next.
5. Click Yes.
6. The status message appears in the upper-right corner. Wait until the operation is done and RAID
configured is shown before closing the page.
Replace a hard drive
Note
To avoid electrostatic discharge, we recommend that you always use a static mat and static strap while
working on components in the interior of the system.
1. Loosen the screws at the left and right of the bezel and remove the bezel.
2. Locate the broken hard drive indicated by a red LED.
All LEDs are red in case of a RAID failure. To identify the broken hard drive, go to the device web
interface and go to System > Storage > Hard drive status.
3. Loosen the screw for the hard drive sled (T10).
4. Pull the hard drive sled out of the hard drive bay.
5. Loosen the four screws for the hard drive (T8).
6. Take the hard drive out of the hard drive sled.
7. Insert a new hard drive into the hard drive sled.
8. Fasten the four screws for the hard drive.
9. Insert and push the hard drive sled all the way into the hard drive bay.
10. Fasten the screw for the hard drive sled. Wait until the LED turns green.
11. Attach the bezel and fasten the screws at the left and right of the bezel.
Create a new RAID
CAUTION
You only create a new RAID in case of a RAID failure. Creating a new RAID deletes all data from your hard
drives.
1. Replace the broken hard drives. See .
2. Configure the RAID. See .
3. Configure recordings in your video management system. See and .
Hard reset a recorder
Important
Move the recorder carefully while it’s switched on. Sudden moves or shocks may damage the hard drive.
AXIS S4000

9
Note
• A hard reset will reset all the settings, including the IP address.
• A hard reset will not remove your recordings.
1. Switch off the recorder:
Press the power button on the back side of the recorder for 4-5 seconds until you hear a beep.
2. Wait until the recorder is switched off.
3. Press and hold the control button. Press and release the power button to start the recorder. Release the
control button after 15-30 seconds when the LED indicator flashes amber.
4. The process is complete when the status LED indicator turns green. The product has been reset to the
factory default settings. If no DHCP server is available on the network, the device will use an IP address
from the link-local address subnet (169.254.0.0/16).
5. If your hard drive is encrypted, it must be mounted manually after the recorder is reset:
5.1. Go to the device’s web interface.
5.2. Go to System > Storage and click Mount.
5.3. Enter the encryption password used when encrypting the hard drive.
AXIS S4000
10
The web interface
To reach the device’s web interface, type the device’s IP address in a web browser.
Note
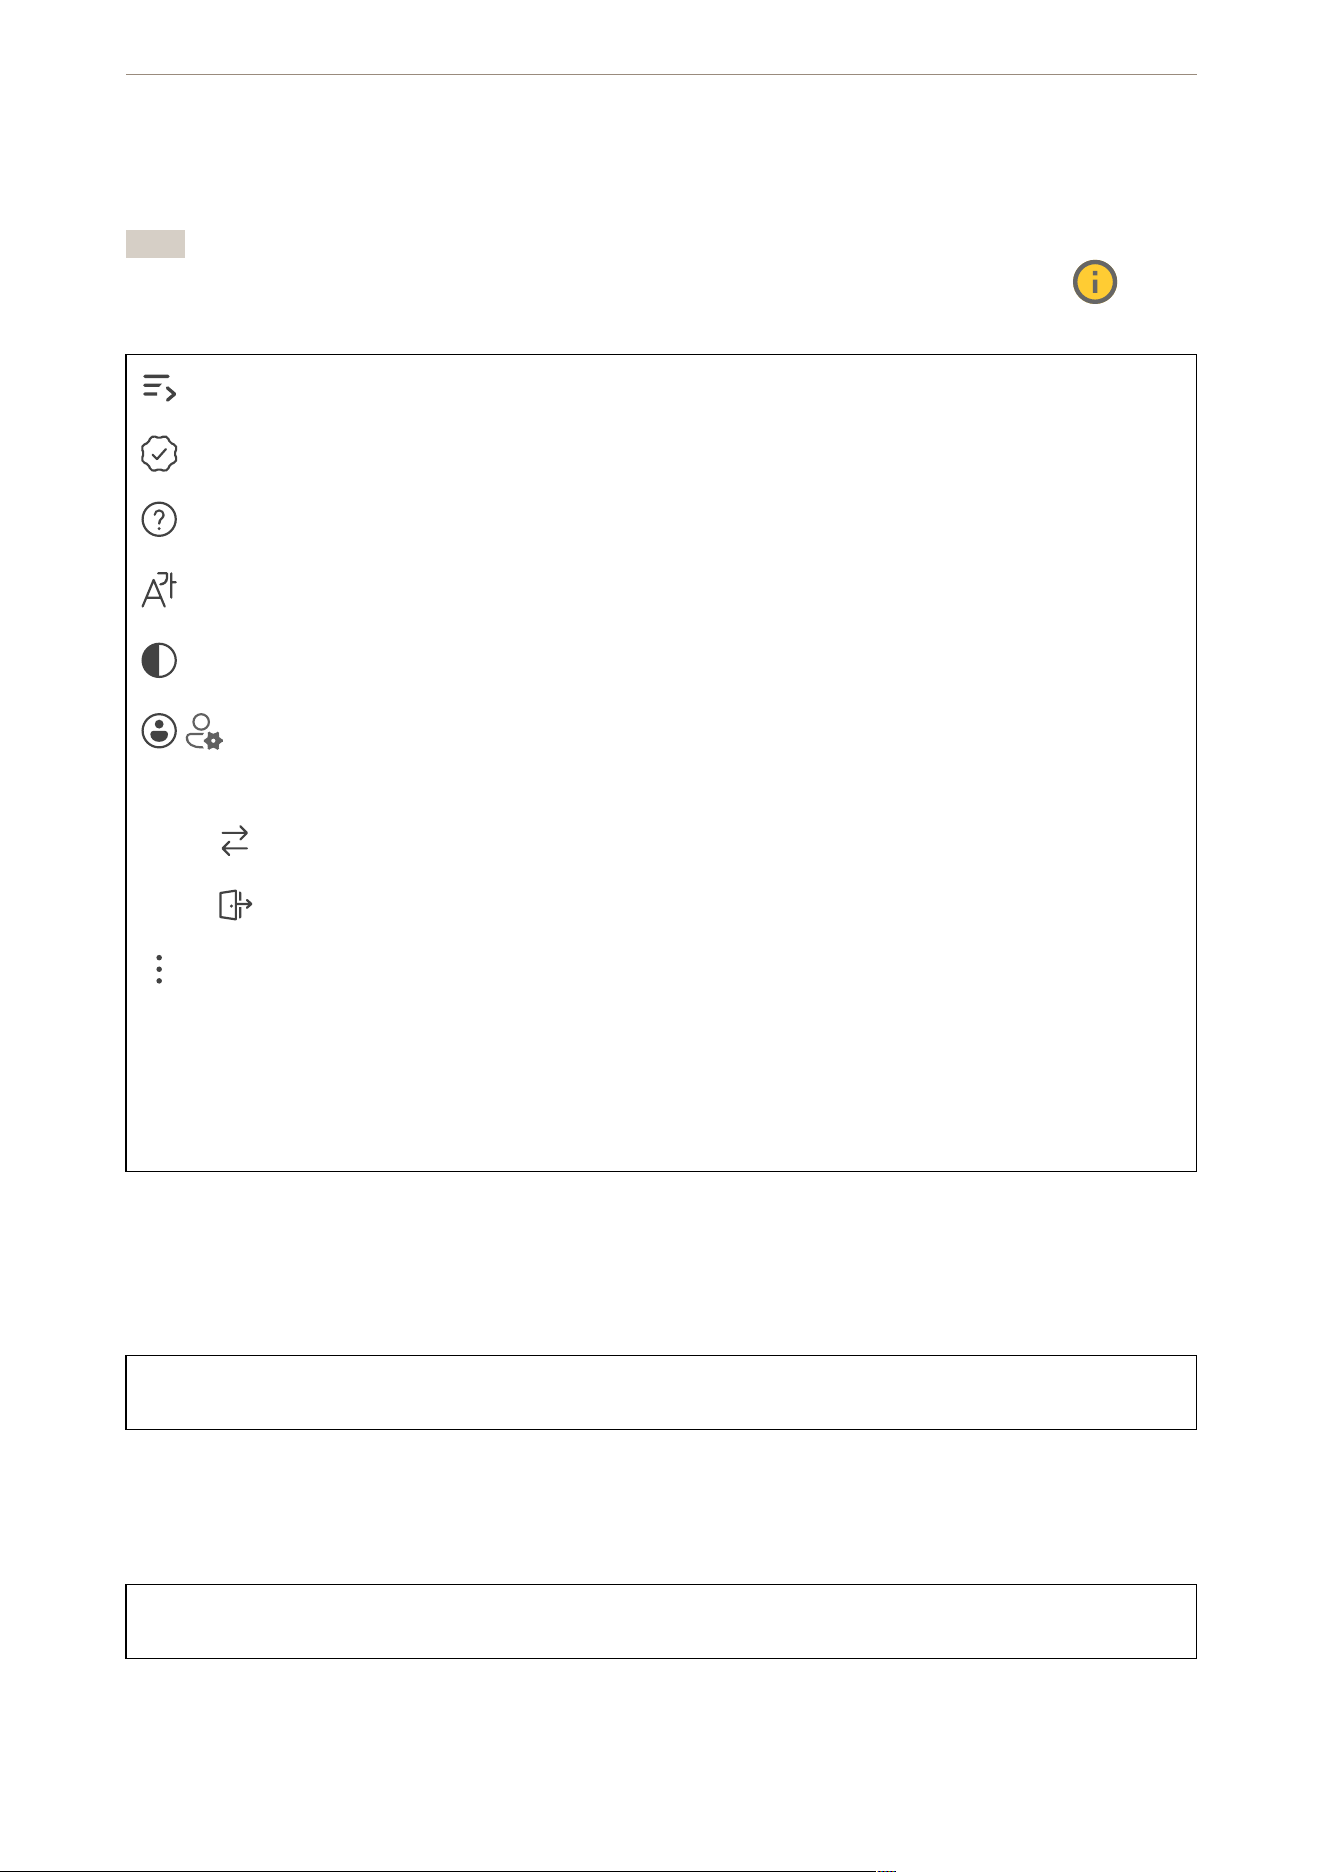
Support for the features and settings described in this section varies between devices. This icon
indicates that the feature or setting is only available in some devices.
Show or hide the main menu.
Access the release notes.
Access the product help.
Change the language.
Set light theme or dark theme.
The user menu contains:
• Information about the user who is logged in.
• Change account : Log out from the current account and log in to a new account.
• Log out : Log out from the current account.
The context menu contains:
• Analytics data: Accept to share non-personal browser data.
• Feedback: Share any feedback to help us improve your user experience.
• Legal: View information about cookies and licenses.
• About: View device information, including AXIS OS version and serial number.
Status
Device info
Shows the device information, including AXIS OS version and serial number.
Upgrade AXIS OS: Upgrade the software on your device. Takes you to the Maintenance page where you can
do the upgrade.
Time sync status
Shows NTP synchronization information, including if the device is in sync with an NTP server and the time
remaining until the next sync.
NTP settings: View and update the NTP settings. Takes you to the Time and location page where you can
change the NTP settings.
Security
AXIS S4000
11
Shows what kind of access to the device that is active, what encryption protocols are in use, and if unsigned
apps are allowed. Recommendations to the settings are based on the AXIS OS Hardening Guide.
Hardening guide: Link to AXIS OS Hardening guide where you can learn more about cybersecurity on Axis
devices and best practices.
Storage
Shows the storage status and information including free space and disk temperature.
Storage settings: Click to go to the Onboard storage page where you can change the settings.
Ongoing recordings
Shows ongoing recordings and their designated storage space.
Recordings: View ongoing and filtered recordings and their source. For more information, see
Shows the storage space where the recording is saved.
Connected clients
Shows the number of connections and connected clients.
View details: View and update the list of connected clients. The list shows IP address, protocol, port, state,
and PID/process of each connection.
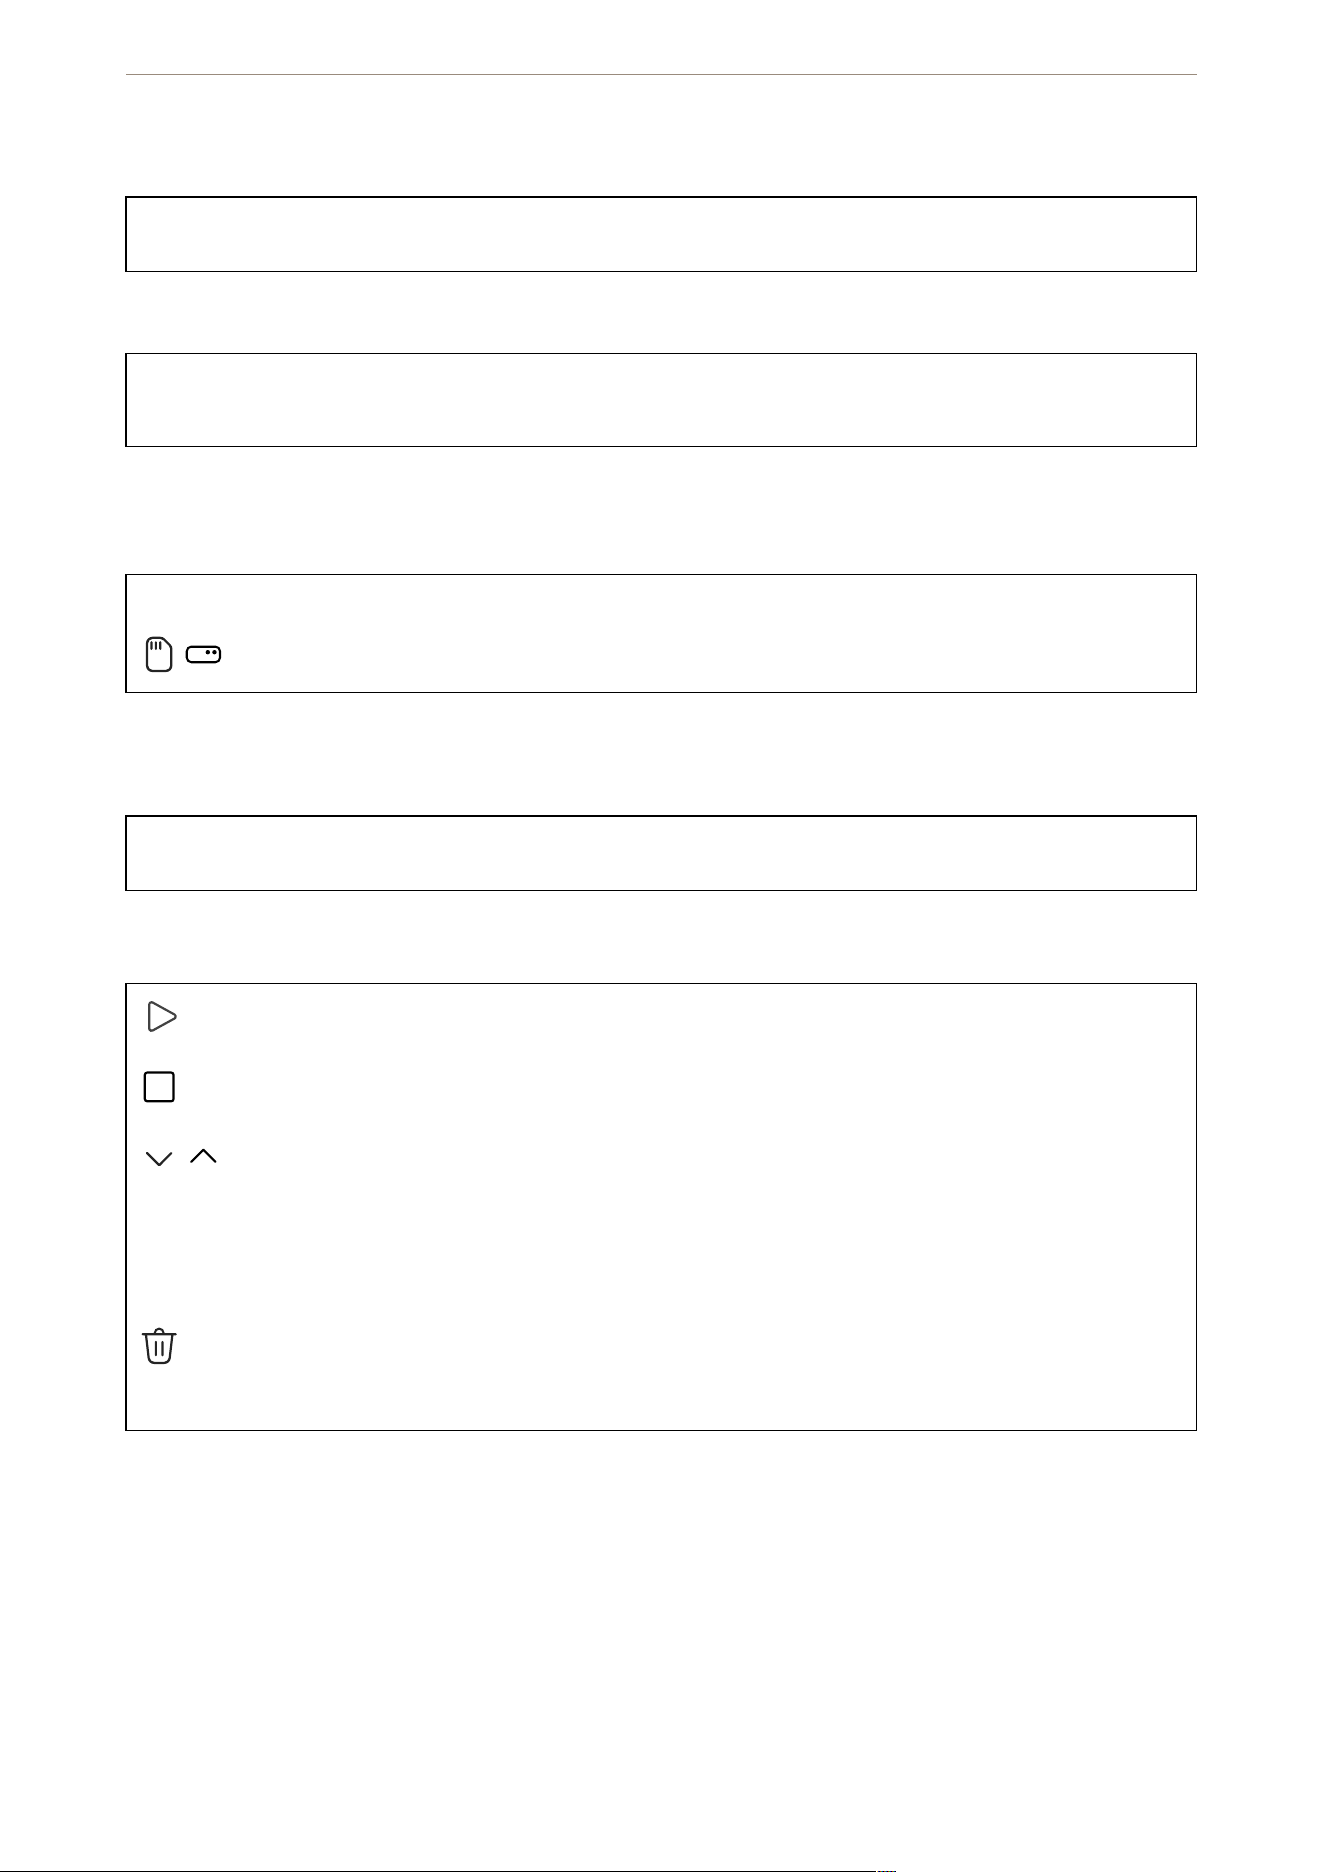
Recordings
Play the recording.
Stop playing the recording.
Show or hide information and options about the recording.
Set export range: If you only want to export part of the recording, enter a time span.
Encrypt: Select to set a password for exported recordings. It will not be possible to open the exported file
without the password.
Click to delete a recording.
Export: Export the whole or a part of the recording.
AXIS S4000
12
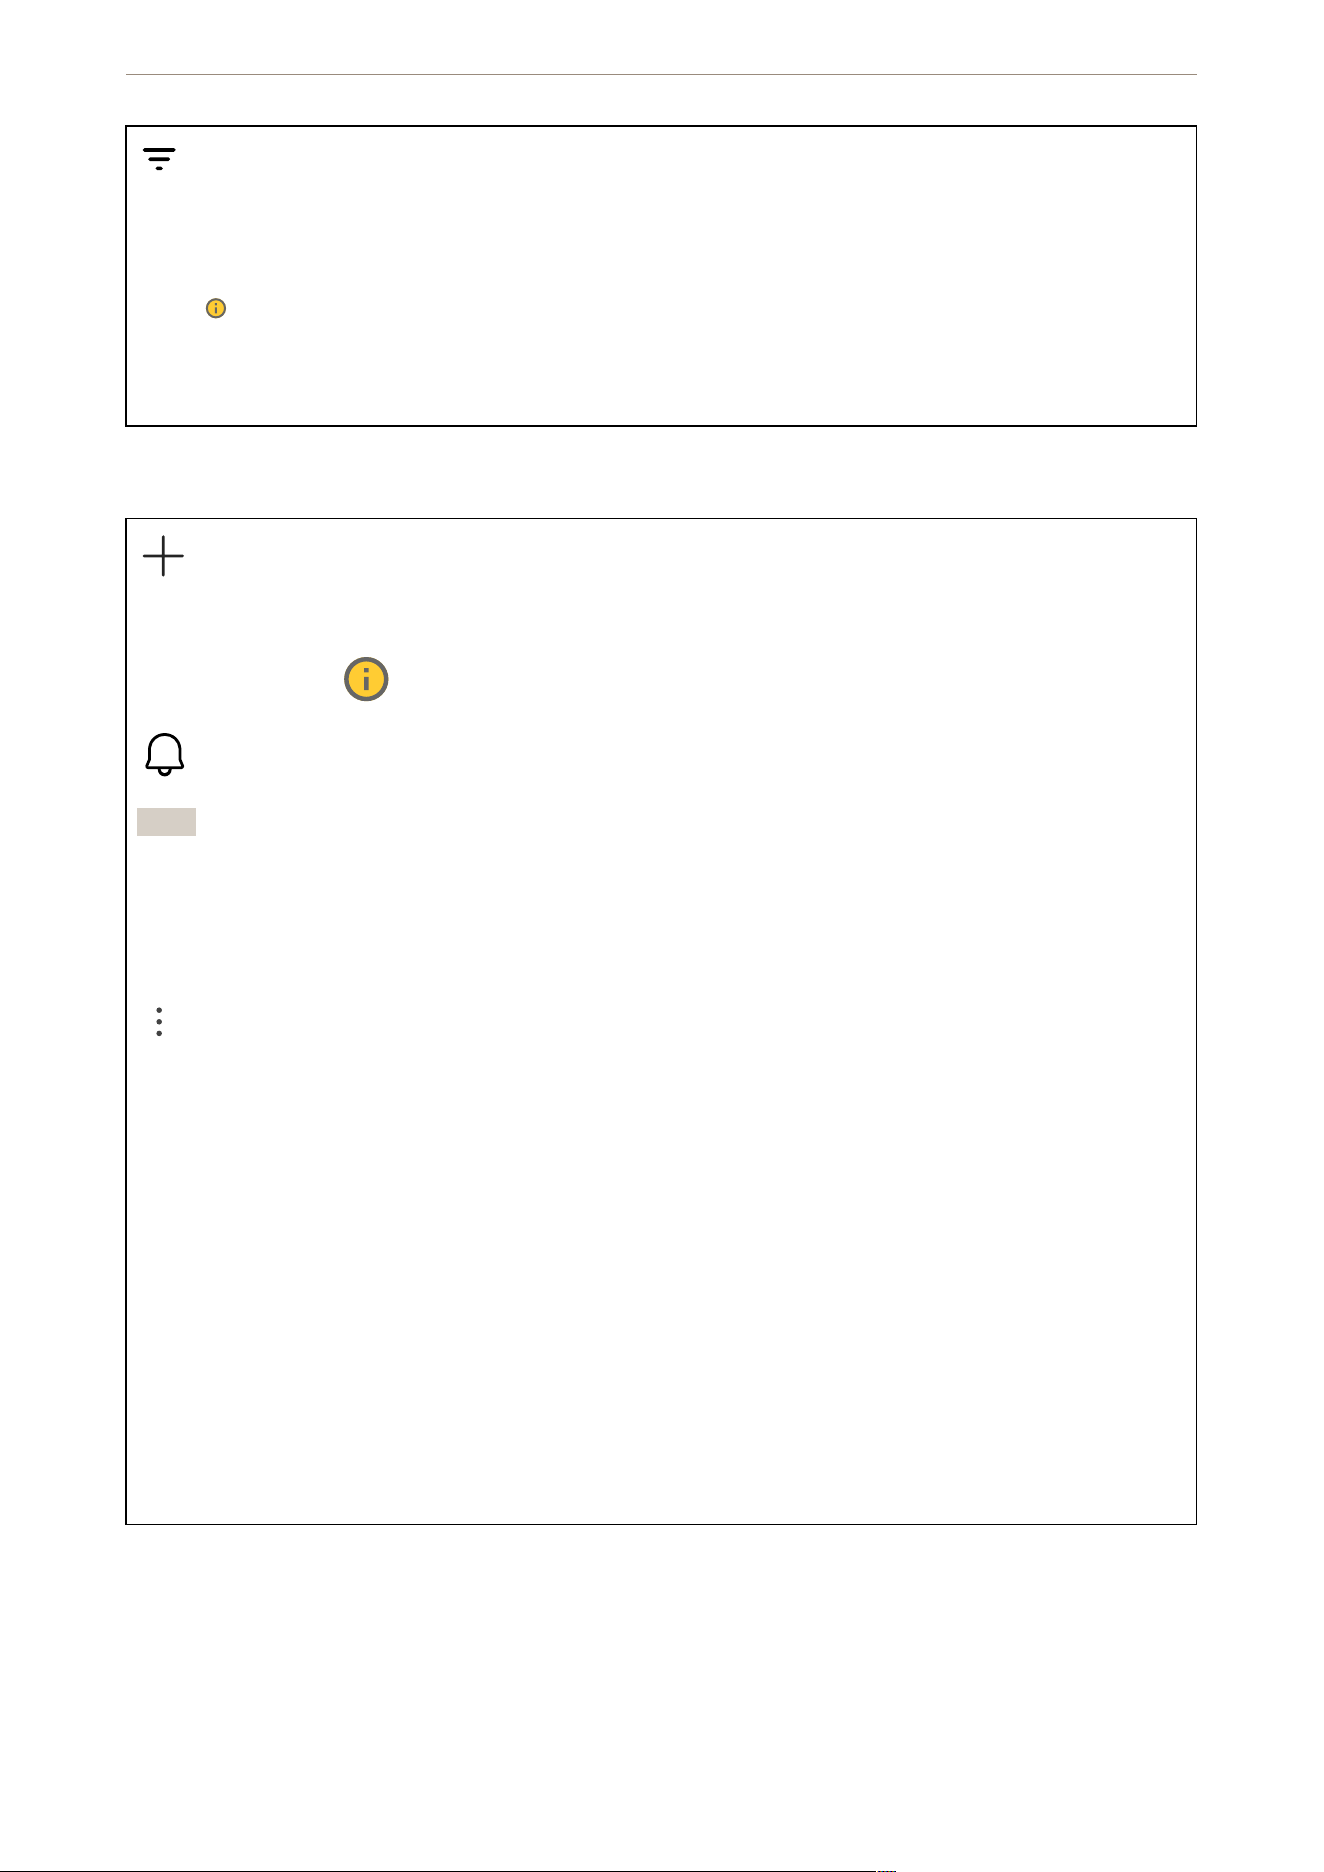
Click to filter the recordings.
From: Show recordings done after a certain point in time.
To: Show recordings up until a certain point in time.
Source : Show recordings based on source. The source refers to the sensor.
Event: Show recordings based on events.
Storage: Show recordings based on storage type.
Apps
Add app: Install a new app.
Find more apps: Find more apps to install. You will be taken to an overview page of Axis apps.
Allow unsigned apps : Turn on to allow installation of unsigned apps.
View the security updates in AXIS OS and ACAP apps.
Note
The device’s performance might be affected if you run several apps at the same time.
Use the switch next to the app name to start or stop the app.
Open: Access the app’s settings. The available settings depend on the application. Some applications don’t
have any settings.
The context menu can contain one or more of the following options:
• Open-source license: View information about open-source licenses used in the app.
• App log: View a log of the app events. The log is helpful when you contact support.
• Activate license with a key: If the app requires a license, you need to activate it. Use this option if
your device doesn’t have internet access.
If you don’t have a license key, go to axis.com/products/analytics. You need a license code and the
Axis product serial number to generate a license key.
• Activate license automatically: If the app requires a license, you need to activate it. Use this option if
your device has internet access. You need a license code to activate the license.
• Deactivate the license: Deactivate the license to replace it with another license, for example, when
you change from a trial license to a full license. If you deactivate the license, you also remove it from
the device.
• Settings: Configure the parameters.
• Delete: Delete the app permanently from the device. If you don’t deactivate the license first, it
remains active.
System
Time and location
Date and time
AXIS S4000

13
The time format depends on the web browser’s language settings.
Note
We recommend you synchronize the device’s date and time with an NTP server.
Synchronization: Select an option for the device’s date and time synchronization.
• Automatic date and time (manual NTS KE servers): Synchronize with the secure NTP key
establishment servers connected to the DHCP server.
– Manual NTS KE servers: Enter the IP address of one or two NTP servers. When you use two
NTP servers, the device synchronizes and adapts its time based on input from both.
– Trusted NTS KE CA certificates: Select the trusted CA certificates to use for secure NTS KE
time synchronization, or leave at none.
– Max NTP poll time: Select the maximum amount of time the device should wait before it
polls the NTP server to get an updated time.
– Min NTP poll time: Select the minimum amount of time the device should wait before it polls
the NTP server to get an updated time.
• Automatic date and time (NTP servers using DHCP): Synchronize with the NTP servers connected to
the DHCP server.
– Fallback NTP servers: Enter the IP address of one or two fallback servers.
– Max NTP poll time: Select the maximum amount of time the device should wait before it
polls the NTP server to get an updated time.
– Min NTP poll time: Select the minimum amount of time the device should wait before it polls
the NTP server to get an updated time.
• Automatic date and time (manual NTP servers): Synchronize with NTP servers of your choice.
– Manual NTP servers: Enter the IP address of one or two NTP servers. When you use two NTP
servers, the device synchronizes and adapts its time based on input from both.
– Max NTP poll time: Select the maximum amount of time the device should wait before it
polls the NTP server to get an updated time.
– Min NTP poll time: Select the minimum amount of time the device should wait before it polls
the NTP server to get an updated time.
• Custom date and time: Manually set the date and time. Click Get from system to fetch the date and
time settings once from your computer or mobile device.
Time zone: Select which time zone to use. Time will automatically adjust to daylight saving time and standard
time.
• DHCP: Adopts the time zone of the DHCP server. The device must connected to a DHCP server before
you can select this option.
• Manual: Select a time zone from the drop-down list.
Note
The system uses the date and time settings in all recordings, logs, and system settings.
Network
IPv4
AXIS S4000
14
Assign IPv4 automatically: Select to let the network router assign an IP address to the device automatically.
We recommend automatic IP (DHCP) for most networks.
IP address: Enter a unique IP address for the device. Static IP addresses can be assigned at random within
isolated networks, provided that each address is unique. To avoid conflicts, we recommend you contact your
network administrator before you assign a static IP address.
Subnet mask: Enter the subnet mask to define what addresses are inside the local area network. Any address
outside the local area network goes through the router.
Router: Enter the IP address of the default router (gateway) used to connect devices that are attached to
different networks and network segments.
Fallback to static IP address if DHCP isn’t available: Select if you want to add a static IP address to use as
fallback if DHCP is unavailable and can’t assign an IP address automatically.
Note
If DHCP isn’t available and the device uses a static address fallback, the static address is configured with a
limited scope.
IPv6
Assign IPv6 automatically: Select to turn on IPv6 and to let the network router assign an IP address to the
device automatically.
Hostname
Assign hostname automatically: Select to let the network router assign a hostname to the device
automatically.
Hostname: Enter the hostname manually to use as an alternative way of accessing the device. The server
report and system log use the hostname. Allowed characters are A–Z, a–z, 0–9 and -.
Enable dynamic DNS updates: Allow your device to automatically update its domain name server records
whenever its IP address changes.
Register DNS name: Enter a unique domain name that points to your device's IP address. Allowed characters
are A–Z, a–z, 0–9 and -.
TTL: Time to Live (TTL) sets how long a DNS record stays valid before it needs to be updated.
DNS servers
Assign DNS automatically: Select to let the DHCP server assign search domains and DNS server addresses to
the device automatically. We recommend automatic DNS (DHCP) for most networks.
Search domains: When you use a hostname that is not fully qualified, click Add search domain and enter a
domain in which to search for the hostname the device uses.
DNS servers: Click Add DNS server and enter the IP address of the DNS server. This provides the translation of
hostnames to IP addresses on your network.
HTTP and HTTPS
HTTPS is a protocol that provides encryption for page requests from users and for the pages returned by the web
server. The encrypted exchange of information is governed by the use of an HTTPS certificate, which guarantees
the authenticity of the server.
To use HTTPS on the device, you must install an HTTPS certificate. Go to System > Security to create and install
certificates.
AXIS S4000

15
Allow access through: Select if a user is allowed to connect to the device through the HTTP, HTTPS, or both
HTTP and HTTPS protocols.
Note
If you view encrypted web pages through HTTPS, you might experience a drop in performance, especially
when you request a page for the first time.
HTTP port: Enter the HTTP port to use. The device allows port 80 or any port in the range 1024-65535. If you
are logged in as an administrator, you can also enter any port in the range 1-1023. If you use a port in this
range, you get a warning.
HTTPS port: Enter the HTTPS port to use. The device allows port 443 or any port in the range 1024-65535. If
you are logged in as an administrator, you can also enter any port in the range 1-1023. If you use a port in
this range, you get a warning.
Certificate: Select a certificate to enable HTTPS for the device.
Network discovery protocols
Bonjour
®
: Turn on to allow automatic discovery on the network.
Bonjour name: Enter a friendly name to be visible on the network. The default name is the device name and
MAC address.
UPnP
®
: Turn on to allow automatic discovery on the network.
UPnP name: Enter a friendly name to be visible on the network. The default name is the device name and
MAC address.
WS-Discovery: Turn on to allow automatic discovery on the network.
LLDP and CDP: Turn on to allow automatic discovery on the network. Turning LLDP and CDP off can impact
the PoE power negotiation. To resolve any issues with the PoE power negotiation, configure the PoE switch for
hardware PoE power negotiation only.
Global proxies
Http proxy: Specify a global proxy host or IP address according to the allowed format.
Https proxy: Specify a global proxy host or IP address according to the allowed format.
Allowed formats for http and https proxies:
• http(s)://host:port
• http(s)://user@host:port
• http(s)://user:pass@host:port
Note
Restart the device to apply the global proxy settings.
No proxy: Use No proxy to bypass global proxies. Enter one of the options in the list, or enter several
separated by a comma:
• Leave empty
• Specify an IP address
• Specify an IP address in CIDR format
• Specify a domain name, for example: www.<domain name>.com
• Specify all subdomains in a specific domain, for example .<domain name>.com
One-click cloud connection
AXIS S4000

16
One-click cloud connection (O3C) together with an O3C service provides easy and secure internet access to live
and recorded video from any location. For more information, see axis.com/end-to-end-solutions/hosted-services.
Allow O3C:
• One-click: This is the default option. To connect to O3C, press the control button on the device.
Depending on the device model, either press and release or press and hold, until the status LED
flashes. Register the device with the O3C service within 24 hours to enable Always and stay
connected. If you don't register, the device will disconnect from O3C.
• Always: The device continuously attempts to connect to an O3C service over the internet. Once you
register the device, it stays connected. Use this option if the control button is out of reach.
• No: Disconnects the O3C service.
Proxy settings: If needed, enter the proxy settings to connect to the proxy server.
Host: Enter the proxy server’s address.
Port: Enter the port number used for access.
Login and Password: If needed, enter username and password for the proxy server.
Authentication method:
• Basic: This method is the most compatible authentication scheme for HTTP. It’s less secure than the
Digest method because it sends the username and password unencrypted to the server.
• Digest: This method is more secure because it always transfers the password encrypted across the
network.
• Auto: This option lets the device select the authentication method depending on the supported
methods. It prioritizes the Digest method over the Basic method.
Owner authentication key (OAK): Click Get key to fetch the owner authentication key. This is only possible if
the device is connected to the internet without a firewall or proxy.
SNMP
The Simple Network Management Protocol (SNMP) allows remote management of network devices.
AXIS S4000
17
SNMP: Select the version of SNMP to use.
• v1 and v2c:
– Read community: Enter the community name that has read-only access to all supported
SNMP objects. The default value is public.
– Write community: Enter the community name that has read or write access to all supported
SNMP objects (except read-only objects). The default value is write.
– Activate traps: Turn on to activate trap reporting. The device uses traps to send messages for
important events or status changes to a management system. In the web interface, you can
set up traps for SNMP v1 and v2c. Traps are automatically turned off if you change to SNMP
v3 or turn off SNMP. If you use SNMP v3, you can set up traps through the SNMP v3
management application.
– Trap address: Enter the IP address or host name of the management server.
– Trap community: Enter the community to use when the device sends a trap message to the
management system.
– Traps:
– Cold start: Sends a trap message when the device starts.
– Link up: Sends a trap message when a link changes from down to up.
– Link down: Sends a trap message when a link changes from up to down.
– Authentication failed: Sends a trap message when an authentication attempt fails.
Note
All Axis Video MIB traps are enabled when you turn on SNMP v1 and v2c traps. For more information, see
AXIS OS Portal > SNMP.
• v3: SNMP v3 is a more secure version, which provides encryption and secure passwords. To use SNMP
v3, we recommend you to activate HTTPS, as the password is then sent through HTTPS. This also
prevents unauthorized parties’ access to unencrypted SNMP v1 and v2c traps. If you use SNMP v3,
you can set up traps through the SNMP v3 management application.
– Password for the account “initial”: Enter the SNMP password for the account named “initial”.
Although the password can be sent without activating HTTPS, we don’t recommend it. The
SNMP v3 password can only be set once, and preferably only when HTTPS is enabled. Once the
password is set, the password field is no longer displayed. To set the password again, you must
reset the device to factory default settings.
Network ports
Click to show or hide the ports image.
• Click a port in the image to see the port details in the port list.
Port list
• Port: The port number.
• PoE : Turn on or off PoE for the port.
• Network: Turn on or off network for the port.
• Status: Shows if there is device connected to this port.
• Friendly name: The friendly name is set in Network settings. The default name is a combination of
the model and the media access control address (MAC address) of the connected device.
AXIS S4000
18
Security
Certificates
Certificates are used to authenticate devices on a network. The device supports two types of certificates:
• Client/server certificates
A client/server certificate validates the device’s identity, and can be self-signed or issued by a
Certificate Authority (CA). A self-signed certificate offers limited protection and can be used before a
CA-issued certificate has been obtained.
• CA certificates
You can use a CA certificate to authenticate a peer certificate, for example to validate the identity of
an authentication server when the device connects to a network protected by IEEE 802.1X. The device
has several pre-installed CA certificates.
These formats are supported:
• Certificate formats: .PEM, .CER, and .PFX
• Private key formats: PKCS#1 and PKCS#12
Important
If you reset the device to factory default, all certificates are deleted. Any pre-installed CA certificates are
reinstalled.
Add certificate : Click to add a certificate. A step-by-step guide opens up.
• More : Show more fields to fill in or select.
• Secure keystore: Select to use Trusted Execution Environment (SoC TEE), Secure element or Trusted
Platform Module 2.0 to securely store the private key. For more information on which secure keystore
to select, go to help.axis.com/axis-os#cryptographic-support.
• Key type: Select the default or a different encryption algorithm from the drop-down list to protect
the certificate.
The context menu contains:
• Certificate information: View an installed certificate’s properties.
• Delete certificate: Delete the certificate.
• Create certificate signing request: Create a certificate signing request to send to a registration
authority to apply for a digital identity certificate.
Secure keystore :
• Trusted Execution Environment (SoC TEE): Select to use SoC TEE for secure keystore.
• Secure element (CC EAL6+): Select to use secure element for secure keystore.
• Trusted Platform Module 2.0 (CC EAL4+, FIPS 140-2 Level 2): Select to use TPM 2.0 for secure
keystore.
Network access control and encryption
AXIS S4000

19
IEEE 802.1x
IEEE 802.1x is an IEEE standard for port-based network admission control providing secure authentication of
wired and wireless network devices. IEEE 802.1x is based on EAP (Extensible Authentication Protocol).
To access a network protected by IEEE 802.1x, network devices must authenticate themselves. The
authentication is performed by an authentication server, typically a RADIUS server (for example, FreeRADIUS
and Microsoft Internet Authentication Server).
IEEE 802.1AE MACsec
IEEE 802.1AE MACsec is an IEEE standard for media access control (MAC) security that defines connectionless
data confidentiality and integrity for media access independent protocols.
Certificates
When configured without a CA certificate, server certificate validation is disabled and the device tries to
authenticate itself regardless of what network it is connected to.
When using a certificate, in Axis' implementation, the device and the authentication server authenticate
themselves with digital certificates using EAP-TLS (Extensible Authentication Protocol - Transport Layer
Security).
To allow the device to access a network protected through certificates, you must install a signed client
certificate on the device.
Authentication method: Select an EAP type used for authentication.
Client certificate: Select a client certificate to use IEEE 802.1x. The authentication server uses the certificate
to validate the client’s identity.
CA certificates: Select CA certificates to validate the authentication server’s identity. When no certificate is
selected, the device tries to authenticate itself regardless of what network it is connected to.
EAP identity: Enter the user identity associated with the client certificate.
EAPOL version: Select the EAPOL version that is used in the network switch.
Use IEEE 802.1x: Select to use the IEEE 802.1x protocol.
These settings are only available if you use IEEE 802.1x PEAP-MSCHAPv2 as the authentication method:
• Password: Enter the password for your user identity.
• Peap version: Select the Peap version that is used in the network switch.
• Label: Select 1 to use client EAP encryption; select 2 to use client PEAP encryption. Select the Label
that the network switch uses when using Peap version 1.
These settings are only available if you use IEEE 802.1ae MACsec (Static CAK/Pre-Shared Key) as the
authentication method:
• Key agreement connectivity association key name: Enter the connectivity association name (CKN). It
must be 2 to 64 (divisible by 2) hexadecimal characters. The CKN must be manually configured in the
connectivity association and must match on both ends of the link to initially enable MACsec.
• Key agreement connectivity association key: Enter the connectivity association key (CAK). It should
be either 32 or 64 hexadecimal characters long. The CAK must be manually configured in the
connectivity association and must match on both ends of the link to initially enable MACsec.
Firewall
AXIS S4000

20
Firewall: Turn on to activate the firewall.
Default Policy: Select how you want the firewall to handle connection requests not covered by rules.
• ACCEPT: Allows all connections to the device. This option is set by default.
• DROP: Blocks all connections to the device.
To make exceptions to the default policy, you can create rules that allows or blocks connections to the device
from specific addresses, protocols, and ports.
+ New rule: Click to create a rule.
Rule type:
• FILTER: Select to either allow or block connections from devices that match the criteria defined in the
rule.
– Policy: Select Accept or Drop for the firewall rule.
– IP range: Select to specify a range of addresses to allow or block. Use IPv4/IPv6 in Start and
End.
– IP address: Enter an address that you want to allow or block. Use IPv4/IPv6 or CIDR format.
– Protocol: Select a network protocol (TCP, UDP, or Both) to allow or block. If you select a
protocol, you must also specify a port.
– MAC: Enter the MAC address of a device that you want to allow or block.
– Port range: Select to specify the range of ports to allow or block. Add them in Start and End.
– Port: Enter a port number that you want to allow or block. Port numbers must be between 1
and 65535.
– Traffic type: Select a traffic type that you want to allow or block.
– UNICAST: Traffic from a single sender to a single recipient.
– BROADCAST: Traffic from a single sender to all devices on the network.
– MULTICAST: Traffic from one or more senders to one or more recipient.
• LIMIT: Select to accept connections from devices that match the criteria defined in the rule but apply
limits to reduce excessive traffic.
– IP range: Select to specify a range of addresses to allow or block. Use IPv4/IPv6 in Start and
End.
– IP address: Enter an address that you want to allow or block. Use IPv4/IPv6 or CIDR format.
– Protocol: Select a network protocol (TCP, UDP, or Both) to allow or block. If you select a
protocol, you must also specify a port.
– MAC: Enter the MAC address of a device that you want to allow or block.
– Port range: Select to specify the range of ports to allow or block. Add them in Start and End.
– Port: Enter a port number that you want to allow or block. Port numbers must be between 1
and 65535.
– Unit: Select the type of connections to allow or block.
– Period: Select the time period related to Amount.
– Amount: Set the maximum number of times a device is allowed to connect within the set
Period. The maximum amount is 65535.
– Burst: Enter the number of connections allowed to exceed the set Amount once during the
set Period. Once the number has been reached, only the set amount during the set period is
allowed.
– Traffic type: Select a traffic type that you want to allow or block.
– UNICAST: Traffic from a single sender to a single recipient.
– BROADCAST: Traffic from a single sender to all devices on the network.
AXIS S4000
21
– MULTICAST: Traffic from one or more senders to one or more recipient.
Test rules: Click to test the rules that you have defined.
• Test time in seconds: Set a time limit for testing the rules.
• Roll back: Click to roll back the firewall to its previous state, before you have tested the rules.
• Apply rules: Click to activate the rules without testing. We don't recommend that you do this.
Custom signed AXIS OS certificate
To install test software or other custom software from Axis on the device, you need a custom signed AXIS OS
certificate. The certificate verifies that the software is approved by both the device owner and Axis. The
software can only run on a specific device which is identified by its unique serial number and chip ID. Only
Axis can create custom signed AXIS OS certificates, since Axis holds the key to sign them.
Install: Click to install the certificate. You need to install the certificate before you install the software.
The context menu contains:
• Delete certificate: Delete the certificate.
Accounts
Accounts
Add account: Click to add a new account. You can add up to 100 accounts.
Account: Enter a unique account name.
New password: Enter a password for the account. Passwords must be 1 to 64 characters long. Only ASCII
printable characters (code 32 to 126) are allowed in the password, for example, letters, numbers, punctuation,
and some symbols.
Repeat password: Enter the same password again.
Privileges:
• Administrator: Has full access to all settings. Administrators can also add, update, and remove other
accounts.
• Operator: Has access to all settings except:
– All System settings.
• Viewer: Has access to:
– Watch and take snapshots of a video stream.
– Watch and export recordings.
– Pan, tilt, and zoom; with PTZ account access.
The context menu contains:
Update account: Edit the account properties.
Delete account: Delete the account. You can’t delete the root account.
SSH accounts
AXIS S4000
22
Add SSH account: Click to add a new SSH account.
• Enable SSH: Turn on to use SSH service.
Account: Enter a unique account name.
New password: Enter a password for the account. Passwords must be 1 to 64 characters long. Only ASCII
printable characters (code 32 to 126) are allowed in the password, for example, letters, numbers, punctuation,
and some symbols.
Repeat password: Enter the same password again.
Comment: Enter a comment (optional).
The context menu contains:
Update SSH account: Edit the account properties.
Delete SSH account: Delete the account. You can’t delete the root account.
Virtual host
Add virtual host: Click to add a new virtual host.
Enabled: Select to use this virtual host.
Server name: Enter the name of the server. Only use numbers 0-9, letters A-Z, and hyphen (-).
Port: Enter the port the server is connected to.
Type: Select the type of authentication to use. Select between Basic, Digest, and Open ID.
The context menu contains:
• Update: Update the virtual host.
• Delete: Delete the virtual host.
Disabled: The server is disabled.
Client Credentials Grant Configuration
Admin claim: Enter a value for the admin role.
Verification URI: Enter the web link for the API endpoint authentication.
Operator claim: Enter a value for the operator role.
Require claim: Enter the data that should be in the token.
Viewer claim: Enter the value for the viewer role.
Save: Click to save the values.
OpenID Configuration
Important
If you can't use OpenID to sign in, use the Digest or Basic credentials you used when you configured OpenID
to sign in.
AXIS S4000

23
Client ID: Enter the OpenID username.
Outgoing Proxy: Enter the proxy address for the OpenID connection to use a proxy server.
Admin claim: Enter a value for the admin role.
Provider URL: Enter the web link for the API endpoint authentication. Format should be https://[insert URL]/.
well-known/openid-configuration
Operator claim: Enter a value for the operator role.
Require claim: Enter the data that should be in the token.
Viewer claim: Enter the value for the viewer role.
Remote user: Enter a value to identify remote users. This assists to display the current user in the device’s web
interface.
Scopes: Optional scopes that could be part of the token.
Client secret: Enter the OpenID password
Save: Click to save the OpenID values.
Enable OpenID: Turn on to close current connection and allow device authentication from the provider URL.
Events
Rules
A rule defines the conditions that triggers the product to perform an action. The list shows all the currently
configured rules in the product.
Note
You can create up to 256 action rules.
Add a rule: Create a rule.
Name: Enter a name for the rule.
Wait between actions: Enter the minimum time (hh:mm:ss) that must pass between rule activations. It is
useful if the rule is activated by, for example, day-night mode conditions, to avoid that small light changes
during sunrise and sunset activate the rule repeatedly.
Condition: Select a condition from the list. A condition must be met for the device to perform an action. If
multiple conditions are defined, all of them must be met to trigger the action. For information about specific
conditions, see Get started with rules for events.
Use this condition as a trigger: Select to make this first condition function only as a starting trigger. It means
that once the rule is activated, it remains active for as long as all the other conditions are met, no matter the
state of the first condition. If you don’t select this option, the rule will simply be active whenever all the
conditions are met.
Invert this condition: Select if you want the condition to be the opposite of your selection.
Add a condition: Click to add an additional condition.
Action: Select an action from the list and enter its required information. For information about specific
actions, see Get started with rules for events.
AXIS S4000

24
Recipients
You can set up your device to notify recipients about events or send files.
Note
If you set up your device to use FTP or SFTP, don’t change or remove the unique sequence number that’s
added to the file names. If you do that, only one image per event can be sent.
The list shows all the recipients currently configured in the product, along with information about their
configuration.
Note
You can create up to 20 recipients.
AXIS S4000

25
Add a recipient: Click to add a recipient.
Name: Enter a name for the recipient.
Type: Select from the list:
• FTP
– Host: Enter the server's IP address or hostname. If you enter a hostname, make sure that a
DNS server is specified under System > Network > IPv4 and IPv6.
– Port: Enter the port number used by the FTP server. The default is 21.
– Folder: Enter the path to the directory where you want to store files. If this directory doesn’t
already exist on the FTP server, you will get an error message when uploading files.
– Username: Enter the username for the login.
– Password: Enter the password for the login.
– Use temporary file name: Select to upload files with temporary, automatically generated
filenames. The files get renamed to the desired names when the upload completes. If the
upload is aborted/interrupted, you don’t get any corrupt files. However, you probably still get
the temporary files. This way you know that all files that have the desired name are correct.
– Use passive FTP: Under normal circumstances, the product simply requests the target FTP
server to open the data connection. The device actively initiates both the FTP control and data
connections to the target server. This is normally needed if there is a firewall between the
device and the target FTP server.
• HTTP
– URL: Enter the network address to the HTTP server and the script that will handle the request.
For example, http://192.168.254.10/cgi-bin/notify.cgi.
– Username: Enter the username for the login.
– Password: Enter the password for the login.
– Proxy: Turn on and enter the required information if a proxy server must be passed to connect
to the HTTP server.
• HTTPS
– URL: Enter the network address to the HTTPS server and the script that will handle the
request. For example, https://192.168.254.10/cgi-bin/notify.cgi.
– Validate server certificate: Select to validate the certificate that was created by HTTPS server.
– Username: Enter the username for the login.
– Password: Enter the password for the login.
– Proxy: Turn on and enter the required information if a proxy server must be passed to connect
to the HTTPS server.
• Network storage
You can add network storage such as NAS (network-attached storage) and use it as a recipient to
store files. The files are stored in the Matroska (MKV) file format.
– Host: Enter the IP address or hostname for the network storage.
– Share: Enter the name of the share on the host.
– Folder: Enter the path to the directory where you want to store files.
– Username: Enter the username for the login.
– Password: Enter the password for the login.
AXIS S4000

26
• SFTP
– Host: Enter the server's IP address or hostname. If you enter a hostname, make sure that a
DNS server is specified under System > Network > IPv4 and IPv6.
– Port: Enter the port number used by the SFTP server. The default is 22.
– Folder: Enter the path to the directory where you want to store files. If this directory doesn’t
already exist on the SFTP server, you will get an error message when uploading files.
– Username: Enter the username for the login.
– Password: Enter the password for the login.
– SSH host public key type (MD5): Enter the fingerprint of the remote host’s public key (a 32-
digit hexadecimal string). The SFTP client supports SFTP servers using SSH-2 with RSA, DSA,
ECDSA, and ED25519 host key types. RSA is the preferred method during negotiation,
followed by ECDSA, ED25519, and DSA. Make sure to enter the right MD5 host key that is
used by your SFTP server. While the Axis device supports both MD5 and SHA-256 hash keys,
we recommend using SHA-256 due to stronger security over MD5. For more information on
how to configure an SFTP server with an Axis device, go to the AXIS OS Portal.
– SSH host public key type (SHA256): Enter the fingerprint of the remote host’s public key (a
43-digit Base64 encoded string). The SFTP client supports SFTP servers using SSH-2 with RSA,
DSA, ECDSA, and ED25519 host key types. RSA is the preferred method during negotiation,
followed by ECDSA, ED25519, and DSA. Make sure to enter the right MD5 host key that is
used by your SFTP server. While the Axis device supports both MD5 and SHA-256 hash keys,
we recommend using SHA-256 due to stronger security over MD5. For more information on
how to configure an SFTP server with an Axis device, go to the AXIS OS Portal.
– Use temporary file name: Select to upload files with temporary, automatically generated
filenames. The files get renamed to the desired names when the upload completes. If the
upload is aborted or interrupted, you don’t get any corrupt files. However, you probably still
get the temporary files. This way, you know that all files that have the desired name are
correct.
• SIP or VMS :
SIP: Select to make a SIP call.
VMS: Select to make a VMS call.
– From SIP account: Select from the list.
– To SIP address: Enter the SIP address.
– Test: Click to test that your call settings works.
• Email
– Send email to: Enter the email address to send emails to. To enter multiple addresses, use
commas to separate them.
– Send email from: Enter the email address of the sending server.
– Username: Enter the username for the mail server. Leave this field empty if the mail server
does not require authentication.
– Password: Enter the password for the mail server. Leave this field empty if the mail server
does not require authentication.
– Email server (SMTP): Enter the name of the SMTP server, for example, smtp.gmail.com, smtp.
mail.yahoo.com.
– Port: Enter the port number for the SMTP server, using values in the range 0-65535. The
default value is 587.
– Encryption: To use encryption, select either SSL or TLS.
– Validate server certificate: If you use encryption, select to validate the identity of the device.
The certificate can be self-signed or issued by a Certificate Authority (CA).
AXIS S4000
27
– POP authentication: Turn on to enter the name of the POP server, for example, pop.gmail.
com.
Note
Some email providers have security filters that prevent users from receiving or viewing large amount of
attachments, from receiving scheduled emails and similar. Check the email provider's security policy to
avoid your email account being locked or missing out on your expected emails.
• TCP
– Host: Enter the server's IP address or hostname. If you enter a hostname, make sure that a
DNS server is specified under System > Network > IPv4 and IPv6.
– Port: Enter the port number used to access the server.
Test: Click to test the setup.
The context menu contains:
View recipient: Click to view all the recipient details.
Copy recipient: Click to copy a recipient. When you copy, you can make changes to the new recipient.
Delete recipient: Click to delete the recipient permanently.
Schedules
Schedules and pulses can be used as conditions in rules. The list shows all the schedules and pulses currently
configured in the product, along with information about their configuration.
Add schedule: Click to create a schedule or pulse.
Manual triggers
You can use the manual trigger to manually trigger a rule. The manual trigger can, for example, be used to
validate actions during product installation and configuration.
Storage
Onboard storage
AXIS S4000

28
RAID
• Free: The amount of free disk space.
• Status: If the disk is mounted or not.
• File system: The file system that is used by the disk.
• Encrypted: If the disk is encrypted or not.
• Temperature: The current temperature of the hardware.
• Overall heath test: The result after checking the health of the disk.
• RAID level: The RAID level used for the storage. Supported RAID levels are 0, 1, 5, 6, 10.
• RAID status: The RAID status of the storage. Possible values are Online, Degraded, Syncing, and
Failed. The syncing process may take several hours.
Tools
Note
When you run the following tools, make sure to wait until the operation is done before closing the page.
• Check: Check the storage device for errors and tries to repair it automatically.
• Repair: Repair the storage device. Active recordings will pause during the repair. Repairing a storage
device may result in lost data.
• Format: Erase all recordings and format the storage device. Choose a file system.
• Encrypt: Encrypt data that is stored. All files on the storage device will be erased.
• Decrypt: Decrypt data that is stored. All files on the storage device will be erased.
• Change password: Change the password for the disk encryption. Changing the password doesn't
disrupt ongoing recordings.
• Change RAID level: Erase all recordings and change the RAID level for the storage.
• Use tool: Click to run the selected tool.
Hard drive status: Click to view the hard drive status, capacity, and serial number.
Write protect: Turn on write protection to protect the storage device from being overwritten.
Logs
Reports and logs
AXIS S4000

29
Reports
• View the device server report: View information about the product status in a pop-up window. The
Access Log is automatically included in the Server Report.
• Download the device server report: It creates a .zip file that contains a complete server report text
file in UTF–8 format, as well as a snapshot of the current live view image. Always include the server
report .zip file when you contact support.
• Download the crash report: Download an archive with detailed information about the server's status.
The crash report contains information that is in the server report as well as detailed debug
information. This report might contain sensitive information such as network traces. It can take
several minutes to generate the report.
Logs
• View the system log: Click to show information about system events such as device startup, warnings,
and critical messages.
• View the access log: Click to show all failed attempts to access the device, for example, when a
wrong login password is used.
• View the audit log: Click to show information about user and system activities, for example,
successful or failed authentications and configurations.
Remote system log
Syslog is a standard for message logging. It allows separation of the software that generates messages, the
system that stores them, and the software that reports and analyzes them. Each message is labeled with a
facility code, which indicates the software type generating the message, and assigned a severity level.
Server: Click to add a new server.
Host: Enter the hostname or IP address of the server.
Format: Select which syslog message format to use.
• Axis
• RFC 3164
• RFC 5424
Protocol: Select the protocol to use:
• UDP (Default port is 514)
• TCP (Default port is 601)
• TLS (Default port is 6514)
Port: Edit the port number to use a different port.
Severity: Select which messages to send when triggered.
Type: Select the type of logs you want to send.
Test server setup: Send a test message to all servers before you save the settings.
CA certificate set: See the current settings or add a certificate.
Plain config
Plain config is for advanced users with experience of Axis device configuration. Most parameters can be set
and edited from this page.
AXIS S4000

30
Maintenance
Maintenance
Restart: Restart the device. This does not affect any of the current settings. Running applications restart
automatically.
Restore: Return most settings to the factory default values. Afterwards you must reconfigure the device and
apps, reinstall any apps that didn’t come preinstalled, and recreate any events and presets.
Important
The only settings saved after restore are:
• Boot protocol (DHCP or static)
• Static IP address
• Default router
• Subnet mask
• 802.1X settings
• O3C settings
• DNS server IP address
Factory default: Return all settings to the factory default values. Afterwards you must reset the IP address to
make the device accessible.
Note
All Axis device software is digitally signed to ensure that you only install verified software on your device.
This further increases the overall minimum cybersecurity level of Axis devices. For more information, see
the white paper “Axis Edge Vault” at axis.com.
AXIS OS upgrade: Upgrade to a new AXIS OS version. New releases can contain improved functionality, bug
fixes, and completely new features. We recommend you to always use the latest AXIS OS release. To download
the latest release, go to axis.com/support.
When you upgrade, you can choose between three options:
• Standard upgrade: Upgrade to the new AXIS OS version.
• Factory default: Upgrade and return all settings to the factory default values. When you choose this
option, you can’t revert to the previous AXIS OS version after the upgrade.
• Automatic rollback: Upgrade and confirm the upgrade within the set time. If you don’t confirm, the
device reverts to the previous AXIS OS version.
AXIS OS rollback: Revert to the previously installed AXIS OS version.
AXIS S4000
31
Troubleshoot
Reset PTR : Reset PTR if for some reason the Pan, Tilt, or Roll settings aren’t working as expected. The
PTR motors are always calibrated in a new camera. But calibration can be lost, for example, if the camera
loses power or if the motors are moved by hand. When you reset PTR, the camera is re-calibrated and returns
to its factory default position.
Calibration : Click Calibrate to recalibrate the pan, tilt, and roll motors to their default positions.
Ping: To check if the device can reach a specific address, enter the hostname or IP address of the host you
want to ping and click Start.
Port check: To verify connectivity from the device to a specific IP address and TCP/UDP port, enter the
hostname or IP address and port number you want to check and click Start.
Network trace
Important
A network trace file might contain sensitive information such as certificates or passwords.
A network trace file can help you troubleshoot problems by recording activity on the network.
Trace time: Select the duration of the trace in seconds or minutes and click Download.
AXIS S4000

32
Learn more
Cybersecurity
For product-specific information about cybersecurity, see the product's datasheet at axis.com.
For in-depth information about cybersecurity in AXIS OS, read the AXIS OS Hardening guide.
Axis security notification service
Axis provides a notification service with information about vulnerability and other security related matters for
Axis devices. To receive notifications, you can subscribe at axis.com/security-notification-service.
Vulnerability management
To minimize customers' risk of exposure, Axis, as a Common Vulnerability and Exposures (CVE) numbering
authority (CNA), follows industry standards to manage and respond to discovered vulnerabilities in our devices,
software, and services. For more information about Axis vulnerability management policy, how to report
vulnerabilities, already disclosed vulnerabilities, and corresponding security advisories, see axis.com/
vulnerability-management.
Secure operation of Axis devices
Axis devices with factory default settings are pre-configured with secure default protection mechanisms. We
recommend using more security configuration when installing the device. To learn more about Axis' approach to
cybersecurity, including best practices, resources, and guidelines for securing your devices, go to https://www.
axis.com/about-axis/cybersecurity.
AXIS S4000

33
Specifications
Product overview
1 USB 3.0 port
2 Product status LED
3 Hard drives status LEDs
4 Power connector
5 AUX RJ45 port
6 LAN RJ45 port
7 LAN SFP port
8 USB 2.0 port
9 Control button
10 Power button
LED indicators
Front LEDs
LED Color Indication
Product status Green The recorder is on and the status is
ok.
Amber The recorder is starting up, or the
device software is upgrading. Wait
until the LED turns green.
Hard drive status Green The drive is online.
Blinks green alternately The RAID is syncing. Recording is
possible but redundancy is not yet
achieved.
Amber This drive is online, but another
drive is broken.
The RAID is missing redundancy.
Red The drive is broken.
AXIS S4000

34
All are red The RAID has failed. System is not
recording.
To identify the broken hard drive in
case of a RAID failure, go to the
device web interface and go to
System > Storage > Hard drive
status.
Off No hard drive.
Rear LEDs
LED Color Indication
Network port Blinks green 1 Gbit/s
Blinks amber 100 Mbit/s
Off No network
Power button
• To shut down the recorder, long press the power button until the buzzer makes a brief sound.
• To silence the buzzer, short press the power button.
Control button
The control button is used for:
• Resetting the product to factory default settings. See .
• Connecting to a one-click cloud connection (O3C) service over the internet. To connect, press and hold
the button for about 3 seconds until the status LED flashes green.
AXIS S4000

35
Troubleshooting
Technical issues, clues and solutions
Issue Solution
My recordings are not
available.
Go to .
I cannot connect to my
cameras.
Go to .
I receive error
notification: “No
contact”.
Go to .
My sites do not appear
in my mobile app.
Make sure you have the latest AXIS Camera Station Edge mobile app.
Fix common issues
Before you restart, configure or reset your devices.
1. Check that your cameras and recorder have power.
2. Check that you are connected to the internet.
3. Check that the network is working.
4. Check that the cameras are connected to the same network as the computer, unless you are remote.
Still not working?
5. Make sure that your cameras, recorder and AXIS Camera Station Edge have the latest device software.
See .
6. Restart AXIS Camera Station Edge.
7. Restart you cameras and recorder.
Still not working?
8. Make a hard reset on the cameras and the recorder, to completely put them back to factory default
settings.
See .
9. Add the reset cameras to your site again.
Still not working?
10. Update your graphics card with the latest drivers.
Still not working?
11. Save a system report and contact Axis technical support.
See .
Upgrade AXIS OS
New device software updates bring you to the latest and improved set of features, functions, and security
enhancements.
1. Go to the leader device’s web interface.
2. Go to Maintenance > AXIS OS upgrade and click Upgrade.
3. Follow the instructions on the screen.
AXIS S4000

36
I can't log in to the product's web interface
If you set a password for the product during configuration, and later add that product to a site, you can no
longer log in to the product's web interface with the password you've set. This is because AXIS Camera Station
Edge changes the passwords of all devices in the site.
To log in to a device in your site, type the username root and your site password.
How to erase all recordings
1. In the device’s web interface, go to System > Storage.
2. Select Format and click Use tool.
Note
This procedure erases all recordings from the hard drive, but the configuration of the recorder and the site
doesn’t change.
Save a system report
1. In AXIS Camera Station Edge, go to > Save system report.
2. In AXIS Camera Station Pro, go to
> Help > System report.
3. When you register a new case at Axis Helpdesk, attach the system report.
AXIS S4000


.
T10230523
2025-10 (M1.7)
© 2025 Axis Communications AB