SAFETY NOTES:
1. Make sure the SuperDrive N7 tool is
powered down and unplugged before
replacing a bit, or removing the
indexing unit.
2. Never use SuperDrive N7 while standing on
an unstable platform.
3. Never point the driver at yourself or others
in the work area.
4. Avoid wearing loose clothing, jewelry or
other items that could become caught in
the tool.
5. Make sure N7 is clear of clothing, hair or
other loose items while operating the tool.
6. Make sure the tool is powered down and
unplugged before performing any
adjustment or repair to the indexing
module.
7. Always use collated screws and strips that
are designed for this tool. See Technical
Data below.
TECHNICAL DATA:
1. Use SuperDrive N7 with #6-#12 gauge
screws only.
2. Use SuperDrive N7 with screw lengths from
3/4-in (19mm) - 2-3/16-in (55mm) only.
3. SuperDrive N7 is designed for fastener
head diameters up to 3/8-in.
4. Only use bits with a 5mm shank diameter
with SuperDrive N7.
5. SuperDrive N7 is designed to work best
with Metabo HPT 115411 bit tips.
OPERATING N7:
1. Remove the factory nose piece and bit from
the driver.
TM
TM
TM
TM
TM
TM
TM
TM
®
TM
TM
TM
TM
TM
TM
TM
TM
®
Operating Instructions for
SuperDrive
®
N7
A.
B.
C.
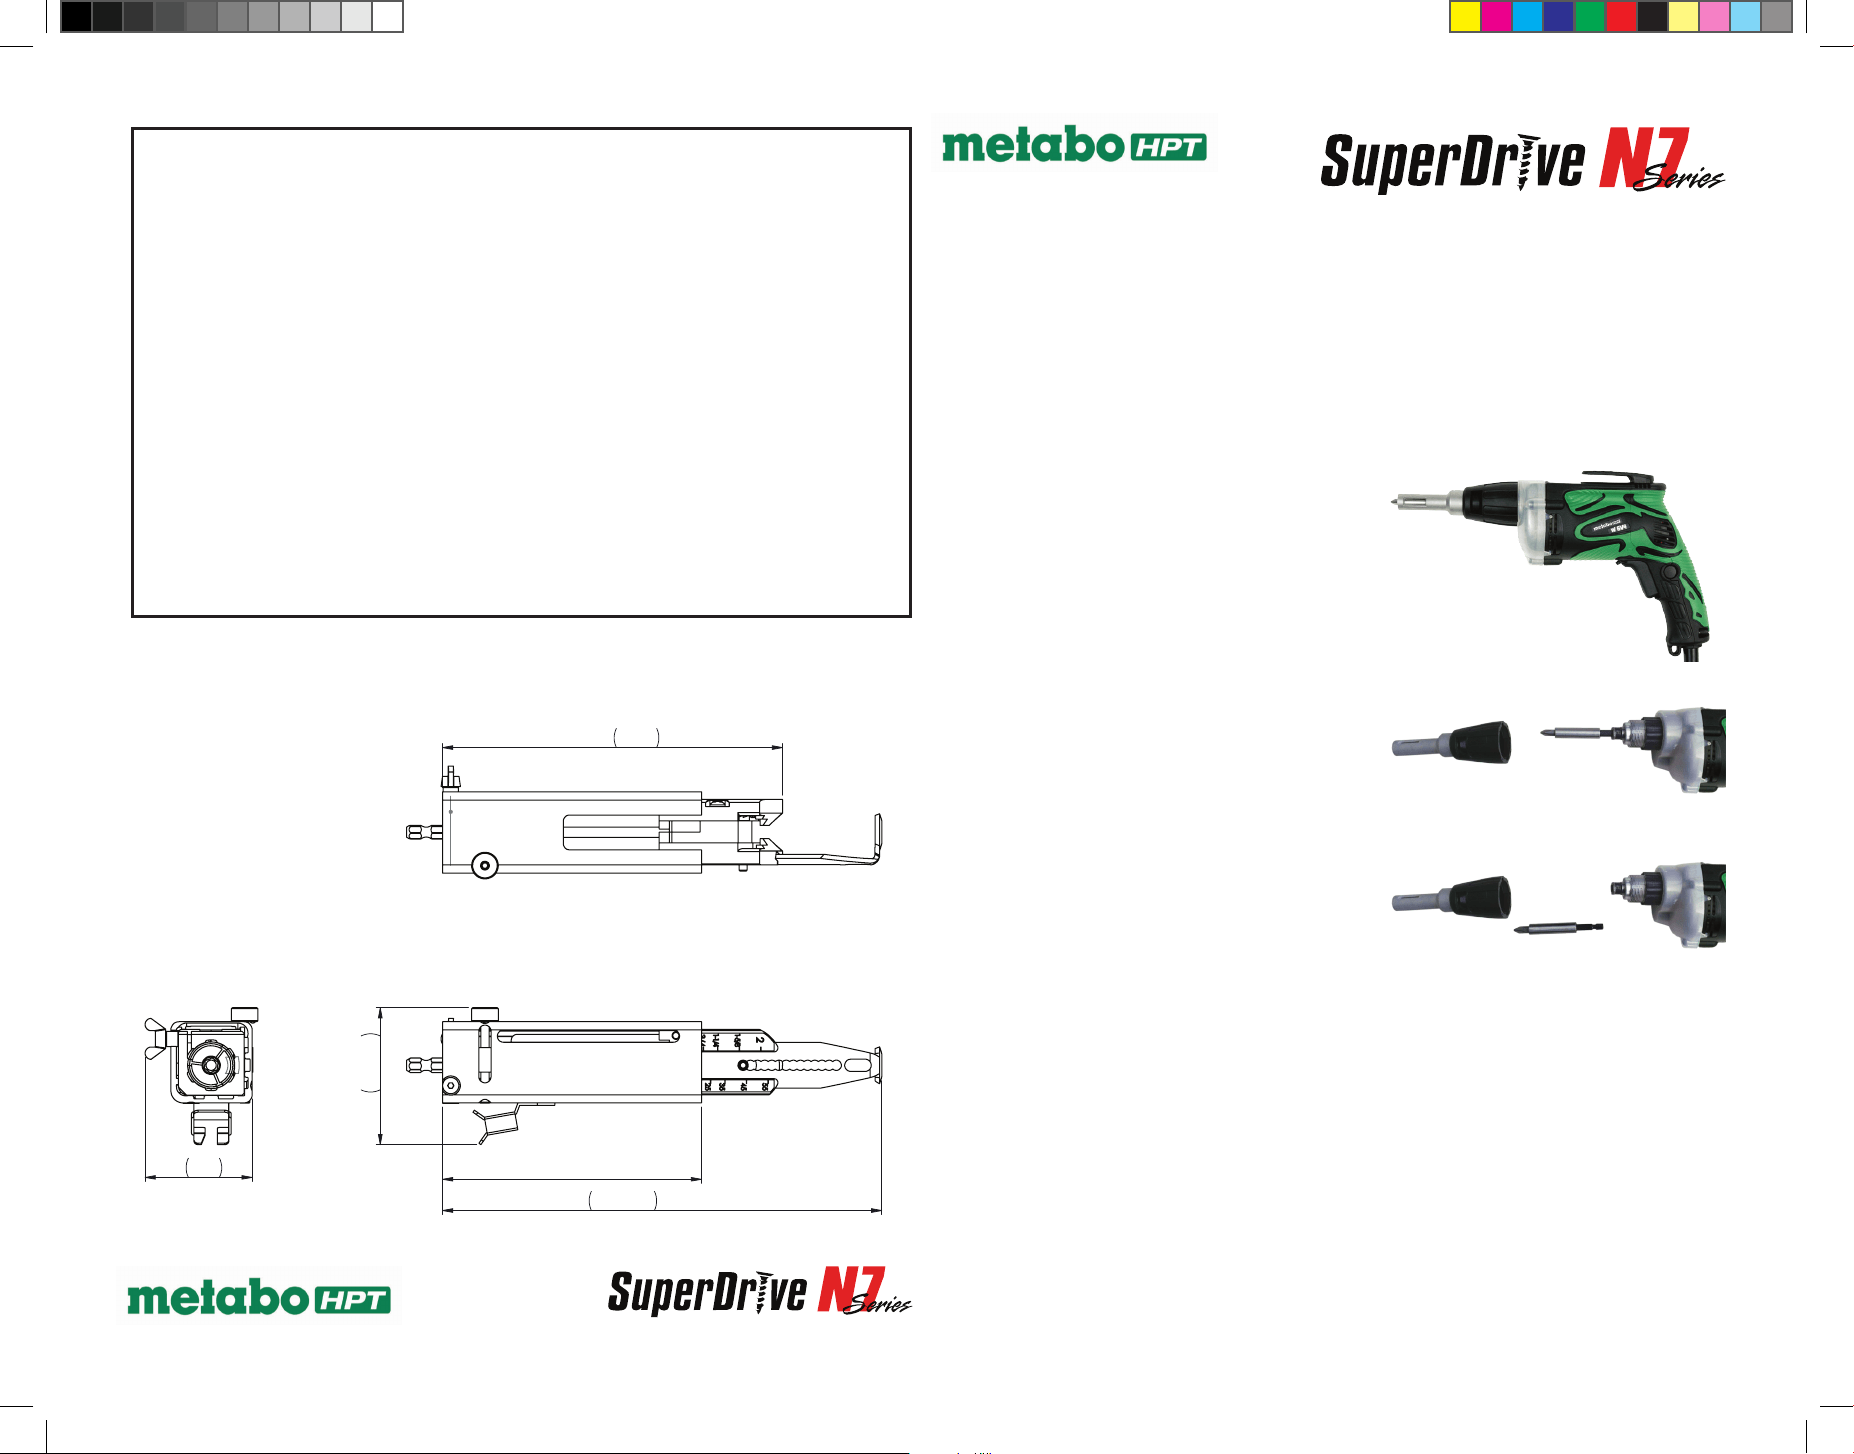
126.50
214.50
66.80
166
49
Metabo HPT SuperDrive Auto-feed Screw System
WARRANTY
Metabo HPT SuperDrive tools and system components are warranted to the original retail
purchaser to be free from defects in material and workmanship one year from the date of
purchase. A dated sales receipt or proof of purchase is required to make a warranty claim.
The warranty shall only cover defects in material or workmanship. The warranty shall not
cover normal wear items or issues arising from improper use, as determined by Koki
Holdings America Ltd. in its absolute discretion.
Koki Holdings America Ltd. is not responsibility for malfunctions, failures or defects resulting
from misuse, abuse, neglect, alteration, or modification of the Metabo HPT SuperDrive tool
and system components. Koki Holdings America Ltd. disclaims any warranty regarding fitness
for any particular use or application of its tools or fasteners. No other warranties,
representations or promises as to the quality or performance of the Metabo HPT SuperDrive
fastening tool and system components are made, other than those contained herein.
ANY IMPLIED WARRANTY GRANTED UNDER STATE LAW, INCLUDING WARRANTIES OR
MERCHANTABILITY OR FITNESS FOR A PARTICULAR PURPOSE, ARE LIMITED TO DURATION OF
THE EXPRESS WARRANTY GRANTED HEREIN. KOKI HOLDINGS AMERICA LTD. SHALL NOT BE
LIABLE FOR DIRECT, INDIRECT, INCIDENTAL, PUNITIVE, OR CONSEQUENTIAL DAMAGES. SOME
STATES DO NOT ALLOW FOR EXCLUSIONS OR LIMITATIONS OF DAMAGES SO THE ABOVE
LIMITATIONS MAY NOT APPLY.
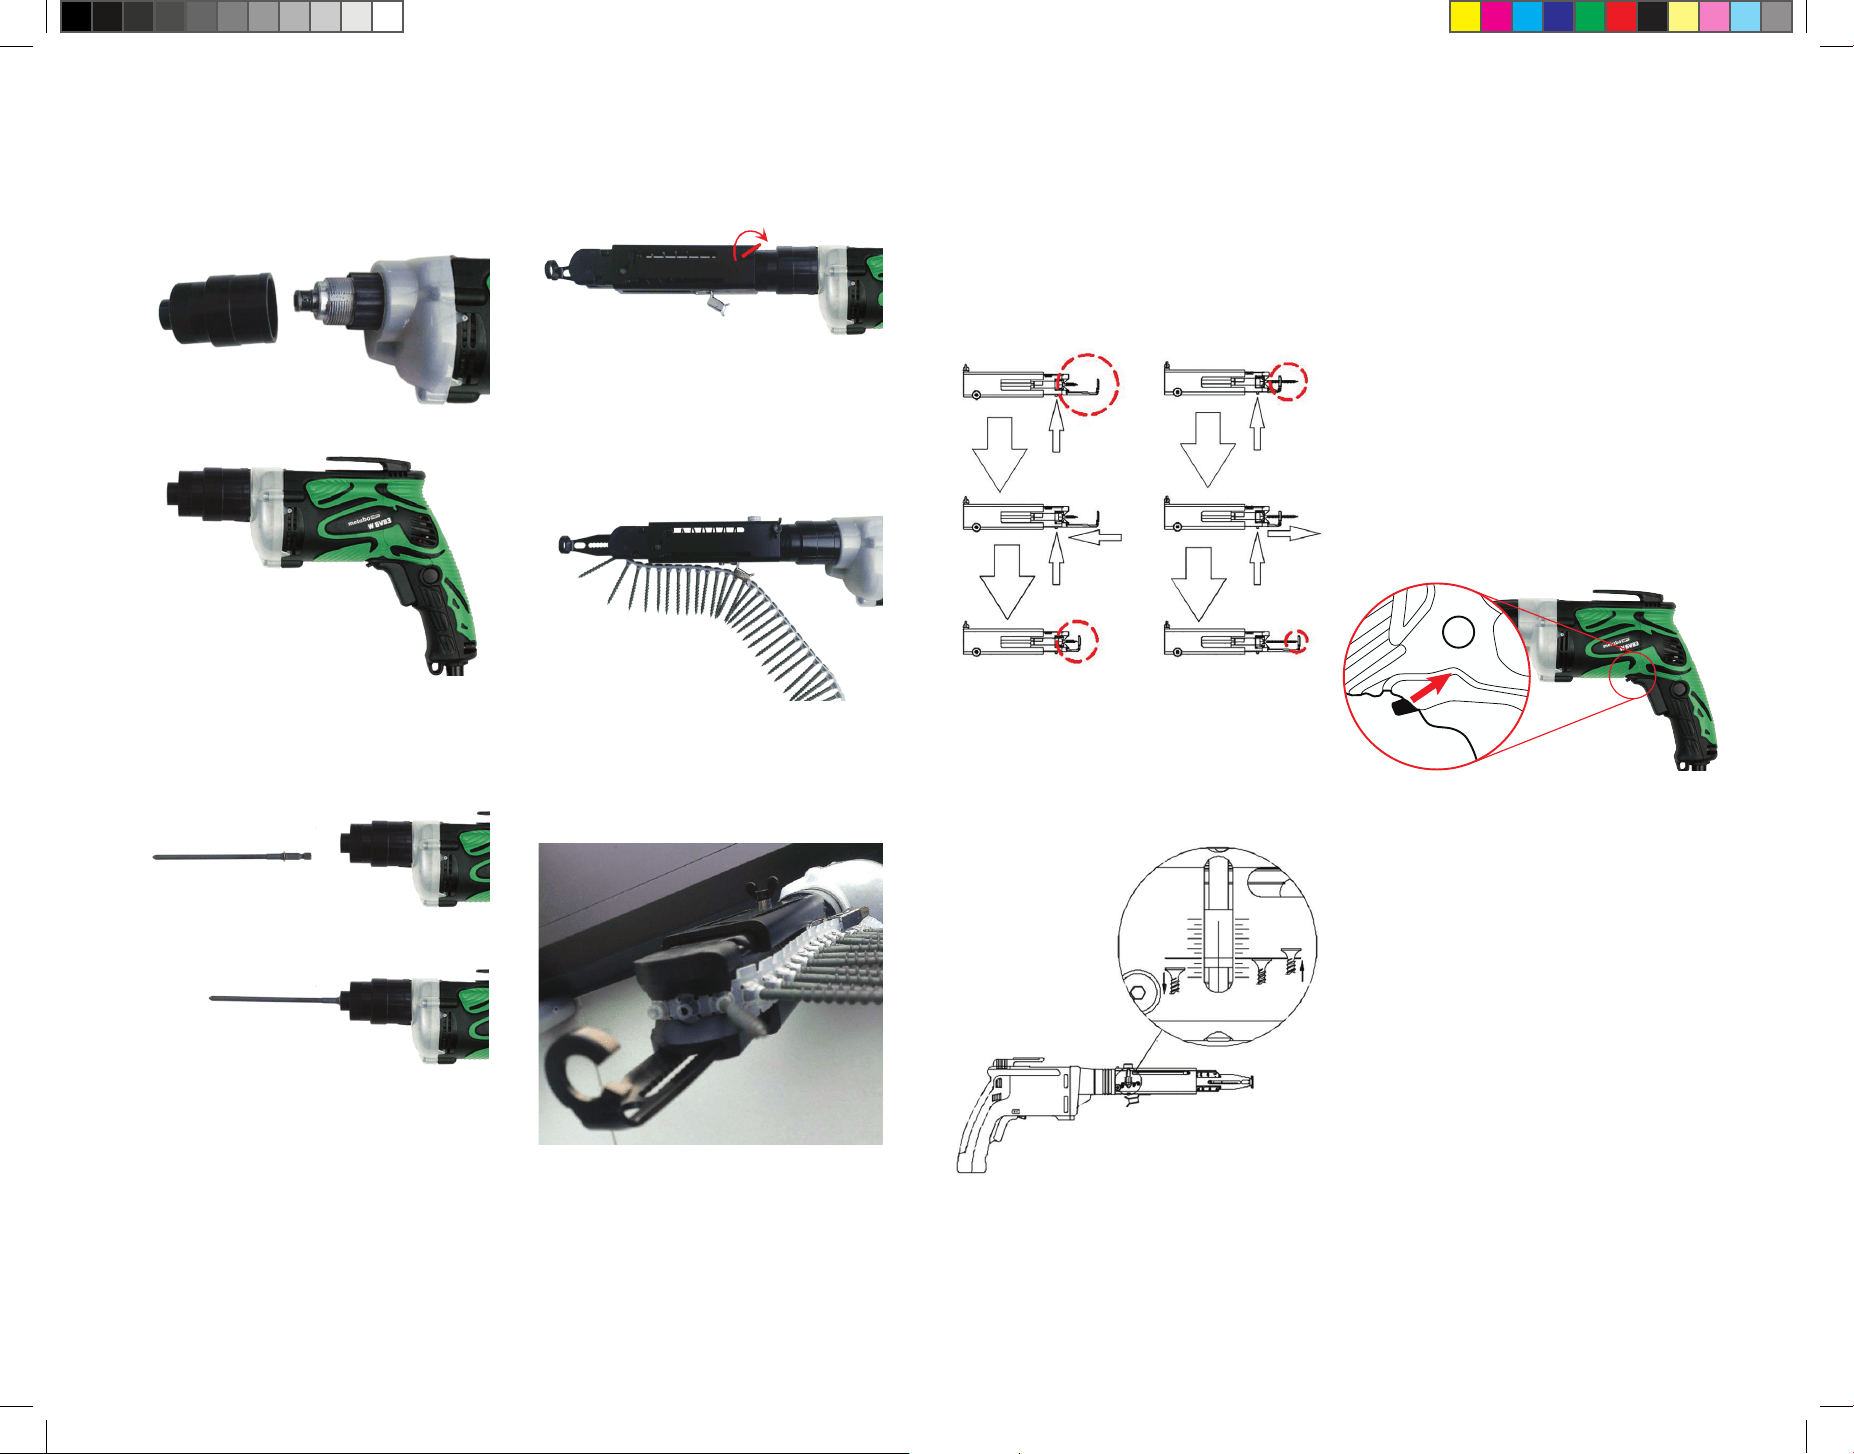
OPERATING N7:
2. Attach SuperDrive N7 coupler to the
Metabo HPT driver.
3. Insert SuperDrive bit tip into the
screw gun.
4. Slide the N7 indexing module onto the
coupler and tighten the locking wing nut
clockwise.
5. Insert a collated strip of screws into the
indexing module guiding the strip through
the drywall clip and into the indexing guide.
6. Position the first screw in the strip just
behind the bit tip guide. The screw will slide
into position as the SuperDrive N7 tool is
pressed to the substrate.
A.
A.
B.
B.
ADJUSTING FOR FASTENER LENGTH
(Coarse adjustment):
Press button on the nose piece attachment to
release the nose piece. The nose piece can
then be slid up or down to accomodate a new
fastener length.
Release the button to lock the nose piece in
the new position.
FINE DEPTH ADJUSTMENT:
Twist the knurled wheel at the top of the N7
indexing module to make fine depth adjust-
ment. An adjustment scale and guide are
located on the top of the tool.
SUGGESTIONS FOR OPERATION:
For best results position N7 at a right angle to
the work surface as much as is possible.
Allow the driver to fully spin up before press-
ing SuperDrive N7 to the substrate surface.
Press SuperDrive N7 to the substrate
maintaining even and consistent pressure
until the faster is fully driven in.
Check fastener depth and make any necessary
fine adjustment.
Keep the driver fully spun up as subsequent
screws are driven.
Check to see that the Metabo HPT driver is in
the right (R) or forward position before
operating the tool.
R