KC-MH-8060A
Humidifier with Fan
User's Guide
Thanks for your purchase.
We provide a one-year warranty.
If any quality issues,
replacement or refund is available.
Please feel free to contact us via E-mail:


Precautions
Thank you for purchasing our humidifier with fan KC-MH-8060A.
Please read this manual carefully before using
and keep it for future reference.
All pictures shown are for illustration purposes only.
Actual products may vary due to product enhancement.

Safety Guide
Components
Placement
Installation
Water filling
Control Panel& Remote Control
Maintenance
FAQ
Product Specification
Warranty
1
2
3
4
5
6-8
9-11
12-13
14
15

0101
Safety Guide
0101
01010101
Do not disassemble or modify the machine.
Do not subject the machine to strong impacts.
Turn off the machine before moving it.
Do not connect the machine to a socket that exceeds the rated voltage or use an
extension cable, as this may cause fire or electric shock.
If the plug or wire becomes abnormally hot, stop using the machine immediately.
Do not unplug the power plug with wet hands, as this may cause electric shock or injury.
Do not use acidic detergents in the main body, as they may produce toxic gas.
Children should use the machine under adult supervision.
When the machine is not in use for more than 24 hours, please pour out the water from
the water tank and main body to prevent mold or impurities from harming your health.
Before the first use, leave the machine at room temperature for 30 minutes to avoid
damage to the water tank due to sudden temperature changes.
Use the machine at normal room temperature, which ranges from 5°C to 40°C.
When the room temperature drops below 0°C, please pour out the water in the water
tank and sink to avoid freezing and damaging the machine.
Note: The above safety guide is for your reference only. Please read the user manual
carefully before using the machine. If you have any questions, please contact customer
service.
Do not put essential oil into the main body or water tank, as this may cause water
leakage, deformation or failure.
Keep a safe distance when the humidifier is working, especially if you have a sensitive
respiratory tract.
0202
02
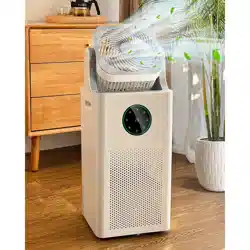
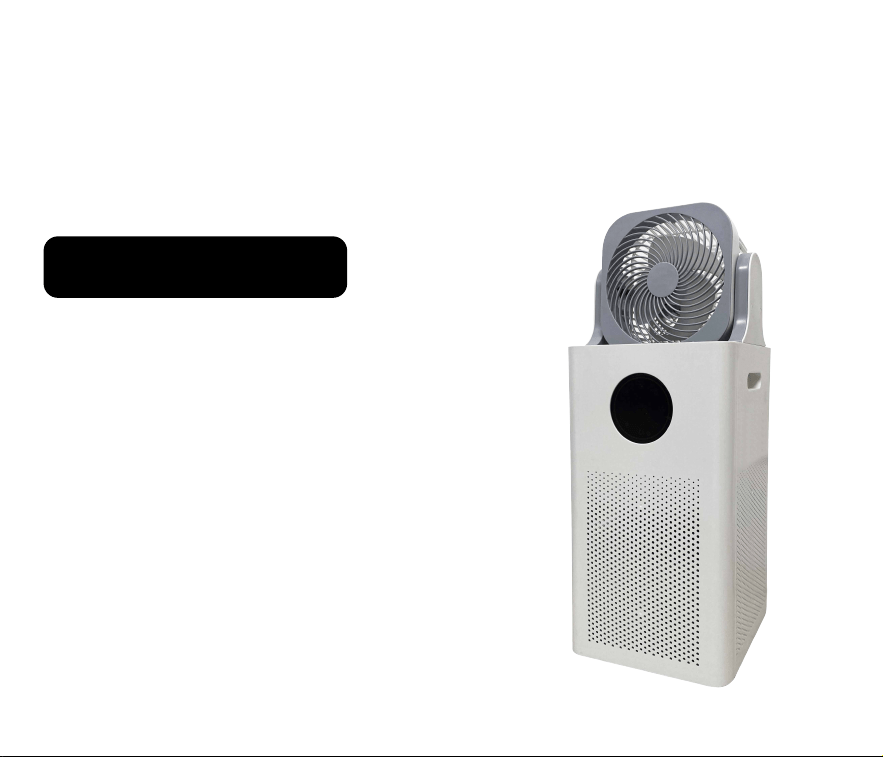
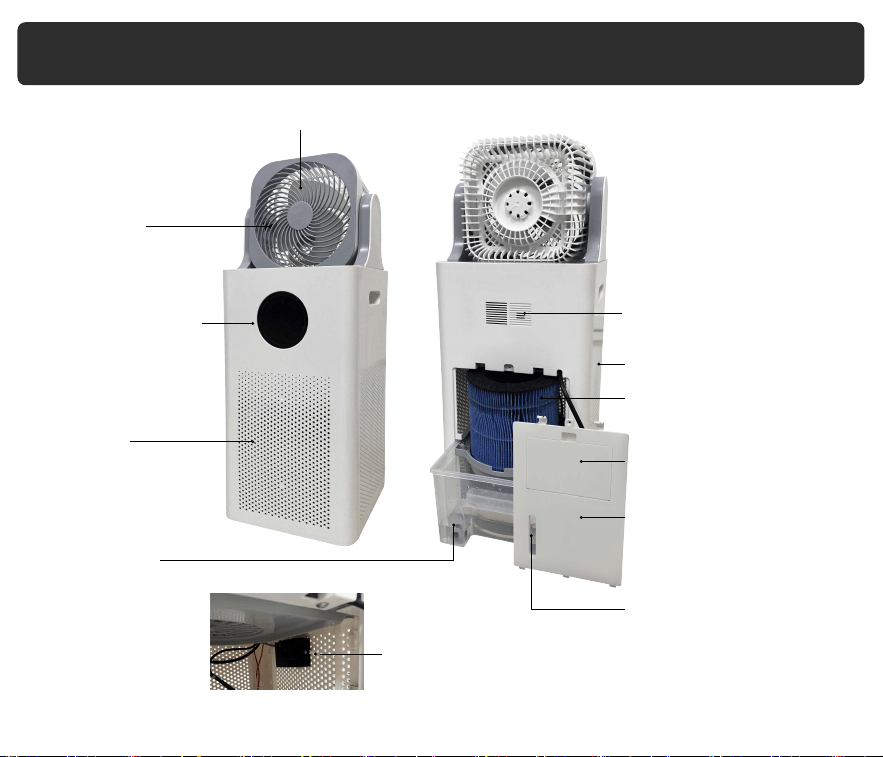
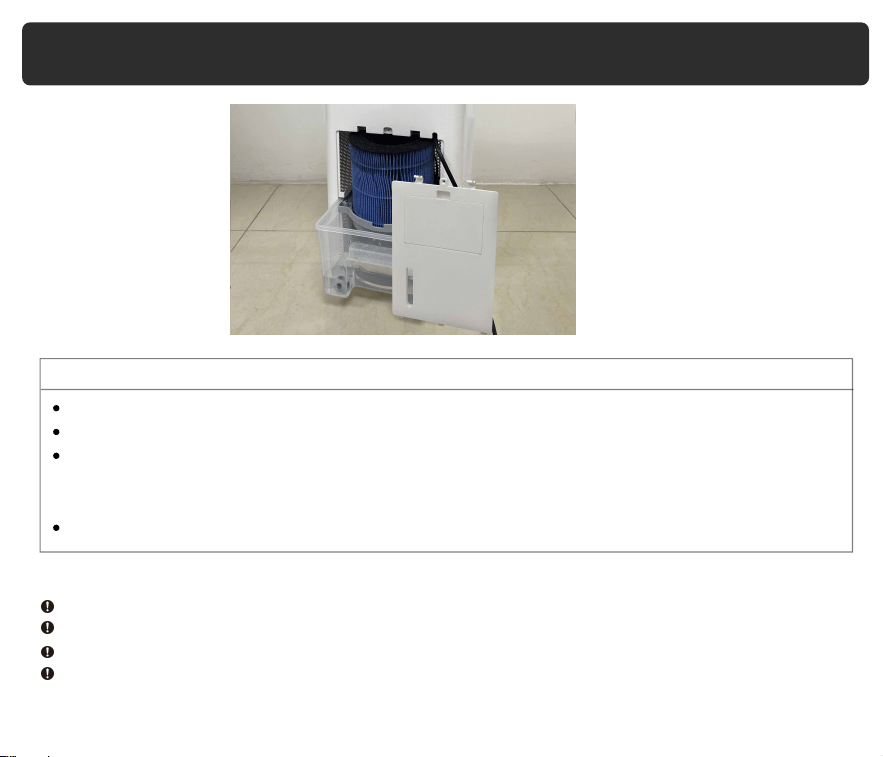
Components
Air circulator fan
Panel &
Display Screen
Air Outlet
Air Inlet
Water tank
Humidity Sensor
Back Cover
Water Window
Water Inlet
Filter
Air Quality Sensor( )
❶
Air Quality Sensor
❶
03
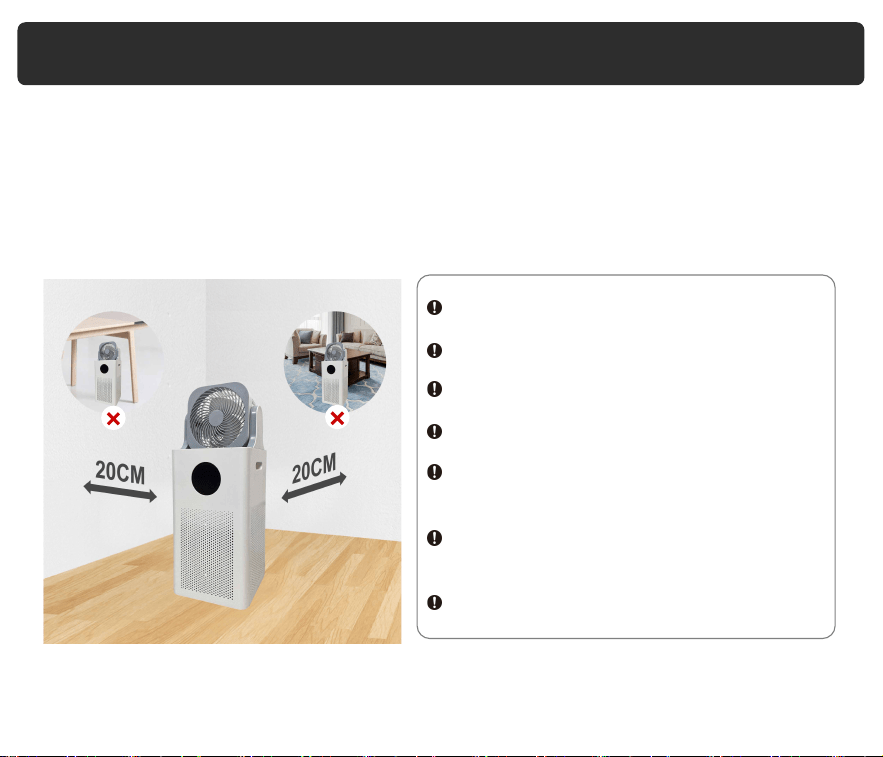
Place the machine in a horizontal position that is more than 20 cm away from walls,
furniture, household appliances, and other objects.
Do not use the machine in the following situations to avoid water leakage, signal
jamming, damage or injury:
In direct sunlight.
On an unstable platform.
In high temperatures, humidity, or dust.
Near the air conditioner, heater, or stove.
Under tables
Near the radio and other objects that emit
radio waves.
Near mobile phones, computers, and other
precision instruments.
Placement
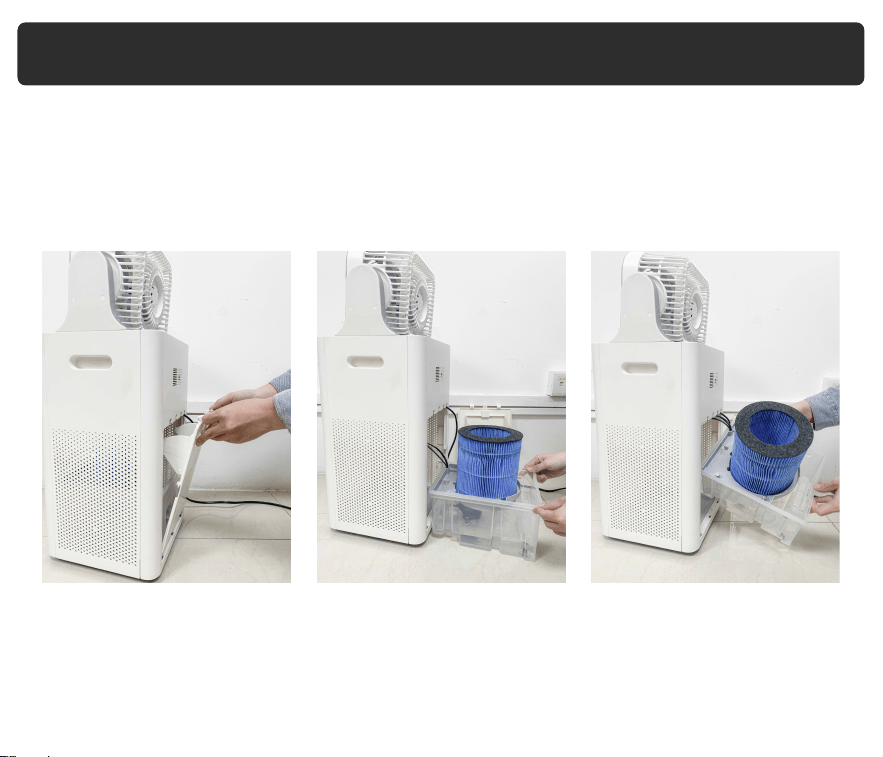
04
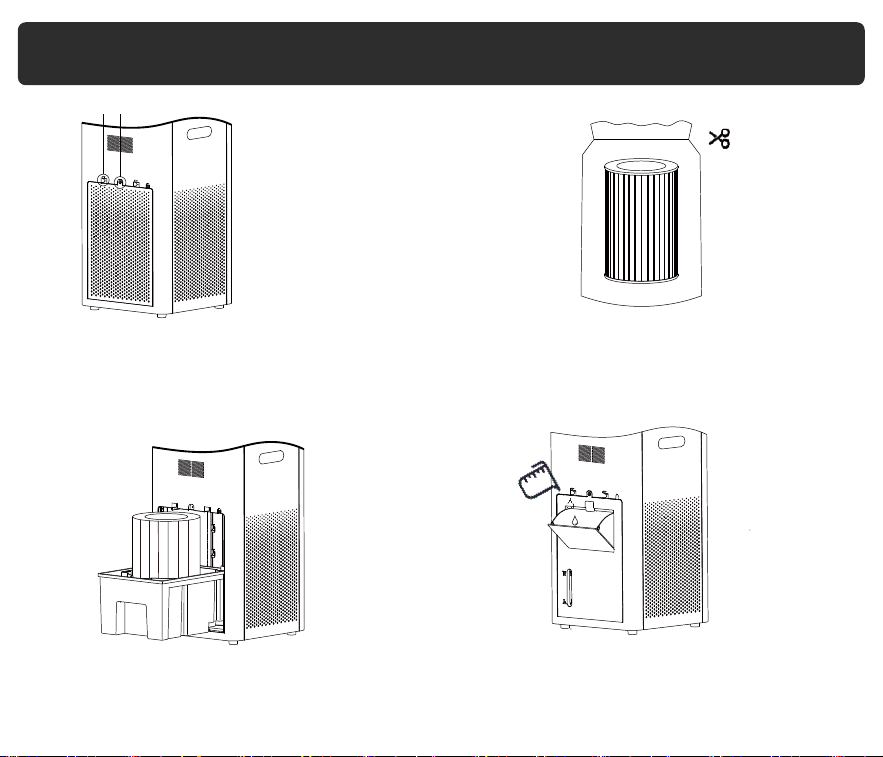
3.Install the filter to the water tank and push
the water tank back to machine
4.Install the cover back to the machine
and add water before use
1.Take the back cover off and pull out the
water tank slowly.
Remove ❶ with a screwdrive
Press
❷ to unlock the cover
❶❷
2.Remove the plastic bag from the filter.
Installation
05
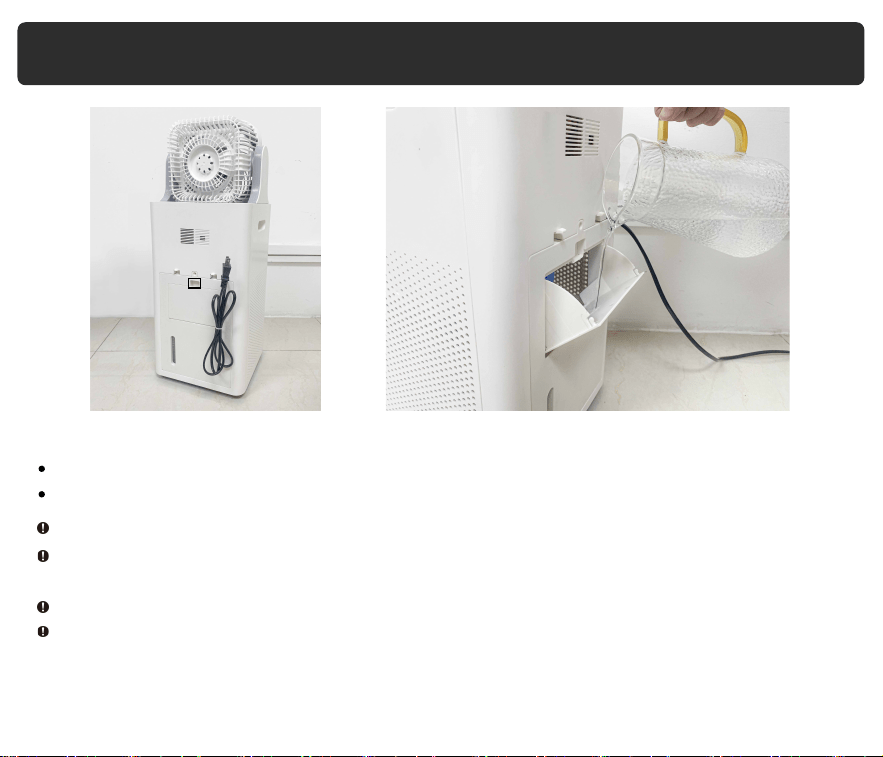
Water Filling
Pull ❶ to open the water inlet.
Add water from the water inlet.
Do not add mineral water, plasma water, or tap water that has been left for a long time.
If mold or impurities breed, it may cause health problems.
Add water below 40°C to the water tank.
Do not add water exceed the water tank.
When the water level is low, the machine will prompt for water shortage, the "humidify"
button on panel will flash.
❶
06
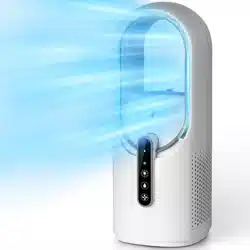
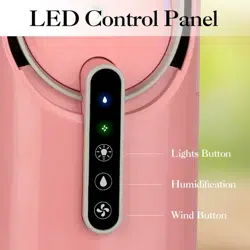
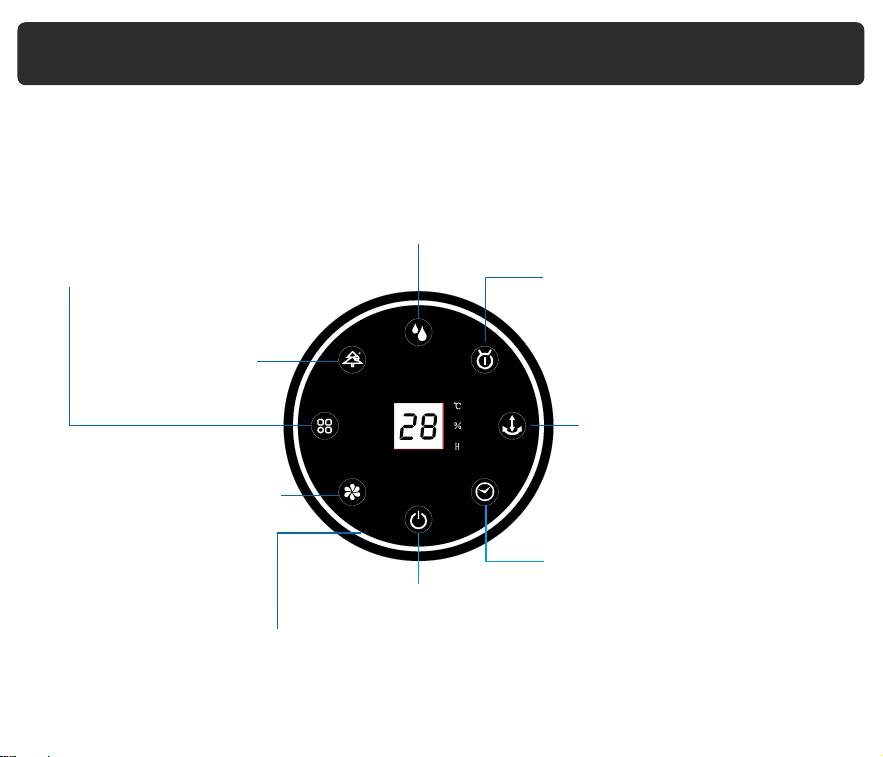
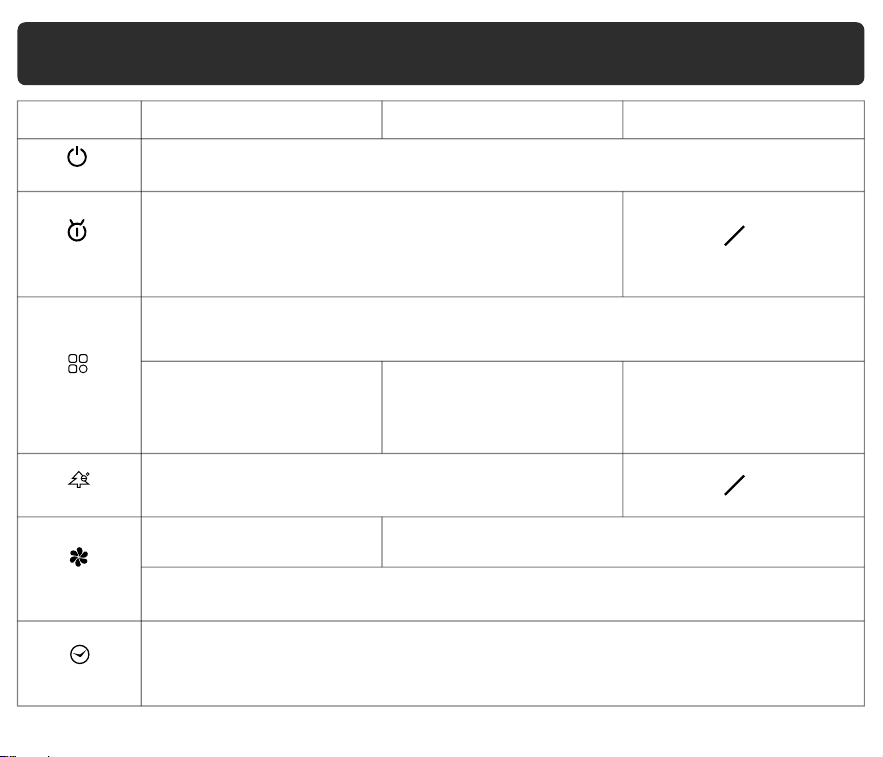
Control Panel
The control panel and remote control allow you to operate the machine with ease.
Here is a breakdown of the various functions:
Smart Mode & Indicator
Timer Button & Indicator
White: On
Red:Off
Flashing:Need to replace filter
Oscillation Button & Indicator
One touch: Left-right auto Oscillation
on/off
Long touch: Adjust air circulation fan's
up-down angle
(0°/30°/60°/90°)
Mode Change Button & Indicator
White: Purifier function
Green: Fan + Purifier function
Blue: Fan function only
Ion & Indicator
White: On
Red:Off
Humidify Button & Indicator
Power Button & Indicator
White: On
Red:Off
Speed Button & Indicator
White: Low
Green: Medium
Blue: High
Air Quality Light
Green: Good
Orange: Normal
Red: Bad
07
Power
Smart Mode
Mode Change
Ion
Speed
Timer
Touch this button to turn on/off the machine. Everytime it start in mode ①
Touch this button to enter smart mode, the humidity function will be
turned on automatically when your environmental humidity is below
45%. When the button is flashing, it means you need to replace the
filter, please check the maintenance page about how to replace the
filter.
Touch this button to switch mode.
Mode ① (the button is white): Purifier function Mode ② (the button is green): Fan + Purifier function
Mode ③ (the button is blue): Fan function only
The up-down angle of the air
circulator fan is 0°,
and air purifier fan speed is low.
Smart mode is on.
Touch this button to start generating negative ion,
effectively improving indoor air quality.
The up-down angle of the air
circulator fan is 30°,
and air circulator fan speed is
medium. Smart mode is on.
The up-down angle of the air
circulator fan is 60°,
and air circulator fan speed is
medium.
Mode ① Mode ② Mode ③
Control Panel& Remote Control
Touch this button to adjust
purifier fan speed
The fan speed has three levels: low(the button is white), medium(the button is green),
high(the button is blue)
This button lets you set the timer to turn on (on standby mode) or shut down (when working)
automatically after 1-12 hours. Each touch increases the timer by 1 hour.
Touch this button to adjust air circulator fan speed
08
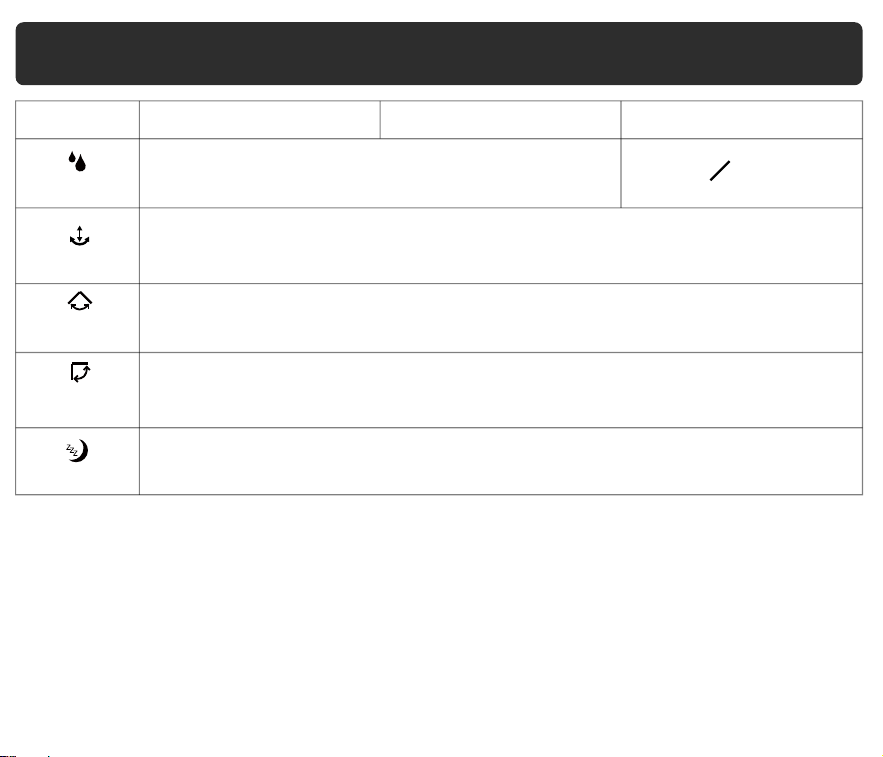
Humidify
Touch this button to turn on/off humidifier function. When the button
is flashing, it means you need to add water.
Oscillation
(Only on panel) Touch this button to turn on/off left-right automatic oscillation function.
Long touch this button can adjust the up-down angle(0°/30°/60°/90°) of the air circulator fan.
Mode ① Mode ② Mode ③
Control Panel& Remote Control
Left-Right
Oscillation
(Only on remote) Press this button to turn on/off left-right automatic oscillation function.
Up-Down
Oscillation
(Only on remote) Press this button to turn on/off up-down automatic oscillation function.
Sleep
(Only on remote) Press this button to enter sleep mode, the display will shut off and the fan speed will
switch to low.
External
Water tank
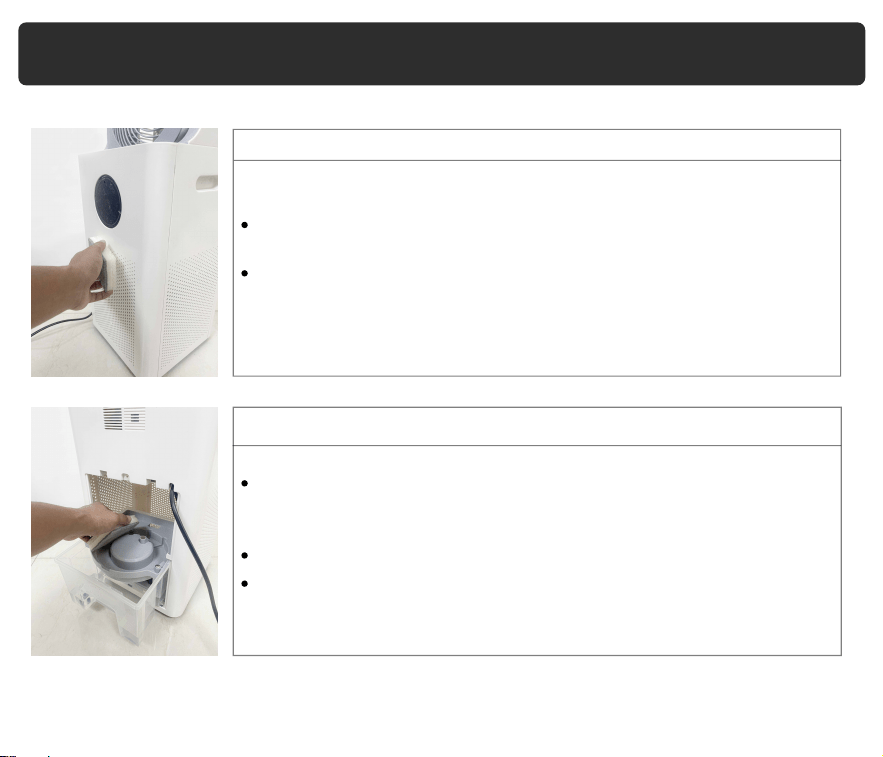
Maintenance
Clean the external surface 1-2 times a week using a clean cloth
to remove dust and dirt.
If the dirt is stubborn, soak the cloth in a neutral detergent before
wiping.
Clean the water sink and tank 1-2 times a week as water can
cause minerals and organic matter to accumulate, affecting the
function of the humidifier.
Use a soft cloth or brush to clean the internal surfaces of the tank.
For stubborn dirt, soak the cloth in white vinegar or baking soda
before wiping.
09
Maintenance
Filter
When the smart mode button is flashing, it means you need to replace the filter.
Follow the installation page to take the back cover off to replace the filter.
After you install the back cover back to the machine, please long press the smart mode
button and timer button on the panel at the same time until you hear a "ding" voice.
Then the smart mode button will stop flashing.
The recommended service life of the filter is 6 months.
Note:
Always disconnect the power plug before performing any maintenance on the machine.
Do not directly flush the whole machine with water as this can cause short circuit and failure.
Use mild detergent and make sure to remove any residue to avoid harm to health.
If the machine will not be used for more than 24 hours, pour out the water from the tank
to avoid mold or impurities that may be harmful to health.
10
Maintenance
How to pour out the water in the tank:
1. Take the cover off.
2. Pull out the tank, and you can remove the filter as your convenience.
Note: The water tank is connected with power cables, please don't force it too hard.
3. Hold the water tank to the side to pour out the water.
11
Q: Why is the humidity button flashing?
A:Open the back cover to check whether the water is empty.
If yes, please add water.
If not, please contact customer service to help.
Q: Why is the smart mode button flashing?
A:The filter need to be replaced. Follow the maintenance page to replace the
filter.
Q: Why is there abnormal noise?
A:There may be too little water in the tank or the machine may not be on a stable
surface. Please fill the water and place the machine on a flat and stable surface.
Q: Why is the humidity value not consistent with the room humidity?
A:Ensure the humidity sensor is not block or wet. A difference of 5-10% is within
the normal range. If it's not within this range, please contact customer service
via email.
FAQ
12
FAQ
Q: Why is there scale in the water tank?
A:Tap water contains minerals that can adhere to objects. Clean the water tank
regularly.
Q:Why is the fire on the stove turning red?
Q: Why is there interference with the TV remote control signal?
A:Keep the machine 1m away from the TV or other objects that emit radio waves.
A:The composition of tap water can react with the flame, so keep the machine
away from the stove.
13
Product Name Humidifier with Fan
Model Number KC-MH-8060A
Fan Speed Low Medium High
Max Mist Output 300ml/h
Rated Power 55W
Water Tank Capacity 4L
Rated Frequency 50/60Hz
Power Supply AC 100V-120V~
Coverage Area 300-600ft²/27-55m
2
Size 9.84*9.84*23.6in/250*250*600mm
N.W. 11 lb / 5 kg
Safety Functions
1-12 hours timer
Water shortage alarm
Automatic shutdown when falling
Product Specifications
14

Warranty Period
Our company provides a one-year warranty starting from the date of purchase.
Warranty Requirements
In order to receive warranty service, please follow these steps:
Provide the warranty card and the order number.
Please note that we cannot provide warranty service if you are unable to provide the
above information.
Thank you for choosing our product, and we hope you enjoy using it. If you have any
questions or concerns, please don't hesitate to contact us.
Describe the problems you are experiencing in detail and provide pictures or videos
if possible.
Non-Warranty Policy
The following conditions are not covered by the warranty:
Damage that occurs after the warranty period has expired.
Damage caused by natural disasters or other force majeure events.
Any damage caused by use that does not follow the requirements outlined in the
User Manual.
Failure or damage caused by the forced use of the product.
The user disassembles or repairs the product without authorization.
Send an email to [email protected]
Warranty
If you need to return the product, please make sure that it is intact and that
the packaging boxes and accessories are complete.
15

15