Note: Your CO
2
and N
2
tanks are shipped empty
to avoid any possible accidents during transportation. When you
purchase the first keg of beer, have your beer distributor fill the gas tanks. Before installation, please read and
understand all gas tank handling procedures.
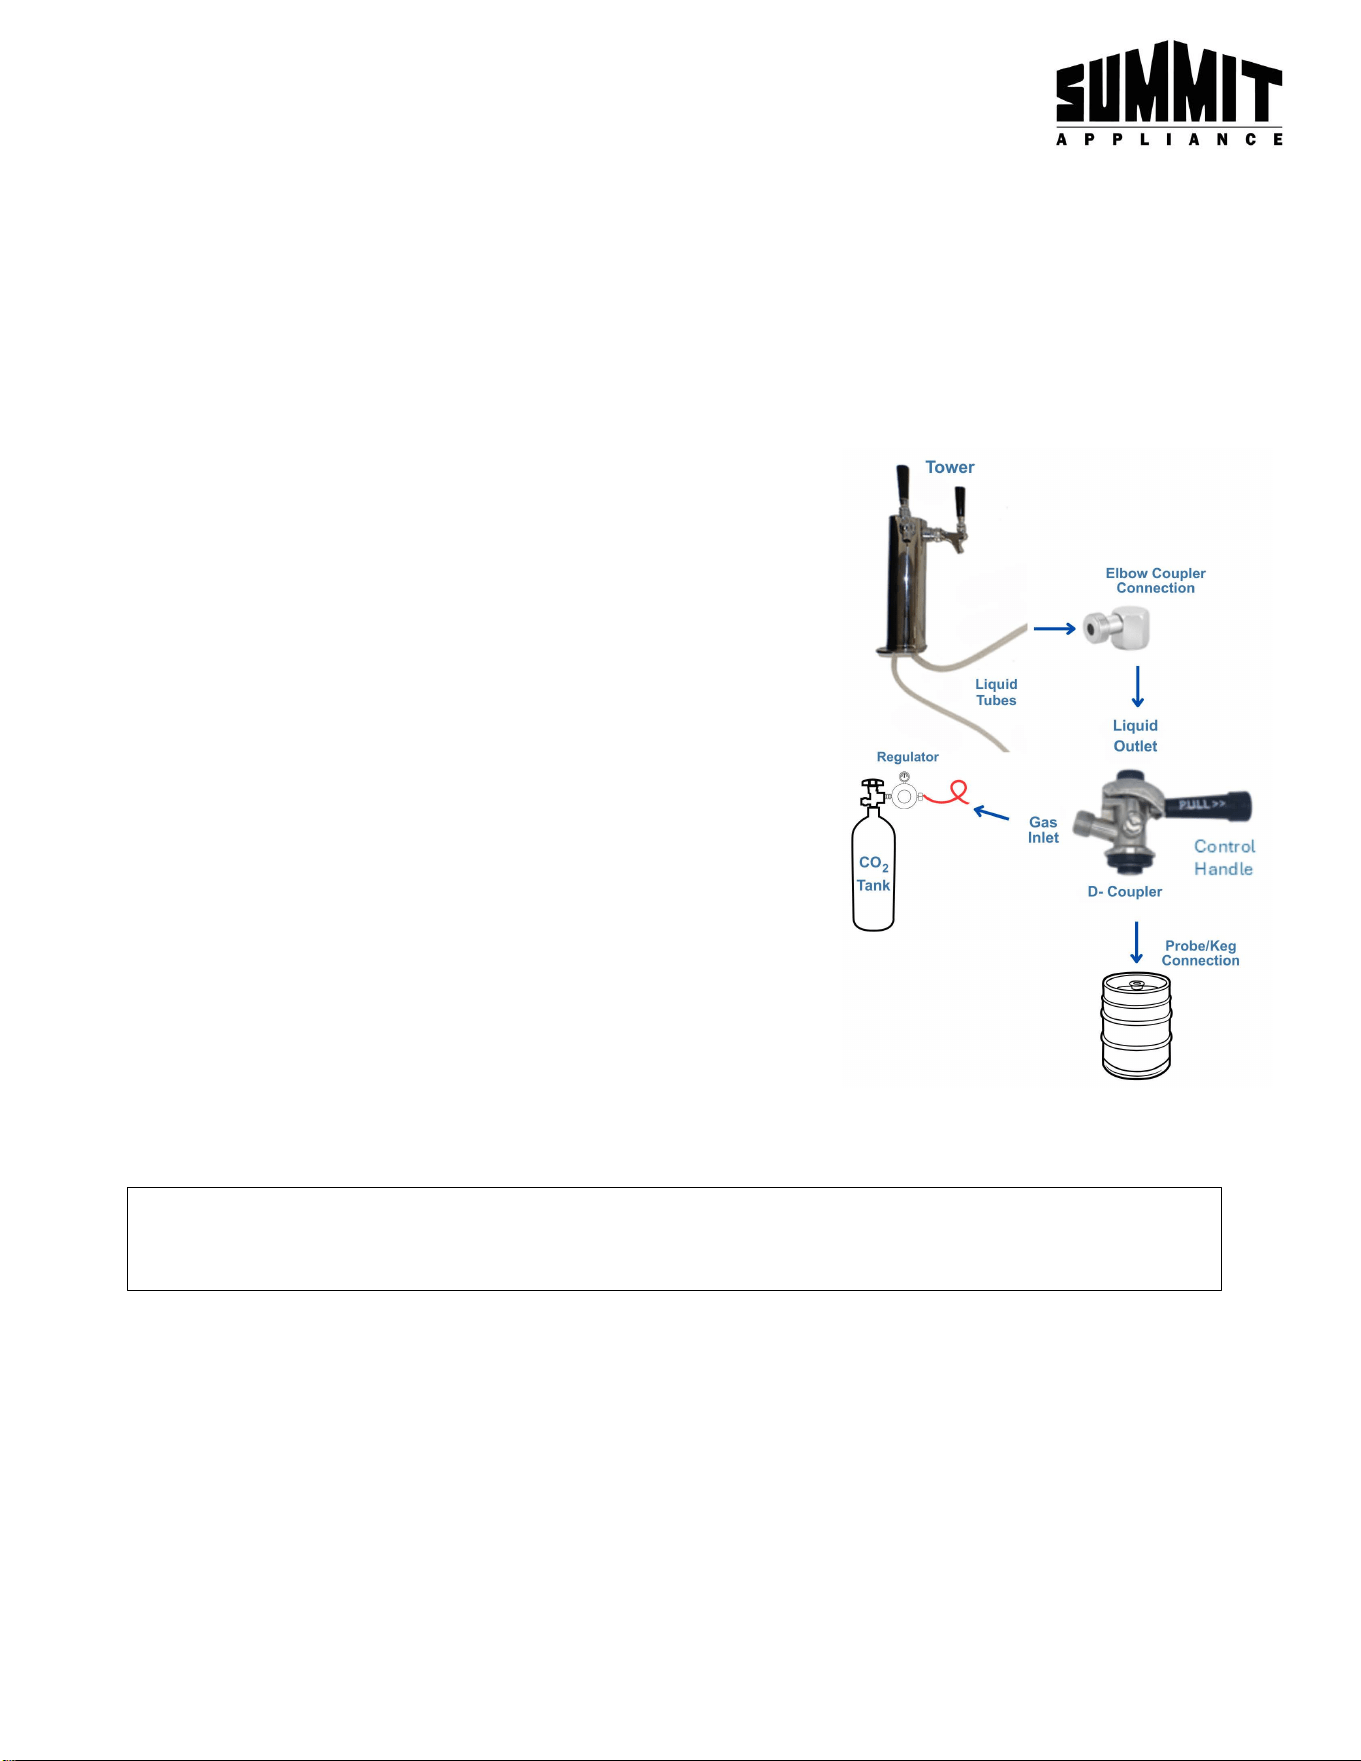
1. Attach the tower to your unit using the screws provided.
2. Hand-tighten the elbow coupler connection to the top (liquid outlet) of
the D-coupler.
3. Connect the beer line from the tower to the elbow coupler connection.
– Use the beer line with the CO₂ tank
4. Connect the gas regulator to its corresponding gas tank (see instructions
on page 2):
– CO₂ regulator to the CO₂ tank
– N₂ regulator to the N₂ tank
5. Attach the CO₂ regulator line for beer from the regulator to the gas inlet
on the D-coupler.
6. Attach the D-coupler to the beer keg (see instructions on page 2)
7. Place the CO
2
/ N
2
tanks inside the kegerator.
8. Lift the keg by the handles and gently place them inside the unit.
9. Neatly arrange the tubing behind the kegs to ensure the door can close
properly. Screw the handle(s) onto the tower tap(s).
1
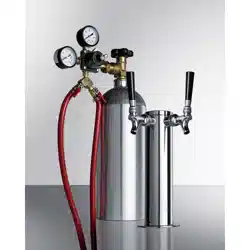
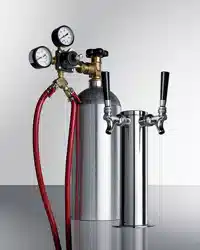
Installing the Dual Beer & Coffee Tap Kit
KITSBCTWINCFB
The tap is pre-assembled by the manufacturer for easy installation. Users only
need to connect the coupler to the keg.
Assembling the D-Coupler for the Beer Keg:
The D-coupler is compatible with a single 1/6 barrel keg. Each 1/6 barrel keg
holds approximately 5 gallons.
Note:
2
Installing the CO
2
Regulators to the CO
2
Tanks:
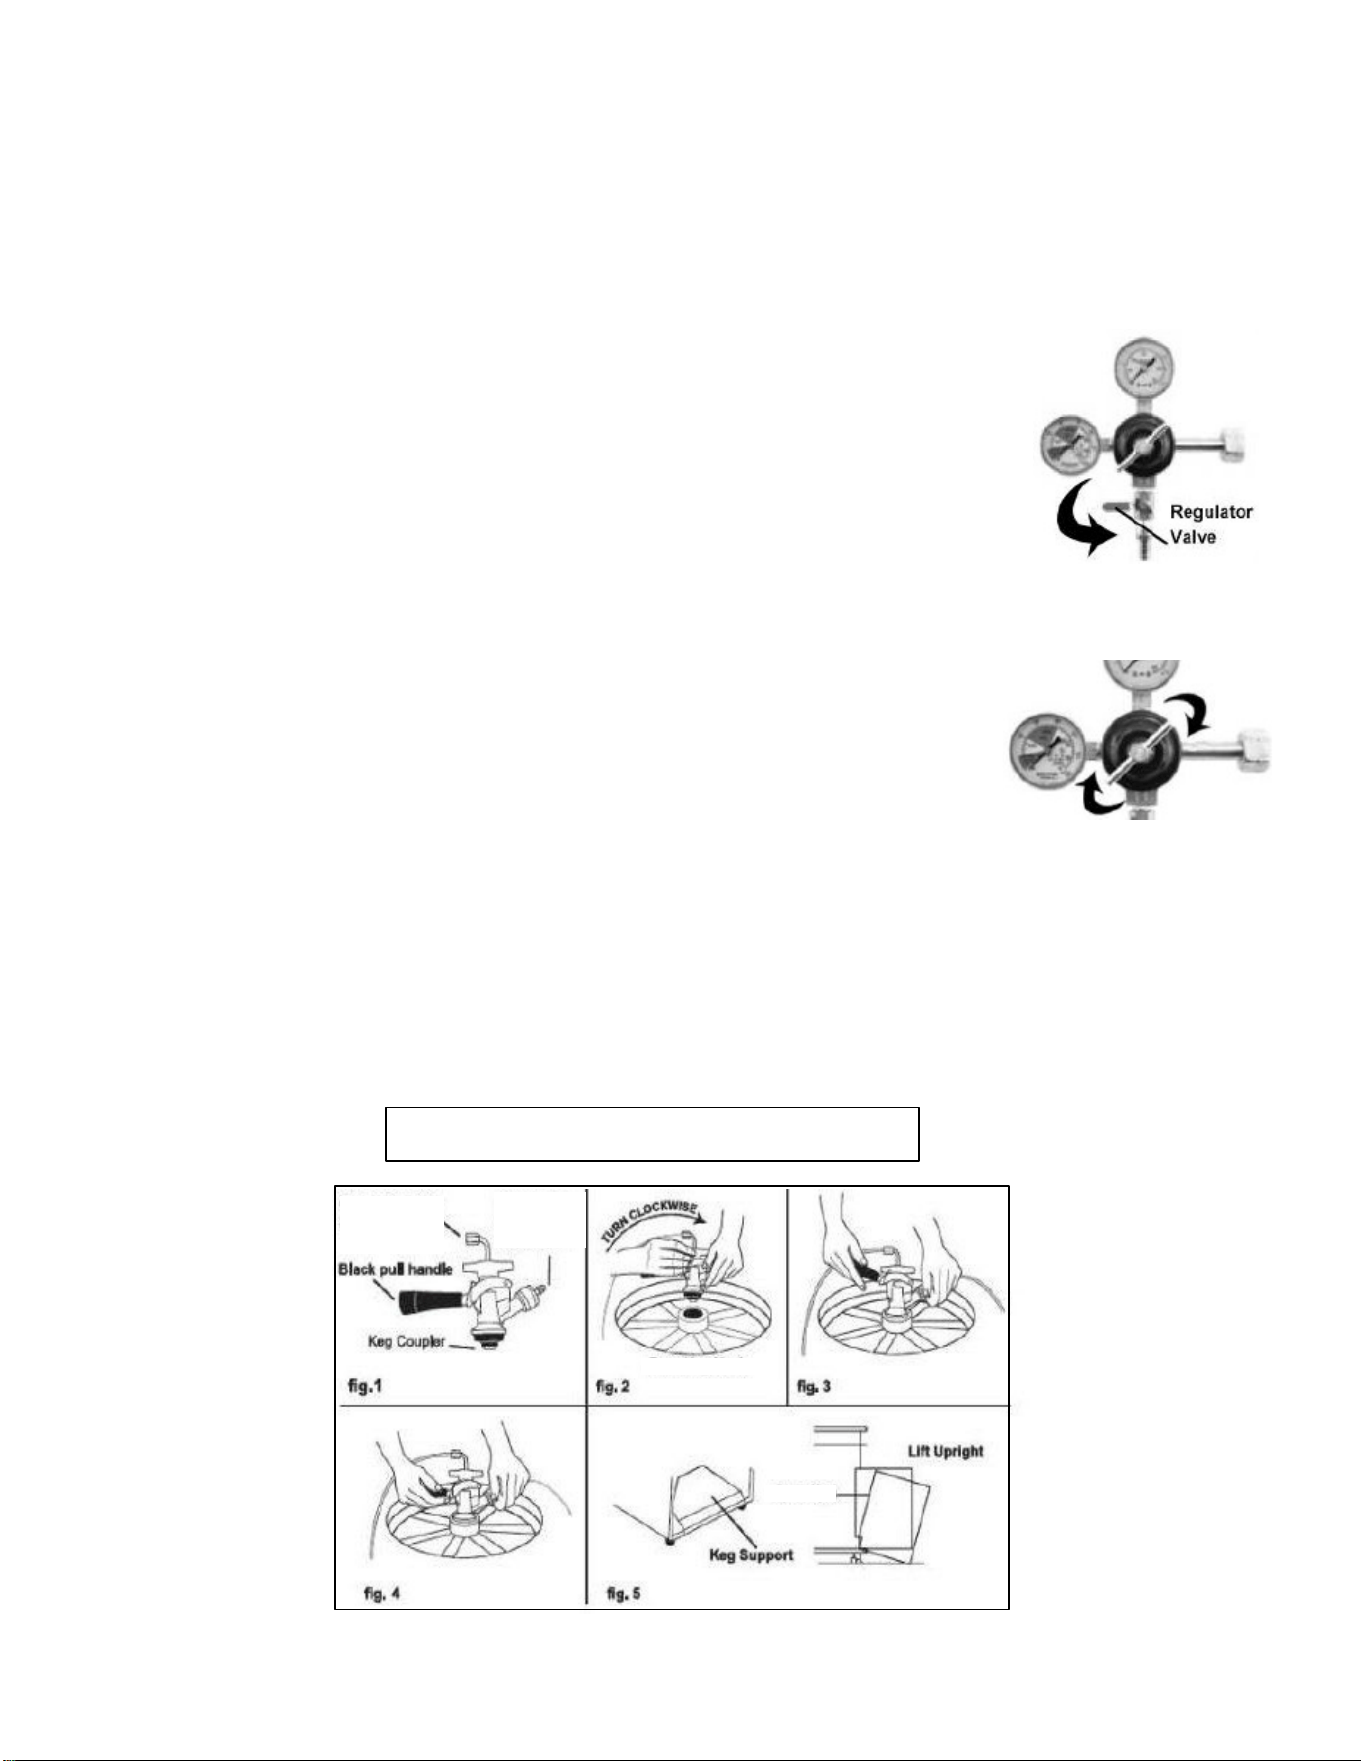
1.
Ensure the tower dispenser is closed.
2.
Position the D-coupler handle in the upward position to indicate that the keg is
untapped (See Figure 1).
3.
Ensure the CO
2
tank is full (gas tanks are shipped empty).
4.
Screw the CO
2
regulator on to the CO
2
tank valve. Use an adjustable wrench to
tighten the nut securely to prevent gas leaks.
5.
Connect the gas line to the pressure inlet nipple on the D-coupler and secure it
with a clamp. Insert the D-coupler mechanism into the top of the keg and lock it
into the lugs with a one-quarter clockwise turn (See Figure 2 & Figure 3).
6.
Open the gas tank valves fully to check for leaks by turning the knob
counterclockwise.
7.
Set the output pressure by adjusting screw on the regulator. Set the CO
2
output
pressure between 6-12 psi using the pressure adjusting screw on the regulator.
Note: Higher CO₂ pressure will result in more foam, adjust accordingly to achieve
the desired pour characteristics.
8.
Lock the regulator setting by tightening the locknut on the pressure screw.
Note: The left regulator gauge indicates total tank press.
Wine Keg Neck
Wine Keg
the Wine
Line Tube
to Gas
Connect to
Line
Connect
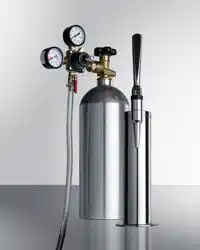
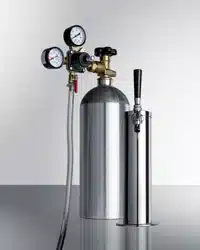
Attaching the Fully Assembled D-Coupler to the Beer Keg:
1. Attach the D-couplers to their respective keg pull the handle out and down until
it clicks securely. There will be an audible click, indicating that the gas and keg
have been opened and is successfully tapped. (See Figure 4)
2. Position the shut-off lever on the gas line in the downward position to allow the
gas to flow. (see image on top right)
HANDLE CAREFULLY. Do not jostle or bang keg on the gas canister.
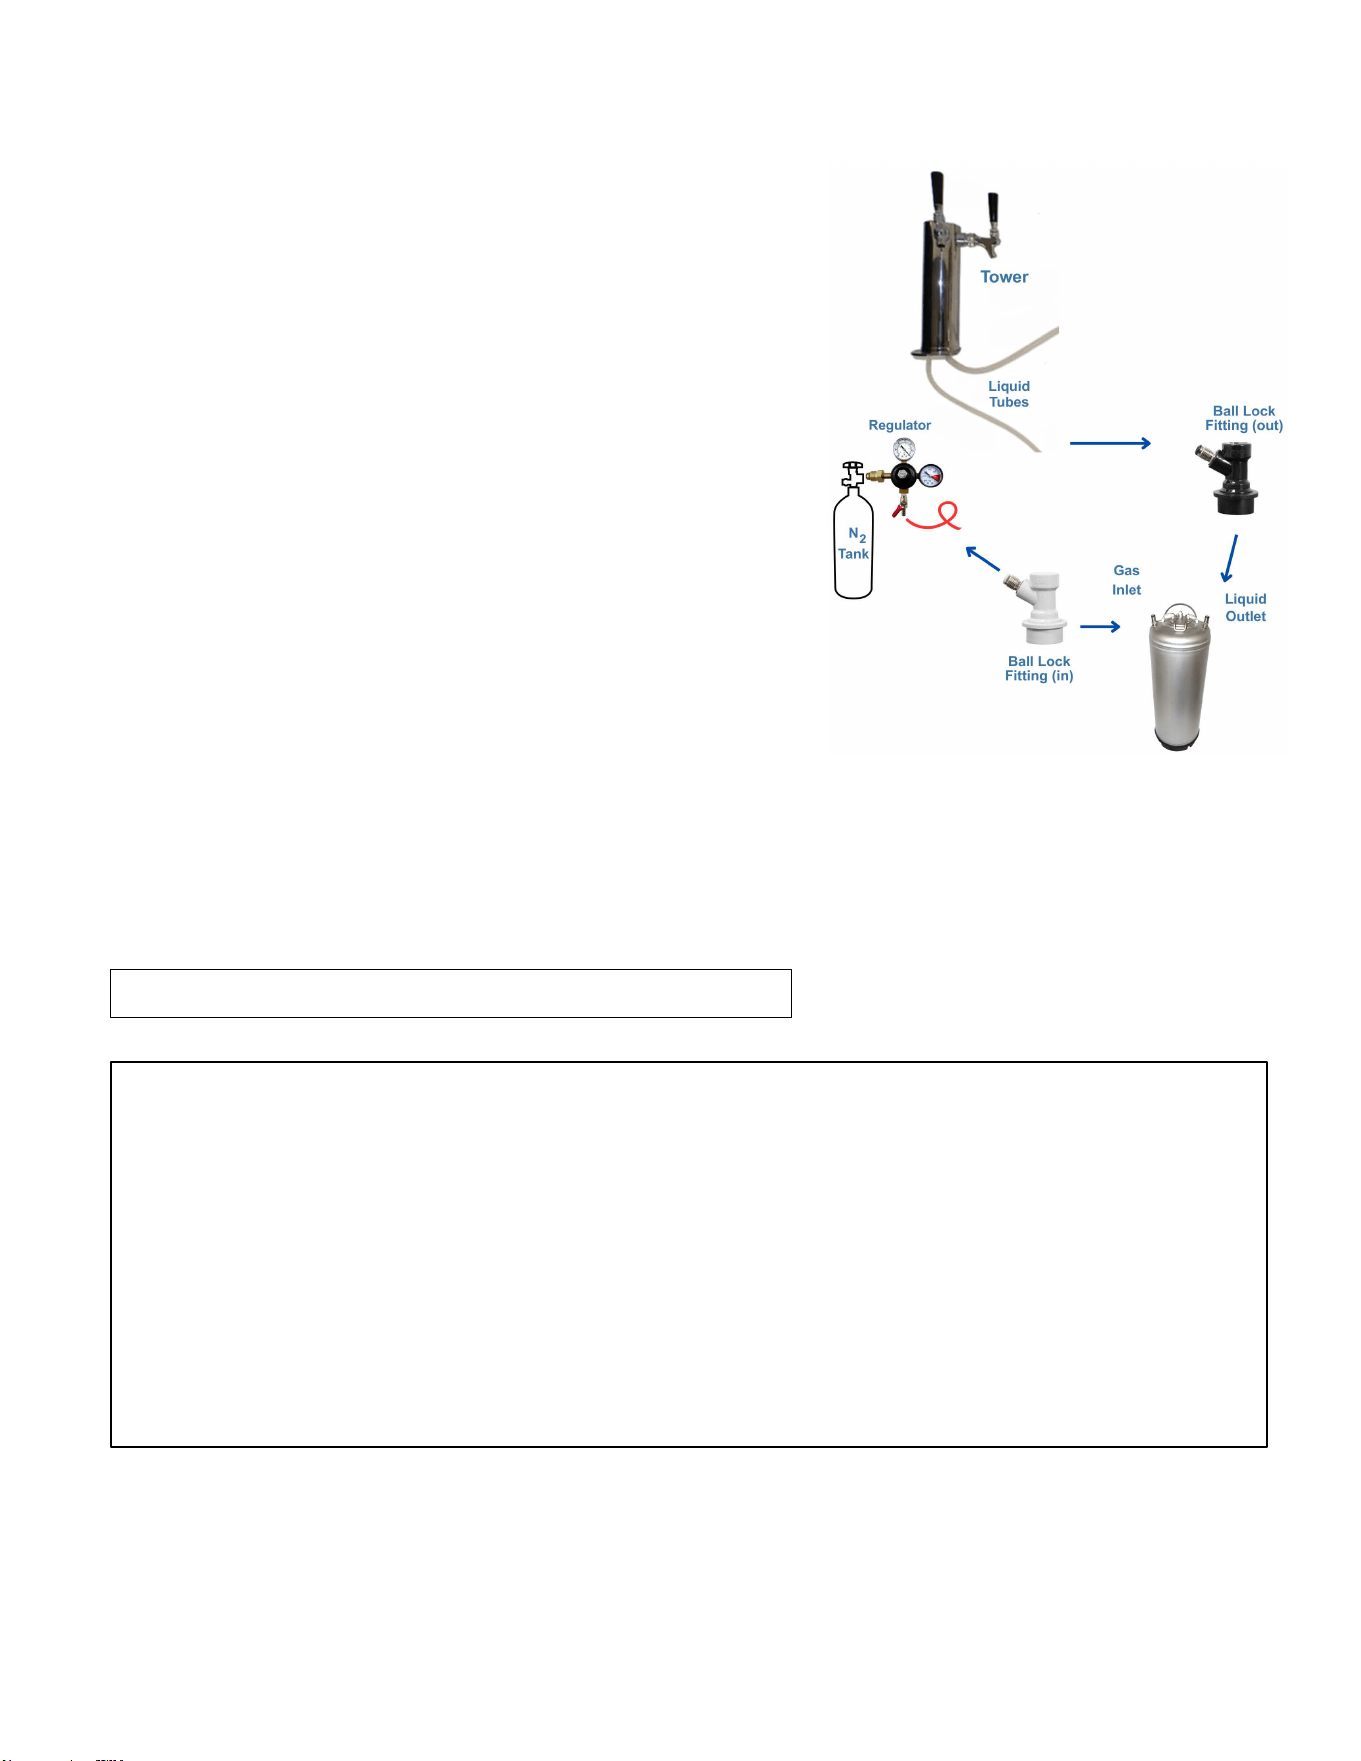
Installing the N
2
Regulator to the N
2
Tank:
1.
Ensure the tower dispenser is closed.
2.
Ensure the N
2
tank is full.
(All gas tanks are shipped empty.)
3.
Screw the N
2
regulator on to the N
2
tank valve. Use an
adjustable wrench to tighten the nut securely to prevent gas leaks.
4.
Connect the N₂ gas line by firmly pressing the ball lock fitting
onto the keg’s gas inlet until it clicks into place.
5.
Connect the coffee line from the tower to the keg by firmly
pressing the ball lock fitting onto the keg’s liquid outlet until it
clicks into place.
6.
Open the gas tank valves fully to check for leaks by turning the
knob counterclockwise.
7.
Set the N₂ output pressure to 4–8 psi for flat coffee.
8.
Lock the regulator setting by tightening the locknut on the
pressure screw.
Attach the CO
2
/N
2
Tank to the Unit:
May vary by tank
1.
Remove the bolt with the nut from the tank retainer. Using two screws, attach it inside the unit on the left side
of the back wall. Holes are pre-drilled, and screws are included.
2.
Slide the tank through the retainer and secure it with the bolt and the nut. Position the tank this way so that
you will
be able to read the numbers on the gauges and easily access the shut-off valve.
To order replacement parts, visit our website: summitapplianceparts.com
Summit Appliance Division · Felix Storch, Inc. · www.summitappliance.com · 718-893-3900 · [email protected]
Note: If serving nitro-infused coffee,
agitate the keg before serving.
Note:
•
These taps are designed for dispensing coffee and should not be used for milk or any other substance.
•
When replacing your keg, first turn off the safety switch on the CO
2
& N
2
regulator valve and remove the coupler to take out
the keg.
•
When replacing the CO
2
& N
2
gas tanks, remember to turn off the main switch of both
gas tanks and the safety switch on the
regulator valves. Afterward, use a wrench to loosen the hexagonal nut
port connecting the regulator valve with the gas tanks.
Then, use a wrench to remove the fixed bolt securing the gas tank, and carefully remove the tank.
•
During the installation process, be sure that all parts are connected tightly and that there are no gas leaks.
•
When connecting the hose to the connection port, you can dip the ends into warm water to make the connection
easier.
•
If the high-pressure compressed gas in the CO
2
& N
2
gas tanks are not handled properly, it could be dangerous if not handled
properly.
•
Make a note of the D.O.T. testing date on the tank's neck before installation. If it is
more than 5 years old, do not use the product.
Return it to the gas supplier.
•
Keep gas tanks away from heat sources. Unused cylinders should be placed upright in a cool, ventilated place
(preferably at 70°F).