INSTRUCTION MANUAL
READ ALL INSTRUCTIONS BEFORE USING
Support Email:help@coomotech.com
Support Phone: (213)516-2282

safety information ................................................................... 1
Quick introduction ................................................................... 4
Installation and setup ..............................................................5
Installation requirements .........................................................5
Prepare for use .......................................................................6
Connect to water and drainage pipe ...................................... 6
Understanding the display ...................................................... 7
Clean and care ..................................................................... 10
Common malfunction analysis .............................................. 11
RoHS .................................................................................... 13
1
IMPORTANT SAFETY INFORMATION READ ALL INSTRUCTIONS BEFORE USING
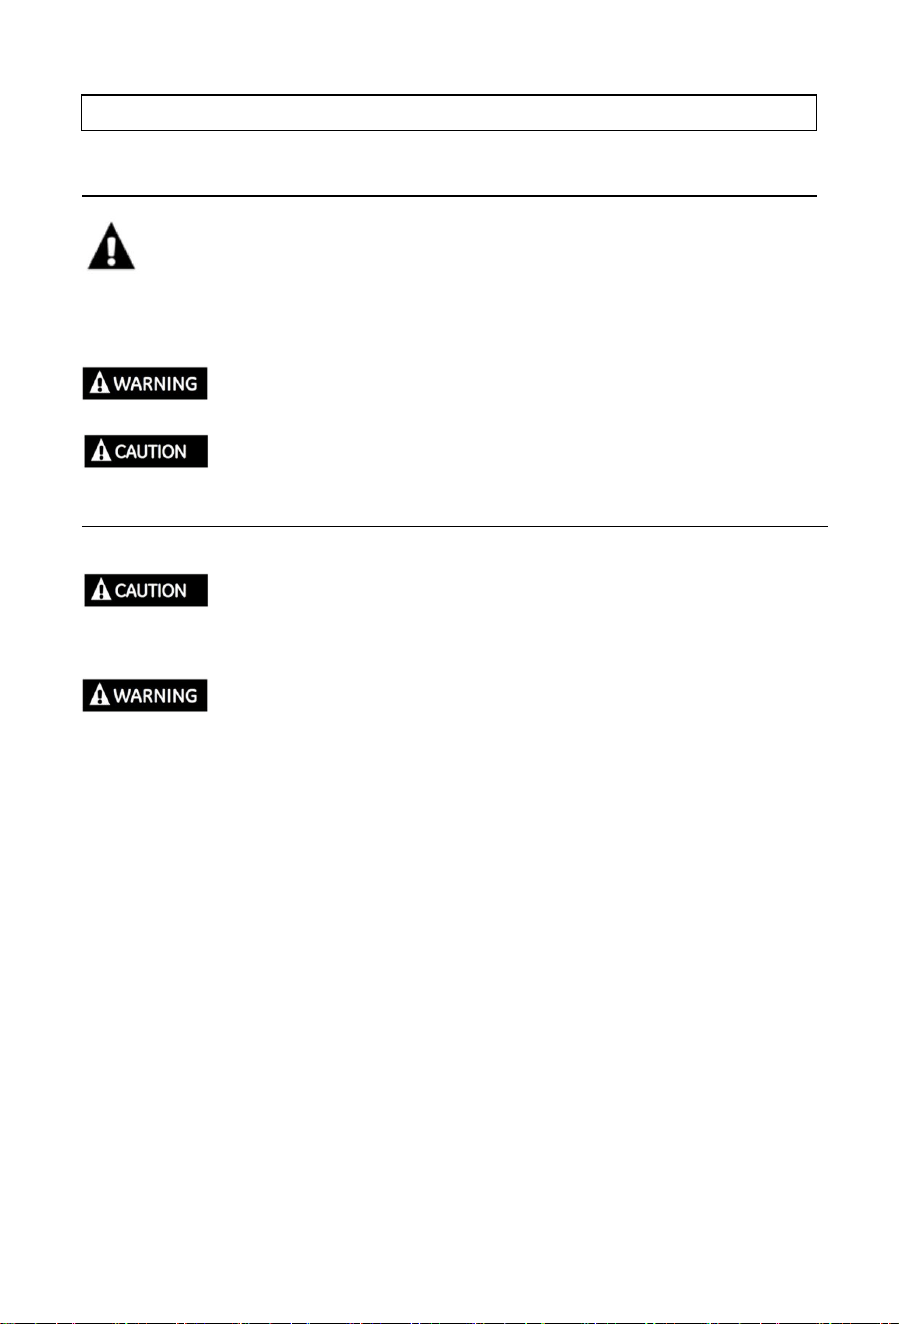
SAFETY INFORMATION
This is the safety alert symbol. This symbol alerts you to potential
hazards that can kill or hurt you and others. All safety messages will
follow the safety alert symbol and the word “WARNING” or
“CAUTION”. These words are defined as:
Indicates a hazardous situation which, if not avoided,
could result in death or serious injury.
Indicates a hazardous situation which, if not avoided,
could result in minor or moderate injury.
ICE CAN’T BE STORED IN THE ICE BIN DURING
NIGHT TIME, IT’S NOT FRIDGE, ICE WILL BE MELTED
INTO WATER AND FLOW OUT OF THE MACHINE.
To reduce the risk of fire, explosion, electric shock,
exposure to UV radiation, or injury when using your ice
maker, follow these basic safety precautions:
●This product must be properly installed and located in accordance with
the Installation instructions before it is used.
●When using electrical appliances,basic safety precautions should be
followed to reduce the risk of fire,electric shock and injury to persons or
property. Read all instructions before using any appliance.
●High humidity environment will increase the risk of short circuit or electric
shock. If in doubt, please cut off the power supply of the ice maker.
●Do not exceed power outlet ratings. It is recommended that the ice maker
is connected to its own circuit. Use only standard electrical supply that is
properly grounded in accordance with the National Electric Code and local
codes and ordinances.
●If the ice maker is brought indoors from outdoors during the
wintertime,give it a few hours to warm up to room temperature before

2
plugging to power source.
●Do not store explosives, such as combustion-supporting sprays in the
appliance.
●The machine is intended to be used in household and similar applications
such as:
-kitchen areas in shops,offices and other working environments;
-farm houses
-by clients in hotels,motels and other residential type environments;
-Catering industry and similar non-retail industry.
●Children and disabled people must be supervised to use this machine
●Avoid direct sunlight and make sure that The machine should be used in
the household and without obstacles surrounded, good ventilation
place.There is must be 50cm at least between the four sides of the
machine with the wall.
●Do not tip the machine over.
●We do not recommend the use of an extension cord,as it may overheat
and become a risk of fire.
●Don’t use any liquid other than water in the unit to make the ice.
●Do not store or use flammable vapors or liquids near this product.
● Do not allow children to climb, stand or hang on the ice maker. They
could seriously injure themselves.
● Do not use with water that is microbiologically unsafe or of unknown
quality.
● To avoid risk of injury, place power cord in such a way it cannot be pulled
on by children or cause a tripping hazard.
● Place power cord in such a way that it is not in contact with hot surfaces.
● Do not operate if any component, including the cord or plug, is damaged.
● Unplug the product before cleaning or repairing, and when not in use.
(Note: If the machine needs repair, it is strongly recommended that it be
operated by professionals.)
● Do not immerse any part of the product in water.
● Do not plug or unplug product with wet hands.

3
● Do not place the power cord on carpet or other heat sources
● Do not attempt to disassemble, repair, modify, or replace any part of your
product.
● Use this product only for its intended purpose as described in this user
manual.
● If the power cord is damaged, it must be replaced by the manufacturer or
similar professionals in order to avoid danger.
● Do not use any accessories not recommended by the manufacturer.
● The foaming materials inside is combustible which must be kept away
from fire.
● It’s forbidden to pull the cable to unplug the plug,pull the plug is a must.
● Except for the method recommended by the manufacturer, no
mechanical tools or other methods shall be used to accelerate the
defrosting process. Do not damage the refrigeration circuit.
●There are high-pressure, flammable and explosive refrigerants in the
compressor. Do not damage the refrigeration system. Care or repair should
be carried out by professionals. Be especially careful when installing and
transporting.
●There are heat insulation materials in the ice maker, which are
combustible materials, and must be kept away from fire sources. Repairs
must be carried out by the manufacturer or professionals. Scrap must be
disposed of by the designated recycling department.
4
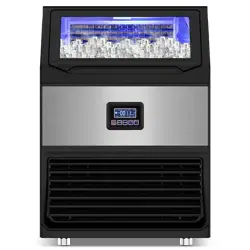
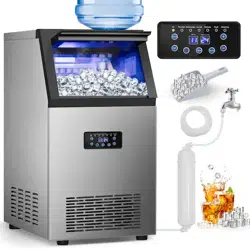
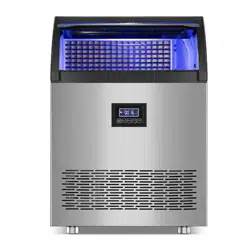
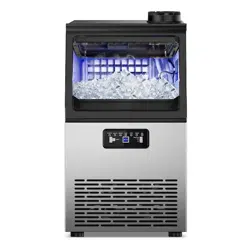
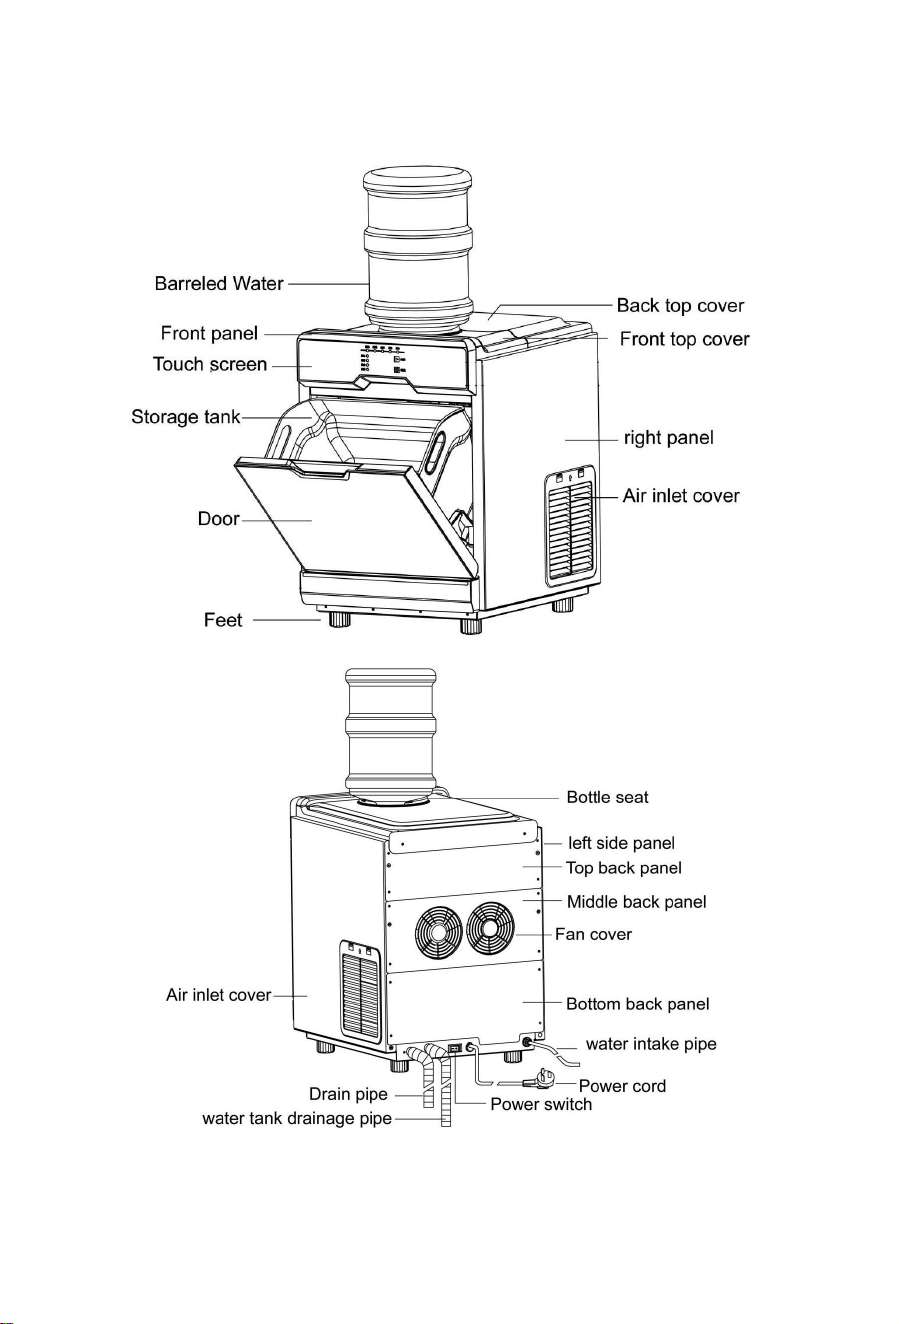
Quick introduction
5
Installation and setup
Caution: Installation must be installed by professionals.
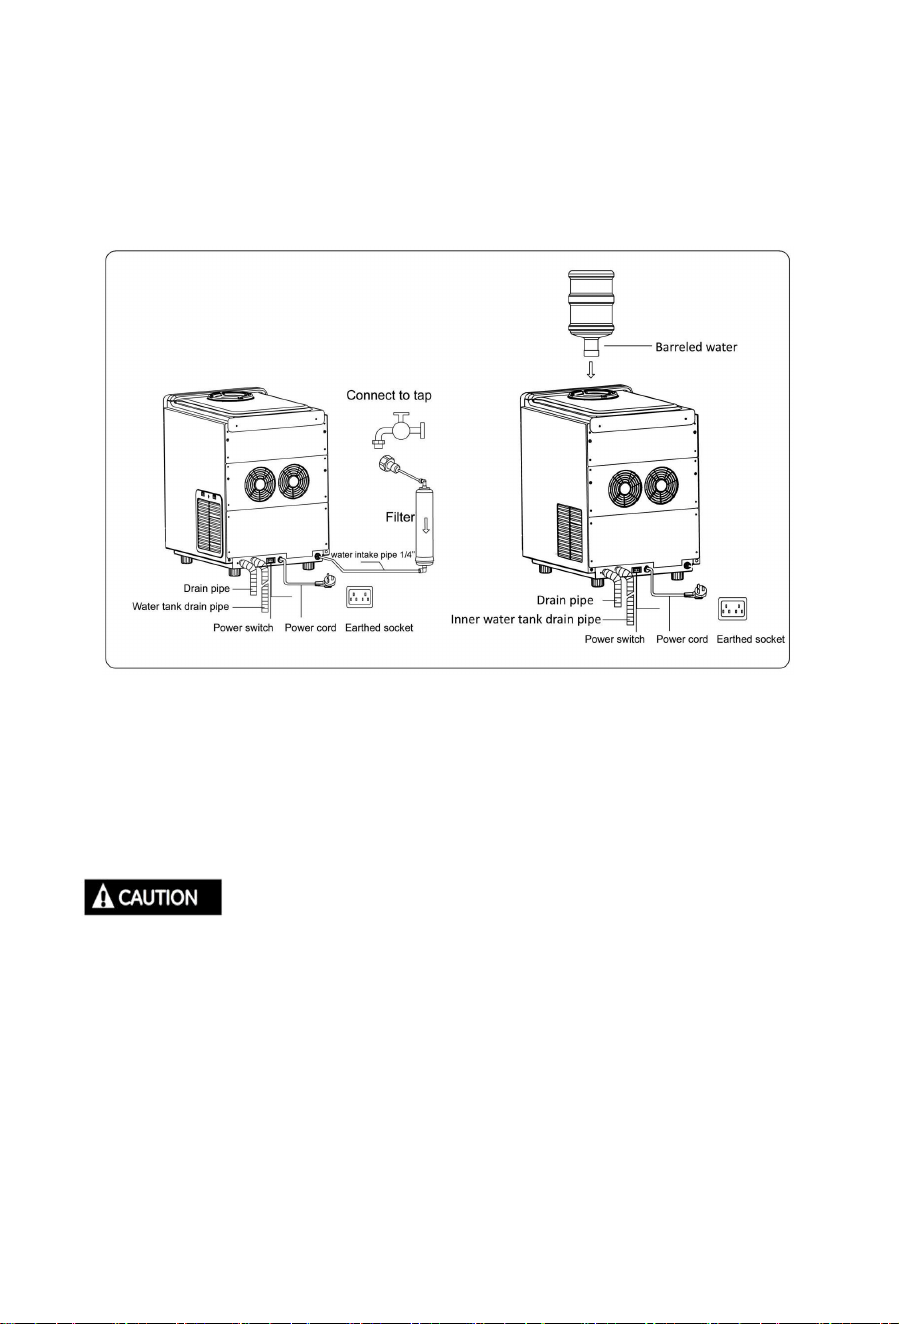
You can choose your preferred ways of adding water:
Tap water or Barreled water
Warning:
The drain of inner tank must be always connected to a container or sewer.
The drain of internal water tank must be plugged during working time.
Installation requirements
Lifting Hazard: It is recommended to have two people
move and install the ice maker in order to prevent injury.
Product is designed to be installed indoors. Do not use your ice maker
outdoors.
■ Product must be installed upright on a flat, level surface that is able to
support the total weight when full of water.
■ Ensure a minimum of 50cm clearance around the side and back walls of
the ice maker for proper air circulation.
■ Install the product in a well-ventilated area with an ambient temperature
between 3℃ and 40℃.

6
■ Do not place the product near heat sources such as ovens or cook tops.
■ Do not place the product in direct sunlight or rain.
■ Do not place any stuff on the top of the machine.
Prepare for use
1.Carefully remove packing material. Do not use sharp tools that can
damage the ice maker.
2. Ensure all components are present.
(An assembled filter, two drainage pipes and a spoon is a standard on the
machine.)
3. Place the ice maker upright on a flat, level surface and plug it in.
4. Clean the ice maker before first use.
Connect to water and drainage pipe
It must be connected to the filter. If there is a problem caused by the tap
water without a filter, our company will not bear the cost of repairing.
The water supply pressure should be 0.1-0.4MPa; if the
pressure is greater than 0.4MPa, a pressure reducing
valve is required.
Use tap water as water source
The filter you received is assembled, plug the water intake pipe firmly into
the connector at the back of the machine until you can’t insert it anymore,
and the other side connects to the water tap.
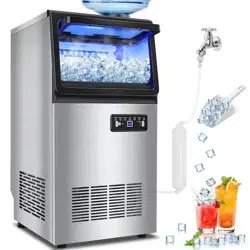
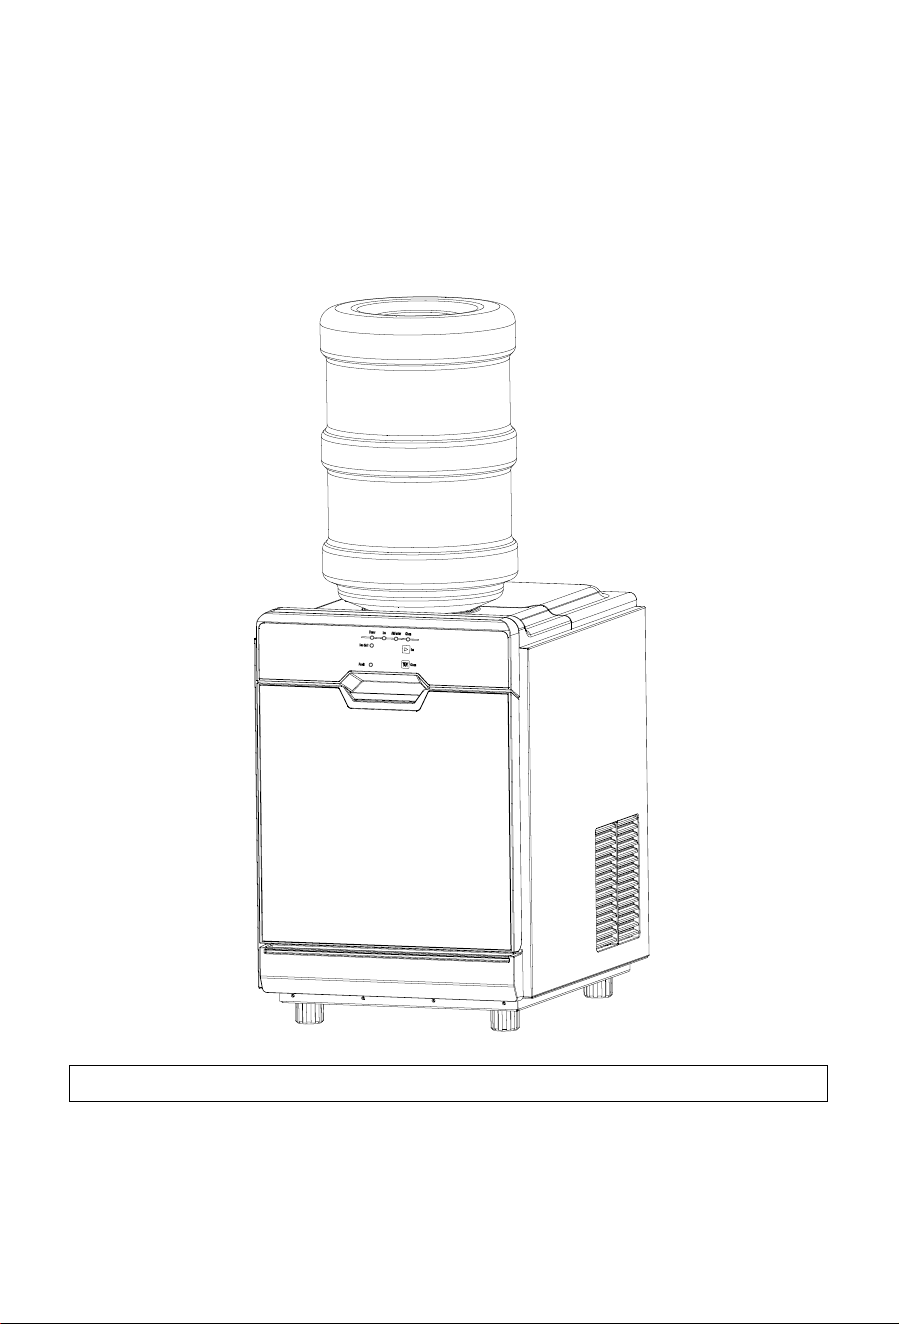
Use bottle water as water source
Take the dust cover away and put the bottle water on the bottle seat.
Drain:Connect one end to the waterspout at the back of the machine, and
lay them down to drain into a sink or bucket that is below the level of the ice
maker.
Note: The drain pipe must be below the level of the ice maker.
The drain pipe must be inserted into a sink or bucket, or else,the
water may leak to floor !
7
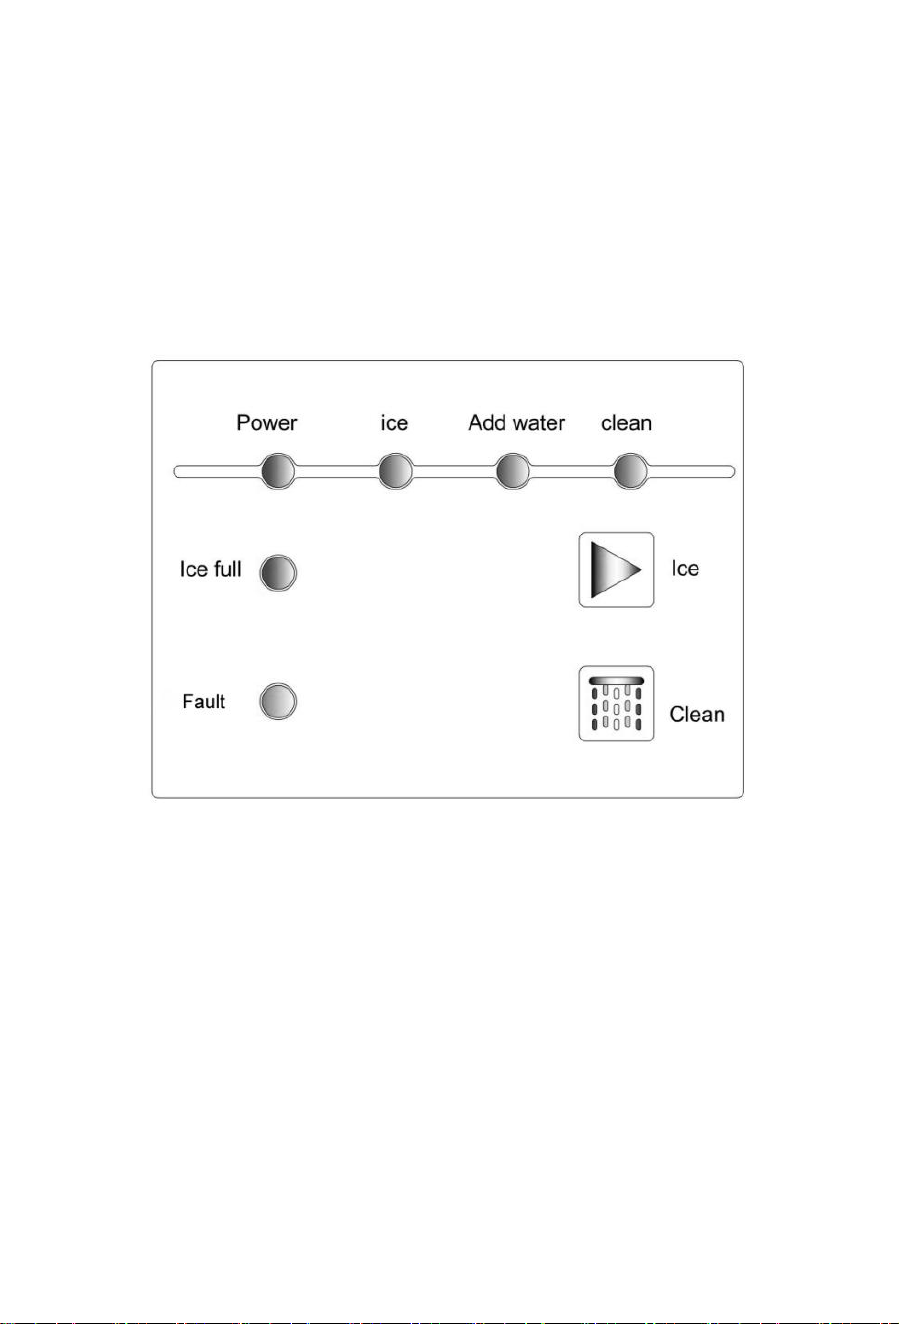
Understanding the display
Please make sure:
1.The tap is on or there is water in the bottle.
2.The drain pipe was inserted into sink or bucket
3.The machine is power on.
2.Touch screen:
(1)Power on:Turn on the power switch at the back of the machine to make
the machine enter standby mode and the power indicator flashes
(2)Choose “ice”or ”Clean” function under standby mode,corresponding
indicator will flash.
(3)Ice : Press “Ice” to start the machine,the ice indicator will be always
on,and water will flow to the inner tank through non-pressure valve if bottle
water,pressure valve if tap water,the compressor start to work,it will take
around 15min (21℃)for the first cycle.
(4)Turn off the machine: Hold on “ice”icon for 3 seconds to make the
machine enter to standby mode.
(5)Clean: Press the clean button to make the machine enter a clean mode
8
for about 5 min. After finishing, unplug the plugin the inner tank make the
water flow out and dry the tank, insert the plug back.
Note: (1)Clean mode and ice mode can’t be operated at the same time.
(2)Insert the drain pipe to sink or bucket before draining.
(6)Ice full:As infrared rays detected no ice fall over 2 min, the machine will
stop and the “ice full” indicator will be on, the machine will restart to work as
you take some ice out or after the ice melt
(7)fault:If no ice fall over 30min for the first cycle, the machine will stop
and fault indicator will be on.
During the normal working time,if no ice fall over 5 min, the machine will
stop working and the “Fault” indicator will be on.
Warning: :The ice machine is used to make and storage ice,please
follow the below principles:
(1)Wash your hands and take ice by the spoon.
(2)Do not store others except ice in the ice bin.
(3)Keep the ice bin and spoon clean,close the door after you take ice.
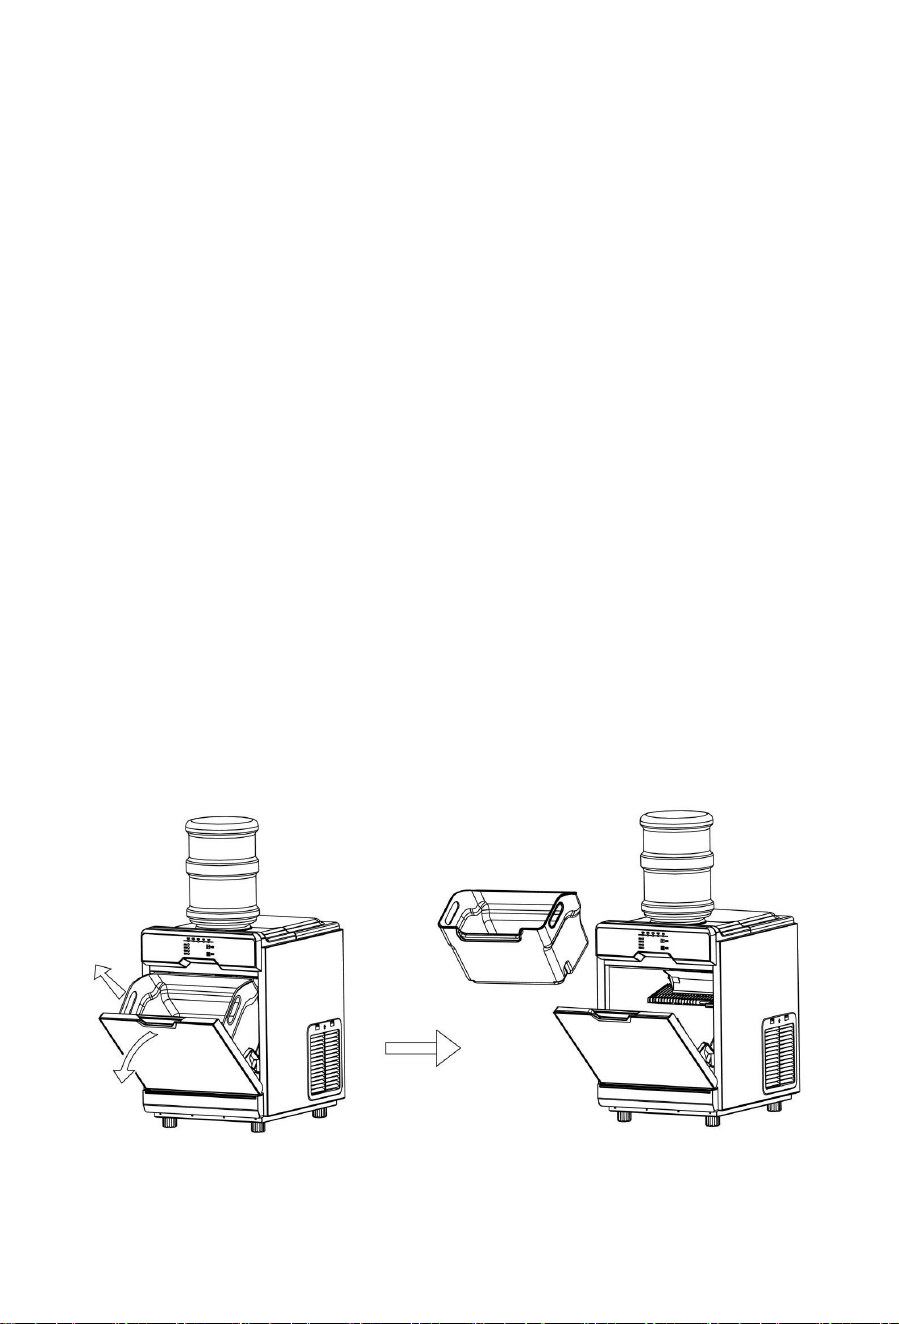
Open the door and take the ice basket out.
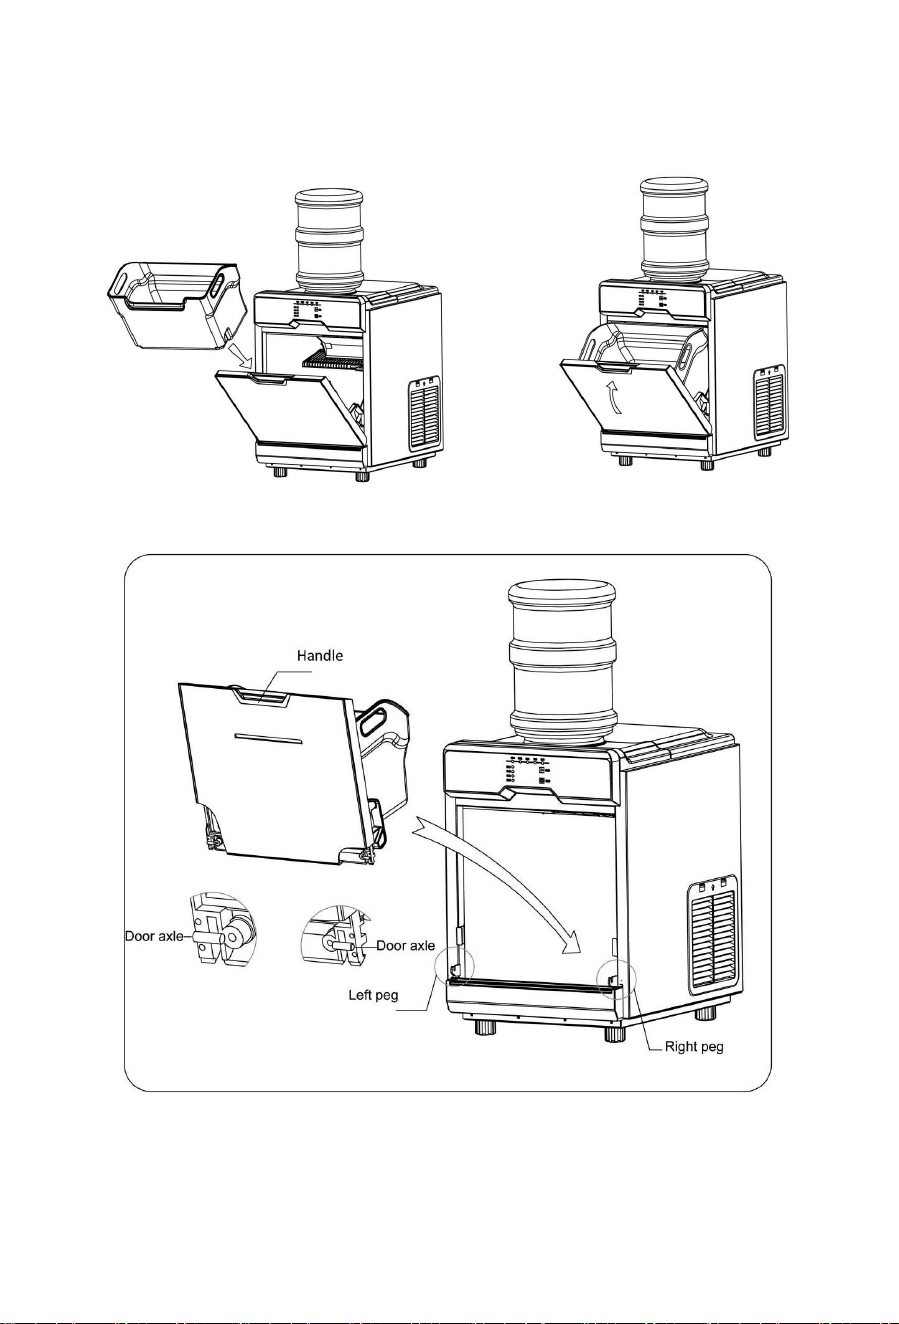
9
Return the ice basket back and close the door.
3.Install the door
(1)Aim to the two pegs to install the door.
(2)Open the door slightly and lift it in an upright position to disassemble the
door.

10
Clean and care
1. For long time storage
a) Power off the machine and pull the plug.
b) Turn off the faucet and remove the inlet pipe
c) Take out all the ice,drain the water inside
d) Dry the ice bin and interior.
2. Daily cleaning
This machine is the extrusion ice maker. During the working time, more and
more scales will precipitate in the water tank. If it is not cleaned in time, it
will cause malfunctions. Generally, it needs to be cleaned once a week.
Take all nugget ice out, add 10% edible citric acid to the water tank during
cleaning, touch the clean icon, it will take about 5min to finish the clean
procedure, and then repeatedly rinse with fresh water before using.
3. Clean interior
NOTE: Pull the plug before cleaning or maintaining
To make the machine work normally, check and clean condenser
annually.
Don’t use alcohol to clean the in-wall of the machine,it will break the
plastic materials.
a)Outside
Clean the outside with detergent weekly
b)Ice spoon (weekly)
Immerse the spoon into detergent water for at least 3 min
c)Ice storage (weekly)
Open the door and take all ice out.
Clean the ice bin and in-wall with detergent then rinse it with water.
11
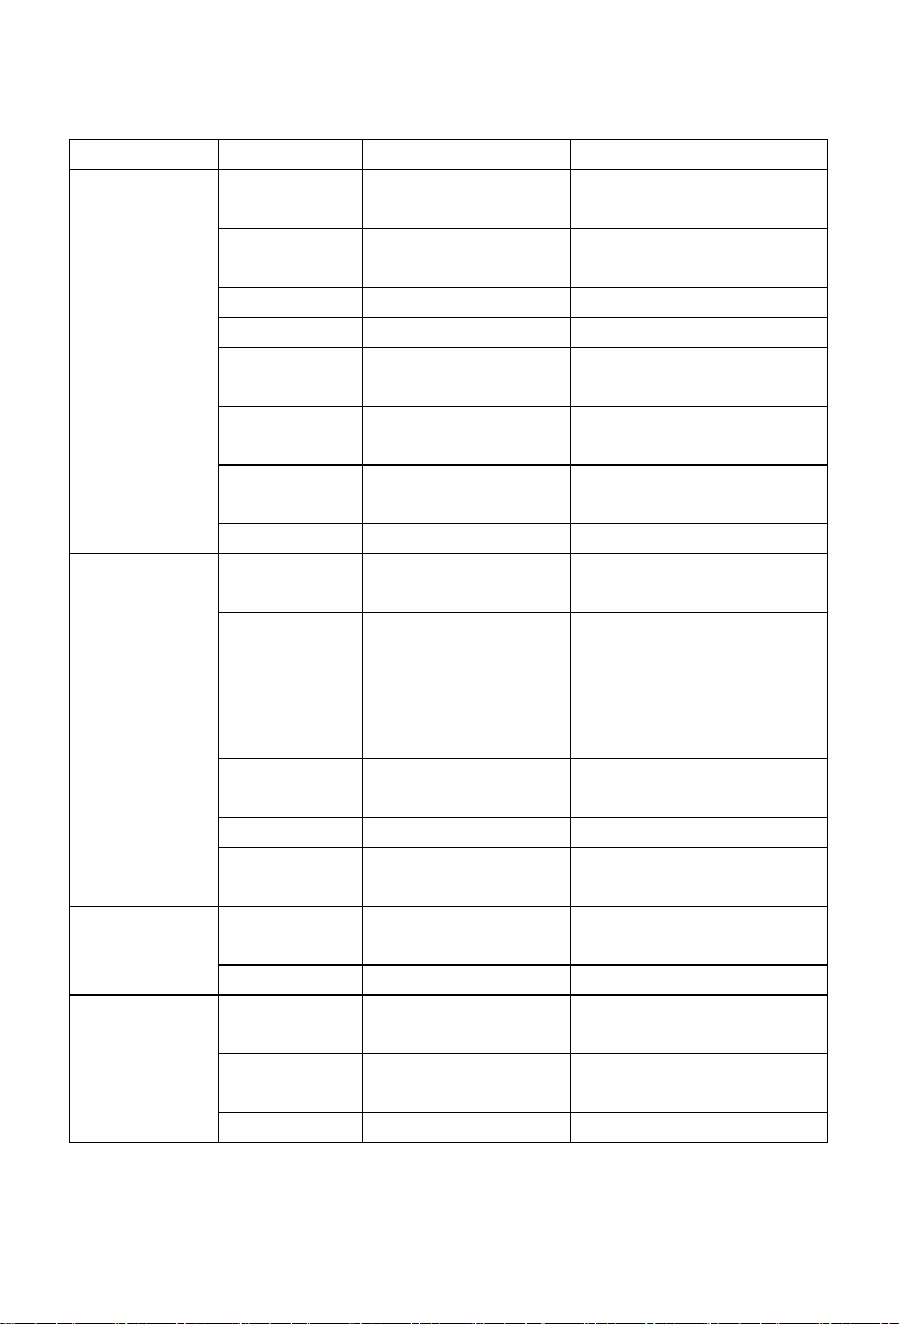
Common malfunction analysis
Issues
Check items
Possible causes
Solutions
The machine
doesn’t work
Power cord
The plug didn’t plug
into socket
Plug into socket
The fuse of
PCB
The fuse is broken
Replace the fuse
PCB
Broken
Replace the PCB
Ice full
Ice full
Take out some ice
Proximity
switch
Proximity switch is
broken
Replace the proximity
switch
Power supply
No power or lower
voltage
Contact power supply
bureau
Water supply
No water or water
pressure is low
Check water source and
its pressure
Inlet valve
Inlet valve is broken
Replace the inlet valve
Compressor
didn’t work or
stop working
suddenly
Power supply
No power or lower
voltage
Contact power supply
bureau
Air inlet is
congested
Ensure that the
machine’s
surrounding space of
at least 50 cm of
clear of any objects
Air inlet is congested
Condenser
Too much dust
covered
Clean the condenser
Refrigerant
Refrigerant leaked
Contact after sales service
compressor
Connection wire is
broken off
Contact after sales service
No water in
the water tank
Water supply
No water or water
pressure is low
Check water source and
its pressure
Inlet valve
Inlet valve is broken
Replace the inlet valve
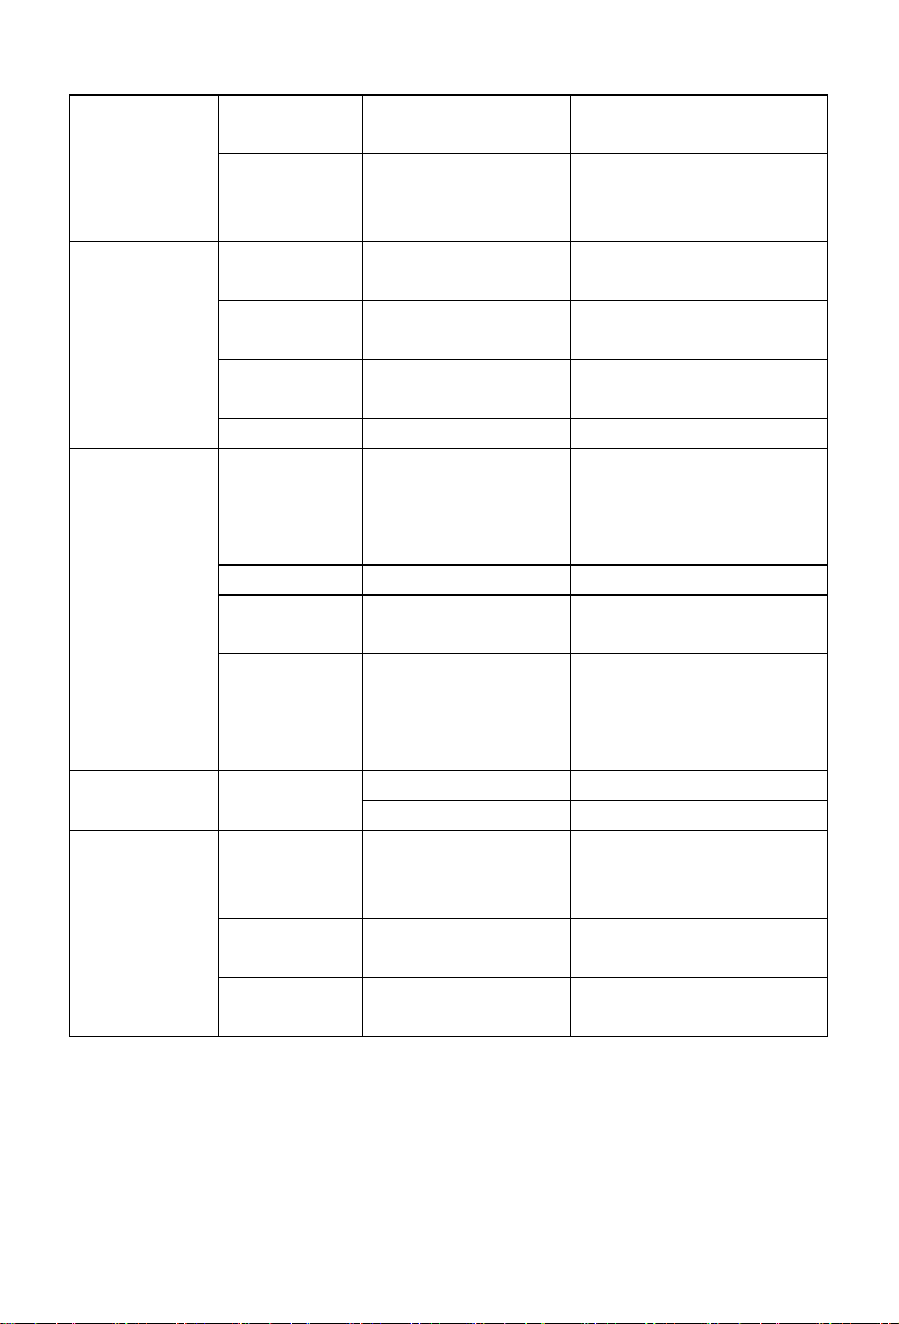
Water leakage
Water inlet
Water inlet is
loosened
Re-tightened the water
pipe
Drain pipe
Didn’t connect to
drain pipe or sewer
Connect to drain pipe or
sewer
Float
Jammed or broken
Adjust or replace
12
Stoppage
indicator is on
No ice during
15min
Refrigeration system
Contact after sales service
There are ice
fall into the
ice basket
Infrared ray is broken
Contact after sales service
Take too long
to make ice
Water
pressure
Lower water
pressure
Check the water source
Water
temperature
Water temperature is
high
Change to a water source
of lower temperature
Ambient
temperature
Ambient temperature
is too high or too low
Change to a place of lower
temperature
Refrigerant
Refrigerant leakage
Contact the after sales
Productions of
ice cubes is
low and the
cube ice is too
thin
Condenser
Too much dust
covered causes bad
ventilation,,will take
too long to make ice
Clean the condenser
Water pump
Water pump broken
Replace a water pump
Ambient
temperature
Ambient temperature
is relative high
Change to a place of lower
temperature
Air inlet
Air inlet is congested
Ensure that the machine’s
surrounding space of at
least 50cm is clear of any
objects
Add water
indicator is on
Water tank
No water inside
Check the water supply
Water in the tank
Check the float
Noise
Condenser
The sound of the fan
scrapes against
condenser
Contact the after sales
Valve
It worked too long for
single time
Restart the machine after
the solenoid valve cool off
Evaporator
In the beginning of
making ice
Normal
13
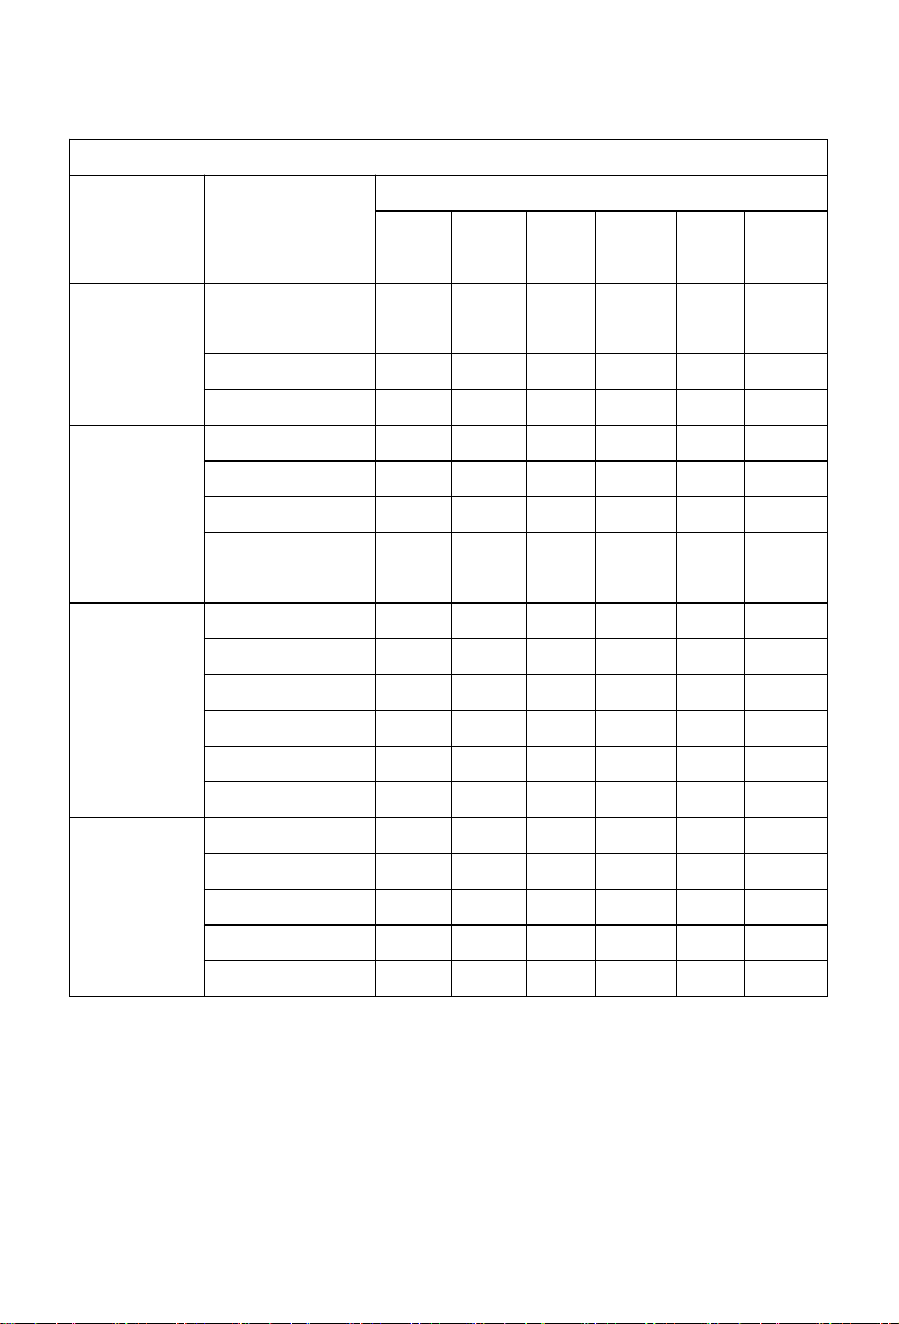
RoHS
Nugget ice maker
Category
Accessories
Harmful substance
Pb
Hg
Cd
Cr(VI)
PBB
PBDE
Hardware
Refrigeration
Component
○
○
○
○
○
○
Screws
○
○
○
○
○
○
Sheet metal
○
○
○
○
○
○
Electricity
Component
Fan component
○
○
○
○
○
○
Power cord
○
○
○
○
○
○
PCB
×
×
×
○
○
○
Compressor
component
○
○
○
○
○
○
Plastic
injection
Plastic panels
○
○
○
○
×
×
Water tank
○
○
○
○
○
○
Inner shaft
○
○
○
○
○
○
Feet
○
○
○
○
○
○
Ties
○
○
○
○
○
○
Silicon gel plugs
○
○
○
○
○
○
Wrapping
Carton
○
○
○
○
○
○
Foam
○
○
○
○
○
○
PE bag
○
○
○
○
○
○
Labels
○
○
○
○
○
○
Manual
○
○
○
○
○
○

Support Email:help@coomotech.com
Support Phone: (213)516-2282