OWNER’S MANUAL AND OPERATING INSTRUCTIONS
WARNING: SAVE THIS MANUAL FOR FUTURE REFERENCE
This manual contains important information regarding safety. Operation,
maintenance and storage of this product. Before use, read carefully and
understand all cautions, warnings, instructions and product labels. Failure
to do so could result in serious personal injury and/or property damage.
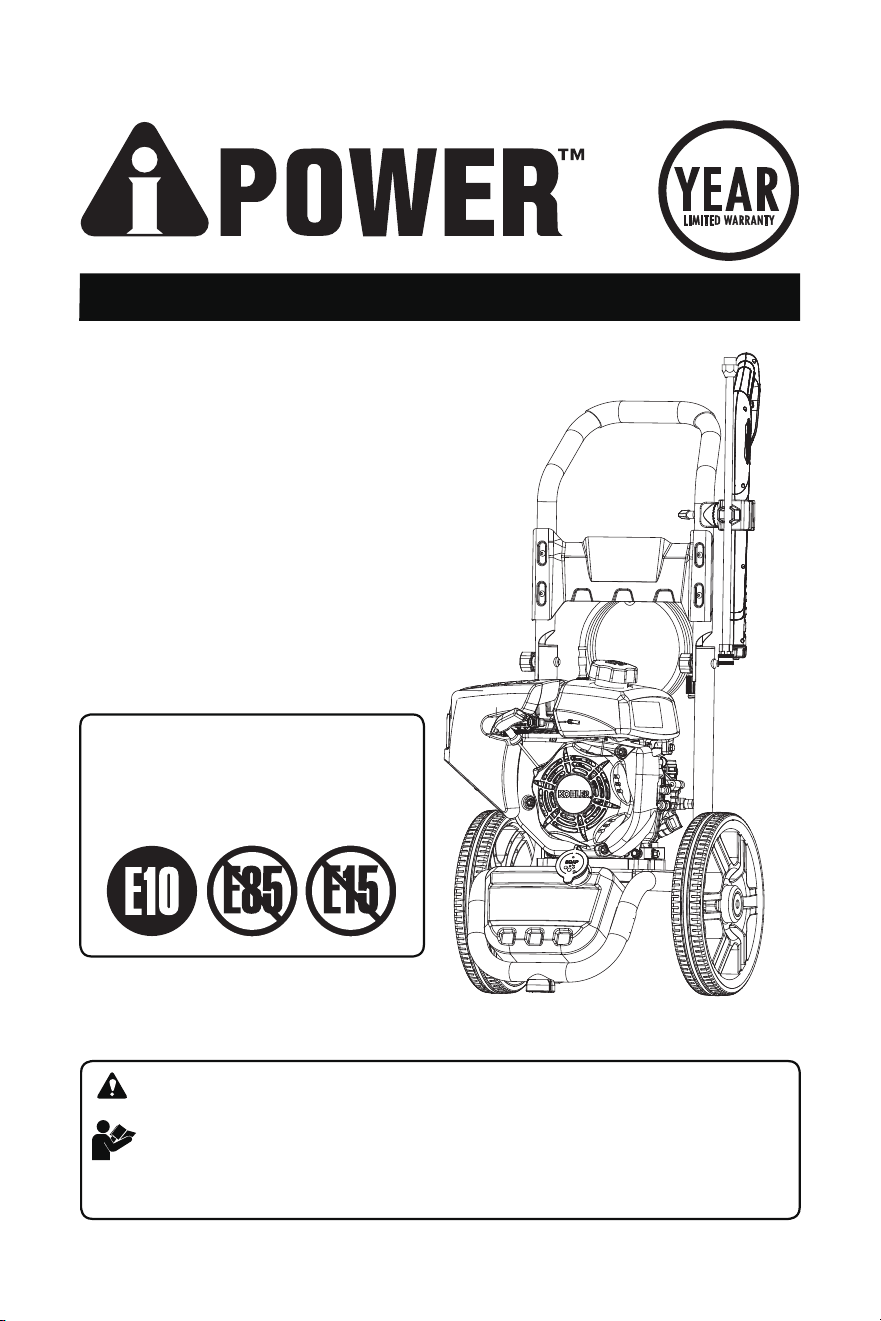
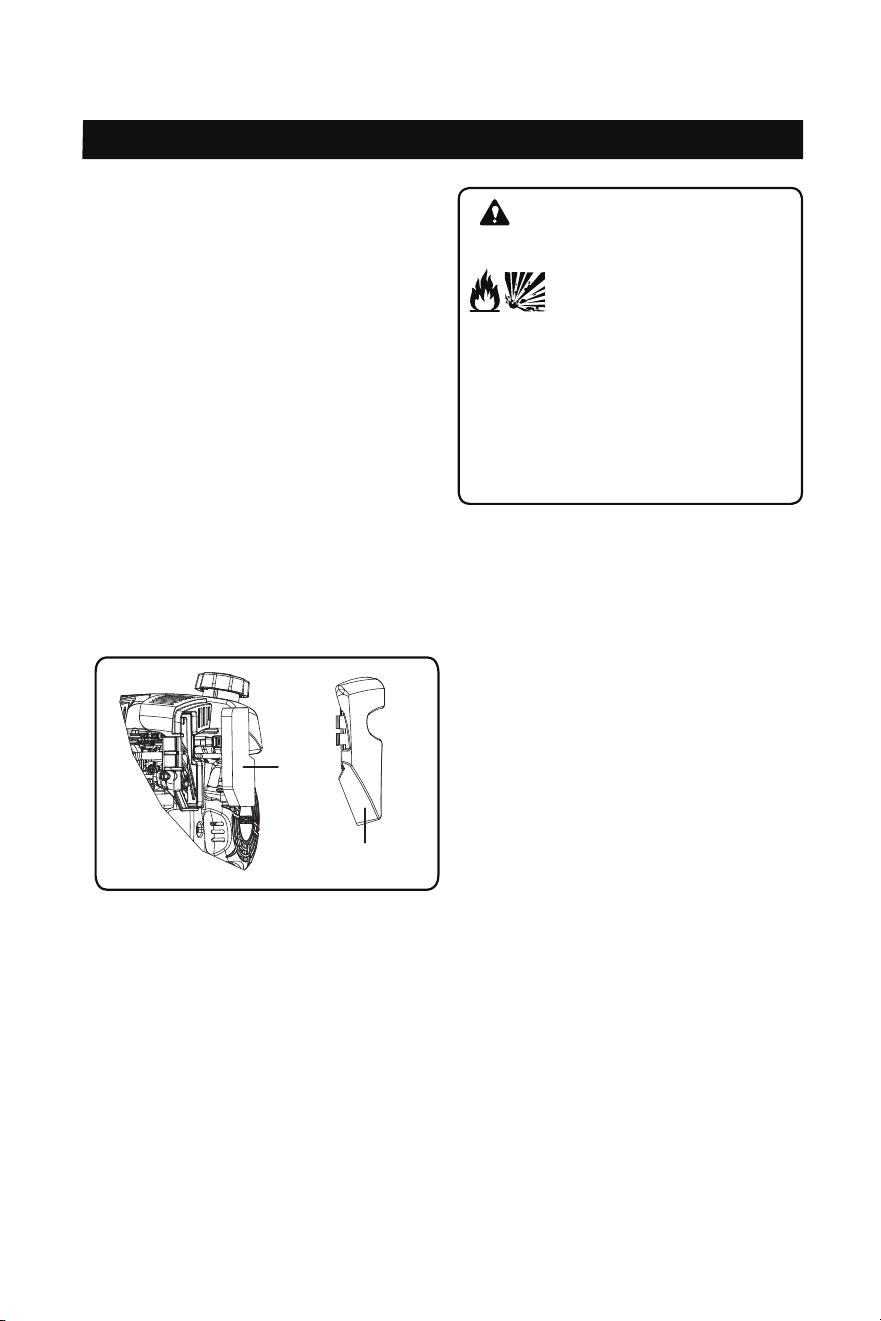
NOTICE: Do not use E85 or E15 fuel
in this product. It can damage the
engine and void your warranty. Only use
unleaded gasoline containing up to 10%
ethanol.
CUSTOMER SERVICE: 1-855-888-3598
Visit Our Website at: www.a-ipower.com
Email Our Technical Support at:
support@a-ipower.com
A-iPower Corp.
Fontana, CA 92337 USA
www.a-ipower.com
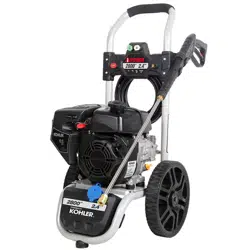
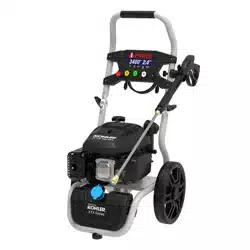
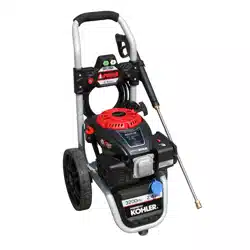
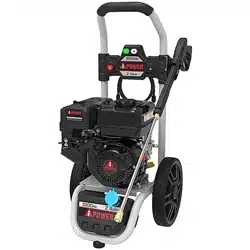
GAS PRESSURE WASHER
3200 PSI, 2.4 GPM
Model: APW3201KH
REV: 00
3

TABLE OF CONTENTS
FOR TECHNICAL QUESTIONS, PLEASE CALL 1-855-888-3598
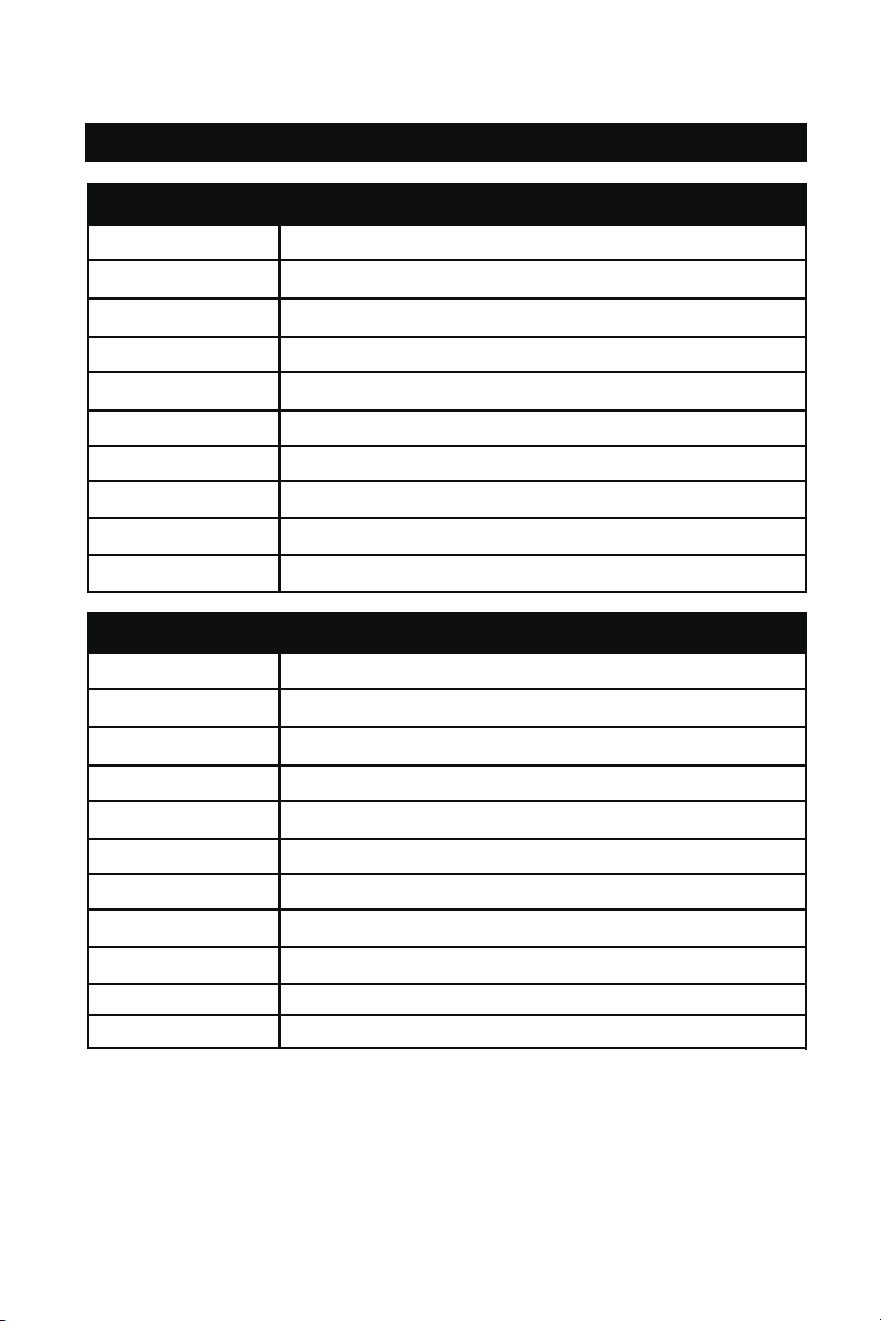
PRODUCT SPECIFICATIONS ........................................................................................... 1
SAFETY
Safety Symbols and Meanings ........................................................................................... 2
Operating Instructions and Precautions ............................................................................. 3
SET UP
Know Your Pressure Washer .............................................................................................. 9
Assembly .......................................................................................................................... 10
General Information .......................................................................................................... 11
OPERATION
Pre-start Checks ............................................................................................................... 13
Starting Engine ................................................................................................................. 15
Pressure Washer Operation ............................................................................................. 16
Stopping Engine and Pressure Washer ........................................................................... 19
High Altitude Operation..................................................................................................... 19
MAINTENANCE
Engine Maintenance Schedule ......................................................................................... 20
Pump Maintenance........................................................................................................... 21
Cleaning Pressure Washer ............................................................................................... 21
Changing Engine Oil......................................................................................................... 21
Adding Engine Oil ............................................................................................................. 22
Spark Plug Maintenance .................................................................................................. 22
Air Filter Maintenance....................................................................................................... 23
Long-term Storage............................................................................................................ 23
Trouble Shooting .............................................................................................................. 25
PARTS LIST AND DIAGRAM
General Assembly Diagram .............................................................................................. 29
General Parts List ............................................................................................................. 30
WARRANTY
Warranty............................................................................................................................ 31
PRODUCT SPECIFICATIONS 1
FOR TECHNICAL QUESTIONS, PLEASE CALL 1-855-888-3598
NOTICE:
without notice for further improvements of products.
We are always working to improve our products. Therefore, final product may
vary from images shown. A-iPower reserves the right to change features, specifications
PRESSURE WASHER SPECIFICATIONS
Model APW3201KH
Pump Axial Maintenance Free
Drive Horizontal Shaft Direct
MAX Pressure 3200 PSI
MAX Flow 2.4 GPM
Hose 1/4 x 30ft - M22
Wand 1/4 Q/C x 21inch
Nozzle Selectio
Wheel
Handle
n 7 in 1 Nozzle and Turbo Nozzle
Never Flat 12.0"
Folding
ENGINE SPECIFICATIONS
Model KOHLER RH265
Displacement 196cc
Engine Type Single Cylinder 4-Stroke OHV
Cooling System Air Cooled
Oil System Splash Lubrication
Fuel Type 87+ Octane Unleaded Gasoline
Fuel Capacity 0.55 Gallon (2.1 Liter)
Engine Oil Type 10W-30
Engine Oil Capacity 0.6 Quart (0.6 Liter)
Soap Tank Capacity 0.6 Gallon
Certifications EPA
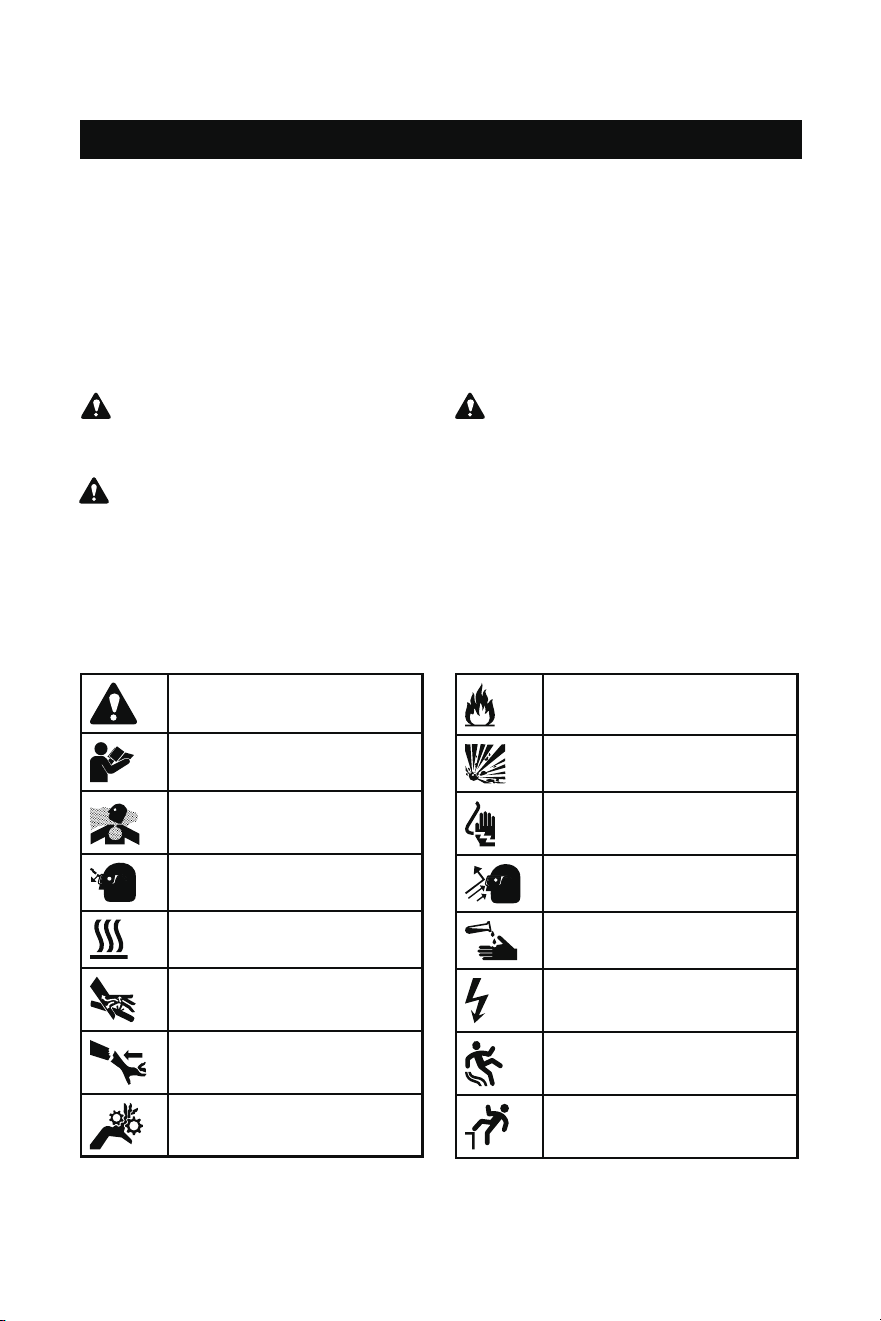
Fire
Explosion
Electrical Shock
Projectile
Chemical Burns
Electrical Hazard
Slippery Surface
Fall
Safety Alert
Read Operators Manual
Asphyxiation Hazard
Eye Protection
Hot Surface
Fluid Injection
Kickback
Moving Parts
This Operating Manual has been designed to instruct you on the correct operation of
your A-I POWER product. Your satisfaction with this product and its safe operation is our
ultimate concern. Therefore, please take the time to read the entire manual, especially the
safety symbols and instructions They will help you to avoid potential hazards that may exist
when working with this product. Every effort has been made to ensure that information
in this manual is accurate and current. However, we reserve the right to change, alter, or
otherwise improve the product and this document at any time without prior notice.
SAFETY 2
FOR TECHNICAL QUESTIONS, PLEASE CALL 1-855-888-3598
Safety Symbols and Warnings
DANGER: indicates a hazard which, if
not avoided, will result in death or serious
injury.
WARNING: indicates a hazard which,
if not avoided, could result in death or
serious injury.
Safety Symbols and Meanings
The following symbols will appear in this manual and on the product. For safe use of this
product, be sure to study them and know their meanings.
CAUTION: indicates a hazard which,
if not avoided, could result in minor or
moderate injury.
NOTICE: Indicates information, or
addresses practices that are important, but
not related to personal injury.
SAFETY 3
FOR TECHNICAL QUESTIONS, PLEASE CALL 1-855-888-3598
Operating Instructions and Precautions
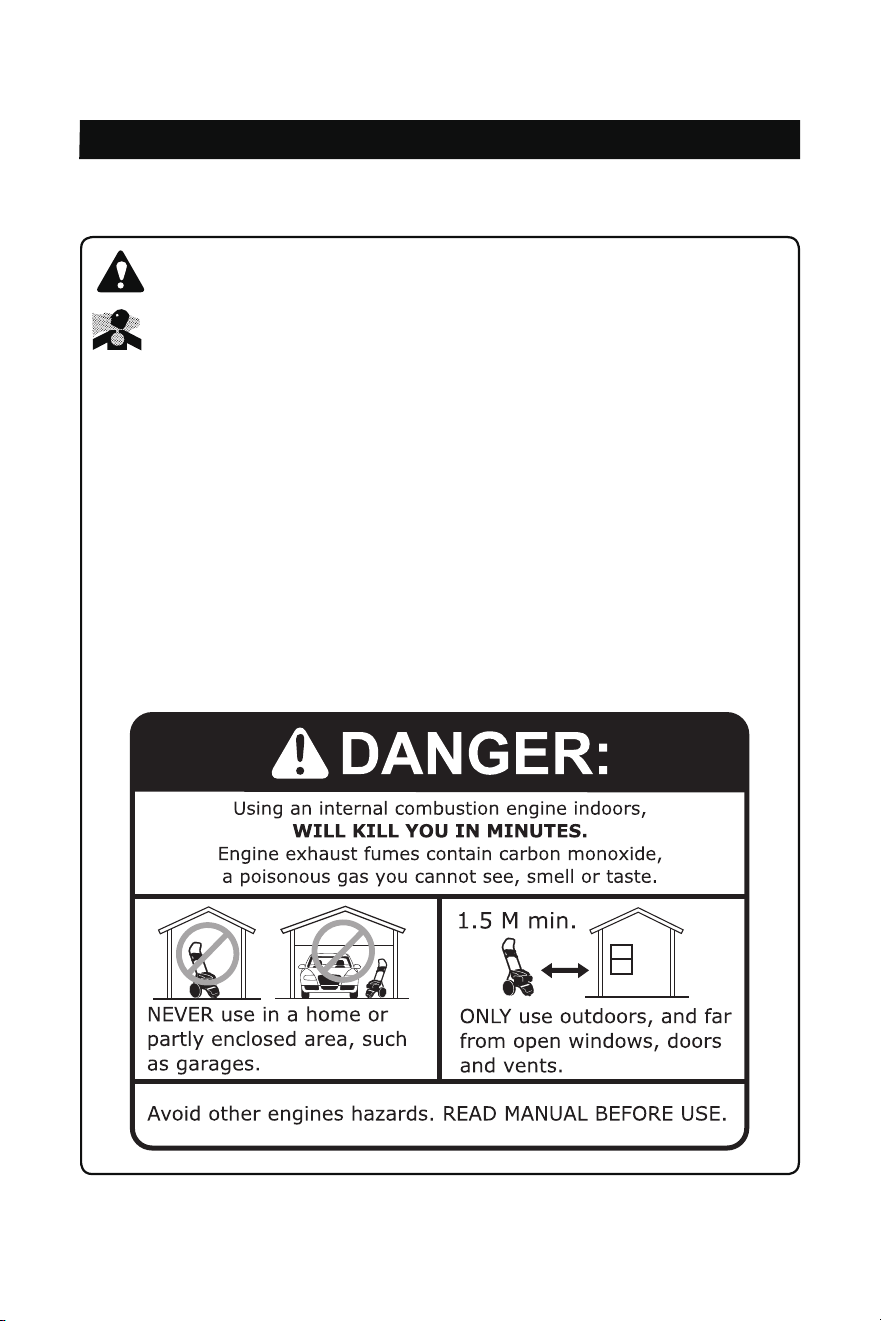
DANGER: POISONOUS GAS HAZARD
Engine exhaust contains carbon monoxide, a poisonous gas that WILL kill you
in minutes. You CANNOT smell it, see it, or taste it. Even if you do not smell
exhaust fumes, you could still be exposed to carbon monoxide gas. Some chemicals or
detergents could also be harmful if inhaled or ingested, resulting in death, serious injury,
nausea, fainting or poisoning.
• Operate this product ONLY outside far away from windows, doors and vents to
reduce the risk of carbon monoxide gas from accumulating and potentially being
drawn towards occupied spaces.
• DO NOT run this product inside homes, garages, basements, crawlspaces, sheds, or
other partially enclosed spaces, even if using fans or opening doors and windows for
ventilation. Carbon monoxide can quickly build up in these spaces and can linger for
hours, even after this product has been shut off.
• ALWAYS place this product downwind and point the engine exhaust away from
If you start to feel sick, dizzy, or weak while using this product, shut it off and get to
occupied spaces.
•
fresh air RIGHT AWAY. See a doctor, as you may have carbon monoxide poisoning.

FOR TECHNICAL QUESTIONS, PLEASE CALL 1-855-888-3598
SAFETY 4
WARNING: READ AND UNDERSTAND ALL SAFETY INSTRUCTIONS
• Keep guards in place and in working order. Never operate this product with any guard
or cover removed. Make sure all guards are intact and operating properly before each
use.
• Remove adjusting tools and wrenches. If any adjustments or maintenance has been
performed, make sure that all tools and adjusting wrenches are removed from product
before use.
• To reduce the risk of injury, keep all children and visitors away from product when in
use. All visitors should wear safety glasses and be kept a safe distance from work area.
• Keep the work area clear of all persons, particularly small children, and pets.
• Use product for its intended use. Don’t force product or attachment to do a job it was
not designed for. Do not use it for a purpose not intended. Use only recommended
accessories with this product. The use of improper and or modified accessories may
cause risk of injury.
• Use proper clothing. Wear long pants and long sleeves. Do not wear loose clothing,
neckties, or jewelry. They can get caught and draw you into moving parts. Rubber
gloves and nonskid footwear are recommended when working outdoors. Do not
operate the equipment while barefoot or when wearing sandals or similar lightweight
footwear Also wear protective hair covering to contain long hair.
• Always wear proper eye protection with side shields marked to comply with ANSI
Z87.1. Following this rule will re-duce the risk of serious personal injury.
• Do not overreach or stand on a ladder, rooftop, or other unstable support structure.
Never leave product running unattended. Turn power off. Don’t leave product until it
Keep proper footing and balance at all times.
•
comes to a complete stop.
• Keep the engine and pump free of grass, leaves, oil, or grease to reduce the chance of
a fire hazard.
• Keep the exhaust outlet free of foreign objects.
• Be completely knowledgeable with product controls. Know how to stop the product and
bleed pressure quickly.
• Stay alert and exercise control. Watch what you are doing at all times and use common
sense. Do not operate tool when you are tired. Do not rush.
Do not operate the product while under the influence of drugs, alcohol, or any•
medication.
• Check the work area before using product. Remove all objects such as rocks, broken
glass, nails, wire, or string which can be thrown or become tangled in the product.
• Do not direct high pressure spray stream at any persons, animals and pets. Do not
direct spray stream
• Never lift or carry the product or attempt to make adjustments while the engine is
running or hot.
• Do not attempt to touch the spark plug or plug wire while the engine is running.
• Use only cold water with this product.
• For outdoor use only
FOR TECHNICAL QUESTIONS, PLEASE CALL 1-855-888-3598
SAFETY 5
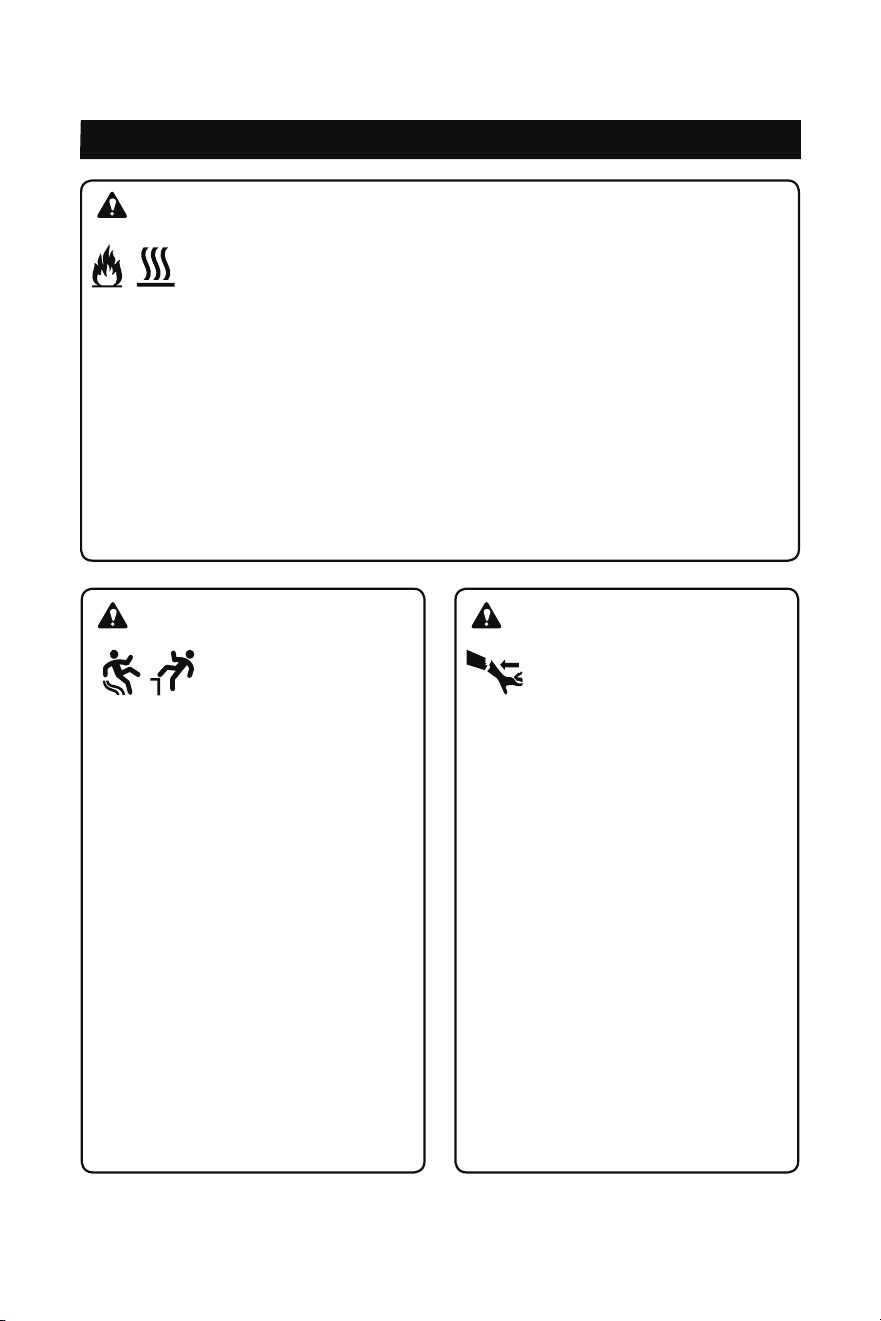
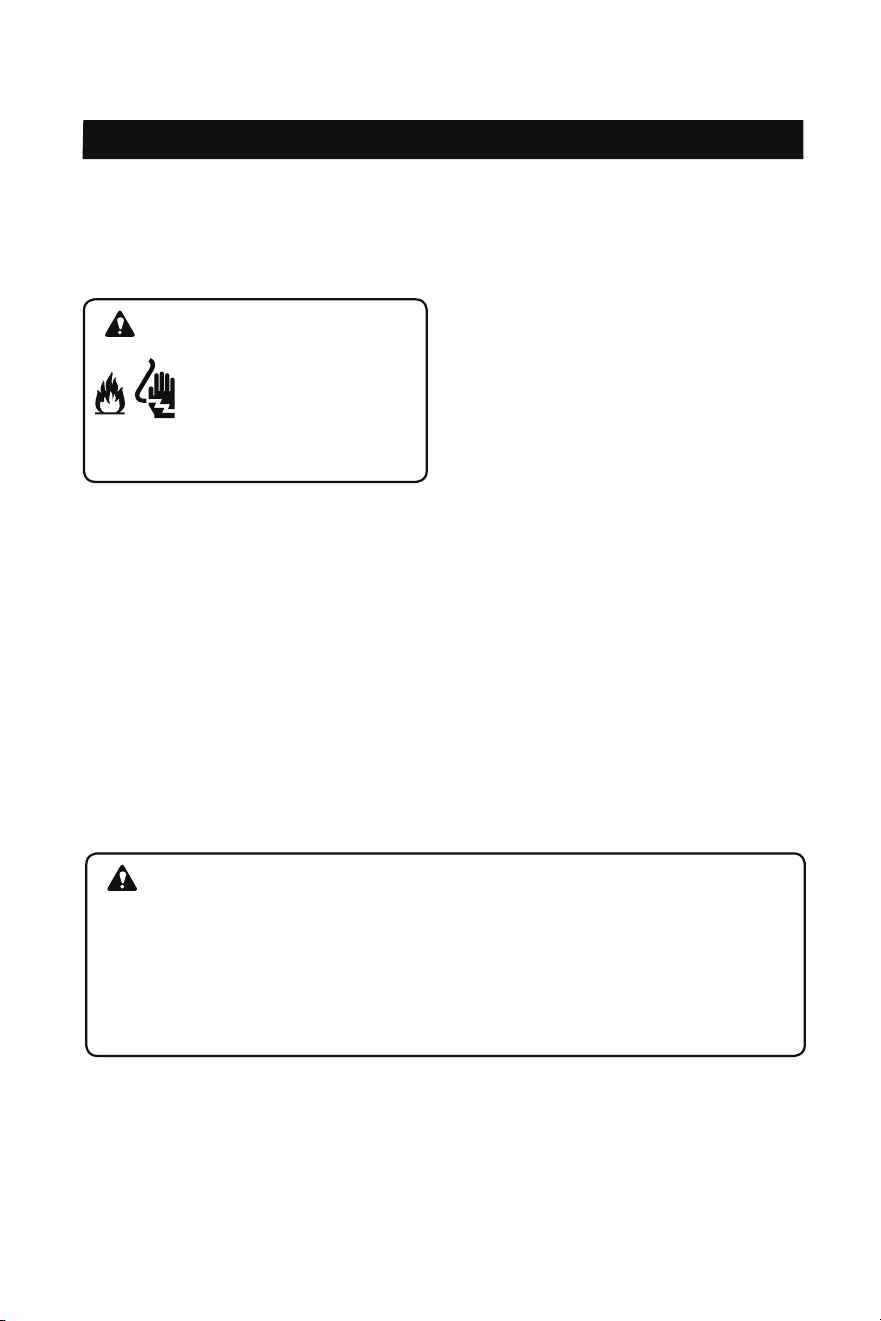
WARNING: Fire / Hot Surface Hazard
Exhaust could ignite combustibles, resulting in death or serious injury.
Contact with muffler area could cause burns resulting in serious injury.
.
• DO NOT touch hot parts and AVOID hot exhaust gases.
• Allow equipment to cool before touching.
• Keep at least 5 feet (1.5 m) of clearance on all sides of pressure washer including
overhead.
• It is a violation of California Public Resource Code, Section 4442, to use or operate
the engine on any forest-covered, brush-covered, or grass-covered land unless
the exhaust system is equipped with a spark arrester, as defined in Section 4442,
maintained in effective working order. Other states or federal jurisdictions may have
similar laws. Contact the original equipment manufacturer, retailer, or dealer to obtain
a spark arrester designed for the exhaust system installed on this engine.
• Replacement part must be the same and installed in the same position as the original .
WARNING: Slip or Fall Hazard
Use of pressure washer
could create slippery
surfaces causing you to fall resulting in
death or serious injury.
• Kickback from spray gun could cause
you to fall resulting in death or serious
injury.
• Operate pressure washer from a
stable surface.
• The cleaning area should have
adequate slopes and drainage to
reduce the possibility of a fall due to
slippery surfaces.
• Be extremely careful if you must use
the pressure washer from a ladder,
scaffolding, or any other similar
location.
• Firmly grasp spray gun with both
hands when using high pressure
spray to avoid injury when spray gun
kicks back.
WARNING: Kickback Hazard
Starter cord kickback (rapid
retraction) will pull hand and
arm toward engine faster than you can
let go, which could cause fractures,
bruises, or sprains resulting in serious
injury.
•
relieving spray gun pressure.
NEVER pull starter cord without first
• When starting engine, pull cord slowly
until resistance is felt and then pull
rapidly to avoid kickback.
• After each starting attempt, where
engine fails to run, always point spray
gun in safe direction, disengage trigger
lock and squeeze spray gun trigger to
release high pressure.
• Firmly grasp spray gun with both
hands when using high pressure spray
to avoid injury when spray gun kicks
back.
FOR TECHNICAL QUESTIONS, PLEASE CALL 1-855-888-3598
SAFETY 6
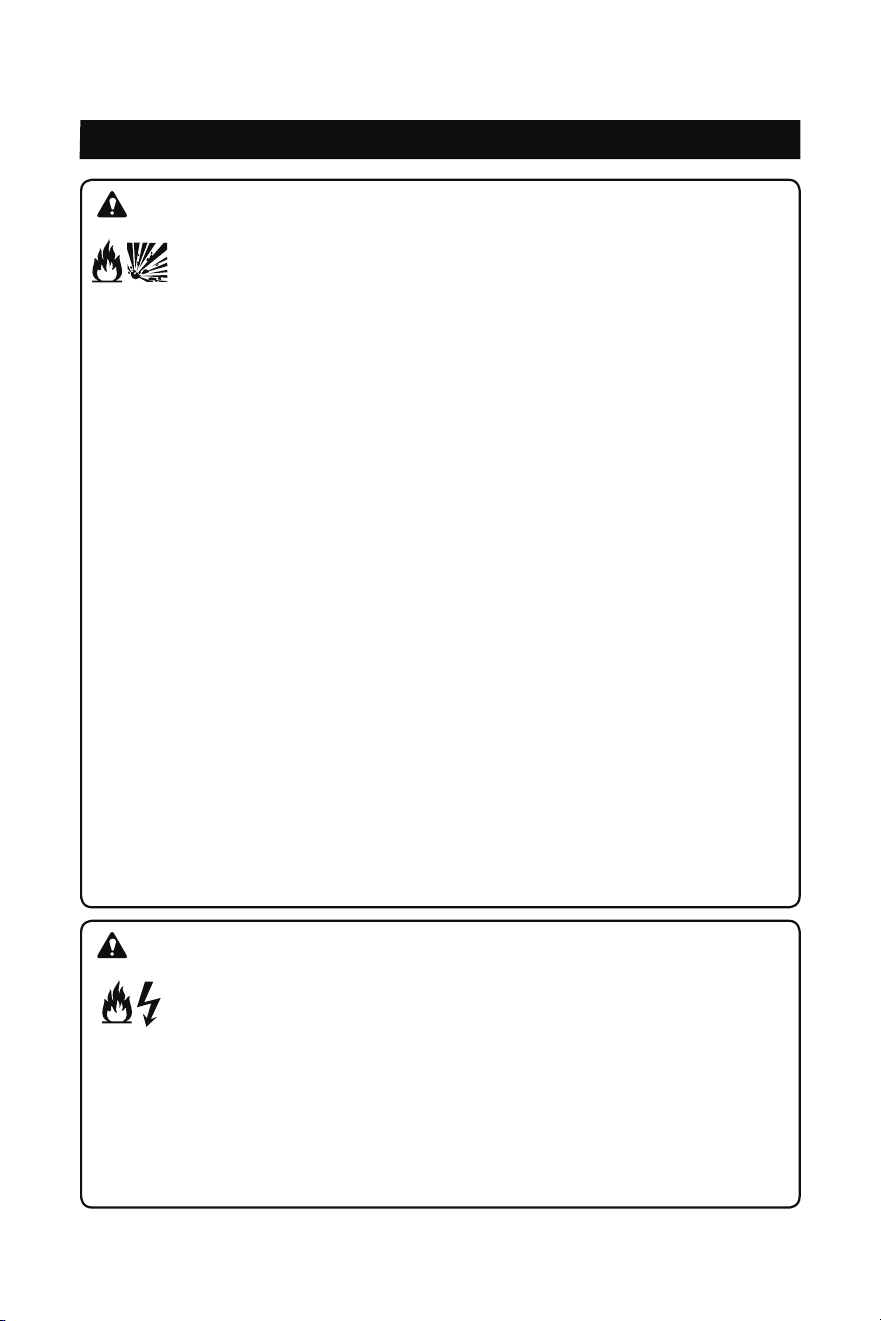
WARNING: Fire / Explosion Hazard
Fuel and its vapors are extremely flammable and explosive which could
cause burns, fire or explosion resulting in death or serious injury.
Risk of fire and serious burns: Never remove fuel cap when unit is running. Shut off
engine and allow the unit to cool at least five minutes. Remove cap slowly.
WHEN ADDING OR DRAINING FUEL
• Turn pressure washer engine OFF and let it cool at least 2 minutes before removing
fuel cap. Loosen cap slowly to relieve any pressure remaining in tank.
• Fill or drain fuel tank outdoors.
DO NOT overfill tank. Allow space for fuel expansion.•
• If fuel spills, wait until it evaporates before starting engine.
Keep fuel away from sparks, open flames, pilot lights, heat, and other ignition sources.
Check fuel lines, tank, cap and fittings frequently for cracks or leaks. Replace if
•
•
necessary.
• DO NOT light a cigarette or smoke.
WHEN STARTING EQUIPMENT
•
• DO NOT crank engine with spark plug removed.
Ensure spark plug, muffler, fuel cap, and air filter are in place.
WHEN OPERATING EQUIPMENT
• DO NOT operate this product inside any building, carport, porch, mobile equipment,
marine applications, or enclosure.
• DO NOT tip engine or equipment at angle which causes fuel to spill.
DO NOT spray flammable liquids.
•
WHEN TRANSPORTING, MOVING OR REPAIRING EQUIPMENT
•
• DO NOT tip engine or equipment at angle which causes fuel to spill.
Transport/move/repair with fuel tank EMPTY or with fuel shutoff valve OFF.
• Disconnect spark plug wire.
WHEN STORING FUEL OR EQUIPMENT WITH FUEL IN TANK
Store away from furnaces, stoves, water heaters, clothes dryers, or other appliances
that have pilot light or other ignition source because they could ignite fuel vapors.
WARNING: Fire and Electrical Shock
Unintentional sparking could cause fire or electric shock, resulting in death or
serious injury.
WHEN ADJUSTING OR MAKING REPAIRS TO YOUR PRESSURE WASHER
• Disconnect the spark plug wire from the spark plug and place the wire where it cannot
contact spark plug.
WHEN TESTING FOR ENGINE SPARK
• Use approved spark plug tester.
• DO NOT check for spark with spark plug removed.
FOR TECHNICAL QUESTIONS, PLEASE CALL 1-855-888-3598
SAFETY 7
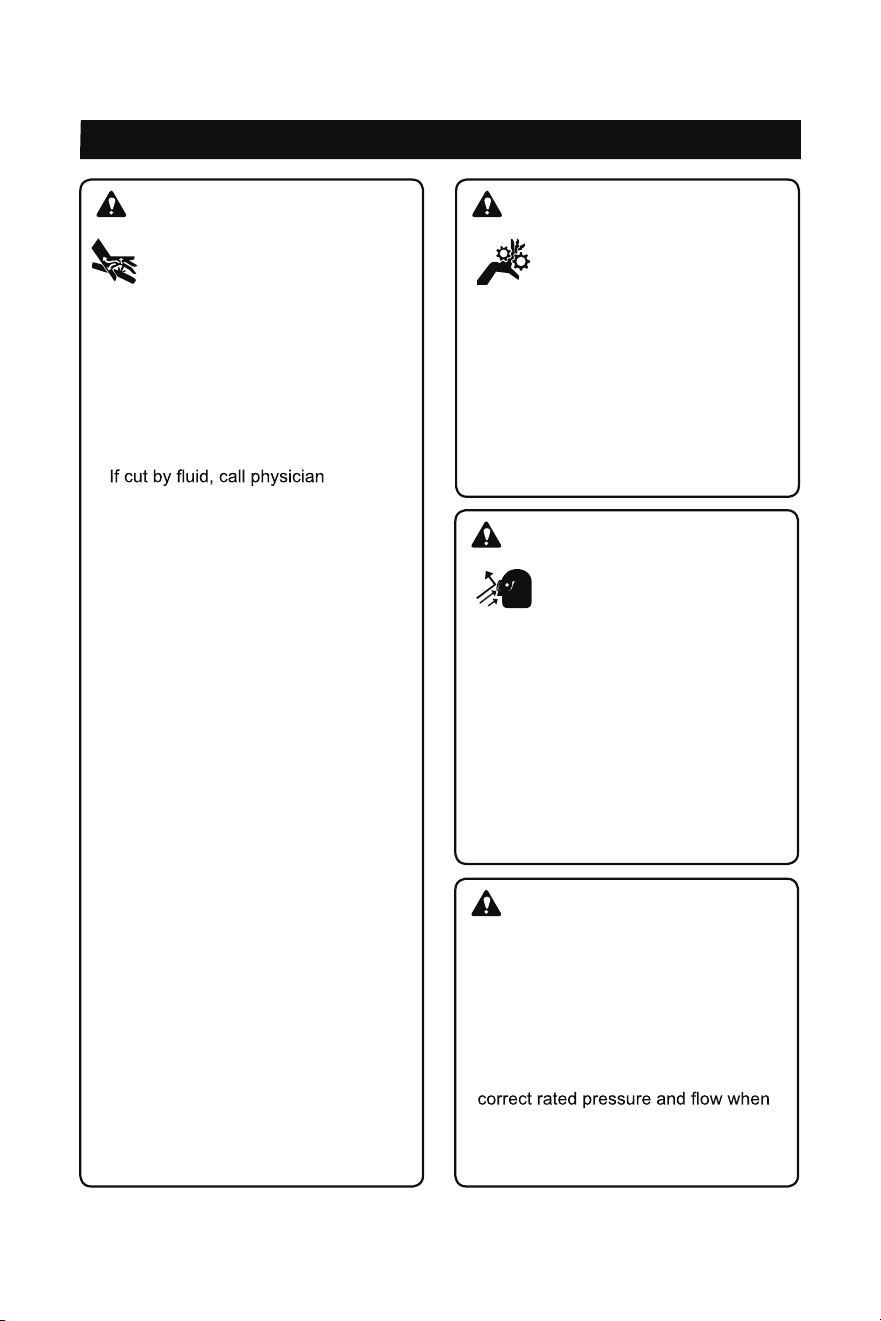
WARNING: Fluid Injection
The high-pressure water that
this equipment produces could
cut through skin and its underlying
tissues, resulting in serious injury and
possible amputation.
• Spray gun traps high water pressure,
even when engine is stopped and
water is disconnected, which could
result in serious injury.
•
immediately. DO NOT treat as a
simple cut.
• DO NOT allow CHILDREN to operate
pressure washer.
• NEVER repair high pressure hose.
Replace it.
• NEVER repair leaking connections
with sealant of any kind. Replace
o-ring or seal.
• NEVER connect high pressure hose
to nozzle extension.
• Keep high pressure hose connected
to pump and spray gun while system
is pressurized.
• ALWAYS point spray gun in safe
direction, disengage trigger lock and
squeeze spray gun trigger to release
high pressure, every time you stop
engine.
• NEVER aim spray gun at people,
animals, or plants.
• DO NOT secure spray gun in open
position.
• DO NOT leave spray gun unattended
while machine is running.
• NEVER use a spray gun which does
not have a trigger lock or trigger guard
in place and in working order.
• Always be certain spray gun, nozzles
and accessories are correctly
attached.
WARNING: Moving parts hazard
Starter and other rotating parts
could entangle hands, hair,
clothing or accessories, resulting in
serious injury.
• NEVER operate pressure washer
without protective housing or covers.
• DO NOT wear loose clothing, jewelry
or anything that could be caught in the
starter or other rotating parts.
• Tie up long hair and remove jewelry.
WARNING: Projectile hazard
Risk of eye or bodily injury.
Spray could splash back or
propel objects resulting in serious injury.
• Always wear safety goggles marked to
comply with ANSI Z87.1 when using or
in vicinity of this equipment.
• Always wear protective clothing such
as a long-sleeved shirt, long pants and
close-toed shoes.
• NEVER operate pressure washer
when barefoot or wearing sandals.
CAUTION: Engine Speed
Excessively high operating speeds could
result in minor injury. Excessively low
speeds impose a heavy load on engine.
• DO NOT tamper with governor spring,
links or other parts to increase engine
speed. Pressure washer supplies
running at governed speed.
• DO NOT modify pressure washer in
any way.
SAFETY 8
FOR TECHNICAL QUESTIONS, PLEASE CALL 1-855-888-3598
NOTICE: For additional information
regarding the parts listed in
the following pages, refer to:
• PARTS LIST AND DIAGRAM on
Page 29.
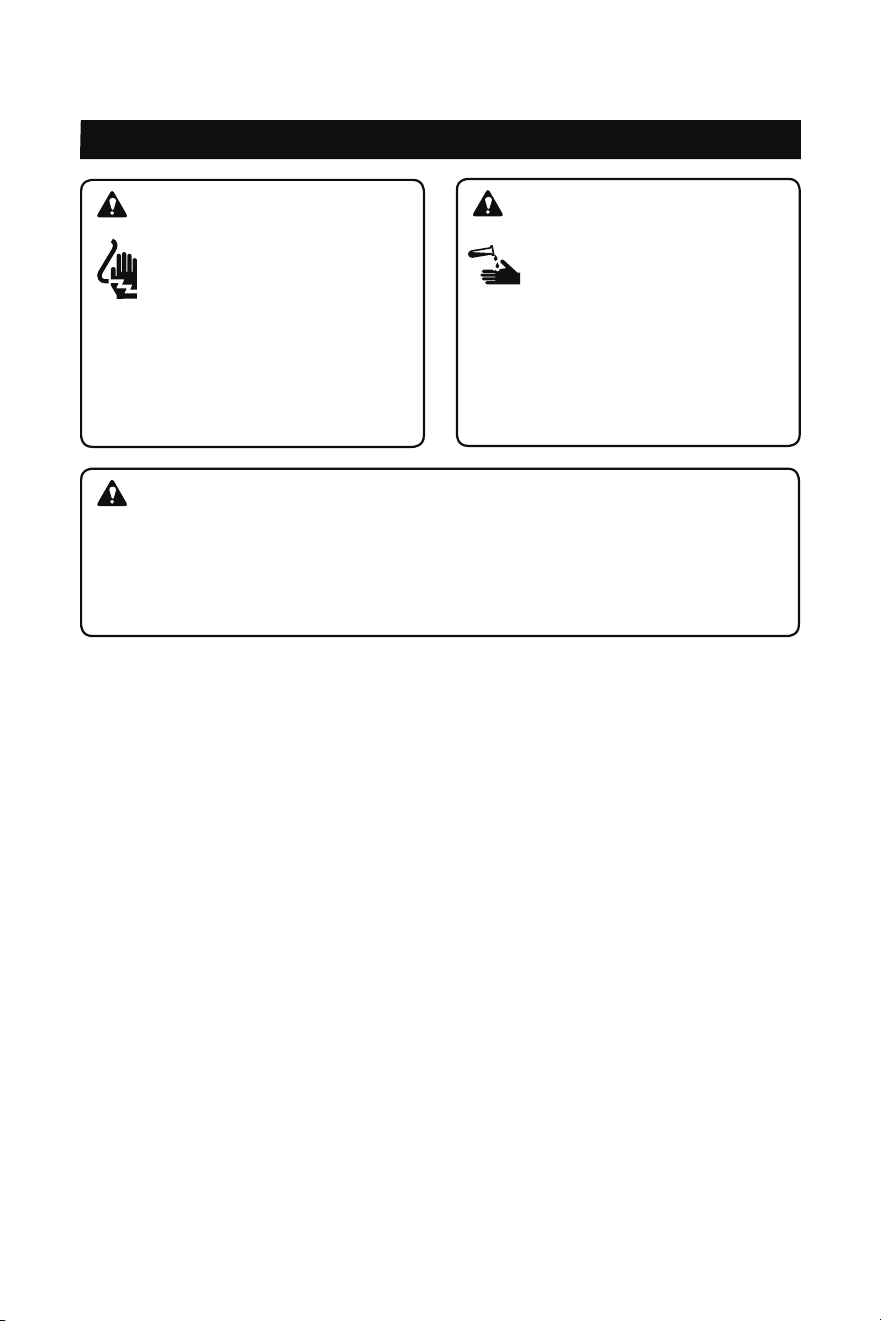
WARNING: Electrical Shock
Contact with power source could
cause electric shock or burn
resulting in death or serious
injury.
• Never spray at or near an electric
power source.
WARNING: Chemical Burn
Chemicals could cause burns
resulting in death or serious
injury.
• DO NOT use caustic liquid with
pressure washer.
• Use ONLY pressure washer safe
detergents/soaps. Follow all
manufacturer’s instructions.
WARNING: California Proposition 65
This product, the engine exhaust and other substances that may become airborne from
its use contains chemicals, including lead, known to the State of California to cause
cancer, birth defects, or other reproductive harm. Wash your hands after handling
product.
NOTICE: High pressure spray could
damage fragile items including
glass.
• DO NOT point spray gun at glass when
using red (0°) nozzle.
• NEVER aim spray gun at plants.
NOTICE: Improper treatment of pressure washer could damage it and shorten its life.
If you have questions about intended use, contact our service center at
1-855-888-3598.
• NEVER operate units with broken or missing parts, or without protective housing or
covers.
• DO NOT by-pass any safety device on this machine.
• DO NOT tamper with governed speed.
• DO NOT operate pressure washer above rated pressure.
• DO NOT modify pressure washer in any way.
• Before starting pressure washer in cold weather, check all parts of the equipment to
be sure ice has not formed there.
• NEVER move machine by pulling on hoses. Use handle provided on unit.
• This equipment is designed to be used with A-iPower authorized parts ONLY. If
equipment is used with parts that DO NOT comply with minimum specifications, user
assumes all risks and liabilities.

SET UP 9
FOR TECHNICAL QUESTIONS, PLEASE CALL 1-855-888-3598
CAUTION: Read Manual
Read the entire SAFETY section at the beginning of this manual including all text
under subheadings therein before set-up or use of this product.
Know Your Pressure Washer
ACCESSORIES INCLUDED:
Owner’s Manual
Quick Start Guide
Oil Bottle
Funnel
Spark Plug Wrench
Nozzle Cleaning Tool
Panel
Pressure hose
Engine
Fuel tank
Wheel
Pump
Spray gun
and wand
Soap tank
15°
25°
45°
SOAP
65°
SOAP
LINE
0°
7 in 1
nozzle
Turbo
nozzle
Nozzle
cleaning
tool
SET UP 10
ASSEMBLY
FOR TECHNICAL QUESTIONS, PLEASE CALL 1-855-888-3598
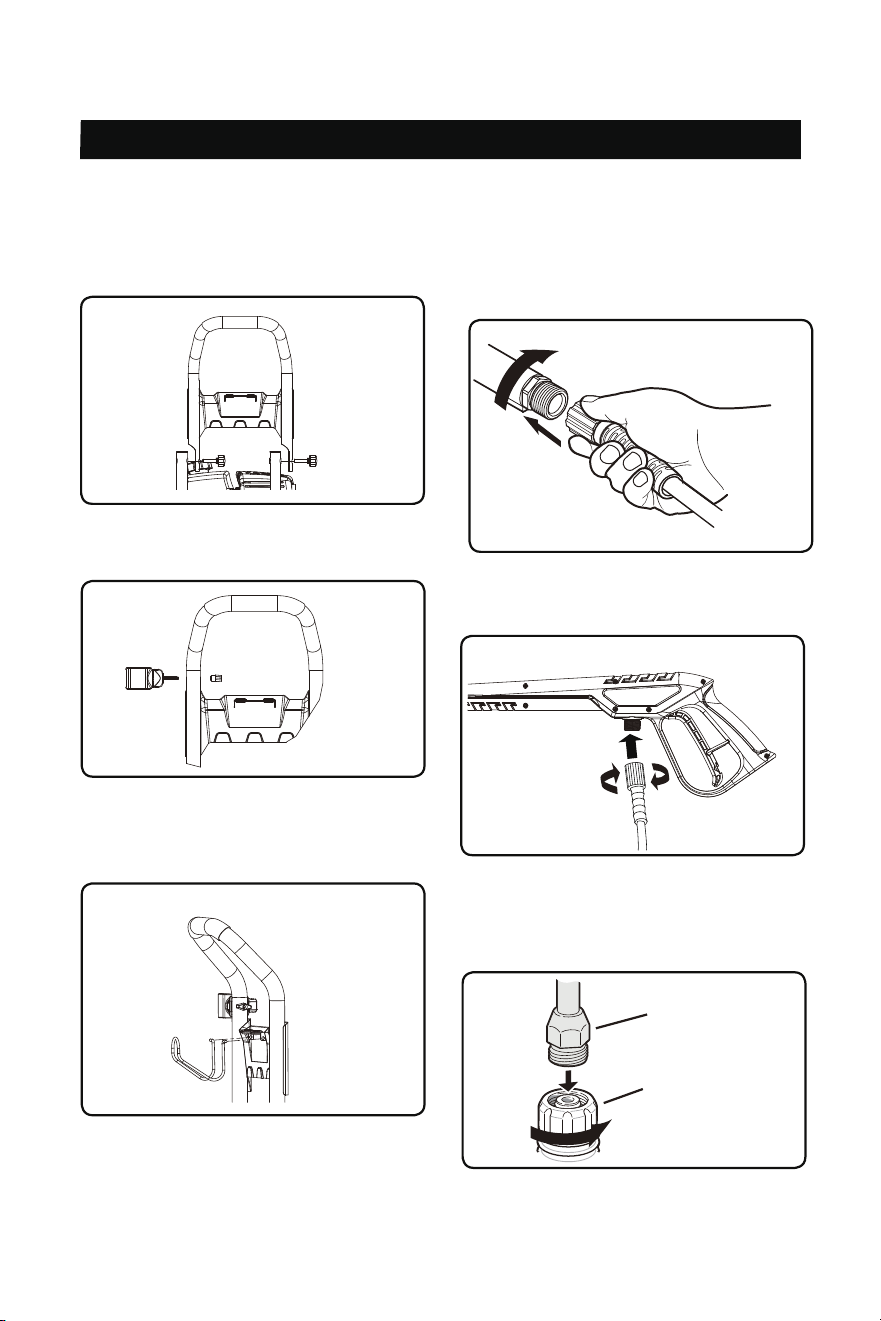
1.
See Figure A.
Figure A
Figure B
4. Connect the Pressure Hose to the Pump
outlet and tighten the nut firmly by
hand, DO NOT use any tool to tighten.
See Figure D.
5. Connect the pressure hose to the spray
gun and tighten the nut firmly by hand.
See Figure E.
Figure E
6. Remove the protective cap on the Wand
Wand
Spray gun tip
inlet. Insert the wand into the spray gun
tip and tighten the nut firmly by hand.
See Figure F.
Figure F
Figure D
Install the handle, tighten the handle and
frame with the knob
2. Attach the hose holder to the handle.
See Figure B.
Figure C
3. Attach the hose holder to the panel.
See Figure C
SET UP 11
FOR TECHNICAL QUESTIONS, PLEASE CALL 1-855-888-3598
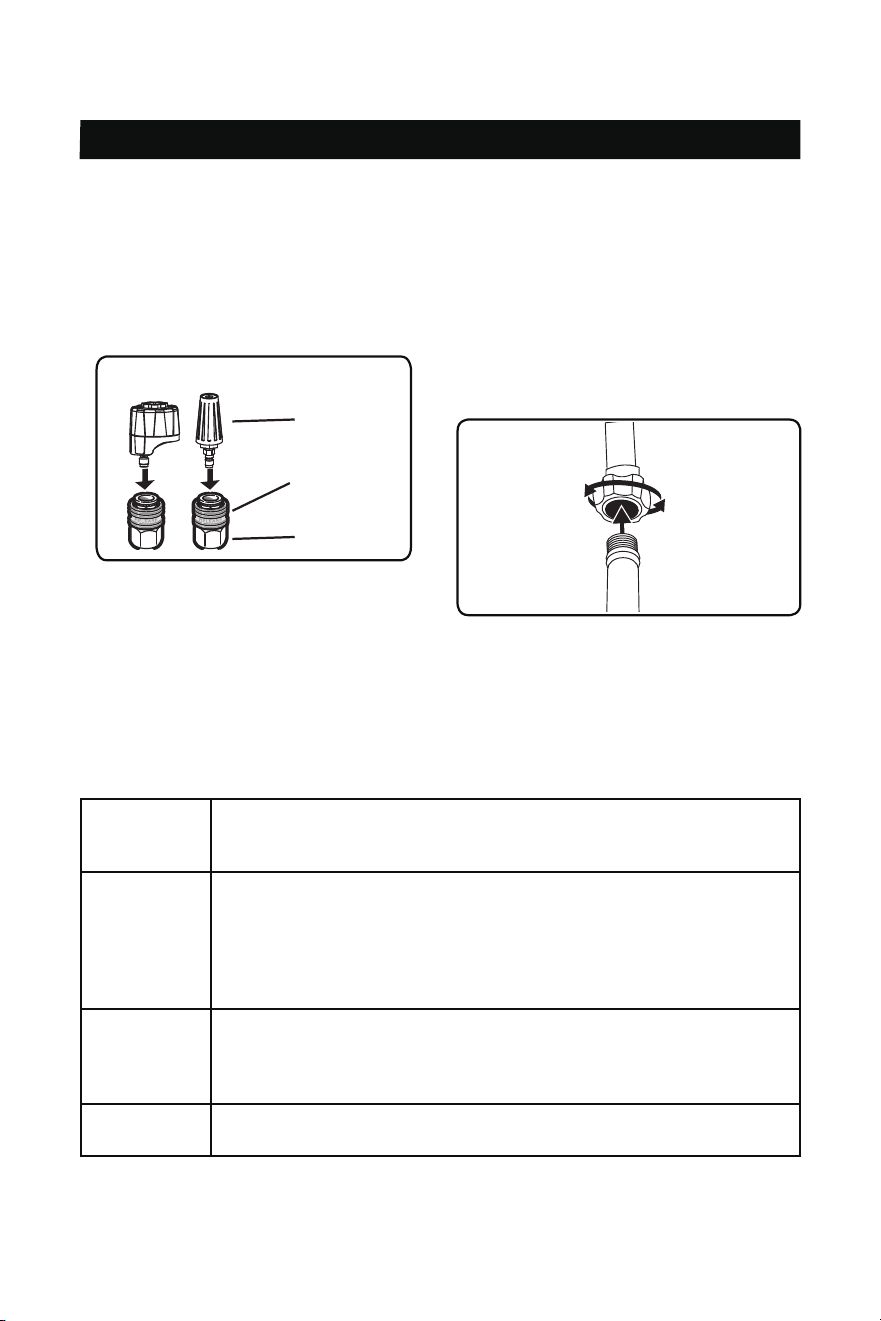
7. Attach the nozzle to the wand by
pulling back the quick connect collar
and pushing the nozzle onto the end of
the wand. Make sure the quick connect
collar locks the nozzle in place.
See Figure G.
See Figure G.
8. Connect the water supply hose to the
water inlet connection on the Pump and
tighten the Inlet Fitting firmly by hand.
The water source must be able to
provide a minimum of five gallons of
clean, cold water per minute at 20PSI.
Only use a 5/8” inner diameter, or larger
hose that is rated to meet this capacity.
Figure H
See Figure H.
GENERAL INFORMATION
Fuel Use fresh high-quality unleaded gasoline (minimum 87 octane),
containing up to 10% ethanol.
Do not use fuel with high ethanol content; E15 or E85.
Oil Engine oil: Use only SAE 1 0W-30, 0.6 Quart non-detergent oil
(supplied).
Pump Oil: The pump was lubricated and sealed at the factory, and is
maintenance free for the life of the product, under normal operation. Do
not attempt to change or add oil to the pump. If the pump is leaking oil,
please call our customer service department at 1-855-888-3598.
Water Use only cold water.
Do not operate pressure washer with clogged or missing water inlet filter
screen.
Do not operate pressure washer without adequate water supply.
Pressure
Adjustment
Pressure setting is pre-set at factory.
For lowering pressure, refer to “Pressure Adjustment” on Page 18.
Nozzle
Wand
Quick connect
collar

High Pressure
Pump
There are no serviceable parts to the high-pressure pump. Do not
attempt to repair or service the pump, as you may damage it and void
your warranty. If you feel that the pump needs service, please call our
customer service department at 1-855-888-3598.
Do not allow water to freeze in pump. If product is stored in an area
that will have temperatures of below 32° F, 0°C, make sure all water is
removed from the pump, or a suitable pump protection product has been
used. Failure to protect the pump form cold temperatures will cause
damage and possibly void your warranty.
By-pass
Mode
When you release the trigger of the gun, the pump goes into bypass
mode. It is good practice to never let the pump run in bypass mode for
more than 2 minutes. Damage to pump could be possible.
Thermal
Relief Valve
Pump is equipped with a thermal relief valve. If during bypass mode the
water overheats, this valve opens releasing the hot water and letting
new cool water enter the pump. Afterwards, the valve closes returning
pump to normal operation. Caution, the valve opens with no warning,
and the water will be hot. Possible injury can occur. Always keep hands
and feet away from thermal relief valve.
Do not allow hoses to come in contact with engine muffler during use orHigh Pressure
Hose immediately after use.
DO NOT attempt to move unit by pulling on high-pressure hose.
Engine Do not adjust or attempt maintenance without reading owner’s manual
or consulting our Customer Service at 1-855-888-3598. Add fuel
stabilizer (not supplied) to fuel tank and let engine run for 5 minutes
before storage. Always turn on water before starting engine.
Soap /
Chemicals
Use only soaps and chemicals detergents designed for pressure
washer use. Always follow detergent manufacturer’s instructions on
their container. DO NOT use bleach, acid, any flammable materials, or
industrial solvents.
Nozzle Always keep nozzles clean and unclogged. Use the nozzle needle
to clean if clogged. Use ONLY detergent nozzle (black) when using
chemical and cleaning solvents.
Storage /
Winterizing
Run clean water through chemical tank / inlet to clear any residual
detergent. Add stabilizer to any remaining fuel in fuel tank. See ENGINE
section above. Do not allow water to freeze in pressure pump, spray
gun, spray wand or hoses.
GENERAL INFORMATION
SET UP 12
FOR TECHNICAL QUESTIONS, PLEASE CALL 1-855-888-3598

OPERATION 13
FOR TECHNICAL QUESTIONS, PLEASE CALL 1-855-888-3598
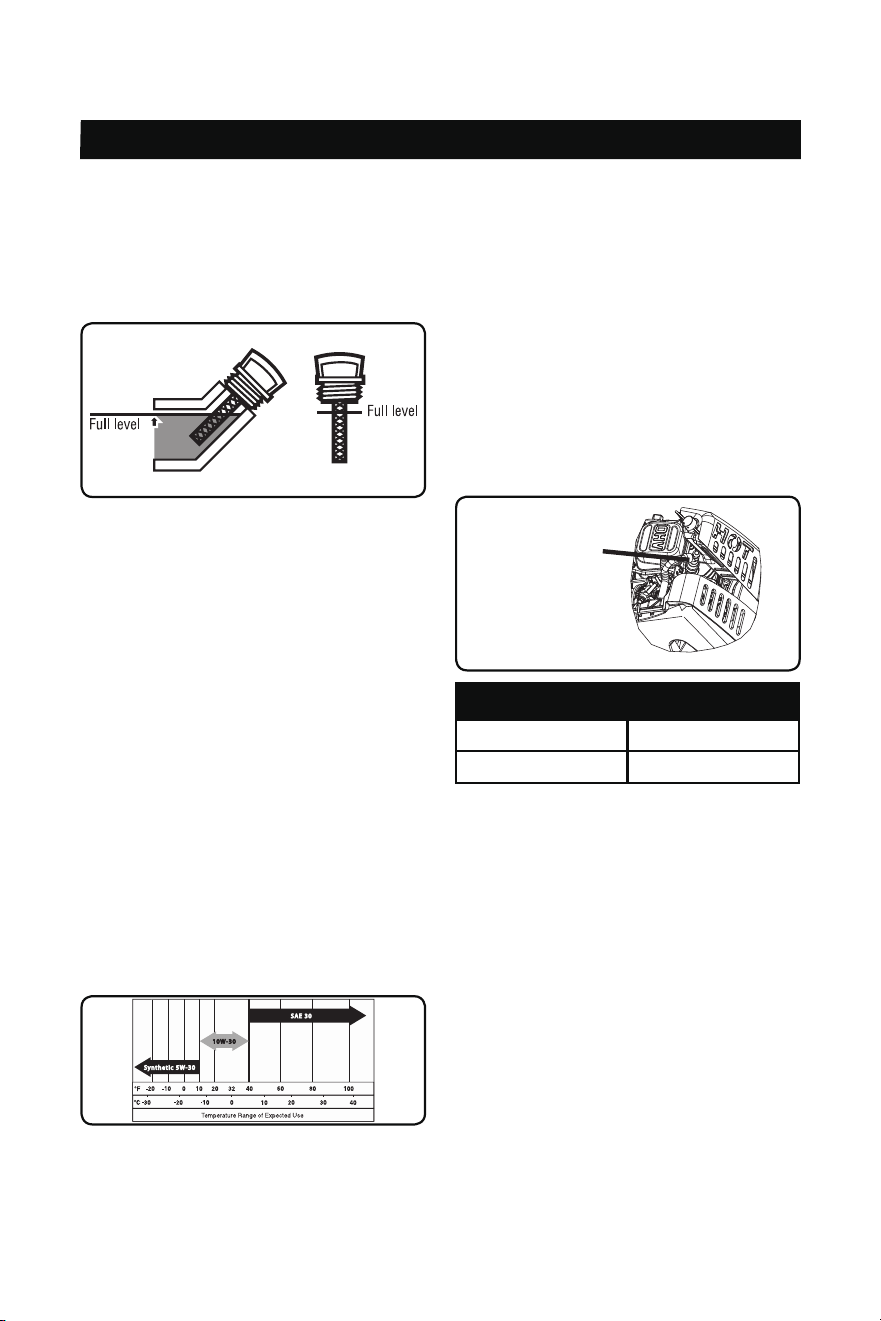
1. Adding Engine Oil
1.1 Move the Pressure Washer OUTSIDE
and place on a flat and level surface.
1.2 Make sure the engine is stopped, cool
and is level.
1.3 Clean the top of the Dipstick and the
area around it. Remove the Dipstick
by turning it counterclockwise, and
wipe it off with a clean, lint free rag.
1.4 Place a funnel in the oil reservoir.
1.5 Pour engine oil (SAE 10W-30 is
recommended for general use).
CAUTION: Read Manual
Read the entire SAFETY and SET UP sections at the beginning of this manual
including all text under subheadings therein before operation of this product.
Improper use or treatment of Pressure Washer can damage internal components and
shorten the life of unit. Failure to follow this warning will void warranty.
engine manufacturers manual if
DO NOT overfill. Consult the separate
available. See figure A
1.6 Reinsert the Dipstick without threading
it in and remove it again to check the
oil level. The oil level should be up to
the full level as shown above.
1.7 If the oil level is at or below the low
mark, add the appropriate type of
oil until the oil level is at the proper
level. (The SAE Viscosity Grade Chart
on page 22 in the MAINTENANCE
section shows other viscosities to use
section shows other viscosities to use
in different average temperatures.)
1.8 Replace the dipstick and fully tighten.
Pre-Start Checks
Inspect engine and equipment looking for damaged, loose and missing parts before setting
up and starting. If any problems are found, do not use equipment until fixed properly.
Please call our customer service at 1-855-888-3598.
Figure A
NOTICE:
before each use. Before each use, check the oil level. Your engine may be equipped with a
Your Warranty is VOID if the engine’s crankcase is not properly filled with oil
low-oil shutdown feature. If so equipped, the engine will not start with low or no engine oil in
the crankcase.
OPERATION 14
FOR TECHNICAL QUESTIONS, PLEASE CALL 1-855-888-3598
2. Adding Fuel
2.1 Move the Pressure Washer OUTSIDE
of any building, or partially enclosed
structure, and place on a flat and level
surface.
2.2 Clean the Fuel Cap and the area
around it before removing.
2.3 Make sure Pressure Washer is OFF
and let it cool for at least two minutes
before removing fuel cap. Unscrew
slowly to release any built-up pressure
and remove the Fuel Cap.
WARNING: Fire / Explosion Hazard
from misuse of fuel can cause severe burns and even death.
Fuel and fuel vapor are extremely flammable and explosive. Fire or explosion
• Fill the fuel tank in a well-ventilated area away from ignition sources. If the engine is
hot from use, shut the engine off and wait for it to cool before adding fuel.
• Do not smoke near open fuel tank or container.
• Failure to use fuel as recommended in this manual will void the warranty.
2.4
Fuel Tank with 87 octane or higher
If needed, fill the Fuel Tank to about
1 inch under the fill neck of the
unleaded gasoline that has been
treated with a fuel stabilizer additive.
Follow fuel stabilizer manufacturer’s
recommendations for use.
2.5 Replace the Fuel Cap, making sure it
is tight ans sealed.
2.6 Wipe up any spilled fuel and allow
excess to evaporate before starting
engine. To prevent FIRE, do not start
the engine while the smell of fuel
hangs in the air.
NOTICE: Do not use gasoline that has been stored in a dirty fuel container. It can cause
particles to enter the carburetor, affecting engine performance and / or causing damage.
NOTICE: When adding fuel to pressure washer, observe the following:
• DO NOT use unapproved gasoline such as E15 or E85 (15% ethanol, 85% ethanol).
• This is a four-cycle engine, DO NOT mix oil with gasoline.
DO NOT modify engine to run on alternate fuels. Any modifications to the engine will
•
void your warranty.
Pre-Start Checks (Continued)
FOR TECHNICAL QUESTIONS, PLEASE CALL 1-855-888-3598
OPERATION 15
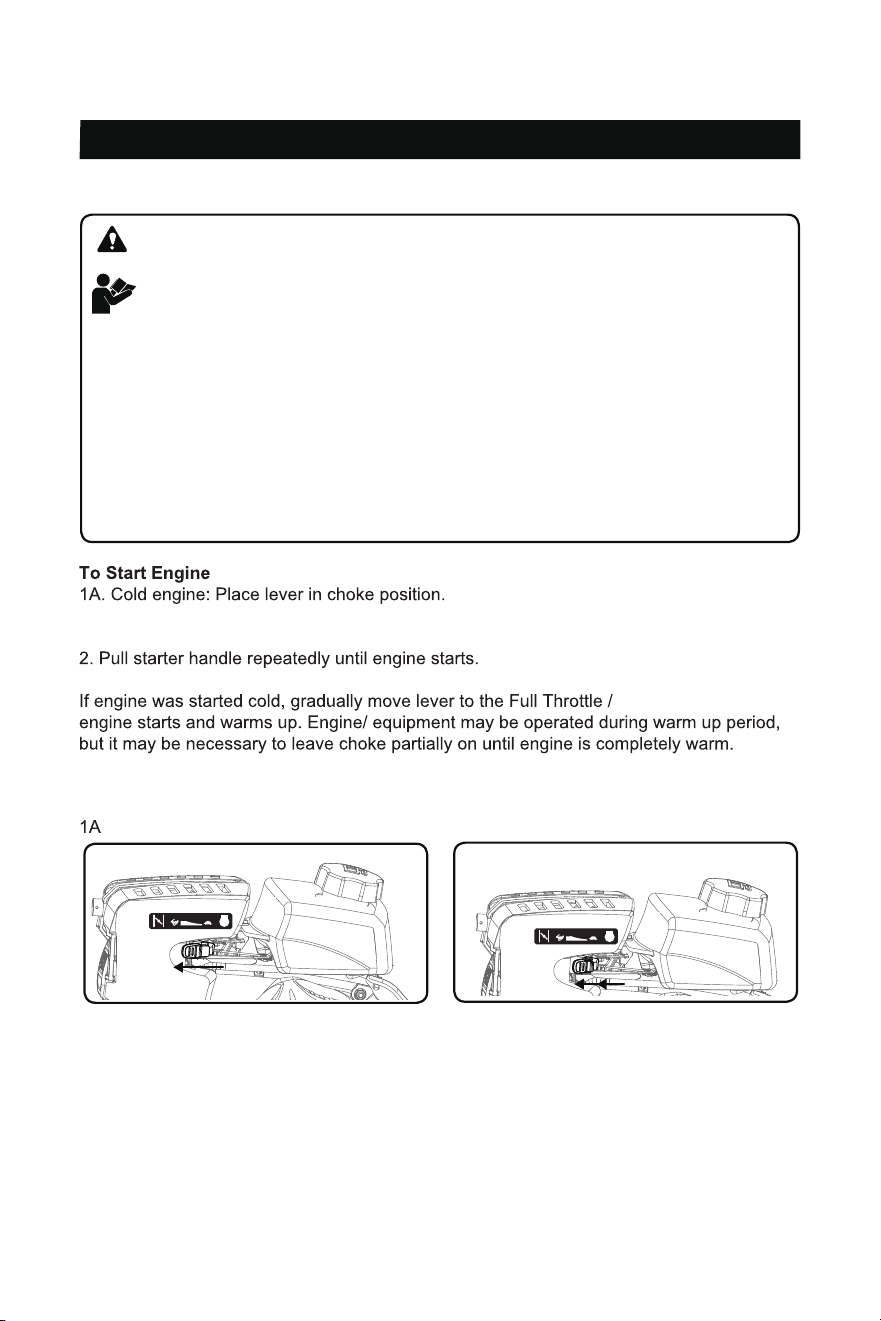
Starting Engine
CAUTION: Read Manual
Read the entire Pre-Start Checks section of this manual before attempting to start
the engine. Be sure to inspect the equipment and engine for any missing or loose
guards or parts. Check both the fuel and oil levels of the engine before starting.
• Turn fuel valve to open, if so equipped.
• Turn on water supply, remove nozzle, point wand in safe direction, and hold down
trigger until all air is released from the system, at least 30 seconds.
• Then release the trigger, lock it in the safety position and replace nozzle before
starting engine.
• Do not let the Starter Handle snap back against the engine housing.
If starter handle become difficult to pull, release pressure in the hose by squeezing
•
the trigger on the gun.
STOP
.
.Choke Position
STOP
1B. Warm engine: Place lever in full throttle / RUN position.
RUN position after
1B. Full Throttle / RUN Position
OPERATION 16
FOR TECHNICAL QUESTIONS, PLEASE CALL 1-855-888-3598
Pressure Washer Operation
WARNING: Eye protection / Fluid Injection hazard
ALWAYS wear approved safety glasses when operating Pressure
Washers. Spray can splash back or propel objects, including incorrectly
attached accessories. The high-pressure stream of water that this equipment produces
can cut through skin and its underlying tissues, leading to possible amputation. The
spray gun traps high water pressure, even when the motor is stopped and water source
is disconnected, which can cause injury.
• Do not direct spray from the Pressure Washer at any persons or animals.
• Keep children and pets away from the work area.
• Keep work area clean of loose rocks, glass and debris.
• The high pressure water stream could cause serious injury.
WARNING: Asphyxiation Hazard
Use the Pressure Washer only outside in a fully ventilated area.
• Operate this product ONLY outside far away from windows, doors and vents.
• DO NOT run this product inside homes, garages, basements, crawlspaces, or sheds.
• ALWAYS place this product downwind and point the engine exhaust away from
occupied spaces.
•
fresh air RIGHT AWAY. See a doctor, as you may have carbon monoxide poisoning.
If you start to feel sick, dizzy, or weak while using this product, shut it off and get to
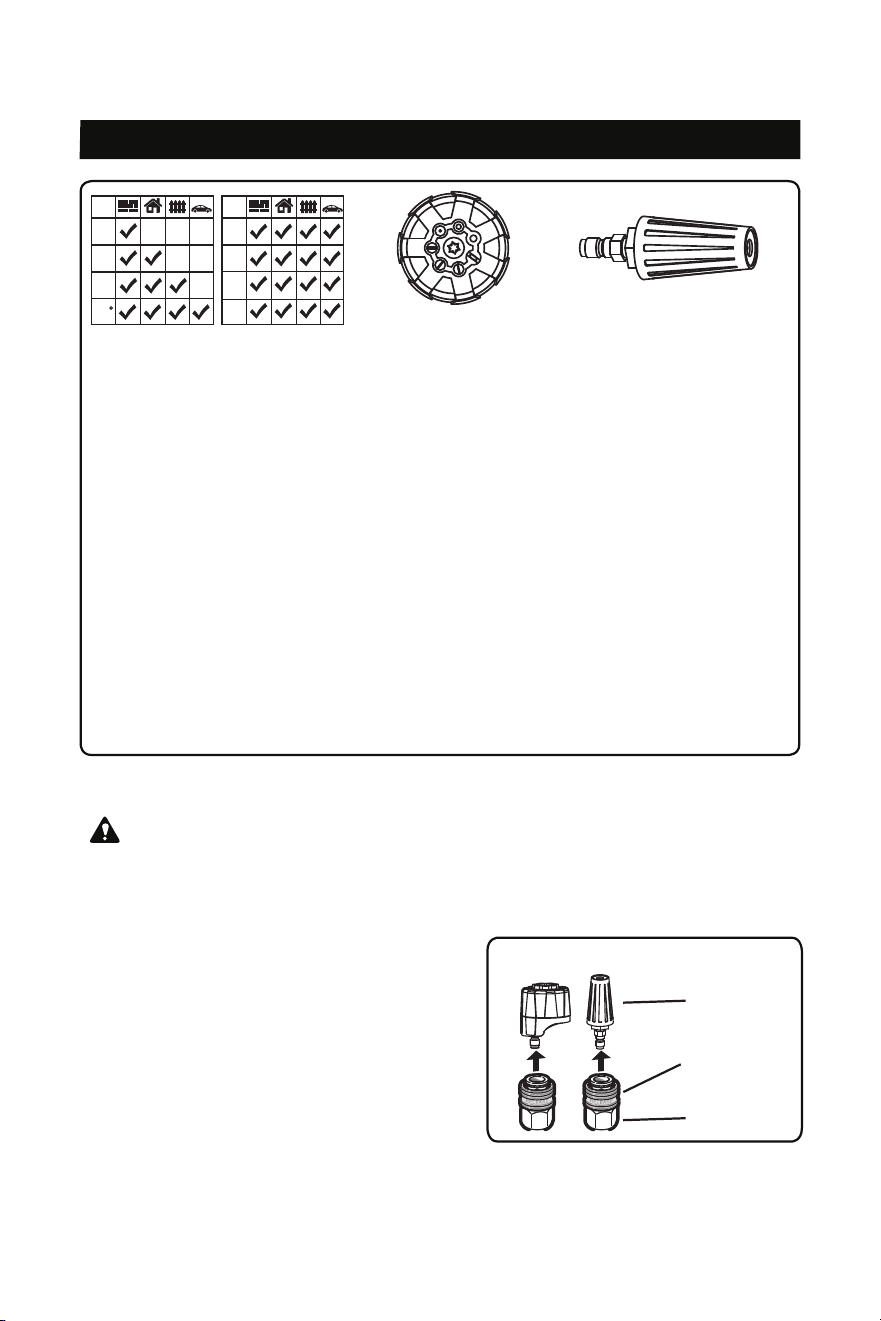
1. Selecting the Right Nozzle for the Job
NOTICE: Not all models come with all nozzles described in this section. Use only the
information pertaining to the nozzles supplied with your product.
(Nozzle selection Chart)
Your product offers 7 in 1 nozzle and turbo
nozzle. The nozzles are sized specifically
to give you maximum pressure at all times.
Each nozzle is marked and rated in
degrees of fan. The higher the number of
the fan degree, the wider the fan pattern
is. The tighter the spray fan the more
impact on the surface, which is good for
cleaning tough jobs. The wider the spray
fan, the more spread out the impact on the
surface, so they are better for easy jobs, or
soft surfaces. Finding the correct nozzle
for the job at hand make take some
experimenting.
Always start with the widest fan degree
and continue to the lower degree fans until
the best work result is achieved. Always
test the nozzle on an area that is not
noticeable.
FOR TECHNICAL QUESTIONS, PLEASE CALL 1-855-888-3598
OPERATION 17
2. Connecting Nozzle to Spray Wand
WARNING:
• Never place hands in front of nozzle, or
point nozzle at your face.
• Never attempt to clean a clogged nozzle
while attached to the wand.
• Never attempt to attach or remove spray
Turn off Pressure Washer. While pointing
wand or hose fittings while Pressure
Washer system is pressurized.
•
spray in a save direction, release
pressure by squeezing trigger. Then lock
the Gun Trigger before attempting to
change pressure nozzles.
2.1 To attach, pull quick connect collar
back, insert nozzle into female quick-
disconnect spray wand and press to
lock in place. Make sure collar snaps
into place.
2.2 To detach, pull quick connect collar
back and pull nozzle to remove.
15°
25°
45°
SOAP
65°
SOAP
LINE
0°
SOAP
65°
SOAP
LINE
45
0°
15°
25°
Turbo Nozzle
Turbo
Nozzle
7 in 1 Nozzle
0° Nozzle: This nozzle delivers a pinpoint stream of pressurized water and is extremely
powerful.Use it for the toughest cleaning jobs, although lt covers only a small area.This
nozzle should only be directed at surfaces that can withstand intense high pressure such
asmetal or concrete. Do not use this nozzle to clean wood or soft surfaces.
15° Nozzle: This nozzle delivers a 15-degree spray pattern for heavy duty cleaning and
stripping. It should only be used on surfaces that can withstand pressure from this nozzle.
25°Nozzle: This nozzle delivers a 25-degree spray pattern for general tasks. It should
only be used on surfaces that can withstand pressure from this nozzle.
45° Nozzle: This nozzle delivers a 40-degree spray pattern for easily damaged surfaces.
lt should only be used on surfaces that can withstand pressure from this nozzle.
Soap 65° Nozzle: This nozzle is used to apply special chemicals and cleaning
solutions.This nozzle produces the weakest pressure stream of the nozzles.
Soap Nozzle: This nozzle is used to apply special chemicals and cleaning solutions.This
nozzle produces the weakest pressure stream of the nozzles.
Line Nozzle: The nozzle provides 180 degree spray mode with large spray area nozzle.
Turbo Nozzle: High-speed rotation generates strong pressurized jet water with an angle
of 15 °. The turbocharger nozzle can save 50% of energy, 30% of water, 50% of cleaning
agent, and increase 50% of work efficiency, which is extremely economical.
Nozzle
Wand
Quick connect
collar
OPERATION 18
FOR TECHNICAL QUESTIONS, PLEASE CALL 1-855-888-3598
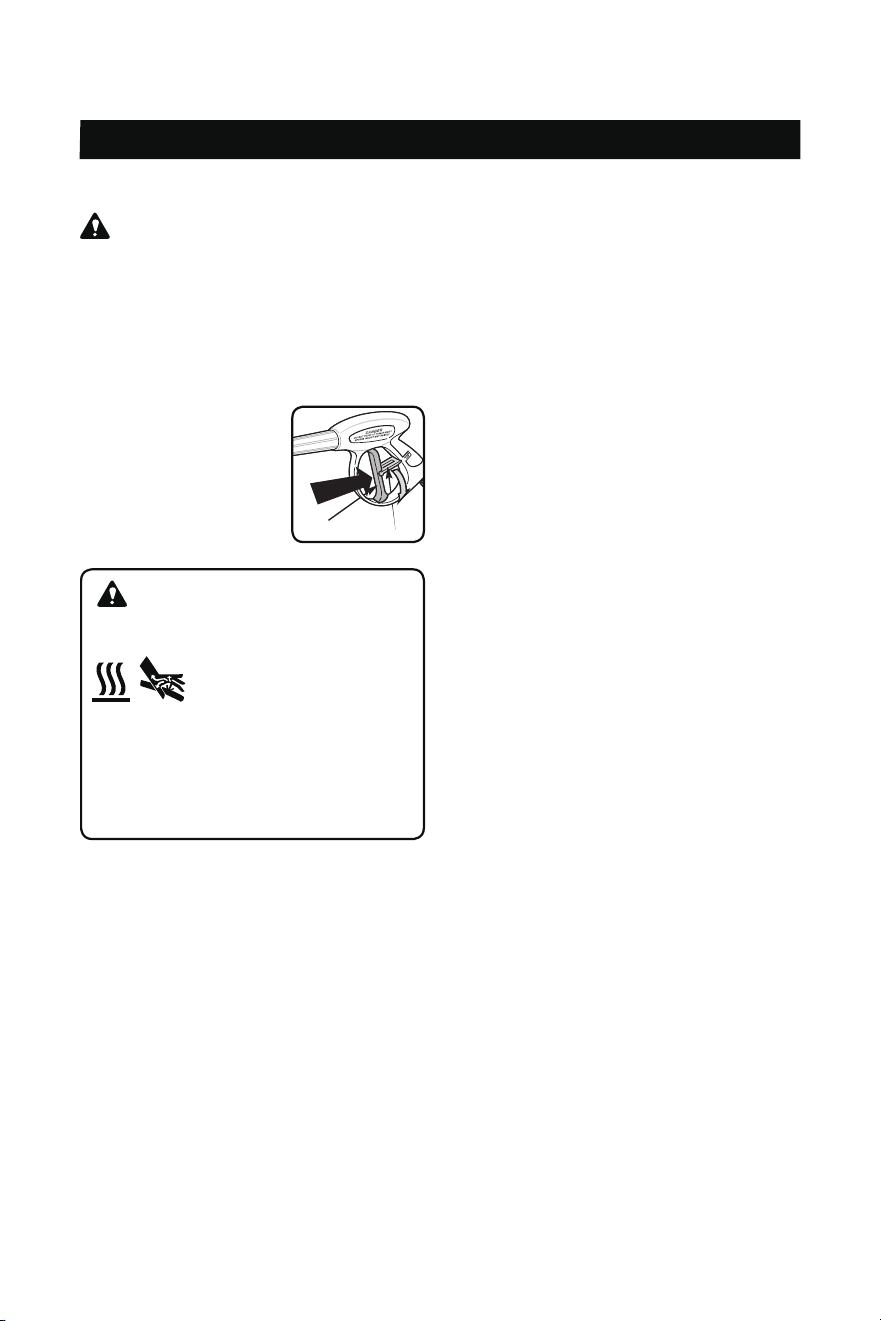
3. Using Spray Gun
WARNING:
• To prevent accidental discharge of high-
pressure washer, the trigger lock on the
trigger should be engaged whenever the
pressure washer is not in use.
• To disengage the Trigger Lock, push the
lock down and into its original position.
To Operate the Trigger
Trigger
Trigger Lock
3.1 Squeeze the trigger
to start water flow
to stop water flow.
through the nozzle.
3.2 Release the trigger
4. Washing/ Cleaning
4.1 Firmly grip spray gun with both hands.
4.2 Start with a high degree fan Nozzle,
and gradually use lower unit the
nozzle meets the task.
4.3 Point the nozzle to a safe direction
and squeeze the spray gun trigger
to allow the pump to purge air and
impurities in the system and then
redirect the nozzle to the working
surface.
4.4 Clean vertical and sloped surfaces
from the top down.
4.5 When cleaning horizontal surfaces,
occasionally use the stream to clear
the area of excess water.
WARNING: Hot Surface / Fluid
Injection hazard
SOME ENGINE
PARTS CAN BECOME
EXTREMELY HOT.
Do not allow the pressure hose to come
in contact with engine exhaust system
which can cause damage to the hose.
Damaged hoses can burst and can
cause injection injuries.
4.6
spray nozzle from 8 to 24 inches
For most effective cleaning, keep
away from cleaning surface. If you
get spray nozzle too close, you may
damage surface being cleaned. It is
not recommended to get closer than 6
inches when cleaning tires.
5. Pressure Adjustment
5.1 Vary your distance: To change the
effect of the pressure on the surface
being cleaned, vary the distance
between spray nozzle and the surface
being cleaned. The closer to the
surface the higher the effect of the
pressure. As you pull away from
the surface, the pressure effect will
reduce. For most effective cleaning,
keep the nozzle between 8 to 24
inches from surface being cleaned
6. Using Chemicals
NOTICE: Use only soaps and chemicals
designed for use with a Pressure Washer.
DO NOT USE CHLORINE BLEACH,
ACIDS OR INDUSTRIAL SOLVENTS.
Chemicals, soaps and cleaning solvents
will not siphon when a high-pressure nozzle
is used. Only use the Black (low pressure)
Nozzle when spraying detergents. Fill
Detergent Tank (if so equipped) with
prepared detergent solution and close the
cap. The Pressure Washer will draw one
gallon of detergent for every seven gallons
of water.
6.1 If your Pressure Washer is equipped
with an on board soap tank:
6.2 Fill the soap tank with detergent and
close the lid.
6.3 Change the nozzle in the wand to
Black Nozzle
6.4 Start the engine, and spray with soap.
6.5 If the Pressure Washer is not
equipped with a soap tank:
6.6 Make sure the Siphon Tube with
Strainer is connected to the brass
FOR TECHNICAL QUESTIONS, PLEASE CALL 1-855-888-3598
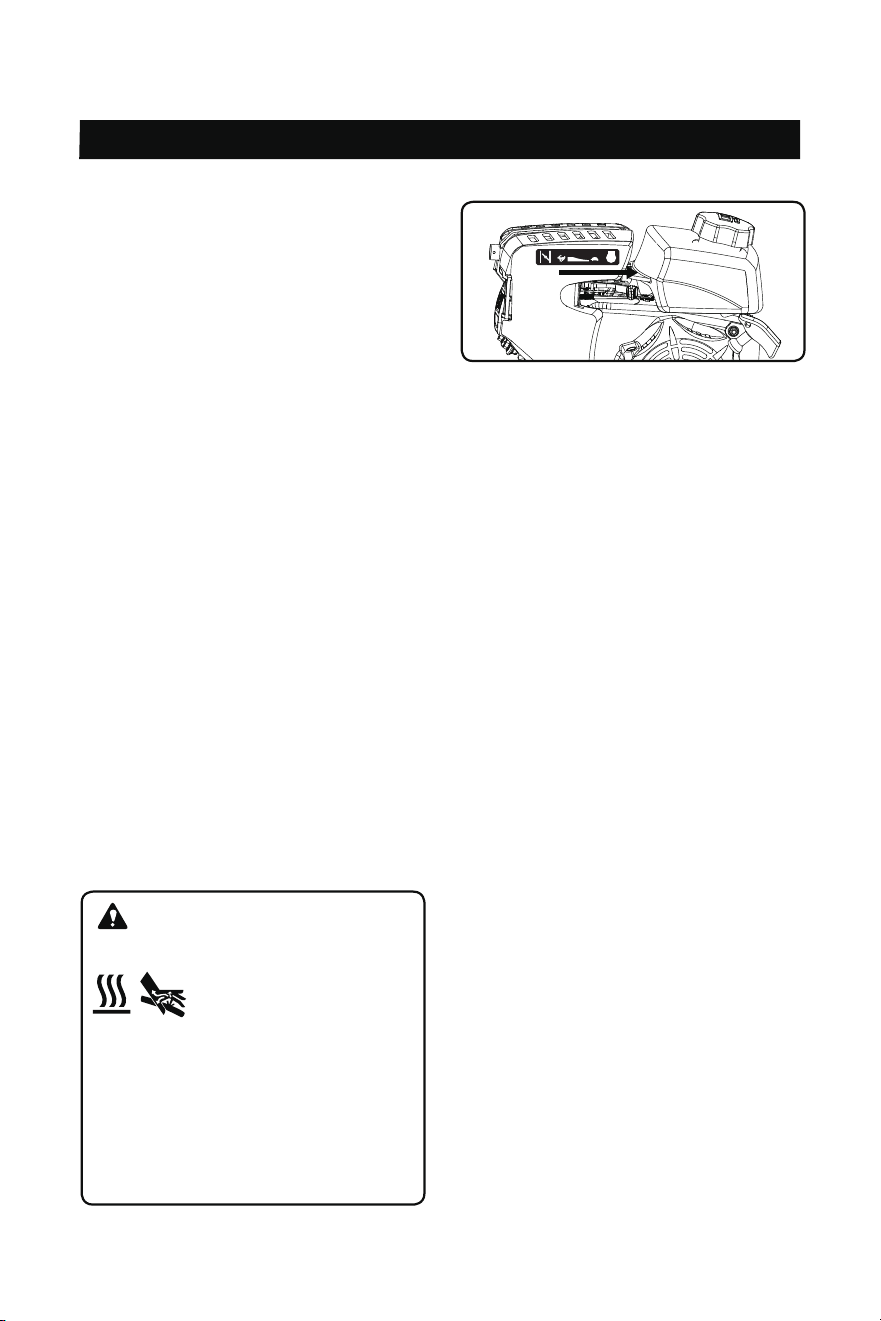
OPERATION 19
Move the lever all the way to the right
(past the first detent). There is a metal
sprint that will ground the ignition system
and shut the engine down.
barb near the high-pressure hose
connection area of the pump
6.7 Submerge the strainer end of the
siphon tube in the soap/detergent
solution bottle or bucket.
6.8 Change the nozzle to black nozzle.
6.9 Start engine and spray with soap.
7. To Rinse
7.1 Replace the nozzle with an appropriate
high-pressure nozzle (see “Selecting The
Right Nozzle” on Page 17). Squeeze the
trigger and wait for the detergent to clear.
7.2 Keep the spray gun a safe distance
from the area you plan to spray.
7.3 Apply a high-pressure spray to a small
area, and then check the surface for
damage. If no damage is found, it is okay to
continue cleaning.
7.4 For a vertical surface, start at the top
of the area to be rinsed, working down with
same overlapping strokes as you used for
washing and applying detergent.
8. Cleaning Tips
NOTICE: Never use the Pressure Washer
garden hose inlet to siphon detergent
or wax. Leaving chemicals and cleaning
solutions inside the pressure pump could
damage it. Damages created by leaving
soaps, chemicals and cleaning solutions
inside the pump can void the warranty.
9. Stopping Engine and Pressure Washer
WARNING: Hot Surface / Fluid
Injection hazard
SOME ENGINE
PARTS CAN BECOME
EXTREMELY HOT.
Release pressure from high-pressure
hose before removing from pump or
gun. If you intend to disconnect the high-
pressure hose after completing a wash,
avoid touching the engine exhaust
system while disconnecting the high-
pressure hose from the pump.
9.1 Release the trigger on the spray gun
Turn the water supply off.
handle.
9.2
9.3
9.4 Squeeze the trigger to release excess
pressure.
9.5 If pressure washer detergent has been
used, run clean water through the
system to eliminate detergent residue
using the following procedure:
Turn off the Engine as detailed in step
9.6
2.
9.7 Fill the detergent tank.
with clean water.
9.8 Remove the Nozzle and restart
the Engine (Following directions in
“Starting the Engine” on Page 15).
9.9 Point Wand in safe direction and hold
Turn off the Engine as detailed in step2.
down to flush water through system
until clean.
9.10
NOTICE: High Altitude Operation
At high altitudes over 3,000 feet, the engine
carburetor and any other parts that control
the fuel-air ratio will be affected, which
will decrease performance, increase fuel
consumption and increase emission. Proper
operation can be ensured by installing an
altitude kit by a qualified mechanic when
use at altitude higher than 3,000 feet. Refer
to the altitude kit and operation instruction
when needed.
STOP

FOR TECHNICAL QUESTIONS, PLEASE CALL 1-855-888-3598
MAINTENANCE 20
NOTICE: Regular maintenance will improve the performance and extend the life of your
Pressure Washer. Service should be done by a qualified person or technician.
Pressure Washer’s warranty does not cover items that have been subjected to operator
abuse or negligence. Only by maintaining Pressure Washer in accordance with instructions
in this manual will the full value of the warranty be honored. Some adjustments will need to
be made periodically to properly maintain the Pressure Washer. All service and adjustments
should be made at least one time each season. It is important that the maintenance chart
below be followed.
Many maintenance procedures, including any not detailed in this manual, will need to be
performed by a qualified technician for safety. If you have any doubts about your ability to
safely service the equipment or engine, have a qualified technician service the equipment
instead.
Engine Maintenance Schedule
NOTICE: This maintenance schedule is intended solely as a general guide. If
performance decreases or if equipment operates unusually, check systems
immediately. The maintenance needs of each piece of equipment will differ
depending on factors such as duty cycle, temperature, air quality, fuel quality,
and other factors.
NOTICE: The following procedures are in addition to the regular checks and
maintenance explained as part of the regular operation of the engine and
equipment.
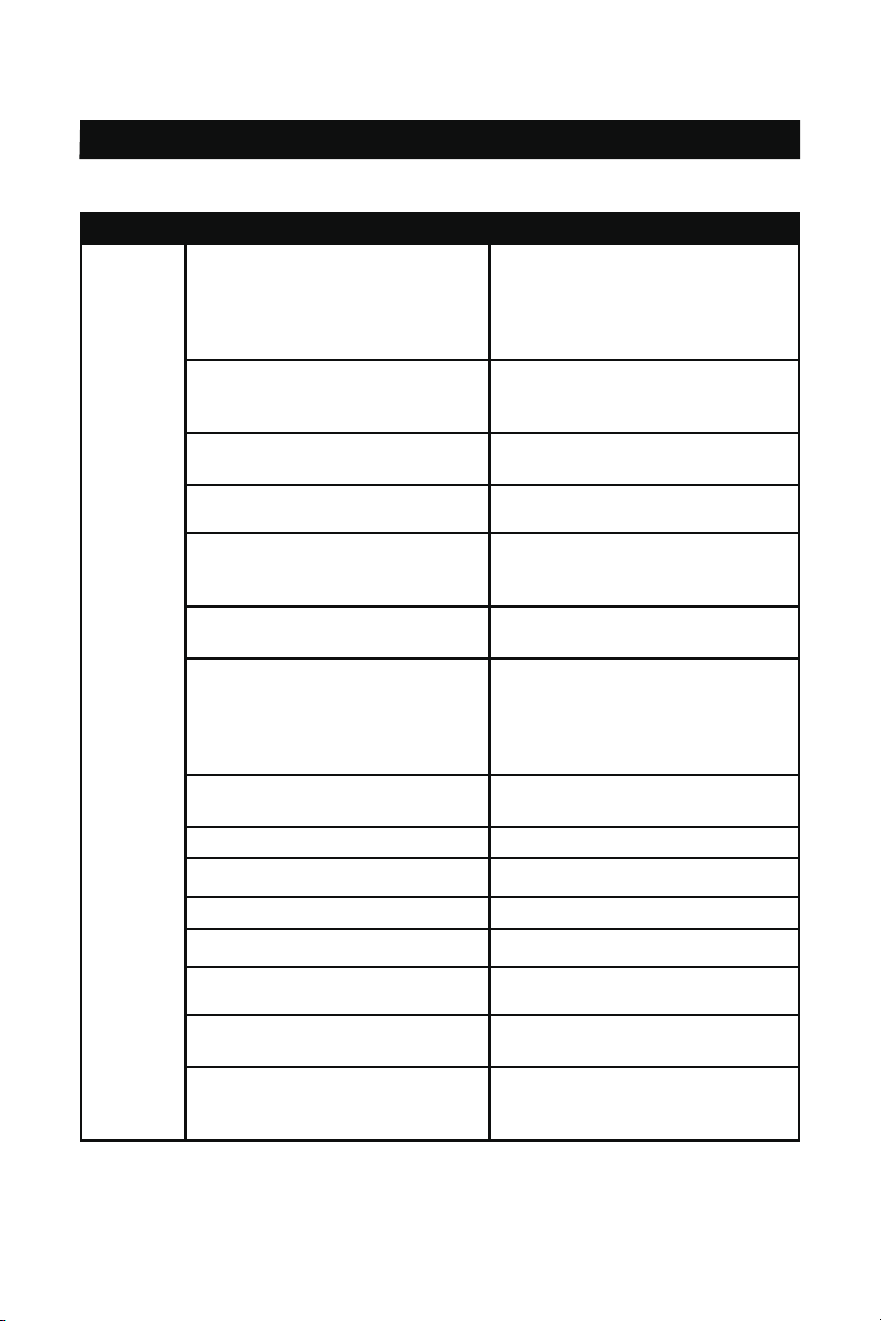
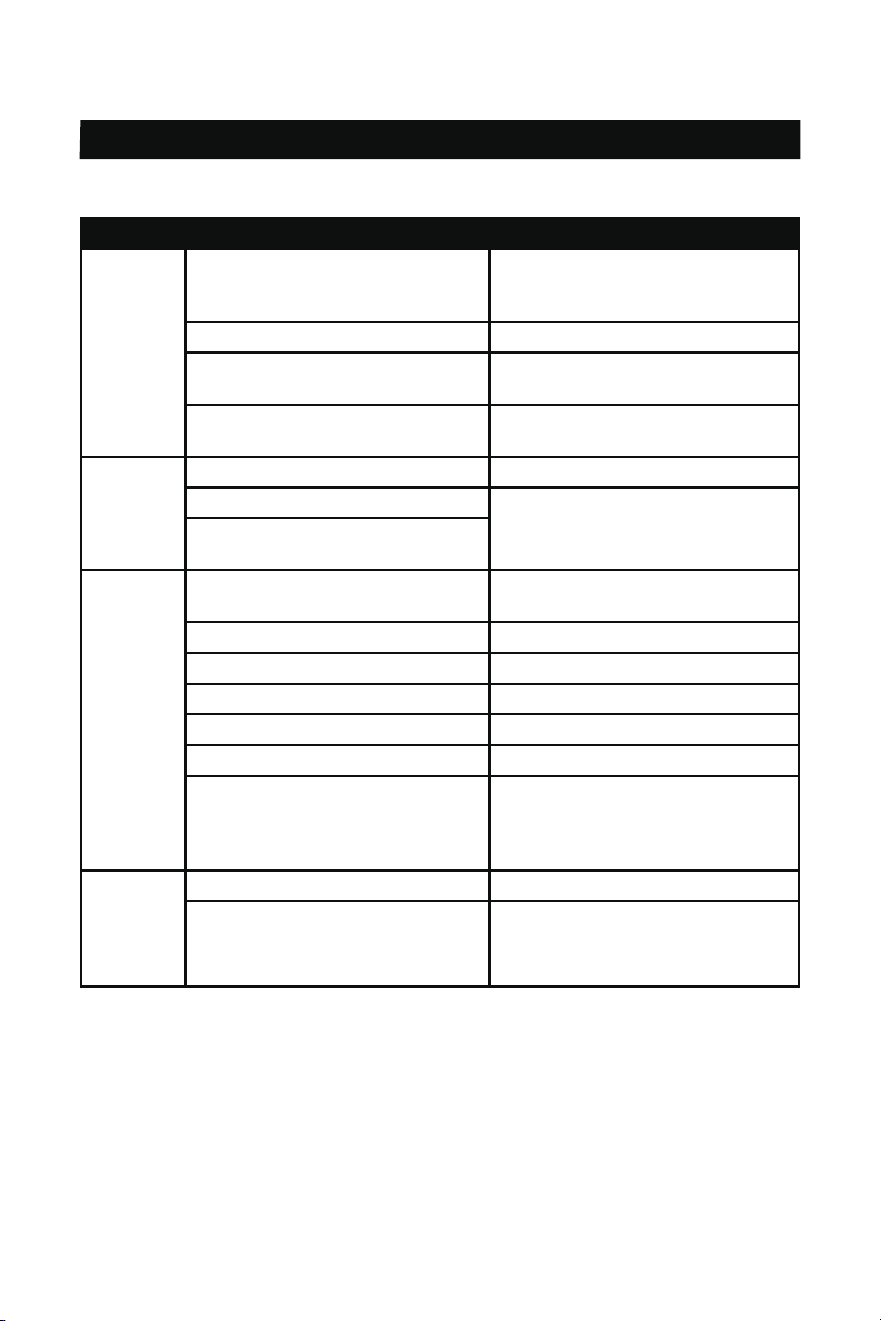
ENGINE MAINTENANCE CHART
ITEM TASK EACH USE 3 MONTHS 6 MONTHS 1 YEAR
ENGINE OIL
Check Level X
Replace X*
AIR FILTER
Check X
Clean X
Replace X*
SPARK PLUG
Clean, adjust X**
Replace X* **
SPARK
ARRESTER
Clean X
* Recommended to be performed more frequently if used in a dusty environment.
** Set gap to 0.6 - 0.7mm
FOR TECHNICAL QUESTIONS, PLEASE CALL 1-855-888-3598
MAINTENANCE 21
Pump Maintenance
NOTICE: The pressure pump is
maintenance free. If you notice any sign of
oil leakage in and around the pump, DO
NOT operate the pressure washer. Please
call our Customer Service at 1-855-888-
3598.
Cleaning Nozzle
Occasionally, the spray wand can become
clogged with foreign materials such as dirt.
When this happens, excessive pressure
can develop. Whenever the pressure
nozzle becomes particularly clogged, the
pump pressure will pulsate. It should be
immediately cleaned.
1.
Make sure Pressure Washer is off and
spray gun is locked.
2. Remove high pressure spray nozzle
from the spray wand. Using the nozzle
cleaning needle (provided), remove any
obstructions by inserting and carefully
moving the pin back-and-forth through
nozzle hole under clean running water.
3. After cleaning, remove the needle from
nozzle and store for future use.
4. Reassemble pressure nozzle to spray
wand.
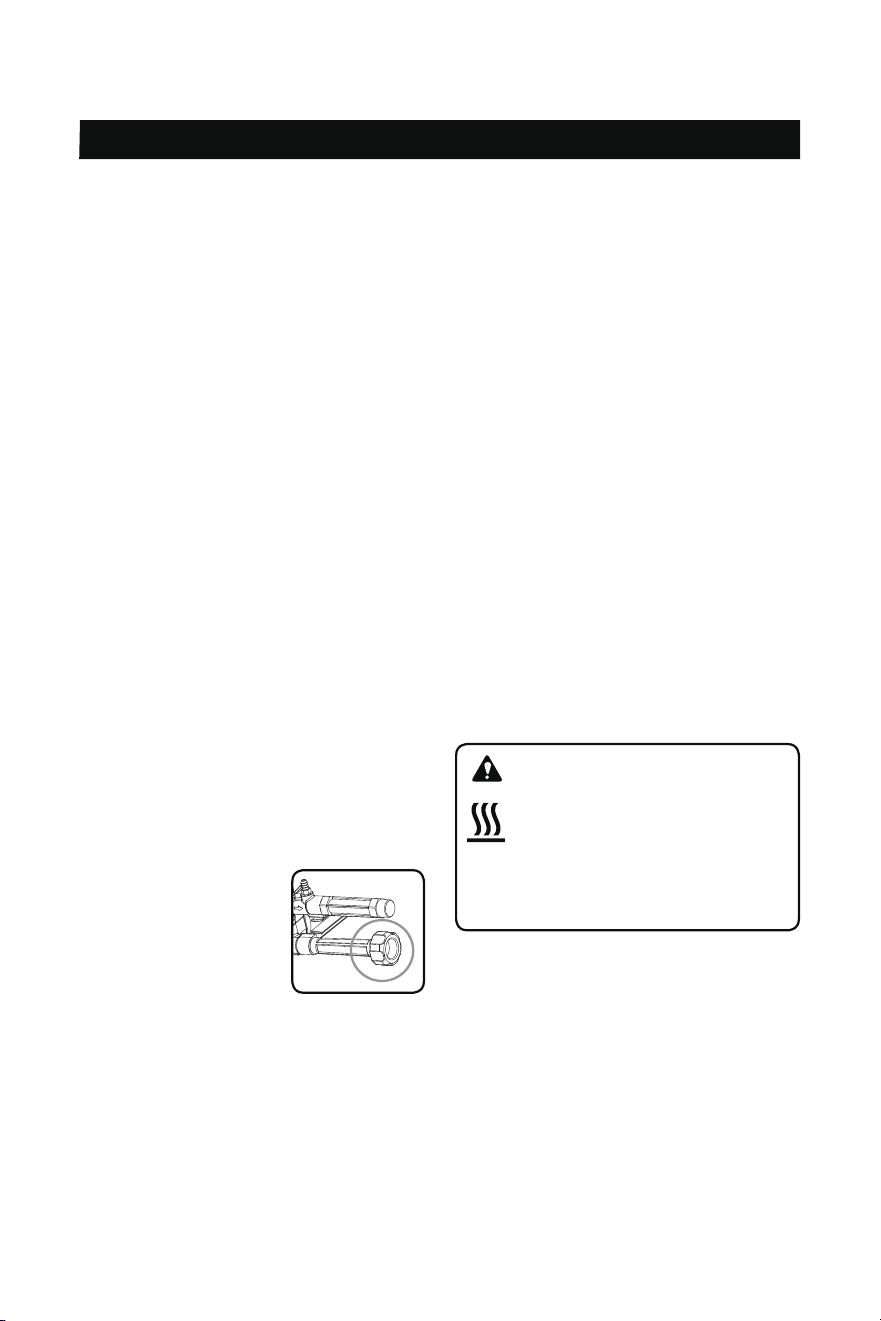
Cleaning Water Inlet Screen Filter
The pump water inlet has
a filter screen that should
be checked periodically
and cleaned if necessary.
• Disconnect inlet water hose.
•
Remove filter by grasping end and pull
straight out.
•
Clean screen filter by flushing both sides
with water.
•
Insert screen filter back inside water inlet
port.
NOTICE: Do not operate Pressure Washer
without water inlet screen filter in place.
Cleaning Pressure Washer
Daily or before use inspections should
include areas around and underneath
Pressure Washer looking for signs of fuel
or oil leaks. Preventative maintenance
should be taken if leakage is found. Clean
accumulated debris from outside and inside
Pressure Washer. Ensure all linkages,
springs and other engine controls are
kept clean. Inspect cooling air slots and
openings on Pressure Washer. Openings
must be kept clean and unobstructed for
peak performance of Pressure Washer.
Engine components should be kept clean
reducing risk of overheating and ignition of
accumulated debris.
• Use a damp cloth to wipe exterior
surfaces clean.
• Use a soft bristle brush to loosen caked
on dirt or oil.
• Use a shop-vacuum to pick up any loose
dirt and debris.
Changing Engine Oil
WARNING: Hot Surface
Oil is very hot during operation
and can cause sevier burns.
Before changing engine oil, wait for 30
minutes after shutting engine down, to
be sure engine oil has cooled.
1. Draining Engine Oil
1. Make sure the engine is stopped, cool
and is on a level surface.
2. Place a drain pan (not included)
underneath the crankcase’s drain plug,
located on bottom side of engine.
3. Clean the top of the Dipstick and the
area around it. Remove the Dipstick by
turning it counterclockwise, and wipe it
off with a clean, lint free rag.
1.
2. Fill crankcase with required amount of
Place product on flat level surface.
fresh clean engine oil (0.6 Quart), using
table below to determine the correct
viscosity.
3. Replace dipstick in hole, but don’t thread
in. Remove the dipstick to confirm oil
level. Replace dipstick and tighten
to finger tight, DO NOT Use a tool to
tighten. Over tightening will break or
damage the dipstick threads.
NOTICE: All oil should meet minimum
American Petroleum Institute (API) Service
Class SJ, SL or better. Use no special
additives. Select the oil’s Viscosity grade
according to the expected operating
temperature.
(See chart below)
• Above 40° F, use 1 0W-30
• Between 40° F and 10°F, use 1 0W-30
• Below 10°F, use synthetic 5W-30
5. Remove the drain plug and, if possible,
tilt the crankcase slightly to help drain
the oil out into the pan. Recycle used oil.
6. Replace the drain plug and tighten it.
2. Adding Engine Oil
FOR TECHNICAL QUESTIONS, PLEASE CALL 1-855-888-3598
MAINTENANCE 22
NOTICE: Do not run the engine with too
little oil. If equipped with Low Oil Shutdown,
the engine will not start with low or no
engine oil.
Spark Plug Maintenance
1. Disconnect spark plug cap from end of
plug. Clean out debris from around spark
plug.
2. Using a spark plug wrench, remove the
spark plug.
3. Inspect the spark plug:
• If the electrode is oily, clean it using a
clean, dry rag.
• If the electrode has deposits on it, polish
it using emery paper.
• If the white insulator is cracked or
chipped, the spark plug needs to be
replaced.
RECOMMENDED SPARK PLUGS
CHAMPION RA6HC
NGK DPCR63
NOTICE: Using an incorrect spark plug
may damage the engine. DO NOT over
tighten spark plug, or engine threads can
be damaged.
4. When installing a new spark plug, adjust
the plug’s gap to the specification on the
Specifications chart. Do not pry against
the electrode, the spark plug can be
damaged.
• Install the new spark plug or the cleaned
spark plug into the engine.
• Gasket-style - Finger-tighten until the
gasket contacts the cylinder head, then
tighten about 1/2-2/3 turn more.
5. Non-gasket-style - Finger-tighten until
the plug contacts the cylinder head, then
tighten about 1/16 turn more.
6. Reattach the spark plug cap securely.
Spark
plug
cap
FOR TECHNICAL QUESTIONS, PLEASE CALL 1-855-888-3598
MAINTENANCE 23
Air Filter Maintenance
1. Remove the Air Filter Cover and the
air filter(s) and check for dirt. Clean as
described below.
2. Cleaning:
• For paper filters: To prevent injury from
dust and debris, wear ANSI-approved
safety goggles, NIOSH-approved dust
mask/respirator, and heavy-duty work
gloves. In a well-ventilated area away
from bystanders, use pressurized air to
blow dust out of the filter. If this does not
get the filter clean, replace it.
•
For foam filters: Wash the filter in warm
water and mild detergent several times.
Rinse. Squeeze out excess water and
allow it to dry completely. Soak the filter
in lightweight oil briefly, then squeeze out
the excess oil.
3.
Install the cleaned filter(s). Secure the Air
Filter Cover before use.
Long-term Storage
When the equipment is to remain idle for
longer than 20 days, prepare the Engine for
storage as follows:
1. Cleaning. Wait for Engine to cool, then
clean Engine with dry cloth.
WARNING: Fire / Explosion
Hazard
Fuel and its vapors are
extremely flammable and
explosive which could cause burns, fire
or explosion resulting in death or serious
injury. Fill tank only in a well-ventilated
area away from ignition sources. If the
engine is hot from use, shut down and
wait for it to cool before adding fuel. Do
not smoke, or have open flame near
fuel, or area when refueling.
2. Fuel. Gasoline fuel can become stale
when stored over 30 days, which
will cause acid and gum deposits
to form in the fuel system or crucial
carburetor parts. To keep fuel fresh,
add fuel stabilizer to the fuel tank.
Draining gasoline is unnecessary if
the fuel stabilizer is used according to
the instructions that come with it. Run
Pressure Washer engine for a minimum
of five minutes, after stabilizer is added
to fuel, to allow it to circulate throughout
the engine. The engine and fuel can be
stored up to 24 months.
NOTICE: Be sure to have the water
connected to the pump when running the
engine for any purpose.
Lubrication
1. To protect against rust formation during
storage, oil the cylinder bore:
2. Change engine oil.
3. Clean out area around spark plug.
Remove spark plug and pour
approximately 1/2 oz (15 ml) of clean
engine oil into cylinder through spark.
4. Replace spark plug, but leave spark plug
cap disconnected.
Filter
Air filter cover
5. Pull Starter Handle to distribute oil
in cylinder. Stop after one or two
revolutions when you feel the piston start
the compression stroke (when you start
to feel resistance).
Disconnect spark plug wire from spark
plug and cover tip of spark plug wire with
insulating tape and place wire where it
cannot come in contact with spark plug or
Pressure Washer frame.
WARNING: Fire / Electrical Shock
Unintentional sparking can
cause fire or electrical
shock. Failure to observe
this warning can cause severe property
damage, severe burns and even death.
Storing Accessories
The Pressure Washer is equipped with
places to store your accessories as shown
(see diagram on page 8).
1. Place Spray Gun into Gun Holder
2. Place nozzles in the top panel.
3. Coil and tie Pressure Hose and hang on
the hose hanger.
FOR TECHNICAL QUESTIONS, PLEASE CALL 1-855-888-3598
MAINTENANCE 24
Pump Preparation
1. Disconnect the high-pressure hose and
the water supply hose from the pump.
2. Pull starter rope handle several times to
expel water from the pump.
NOTICE: It is normal to see water exit
both inlet and outlet of pump during this
exercise.
Storage Area
Cover and store in a dry, level, well-
ventilated area out of reach of children.
Storage area should also be away from
ignition sources, such water heaters,
clothes dryers and furnaces.
Preparation for Use After Storage
1. Slowly pull the starter cord a few times
to clean oil from the cylinder or to eject
any pump protector from the pump which
may have been added prior to storage.
2. Remove the spark plug from the cylinder.
Wipe oil from the spark plug and return it
to the cylinder and re-tighten.
3. Reconnect the spark plug wire.
4. Refuel engine per earlier instructions in
this manual.
CAUTION: Cold storage location
• If product will be exposed to temperatures below 32° F / 0° C during storage, the
use of a pump protection product (not included) is required. Use the pump protection
product per the pump protection manufacturer’s instructions.
• Failure to prepare the pump for exposure to cold temperature will cause damage to
the pump and void your warranty.
FOR TECHNICAL QUESTIONS, PLEASE CALL 1-855-888-3598
MAINTENANCE 25
Trouble Shooting
Problem Possible Causes Possible Solutions
Engine will
not start.
No fuel in tank or fuel valve is in
“OFF” position.
Fill fuel tank with fresh 87 + octane
unleaded stabilizer-treated gasoline
and turn fuel valve to “ON” position.
Do not use gasoline with more than
10% ethanol (E15, E20, E85, etc.).
Low quality, stale, dirty or
deteriorated gasoline.
Drain fuel tank and carburetor; fill
with fresh fuel.
Choke not in START position, cold
engine.
Move Choke to START position.
Carburetor not primed. Pull on Starter Handle to prime.
Dirty fuel passageways in
carburetor.
Clean out passageways using fuel
additive. Heavy deposits may require
further cleaning.
Carburetor needle stuck. Gently tap side of carburetor float
chamber with screwdriver handle.
Too much fuel in cylinder. This can
be caused by the carburetor needle
sticking.
Turn Choke to RUN position.
Remove spark plug and pull the start
handle several times to air out the
chamber. Reinstall spark plug and
set Choke to START position.
Intake valve stuck open or closed. Call customer service at:
1-855-888-3598.
Clogged Fuel Filter. Replace Fuel Filter.
Spark plug cap not secured Connect spark plug cap properly.
Spark plug electrode wet or dirty. Clean spark plug.
Incorrect spark plug gap Set spark plug gap to 0.6 - 0.7mm
Spark plug cap broken. Replace spark plug cap
Incorrect spark timing or faulty
ignition system.
Call customer service at:
1-855-888-3598.
Cylinder not lubricated.
(problem after long storage
periods).
Pour tablespoon of oil into spark
plug hole. Crank engine a few times
and try to start again.

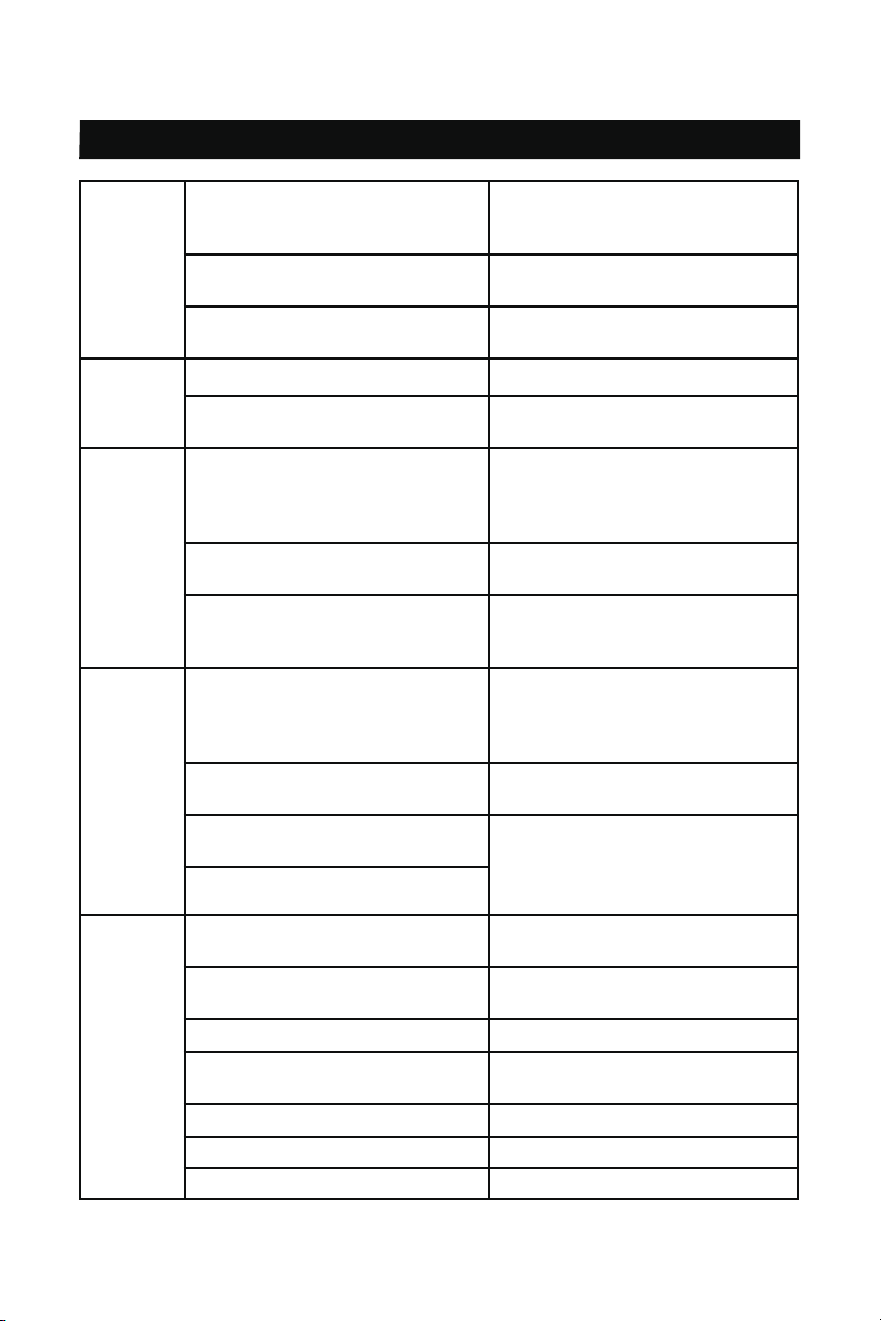
Problem Possible Causes Possible Solutions
Engine will
not start.
(cont).
Loose or broken spark plug.
(Hissing noise will occur when trying
to start.)
Tighten spark plug. If that does not
work, replace spark plug.
If problem persists, may have head
gasket problem.
Loose cylinder head or damaged
head gasket. (Hissing noise will
occur when trying to start.)
Tighten head.
If that does not remedy problem,
replace head gasket
Engine valves or tappets mis-
adjusted or stuck.
Call customer service at:
1-855-888-3598.
Low engine oil. Fill engine oil to proper level.
Product on slope or unleveled
surface, triggering low oil shutdown.
Move product to level surface.
Engine
“hunts” or
falters
Carburetor is running too rich or too
lean.
Call customer service at:
1-855-888-3598.
Engine
lacks
power
Cylinder compression is low.
Dirty air filter.
Clogged or dirty fuel filter.
Call customer service at:
Clean or replace fuel filter.
1-855-888-3598.
Engine
misfires
Spark plug cap loose. Check all wire connections.
Clean or replace fuel filter.
Incorrect or defective spark plug. Re-gap or replace spark plug.
Defective spark plug cap. Replace spark plug cap.
Old or low quality gasoline. Use only fresh 87+ octane stabilizer-
treated unleaded gasoline. Do not
use gasoline with more than
10% ethanol (E15, E20, E85, etc.).
Incorrect compression. Call customer service at:
1-855-888-3598.
Engine
suddenly
stops
Fuel tank empty or full of impure or
low quality gasoline.
Fill fuel tank with fresh 87+ octane
stabilizer-treated unleaded gasoline.
Do not use gasoline with more than
10% ethanol (E15, E20, E85, etc.).
Low oil shutdown. Fill engine oil to proper level.
FOR TECHNICAL QUESTIONS, PLEASE CALL 1-855-888-3598
MAINTENANCE 26
Trouble Shooting Continued
FOR TECHNICAL QUESTIONS, PLEASE CALL 1-855-888-3598
MAINTENANCE 27
Engine
suddenly
stops
(cont).
Defective fuel tank cap creating
vacuum,preventing
proper fuel flow.
Test/replace fuel tank cap.
Faulty magneto. Call customer service at:
1-855-888-3598.
Disconnected or improperly
connected spark plug cap.
Secure spark plug cap.
Engine
stop under
heavy load
Engine running cold. Allow engine to warm up prior to
Dirty air filter Clean or replace filter element.
operating equipment.
Engine
knocks
Old or low quality gasoline. Use only fresh 87+ octane stabilizer-
treated unleaded gasoline. Do not
use gasoline with more than
10% ethanol (E15, E20, E85, etc.).
Engine overloaded. Do not exceed equipment’s load
rating.
Incorrect spark timing, deposit
buildup, worn engine, or other
mechanical problem.
Call customer service at:
1-855-888-3598.
Engine
backfires
Impure or low quality gasoline. Use only fresh 87+ octane stabilizer-
treated unleaded gasoline. Do not
use gasoline with more than
10% ethanol (E15, E20, E85, etc.).
Engine too cold. Allow engine to warm up prior to
operating equipment.
Intake valve stuck or overheated
engine.
Call customer service at:
1-855-888-3598.
Incorrect engine timing.
No
pressure
or low
pressure
No nozzle inserted into wand quick
connect fitting
See “Selecting The Right Nozzle” on
Page 16.
Inadequate water supply. Water supply must be 5 GPM @ 20
PSI minimum.
Nozzle is clogged Clean Nozzle (See “Cleaning
Hose fitting leaking Check and tighten all hose fittings
Nozzle” on Page 20).
Air in hose. Squeeze trigger to remove air.
Water inlet filter screen obstructed. Remove and clean filter screen.
Choke lever in “START “ position. Move choke to “RUN” position.
Problem Possible Causes Possible Solutions
Output
pressure
varies
Not enough water supply. Check water supply hose for kinks,
leaks, or blockage. Open faucet all
the way.
Water inlet screen is clogged.
Nozzle is clogged. Clean Nozzle (See “Cleaning
Remove and clean filter screen.
Nozzle” on Page 20).
Nozzle has mineral build up Remove Nozzle and clean with
vinegar.
Water
or Oil
Leaking at
Pump
Loose connections. Check and tighten all connections.
Worn or broken O-rings. Call customer service at:
1-855-888-3598.
Pump head or tubes damaged from
freezing.
No
intake of
detergent
Detergent hose not properly
inserted into unit.
Soap injector hose cracked or split. Replace hose.
Push firmly onto injector fitting.
Wrong Nozzle.
Injector turned off.
Switch to black SOAP nozzle.
Turn on injector
Injection hose strainer clogged Clean hose and strainer.
Nozzle blocked. Clean nozzle.
Dried detergent in injector. Dissolve by running warm water
through the injection hose. Run
clean water through injector until
clear.
Water
leaking
at spray
gun/wand
connection
Loose hose connection. Check and tighten all connections.
Worn, broken or missing O-ring. Call customer service at:
1-855-888-3598.
FOR TECHNICAL QUESTIONS, PLEASE CALL 1-855-888-3598
MAINTENANCE 28
Trouble Shooting Continued

FOR TECHNICAL QUESTIONS, PLEASE CALL 1-855-888-3598
PARTS LIST AND DIAGRAM 29
General Assembly Diagram
31
32
24
1
2
3
4
5
6 7 8
9
10
11
12
13
14
15
162718
19202122
23
25
26
27
28
29
30

FOR TECHNICAL QUESTIONS, PLEASE CALL 1-855-888-3598
PARTS LIST AND DIAGRAM 30
General Parts List
Description
Part Qty.
1
2
3
4
5
6
7
8
9
10
11
12
13
14
15
16
17
18
19
20
21
22
23
24
25
26
27
28
29
30
31
32
Engine assy.
Handle bolt
Hex socket bolt
Panel
7 in 1 nozzle
Foam grip
Handle assy.
Gun holder
Flat key
Axial pump
Hex flange bolt
Plug
Frame assy.
R-split pin
Axle
Wheel
Hex flange nut
Hex flange bolt
Flat washer
20260-01585-00
33580-00023-00
30114-00001-00
33089-00631-00
34036-00198-00
33015-00014-00
20135-00543-00
34035-00044-01
33400-00003-00
20100-00538-00
30101-00297-00
33126-00008-00
20090-02121-00
34006-00020-00
34031-00057-00
20134-00035-00
30125-00003-00
30101-00042-00
30136-00113-00
30114-00016-00
34030-00115-00
20130-00509-00
20131-00027-01
34030-00056-00
20091-00021-00
20092-00016-00
20048-00165-00
34028-00003-00
34036-00198-00
34036-00199-00
70009-00999-00
70003-00855-00
Hex socket bolt
Shock-absorbing pad
Soap tank
Soap tank cap
Stud damping seat
Spray gun
Wand
High pressure hose
Siphon
7 in 1 nozzle
Turbo nozzle
Spark plug wrench
Nozzle cleaning tool
1
2
4
1
1
1
1
1
1
1
4
2
1
2
2
2
8
2
2
Description
Part Qty.
1
1
1
1
4
1
1
1
0.75
1
1
1
1
Part Number Part Number

FOR TECHNICAL QUESTIONS, PLEASE CALL 1-855-888-3598
WARRANTY 31
LIMITED WARRANTY
KEEP YOUR RECEIPT
Proof of purchase will be required to substantiate any warranty claim.
WHAT IS COVERED:
A-iPower Corp. warrants to the original retail purchaser in the United States of America,
or Canada that this product is free of defects in material and workmanship and agrees,
at A-iPower Corp’s direction, to either repair, provide replacement parts for, or replace
(without charge for parts or labor) any product or component with a material defect for a
period of 3 years from the date of purchase, except as limited below. Warranty service
and replacement parts are warranted only for the duration of the warranty on the original
product. All replaced parts or products become a property of A-iPower Corp. This product
is also covered by an Emissions Control System Warranty which is separate from and in
addition to the warranty.
Warranty
A-iPower Limited Warranty – 3 Years Residential and 1 Year Commercial
3 years Residential warranty applies as follow: 1st year Parts & Labor / 2nd to 3th year Parts
Thank you for choosing A-iPower products. To ensure proper registration of your product
warranty, please submit your warranty registration along with proof of purchase within 10
days of the date of purchase, this can be done by:
A. Completing the Warranty Registration
form at the back of this manual and
mailing to:
A-IPOWER CORP.
10887 COMMERCE WAY UNIT A
FONTANA CA 92337 USA
B. Visit us at www.a-ipower.com and click
the product registration icon.
Warranty Term
A-iPower will provide warranty for any of its products purchased through any authorized
A-iPower dealer in North America to the original purchaser and will be warranted against
defects in material or workmanship for a period of three (3) years for Consumer use from
date of purchase, subject to exclusions noted herein. Commercial and Rental applications
are warranted for a period of one (1) year from date of purchase.
“Consumer Use” – residential household use by a retail consumer
“Commercial Use” – all other use – commercial , business, industrial, or rental purpose.
How to Obtain Warranty Service
Please call our Customer Service Dept. 855-888-3598 or e-mail to support@a-ipower.com
Please have necessary information available – Model Number, Serial Number, Proof of
Purchase.
ONLY.

FOR TECHNICAL QUESTIONS, PLEASE CALL 1-855-888-3598
WARRANTY 32
DO NOT RETURN THE PRODUCT TO THE PLACE OF PURCHASE
A-iPower Customer Service Dept. will assist with all product related questions and will
help troubleshoot issues and will send any replacement parts as necessary while product
is within the warranty period at no charge. If the issue cannot be resolved then A-iPower
Customer Service Dept. at its discretion determine and authorize diagnosis and repair
through one of its authorized Service Centers. A-iPower corp. at its discretion may choose
to provide replace of part, component, or product. Service or replacement of parts at any
unauthorized repair facility without prior authorization will not be covered by this warranty.
Warranty Exclusions
This warranty does not cover the following:
Regular wear and maintenance – this warranty will not cover repair when normal use has
exhausted the lifetime of a part(s) or engine.
Installation and Maintenance - this warranty does not cover improper or unauthorized
- this warranty does not cover spark plugs, air filters,
- this warranty does not cover wearable parts such as filers, spark
Normal maintenance parts
adjustments, or other related service due to obstructions and other build ups resulting from
assembly, alteration, modification or any other damage resulting from misuse or neglect.
improper maintenance
Additional exclusions
plugs , o-rings, batteries etc. It does not cover any cosmetic defects such as scratches
to paint, decals etc. It does not cover any damage resulting from use of non-original
manufacturer’s parts, use of after-market parts. It does not cover any failures due to acts of
God and other force majeure events beyond the control of the manufacturer.
Warranty limits and Implications and Consequential Damages
A-iPower is not obligated to cover any loss of time, use of product, freight cost, or any other
incidental or consequential claim from the use of this product. This warranty is in Lieu of all
other warranties, express or implied
This warranty gives you specific legal rights which vary from state to state.
MERCHANDISE RETURN GUIDELINES
• All products must be returned in original or equivalent packaging. Improperly packaged
returns will not be accepted.
• Must have adequate packing for transportation
•
Federal Law requires that all machines that utilize gasoline, oil, or other flammable
liquids must be drained Completely & Thoroughly prior to shipment.
•
Gas caps and oil plugs must be left off for 24 hours prior to shipping. Please note: liability
for this violation of the law resides with the sender of the shipment.
• Return to address provided in return authorization, using the parcel service required.
Units returned without authorization will not be honored.
•
Please Note: Refunds will not be granted for items that have been modified or damaged
by abuse or usage not in accordance with product instructions.

NOTES 33
_____________________________________________________________________
_____________________________________________________________________
_____________________________________________________________________
_____________________________________________________________________
_____________________________________________________________________
_____________________________________________________________________
_____________________________________________________________________
_____________________________________________________________________
_____________________________________________________________________
_____________________________________________________________________
_____________________________________________________________________
_____________________________________________________________________
_____________________________________________________________________
_____________________________________________________________________
_____________________________________________________________________
_____________________________________________________________________
_____________________________________________________________________
_____________________________________________________________________
_____________________________________________________________________

Fontana, CA 92337 USA
Phone: 1-855-888-3598
support@a-ipower.com
www.a-ipower.com
Made in China
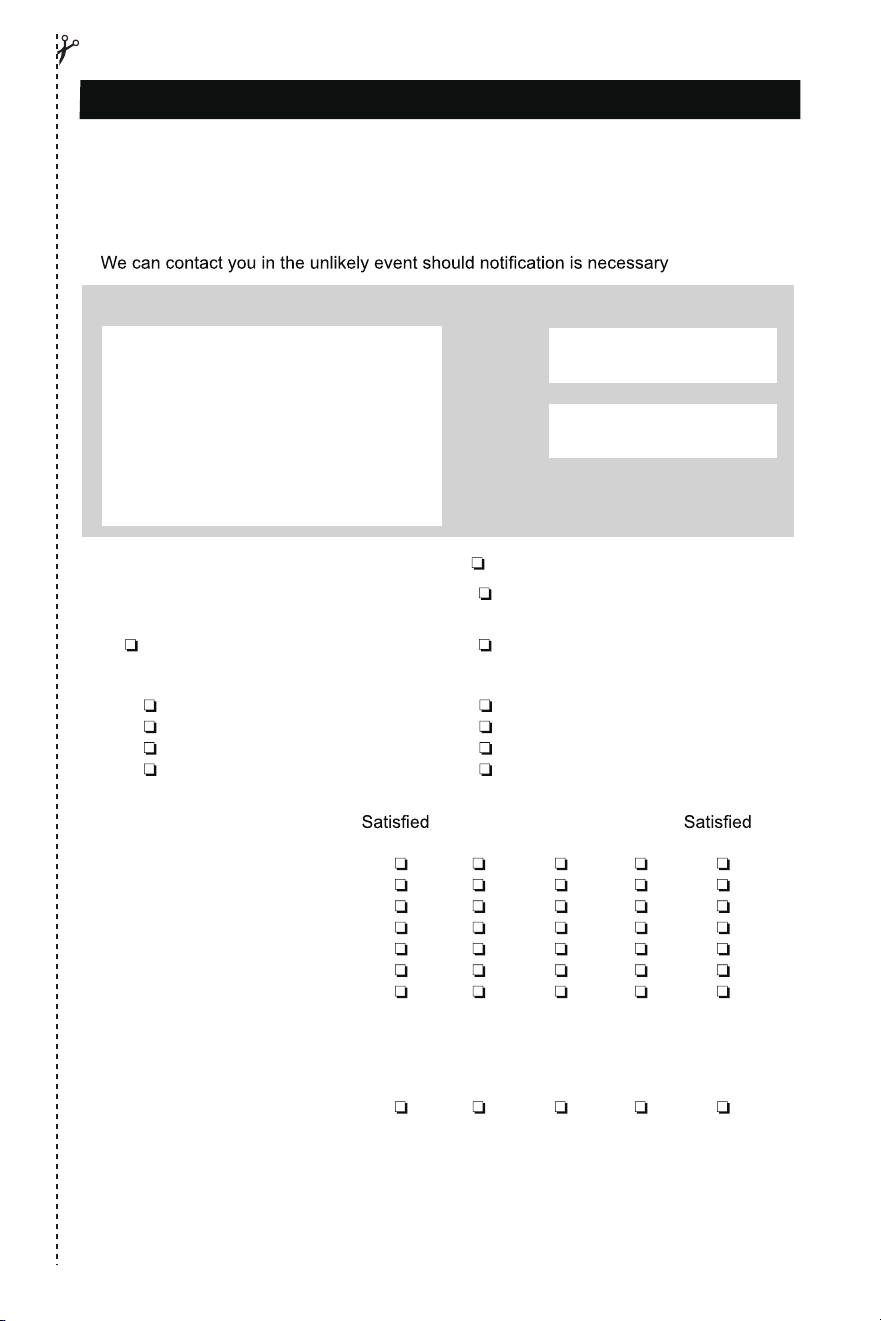
A-iPOWER WARRANTY REGISTRATION FORM
Register your product by emailing this form to support@a-ipower.com or register on-line at:
www.a-ipower.com.
Registering your product is important , it provides the following protections:
1. You have record of product purchased
2. Customer Service can Better serve you for Warranty related issues
3.
1.THE PRODUCT WAS PURCHASED FOR: A. Residential cleaning
B. Other ____________________
2.THIS PRODUCT IS A: (select one)
A. First time purchase B. Replacement
3.HOW DID YOU FIRST LEARN OF THIS PRODUCT: (select one)
A. Radio G. Direct Mail
B. Store Display H. From Friend/Relative/Neighbor
C. Contractor I. Internet
D. Trade Show J. Other ____________________
4. PLEASE RATE THE Completly Not at all
FOLLOWING:
5 4 3 2 1
Product Value for Price Paid
Performance
Features
Product Appearance
Warranty
Ease of Maintenance
Noise Level
5 . HOW LIKELY ARE YOU TO RECOMMEND A-iPOWER TO FAMILY OR FRIENDS?
Extremely Not Likely
Likely at all
5 4 3 2 1
Privacy Statement: A-ipower is committed to respecting your privacy and to complying with
the regulations regarding the protection of personal data. The survey data we collect is for
the purposes of marketing or product support and demographic information about the entire
audience registering their products.
Customer Information:
Name: _________________________
Phone: _________________________
E-mail: _________________________
Address: _______________________
City, State: ______________________
Zip code: _______________________
Purchase Date: __________________
Product Information:
Serial #
Model #
The serial No. can be found on the engine.
PLEASE NOTE: Your product cannot be
registered without model & serial numbers.

Fontana, CA 92337 USA
Phone: 1-855-888-3598
support@a-ipower.com
www.a-ipower.com
32082-05002-00
Made in China