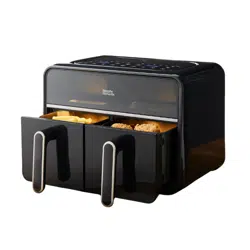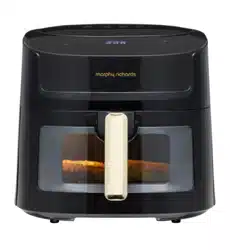
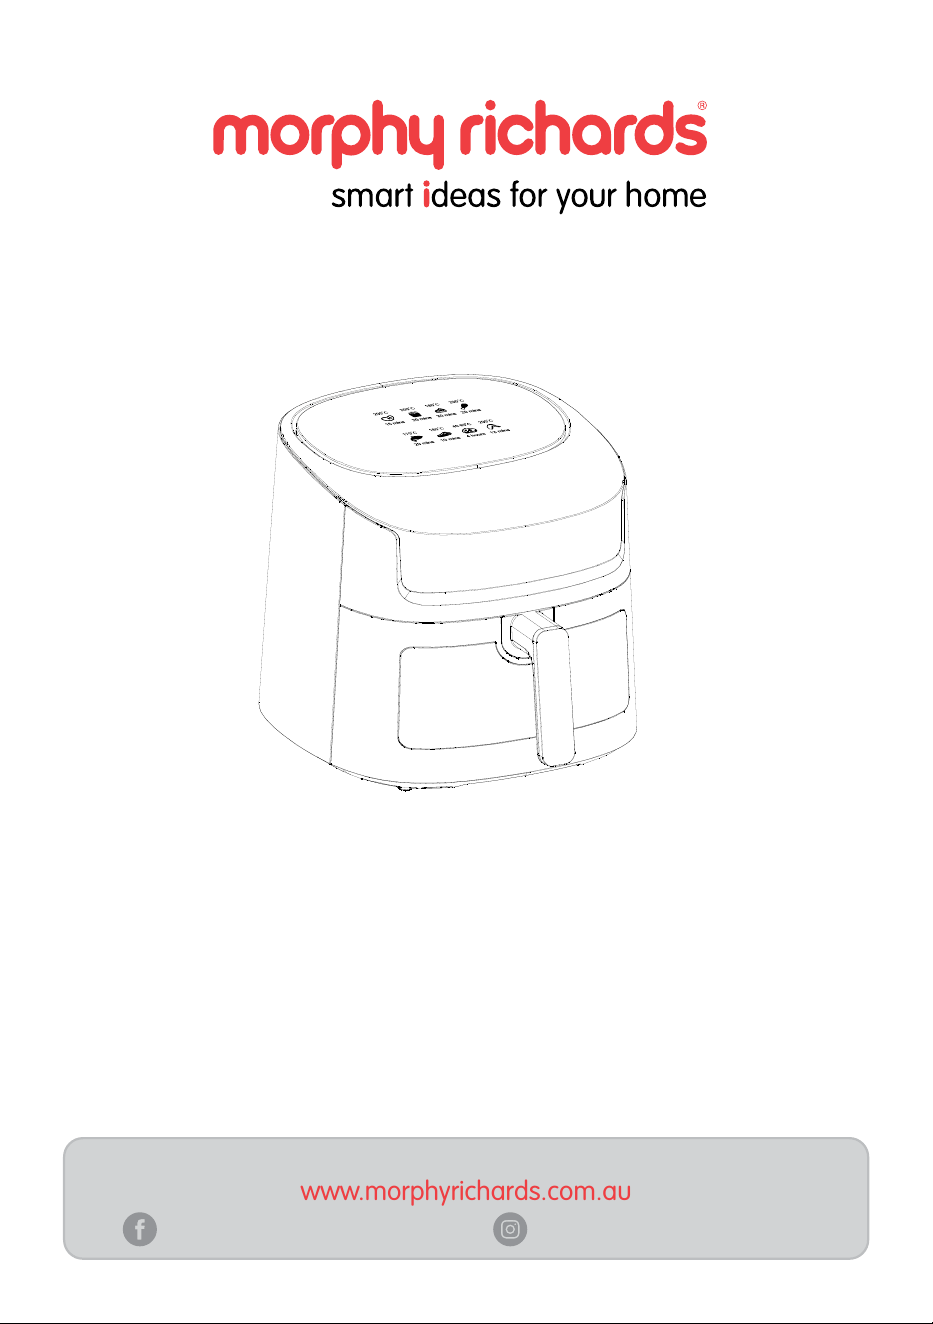
Model: MRAF72BK
INSTRUCTION MANUAL
Read these instructions carefully before
using this appliance for the rst time.
STORE THESE INSTRUCTIONS CAREFULLY
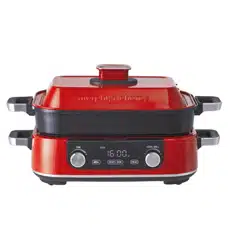
Digital Air Fryer
For product hints and tips plus more join us at
facebook.com/MorphyRichardsAUS instagram.com/morphyrichardsau
www.morphyrichards.com.au
200 200 160
15
180
10
170
20
20040-80
134
20
200
2030

2
WARNING
To reduce the risk of fire, electric shock, injury to persons or
damage to property, follow basic precautions including the
following:
• WARNING: Do not touch hot surfaces. Use drawer handle.
• WARNING: Misuse of appliance could cause personal injury.
• To protect against electric shock, do not immerse power cord,
plug, or appliance in water or other liquid.
• If the power cord is damaged, it must be replaced by the
manufacturer or its service agent or a similarly qualified person
in order to avoid a hazard.
• Keep the appliance and its cord out of reach of children.
• This appliance is not intended to be operated by means of an
external timer or a separate remote-control system.
• This appliance is not intended for use by persons with reduced
physical, sensory or mental capabilities or lack of experience
and knowledge unless they have been given supervision
or instruction concerning use of the appliance by a person
responsible for their safety.
• Children should be supervised to ensure that they do not play
with this appliance and children should be watched carefully
to avoid scalding them.
• In the absence of supervision, the cleaning and maintenance
work should not be done by a child.
• Use of accessories not recommended or sold by the original
manufacturer may cause risks of fire, electric shock or
personal injury.
IMPORTANT SAFETY INSTRUCTIONS

3
• This appliance must be used in accordance with the
instructions and must not be used for other purposes.
• This appliance is intended to be used in household and similar
applications such as:
- staff kitchen areas in shops, offices and other working
environments;
- farm houses;
- by clients in hotels, motels and other residential type
environments;
- bed and breakfast type environments.
Location
• For indoor use only. Do not use outdoors or near water.
• The appliance and accessories should be positioned on a flat,
heat-resistant surface away from water.
• The appliance should not be used on or near a high
temperature gas or electric stove.
• Do not obstruct the air outlet on the back and the air inlet on
the top of the Air Fryer with any objects.
• Keep the appliance at least 10cm away from walls or other
objects during operation.
Power cord
• WARNING: This appliance should NOT be used with extension
leads and/or power boards.
• The power cord should reach from the socket to the appliance
without straining the connections.
• Remove the plug from the socket, grasp the plug and pull out
the power cord, do not pull on the cord directly.
• Do not let the cord hang over the edge of the table or counter
and keep it away from any hot surfaces.

4
• Do not let the cord run across an open space e.g. between a
low socket and table.
Personal safety
• WARNING: The Air Fryer will not operate unless the drawer is
fully closed.
• WARNING: This appliance generates heat and steam escapes
during use. Proper precautions must be taken to prevent the
risk of burns, fires, or other injury to persons or damage to
property.
• WARNING: This appliance is hot during operation and retains
heat for some time after turning OFF. Always use oven gloves
when handling hot materials and allow metal parts to cool
before cleaning. Do not place anything on top of the appliance
while it is operating or while it is hot.
• WARNING: After air frying, the drawer, frying rack and all
cooked foods are hot. Extreme caution must be used when
handling the Air Fryer drawer and frying rack. Place the drawer
and frying rack on a heat-resistant surface after use.
• WARNING: The appliance surface is subject to residual heat
after use.
• WARNING: Under or over filling the drawer may damage the
Air Fryer and could result in serious personal injury.
• Do not use any of the appliance parts in a microwave or on
any cooking/heated surfaces.
• Extreme caution must be used when moving an appliance
containing hot oil or other hot liquids.
• To turn off, end all function operations on the control panel.
Always unplug when not in use.

5
• The drawer must be fully inserted into the grooves on the top
of the housing cavity using the drawer handle until a click is
heard.
• Unplug from outlet when not in use and before cleaning. Allow
to cool completely before removing or adding parts, and
before cleaning the appliance.
• Do not operate any appliance with a damaged lead or plug, or
after an appliance has malfunctioned, or has been dropped or
damaged in any way.
Treating scalds
• Be careful of hot oil or steam, as it can be ejected from the
appliance.
• Run cold water over the affected area immediately. Do not
stop to remove clothing, seek medical advice quickly.
Electrical requirements
• WARNING: This appliance should NOT be used with extension
leads and/or power boards.
• Check that the voltage on the rating label of your appliance
corresponds with your house electricity supply which must be
A.C.
READ CAREFULLY AND KEEP FOR FUTURE REFERENCE
CAUTION: HOT SURFACE
PLEASE BE AWARE OF HOT SURFACES
HANDLE WITH CARE
6
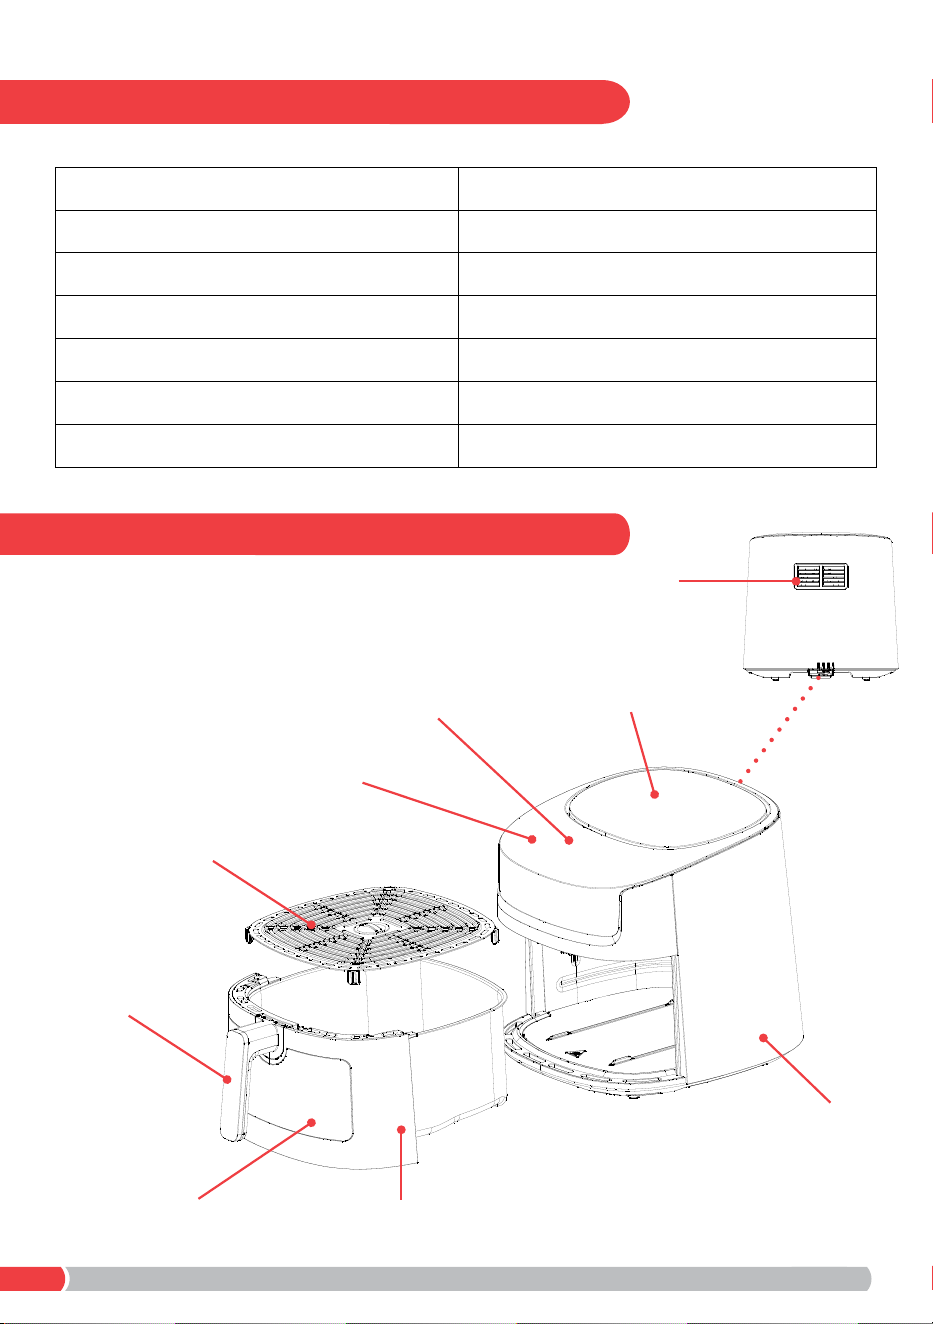
Model: MRAF72BK
Colour: Black
Working Capacity: 6.5L
Rated Power: 1800W
Rated Voltage: 220-240V~ 50-60Hz
Dimensions (W x D x H): 319 x 387 x 303mm
Net Weight: 4.8kg
PRODUCT OVERVIEW
SPECIFICATIONS
Control Panel
200 200 160
15
180
10
170
20
20040-80
134
20
200
2030
Air Outlet
LED Display
Cover
Viewing Window Drawer
Housing
Drawer Handle
Frying Rack
7
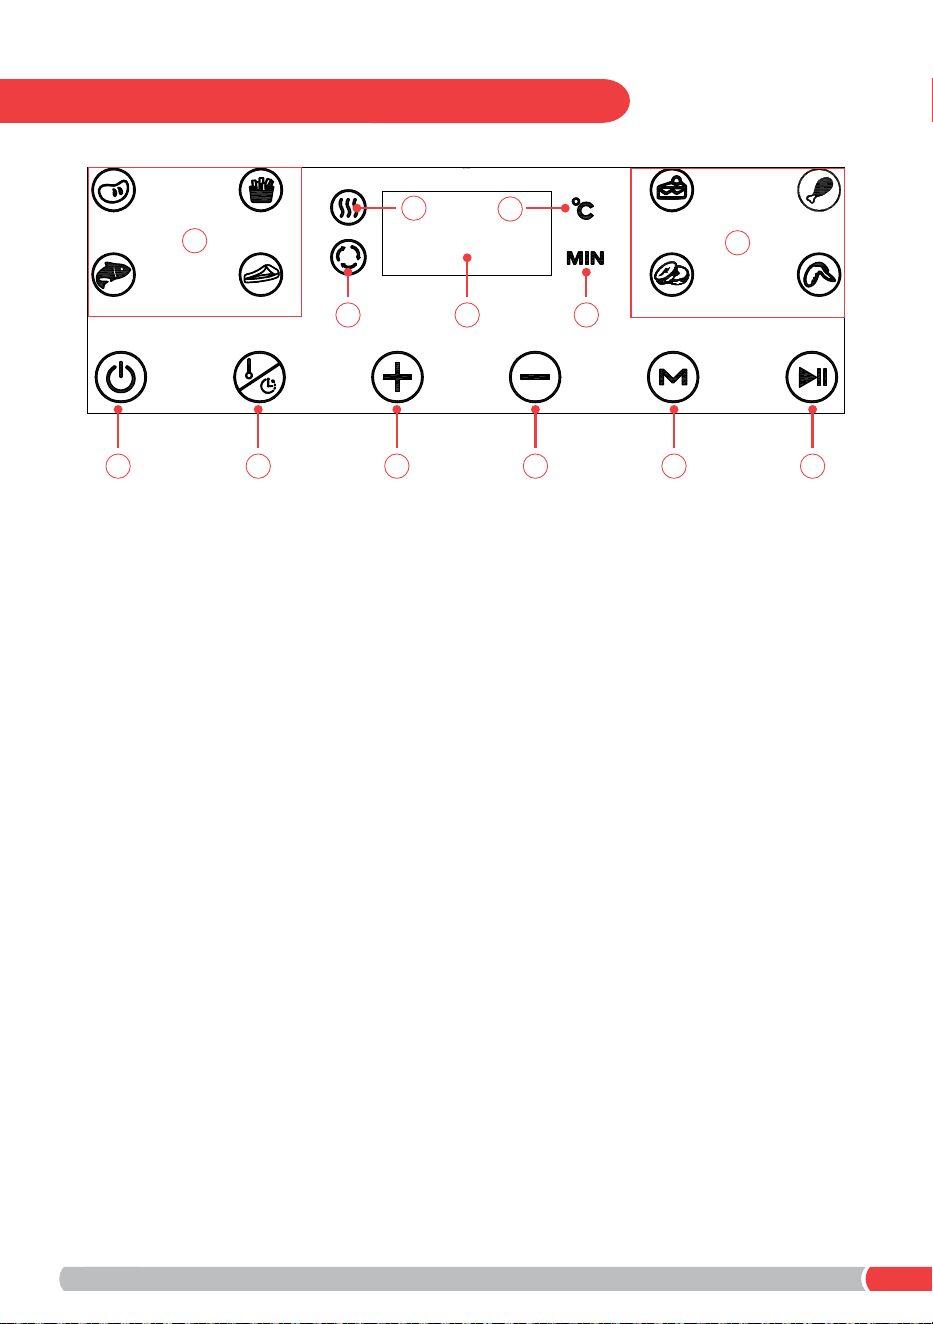
CONTROL PANEL
Touch Control Panel
A - On/Off Button
B - Time/Temperature Mode Button
C - Increase Time/Temperature Button (by 1 minute/5°C every press)
D - Decrease Time/Temperature Button (by 1 minute/5°C every press)
E - Program Function Button
F - Start/Pause Button
LED Display Indicators
1 - Displays the current selected operation time or temperature
2 - Indicates the heater is in operation and the temperature is
increasing to the selected setting
3 - When displayed, the fan motor is in operation
4 - Indicates the selected temperature shown on the display
5 - Indicates the remaining operation time (Minutes) on the display
6 - Flashes when a preset program is in operation after pressing the
Program Function Button (E)
A B C D E F
13 5
2
4
6
6

8
BEFORE FIRST USE
1. Remove all packaging materials.
2. Remove all stickers and labels from the appliance. Do not
remove the rating label on the bottom of the appliance.
3. Clean all parts to remove any dust or manufacturing residue.
4. Thoroughly wash the Drawer and Frying Rack by hand with
warm soapy water and a non-abrasive sponge. Do NOT
immerse the Housing in water.
5. Wipe the inside and outside of the appliance with a moist
cloth. Do not use chemical cleaners.
6. Drawer, ensure it is inserted correctly.
7. Use the appliance on a horizontal, flat and stable heat-
resistant surface, away from a heating source and where it will
not come in contact with water.
8. In rare cases, the non-slip feet on the base of the appliance
may cause marking on some types of worktop surface. To
prevent any risk of this occurring, place non-plastic (heat-
resistant) coasters or place mats under the feet of the
appliance.
NOTE: During first use, the Air Fryer may emit a slight odour. This
is normal.

9
USING YOUR AIR FRYER
1. Remove the Drawer entirely from the Housing.
2. Ensure the Frying Rack is placed securely in the bottom of the
Drawer and re-insert the Drawer into the Housing until it clicks
into place. Ensure the Drawer is fully closed. A safety switch
will prevent the appliance from working if not closed properly.
3. Plug the Air Fryer plug into the mains power. All the lights on
the display screen will turn on for 1 second and the air fryer will
enter standby mode. The On/Off button (A) will flash slowly.
4. Press the On/Off Button (A) once, then Press the Temperature
Mode Button (B) once and press the Decrease Temperature
Button (D) to set the pre-heat temperature to 180°C, then
press the Time Mode Button (B) once and press the Decrease
Time Button (D) to set the pre-heat time between 3-5 minutes,
press Start/Pause (F). This will pre-heat the Air Fryer. When the
pre-heat is complete, it will beep 5 times with the display will
show “0:00”, then automatically switch off the Air Fryer after 20
seconds.
5. Remove the Drawer from the Air Fryer and place the food
evenly onto the Frying Rack inside the Drawer and place back
into the Housing securely until the Drawer clicks. Do not fill
more than half of the Drawer capacity.
6. Press the Temperature Mode Button (B) and then press
the Decrease Temperature Button (D) to select the correct
temperature for the food to be cooked. The default temperature
is set at 200°C, and the default cooking time is 15 minutes.
The temperature range can be set between 40°C - 200°C in
5°C increments, press and hold the buttons to change the
temperature faster.
7. Use the Time Mode Button (B) and Increase Time Button (C) or
Decrease Time Button (D) to select the desired cooking time.
Cooking time range can be set between 0:01 - 0:60 mins, press
and hold the button changes the time faster.

10
USING YOUR AIR FRYER
8. Press the Start/Pause Button (F) and the Air Fryer will begin
cooking your food.
9. When the Air Fryer reaches its set temperature, the heating
indicator (2) will turn off.
IMPORTANT: When you pull the drawer out from the Air Fryer
body, the appliance stops working. The appliance will resume
working when the Drawer is pushed into position again.
Note: When the timer has expired, the Air Fryer will beep 5 times
and automatically turn off. You can switch off the Air Fryer at
anytime by pressing the On/Off button (A).
Note: It is recommended to check your food halfway through the
cooking time to ensure food is cooked evenly.
Note: Take care when turning hot food in the Drawer. To avoid
personal injury or property damage, do not turn the food by
shaking the whole appliance, use wooden or plastic utensils.
Note: Hot oil may accumulate at the bottom of the drawer. To
avoid personal injury or food contamination, be sure to remove
any residual oil at the bottom of the Drawer before cleaning.
IMPORTANT: After cooking, never place the Drawer onto a heat
sensitive surface, always place on a suitable heat protective
surface.
IMPORTANT: Do not turn the Drawer upside down as the Frying
Rack will fall out. Remove food using wooden or plastic utensils
only.
Note: After use, press the On/Off button (A) before unplugging
the appliance and allow to cool completely before moving or
cleaning.
11
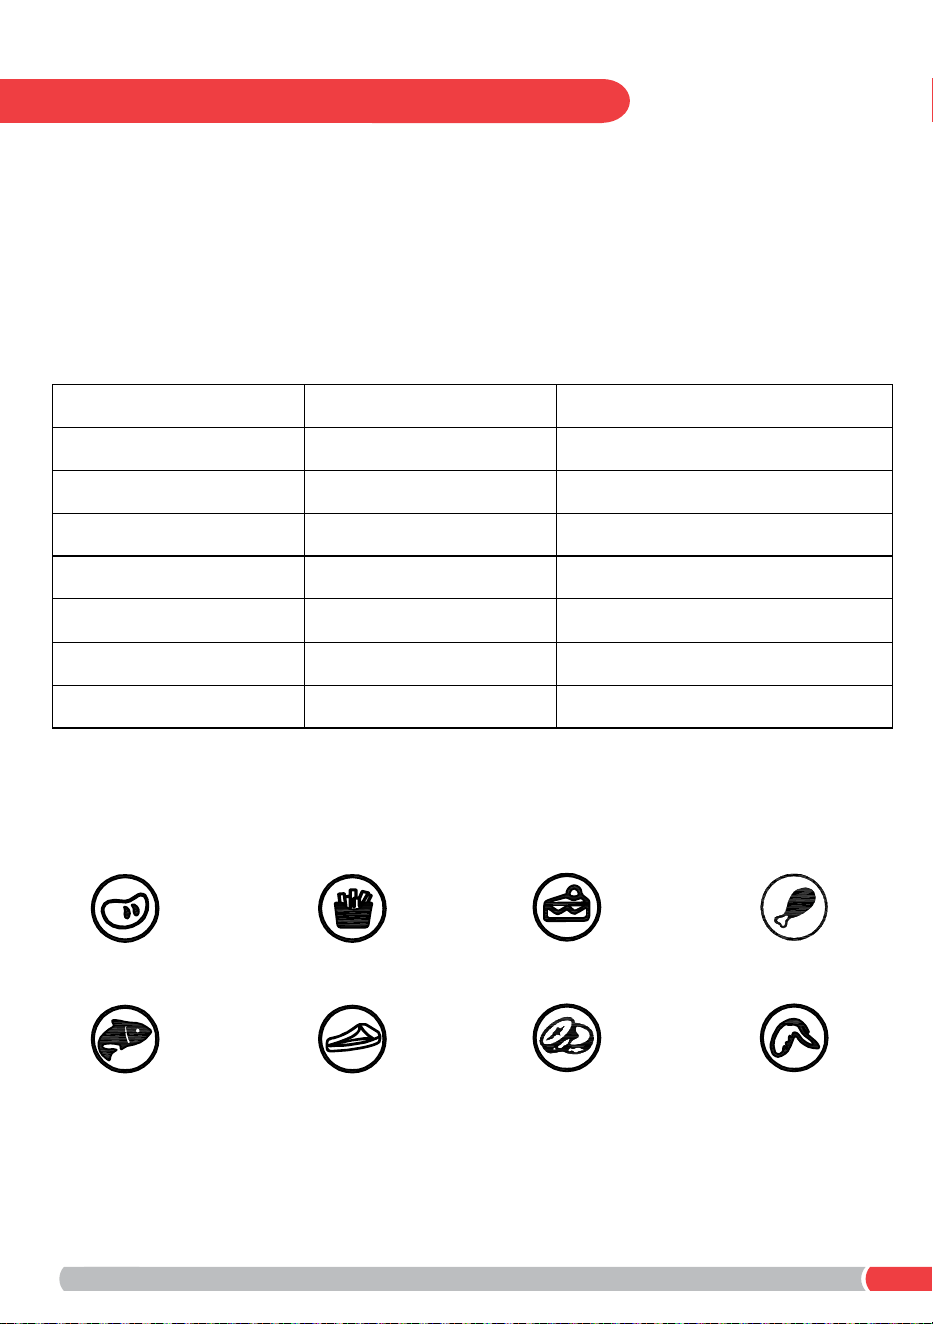
USING YOUR AIR FRYER PROGRAMS
The Air Fryer is equipped with eight pre-programmed cooking
functions. The following chart is intended as a guide only. The
quantity of food air fried at one time, the thickness or density of
the food, and whether the food is fresh, thawed, or frozen may
alter the total cooking time.
Program Cooking Temperature °C Cooking Time
LED Program Function Display Indicators
Meat 200°C 15 minutes
French Fries 200°C 20 minutes (Shake after 10min)
Bake 160°C 30 minutes
Drumsticks 200°C 20 minutes
Fish 170°C 20 minutes
Steak 180°C 10 minutes
Dehydrate 40-80°C 4 hours
Wings 200°C 13 minutes
French FriesMeat Bake Drumsticks
Fish Steak Dehydrate Wings

12
USING YOUR AIR FRYER PROGRAMS
1. Press the Program Function Button (E) until you reach the
desired program. You can also adjust the default temperature
and time of each pre-set program by repeating the steps on
page 9.
2. Once the desired program is selected, press the Start/Pause
Button (F) and the selected program icon will flash and the Air
Fryer will begin cooking.
3. When the timer has elapsed, the Air Fryer will beep and
automatically turn off. You can switch off the Air Fryer at
anytime by pressing the On/Off button (A). If the food is not
cooked to your desired requirements, repeat the steps on
page 9.
Note: It is recommended to check your food halfway through the
cooking time to ensure food is cooked evenly.
Note: Either remove the entire Drawer, or carefully use plastic or
wooden utensils to turn and remove your food.
TIPS FOR YOUR AIR FRYER
• Take into account the food to be cooked before you select the
frying temperature. As a general rule, pre-cooked food needs a
higher cooking temperature than raw food.
• Cook food thoroughly. Remember that food may begin to turn
golden brown before it is cooked inside.
• Select your cooking utensils with care. Do not use utensils that
may melt. Do not use metal utensils as they may damage the
Drawer and Frying Rack coatings.
• Your Air Fryer has a maximum cooking capacity. This is
dependant on food type. As a guide do not fill the basket more
than half full.

13
TIPS FOR YOUR AIR FRYER
• Smaller ingredients usually require a shorter frying time than
larger ingredients.
• A larger amount of ingredients requires only a slightly longer
frying time than a smaller amount of ingredients.
• Do not leave the Drawer out for too long. The temperature will
drop.
• The optimal amount for preparing crispy French Fries is 500g.
• Use pre-made dough to prepare filled snacks quickly and
easily. Pre-made dough also requires a shorter frying time than
homemade dough.
• You can also use the Air Fryer to reheat ingredients. To do this,
set the temperature to 150°C for up to 10 minutes. Check that
food is hot before eating.
• If you find that food is undercooked or overcooked, be
prepared to manual adjust the temperature setting up or down
by 10°C to achieve the results you want.
• It is recommended to use a meat thermometer when cooking
meat, poultry and fish to ensure food is cooked correctly
before consuming.
• To assure even cooking/browning, open the Drawer halfway
through the cooking time. Check, turn or vigorously shake
foods in the Drawer.
• Adjust air frying temperatures and times as necessary to suit
your taste.
• Unless food is pre-packaged and pre-oiled, for golden, crispy
results, all foods should be lightly oiled before air frying.

14
TIPS FOR YOUR AIR FRYER
• Oil may be sprayed or brushed onto foods. Spray oils work
well, as oil is evenly distributed and smaller quantities of oil are
needed.
• To ensure crispy results, make sure foods are dried before
adding oil. Cut pieces smaller to create more surface area for
crispier results. Blanching is a term that refers to pre-cooking
foods at a lower temperature before the final air fry.
• Add 3-5 minutes to the cooking time to allow the Air Fryer to
pre-heat or follow the pre-heat steps below.
• Press the On/Off Button (A) once, then Press the Temperature
Mode Button (B) once and press the Decrease Temperature
Button (D) to set the pre-heat temperature to 180°C, then
press the Time Mode Button (B) once and press the Decrease
Time Button (D) to set the pre-heat time between 3-5 minutes,
press Start/Pause (F). This will pre-heat the Air Fryer. When the
pre-heat is complete, it will beep 5 times with the display will
show “0:00”, then automatically switch off the Air Fryer after
20 seconds.
TROUBLESHOOTING
• If the Air Fryer fails to turn on, check the appliance is plugged
in correctly and the Drawer is fully in place.
• If food has not been cooked thoroughly, check that the drawer
capacity has not been exceeded and adjust the cooking time.
• If food has cooked unevenly, certain types of food may need to
be shaken during the frying process.
• If circuit alarm fault codes ‘E1’ or ‘E2’ appear on the display,
the appliance needs to be returned to place of purchase, if
under warranty, or discarded.

15
MAINTENANCE
If the unit fails to operate efficiently, is broken or other problems
arise, unplug and do not operate.
Ask for advice by calling your local after sales service agent or
the Customer Care Centre on 1300 556 816 (AU) / 0800 666 2824
(NZ).
WARRANTY
Please refer to the warranty card in the box for warranty information.
For any troubleshooting advice, please contact the relative Customer
Care Centre below.
Glen Dimplex Australia Pty Ltd Glen Dimplex New Zealand Ltd
8 Lakeview Drive, 38 Harris Road, East Tamaki,
Scoresby 3179, Victoria Auckland 2013
Australia New Zealand
Ph: 1300 556 816 Ph: 0800 666 2824
CARE & CLEANING
• WARNING: Allow the Air Fryer to cool fully before cleaning.
• Unplug the Air Fryer and allow the Frying Rack & Drawer to
cool completely before removing.
• Wash the Frying Rack & Drawer in hot soapy water. Do not
use metal kitchen utensils or abrasive cleansers or cleaning
products as this may damage the non-stick coating.
• The Drawer is dishwasher safe. For best results, place in the
top rack of your dishwasher to clean.
• Wipe the Air Fryer housing with a soft, non-abrasive damp
cloth to clean.
• Make sure the Air Fryer is unplugged and all parts are clean
and dry before storing.

Glen Dimplex New Zealand Ltd
1 Ron Driver Place
East Tamaki, Auckland
Phone: 09 274 8265
Email: [email protected]
Web: www.morphyrichards.co.nz
© Glen Dimplex Australia. All rights reserved. Material contained in this publication may not be
reproduced in whole or in part, without prior permission in writing of Glen Dimplex Australia.
MRAF72BK_IM_v2
Recycling: Do not dispose of electrical appliances as unsorted municipal waste. Use separate collection
facilities. Contact your local government for information regarding the collection systems available. If
electrical appliances are disposed of in landfills or dumps, hazardous substances can leak into the ground
water, polluting the food chain and damaging health and wellbeing.
Expanded Polystyrene Disposal: The websites listed below can assist in the responsible disposal of EPS
(Expanded Polystyrene) packaging products.
Australia: https://recyclingnearyou.com.au/polystyrene and/or http://epsa.org.au
New Zealand: https://greenbusinesshq.com/epsrecycling and/or
https://www.plastics.org.nz/environment/recycling-disposal/eps-recycling
Glen Dimplex Australia Pty Ltd
8 Lakeview Drive
Scoresby VIC 3179
Phone: 1300 556 816
Email: [email protected]
Web: www.morphyrichards.com.au