
Technical Support and E-Warranty Certificate www.vevor.com/support
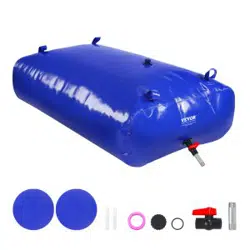
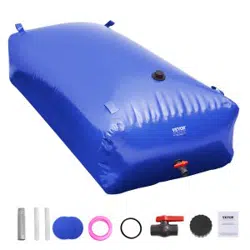
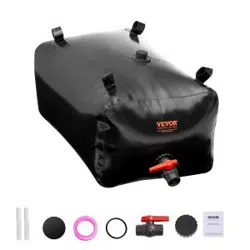
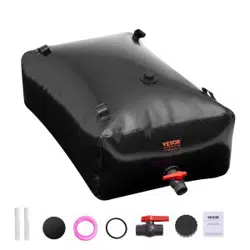
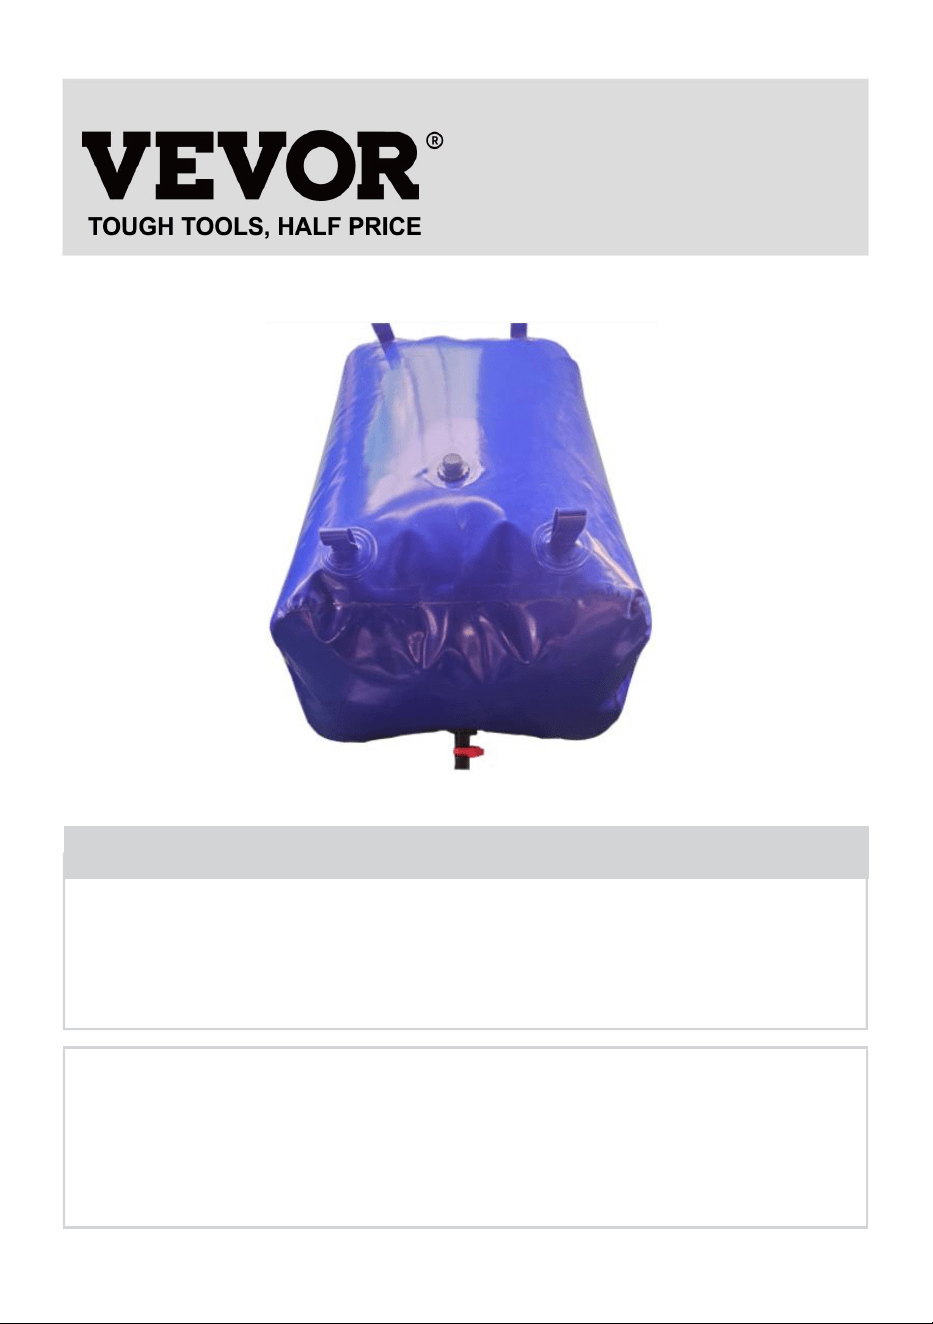
WATER STORAGE TANK
Model: BY-L330L/BY-L400L/BY-L540L/BY-L1000L
We continue to be committed to provide you tools with competitive price.
"Save Half", "Half Price" or any other similar expressions used by us only represents an
estimate of savings you might benefit from buying certain tools with us compared to the major
top brands and does not necessarily mean to cover all categories of tools offered by us. You
are kindly reminded to verify carefully when you are placing an order with us if you are
actually saving half in comparison with the top major brands.

1
MODEL:BY-L330L/BY-L400L/BY-L540L/BY-L1000L
Have product questions? Need technical support? Please feel free to
contact us:
Technical Support and E-Warranty Certificate
www.vevor.com/support
NEED HELP? CONTACT US!
This is the original instruction, please read all manual instructions
carefully before operating. VEVOR reserves a clear interpretation of our
user manual. The appearance of the product shall be subject to the
product you received. Please forgive us that we won't inform you again if
there are any technology or software updates on our product.
WATER STORAGE TANK
2
NOTES
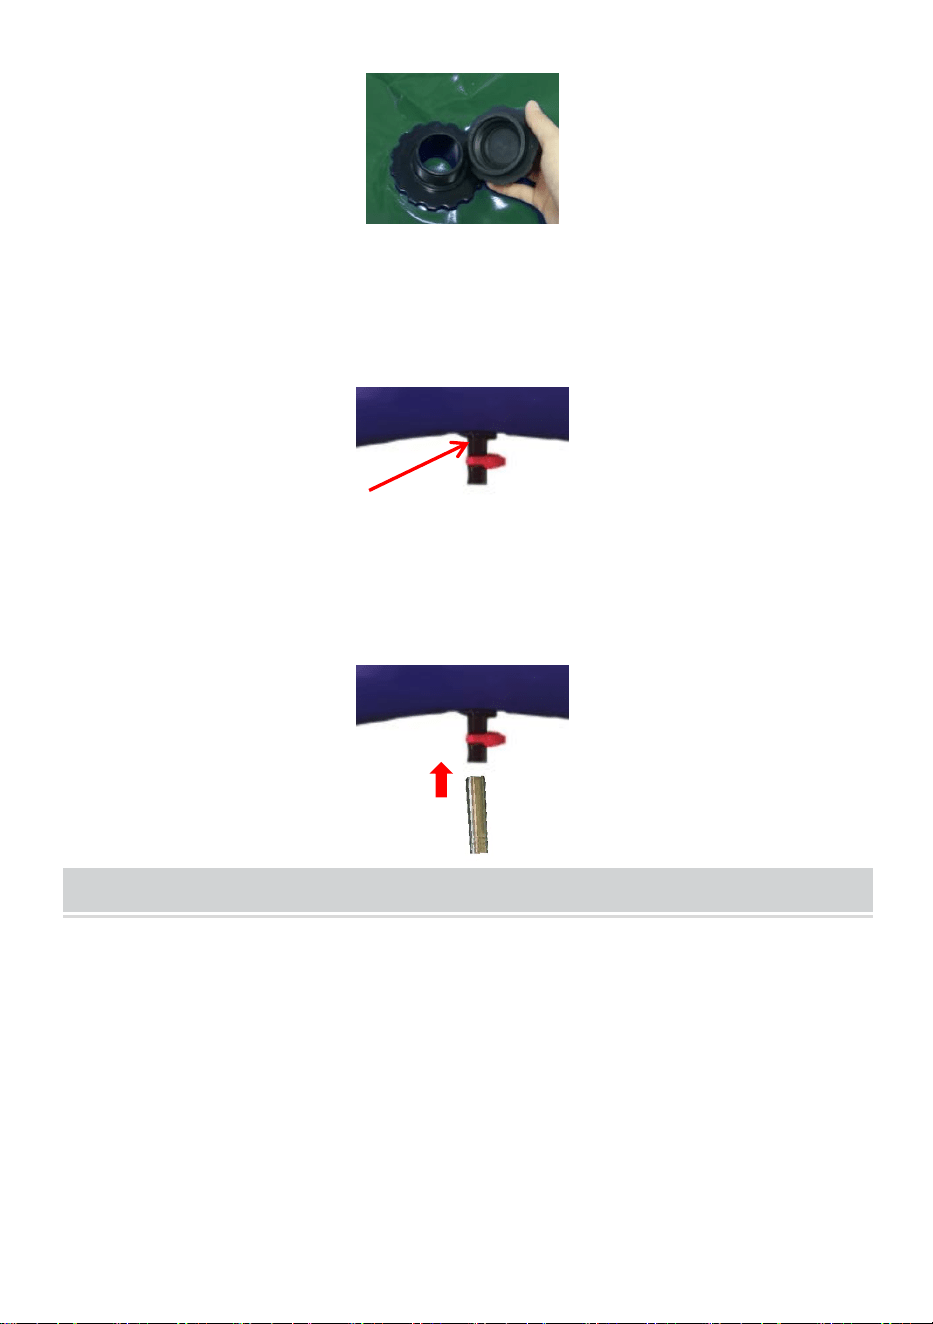
1. Keeping the outlet valve closed, fill in the liquid from the inlet valve on the top.
2. The diameter of the water injection tube should be less than water inlet so that
the air in the tank can be discharged.
3. Ensure all accessories are firmly tightened by hand. Improper tightening of
accessories can lead to leakage.
MODEL AND PARAMETERS
Model
BY-L330L
BY-L400L
BY-L540L
BY-L1000L
Capacity
330L
400L
540L
1000L
Water Inlet
DN25
DN40
Water Outlet
DN20
DN25
Material
PVC(0.9mm)
Ambient Temperature
-30℃~+70℃
Color
Blue
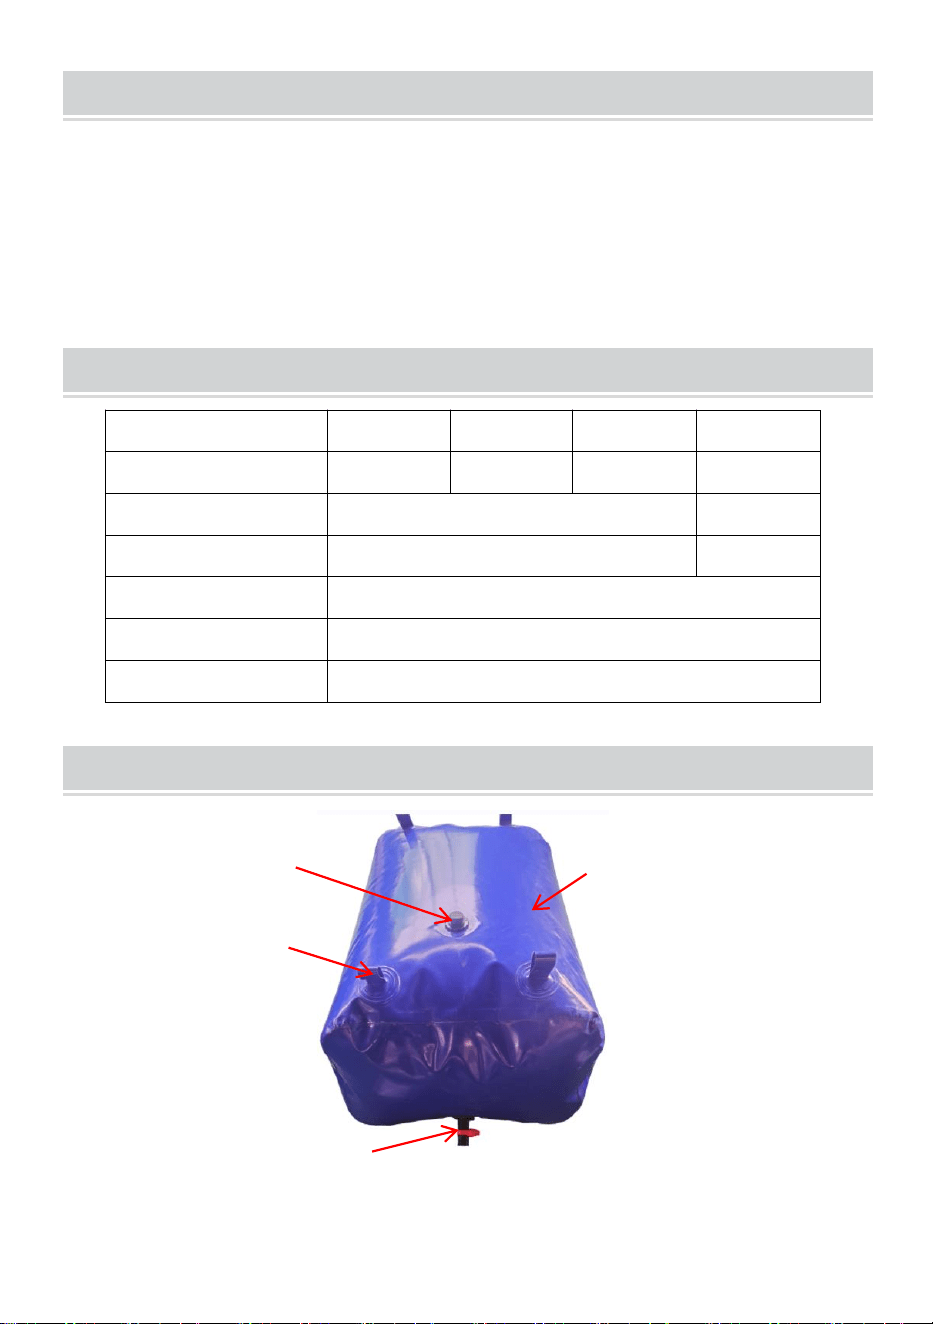
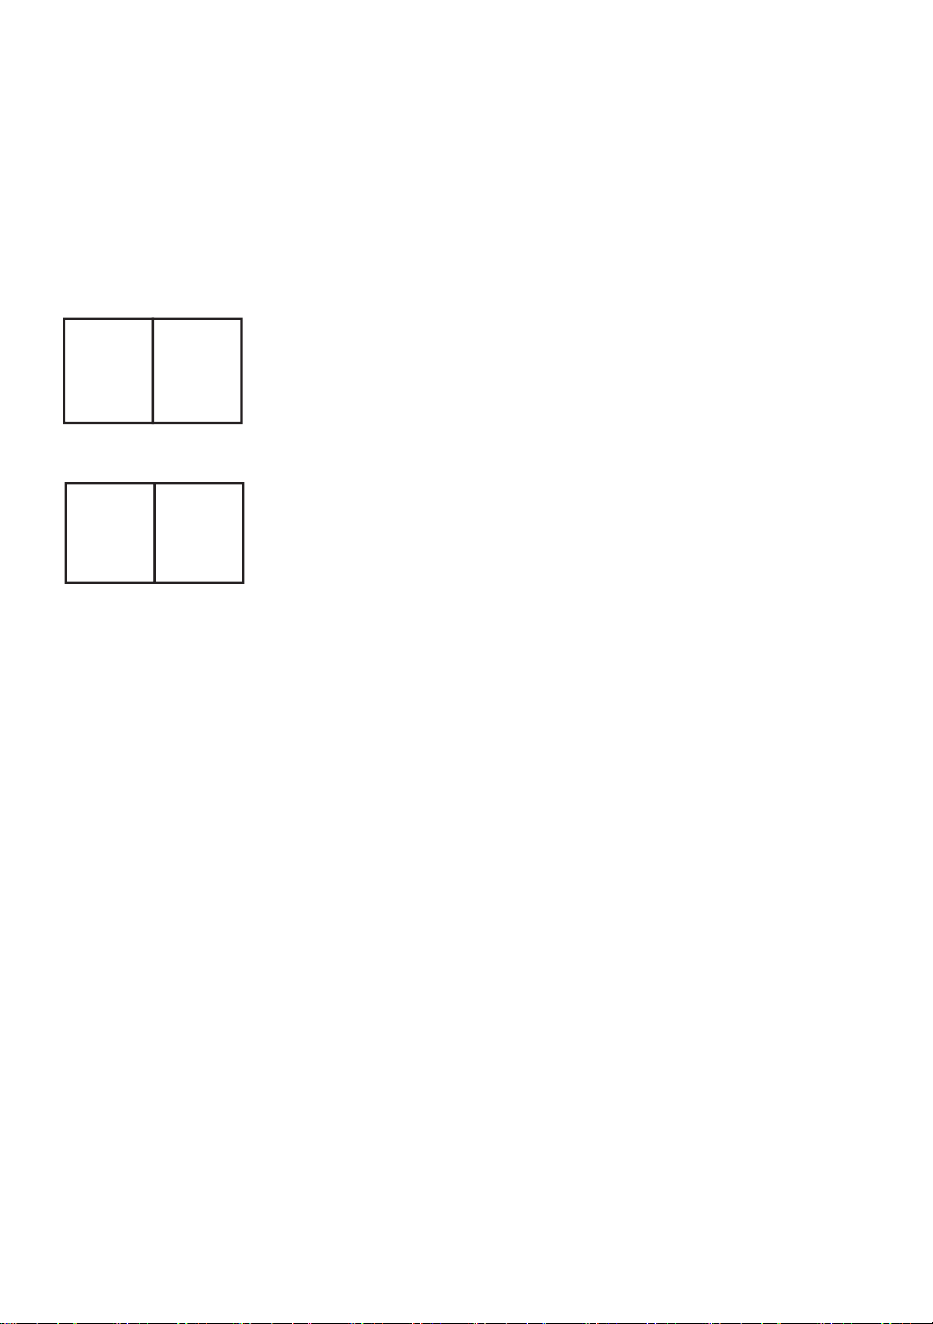
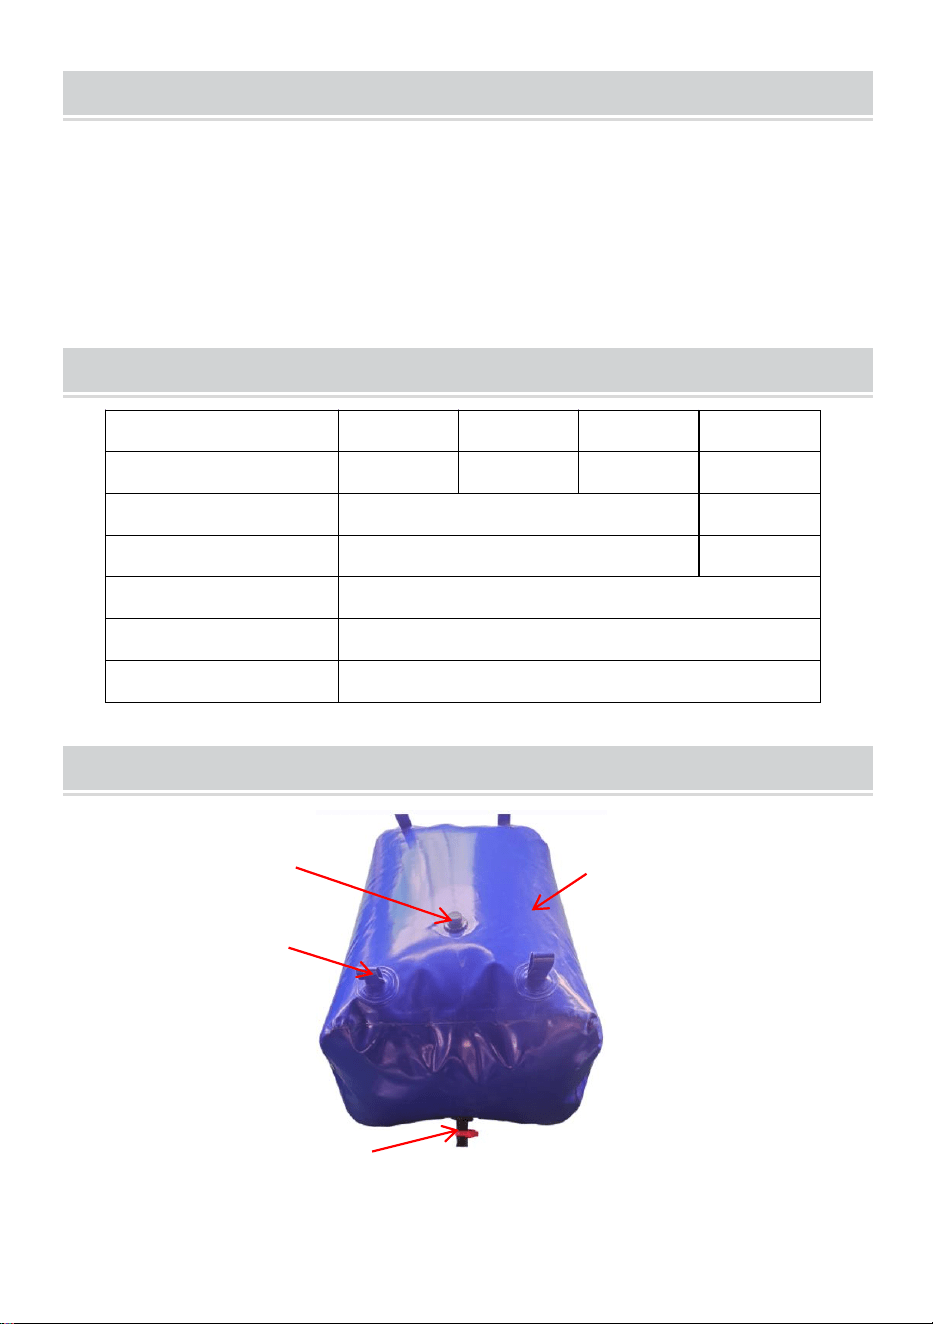
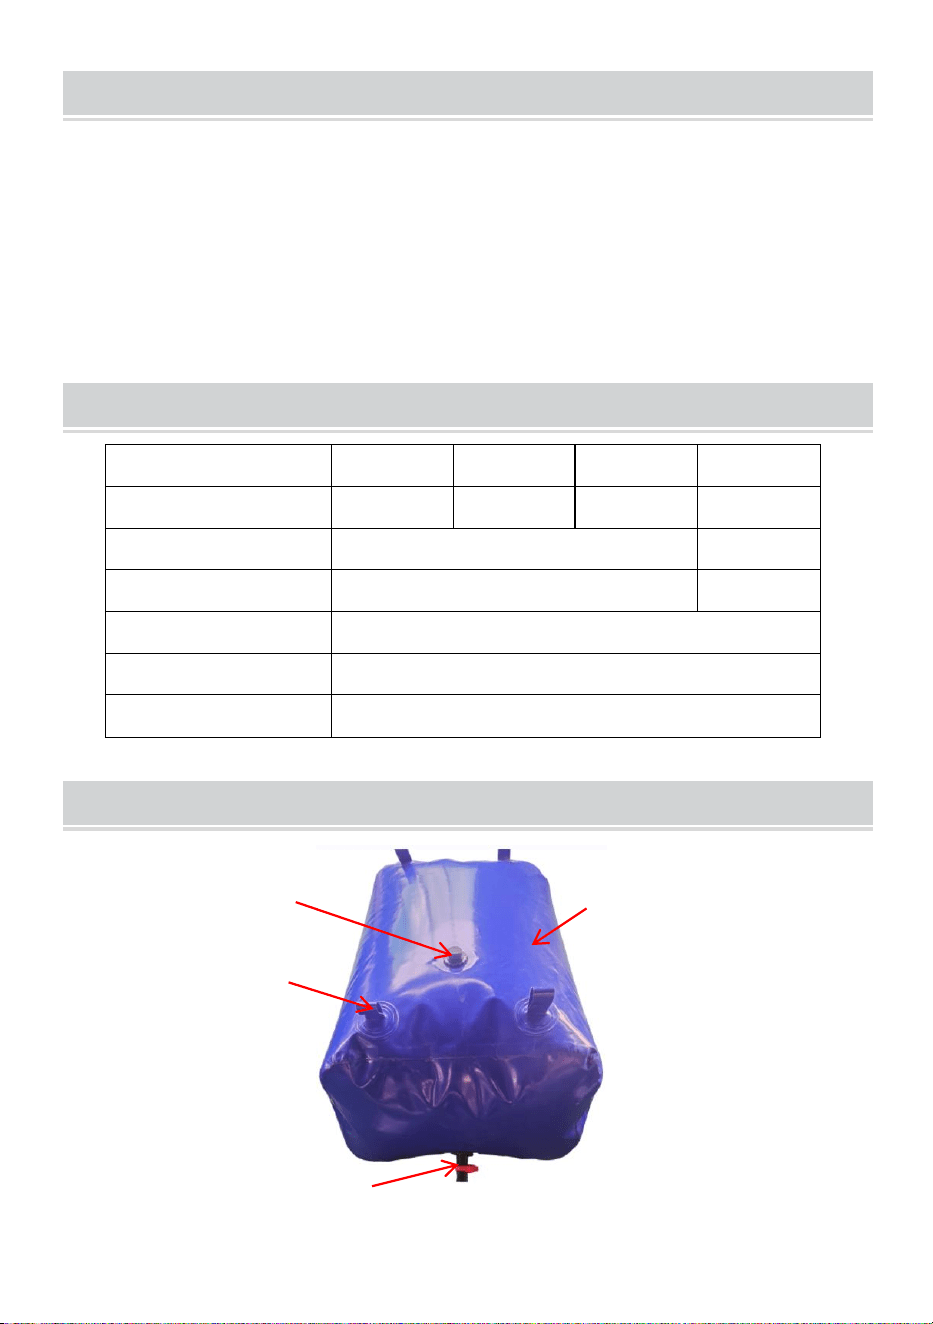
STRUCTURE DIAGRAM
1.Top Intake 2.Hanging Ring 3.Bag Body 4.Drain Valve
1
2
3
4

3
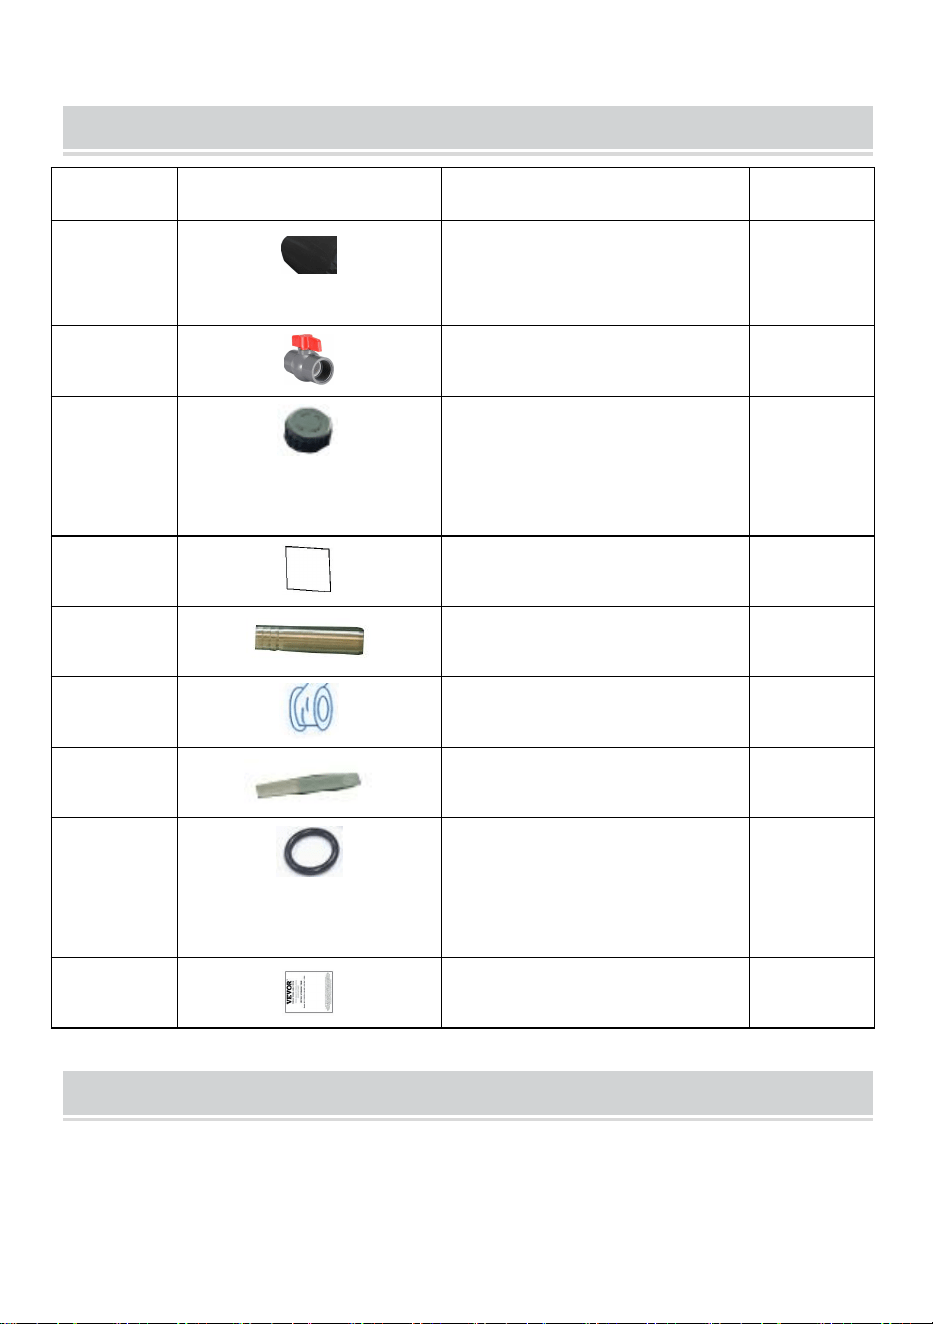
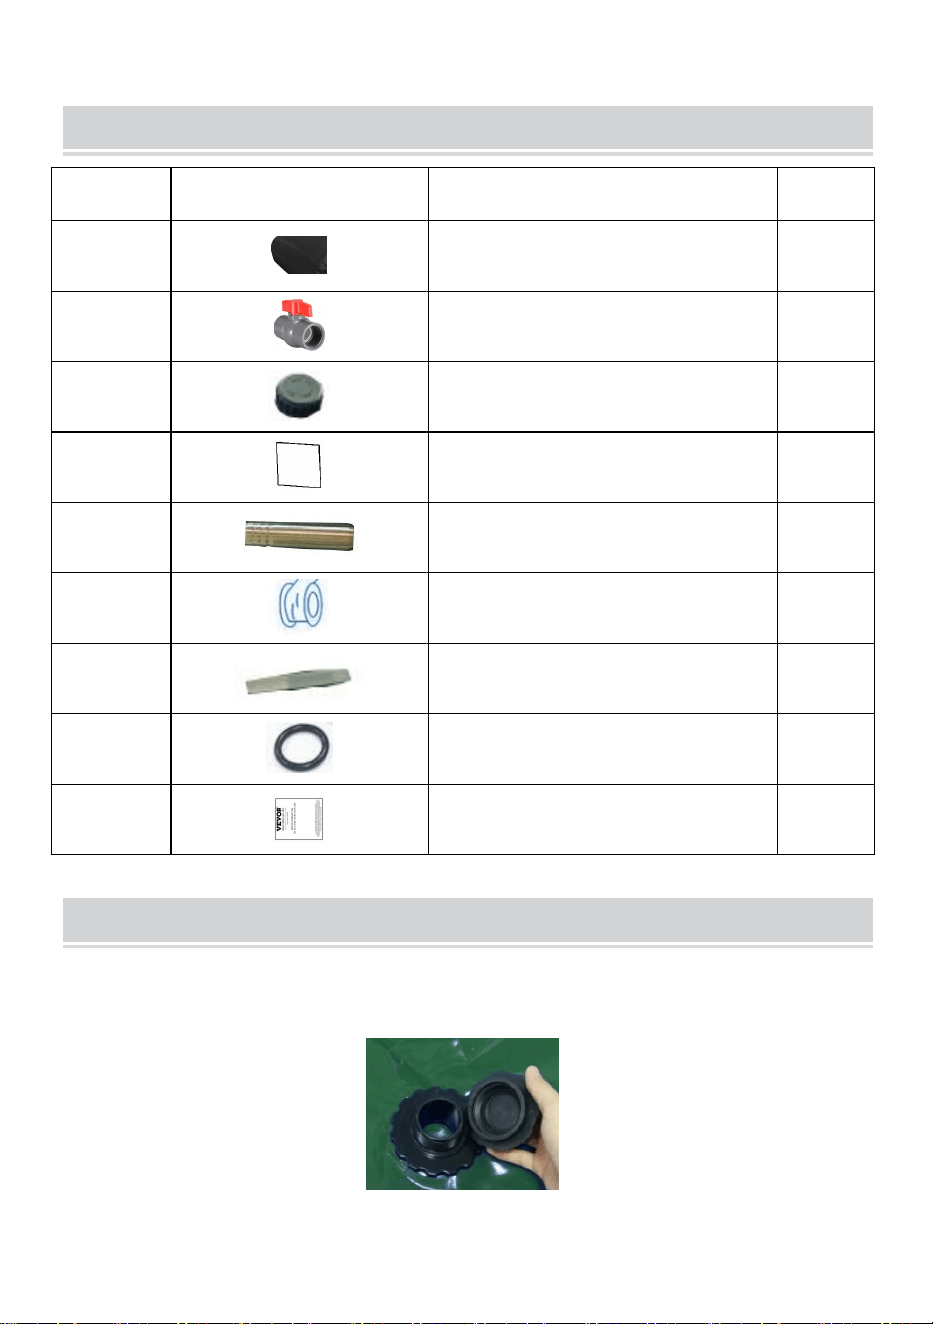
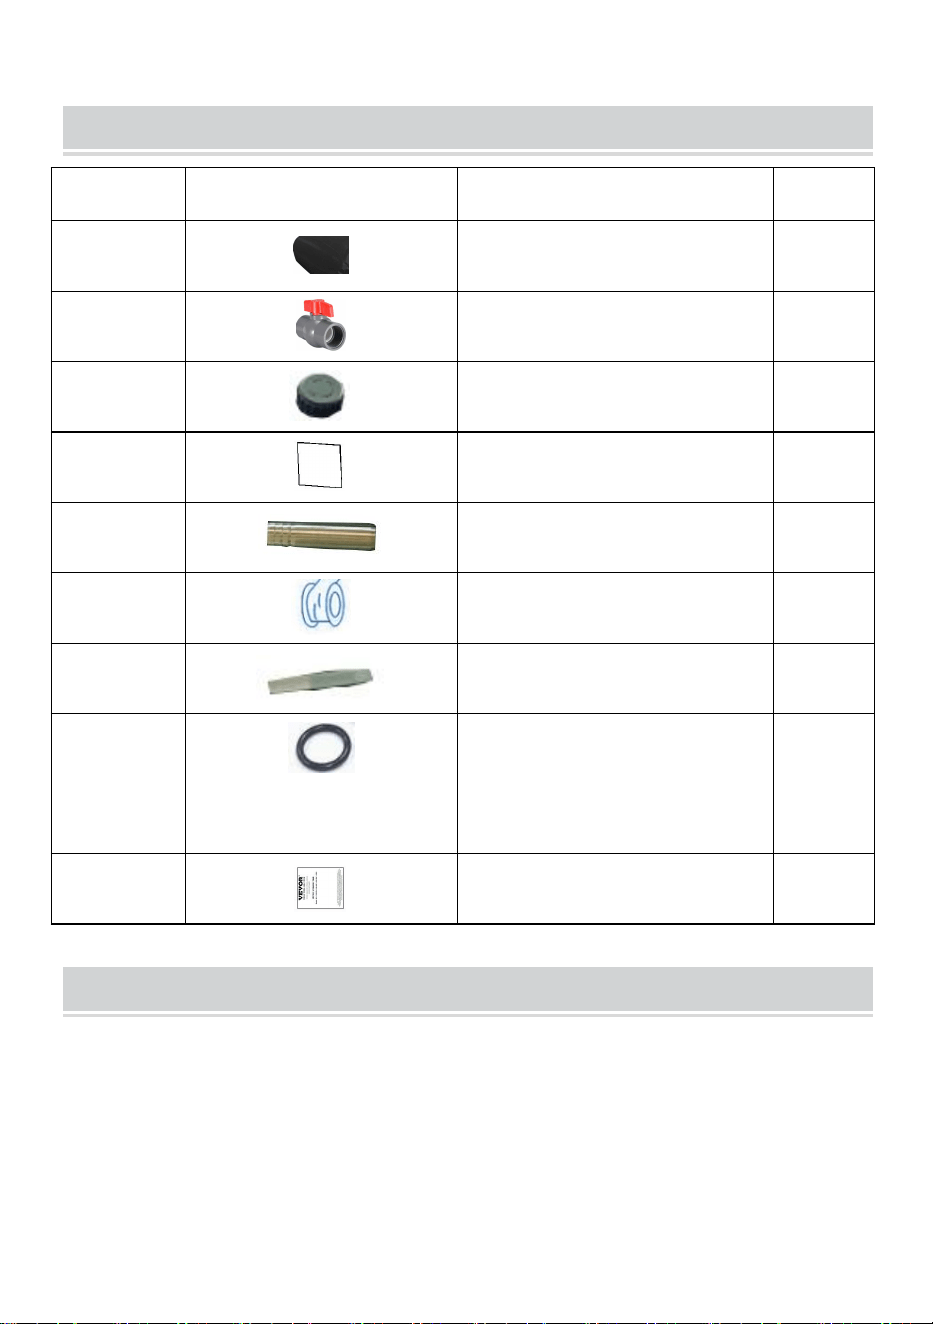
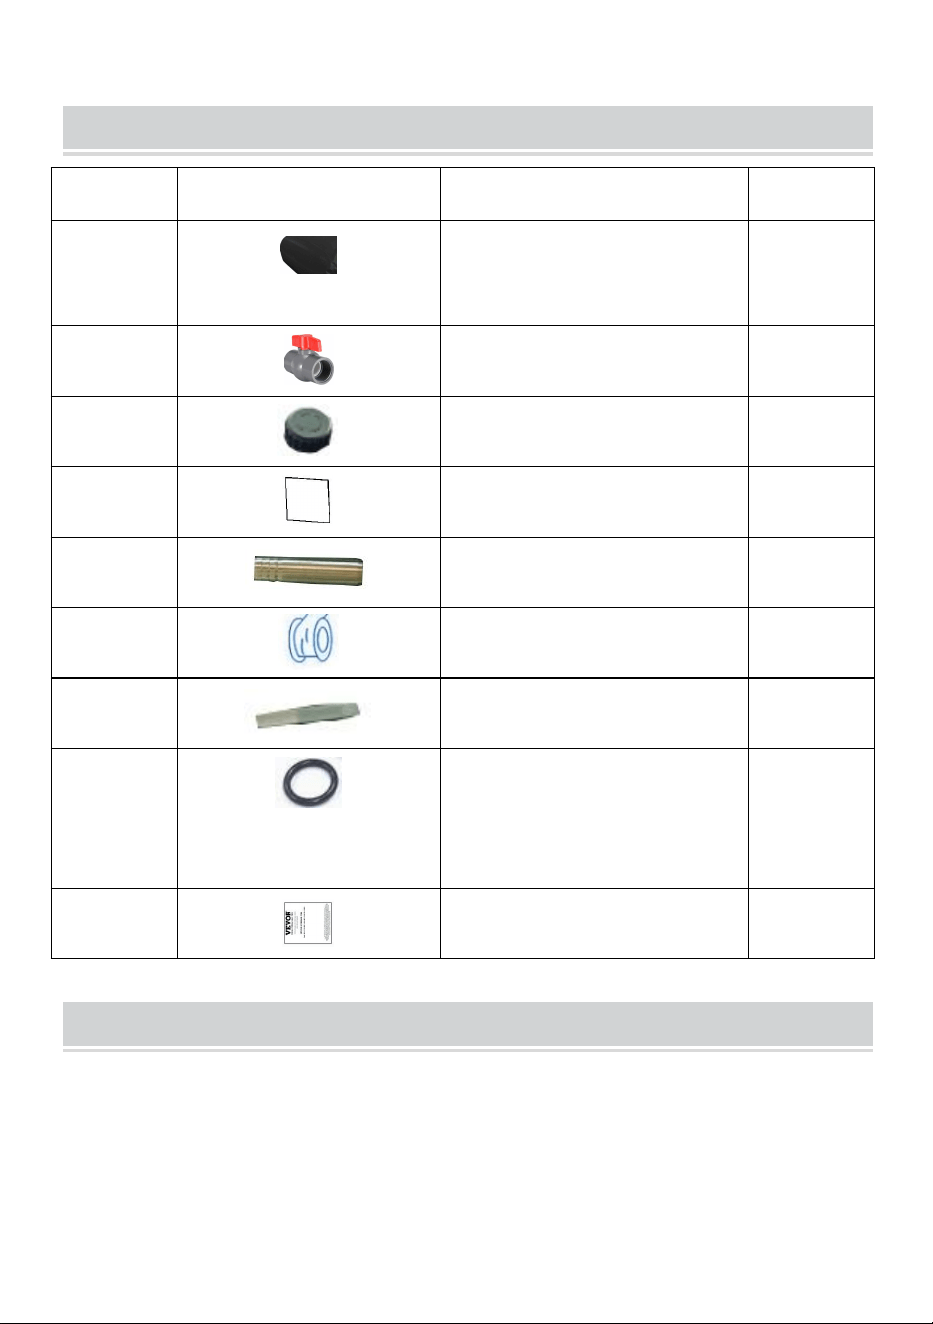
COMPONENTS
No.
PART
NAME
QTY
1
Water storage bag
1
2
Drain valve
1
3
Intake cover
1
4
Patch
2
5
Outlet joint
1
6
PTFE tape
1
7
Repair glue
2
8
Rubber seal ring
1
9
User manual
1
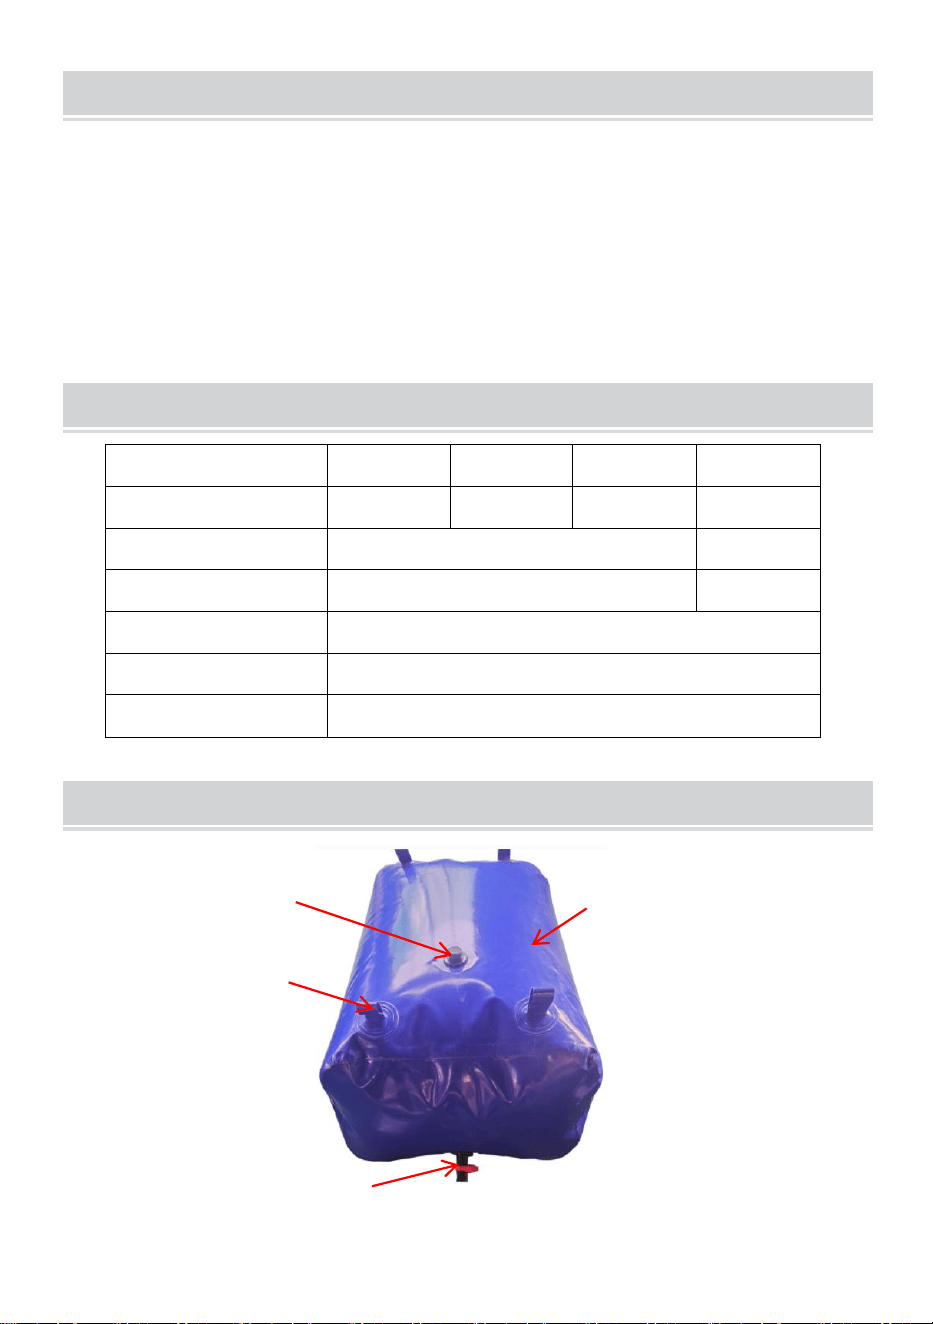
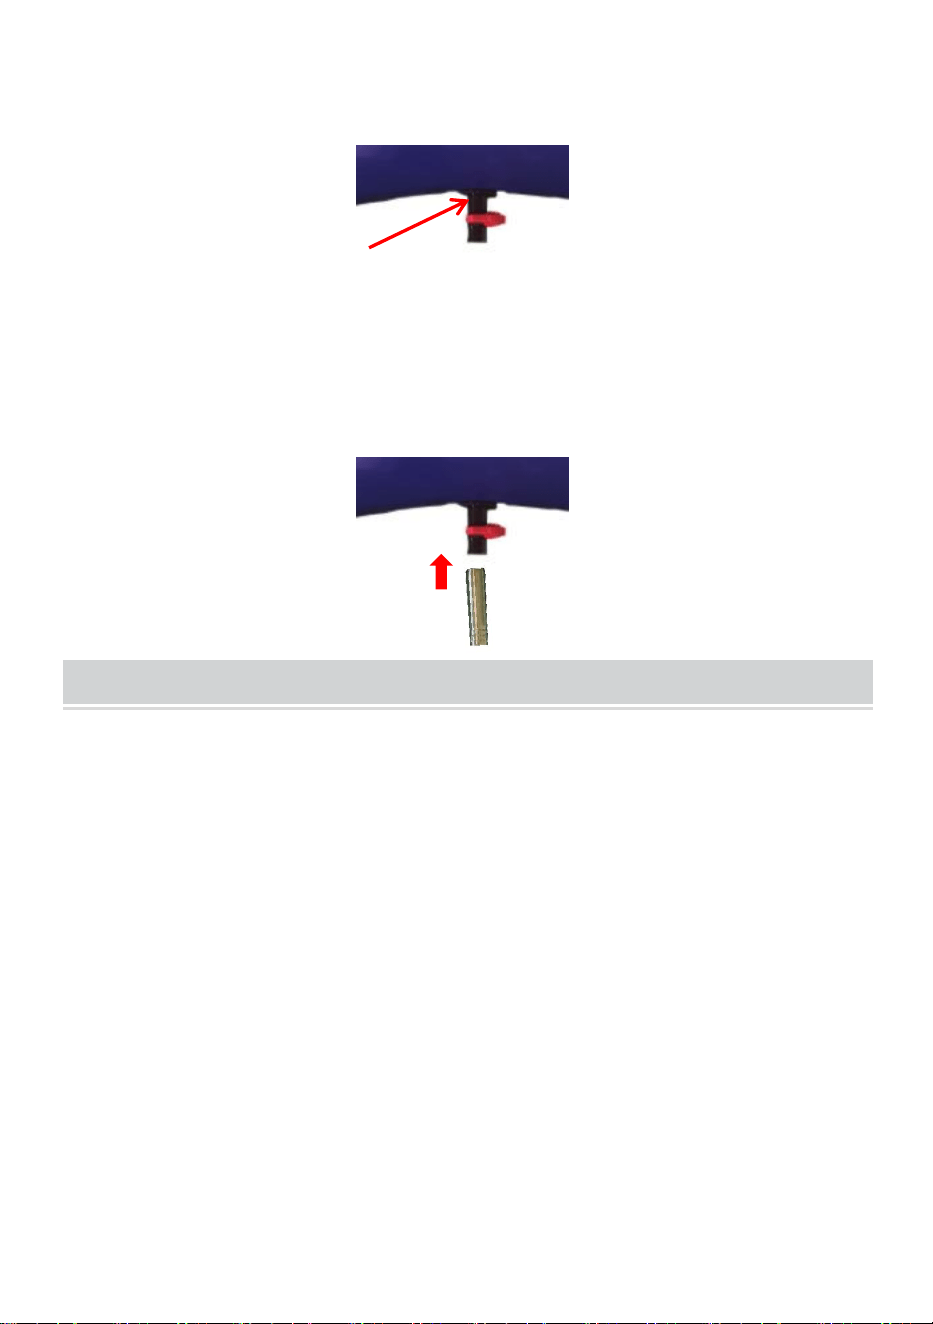
USE
1. After getting the product, unroll the rain bag.The water inlet is at
the top.
2. Install water outlet valve(Clockwise tightening). The outlet valve
is larger and needs to be installed more forcefully until the valve is
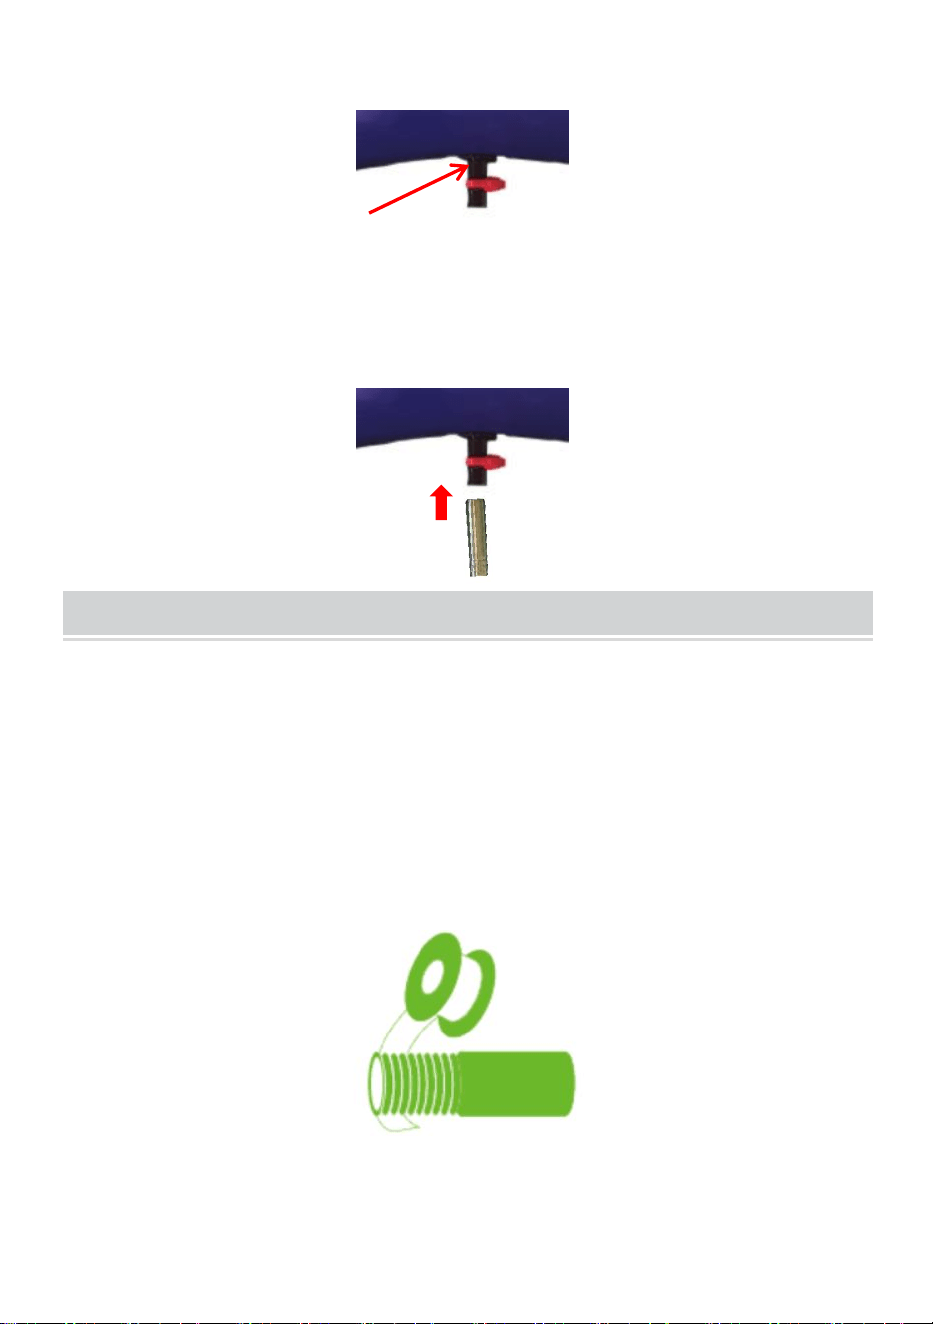
4
centered.
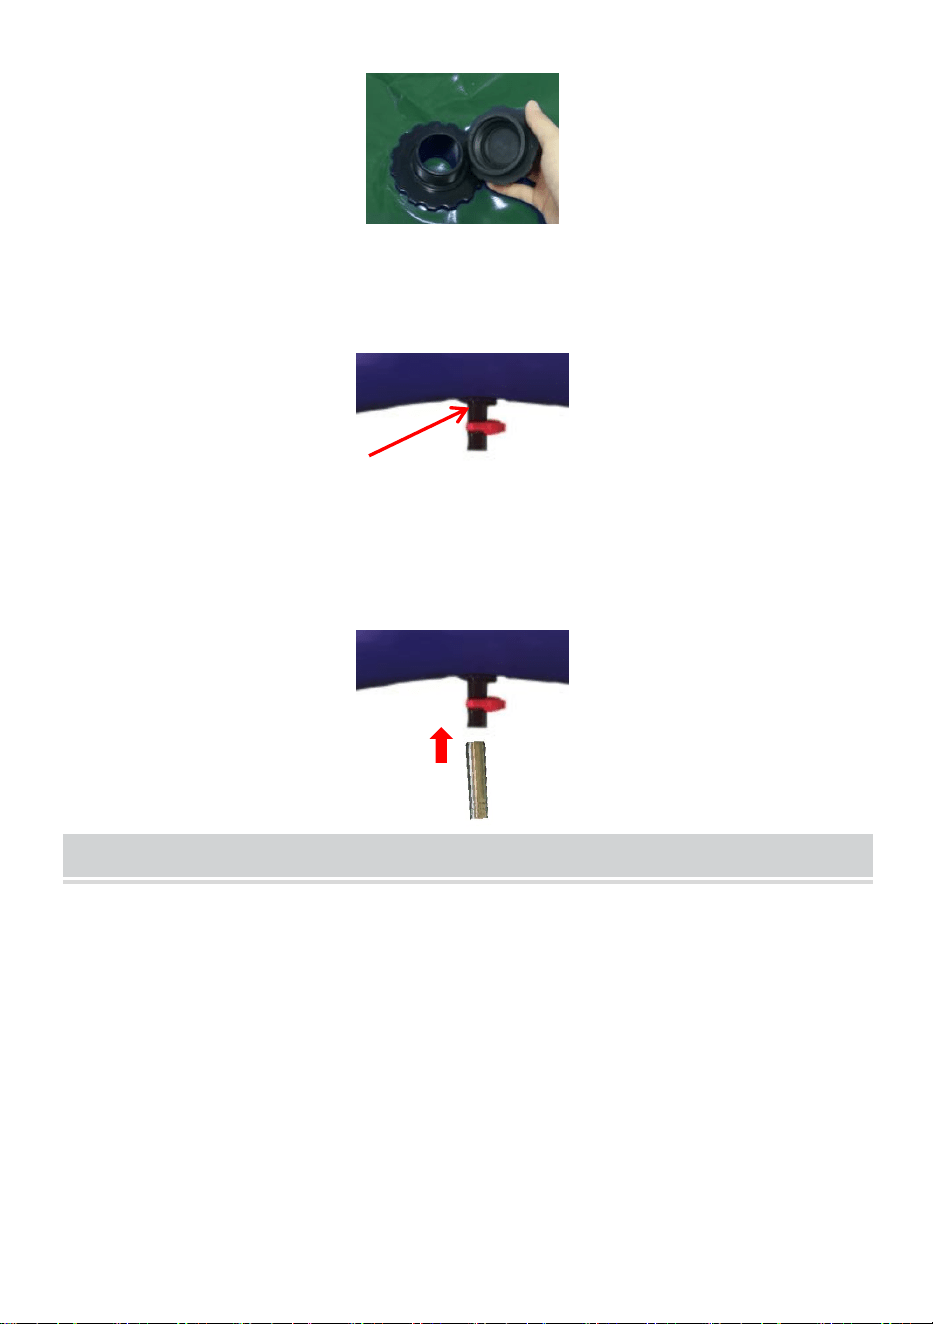
3. Install the external outlet connector with the PTFE tape.
MAINTAIN AND STORAGE
1. Please use mild detergent and water for cleaning.
2. Don't scrub with hard objects like brushes.
3. Dry before storage.Do not store in a dark, damp place.
4. Clean the debris at the filter port in time to avoid clogging.
5. If the barrel body is damaged, it can be repaired with the attached
patch (Please bring your own glue).
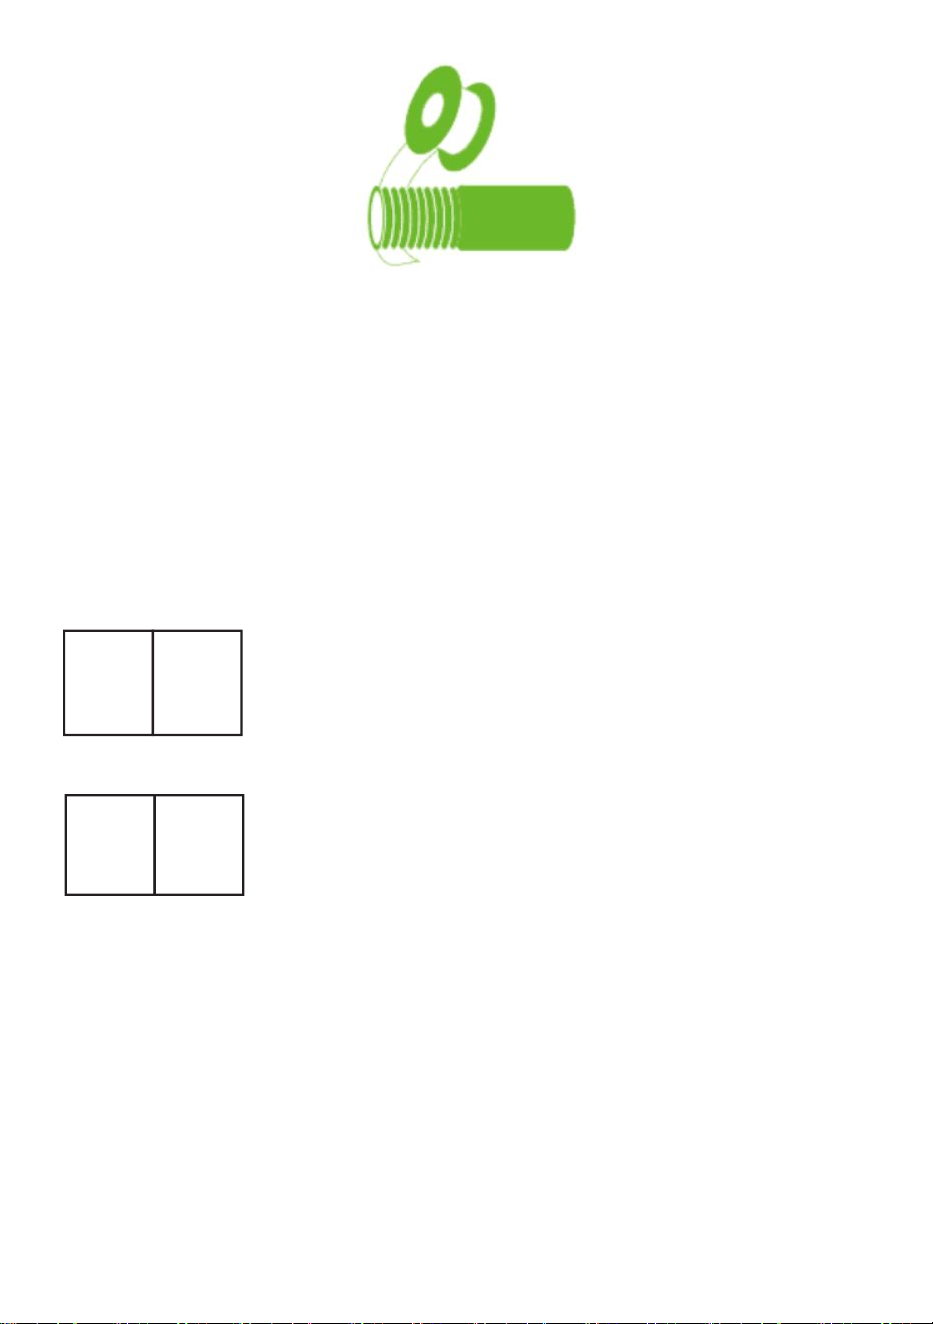
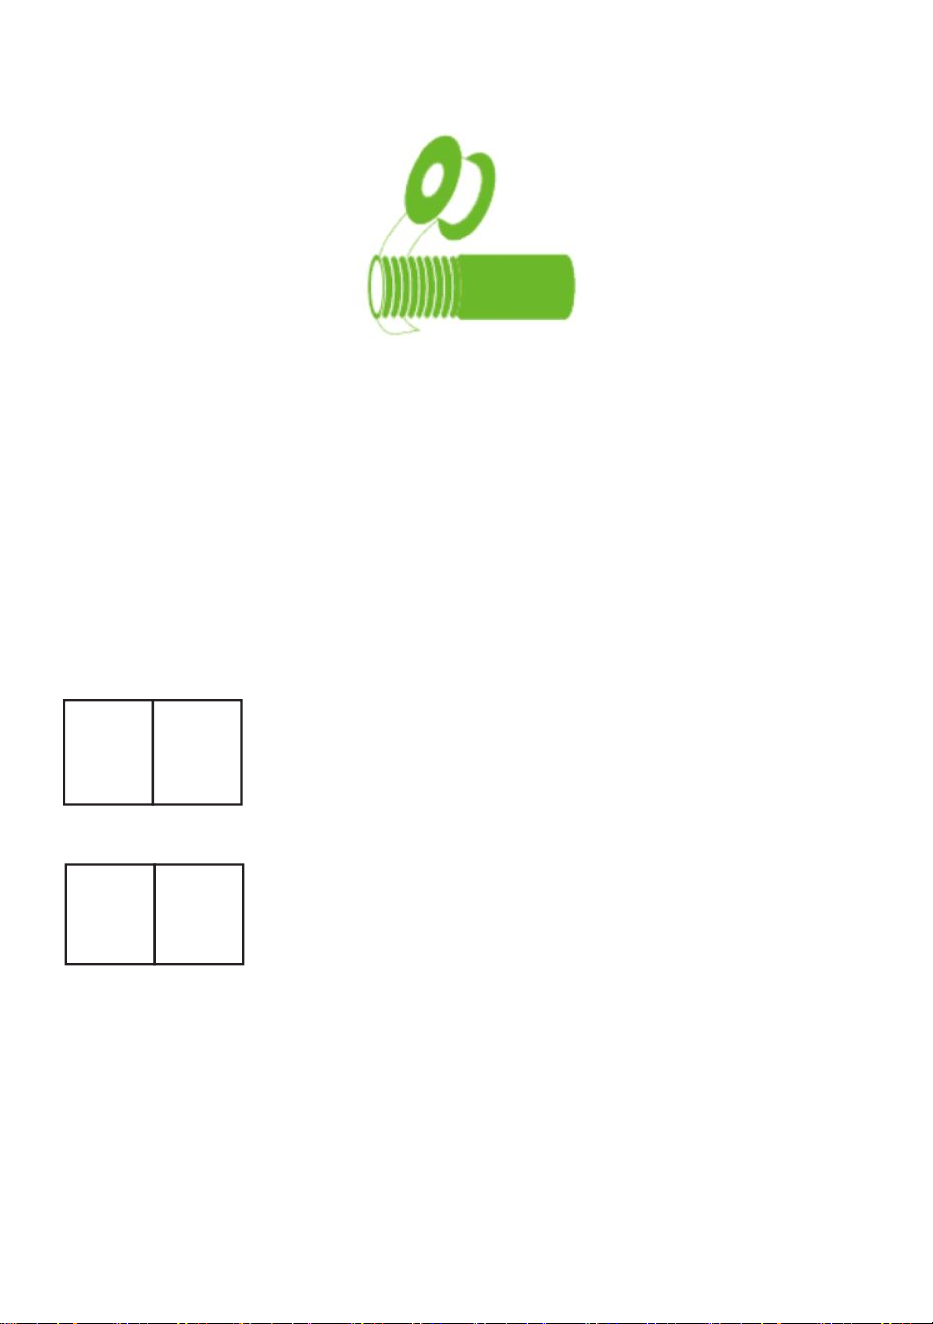
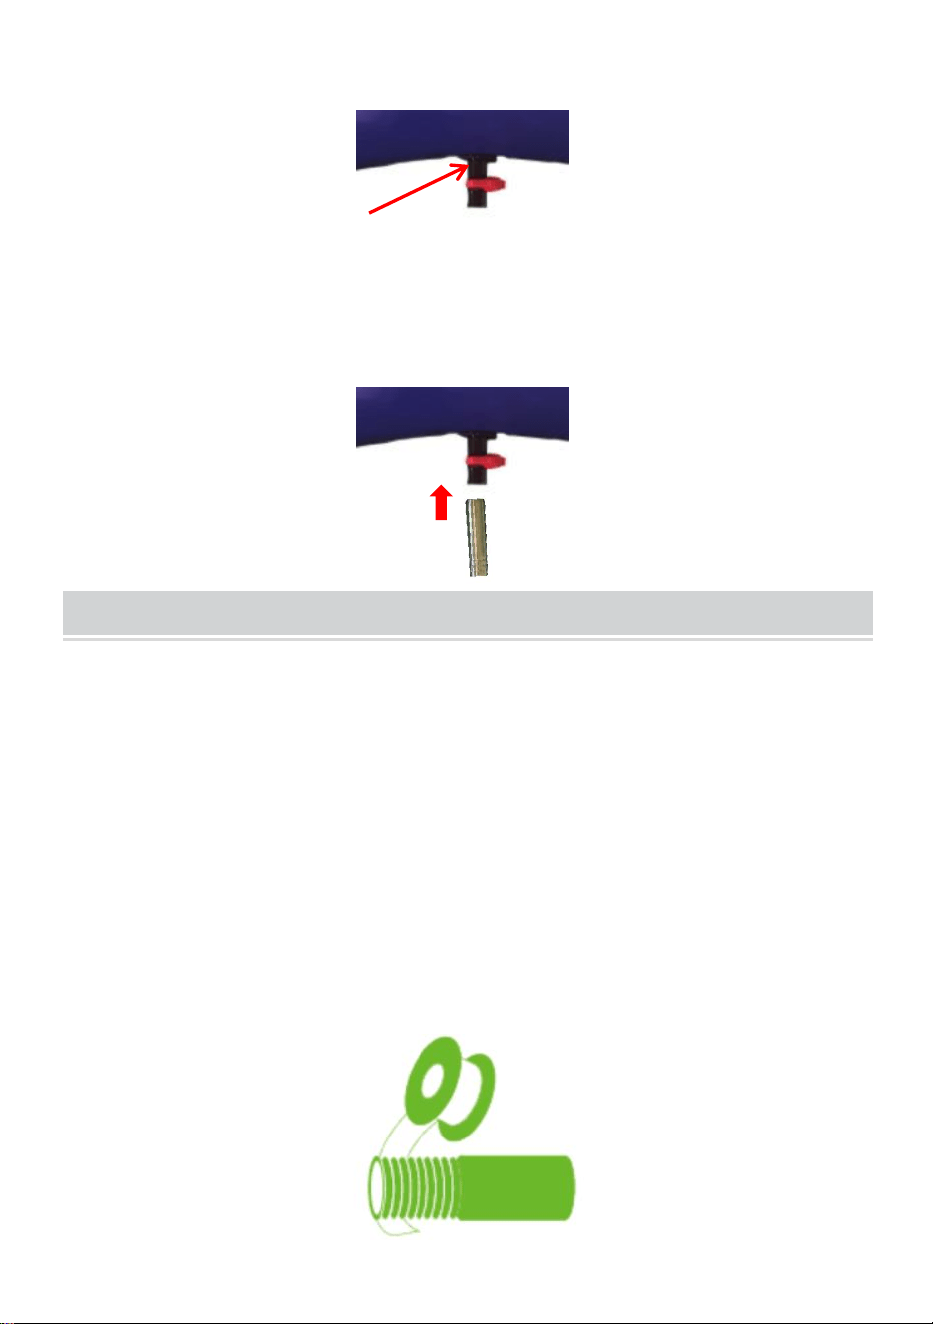
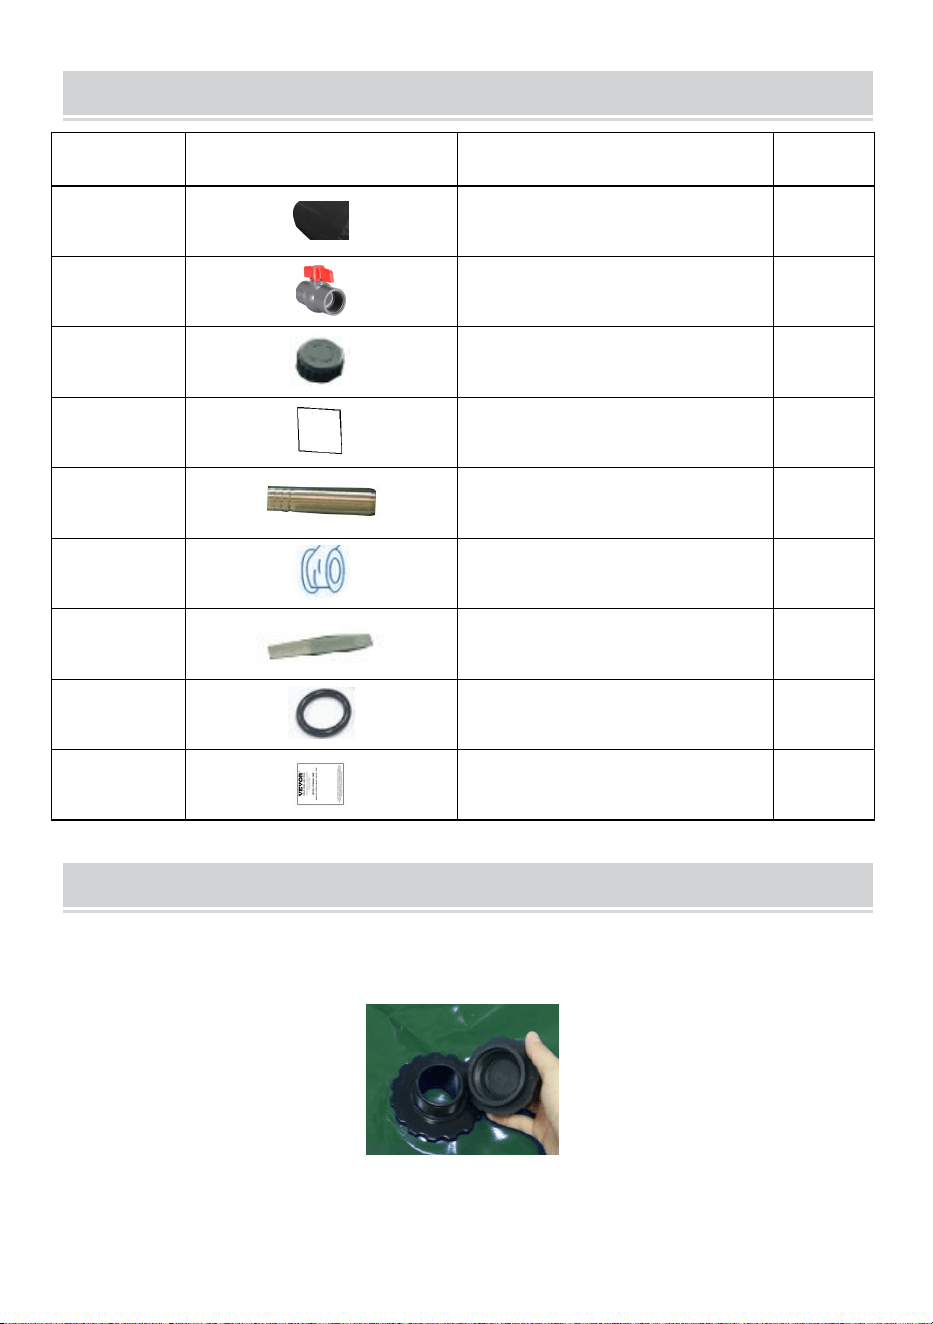
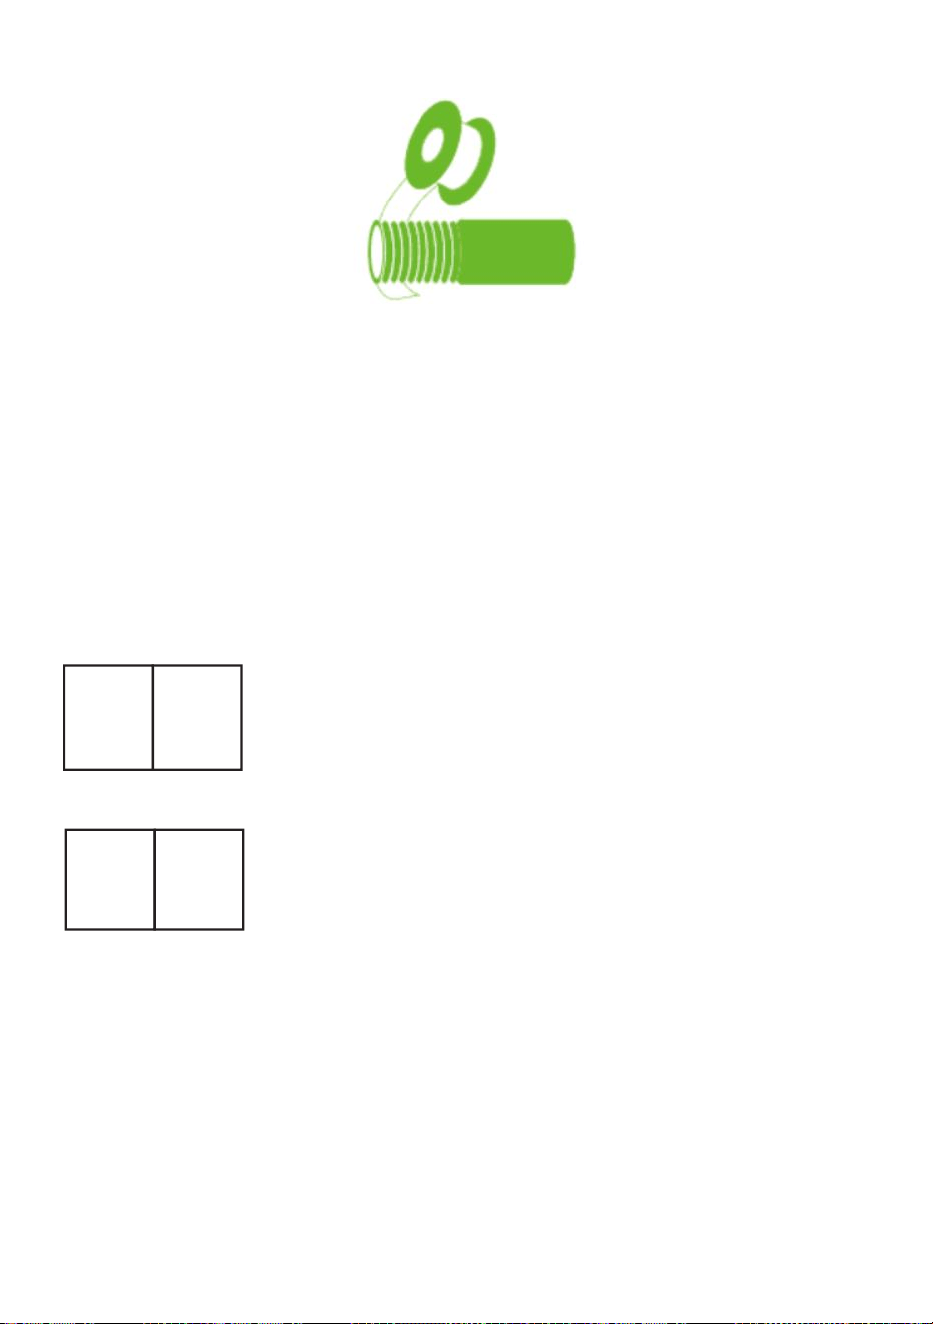
6. If the joint is leaking, tighten the joint or wrap waterproof tape on
the thread of the joint before installing it(As shown below).
Note: If you install and remove the connector yourself and the
switch is not vertical, try increasing the number of winding laps of
waterproof tape.
NOTE: The rubber sealing ring should be placed first. (If you do not use
rubber rings, you can also use PTFE tape to seal, PTFE tape use
described below.)
5
Manufacturer: Shanghaimuxinmuyeyouxiangongsi
Address: Baoshanqu Shuangchenglu 803long 11hao 1602A-1609shi
Shanghai
Imported to AUS: SIHAO PTY LTD, 1 ROKEVA STREETEASTWOOD
NSW 2122 Australia
Imported to USA: Sanven Technology Ltd., Suite 250, 9166 Anaheim
Place, Rancho Cucamonga, CA 91730
REP
UK
Pooledas Group Ltd
Unit 5 Albert Edward House, The Pavilions
Preston, United Kingdom
REP
EC
SHUNSHUN GmbH
Römeräcker 9 Z2021, 76351
Linkenheim-Hochstetten, Germany
Made In China


Tecnico Supporto e certificato di garanzia elettronica www.vevor.com/support
SERBATOIO DI STOCCAGGIO ACQUA
Modello: BY-L330L/ BY-L 40 0L / BY-L 54 0L / BY-L 100 0L
We continue to be committed to provide you tools with competitive price.
"Save Half", "Half Price" or any other similar expressions used by us only represents an
estimate of savings you might benefit from buying certain tools with us compared to the major
top brands and does not necessarily mean to cover all categories of tools offered by us. You
are kindly reminded to verify carefully when you are placing an order with us if you are
actually saving half in comparison with the top major brands.

1
MODELLO:BY-L330L/BY-L400L/BY-L540L/BY-L1000L
Have product questions? Need technical support? Please feel free to
contact us:
Technical Support and E-Warranty Certificate
www.vevor.com/support
NEED HELP? CONTACT US!
This is the original instruction, please read all manual instructions
carefully before operating. VEVOR reserves a clear interpretation of our
user manual. The appearance of the product shall be subject to the
product you received. Please forgive us that we won't inform you again if
there are any technology or software updates on our product.
WATER STORAGE TANK
2
NOTES
4. Tenendo chiusa la valvola di uscita, riempire il liquido dalla valvola di ingresso
sulla parte superiore .
5. Il diametro del tubo di iniezione dell'acqua deve essere inferiore all'ingresso
dell'acqua in modo che l'aria nel serbatoio possa essere scaricata.
6. Garantire tutti gli accessori sono serrati saldamente a mano. Il serraggio
improprio degli accessori può causare perdite.
MODEL AND PARAMETERS
Modello
BY-L330L
BY-L 40
BY - L540L
BY-L 100
Capacità
330 litri
400 litri
540 litri
1000 litri
Ingresso acqua _ _
DN25
DN40
Uscita acqua _ _
DN20
DN25
Materiale
PVC (0,9 mm)
Temperatura
-30℃~+70℃
Colore
Blu
STRUCTURE DIAGRAM
1.Inizio d' assunzione 2. Anello da appendere 3.Corpo della borsa 4.V
1
2
3
4
3
alvola di scarico
COMPONENTS
NO.
PARTE
NOME
QUANTITÀ
1
Borsa per la
conservazione dell'acqua
1
2
Valvola di drenaggio
1
3
Copertura di
aspirazione
1
4
Toppa
2
5
Giunto di uscita
1
6
Nastro in PTFE
1
7
Colla per riparazioni
2
8
Anello di tenuta in
gomma
1
9
Manuale d'uso
1
USE
4. Dopo aver preso il prodotto, srotolare la borsa antipioggia.
L'ingresso dell'acqua è in alto.
4
5. Installare la valvola di uscita dell'acqua (serraggio in senso
orario). La valvola di uscita è più grande e deve essere installata
con maggiore forza finché la valvola non viene centrata.
6. Installare il connettore di uscita esterno con il nastro in PTFE.
MAINTAIN AND STORAGE
1. Per la pulizia utilizzare un detergente delicato e acqua.
2. Non strofinare con oggetti duri come spazzole.
3. Asciugare prima di riporlo. Non conservare in un luogo buio e
umido.
4. Pulire in tempo i detriti sulla porta del filtro per evitare
intasamenti.
5. Se il corpo della canna è danneggiato, può essere riparato con la
toppa allegata (portare la propria colla).
6. Se il giunto perde, stringere il giunto o avvolgere del nastro
impermeabile sulla filettatura del giunto prima di installarlo (come
NOTE: The rubber sealing ring should be placed first. (If you do not use
rubber rings, you can also use PTFE tape to seal, PTFE tape use
described below.)

5
mostrato di seguito).
Nota: se si installa e rimuove il connettore da soli e l'interruttore non
è verticale, provare ad aumentare il numero di giri di avvolgimento
del nastro impermeabile.
Produttore : Shanghaimuxinmuyeyouxiangongsi
Indirizzo : Baoshanqu Shuangchenglu 803long 11hao 1602A-1609shi
Shanghai
Importato in AUS: SIHAO PTY LTD, 1 ROKEVA STREETEASTWOOD
NSW 2122 Australia
Importato negli Stati Uniti: Sanven Technology Ltd., Suite 250, 9166
Anaheim Place, Rancho Cucamonga, CA 91730
REP
UK
Pooledas Group Ltd
Unit 5 Albert Edward House, The Pavilions
Preston, United Kingdom
REP
EC
SHUNSHUN GmbH
Römeräcker 9 Z2021, 76351
Linkenheim-Hochstetten, Germany
Made in China


Techniczny Certyfikat wsparcia i e-gwarancji www.vevor.com/support
ZBIORNIK NA WODĘ
Model: BY-L330L/ BY-L 40 0L / BY-L 54 0L / BY-L 100 0L
We continue to be committed to provide you tools with competitive price.
"Save Half", "Half Price" or any other similar expressions used by us only represents an
estimate of savings you might benefit from buying certain tools with us compared to the major
top brands and does not necessarily mean to cover all categories of tools offered by us. You
are kindly reminded to verify carefully when you are placing an order with us if you are
actually saving half in comparison with the top major brands.

1
MODEL:BY-L330L/BY-L400L/BY-L540L/BY-L1000L
Have product questions? Need technical support? Please feel free to
contact us:
Technical Support and E-Warranty Certificate
www.vevor.com/support
NEED HELP? CONTACT US!
This is the original instruction, please read all manual instructions
carefully before operating. VEVOR reserves a clear interpretation of our
user manual. The appearance of the product shall be subject to the
product you received. Please forgive us that we won't inform you again if
there are any technology or software updates on our product.
WATER STORAGE TANK

2
NOTES
7. Trzymając zawór wylotowy zamknięty, napełnij ciecz przez zawór wlotowy na
górze .
8. Średnica rury wtryskowej wody powinna być mniejsza niż wlot wody , aby
umożliwić odprowadzenie powietrza ze zbiornika .
9. Zadbaj o wszystkie akcesoria są mocno dokręcone ręcznie. Nieprawidłowe
dokręcenie akcesoriów może spowodować wyciek.
MODEL AND PARAMETERS
Model
BY-L330L
BY-L 40
BY-L 54 0L
BY-L 100
Pojemność
330L
400L
540L
1000L
Dopływ wody _ _
DN25
DN40
Wylot wody _ _
DN20
DN25
Materiał
PCV (0,9 mm)
Temperatura
-30 ℃ ~ + 70 ℃
Kolor
Niebieski
STRUCTURE DIAGRAM
1
2
3
4

3
1. Najlepsze , co biorę 2. Wiszący pierście
ń
3.Torba B ody 4.Zawór
spustowy _
COMPONENTS
NIE.
CZĘŚĆ
NAZWA
ILOŚĆ
1
Torba do przechowywania
wody
1
2
Zawór spustowy
1
3
Osłona wlotu
1
4
Skrawek
2
5
Złącze wylotowe
1
6
Taśma teflonowa
1
7
Klej naprawczy
2
8
Gumowy pierścień
uszczelniający
1
9
Instrukcja obsługi
1
USE
7. Po otrzymaniu produktu rozwiń worek przeciwdeszczowy. Wlot
wody znajduje się u góry.

4
8. Zamontować zawór wylotowy wody (dokręcając zgodnie z
ruchem wskazówek zegara). Zawór wylotowy jest większy i należy
go zamontować z większą siłą, aż do wycentrowania zaworu.
9. Zamontuj zewnętrzne złącze wylotowe za pomocą taśmy PTFE.
MAINTAIN AND STORAGE
1. Do czyszczenia użyj łagodnego detergentu i wody.
2. Nie szoruj twardymi przedmiotami, takimi jak szczotki.
3. Przed składowaniem wysuszyć. Nie przechowywać w ciemnym,
wilgotnym miejscu.
4. Oczyść port filtra z zanieczyszczeń na czas, aby uniknąć
zatkania.
5. Jeżeli korpus lufy jest uszkodzony, można go naprawić za
pomocą dołączonej łatki (prosimy zabrać ze sobą własny klej).
6. Jeśli złącze jest nieszczelne, przed jego montażem dokręć złącze
lub owiń wodoodporną taśmę gwint złącza (jak pokazano poniżej).
NOTE: The rubber sealing ring should be placed first. (If you do not use
rubber rings, you can also use PTFE tape to seal, PTFE tape use
described below.)

5
Uwaga: Jeśli samodzielnie montujesz i demontujesz złącze, a
przełącznik nie jest ustawiony pionowo, spróbuj zwiększyć liczbę
zwojów wodoodpornej taśmy.
Producent : Shanghaimuxinmuyeyouxiangongsi
Adres : Baoshanqu Shuangchenglu 803long 11hao 1602A-1609shi
Szanghaj
Import do AUS: SIHAO PTY LTD, 1 ROKEVA STREETEASTWOOD
NSW 2122 Australia
Import do USA: Sanven Technology Ltd., Suite 250, 9166 Anaheim Place,
Rancho Cucamonga, CA 91730
REP
UK
Pooledas Group Ltd
Unit 5 Albert Edward House, The Pavilions
Preston, United Kingdom
REP
EC
SHUNSHUN GmbH
Römeräcker 9 Z2021, 76351
Linkenheim-Hochstetten, Germany
Wyprodukowano w Chinach


Technisch Support- und E-Garantie-Zertifikat www.vevor.com/support
WASSERTANK
Modell: BY-L330L/ BY-L 40 0L / BY-L 54 0L / BY-L 100 0L
We continue to be committed to provide you tools with competitive price.
"Save Half", "Half Price" or any other similar expressions used by us only represents an
estimate of savings you might benefit from buying certain tools with us compared to the major
top brands and does not necessarily mean to cover all categories of tools offered by us. You
are kindly reminded to verify carefully when you are placing an order with us if you are
actually saving half in comparison with the top major brands.

1
MODELL: BY-L330L/BY-L400L/BY-L540L/BY-L1000L
Have product questions? Need technical support? Please feel free to
contact us:
Technical Support and E-Warranty Certificate
www.vevor.com/support
NEED HELP? CONTACT US!
This is the original instruction, please read all manual instructions
carefully before operating. VEVOR reserves a clear interpretation of our
user manual. The appearance of the product shall be subject to the
product you received. Please forgive us that we won't inform you again if
there are any technology or software updates on our product.
WATER STORAGE TANK

2
NOTES
10. Halten Sie das Auslassventil geschlossen und füllen Sie die Flüssigkeit über
das Einlassventil oben ein .
11. Der Durchmesser des Wassereinspritzrohrs sollte kleiner als der
Wassereinlass sein , damit die Luft im Tank abgelassen werden kann.
12. Stellen Sie sicher, dass alle Zubehörteile vorhanden sind werden von Hand
fest angezogen. Unsachgemäßes Anziehen des Zubehörs kann zu
Undichtigkeiten führen.
MODEL AND PARAMETERS
Modell
BY-L330L
BY-L 40
BY-L 54
BY-L 100
Kapazität
330L
400L
540L
1000L
Wasserzufluss _ _ _
DN25
DN40
Wasserabfluss _ _ _
DN20
DN25
Material
PVC (0,9 mm)
Umgebungstemperatur
-30℃~+70℃
Farbe
Blau
STRUCTURE DIAGRAM
1
2
3
4
3
1.Top I ntake 2.Hängering _ _ 3. Taschenkörper _ 4. Ablassventil _
COMPONENTS
NEIN.
TEIL
NAME
MENGE
1
Wasseraufbewahrungsbeutel
1
2
Abflussventil
1
3
Ansaugdeckel
1
4
Patch
2
5
Auslassgelenk
1
6
PTFE-Band
1
7
Reparaturkleber
2
8
Gummidichtring
1
9
Benutzerhandbuch
1
USE
10. Nachdem Sie das Produkt erhalten haben, rollen Sie den
Regenbeutel aus. Der Wassereinlass befindet sich oben.
11. Installieren Sie das Wasserauslassventil (im Uhrzeigersinn
4
festziehen). Das Auslassventil ist größer und muss kräftiger
installiert werden, bis das Ventil zentriert ist.
12. Installieren Sie den externen Auslassanschluss mit dem
PTFE-Band.
MAINTAIN AND STORAGE
1. Bitte verwenden Sie zur Reinigung ein mildes Reinigungsmittel
und Wasser.
2. Schrubben Sie nicht mit harten Gegenständen wie Bürsten.
3. Vor der Lagerung trocknen. Nicht an einem dunklen, feuchten Ort
lagern.
4. Reinigen Sie den Filteranschluss rechtzeitig von Schmutz, um ein
Verstopfen zu vermeiden.
5. Wenn der Laufkörper beschädigt ist, kann er mit dem beigefügten
Flicken repariert werden (bitte bringen Sie Ihren eigenen Kleber
mit).
6. Wenn die Verbindung undicht ist, ziehen Sie die Verbindung fest
oder wickeln Sie wasserdichtes Klebeband um das Gewinde der
Verbindung, bevor Sie sie installieren (wie unten gezeigt).
NOTE: The rubber sealing ring should be placed first. (If you do not use
rubber rings, you can also use PTFE tape to seal, PTFE tape use
described below.)
5
Hinweis: Wenn Sie den Stecker selbst installieren und entfernen
und der Schalter nicht vertikal ist, versuchen Sie, die Anzahl der
Windungen des wasserdichten Klebebands zu erhöhen.
Hersteller : Shanghaimuxinmuyeyouxiangongsi
Adresse : Baoshanqu Shuangchenglu 803long 11hao 1602A-1609shi
Shanghai
Importiert nach AUS: SIHAO PTY LTD, 1 ROKEVA
STREETEASTWOOD NSW 2122 Australien
In die USA importiert: Sanven Technology Ltd., Suite 250, 9166 Anaheim
Place, Rancho Cucamonga, CA 91730
REP
UK
Pooledas Group Ltd
Unit 5 Albert Edward House, The Pavilions
Preston, United Kingdom
REP
EC
SHUNSHUN GmbH
Römeräcker 9 Z2021, 76351
Linkenheim-Hochstetten, Germany
In China hergestellt


Technique Assistance et certificat de garantie électronique
www.vevor.com/support
RÉSERVOIR DE STOCKAGE D'EAU
Modèle: BY-L330L/ BY-L 40 0L / BY-L 54 0L / BY-L 100 0L
We continue to be committed to provide you tools with competitive price.
"Save Half", "Half Price" or any other similar expressions used by us only represents an
estimate of savings you might benefit from buying certain tools with us compared to the major
top brands and does not necessarily mean to cover all categories of tools offered by us. You
are kindly reminded to verify carefully when you are placing an order with us if you are
actually saving half in comparison with the top major brands.

1
Modèle : BY-L330L/BY-L400L/BY-L540L/BY-L1000L
Have product questions? Need technical support? Please feel free to
contact us:
Technical Support and E-Warranty Certificate
www.vevor.com/support
NEED HELP? CONTACT US!
This is the original instruction, please read all manual instructions
carefully before operating. VEVOR reserves a clear interpretation of our
user manual. The appearance of the product shall be subject to the
product you received. Please forgive us that we won't inform you again if
there are any technology or software updates on our product.
WATER STORAGE TANK

2
NOTES
13. En gardant la vanne de sortie fermée, remplissez le liquide depuis la vanne
d'entrée située sur le dessus .
14. Le diamètre du tube d'injection d'eau doit être inférieur à l'entrée d'eau afin
que l'air présent dans le réservoir puisse être évacué.
15. Assurez-vous que tous les accessoires sont fermement serrés à la main. Un
serrage incorrect des accessoires peut entraîner des fuites.
MODEL AND PARAMETERS
Modèle
BY-L330L
BY-L 40
BY-L 54 0L
BY-L 100
Capacité
330L
400L
540L
1000L
Arrivée d' eau _
DN25
DN40
Sortie d' eau _
DN20
DN25
Matériel
PVC (0,9 mm)
Température
-30 ℃ ~ + 70 ℃
Couleur
Bleu
STRUCTURE DIAGRAM
1.Top Je prends 2. Anneau de suspension 3. Corps du sac 4.Vanne de
1
2
3
4
3
vidange
COMPONENTS
Non.
PARTIE
NOM
QTÉ
1
Sac de stockage d'eau
1
2
Vanne de vidange
1
3
Couvercle d'admission
1
4
Correctif
2
5
Joint de sortie
1
6
ruban PTFE
1
7
Colle de réparation
2
8
Bague d'étanchéité en
caoutchouc
1
9
Manuel de l'Utilisateur
1
USE
13. Après avoir récupéré le produit, déroulez le sac de pluie.
L'arrivée d'eau se fait en haut.
4
14. Installez la vanne de sortie d'eau (serrage dans le sens des
aiguilles d'une montre). La vanne de sortie est plus grande et doit
être installée avec plus de force jusqu'à ce que la vanne soit
centrée.
15. Installez le connecteur de sortie externe avec le ruban PTFE.
MAINTAIN AND STORAGE
1. Veuillez utiliser un détergent doux et de l'eau pour le nettoyage.
2. Ne frottez pas avec des objets durs comme des brosses.
3. Sécher avant le stockage. Ne pas stocker dans un endroit
sombre et humide.
4. Nettoyez les débris au niveau du port du filtre à temps pour éviter
le colmatage.
5. Si le corps du canon est endommagé, il peut être réparé avec le
patch ci-joint (veuillez apporter votre propre colle).
6. Si le joint fuit, serrez-le ou enroulez du ruban adhésif
NOTE: The rubber sealing ring should be placed first. (If you do not use
rubber rings, you can also use PTFE tape to seal, PTFE tape use
described below.)
5
imperméable sur le filetage du joint avant de l'installer (comme
indiqué ci-dessous).
Remarque : Si vous installez et retirez le connecteur vous-même et
que l'interrupteur n'est pas vertical, essayez d'augmenter le nombre
de tours d'enroulement de ruban étanche.
Fabricant : Shanghaimuxinmuyeyouxiangongsi
Adresse : Baoshanqu Shuangchenglu 803long 11hao 1602A-1609shi
Shanghai
Importé en Australie : SIHAO PTY LTD, 1 ROKEVA STREETASTWOOD
NSW 2122 Australie
Importé aux États-Unis : Sanven Technology Ltd., Suite 250, 9166
Anaheim Place, Rancho Cucamonga, CA 91730
REP
UK
Pooledas Group Ltd
Unit 5 Albert Edward House, The Pavilions
Preston, United Kingdom
REP
EC
SHUNSHUN GmbH
Römeräcker 9 Z2021, 76351
Linkenheim-Hochstetten, Germany
Fabriqué en Chine


Technisch Ondersteuning en e-garantiecertificaat www.vevor.com/support
WATEROPSLAGTANK
Model: BY-L330L/ BY-L 40 0L / BY-L 54 0L / BY-L 100 0L
We continue to be committed to provide you tools with competitive price.
"Save Half", "Half Price" or any other similar expressions used by us only represents an
estimate of savings you might benefit from buying certain tools with us compared to the major
top brands and does not necessarily mean to cover all categories of tools offered by us. You
are kindly reminded to verify carefully when you are placing an order with us if you are
actually saving half in comparison with the top major brands.

1
MODEL:BY-L330L/BY-L400L/BY-L540L/BY-L1000L
Have product questions? Need technical support? Please feel free to
contact us:
Technical Support and E-Warranty Certificate
www.vevor.com/support
NEED HELP? CONTACT US!
This is the original instruction, please read all manual instructions
carefully before operating. VEVOR reserves a clear interpretation of our
user manual. The appearance of the product shall be subject to the
product you received. Please forgive us that we won't inform you again if
there are any technology or software updates on our product.
WATER STORAGE TANK
2
NOTES
16. Houd de uitlaatklep gesloten en vul de vloeistof via de inlaatklep bovenaan .
17. De diameter van de waterinjectiebuis moet kleiner zijn dan de waterinlaat ,
zodat de lucht in de tank kan worden afgevoerd.
18. Zorg ervoor dat alle accessoires aanwezig zijn worden stevig met de hand
vastgedraaid. Het onjuist aandraaien van accessoires kan tot lekkage leiden.
MODEL AND PARAMETERS
Model
BY-L330L
BY-L 40
BY-L 54
BY-L 100
Capaciteit
330L
400L
540L
1000L
Water laat ik toe
DN25
DN40
Water uit laten _
DN20
DN25
Materiaal
PVC (0,9 mm)
Omgevingstemperatuur
-30℃~+70℃
Kleur
Blauw
STRUCTURE DIAGRAM
1.Top Ik neem 2. Ophangring _ 3. Taslichaam _ 4. Aftapkraan _
1
2
3
4

3
COMPONENTS
Nee.
DEEL
NAAM
AANTAL
1
Wateropbergtas
1
2
Aftapkraan
1
3
Inlaat deksel
1
4
Lapje
2
5
Uitlaatverbinding
1
6
PTFE-tape
1
7
Reparatie lijm
2
8
Rubberen afdichtring
1
9
Handleiding
1
USE
16. Nadat u het product hebt ontvangen, rolt u de regenzak uit. De
waterinlaat bevindt zich aan de bovenkant.
17. Installeer de wateruitlaatklep (met de klok mee vastdraaien). De
uitlaatklep is groter en moet krachtiger worden geïnstalleerd totdat
4
de klep gecentreerd is.
18. Installeer de externe uitlaatconnector met de PTFE-tape.
MAINTAIN AND STORAGE
1. Gebruik voor het reinigen een mild schoonmaakmiddel en water.
2. Schrob niet met harde voorwerpen zoals borstels.
3. Droog voor opslag. Niet op een donkere, vochtige plaats
bewaren.
4. Reinig het vuil bij de filterpoort op tijd om verstopping te
voorkomen.
5. Als het lichaam van de loop beschadigd is, kan deze worden
gerepareerd met de bijgevoegde patch (breng uw eigen lijm mee).
6. Als de verbinding lekt, draai de verbinding dan vast of wikkel
waterdichte tape op de schroefdraad van de verbinding voordat u
deze installeert (zoals hieronder weergegeven).
NOTE: The rubber sealing ring should be placed first. (If you do not use
rubber rings, you can also use PTFE tape to seal, PTFE tape use
described below.)
5
Let op: Als u de connector zelf installeert en verwijdert en de
schakelaar niet verticaal staat, probeer dan het aantal kronkelende
banen waterdichte tape te vergroten.
Fabrikant : Shanghaimuxinmuyeyouxiangongsi
Adres : Baoshanqu Shuangchenglu 803long 11hao 1602A-1609shi
Shanghai
Geïmporteerd naar AUS: SIHAO PTY LTD, 1 ROKEVA
STREETEASTWOOD NSW 2122 Australië
Geïmporteerd naar de VS: Sanven Technology Ltd., Suite 250, 9166
Anaheim Place, Rancho Cucamonga, CA 91730
REP
UK
Pooledas Group Ltd
Unit 5 Albert Edward House, The Pavilions
Preston, United Kingdom
REP
EC
SHUNSHUN GmbH
Römeräcker 9 Z2021, 76351
Linkenheim-Hochstetten, Germany
Gemaakt in China


Teknisk Support och e-garanticertifikat www.vevor.com/support
VATTENLAGERTANK
Modell: BY-L330L/ BY-L 40 0L / BY-L 54 0L / BY-L 100 0L
We continue to be committed to provide you tools with competitive price.
"Save Half", "Half Price" or any other similar expressions used by us only represents an
estimate of savings you might benefit from buying certain tools with us compared to the major
top brands and does not necessarily mean to cover all categories of tools offered by us. You
are kindly reminded to verify carefully when you are placing an order with us if you are
actually saving half in comparison with the top major brands.
1
MODELL:BY-L330L/BY-L400L/BY-L540L/BY-L1000L
Have product questions? Need technical support? Please feel free to
contact us:
Technical Support and E-Warranty Certificate
www.vevor.com/support
NEED HELP? CONTACT US!
This is the original instruction, please read all manual instructions
carefully before operating. VEVOR reserves a clear interpretation of our
user manual. The appearance of the product shall be subject to the
product you received. Please forgive us that we won't inform you again if
there are any technology or software updates on our product.
WATER STORAGE TANK
2
NOTES
19. Håll utloppsventilen stängd och fyll på vätskan från inloppsventilen på
toppen .
20. Vatteninsprutningsrörets diameter bör vara mindre än vatteninloppet så att
luften i tanken kan släppas ut.
21. Se till alla tillbehör är ordentligt åtdragna för hand. Felaktig åtdragning av
tillbehör kan leda till läckage.
MODEL AND PARAMETERS
Modell
BY-L330L
BY-L 40
BY-L 54
BY-L 100
Kapacitet
330L
400L
540L
1000L
Vattenintag _ _ _
DN25
DN40
Vattenutlopp _ _ _
DN20
DN25
Material
PVC (0,9 mm)
Omgivningstemperatur
-30℃~+70℃
Färg
Blå
STRUCTURE DIAGRAM
1.Topp I ntake 2.Hängande ring _ 3.Bag Body _ 4. Dränera V alven
1
2
3
4
3
COMPONENTS
Nej.
DEL
NAMN
ANTAL
1
Vattenförvaringspåse
1
2
Avloppsventil
1
3
Insugsskydd
1
4
Lappa
2
5
Utloppsskarv
1
6
PTFE-tejp
1
7
Reparera lim
2
8
Gummitätningsring
1
9
Användarmanual
1
USE
19. När du har hämtat produkten, rulla ut regnpåsen. Vatteninloppet
är överst.
20. Installera vattenutloppsventilen (åtdragning medurs).
Utloppsventilen är större och måste installeras mer kraftfullt tills

4
ventilen är centrerad.
21. Installera den externa uttagskontakten med PTFE-tejpen.
MAINTAIN AND STORAGE
1. Använd milt rengöringsmedel och vatten för rengöring.
2. Skrubba inte med hårda föremål som borstar.
3. Torka före förvaring. Förvara inte på en mörk, fuktig plats.
4. Rengör skräpet vid filterporten i tid för att undvika igensättning.
5. Om fatkroppen är skadad kan den repareras med den bifogade
lappen (ta med eget lim).
6. Om fogen läcker, dra åt fogen eller linda vattentät tejp på fogens
gänga innan du installerar den (som visas nedan).
Obs: Om du installerar och tar bort kontakten själv och
omkopplaren inte är vertikal, försök att öka antalet lindningsvarv
med vattentät tejp.
NOTE: The rubber sealing ring should be placed first. (If you do not use
rubber rings, you can also use PTFE tape to seal, PTFE tape use
described below.)
5
Tillverkare : Shanghaimuxinmuyeyouxiangongsi
Adress : Baoshanqu Shuangchenglu 803long 11hao 1602A-1609shi
Shanghai
Importerad till AUS: SIHAO PTY LTD, 1 ROKEVA STREETEASTWOOD
NSW 2122 Australien
Importerad till USA: Sanven Technology Ltd., Suite 250, 9166 Anaheim
Place, Rancho Cucamonga, CA 91730
REP
UK
Pooledas Group Ltd
Unit 5 Albert Edward House, The Pavilions
Preston, United Kingdom
REP
EC
SHUNSHUN GmbH
Römeräcker 9 Z2021, 76351
Linkenheim-Hochstetten, Germany
Tillverkad i Kina


Técnico Soporte y certificado de garantía electrónica www.vevor.com/support
TANQUE DE ALMACENAMIENTO DE AGUA
Modelo: BY-L330L/ BY-L 40 0L / BY-L 54 0L / BY-L 100 0L
We continue to be committed to provide you tools with competitive price.
"Save Half", "Half Price" or any other similar expressions used by us only represents an
estimate of savings you might benefit from buying certain tools with us compared to the major
top brands and does not necessarily mean to cover all categories of tools offered by us. You
are kindly reminded to verify carefully when you are placing an order with us if you are
actually saving half in comparison with the top major brands.
1
MODELO:BY-L330L/BY-L400L/BY-L540L/BY-L1000L
Have product questions? Need technical support? Please feel free to
contact us:
Technical Support and E-Warranty Certificate
www.vevor.com/support
NEED HELP? CONTACT US!
This is the original instruction, please read all manual instructions
carefully before operating. VEVOR reserves a clear interpretation of our
user manual. The appearance of the product shall be subject to the
product you received. Please forgive us that we won't inform you again if
there are any technology or software updates on our product.
WATER STORAGE TANK

2
NOTES
22. Manteniendo la válvula de salida cerrada, llene el líquido de la válvula de
entrada en la parte superior .
23. El diámetro del tubo de inyección de agua debe ser menor que la entrada de
agua para que se pueda descargar el aire del tanque .
24. Asegúrese de que todos los accesorios se aprietan firmemente con la mano.
Un ajuste inadecuado de los accesorios puede provocar fugas.
MODEL AND PARAMETERS
Modelo
POR-L330L
BY-L 40
POR-L 54
POR-L
Capacidad
330L
400L
540L
1000L
Entrada de agua _
DN25
DN40
Salida de agua _
DN20
DN25
Material
PVC (0,9 mm)
Temperatura
-30℃~+70℃
Color
Azul
STRUCTURE DIAGRAM
1.Toma superior _ 2.Anillo colgante _ 3.Cuerpo de la bolsa 4.Válvula de
1
2
3
4
3
drenaje
COMPONENTS
No.
PARTE
NOMBRE
CANTIDAD
1
Bolsa de
almacenamiento de agua
1
2
Válvula de drenaje
1
3
Tapa de entrada
1
4
Parche
2
5
Junta de salida
1
6
cinta de PTFE
1
7
Pegamento reparador
2
8
Anillo de sello de
goma
1
9
Manual de usuario
1
USE
22. Después de recibir el producto, desenrolle la bolsa de lluvia. La
entrada de agua está en la parte superior.

4
23. Instale la válvula de salida de agua (apriete en el sentido de las
agujas del reloj). La válvula de salida es más grande y es necesario
instalarla con más fuerza hasta que la válvula esté centrada.
24. Instale el conector de salida externo con la cinta de PTFE.
MAINTAIN AND STORAGE
1. Utilice detergente suave y agua para la limpieza.
2. No frotes con objetos duros como cepillos.
3. Seque antes de guardarlo. No lo guarde en un lugar oscuro y
húmedo.
4. Limpie los residuos en el puerto del filtro a tiempo para evitar
obstrucciones.
5. Si el cuerpo del cañón está dañado, se puede reparar con el
parche adjunto (traiga su propio pegamento).
6. Si la junta tiene fugas, apriete la junta o envuelva cinta
impermeable en la rosca de la junta antes de instalarla (como se
NOTE: The rubber sealing ring should be placed first. (If you do not use
rubber rings, you can also use PTFE tape to seal, PTFE tape use
described below.)
5
muestra a continuación).
Nota: Si instala y retira el conector usted mismo y el interruptor no
está vertical, intente aumentar el número de vueltas de cinta
impermeable.
Fabricante : Shanghaimuxinmuyeyouxiangongsi
Dirección : Baoshanqu Shuangchenglu 803long 11hao 1602A-1609shi
Shangai
Importado a AUS: SIHAO PTY LTD, 1 ROKEVA STREETEASTWOOD
NSW 2122 Australia
Importado a EE. UU.: Sanven Technology Ltd., Suite 250, 9166 Anaheim
Place, Rancho Cucamonga, CA 91730
REP
UK
Pooledas Group Ltd
Unit 5 Albert Edward House, The Pavilions
Preston, United Kingdom
REP
EC
SHUNSHUN GmbH
Römeräcker 9 Z2021, 76351
Linkenheim-Hochstetten, Germany
Hecho en china