Model No.: DS190P
Please read this User Manual before operating and save for future reference.
Commercial Dehumidifier
User Manual


Welcome
Thanks for choosing ANDTE dehumidifier!
ANDTE is dedicated to keeping people healthy, comfortable and more
enjoyable by offering quality appliances ranging from dehumidifiers to ice
makers, and more. From breathing easier in your office to upgrading your
kitchen appliances, we hope ANDTE could help you every step of the way.
ANDTE DS190P commercial dehumidifier can remove 190 PPD at saturation
(95°F, 90% RH) and 90 PPD at AHAM (80°F, 60% RH) , reducing humidity to
comfortable levels in a short period of time. This dehumidifier has a solid case
to withstand harsh environments, is safe and easy to use, guarantees long-
term use and easy maintenance,plus we use a copper tube condenser and high
quality and accurate sensors, it will be more effective and last longer.
Before plugging in your new dehumidifier, we suggest that you read this user
manual as it contains important safety information, operation instructions,
troubleshooting, maintenance tips, and warranty information to ensure the
reliability and longevity of your dehumidifier.
We’re always just an email away
To access customer support, please email to AndteServices@outlook.com
with your purchase order ID to help us address the problem faster and serve
you better.
Thank you again!
READ THIS MANUAL INSTRUCTION CAREFULLY BEFORE USING THE UNIT.
PLEASE KEEP THIS FOR FUTURE REFERENCE.

CONTENTS
Safety Information ................................................................
1
Introduction ..........................................................................
2
Important Safety Tips ...........................................................
3
Operation Instruction ...........................................................
6
Maintenance ........................................................................
10
Parts Identification ...............................................................
4
12
Trouble shooting guide .......................................................
13
Safety Precautions ..............................................................
14
15
Parts List & Schematic diagram of flange installation .........
Warranty and Service ..........................................................

Install the dehumidifier on flat surface to minimize vibration and/or noise.
Inspect the power cord before use. Never operate the dehumidifier when the
power cord or plug is damaged.
Insert the three-prong plug on the power cord into a matching electrically
grounded outlet (120V/ 60 Hz, 15A at least). Do not use an adapter. Never cut
offthe third prong.Do not use an extension cord.
Do not operate the dehumidifier in standing water.Keep motor and wiring dry.
Never immerse the dehumidifier into water or other liquids.
Do not put the dehumidifier close to heat-generating devices, induding
flammable or dangerous materials.
Unplug the power supply before cleaning or storing the dehumidifier. Always
grasp the plug (not the cord) to unplug.
Do not put fingers or other items into air inlet or air outlet.
Never insert any other objects into the dehumidifier body.
Do not sit, stand or put heavy objects on the dehumidifier.
This dehumidifier should only be used by adults who have read the manual
and understand the operating procedure of the dehumidifier.
The dehumidifier is not to be used by persons (induding children) with
reduced physical, sensory or mental capabilities, or lack ofexperience and
knowledge, unless they have been given supervision or instruction by an adult.
●
●
●
●
●
●
●
●
●
●
●
●
Never repair or remove plug and or power cord. Any repairs should be
completed by qualified electrician or distributor.
!
Safety Information
-01-

Thank you for choosing the dehumidifier by ANDTE!
We hope it will bring great convenience to your work and life.
We recommend that you save the user manual properly for future reference.
Before using this product, please read the user manual carefully to ensure that
this product functions at its best.
The ANDTE's dehumidifier adopt an upgraded design, compact structure, easy
to operate, and other characteristics, widely used in scientific research,
basement, crawl space, greenery, laboratory, gymnasium, sanitation,
commodity storage, underground engineering, and dehumidification in high
humidity places such as kitchens, bathrooms, archives, warehouses, etc.
Can be effectively avoided telecommunications equipment, materials, etc, are
damaged due to dampness or rust.
Transportation and Custody
During transportation, this product should be handled preciously to prevent
violent vibration. Generally, the packaged product should not be stored in the
open air for a long time. It should be placed in a well-ventilated, non-corrosive
gas warehouse. It should not be placed upside down. Rainproof measures
should be adopted when stored temporarily.
Introduction
-02-

Important Safety Tips
Before using the product, for safe and correct operation and maintenance,
please read and understand the following safety tips.
1. When cleaning or storing the dehumidifier, please pull out the plug first, cut
off the power supply, and ensure safety.
2.Don't immerse the machine in water or close to water sources.
3.Don't place the machine near heating devices or flammable dangerous
goods.
4.Don't insert fingers or stick-like objects into the air inlet or outlet.
5.The fuselage should be placed or installed horizontally to avoid tilting the
fuselage.
6.Never spray the machine with water.
7.Don't spray pesticides or flammable liquids on the machine.
8.Don't place heavy objects on the machine or let children and animals ride.
9.The machine should not be operated in a confined and narrow space.
10.If the power cord is damaged, to avoid danger, it must be repaired or
replaced by the manufacturer or its maintenance department or full-time
maintenance personnel.
11.The power wiring of the machine must be carried out by the national
standard wiring rules, and the power cord must be reliably connected to the
external grounding wire.
12.The fixed wiring of the machine connection must be equipped with an
all-pole disconnection device (air switch) with a contact distance of at least
0.12 inch.
13.The model specification of the fuse is: 3.15A.
14.The distance between the machine and surrounding objects should be
kept at least: 40 inch.
15.The dehumidifier is not allowed to be used by persons (including children)
who are physical, sensory, or mentally retarded or lack experience and
knowledge, don't touch the machine unless under the supervision or direction
of an adult.
16.Children should be under the supervision of adults to ensure that they do
not touch the machine at will.
-03-
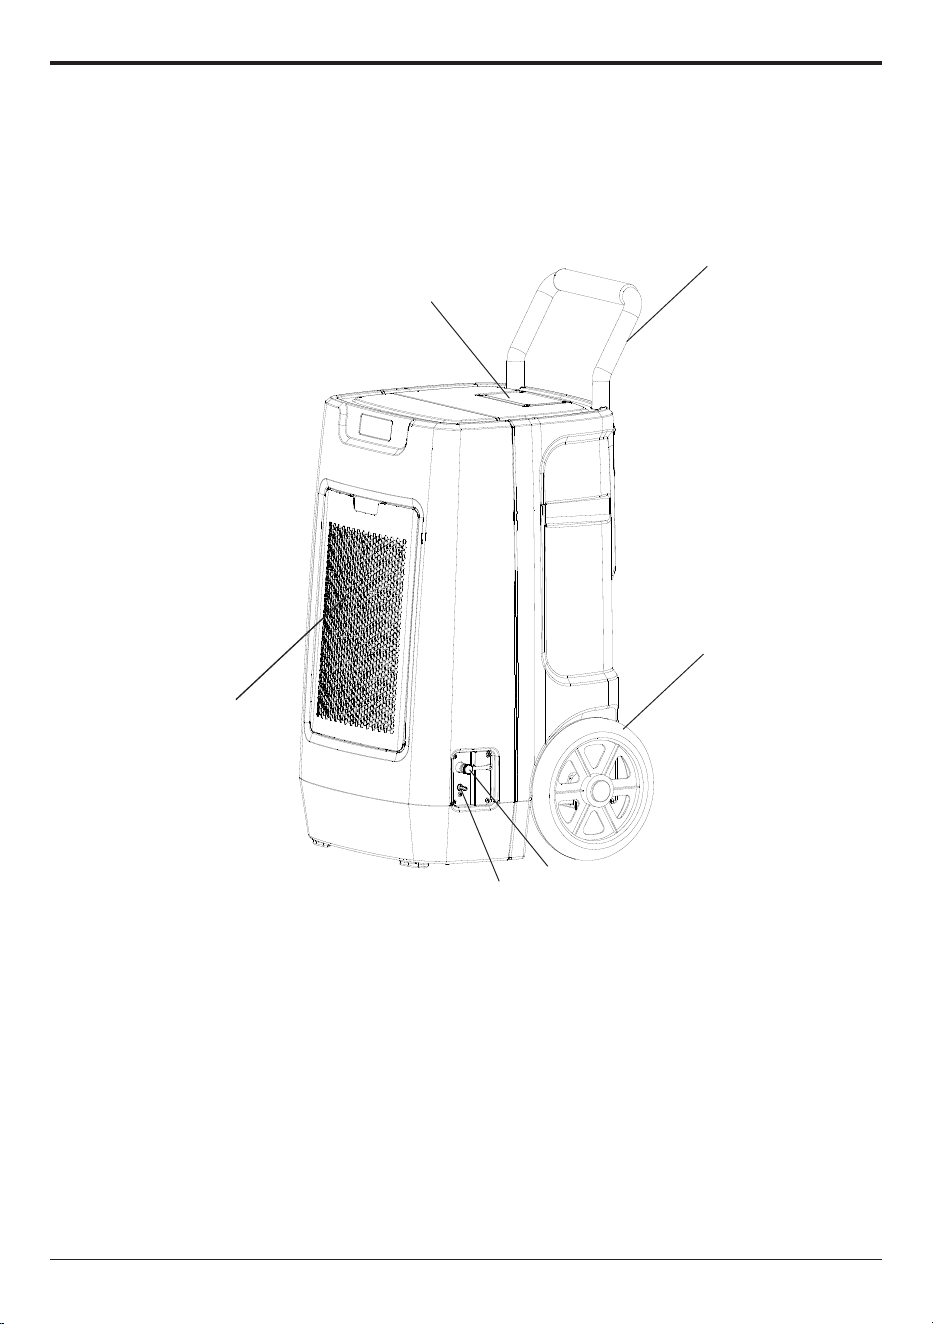
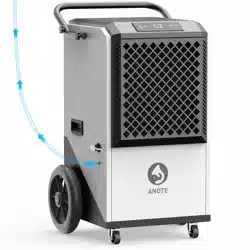
Parts Identification
NOTE:There May be slight differences in the model, the actual machine shall prevail.
1
2
4
3
5
6
1. Handle Bar 2. Control Panel 3. Wheels
4.Air Inlet 5.Gravity Drainage Outlet 6. Pump outlet
-04-
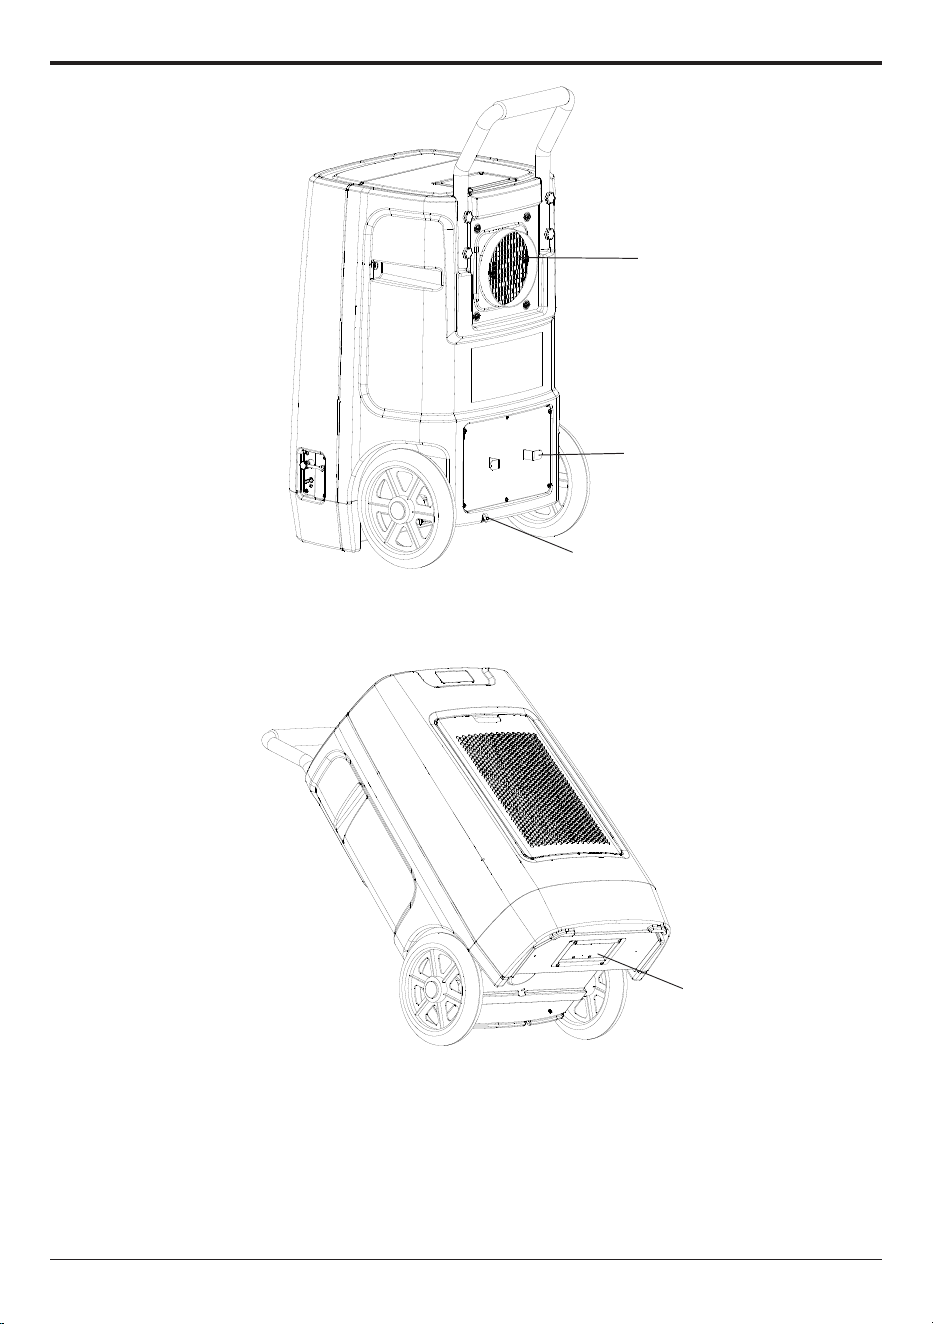
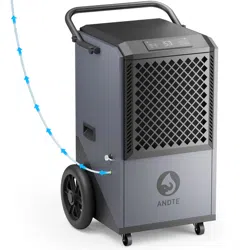
1. Air Outlet 2. Cord Winder 3. Power Cord Port
4. Pump access port
1
2
3
4
-05-
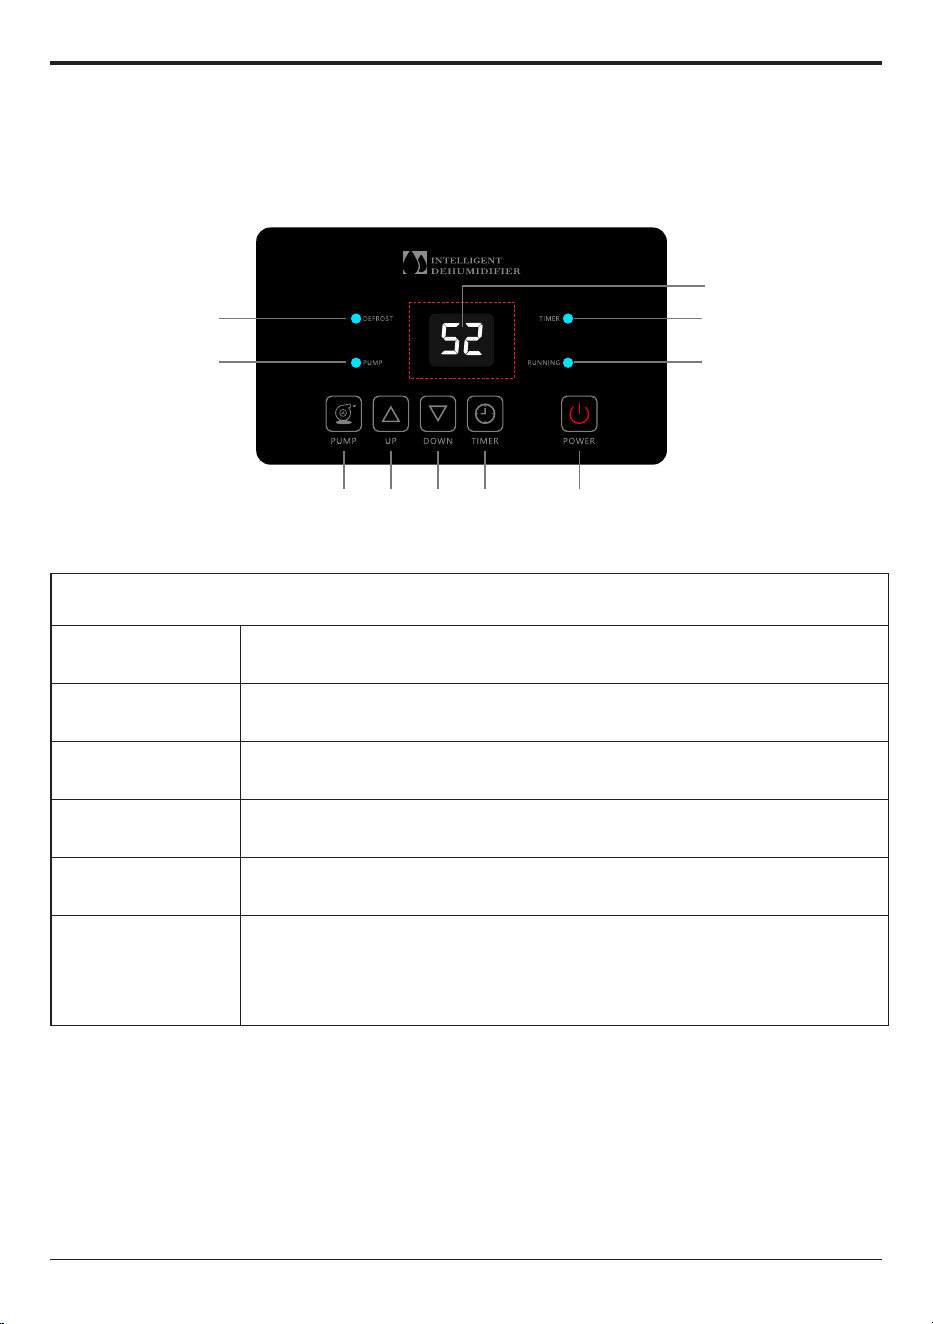
Defrost Indicator
Pump Working
Indicato
Display screen
Timer Indicator
Running Indicator
PowerTimer DownUpPump
Operation Instruction
Operation panel
Buttons Definition
Button
Function
POWER Button Press to turn the dehumidifier ON or OFF.
UP Button Press to increase the set-point of humidity level or timer.
DOWN Button Press to decrease the set-point of humidity level or timer.
TIMER Button
Press to enable the timer function or confirm the timer
settings.
PUMP Button
Press and hold the PUMP button for 3-5 seconds to empty
water from the pump reservoir manually.
When the water tank is empty , the pump does not start forcibly
and the indicator light does not light up.
-06-

Operation panel
(1) Target Humidity Value Setting
① Check the room humidity (After powering on, the digital number on the
control panel is the room humidity readout.);
② Press UP or DOWN button once, the digital number will turn to be the
previous setting value and blink;
③ Repeatedly press the UP or DOWN button to set a desired humidity
percentage value between 10%-98% in increment of 1%. The set humidity
value needs to be at least 5% lower than room humidity (The digital number
keeps blinking while changes are being made);
④ After selecting the desired value, wait for a few seconds until the digital
number turns to be room humidity readout, then let the dehumidifier run.
NOTE:
The dehumidifier with a humidistat will automatically stop and restart to maintain
room humidity level within a range of ±3% of the set point.
For example, if the set humidity is 50%,
when the inlet humidity level the dehumidifier detects is 47%, 3% lower than the
set humidity, the dehumidifier will automatically stop and enter into standby
mode. During this time, the digital number keeps blinking.
when the inlet humidity level the dehumidifier detects raises to 53%, 3% higher
than the set humidity, it will automatically restart.
However, if the set humidity level is equal to 10, the dehumidifier will enter
CONTINUOUS MODE where the dehumidifier will run continuously.
(2) Timer Setting
The TIMER function enables you to either delay AUTO-ON or delay AUTO-OFF
the dehumidifier in the choice from 1 hour to 24 hours.
Setting an AUTO-ON timer: When the dehumidifier is on standby, selecting
Timer will turn the dehumidifier on in the hours that will be set.
Setting an AUTO-OFF timer: When the dehumidifier is running, selecting
Timer will turn the dehumidifier off in the hours that will be set.
●
●
●
●
●
-07-

To Set Timer:
* Timed startup: When the set timing time is reached, the dehumidifier
automatically starts, and the time range can be set to be
0-24 hours.
* Timed shutdown: When the set timing time is reached, the dehumidifier
automatically shuts down, and the time range can be set to
be 0-24 hours.
* Set time to turn on (turn off)
1. When the dehumidifier is in the dehumidifier state, press the [Timing] key, the
timing indicator is on, and the dehumidifier enters the timing startup setting
state; When the dehumidifier is on, press the "Timing" key, the timing
indicator is on, and the dehumidifier enters the setting state of timing
shutdown.
2. In the setting state of timed startup or timed shutdown, press [Up] or [Down]
to set the timing time. After 5 seconds, the display area of the dehumidifier
control board does not blink, and the timing setting is complete.
* Query the remaining timing time
Press [Timing]. The time displayed in the display area of the dehumidifier
control panel is the remaining reservation time. The original status will be
displayed 5 seconds later.
* Untiming
Press [Timing] to enter the setting state of timing startup (shutdown), press
[up] or [down] to adjust the time to 0 to cancel the setting of timing Settings,
timing indicator off.
* Change the timing time
If you need to change the timing time, reset the timing time.
(3) Drainage
When water tank is full, the PUMP will automatically start pumping water, and
the indicator light will flash.
When the water level in the water tank is too low, the PUMP will automatically
stop pumping water, and the indicator light goes out.
In the power-on state, long press the “PUMP” button for 3 seconds, the PUMP
function is forced to open, the indicator PUMP will flash.
When the water tank is empty, the pump does not start forcibly and the
indicator light does not light up.
-08-
●
●
●
Smart Functions
Auto Drain
Thanks to the built-in pump, the dehumidifier will drain the condensation water
automatically.
Wait 3 Minutes before Resuming Operation
To avoid any damage to the dehumidifier, the dehumidifier will not start operation
following a complete cycle until after 3 minutes. Operation will automatically start after
3 minutes.
Auto Defrost
When the frost builds up on the evaporator coils, the compressor will cycle off and the
fan will continue to run until the frost disappears.
Auto-Restart
If the dehumidifier shuts off unexpectedly due to power being cut, the dehumidifier will
restart with the previous function setting automatically when the power resumes.
Note: If the dehumidifier has been turned off before power outage, the dehumidifier will
not auto restart after the power resumes.
-09-
2.Position Your Dehumidifier
●For optimal outcomes, use your dehumidifier in a confined space.
●Shut all entryways and windows.
●Position it clear of obstructions and avoid anything that could obstruct airflow in or out of the
dehumidifier.
Note: Place the dehumidifier on a flat surface to minimize vibration or noise.
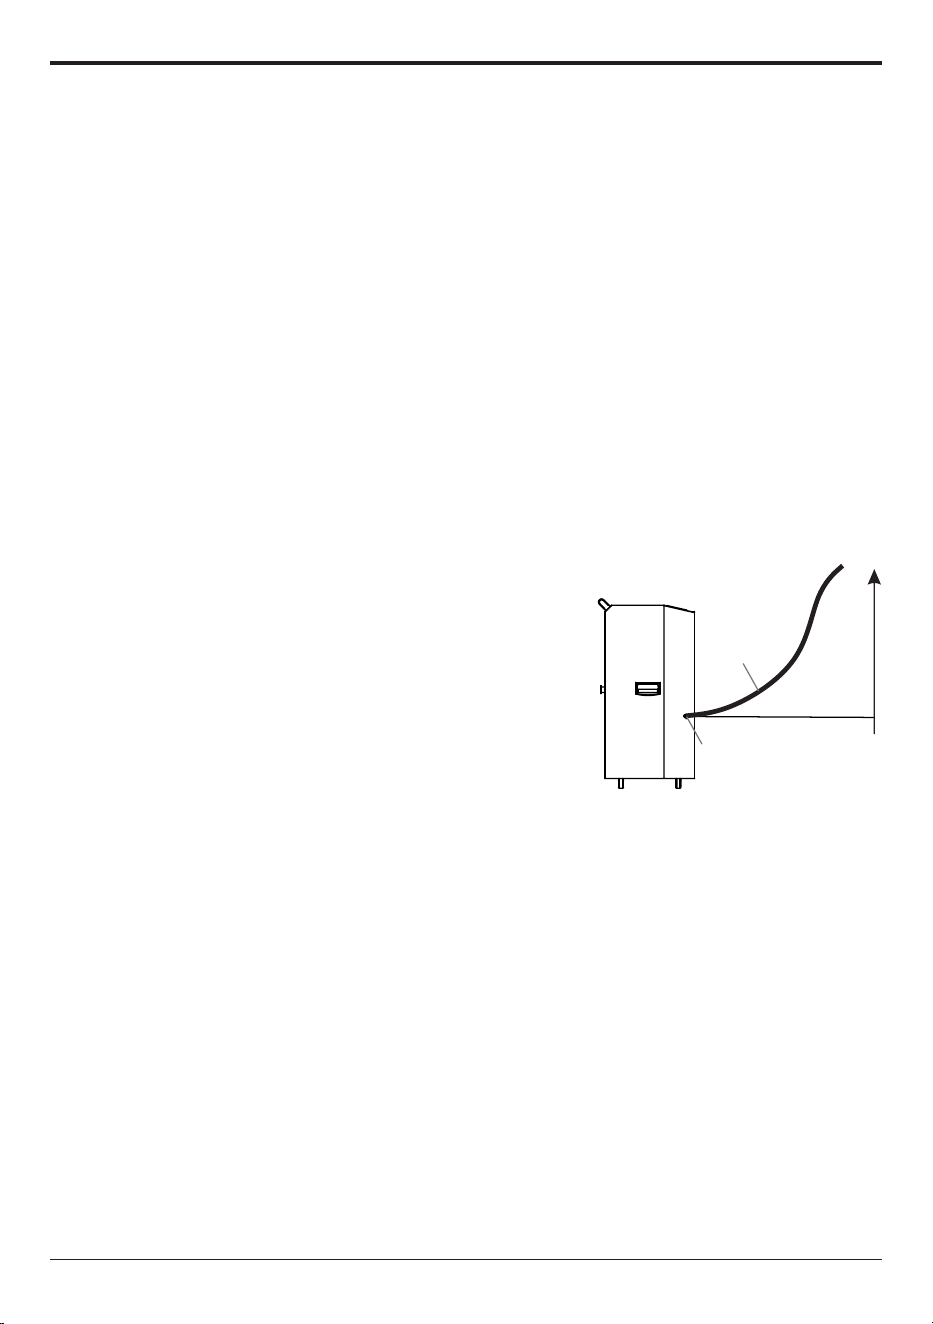
3. Setting up the Drainage System
3.1 The dehumidifier comes equipped with an internal pump for drainage, specially designed to
handle upward drainage needs.
Note: To prevent any leakage, please ensure the drainage height does not exceed a distance of
more than 16.4 feet from the drainage outlet.
3.2 Please connect the provided drain hose to the outlet for secure and effective drainage.
Note: If an alternative drainage hose(inner diameter is 0.197 inches) is used, please ensure it is
compatible with the drainage outlet to avoid any risk of leakage.
3.3 During the drainage process, please keep the hose unobstructed and free from twists or kinks.
This will enable the smooth removal of condensate water.
Upper drainage limit 16f
16f
Drain Hose
Drain Outlet
Maintenance
Ensure the dehumidifier is turned OFF and the plug is removed from
the power socket before cleaning or maintenance is carried out.
!
1. Cleaning the Dehumidifier
Clean the dehumidifier housing with a soft damp cloth. Do not submerge or
place water on the dehumidifier or control panel. Water may damage the
electronic components of the dehumidifier. Do not use chemical solvents such
as benzene, alcohol, gasoline or other heavy-duty cleaners. The surface may
become damaged or deformed.
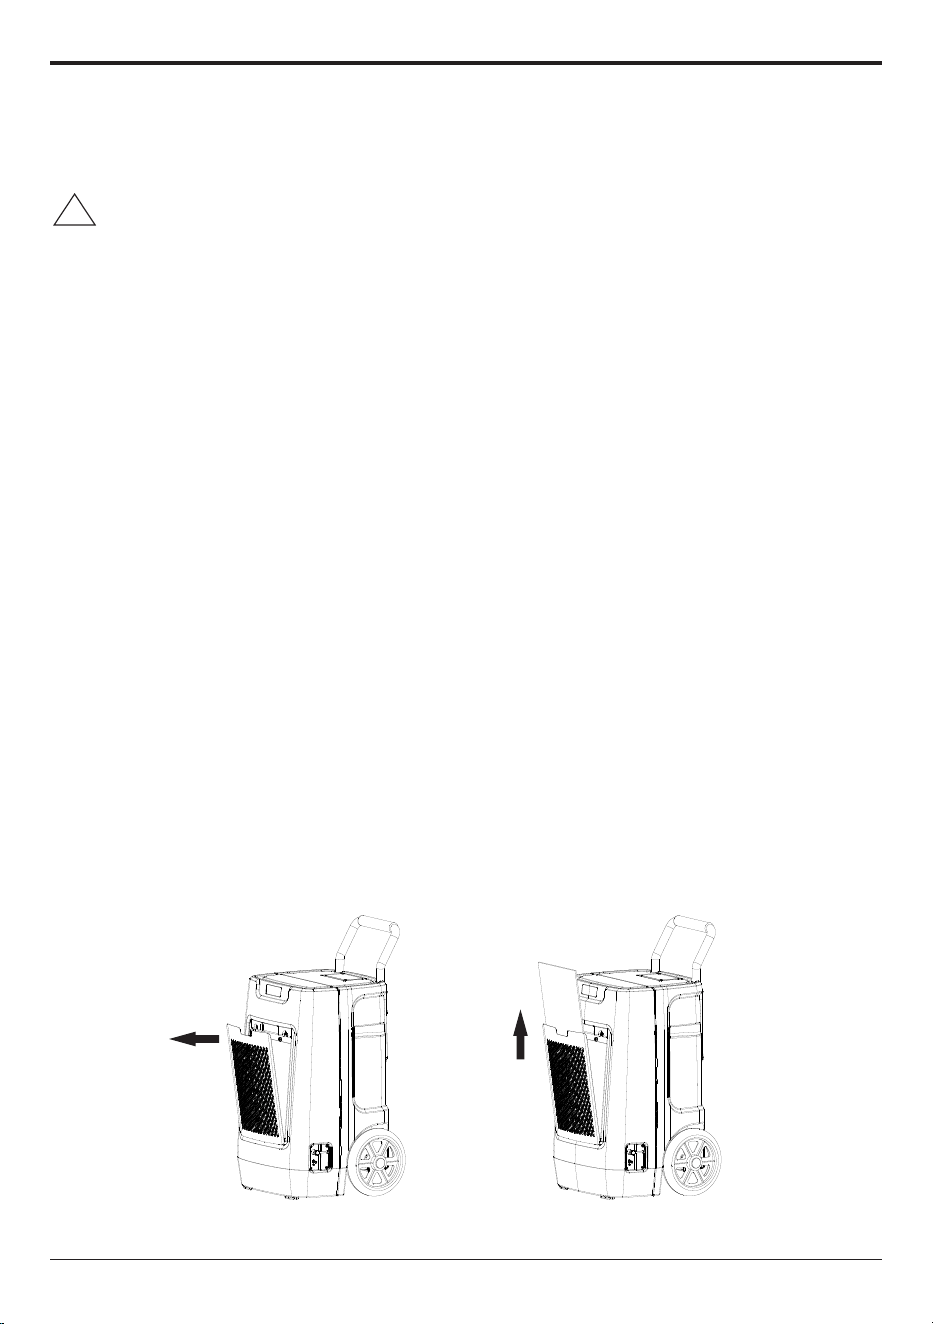
2. Cleaning the Air Filter
The working performance of the dehumidifier will be greatly reduced if the
filters become blocked. Please check and clean the filter regularly.
To Clean the Filter
1)Open the air filter cover
2) Slide the filter out.
3) Vacuum any debris from the filter using the vacuum hose and nozzle
attachment.
4) Immerse the filter into lukewarm water (about 104°F) with a mild detergent,
and then wash it and allow it to dry.
5) Once dry, re-install the filter into the dehumidifier.
-10-

3. Dehumidifier Storage & Transportation
1) Press and hold the PUMP button for 3-5 seconds to empty the water in the
pump reservoir before transportation or storage.
2) Transport and store the dehumidifier upright.
-11-
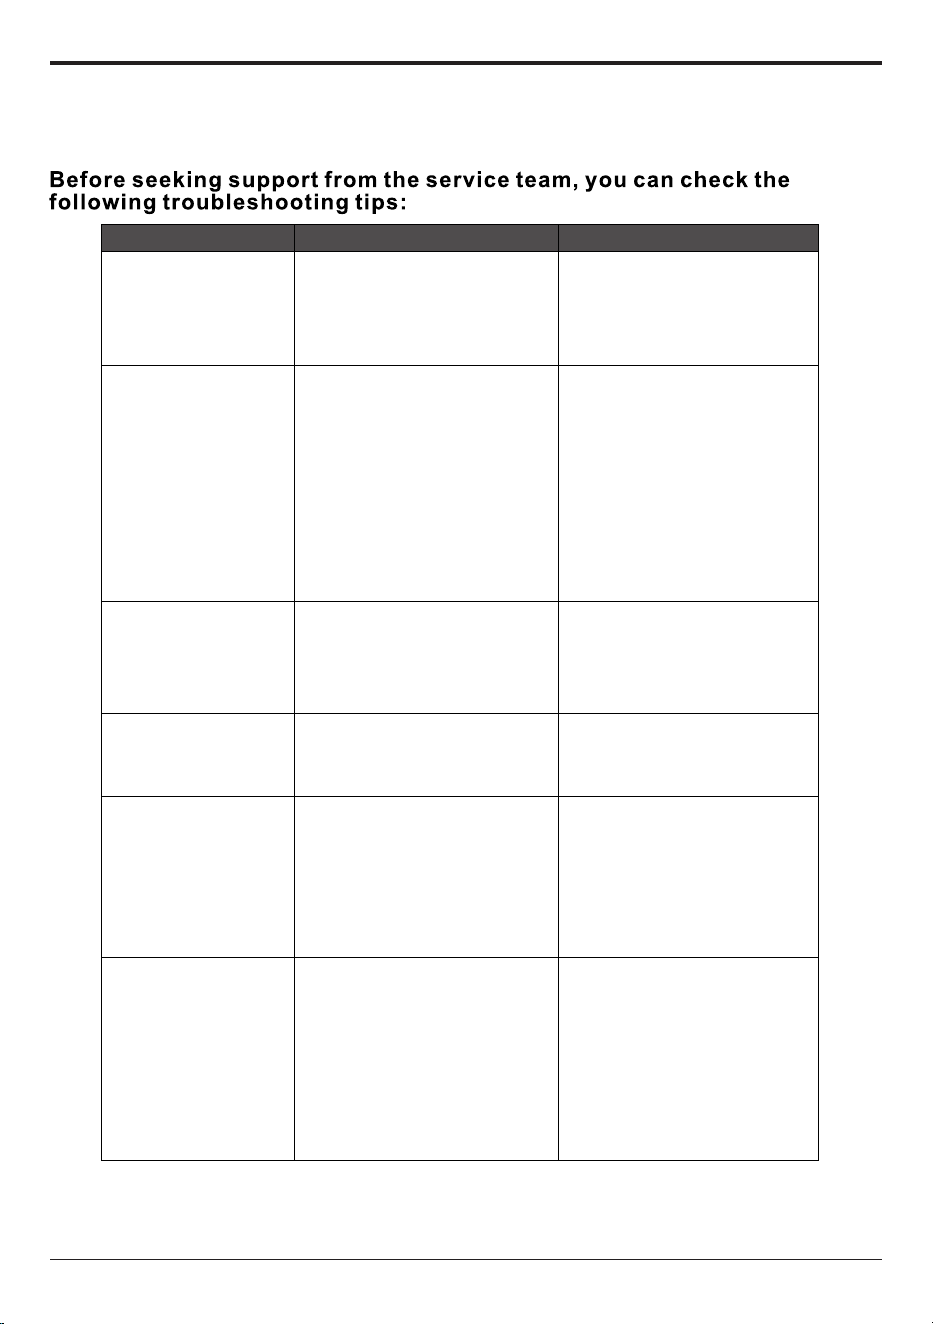
Trouble shooting guide
Fault
Cause Solution
Dehumidifier
not working
1.The fuse is blown
2.Machine failure prompt
1.Replace the fuse;
2.Please provide the fault
code and seek technical
support from ANDTE;
Dehumidifying
effect is not
obvious
1.Air filter fouling;
2.There are obstacles in
the air inlet and outlet
of the dehumidifier;
3.The space is not sealed;
4.Refrigerant leakage;
1.Clean the filter;
2.Remove obstacles;
3.Close the doors and
windows, the
dehumidification effect
of the confined space is
more obvious;
4.Please contact ANDTE for
technical support;
Water leakage
1.Machine tilt;
2.The outlet pipe is Blocked;
1.Adjust the machine and
place it horizontally;
2.Remove the access door
to remove the foreign
matter blocked in the pipe;
Abnormal noise
1.The machine is not placed
smoothly;
2.Is the filter blocked;
1.Relocate the machine to
a stable place;
2.Clean the filter;
Humidity always
shows "10"(when
there is a big
difference from the
actual humidity)
Humidity sensor failure
1.When the "10" fault
phenomenon is always
displayed, the humidity
is set to 10%RH, and the
machine can still continue
to run and be used normally;
2.Repair and replace the
humidity sensor;
Humidity always
shows "99"(when
there is a big
difference from the
actual humidity)
1.The surface of the humidity
sensor os condensed or
wetted with water;
2.Humidity sensor failure
1.When the "99" fault phenomenon
is displayed all the time, the machine
can still continue to dehumidify and
operate normally;
2.After the machine has been running
for a period of time, when the moisture
on the surface of the humidity sensor
dissipates,ig can automatically remove
the fault and resume normal operation;
3.Repair and replace the humidity
sensor;
1. When the above fault cannot be eliminated and it is confirmed that repair is required,
please contact the ANDTE support, please do not disassemble the machine for repair without authorization.
2. When the dehumidifier is running or stopped, it is normal to hear the sound of refrigerant circulating.
3. It is normal for hot air to be discharged from the air outlet.
-12-
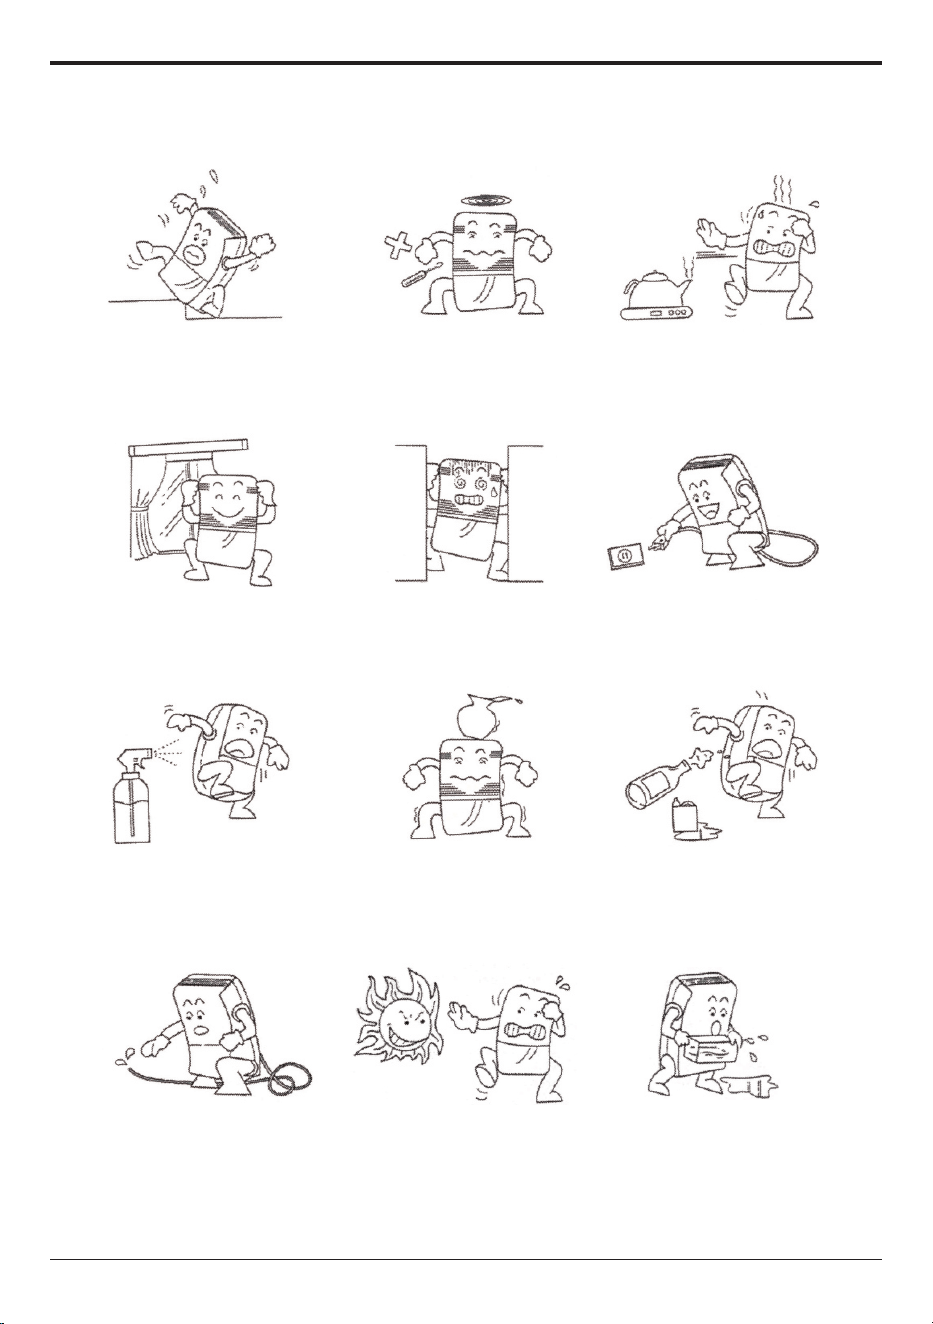
Safety Precautions
3. When using, please keep the
dehumidifier away from heat
sources such as heaters and
electric kettles to save electricity.
6. In case of power failure or
long-term non-use, please
unplug the power cord.
9. Please clean the filter every
two weeks (do not use hot water
above 104°F/40°C, alcohol,
gasoline, or toluene).
12. Before moving or carrying
the dehumidifier, please pour
out the accumulated water in
the water tank.
11. After the filter is cleaned,
please do not place it in direct
sunlight to dry it to avoid
deformation.
8. Do not place any objects on
the dehumidifier.
5. Do not place items before and
after the dehumidifier. If the
ventilation is blocked, the
dehumidification effect will be
affected.
2. Do not use thin rods or hard
objects to insert into the fuselage
to avoid malfunction or danger.
7. When cleaning the dehumidifier,
gently wipe it with a damp cloth,
do not directly spray water to clean it.
4. When using, please close the
doors and windows to achieve
the best dehumidification effect.
1. When using, do not place the
dehumidifier on soft, uneven
ground to avoid vibration or
movement.
10. During continuous drainage,
the drainage pipe must be placed
horizontally or downwards, and
must not be uneven or entangled.
-13-
-14-
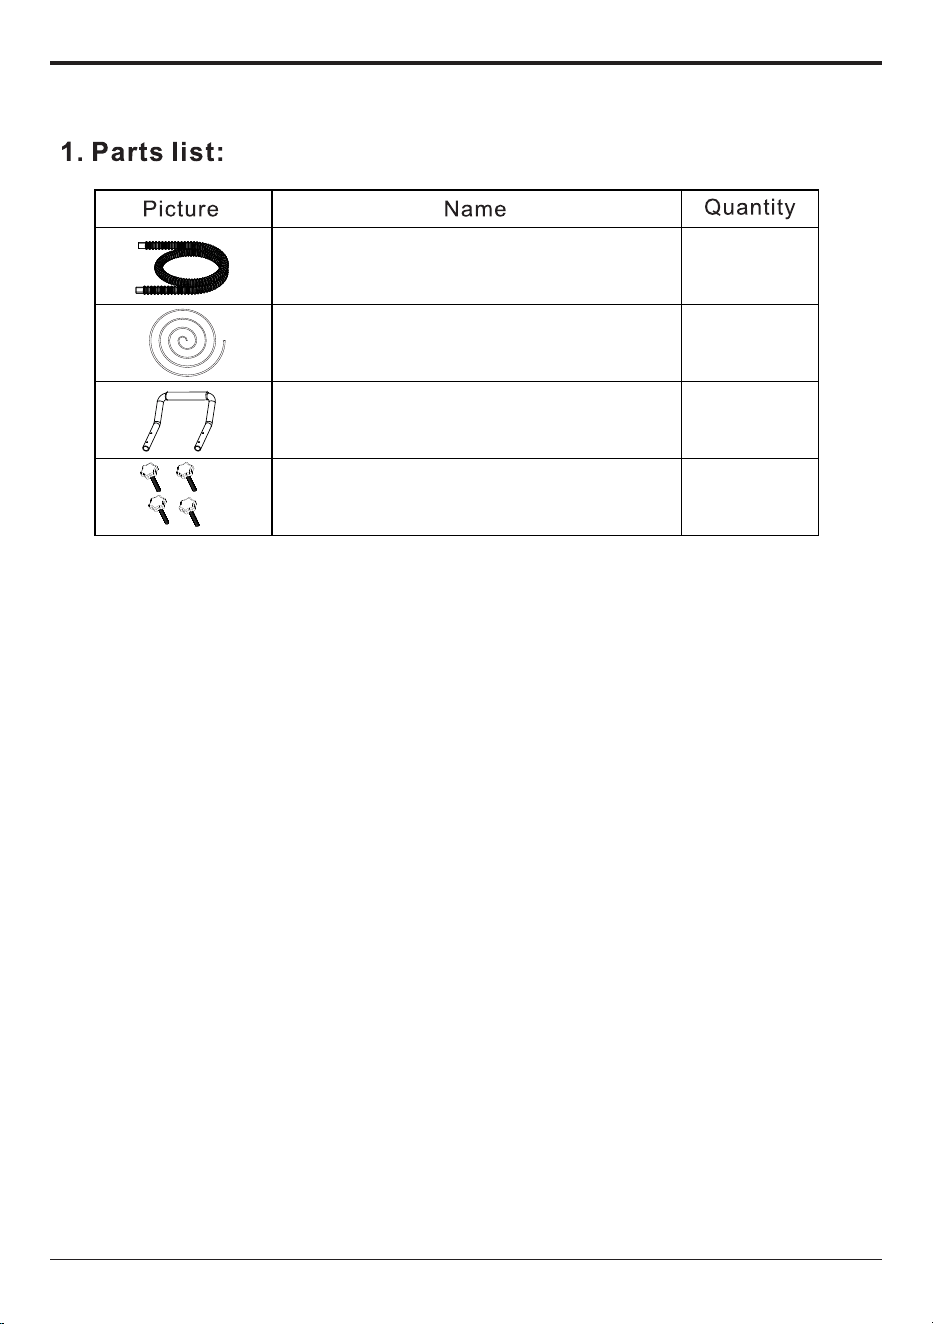
Parts List & Schematic diagram of flange installation
1PCS
Gravity Drain hose
Pump Drain hose
1PCS
1PCS
4PCS
Round Pipe handle
Rubber head screws with
plum blossoms
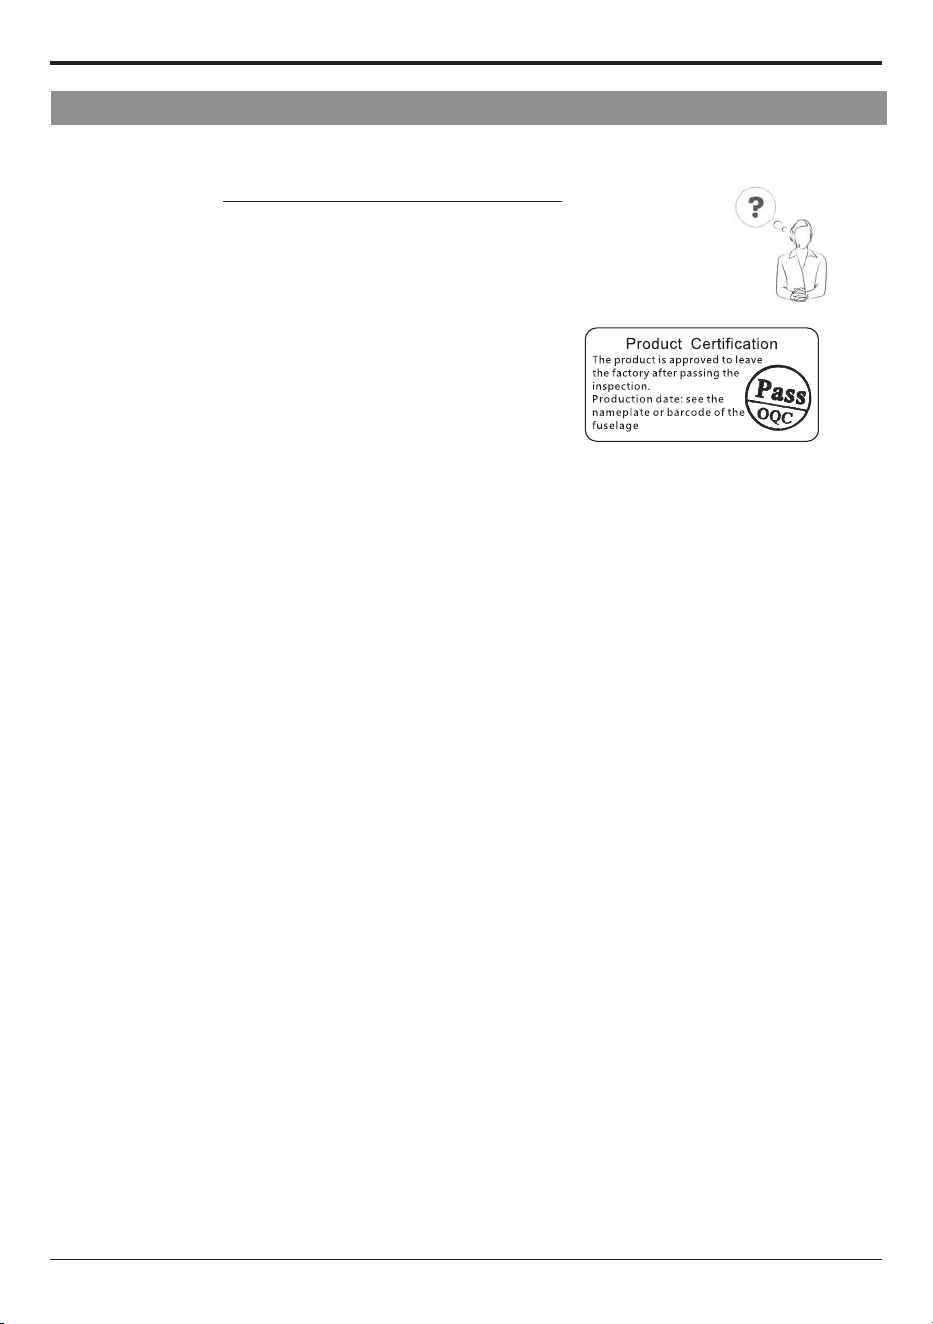
Warranty and Service
If you have an issue with an ANDTE product, please
contact us at AndteServices@outlook.com, and
we will do our best to resolve it for you.
Support Hours
24 Hours available
*Please have your order number before
contacting customer support.
-15-