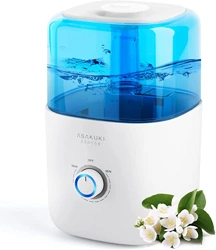
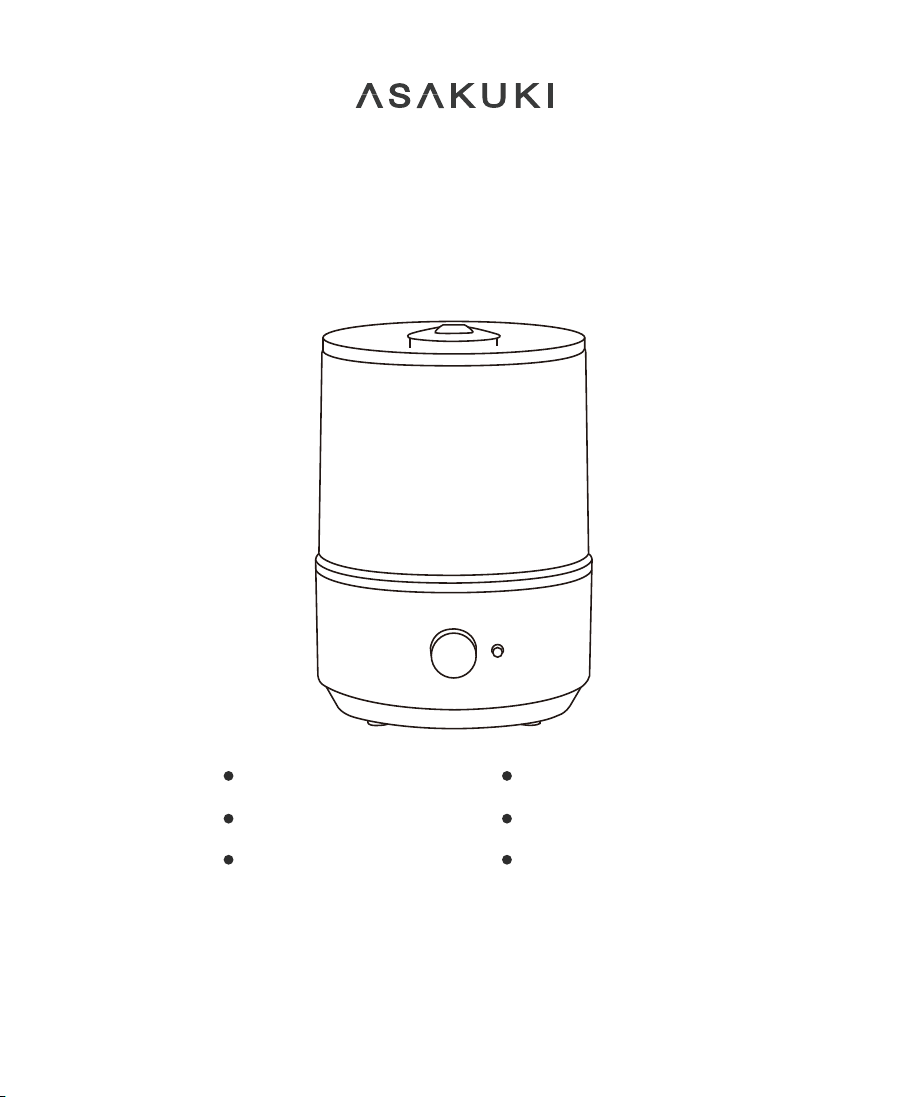
2-in-1 Ultrasonic
Humidifier & Oil Diffuser
User Manual
Need Help?
Please contact us at [email protected]
Model: AH002
No lters required
Whisper quiet
Aroma diuser
Use with scented pads
Optional night light
Auto shut o

TABLE OF CONTENTS
PACKAGE CONTENTS
01
SPECIFICATIONS
01
SAFETY INFORMATION
02
GETTING TO KNOW YOUR HUMIDIFIER
03
GETTING STARTED
05
Using ASAKUKI Scented Pad
08
TROUBLESHOOTING
12
14
WARRANTY
03
Humidifier Diagram
04
ASAKUKI Scented Pad
04
Controls
05
Setting Up Your Humidifier
06
Filling/Refilling
09
Using with Essential Oils
09
Operating
10
Operating the Night Light
10
Refilling the Water Tank
11
CARE & MAINTENANCE
11
Cleaning
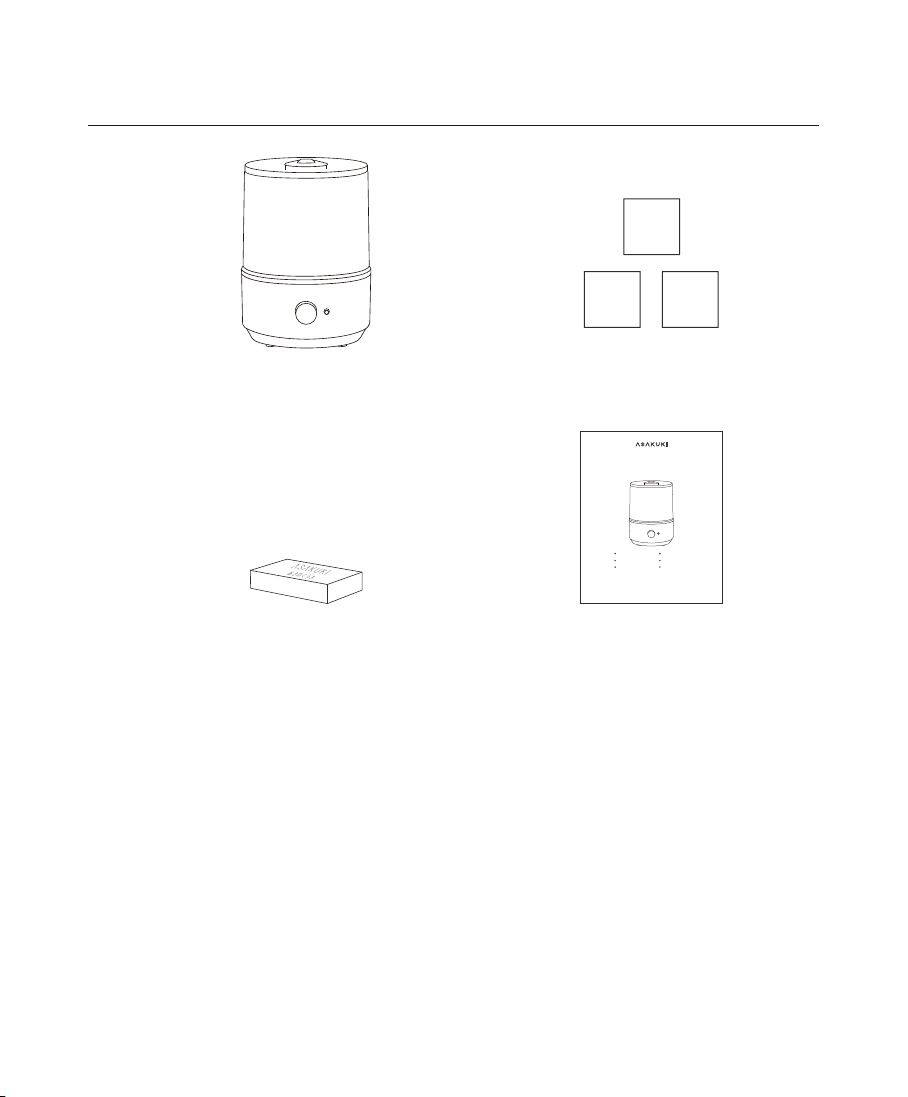
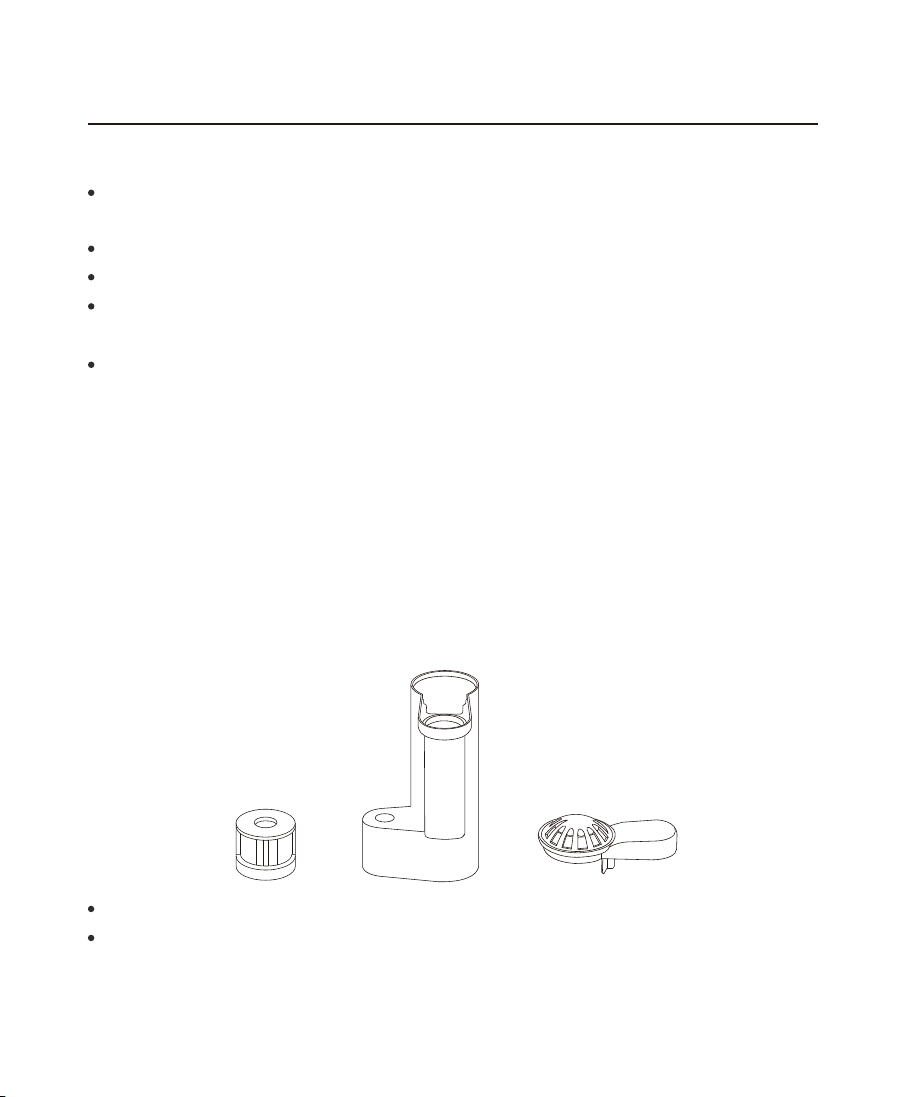
PACKAGE CONTENTS
SPECIFICATIONS
Power Supply: AC 100-240V, 50/60Hz
Water Tank Capacity: 0.8gal / 3L
Rated Power: 27W±2W
Dimension: 188 × 188 × 262mm / 7.4 × 7.4 × 10.3in
Weight: 1.05kg / 2.31lbs
01
1 × 3L Ultrasonic Cool Mist Humidier
1 x ASAKUKI Scented Pad (Lavender)
3 x Aroma Pads
1 x User Manual
2-in-1 Ultrasonic
Humidifier & Oil Diffuser
User Manual
Need Help?
Please contact us at [email protected]
Model: AH002
No lters required
Whisper quiet
Aroma diuser
Use with scented pads
Optional night light
Auto shut o

SAFETY INFORMATION
SAVE THESE INSTRUCTIONS
FOR HOUSEHOLD USE ONLY
To reduce the risk of re, electric shock, or other injury, when
using your humidiers, basic safety precautions should always
be followed. Read all instructions before using.
1. Place the humidier on a dry, at, stable suace. Do not place the humidier
directly on carpets or rugs.
2. Place the humidier and cord so that the humidier will not be knocked over.
3. Do not place the humidier on or near heat sources such as radiators,
heated ovens, etc.
4. Close supervision is necessary when the humidier is used by or near children.
5. Do not oveill the water tank. Water should not exceed the MAX level.
6. Only ll the tank with cold pure water (distilled/puried water). Never ll
the humidier with other liquids.
7. Do not cover the nozzle while the humidier is on.
8. Do not aempt to inhale the mist directly from the nozzle.
9. Make sure to unplug the humidier before cleaning or when the machine
is not in use.
10. Do not immerse the cord, plug, or base in water or other liquids.
11. Do not use the humidier for other than intended purpose.
12. Do not use the humidier if it is malfunctioning, or if any pa, including
the base, water tank, cord, or plug, is damaged in any way. Stop using it and
contact customer suppo.
02
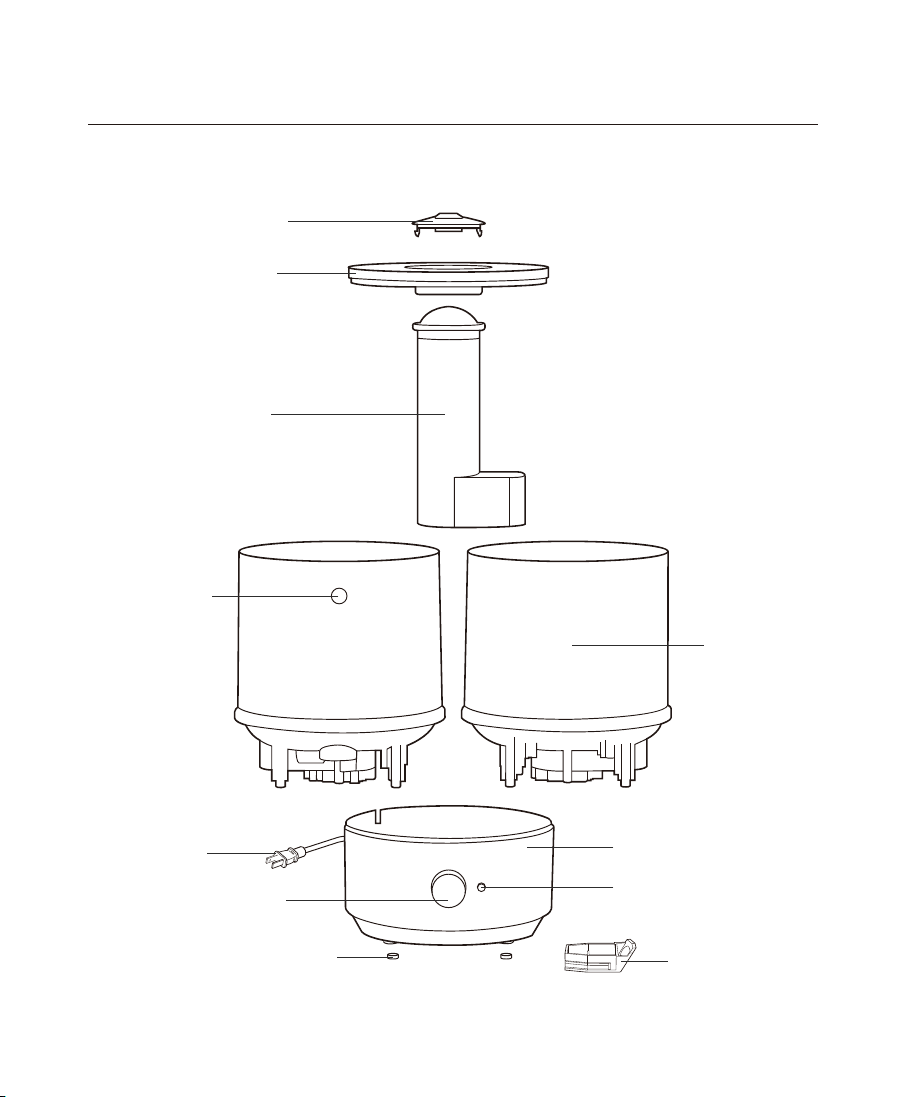
GETTING TO KNOW YOUR HUMIDIFIER
Humidifier Diagram
Nozzle
Top Cover
Mist Tube
Water Tank
Night Light Buon
Base
Aroma Box
Drain Outlet
Power Cord
Control Knob
Feet
03
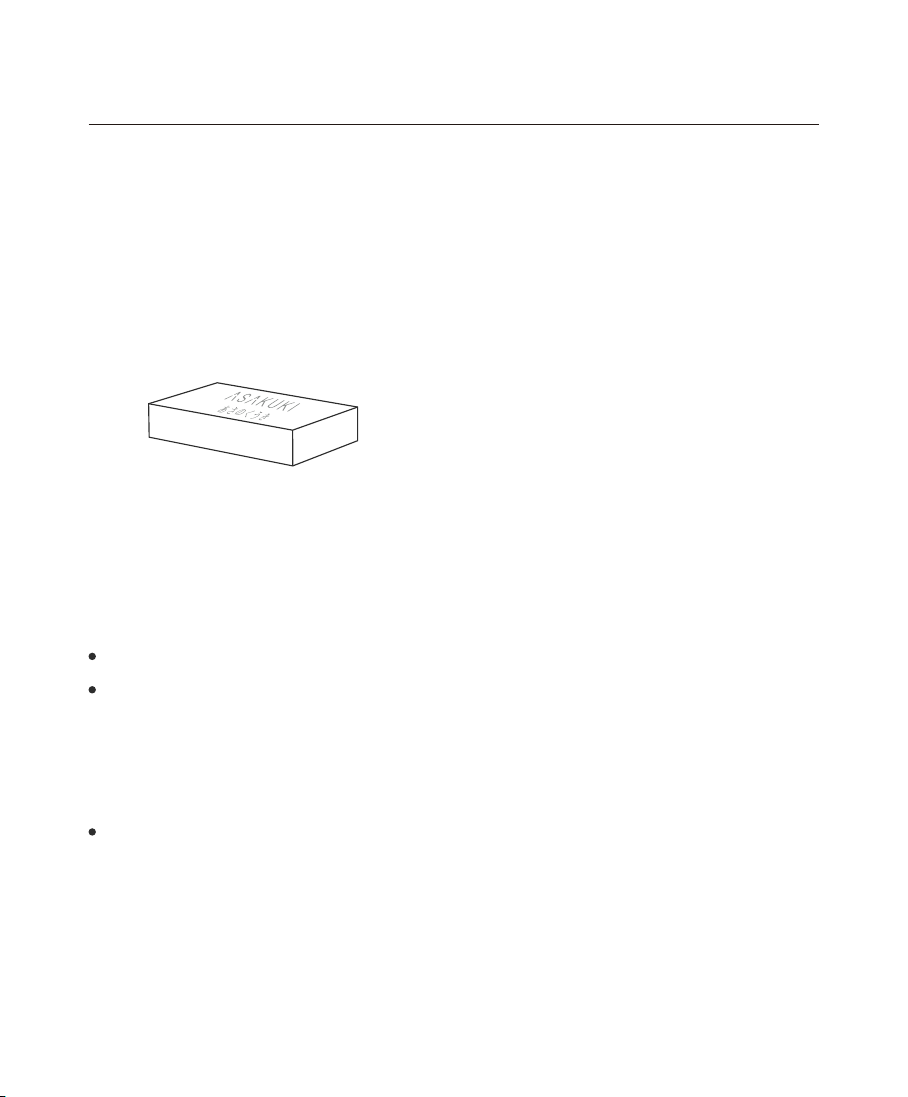
GETTING TO KNOW YOUR HUMIDIFIER
ASAKUKI Scented Pad (One lavender scent included)
Use ASAKUKI scented pad with your humidier for soothing and fresh air.
Enjoy up to 1 month of soothing comfo per pad. Contact Customer
Suppo if you want to purchase more scented pads.
Controls
Control Knob
Note:
You will hear a clicking sound when the humidier turns on/o.
Rotate clockwise to turn on the humidier and adjust the mist level.
Rotate counterclockwise to turn o the humidier.
Night Light Buon
Press to turn the night light on/o.
04
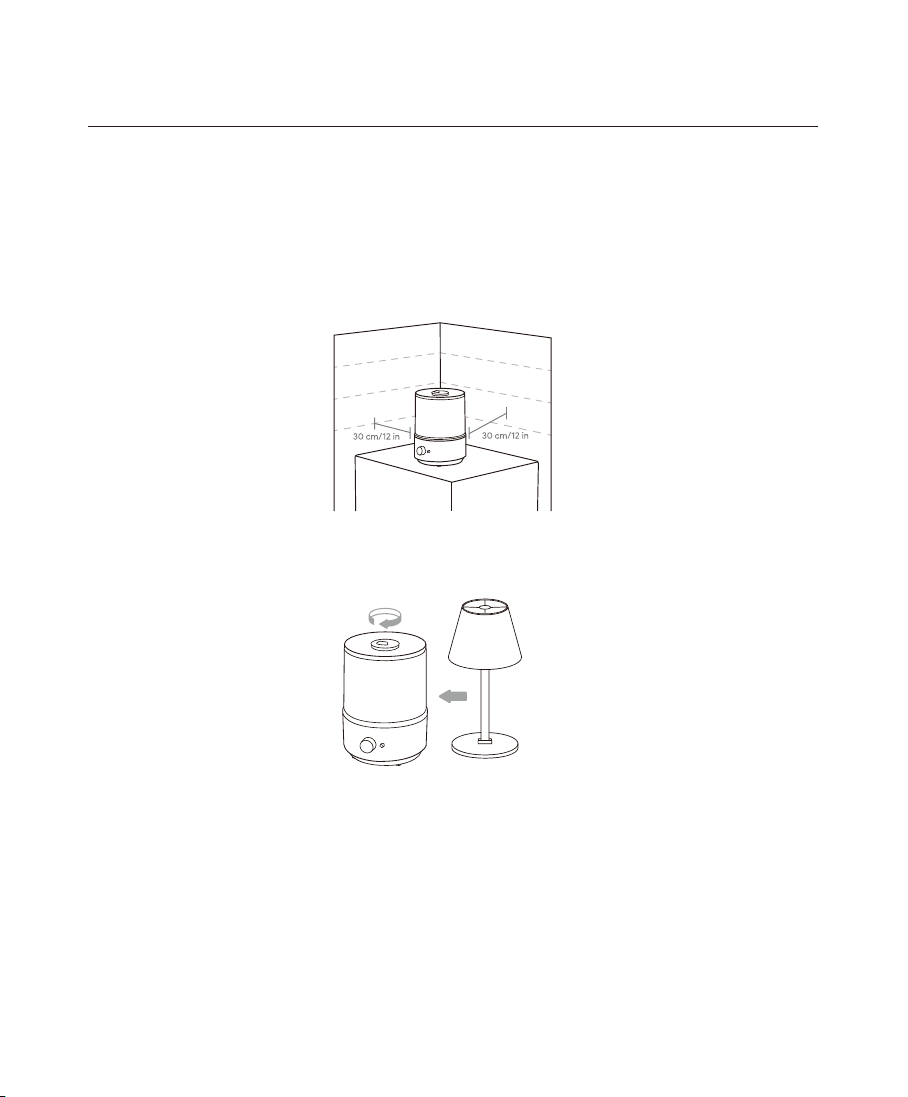
Setting Up Your Humidifier
GETTING STARTED
1. Remove all packaging.
2. Clean the water tank and top cover before rst use.
3. Place on a rm, level, water-resistant suace a minimum of 12” (30cm)
from any walls.
4. Rotate the nozzle to keep mist directed away from any walls, furniture,
bedding and appliances.
05
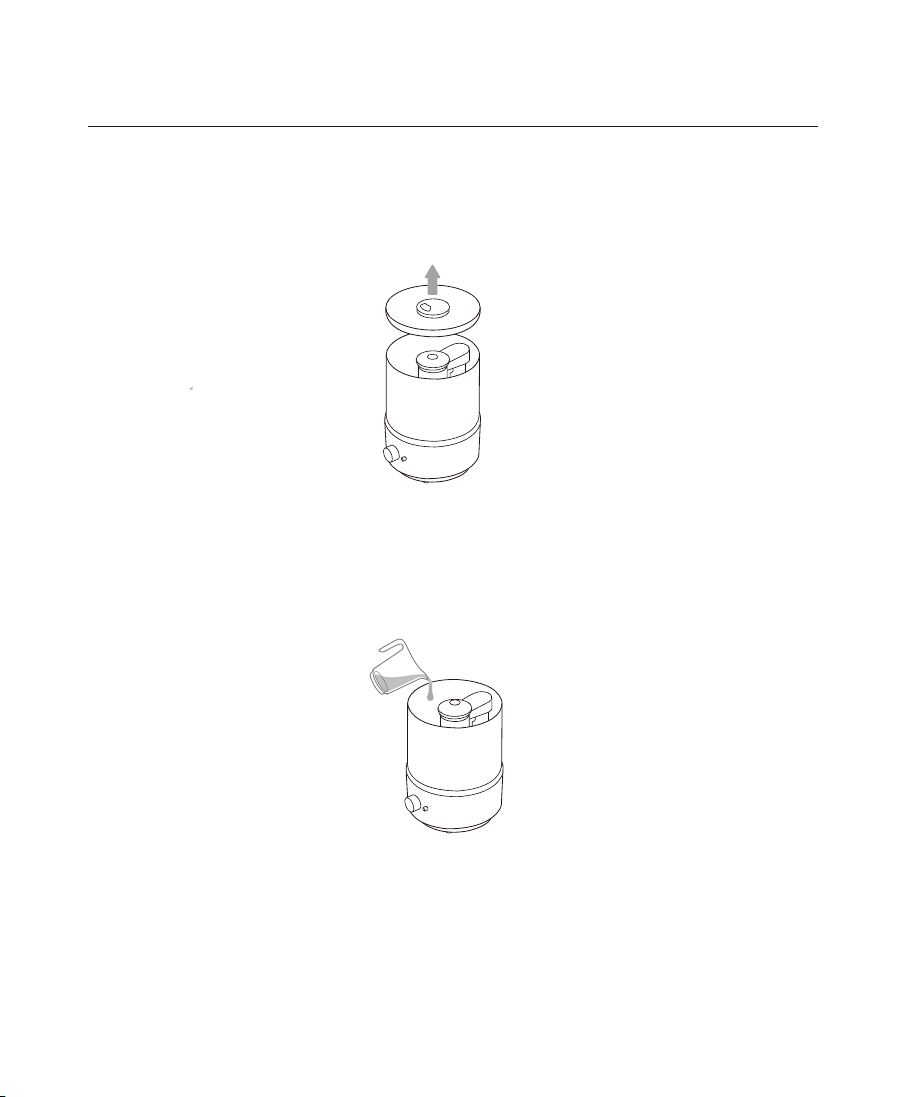
Filling/Refilling
GETTING STARTED
1. Turn the humidier o.
3. Fill the tank with room-temperature water.
2. Remove the top cover by holding the nozzle and pulling it upward.
06
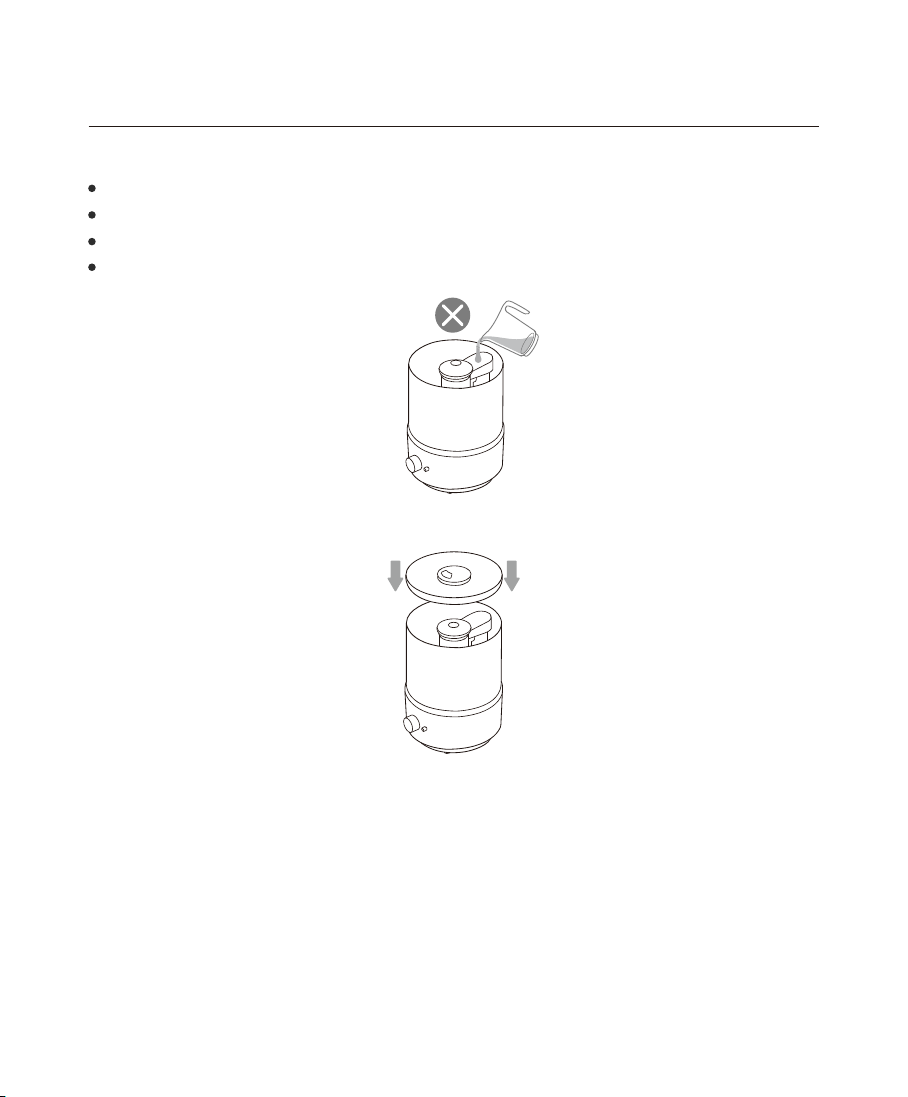
GETTING STARTED
4. Replace the water tank cover.
We recommend using puried or distilled water for healthy mist.
Do not ll water over the maximum water level.
Do not ll with hot water.
Do not add water or other liquids through the mist tube.
Note:
Make sure the nozzle on the top cover is placed over the mist tube, otherwise the
humidier may not work correctly.
Note:
07
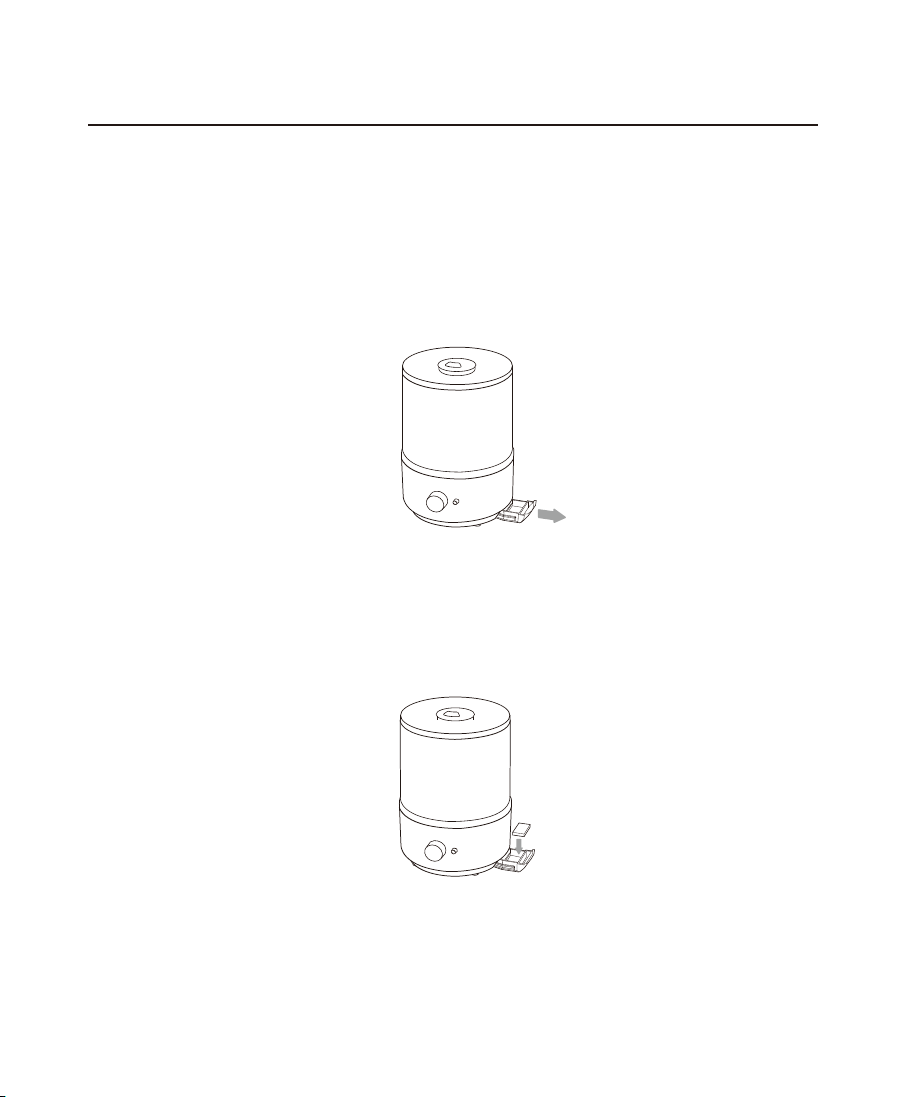
Using ASAKUKI Scented Pad
GETTING STARTED
Your humidier can be used with ASAKUKI Scented Pad to provide up to 1
month of soothing air. One free sample (soothing lavender scent) is included
with your humidier. Follow the below instructions to use your unit with
ASAKUKI Scented Pad:
1. Pull out the Aroma Box
3. Inse ASAKUKI Scented Pad and close the Aroma Box.
4. When the fragrance fades, discard the scented pad.
2. Open the scented pad by tearing notch on pad bag.
DO NOT touch the pad with hands. If you touched the pad, AVOID rubbing your face
or eyes before washing your hands as it may cause irritation.
Note:
08

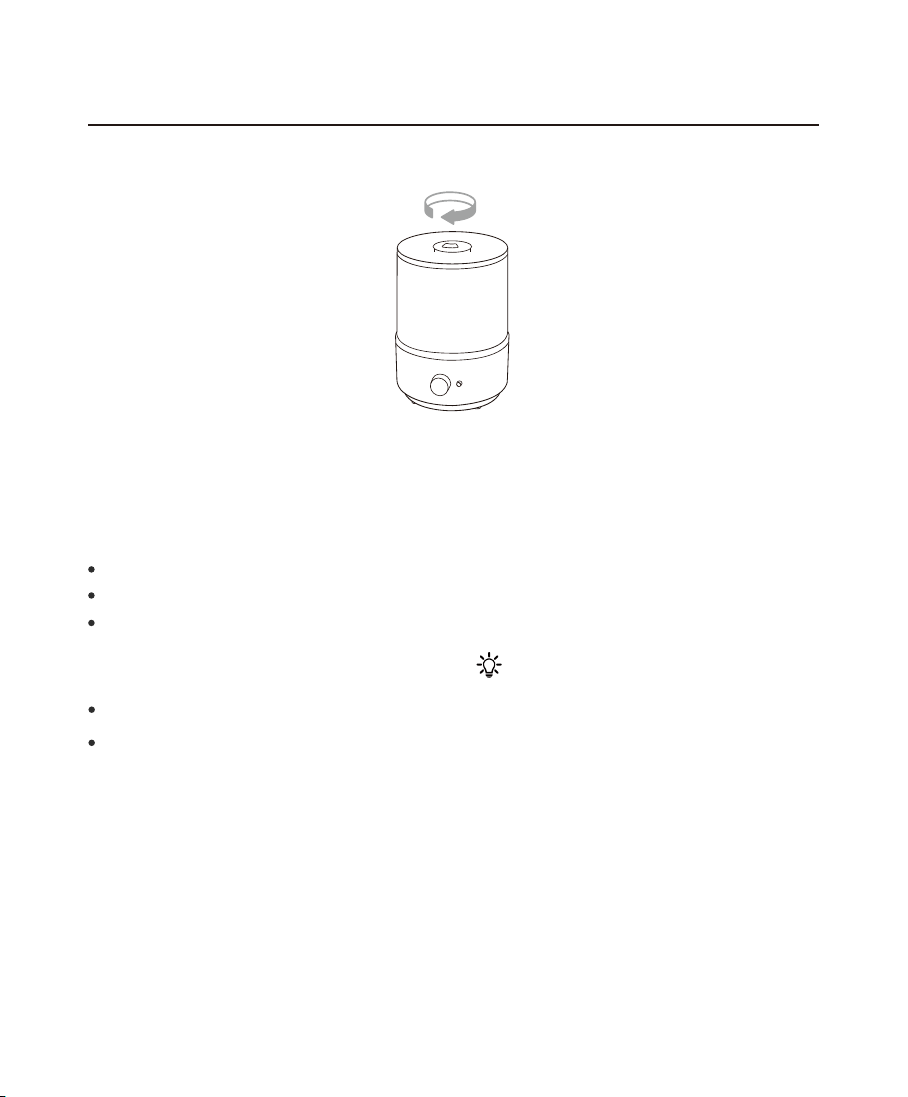
Operating
Using with Essential Oils
GETTING STARTED
1. With the Control Knob in the o position, plug in the humidier.
2. Rotate the Control Knob clockwise to turn the humidier on. Adjust the
knob to your desired mist level.
Add 10-15 drops of your favorite essential oils to the aroma pad in the
essential oil tray.
09
GETTING STARTED
3. Rotate the nozzle to adjust the direction of the mist
4. When your room has reached your preferred humidity level, turn the
humidier to a lower seing, or turn it o.
5. Rotate the Control Knob counterclockwise to turn the humidier o.
To avoid electric shock, DO NOT plug the humidier into outlet with wet hands.
Before moving humidier, turn o, unplug and empty the humidier.
If there is no water in the tank, the humidier will stop misting.
1st Press: Turn the night light on.
2nd Press: Turn the night light o.
The humidier will stop working when the water tank is empty. Please rell
the water tank.
Note:
The light will not change when the humidier runs out of water.
Operating the Night Light
Refilling the Water Tank
Note:
10
Cleaning
CARE & MAINTENANCE
1. Turn o and unplug the humidier.
2. Remove and rinse the top cover.
3. Empty water from the water tank.
4. Add 3 US cups / 710 ml of distilled white vinegar to the water tank. Replace
the top cover and swish the vinegar around the tank, and soak for 15-20 minutes.
5. Remove the top cover, pour out any vinegar solution.
6. Remove the mist tube from the tank, detach and rinse all the pas.
All maintenance should be done on a water-resistant suace near a faucet, such
as a kitchen counter.
Change the water daily to avoid bacteria growth.
Do not wash any components of this humidier in the dishwasher.
If not using the humidier for 1 week or longer, do not leave water inside. Clean
the humidier and keep it dry.
Clean your humidier water tank every 3 days, or when you need to store it.
Note:
Rinse all pas until any vinegar smell is completely gone.
Dry all pas with a cloth. Make sure all pas are completely dry before
reassembling or storing.
Note:
11
TROUBLESHOOTING
Problem
Humidier doesn't
turn on.
Lile or no mist
comes out.
Humidier uses
water too quickly.
Humidier produces
an unusual smell.
Water leaks from
the humidier.
White dust appears
around the humidier.
Possible Solution
If the humidier is new, unplug and rinse all pas, then place in a cool,
dry place for 12 hours.
If essential oils were placed on the aroma pad, rinse the pad under clean
water and allow it to dry.
Clean the humidier.
The humidier uses up water based on the environmental temperature
and humidity. If your environment is cold and/or dry, the humidier will
run out of water faster.
Make sure the plug is securely inseed into the outlet.
Turn the mist level to a higher seing.
Fill the water tank.
Clean the humidier. Make sure the nozzles are not blocked or clogged.
Make sure the humidier is on a level suace.
The water temperature may be too low. Turn on the humidier and let
it run for a while, then adjust to the desired seing.
Make sure the air inlet on the boom of the base is not blocked.
If the water tank was washed with detergent, rinse thoroughly with clean
water to remove any detergent.
Make sure to place the humidier on a at, level suace.
Do not remove the humidier when it is full.
Wipe any excess water of the top and boom of the base.
Avoid running the humidier in a room with over 65% relative humidity.
Do not shake the humidier.
Check the water tank for leaks. If there are leaks, contact
Customer Suppo.
We recommend using puried or distilled water to ll the humidier.
Avoid using tap water or other water with high mineral content.
Clean the humidier.
12

TROUBLESHOOTING
Problem Possible Solution
The area around the
humidier is damp or
wet from condensation.
Humidity may be too high. Turn down the mist or turn o the
humidier, and open a door or window.
Open a window to ensure proper ailow for the humidier, or move
the humidier to a more well-ventilated room.
When replacing the water tank, wipe of excess water from
the water tank.
Mold grows inside
the humidier.
Clean the water tank and base chamber regularly.
Essential oil has lile
or no smell.
Add more essential oil. For best results, use pure essential oil.
The humidity level isn’t
changing in my room.
Use a higher mist level seing.
Depending on your environment, the humidier may take longer to
humidify your air.
The room may be larger than the humidier's eective range.
If the room is larger than 215-430² / 20-40 m², the humidier will
not be as eective.
13

WARRANTY
What Is Covered
The One-Year Limited Warranty is valid for products purchased from our
ASAKUKI only, staing from the date of original retail purchase against defects
in quality and materials under normal, non-commercial use. According to the
requirements outlined in this instruction manual, subject to the following
conditions and exclusions. This warranty does not cover the other accessories (if
included) except for material or workmanship defects.
The repair or replacement of your ASAKUKI appliance if your ASAKUKI appliance
is found to be defective due to faulty materials, workmanship or function within
one year of purchase or delivery [if any pa is no longer available or out of
manufacture, ASAKUKI will replace it with a functional replacement pa]. This
warranty provides, at no extra cost to you, all labor and pas necessary to
ensure your machine is in proper operating condition during the warranty period.
What Is Not Covered
Under your ASAKUKI guarantee, ASAKUKI shall not be liable for costs of repair or
replacement of a product incurred as a result of: Accidental damage, faults
caused by negligent use or care, misuse, neglect, careless operation or handling
of the ASAKUKI appliance which is not in accordance with this ASAKUKI Operating
Manual. Machines purchased from an unauthorized dealer. Use of pas and
accessories other than those produced or recommended by ASAKUKI. Repairs
or alterations carried out by unauthorized paies or agents. Use of the machine
other than for normal domestic purposes, e.g. for commercial or rental purposes.
14

WARRANTY
Extend Warranty
If you have a query about your ASAKUKI appliance, please contact the ASAKUKI
customer service email: suppo@asakuki.com
Register your product within 60 days of purchase to extend your 1-year
warranty by an additional year. Register your product at hps://asakuki.com/
pages/warranty Please inform us of your model name/number, purchase date,
order number, machine problem and your requirement. Your model number can
be found on the rating plate. Please keep your purchase receipt in a safe place
to ensure you have this information. Service under this warranty will not extend
the period of this warranty.
If you have any questions about our products, please contact our customer
suppo team.
suppo@asakuki.com
15

Brand: ASAKUKI
Product Name: Humidier
Model Number: AH002
Power Supply: AC 100-240V, 50/60Hz
WEEE-Reg. -Nr: DE: DE 41980660 FR: FR031399 05UERI
Manufacture: Chongqing ChuangHong Dian Zi Shang Wu You Xian GongSi
Address: 1 zhuang 11-3, jin kai da dao 1228 hao, bei bu xin qu, Chongqing,
401120, China
Email: suppo@asakuki.com
UK Responsible Person: JunBright Ltd
Address: 51 Chalton Street London, England, NW1 1HY
Email: yldyx112@outlook.com
EU Responsible Person: C&E Connection E-Commerce (DE) GmbH
Address: Zum Linnegraben 20, 65933, Frankfu am Main, Germany
Email: info@ce-connection.de
MADE IN CHINA


ASAKUKI.com