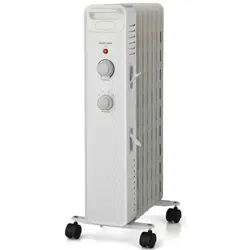
OWNER’S MANUAL
OIL FILLED HEATER
MODEL: NY1507-20MB
READ AND SAVE THESE INSTRUCTIONS
Version 2.0 2019
Attention: Pictures in the IM are for reference only.
OPERATING INSTRUCTION
[Inspection before start]
1.The power cord shall not be damaged or fractured.
2.Please verify the rated current of the power socket is in line with the requirements
in the table above and is equipped with a safety grounding device before use;
otherwise, replace the socket.
[Start and power selection]
1.Start
Plug in the power, clockwise turn the thermostat knob to the "MAX" mark position,
then turn on the power switch, the heater starts to work.
2.Power selection
Under normal circumstances, please use the maximum power "3" gear for rapid
heating. If the room temperature reaches a suitable temperature, please choose a
lower power "2" or "1" gear to reduce energy consumption so as to prevent the
room becoming overheated.
[Note]
To use the machine for the first time or to re-insert the socket, please pay attention
to check whether the plug and the socket are fitted well.
<Inspection method>
Insert the power plug into the socket and start for use; after about half an hour, turn
off and pull out the plug. Check whether the plug pins are hot; replace the socket if
so (more than about 50 °C) to avoid burning the plug or even causing a fire caused
by overheating of the socket due to poor contact.
[Temperature adjustment]
During use, if you feel it is necessary to lower the room temperature since it is too
high, you can use the following adjustment modes:
1.Turn the power switch to gear "2" or "1".
2.Counterclockwise turn the thermostat knob back by a certain angle, for which it
indicates that the set temperature is lower when the temperature indication is
closer to the " MIN " position.
[Stop]
Turn the power switch to indication point "0", and then pull out the power plug.
[Movement of the heater]
To move the heater, turn it off first, and pull out the power plug; then push the body
to make the four casters below the body to roll.
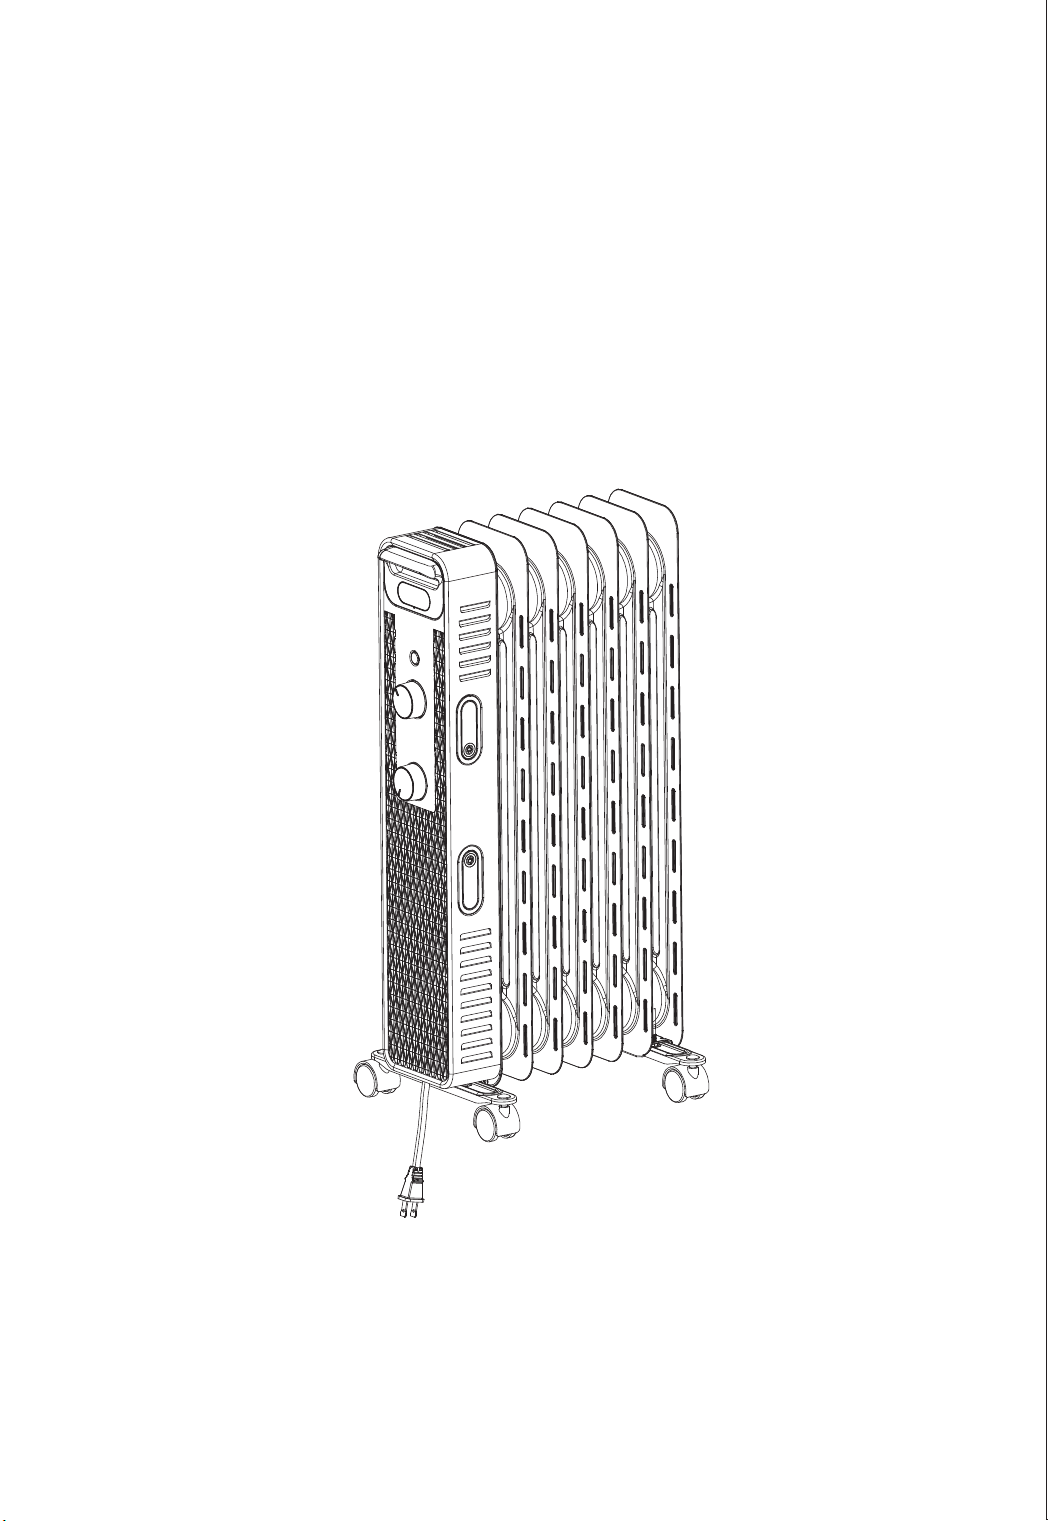
PART FIGURE
TABLE 2信息表和能效值
(见ERP报告)
1. The electric heater should be cleaned regularly to wipe out the dust on
the surface of flanges. As this may influence the radiating efficiency.
2. Disconnect electricity supply and allow radiator to cool, wipe out dust
with a soft damp cloth. Do not use detergent or abrasives.
3. Do not scrap the surfaces of flanges with sharp hard tools, to avoid
surfaces getting rusty, because of damage of the paint coat.
CLEANING AND MAINTENANCE INSTRUCTION
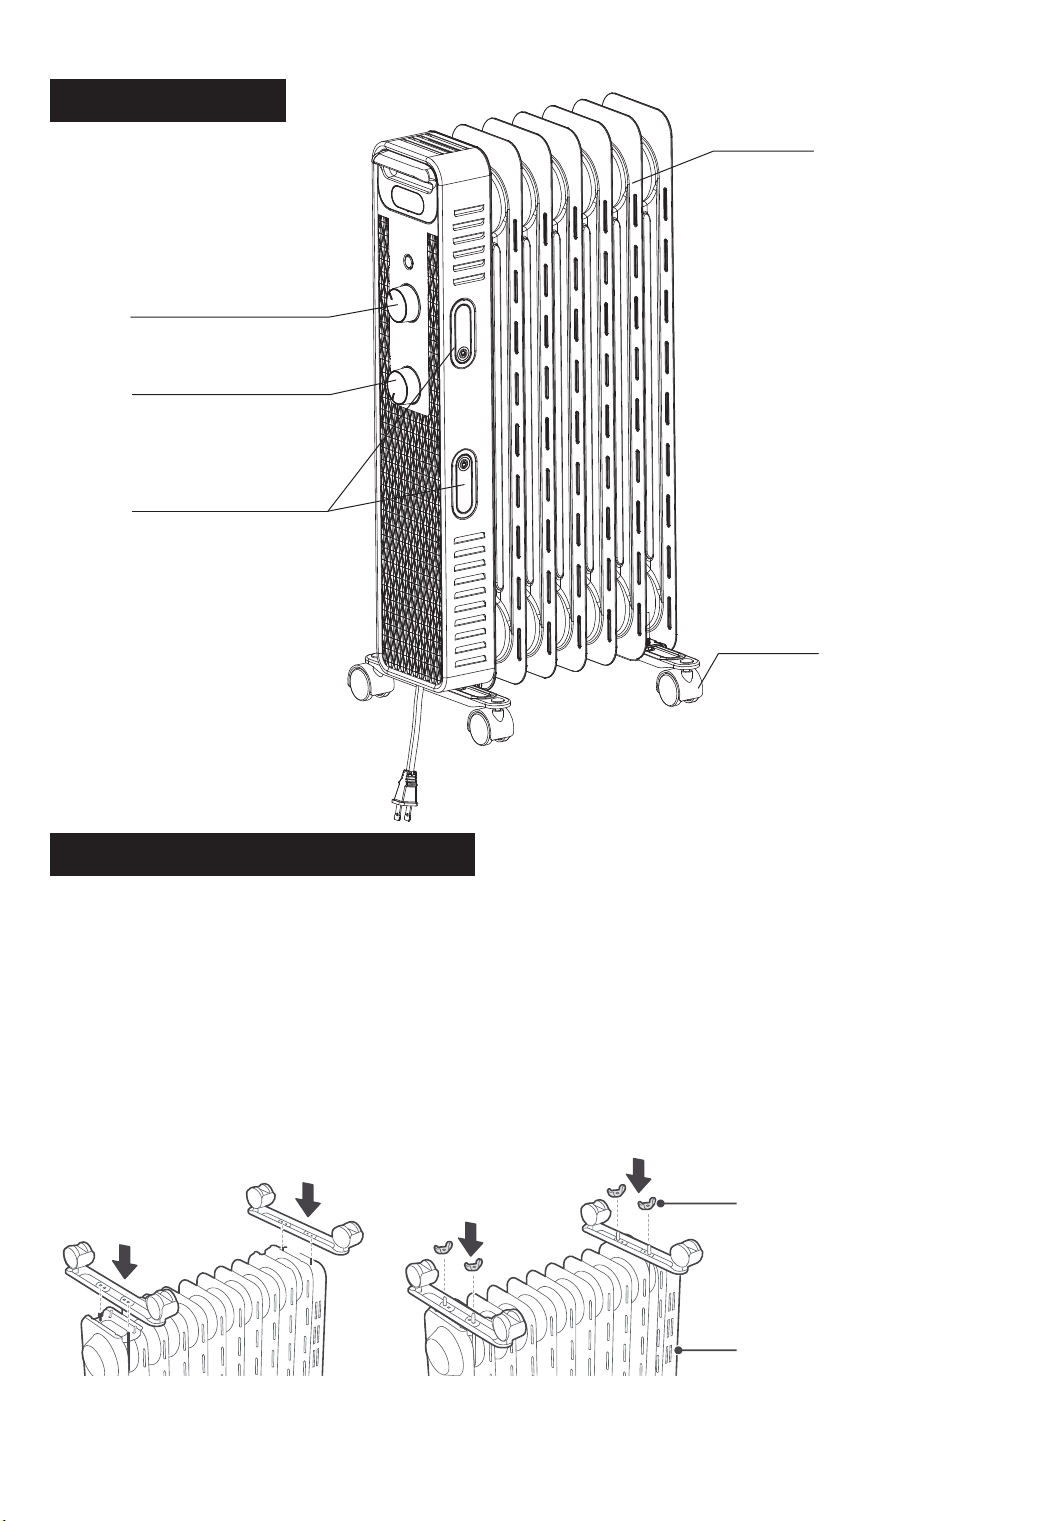
Thermostat Knob
Cord wrap
Caster assembly
Fin
Power Switch Knob
GD Midea Environment Appliances MFG.Co.,Ltd.
No.28, Dong Fu Road, Hesui East Industrial Area, Dong Feng Town,
Zhongshan, Guangdong 528425 P.R.China
This product is only suitable for well insulated spaces or occasional use.
结构简图
使用方法
【开机前的检查】
1. 电源线是否完好。
2. 使用前请确认电源插座额定电流符合要求,否则应更换插座。
【开机与功率选择】
1. 开机:插上电源,将温控旋钮顺时针方向旋转到“MAX”标记位置,然后打开功率开关,电暖
器即开始工作。
2. 功率选择:一般情况下,请选用最大功率“3”档,以迅速加热。如果室内达到合适的温度,
则请选用较低功率“2”或“1”档,以降低能耗,防止室内变得过热。
注意:首次使用本机或需要重新插入插座时,请注意检查插头与插座的配合是否良好。
检查的方法:将电源插头插进插座并开机使用,约半个小时后,关机并拔下插头。检查插头的插
脚是否烫手,若插脚烫手(约超过50摄氏度),则必须更换插座,以免因接触不良引起插座过
热,导致烧坏插头,甚至引发火灾。
【调温】
在使用过程中,如感觉室温太高,需要调低时,可采用以下调节方式:
1. 将功率开关旋至档位“2”或“1”。
2. 将调温旋钮逆时针回旋一定角度,温度指示越接近“MIN”标记位置,则表明设定温度越低。
【关机】
将功率开关旋转至指示点为“0”位,拔下电源线插头即可。
【电暖器的移动】
若要移动电暖器,请先关机,拔下电源插头,然后推动机身使下面四个万向轮滚动即可。
此图纸不作印刷,仅用于产品使用说明。
说明书中图片仅为示意图,若有变动,请以实物为准!
使用说明书
油汀
产品型号
NY1507-20MB
警语中文版空缺 警语中文版空缺
脚轮使用说明
Use of oil filled radiator
蝶形螺母
控制箱
1
将取暖器机身倒置,底部朝上。
如图1所示,将一套脚轮组件的安装孔对准并安装在散热片尾部的脚轮垫板的螺杆上;另外
一套脚轮组件对准安装在控制箱底部的螺钉上。
2
3
如图2所示 ,用四个蝶形螺母分别将两套脚轮组件拧紧。安装牢靠后再将取暖器放正,轮子
着地即可。
butterfly nuts
control box
figure 1 figure 2
1,Turn the heater upside down.
2. As shown in figure 1, align the mounting hole of a set of caster assembly and install
it on the screw of the caster pad plate at the end of the radiator fin, and The other
caster assembly is aligned to the screws mounted at the bottom of the control box.
3,As shown in figure 2, two sets of caster components are tightened with four butterfly
nuts. Install solid and then put the heater in place-just put the wheels on the ground.
温度调节旋钮
收线板
脚轮组件
散热片
电源开关旋钮
When using electrical appliances,basic precautions should always be followed to
reduce the risk of fire,electric shock,and injury to persons,including the following:
1. Read all instructions before using heater.
2. This heater is hot when in use. To avoid burns, do not let bare skin touch hot
surface. If provided, always use handles when moving this heater. Keep
combustible materials such as furniture, pillows, bedding, papers, clothes and
curtains at least 3 feet (0.9m) from the front of the heater and keep them away
from the sides and rear.
3. Extreme caution is necessary when any heater is used by or near children or
invalids and whenever the heater is left operating and unattended.
4. Always unplug the heater when not in use.
5. Do not operate any heater with a damaged cord or plug or after the heater
malfunctions, has been dropped or damaged in any manner. Discard heater or
return heater to authorized service facility for examination, electrical or
mechanical adjustment, or repair.
6. Do not use the heater outdoors.
7. This heater is not intended for use in bathroom, laundry areas and similar moist
indoor locations. Never locate heater where it may fall into a bathtub or other
water container.
8. Do not run cord under carpeting. Do not cover cord with throw rugs, runners,
or similar coverings. Do not route cord under furniture or appliances. Arrange
cord away from traffic area and where it will not be tripped over.
9. CAUTION: This appliance has a polarized plug (one blade is wider than the
other). To reduce the risk of shock, this plug is intended to fit only one way in a
polarized outlet. If the plug does not fit fully in the outlet, reverse the plug. If it
still does not fit, contact a qualified electrician. DO NOT attempt to defeat this
safety feature. To do so could result in an electric shock hazard.
10. This heater draws 12.5 amps during operation. To prevent overloading a
circuit, do not plug the heater into a circuit that already has other appliances
working.
11. CAUTION: It is normal for the plug to feel warm to the touch; however, a loose
fit between the AC outlet (receptacle) and plug may cause overheating and
distortion of the plug. Contact a qualified electrician to replace loose or worn
outlet
12. To disconnect the heater, first turn controls to off, then remove plug from
outlet. Never pull by the cord.
13. Do not insert or allow foreign objects to enter any ventilation or exhaust
opening as this may cause an electric shock or fire, or damage the heater.
IMPORTANT SAFEGUARDS
14. To prevent a possible fire, do not block air intakes or exhaust in any manner.
Do not use on soft surface, like a bed, where openings may become blocked.
15. A heater has hot and arcing or sparking parts inside. Do not use it in the areas
where gasoline, paint, or flammable liquids are used or stored.
16. Use this heater only as described in this manual. Any other use not
recommended by the manufacturer may cause fire, electric shock, or injury to
persons.
17. CAUTION: Always plug heaters directly into a wall outlet/receptacle. Never
use with an extension cord or reloadable power tap (outlet/power strip).
18. The output of this heater may vary and its temperature may become intense
enough to burn exposed skin. Use of this heater is not recommended for
persons with reduced sensitivity to heat or an inability to react to avoid burns.
19. Disposal of oil contained within should be in accordance with applicable
regional, national, and local laws and regulations.
20.CAUTION: TO PREVENT ELECTRIC SHOCK, MATCH WIDE BLADE OF
PLUG TO WIDE SLOT AND FULLY INSERT.
21.
“SAVE THESE INSTRUCTIONS”

OWNER’S MANUAL
OIL FILLED HEATER
MODEL: NY1507-20MB
READ AND SAVE THESE INSTRUCTIONS
Version 2.0 2019
Attention: Pictures in the IM are for reference only.
OPERATING INSTRUCTION
[Inspection before start]
1.The power cord shall not be damaged or fractured.
2.Please verify the rated current of the power socket is in line with the requirements
in the table above and is equipped with a safety grounding device before use;
otherwise, replace the socket.
[Start and power selection]
1.Start
Plug in the power, clockwise turn the thermostat knob to the "MAX" mark position,
then turn on the power switch, the heater starts to work.
2.Power selection
Under normal circumstances, please use the maximum power "3" gear for rapid
heating. If the room temperature reaches a suitable temperature, please choose a
lower power "2" or "1" gear to reduce energy consumption so as to prevent the
room becoming overheated.
[Note]
To use the machine for the first time or to re-insert the socket, please pay attention
to check whether the plug and the socket are fitted well.
<Inspection method>
Insert the power plug into the socket and start for use; after about half an hour, turn
off and pull out the plug. Check whether the plug pins are hot; replace the socket if
so (more than about 50 °C) to avoid burning the plug or even causing a fire caused
by overheating of the socket due to poor contact.
[Temperature adjustment]
During use, if you feel it is necessary to lower the room temperature since it is too
high, you can use the following adjustment modes:
1.Turn the power switch to gear "2" or "1".
2.Counterclockwise turn the thermostat knob back by a certain angle, for which it
indicates that the set temperature is lower when the temperature indication is
closer to the " MIN " position.
[Stop]
Turn the power switch to indication point "0", and then pull out the power plug.
[Movement of the heater]
To move the heater, turn it off first, and pull out the power plug; then push the body
to make the four casters below the body to roll.
PART FIGURE
TABLE 2信息表和能效值
(见ERP报告)
1. The electric heater should be cleaned regularly to wipe out the dust on
the surface of flanges. As this may influence the radiating efficiency.
2. Disconnect electricity supply and allow radiator to cool, wipe out dust
with a soft damp cloth. Do not use detergent or abrasives.
3. Do not scrap the surfaces of flanges with sharp hard tools, to avoid
surfaces getting rusty, because of damage of the paint coat.
CLEANING AND MAINTENANCE INSTRUCTION
Thermostat Knob
Cord wrap
Caster assembly
Fin
Power Switch Knob
GD Midea Environment Appliances MFG.Co.,Ltd.
No.28, Dong Fu Road, Hesui East Industrial Area, Dong Feng Town,
Zhongshan, Guangdong 528425 P.R.China
This product is only suitable for well insulated spaces or occasional use.
结构简图
使用方法
【开机前的检查】
1. 电源线是否完好。
2. 使用前请确认电源插座额定电流符合要求,否则应更换插座。
【开机与功率选择】
1. 开机:插上电源,将温控旋钮顺时针方向旋转到“MAX”标记位置,然后打开功率开关,电暖
器即开始工作。
2. 功率选择:一般情况下,请选用最大功率“3”档,以迅速加热。如果室内达到合适的温度,
则请选用较低功率“2”或“1”档,以降低能耗,防止室内变得过热。
注意:首次使用本机或需要重新插入插座时,请注意检查插头与插座的配合是否良好。
检查的方法:将电源插头插进插座并开机使用,约半个小时后,关机并拔下插头。检查插头的插
脚是否烫手,若插脚烫手(约超过50摄氏度),则必须更换插座,以免因接触不良引起插座过
热,导致烧坏插头,甚至引发火灾。
【调温】
在使用过程中,如感觉室温太高,需要调低时,可采用以下调节方式:
1. 将功率开关旋至档位“2”或“1”。
2. 将调温旋钮逆时针回旋一定角度,温度指示越接近“MIN”标记位置,则表明设定温度越低。
【关机】
将功率开关旋转至指示点为“0”位,拔下电源线插头即可。
【电暖器的移动】
若要移动电暖器,请先关机,拔下电源插头,然后推动机身使下面四个万向轮滚动即可。
此图纸不作印刷,仅用于产品使用说明。
说明书中图片仅为示意图,若有变动,请以实物为准!
使用说明书
油汀
产品型号
NY1507-20MB
警语中文版空缺 警语中文版空缺
脚轮使用说明
Use of oil filled radiator
蝶形螺母
控制箱
1
将取暖器机身倒置,底部朝上。
如图1所示,将一套脚轮组件的安装孔对准并安装在散热片尾部的脚轮垫板的螺杆上;另外
一套脚轮组件对准安装在控制箱底部的螺钉上。
2
3
如图2所示 ,用四个蝶形螺母分别将两套脚轮组件拧紧。安装牢靠后再将取暖器放正,轮子
着地即可。
butterfly nuts
control box
figure 1 figure 2
1,Turn the heater upside down.
2. As shown in figure 1, align the mounting hole of a set of caster assembly and install
it on the screw of the caster pad plate at the end of the radiator fin, and The other
caster assembly is aligned to the screws mounted at the bottom of the control box.
3,As shown in figure 2, two sets of caster components are tightened with four butterfly
nuts. Install solid and then put the heater in place-just put the wheels on the ground.
温度调节旋钮
收线板
脚轮组件
散热片
电源开关旋钮
When using electrical appliances,basic precautions should always be followed to
reduce the risk of fire,electric shock,and injury to persons,including the following:
1. Read all instructions before using heater.
2. This heater is hot when in use. To avoid burns, do not let bare skin touch hot
surface. If provided, always use handles when moving this heater. Keep
combustible materials such as furniture, pillows, bedding, papers, clothes and
curtains at least 3 feet (0.9m) from the front of the heater and keep them away
from the sides and rear.
3. Extreme caution is necessary when any heater is used by or near children or
invalids and whenever the heater is left operating and unattended.
4. Always unplug the heater when not in use.
5. Do not operate any heater with a damaged cord or plug or after the heater
malfunctions, has been dropped or damaged in any manner. Discard heater or
return heater to authorized service facility for examination, electrical or
mechanical adjustment, or repair.
6. Do not use the heater outdoors.
7. This heater is not intended for use in bathroom, laundry areas and similar moist
indoor locations. Never locate heater where it may fall into a bathtub or other
water container.
8. Do not run cord under carpeting. Do not cover cord with throw rugs, runners,
or similar coverings. Do not route cord under furniture or appliances. Arrange
cord away from traffic area and where it will not be tripped over.
9. CAUTION: This appliance has a polarized plug (one blade is wider than the
other). To reduce the risk of shock, this plug is intended to fit only one way in a
polarized outlet. If the plug does not fit fully in the outlet, reverse the plug. If it
still does not fit, contact a qualified electrician. DO NOT attempt to defeat this
safety feature. To do so could result in an electric shock hazard.
10. This heater draws 12.5 amps during operation. To prevent overloading a
circuit, do not plug the heater into a circuit that already has other appliances
working.
11. CAUTION: It is normal for the plug to feel warm to the touch; however, a loose
fit between the AC outlet (receptacle) and plug may cause overheating and
distortion of the plug. Contact a qualified electrician to replace loose or worn
outlet
12. To disconnect the heater, first turn controls to off, then remove plug from
outlet. Never pull by the cord.
13. Do not insert or allow foreign objects to enter any ventilation or exhaust
opening as this may cause an electric shock or fire, or damage the heater.
IMPORTANT SAFEGUARDS
14. To prevent a possible fire, do not block air intakes or exhaust in any manner.
Do not use on soft surface, like a bed, where openings may become blocked.
15. A heater has hot and arcing or sparking parts inside. Do not use it in the areas
where gasoline, paint, or flammable liquids are used or stored.
16. Use this heater only as described in this manual. Any other use not
recommended by the manufacturer may cause fire, electric shock, or injury to
persons.
17. CAUTION: Always plug heaters directly into a wall outlet/receptacle. Never
use with an extension cord or reloadable power tap (outlet/power strip).
18. The output of this heater may vary and its temperature may become intense
enough to burn exposed skin. Use of this heater is not recommended for
persons with reduced sensitivity to heat or an inability to react to avoid burns.
19. Disposal of oil contained within should be in accordance with applicable
regional, national, and local laws and regulations.
20.CAUTION: TO PREVENT ELECTRIC SHOCK, MATCH WIDE BLADE OF
PLUG TO WIDE SLOT AND FULLY INSERT.
21.
“SAVE THESE INSTRUCTIONS”
