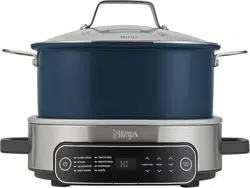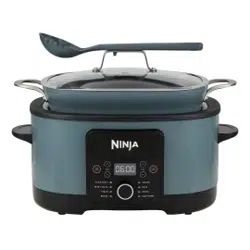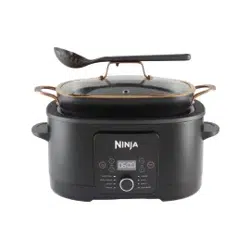

POSSIBLE COOKER
MC1001UK INSTRUCTIONS
IMPORTANT SAFETY INSTRUCTIONS
HOUSEHOLD USE ONLY • READ ALL INSTRUCTIONS BEFORE USE
WARNING
To reduce the risk of injury, fire, electrical shock or property damage, basic safety precautions
must always be followed, including the following numbered warnings and subsequent instructions.
Do not use appliance for other than intended use.
Read and review instructions to understand operation and use of product.
Indicates the presence of a hazard that can cause personal injury, death or substantial
property damage if the warning included with this symbol is ignored.
Avoid contact with hot surface. Always use hand protection to avoid burns.
For indoor and household use only.
1 To eliminate a choking hazard for young children, discard all packaging materials immediately upon
unpacking.
2 This appliance can be used by persons with reduced physical, sensory, or mental capabilities or lack
of experience or knowledge if they have been given supervision and instruction concerning use of
the appliance in a safe way and understand the hazards involved.
3 Keep the appliance and its cord out of reach of children. DO NOT allow children to play with or
use the appliance. Close supervision is necessary when used near children. Cleaning and user
maintenance should not be done by children
4 Spilled food can cause serious burns. DO NOT let cord hang over edges of tables or worktops or
place appliance on or near hot surfaces, on or near a gas or electric burner, or in a heated oven.
5 DO NOT operate multicooker in water or under running water.
6 DO NOT use the appliance without the Cooking Pot installed.
7 To protect against risk of electrical shock, do not immerse the multicooker housing in water or any
other liquid. If housing falls into liquid, unplug the cord from socket immediately. DO NOT reach
into the liquid.
8 Before placing removable Cooking Pot in the cooker base, ensure pot and cooker base are clean
and dry, by wiping with a soft cloth.
9 When removable Cooking Pot is empty, DO NOT heat it for more than 10 minutes. Doing so may
damage the cooking surface.
10 DO NOT use this appliance for deep-frying.
11 ALWAYS follow the maximum and minimum quantities of liquid as stated in instructions and
recipes.
12 Prevent food contact with heating elements. DO NOT overfill Cooking Pot. Overfilling may cause
personal injury or property damage or affect safe use of the appliance.
13 NEVER use SLOW COOK setting without food and liquids in the removable Cooking Pot.
14 CAUTION: A heated pot may damage worktops or tables. When removing the hot pot from the
multicooker, DO NOT place it directly on any unprotected surface. ALWAYS set the hot Cooking
Pot on a trivet or a rack.
IMPORTANT SAFETY INSTRUCTIONS
HOUSEHOLD USE ONLY • READ ALL INSTRUCTIONS BEFORE USE
15 The base unit, removable Cooking Pot and glass lid become extremely hot during the cooking
process. Avoid hot steam and air while removing the removable Cooking Pot and glass lid from
the base unit. ALWAYS place them on a heat-resistance surface after removing. DO NOT touch
accessories during or immediately after cooking.
16 ONLY lift the lid from the handle from the front of the unit. DO NOT lift lid from side area as
scalding steam will release.
17 CAUTION: Sear/Sauté reaches high temperatures. If unmonitored, food may burn on this setting.
Use care when touching hot surfaces and when removing food to avoid burns. Do not use the lid
and do not leave your cooker unattended while using Sear/Sauté.
18 Avoid sudden temperature changes, such as adding refrigerated foods to a heated pot.
19 CAUTION: The Cooking Pot and lid get very hot while using Braise. Use care when touching hot
surfaces and when removing food to avoid burns.
20 Caution should be used when searing meats and sautéing. Keep hands and face away from the
removable Cooking Pot, especially when adding new ingredients, as hot oil may splatter.
21 This appliance is for household use only. DO NOT use this appliance for anything other than its intended
use. DO NOT use in moving vehicles or boats. DO NOT use outdoors. Misuse may cause injury.
22 CAUTION: To reduce the risk of electric shock, cook only in the pot provided or in containers
placed on the cooking rack in the provided pot.
23 Intended for worktop use only. Ensure the surface is level, clean, and dry. DO NOT place the
appliance near the edge of a worktop during operation.
24 DO NOT use the appliance if there is damage to the power cord or plug. Regularly inspect
the appliance and power cord. If the appliance malfunctions or has been damaged in any way,
immediately stop use and call Customer Service.
25 ALWAYS ensure the appliance is properly assembled before use.
26 DO NOT use accessory attachments not recommended or sold by SharkNinja. DO NOT place
accessories in a microwave, toaster oven, convection oven or conventional oven or on a ceramic
hob, electrical coil, gas burner range or outdoor grill. The use of accessory attachments not
recommended by SharkNinja may cause fire, electric shock or injuries.
27 When using this appliance, provide at least 15cm (6 inches) of space above and on all sides for
adequate air circulation.
28 DO NOT operate your appliance in a cupboard. When storing in a cupboard always unplug the
unit from the electrical socket. Not doing so could create a risk of fire, especially if the appliance
touches the walls of the garage or the door touches the unit as it closes.
29 To avoid possible steam damage, place the unit away from walls and cupboards during use.
30 CAUTION: The Cooking Pot and lid get very hot while unit is in use. Use care when touching hot
surfaces and when removing food to avoid burns.
31 DO NOT use this unit to cook instant rice.
32 Electrical socket voltages can vary, affecting the performance and heat output of your product.
To prevent possible illness, use a thermometer to check that your food is cooked to the
temperatures recommended.
33 Should the unit emit black smoke, unplug immediately and wait for smoking to stop before
removing the Cooking Pot.
WARNING
To reduce the risk of injury, fire, electrical shock or property damage, basic safety precautions
must always be followed, including the following numbered warnings and subsequent
instructions. Do not use appliance for other than intended use.
1ninjakitchen.co.uk
34 DO NOT touch hot surfaces. Appliance surfaces are hot during and after operation. To prevent
burns or personal injury, ALWAYS use protective hot pads or insulated oven gloves and use
available handles and knobs.
35 Extreme caution must be used when moving an appliance containing hot liquids. Improper use,
including moving the cooker, may result in personal injury such as serious burns.
36 When unit is in operation, hot steam may be released into the air via the steam hole in the top
of the lid. Place unit so steam hole is not directed toward, electrical sockets, cabinets or other
appliances. Keep your hands and face at a safe distance from steam hole.
37 When using SLOW COOK setting, ALWAYS keep the lid closed.
38 Removable Cooking Pot can be extremely heavy when full of ingredients. Care should be taken
when lifting pot from cooker base.
39 Allow unit to cool before cleaning, disassembly, putting in or taking o parts and storage.
40 When not in use and before cleaning, turn the unit o and unplug from socket to disconnect.
41 DO NOT clean with metal scouring pads. Pieces can break o the pad and touch electrical parts,
creating a risk of electric shock.
42 Please refer to the Cleaning & Maintenance section for regular maintenance of the appliance.
43 DO NOT place appliance on hot surfaces, near a hot gas or electric burner, in a heated oven or on
a hob.
PRODUCT REGISTRATION:
Please visit ninjakitchen.co.uk or call 0800 862 0453 to register your new Ninja® product
within 28 days of purchase. You will be asked to provide the store name, date of purchase
and model number along with your name and address.
The registration will enable us to contact you in the unlikely event of a product safety
notification.
TECHNICAL SPECIFICATIONS
Voltage: 220-240V~, 50-60Hz
Power: 1200W
RECORD THIS INFORMATION
Model Number: ____________________
Serial Number: _____________________
Date of Purchase: ___________________
(Keep receipt)
Store of Purchase: __________________
REGISTER YOUR PURCHASE

2 ninjakitchen.co.uk
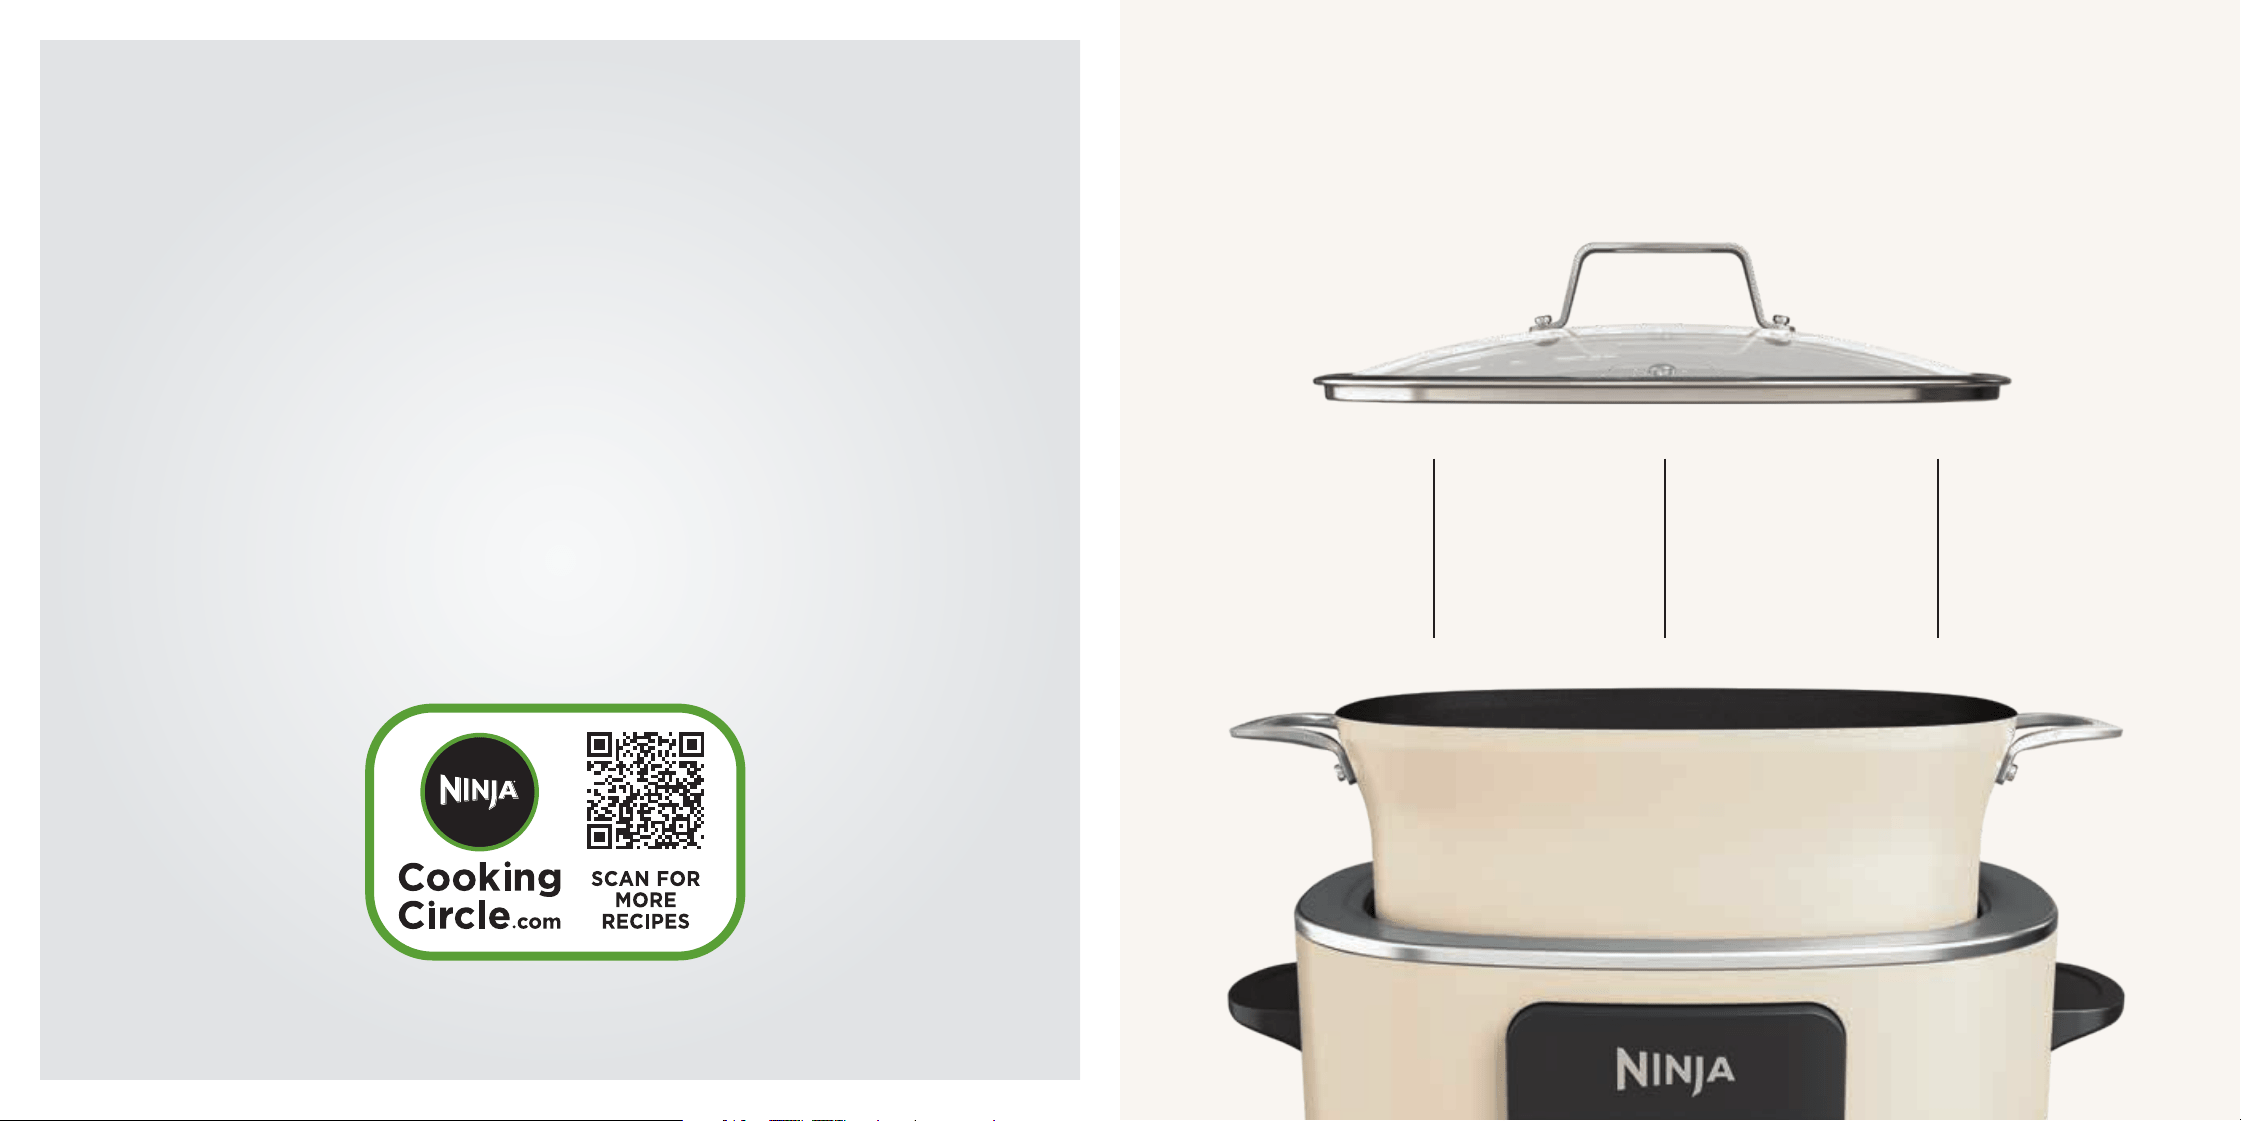
A Spoon-Ladle
B Cooking Pot Lid
C Lid Handle/Spoon-Ladle Rest
D Steam Rack
E Removable Cooking Pot
F Removable Cooking Pot Side Handles
G Cooker Base
H Control Panel
I Cooker Base Handles
A
H
B
C
I
F
E
D
G
1 Remove and discard any packaging material and tape from the unit. Some stickers are to be
permanently kept on the unit, ONLY remove stickers with 'peel here'.
2 Remove all accessories from the package and read this manual carefully. Please pay particular
attention to operational instructions, warnings and important safeguards to avoid any injury
or property damage.
3 Wipe the main unit and control panel with a damp cloth. NEVER submerge the main unit in
water. Wash the Cooking Pot, Cooking Pot lid, spoon-ladle and steam rack in warm, soapy water
then dry thoroughly.
4 We recommend turning the unit on and running it for 10 minutes without adding food. Make
sure the area is well ventilated. This removes any packaging residue and odour traces that
may be present. This is completely safe and not detrimental to the performance of the unit.
BEFORE FIRST USE
To order additional or replacement parts and accessories, visit ninjakitchen.co.uk.
Tool rest prevents spoon-ladle
from touching work surface and
allows it to be neatly stored on
the lid.
PARTS
Slow Cook
1 Use the dial to select SLOW COOK.
2 Press the TEMP arrows to select HI or LO.
3 Select a time between 3 and 12 hours in
15-minute increments.
4 Press START/STOP to begin cook time.
5 When cook time reaches zero, the unit will
beep, automatically switch to KEEP WARM
and begin counting up. Press START/STOP to
switch o KEEP WARM.
Sear/Sauté
1 Use the dial to select SEAR/SAUTÉ.
2 Press the TEMP arrows to choose HI or LO
temperature. The timer will count up to keep
track of cook time.
3 Press START/STOP to begin cooking.
4 Press START/STOP to turn o the SEAR/
SAUTÉ function.
GETTING TO KNOW THE COOKER
COOKING FUNCTIONS
SLOW COOK: Cook your food at a lower
temperature for a longer period of time. Ideal
for casserole, chilli and stew.
SEAR/SAUTÉ: Use the unit as a hob for
browning meats and to sauté vegetables.
STEAM: Gently cook delicate foods, such as fish
and vegetables, using steam for a healthier way
to cook.
BRAISE: Transform tougher cuts of meat by first
browning at high heat (with a little oil or butter)
and then simmering in liquid at a low heat.
SIMMER: Preset temp to gently simmer water or
sauces at a consistent temperature.
BAKE: Bottom and side heat only (no
convection fan) means this function is best for
upside down puddings, poached fruit, baked
apples and egg custard.
PROVE: Create an environment for dough to
rest and rise.
KEEP WARM: Reheat or keep cooked food
warm for longer periods of time.
NOTE: SLOW COOK LO time may be adjusted
between 6 and 12 hours. SLOW COOK HI may be
adjusted between 3 and 12 hours.
NOTE: The unit will automatically shut o after
12 hours on KEEP WARM.
NOTE: It is recommended to let the unit heat
up for 5 minutes prior to adding ingredients.
NOTE: You can use this function with or
without the lid placed on the pot.
NOTE: DO NOT use metal utensils, they will
scratch the non-stick coating on the pot.
USING THE COOKER
3
ninjakitchen.co.uk
A
B C
D
E
NOTE: If no cooking function is chosen, the
unit will shut o after 10 minutes.
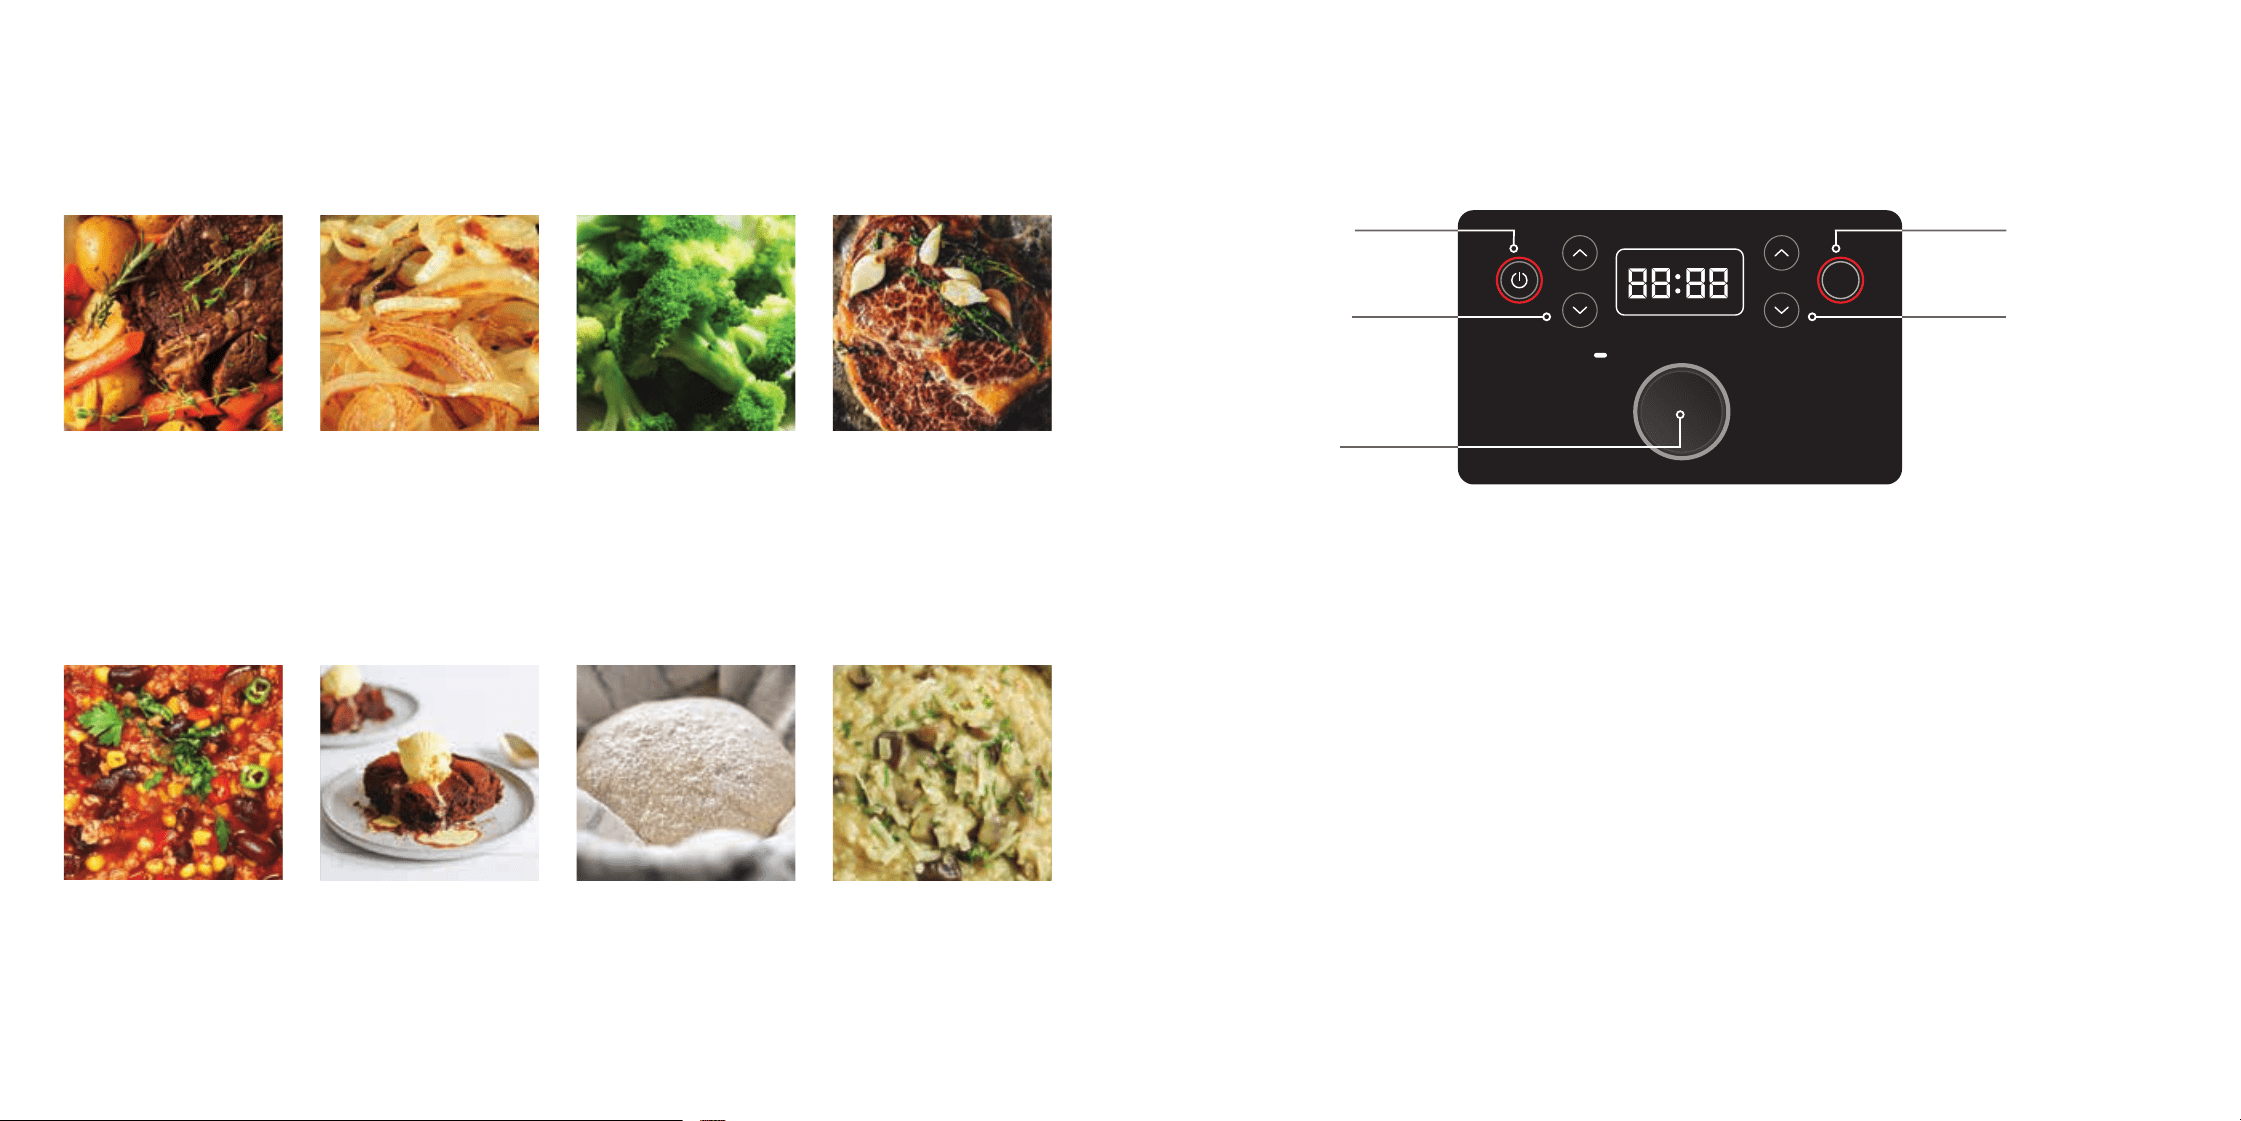
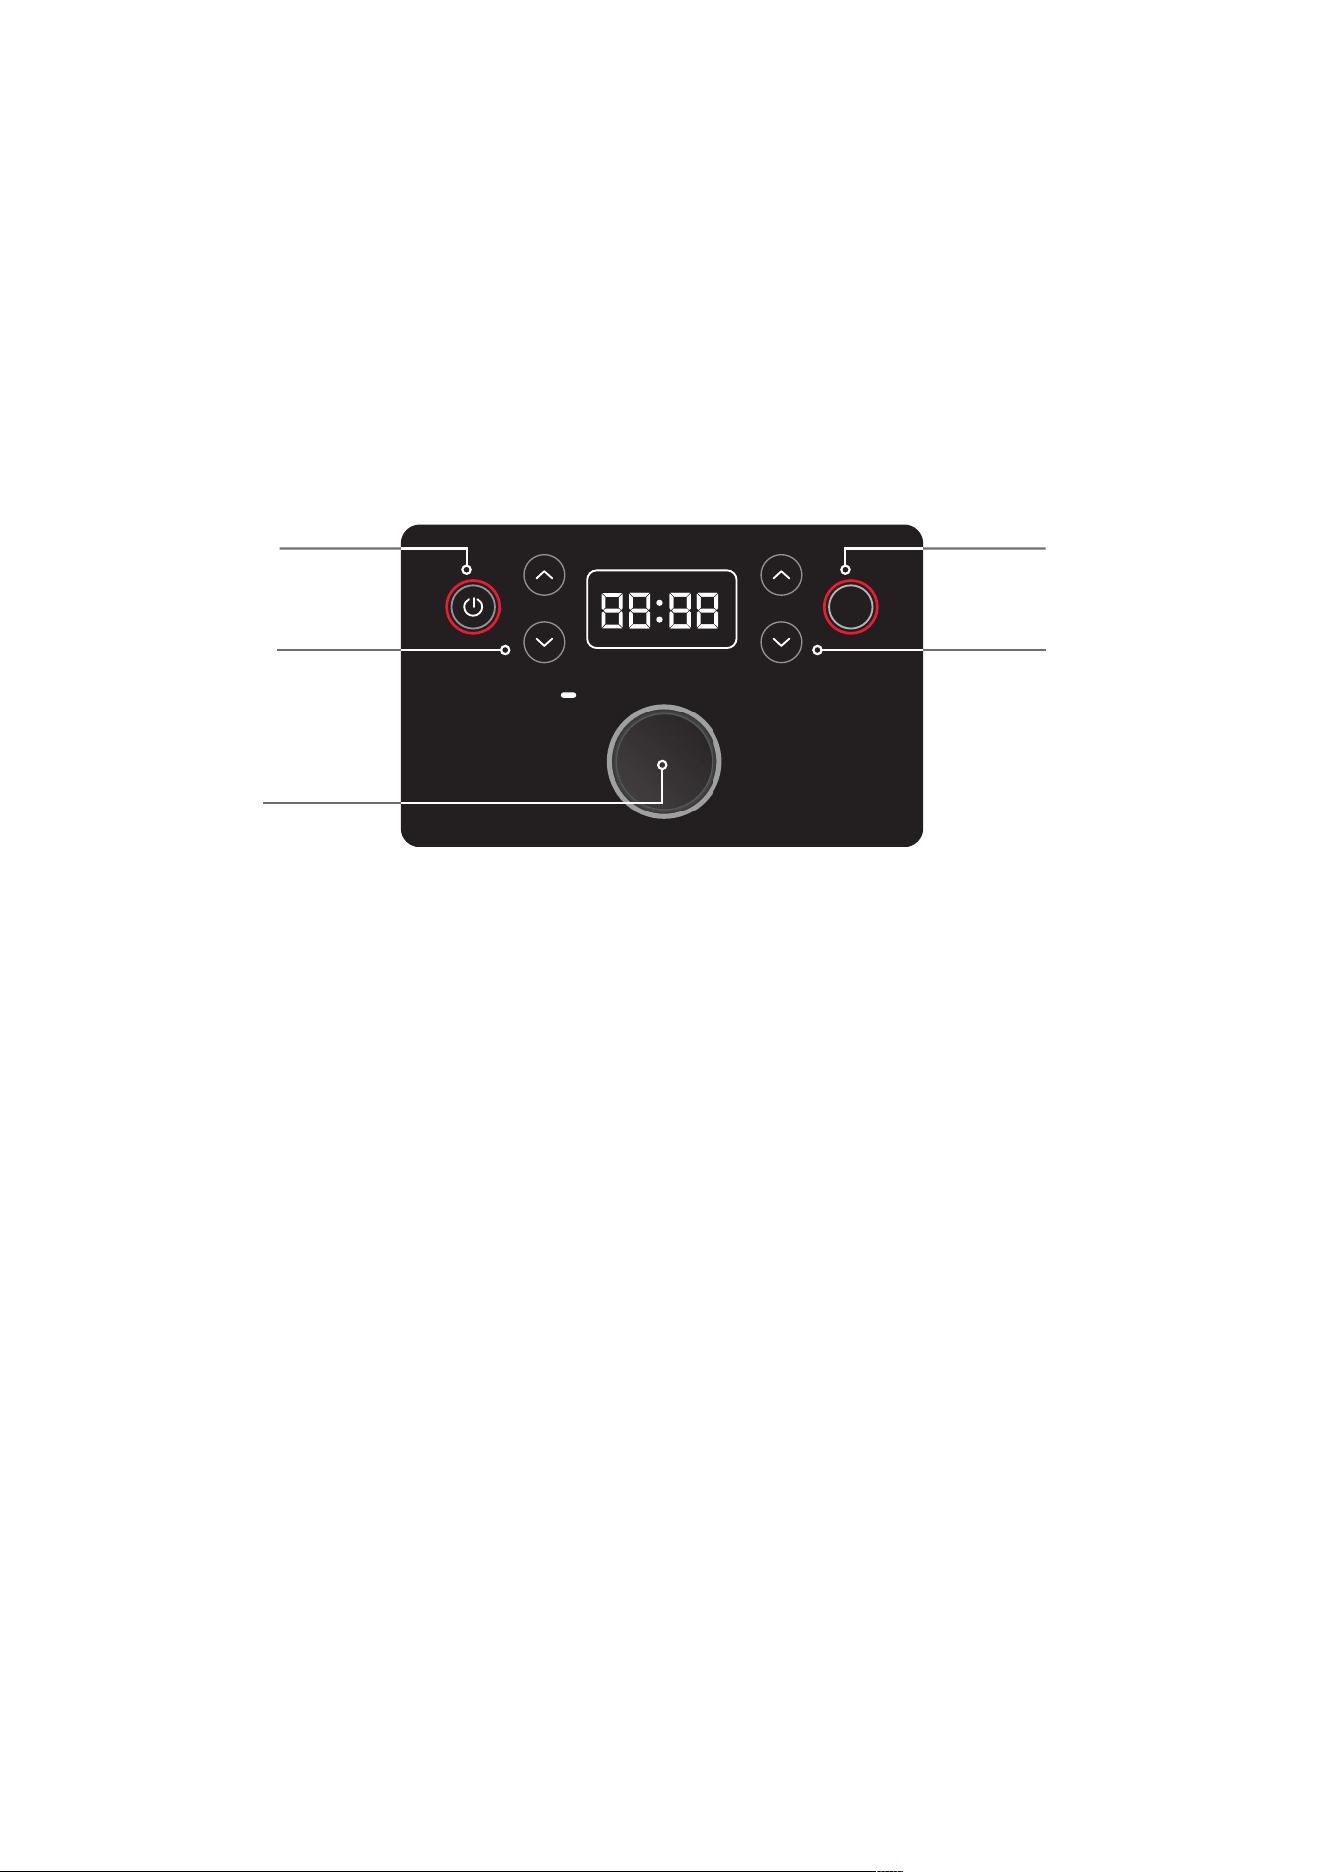
OPERATING BUTTONS
A (POWER): This button shuts the unit o
and stops all cooking modes.
B TEMPERATURE ARROWS: Use the up/down
arrows to the left of the display to adjust the
cooking temperature.
C TIME ARROWS: Use the up/down arrows to
the right of the display to adjust the cooking
time.
D START/STOP BUTTON: Press START to
begin cooking. Pressing START/STOP during
a cook cycle will stop cooking function.
E FUNCTION DIAL: Use the dial to select
a cook function.
4 ninjakitchen.co.uk
Steam
1 Add at least 250ml water or stock into the
pot. Place rack into pot and place ingredients
on the rack.
2 Use the dial to select STEAM.
3 Use the TIME arrows to adjust cook time
in 1-minute increments between 1 minute and 1
hour. The preset time is 10 minutes.
4 Press START/STOP to begin cooking.
5 The display will show PrE, indicating the unit
is preheating to selected temperature.
6 When the unit reaches the appropriate steam
level, the display will show the set temperature
and the timer will begin to count down.
7 When cook time reaches zero, the unit will
beep and END will flash twice on the display
Braise
1 Sear ingredients in the pot using the Sear/
Sauté instructions.
2 Once complete, deglaze with wine or stock.
3 Add remaining cooking liquid and
ingredients into the pot.
4 Turn the dial to select BRAISE. The default
time setting of 06:00 will display.
5 Use the TIME arrows to set cook time
in 15-minute increments between 1 - 12 hours.
6 Press START/STOP to begin cooking. When
cook time reaches zero, unit will beep and
display END for 5 minutes.
Simmer
1 Use the dial to select SIMMER.
2 Press START/STOP to begin cooking.
3 Press START/STOP to turn o the SIMMER
function.
Bake
This product does not use a convection fan so
it's best for upside down cakes or puddings,
using it as a bain marie or for steamed puddings
and cheesecakes.
1 Place ingredients and any recommended
accessory into the pot.
2 Turn the dial to select BAKE. The default
temperature will display.
3 Use the TEMP arrows to set temperature
between 120°C and 230°C.
4 Use the TIME arrows to adjust cook time
in 1-minute increments up to 1-hour or
10-minute increments up to 6-hours.
5 Press START/STOP to begin cooking.
6 When cook time reaches zero, unit will beep,
automatically switch to KEEP WARM and
begin counting up. Press START/STOP to
switch o KEEP WARM.
Prove
1 Place dough in the pot and place the lid on
top.
2 Turn the dial to select PROVE. The default
temperature setting of 35°C will display.
3 Use the TEMP arrows to set temperature.
in 5-degree increments between 30
°
C and
40
°
C.
4 Use the TIME arrows to adjust the prove time
in 5-minute increments up to 4-hours.
5 Press START/STOP to begin cooking.
6 When cook time reaches zero, unit will beep,
and END will flash 3 times on the display.
Keep Warm
1 Use the dial to select KEEP WARM. There is
no temperature or time selection. The time
will start counting until you press START/
STOP to end the program.
USING THE COOKER – CONT
NOTE: Use 250ml or more of liquid when
steaming.
NOTE: There is no variable temperature
selection for the BRAISE function. The
temperature is set to 99°C.
NOTE: To deglaze, pour 125ml liquid into pot.
Scrape brown bits from bottom of pot and
mix into cooking liquid.
NOTE: It is recommended to let the unit heat
up for 5 minutes prior to adding ingredients.
NOTE: You can use this function with or
without the lid placed on the pot.
NOTE: There is no variable time or temperature
selection for the SIMMER function. The
temperature is set to 99°C. Timer will start
counting up.
NOTE: DO NOT use metal utensils, they will
scratch the nonstick coating on the pot.

CLEANING & MAINTENANCE
TROUBLESHOOTING GUIDE
HELPFUL HINTS
Dishwasher & Hand-Washing
The unit should be cleaned thoroughly after
every use.
1 Unplug the unit from the wall socket before
cleaning.
2 To clean the cooker base and the control
panel, wipe them clean with a damp cloth.
3 Hand washing is recommended to extend
the life of the Cooking Pot. If food residue is
stuck on the Cooking Pot, fill pot with water
and allow to soak before cleaning. DO NOT
use scouring pads. If scrubbing is necessary,
use a non-abrasive cleanser or liquid dish
soap with a nylon pad or brush.
4 The Cooking Pot, glass lid and spoon–ladle
can be washed in the dishwasher. If food
residue is stuck on these items then use a
non-abrasive cleaner.
5 Air-dry all parts after each use.
NOTE: NEVER put the main unit in the dishwasher or immerse it in water or any other liquid.
The unit won't turn on.
• Make sure the power cord is securely plugged into the socket.
• Try plugging the cord into a dierent socket.
• Reset the circuit breaker if necessary.
"ADD POT" error message appears on display screen and the unit is beeping.
• Cooking pot is not inside the cooker base. Cooking pot is required for all functions.
"ADD WATER" error message appears on display screen.
• The water level is too low. Add more water to the unit to continue.
Why is the time counting down so slowly?
• You may have set hours rather than minutes. When setting time, the display will show HH:MM and the
time will increase/decrease in minute increments.
The unit is counting up rather than down.
• The Slow Cook cycle is complete and the unit is in Keep Warm mode.
“E1', "E2"
• The unit is not functioning properly. Please contact Customer Service at 0800 862 0453. We ask that you
register your product online at ninjakitchen.co.uk and have the product on hand when you call, so we
may better assist you.
Why did my unit shut o?
• If a cook function is not chosen within 10 minutes after turning on the unit, it will automatically shut o.
1 Removable Cooking Pot is oven safe up to 260°C.
2 Use KEEP WARM to keep food at a warm, food-safe temperature after cooking.
3 Refrain from removing the lid during a cook cycle.
4 The Cooking Pot is NOT hob safe.
5 For longevity, we recommend hand-washing the Cooking Pot.
6 The glass lid can be cleaned in the dishwasher.
7 The spoon–ladle can be cleaned in the dishwasher.
8 Preheat time will vary depending on quantity and temperature of ingredients.
9 ALWAYS use oven gloves when removing the Cooking Pot from the base unit.
10 ALWAYS use oven gloves when removing glass lid from the Cooking Pot.
11 Store extra food in sealed, freezer–friendly containers.
5
ninjakitchen.co.uk
SharkNinja Europe Limited
3150 Century Way,
Thorpe Park, Leeds, LS15 8ZB, UK
0800 862 0453
ninjakitchen.co.uk
SharkNinja Germany GmbH,
Rotfeder-Ring 9,
60327 Frankfurt am Main, Germany
Illustrations may dier from actual product. We are constantly striving to improve our products,
therefore the specifications contained herein are subject to change withoutnotice.
FOODI and NINJA are registered trademarks of SharkNinja Operating LLC in the United Kingdom.
POSSIBLECOOKER is an unregistered trademark of SharkNinja Operating LLC in the United Kingdom.
© 2023 SharkNinja Operating LLC.
This marking indicates this product should not be disposed of with other household
waste. To prevent possible harm to the environment or human health from uncontrolled
waste disposal, recycle it responsibly to promote the sustainable reuse of material
sources. To return your used device, please use the return and collection systems
or contact the retailer where this product was purchased. They can take this product for
environmentally safe recycling.
MC1001UK_IB_MP_230425_Mv1
NOTE: Save these instructions. Keep for future reference.
VISIT US ONLINE AT:
ninjakitchen.co.uk
Or follow us on any of our social media pages:
@ninjakitchenuk
Please make sure to read the enclosed Ninja® Instructions prior to using your unit.
Recipes plus cooking charts
for unlimited possibilities

Your guide to
cooking like a pro
Welcome to the Ninja® Foodi® Possible Cooker recipe book.
From here, you’re just a few pages away from recipes,
tips and tricks and helpful hints that unlock delicious
possibilities. From slow-cooked classics to oven-to-table
showstoppers, anything is possible.

1
Questions? ninjakitchen.co.uk
Endless possibilities,
all in one pot.
Sauté to
perfection
From caramelised
veggies to braised meat,
the bottom of your pot
sautés like your hob.
Set it and
forget it
Just throw in all of your
ingredients and come
back to a beautifully
cooked meal.
Oven safe pot
up to 260°C
Add a pastry top to
your stew or casserole
and finish o in a
conventional oven.
Serve straight
from the pot
Elegantly designed,
the inner pot makes the
perfect serving dish.
2
Cooking functions
Slow Cook Sear/Sauté Steam
Cook your food at a
lower temperature for
a longer period of time.
Ideal for casserole,
chilli and stew.
Use the unit as a hob for
browning meats and to
sauté vegetables.
Gently cook delicate
foods, such as fish and
vegetables, using steam
for a healthier way
to cook.
For best results use the
steam rack.
Simmer
Preset temp to gently
simmer water, soup or
sauce at a consistent
temperature.
Braise
Transform tougher cuts
of meat by first browning
at high heat (with a little
oil or butter) and then
simmering in liquid at
a low heat.
Bake
Bottom and side heat only
(no convection fan) means
this function is best for
upside down puddings,
poached fruit, baked
apples and egg custard.
Prove
Prepare doughs in a
consistently warm and
humid environment.
Keep Warm
Reheat or keep cooked
food warm for longer
periods of time.
For step by step instructions of how to use each function please refer to the Instruction Booklet.
3
Questions? ninjakitchen.co.uk
Getting Started
Cooking Tips
• For best results, don’t remove the lid
while your food is cooking.
• When steaming delicate foods like dumplings, it’s
best to add ingredients before preheating.
• The bake function can be used for foods like
upside down puddings, poached fruits, it can also
be used like a bain marie for gently baking custards,
brûlées and cheesecakes.
• For best steam results use the steam rack.
• Use oven gloves, roasting forks or tongs when
removing food, as the inner pot may be hot.
Product Tips
• Always use oven mitts to remove the glass lid
and cooking pot as handles may get hot
during cooking.
• Always use non-stick utensils in the cooking
pot. Never use metal utensils as they may
damage pot coating.
• For longevity we recommend hand
washing the cooking pot.
• The inner pot and glass lid are oven safe
up to 260°C.
• The inner pot doubles as a serving dish
– no need to transfer food.
START
STOP
TIMETEMP
SLOW COOK
SEAR / SAUTÉ
STEAM
BRAISE
SIMMER
BAKE
PROVE
KEEP WARM
Use the dial to
select a cooking
function.
Press START/STOP
to begin cooking
Press the POWER
button to turn the
unit on
Press the TIME
arrows to set
cook time.
Press the TEMP
arrows to set cook
temperature

4 4
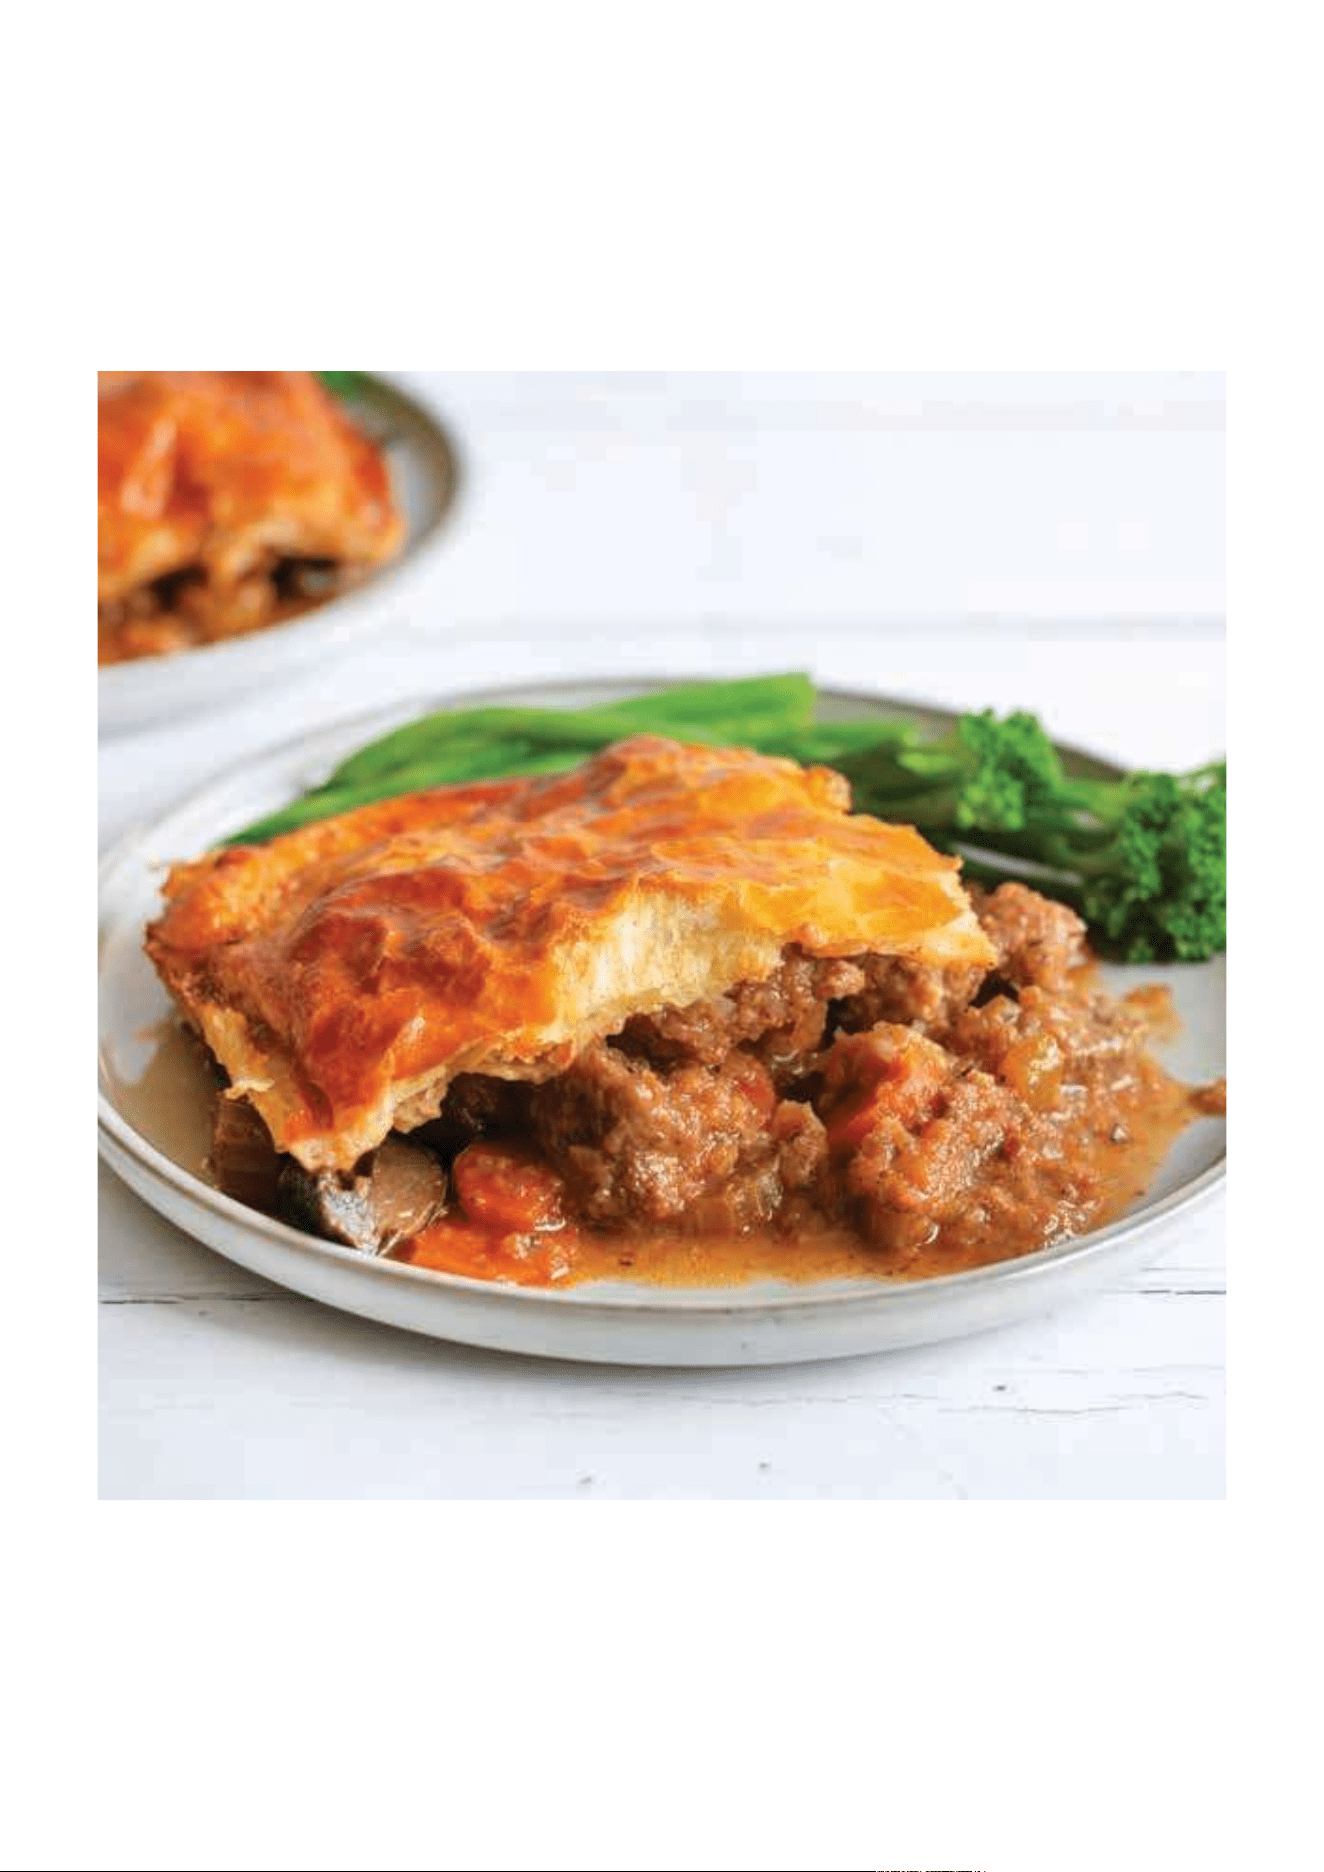
STEAK & ALE PIE
PREP: 15 MINUTES | COOK: 3 HOURS AND 30 MINUTES | MAKES: 6 SERVINGS
DIRECTIONS
1 Remove the lid from the pot. Turn dial to SEAR/
SAUTÉ, set temperature to HI and press START/
STOP to begin preheating. Allow the unit to
preheat for 5 minutes
2 In a large bowl, toss steak with flour, salt and
pepper. Shake excess flour o steak and reserve
for stirring in later. Place oil and steak in the
pot. Cook uncovered for 10 minutes, stirring
occasionally. When steak is browned, remove with
a spoon and set aside.
3 Place all remaining ingredients except pu pastry,
egg and milk in the pot. Add steak and any juices.
Stir to combine, then cover with the lid.
4 Turn dial to SLOW COOK, set temperature to HI,
set time to 3 hours and press START/STOP to
begin cooking.
5 When cooking is complete, press START/STOP to
end cooking. Remove lid and stir filling to ensure
ingredients are not stuck to the bottom of the
pot, then remove bay leaves and allow to cool
slightly. Meanwhile, preheat oven to 220°C/fan
200°C.
6 Roll out pu pastry to fit the size of pot, then
cut if necessary. Place the pu pastry over the top
of the steak and ale filling. Crimp the edges of the
crust along the sides of the pot. Then use a knife
to cut 4 slits in the top of the crust.
7 In a small bowl, mix together egg and milk. Brush
egg mixture over the top of the pastry. Place the
entire pot (without the lid) into oven and bake for
30 minutes or until pastry is golden brown.
8 When cooking is complete, serve the pie
immediately.
INGREDIENTS
2 tablespoons olive oil
800g stewing or braising steak, cut into 4cm cubes
35g plain flour
Salt and pepper, to taste
2 medium onions, peeled, finely diced
2 carrots, peeled, sliced
200g chestnut mushrooms, cleaned, halved
2 celery sticks, sliced
1 garlic clove, peeled, crushed
1 tablespoon tomato purée
1 tablespoon Worcestershire sauce
1 teaspoon English mustard
500ml brown ale
2 teaspoons dried mixed herbs
2 bay leaves
350g pu pastry
1 large egg
1 tablespoon milk
TIP Use lid as a template for pastry. The steak and ale
can be served without pastry topping.
INTERMEDIATE RECIPE
6
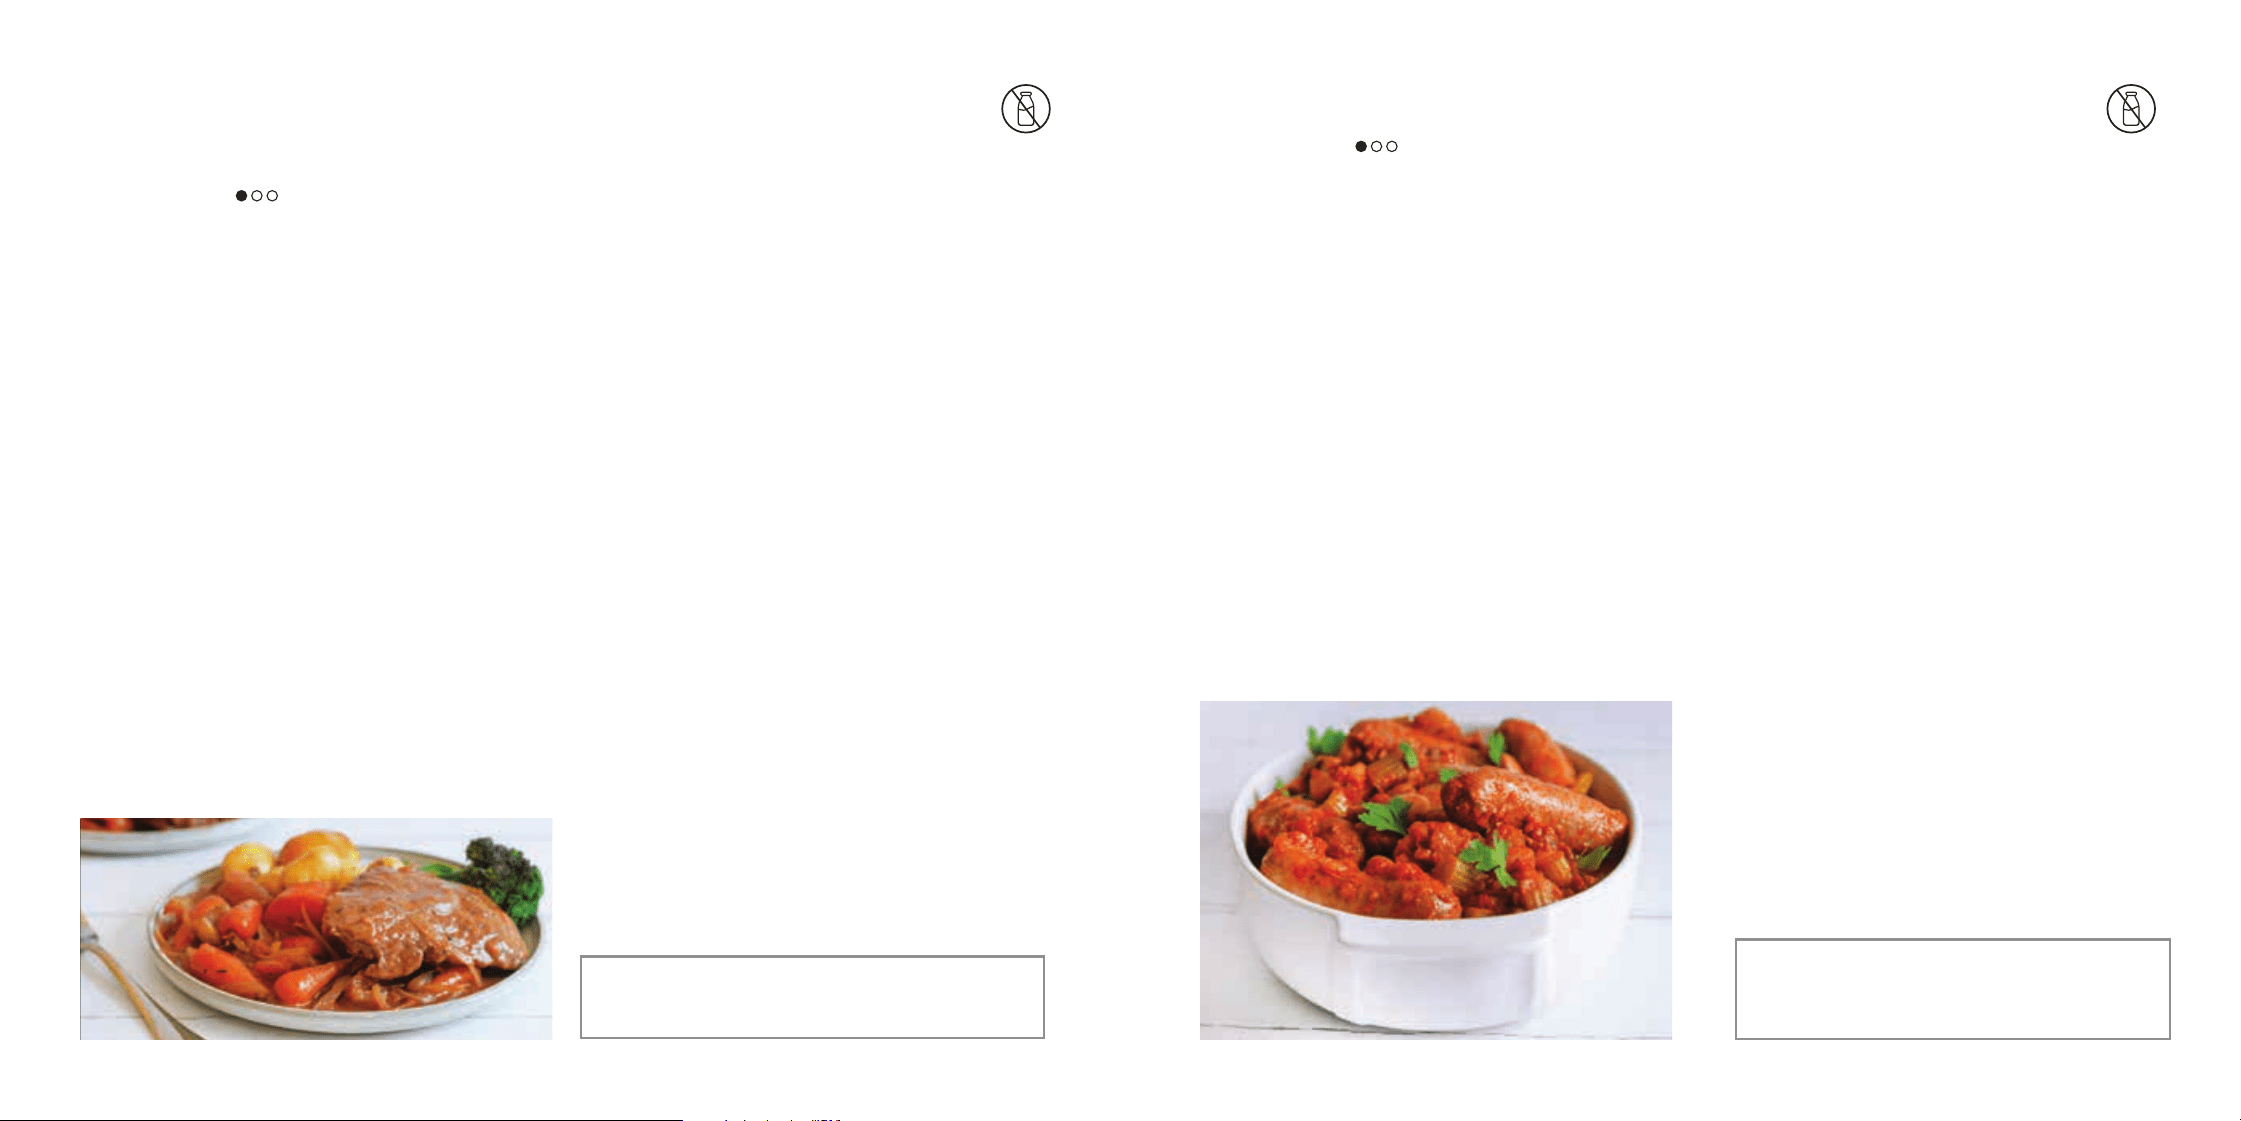
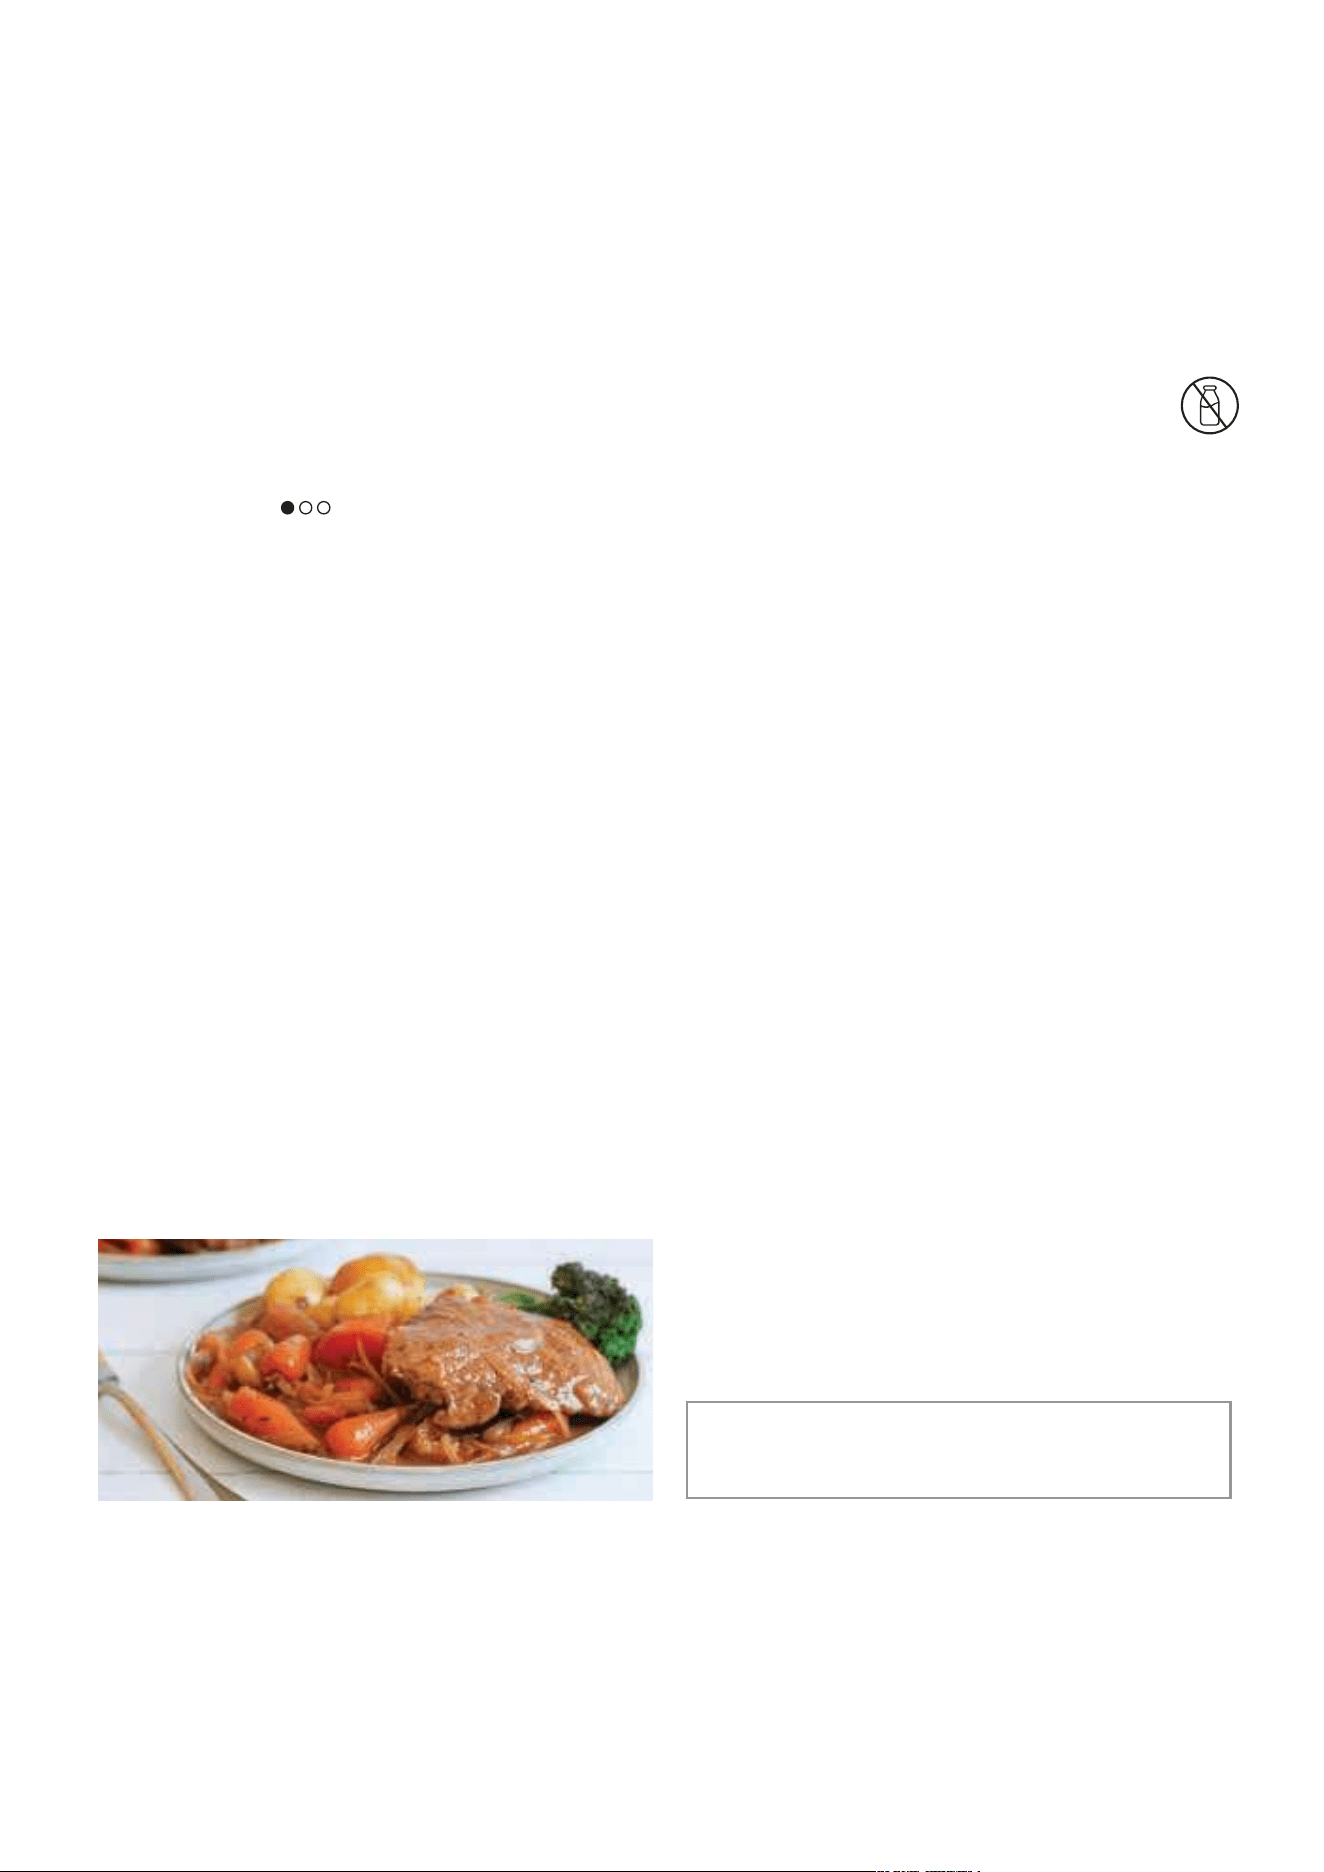
BRAISED BEEF IN RED WINE
WITH ROOT VEGETABLES
PREP: 15 MINUTES | COOK: 3 HOURS AND 30 MINUTES | MAKES: 6 SERVINGS
DIRECTIONS
1 Season the beef on all sides with salt and pepper,
then coat with flour. (This helps to thicken the
sauce).
2 Remove the lid from the pot. Turn dial to SEAR/
SAUTÉ, set temperature to HI and press START/
STOP to begin preheating. Allow the unit to
preheat for 5 minutes.
3 Add 1 tablespoon oil and steaks to the pot. Cook
uncovered for 10 minutes, until browned on all
sides. Remove steaks from pot and set aside.
4 Add remaining 1 tablespoon oil and all remaining
ingredients to pot. Season with salt and pepper
as desired. Stir to combine, then cover with
the lid.
5 Turn dial to BRAISE, set temperature to HI,
set time to 3 hours and press START/STOP to
begin cooking.
6 When cooking is complete, press START/STOP
to end cooking. Remove the lid, remove bay
leaf and allow dish to cool slightly for 5 minutes
before serving.
INGREDIENTS
4 x 200g braising steaks
Salt and pepper, to taste
30g plain flour
2 tablespoons olive oil, divided
2 medium white onions, peeled, finely sliced
2 celery sticks, 1cm slices
200g chantenay carrots, peeled, cut in half if large
250g sweet potato, peeled, diced into 4cm chunks
300g parsnips peeled, diced into 4cm chunks
1 garlic clove, peeled, crushed
1 tablespoon tomato purée
1 teaspoon English mustard
250ml beef stock
250ml red wine
2 teaspoons dried thyme
1 bay leaf
TIP If you prefer the sauce to be thicker, mix 1
tablespoon cornflour and a little water to a thin
paste. Stir into hot sauce and wait for it to thicken.
BEGINNER RECIPE
D
A
I
R
Y
-
F
R
E
E
7
Questions? ninjakitchen.co.uk
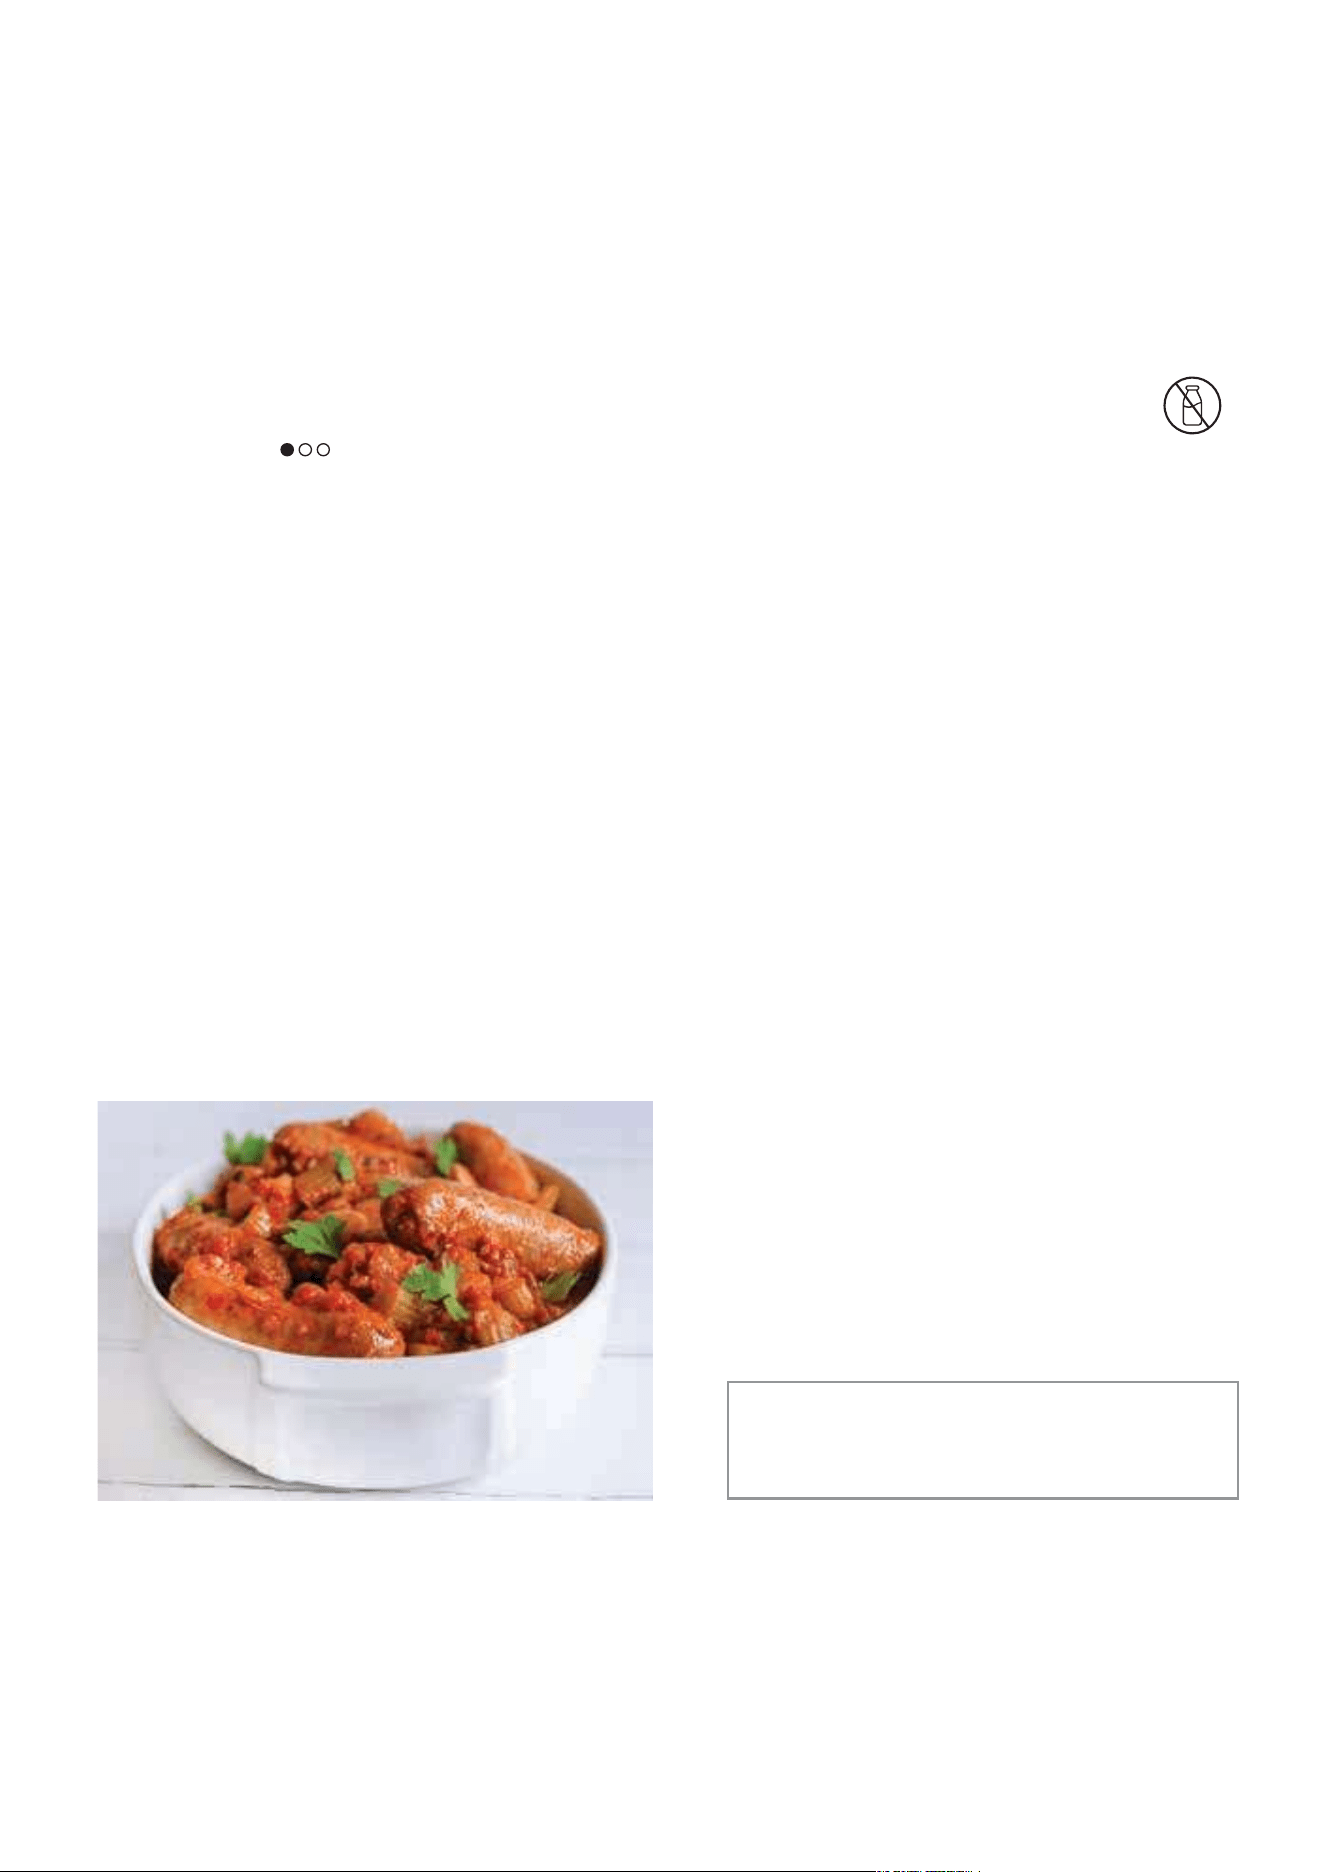
SAUSAGE & BEAN HOT POT
PREP: 15 MINUTES | COOK: 3 HOURS | MAKES: 6 SERVINGS
DIRECTIONS
1 Add all ingredients to the pot. Stir to combine,
then cover with the lid.
2 Turn dial to BRAISE, set temperature to HI, set
time to 3 hours and press START/STOP to begin
cooking.
3 When cooking is complete press START/STOP to
end cooking. Remove lid. Remove bay leaves and
stir ingredients to combine. Serve immediately.
INGREDIENTS
130g lardon cubes
12 (800g) pork sausages
2 red onions, peeled, diced
2 celery sticks, sliced
2 garlic cloves, peeled, crushed
2 tablespoons sundried tomato purée
1 can (400g) chopped tomatoes
1 can (400g) butter beans, drained and rinsed
200ml red wine
1 tablespoon sweet paprika
1 teaspoon dried oregano
2 tablespoons fresh flat leaf parsley, chopped
2 bay leaves
Salt and pepper, to taste
TIP Add 1 can (340g) of sweetcorn 30 minutes
before end. To make veggie, replace lardon
and sausages with sweet potato and
cauliflower florets cut into 3cm chunks.
BEGINNER RECIPE
D
A
I
R
Y
-
F
R
E
E

8 8
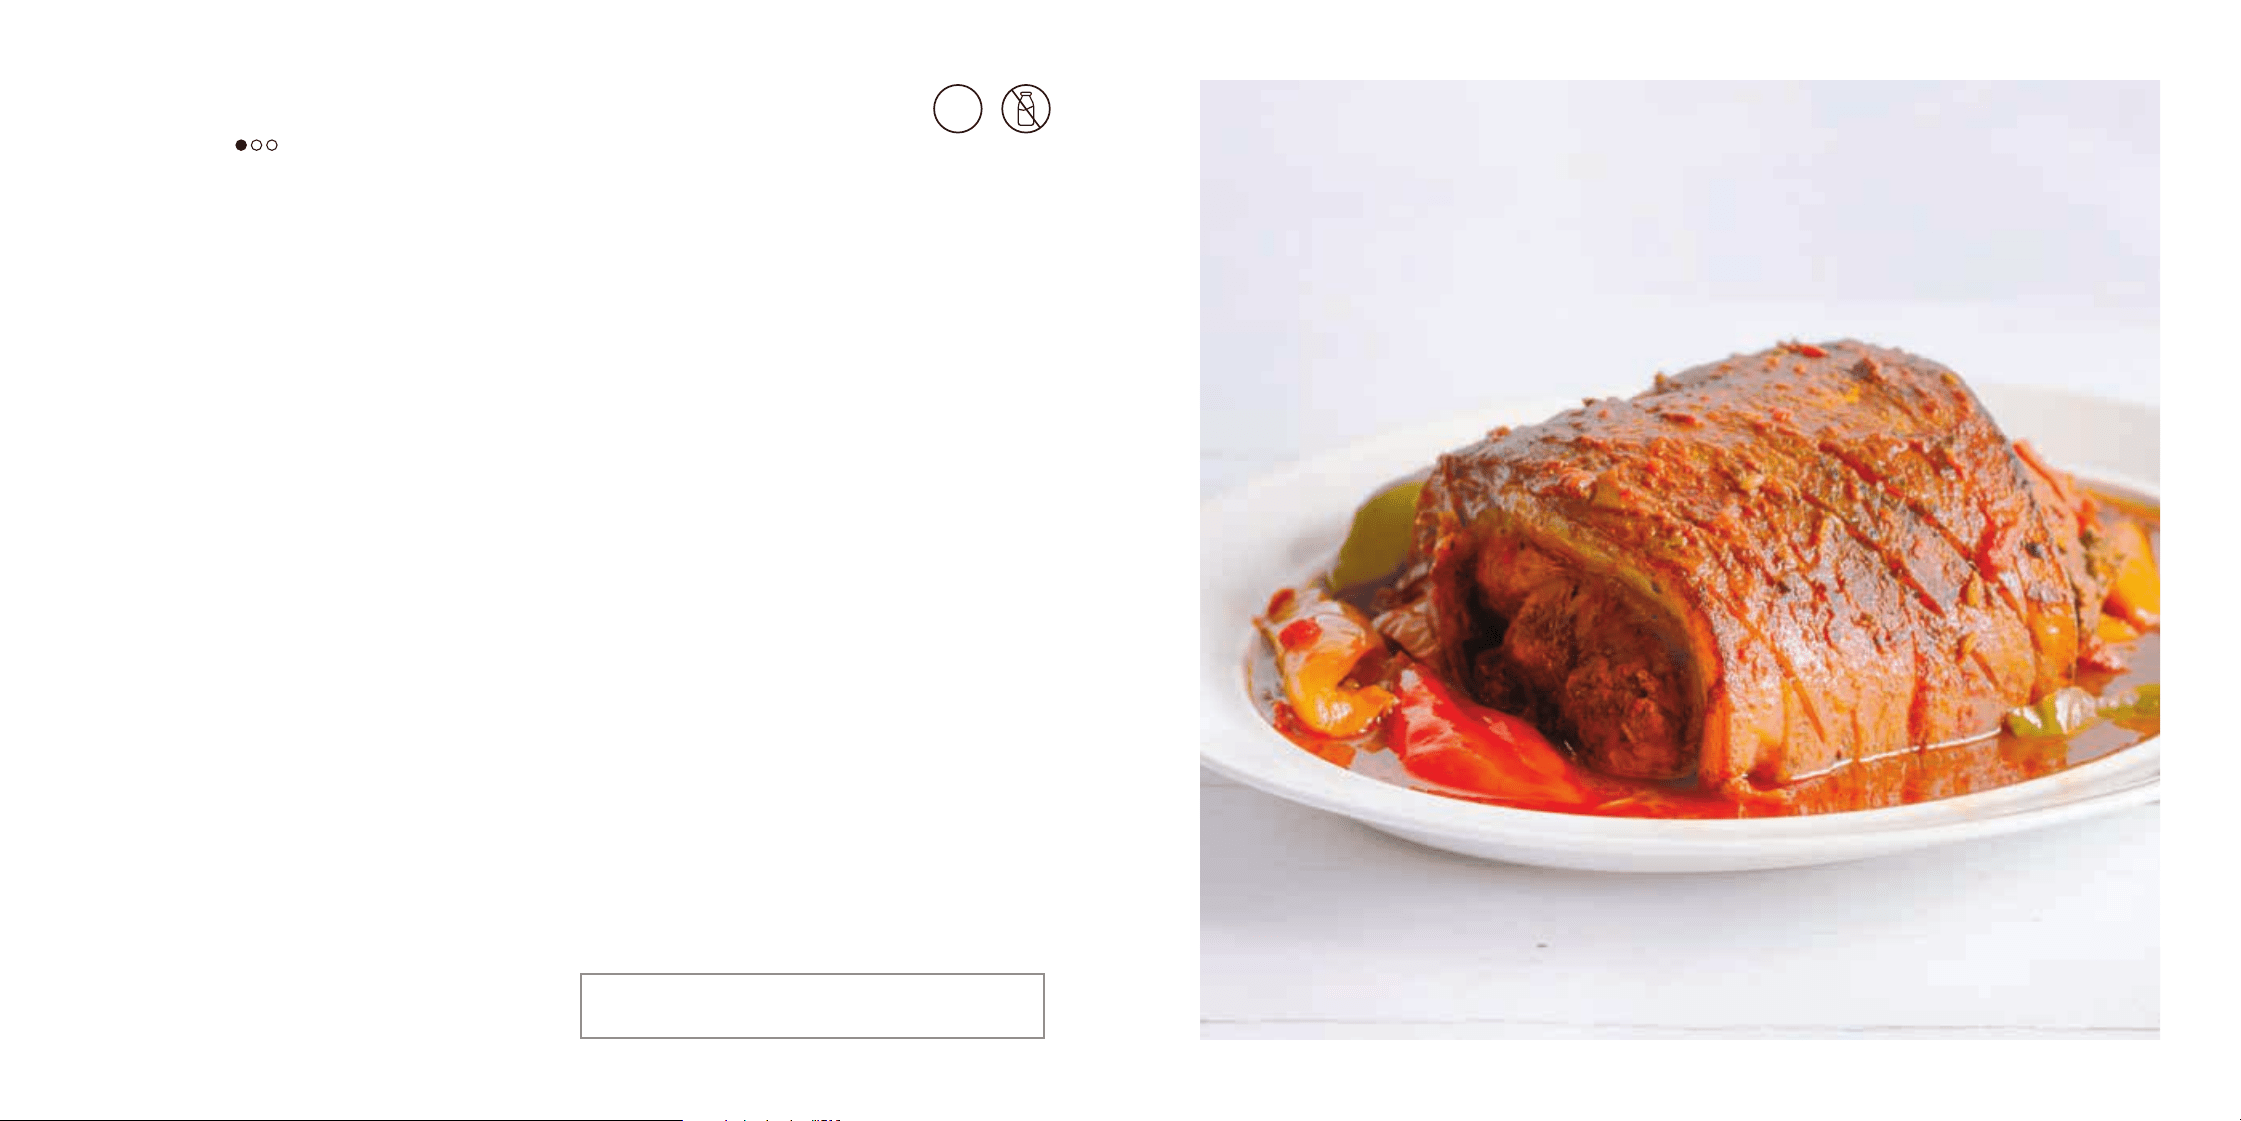
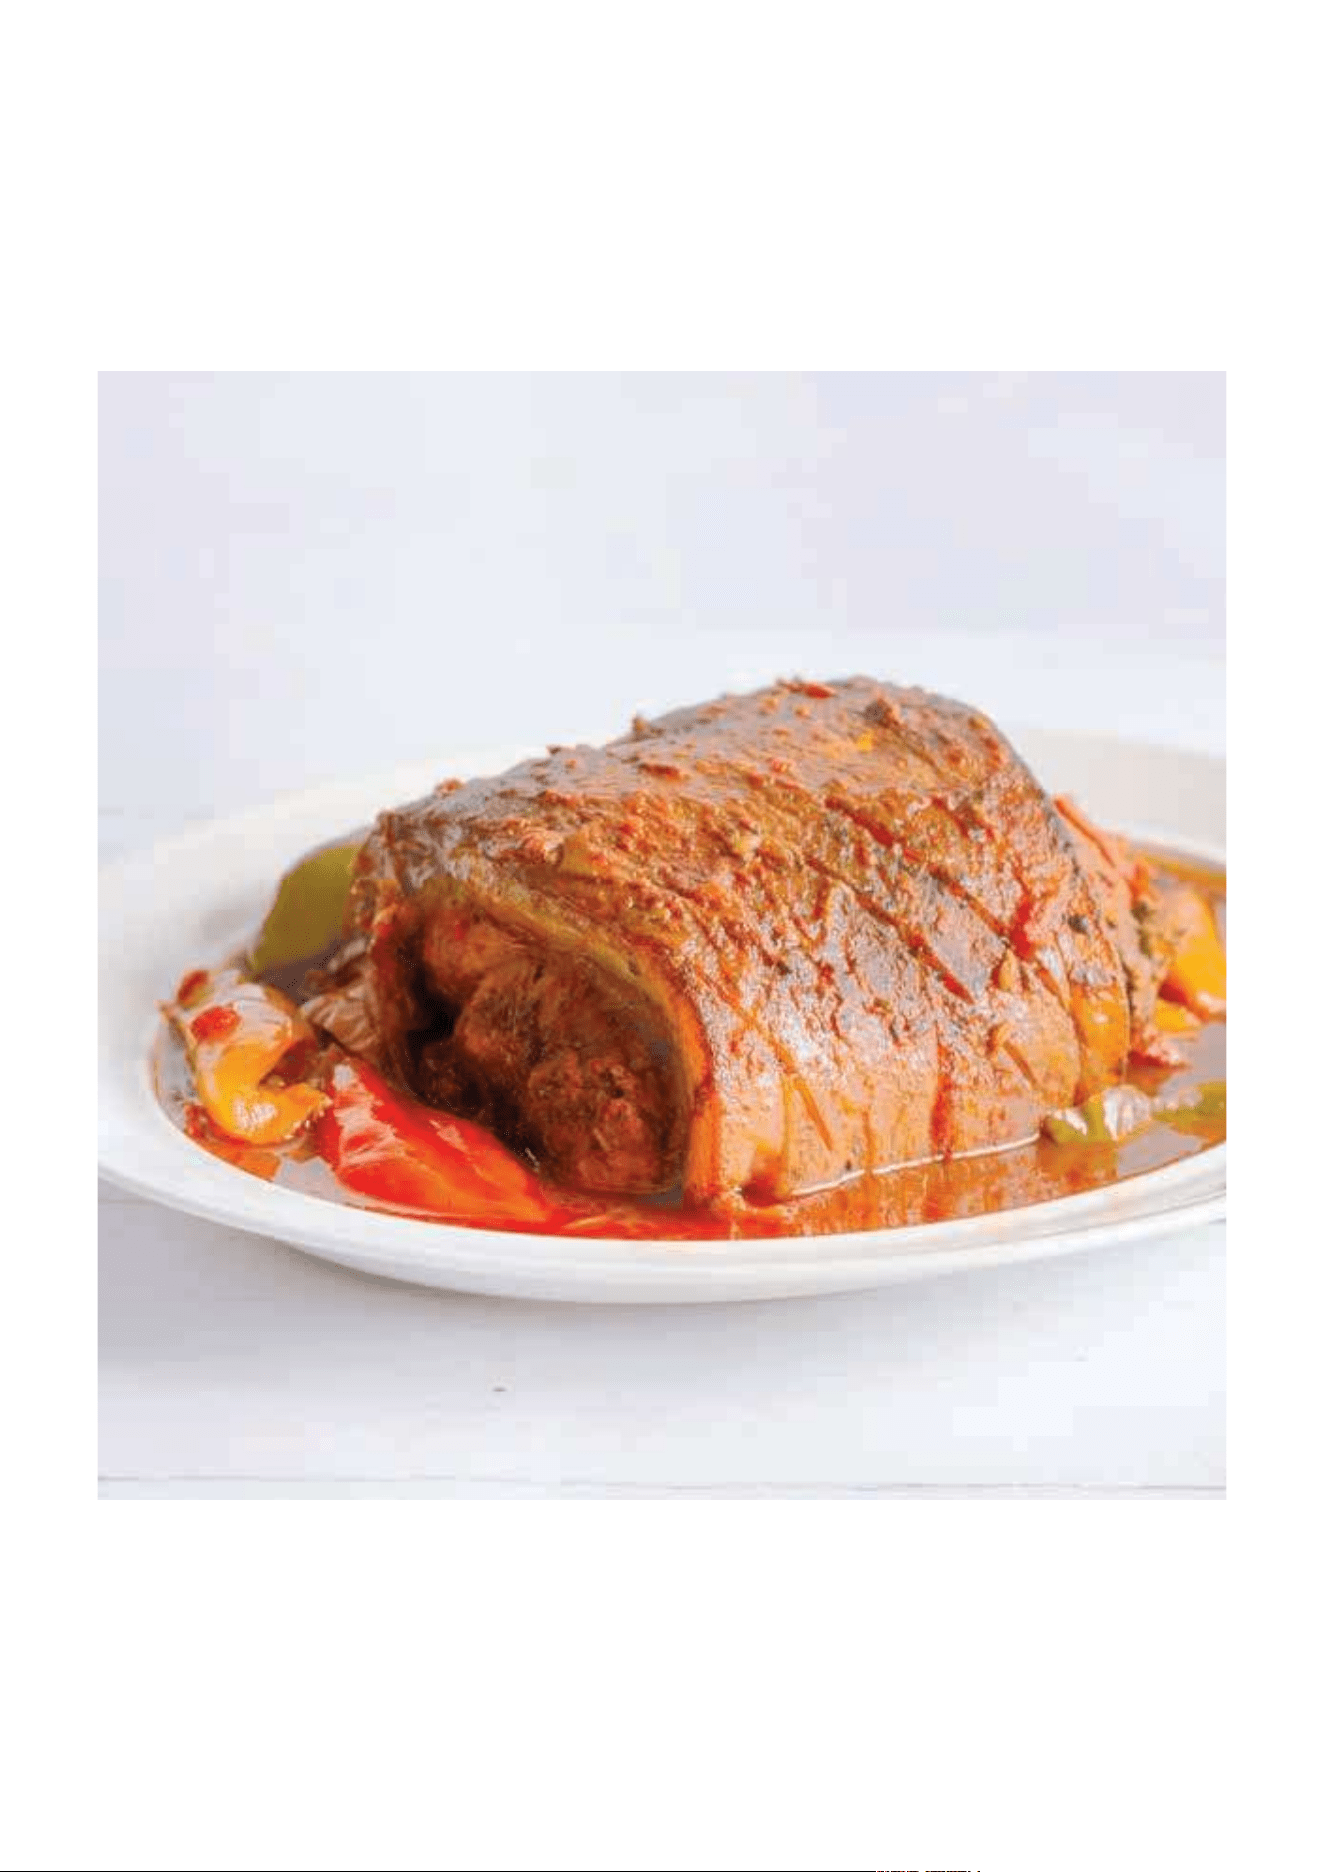
POT ROAST PORK WITH PEPPERS
PREP: 15 MINUTES | COOK: 5 HOURS AND 30 MINUTES | MAKES: 6 SERVINGS
DIRECTIONS
1 Remove the lid from the pot. Turn dial to SEAR/
SAUTÉ, set temperature to HI and press START/
STOP to begin preheating. Allow the unit to
preheat for 5 minutes.
2 Add oil to the pot. Season pork and place fat side
down in the pot. Cook uncovered until browned
on all sides, about 16 to 20 minutes. Then remove
pork from pot and set aside.
3 Add onions, garlic, tomato purée, stock, herbs
and season with salt and pepper as desired. Stir
to combine and cook until softened, about 5
minutes. Place the pork on top of the vegetables,
then spoon the sauce over top. Cover with the lid
and press START/STOP to stop cooking.
4 Turn dial to SLOW COOK, set temperature to HI,
set time to 5 hours and press START/STOP to
begin cooking.
5 When 45 minutes remain, check pork to see if it’s
fully cooked. If not, turn pork over and resume
cooking.
6 When cooking is complete, press START/STOP
to end cooking. Remove lid, lid and allow pork to
cool for 5 minutes before slicing and serving.
INGREDIENTS
2 tablespoons olive oil
1 rolled and tied pork shoulder (2kg), fat trimmed
Salt and pepper, to taste
2 medium red onions, peeled, finely sliced
1 red chilli, deseeded and finely chopped
4 peppers, mixed colours, deseeded and quartered
1 tablespoon sweet smoked paprika
1 garlic clove, peeled, crushed
2 tablespoons tomato purée
1 can (400g) chopped tomatoes
400ml chicken stock
2 tablespoons fresh sage leaves
1 teaspoon dried fennel seeds
1 bay leaf
TIP If preferred, pork can be shredded. Cook for 30
minutes extra.
BEGINNER RECIPE
D
A
I
R
Y
-
F
R
E
E
K
E
T
O
D
I
E
T
K

10
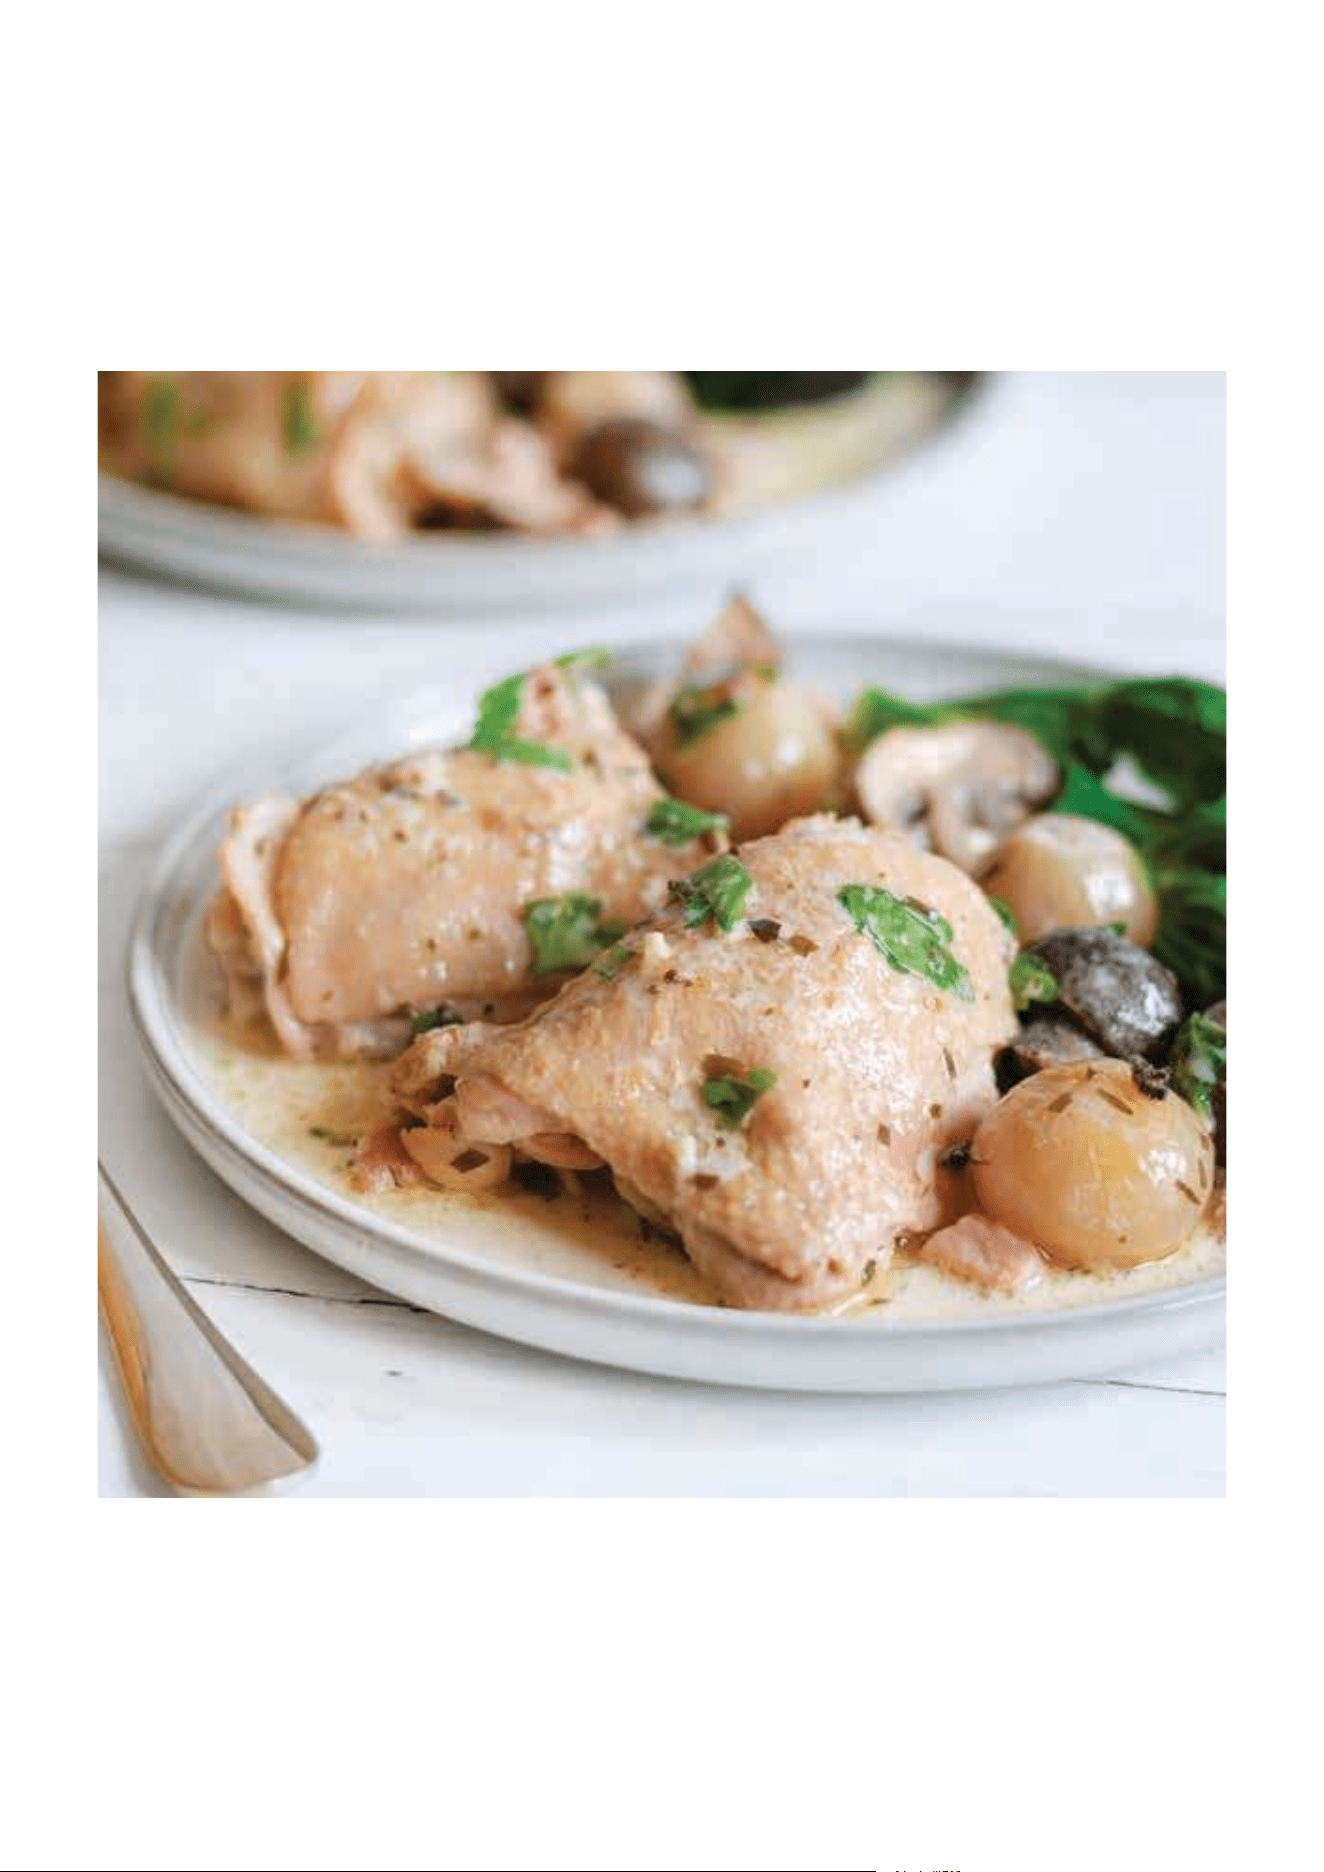
CREAMY CHICKEN CASSEROLE
PREP: 15 MINUTES | COOK: 2 HOURS | MAKES: 4-5 SERVINGS
DIRECTIONS
1 Turn dial to SEAR/SAUTÉ, set temperature to HI
and press START/STOP to begin preheating. Allow
the unit to preheat for 5 minutes.
2 While unit is preheating, season the chicken with
salt and pepper on both sides.
3 When preheating is complete, place the pancetta
and shallots in the pot. Cook uncovered, stirring
occasionally until browned, about 5 minutes.
4 After 5 minutes, use a spoon to remove the
pancetta and shallots from the pot and set aside.
5 Place the chicken in the pot, skin-side down and
cook until browned on all sides, about 10 minutes.
Add mushrooms, garlic, wine, stock, tarragon, salt
and pepper, pancetta and shallots to the pot. Stir to
combine. Stir to combine, then cover with the lid.
6 Turn dial to BRAISE, set temperature to HI, set time
to 1 hour 45 mins and press START/STOP to begin
cooking.
7 In a small bowl, add cornflour and water and mix
until fully combined. When 15 minutes remain,
remove lid and stir cornflour mixture into pot to
thicken casserole. Cover with lid and finish cooking.
8 When cooking is complete, press START/STOP to
end cooking. Remove lid, stir and allow chicken to
cool for 5 minutes. Add crème fraîche and parsley
to pot as stir to combine. Serve hot.
INGREDIENTS
8 x 150g bone-in, skin-on chicken thighs
Salt and pepper, to taste
130g smoked pancetta cubes
150g shallots, peeled, cut in half (if large)
125g chestnut mushrooms, cleaned, halved
2 garlic cloves, peeled, crushed
200ml white wine
200ml chicken stock
1 teaspoon dried tarragon
2 teaspoons cornflour
1-2 tablespoons cold water
3-4 tablespoons crème fraîche
2 tablespoons fresh flat leaf parsley, chopped
BEGINNER RECIPE
TIP In a hurry? Skip sautéing and browning in steps
3-5 and add all ingredients to the pot. Longer
cook time may be required for BRAISE. Eating
at dierent times? Use KEEP WARM to keep
casserole hot at the right temperature.
11
Questions? ninjakitchen.co.uk
12
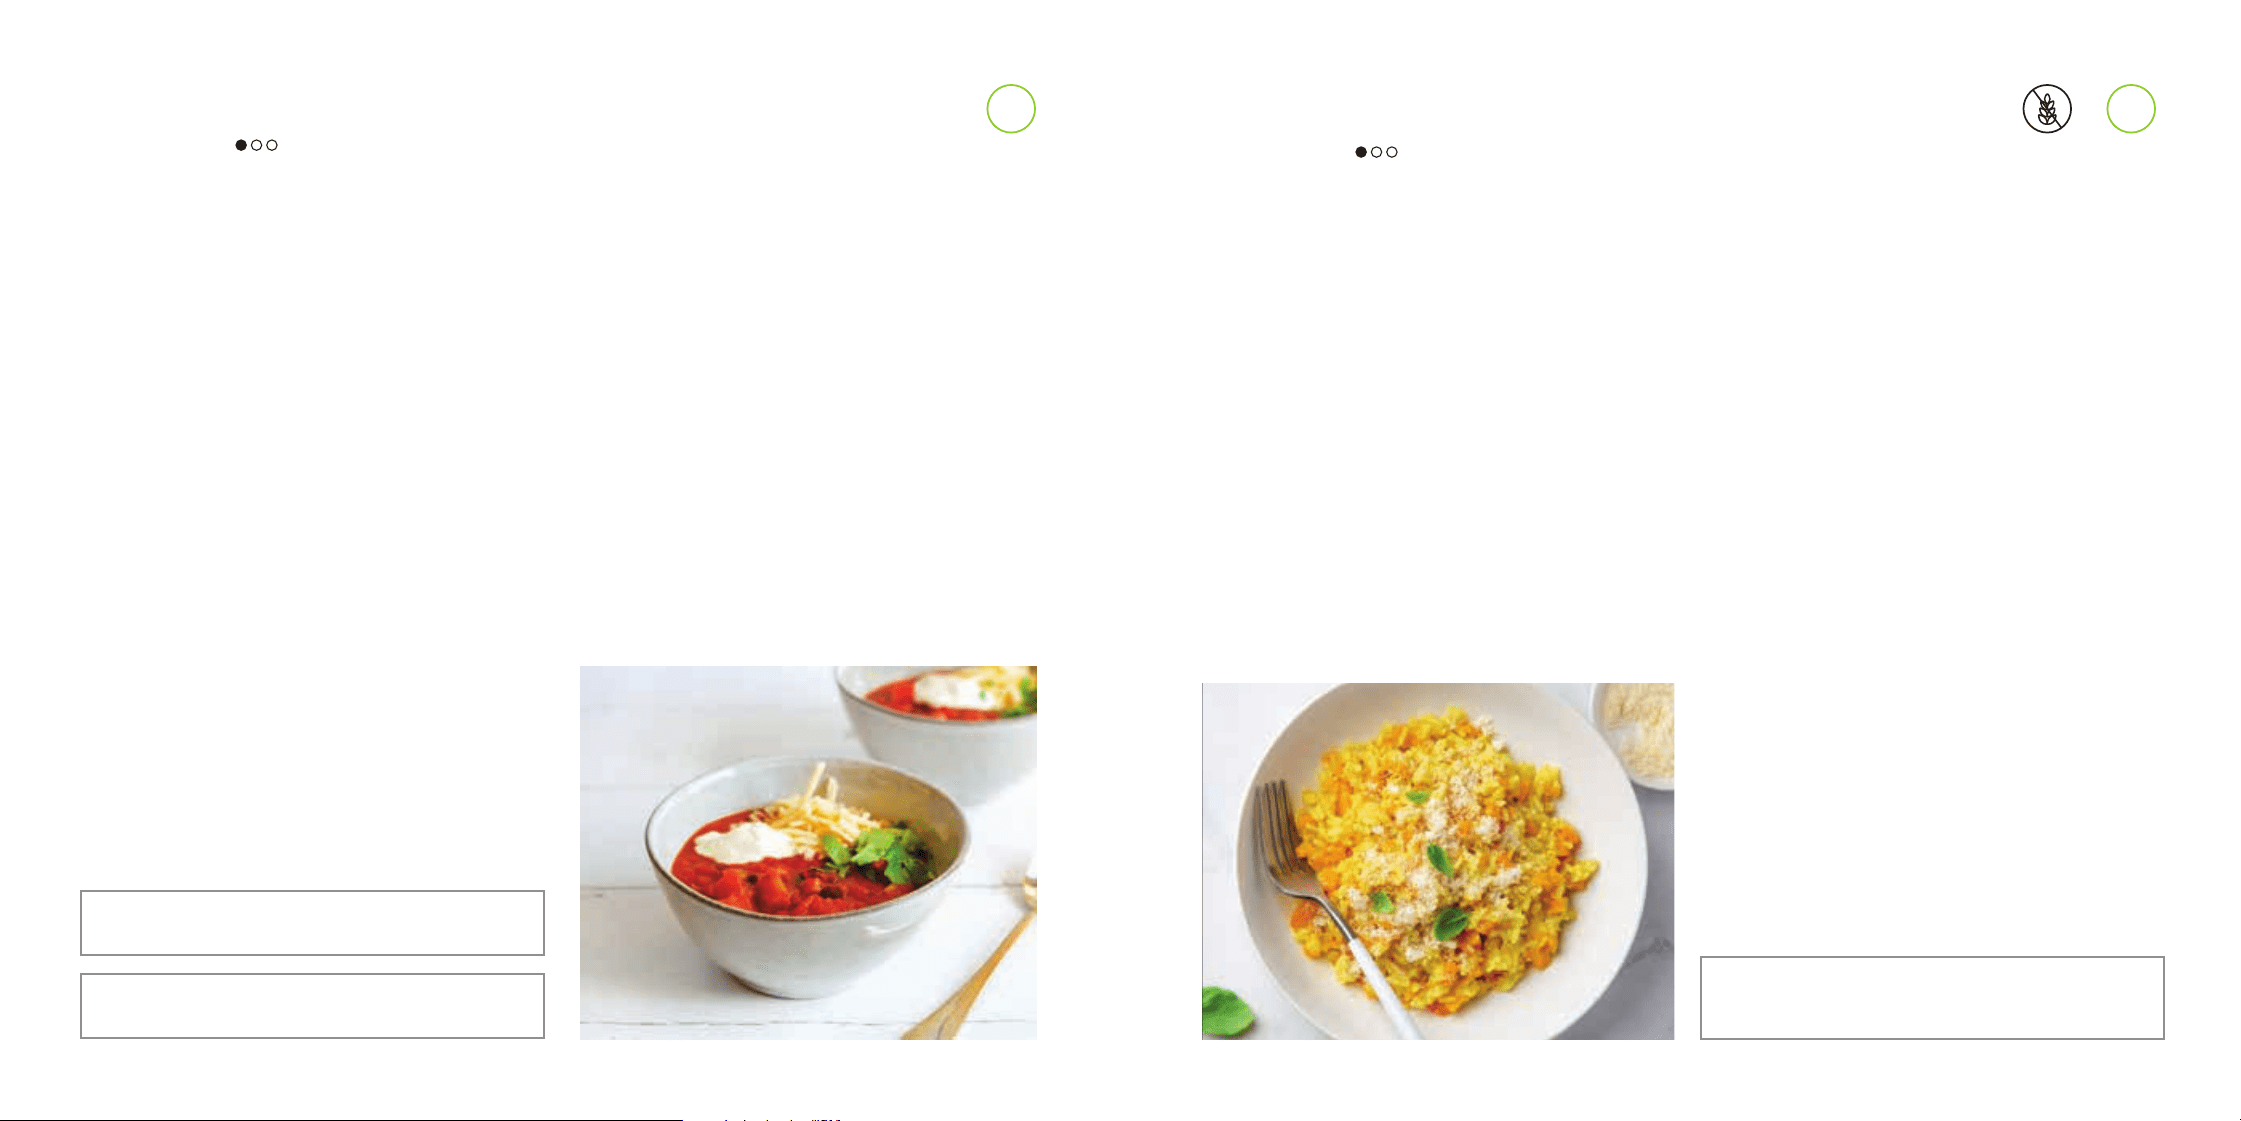
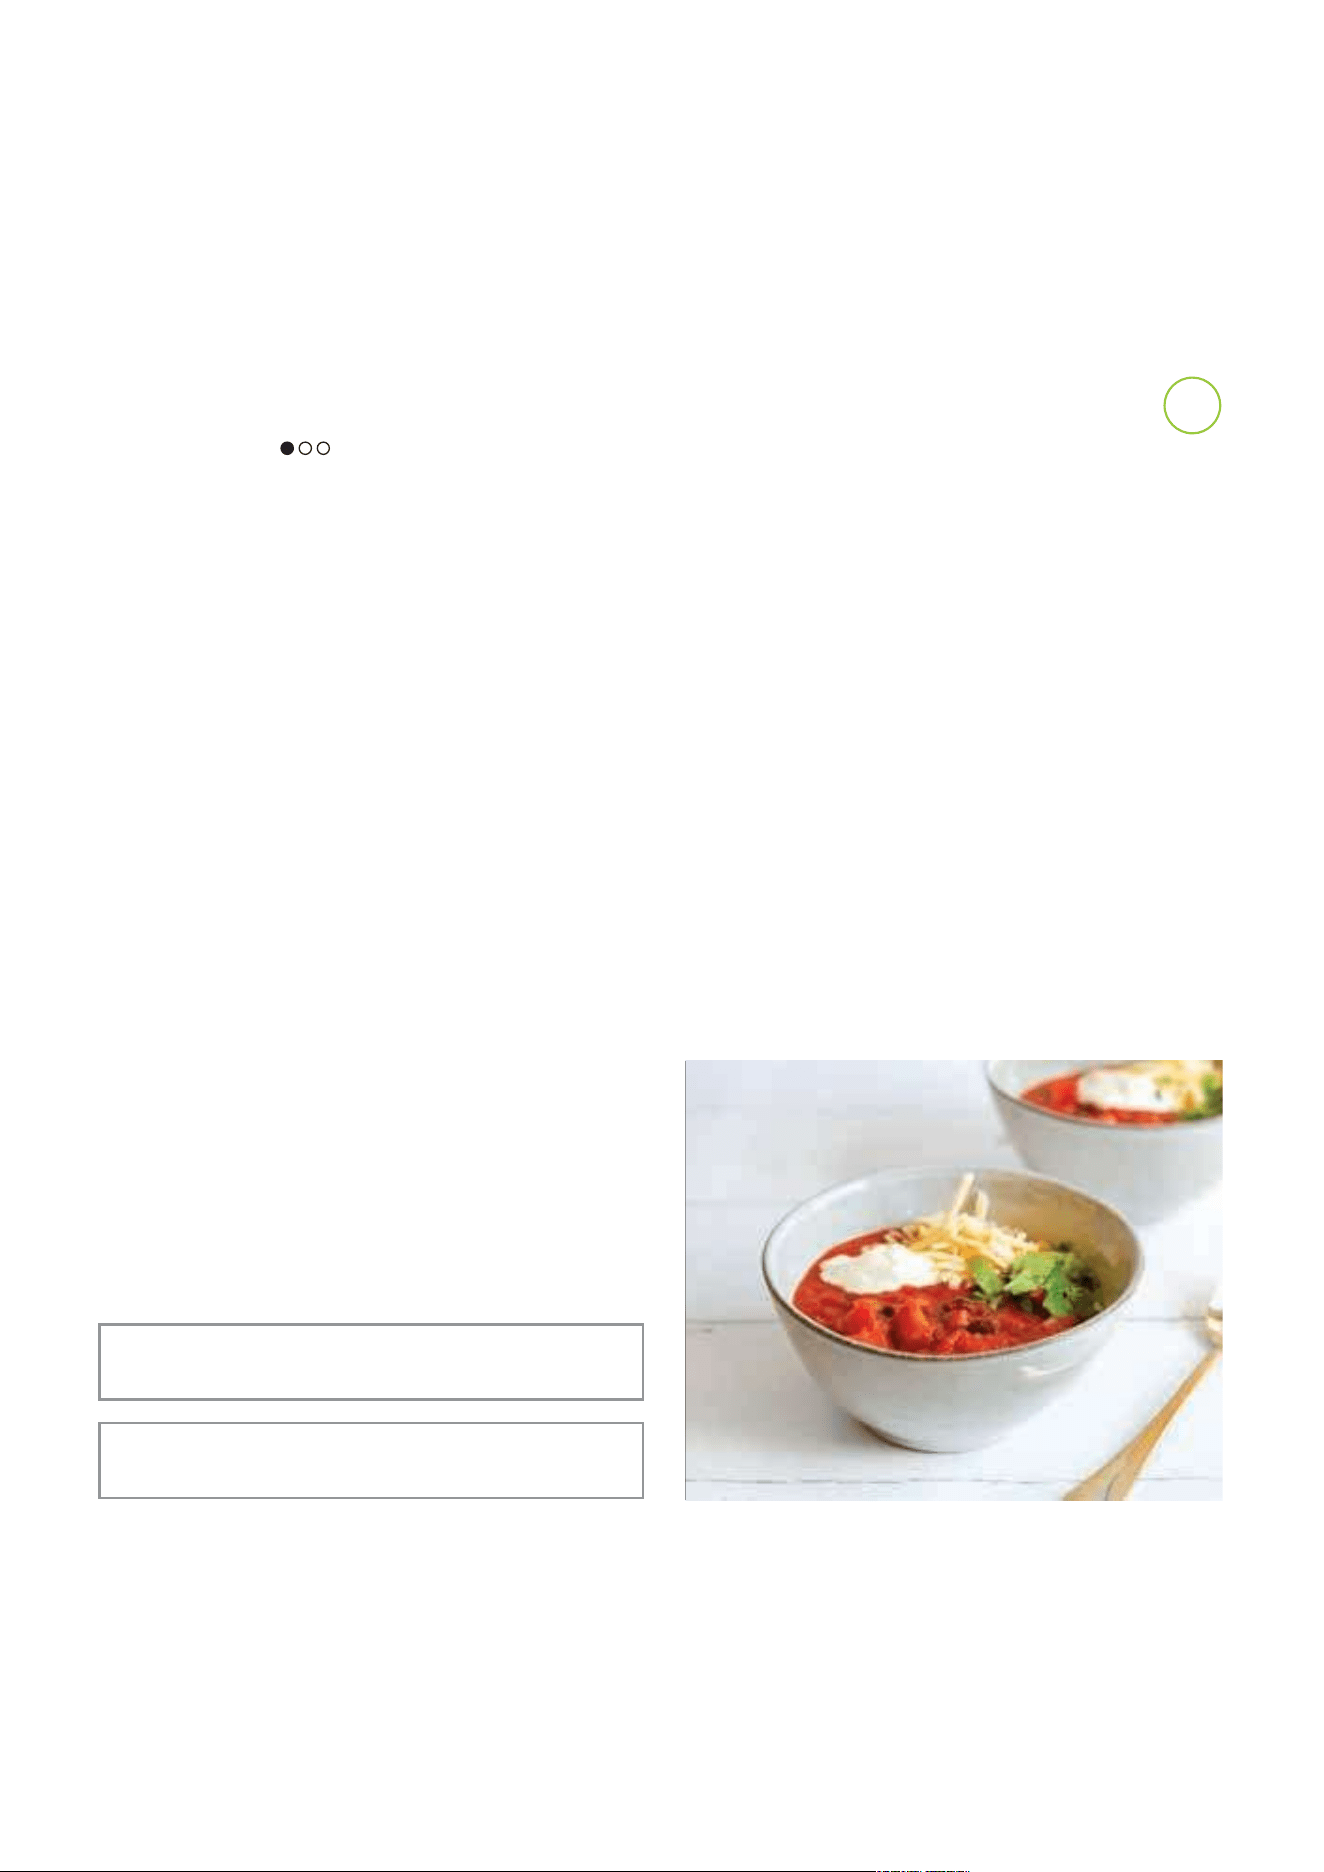
THREE BEAN CHILLI
PREP: 15 MINUTES | COOK: 6 HOURS | MAKES: 12 SERVINGS
DIRECTIONS
1 Place all ingredients in the pot. Stir to combine,
then cover with the lid.
2 Select SLOW COOK, set temperature to HI, set
time to 6 hours and press START/STOP to begin
cooking.
3 When cooking is complete, press START/STOP to
end cooking. Remove the lid and stir to combine
ingredients. Serve chilli immediately with desired
toppings.
INGREDIENTS
1 onion, peeled, diced
2 carrots, peeled, chopped
3 celery stalks, chopped
3 cloves garlic, peeled, chopped
1 can (400g) chickpeas, drained and rinsed
1 can (400g) black beans, drained and rinsed
1 can (400g) kidney beans, drained and rinsed
1 packet (25g) taco seasoning
2 tablespoons adobo chilli paste
800g tomato passata
2 cans (800g) chopped tomatoes
1L water
Salt and pepper, to taste
TOPPINGS (OPTIONAL)
Sour cream
Grated Cheddar cheese
Fresh chopped coriander
TIP Swap out any of the canned beans in step 1 for
other varieties, like cannellini, butter or pinto.
TIP Use KEEP WARM to keep chilli hot at the right
temperature.
BEGINNER RECIPE
V
E
G
E
T
A
R
I
A
N
V
13
Questions? ninjakitchen.co.uk
G
L
U
T
E
N
-
F
R
E
E
V
E
G
E
T
A
R
I
A
N
V
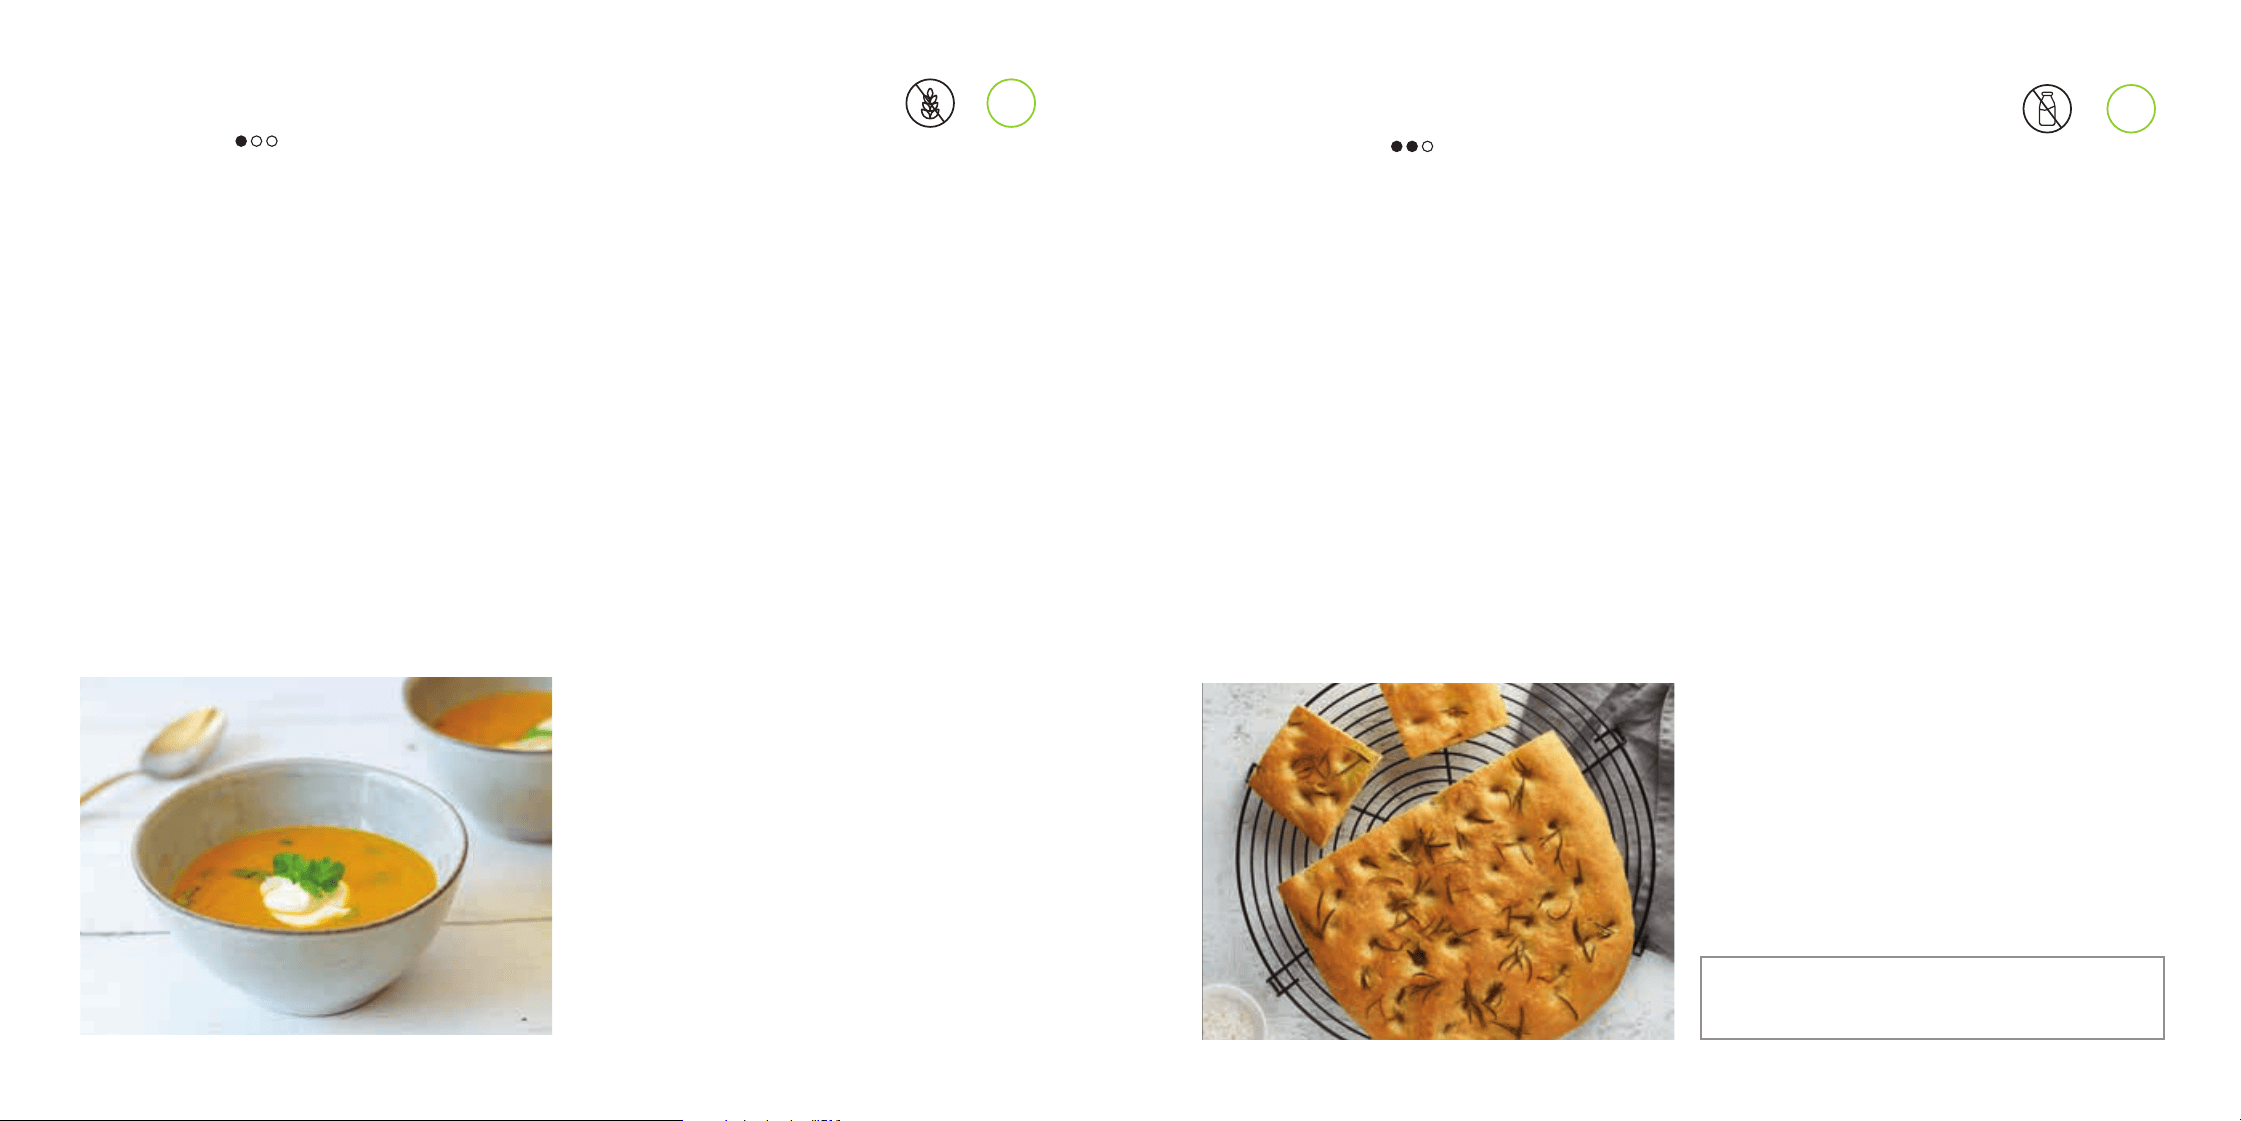
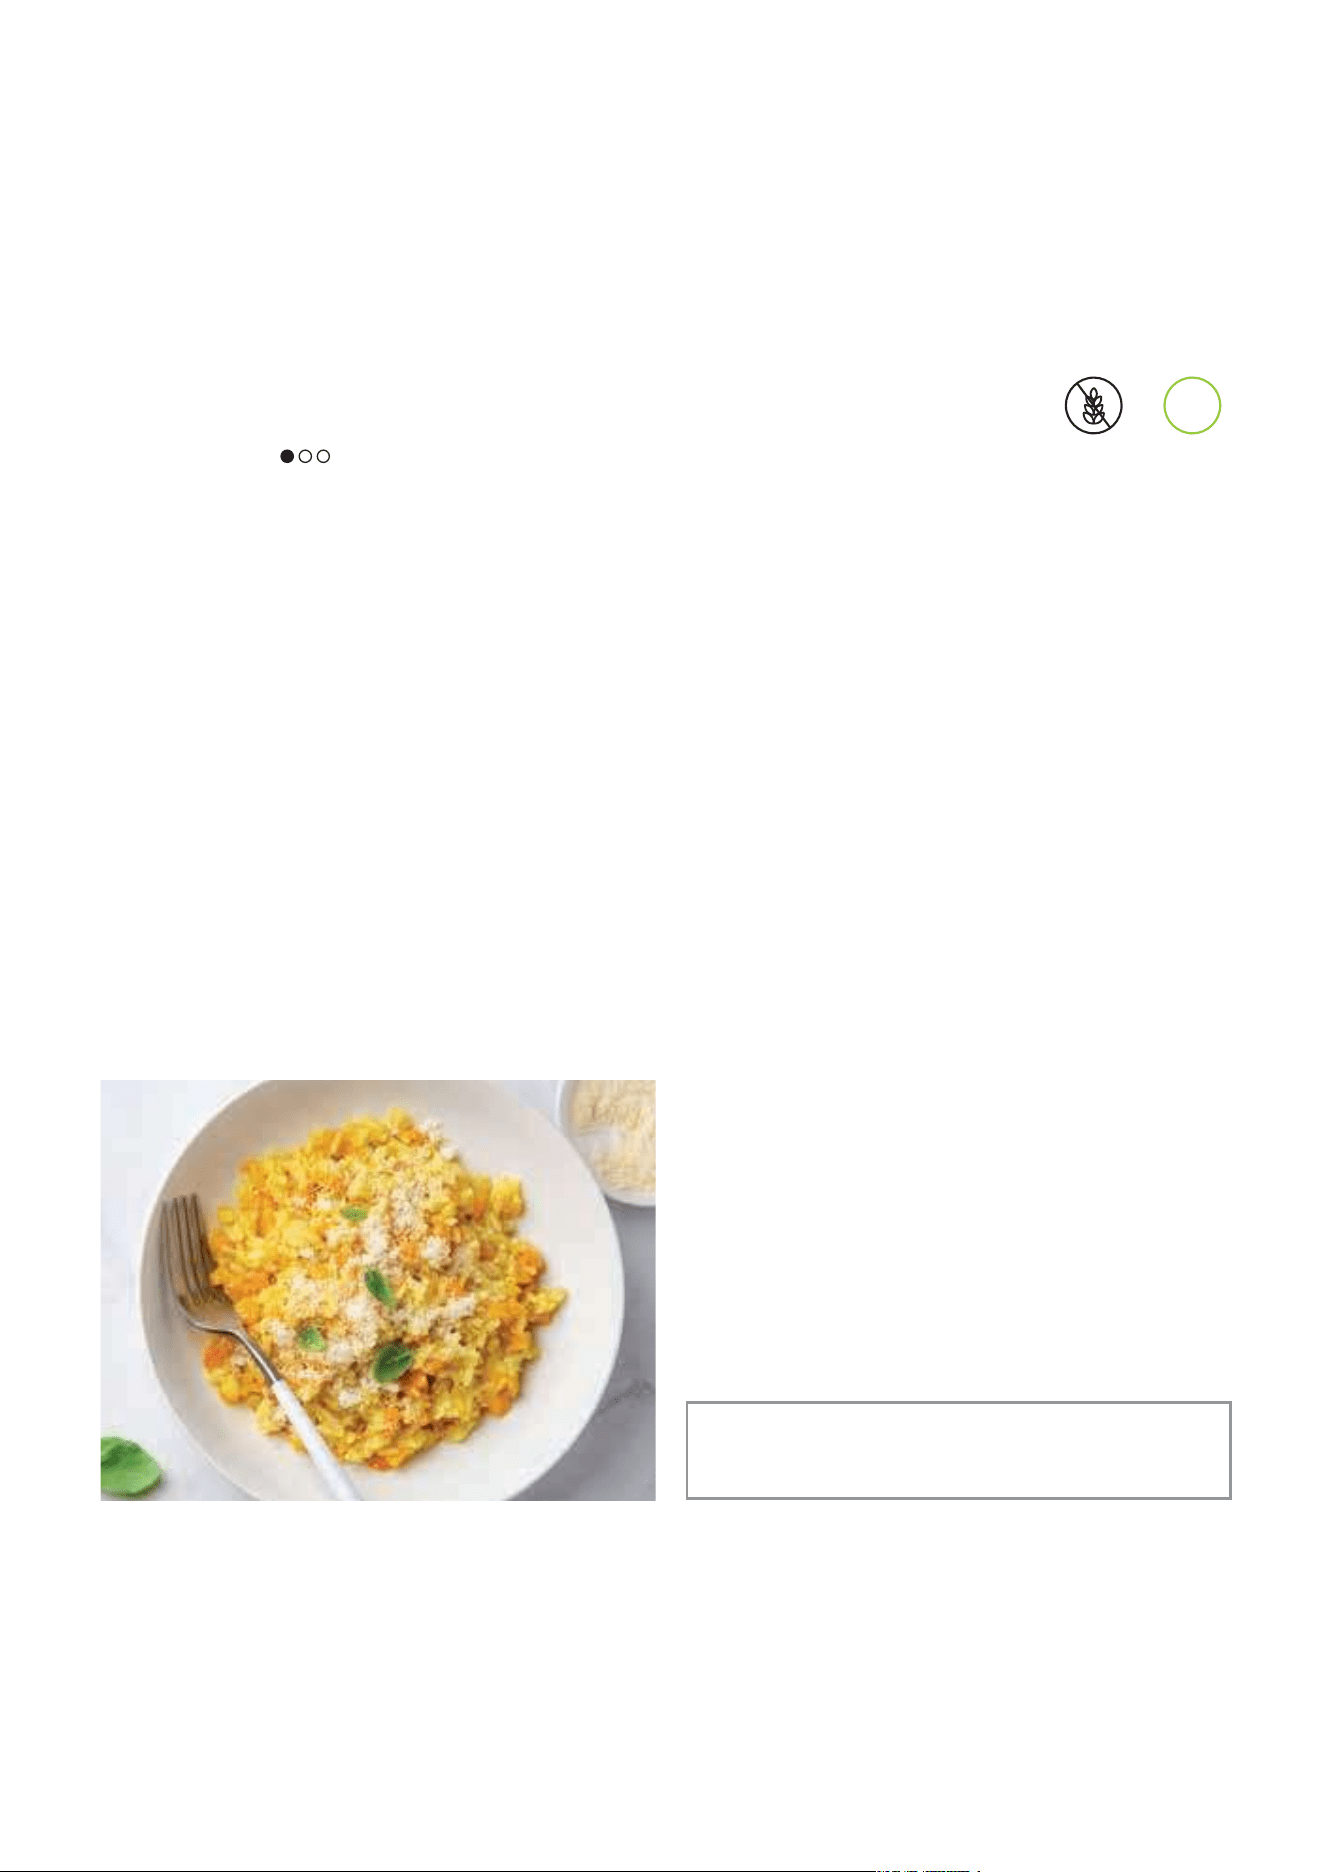
BUTTERNUT SQUASH RISOTTO
PREP: 10 MINUTES | COOK: 40 MINUTES | MAKES: 4 SERVINGS
DIRECTIONS
1 Turn dial to SEAR/SAUTÉ set temperature to
HI and press START/STOP to begin preheating.
Allow the unit to preheat for 5 minutes.
2 When preheating is complete, add the oil
and onion to the pot and cook uncovered, stirring
occasionally, about 5 minutes.
3 Add the stock, rice, squash and sage to the pot.
Stir the ingredients until well combined, then
cover with the lid.
4 Cook the rice mixture for 35 minutes, stirring
occasionally.
5 When cooking is complete, press START/STOP
to end cooking. Remove the lid, then add the
Parmesan cheese and mix to combine. Allow the
risotto to sit, uncovered, for 5 minutes. Serve hot.
INGREDIENTS
1 tablespoon olive oil
1 small onion, peeled, chopped
2L vegetable stock
200g arborio rice
225g frozen butternut squash chunks
1
/
4
teaspoon dried sage leaves
100g Parmesan cheese or vegetarian equivalent
TIP Meat lovers: use chicken stock instead of
vegetable stock and sauté 200g chopped bacon
before cooking onion in step 2.
BEGINNER RECIPE
14
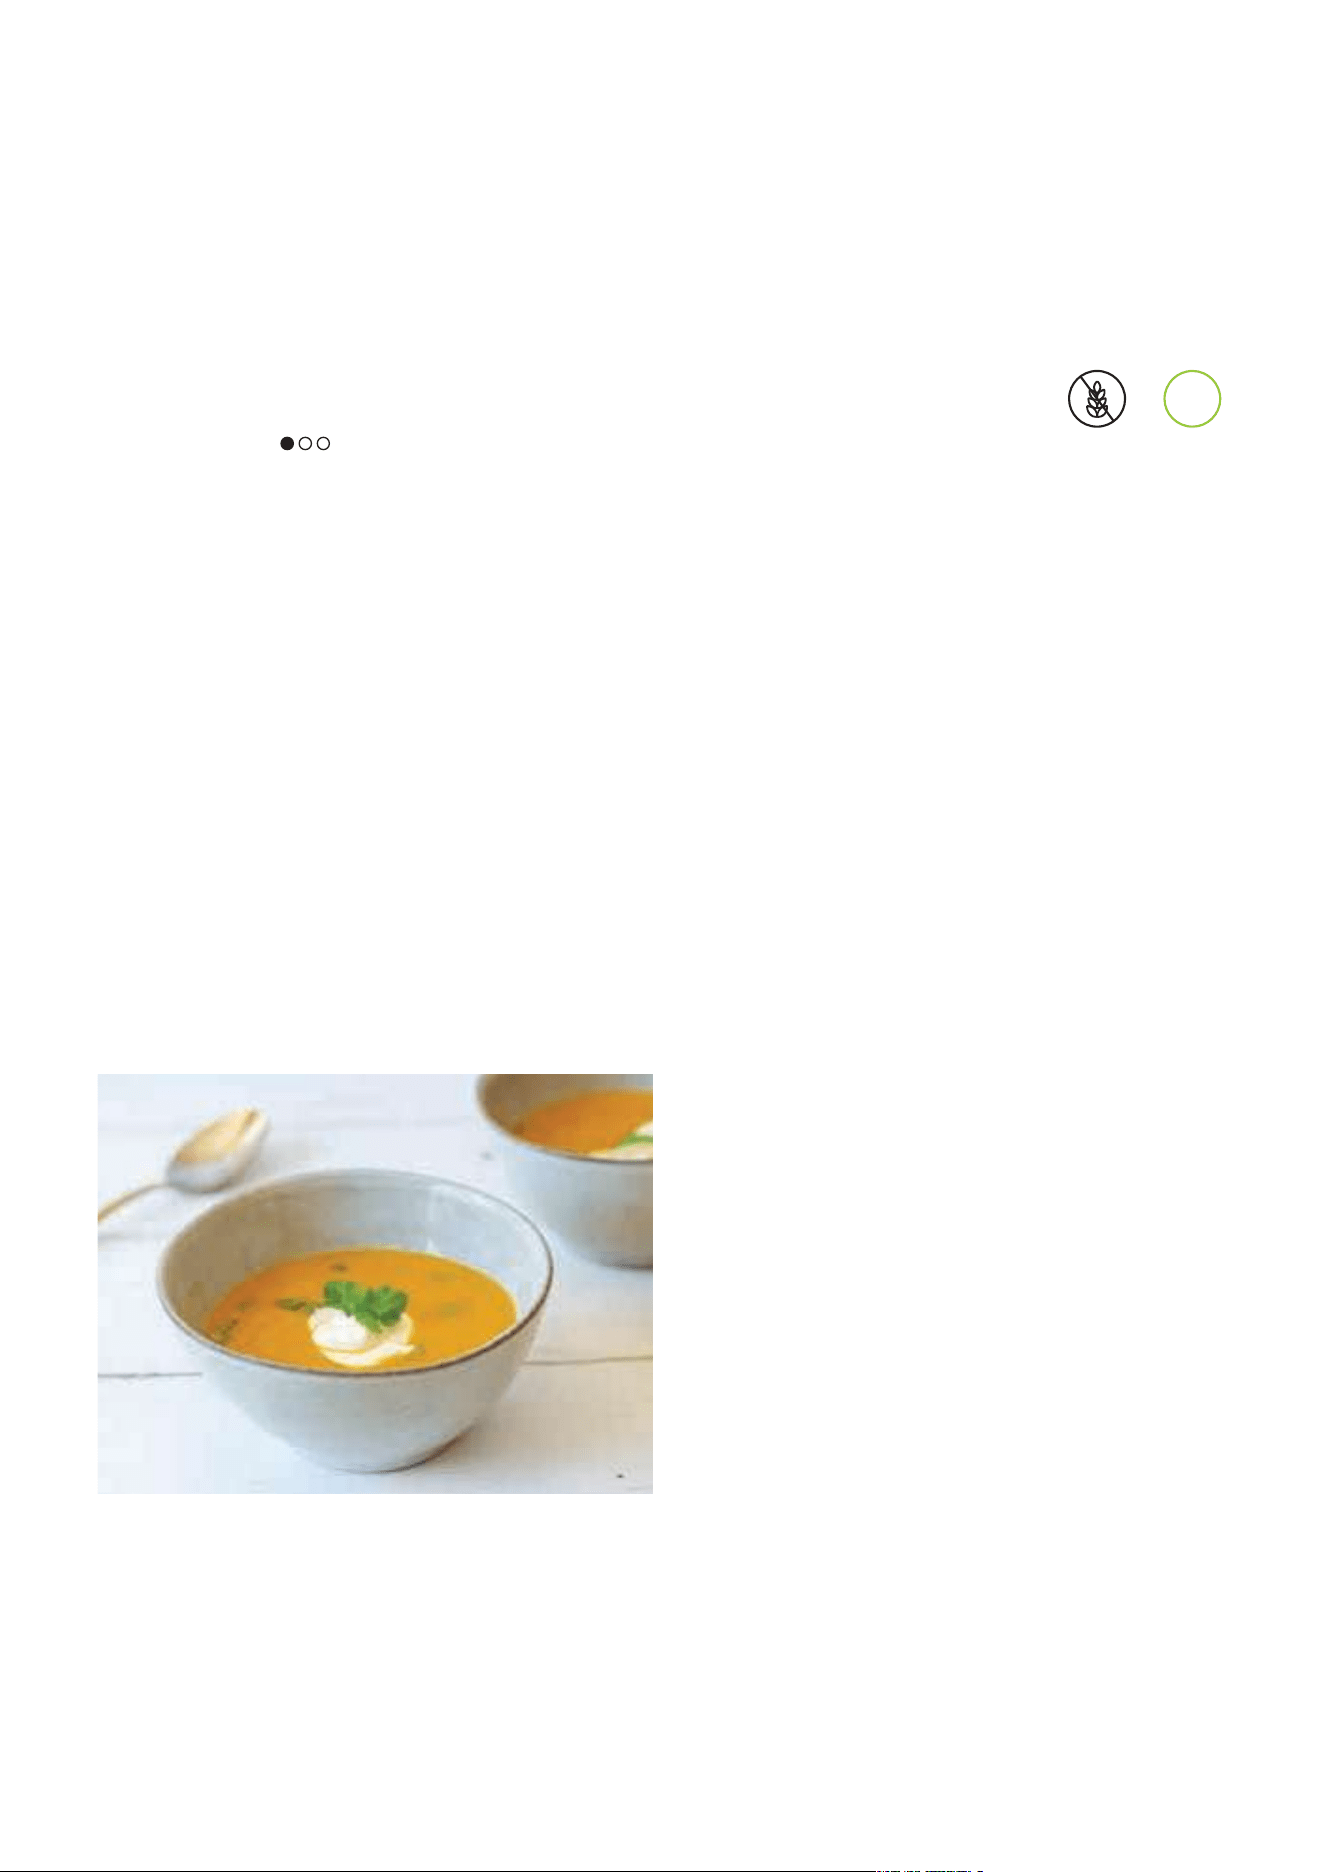
CARROT & CORIANDER SOUP
PREP: 15 MINUTES | COOK: 25 MINUTES | MAKES: 6 SERVING
DIRECTIONS
1 Remove the lid from the pot. Turn dial to SEAR/
SAUTÉ, set temperature to HI and press START/
STOP to begin preheating. Allow the unit to
preheat for 5 minutes.
2 Add the oil and onion to the pot. Cook covered
for 5 minutes, stirring occasionally.
3 Remove lid. Add half of the fresh coriander and
all remaining ingredients except crème fraîche to
the pot. Stir to combine, then cover with the lid.
Cook until the carrots and potatoes are tender,
about 10 to 15 minutes.
4 When cooking is complete, press START/STOP to
end cooking. Remove lid and allow soup to cool
slightly. Transfer cooled soup to a blender and
purée until smooth. Add puréed soup back to pot.
Select Select KEEP WARM until ready to serve.
5 Stir in remaining coriander, reserving a few leaves
for garnish. Serve in soup bowls garnished with
crème fraîche and coriander.
INGREDIENTS
2 tablespoons olive oil
1 large onion, peeled, finely sliced
15g bunch fresh coriander, chopped, divided
2 teaspoons ground coriander
1 teaspoon ground cumin
1 garlic clove peeled, crushed
250g potato peeled, diced
750g carrots, peeled, sliced
1.4L vegetable stock
Salt and pepper, to taste
6 tablespoons crème fraîche
BEGINNER RECIPE
G
L
U
T
E
N
-
F
R
E
E
V
E
G
E
T
A
R
I
A
N
V
15
Questions? ninjakitchen.co.uk
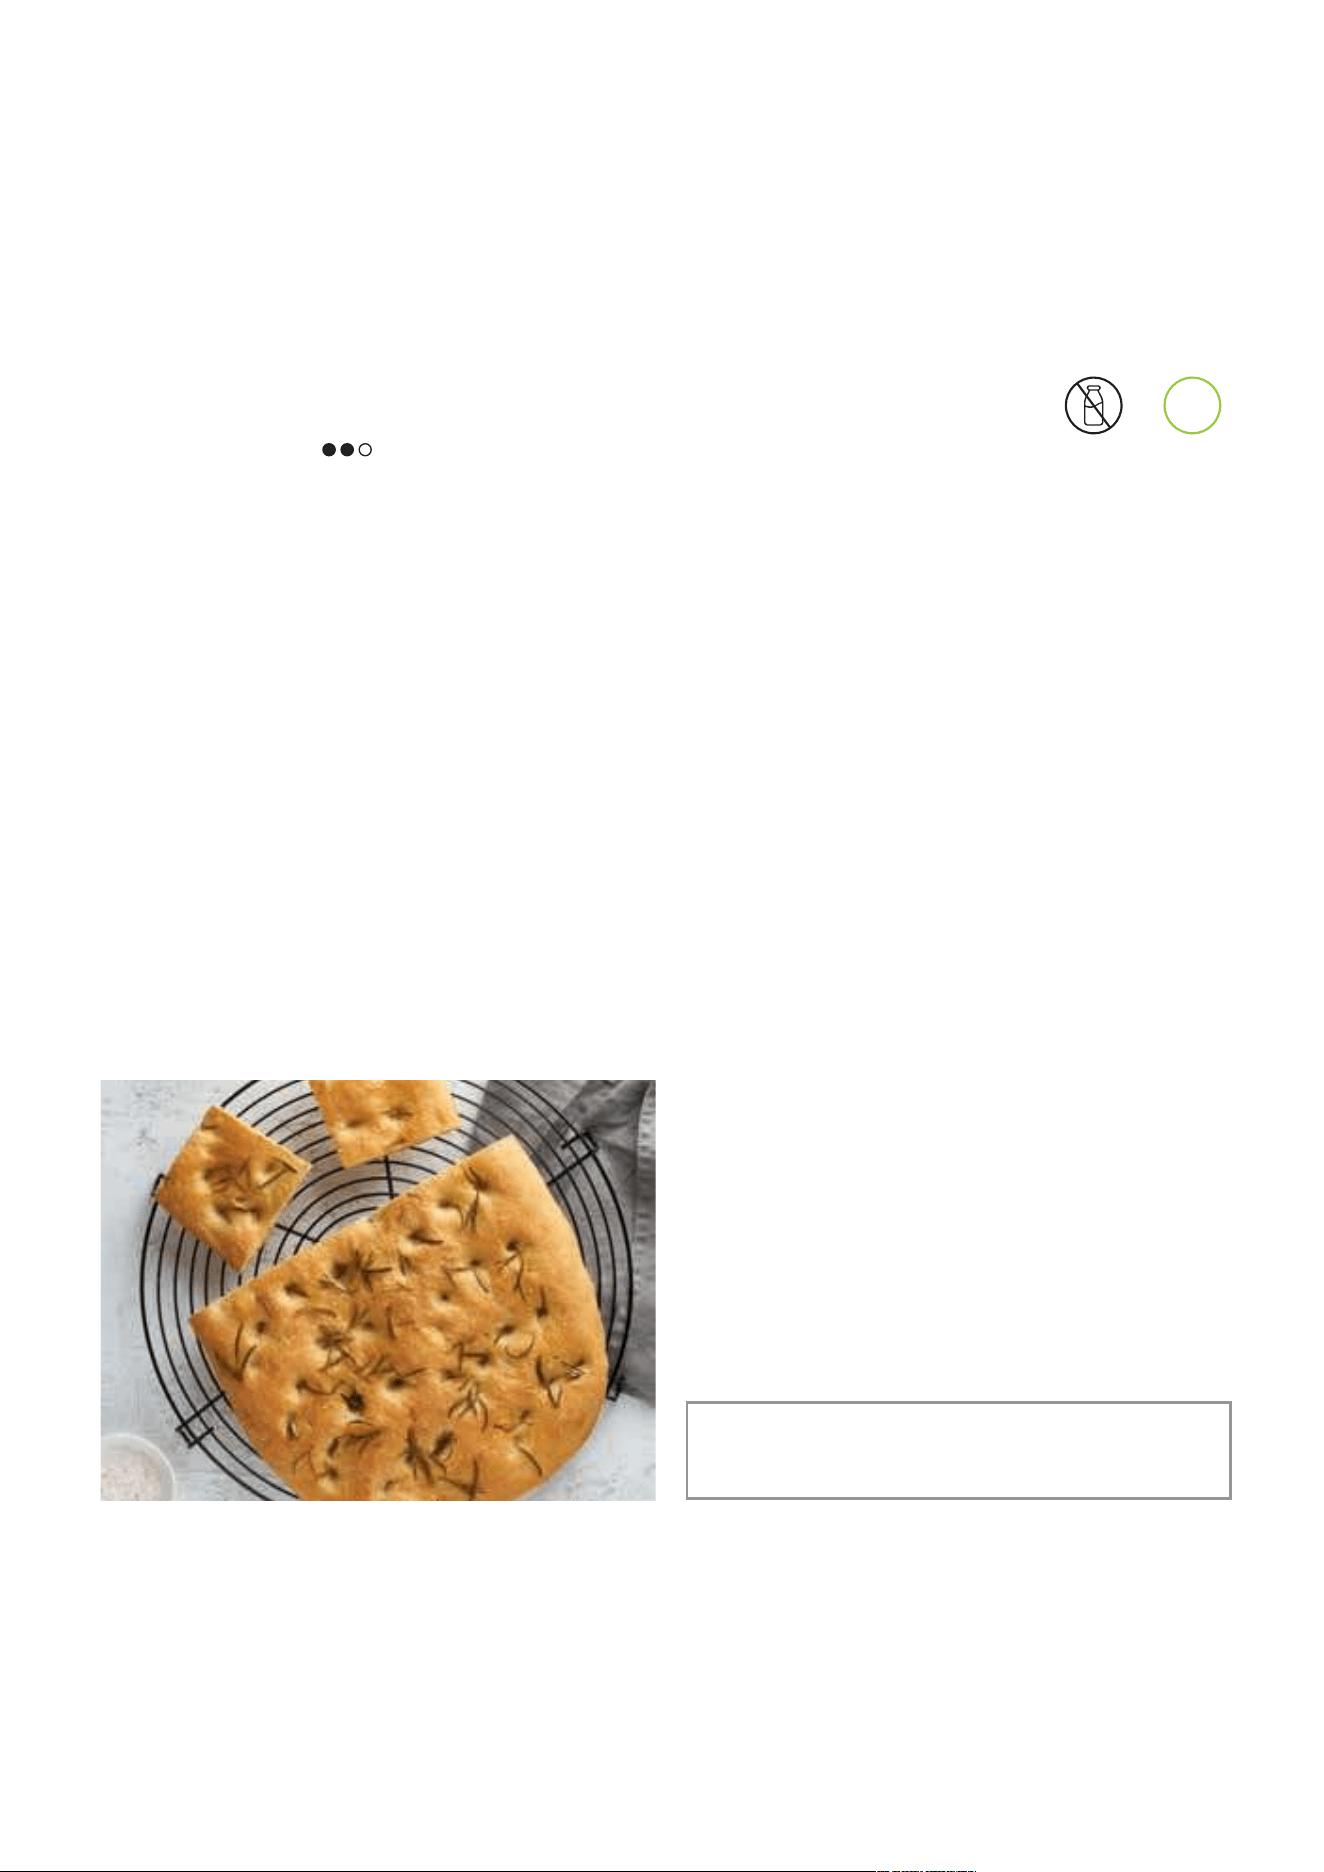
ROSEMARY & SEA SALT FOCACCIA
PREP: 10 MINUTES | PROVE: 1 HOUR | COOK: 18 MINUTES | MAKES: 4–6 SERVINGS
DIRECTIONS
1 Roll the bread dough into a ball, then flatten the
ball into a 10cm disc. Lightly spray the top of the
dough and the inside of the pot with cooking
spray or oil.
2 Place the dough in the pot, then cover with
the lid.
3 Turn dial to PROVE, set time to 60 minutes and
set temperature to 35°C. Press START/STOP to
begin proving.
4 While the dough is proving, preheat oven to
210°C/fan 190°C.
5 When proving is complete, remove the lid. Use
fingers to spread dough evenly across surface
area of pot. Gently press fingers into dough
multiple times to create dimples in the dough.
6 Sprinkle the oil, rosemary, salt and pepper evenly
over the dough.
7 Place the entire pot (without the lid) in the
oven and bake for 18 minutes, until focaccia is
lightly golden.
8 When cooking is complete, remove the pot
from the oven and place on a heat resistant
surface. Serve hot or cooled to room temperature
with additional olive oil and balsamic vinegar
as desired.
INGREDIENTS
450g prepared bread dough
Cooking spray or oil
2 tablespoons extra virgin olive oil,
plus more for serving
2 sprigs fresh rosemary, chopped
Salt and pepper, to taste
Balsamic vinegar, to serve
TIP For more variety, top the focaccia dough in step 6
with sliced onions, chopped sun-dried tomatoes,
and/or green olives.
INTERMEDIATE RECIPE
D
A
I
R
Y
-
F
R
E
E
V
E
G
E
T
A
R
I
A
N
V
16
V
E
G
E
T
A
R
I
A
N
V
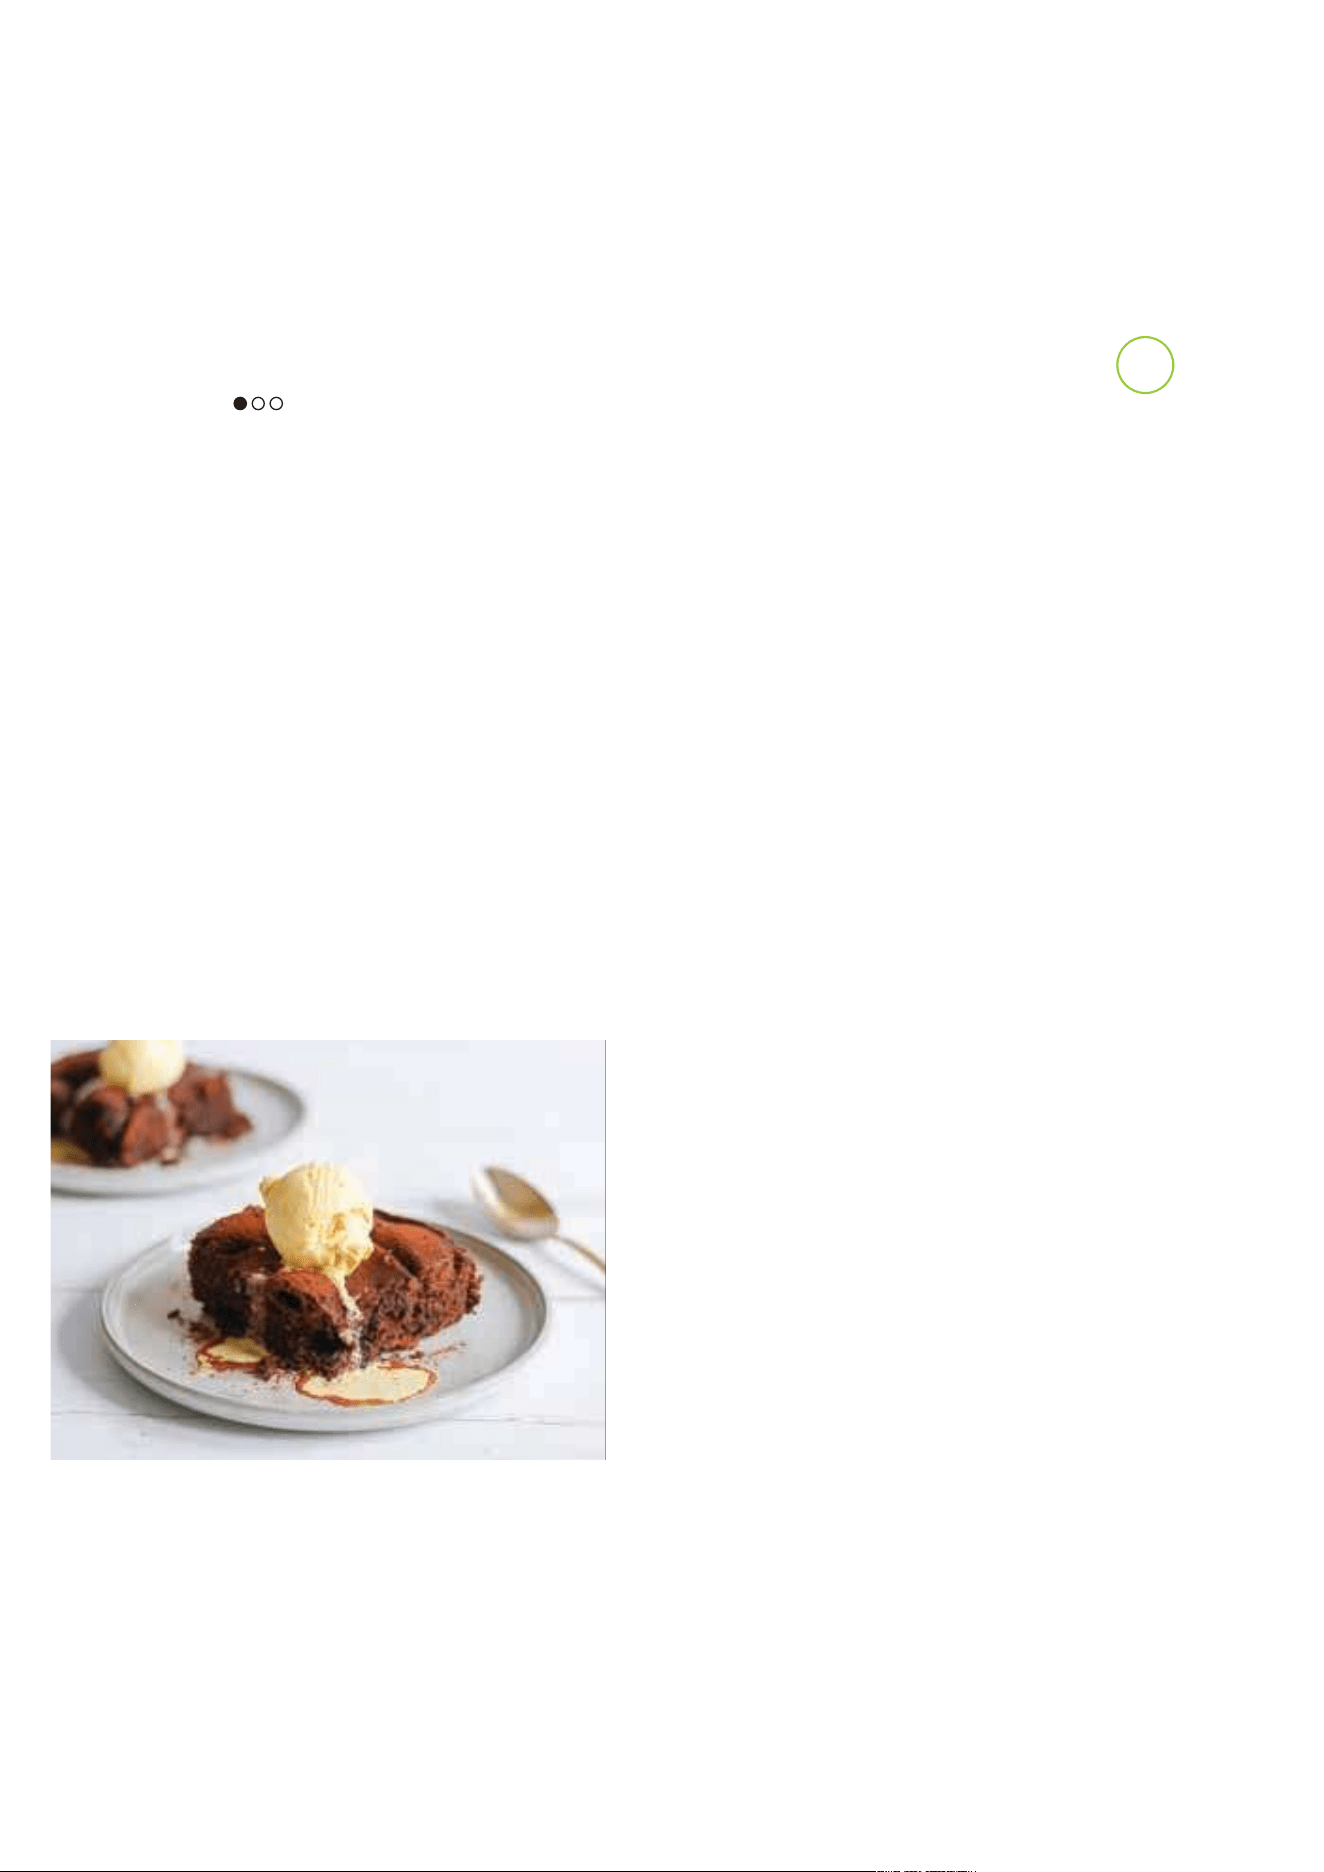
CHOCOLATE SPONGE PUDDING
PREP: 15 MINUTES | COOK: 20 MINUTES | MAKES: 4 SERVINGS
DIRECTIONS
1 Grease inside of pot with butter.
2 In a large bowl, add butter, 225g brown sugar,
eggs, vanilla extract and milk. Sift in flour, 40g
cocoa and baking powder together.
3 Beat all ingredients together for 2 to 3 minutes by
hand or 1 to 2 minutes if using a hand mixer on a
medium speed.
4 Spoon mixture into pot and level mixture flat with
a spatula.
5 In a small bowl, sift 35g cocoa powder, add
75g sugar and boiling water. Stir to mix. Spoon
chocolate mixture over the top of the pudding
mixture. Cover with lid.
6 Turn dial to BAKE, set temperature to 180°C, set
time to 20 minutes and press START/STOP to
begin cooking.
7 Cooking is complete when a cocktail stick
inserted in middle comes out clean, press START/
STOP to end cooking. Remove lid. Dust sponge
pudding with extra cocoa powder and serve hot
with whipped cream or ice cream.
INGREDIENTS
225g butter, softened, plus extra for greasing
300g soft light brown sugar, divided
4 large eggs
1 teaspoon vanilla extract
75ml milk
175g self-raising flour
75g cocoa powder, divided, plus extra for dusting
2 teaspoon baking powder
250ml boiling water
Whipped cream or ice cream, to serve
BEGINNER RECIPE

17
Questions? ninjakitchen.co.uk
VEGETABLE
SIZE/PREPARATION
WATER SEASONING IDEAS STEAMING TIME
Artichokes Whole 1L Olive oil, lemon zest 25–40 minutes
Asparagus Whole spears 250ml Olive oil 7–13 minutes
Green beans Whole 250ml Garlic, minced 6–10 minutes
Beetroot Whole, unpeeled 1L Garlic, minced 35–50 minutes
Broccoli Long stem, trimmed 250ml Olive oil 1–5 minutes
Broccoli Florets 250ml Olive oil 5–7 minutes
Brussels sprouts Whole, trimmed 250ml Thyme 8–15 minutes
Butternut squash Peeled, 1.5cm cubes 250ml Honey 7–10 minutes
Cabbage Cut in 3cm wedges 250ml Lemon juice 6–10 minutes
Carrots 0.5cm slices 250ml Honey 7–10 minutes
Chantenay carrots Whole 250ml Honey and orange 7–10 minutes
Cauliflower Florets 250ml Cumin 5–10 minutes
Corn on the cob Whole, husks removed 500ml Garlic butter 15–20 minutes
Courgette 2.5cm slices 250ml Olive oil and italian seasoning 5–8 minutes
Kale Trimmed 250ml Olive oil and garlic 5–8 minutes
Okra Whole, trimmed 250ml Sea salt 6–8 minutes
Parsnips Peeled, 1.5cm slices 250ml Italian seasoning 7–10 minutes
Green peas Fresh or frozen shelled 250ml Mint and lemon juice 2–4 minutes
Sugar snap peas Whole pods, trimmed 250ml Mint and lemon juice 5–6 minutes
Potatoes 1.5cm slices 250ml Parsley or dill 8–12 minutes
New potatoes Whole 1L Parsley or mint 15–20 minutes
Sweet potatoes 1.5cm chunks 250ml Olive oil and garlic 8–12 minutes
Shallots Whole 250ml Lemon juice 8–12 minutes
Spinach Whole leaves 250ml Olive oil and garlic 3–5 minutes
Swiss Chard Coarsely chopped 250ml Olive oil and garlic 3–5 minutes
Turnips 1.5cm slices 250ml Italian seasoning 8–12 minutes
STEAM CHART
USING THE STEAM RACK
Small vegetables can be placed on a sheet of baking parchment to prevent them falling through rack.

MC1001UK_IG_QSG_MP_220804_Mv1
FOODI and NINJA are registered trademarks in the United Kingdom of SharkNinja Operating LLC.
POSSIBLE COOKER is an unregistered trademark in the United Kingdom for SharkNinja Operating LLC.
© 2022 SharkNinja Operating LLC.