INSTALLATION FUSE REPLACEMENTLINKING ADDITIONAL
ROPE LIGHTS
WARNING
1. DO NOT MOUNT OR SUPPORT FLEXIBLE LIGHT IN A MANNER THAT CAN
DAMAGE THE OUTER JACKER OR CORD INSULATION.
2. RISK OF FIRE AND ELECTRIC SHOCK. UNCOIL FLEXIBLE LIGHT PRIOR TO
PLUGGING IN. DO NOT USE WITH EXTENSION CORD NEAR WATER MAY
ACCUMLATE. FOR USE ONLY ON GFCI PROTECTED CIRCUITS.
3. MATERIAL MAY BECOME BRITTLE WHEN COLD. DO NOT INSTALL WHERE
IT MAY BE STEPPED ON OR SUBJECT TO PHYSICAL DAMAGE.
4. DO NOT INSTALL NEAR FLAMMABLE LIQUIDS.
5. DO NOT INSTALL CLOSER THAN 3 METERS FROM A SWIMMING POOL
SURFACE.
6. ALWAYS UNPLUG THIS PRODUCT BEFORE INSTALLING OR REPLACING
FUSES. USE ONLY 125-VOLT, 3 AMP MAX.
7. DO NOT COVER FLEXIBLE LIGHT AS THE COVERING MAY CAUSE THE
FLEXIBLE LIGHT TO OVERHEAT AND MELT OR IGNITE.
8. TO PREVENT OVERHEATING, DO NOT ALLOW CONTACT BETWEEN
FLEXIBLE LIGHT CABLES OR PARTS OF THE FLEXIBLE LIGHT CABLE.
MAINTAIN AT LEASE 10MM (0.39IN) SPACING BETWEEN LIGHT CABLE OR
LIGHT CABLE PARTS.
9. NOT SUITABLE FOR FIELD CUTTING OR SPLICING.
10. DO NOT OVERLOAD. DO NOT CONNECT TOGETHER MORE THAN 150
TOTAL FEET.
THANK YOU FOR YOUR PURCHASE!
Like our product?
Leave a review on your favorite
retailer website or amazon.com
Having problems?
Let us know how we can help.
Call 1-800-654-8483 between
7AM-8PM, M-F, Central Time.
For deals, to register your
purchase and to tell us how
we’re doing, simply scan the
code or visit
byjasco.com/deals
Read instructions or watch
easy-to-follow video.
Discover more
innovative lighting at
byjasco.com/lighting
Instructions
made easy
Scan code or visit
byjasco.com/54503i
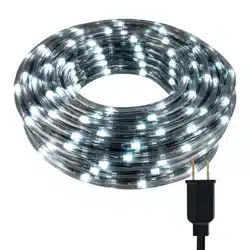
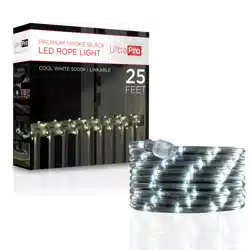
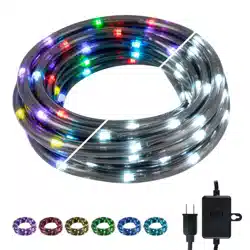
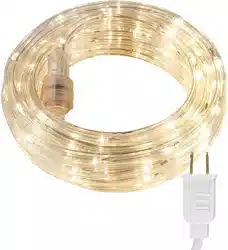
User Manual
LED Rope Light
Congratulations on your new UltraPro Escape
LED Rope Light! Please read this user manual
carefully before using the product. Important
features and operating procedures are
included in this guide. Please keep the manual
in a safe place for future reference.
IMPORTANT: Before installation, please read all the
warning statements included at the bottom of these
instructions. Save these instructions for later use.
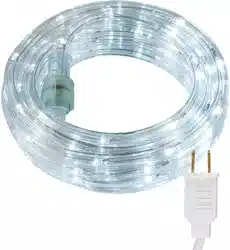
INCLUDED HARDWARE
TOOLS REQUIRED
MOUNTING THE ROPE LIGHT
A - LED rope light with
power cord x 1
B - Mounting clip x 15
Phillips screwdriver
Power drill (optional)
C - Mounting screw x 15
Before installing, make sure that the surface can support the rope
light and that the power cord will be in range of an outlet.
1. Mark the location for each clip (B) and drill pilot holes
using a 1/16in. drill bit.
2. Place the mounting clips over the pilot holes and use a
screwdriver to install and tighten each screw (C).
3. Carefully ax the rope light (A) to each installed clip.
4. Insert the power plug into outlet.
This product employs overload protection (fuse). A blown fuse
indicates an overload or short-circuit situation. If the fuse blows,
unplug the product from the outlet. Also unplug any additional
strings or products that may be attached to the product. Replace
the fuse as per the user servicing instructions (follow product
marking for proper fuse rating) and check the product. If the
replacement fuse blows, a short-circuit may be present and the
product should be discarded.
1. Grasp plug (1) and remove from the receptacle or other outlet
device. Do not unplug by pulling on cord. Always unplug this
product before installing or replacing fuses.
2. Slide open the fuse access cover (2) on top of the attachment
plug towards blades (3).
3. Remove fuse (4) carefully. Push the fuse from the other side.
4. Risk of fire. Replace fuse only with 3 Amp, 125 Volt fuse
(provided with product).
5. Close fuse cover (2). Close the fuse access cover on top of
attachment plug.
6. Risk of fire. Do not replace attachment plug as it contains a
safety device (fuse) that should not be removed.
Discard product if the attachment plug is damaged.
IMPORTANT: Disconnect the rope light from power before
linking any additional strands. You can link up to three
strands together in a sequence (maximum 150 ft.).
1. Unscrew and remove the end plug (A) to expose the
female connector (B).
2. Make sure the ring gasket (C) is in place on the female
connector.
3. Plug male connector (D) from next segment into
the female connector. Screw compression nut (E) over
connection until tight.
1
1
2
2
4
3
1
1
2
2
3
3
4
5 6
A B
C
D
E
MADE IN CAMBODIA
Distributed by Jasco Products Company LLC,
10 E. Memorial Rd., Oklahoma City, OK 73114.
This Jasco product comes with a 3-year limited
warranty. Visit www.byjasco.com for warranty details.
Questions? Contact our U.S.-based Consumer Care at
1-800-654-8483 between 7AM—8PM , M-F,
Central Time.
©JASCO 2020 | 54503, 54504, 54505, 54842,
54843, 54586 | 08/06/20 v1
5017247
Intertek
INSTALACIÓN REEMPLAZO DEL FUSIBLEUNIÓN DE CORDONES DE
LUCES ADICIONALES
Manual de Usuario
Cordón de Luces LED
¡Felicitaciones por su nuevo cordón de luces
LED UltraPro Escape! Lea atentamente
este manual del usuario antes de usar el
producto. Las características importantes y los
procedimientos de operación están incluidos
en esta guía. Guarde este manual en un lugar
seguro para consultas futuras.
IMPORTANTE: Antes de la instalación, por favor lea
todas las advertencias incluidas en la parte inferior
de estas instrucciones. Guarde estas instrucciones
para su uso posterior.
PIEZAS DE MONTAJE INCLUIDAS
HERRAMIENTAS NECESARIAS
MONTAJE DEL CORDÓN DE LUCES
A - cordón de luces
con cable eléctrico
de 7,6 m x 1
B - presilla de
montaje x 15
Destornillador
Phillips
Taladro eléctrico:
opcional
C - tornillo de
montaje x 15
Antes de la instalación, asegúrese de que la superficie pueda
sostener el cordón de luces y de que el cable de alimentación esté
dentro del alcance de un tomacorriente.
1. Marque el lugar para cada presilla (B) y perfore orificios piloto
con una broca de 1/16”.
2. Coloque las presillas de montaje sobre los orificios piloto y use
un destornillador para instalar y apretar cada tornillo (C).
3. Cuidadosamente fije el cordón de luces (A) a cada presilla
instalada.
4. Inserte el enchufe en el tomacorriente.
Este producto emplea protección de sobrecargas (fusible). Un
fusible quemado indica una sobrecarga o un cortocircuito. Si
el fusible se quema, desenchufe el producto del tomacorriente.
También desenchufe cualquier cadena de luces o producto
adicional que pueda estar conectado al producto. Reemplace el
fusible según las instrucciones de mantenimiento para el usuario
(siga las marcas del producto para ver la especificación adecuada
del fusible) y revise el producto. Si el fusible de reemplazo
se quema, puede haber un cortocircuito y el producto debe
desecharse.
1. Tome el enchufe (1) y retírelo del receptáculo o de otro
dispositivo tomacorriente. No desenchufe el producto tirando
el cable. Siempre desenchufe este producto antes de instalarlo
` o eemplazar los fusibles.
2. Abra la tapa de acceso del fusible (2), que se encuentra en la
parte superior del enchufe de conexión, deslizándola hacia las
clavijas (3).
3. Retire el fusible (4) cuidadosamente. Empuje el fusible desde el
lado opuesto.
4. Riesgo de incendio. Reemplace el fusible solamente con un
fusible de 3 Amp, 125 voltios (provisto con el producto).
5. Cierre la tapa del fusible (2). Cierre la tapa de acceso del
fusible, que se encuentra en la parte superior del enchufe de
conexión.
6. Riesgo de incendio. No reemplace el enchufe de conexión,
porque contiene un dispositivo de seguridad (fusible) que no se
debe retirar. Deseche el producto si el enchufe de conexión está
dañado.
IMPORTANTE: Desconecte el cordón de luces de la
corriente antes de unir cordones adicionales. Puede unir
hasta tres cordones en una secuencia (máximo 150 ft.).
1. Quite los tornillos y retire el enchufe del extremo (A) para
dejar expuesto el conector hembra (B).
2. Asegúrese de que la junta de anillo (C) esté colocada en
el conector hembra.
3. Enchufe el conector macho (D) del siguiente segmento
en el conector hembra. Atornille la tuerca de compresión
(E) sobre la conexión hasta que quede apretada.
1
1
2
2
4
3
1
1
2
2
3
3
4
5 6
A B
C
D
E
HECHO EN CAMBOYA
Distribuido por Jasco Products Company LLC,
10 E. Memorial Rd., Oklahoma City, OK 73114.
Este producto de Jasco tiene una garantía
limitada de 3años. Visite www.byjasco.com para
conocer los detalles de la garantía.
¿Tiene preguntas? Póngase en contacto con
nuestro servicio de atención al consumidor de
EE.UU. al 1-800-654-8483, de lunes a viernes, de
7a.m. a 8p.m., horario central.
©JASCO 2020 | 54503, 54504, 54505, 54842,
54843, 54586 | 08/06/20 v1
100%
reciclable
Separe
el papel del
plástico
antes
de reciclar
byjasco.com/recycle
papel a base de un 25 %
de residuos postconsumo
ADVERTENCIA
1. NO INSTALE NI APOYE EL CORDÓN DE LUCES FLEXIBLE DE UNA MANERA QUE
PUEDA DAÑAR EL REVESTIMIENTO EXTERIOR O AISLAMIENTO DEL CABLE.
2. RIESGO DE INCENDIO Y DESCARGA ELÉCTRICA. DESENROLLE EL CORDÓN DE LUCES
FLEXIBLE ANTES DE ENCHUFARLO. NO LO USE CON CABLES DE EXTENSIÓN CERCA
DE DONDE PUEDA ACUMULARSE AGUA. PARA USO EXCLUSIVO EN CIRCUITOS
PROTEGIDOS MEDIANTE GFCI
3. EL MATERIAL PUEDE VOLVERSE FRÁGIL CUANDO ESTÁ FRÍO. NO LO INSTALE EN
ÁREAS EN LAS QUE SEA PROBABLE PISARLO O ESTÉ SUJETO A DAÑO FÍSICO.
4. NO LO INSTALE CERCA DE LÍQUIDOS INFLAMABLES.
5. NO LO INSTALE A UNA DISTANCIA MENOR A 3 METROS DE LA SUPERFICIE DE UNA
PISCINA.
6. SIEMPRE DESENCHUFE ESTE PRODUCTO ANTES DE INSTALARLO O REEMPLAZAR
LOS FUSIBLES. USE SOLAMENTE UN MÁXIMO DE 125 VOLTIOS Y 3AMPERIOS.
7. NO CUBRA EL CORDÓN DE LUCES FLEXIBLE, PORQUE ESO PODRÍA CAUSAR QUE SE
SOBRECALIENTE Y SE DERRITA O SE INCENDIE.
8. PARA PREVENIR EL SOBRECALENTAMIENTO, NO PERMITA EL CONTACTO ENTRE
CABLES O PARTES DEL CORDÓN DE LUCES FLEXIBLE. MANTENGA UN ESPACIO DE 10
MM (0,39IN) COMO MÍNIMO ENTRE EL CABLE O PARTES DEL CORDÓN DE LUCES.
9. NO RECOMENDABLE PARA CORTE O EMPALME IN SITU.
10. NO SOBRECARGUE. NO CONECTE JUNTOS MÁS DE 45 METROS (150 PIES) EN TOTAL.
¡GRACIAS POR SU COMPRA!
¿Le gusta nuestro producto?
Deje una reseña en el sitio web de su
comercio favorito o en amazon.com
¿Tiene algún problema?
Díganos cómo podemos ayudar.
Llame al 1-800-654-8483, entre las 7
a.m. y las 8p.m., horario central.
Para acceder a ofertas,
registrar su compra y darnos
su opinión sobre nosotros, tan
solo escanee el código o visite
byjasco.com/deals
Lea las instrucciones o mire
el video con el paso a paso.
Descubra más
iluminación innovadora
en byjasco.com/lighting
Instrucciones
fáciles
Escanee el código o visite
byjasco.com/54503i
Ofertas exclusivas
5017247
Intertek