
Technical Support and E-Warranty Certificate www.vevor.com/support
Pressing Plate Electric Griddle
MODEL: GC5403A-UL
GC5403A-UL
GC5403A-AU
We continue to be committed to provide you tools with competitive price.
"Save Half", "Half Price" or any other similar expressions used by us only represents an
estimate of savings you might benefit from buying certain tools with us compared to the major
top brands and doses not necessarily mean to cover all categories of tools offered by us. You
are kindly reminded to verify carefully when you are placing an order with us if you are
actually saving half in comparison with the top major brands.

1
MODEL: GC5403A-UL
GC5403A-GS
GC5403A-AU
Have product questions? Need technical support? Please feel free to
contact us:
CustomerService@vevor.com
NEED HELP? CONTACT US!
This is the original instruction, please read all manual instructions
carefully before operating. VEVOR reserves a clear interpretation of our
user manual. The appearance of the product shall be subject to the
product you received. Please forgive us that we won't inform you again if
there are any technology or software updates on our product.
Pressing Plate Electric
Griddle
2
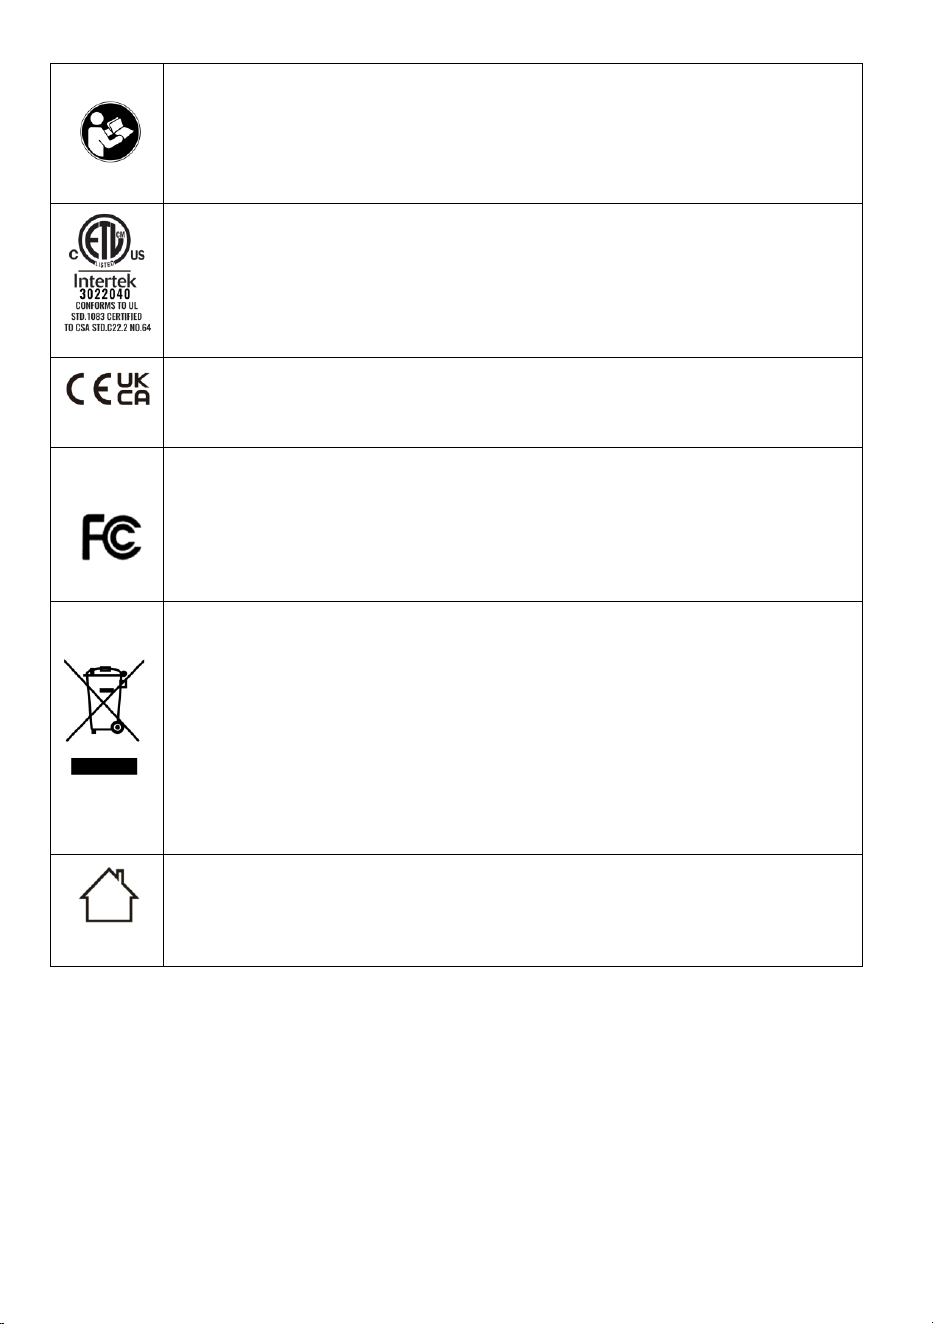
Warning-To reduce the risk of injury, user must read
instructions manual carefully.
Compliance is a North n security certification.
Compliance is a Europe and the United Kingdom n security
certification.
This device complies with Part 15 of the FCC Rules. Operation is
subject to the following two conditions:(1)This device may not cause
harmful interference, and (2)this device must accept any interference
received, including interference that may cause undesired operation.
This product is subject to the provision of European Directive
2012/19/EC. The symbol showing a wheelie bin crossed through
indicates that the product requires separate refuse collection in the
European Union. This applies to the product and all accessories
marked with this symbol. Products marked as such may not be
discarded with normal domestic waste, but must be taken to a
collection point for recycling electrical and electronic devices
CAUTION:HOUSEHOLD USE ONLY, DO NOT IMMERSE IN
WATER!ATTENTING:USAGEDOMESTIQUE SEULEMENT,NE PAS
IMMERGER!

3
Thank you for using this product. In order to make sure that you can
operate the machine correctly, read this instruction carefully before
operation and keep it properly for future reference. Please be sure to read
the precautions and safety rules in this page to ensure your safe use.
This manual will outline safety warnings and precautions, operating,
maintenance and cleaning. The warnings and instructions reviewed in this
manual cannot cover all possible conditions and situations that may occur.
Caution and common sense are not built into this product, since we believe
that the uses will comply with these codes.
Please read ALL the instructions before using your machine.
1. Make sure the voltage in your outlet is the same as the voltage indicated
on the appliance's rating label.
2. Do not let children and minors get close to or touch the machine.
3. Do not touch the hot surface directly with your hands. Always operate
with handle or knob.
4. To prevent electrical shock, do not immerse the cord or plug into water or
other liquids.
5. Do not immerse the appliance in water or any other liquid.
6. Unplug the machine from the outlet when not in use and before cleaning.
Cool the appliance before installing or removing parts and before cleaning.
7. Cool down the HOT parts before operation.
8. Do not operate the device with damaged cord or plug, malfunction or
with any mechanical damage. Send it to your nearest authorized service
centre for examination and repair (ONLY technicians should open up the
unit).
9. Using any accessories or attachments that are not provided or
recommended by the manufacturer may cause injury.
10. If the machine is not to be used for a long period of time, unplug it,

4
clean and cover it and store it in a dry and safe place.
11. Do not leave the power cord hanging over the edge of table or counter
or let it come into contact with any hot surfaces.
12. Do not place the unit on or near hot air, electric burners or heaters.
13. Always switch off the power before plugging in or unplugging. Hold the
plug instead of pulling on the cord.
14. Do not apply this unit to any other purposes than the indicated usage.
15. Do not use it indoor or for commercial purposes.
16. KEEP IT OUT OF CHILDREN'S REACH.
17. DO NOT CLEAN IT WITH ANY ABRASIVE MATERIAL.
18. Never leave it unattended while in use.
19. Always check that this machine is plugged into a grounded outlet with
the appropriate electrical supply. Ensure that the wall outlet being used is
properly grounded. If not, you must install a grounded outlet. Have the
work performed only by a certified electrician who is properly qualified to
meet local safety and electrical codes.
20. Ensure that the power outlet, plug and cord being used are in good
working condition. Damaged components should be repaired by a certified
electrician who is qualified to meet local safety and electrical codes. Even if
your power cord is functioning properly, keep it away from water and avoid
letting it run over carpets or heating devices.
21. Avoid using it in the presence of flammable liquids, gases, dust or other
explosive situations.
22. Extreme caution must be taken when moving an appliance containing
hot oil or other hot liquids.
23. Do not operate the machine in an appliance garage or under a wall
cabinet. Always unplug the unit from the electrical outlet when storing in an
appliance garage. Otherwise, it would cause a risk of fire, especially if the
machine touches the garage wall or the door touches it as it closes.
24. Type Y attachment: If the supply cord is damaged, it must be replaced

5
by a special cord or assembly available from the manufacturer or its
service agent.
25. This appliance can be used by children aged from 8 years and above
and persons with reduced physical, sensory or mental capabilities or lack
of experience and knowledge if they have been given supervision or
instruction concerning use of the appliance in a safe way and understand
the hazards involved. Children shall not play with the machine alone.
Cleaning and user maintenance shall not be made by children without
supervision.
ATTENTION!
This article is intended for indoor use. Do not use outdoors!
Model No.
Region
Voltage
Power
Plug Type
GC5403A-UL
North
America
AC120
60Hz
1800W
American
PLUG
GC5403A-GS
Europe
AC220V
50Hz
2100W
Europe PLUG
GC5403A-AU
Australia
AC240V
50Hz
2100W
Australia
PLUG
ATTENTION!
1. The voltage used for this device must be the same as the power supply
voltage.
6
ATTENTION!
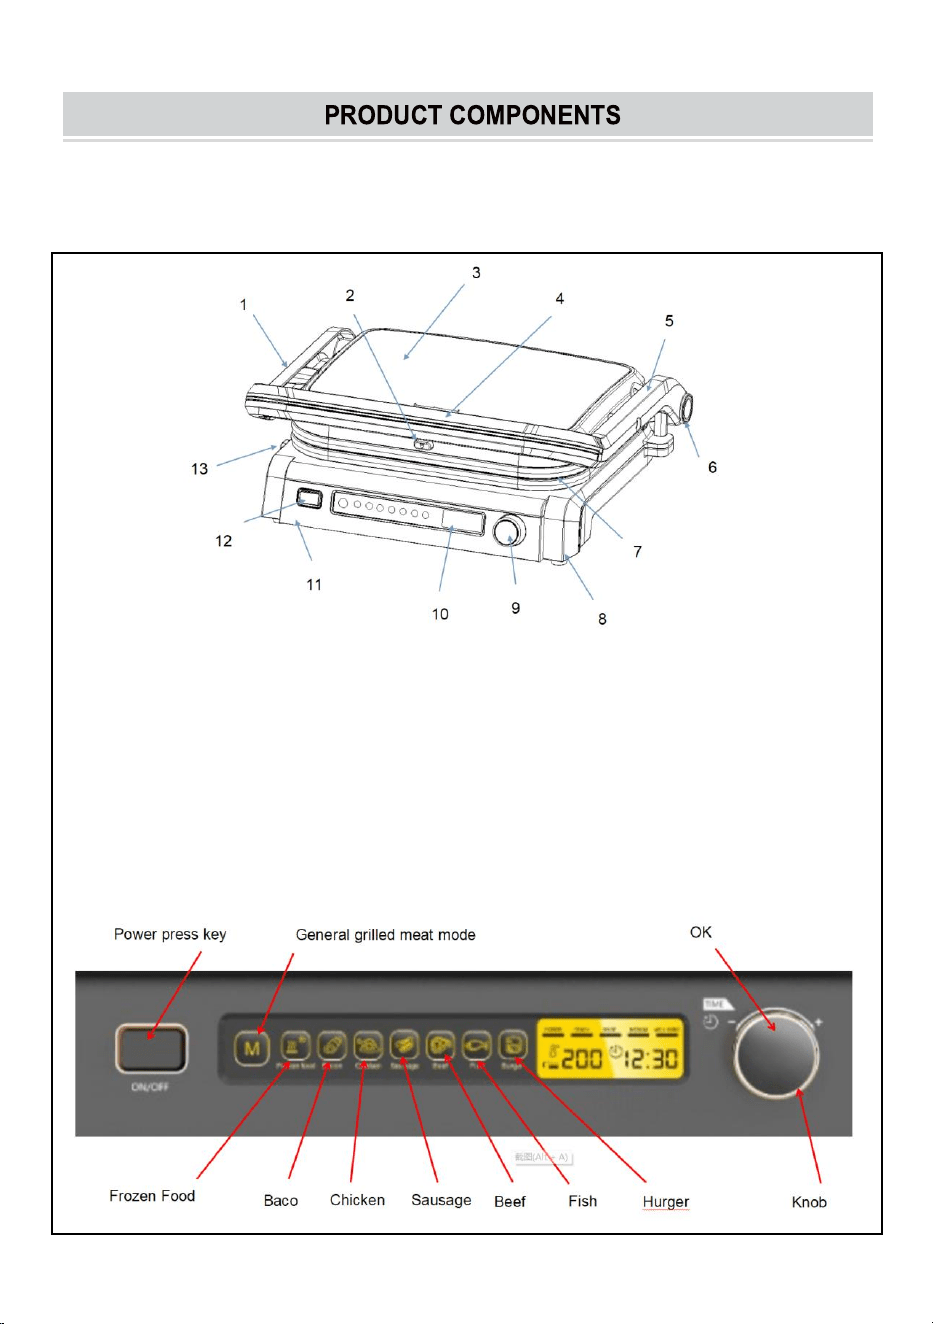
1. Check all parts for completeness before beginning assembly.
1. Left pole 8. Base
2. Release Button of upper cooking plate 9. Knob
3. Upper housing 10. LCD display
4. Handle 11. Control panel
5. Right pole 12.Power press key
6. 180°Angle 13. Release Button of Lower cooking plate
7. Upper /lower cooking plate
Control panel

7
Before using the appliance for the first time, peel off any promotional
materials and packaging materials, and check that the cooking plates are
clean and free of dust. If necessary, wipe them over with a damp cloth.
Spread over with an absorbent kitchen towel and wipe off any excess oil.
When your product is heated for the first time, it may emit slight smoke or
odor, which is normal for many heating appliances, and will not affect the
safety of your appliance.
1. Place the machine on a clean, dry, level surface near a plug base outlet.
2. Select the plates (grill plates or griddle plates) you want to use, and to
ensure that it is installed.
3. Normally, the grill is opened at an angle of 105 degree .The top roasting
tray can be level with the bottom roasting tray to create a large cooking
surface and assemble the top roasting tray.
4. First open the grill to a angle which is less than 105°, then push the
pushing knob upward with the other hand and hold the handle with one
hand to open the grill to 180°.
5. Insert the trays into the clamps near the hinge and push down the front
end of tray with a little force to snap the tray into place. Then close the grill,
just pull the handle toward you directly.
Manual Mode
1. Whether the cover is opened or closed, M gear: after powering on, press
the power on button.
2. Press the M key, the light under the M key will remain on, and the
temperature value will start flashing. The user can rotate the knob to adjust
the required baking temperature, which is 392°F (200℃) by default.
3. After selecting the temperature, press the OK button in the middle of the
knob, and the time will start to flash. The default is 60 minutes. Turn the

8
knob to adjust the time. After adjusting the required time, press the OK
button in the middle, and the whole machine will start to warm up (the
progress bar POWER will flash).
4. When the baking pan temperature reaches the preset preheating
temperature, the machine will send out a "BIBIBIBI" prompt to remind the
user that the preheating has been completed, the POWER font and the
progress bar below will start to light up permanently, and the progress bar
below will light up circularly.
NOTE:The manual mode can be started when the cover is closed or
opened (the key sequence is power key - M key - OK confirmation key
respectively).
Intelligent Mode
1. After power-on, press the power-on button, and then the LCD screen will
light up, and the light under the button will cycle on.
2. After the user presses the required food menu key, press the OK key to
start heating. At this time, the POWER light starts to stay on, and the
READY light starts to flash, indicating that the user has finished preheating
and can put food in.
3. Open the lid, put in the food, and then close the lid. The machine detects
the thickness of the food within 5 seconds, and selects the corresponding
thickness program to bake the food. The status progress bar shows that
the READY light starts to stay on, the RARE light starts to flash, and the
following time value countdown displays. As the baking time goes on, the
RARE light, MEDIUM light, and WELL DONE light gradually stay on. When
the countdown shows 00:00, the whole machine starts BIBIBIBI "prompt 6
times, and the consumer can open the lid and take out the food.
NOTE:The intelligent mode can only be started when the cover is closed. It
can not be started when the cover is opened for 105° or 180° (the product
will give an alarm to close the cover).

9
Griddle Mode
1. Turn the machine on 180° and place it flat (in this state, only the normal
grill mode can be used).
2. Power on the whole machine, and then press the power switch key to
start.
3. Select the M icon, press the OK key in the middle of the knob, and the
user can adjust the knob to select different baking pan temperatures and
times as required, and then press the OK key to confirm. The product
starts to heat. When the temperature of the baking tray reaches the preset
temperature, the machine BIBIBI will prompt 3 times, and the user can put
food into it for baking.
ATTENTION!
1. Do not move while the appliance is hot.
2. Do not leave the appliance unattended during use.
3. Do not use the appliance near flammable objects (keep at a safe
distance, at least 3 meters).
4. Plug in the power, such as the power light will not light, Make sure the
timer is turned on
5. DO NOT IMMERSE THE UNIT AND DO NOT RUN WATER DIRECTLY
ONT THE COOKING SURFACES.
WARNING! This product will become very hot, do not move it
during operation.
WARNING! Keep children and pets away.
WARNING! Remove all packaging materials and keep them for future
use.Packaging materials are not a toy.
WARNING! Don't let children play with the packaging materials. If they
swallow the packaging materials, they will suffocate!
IMPORTANT! Do not pour water into the appliance while it is still hot.

10
1. Before cooking, ensure product surfaces and tools are clean and free of
old food residues.
2. For best results, lightly coat the cooking plates with a little cooking oil or
cooking spray.
3. Close up the plates when preheating. After the preheating is done, if you
do not lift up the upper plate to put in food, the appliance in the intelligent
mode will automatically turn off after dozens of minutes, but in manual
mode, the appliance has no detection function so it will keep running for
about two hours till the appliance turns off automatically.
4. When the food is cooked, use the handle to open the lid. Remove the
food with a plastic heat-resistant spatula. Never use metal tongs or a knife
as these can cause damage to the non-stick coating of the cooking plates.
5. There is beep sound for “RARE” and “MEDIUM” only when you use
beef function. And for other functions, there only is beep sound for “WELL
DONE”.
6. Intelligent mode can only enter.
7. Intelligent mode .When preheating is completed,there will be a reminder
to put food .If there is no food, it will be prompted again in 10minutes, and
then it will be prompted again 40minutes,and then it will automatically shut
down.
CAUTION:
1. DO NOT use the same utensils to handle cooked and uncooked foods.
2. Ensure all meat is cooked thoroughly before eating.
3. Eating raw or under cooked meat will cause food poisoning (e.g.
bacteria strains such as Escherichia coli).
4. To reduce the risk of under cooked meat, cut the meat to ensure it is
fully cooked.
5. If the meat is fully cooked, its juice should be clear and there should be
no pink / red juice or traces of meat color.

11
6. After cooking on your grill always clean the cooking surfaces and
utensils.
1. Before cleaning, turn off the power and unplug the plug, and wait for the
machine to cool down
2. Press down release button and take apart the roasting trays.
3. After disassembling the trays, wash the roasting trays in warm soapy
water or in a dishwasher. Dry the roasting trays before replacing them on
the grill.
4. Remove the upper and lower drip trays with gloves, empty the drip tray
into a heat-proof bowl, rinse them in warm soapy water or in the top rack of
the dishwasher and then dry them thoroughly.
5. Wipe the outside of the product with a damp cloth only. Do not clean the
outside with any abrasive scouring pad or steel wool, as this will damage
the finish. Do not immerse in water or any other liquid.
6. Do not place in the dishwasher.
7. Remove and empty the drip tray after each use and wash the tray in
warm, soapy water. Avoid the use of scouring pads or harsh detergents as
they may damage the surface.Rinse and dry thoroughly with a clean, soft
cloth and replace.
1. Always unplug the machine before storage.
2. Always make sure the machine is cool and dry before string.
3. Store the appliance in a dry and clean area.
Made in China