
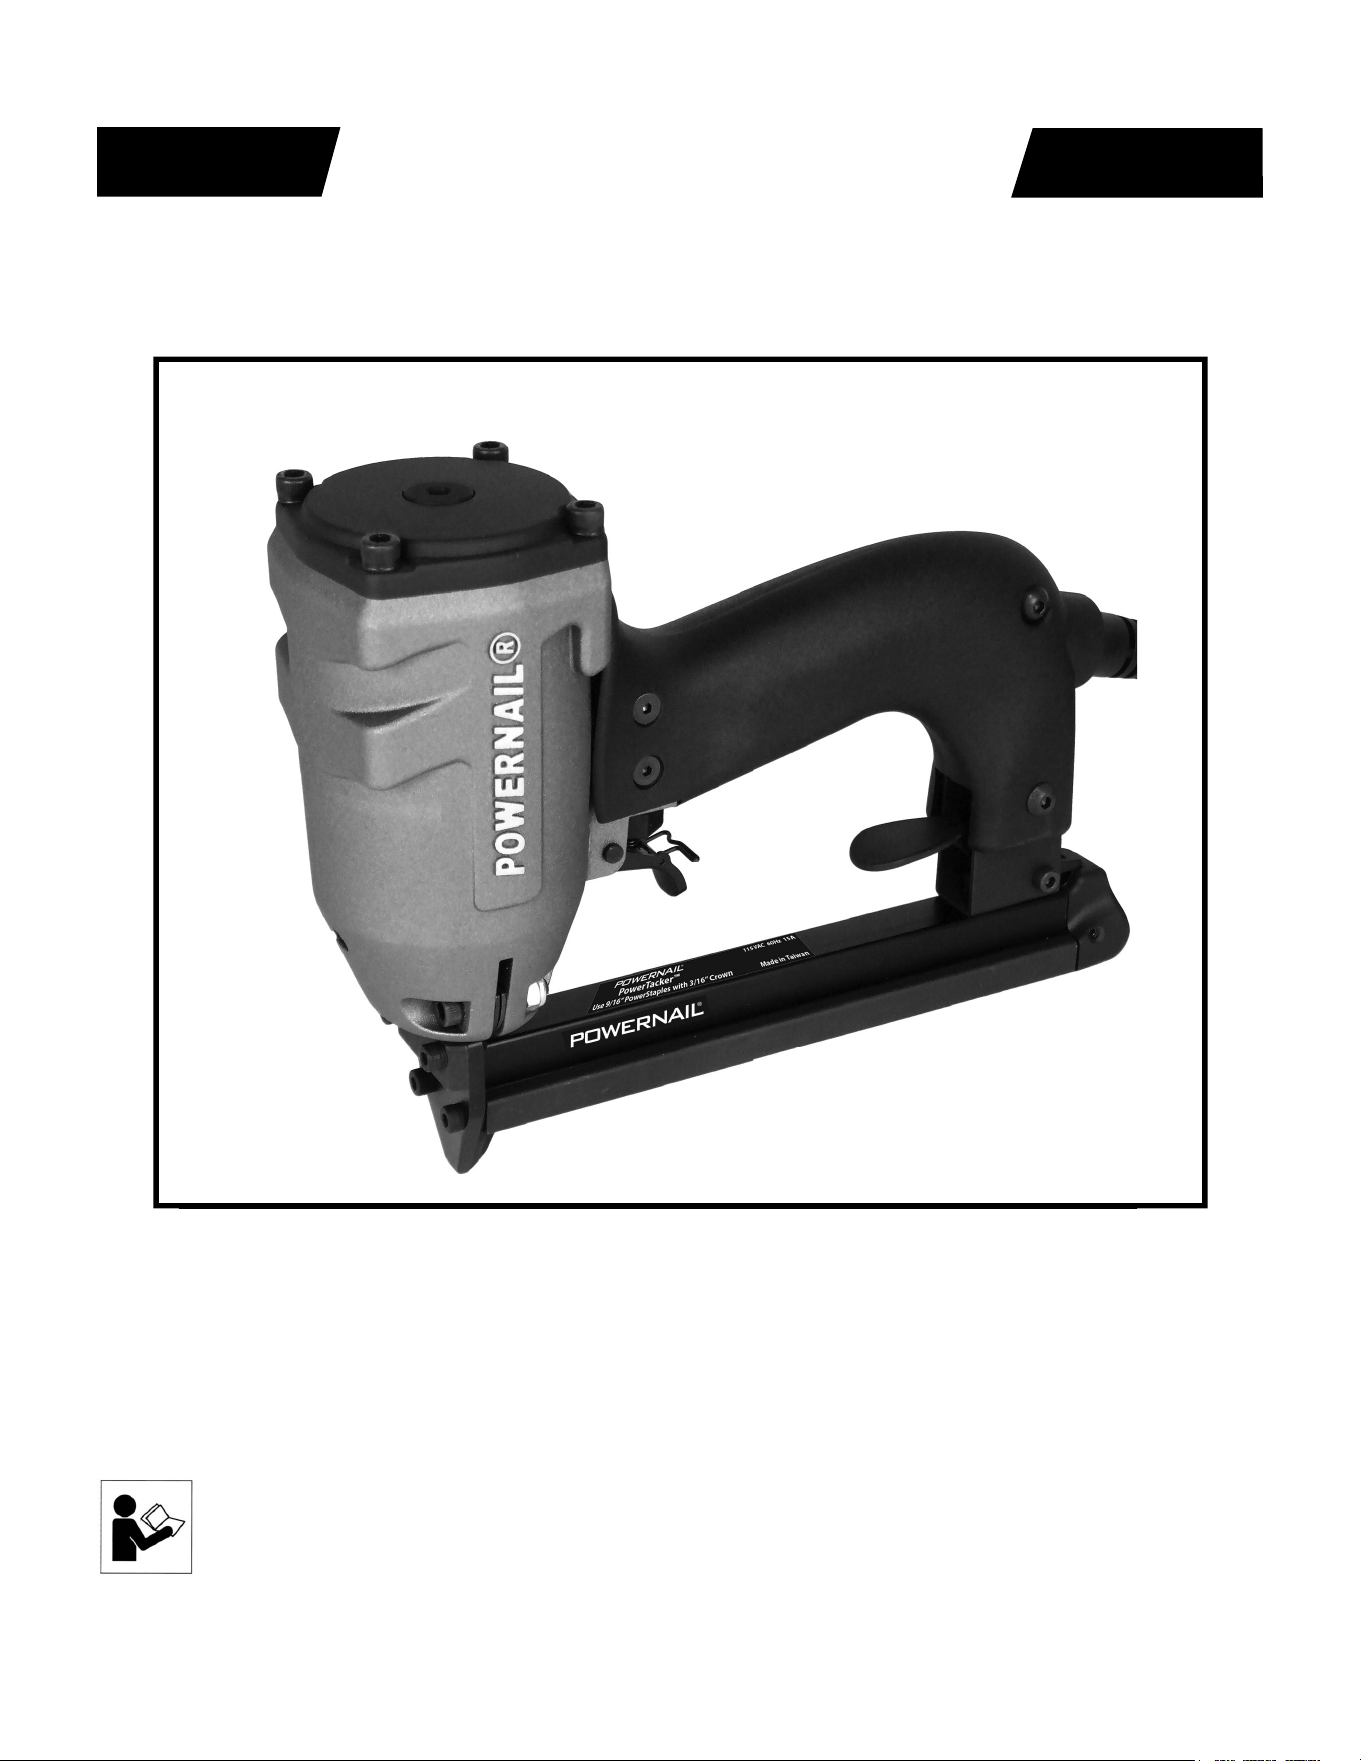
Powernail Electric PowerTacker™
POWERNAIL
®
CO.
REV 2024.04.25
WARNING
OPERATION AND MAINTENANCE MANUAL
MANUAL DE OPERACION Y DE MANTENIMIENTO
MANUEL D’INSTRUCTIONS ET D’ENTRETIEN
Read this manual before you use this electric Powerstapler®. Follow all safety warnings
and instructions. If you are uncertain about the operation of the nailer, call us directly at
1-800-323-1653 for assistance or contact the closest Powernail Dealer for help. Please
retain this information for future reference.

2
The Powernail trigger-pull Carpet Tacker is designed to bring Powernail quality and fl ooring
expertise to an electric stapler. The Powernail carpet tacker is designed for use with 9/16”
staples.
The Powernail PowerTacker™ is designed to be used for installation of carpet and carpet
padding.
INTRODUCTION
INDEX
LIMITED WARRANTY
POWERNAIL® Company, Inc. warrants to its customer, and to the fi rst end-use purchaser of
POWERNAIL trigger-pull PowerTacker™ purchased from an authorized POWERNAIL distributor,
that each serialized manufactured trigger-pull PowerTacker™ by POWERNAIL®, for a period of 12
months from the date of purchase, and with respect to the PowerTacker™ power cord for a period
of 100 days; shall be free of defects in materials and workmanship and will meet POWERNAIL’S
specifi cations in effect at the time of product shipment. POWERNAIL will repair or replace, at its
option, any Powernail PowerTacker™ that does not conform to this warranty. Claims must be made
no later than fi fteen (15) days after the end of the warranty period. POWERNAIL will perform all
repair or replacements itself or through its authorized contractors. POWERNAIL is not responsible
for shipping, labor or other direct or indirect costs. Damage caused by abuse, misuse, unusual or
excessive wear is excluded. Repair or modifi cation of the Products by unauthorized parties will void
this warranty. The customer is responsible for returning Products to POWERNAIL for verifi cation
of nonconformance. Warranties for Products not manufactured by POWERNAIL are limited to
warranties provided to POWERNAIL by the manufacturer of such product that are assignable to
customer.
THESE WARRANTIES AND REMEDIES ARE EXCLUSIVE OF ALL OTHERS, EXPRESS
OR IMPLIED. THE WARRANTIES OF MERCHANTABILITY AND FITNESS FOR PURPOSE
ARE EXPRESSLY EXCLUDED. IN NO EVENT SHALL POWERNAIL’S LIABILITY
FOR A WARRANTY CLAIM EXCEED THE PRICE PAID TO POWERNAIL FOR THE
NONCONFORMING PRODUCT, REGARDLESS OF THE FORM OR BASIS OF THE CLAIM
OR CAUSE OF ACTION.
Index..................................... 2
Warranty............................... 2
Safety............................. 3
Operation............................. 4-5
Loading Staples........................ 6
Clearing a jam...................... 7
Safety Labels......................... 7
Disassembly/Reassembly......... 8
Maintenance......................... 7
Troubleshooting Chart.......... 9
Schematic / Parts List.......... 10-11
Power Cord Info..................... 8
Phone Support..................... 12
Web Site.............................. 12
SAFETY INSTRUCTIONS
3
When operating this stapler, the operator and others in the work area should
ALWAYS wear approved SAFETY GLASSES, with front and side eye protection
(i.e. OSHA required iZ87i safety glasses). Eye protection will help guard against
fl ying staples and debris, which could cause severe eye injury.
EAR PROTECTION should be used to prevent hearing damage when there are high
noise levels in the work area. ALWAYS use ear plugs with a noise reduction rated
at 29 db or higher at a construction site.
To prevent accidental misfi re, always unplug the power cord before making any
adjustments, repairing, clearing jams or when the stapler is not in use. Do not use on
scaffolding or ladders and disconnect power cord from electricity when transporting
between work areas. Never carry with fi nger on switch and be sure switch is off
when plugging in.
Never place any part of the body in the discharge path of the carpet tacker when air
is connected to the stapler. Never point the tool at yourself or others, even if the tool
is not loaded. Never leave the carpet tacker unattended while it is plugged in to a
power source. For safety, keep tools locked up and out of reach of children.
Use only Powernail replacement parts in the repair or maintenance of this carpet
tacker. Parts or repair services are available from the manufacturer or from agents
authorized by the manufacturer. Repairs should be carried out only by trained service
personel in the fi eld of fastener driving tools who will observe proper safety controls
while performing maintenance. Service personel should be qualifi ed to assess the
safe working condition of fastener driving tools.
When not in use, the tool should be cleaned, fully assembled and then stored in a
dry location. This will extend the life of the tool and reduce any oxidation. To guard
against electric shock, do not use tool in rain or wet envirionment and prevent body
contact with grounded surfaces such as pipes, radiators, ranges, etc.
Keep work area clean. Cluttered work areas invite injuries. Dress properly. Be sure
not to wear clothing or jewelry that may get caught in moving parts. Rubber gloves
and non-skid footwear are recommended when working outdoors. Wear protective
hair covering to contain long hair.
Keep work area well lit. Keep children away and visitors away from work area. Do
not let visitors contact tool or extension cord. Do not operate tool when you are
tired. Always stay alert and watch what you are doing.
OPERATION
The Powernail PowerTacker™ is designed for use with 9/16” long
staples with a 3/16” crown.
APPLICATIONS
Carpet and Carpet Pad Installation
*Only use tool for its intended purposes. Drive fasteners into work
surfaces only; never into materials too hard to penetrate.
4
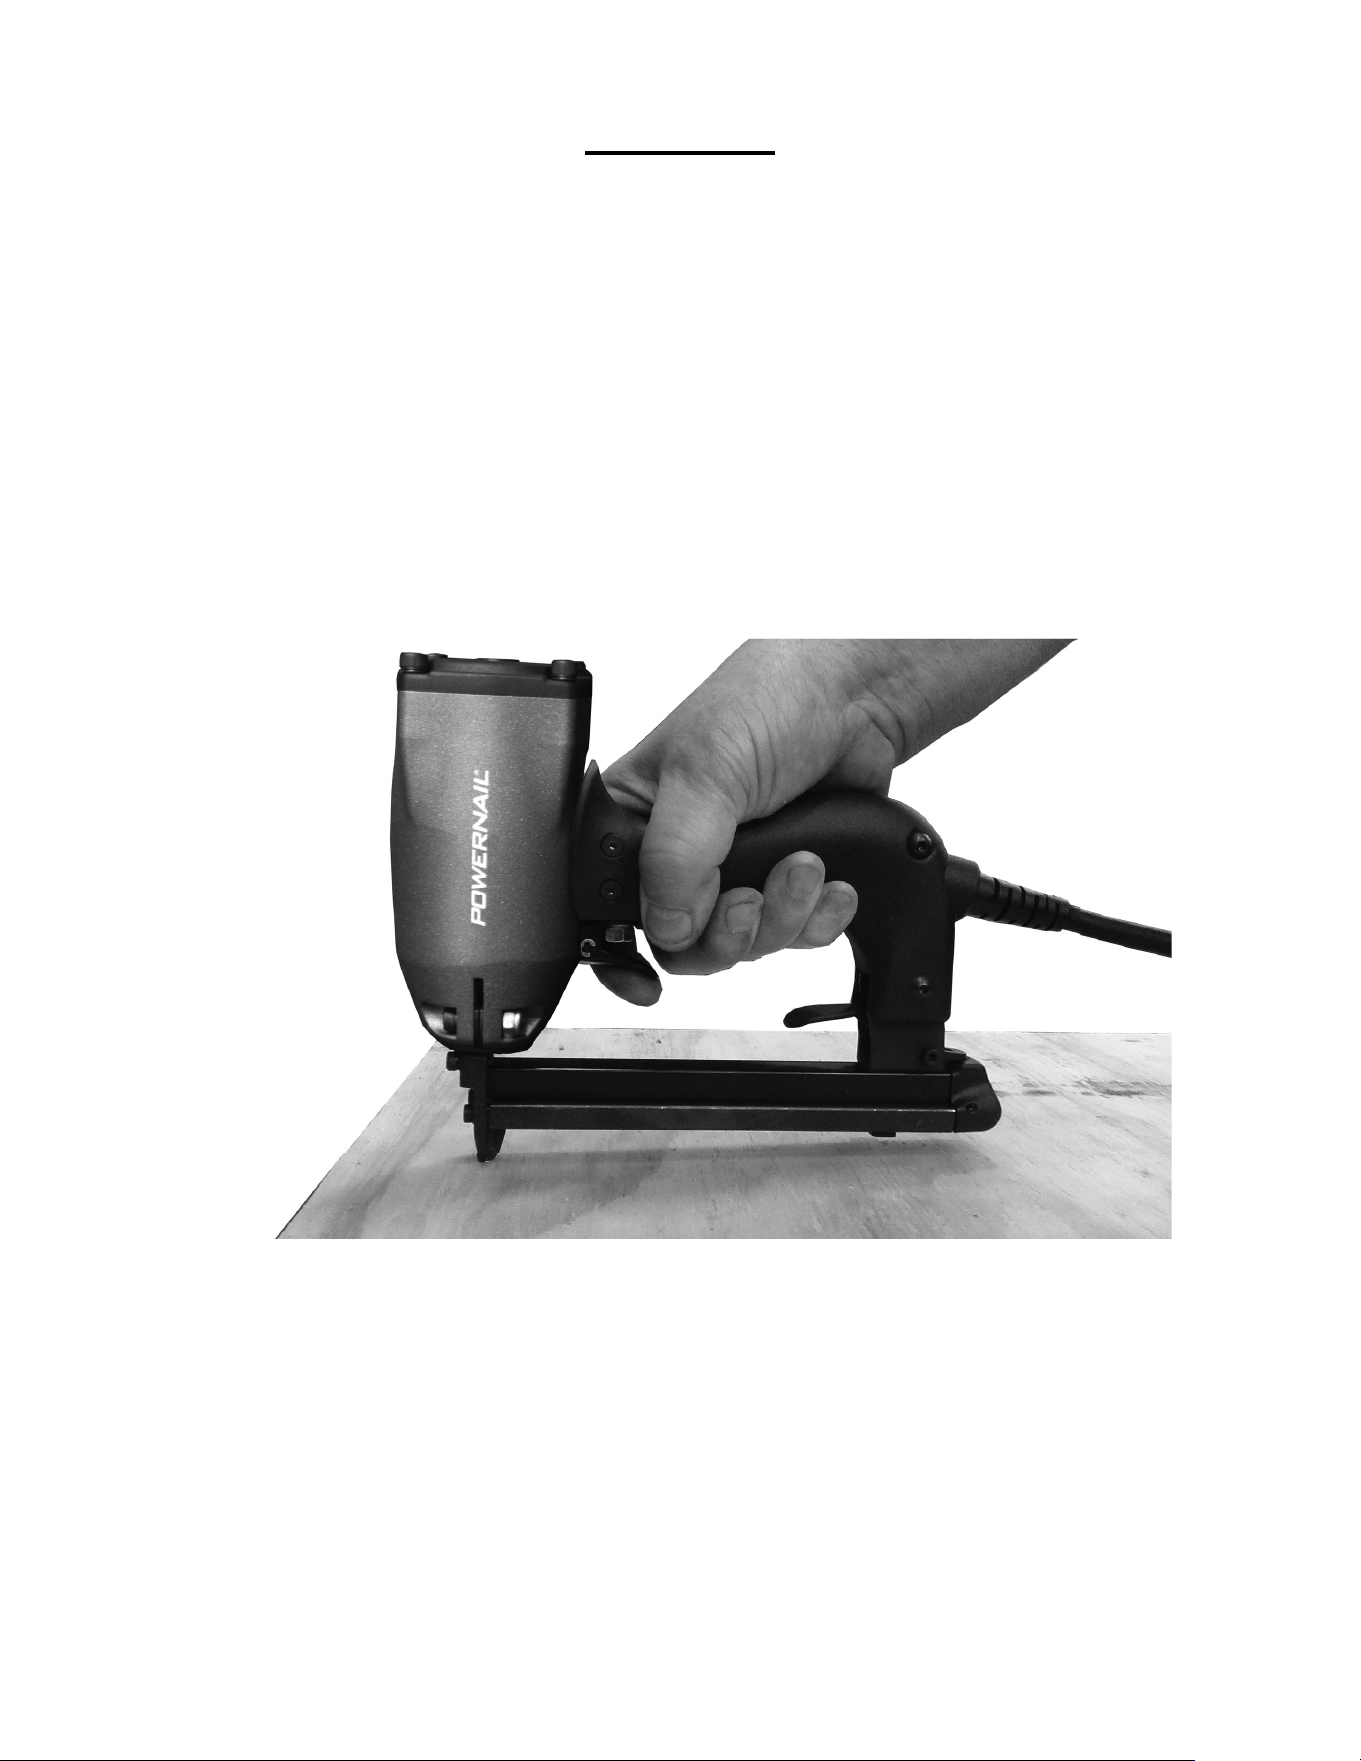
1. Hold the tool by the handle.
2. Place the nose of the tool where you want to drive the staple.
3. Keeping a fi rm grip, pull the trigger with your index fi nger.
5
Before using this tool, carefully check that all parts are working correctly. Do
not use the tool if it is not operating correctly, check for causes and adjust as
necessary for proper operation.
When unplugging the tool, always grasp the base of the power cord to pull the
plug. Do not unplug by pulling on the power cord.
Secure your work. Use clamps or a vise to hold your work project in place. It is
safer than using your hands and it frees both hands to operate tool.
Do not drive fasteners on top of other fasteners or with tool at too steep of an
angle; the fasteners may ricochet and injure someone.
Do not staple too close to the edge of the work surface. The work piece is likely
to split and the fastener could fl y free or ricochet and injure someone.
Do not fi re into hard materials or attempt to use on hard or brittle materials such
as concrete, steel or tile.
During operation, the stapler may be warm to the touch. This is normal.
However, if the tool begins to feel hot, slow down tacking speed. If the unit
continues to be hot, discontinue use until it cools.
Avoid fi ring the stapler when empty as it puts unnessecary wear on internal
components and can shorten the life of the tool.
WORK TIPS
6
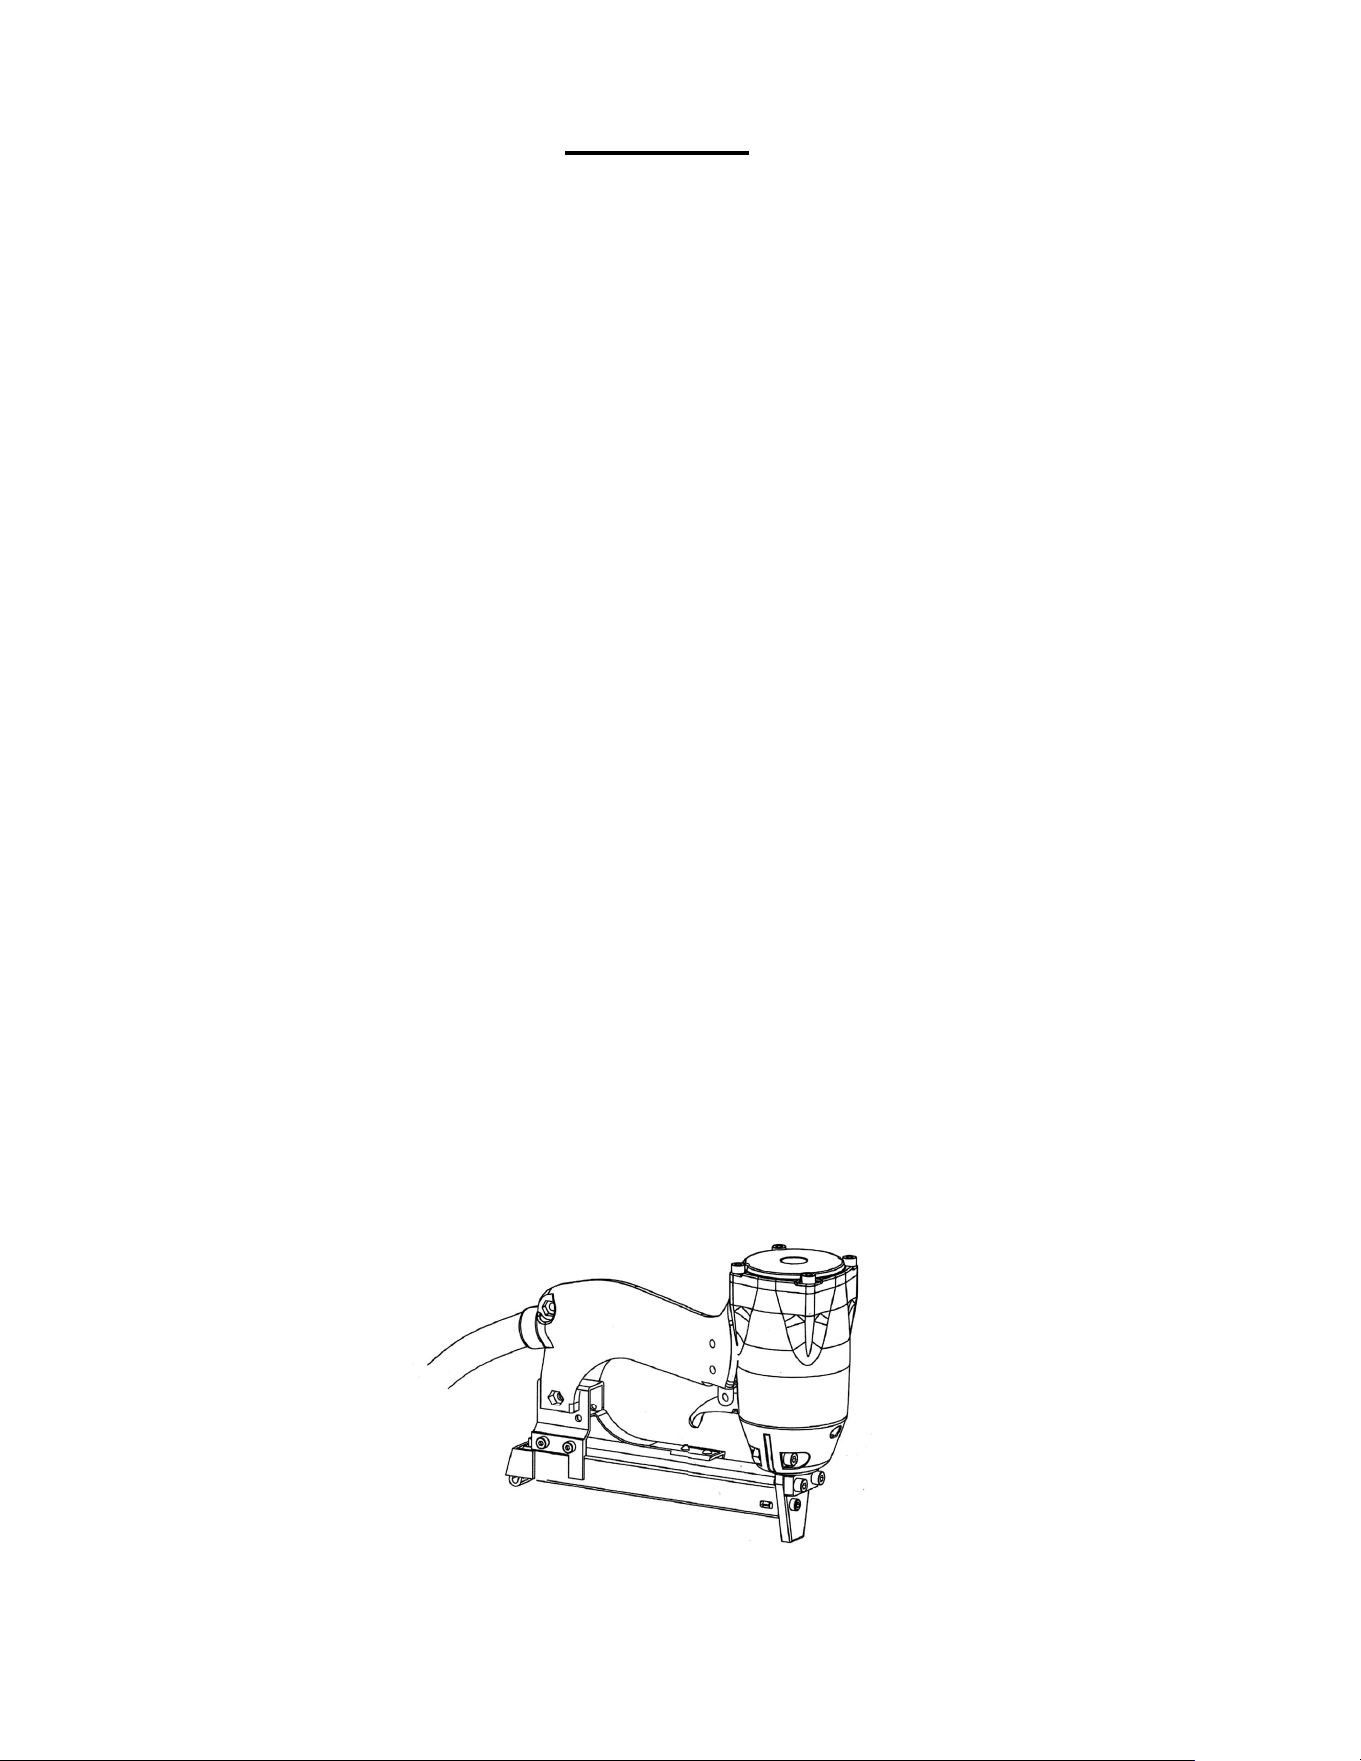
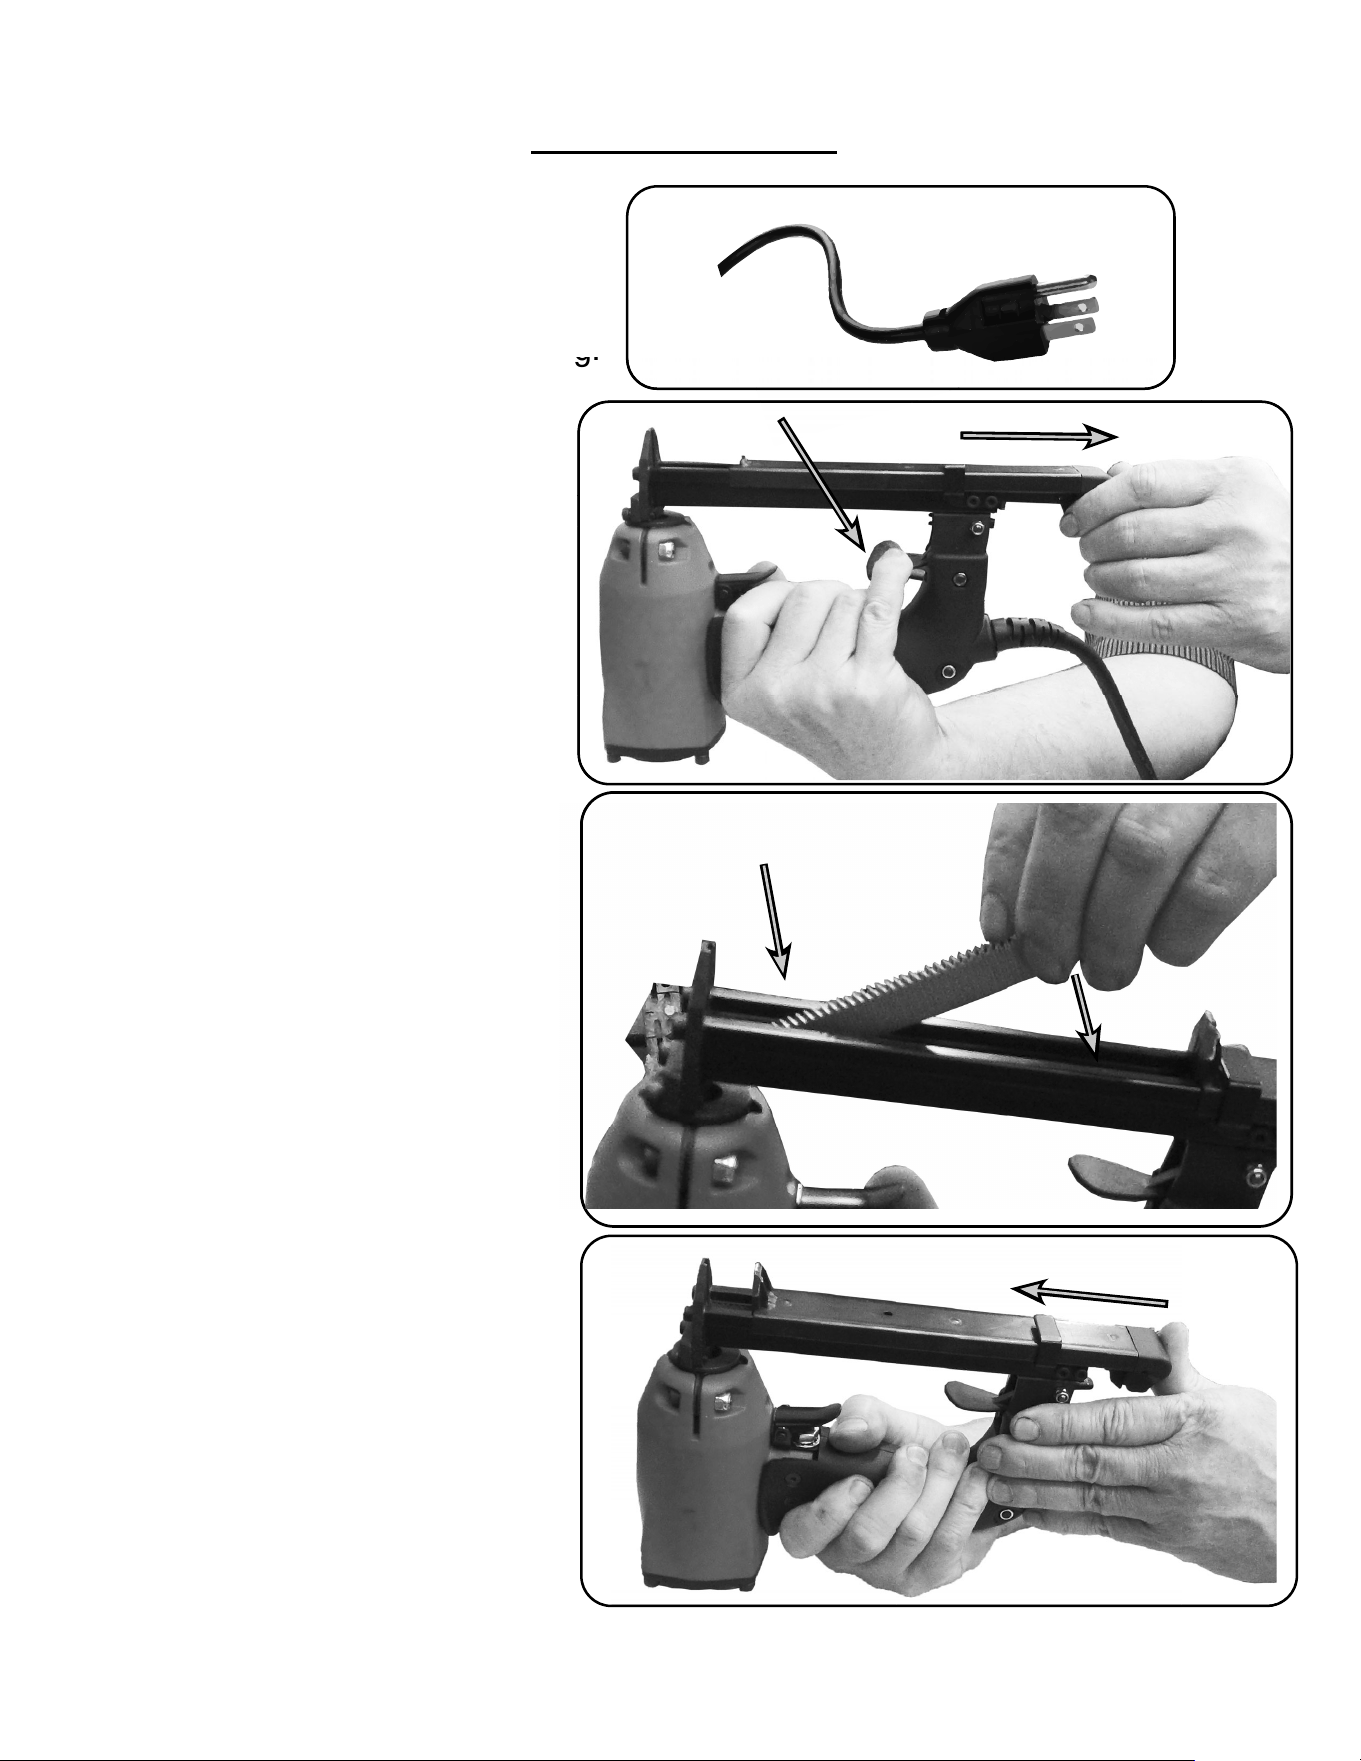
LOADING STAPLES
1. Unplug the stapler power cord.
To prevent wear, always grasp the
base of the power cord to unplug.
2. Hold the tool upside
down, and depress the
magazine latch. Pull back on
the magazine cover.
3. Insert a strip of fasteners
into the magazine. Make sure
the crown of the fasteners are
resting in the magazine.
4. Push the magazine cover
forward until the latch catches.
g.
1
2
For fasteners jammed inside the magazine:
1. Unplug tool power cord.
2. Press down latch and pull back on magazine.
3 Remove jammed fasteners using pliers if needed.
4. Push magazine cover forward until latch catches.
For fasteners jammed in discharge area :
1. Unplug tool power cord.
2. Grab jammed fasteners with pliers and remove.
3. If fastener can not be reached from
discharge area refer to above
for fasteners jammed inside the magazine.
4. Push magazine cover forward until latch catches.
CAUTION: Always unplug the tool power cord before adjusting the tool, clearing
jams, servicing, carrying to a new work location, or when not in use.
7
STAPLER SAFETY LABELS
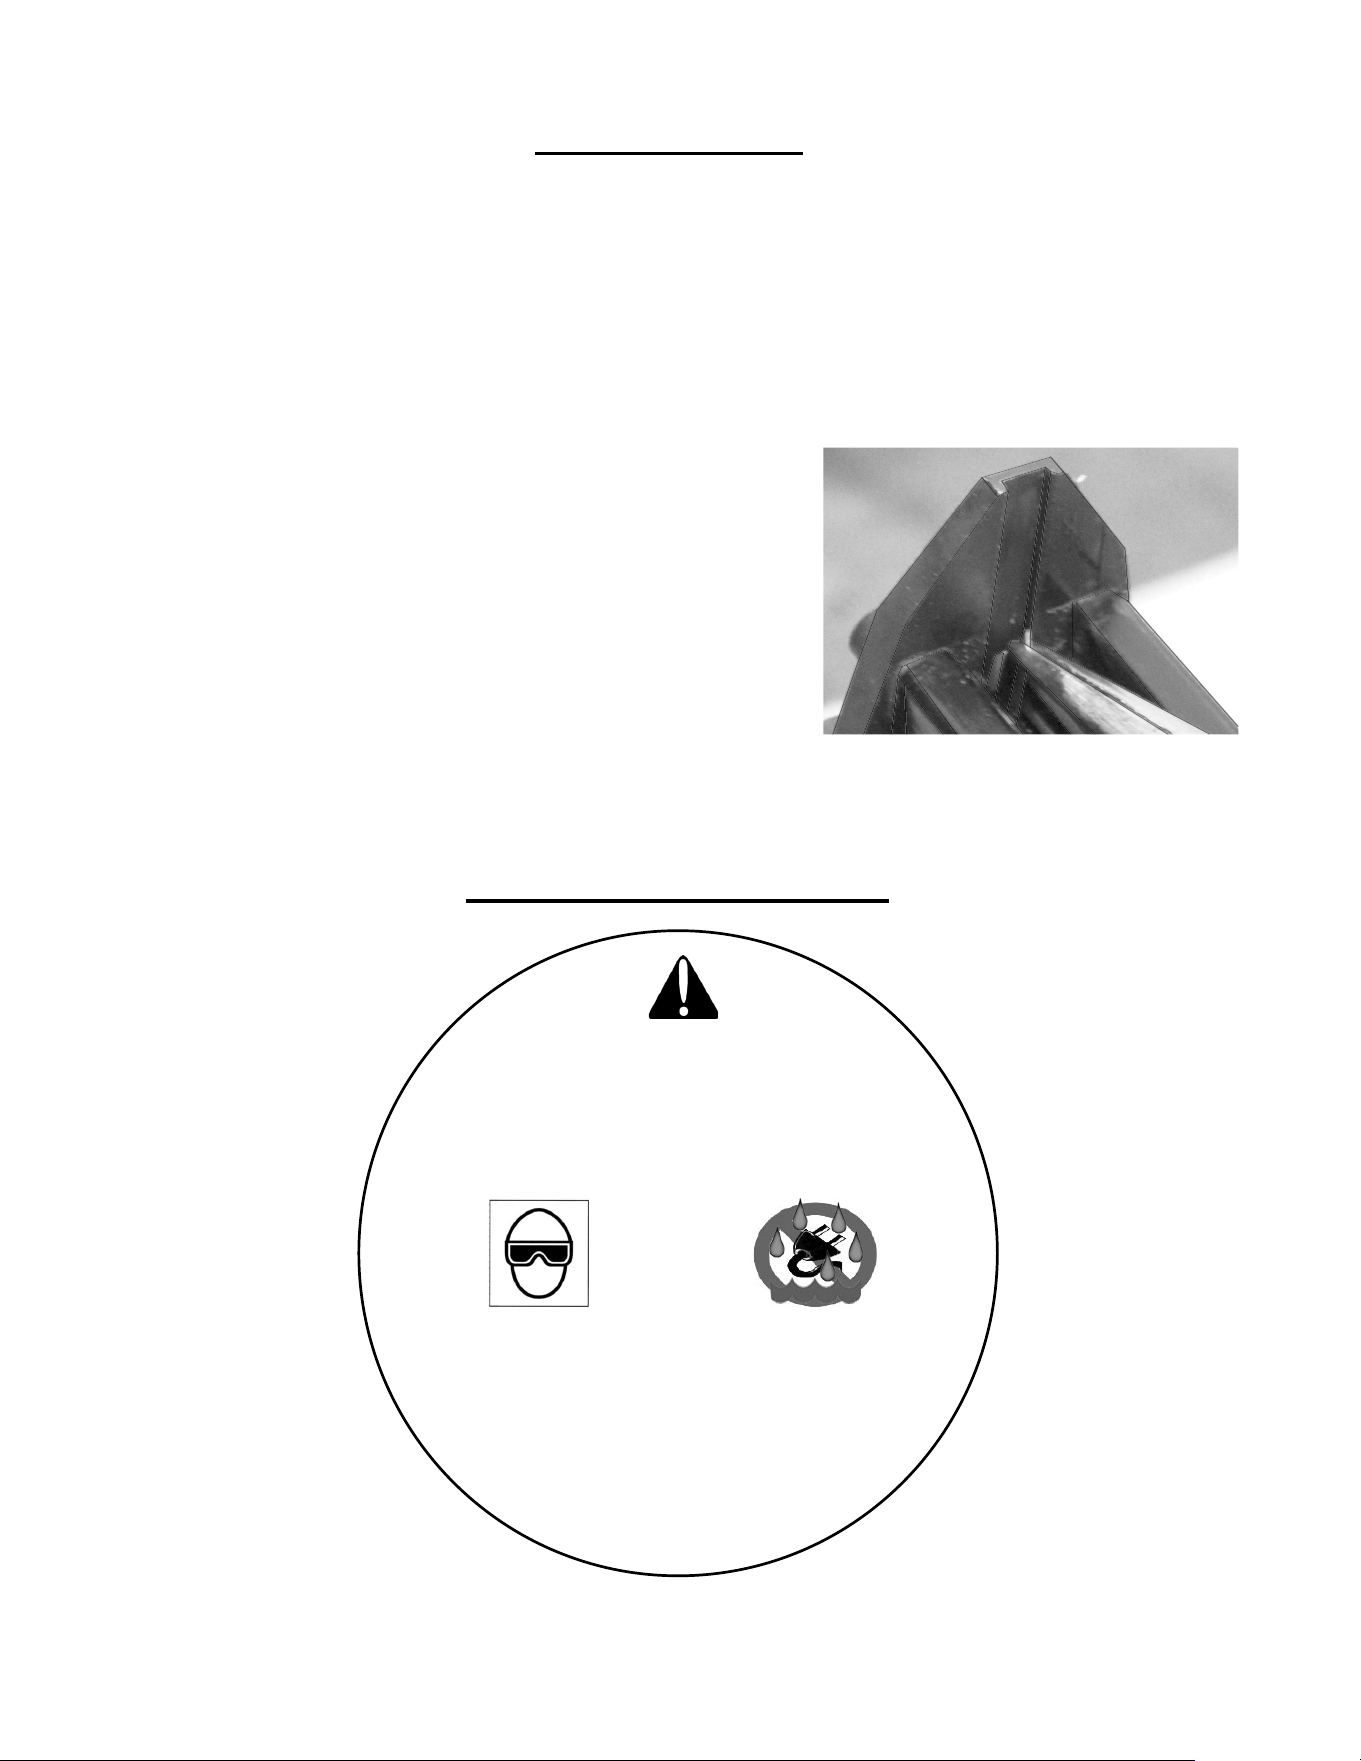
CLEARING JAMS
Use a needle-nose pliers to
remove jammed staples
WARNING!
To reduce risk of injury, user must read and
understand operating manual before using.
Always wear eye and ear protection.
Unplug when servicing or not in use.
Keep away from water.
ADVERTENCIA:
Para reducir el riesgo de lesiones, el usuario debe
leer y comprender manual de instrucciones antes de
usar. Siempre use aprobada protección
ocular y auditiva. Desconecte cuando en el
mantenimiento o no esté en uso. Mantener
alejado del agua.

8
Power Source: 15 Amps 120 Volts 60 Hz Single Phase
Dimensions: 9" L x 7.5" H x 2.75" W
Weight: 3.25 lbs.
Fastener Capacity: 85 staples
Fastener Type: 20 Gauge 3/16" Crown
Fastener Lengths: 1/4" , 5/16" , 3/8" , 1/2", 9/16"
Recommended Minimum AWG Size for Extension Cords.
Cord length (Feet): 25 ft 50 ft 100 ft 150 ft
AWG size (gage): 14 gage 14 gage 12 gage 12 gage
Inspect your tools power cord regularly and ensure that all power and extension cords are in
good working condition. Any damages cords or connectors should be replaced.
This tool should be grounded while in use to protect the user from electric shock. Use only
3-wire extension cords that have 3-prong grounding type plugs and 3-pole receptacles that
accept the tool plug. Always replace or repair damaged cords.
Improper extension cord use may result in the risk of fi re and/or electric shock.
If an extension cord must be used, always be sure :
a. That the plug of the extension cord are the same number, size and shape as
the pins on the plug of the tool.
b. That the extension cord is properly wired and in good condition.
c. The wire size is large enough to carry the full AMP rating of the tool.
d. CAUTION: An undersized cord will cause a drop in tool voltage resulting in
loss of power and overheating. If in doubt, use the next heaviest gage.
The smaller the gage number, the heavier the cord required for safety.
Powernail PowerTacker™ TECHNICAL SPECIFICATIONS
Voltage warning : before connecting this tool to a power source (outlet, receptacle, etc.), be
sure that the power supply is of the same voltage as specifi ed on tool.
Use of higher voltage than specifi ed could result in serious injury to the user and damage
the tool. Use of a lesser voltage can also cause damage to tool. Never connect tool to a dc
power source. To guard against electric shock, prevent body contact with grounded surfaces
such as pipes, radiators, ranges, etc. While in use, do not touch metal parts of tool. Only hold
plastic handle.
Do not abuse power cord. Never carry tool by cord or yank it to disconnect from receptacle.
Keep cord from heat, oil and sharp edges. Disconnect tool when not in use, before servicing
and when changing accessories. When tools are used outdoors, use only extension cords
intended for outdoor use.

PROBLEM POSSIBLE CAUSE SOLUTION
1
Tool repeatedly jams
1. Wrong staple size
2. Bent staple pusher
3. Clogged or damaged nose.
4. Misaligned magazine cover
1. Use only the correct size staples
2. Replace staple pusher
3. Unclog or replace nose
4. Replace or service magazine cover
2
Tools works but no
staple comes out
1. Jammed staple-feed pusher
1. Open staple-feed magazine cover and
unjam staple-feed pusher
3
Poor drive
1. Overheated tool
2. Extension cord gauge too small
1. Allow to cool
2. Use properly rated extension cord.
4
Tool will not operate
1. Plug or extension cord not getting power.
2. Trigger switch failure
3. Line cord damaged
4. Jammed driver blade/plunger
1. Check outlets and cords are live
2. Have trigger switch serviced
3. Have line cord serviced
4. Unjam driver blade/plunger
5
Tool overheats
1. Extension cord gauge too small
2. Using at too fast a pace
1. Use properly rated extension cords.
2. Pace work at a more reasonable speed
for the tool.
Here are some common issues that may occur during use.
If the stapler is not working as it should, stop using the tool immediately and resolve the issue
before continuing.
9
TROUBLE SHOOTING CHART

10
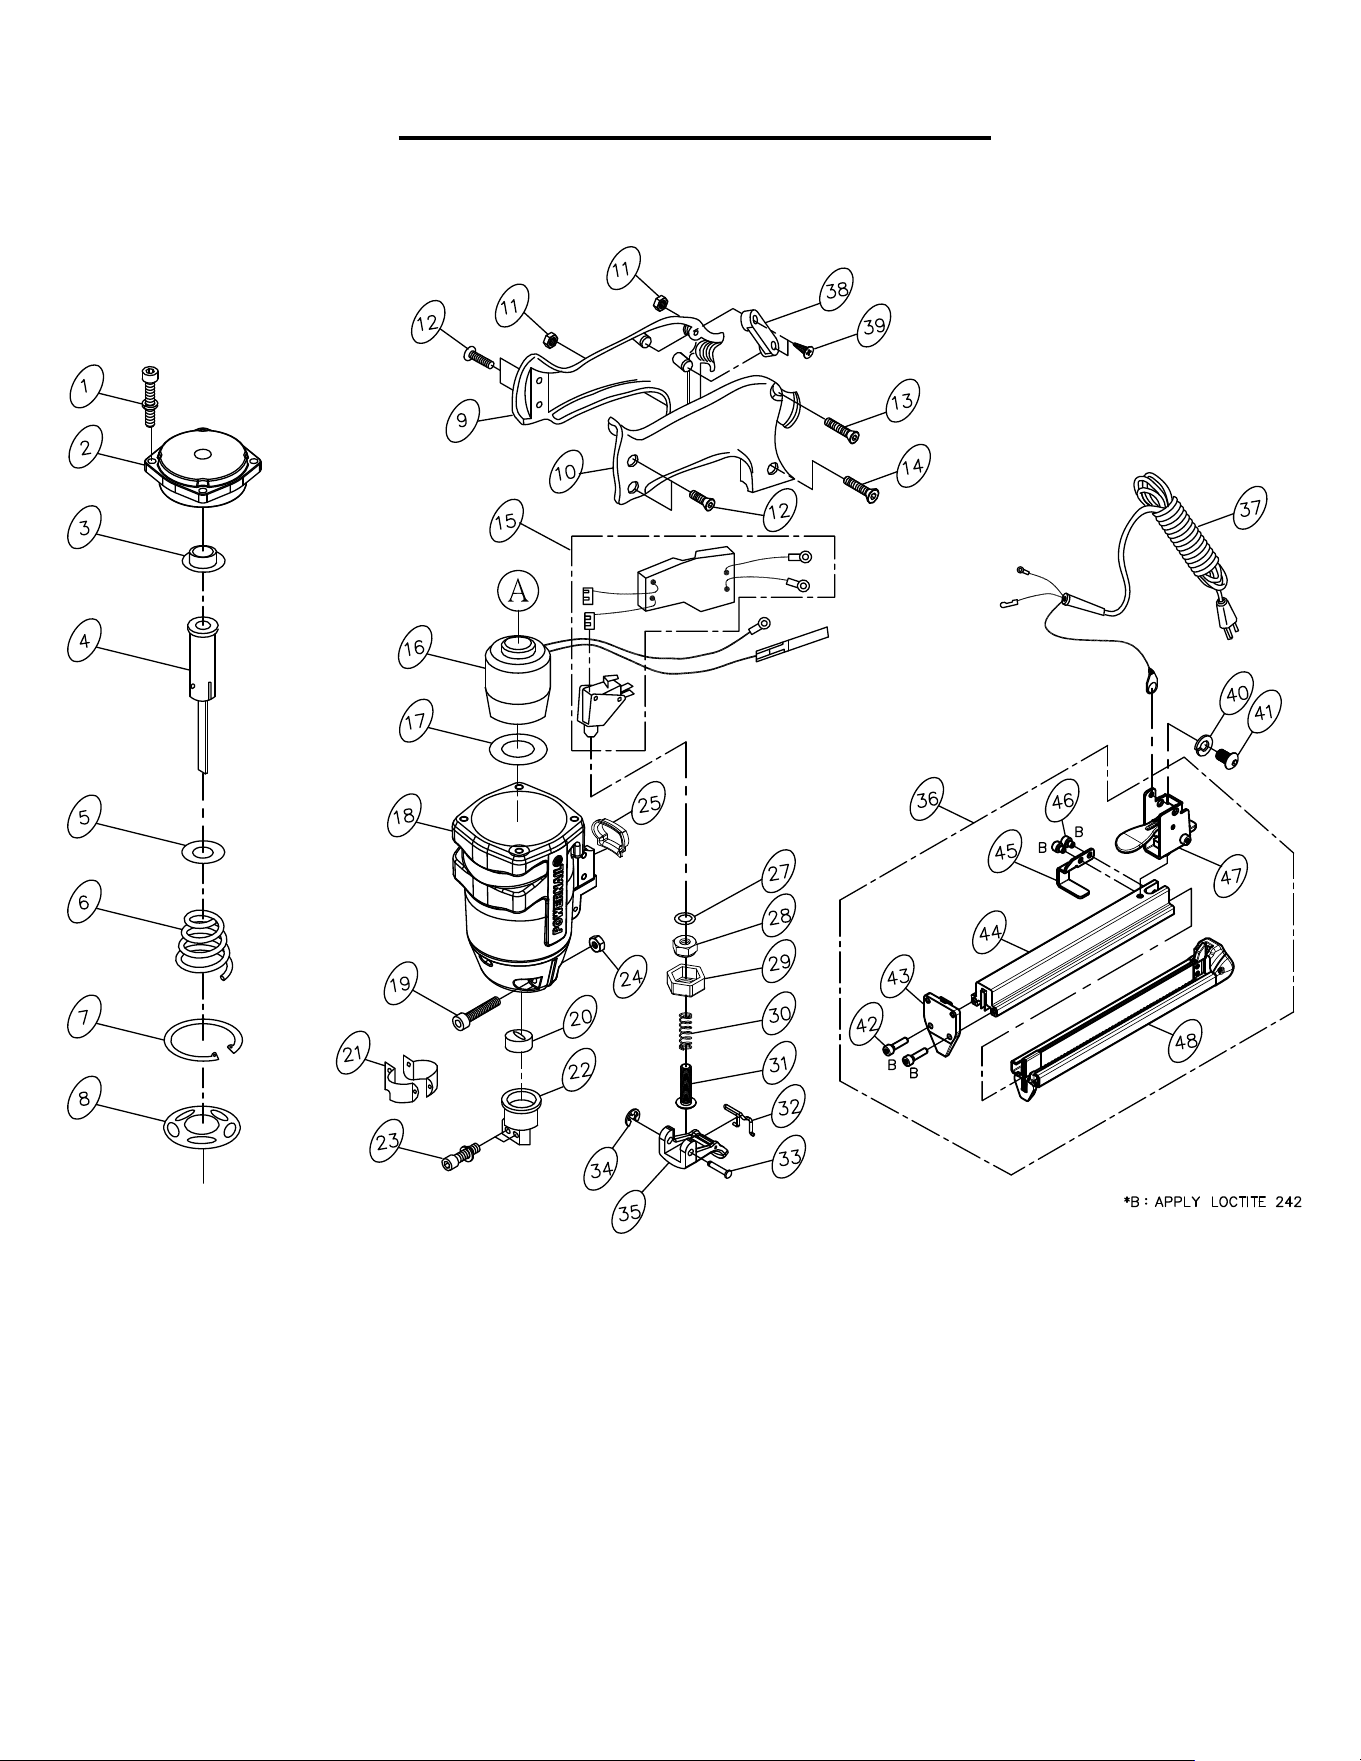
Powernail PowerTacker™ PARTS LIST
KEY: S=Sold Separately, n/a Not available separately, KIT=Sold as part of a Kit
DESCRTIPTION PART #
1 Screw M5x20 09-54E001
2 Cylinder Cap Assembly n/a
3 Bumper (Cap) n/a
4 Plunger Assembly 09-54E004
5 Plunger Disc Retaining Washer 09-54E005
6 Return Spring 09-54E006
7 C-ring n/a
8 Plunger Valve n/a
9 Handle (Right) 09-54E009
10 Handle (Left) 09-54E010
11 Nut M5 09-54E011
12 Screw M4x10 09-54E012
13 Screw M5x22 09-54E013
14 Screw M5x30 09-54E014
15 Switch and Circuit Board Assembly 09-54E015
16 Coil & Washer Assembly 09-54E016
17 Rubber Washer 09-54E017
18 Tool Body n/a
19 Screw 10-32x7/8 09-54E019
20 Bumper 09-54E020
21 Clamp n/a
22 Nose Retainer n/a
23 Screw M4x12 09-54E023
24 Nut 10-32 09-54E024
25 Sleeve 09-54E025
27 Lock Washer 09-54E027
28 Nut n/a
DESCRTIPTION PART #
29 Trigger Nut Seat n/a
30 Spring n/a
31 Contact Button n/a
32 Safety Buckle n/a
33 Pin n/a
34 Retainer Ring 09-54E034
35 Trigger 09-54E035
36 Magazine Assembly n/a
37 Cord Assembly 14 Gauge 09-54E037
38 Holder n/a
39 Screw M4x16 09-54E039
40 Spring Washer n/a
41 Screw 5/32x1/2 n/a
42 Screw M4x16 09-54E042
43 Nose 09-54E043
44 Magazine n/a
45 Stopper n/a
46 Screw M4x05 09-54E046
47 Release Lever Assembly 09-54E047
48 Staple Guide Unit 09-54E048
11
Powernail PowerTacker™ SCHEMATIC

POWERNAIL COMPANY, INC.
1020 Williams Road, Genoa City, WI 53128 US
Phone: 1-800-323-1653 or 262-292-5300
www.powernail.com