Thank you for choosing our heater. This user manual will provide you with valuable
information necessary for the proper care and maintenance of your new product.
Please take a few moments to thoroughly read the instructions and familiarize
yourself with all the operational aspects of your new product.
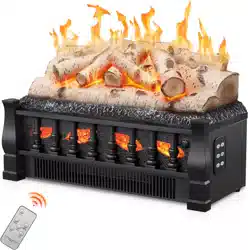
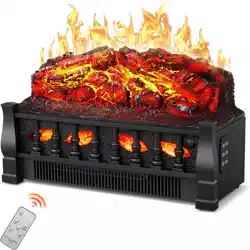
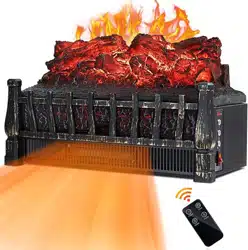
ELECTRIC FIREPLACE STOVE HEATER
OWNER'S MANUAL

Please take a few minutes to read
this manual carefully.
SAFETY TIPS & WARNINGS PAGES 4-5
Proper maintenance and operation of this
machine can provide better service.
INTRODUCTION
SECTION 1
PARTS & ACCESSORIES PAGES 6
SPECIFICATIONS PAGES 6
SECTION 2
PRODUCT DIAGRAM PAGES 7
CONTROL PANEL PAGES 7
REMOTE CONTROL PAGES 8
SECTION 3
PREPARATION PAGES 9
SECTION 4
OVERHEAT PROTECTION PAGES 11
MAINTENANCE PAGES 11
SECTION 5
STORAGE PAGES 12
TROUBLE SHOOTING PAGES 12
SECTION 6
TABLE OF CONTENTS
OPERATING INSTRUCTIONS PAGES 9-10

When using this electric unit, basic safety precautions should always be followed to reduce
the risk of fire, electric shock, and injury to persons, including the following:
(1). Read all instructions before using this unit.
(2). CAUTION: Risk of Electric Shock. DO NOT open or try to repair the heater yourself.
(3). This heater may get hot when in use. To avoid burns, DO NOT let bare skin touch hot
surfaces.
(4). Keep combustible materials, such as furniture, pillows, bedding, paper, clothes, and
curtains at least 3 ft from the front of the heater and keep them away from the sides, top,
and rear. DO NOT place towels or other objects on the heater.
(5). Extreme caution is necessary when any heater is used by or near children or the
disabled, or when the heater is left operating and unattended.
(6). 6.DO NOT operate any heater with a damaged cord or after the heater malfunctions,
has been dropped or damaged in any manner. Return heater to authorized service facility
for examination, electrical or mechanical adjustment, or repair.
(7). This heater is not intended for use in bathrooms, laundry areas and similar indoor
locations. NEVER locate heater where it may fall into a bathtub or other water container.
To protect against electrical hazards, DO NOT immerse in water or other liquids.
(8). DO NOT touch the control panel or plug with a wet hand.
(9). DO NOT run cord under carpeting. DO NOT cover cord with throw rugs, runners, or
similar coverings. Arrange cord away from traffic area and where it will not be tripped over.
(10). DO NOT insert or allow foreign objects to enter any ventilation or exhaust opening as
this may cause an electric shock or fire, or damage the heater.
(11). To prevent a possible fire, DO NOT block the air intakes or exhaust in any manner.
DO NOT use on soft surfaces, like a bed, where openings may become blocked.
(12). A heater has hot and arcing or sparking parts inside. DO NOT use in areas where
gasoline, paint, explosive and/or flammable liquids are used or stored. Keep unit away
from heated surfaces and open flames.
(13). Always plug heaters directly into a wall outlet / receptacle Never use with an
extension cord or relocatable power tap (Outlet / Power strip).
(14). To avoid fire or shock hazard, plug the unit directly into a 120 V AC electrical outlet.
(15). To disconnect heater, turn controls to OFF, then remove plug from outlet. Pull firmly
on the plug, DO NOT unplug by pulling on the cord.
(16). Always unplug the unit before moving or cleaning, or whenever the heater is not in
use.
(17). Use only for intended household use as described in this manual. Any other use not
recommended by the manufacturer may cause fire, electric shock, or injury to persons.
The use of attachments not recommended or sold by unauthorized dealers may cause
hazards.
(18). Always use on a dry, level surface. Use on floor only.
(19). DO NOT use outdoors.
(20). WARNING: To reduce the risk of fire or electric shock, DO NOT use this unit with
any solid-state speed control device.
(21). DO NOT attempt to repair or adjust any electrical or mechanical functions on this
unit. Doing so will void your warranty. The inside of the unit contains no user serviceable
parts. Qualified personnel should perform all servicing only.
SAFETY TIPS & WARNINGS
!
- 4 - - 5 -
ELECTRIC STOVE HEATER
PRODUCT USE GUIDE
FP201R
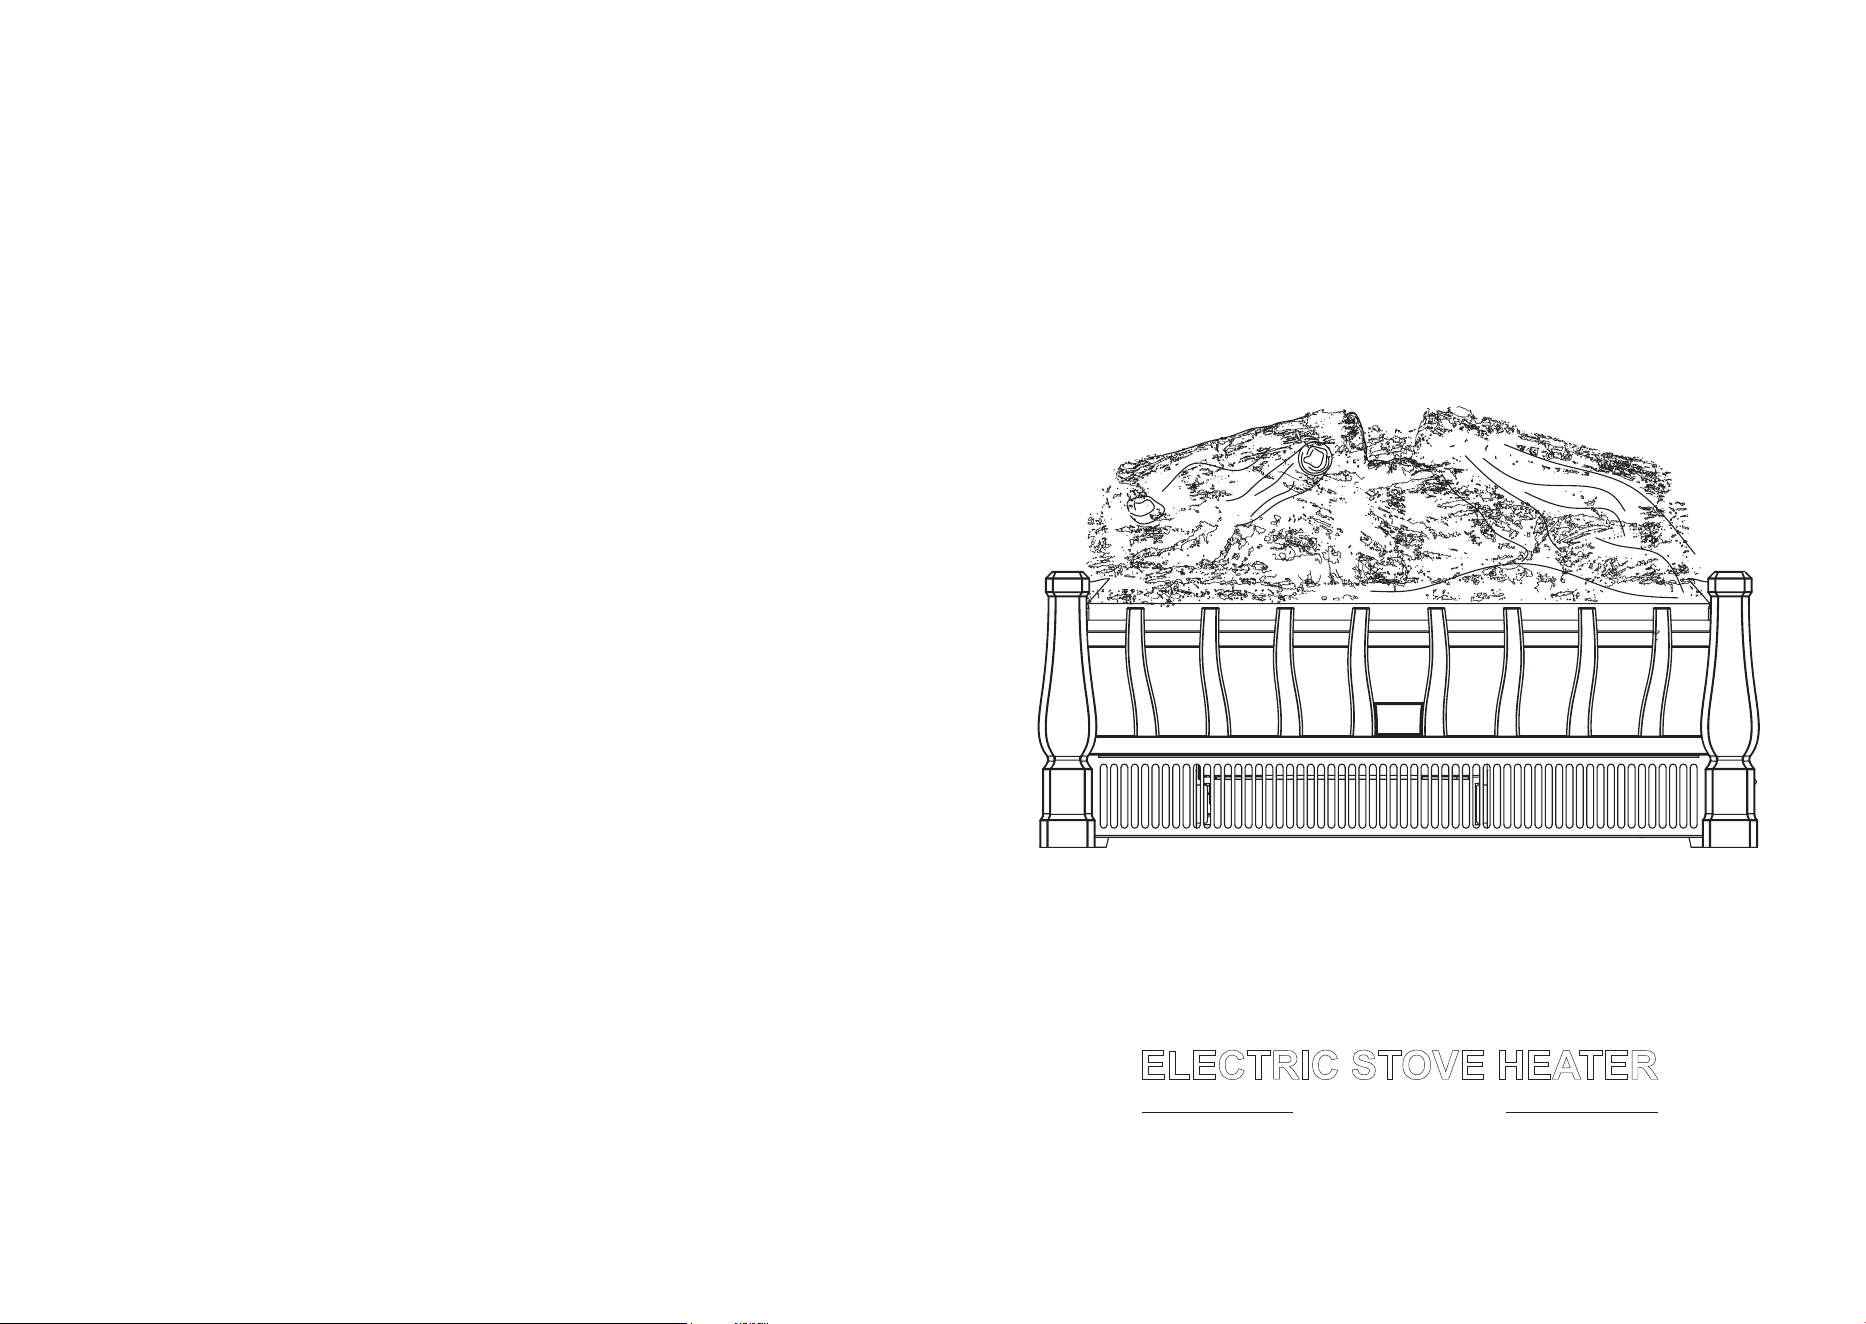
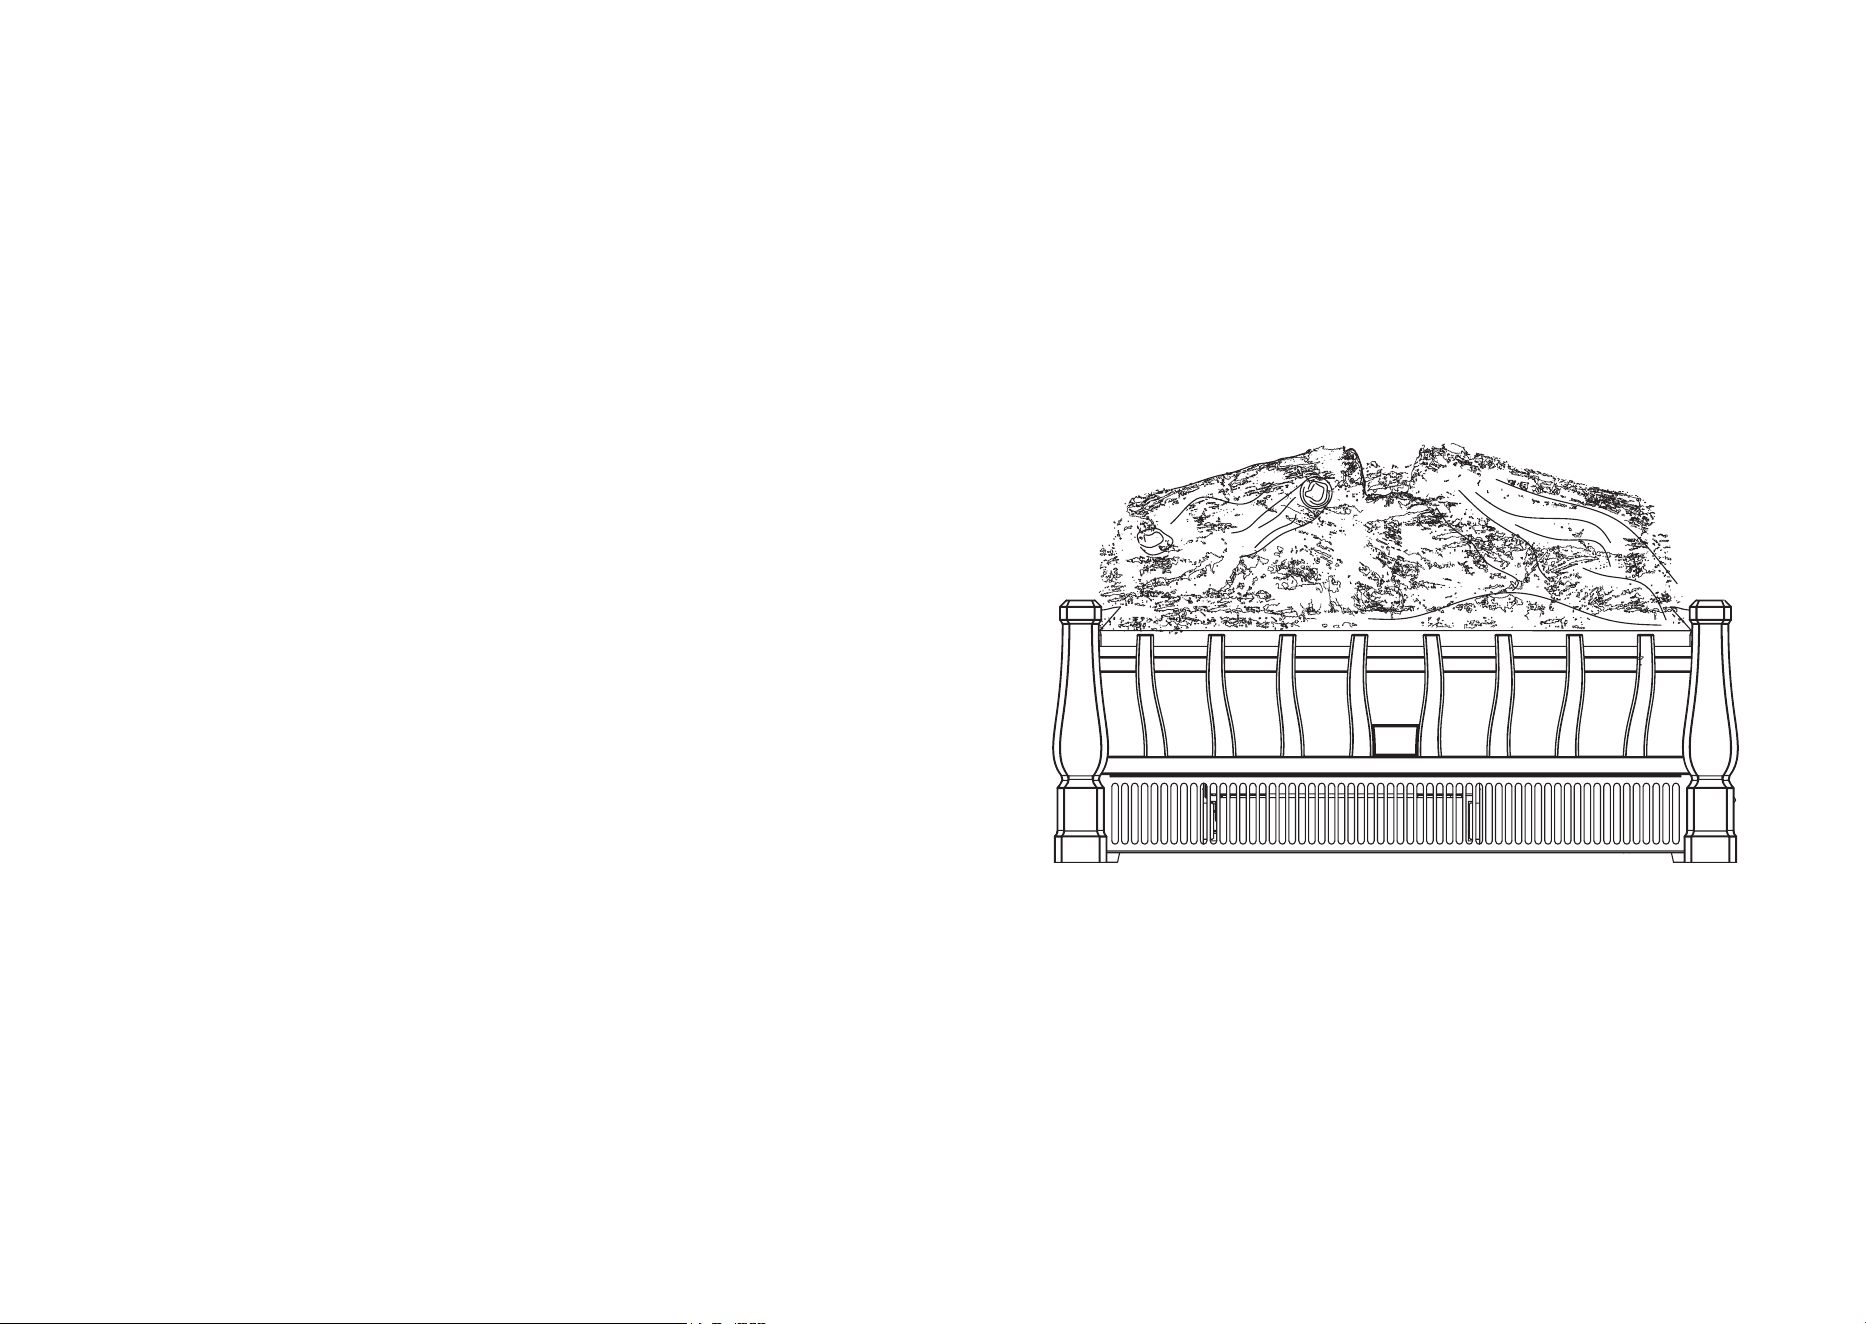
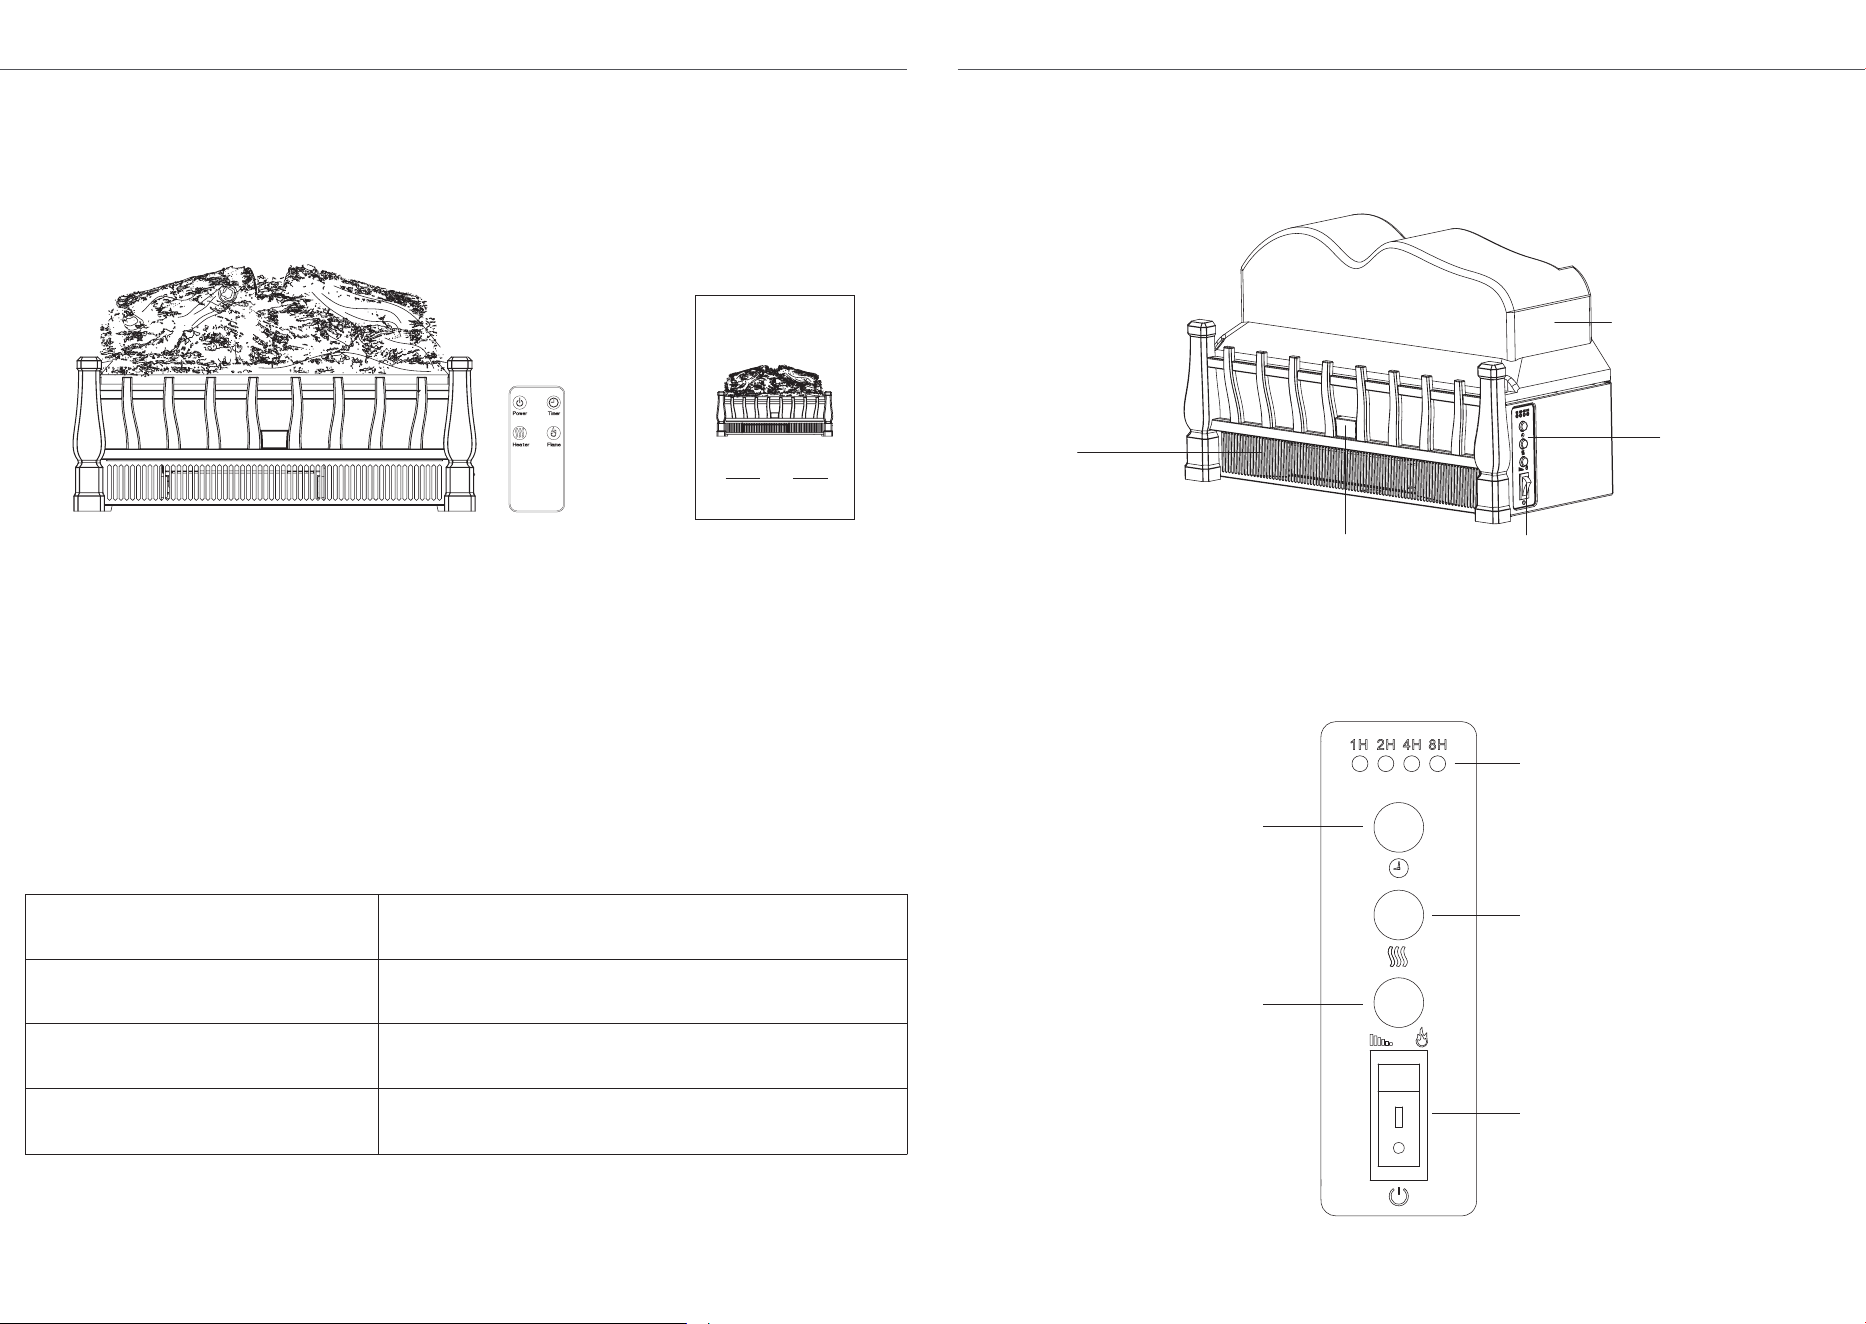
PARTS & ACCESSORIES
Electric Fireplace Stove Heater
TIMER LIGHT:
Indicate the timer mode
Air Outlet
Artificial Charcoal Set
Receiver Cover
Instruction
SPECIFICATIONS
PRODUCT DIAGRAM
CONTROL PANEL
Voltage Rating
Power Consumption 1500 W
120 V / 60 Hz
Unit Size
Unit Weight 12.13 LB
20.5 in. (W) x 8.7 in. (D) x 12.2 in. (H)
- 6 - - 7 -
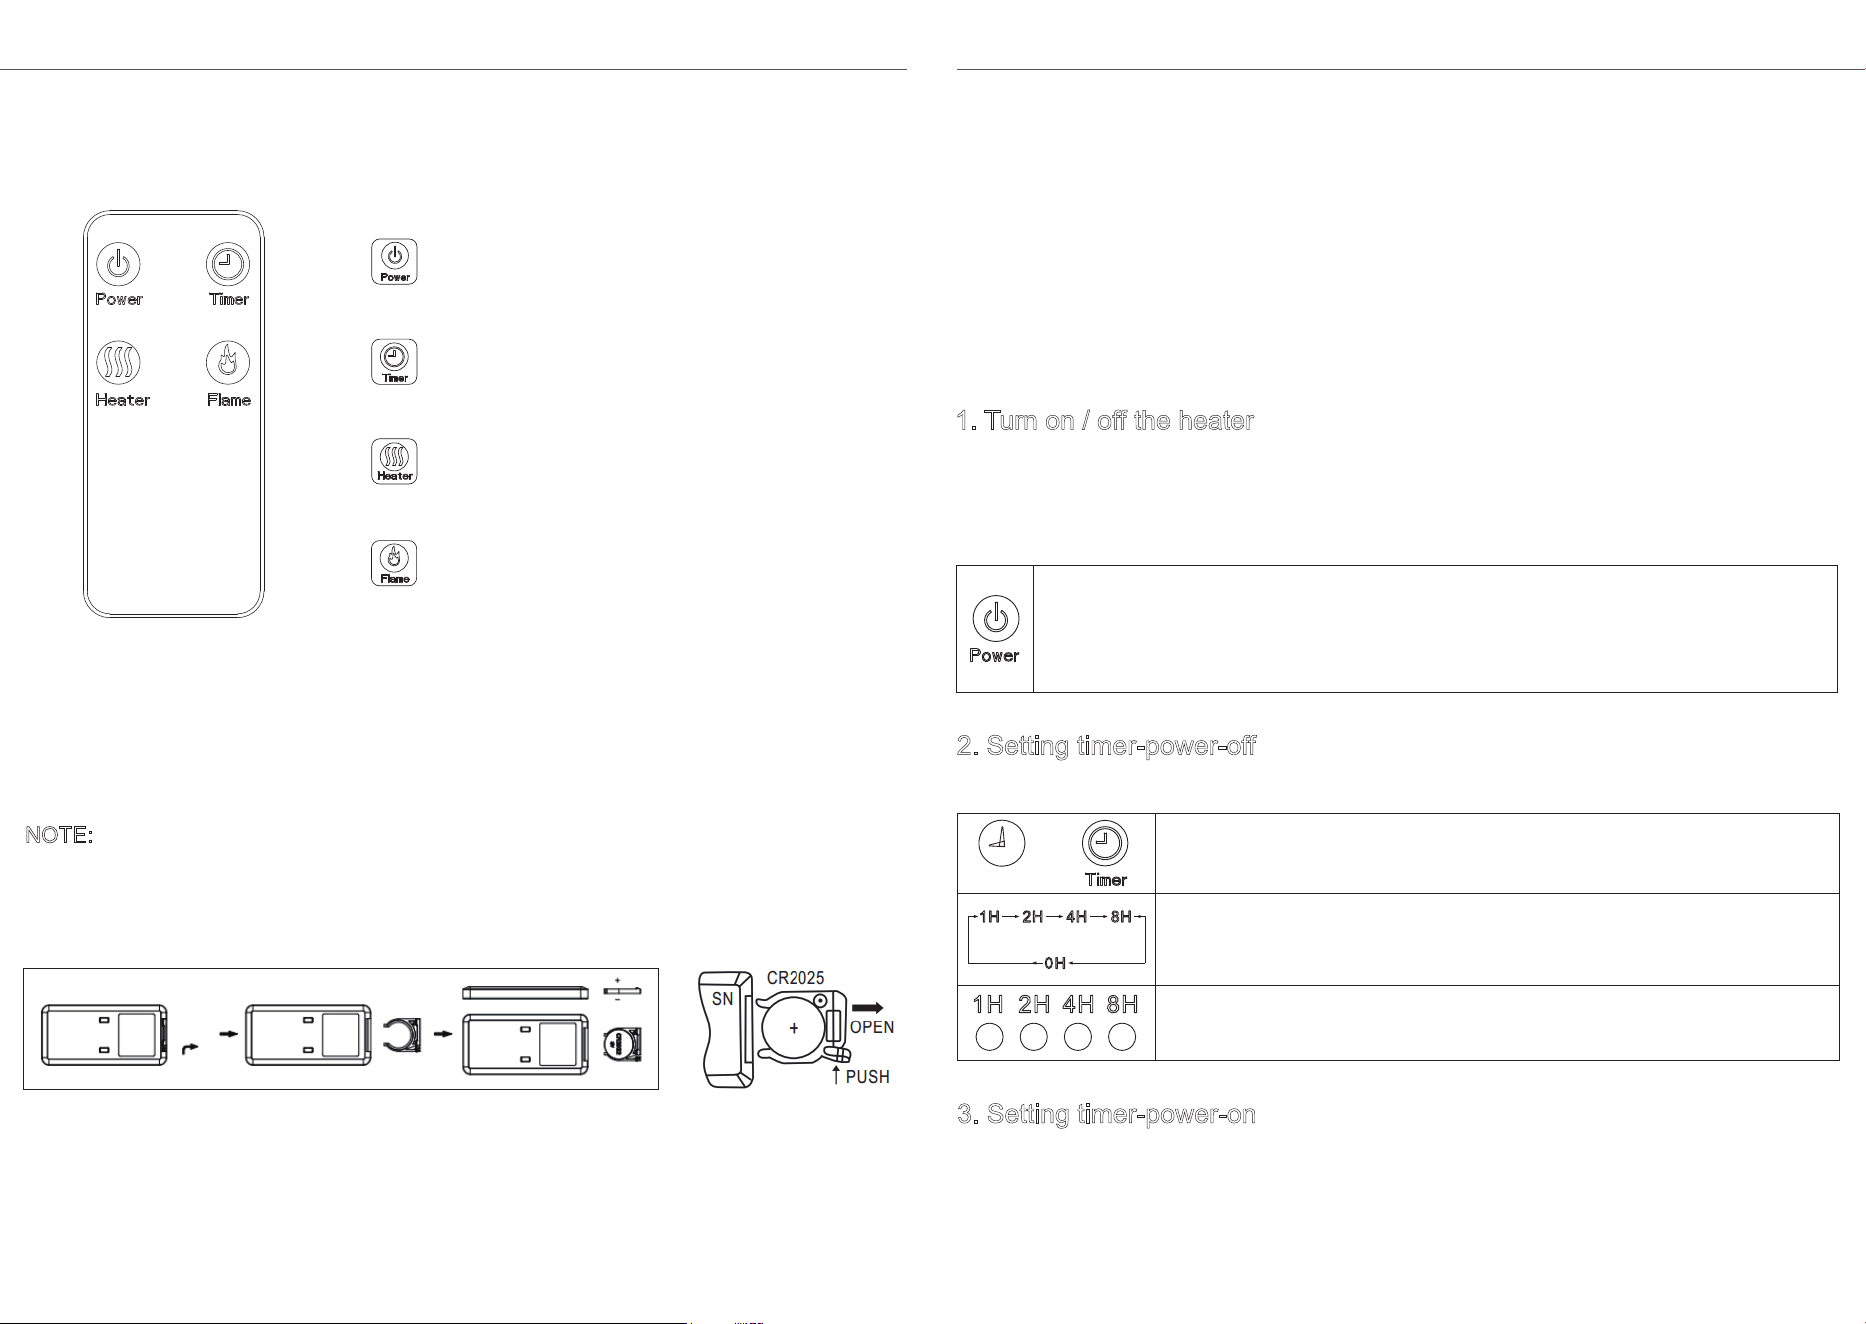
POWER BUTTON:
Powers the heater on and off.
HEATER BUTTON:
Set up the heat mode and
turn off the heat.
TIMER BUTTON:
User setting timing boot or
shutdown.
FLAME BUTTON:
Set the brightness of
the flame
Control Panel
Power Switch
- 8 - - 9 -
PREPARATION
Place the heater on a firm, level surface and plug into a 120V 60Hz power outlet.
Caution: The rear of the heater should be at least 4 inch away from the wall.
Please pull the insulating film out of battery cover before using the remote control.
OPERATING INSTRUCTIONS
First turn on the Power switch on the right side of the heater. The Power switch supplies
power to all the function of the fireplace. This switch must be in “ I ” position for any
functions including the remote control to work.
1. Turn on / off the heater
Caution: Only under power-on mode can you set timer-power-off function.
2. Setting timer-power-off
Press the Power button on the remote control, the heat and flame effect will be
on. Press the Power button again, heat and flame effect will be off immediately
(but the fan will prolong working for 30 seconds), and then the heater goes into
a standby mode.
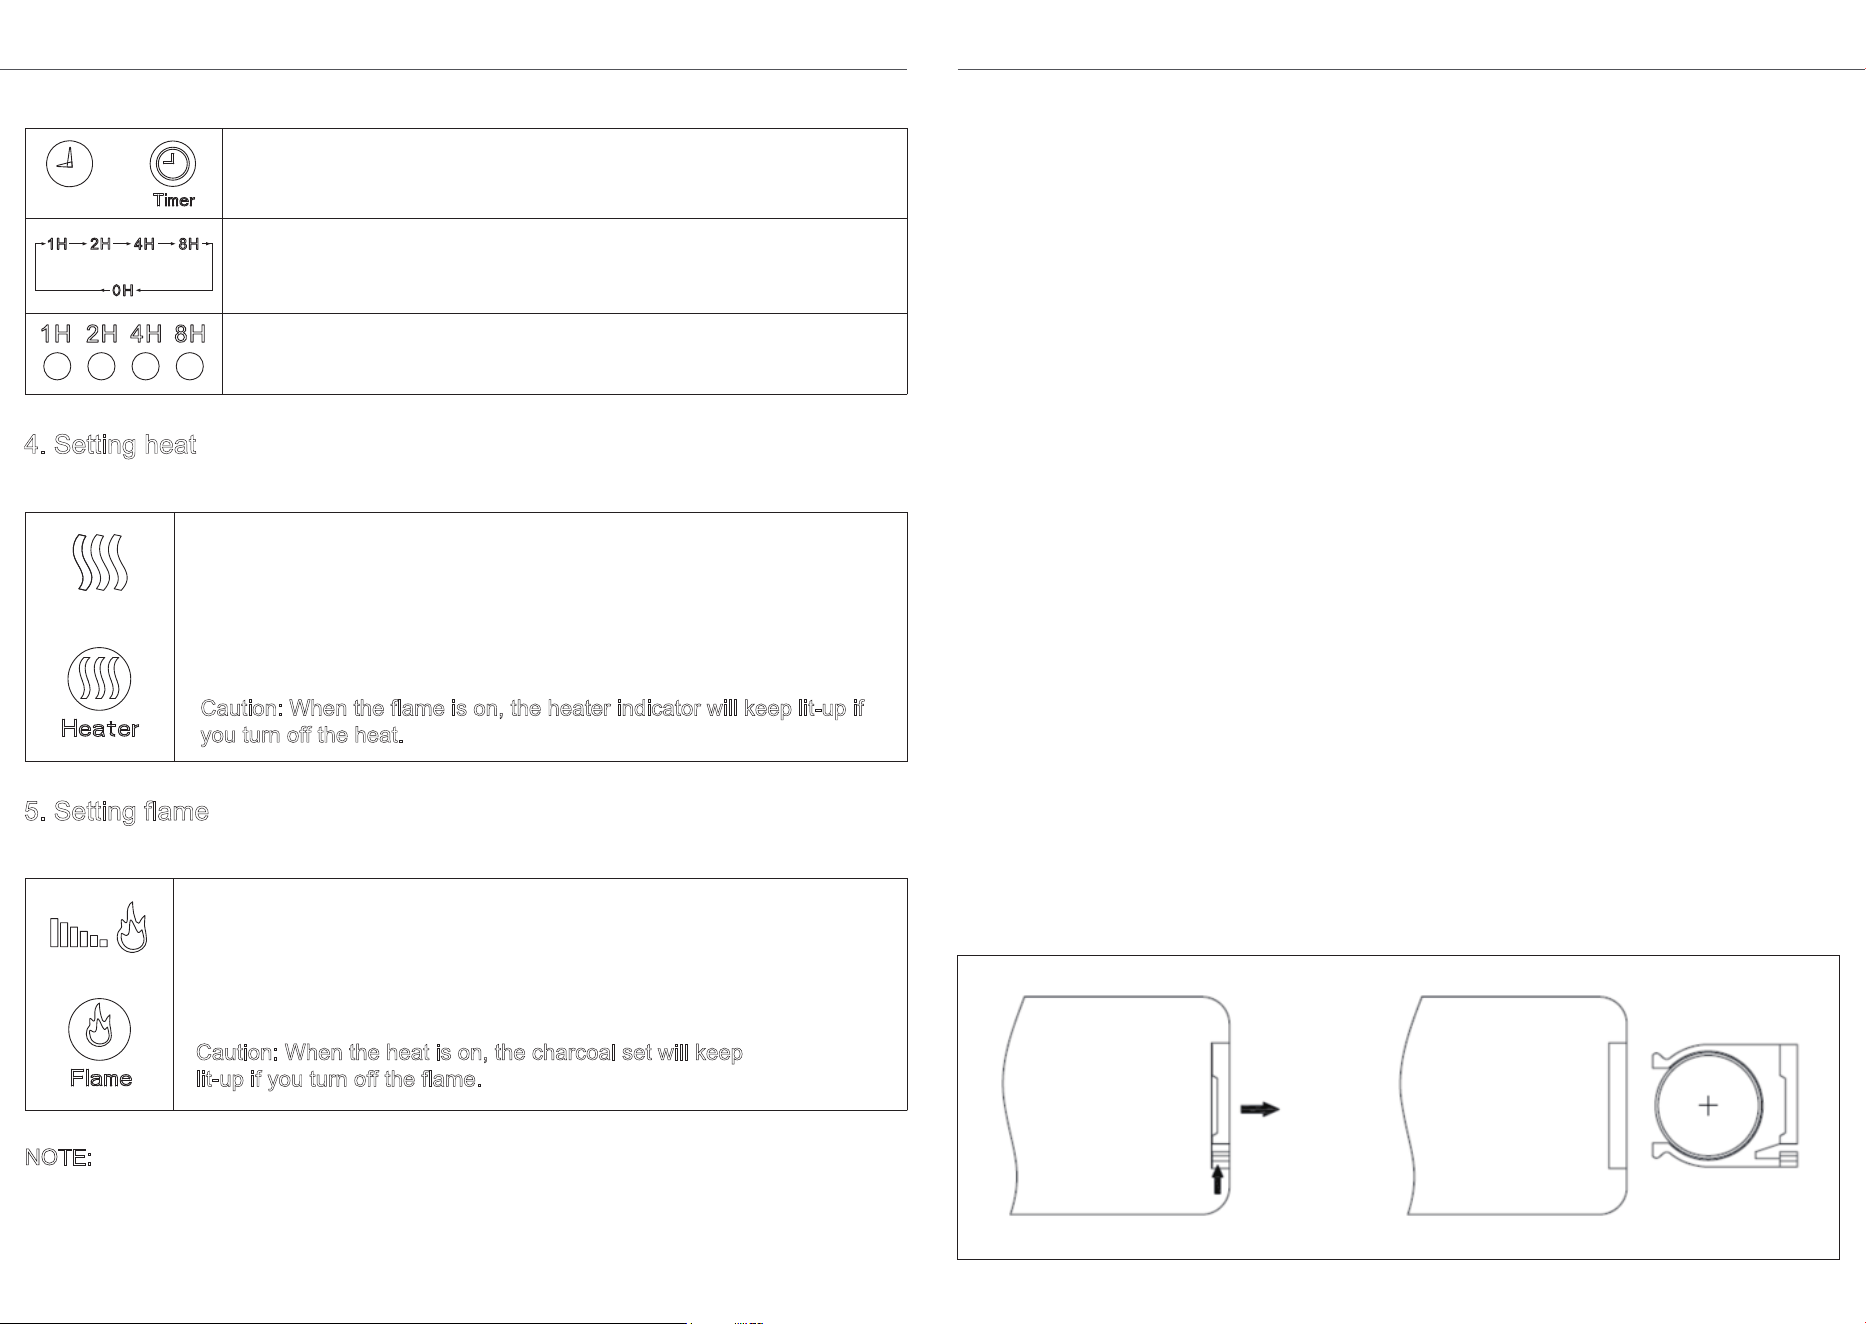
When the unit is power on, press the Timer button to set timer-
power-off function. (Through control panel or remote control.)
Under power-on, the timer light demonstrates the timer-power-off
mode. Press the Timer button more than once, the time value will
vary through the path 0-1h-2h-4h-8h-0 in circulation.
The corresponding light is on when timer –power-off is set.
or
Caution: Only under standby mode can you set timer-power-on function.
3. Setting timer-power-on
Before using the remote control, you must remove the insulating film.
1. All functions performed with remote control work identically to the heater control panel.
2. Aim the remote control at the heater control panel to operate the heater.
REMOTE CONTROL
The remote control uses on button cell battery, type CR2025(3V). To remove the battery
carriage use your thumb to squeeze the release tab to the right and then pull the carriage
out. Place the battery into the carriage and slide the carriage back into the remote.
POWER BUTTON:
Powers the heater on and off.
HEATER BUTTON:
Set up the heater mode.
TIMER BUTTON:
User setting timing boot or shutdown.
NOTE:
Follow battery disposal instruction on battery packaging, or contact your local safety
council for safely disposal of batteries.
FLAME BUTTON:
Turn on/off the flame and adjust the brightness.
(1). Turn off the heater of the power switch.
(2). Unplug the unit and let it cool completely.
(3). To keep the heater clean, the outer shell may be cleaned with a soft, damp cloth.
You may use a mild detergent if necessary. After cleaning, dry the unit with a soft cloth.
CAUTION: DO NOT let liquid enter the heater.
(4). DO NOT use alcohol, gasoline, abrasive powders, furniture polish, or rough brushes
to clean the heater. This may cause damage or deterioration to the surface of the heater.
(5). DO NOT immerse the heater in water.
(6). Wait until the unit is completely dry before use.
(7). If won’t use the unit for a long time, please take out battery in remote control
according to following steps, then take care of the remote control.
MAINTENANCE
OVERHEAT PROTECTION
This heater is protected with an overheat protection that switches off the appliance
automatically in case of overheat, e.g. due to the total or partial obstruction of the grids.
In this case, unplug the appliance, wait about 30 minutes for it to cool and remove the
object which is obstructing the grids. Then switch it back on as described above.
The appliance should operate normally. Should the problem persist, please contact the
customer service.
- 10 - - 11 -
NOTE:
When using the heater for the first time, it is normal for the hot wind with a bad smell. It
will disappear after a few minutes.
or
or
Under standby mode, press the Timer button to set timer-power-on
function (through control panel or remote control).
Under standby, timer light demonstrates the timer-power-on mode.
Press the Timer button more than once, the time value will vary
through the path 0-1h-2h-4h-8h-0 in circulation.
The corresponding light is on when timer –power-on is set.
Under standby mode, press Heater button to start heater.
4. Setting heat
Under standby mode, press the Heater button on the control panel or
remote control, the heater will start (The heater indicator is under the
artificial charcoal set. When heat is on, the charcoal set will be lit up
and flicker automatically at a slow pace). Press the Heater button
again. Heat and heater indicator will be off while fan will prolong
working for 30 seconds to emit plenty of heat inside.
Caution: When the flame is on, the heater indicator will keep lit-up if
you turn off the heat.
or
Under standby, press the Flame button to watch the flame effect.
5. Setting flame
Under standby, press Flame button, the flame will be on at brightest.
The charcoal set will be lit up and flicker automatically at a slow pace.
Each time this button is pressed, the intensity of the flame decreases.
There are five brightness levels you can cycle through including the
OFF setting.
Caution: When the heat is on, the charcoal set will keep
lit-up if you turn off the flame.

Store the heater in a cool, dry location when not in use. To prevent dust and dirt build-up,
use the original packaging to repack the unit.
STORAGE
If the heater will not operate, please check the following before seeking repair advice:
1. Check if the power cord is plugged into an electrical outlet, if not, plug in.
2. Check if electricity to the main power switch (in the back) is working.
3. Check the power switch is on.
4. If the remote not work, please replace the battery first.
TROUBLE SHOOTING
- 12 -
WARRANTY
After-sales Service Letter of Commitment
All products purchased in our company are guaranteed to keep in good repair for 1 year
If quality problems happen in guarantee period, our company will maintain for free or
provide replacement. Additionally, our company provides technical support and fittings
for life. After-sales service isn't restricted by time and hear feedback idea of users and
deal with them in time. If you are caught in some problems when using our products,
welcome to contact us at any time.