Please make sure to read the enclosed Ninja
®
Quick Start Guide prior to using your machine.
INSPIRATION GUIDE
SCAN HERE
for how-to videos,
recipes, and
cleaning &
maintenance.
PREMIER SERIES

TABLE OF CONTENTS
Get to Know Your Luxe Cafe .................................................................... 4
Brew Tips ..................................................................................................... 10
How to Brew Espresso .............................................................................. 12
How to Brew Filter Coee ......................................................................30
How to Brew Cold Brew ..........................................................................34
Your At-home Barista ............................................................................... 38
Choosing The Right Beans ..................................................................... 40
Learn More About Barista Assist Technology ...................................42
Cleaning & Care .........................................................................................43
YOUR GUIDE TO
ESPRESSO & COFFEE
PERFECTION
WITHOUT THE GUESSWORK
Welcome to Ninja Luxe Cafe, the intelligent system that
guides you to the perfect cup. From here, you’re pages
away from tips, tricks, and how-tos on creating a
café-quality cup of espresso, filter coee,
or cold brew. Now let’s get brewing.
3
SCAN HERE
for accessories,
how-to videos
& quick tips
2
Water Filter
Inserts
Cleaning
Tablets
1 packet included
ELEVATE
YOUR STATION
Find premium accessories,
extra cleaning supplies, and
more on ninjakitchen.co.uk
530ml Shareable
Pitcher
Knock Box
for used grounds
Descale
Powder
1 packet included
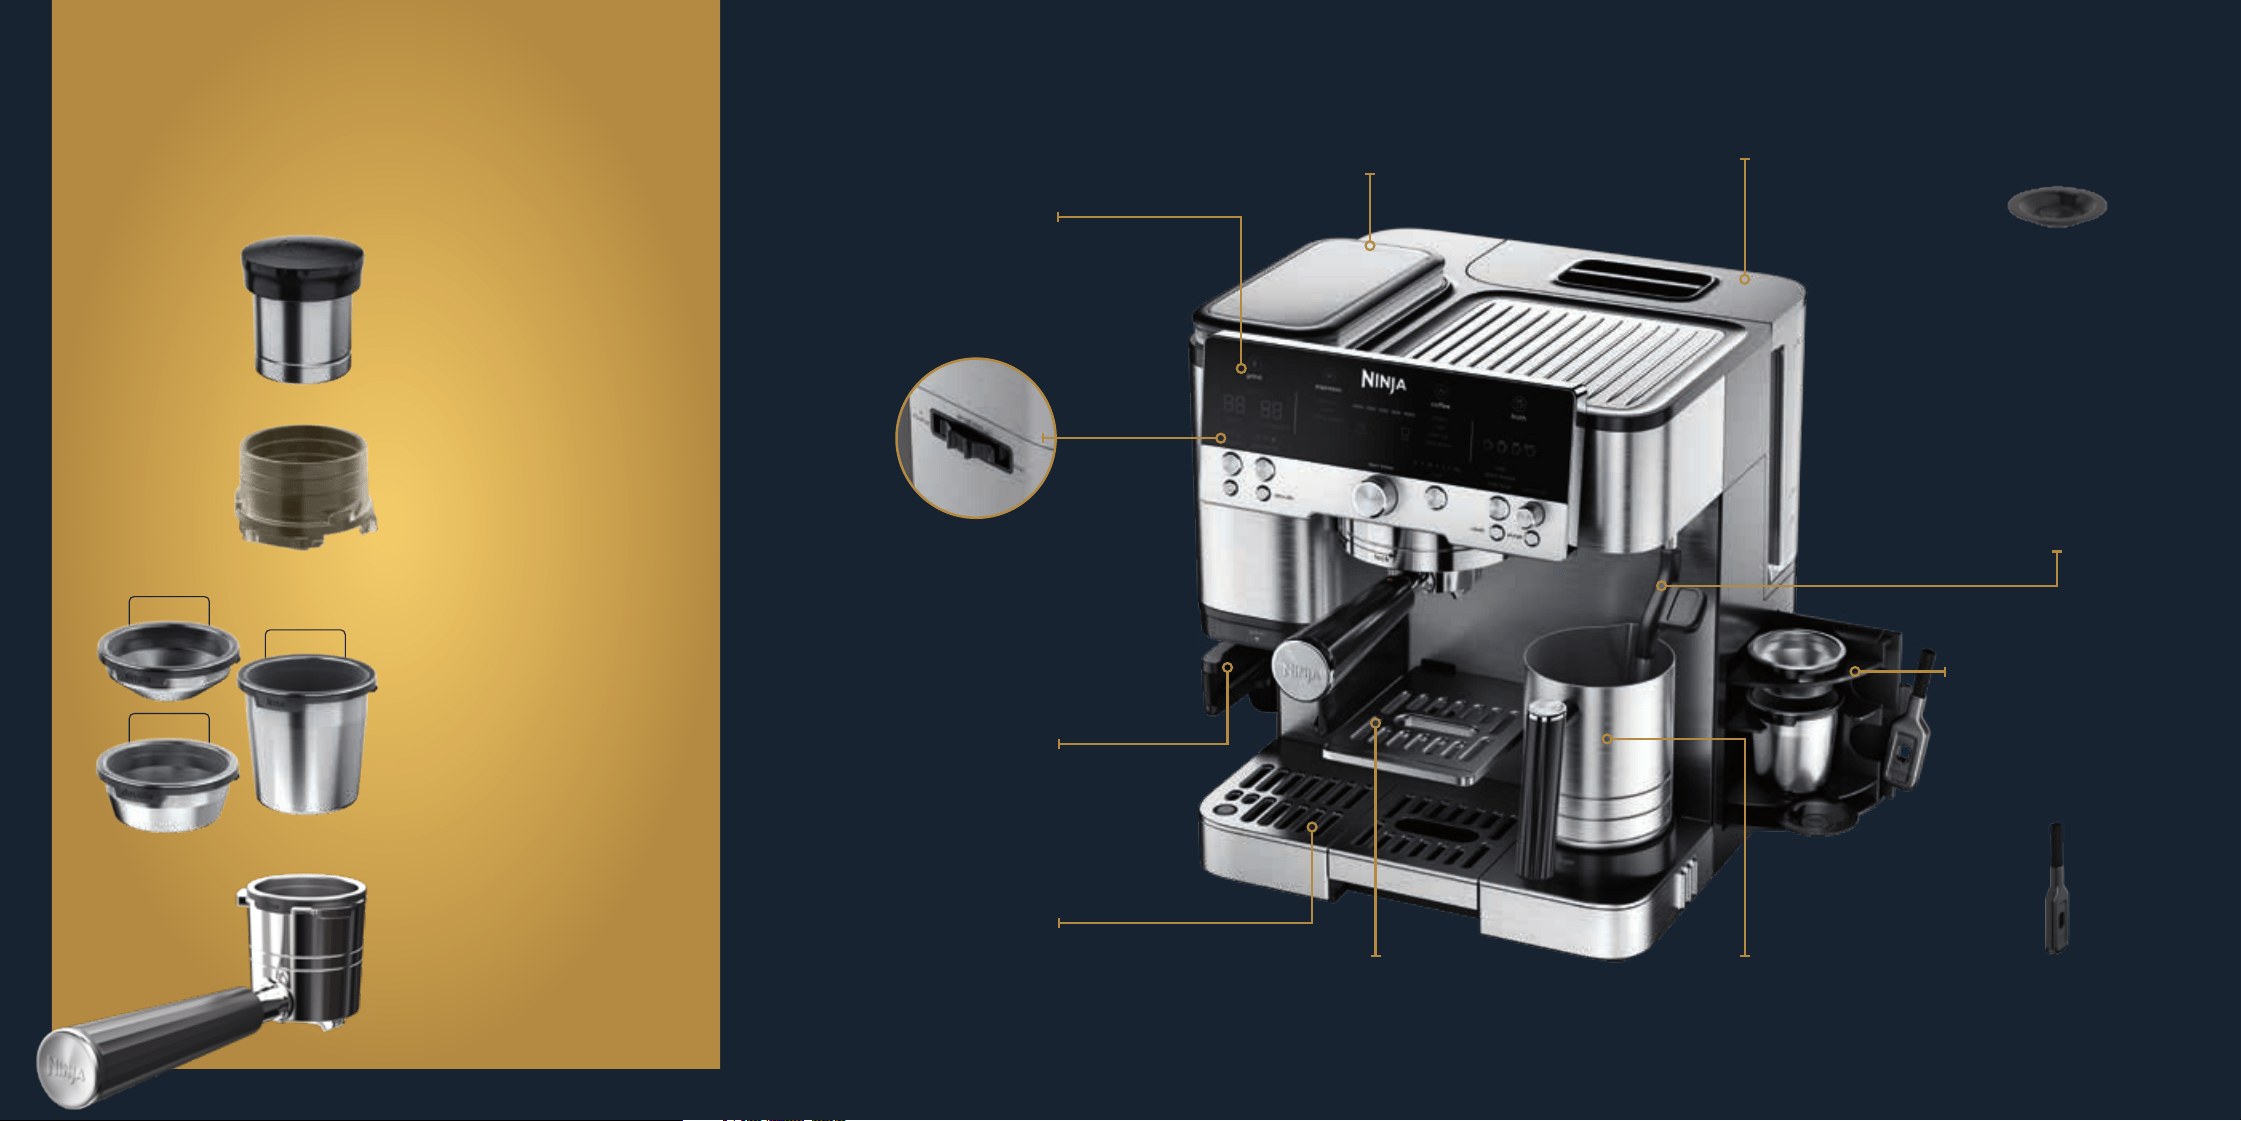
Easy-to-Use
Control Panel
Intuitive display with
grind recommendations
and a progress bar.
Bean Hopper
Shields beans from UV light
to keep them fresh longer.
Removable for easy refilling.
Water Reservoir
2L removable
water reservoir.
Integrated Conical
Burr Grinder with dial
Precisely grinds beans for
uniform grounds. Choose
between 25 grind settings,
from coarse to extra-fine.
Modular Drip Tray
with Indicator
Catches drips and detaches
for easy cleaning. Removable
centre tray fits a travel mug.
Adjustable Cup Tray
Removable stand with
3 dierent levels minimises
drips and splashing.
Built-in Scale
Weight based dosing to
ensure the perfect amount
of grounds every time.
Steam Wand
Steams milk and monitors
temperature to prevent
burning. Self cleans with
auto-purge feature.
Accessory Storage
Used to store
the single basket,
double basket,
luxe basket,
cleaning disc,
and brush.
Funnel
Prevents grounds from
overflowing when grinding
and assists tamping.
Always install funnel before
grinding.
Assisted Tamper
Designed to apply the right
amount of even pressure for
the perfect puck.
Portafilter
Holds baskets for grinding
and brewing.
Cleaning Disc
Used to run a cleaning cycle.
Refer to Owner’s Guide
for instructions.
Cleaning Brush
Can be used to clean any
part of the machine, before
or after use.
Milk Jug with
Integrated Whisk
Engraved fill lines for easy
reference and an attached whisk
for fluy, hands-free froth.
GET TO KNOW YOUR
LUXE CAFE
5
Single, Double &
Luxe Baskets
Sits inside the portafilter to hold
grounds and brew your drink.
SINGLE: espresso, americano,
cold-pressed
DOUBLE: espresso, americano,
cold-pressed
LUXE: quad espresso, americano,
filter coee, cold brew,
cold-pressed
LUXE
DOUBLE
SINGLE
6
7
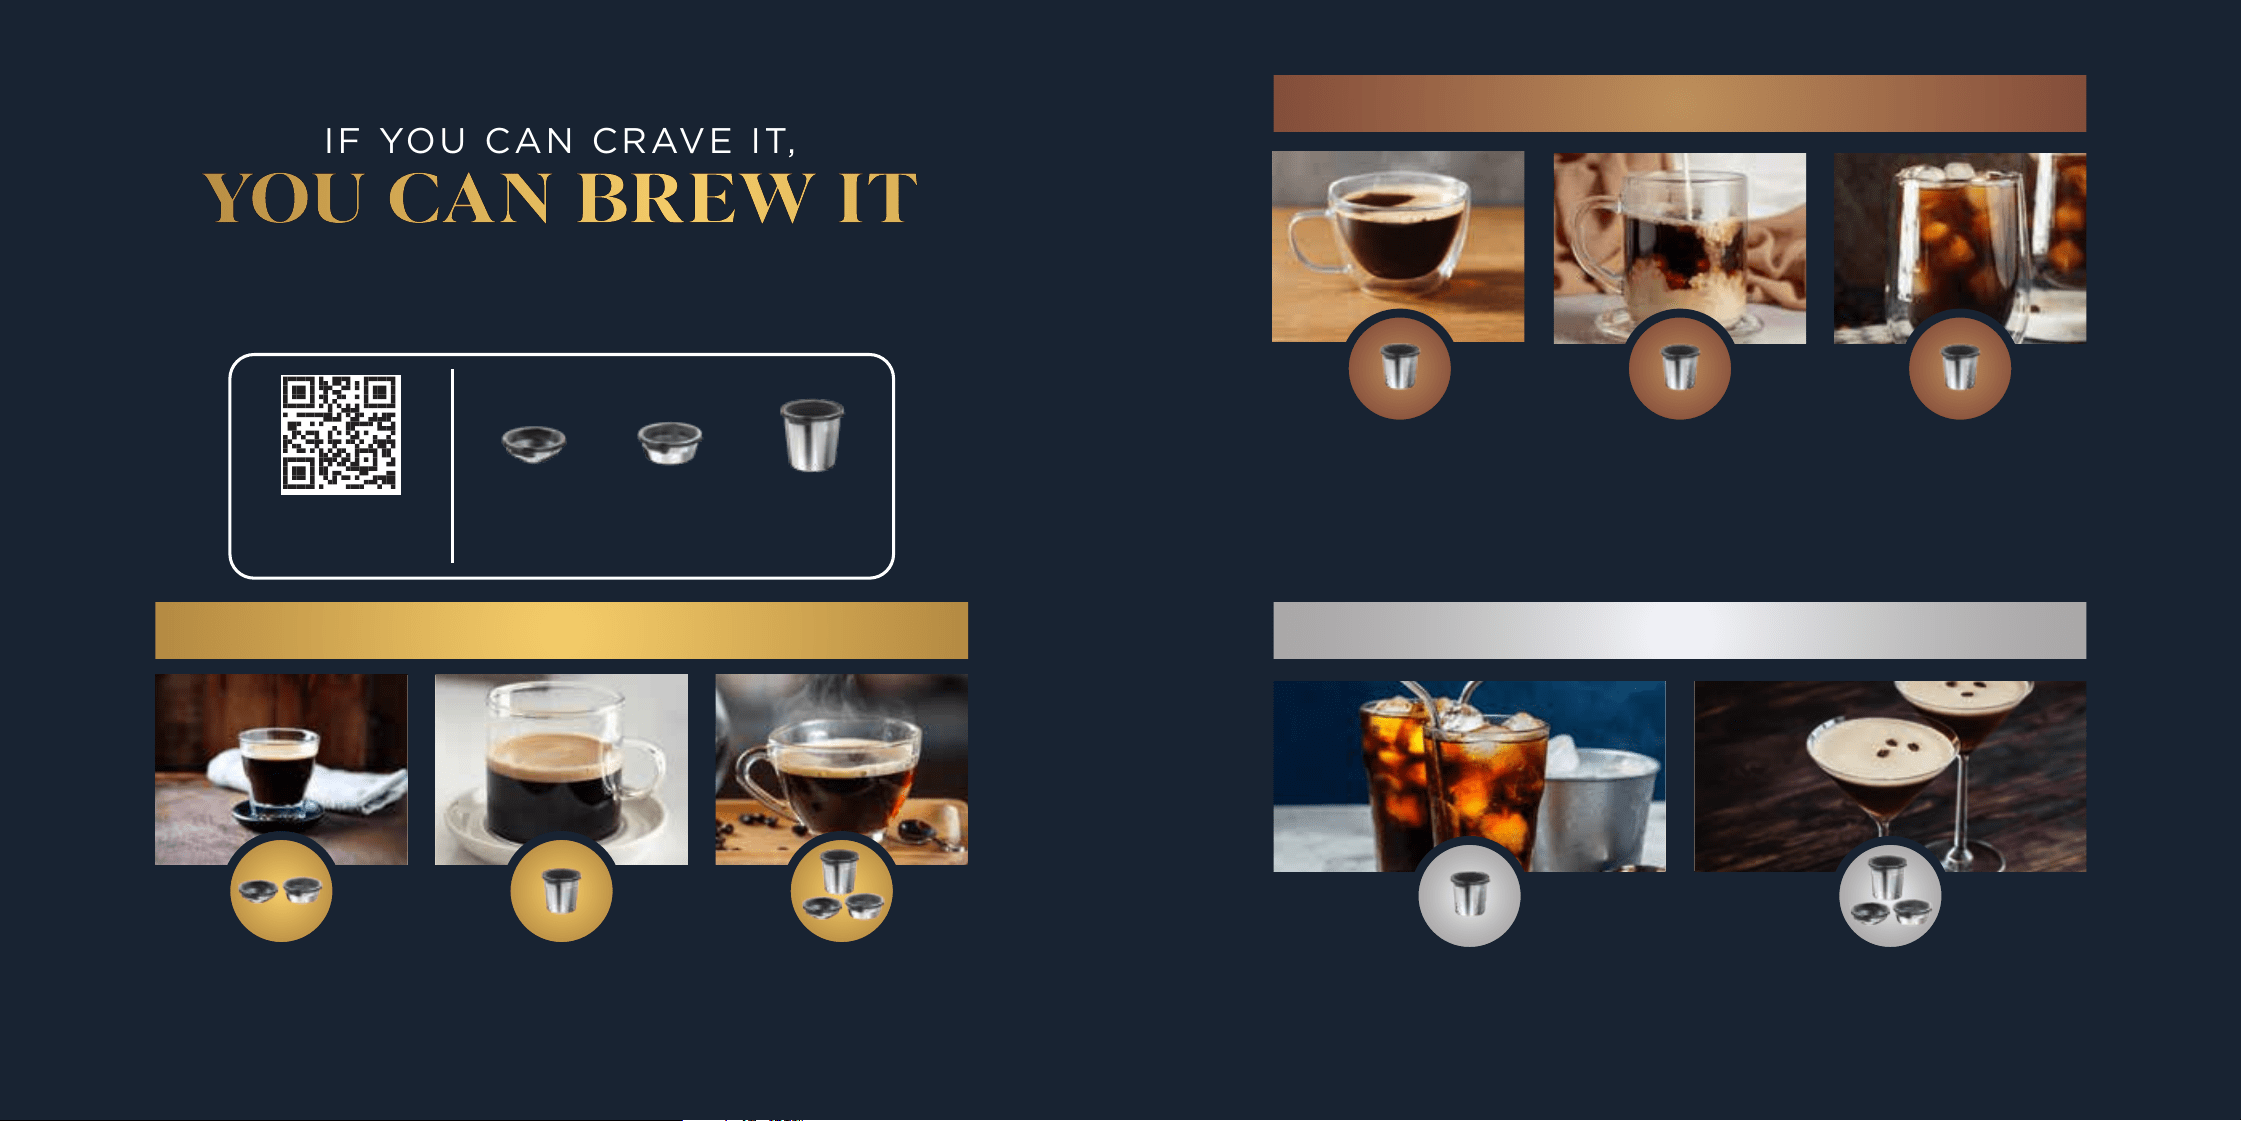
IF YOU CAN CRAVE IT,
YOU CAN BREW IT
From your café favourites to your everyday go-tos,
make it all without the guesswork.
SINGLE
BASKET
DOUBLE
BASKET
LUXE
BASKET
SCAN HERE
for how-to videos,
recipes, and cleaning
& maintenance.
WELL-BALANCED FILTER COFFEE
RAPID COLD BREW
CLASSIC
Balanced coee smooth
enough to drink by itself.
RICH
More concentrated
coee ideal for mixing
with milk and flavorings.
OVER ICE
Specially programmed to
brew concentrated hot coee
over ice for a drink that’s
never watered down.
FILL CUP WITH ICE BEFORE BREWING.
COLD BREW
Brewed at a lower temperature for
ultra-smooth, naturally sweet coee.
FILL CUP WITH ICE BEFORE BREWING.
COLD-PRESSED
Espresso brewed at a lower temperature
for elevated cold drinks.
NO-GUESSWORK ESPRESSO
ESPRESSO
A single or double shot of
balanced espresso ideal for
most espresso-based drinks.
QUAD
4 shots of super-rich
espresso for larger or
concentrated drinks.
AMERICANO
A single, double or quad shot
of balanced espresso with a
splash of hot water.
YOU CAN TOP-UP YOUR AMERICANO
USING THE HOT WATER FUNCTION.

SMOOTH MICROFOAM WITH
DUAL FROTH SYSTEM
THE PERFECT CUP WITH
Our temperature-controlled steam wand and
integrated whisk work together to create hot or cold foam from
DAIRY OR PLANT-BASED MILK
8
9
Auto-calibrates settings by brew to deliver the perfect cup with
NO GUESSWORK REQUIRED
Continuously monitors and adjusts
brew temperature and brew pressure.
Calibrates grind recommendations for
the next brew so you get the perfect
cup without the guesswork.
Integrated grinder & built-in scale
continuously tailor your grind
for smooth, concentrated espresso
BARISTA ASSIST
TECHNOLOGY
Questions? ninjakitchen.co.uk
THIN FROTH
A thin layer of froth,
ideal for flat whites,
lattes and latte art!
THICK FROTH
Classic, fluy froth
to top o drinks like
cappuccinos.
STEAMED MILK
Gently steams to
an ideal drinking temp,
perfect for coee, hot
chocolate or matchas.
COLD FOAM
Cold thick froth that
pairs perfectly with
any hot or chilled drink.
10
11
Questions? ninjakitchen.co.uk
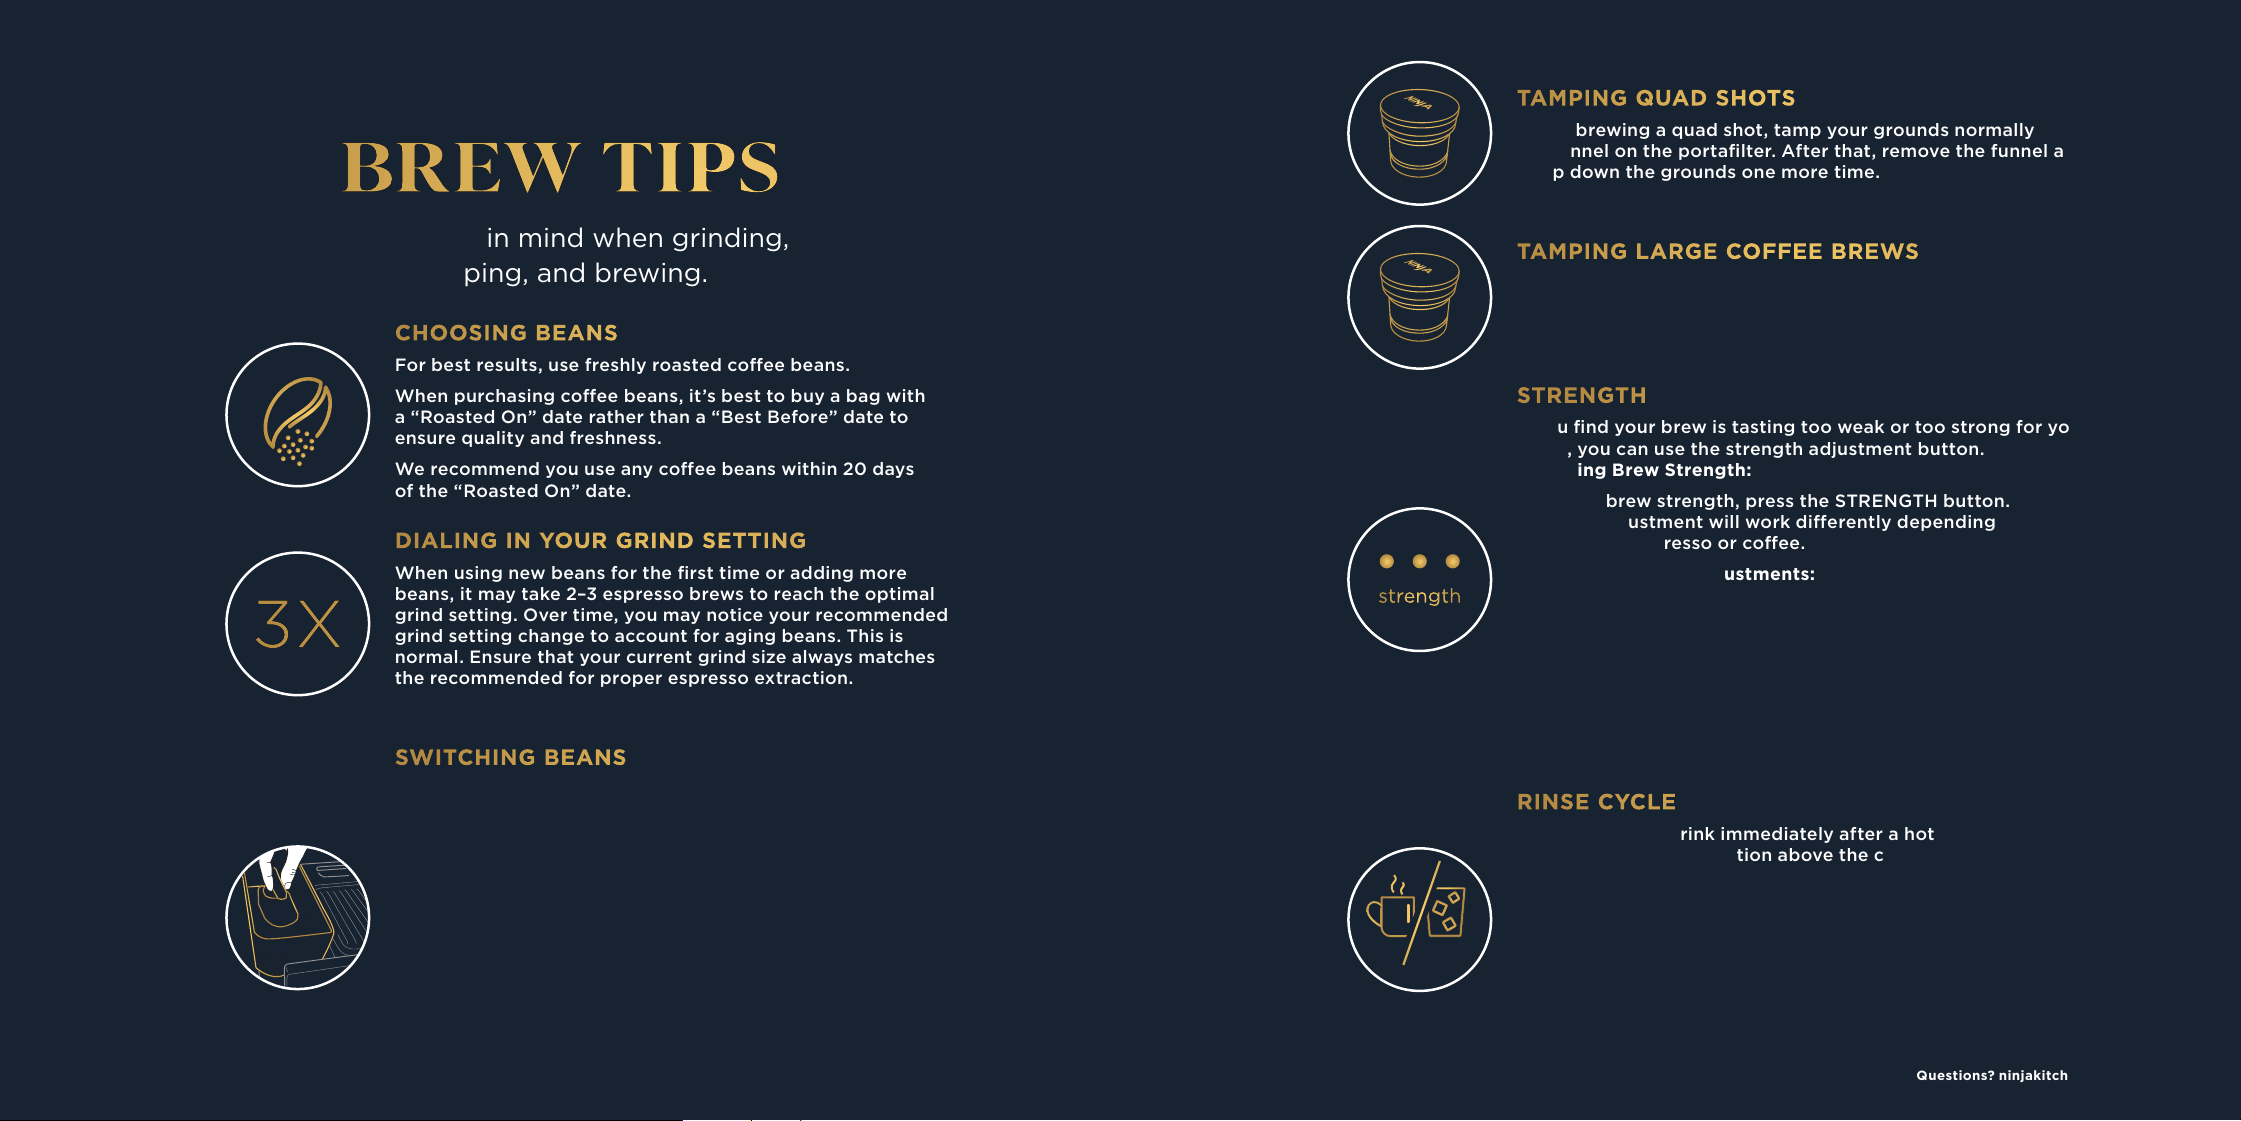
BREW TIPS
Keep these in mind when grinding,
tamping, and brewing.
CHOOSING BEANS
For best results, use freshly roasted coee beans.
When purchasing coee beans, it’s best to buy a bag with
a “Roasted On” date rather than a “Best Before” date to
ensure quality and freshness.
We recommend you use any coee beans within 20 days
of the “Roasted On” date.
RINSE CYCLE
If making a cold drink immediately after a hot drink, you’ll
receive a RINSE notification above the center dial. Be sure
that the portafilter is not installed in the group head before
proceeding. Put a cup (that can hold at least 250ml) below
the group head. Press START BREW. The machine will beep
to indicate that the brew has started. The progress bar will
illuminate indicating the status of the brew. When finished, the
machine will beep again signifying the brew is complete. After
the machine beeps a second time, remove the cup and dispose
of the water. You may now proceed with making a cold drink.
STRENGTH
If you find your brew is tasting too weak or too strong for your
liking, you can use the strength adjustment button.
Adjusting Brew Strength:
To adjust brew strength, press the STRENGTH button. The
strength adjustment will work dierently depending on if you
are brewing espresso or coee.
Espresso Strength Adjustments:
•
Taller, less concentrated: 4:1 water to grounds ratio
• •
Default: 2.5:1 water to grounds ratio
• • •
Shorter, more concentrated: 2:1 water to grounds ratio
Coee Strength Adjustments:
•
Mild: Less beans will be ground.
• •
Default
• • •
Bold: More beans will be ground.
TAMPING QUAD SHOTS
When brewing a quad shot, tamp your grounds normally with
the funnel on the portafilter. After that, remove the funnel and
tamp down the grounds one more time.
TAMPING LARGE COFFEE BREWS
If you’re making a L+ (475ml) or XL (530 ml) coee or cold
brew, tamp your grounds to ensure no grounds spill over the
edge of the portafilter. You do not need to tamp for
smaller coee drinks.
DIALING IN YOUR GRIND SETTING
When using new beans for the first time or adding more
beans, it may take 2–3 espresso brews to reach the optimal
grind setting. Over time, you may notice your recommended
grind setting change to account for aging beans. This is
normal. Ensure that your current grind size always matches
the recommended for proper espresso extraction.
3X
SWITCHING BEANS
1 Unlock bean hopper by rotating handle counterclockwise.
2 Remove the bean hopper and pour out any leftover beans.
3 Place the hopper back on the machine. Lock bean hopper
back in by rotating handle clockwise.
4
Place the portafilter with the funnel attached in the
grinding cradle.
5 Press and hold START GRIND button to clear any
leftover beans.
6 Add new beans into the bean hopper.
strength
12
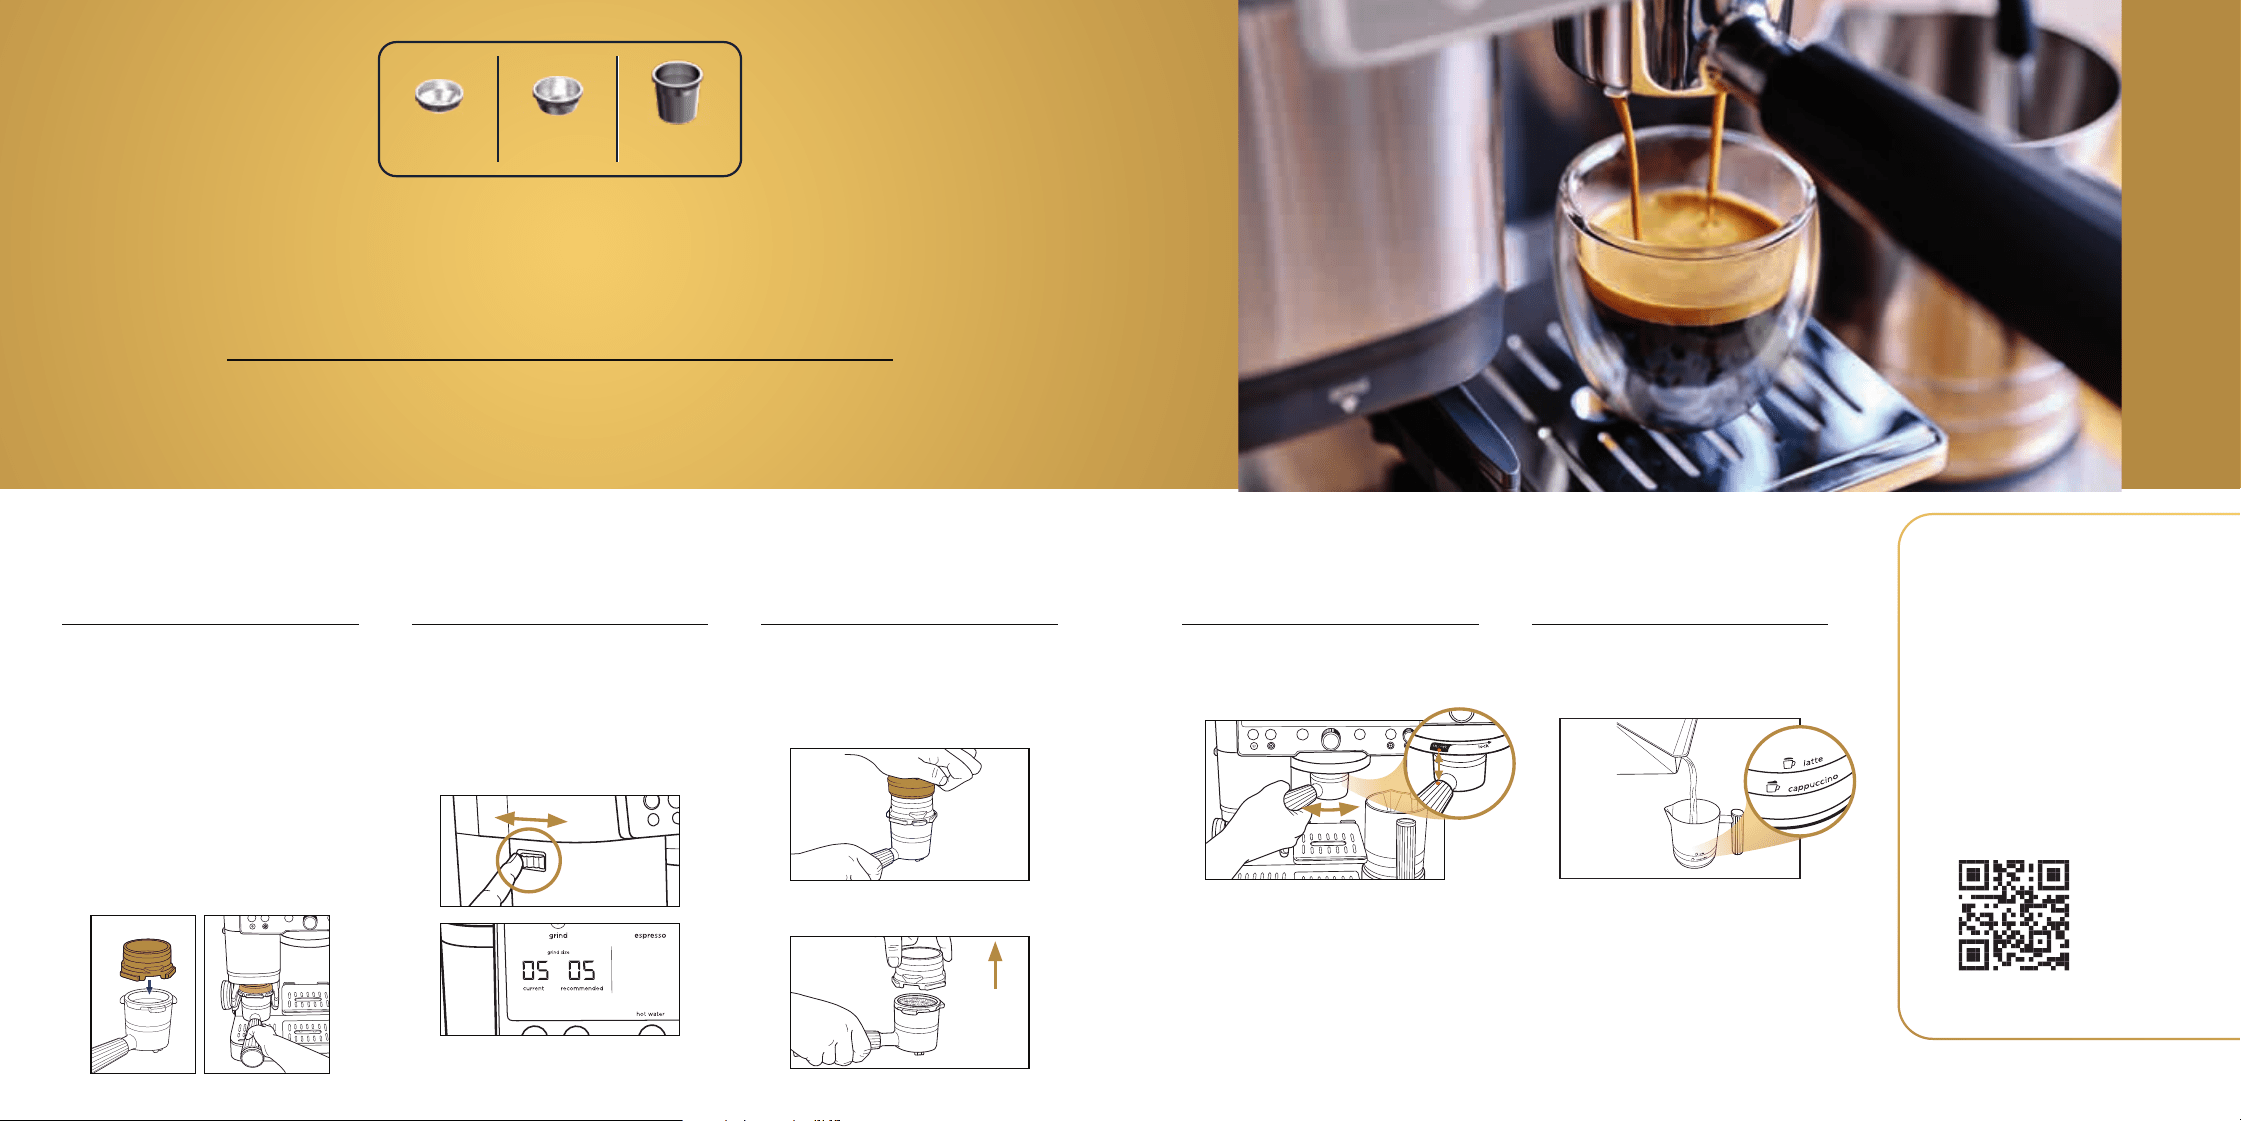
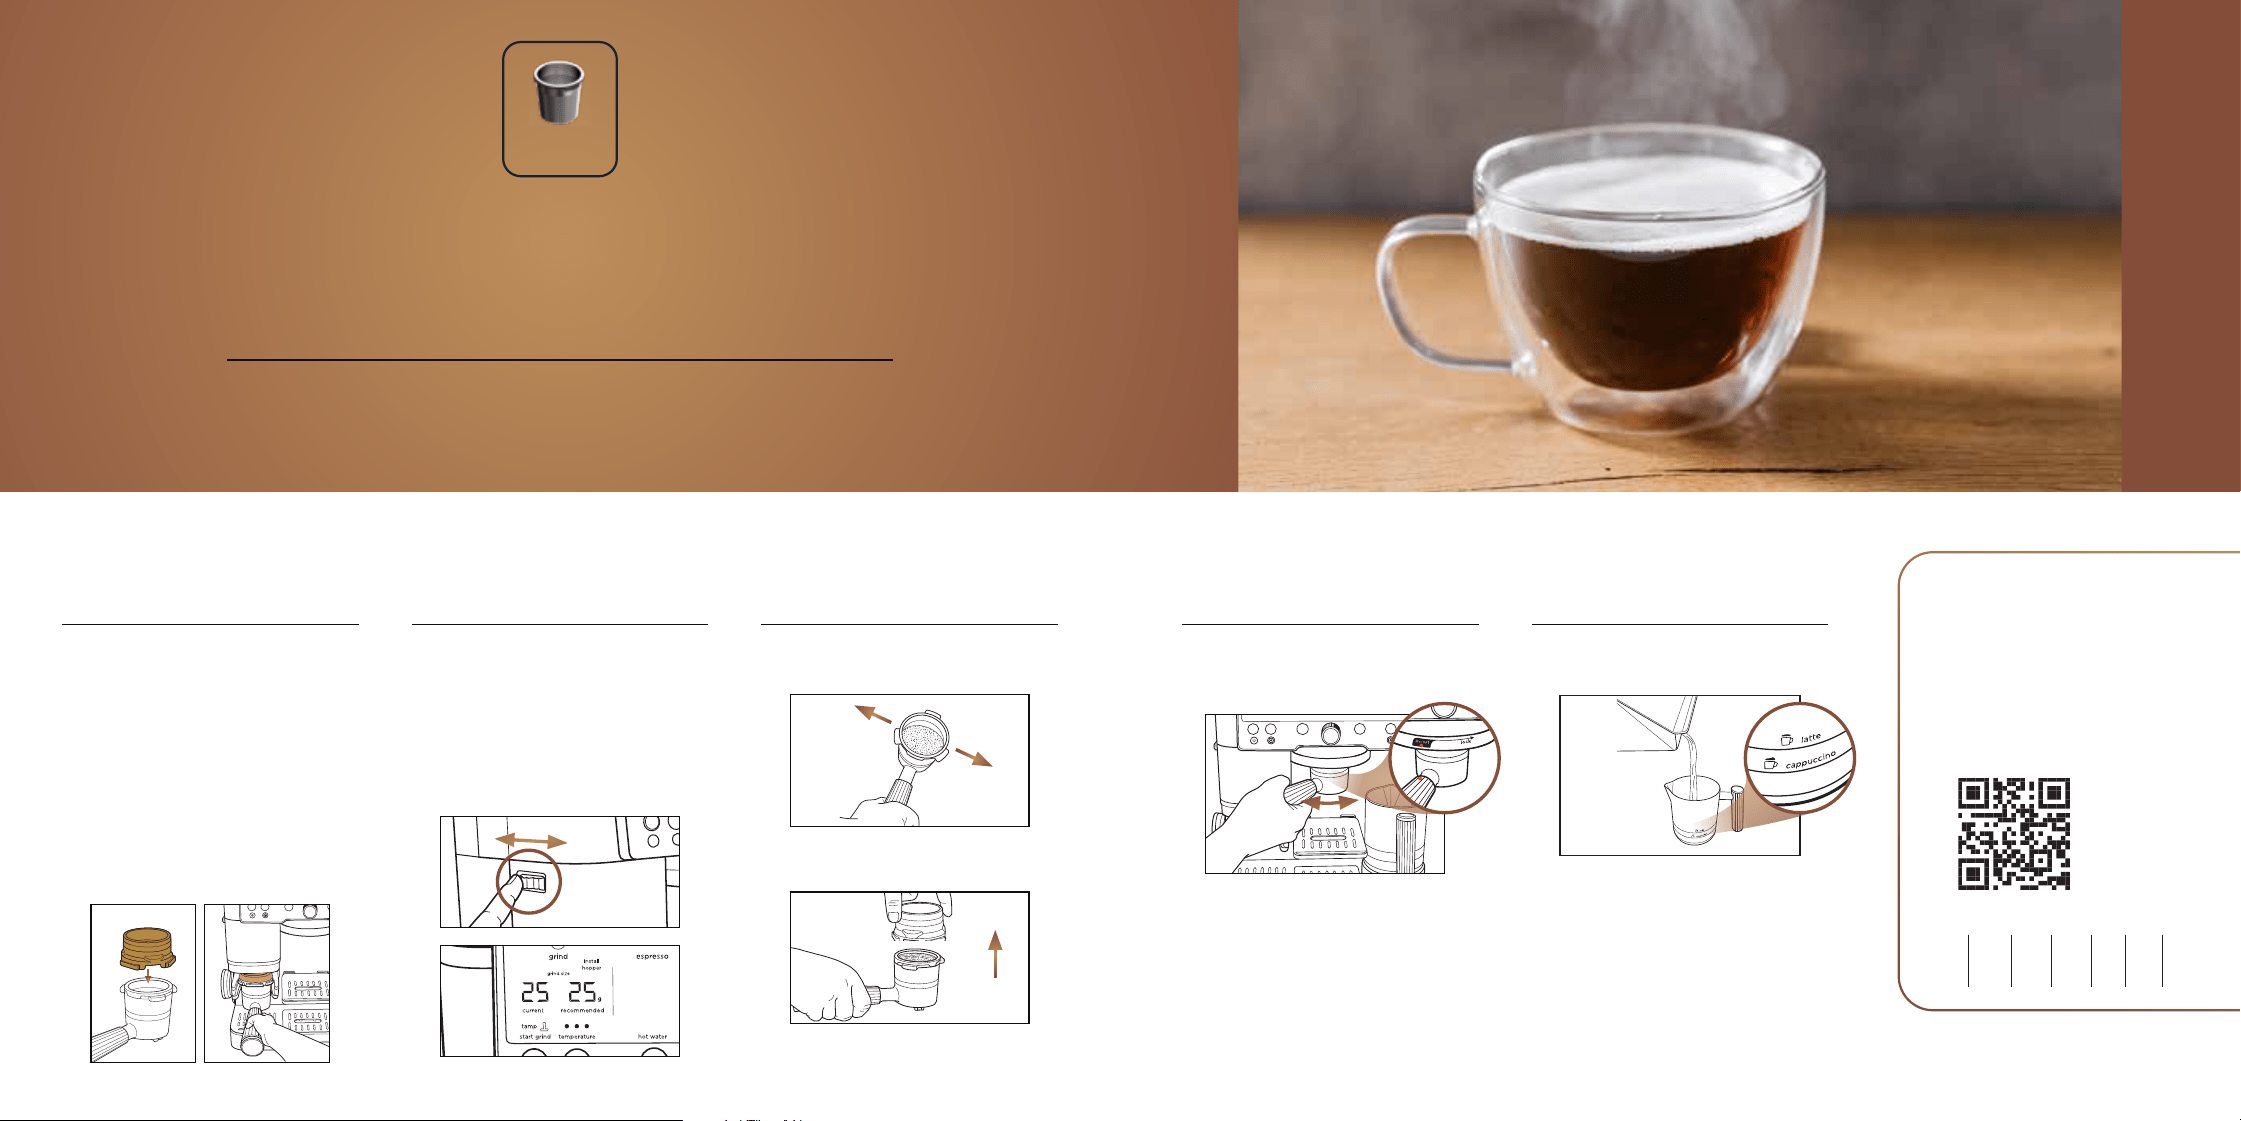
STEP 4
BREW
Install portafilter into group
head by aligning orange dots
and twisting to the right.
Place cup under portafilter.
Press START BREW.
When brewing is complete
empty grounds into a knock box
or container.
STEP 3
TAMP
STEP 1
SET UP
Remove funnel and store on
left side of machine.
With portafilter on a solid level
surface, and with funnel still
attached, press tamper all
the way down until it meets
the funnel.
Select basket based on drink
choice. Line up tabs on basket
with notches on portafilter
and press down.
Place funnel on portafilter, aligning
the notches on the funnel with the
notches on the portafilter. Push
down until funnel locks into place
in the portafilter.
Insert portafilter straight into
grinding cradle, making sure
it’s level and fits securely.
STEP 2
GRIND
13
Fill milk jug to one of the
recommended fill lines. DO NOT
exceed the max line.
Place milk jug on milk jug
platform. Press MILK TYPE
button based on the milk
that is in the jug.
Turn FROTH DIAL to select
your froth type, then press
START FROTH.
Questions? ninjakitchen.co.uk
Turn the centre dial to select
ESPRESSO.
Use grind dial on left side of
machine to match current grind
size to recommended grind size.
Press START GRIND.
HOW TO BREW
ESPRESSO
The perfect base to any café-quality drink.
Smooth enough to sip by itself.
DOUBLE
BASKET
SINGLE
BASKET
LUXE
BASKET
STEP 5 | OPTIONAL
FROTH
TIPs
• If the tamper isn’t
compressing the grounds
in a quad shot, try
removing the funnel and
tamp again.
• If brewing a cold drink
right after brewing hot,
you’ll need to run a Rinse
cycle.
See Brew Tips
for instructions.
• SCAN HERE for how-to
videos, recipes, and
cleaning & maintenance.
FOR MORE INFORMATION,
see the Owner’s Guide.
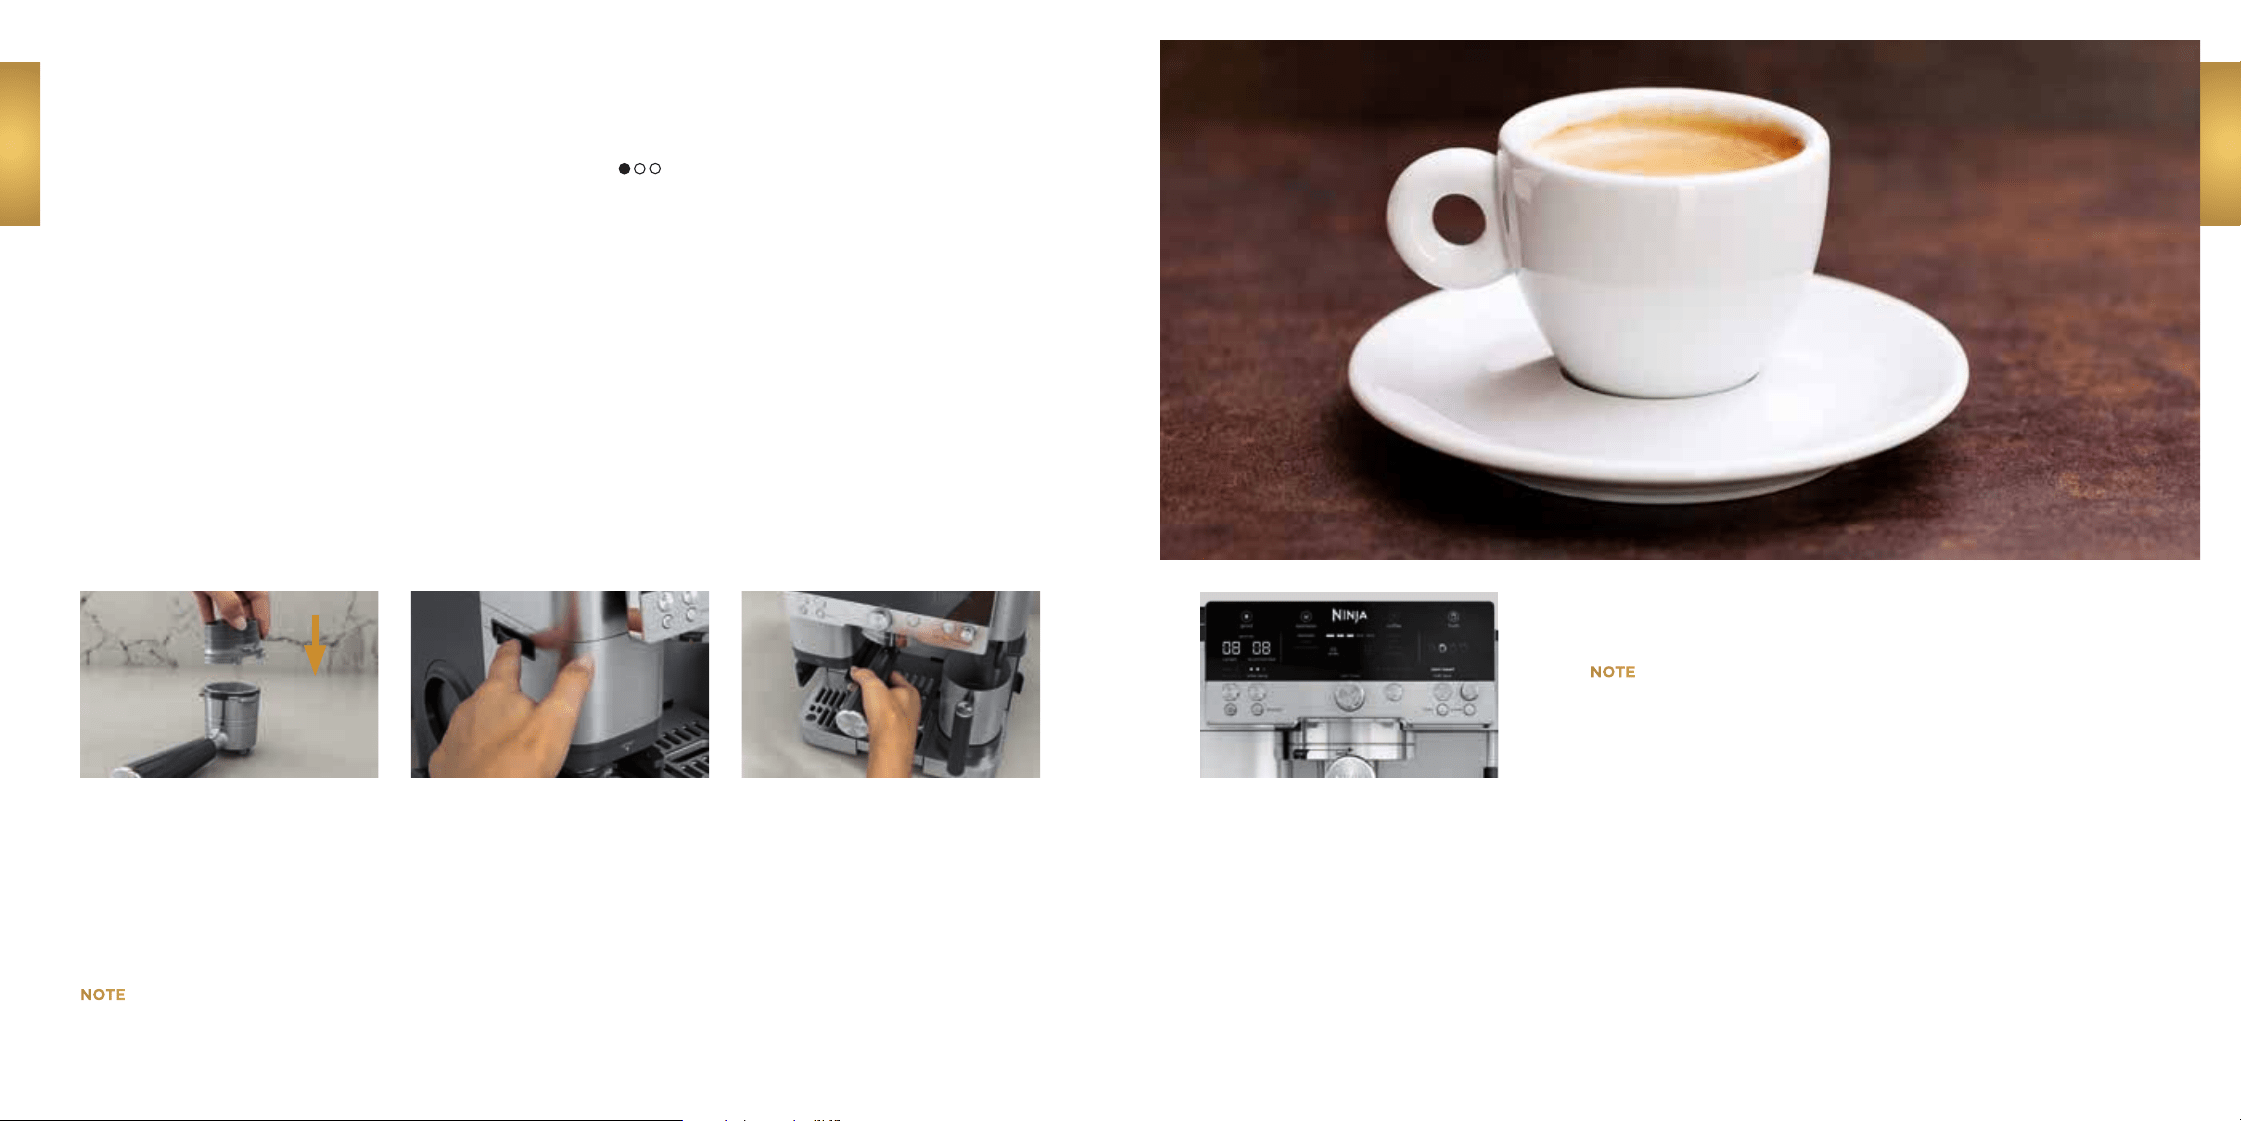
KICKSTARTER
KICKSTARTER
ESPRESSO SHOT
BREW TIME: APPROX. 2 MINUTES | FUNCTION: ESPRESSO
ACCESSORIES: DOUBLE BASKET | MAKES: 1 SERVING
BEGINNER RECIPE
INGREDIENTS
Fresh coffee beans
Place an espresso cup under
portafilter. Press the centre dial
to START BREW.
14
15
Questions? ninjakitchen.co.uk
DIRECTIONS
NOTE
If a single espresso shot is
desired, use the single basket.
If a larger quad shot is desired,
use the luxe basket. Adjust cup
sizing as necessary.
Turn centre dial until ESPRESSO
program is illuminated, adjust
grind size then press START
GRIND.
Tamp the grounds. Then remove
grind funnel and install portafilter
into group head.
Install the double basket into
portafilter and place the funnel
on top. Then install portafilter
into grinding cradle.
NOTE
See page 12-13 for further unit
interaction information.
16
CUSTOMISE YOUR COFFEE
by adding your preferred
flavoured syrup, sugar or spice.
See page 38 for inspiration!
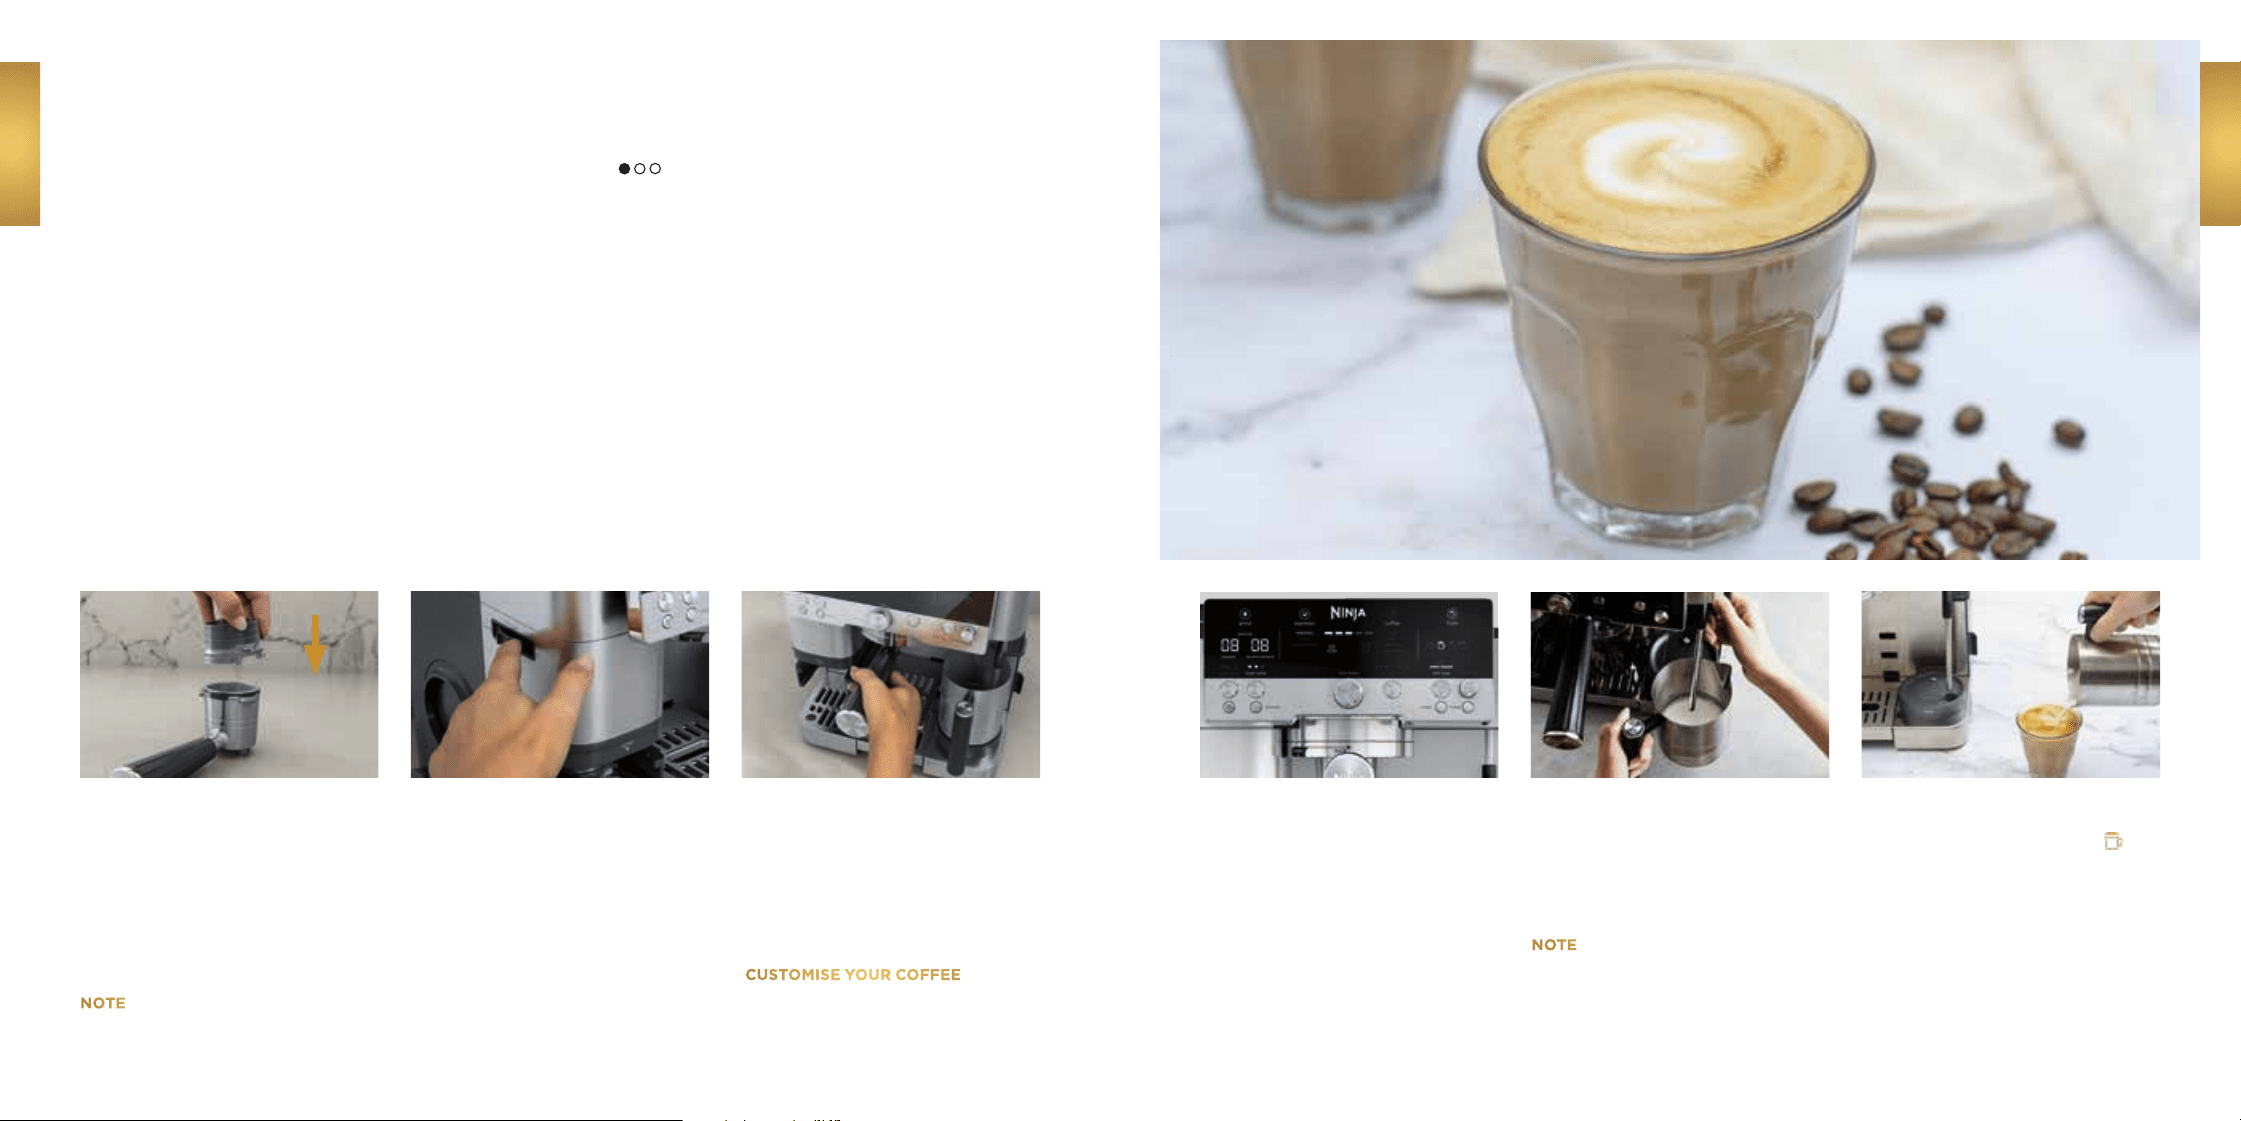
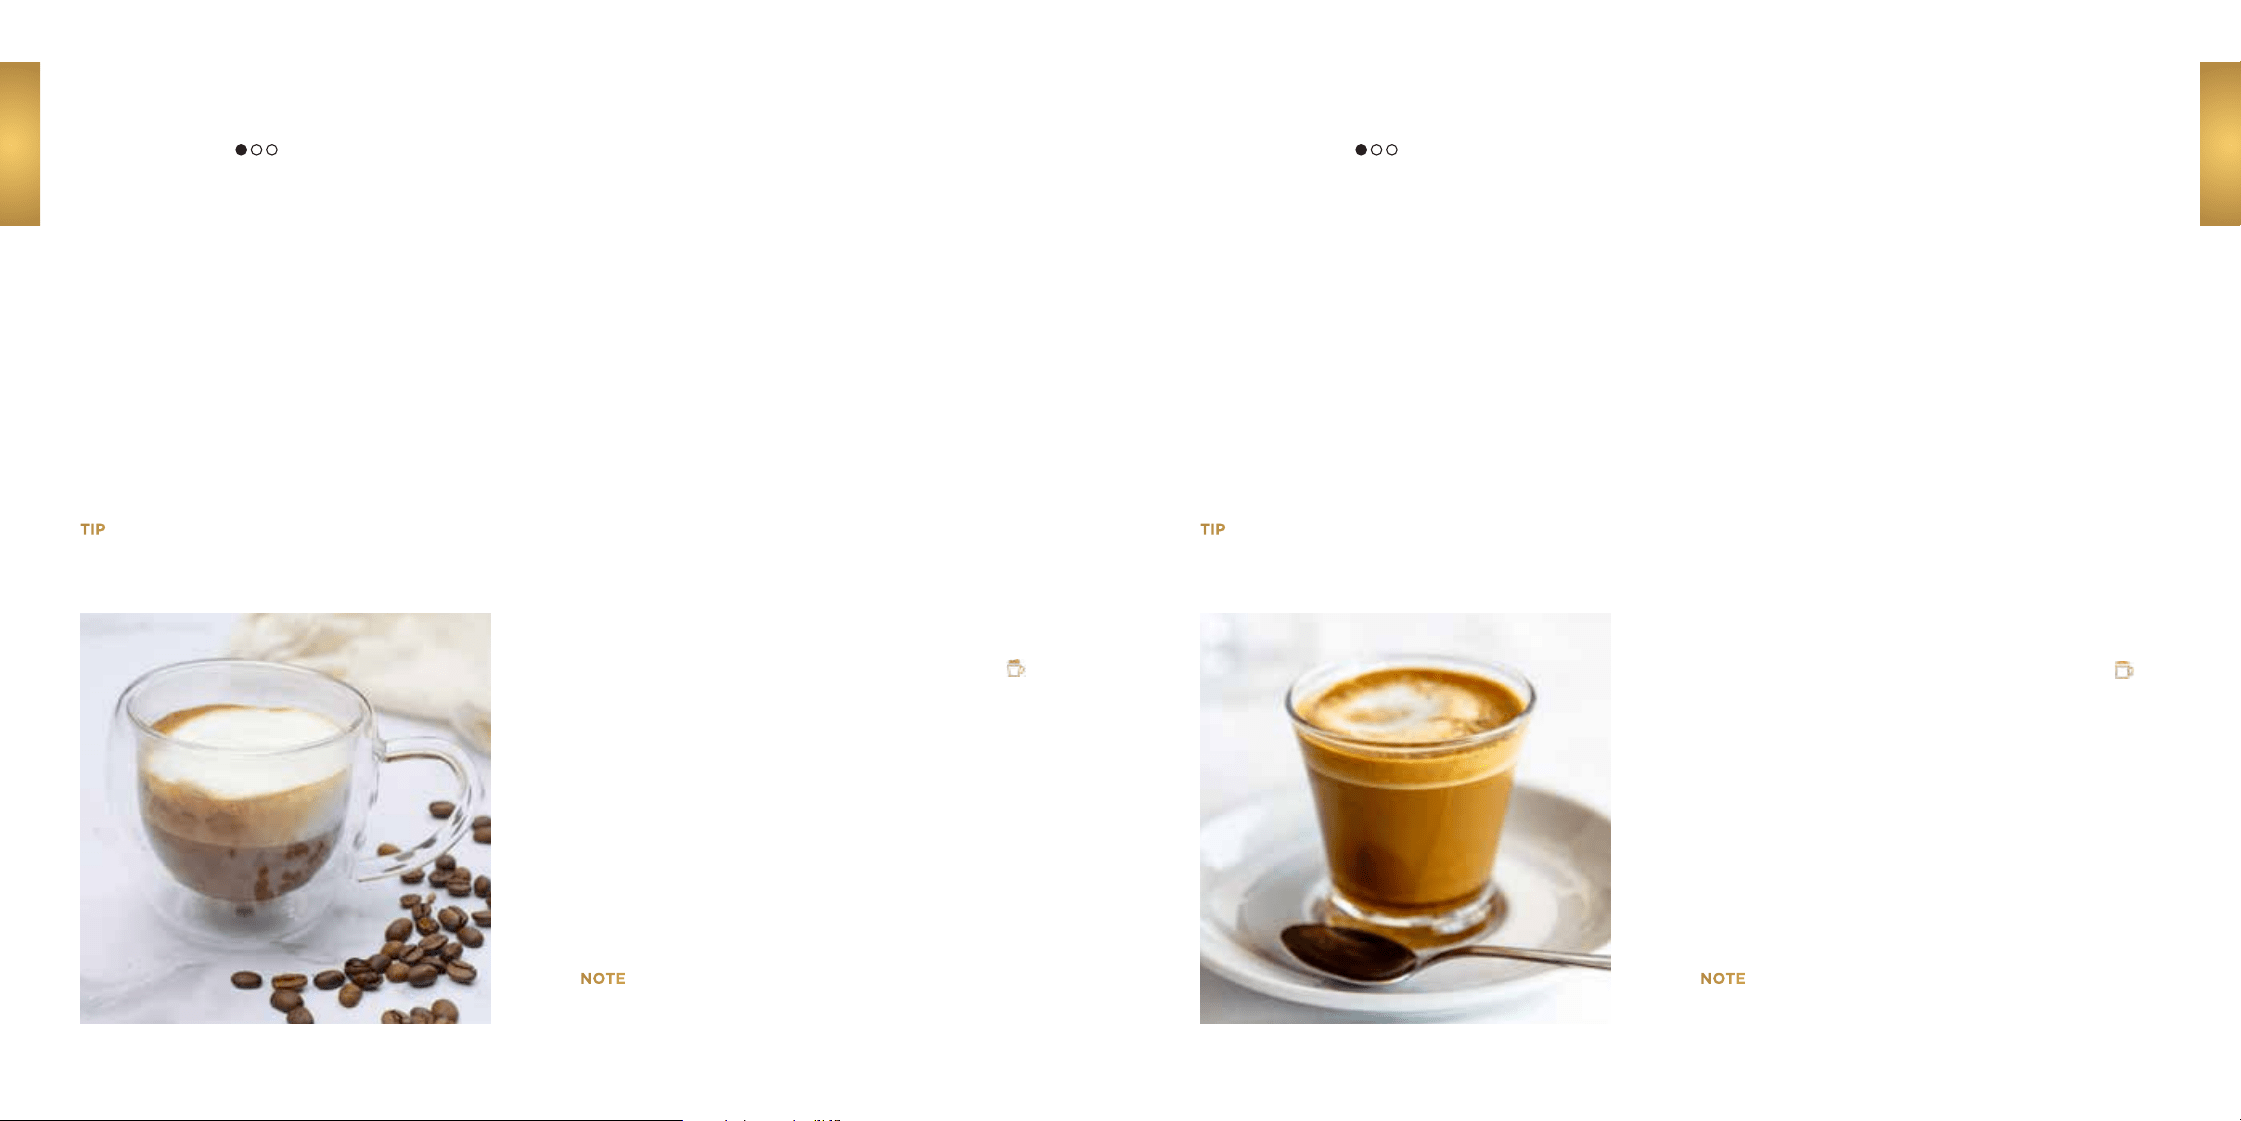
KICKSTARTER
KICKSTARTER
FLAT WHITE
BREW TIME: APPROX. 2 MINUTES | FROTH TIME: APPROX. 2 MINUTES | FUNCTION: ESPRESSO
ACCESSORIES: DOUBLE BASKET | MAKES: 1 SERVING
BEGINNER RECIPE
INGREDIENTS
Fresh coffee beans
120ml milk of choice
Place cup under portafilter.
Press the centre dial to START
BREW.
Add milk to milk jug, place jug on
platform with steam wand inside.
DIRECTIONS
Questions? ninjakitchen.co.uk
17
Press the MILK TYPE button until
milk of choice is illuminated. Turn
froth dial until THIN FROTH
is illuminated. Press froth dial to
begin frothing. Pour frothed milk
over brewed espresso and serve.
NOTE
Don’t forget to place the steam wand
back in its original position to allow it
to auto-purge. See page 43 for more
cleaning instructions.
Turn centre dial until ESPRESSO
program is illuminated, adjust
grind size then press START
GRIND.
Tamp the grounds. Then remove
grind funnel and install portafilter
into group head.
Install the double basket into
portafilter and place the funnel
on top. Then install portafilter
into grinding cradle.
NOTE
See page 12-13 for further unit
interaction information.
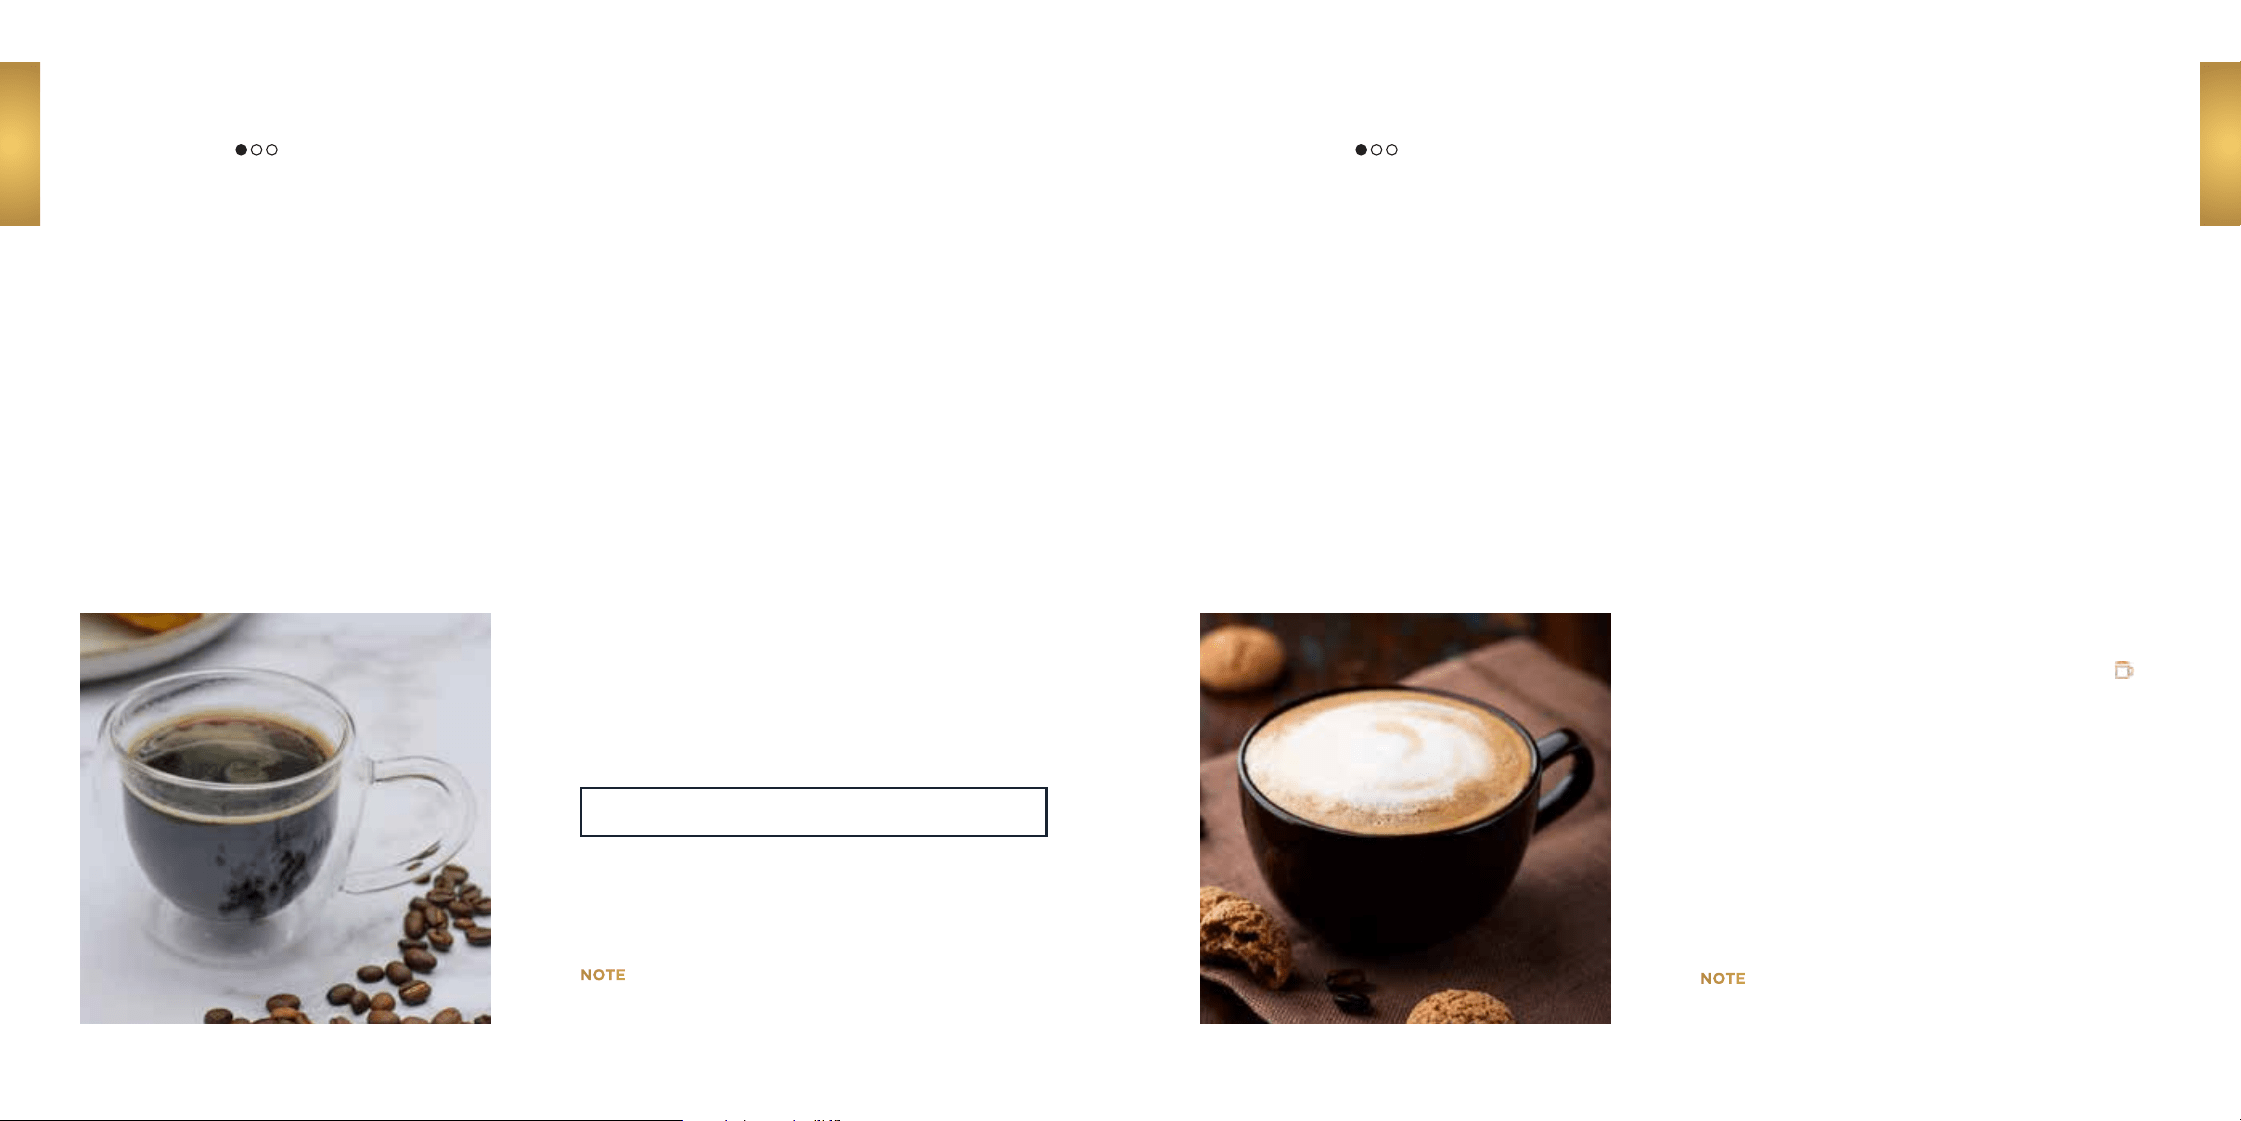
HOT ESPRESSO
AMERICANO
BREW TIME: APPROX. 2 MINUTES | FUNCTION: AMERICANO | ACCESSORIES: DOUBLE BASKET | MAKES: 1 SERVING
BEGINNER RECIPE
DIRECTIONS
1 Install the double basket into portafilter and place
the funnel on top. Then install portafilter into
grinding cradle.
2 Turn centre dial until AMERICANO program is
illuminated, adjust grind size then press START
GRIND.
3 Tamp the grounds. Then remove grind funnel and
install portafilter into group head.
4 Place cup under portafilter. Press the centre dial to
START BREW.
5 Once coffee is brewed, serve immediately.
INGREDIENTS
Fresh coffee beans
HOT ESPRESSO
Questions? ninjakitchen.co.uk
DIRECTIONS
1 Install the double basket into portafilter and place
the funnel on top. Then install portafilter into
grinding cradle.
2 Turn centre dial until ESPRESSO program is
illuminated, adjust grind size then press START
GRIND.
3 Tamp the grounds. Then remove grind funnel and
install portafilter into group head.
4 Place cup under portafilter. Press the centre dial
to START BREW.
5 Add milk to milk jug, place jug on platform with
steam wand inside.
6 Press the MILK TYPE button until milk of choice is
illuminated. Turn froth dial until THIN FROTH
is
illuminated. Press froth dial to begin frothing. Pour
frothed milk over brewed espresso and serve.
LATTE
BREW TIME: APPROX. 2 MINUTES | FROTH TIME: APPROX. 2 MINUTES | FUNCTION: ESPRESSO
ACCESSORIES: DOUBLE BASKET | MAKES: 1 SERVING
BEGINNER RECIPE
INGREDIENTS
Fresh coffee beans
Milk of choice, up to latte line
CUSTOMISE YOUR COFFEE
by adding your preferred
flavoured syrup, sugar or spice.
See page 40 for inspiration!
19
YOU CAN TOP-UP YOUR AMERICANO USING THE HOT
WATER FUNCTION.
NOTE
See page 12-13 for further unit
interaction information.
NOTE
See page 12-13 for further unit
interaction information.
20
HOT ESPRESSO
HOT ESPRESSO
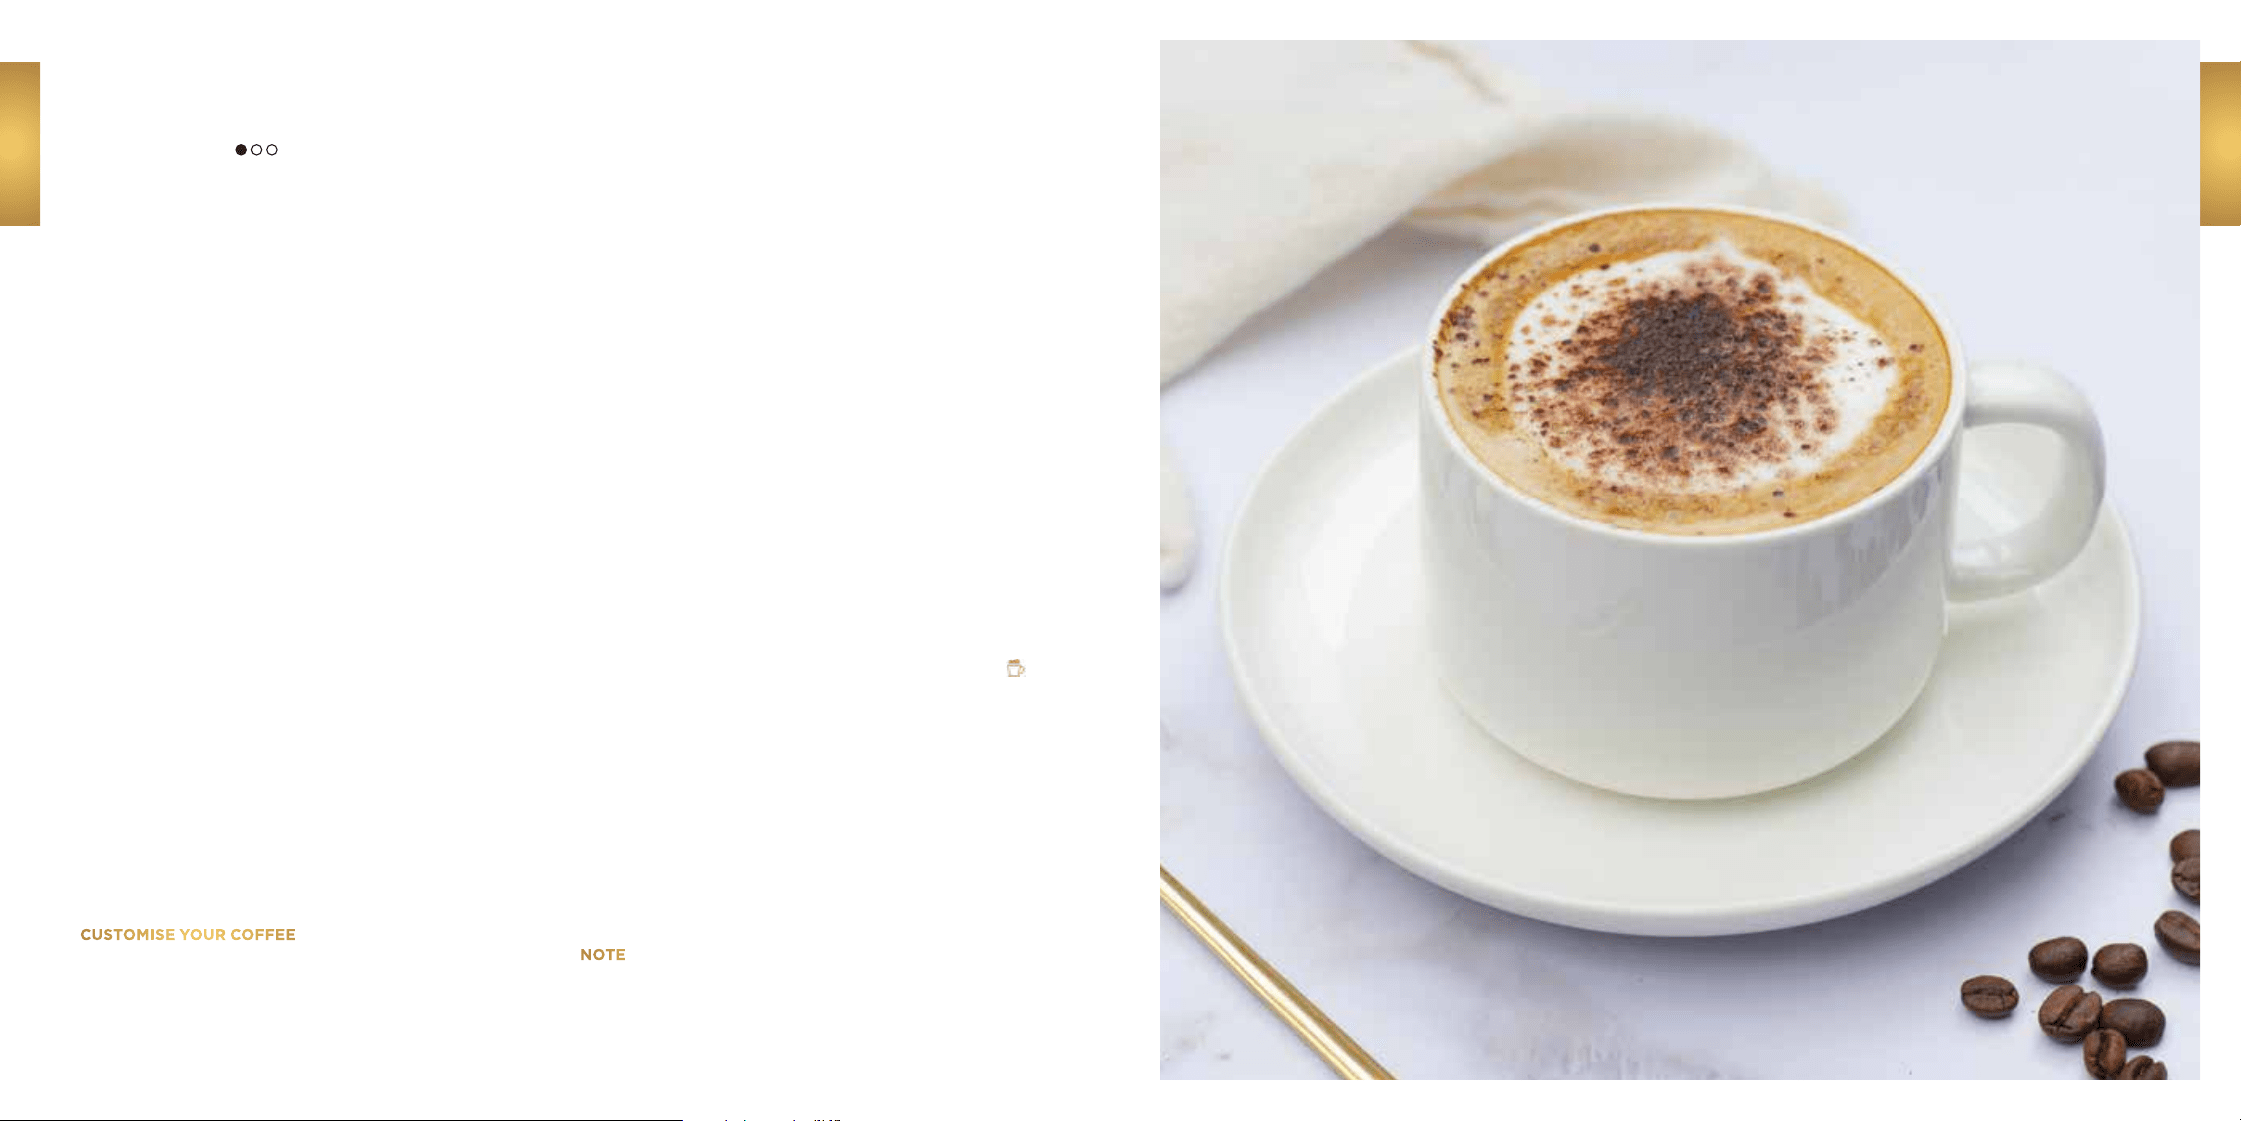
CAPPUCCINO
BREW TIME: APPROX. 2 MINUTES | FROTH TIME: APPROX. 2 MINUTES | FUNCTION: ESPRESSO
ACCESSORIES: DOUBLE BASKET | MAKES: 1 SERVING
BEGINNER RECIPE
DIRECTIONS
1 Install the double basket into portafilter and place
the funnel on top. Then install portafilter into
grinding cradle.
2 Turn centre dial until ESPRESSO program is
illuminated, adjust grind size then press START
GRIND.
3 Tamp the grounds. Then remove grind funnel and
install portafilter into group head.
4 Place cup under portafilter. Press the centre dial
to START BREW.
5 Add milk to milk jug, place jug on platform with
steam wand inside.
6 Press the MILK TYPE button until milk of choice is
illuminated. Turn froth dial until THICK FROTH
is
illuminated. Press froth dial to begin frothing.
7 Pour frothed milk over brewed espresso.
Dust top of milk with cocoa and serve.
INGREDIENTS
Fresh coffee beans
Milk of choice, up to cappuccino line
Cocoa powder, for topping
CUSTOMISE YOUR COFFEE
by adding your preferred
flavoured syrup, sugar or spice.
See page 38 for inspiration!
NOTE
See page 12-13 for further unit
interaction information.
22
HOT ESPRESSO
HOT ESPRESSO
Questions? ninjakitchen.co.uk
MACCHIATO
BREW TIME: APPROX. 2 MINUTES | FROTH TIME: APPROX. 2 MINUTES | FUNCTION: ESPRESSO
ACCESSORIES: DOUBLE BASKET | MAKES: 1 SERVING
BEGINNER RECIPE
DIRECTIONS
1 Install the double basket into portafilter and place
the funnel on top. Then install portafilter into
grinding cradle.
2 Turn centre dial until ESPRESSO program is
illuminated, adjust grind size then press START
GRIND.
3 Tamp the grounds. Then remove grind funnel and
install portafilter into group head.
4 Place cup under portafilter. Press the centre dial
to START BREW.
5 Add milk to milk jug, place jug on platform with
steam wand inside.
6 Press the MILK TYPE button until milk of choice is
illuminated. Turn froth dial until THICK FROTH
is
illuminated. Press froth dial to begin frothing. Top
espresso with froth only and serve.
INGREDIENTS
Fresh coffee beans
Milk of choice, up to minimum fill line
DIRECTIONS
1 Install the double basket into portafilter and place
the funnel on top. Then install portafilter into
grinding cradle.
2 Turn centre dial until ESPRESSO program is
illuminated, adjust grind size then press START
GRIND.
3 Tamp the grounds. Then remove grind funnel and
install portafilter into group head.
4 Place cup under portafilter. Press the centre dial
to START BREW.
5 Add milk to milk jug, place jug on platform with
steam wand inside.
6 Press the MILK TYPE button until milk of choice is
illuminated. Turn froth dial until THIN FROTH
is
illuminated. Press froth dial to begin frothing. Pour
frothed milk over brewed espresso and serve.
CORTADO
BREW TIME: APPROX. 2 MINUTES | FROTH TIME: APPROX. 2 MINUTES | FUNCTION: ESPRESSO
ACCESSORIES: DOUBLE BASKET | MAKES: 1 SERVING
BEGINNER RECIPE
INGREDIENTS
Fresh coffee beans
Milk of choice, up to minimum fill line
TIP
If a smaller output is desired,
use the single basket and brew
a single shot of espresso.
TIP
If a smaller output is desired,
use the single basket and brew
a single shot of espresso.
23
NOTE
See page 12-13 for further unit
interaction information.
NOTE
See page 12-13 for further unit
interaction information.
24
HOT ESPRESSO
HOT ESPRESSO
Questions? ninjakitchen.co.uk
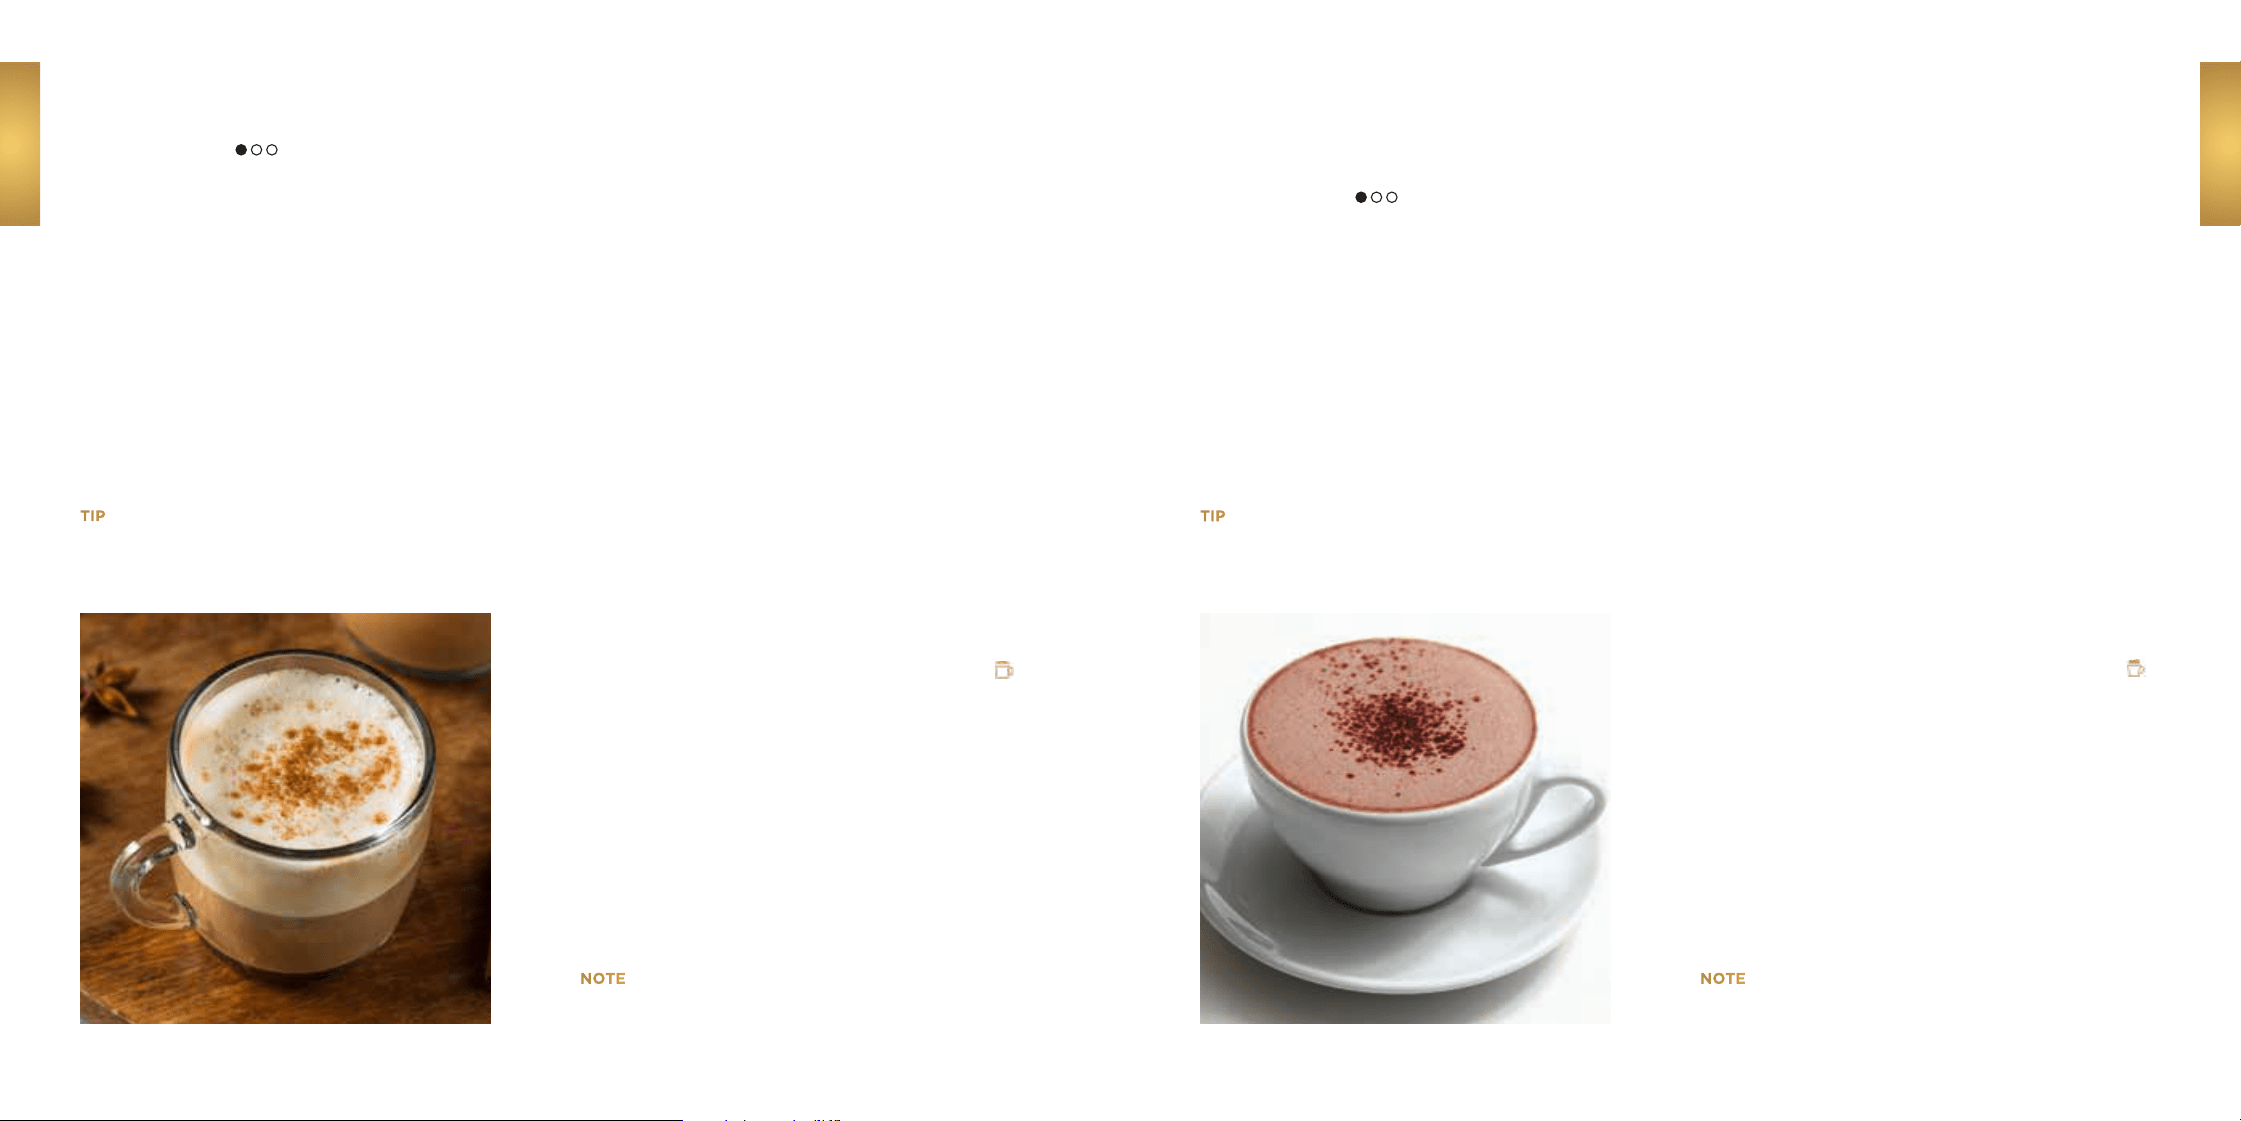
CHAI LATTE WITH ESPRESSO
BREW TIME: APPROX. 2 MINUTES | FROTH TIME: APPROX. 2 MINUTES | FUNCTION: ESPRESSO
ACCESSORIES: SINGLE BASKET | MAKES: 1 SERVING
BEGINNER RECIPE
DIRECTIONS
1 Install the single basket into portafilter and place
the funnel on top. Then install portafilter into
grinding cradle..
2 Turn centre dial until ESPRESSO program is
illuminated, adjust grind size then press START
GRIND.
3 Tamp the grounds. Then remove grind funnel and
install portafilter into group head.
4 Place cup under portafilter. Press the centre dial
to START BREW.
5 Add chai powder and milk to milk jug, place jug on
platform with steam wand inside.
6 Press the MILK TYPE button until milk of choice is
illuminated. Turn froth dial until THIN FROTH
is
illuminated. Press froth dial to begin frothing. Pour
frothed milk over brewed espresso and serve.
INGREDIENTS
Fresh coffee beans
3 teaspoons chai powder
Milk of choice, up to latte line
DIRECTIONS
1 Install the double basket into portafilter and place
the funnel on top. Then install portafilter into
grinding cradle.
2 Turn centre dial until ESPRESSO program is
illuminated, adjust grind size then press START
GRIND.
3 Tamp the grounds. Then remove grind funnel and
install portafilter into group head.
4 Place cup under portafilter. Press the centre dial
to START BREW.
5 Add hot chocolate and milk to milk jug, place jug
on platform with steam wand inside.
6 Press the MILK TYPE button until milk of choice is
illuminated. Turn froth dial until THICK FROTH
is
illuminated. Press froth dial to begin frothing. Pour
frothed milk over brewed espresso and serve.
CLASSIC MOCHA WITH
CHOCOLATE FROTH
BREW TIME: APPROX. 2 MINUTES | FROTH TIME: APPROX. 2 MINUTES | FUNCTION: ESPRESSO
ACCESSORIES: DOUBLE BASKET | MAKES: 1 SERVING
BEGINNER RECIPE
INGREDIENTS
Fresh coffee beans
2 tablespoons hot chocolate mix of choice
Milk of choice, up to cappuccino line
TIP
If a stronger output is desired,
use the double basket and
brew a double shot of espresso.
TIP
If a smaller output is desired,
use the single basket and brew
a single shot of espresso.
25
NOTE
See page 12-13 for further unit
interaction information.
NOTE
See page 12-13 for further unit
interaction information.
26
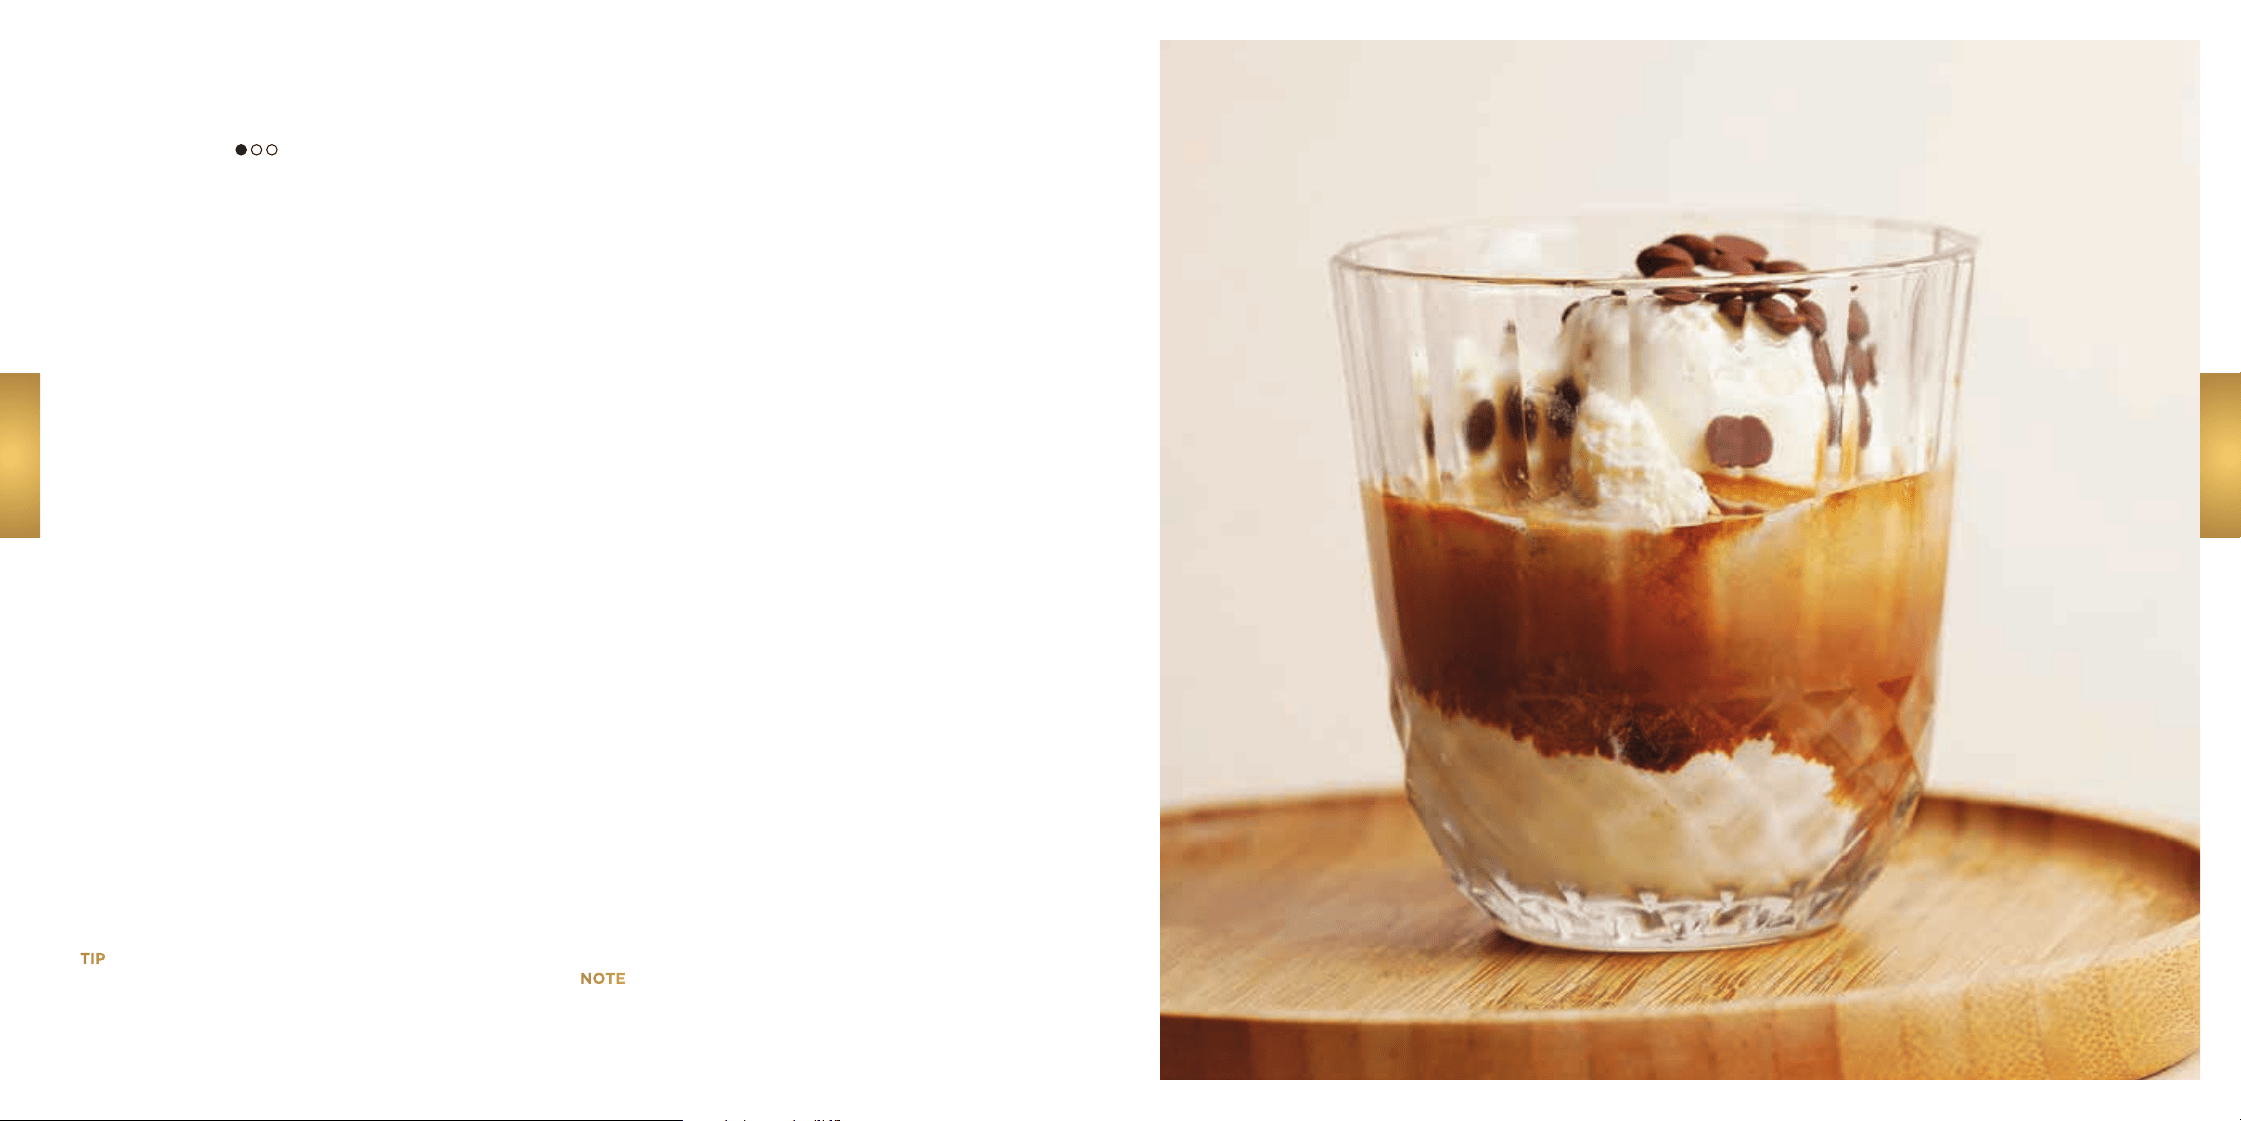
AFFOGATO
BREW TIME: APPROX. 2 MINUTES | FUNCTION: ESPRESSO | ACCESSORIES: DOUBLE BASKET
MAKES: 1 SERVING
BEGINNER RECIPE
DIRECTIONS
1 Install the double basket into portafilter and place
the funnel on top. Then install portafilter into
grinding cradle.
2 Turn centre dial until ESPRESSO program is
illuminated, adjust grind size then press START
GRIND.
3 Tamp the grounds. Then remove grind funnel and
install portafilter into group head.
4 Place espresso cup under portafilter. Press the
centre dial to START BREW.
5 While the espresso is brewing, place ice cream
into a small glass. Once shot is brewed, pour
the hot espresso over the ice cream and serve
immediately.
INGREDIENTS
Fresh coffee beans
1-2 scoops vanilla ice cream
TIP
If a smaller output is desired,
use the single basket and brew
a single shot of espresso.
HOT ESPRESSO
HOT ESPRESSO
NOTE
See page 12-13 for further unit
interaction information.
28
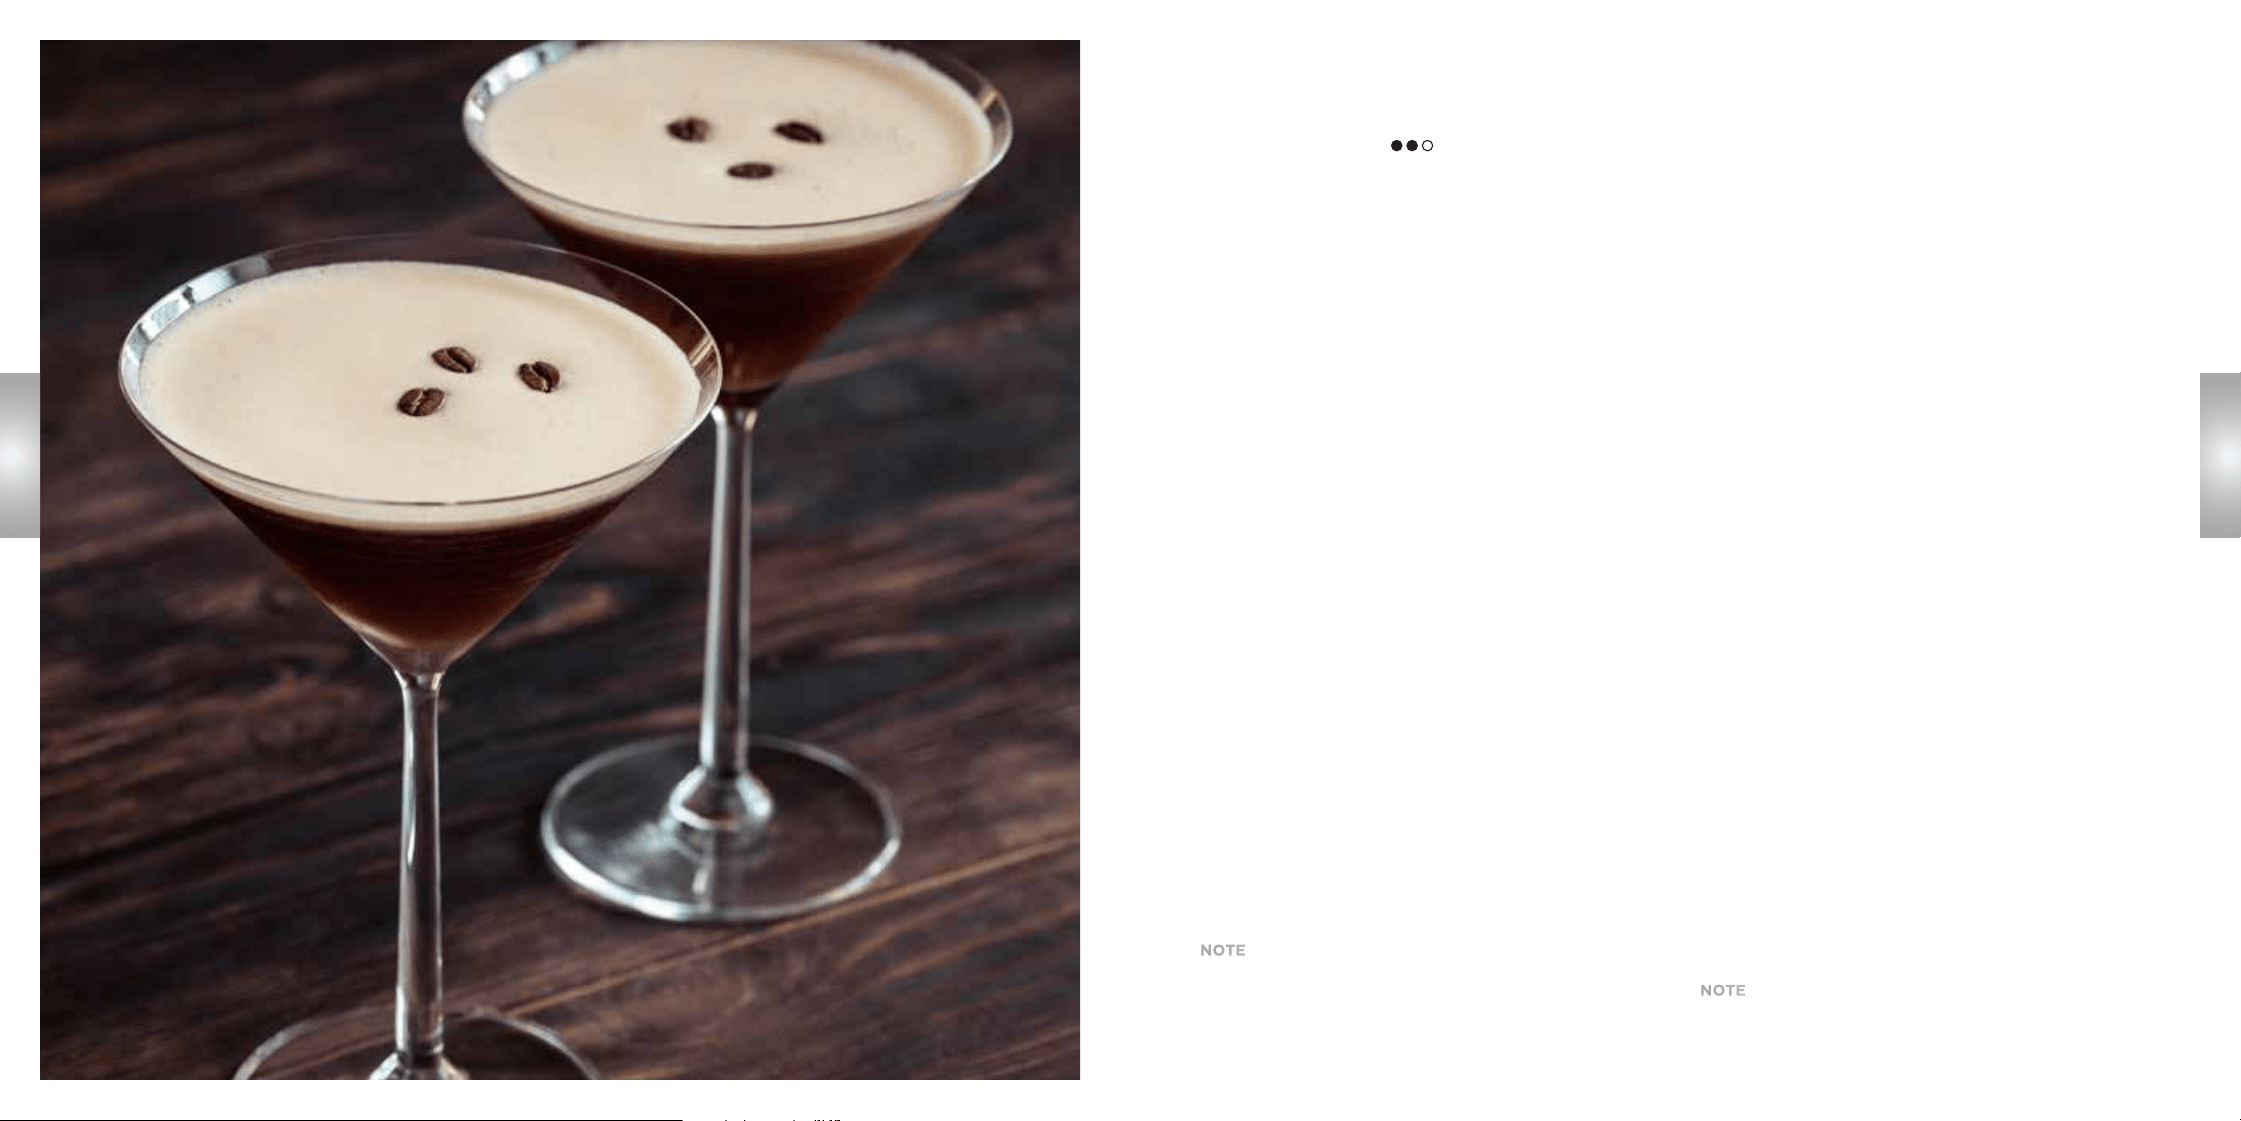
INGREDIENTS
Fresh coffee beans
Ice cubes, as needed
10ml agave or simple syrup
50ml vodka
25ml coffee liqueur
ESPRESSO MARTINI
BREW TIME: APPROX. 2 MINUTES | FUNCTION: COLD-PRESSED | ACCESSORIES: DOUBLE BASKET, COCKTAIL SHAKER
MAKES: 1 SERVING
INTERMEDIATE RECIPE
DIRECTIONS
1 Install the double basket into portafilter and
place the funnel on top. Then install portafilter
into grinding cradle.
2 Turn centre dial until COLD-PRESSED program
is illuminated, adjust grind size then press START
GRIND.
3 Tamp the grounds. Then remove grind funnel and
install portafilter into group head.
4 Place a cocktail shaker filled with ice under
portafilter. Press the centre dial to START BREW.
5 Add simple syrup, vodka and coffee liqueur to the
cocktail shaker. Shake vigorously for 10 seconds,
strain into a martini glass and serve.
Questions? ninjakitchen.co.uk
COLD-PRESSED
COLD-PRESSED
29
NOTE
When brewing a cold output after
brewing a hot output, be sure to rinse
to bring the temperature of the unit
down. See page 11 for more details.
NOTE
See page 12-13 for further unit
interaction information.
30
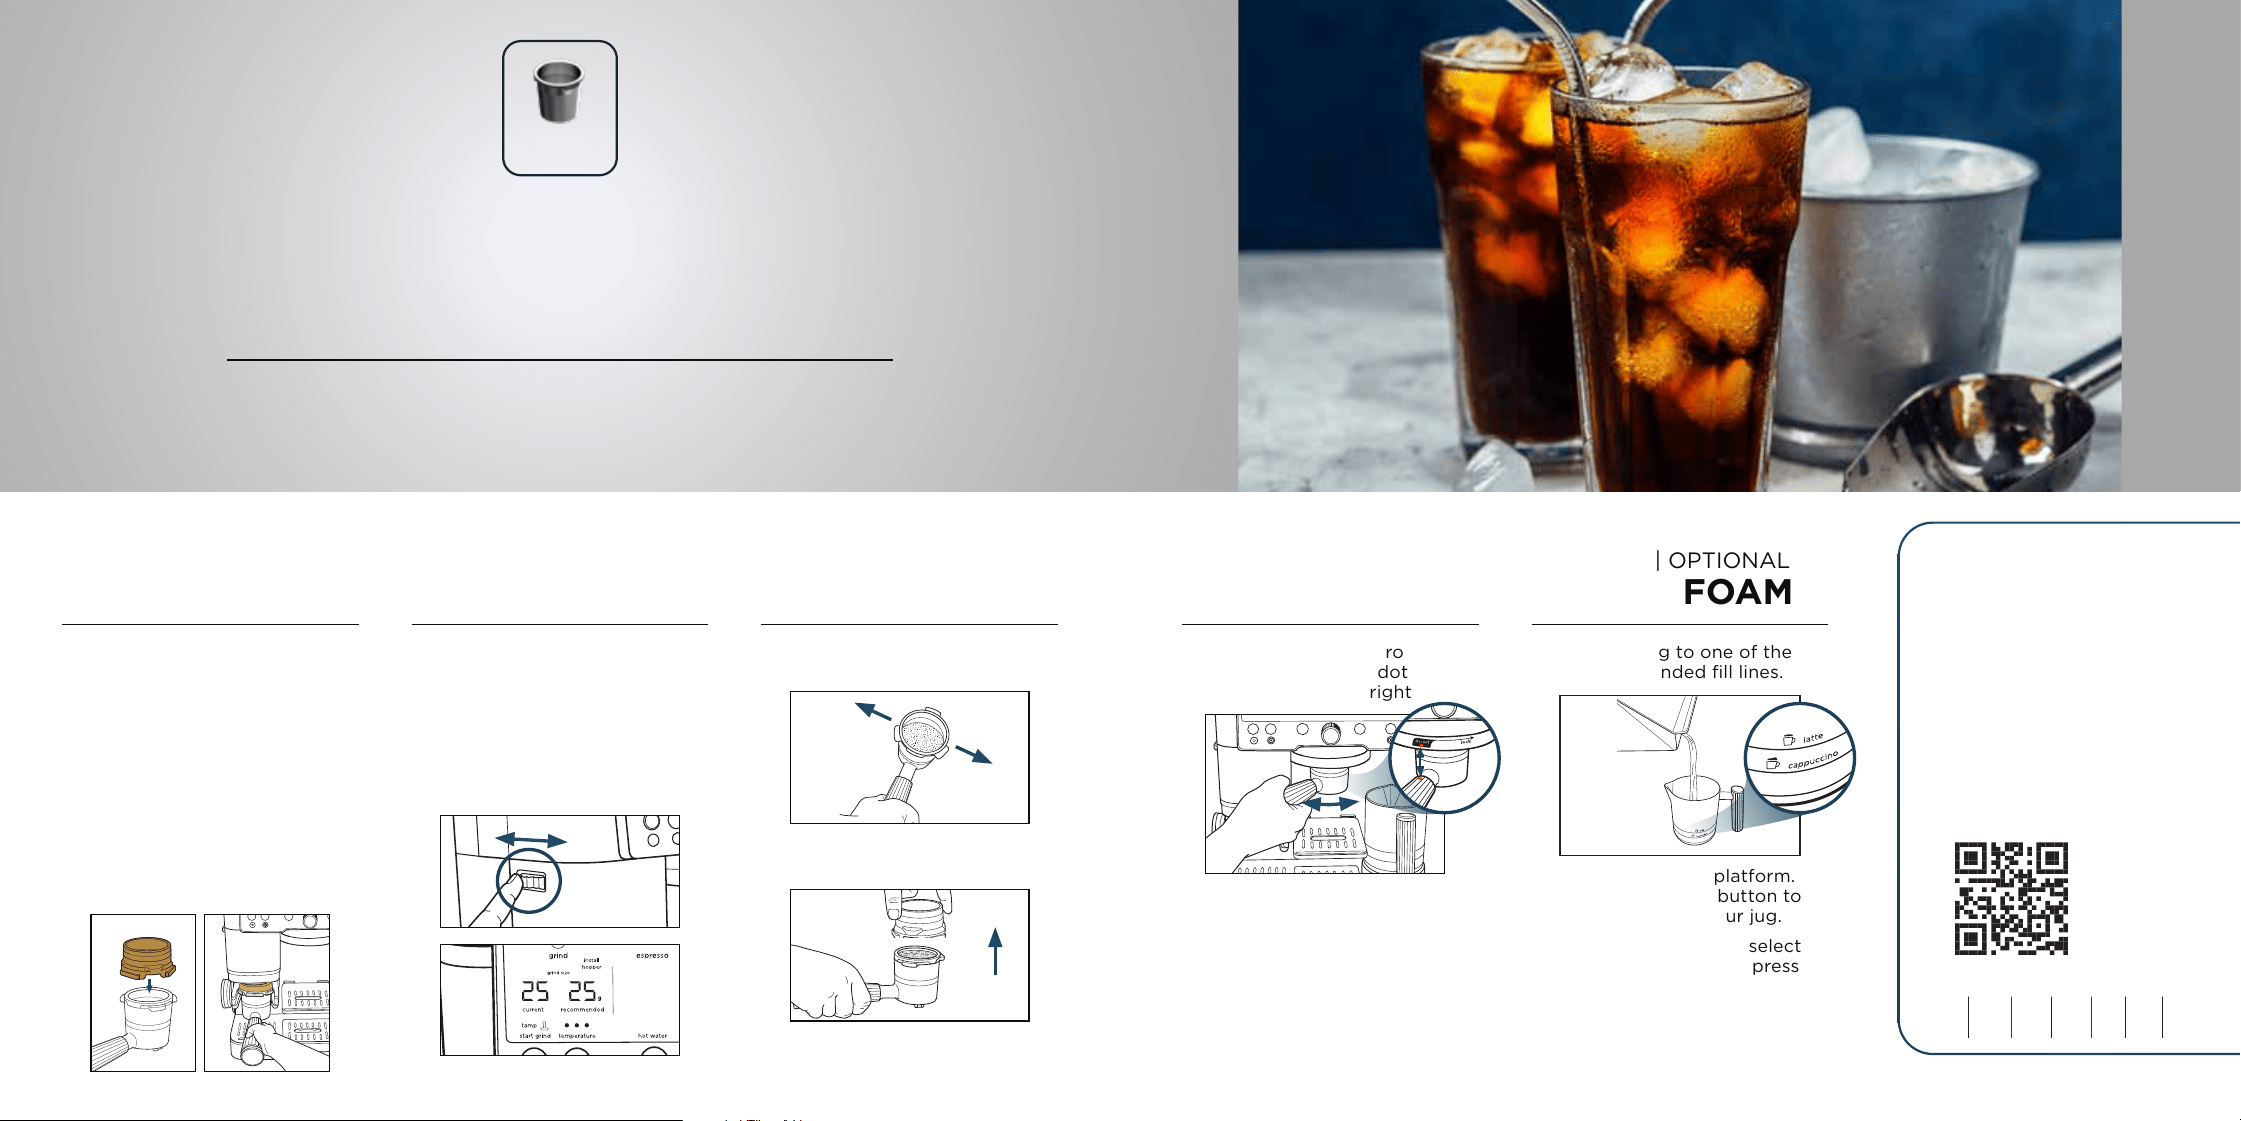
STEP 4
BREW
STEP 5 | OPTIONAL
FROTH
Install portafilter on group head
by aligning orange dots and
twisting to the right.
Fill milk jug to one of the
recommended fill lines.
Place milk jug on milk jug
platform. Press MILK TYPE
button based on the milk
that is in the jug.
Turn FROTH DIAL to select
your froth type, then press
START FROTH.
Place cup under portafilter.
Press START BREW.
When brewing is complete
empty grounds into a knock box
or container.
STEP 3
SHAKE
STEP 1
SET UP
Remove funnel and store on
left side of machine.
With the funnel still on, even out
the grounds with a light shake.
Insert Luxe basket in portafilter by
aligning tabs on basket with notches
on portafilter and press down.
Place funnel on portafilter, aligning
the notches on the funnel with the
notches on the portafilter. Push down
until funnel locks into place in the
portafilter.
Insert portafilter straight into
grinding cradle, making sure
it’s level and fits securely.
STEP 2
GRIND
TIPs
• For L, L+ and XL drinks,
tamp your grounds like
you would for espresso.
• SCAN HERE for how-to
videos, recipes, and
cleaning & maintenance.
31
Questions? ninjakitchen.co.uk
Turn the centre dial to select
CLASSIC. Press the SIZE button
to select your brew size.
Use grind dial on left side of
machine to match current grind
size to recommended grind size.
Press START GRIND.
HOW TO BREW
FILTER COFFEE
Turn freshly ground beans into
rich, flavourful coee in a range of sizes.
LUXE
BASKET
DRINK SIZES (millilitres):
S S+ M M+ L L+ XL
175 235 295 355 415 475 530
33
FILTERED COFFEE
FILTERED COFFEE
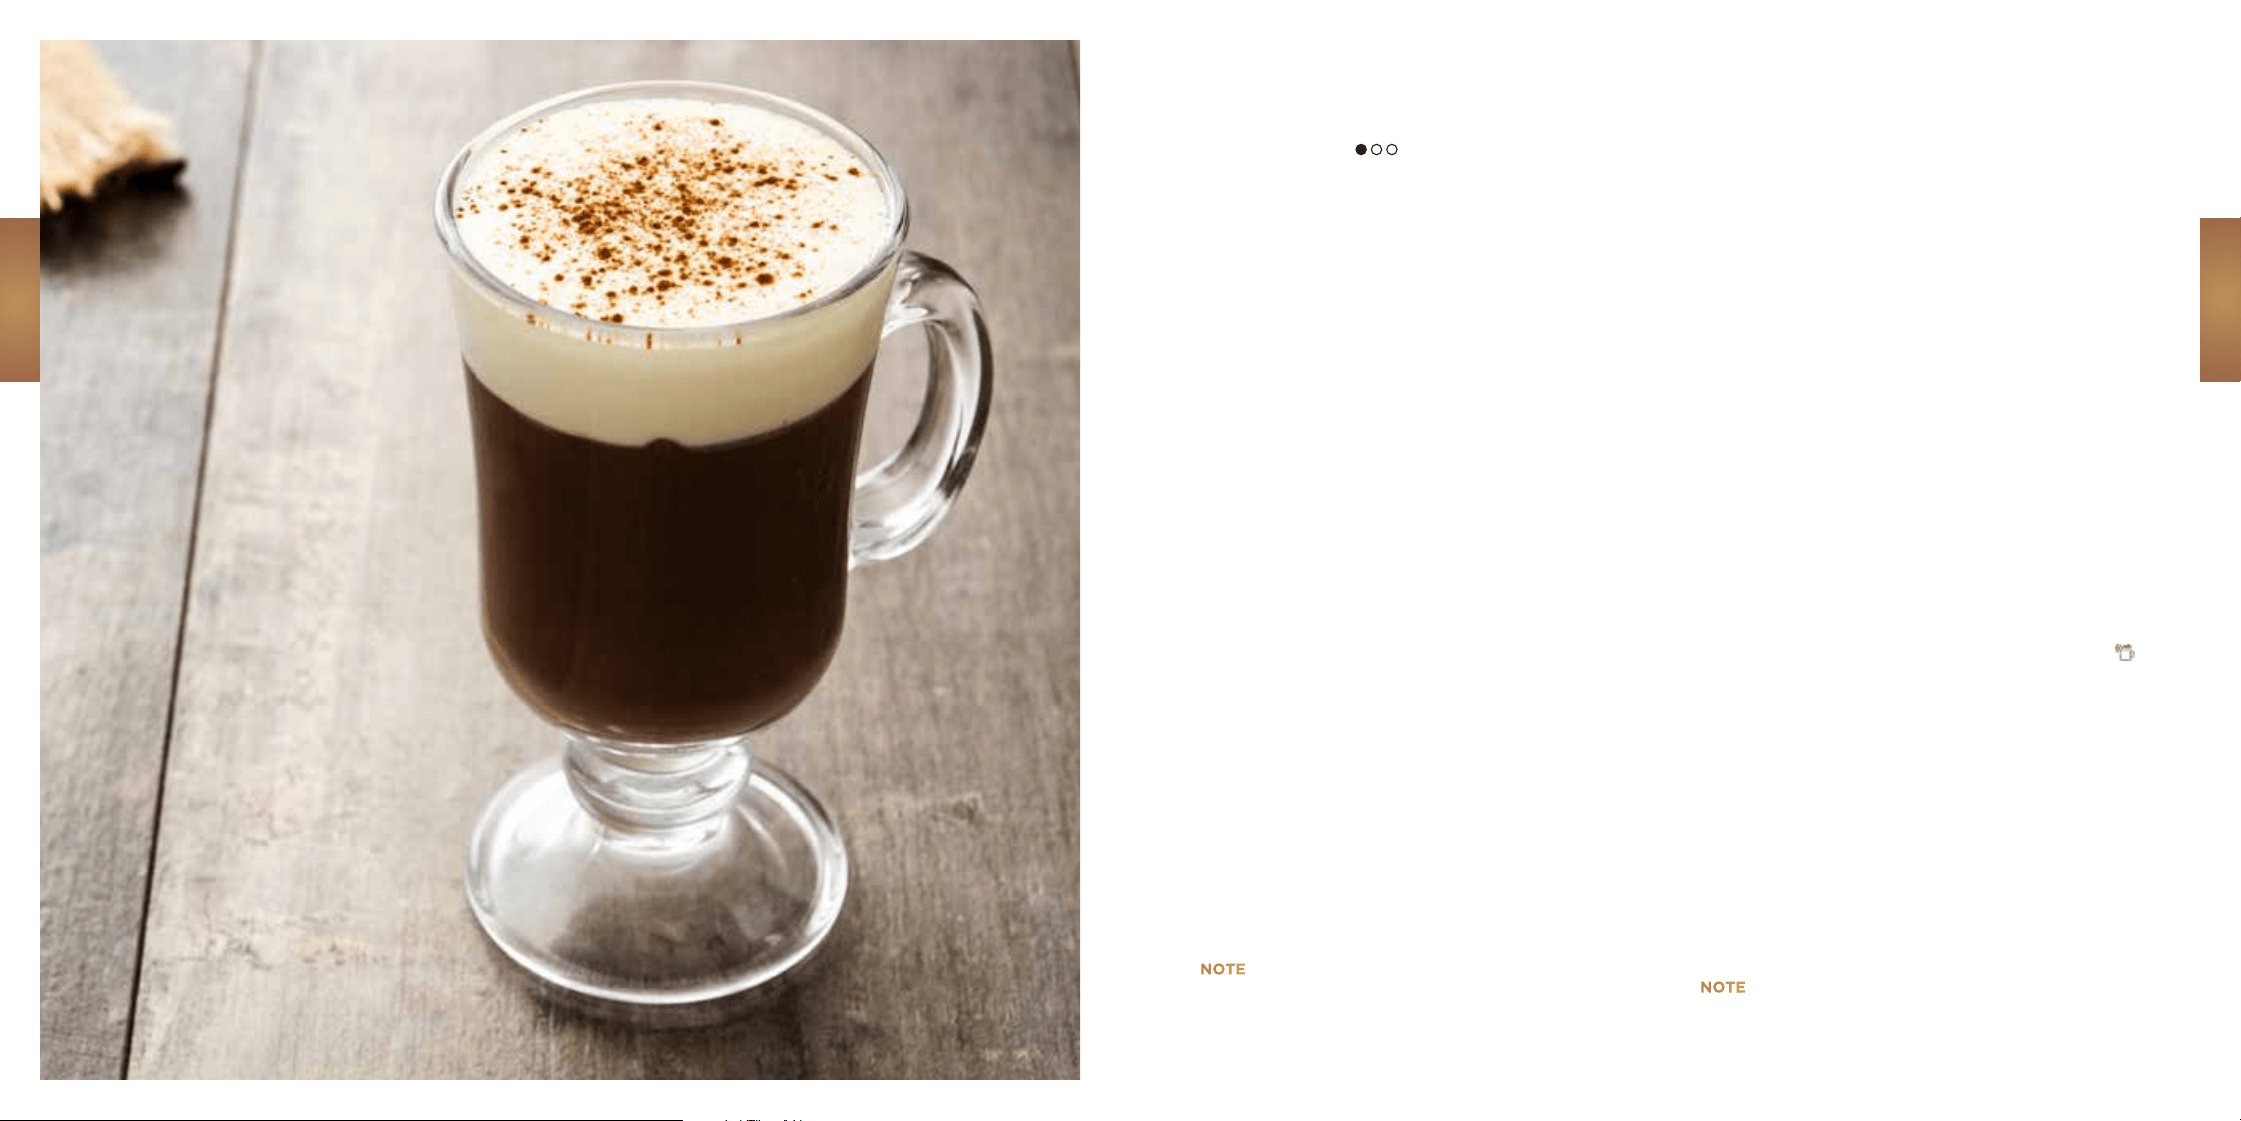
INGREDIENTS
Fresh coffee beans
1 tablespoon brown sugar
25ml Irish whiskey
30ml whole milk
60ml double cream
IRISH COFFEE WITH COLD FOAM
BREW TIME: APPROX. 4 MINUTES | FROTH TIME: APPROX. 2 MINUTES | FUNCTION: RICH | ACCESSORIES: LUXE BASKET
MAKES: 1 SERVING
BEGINNER RECIPE
DIRECTIONS
1 Install the luxe basket into portafilter and place
the funnel on top. Then install portafilter into
grinding cradle.
2 Turn centre dial until RICH program is illuminated
and select size L. Adjust the grind size then press
START GRIND.
3 Shake to distribute grounds, remove funnel and
install portafilter into group head.
4 Add brown sugar to a large cup and place under
portafilter. Press the centre dial to START BREW.
5 Once the coffee has brewed, add the whiskey
and stir until sugar has dissolved.
6 Add milk and cream to milk jug, place jug on
platform with steam wand inside.
7 Press the MILK TYPE button until DAIRY is
illuminated. Turn froth dial until COLD FOAM
is illuminated. Press START FROTH to
begin frothing. Spoon cold foam over brewed
coffee and serve.
Questions? ninjakitchen.co.uk
NOTE
Replace whole milk with double
cream (90ml total) for an even
thicker cold foam!
NOTE
See page 30-31 for further unit
interaction information.
34
STEP 4
BREW
STEP 5 | OPTIONAL
COLD FOAM
Fasten portafilter on group head
by aligning orange dots and
pulling to the right.
Fill milk jug to one of the
recommended fill lines.
Place jug on jug platform.
Press MILK TYPE button to
match milk in your jug.
Turn FROTH DIAL to select
your froth type, then press
START FROTH.
Fill your cup with ice and place
it under the portafilter.
Press START BREW.
When brewing is complete
empty grounds into a knock box
or container.
STEP 3
SHAKE
STEP 1
SET UP
Remove funnel and store on
left side of machine.
With the funnel still on, even out
the grounds with a light shake.
STEP 2
GRIND
Turn the centre dial to select
COLD BREW. Press the SIZE
button to select your brew size.
Use grind dial on left side of
machine to match current grind
size to recommended grind.
Press START GRIND.
TIPs
• When making a L, L+ or XL
cold brew, you must tamp
your grounds.
• If brewing a cold drink right
after brewing hot, you’ll
need to run a “Rinse” cycle.
See Brew Tips for instructions.
• Brewing may take
5-10 minutes depending on
drink size.
• SCAN HERE for how-to
videos, recipes, and cleaning
& maintenance.
35
Questions? ninjakitchen.co.uk
HOW TO BREW
COLD BREW
Brewed at a lower temperature for
ultra-smooth, naturally sweet coee.
LUXE
BASKET
DRINK SIZES (millilitres):
S S+ M M+ L L+ XL
175 235 295 355 415 475 530
Select basket based on drink
choice. Line up tabs on basket
with notches on portafilter
and press down.
Place funnel on portafilter, aligning
the notches on the funnel with the
notches on the portafilter. Push
down until funnel locks into place
in the portafilter.
Insert portafilter straight into
grinding cradle, making sure
it’s level and fits securely.
36
37
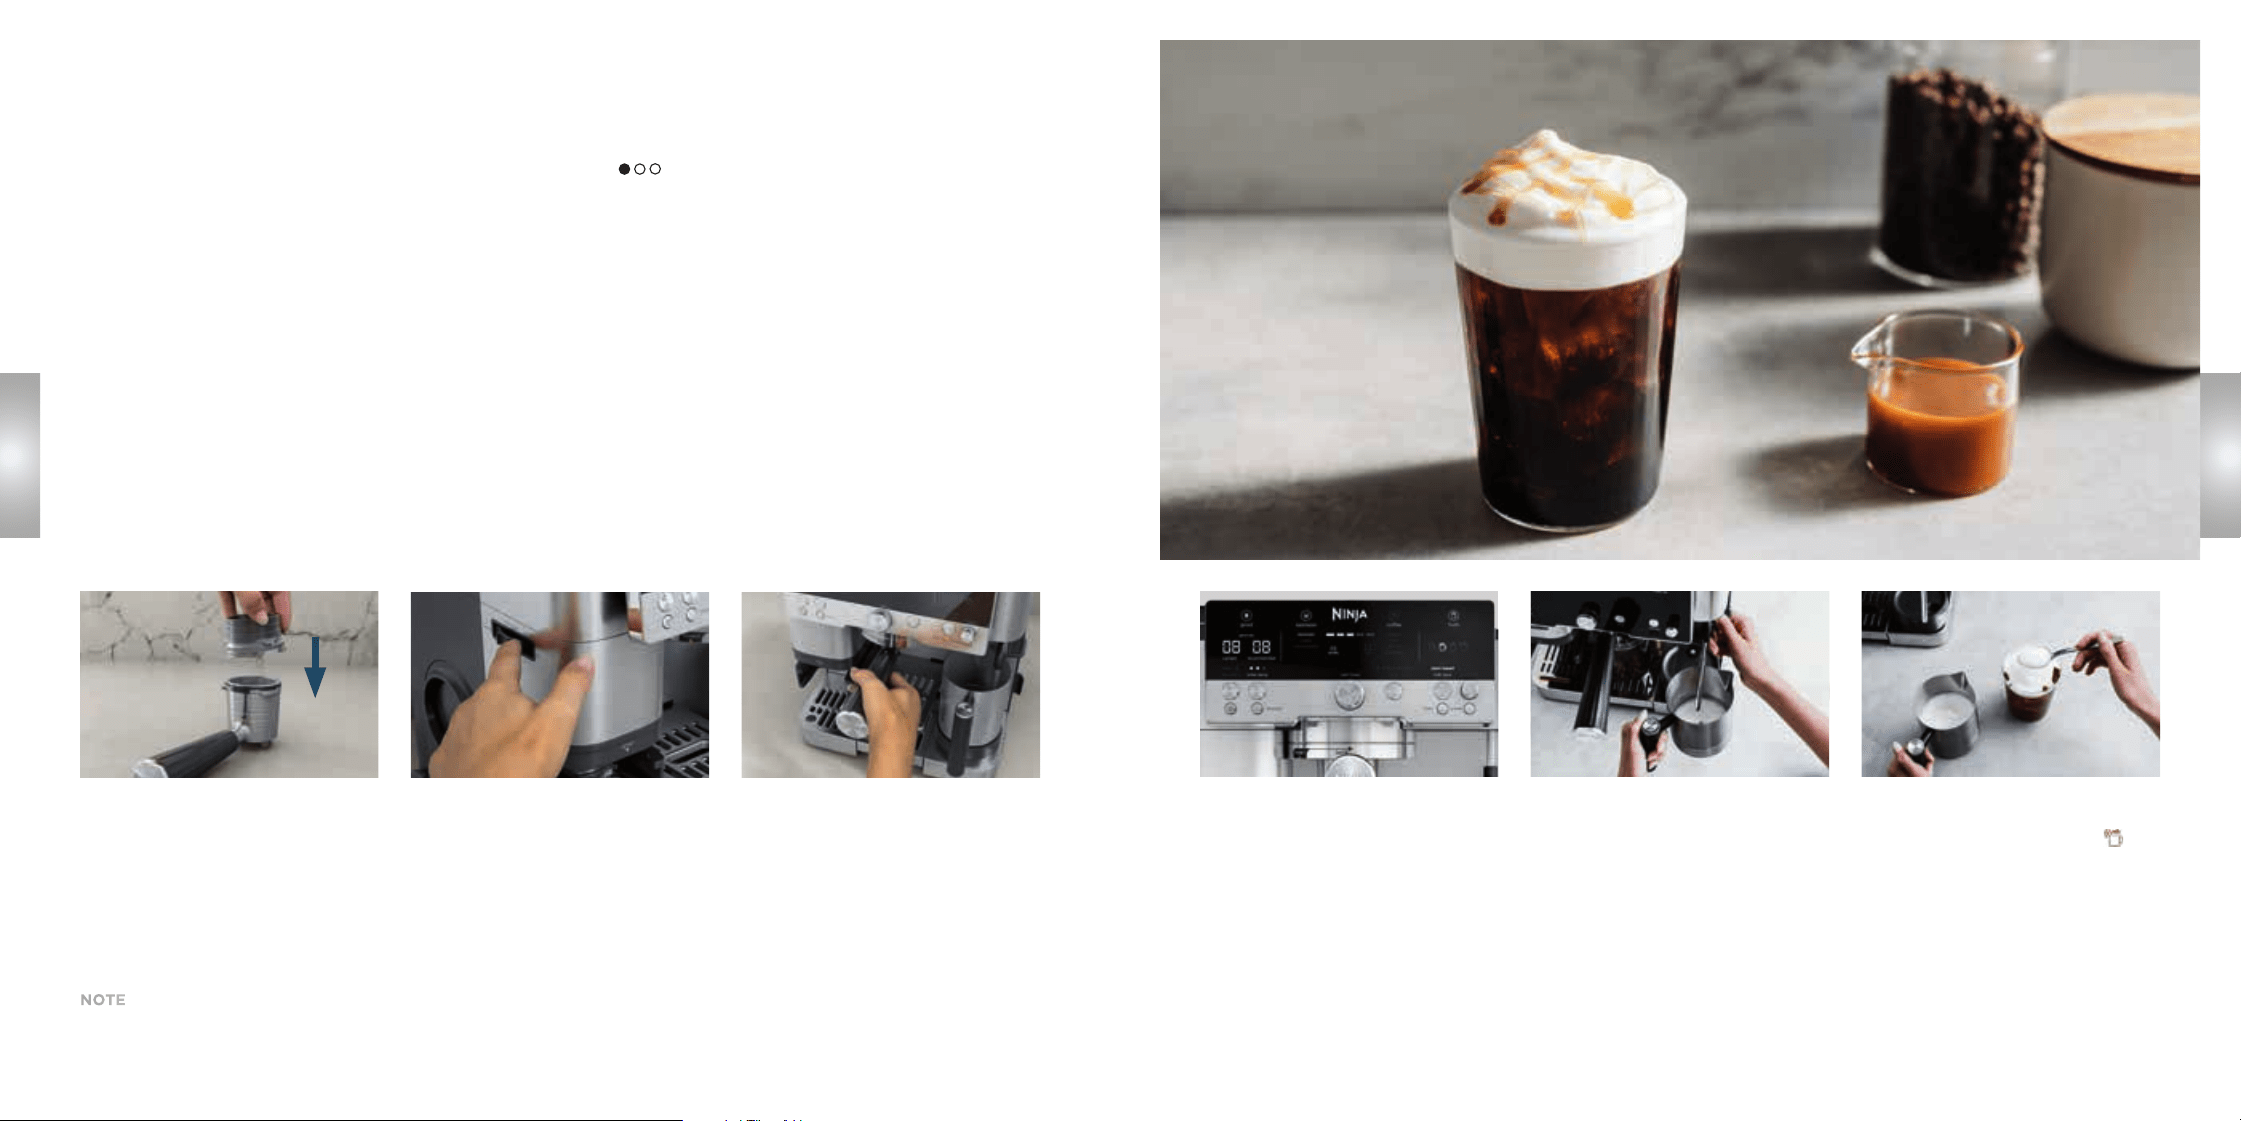
KICKSTARTER
KICKSTARTER
DIRECTIONS
COLD BREW COFFEE WITH COLD FOAM
BREW TIME: APPROX. 5-10 MINUTES | FROTH TIME: APPROX. 2 MINUTES | FUNCTION: COLD BREW
ACCESSORIES: LUXE BASKET | MAKES: 1 SERVING
BEGINNER RECIPE
Fill a medium glass with ice and
place under portafilter. Press the
centre dial to START BREW.
INGREDIENTS
Fresh coffee beans
Ice cubes, as needed
60ml double cream
30ml whole milk
CUSTOMISE YOUR COFFEE
by topping cold foam with
caramel syrup or sauce.
NOTE
Don’t forget to place the steam wand
back in its original position to allow it
to auto-purge. See page 43 for more
cleaning instructions.
Questions? ninjakitchen.co.uk
Install the luxe basket into
portafilter and place the funnel
on top. Then install portafilter into
grinding cradle.
Turn centre dial until COLD BREW
program is illuminated, select M.
Adjust grind size then press
START GRIND.
Shake to distribute grounds,
remove funnel and install
portafilter into group head.
Add cream and milk to milk jug,
place jug on platform with steam
wand inside.
Press the MILK TYPE button until
milk of choice is illuminated. Turn
froth dial until COLD FOAM
is illuminated. Press froth dial to
begin frothing. Pour frothed milk
over brewed drink and serve.
NOTE
See page 34-35 for further unit
interaction information.
38
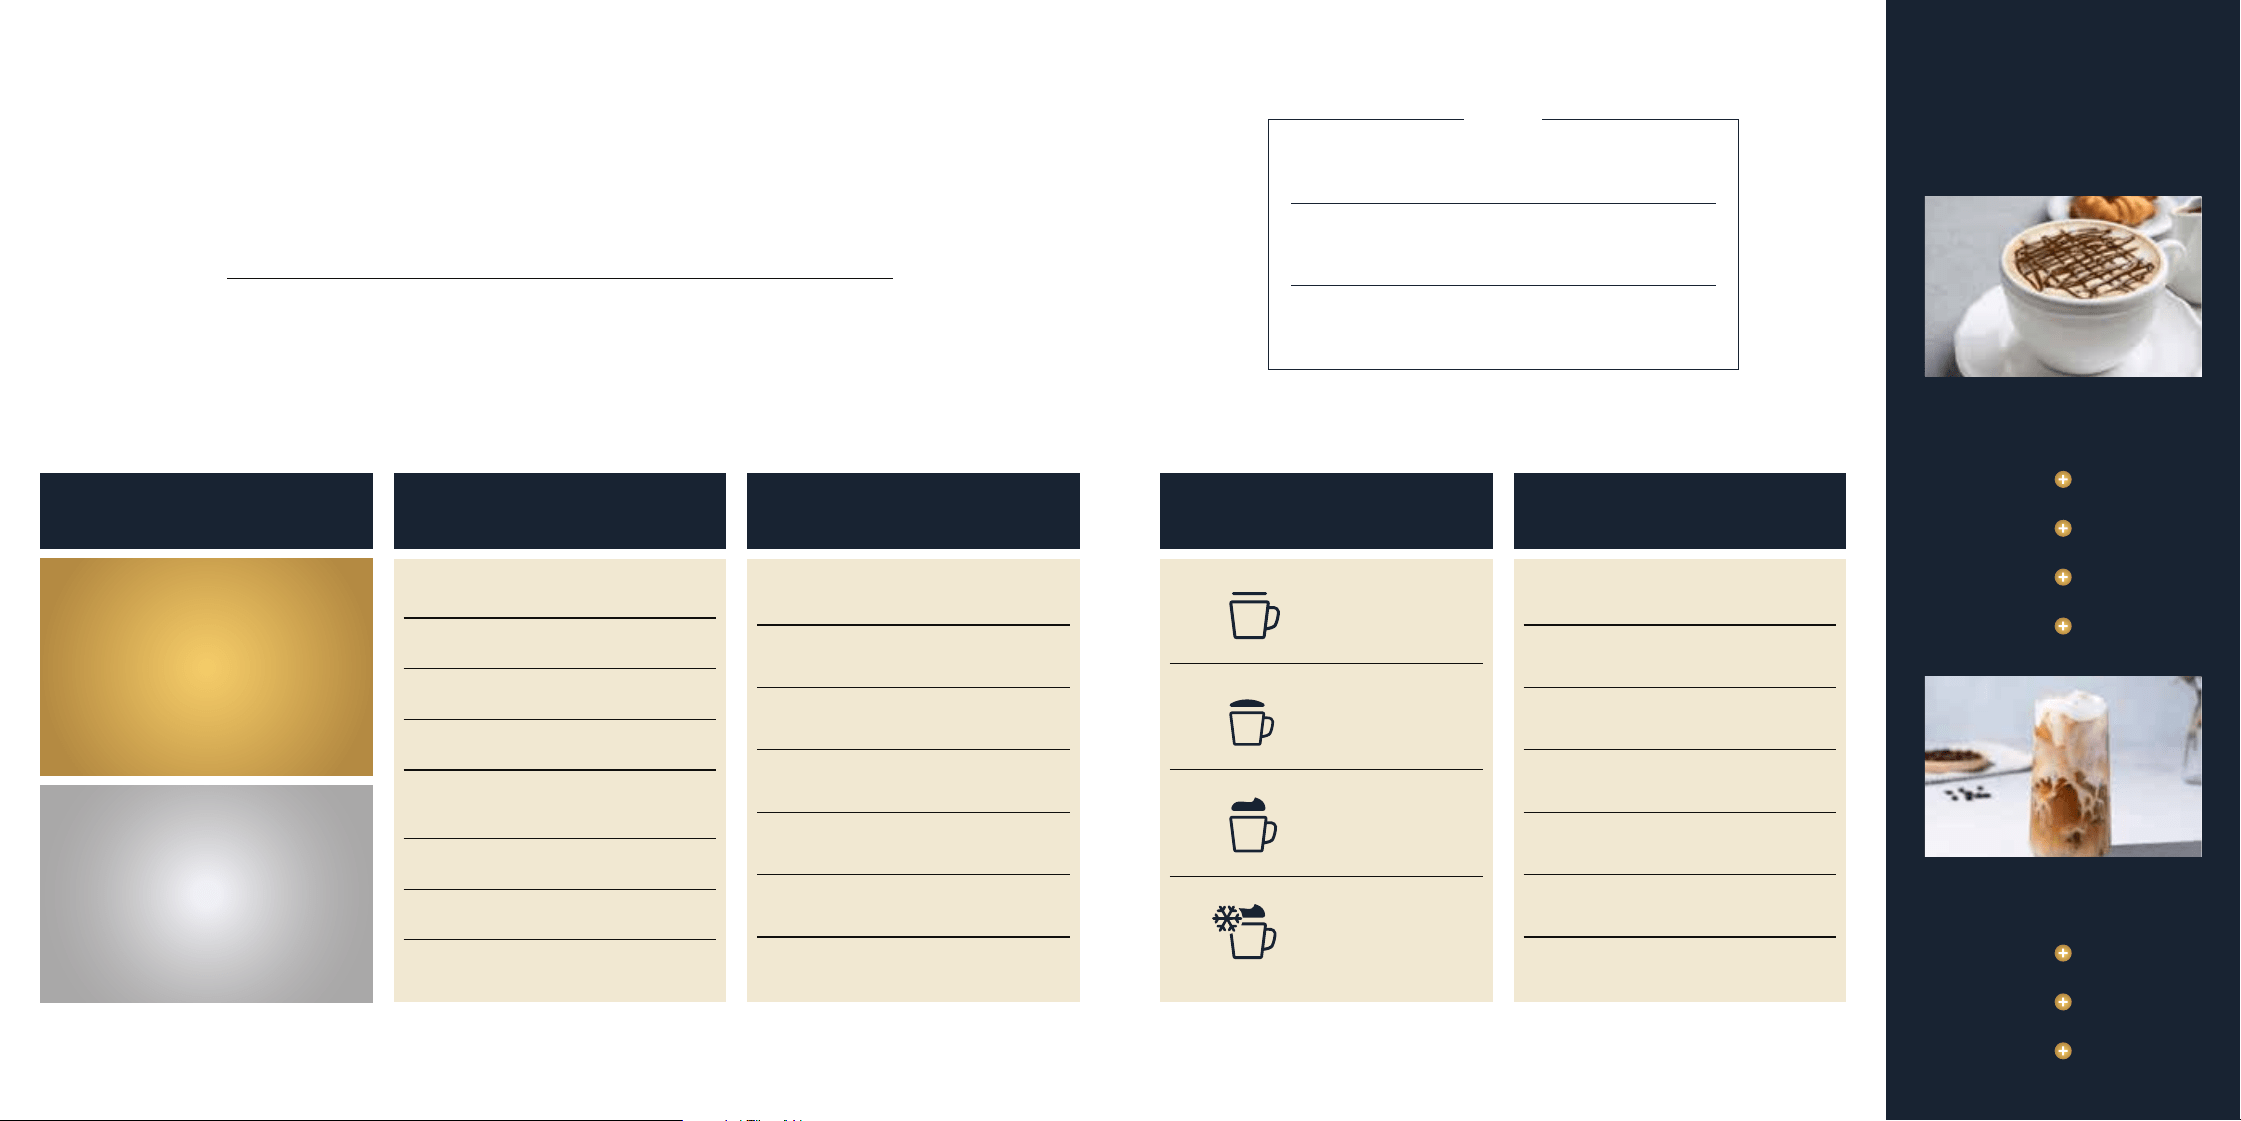
YOUR AT-HOME
BARISTA
Create your own café menu and never
wait in line for a quality drink again.
BREW TYPE
FLAVOR SYRUPS
OR SWEETENERS
DAIRY OR
PLANT-BASED MILK
Whole Milk
Skimmed Milk
Semi Skimmed Milk
Oat Milk
Soy Milk
Almond Milk
Cashew Milk
FROTH OR FOAM TOPPINGS
Steamed Milk
Thin Froth
Thick Froth
Cold Foam
Whipped Cream
Cocoa Powder
Cinnamon
Chocolate Drizzle
Caramel Drizzle
Sprinkles
Chocolate Shavings
NINJA TEST KITCHEN’S
FAVOR ITE
COMBOS
TIPS
Add a shot of espresso to any
coee drink for an extra boost.
Use the fill lines on your milk jug to easily pour
the right amount for popular drinks.
If you want a creamier froth when using
plant-based milks, use “barista-style” varieties.
Espresso
Hazelnut Syrup
Oat Milk
Thick Froth
Chocolate Drizzle
Espresso
Vanilla Syrup
Whole Milk
Cold Foam
CHOCOLATE HAZELNUT
MACCHIATO
ICED VANILLA LATTE
WITH COLD FOAM
HOT
Espresso (single, double, quad)
Classic
Rich
COLD
Cold-Pressed
Over Ice
Cold Brew
Honey
Maple Syrup
Agave
Sugar Syrup
Flavoured syrup of choice
(i.e hazelnut, chocolate, vanilla)
Cane sugar
Brown Sugar
Sugar substitute of choice
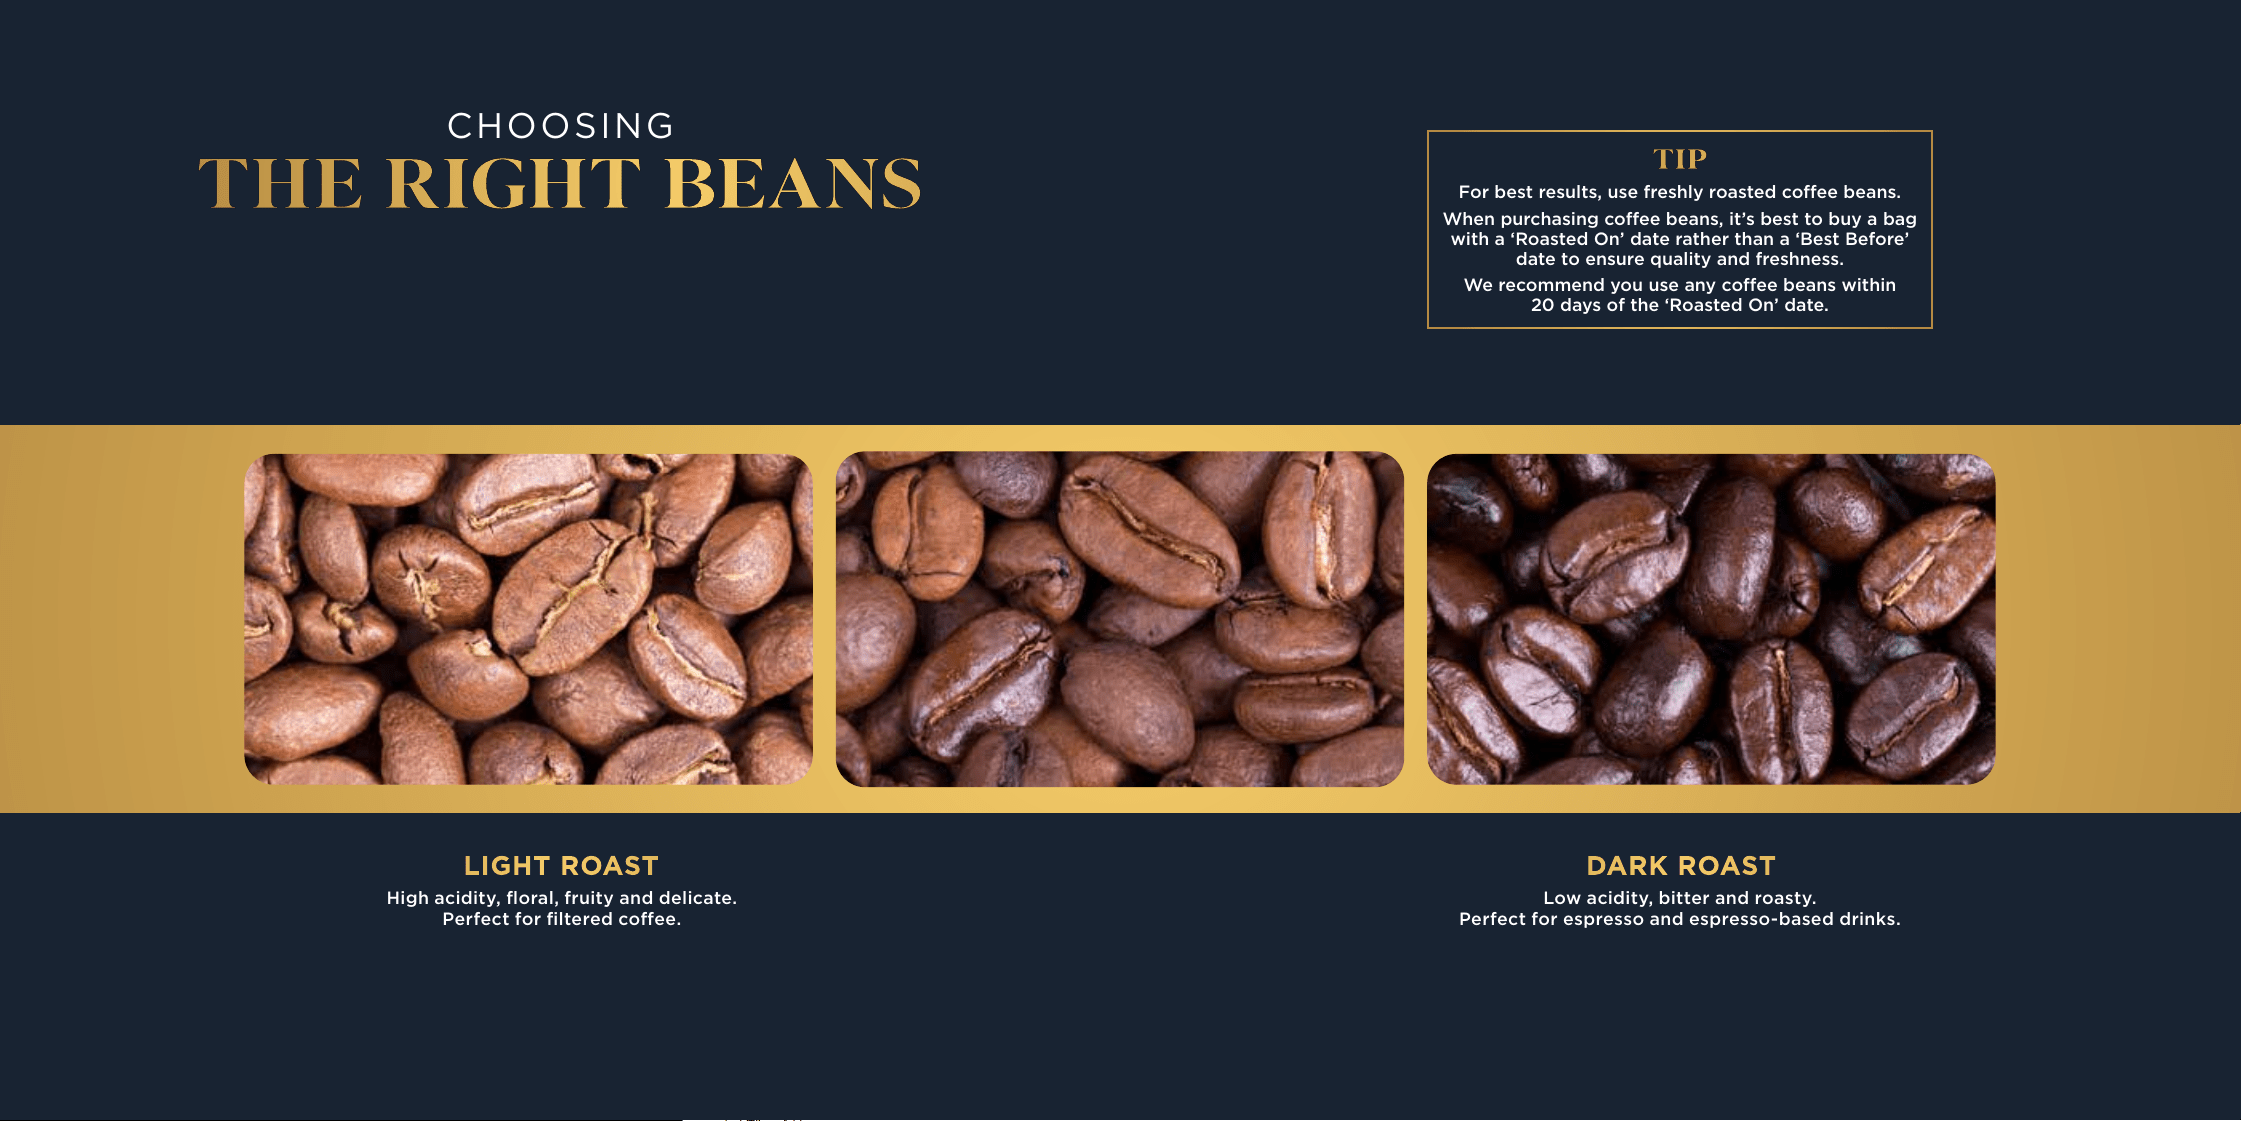
CHOOSING
THE RIGHT BEANS
Every delicious cup starts with a perfectly roasted bean.
Follow this guide to pick the right one for your drink.
High acidity, floral, fruity and delicate.
Perfect for filtered coee.
Low acidity, bitter and roasty.
Perfect for espresso and espresso-based drinks.
LIGHT ROAST DARK ROAST
TIP
For best results, use freshly roasted coee beans.
When purchasing coee beans, it’s best to buy a bag
with a ‘Roasted On’ date rather than a ‘Best Before’
date to ensure quality and freshness.
We recommend you use any coee beans within
20 days of the ‘Roasted On’ date.
41
40

GRIND SIZE RECOMMENDATIONS & ADAPTIVE BREWING
Our espresso machine eliminates the endless guesswork of making espresso
by monitoring your brew and continuously adjusting settings like grind size,
pressure and more. That means you can create the perfect cup
with no guesswork required.
CONICAL BURR GRINDER
Two conical-shaped burrs precisely crush beans, ensuring consistent
particle size for a flavourful and balanced cup. Equipped with 25 grind sizes,
our grinder makes it easier than ever to dial in.
BUILT-IN SCALE
Dierent drinks require dierent amounts of grounds. While other
machines simply grind for a set amount of time, our built-in scale
weighs out the perfect dose for your chosen drink.
HANDS-FREE FROTHING
Our integrated whisk and high-velocity steam wand eortlessly
creates hot or cold microfoam from any dairy or plant-based milk.
It even monitors temperature to prevent burning.
BASKET RECOGNITION
The machine automatically detects which basket you’re using and
adjusts settings accordingly without you lifting a finger.
LEARN MORE ABOUT
BARISTA ASSIST
TECHNOLOGY
AUTO-PURGE
The steam wand comes equipped with its own cleaning program
to get rid of inner debris and residue. After frothing, put the
wand back in its original position without the milk jug and it will
automatically flush itself out.
DAILY CARE
Wipe down your steam wand with a damp cloth immediately
after each use and use the brush to clean o grounds from
any part of the machine.
CLEANING CYCLE
Your unit is programmed with a self-cleaning cycle.
To keep the grouphead clean and free of build-up, be sure to
run a clean cycle whenever the “clean” light is illuminated.
See the Owner’s Guide for more information.
DESCALE
Water hardness aects how often your machine will need
to descale. Use the water test included in the starter kit,
program the machine with the results, and run a descale cycle
whenever the DESCALE light is illuminated to keep your
machine running at peak performance.
DISHWASHER-SAFE PARTS
Funnel, Whisk, Cleaning Disc, Water Reservoir,
Bean Hopper, and all Drip Tray Components.
RECOMMENDATIONS FOR
CLEANING & CARE
43
42

For accessories and replacement parts, visit ninjakitchen.co.uk/ninja-parts-accessories/
NINJA is registered trademark in the United Kingdom of SharkNinja Operating LLC.
© 2024 SharkNinja Operating LLC
ES601UK_IG_QSG_MP_240620_Mv1
PREMIER SERIES