QUICK
START
GUIDE
Schnellstartanleitung
Guide De Démarrage Rapide
Guida Rapida
Guía De Inicio Rápido
Przewodnik Szybkiego Startu
Snelle Startgids
Snabbstartsguide
Panduan Memulai Cepat
ENGLISH
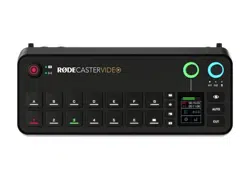
1. Connect your video input devices, such as
cameras and webcams, to HDMI 1-4 and/or
USB-C 4-5
2. Connect your display(s) to the HDMI outputs
labelled ‘A’ and ‘B’
3. Connect your microphone(s) and/or instrument(s)
to the combo inputs (XLR or 1/4-inch)
4. Connect your headphones and/or monitor
speakers to the 1/4-inch outputs
5. Connect the two antennae to the sockets on
either side of the rear panel
6. Connect the included power supply and press
the red button to power on your RØDECaster
Video
7. Download and install RØDE Central (rode.com/
apps/rode-central)
8. To congure settings and remotely control your
RØDECaster Video via RØDE Central, you can
either connect it via Wi-Fi or Ethernet (on the
same network as your computer) or directly to
your computer via USB 2
• Wi-Fi: connect to your computer using USB 2,
navigate to Device Conguration > System >
Network in RØDE Central, and once paired,
disconnect from USB 2
• Ethernet: connect your RØDECaster Video’s
Ethernet port directly to your router or
network device
• USB 2: connect USB 2 to your computer
SCAN FOR MORE INFO
View the user guide to learn more
Sehen Sie sich das Benutzerhandbuch an,
um mehr zu erfahren
Consultez le guide de l’utilisateur pour en savoir plus
Consulta la guida per l’utente per saperne di più
Consulte la guía del usuario para
obtener más información
Zapoznaj się z przewodnikiem użytkownika,
aby dowiedzieć się więcej
Bekijk de gebruikershandleiding voor meer informatie
Se användarhandboken för att lära dig mer
Lihat panduan pengguna untuk mempelajari lebih lanju
t

9. Connect USB 1 to your computer if you wish to
access the RØDECaster Video’s video stream
and multitrack audio interface
10. Visit the user guide to learn more about
operating your RØDECaster Video
GERMAN
1. Schließen Sie Ihre Videoeingabegeräte, wie
Kameras und Webcams, an HDMI 1-4 und/oder
USB-C 4-5 an
2. Schließen Sie Ihr(e) Display(s) an die HDMI-
Ausgänge mit den Bezeichnungen ‘A’ und ‘B’ an
3. Schließen Sie Ihre Mikrofone und/oder
Instrumente an die Kombi-Eingänge (XLR oder
1/4-Zoll) an
4. Schließen Sie Ihre Kopfhörer und/oder
Monitorlautsprecher an die 1/4-Zoll-Ausgänge
an
5. Schließen Sie die beiden Antennen an die
Buchsen auf beiden Seiten der Rückwand an
6. Schließen Sie das mitgelieferte Netzteil an
und drücken Sie die rote Taste, um Ihren
RØDECaster Video einzuschalten
7. Laden Sie RØDE Central herunter und
installieren Sie es (rode.com/apps/rode-central)
8. Um die Einstellungen zu kongurieren und
Ihren RØDECaster Video über RØDE Central
fernzusteuern, können Sie ihn entweder über
Wi-Fi oder Ethernet (im selben Netzwerk wie
Ihr Computer) oder direkt über USB 2 mit Ihrem
Computer verbinden
• Wi-Fi: Verbinden Sie sich mit Ihrem
Computer über USB 2, navigieren Sie zu
Gerätekonguration > System > Netzwerk
in RØDE Central und trennen Sie nach dem
Pairing die Verbindung zu USB 2
• Ethernet: Verbinden Sie den Ethernet-
Anschluss Ihres RØDECaster Video direkt mit
Ihrem Router oder Netzwerkgerät
• USB 2: Verbinden Sie USB 2 mit Ihrem
Computer
9. Verbinden Sie USB 1 mit Ihrem Computer, wenn
Sie auf den Videostream und das Mehrspur-
Audio-Interface des RØDECaster Video
zugreifen möchten
10. Besuchen Sie die Bedienungsanleitung, um
mehr über den Betrieb Ihres RØDECaster Video
zu erfahren
FRENCH
1. Connectez vos dispositifs d’entrée vidéo, tels
que des caméras et des webcams, aux ports
HDMI 1-4 et/ou USB-C 4-5
2. Connectez votre ou vos écrans aux sorties HDMI
étiquetées ‘A’ et ‘B’
3. Connectez vos microphones et/ou instruments
aux entrées combo (XLR ou 1/4 pouce)
4. Connectez vos écouteurs et/ou enceintes de
monitoring aux sorties 1/4 pouce
5. Connectez les deux antennes aux prises de

chaque côté du panneau arrière
6. Connectez l’alimentation incluse et appuyez sur
le bouton rouge pour allumer votre RØDECaster
Video
7. Téléchargez et installez RØDE Central (rode.
com/apps/rode-central)
8. Pour congurer les paramètres et contrôler à
distance votre RØDECaster Video via RØDE
Central, vous pouvez soit le connecter via Wi-Fi
ou Ethernet (sur le même réseau que votre
ordinateur) ou directement à votre ordinateur
via USB 2
• Wi-Fi : connectez-vous à votre ordinateur en
utilisant USB 2, allez dans Conguration de
l’appareil > Système > Réseau dans RØDE
Central, et une fois jumelé, déconnectez-vous
de USB 2
• Ethernet : connectez le port Ethernet de
votre RØDECaster Video directement à votre
routeur ou appareil réseau
• USB 2 : connectez USB 2 à votre ordinateur
9. Connectez USB 1 à votre ordinateur si vous
souhaitez accéder au ux vidéo et à l’interface
audio multipiste du RØDECaster Video
10. Consultez le guide de l’utilisateur pour en savoir
plus sur l’utilisation de votre RØDECaster Video
ITALIAN
1. Collega i tuoi dispositivi di ingresso video, come
telecamere e webcam, a HDMI 1-4 e/o USB-C
4-5
2. Collega il/i tuo/i display alle uscite HDMI
etichettate ‘A’ e ‘B’
3. Collega i tuoi microfoni e/o strumenti agli
ingressi combo (XLR o 1/4 di pollice)
4. Collega le tue cufe e/o i diffusori monitor alle
uscite da 1/4 di pollice
5. Collega le due antenne alle prese su entrambi i
lati del pannello posteriore
6. Collega l’alimentatore incluso e premi il pulsante
rosso per accendere il tuo RØDECaster Video
7. Scarica e installa RØDE Central (rode.com/apps/
rode-central)
8. Per congurare le impostazioni e controllare
a distanza il tuo RØDECaster Video tramite
RØDE Central, puoi connetterlo tramite Wi-Fi o
Ethernet (sulla stessa rete del tuo computer) o
direttamente al tuo computer tramite USB 2
• Wi-Fi: collegati al tuo computer utilizzando
USB 2, vai su Congurazione dispositivo >
Sistema > Rete in RØDE Central e, una volta
associato, disconnetti USB 2
• Ethernet: collega la porta Ethernet del tuo
RØDECaster Video direttamente al tuo router
o dispositivo di rete
• USB 2: collega USB 2 al tuo computer
9. Collega USB 1 al tuo computer se desideri
accedere al usso video e all’interfaccia audio
multitraccia del RØDECaster Video
10. Consulta la guida utente per saperne di più su

come utilizzare il tuo RØDECaster Video
SPANISH
1. Conecta tus dispositivos de entrada de video,
como cámaras y webcams, a HDMI 1-4 y/o
USB-C 4-5
2. Conecta tu(s) pantalla(s) a las salidas HDMI
etiquetadas como ‘A’ y ‘B’
3. Conecta tus micrófonos y/o instrumentos a las
entradas combinadas (XLR o 1/4 pulgada)
4. Conecta tus auriculares y/o altavoces de
monitoreo a las salidas de 1/4 pulgada
5. Conecta las dos antenas a los enchufes en
ambos lados del panel trasero
6. Conecta la fuente de alimentación incluida
y presiona el botón rojo para encender tu
RØDECaster Video
7. Descarga e instala RØDE Central (rode.com/
apps/rode-central)
8. Para congurar los ajustes y controlar
remotamente tu RØDECaster Video a través
de RØDE Central, puedes conectarlo a través
de Wi-Fi o Ethernet (en la misma red que tu
computadora) o directamente a tu computadora
a través de USB 2
• Wi-Fi: conéctate a tu computadora usando
USB 2, navega a Conguración del dispositivo
> Sistema > Red en RØDE Central y, una vez
emparejado, desconéctate de USB 2
• Ethernet: conecta el puerto Ethernet de
tu RØDECaster Video directamente a tu
enrutador o dispositivo de red
• USB 2: conecta USB 2 a tu computadora
9. Conecta USB 1 a tu computadora si deseas
acceder al ujo de video y a la interfaz de audio
multipista del RØDECaster Video
10. Visita la guía del usuario para aprender más
sobre el funcionamiento de tu RØDECaster
Video
POLISH
1. Podłącz swoje urządzenia wejściowe wideo, takie
jak kamery i kamery internetowe, do HDMI 1-4 i/
lub USB-C 4-5
2. Podłącz swoje wyświetlacze do wyjść HDMI
oznaczonych jako ‘A’ i ‘B’
3. Podłącz swoje mikrofony i/lub instrumenty do
wejść combo (XLR lub 1/4 cala)
4. Podłącz swoje słuchawki i/lub głośniki
monitorujące do wyjść 1/4 cala
5. Podłącz dwie anteny do gniazd po obu stronach
tylnego panelu
6. Podłącz dołączony zasilacz i naciśnij czerwony
przycisk, aby włączyć swój RØDECaster Video
7. Pobierz i zainstaluj RØDE Central (rode.com/
apps/rode-central)
8. Aby skongurować ustawienia i zdalnie
kontrolować swój RØDECaster Video za pomocą
RØDE Central, możesz połączyć go przez Wi-Fi
lub Ethernet (w tej samej sieci co twój komputer)

lub bezpośrednio z komputerem przez USB 2
• Wi-Fi: połącz się z komputerem za pomocą
USB 2, przejdź do Konguracja urządzenia
> System > Sieć w RØDE Central i po
sparowaniu odłącz USB 2
• Ethernet: podłącz port Ethernet swojego
RØDECaster Video bezpośrednio do routera
lub urządzenia sieciowego
• USB 2: podłącz USB 2 do swojego komputera
9. Podłącz USB 1 do swojego komputera, jeśli
chcesz uzyskać dostęp do strumienia wideo i
interfejsu audio wielościeżkowego RØDECaster
Video
10. Odwiedź podręcznik użytkownika, aby
dowiedzieć się więcej o obsłudze swojego
RØDECaster Video
DUTCH
1. Verbind je video-ingang apparaten, zoals
camera’s en webcams, met HDMI 1-4 en/of
USB-C 4-5
2. Verbind je beeldschermen met de HDMI-
uitgangen gelabeld ‘A’ en ‘B’
3. Verbind je microfoons en/of instrumenten met
de combi-ingangen (XLR of 1/4-inch)
4. Verbind je koptelefoon en/of monitor
luidsprekers met de 1/4-inch uitgangen
5. Verbind de twee antennes met de aansluitingen
aan beide zijden van het achterpaneel
6. Verbind de meegeleverde voeding en druk op
de rode knop om je RØDECaster Video aan te
zetten
7. Download en installeer RØDE Central (rode.
com/apps/rode-central)
8. Om instellingen te congureren en je
RØDECaster Video op afstand te bedienen
via RØDE Central, kun je deze verbinden via
Wi-Fi of Ethernet (op hetzelfde netwerk als je
computer) of rechtstreeks met je computer via
USB 2
• Wi-Fi: verbind met je computer via USB 2,
navigeer naar Apparaatconguratie > Systeem
> Netwerk in RØDE Central, en koppel, na het
pairen, USB 2 los
• Ethernet: verbind de Ethernet-poort van je
RØDECaster Video rechtstreeks met je router
of netwerkapparaat
• USB 2: verbind USB 2 met je computer
9. Verbind USB 1 met je computer als je toegang
wilt tot de videostream en de multitrack audio-
interface van de RØDECaster Video
10. Bezoek de gebruikershandleiding om meer te
leren over het gebruik van je RØDECaster Video
SWEDISH
1. Anslut dina videoinmatningsenheter, såsom
kameror och webbkameror, till HDMI 1-4 och/
eller USB-C 4-5
2. Anslut din(a) skärm(ar) till HDMI-utgångarna
märkta ‘A’ och ‘B’

3. Anslut dina mikrofoner och/eller instrument till
kombinationsingångarna (XLR eller 1/4-tum)
4. Anslut dina hörlurar och/eller monitorspeakers
till 1/4-tumsutgångarna
5. Anslut de två antennerna till uttagen på vardera
sidan av bakpanelen
6. Anslut den medföljande strömförsörjningen och
tryck på den röda knappen för att slå på din
RØDECaster Video
7. Ladda ner och installera RØDE Central (rode.
com/apps/rode-central)
8. För att kongurera inställningar och fjärrstyra din
RØDECaster Video via RØDE Central, kan du
antingen ansluta den via Wi-Fi eller Ethernet (på
samma nätverk som din dator) eller direkt till din
dator via USB 2
• Wi-Fi: anslut till din dator med USB 2, navigera
till Enhetskonguration > System > Nätverk
i RØDE Central, och när den är ihopparad,
koppla från USB 2
• Ethernet: anslut din RØDECaster Video’s
Ethernet-port direkt till din router eller
nätverksenhet
• USB 2: anslut USB 2 till din dator
9. Anslut USB 1 till din dator om du vill få tillgång
till RØDECaster Video’s videoström och
multikanalsljudgränssnitt
10. Besök användarhandboken för att lära dig mer
om hur du använder din RØDECaster Video
INDONESIAN
1. Hubungkan perangkat input video Anda, seperti
kamera dan webcam, ke HDMI 1-4 dan/atau
USB-C 4-5
2. Hubungkan layar Anda ke output HDMI berlabel
‘A’ dan ‘B’
3. Hubungkan mikrofon dan/atau instrumen Anda
ke input kombo (XLR atau 1/4 inci)
4. Hubungkan headphone dan/atau speaker
monitor Anda ke output 1/4 inci
5. Hubungkan dua antena ke soket di kedua sisi
panel belakang
6. Hubungkan catu daya yang disertakan dan tekan
tombol merah untuk menyalakan RØDECaster
Video Anda
7. Unduh dan instal RØDE Central (rode.com/
apps/rode-central)
8. Untuk mengkongurasi pengaturan dan
mengontrol RØDECaster Video Anda dari
jarak jauh melalui RØDE Central, Anda dapat
menghubungkannya melalui Wi-Fi atau Ethernet
(di jaringan yang sama dengan komputer Anda)
atau langsung ke komputer Anda melalui USB 2
• Wi-Fi: hubungkan ke komputer Anda
menggunakan USB 2, navigasikan ke
Kongurasi Perangkat > Sistem > Jaringan
di RØDE Central, dan setelah dipasangkan,
putuskan dari USB 2
• Ethernet: hubungkan port Ethernet
RØDECaster Video Anda langsung ke router

atau perangkat jaringan Anda
• USB 2: hubungkan USB 2 ke komputer Anda
9. Hubungkan USB 1 ke komputer Anda jika Anda
ingin mengakses streaming video dan antarmuka
audio multitrack dari RØDECaster Video
10. Kunjungi panduan pengguna untuk mempelajari
lebih lanjut tentang pengoperasian RØDECaster
Video Anda
NORTH AMERICA
The RØDECaster Video must not be co-located or
operated in conjunction with any other antenna or
transmitter.
The device complies with part 15 of the FCC rules.
Operation is subject to the following two conditions:
(1) This device may not cause harmful
interference, and
(2) This device must accept any interference
received, including interference that may cause
undesired operation
This equipment has been tested and found
to comply with the limits for a Class B digital
device, pursuant to part 15 of the FCC rules.
These limits are designed to provide reasonable
protection against harmful interference in
a residential installation. This equipment
generates, uses and can radiate radio frequency
energy and, if not installed and used in
accordance with the instructions, may cause
harmful interference to radio communications.
However, there is no guarantee that interference
will not occur in a particular installation. If this
equipment does cause harmful interference
to radio or television reception, which can be
determined by turning the equipment off and
on, the user is encouraged to try to correct the
interference by one of more of the following
measures:
1. Reorient or relocate the receiving antenna
2. Increase the separation between the equipment
and receiver
3. Connect the equipment into an outlet on a
circuit different from that to which the receiver
is connected
4. Consult the dealer or an experienced radio/TV
technician for help
This equipment complies with FCC radiation
exposure limits set forth in an uncontrolled
environment.
Changes or modications not expressly approved by
RØDE could void the user’s authority to operate the
equipment.
For USA: The frequency stability of all transmission
frequencies of U-NII-1, U-NII 2A, U- NII 2C and
U-NII-3 meets the requirements of 47 CFR FCC
Part15.407(g), and the manufacturer declares that
their transmission is maintained at Band U-NII-1,
U-NII 2A, U-NII 2C and U-NII-3.

1. This device may not cause interference
2. This device must accept any interference,
including interference that may cause undesired
operation of the device
L’émetteur/récepteur exempt de licence contenu
dans le présent appareil est conforme aux
CNR d’Innovation, Sciences et Développement
économique Canada applicables aux appareils
radio exempts de licence. L’exploitation est
autorisée aux deux conditions suivantes:
(1) L’appareil ne doit pas produire de brouillage;
(2) L’appareil doit accepter tout brouillage
radioélectrique subi, même si le brouillage
est susceptible d’en compromettre le
fonctionnement
RADIATION EXPOSURE STATEMENT:
This equipment complies with FCC radiation
exposure limits set forth for an uncontrolled
environment. This equipment shall be installed and
operated with minimum distance 20cm between the
radiator & body.
Radio Frequency Exposure Statement for Canada
The device has been evaluated to meet general
RF exposure requirements. The device can be
used in mobile exposure conditions. The minimum
separation distance is 20cm.
Déclaration d’exposition aux radiofréquences pour
IC
L’appareil a été évalué pour répondre aux exigences
générales en matière d’exposition aux RF. L’appareil
peut être utilisé dans des conditions d’exposition
mobiles. La distance de séparation minimale est de
20cm.
Operation of this device is restricted to indoor use
only. (W52 band)
Le fonctionnement de cet appareil est limité à une
utilisation en intérieur uniquement. (W52 band)
EU COMPLIANCE STATEMENT
Hereby, RØDE Microphones declares that the radio
equipment type RØDECaster Video is in compliance
with Directive 2014/53/EU.
The full text of the EU declaration of conformity is
available at the following internet address:
info.rode.com/rodecaster-video
For details of EU representative go to
http://en.rode.com/distributors
EU - KONFORMITÄTSERKLÄRUNG
RØDE Microphones erklärt hiermit, dass der
Funkanlagentyp RØDECaster Video der Richtlinie
2014/53/EU (FuA) entspricht.
Der vollständige Text der EU-Konformitätserklärung
ist unter der folgenden Internetadresse verfügbar:
info.rode.com/rodecaster-video
Einzelheiten zur EU-Vertretung nden Sie unter
http://en.rode.com/distributors
Operating Frequency
Range
The maximum RF
Output Power
Bluetooth 2402-2480 MHz 8 dBm (BLE) EIRP
WiFi 2412-2472 MHz 19 dBm EIRP
WiFi 5150-5850 MHz 18 dBm EIRP
2.4G SRD 2402-2480 MHz 4 dBm EIRP
CAUTION:
The RØDECaster Video has been designed to be
used with the provided power supply, as use the
provided power supply only.
Stop using the power supply unit and any cables if:
1. There is any damage to the charging port,
power connector or power cord
2. The power supply unit is exposed to excessive
moisture, or liquids is spilled into the power
supply unit
3. The power supply unit enclosure is broken
POWER SUPPLY UNIT SPECIFICATIONS:
Model Name: PA-1650-58
Frequency: 50-60 Hz
Input: 100-240 Vac; 1.6A
POWER SUPPLY UNIT SPECIFICATIONS:
POWER SUPPLY UNIT SPECIFICATIONS:
POWER SUPPLY UNIT SPECIFICATIONS:
Model Name: PA-1650-58
Frequency: 50-60 Hz
Input: 100-240 Vac; 1.6A
Output: 5Vdc 3A; 9Vdc 3A; 12Vdc 3A; 15Vdc 3A;
20Vdc 3.25A; 65W Max
NCC COMPLIANCE NOTICE
取得審驗證明之低功率射頻器材,非經核准,公司、商號
或使用者均不得擅自變更頻率、加大功率或變更原設計
之特性及功能。低功率射頻器材之使用不得影響飛航
安全及干擾合法通信;經發現有干擾現象時,應立即停
用,並改善至無干擾時方得繼續使用。前述合法通信,指
依電信管理法規定作業之無線電通信。低功率射頻器材
須忍受合法通信或工業、科學及醫療用電波輻射性電
機設備之干擾。
應避免影響附近雷達系統之操作。
高增益指向性天線只得應用於固定式點對點系統。
Note: For regulatory information such as
identication numbers go to
Settings > About > Info
USA
FCC ID: 2AEAN-0558
CANADA
IC: 20091-0558
CAN: ICES-003 (B) / NMB-003 (B)
SOUTH KOREA
ID: R-R-R72-0558
Company Name: RØDE Microphones
Model: RØDECaster Video
Country of Origin: Australia
NZ
R-NZ
NCC
JAPAN
INDIA
POWER
USB Input: 20Vdc 3.25A
IS 13252(PART 1):2010
IEC 60950-1:2005
R-14263699
This device complies with part 15 of the FCC Rules.
Operation is subject to the following two conditions:
1. This device may not cause harmful interference, and (2)
this device must accept any interference received, including
interference that may cause undesired operation.
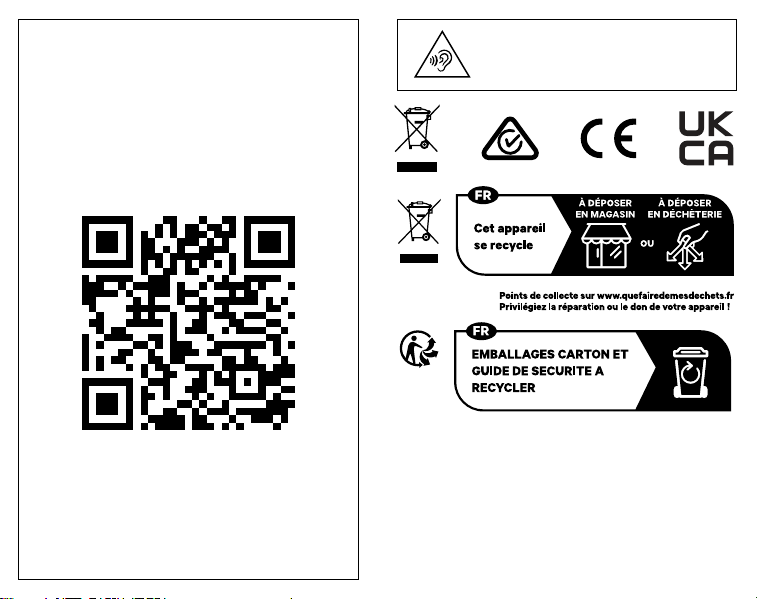
To prevent possible hearing damage,
do not listen at high volume levels for
long periods.
RØDE Microphones:
107 Carnarvon St, Silverwater NSW 2128, Australia
Authorised UK Representative:
RØDE UK, Unit A, 23-25 Sunbeam Rd, London
NW10 6JP, United Kingdom
Authorised EU Representative:
RØDE EU, Neukirchner Str. 18, 65510 Hünstetten,
Germany
SCAN FOR MORE INFO

rode.com
0927-0860-03-02