1
OPERATION MANUAL
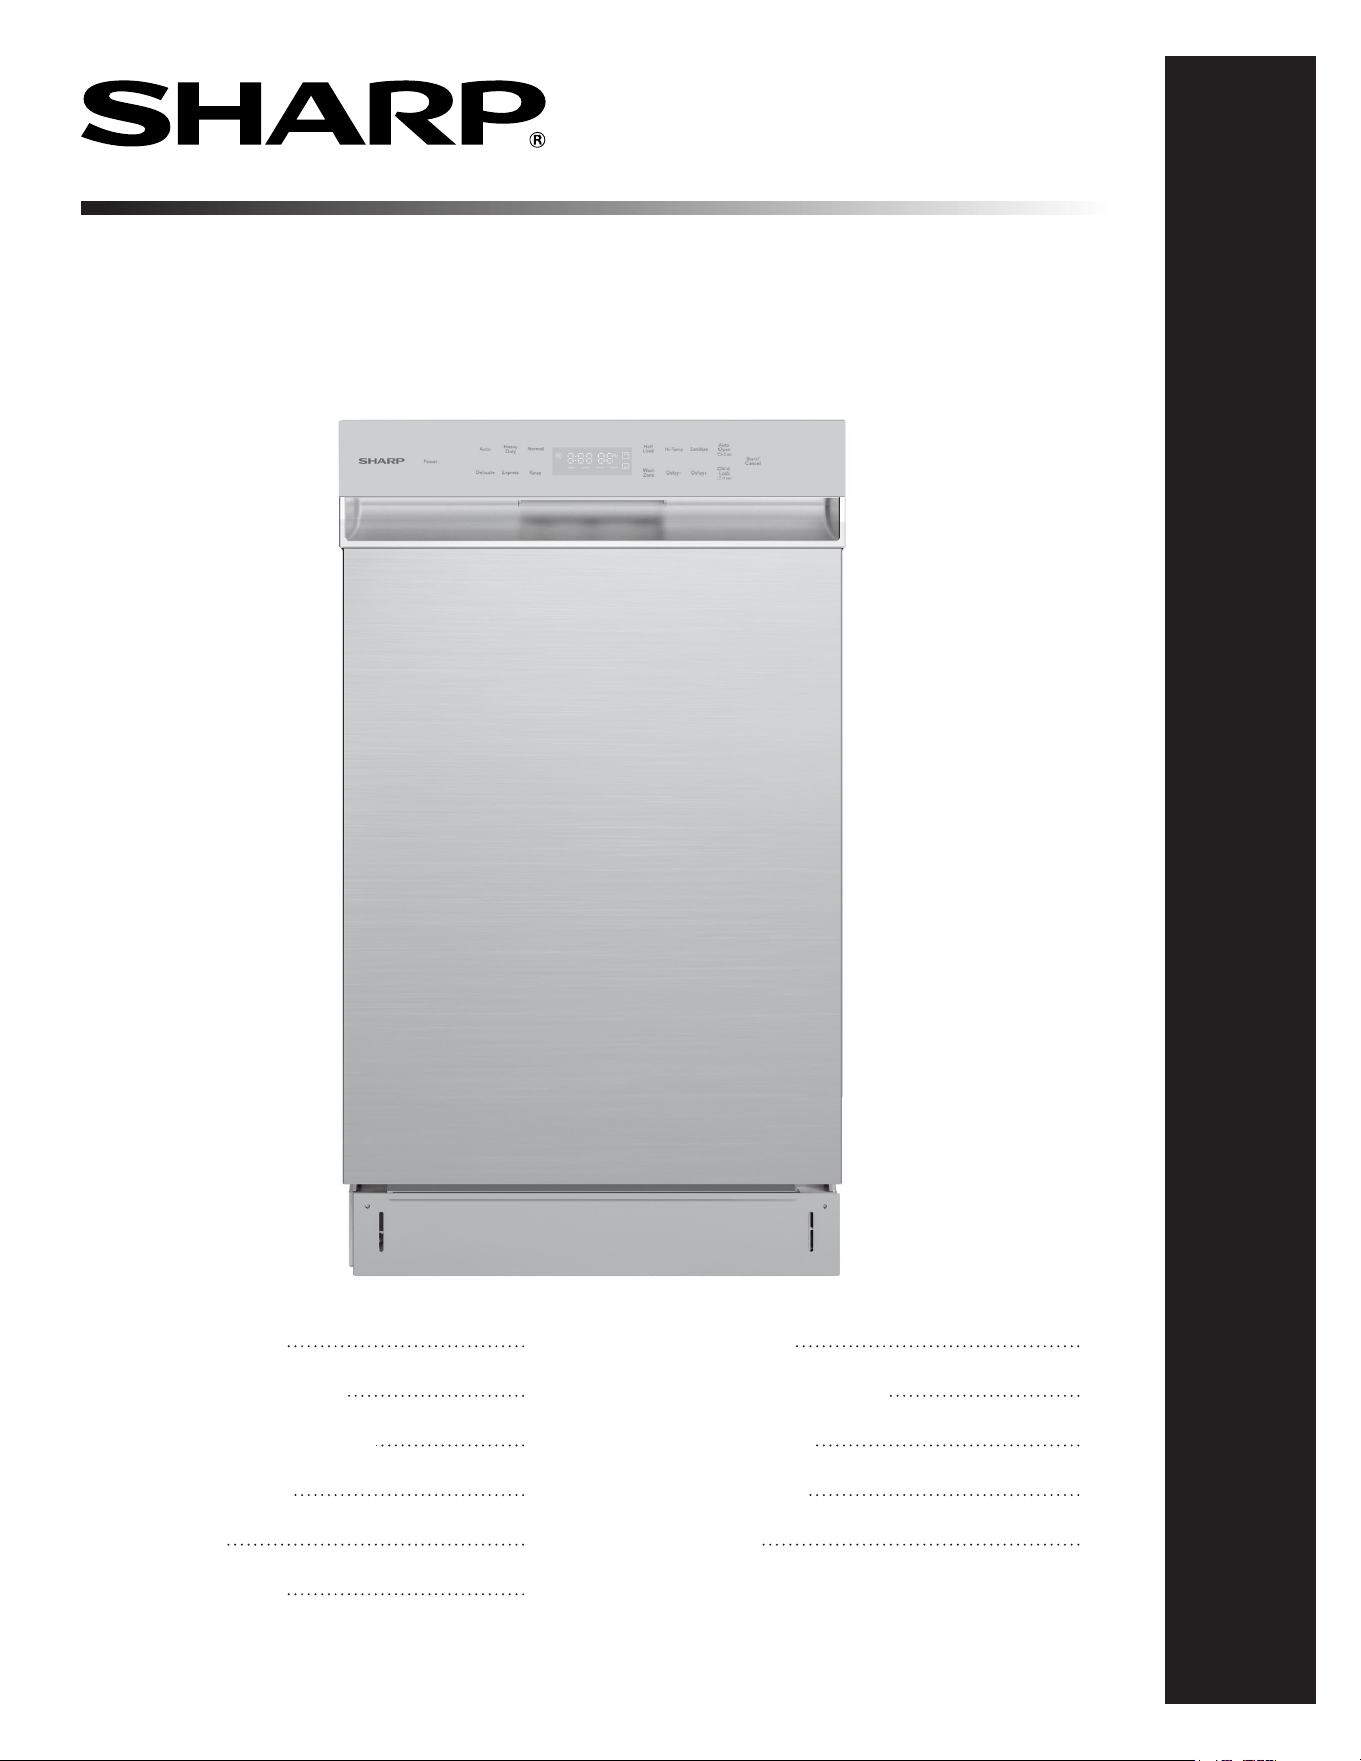
DISHWASHER
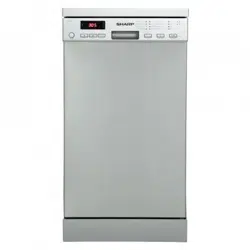
MODEL: SDW4523MS
Dishwasher: Model SDW4523MS
CUSTOMER ASSISTANCE
CONSUMER LIMITED WARRANTY
IMPORTANT SAFETY INSTRUCTIONS
APPEARANCE OVERVIEW
CONTROL PANEL
CONVENIENT FEATURES
GETTING STARTED
DISHWASHER CYCLE OPTIONS
CARE AND CLEANING
TROUBLESHOOTING
ERROR CODES
2
3
4
5
6
7
8-11
12-13
14-15
16-17
18
2
CUSTOMER ASSISTANCE UNITED STATES ONLY
REGISTER YOUR PRODUCT
Registering your new product is easy and offers benets that help you get the most
out of your Sharp product including:
9 Convenience: If you ever need warranty support, your product information is already on le.
9 Communication:Stay up to date with important notications and special offers from SHARP.
9 Support: Quickly access support content including Owner’s Manuals, FAQ’s,
How-to Videos, and much more.
3 EASY WAYS TO REGISTER TODAY!
PRODUCT SUPPORT
If you have questions about the setup or operation of your product, please refer to
the corresponding section within this manual.
Additionally, visit www.sharpusa.com/support to access exclusive content about your
product including:
Æ FAQ’s and How-To Videos
Æ Find or Request Service
Æ Extended Warranty Options
Æ Downloads including the Installation Guide, Spec Sheet, and Owner’s Manual
CONTACT US
If at any time you have questions or comments concerning your SHARP product,
please contact the SHARP Customer Assistance Center. We are available to
assist you through multiple contact methods for your convenience:
Scan this QR Code on your mobile device Visit http://www.sharpusa.com/register
ONLINE
Visit our sites to
learn more about
your product at
sharpusa.com and
sbl.sharpusa.com
See the Contact Us section on our sites U.S. | www.sharpusa.com/support Contact a Sharp Advisor on the phone
Contact a Sharp Advisor on the phone
CALL US
US 800-BE-SHARP
800-237-4277
Mon-Fri: 7am-7pm CST
Sat-Sun: 9am-7pm CST
CALL US
US 800-BE-SHARP
800-237-4277
Mon-Fri: 7am-7pm CST
Sat-Sun: 9am-7pm CST
EMAIL
Available 24/7
US: sharpusa.com
CHAT ONLINE
Mon-Fri: 7am-7pm CST
Sat-Sun: 9am-7pm CST
SCAN
Use the camera or
QR code scanning
application on your
mobile device
TGANEB010MRR1 Aug 26, 2024

3
CONSUMER LIMITED WARRANTY
SHARP ELECTRONICS CORPORATION (“Sharp”) warrants to the rst consumer purchaser that this Sharp brand product (the “Product”),
when shipped in its original container, will be free from defective workmanship and materials, and agrees that it will, at its option, either
repair the defect or replace the defective Product or part thereof with a new or remanufactured equivalent at no charge to the purchaser for
parts or labor for the period(s) set forth below.
This warranty does not apply to any cosmetic or appearance items of the Product nor to the additional excluded item(s) set forth below nor to
any Product the exterior of which has been damaged or defaced, which has been subjected to misuse, abnormal service, or handling, or which
has been altered or modied in design or construction. In order to enforce the rights under this limited warranty, the purchaser should follow
the steps set forth below and provide proof of purchase to the servicer.
The limited warranty described herein is in addition to whatever implied warranties may be granted to purchasers by law. ALL IMPLIED
WARRANTIES INCLUDING THE WARRANTIES OF MERCHANTABILITY AND FITNESS FOR USE ARE LIMITED TO THE
PERIOD(S) FROM THE DATE OF PURCHASE SET FORTH BELOW. Some states do not allow limitations on how long an implied
warranty lasts, so the above limitation may not apply to you.
Neither the sales personnel of the seller nor any other person is authorized to make any warranties other than those described herein, or to
extend the duration of any warranties beyond the time period described above on behalf of Sharp. The warranties described herein should be
the sole and exclusive warranties granted by Sharp and should be the sole and exclusive remedy available to the purchaser. Correction of de-
fects, in the manner and for the period of time described herein, should constitute complete fulllment of all liabilities and responsibilities of
Sharp to the purchaser with respect to the Product, and should constitute full satisfaction of all claims, whether based on contract, negligence,
strict liability or otherwise. In no event should Sharp be liable, or in any way responsible, for any damages or defects in the Product which
were caused by repairs or attempted repairs performed by anyone other than a Sharp authorized servicer. Nor should Sharp be liable or in any
way responsible for any incidental or consequential economic or property damage. Some states do not allow the exclusion of incidental or
consequential damages, so the above exclusion may not apply to you.
THIS LIMITED WARRANTY IS VALID ONLY IN THE FIFTY (50) UNITED STATES, THE DISTRICT OF COLUMBIA AND
PUERTO RICO.
Your product model number
& description
Warranty period for
this product:
Additional item(s) excluded
from warranty coverage:
What to do to obtain service:
Model # SDW4523MS Dishwasher.
(Be sure to have this information available when you need service for your Product.)
One (1) year parts and labor, including in-home service.
Five (5) years parts only, racks and electronics controls.
Commercial, non-residential, or use inconsistent with published installation and product
operational instructions.
Service calls to your home to instruct how to use your dishwasher appliance, replace or repair house fuses
or to correct house wiring, installation, or maintenance, damage to the product caused by delivery,
accident, modications, re, oods or acts of God.
In-home service is provided for one (1) year from date of purchase. Service can be arranged by calling
1-800-BE-SHARP. Be sure to have Proof of Purchase, Model, and Serial Number available.
TO OBTAIN SUPPLY, ACCESSORY OR PRODUCT INFORMATION, CALL 1-800-BE-SHARP or visit www.sharpusa.com.
SAVE THE PROOF OF PURCHASE AS IT IS NEEDED SHOULD YOUR DISHWASHER EVER REQUIRE WARRANTY SERVICE.

4
IMPORTANT SAFETY INSTRUCTIONS
WARNING Follow the information in this manual to
minimize the risk of re, explosion, electric shock and to help
prevent property damage or personal injury.
PROPER INSTALLATION
Install the dishwasher properly, as instructed in the included
installation guide.
1 Water supply inlet temperature should be between 120℉ and
149℉.
2 Dispose of the discarded appliance and packing material properly.
3 The dishwasher must be properly grounded to reduce the risk of
electrical shock.
4 If there is any damage to the new dishwasher, contact the dealer.
Do not attempt to repair or replace any part yourself.
WARNING
The manual does not cover every possible condition and situation
that may occur.
1 Read all instructions before using the dishwasher.
2 Use the dishwasher only for intended functions as described
in this manual.
3 Use only detergents or rinse agents recommended for use in a
dishwasher and keep them out of the reach of children.
4 When loading items to be washed:
●
Load sharp items and knives so that they are not likely to
damage the door seal and tub.
●
Load sharp items and knives with the handles up to reduce
the risk of injury.
5 Do not wash plastic items unless they are marked dishwasher safe.
If not marked, check with manufacturer for recommendation.
Items that are not dishwasher safe may melt and create a
potential re hazard.
SAVE THESE INSTRUCTIONS
6 If the dishwasher drains into a food disposer, make sure
disposer is completely empty before running dishwasher.
7 Do not tamper with controls.
8 Do not operate the dishwasher unless all enclosure panels are
in the proper place.
9 Do not touch the heating element during or immediately after
use, especially if the sanitize option has been selected.
10 To reduce the risk of injury, do not allow children to play in or
on a dishwasher.
11 Do not let children abuse, sit or stand on door or racks of
the dishwasher.
12 Keep young children and infants away from dishwasher when
it is in operation.
13 Under certain conditions, hydrogen gas may be produced in
a hot water system that has not been used for two weeks or
longer. HYDROGEN GAS IS EXPLOSIVE. If the hot water
system has not been used for such a period, BEFORE USING
DISHWASHER, turn on all hot water faucets and let water
run from each for several minutes. This will release any accu-
mulated hydrogen gas. Hydrogen gas is ammable. DO NOT
smoke or use an open ame during this time.
14 Do not store or use combustible materials, gasoline or other
ammable vapors and liquids in the vicinity of this or any
other appliance.
15 Do not use the dishwasher if it has a damaged power line or
plug, and do not plug the dishwasher into a damaged outlet.
Failure to observe these instructions may result in electric
shock.
16 Remove the door to the washing compartment when removing
an old dishwasher from service or discarding it.
STATE OF CALIFORNIA PROPOSITION 65
WARNINGS
WARNING Cancer and Reproductive Harm -
www.P65Warnings.ca.gov
5
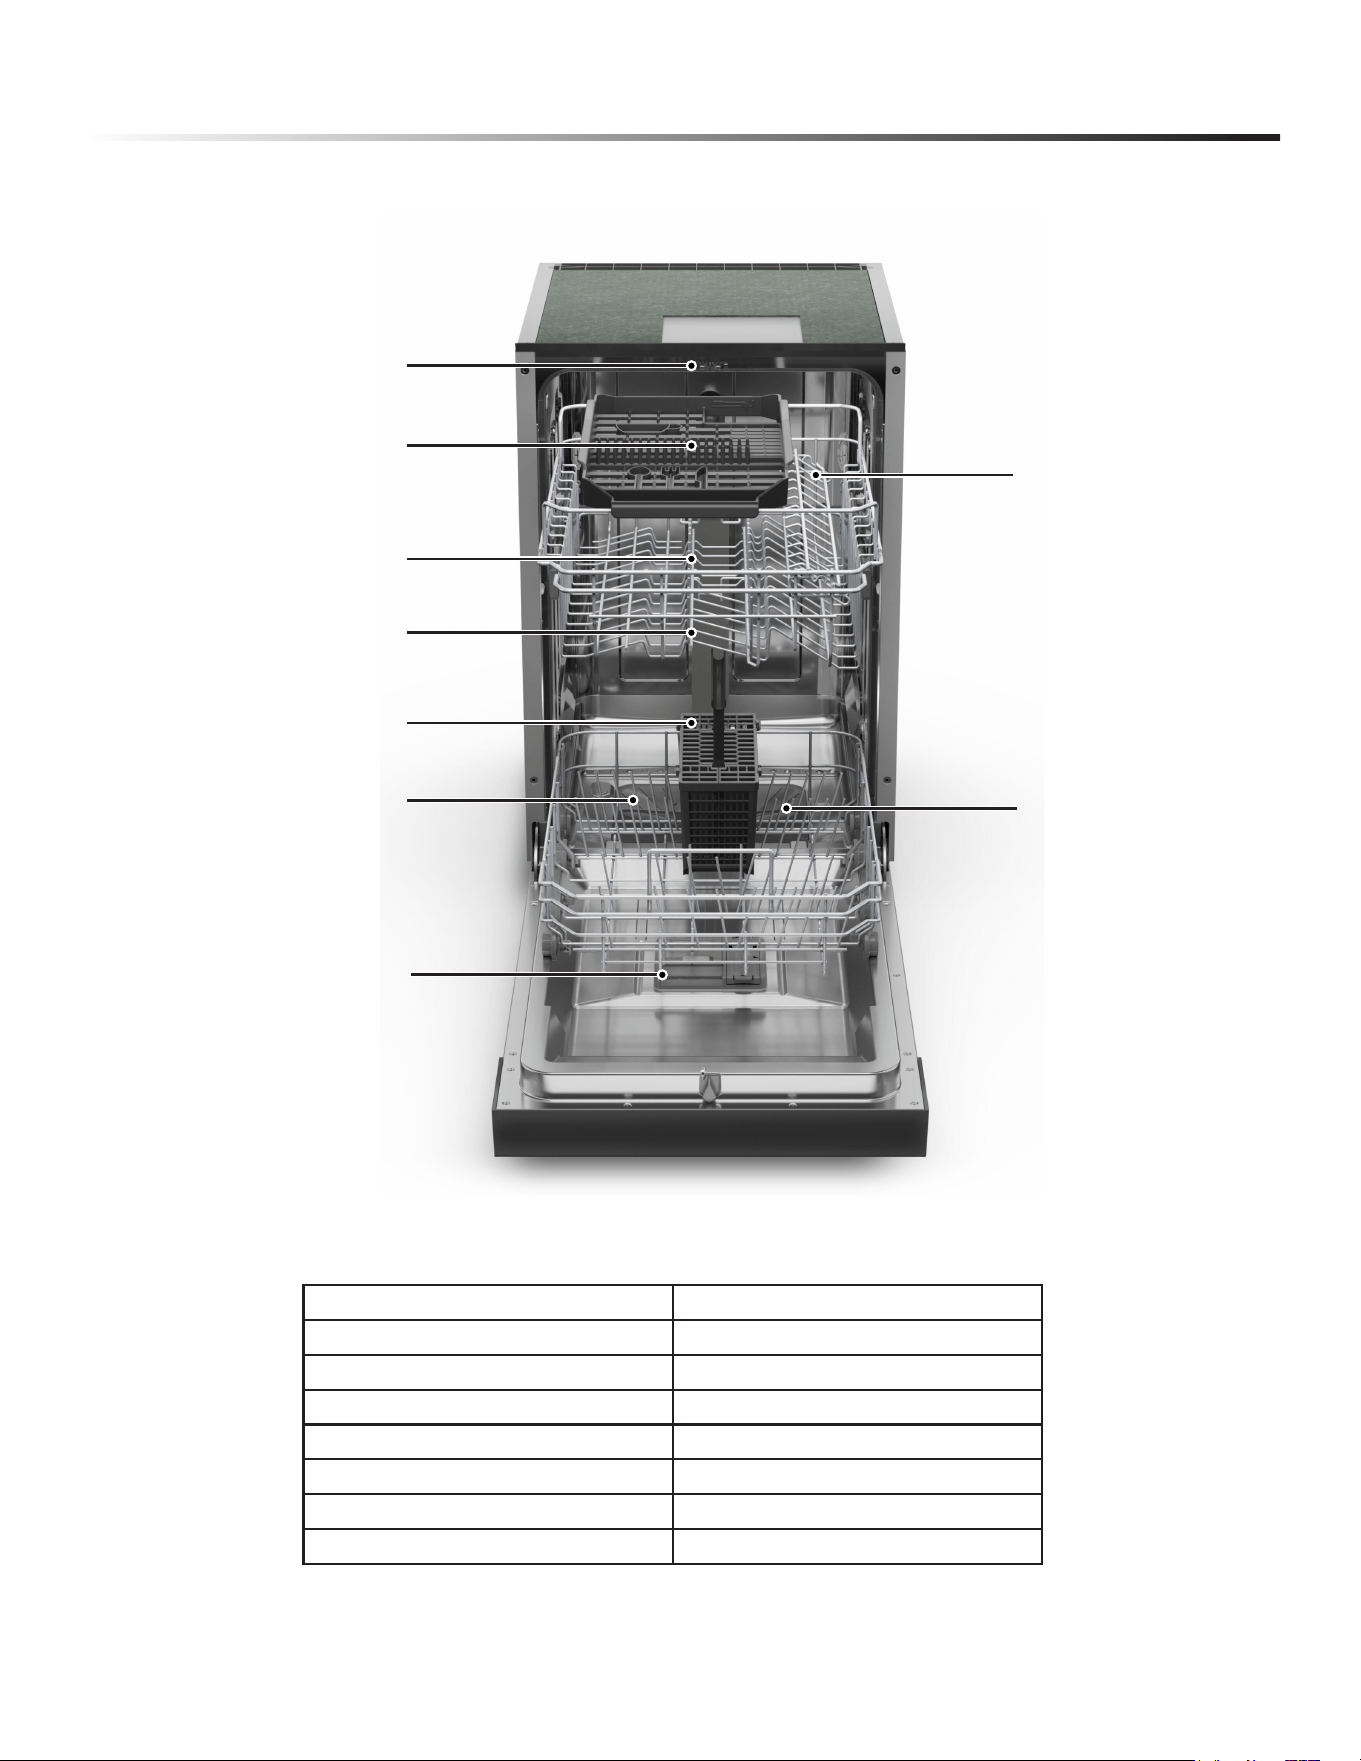
APPEARANCE OVERVIEW
SPECIFICATIONS
Capacity 8 place settings
Dimension 17.7 x 22.7 x 31.1 inches (W x D x H)
Power Supply 120 volts, 60 Hz
Rated Power Usage Wash motor 100 W / Heater 1000 W
Water Feed Pressure 5.8 ~ 145 psi (0.04 ~ 1MPa)
Weight 93.7 lbs (Unpacked)
Current (Amps) 9.14 A
dB Specs 47
Lock
Upper Rack
Upper Spray Arm
Cutlery Basket
Lower Rack
Lower Spray Arm
Detergent and Rinse Aid Dispenser
Cup Shelf
Sliding Tray (3rd Rack)
6
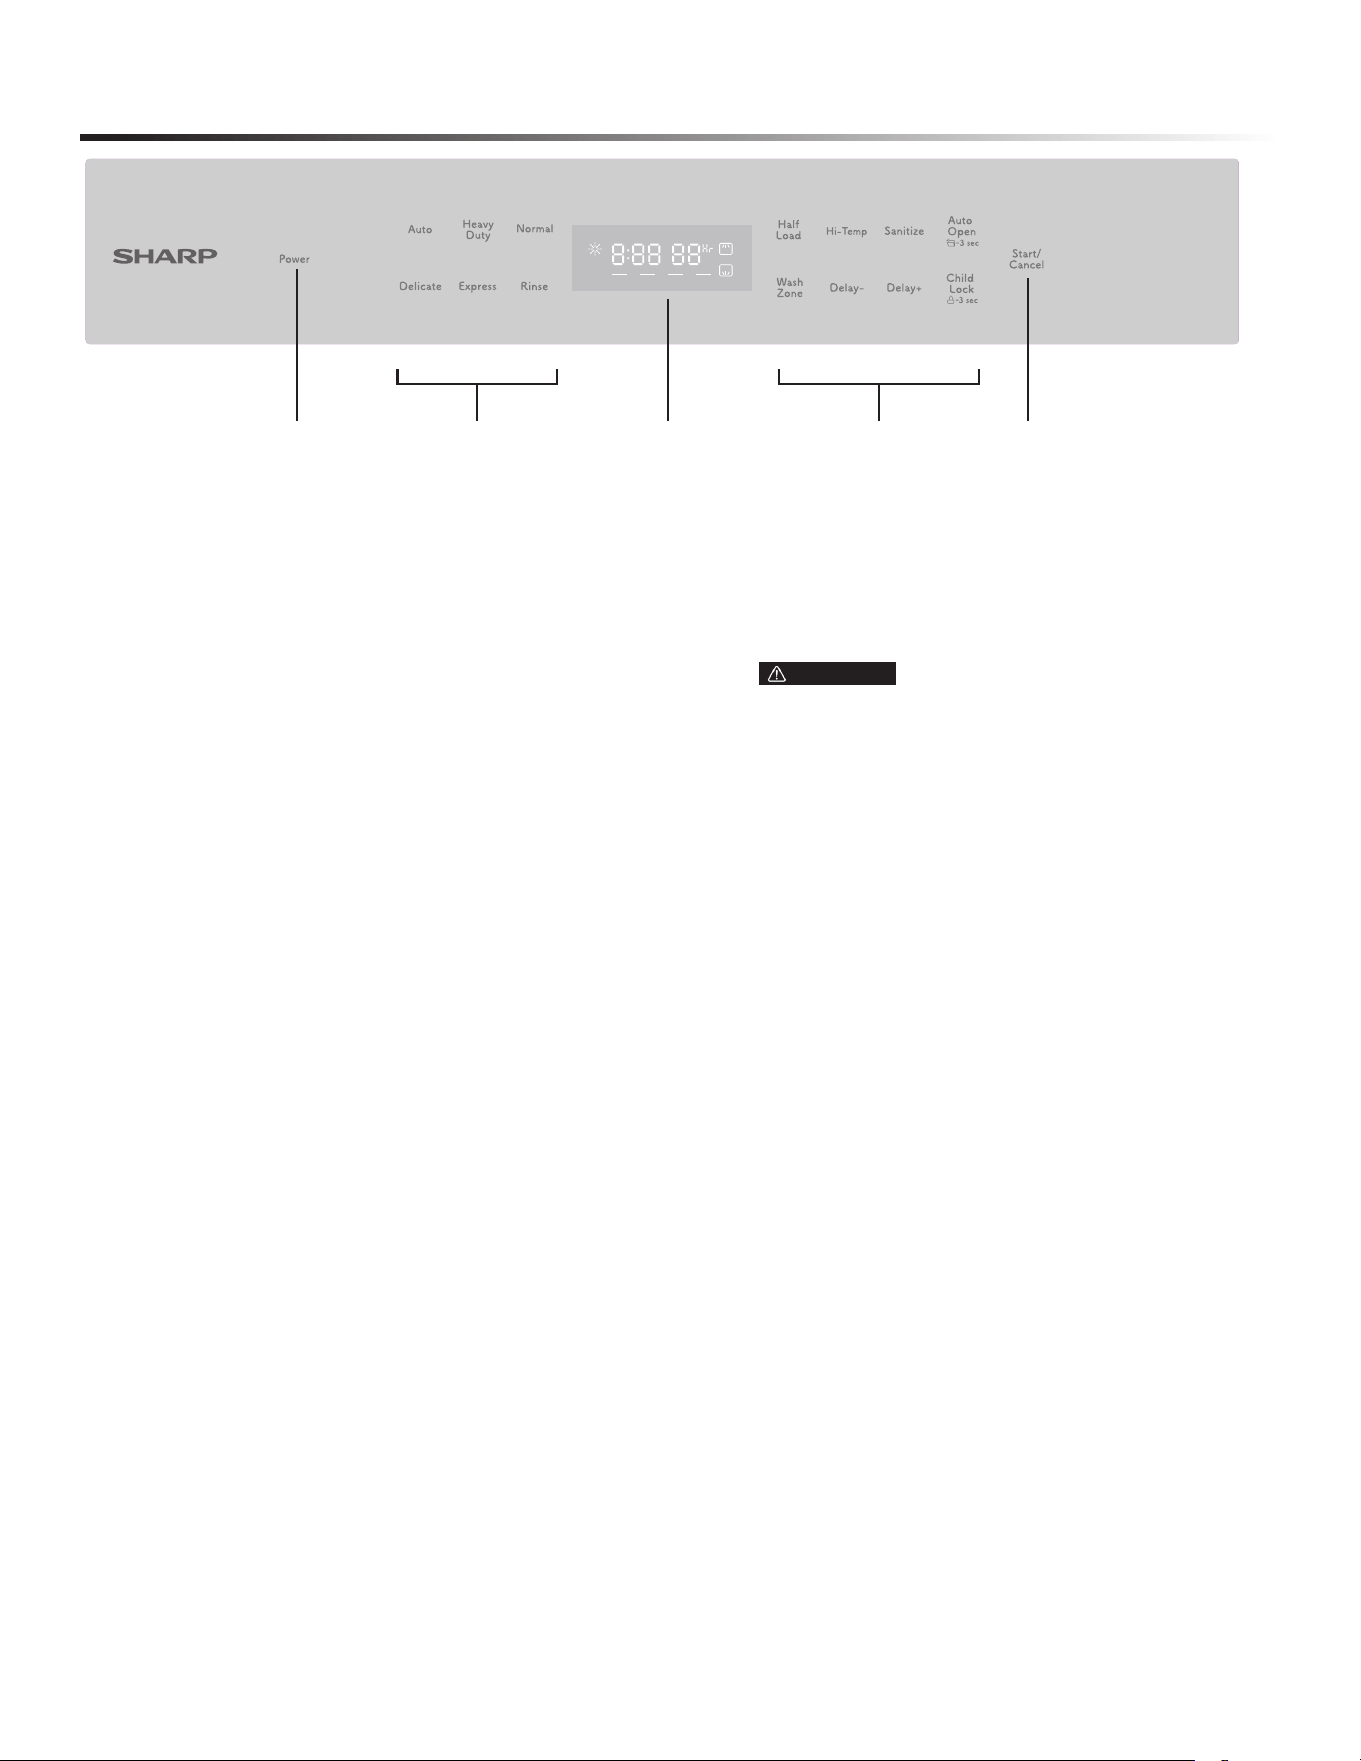
CONTROL PANEL
OPERATIONS AND DISPLAYS
1 Power
Press this button to turn on or turn off the dishwasher.
2 Start/Cancel
Once the door is rmly closed, press Start/Pause to start
operation after selecting the cycle and options or delay
time settings.
Adaptive Option Indication
When a washing cycle is selected, default Option(s) are rmly lit. Also
available Option(s) the selected washing cycle are dimly lit for
your convenience.
3 Wash Cycle Selections
• Auto
Auto sensing wash, lightly, normally or heavily soiled crockery,
with or without dried-on food.
• Heavy Duty
Heavy Duty cycle is for pots, pans, casseroles, and dinnerware
with dried-on or baked on soil.
• Normal
Normal cycle with Heated Dry will completely wash and dry a
full load of normally soiled dishes.
• Delicate
Delicate cycle is for items that need special care such as
stemware or porcelain.
• Express
Express Wash cycle is for lightly soiled or well-rinsed
dish loads.
• Rinse
Use for pre-rinsing dishes or glasses. This is only a rinse that
keeps food from drying on your dishes and reduces odor buildup
in your dishwasher until you are ready to wash a full load.
4 Options
• Half Load
When the load is about or less than half a typical load, use the
Half Load function, which washes and dries with less water
and energy.
• Hi Temp
When the “Hi Temp wash” function is selected, the temperature
of the water will be maintained at 60˚C (140˚F) max.
• Sanitize
When the “Sanitize” function is selected, the temperature of
water will be maintained at 69˚C (156.2˚F) max. The max
temperature may not be reached if the incoming water
temperature is not corrected. Certied residential
dishwashers are not intended for licensed
food establishments.
• Auto Open
After washing, the door will open automatically to achieve
better drying effect. (It can only be used with Auto, Heavy,
Normal, Delicate, and Express).
Press and hold this button for 3 seconds to open or cancel
this function. When the icon lights up, the function of Auto
open is selected.
• Wash Zone
Press the button to select either upper basket or lower basket
loaded, and the corresponding indicator will light up.
• Delay +/Delay --
To delay the start of a selected cycle, press the Delay Start
pad until the desired delay time shows in the LED display.
Each press of the button changes in a cycle of
“00Hr~08Hr › 12Hr › 16Hr › 20Hr › 24Hr › 00Hr.”
Each button from 00Hr to 08Hr increases by 1 hour, and
each button from 08Hr to 24Hr increases by 4 hours. To
cancel the delay start option before the delay period is over,
press the Start/Pause pad for 3-5 seconds.
• Child Lock
Press the button to lock all and prevent children from
accidentally interacting with controls or settings.
• Time Indicator
This displays the remaining hours and minutes of the
running cycle, delayed hours, error codes, etc.
5 Display Window
1 3 5 4 2
WARNING The sanitize option is available with
“Auto” “Heavy” “Normal” and “Express” cycles.

7
OPERATING THE DISHWASHER
H: 01-H:24
If the Delay Start option is selected, the number of delay
start hours shows in the status window.
2:25-0:00
After the machine starts operation, the remaining time of the
selected cycle will be shown in the window.
ERROR INDICATION
In certain situations which are critical to the machine’s
function and safe operation, the control shall shut down
and indicate an error code (see Error Codes on page 19).
If Error codes are displayed, contact the dealer or services.
They will be able to provide assistance in trouble shooting
the problem and/or locate authorized service technician if
needed.
NOTE: The remaining time could suddenly increase or drop
several minutes. This means the Smart Sensor has checked the
soil level and determined if additional water lls are needed or
if water lls can be deleted.
To show the remaining program time and
error code etc.
To show the delay time.
Status Indicator
To roughly show the progress of program
operation.
Rinse Aid Indicator
If the icon is lit, the dishwasher is low on
dishwasher rinse aid and requires a rell.
Wash Zone-Upper Rack
Wash Zone-Lower Rack
8
CONVENIENT FEATURES
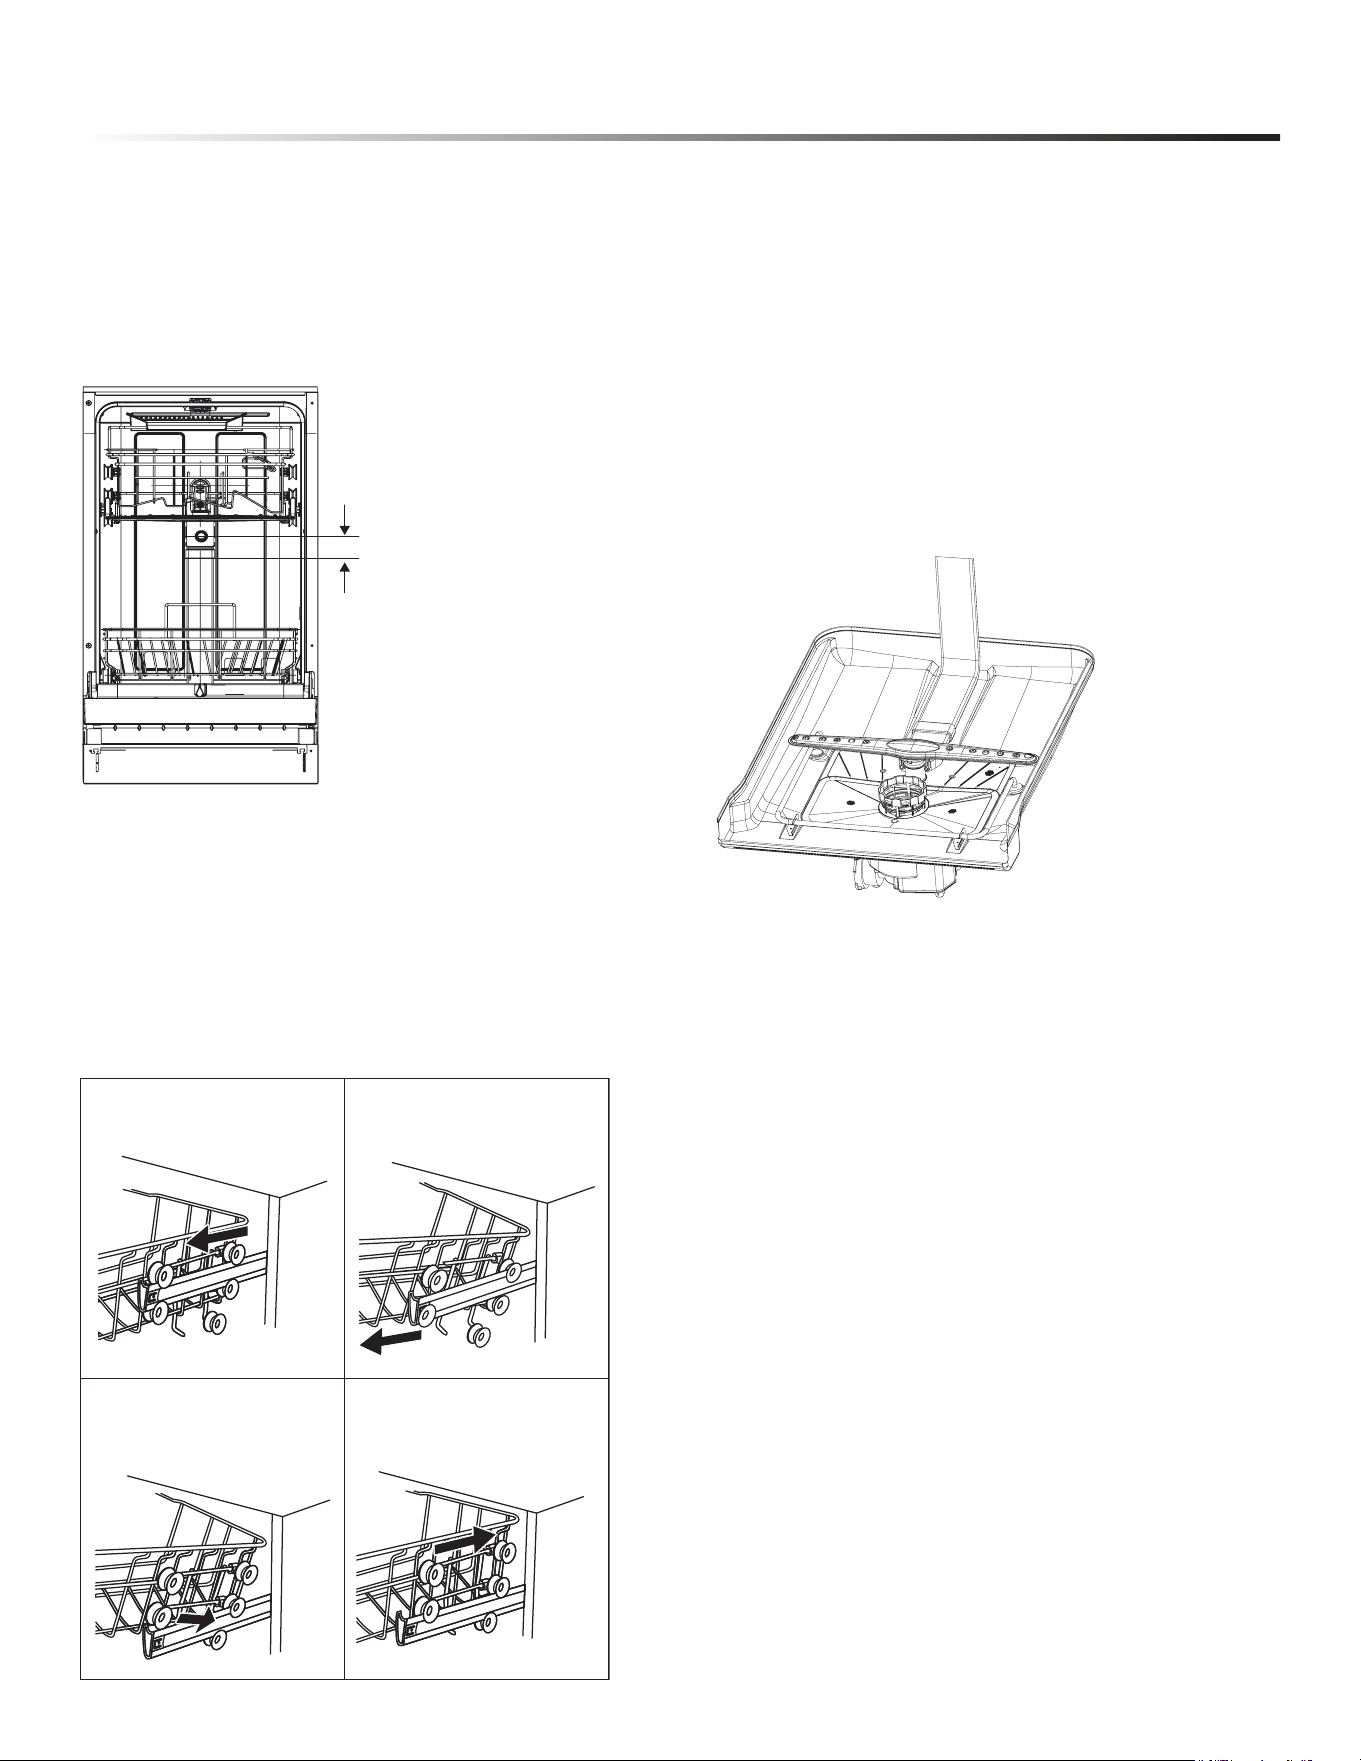
ADJUSTING UPPER RACK
e adjusting upper rack feature allows you to load taller items in
either the upper or lower rack.
e upper rack can be adjusted 2" (5.08 cm).
Adjusting the clearance of the upper rack increases or decreases
the clearance of the lower rack, as shown.
The upper dishwasher rack is designed for cups, glasses, small
plates, bowls and plastic items marked dishwasher safe.
The upper rack can be easily adjusted 2” (5 cm) up or down to
accommodate taller items in either in the upper or lower rack.
IMPORTANT:
●Remove all items before adjusting the rack. The rack must
be empty.
To adjust the height of the upper rack, follow these steps:
SMART WASH SYSTEM
Your dishwasher has Smart Wash System. is system can
determine the type of cycle required to clean the dishes in the
load with maximum eciency. When a partial load of lightly
soiled dishes is placed in the unit, a wash cycle similar to
Express Wash will automatically be performed. When a full load
of heavily soiled dishes is placed in the unit, Heavy Duty cycle will
automatically be performed.
FILTER SYSTEM
Your dishwasher has a multiple lter system, which helps your
dishwasher perform better using less water and less energy.
e lter system includes three lters that work in combination
to separate dirty and clean water into dierent chambers.
AUTO DOOR OPENING
At the end of washing cycles, the door of the dishwasher will open
automatically and leave a gap for air exchange, promoting washed
items, even plastic dishes to achieve the best drying performance.
1
Pull out the upper basket.
2
Pull up on upper bascket
to remove.
Lower position
3 Re-attach the upper basket
to upper or lower rollers.
4 Push in the upper basket.
Upper position
2"
(5.08 cm)
9
GETTING STARTED
HOW YOUR DISHWASHER CLEANS
Your dishwasher cleans by spraying a mixture of hot water
and detergent through the spray arms against soiled surfaces.
e dishwasher lls with water, covering the lter area.
Water is then pumped through the multiple lter system and
spray arms. Separated soil particles go down the drain as the
water is pumped out and replaced with clean water.
e number of water lls will vary with the cycle being used.
BASIC OPERATIONS
DISH PREPARATION
Scrape away large pieces of food, bones, pits, toothpicks, etc.
e continuous ltered wash system will remove the remaining
food particles. Burned-on foods should be loosened before
loading. Empty liquids from glasses and cups.
Foods such as mustard, mayonnaise, vinegar, lemon juice and
tomato-based products may cause discoloration of stainless
steel and plastics if allowed to sit for a long period of time. If
not operating the dishwasher immediately, it is best to rinse o
dishes soiled with these types of foods.
If the dishwasher drains into a food disposer, be sure disposer is
completely empty before starting dishwasher.
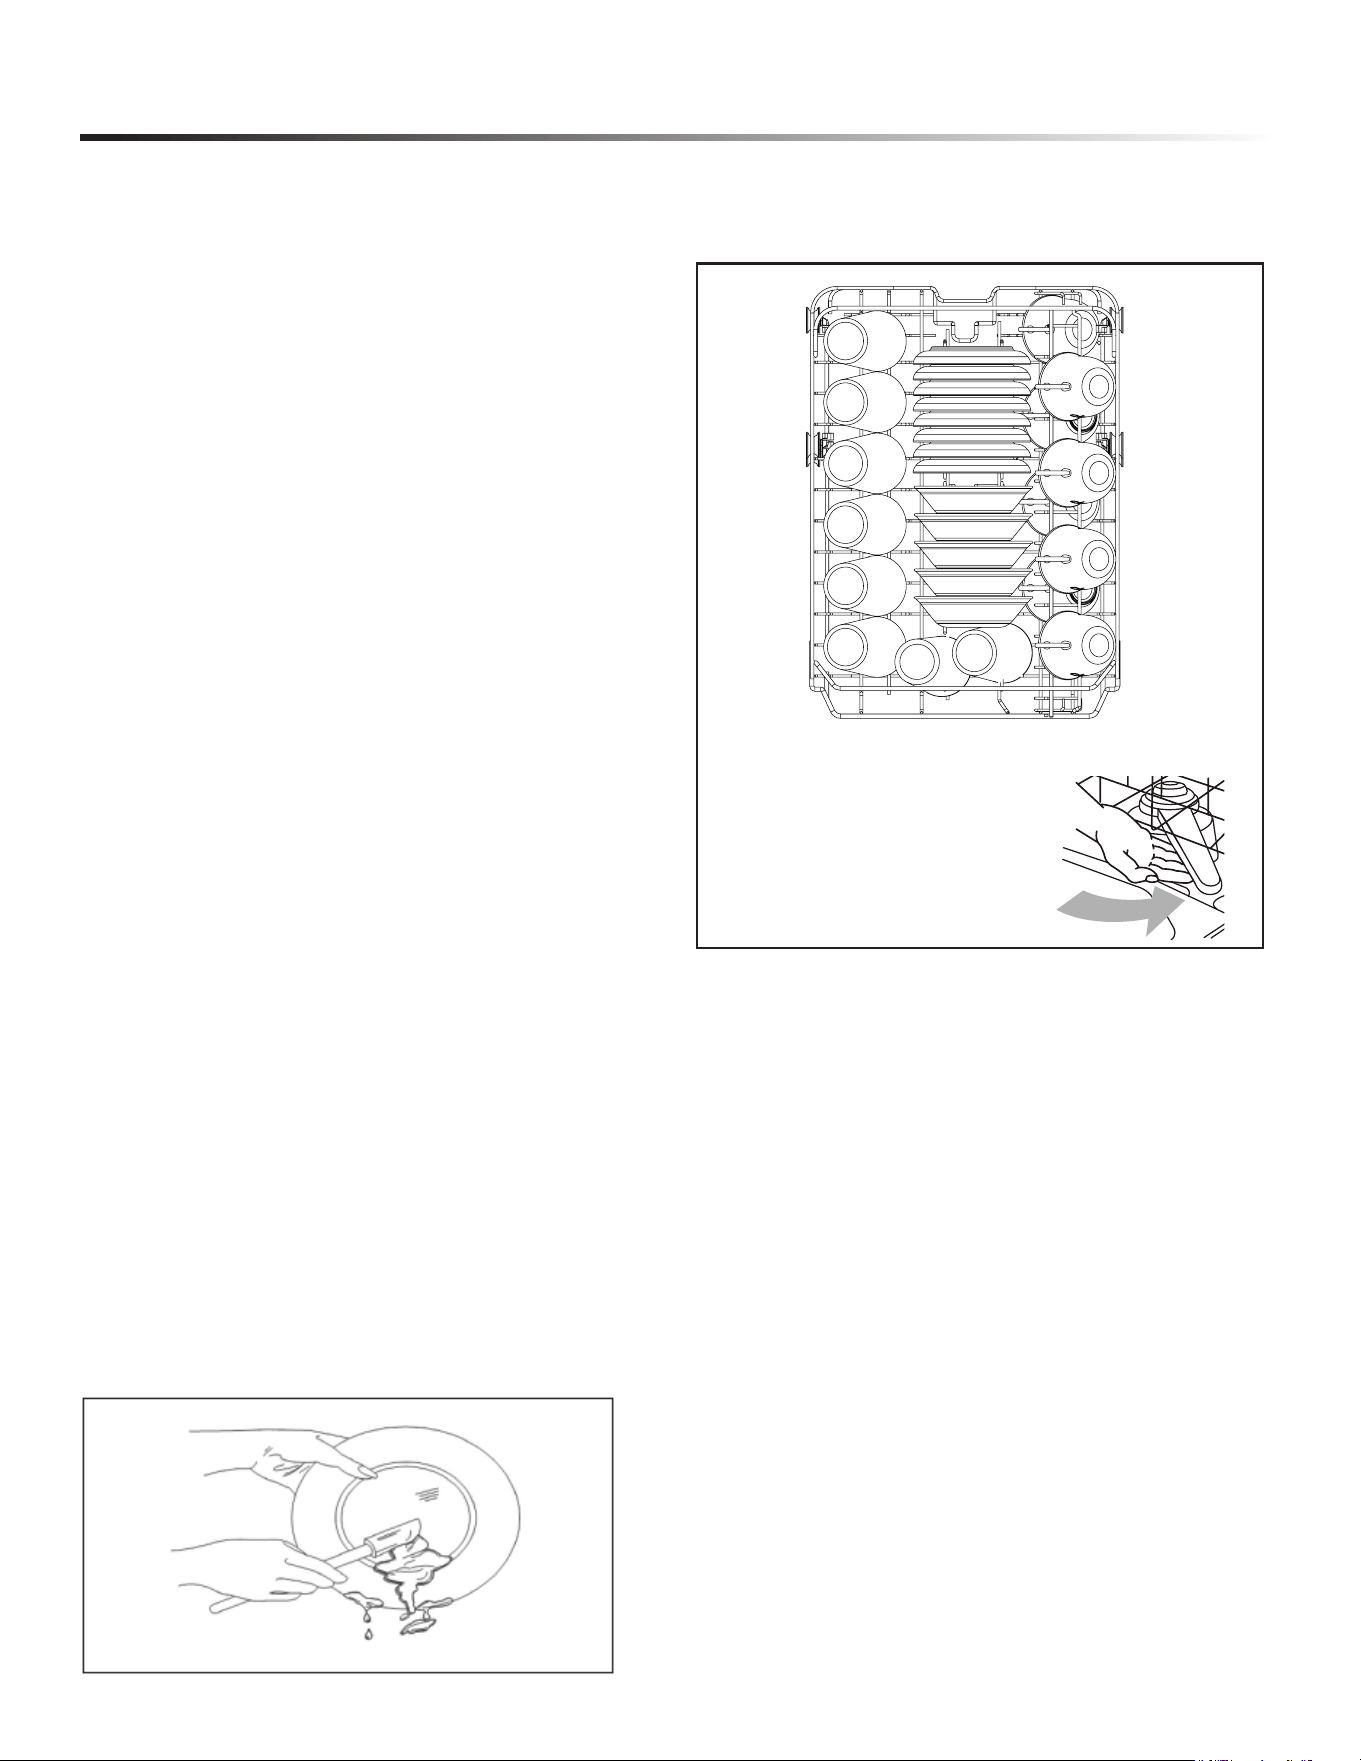
LOADING THE UPPER RACK
e features on your dishwasher rack may vary from the
drawings shown.
● Place items so the open ends face downward for
cleaning and draining.
● Load glasses and cups in upper rack only. The lower
rack is not designed for glasses and cups. Damage can
occur.
● Place cups and glasses in the rows between tines.
Placing them over the tines can lead to breakage, water
spots and poor cleaning.
● Small bowls, pans and other utensils can be placed in
the top rack. Load bowls in the center section for best
stability.
● China, crystal and other delicate items must not touch
each other during dishwasher operation. Damage may
occur.
● Load plastic items so the force of the spray does no
move them during the cycle.
IMPORTANT: Make sure the items
loaded in the upper rack do not
interfere with the rotation of the
middle spray arm located beneath the
upper rack. Check for interference
by turning spray arm by hand.
Your selections will only be activated when the door is rmly
closed.
Check and clean the lters regularly for best performance.
NOTE
The dishwasher is programmed to remember your last cycle so
you do not have to reset each time. To start the dishwasher
using the same cycle and options selected on the previous
wash, simply press the Start/Cancel button.
1 Prepare and load dishes into the dishwasher.
2 Add detergent and, if needed, rinse aid.
3 Close the door rmly to latch.
4 Select the cycle. Press the corresponding button, and the cycle
icon will be lit.
5 Select the options. Press the corresponding button, and the
option icon will be lit.
6 To start, press the Start/Cancel button.
8 place setting
10
GETTING STARTED
LOADING THE LOWER RACK
The lower rack is designed for plates, soup bowls, cookware
and bakeware.
The adjustable upper rack allows you to load items up to 12.6”
in height in the lower rack.
IMPORTANT: Items in the lower rack must be placed so
that they do not interfere with the rotation of the spray arms,
block the water inlet or keep the water spray from reaching the
detergent dispenser.
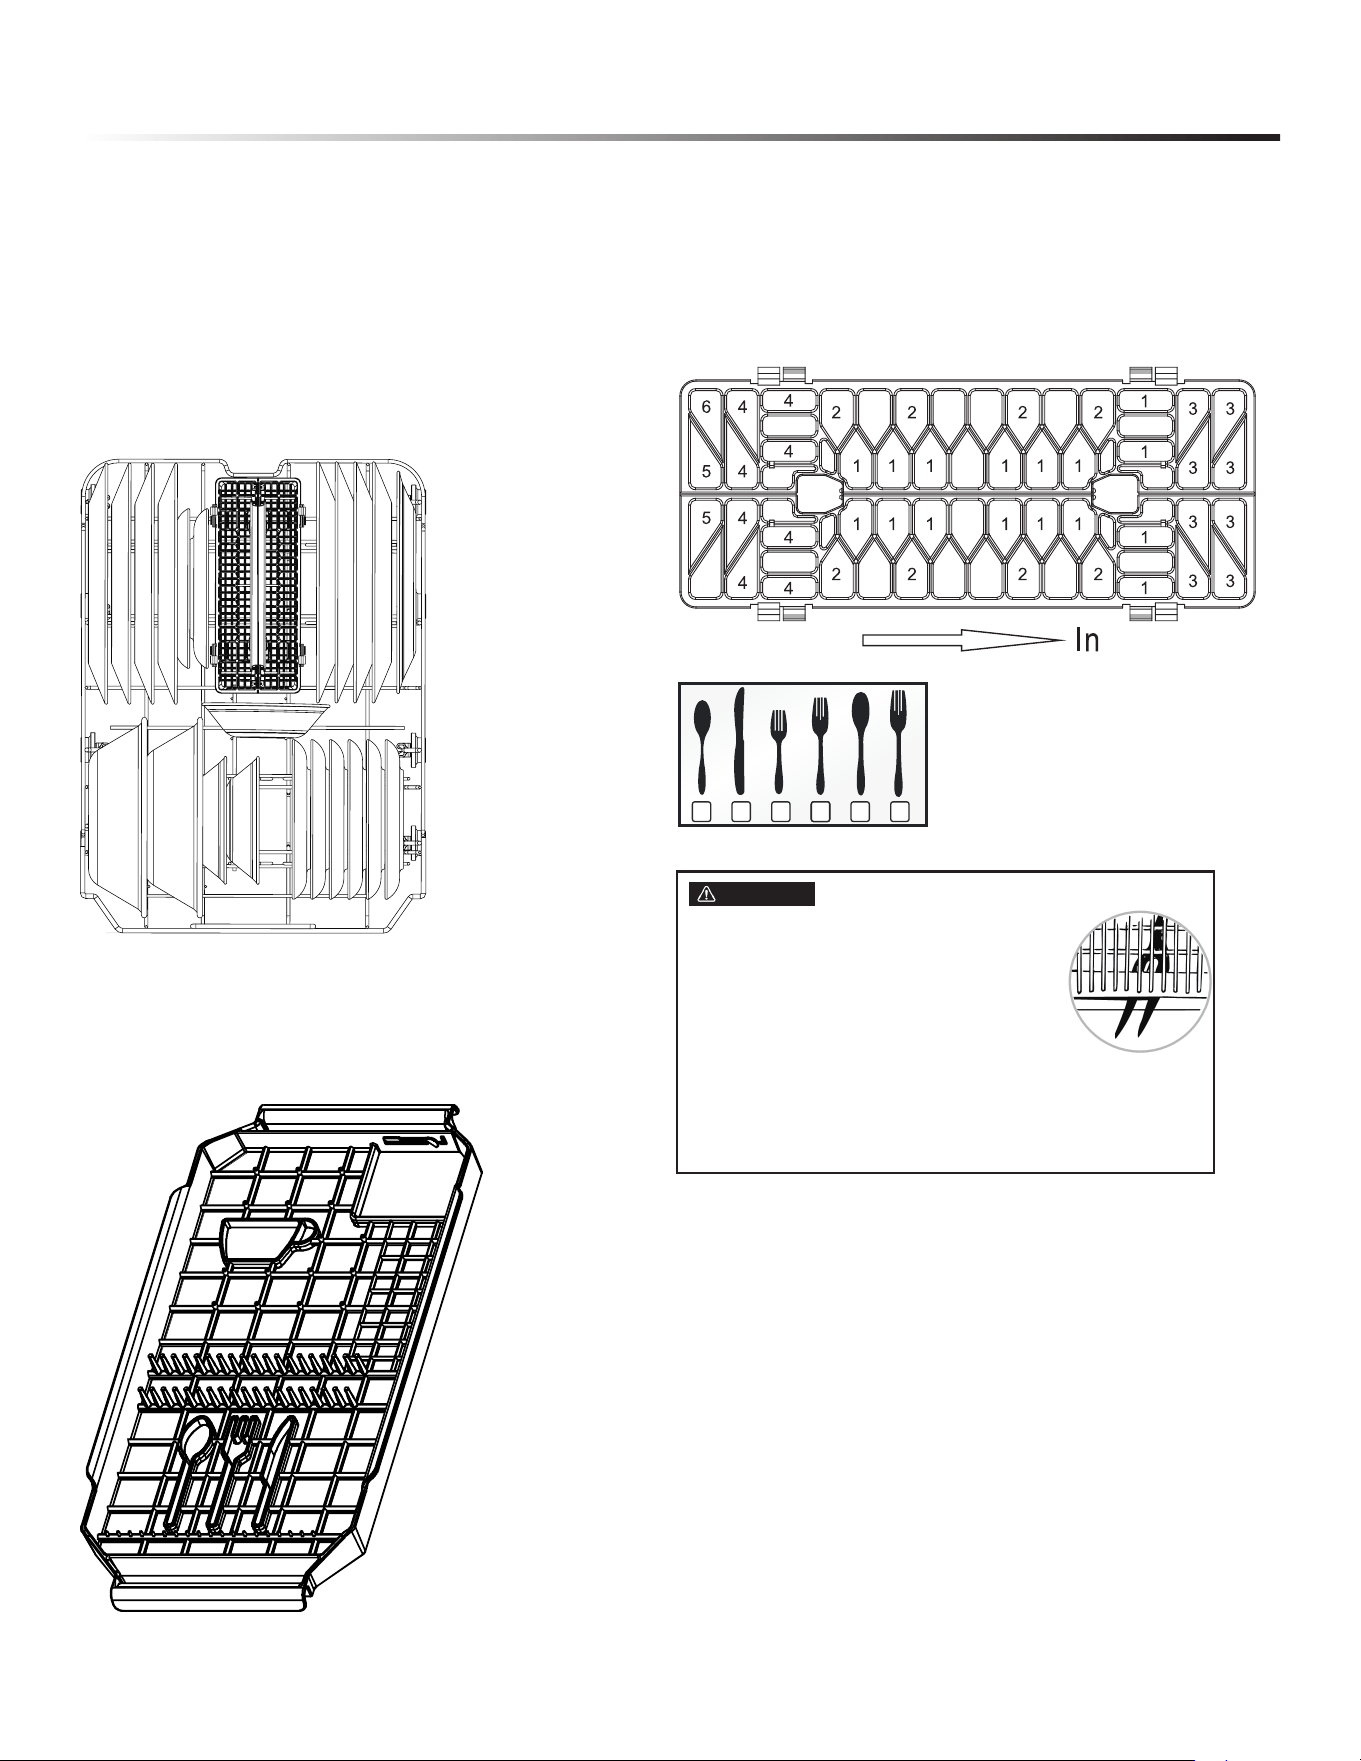
LOADING THE THIRD RACK
You can place the items in the cutlery rack randomly or in an
orderly fashion.
LOADING THE SILVERWARE BASKET
The silverware basket can be divided into three separate
modules that can be used in both upper and lower racks.
1 Spoons 3 Salad forks 5 Large spoons
2 Knives 4 Forks 6 Large forks
FOR BEST RESULTS
● To avoid injury, load utensils such as knives and skewers
with handles pointing up and sharp metal edges pointing down.
Items such as forks and spoons may be loaded with handles
pointing up or down, using separators to prevent the edges of
the silverware from nesting.
● Place small items such as baby bottle caps, jar lids, corncob
holders, etc. in the basket sections with hinged covers. Close
the covers to hold small items in place.
CAUTION
● Do not let any item extend through bottom.
● Be sure nothing protrudes through bottom
of the silverware basket or rack that could
block the lower spray arm.
● Always load sharp items (knives, skewers,
etc.) pointing down.
1 32 6444 5
8 place setting
11
GETTING STARTED
• Unload or remove the baskets before unloading the racks
to void water drops from falling on the silverware.
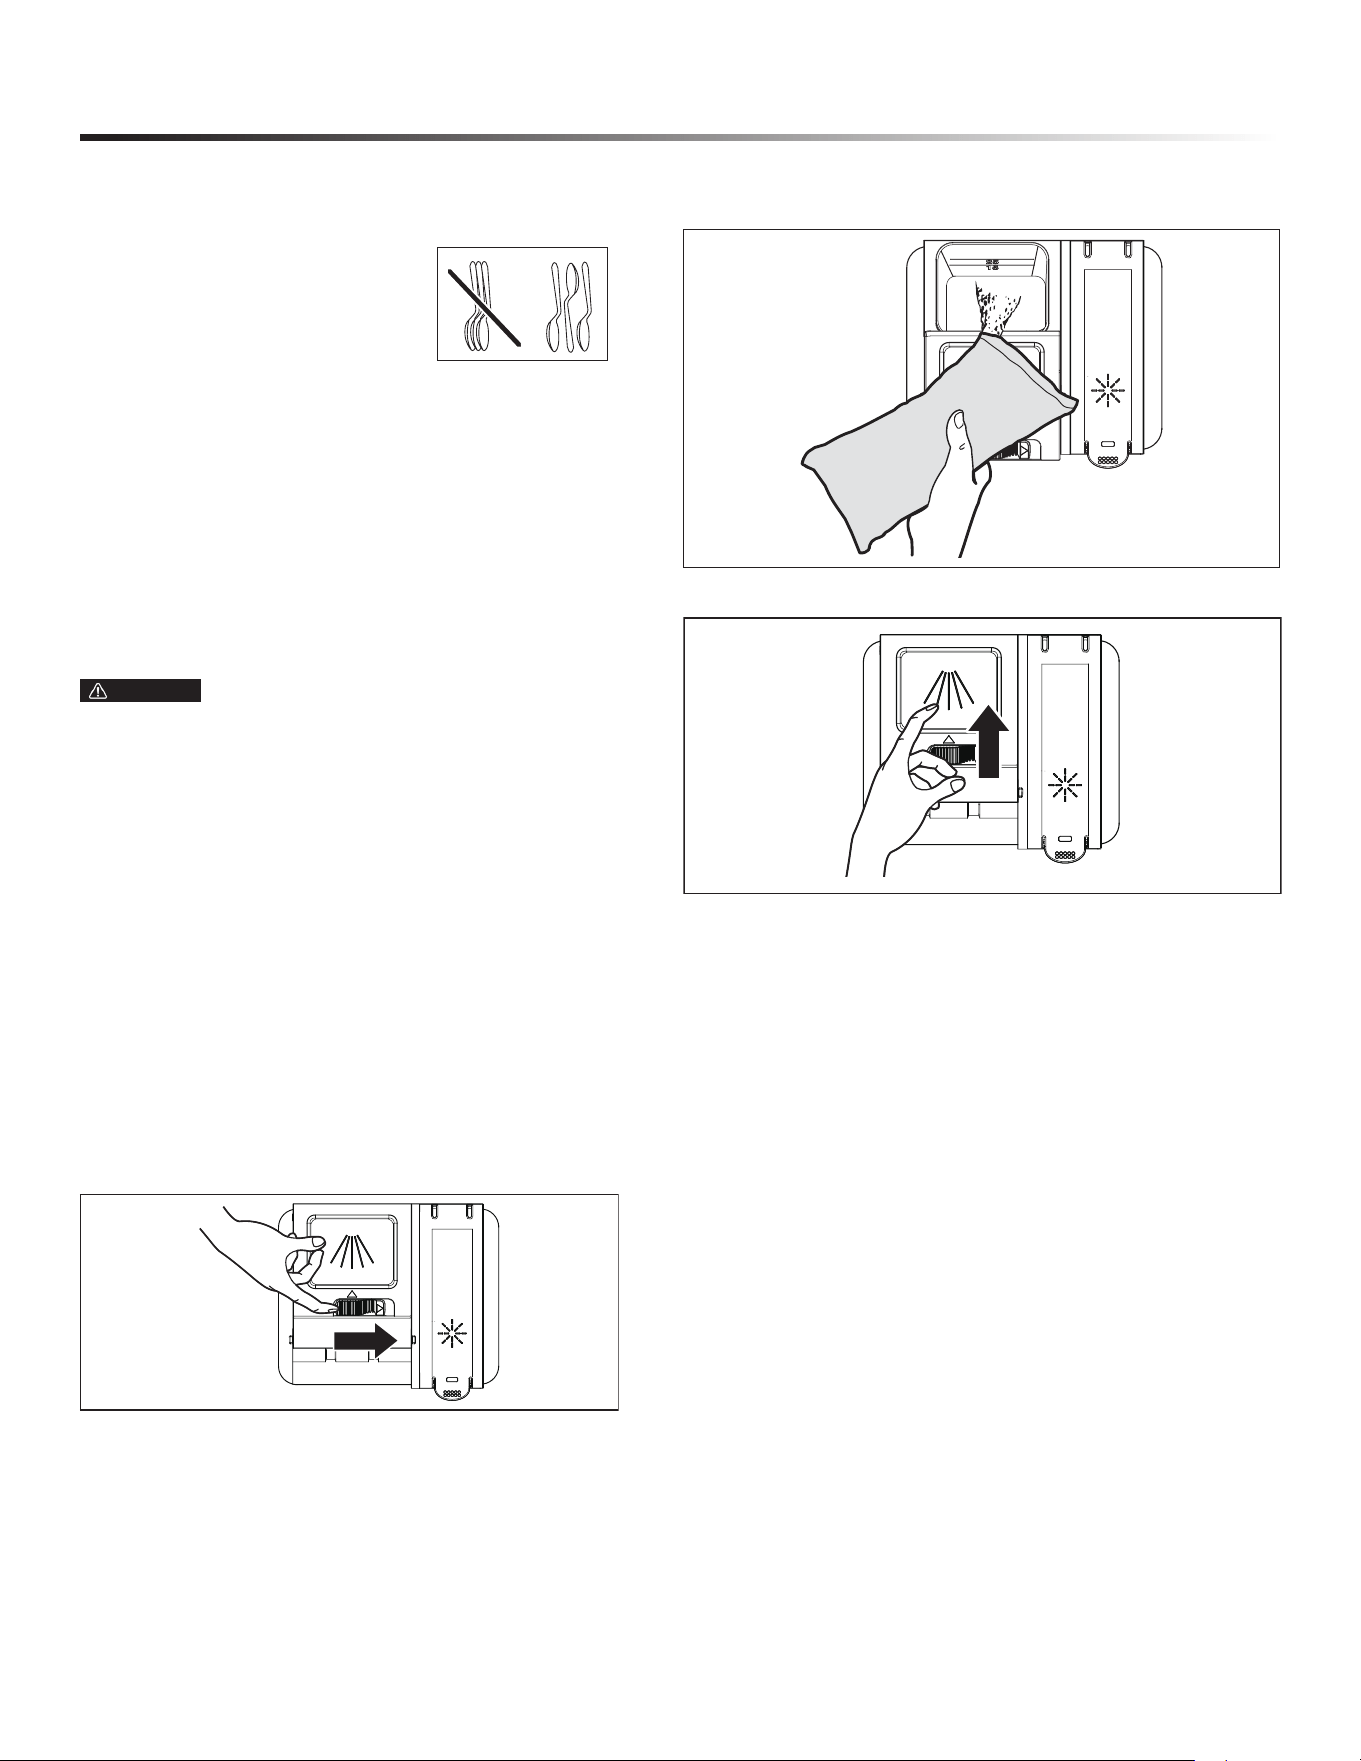
• When handles are up, mix items in
each section of the baskets with
some pointing up and some down to
avoid nesting. Spray cannot reach
nested items.
ADDING A DISH
To add or remove items after wash cycle starts:
CAUTION TO AVOID BURN INJURY: Slightly
open door and wait until spray arms and wash action stop.
Hot steam may exit the dishwasher or hot water may splash
out of it. Failure to USE CAUTION may result in injury.
ADD DETERGENT
IMPORTANT:
● Use automatic dish washing detergent only. Other detergents
can produce excessive suds that can overow out of the
dishwasher and reduce washing performance.
● Add detergent just before starting a cycle.
● Store detergent tightly closed in a cool, dry place. Fresh
automatic dishwasher detergent results in better cleaning.
DETERGENT DISPENSER
NOTE: The ap is always open at the end of a dishwashing cycle.
HOW MUCH DETERGENT TO USE
The amount of detergent to use depends on the soil level of
your load, the type of detergent used and the hardness of your
water.
● If you use too little detergent, dishes won’t be clean.
● If you have soft water and use too much detergent, glassware
will etch.
WATER HARDNESS
Water hardness varies depending on your water source. For the
best results, your dishwasher is designed to operate with water
that has a hardness of no more than 7 grains per gallon. Test
kits are available from all major appliance parts retail outlets.
If your water has a hardness over 8 grains per gallon, you may
consider installing a water softener or regularly use an additive
to enhance the performance of your detergent.
1 Open door slightly and wait a few seconds until wash
action stops before completely opening.
2 Add the item.
3 Close the door rmly to latch.
4 Press the Start/Cancel button.
1 Push the dispenser cover release catch to open the main
wash detergent compartment.
2 Add the recommended amount of detergent to the detergent
compartment.
3 Press down on the top of the cover to secure.
12
GETTING STARTED
FILLING THE RINSE AID
Rinse aid greatly improves drying and reduces water spots and
lming. Without rinse aid, your dishes and dishwasher interior
will have excessive moisture. The Heated Dry option will not
perform as well without rinse aid. The Rinse Aid Dispenser,
located next to the detergent dispenser, automatically releases
a measured amount of rinse aid during the nal rinse.
If spotting and poor drying are a problem, increase the amount
of rinse aid dispensed by rotating the dial to a higher number.
The dial is located under the dispenser cap.
If the rinse aid is low, the rinse aid light is illuminated at the
beginning and end of the cycle indicating that it is time to rell.
Do not use a solid or bar-type rinse aid. Under normal
conditions, the rinse aid will last approximately one month.
Try to keep the reservoir full, but do not overll.
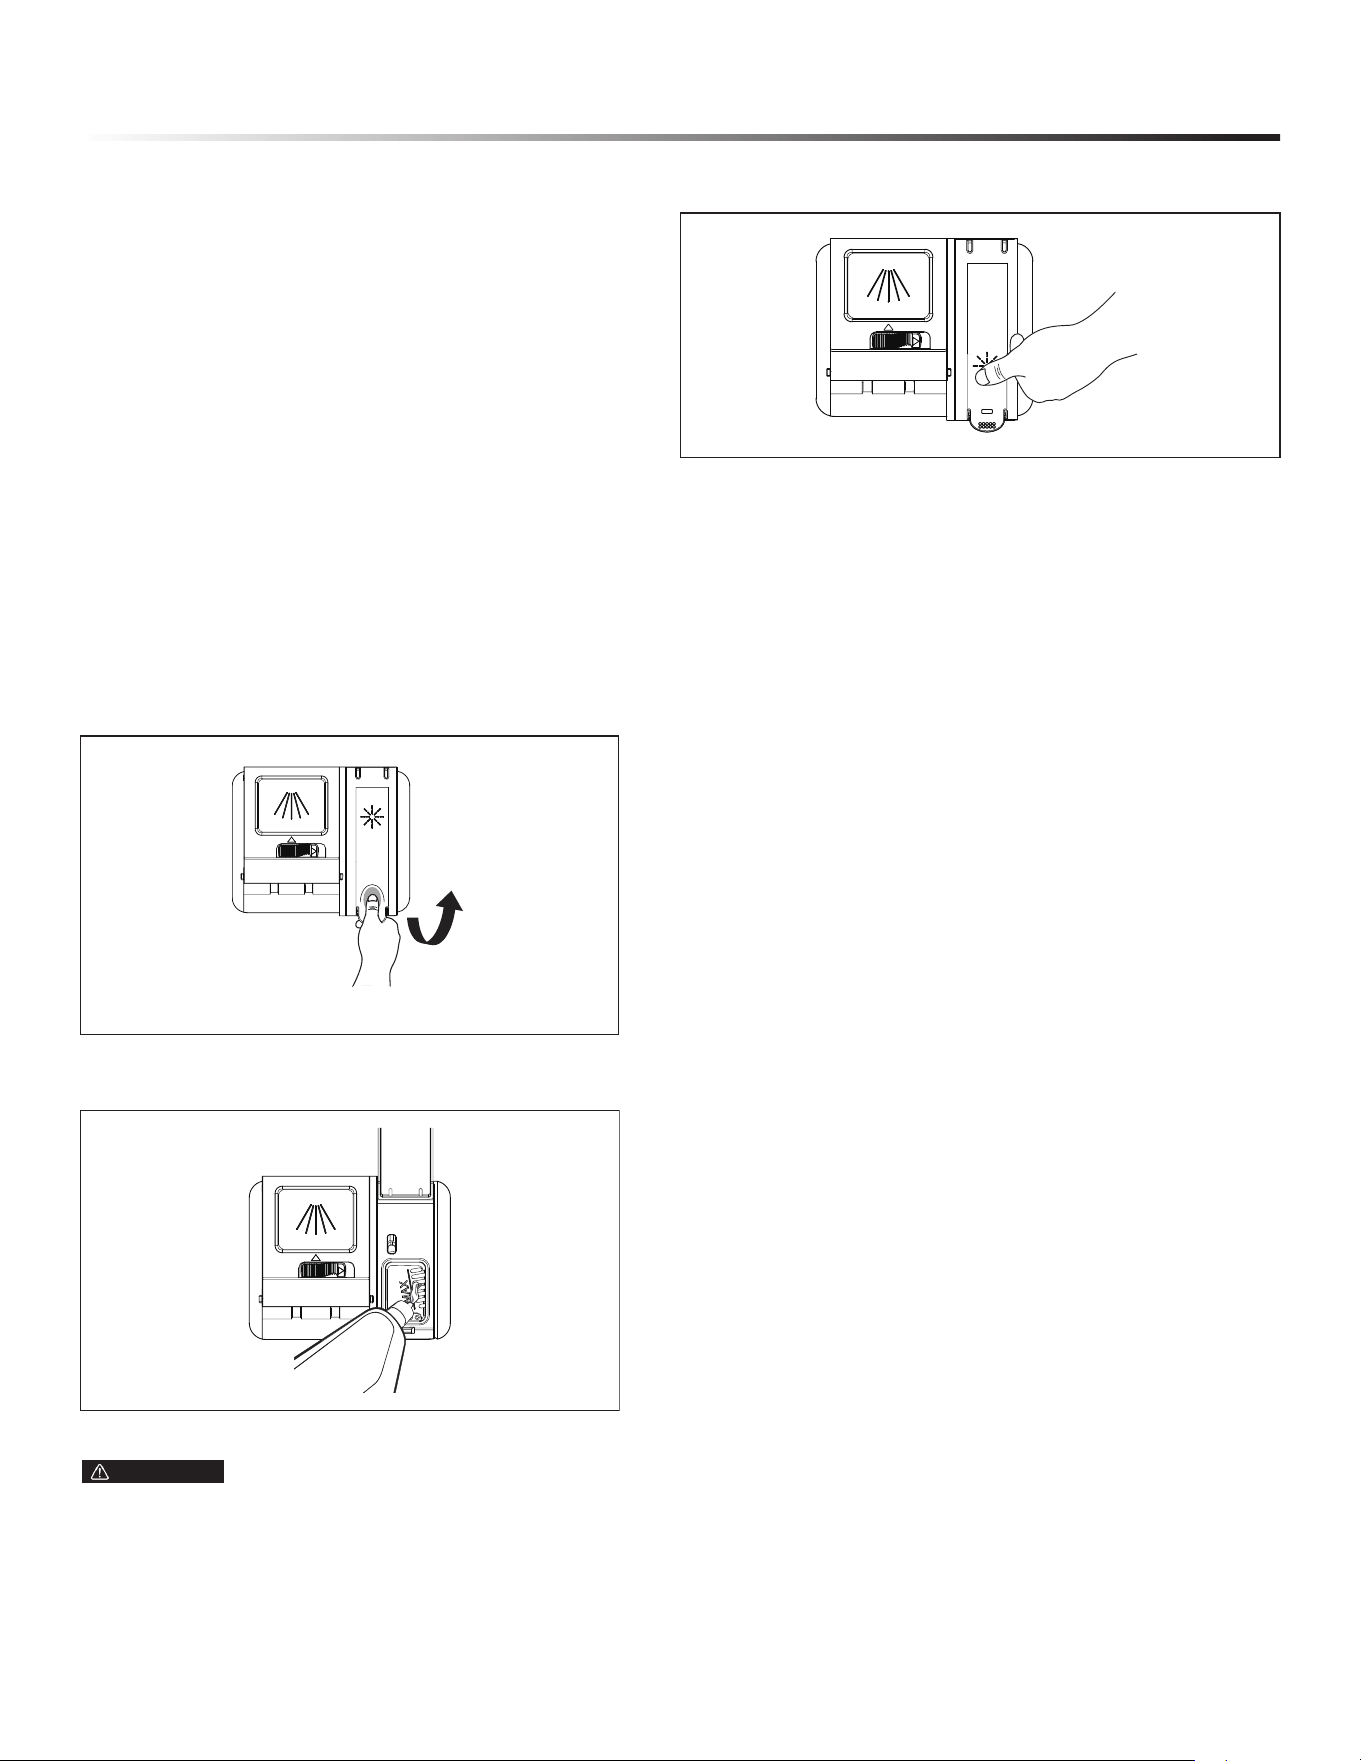
RINSE AID DISPENSER
2 Fill the rinse aid dispenser with liquid rinse aid until ll.
Do not overll.
NOTE: Use the viewing port when lling the rinse aid reservoir.
WARNING Do not ll the reservoir above the full level
indicator. Excess rinse aid can overow during the wash
cycle.
3 Press the rinse aid cover down rmly to close.
TO ADJUST THE RINSE AID SETTING
You can adjust the amount of the rinse aid released during the
rinse aid according to the following steps:
1 Lift up the end tab of rinse aid cover to open.
1 Close the door and power on the dishwasher.
2 Within 60 seconds after step 1, press the Rinse Only button more
than 5 seconds to enter into the setting mode, the rinse aid
indicator will blink quickly.
3 Press the Rinse Only button to select the proper setting
according to your using habits. The setting will change in the
following sequence: d3 › d4 › d5 › d1 › d2 › d3.
4 Without any operation in 5 seconds or press the Power button to
complete the setting and exit the setting mode.
13
DISHWASHER CYCLE OPTIONS
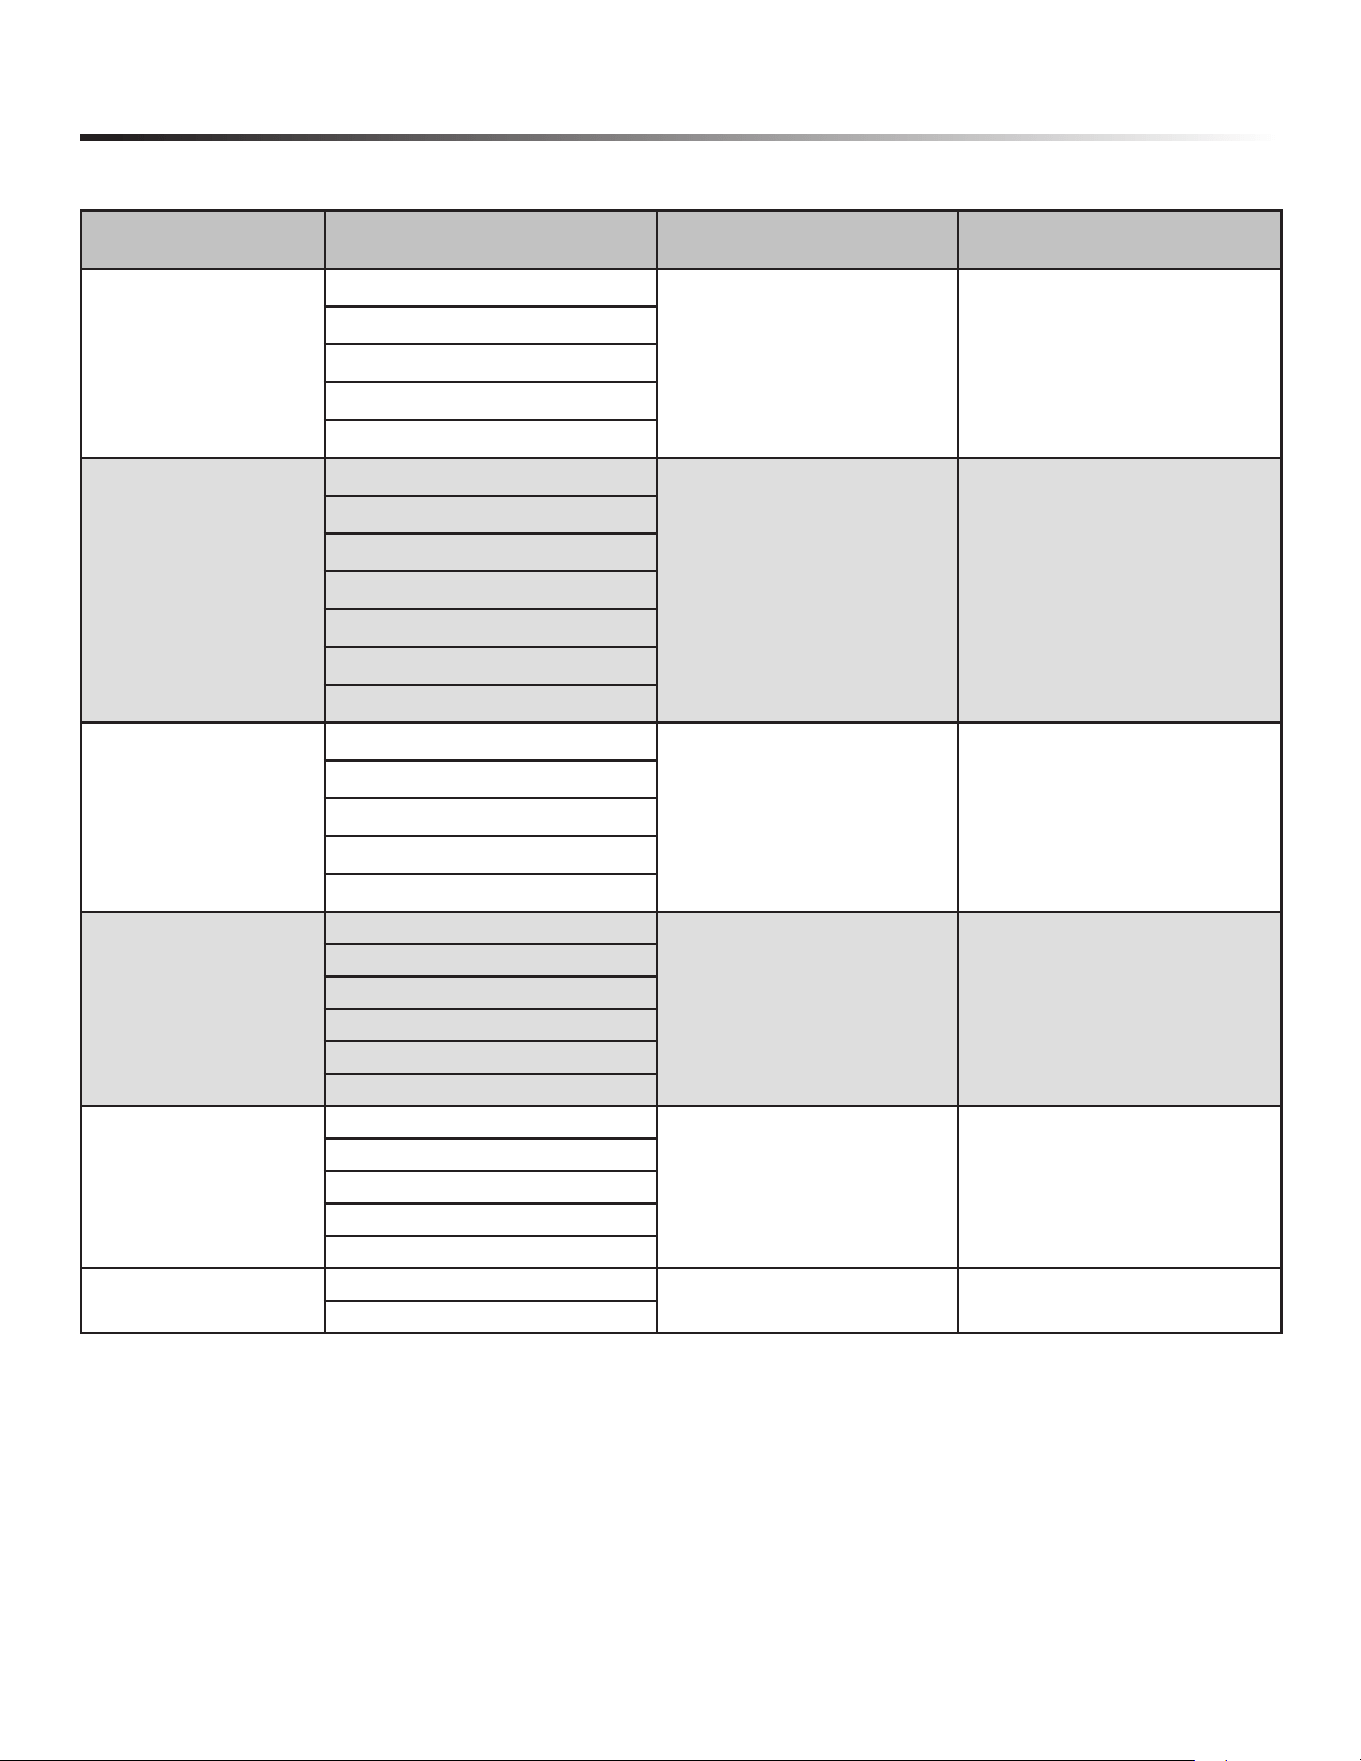
CYCLE CHART
PROGRAM DESCRIPTION OF CYCLE WATER (IN L/Gal) CYCLE TIME (MIN)
AUTO
Pre-Wash
9 - 17.7 L/
2.4 - 4.7 Gal
123 - 154
Main Wash 113-140˚F (45-60˚C)
Rinse
Last Rinse 149˚F (65˚C)
Drying
HEAVY DUTY
Pre-Wash
17.7 L/4.7 Gal 157
Pre-Wash
Main Wash 149˚F (65˚C)
Rinse
Rinse
Last Rinse 154˚F (68˚C)
Drying
NORMAL
Pre-Wash
9~17.7L/
2.4~4.7Gal
118~149
Main Wash 113-140˚F (45-60˚C)
Rinse
Last Rinse 149˚F (65˚C)
Drying
DELICATE
Pre-Wash
15.9L/4.2Gal 116
Main Wash 122˚F (50˚C)
Rinse
Rinse
Last Rinse 143.6˚F (62˚C)
Drying
EXPRESS
Pre-Wash 131˚F (55˚C)
12.8L/3.4Gal 60
Main Wash 140˚F (60˚C)
Rinse 131˚F (55˚C)
Last Rinse 154˚F (68˚C)
Drying
RINSE
Pre-Wash
6.6L/1.7Gal 20
Pre-Wash
14
DISHWASHER CYCLE OPTIONS
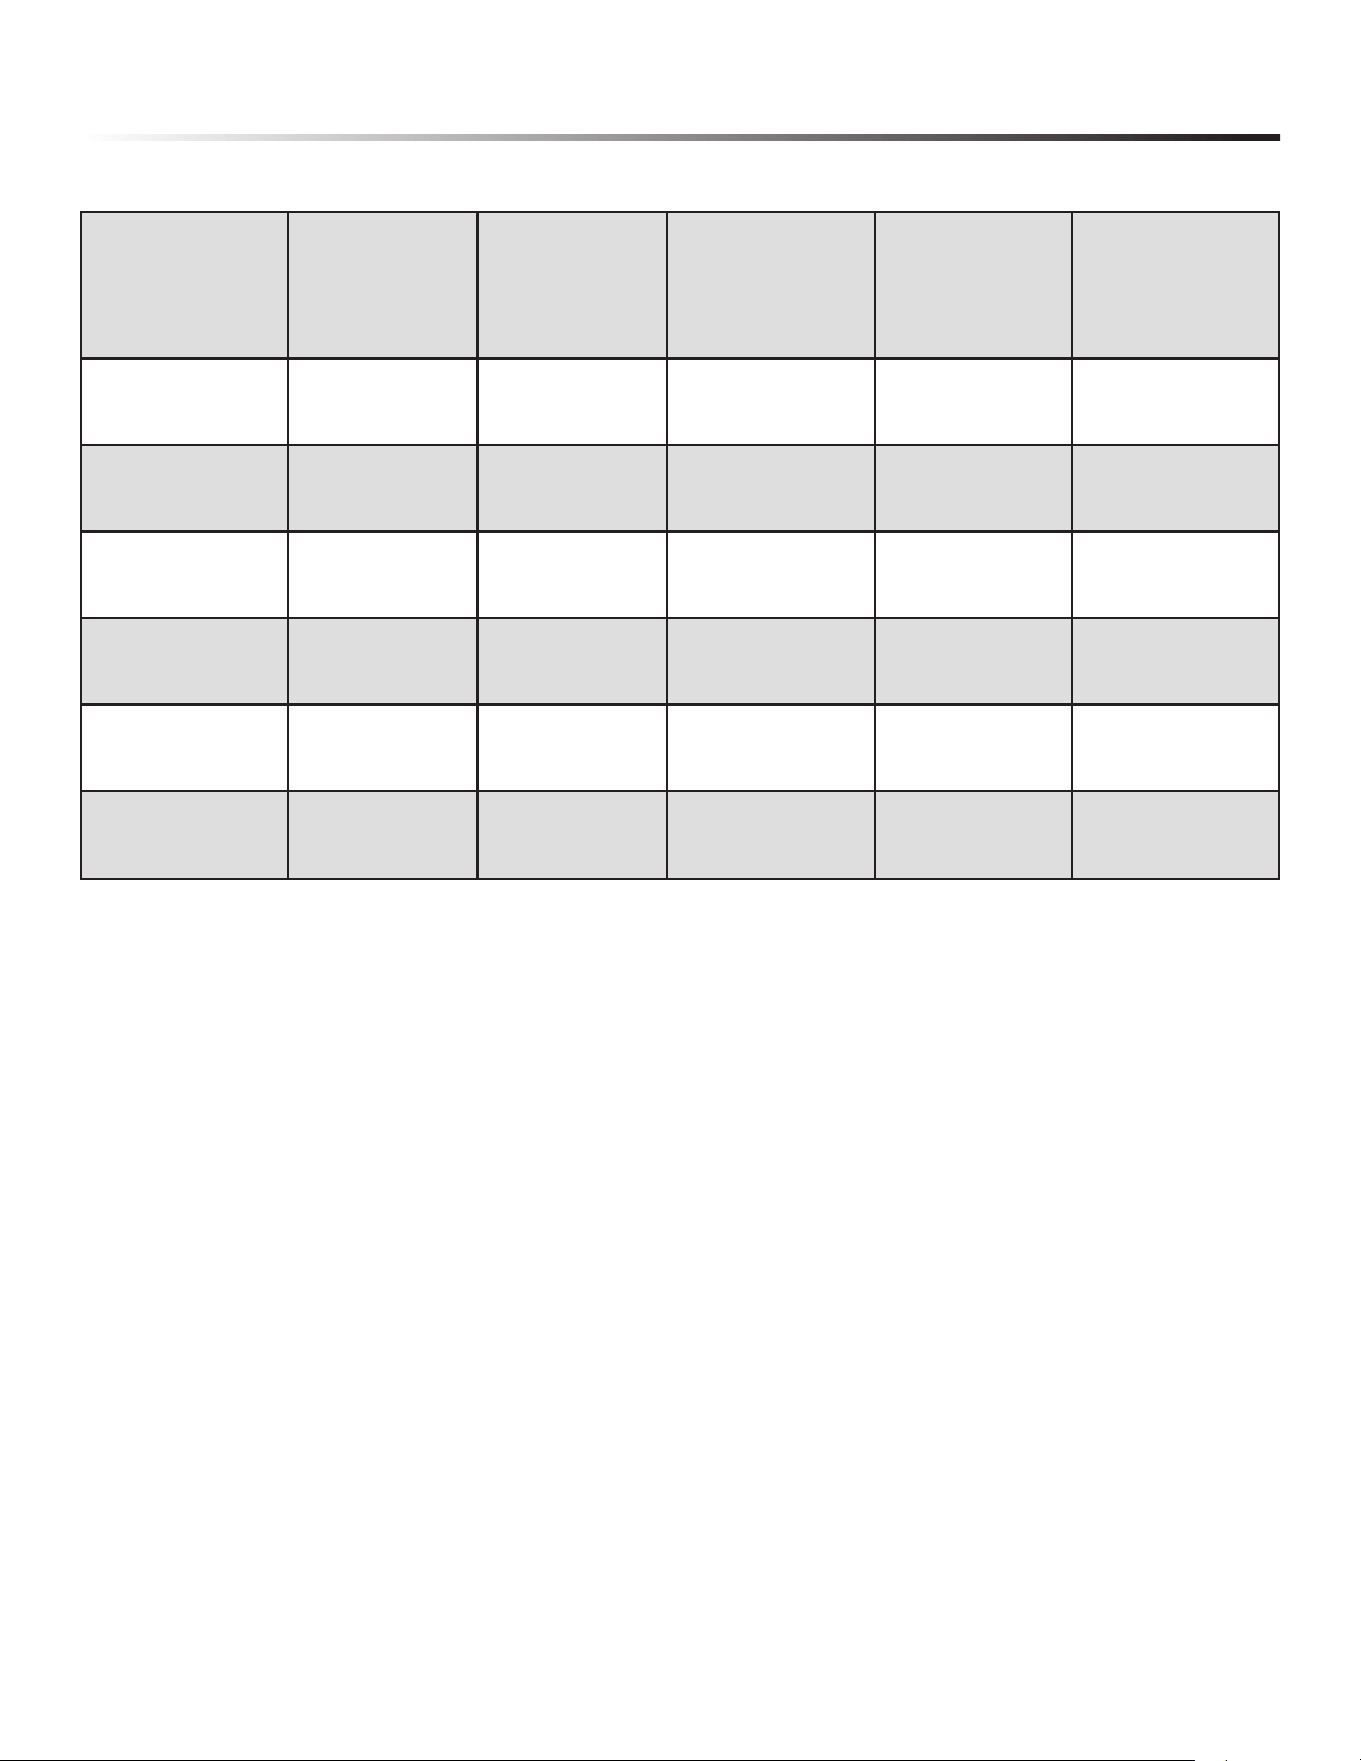
CYCLE TIME WITH OPTIONS
CYCLE TIME (MIN)
NULL HALF-LOAD HI-TEMP
SANITIZE
HI-TEMP +
SANITIZE
AUTO 123-154 113-137 118-159 153-184 173-189
HEAVY DUTY 157 130 162 182 187
NORMAL 118-149 108-139 113-129 148-179 168-184
DELICATE 116 100 N.A. N.A. N.A.
EXPRESS WASH 60 55 N.A. 120 N.A.
RINSE ONLY 20 N.A. N.A. N.A. N.A.
WASH CYCLE SELECTIONS
Cycle times are approximate and will vary with options selected.
Hot water is necessary to activate dishwasher detergent and melt
fatty food soils. An automatic sensor will check the incoming
water temperature, and, if it is not hot enough, the timer will
be delayed for automatic water heating in the main wash of all
cycles. This happens even when HI-TEMP WASH is selected
as an even higher temperature will be guaranteed to handle
heavier soil loads.
NOTE: The energy usage label is based on Normal cycle with
Heated Dry option selected and with the upper rack in the
raised position.
15
CARE AND CLEANING
CLEANING THE DISHWASHER
STAINLESS STEEL INNER DOOR AND TUB
The tub is made of stainless steel; it will not rust or corrode if the
dishwasher is scratched or dented. Do not clean the dishwasher
interior until it has cooled. Wear rubber gloves. Do not use any
type of cleanser other than dishwasher detergent because it may
cause forming or create suds.
Clean any spots on the steel inner door and tub with a
damp, nonabrasive cloth.
FILTER SYSTEM
The Cylinder Filter is designed to collect some big items such
as broken glass, bones and pits. The Cylinder Filter needs to be
cleaned to maximize wash performance.
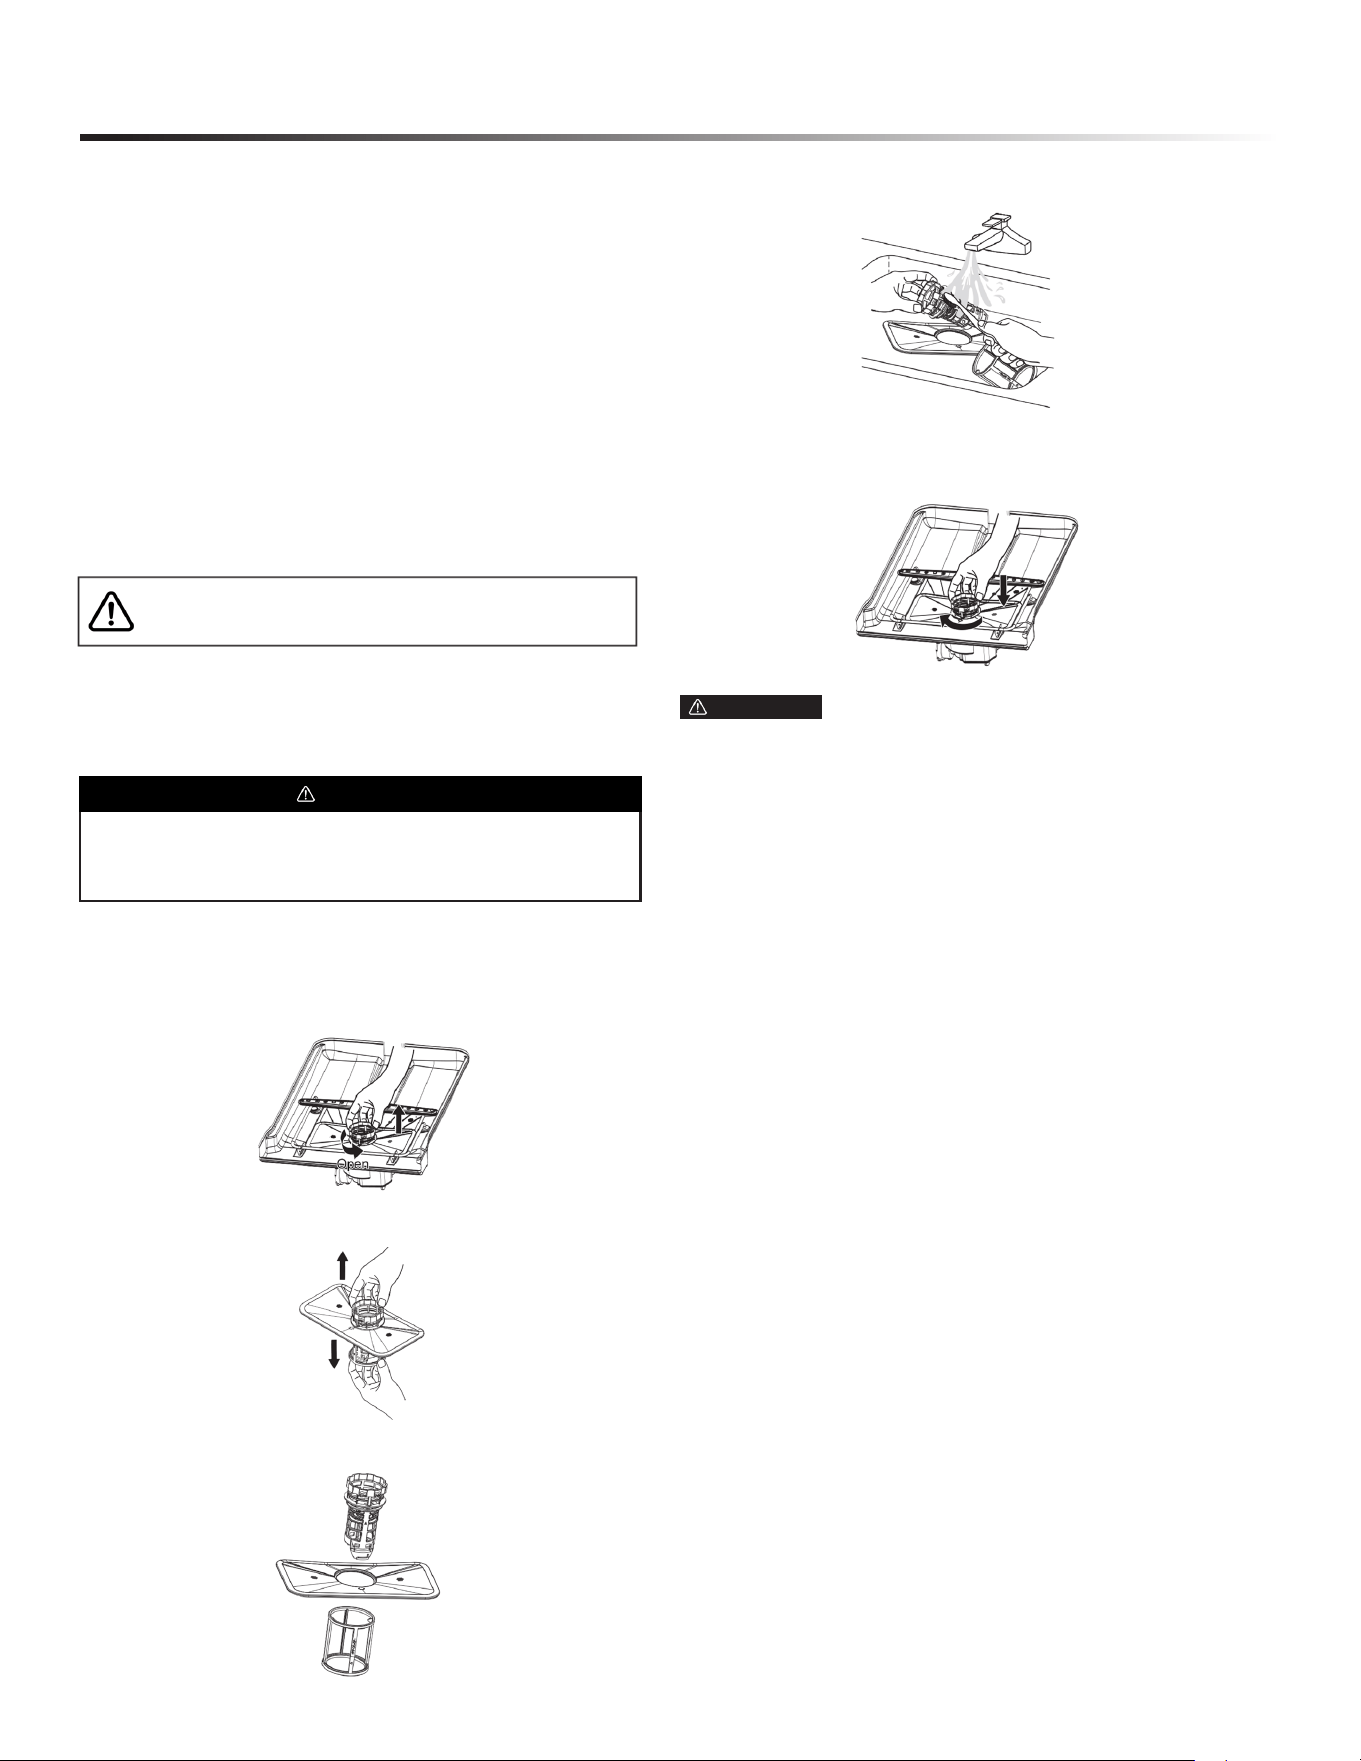
CLEANING THE FILTERS
2 Rotate the lter insert counterclockwise to unfasten and
then detach the lter insert.
3 Remove the ne lter (at, rectangular).
4 Remove any dirt or other remains from the lters, and then
rinse them under running water.
5 Reassemble the lters in the reverse order of the
disassembly, replace the lter insert, and rotate clockwise to
the close arrow.
DOOR GASKET
Clean the door gasket with a damp cloth regularly to remove
food particles.
AIR GAP
If there is an air gap installed with your dishwasher, make sure
it is clean, so the dishwasher will drain properly.
Before cleaning the air gap, rst turn off the dishwasher and lift
off the cover. Remove the plastic cap and clean with a toothpick.
NOTE: Air gap is an external plumbing device that is not part of
your dishwasher. The warranty provided with your dishwasher
does not cover service costs directly associated with the cleaning
or repair of the air gap.
1 Regularly clean the stainless steel door and handle with a
soft cleaning cloth to remove any debris. Do not use
appliance wax, polish, bleach or products containing
chlorine to clean the stainless steel door.
2 Gently clean the control panel with a lightly
dampended cloth.
1 Turn off the dishwasher.
WARNING
Clean and check lters regularly for best performance.
CAUTION If the lter insert is not closed properly, its
performance will be decreased.
BURN HAZARD
Allow heating element to cool before cleaning the interior.
Failure to do so can result in burns.
EXTERIOR DOOR AND PANEL
CLEANING THE NOZZLES
If your dishwasher does not seem to be cleaning adequately or the
nozzles seem clogged, you can clean each of the nozzles. When
removing the nozzles, take care as they may break.
Lower Nozzle
1 Check whether the nozzle holes are clogged by food
particles.
2 If cleaning is needed, remove the nozzle by pulling
it upwards.
3 Clean the nozzle, and then push it back into place.
4 Check whether the nozzle is engaged correctly by rotating it
by hand.

16
CARE AND CLEANING
PROTECT AGAINST FREEZING
Your dishwasher should be properly protected from freezing
when left in an unheated place. Have a qualied technician
perform the steps listed below in this section.
TO DISCONNECT SERVICE
TO RESTORE SERVICE
1 Turn off electrical power to the dishwasher at the supply
source by moving fuses or tripping the circuit breaker.
2 Turn off the water supply.
3 Place a pan under the inlet valve. Disconnect water line
from inlet valve and drain into pan.
4 Disconnect drain line from pump and drain water into pan.
1 Reconnect the water, drain and electrical power supply.
2 Turn on water and electrical power supply.
3 Fill both detergent cups and run dishwasher through a
heated wash cycle.
4 Check connections to make sure they do not leak.
17
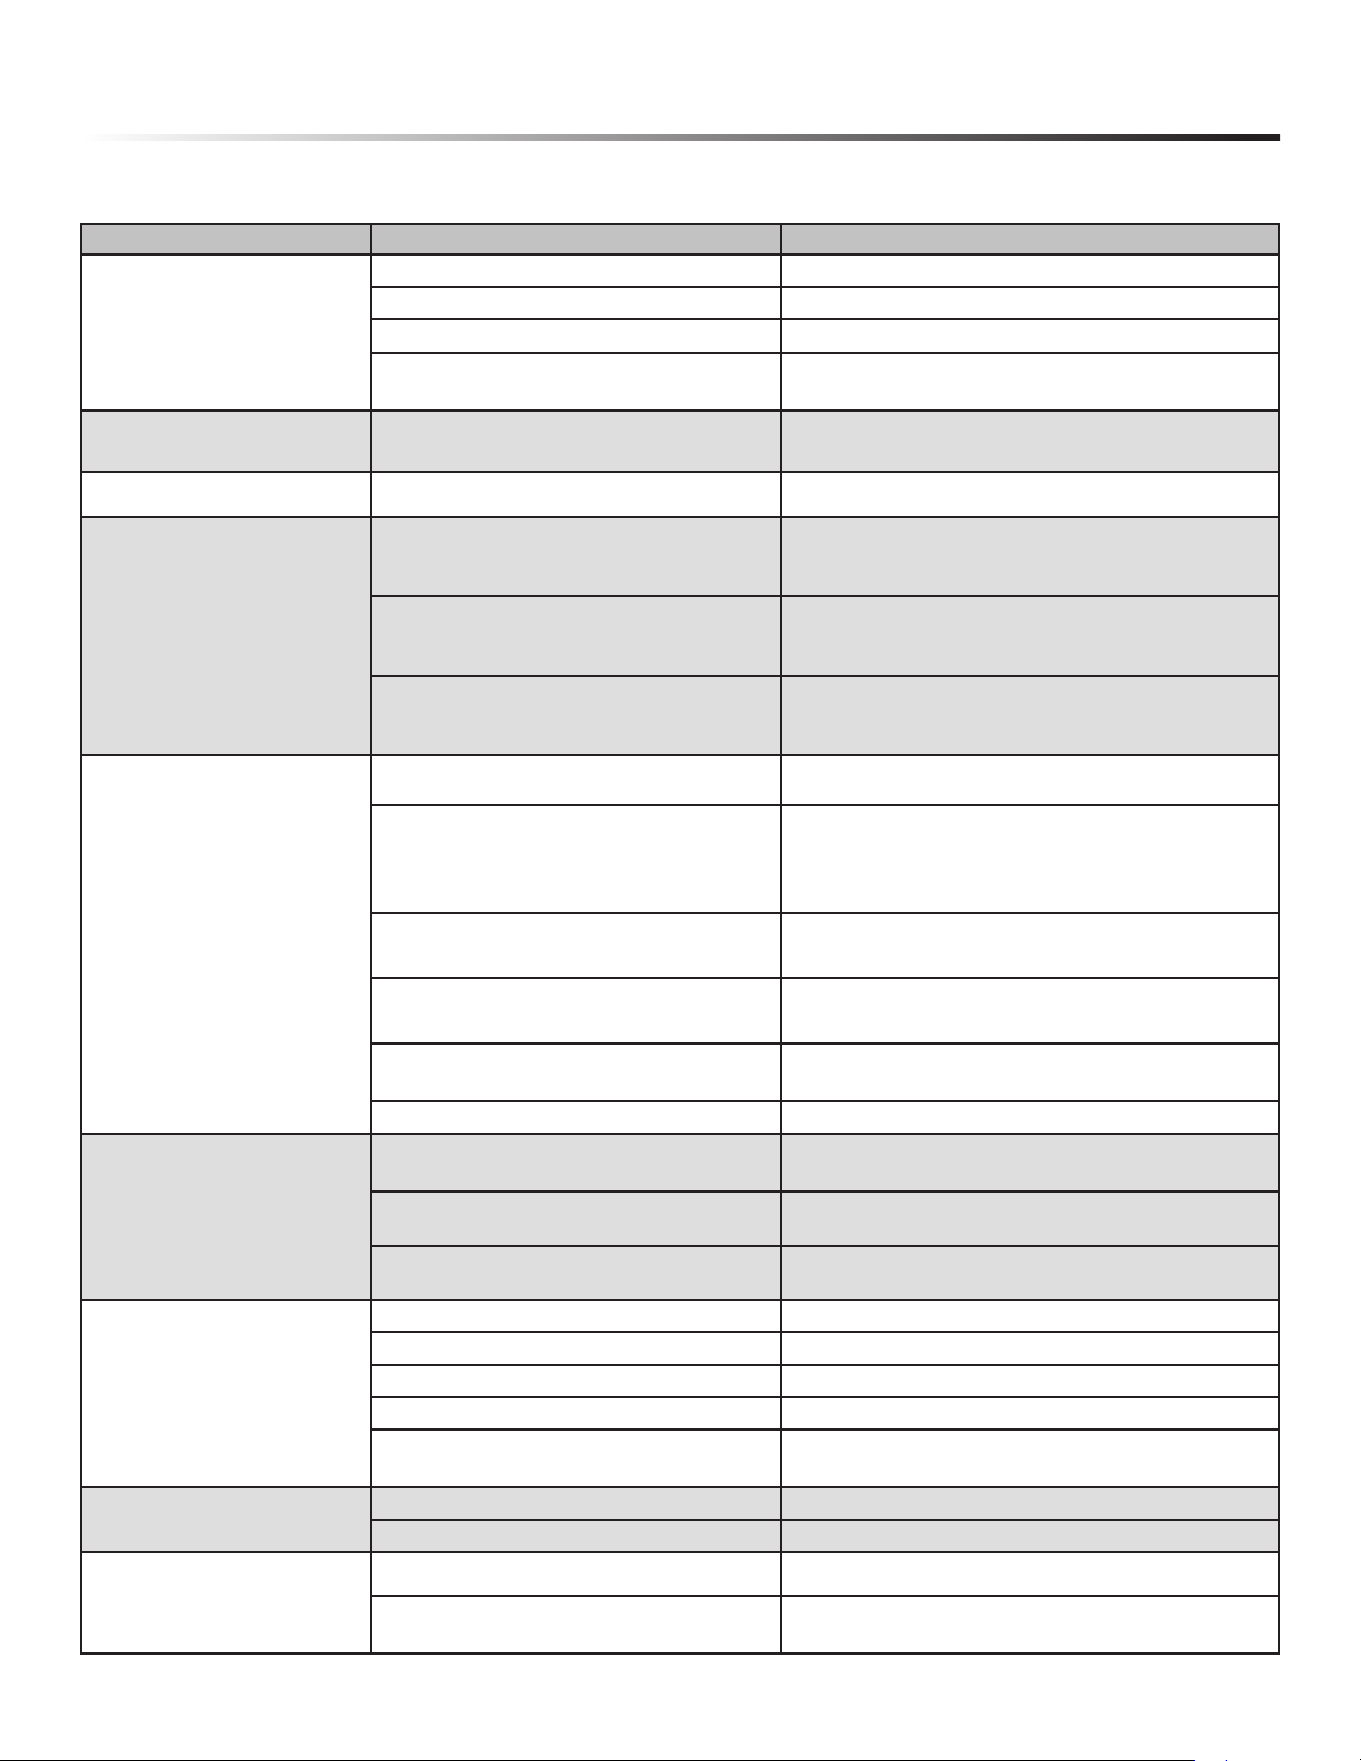
TROUBLESHOOTING
BEFORE CALLING FOR SERVICE
PROBLEM POSSIBLE CAUSE SOLUTION
Dishwasher won’t start
Door may not be closed properly Ensure the door is properly closed
Power supply or power line is not connected Ensure power supply is correctly connected
Delay Start option has been selected Refer to delay start section in this manual to reset
Child lock activated (selected models)
Refer to child lock section in this manual to
deactivate the child lock
Dishwasher beeps at
the end of the cycle
Indicates the wash cycle is nished This is normal.
Rinse aid light is on The rinse aid level is low Add rinse aid
Dishwasher operates too long
The dishwasher is connected to cold water
Make sure the dishwasher is connected to hot
water supply
The cycle time will vary depending on the
soil level of the dishes
When heavy soil is detected, the Auto and Normal
cycles will automatically increase the cycle time
The sanitize option is selected
When Sanitize option is selected, the cycle time will be
increased to meet the sanitize temperature requirement
Dishes are not clean enough
Water pressure is temporarily low Use dishwasher when the water pressure is normal
The inlet water is low
Make sure the dishwasher is connected to the hot water
supply. Try not to use the dishwasher when hot water is
being used elsewhere in the house
Dishes are loaded too close together Load the dishes again as the manual indicates
Improper use of detergent
Using fresh detergent, add the correct amount
depending on the water hardness and the selected cycle
The selected cycle is not suitable for food soil
condition
Choose another cycle for longer washing time
Spray arms are blocked by items Make sure the spray arm is rotated fully
Dishes are not dry enough
Rinse aid dispenser is empty Fill rinse aid dispenser or increase the amount of rinse
aid
Improper loading of dishes Load the dishes again as the manual indicates
The selected cycle did not include drying Choose the proper cycle with drying
Spots and lming on dishes
Water hardness is too high For extremely hard water, install a water softener
Improper loading of dishes Load the dishes again as the manual indicates
Old or damp powder rinse aid is used Use fresh rinse aid
Rinse aid dispenser empty Add rinse aid to the dispenser
Water temperature is too low
For best results, water should be a minimum 120˚F as it
enters the dishwasher.
Etching
Use of too much detergent Use less detergent if you have soft water etching
The inlet water temperature exceeds 150˚F Lower the inlet water temperature
Detergent left in dispenser cup
Detergent may be too old Use fresh detergent
Spray arm is blocked
Load the dishes, making sure the spray arms are not
blocked
18
TROUBLESHOOTING
PROBLEM POSSIBLE CAUSE SOLUTION
Detergent dispenser will not close Improper operation of the detergent cover
Add the detergent and rinse aid as indicated by the
manual
Water remains in the dishwasher
Previous cycle has not nished or has been
interrupted
Select the proper cycle as indicated by the manual
Dishwasher does not drain
properly
Drain is clogged
Check the air gap if it is installed
Make sure the disposer is empty if the dishwasher
is connected to the disposer
Drain hose is kinked
Be sure the drain hose is properly connected to the
sink
Suds in the tub
Improper detergent is used
Be sure to use only the automatic dishwasher
detergent
Excessive suds caused by using the improper
detergent
Make sure to use only the automatic dishwasher
detergent
Dishwasher leaks Dishwasher is not level Level the dishwasher (see the installation manual)
Black or gray marks on dishes Aluminum utensils have rubbed against dishes
Choose a higher cycle
Make sure the inlet water temperature is no less
than 120˚F
Stained tub interior
Coffee and tea soil Use a spot cleaner to remove the soil
Reddish stain
Some tomato-based foods will cause this. Use of
the rinse only cycle right after loading this will
decrease the staining
Noise
Detergent cup opening or drain pump sound This is normal
A hard object has entered the wash module.
When the object is ground up, the sound should
stop
If the noise persists after a complete cycle, call for
service
Dishwasher won’t ll
Water valve is shut off Make sure water valve is open
Door latch may not be properly seated Make sure the door is closed
Water pressure is too low
Verify a minimum of 5.8 psi water pressure is
maintained during the lling operation.

19
ERROR CODES
If there is a malfunction the dishwasher will display an error code. e following table shows possible error codes and their causes.
CHECK CODE DISPLAY POSSIBLE CAUSE
E1
• The water supply pressure is low.
• The water supply valve is closed.
• The non-water switch is broken.
• The wash pump does not work.
• The main PBA has some problems.
E3
• The heater is broken.
• The thermistor doesn’t work normally.
• The main PBA has some problems.
E4
• The case brake fails to detect the pulse.
• The valve water is out of order.
• The overow sensor is broken.
• There is a water leakage.
E6
• The Thermistor is broken.
• The main PBA fails to detect the pulse.
E7
• The Thermistor is broken.
• The main PBA fails to detect the pulse.
E8
• The main PBA or sub PBA is out of order.
• Breakage of distributary valve.
• The connecting wire harness is defective or damaged.
Ed
• The main PBA or sub PBA is out of order.
• The communications connection for the main PBA or sub PBA is not properly connected.

20

21
SHARP ELECTRONICS CORPORATION • 100 Paragon Drive • Montvale, New Jersey 07645 • USA
800-BE-SHARP (800-237-4277)
October 31st, 2024