
INSTANT
®
PRECISION DUTCH OVEN
USER MANUAL

to your new Instant
®
Precision Dutch Oven!
This Instant Precision Dutch Oven can help you cook delicious meals
easily and with more precise control. We hope you fall in love with
Dutch Oven cooking, and enjoy it in your kitchen for years to come!
Get started with your new Dutch Oven!
.
Welcome
Before using your new appliance, read all instructions, including
the Important Safeguards. Failure to follow the safeguards and
instructions may result in personal injury and/or property damage.

CONTENTS
Important safeguards 2
What’s in the box 6
Using your Dutch Oven 8
Sear / Sauté 11
Braise 12
Slow Cook 14
Manual Mode 16
Keep Warm 18
Cleaning 19
Troubleshooting 20
Learn more 21
Warranty 22
Notes 24

2
User Manual
IMPORTANT
SAFEGUARDS
Failure to follow safety instructions may result in personal injury
and/or property damage and may void your warranty.
READ ALL INSTRUCTIONS
Before using your new appliance, please read all instructions, including
the Safety Information below. Keep this manual for reference.
Placement
• DO place the appliance on a countertop only. Always operate the
appliance on a stable, non-combustible, level surface.
• DO make sure all parts are dry and free of food debris before placing
the inner cooking pot on the cooker base.
• DO NOT place the appliance on or close to a gas or electric burner,
or oven. NEVER use the appliance on your stove.
• DO NOT use the appliance near water, an external heat source
or flame.
• DO NOT use outdoors. Keep out of direct sunlight.
• DO NOT place on anything that may block the vents on the bottom
of the appliance.
General Use
The removable inner cooking pot is extremely hot during use and can
be extremely heavy when full of ingredients.
• DO use oven mitts when handling the inner cooking pot and
removing accessories.
• DO place hot accessories on a heat-resistant surface or cooking plate.
• DO use care when lifting the cooking pot from the cooker base to
avoid burn injury.
• DO use extreme caution when the cooking pot contains hot food, hot
oil or other hot liquids.
• DO NOT use the appliance without the removable inner cooking
pot installed.

3
User Manual
• DO NOT touch the appliance’s hot surfaces, or any accessories
during or immediately after cooking because they will be hot. Only
use the appliance’s side handles for carrying or moving.
• DO NOT use this appliance for deep frying or frying with oil.
• DO NOT move the appliance while it is in use and use extreme
caution when disposing of hot grease.
• DO NOT allow children or persons with reduced physical, sensory
or mental capabilities to operate this appliance. Close supervision
is necessary when any appliance is used by or near children and
persons with reduced physical, sensory or mental capabilities.
Children should not play with this appliance.
• DO NOT use the appliance for anything other than household use.
It is not intended for commercial use.
• DO NOT leave the appliance unattended while in use.
Overfill During Cooking
• DO NOT fill the inner cooking pot over the line labeled ‘PC MAX’ or
‘Max PC Fill’.
• DO NOT fill the inner cooking pot over the line labeled ‘1/2’ when
cooking foods that expand during cooking such as rice, dried beans
or dried vegetables.
• DO be aware that certain foods, such as applesauce, cranberries,
pearl barley, oatmeal or other cereals, split peas, noodles, macaroni,
rhubarb, or spaghetti can foam, froth and sputter. DO NOT fill
the inner cooking pot over the line labeled ‘1/2’ when cooking
these foods.
• DO NOT place oversized foods into the inner cooking pot as they
may cause risk of fire, personal injury and/or property damage.
Accessories
• DO use only accessories or attachments authorized by Instant
Brands. The use of parts, accessories or attachments not
recommended by the manufacturer may cause a risk of electric
shock or other personal injury, fire and/or property damage.
• DO use only an authorized Instant inner cooking pot to reduce the
risk of pressure leakage.
• DO NOT use the included accessories in a microwave, toaster oven,
convection or conventional oven, or on a ceramic cooktop, electric
coil, gas range or outdoor grill.

4
User Manual
Care and Storage
• DO let the appliance cool to room temperature before cleaning
or storage.
• DO NOT store any materials, other than the inner cooking pot, in the
cooker base when not in use.
• DO NOT place any combustible materials in the cooker base, such
as paper, cardboard, plastic, Styrofoam or wood.
Power Cord
A short power-supply cord is used to reduce the hazards resulting
from grabbing, entanglement or tripping. WARNING: Hot spilled food
can cause serious burns.
• DO keep appliance and power cord away from children.
• DO NOT let the power cord hang over edges of tables or counters.
• DO NOT let the power cord touch hot surfaces or open flame,
including a stovetop.
• DO NOT use below-counter power outlets.
This appliance has a 3-prong grounding plug. To reduce the risk of
electric shock:
• ONLY plug the power cord into a grounded electrical outlet.
• DO NOT remove ground.
• DO NOT use with extension cords, power converters or adapters,
timer switches or separate remote-control systems.
If the unit includes a detachable power cord:
• To connect, always attach the power cord to the appliance first, then
plug the power cord into the wall outlet.
Electrical Cautions
The cooker base contains electrical components that are an electrical
shock hazard. Failure to follow these instructions may result in electric
shock and/or death.
To protect against electrical shock:
• To disconnect, select Cancel, then remove plug from power source.
Always unplug when not in use, as well as before adding or removing
parts or accessories, and before cleaning. To unplug, grasp the plug
and pull from the outlet. NEVER pull from the power cord.

5
User Manual
• DO regularly inspect the appliance and power cord for any signs of
damage or fraying.
• DO NOT operate the appliance if the power cord or plug is damaged,
or after the appliance malfunctions or is dropped or damaged in
any manner. For assistance, contact Consumer Care by email at
support@instantpot.com.
• DO NOT attempt to repair, replace or modify components of
the appliance, as this may cause electric shock or other personal
injury, fire and/or property damage, and will void the warranty.
For assistance, contact Consumer Care by email at
support@instantpot.com.
• DO NOT tamper with any of the safety mechanisms, as this may
result in personal injury and/or property damage.
• DO NOT put liquid or food of any kind into cooker base without the
inner cooking pot.
• DO NOT immerse the power cord, plug or the appliance in water
or other liquid.
• DO NOT clean the appliance by rinsing it under a faucet.
• DO NOT use the appliance in electrical systems other than
120 V ~ 60 Hz for North America.
SAVE THESE INSTRUCTIONS
Failure to follow safety instructions may result in personal injury
and/or property damage and may void your warranty.
6
User Manual
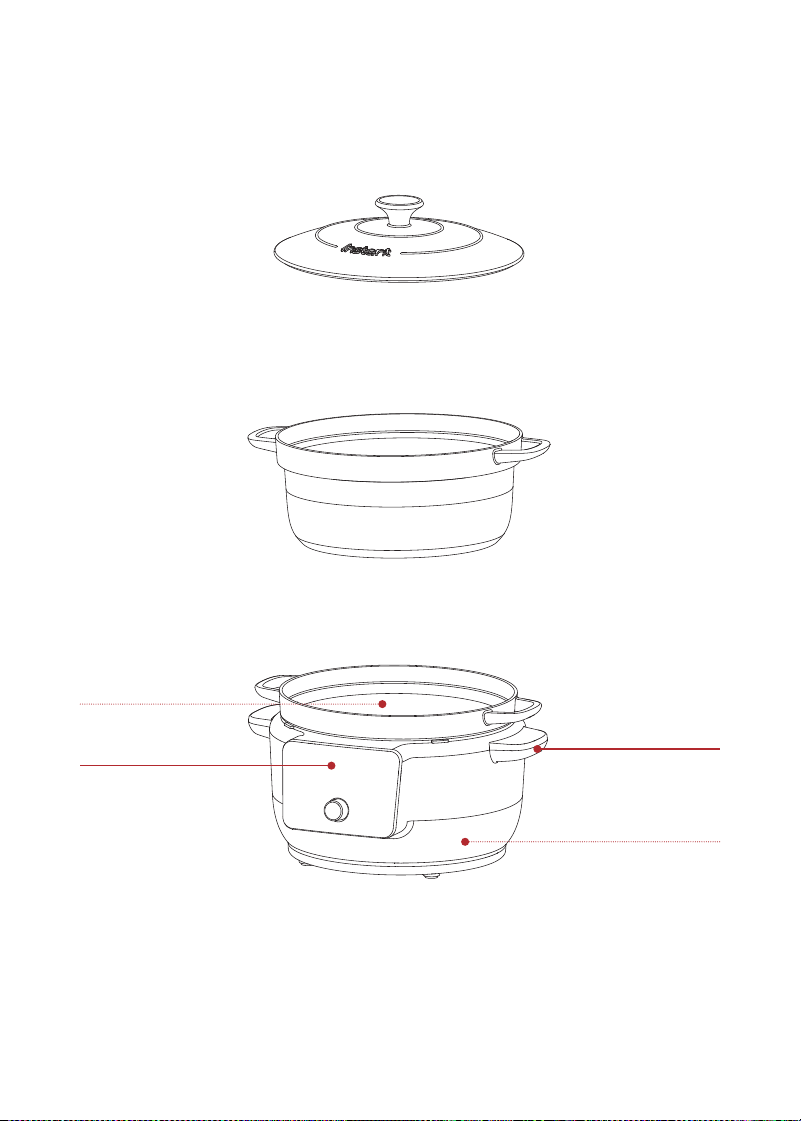
WHAT’S IN THE BOX
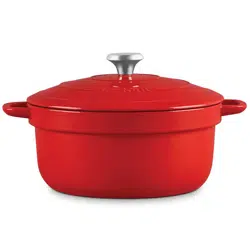
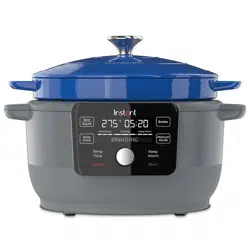
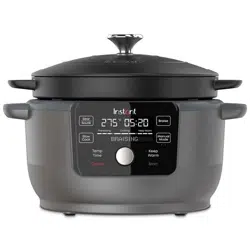
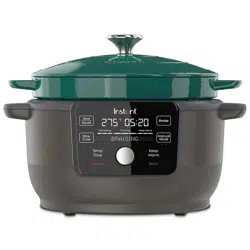
Enameled Cast Iron Lid
Enameled Cast Iron Cooking Pot
Cooker Base
Illustrations are for reference only and may differ from the actual product.
Control Panel
Heating Element
(inside)
Cooker Handles
Power Socket
(rear)

7
User Manual
Accessories
Using the silicone accessories
• Use the Protective Pad under the hot Cooking Pot instead of
placing the pot directly on the counter surface.
• Use the Silicone Handle Covers when transferring the hot Cooking
Pot. Do not leave them on the Cooking Pot during cooking, whether
cooking on the Cooker Base or in the oven or on the stovetop.
Do not use them in place of oven mitts.
Remember to recycle!
We designed this packaging with sustainability in mind. Please recycle
everything that can be recycled where you live. Be sure to keep this
Guide, along with the Safety and Warranty insert for reference.
Silicone Handle Covers
Silicone Protective Pad
8
User Manual
USING YOUR DUTCH OVEN
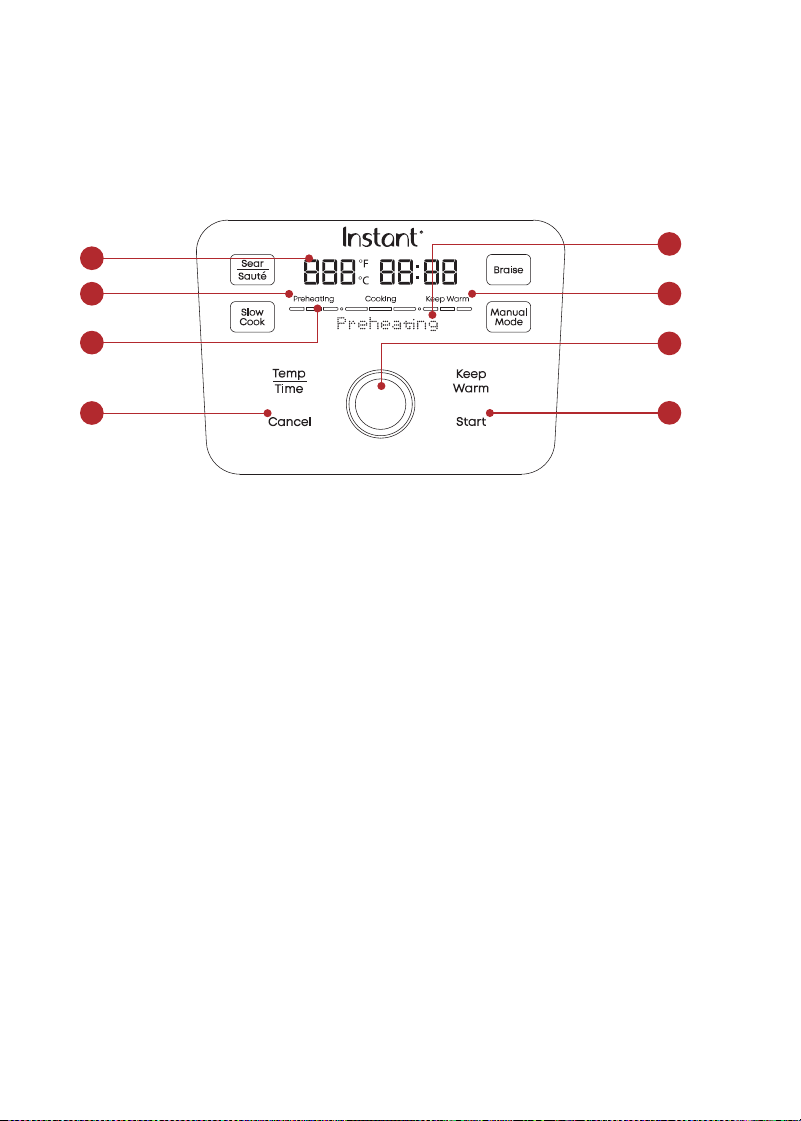
Control panel
We’ve designed the control panel to be simple to use and easy to read.
1. Temperature/Time
• Cooking time in either Fahrenheit
or Celsius
2. Control Dial
3. Keep Warm
• On: light is orange
• Off: light is white
4. Start
• Begin a Cooking Program
5. Cancel
• End a Cooking Program
6. Status Bar
• Cooking progress: Preheating,
Cooking, Keep Warm
7. Message Bar
• Cooking status: Ready, Preheating,
Add Food, End
• Shows the Smart Program in use
7
3
2
4
1
2
6
5

9
User Manual
Initial setup
Clean before use
1. Wash the cooking pot with hot water and soap. Rinse and use
a soft cloth to dry the outside. Or you can wash the cooking pot
in the dishwasher.
2. Wipe the heating element inside the cooker base with a soft cloth
to ensure there are no stray packaging particles.
3. Wash the accessories with hot water and dish soap. Rinse with
warm, clear water and use a soft cloth to dry.
Changing settings
Adjust cooking time during cooking
You can adjust cooking time while a Smart Program is in use.
1. During cooking, press Time/Temp. The cooking time on the
control panel blinks.
2. Use the Control Dial to increase or decrease the cooking time.
The cooking time on the control panel displays the new time and
resets Smart Programs to original settings.
Change the cooking time of a Smart Program
You can change the default cooking time for a Smart Program.
1. During cooking, press Time/Temp. The cooking time on the
control panel blinks.
2. Use the Control Dial to increase or decrease the cooking time.
The cooking time on the control panel displays the new time and
the Smart Program continues cooking for the new time limit.
3. Within 10 seconds, press Start. The cooking time on the control
panel displays the new time and the Smart Program continues
cooking for the new time limit. The time set becomes the new
default cooking time for this Smart Program.

10
User Manual
Turning the sound On/Off
Turn sound on
• When in Standby mode, press and hold Time/Temp + Keep Warm
buttons until display shows Sound On.
Turn sound off
• When in Standby mode, press and hold Time/Temp + Keep Warm
buttons until display shows Sound Off.
Choosing the temperature scale
• You can choose to show cooking temperature in either Fahrenheit
or Celsius.
• When in Standby mode, press and hold Time/Temp until the display
shows °F or °C.
• Cooking temperature will now show in the scale you chose.
Reset Smart Programs to original settings
Reset Individual Smart Programs
• With the cooker in Standby mode, press and hold one Smart
Program button until the cooker beeps twice and shows Ready.
• While in Cooking mode, press and hold the Smart Program button
until the unit beeps twice and the cooker displays the default time
and temperature.
• The Smart Program’s cooking time and temperature are restored to
the factory default setting.
Reset All Smart Programs
• With the cooker in Ready mode, press and hold Control Dial until
the cooker beeps 3 times and re-displays Ready.
• All Smart Program cooking times and temperatures are restored to
the factory default setting.

11
User Manual
SEAR / SAUTÉ
Use Sear/Sauté in place of a frying or saucepan. Searing browns the
surface for a beautiful finish, and sautéing can deepen the flavors of
your food.
Setting Default Minimum Maximum
Cooking time
20 minutes
(00:20)
10 minutes
(00:10)
1 hour
(01:00)
Cooking
temperature
204° C / 400° F NA NA
How to sear/sauté
Prep
Cut, chop, season or marinate your ingredients according to your recipe.
Preheat
1. Place the cooking pot onto the cooker base. The display shows Ready.
2. Press Sear/Sauté. The cooking time blinks.
To use the default cooking time, skip to step 3.
3. Use the Control Dial to increase or decrease cooking time.
4. Press Start to start preheating. The display shows Preheating.
Cook
1. When display shows Add Food, add ingredients. The display shows
Sear-Sautéing and counts down the time.
2. When timer ends, display shows End.
3. Press Cancel if you want to finish cooking before timer runs out.
4. Press the Control Dial to return to Ready mode.
See ‘Keep Warm’ to learn how to add that function when the Sear-Sauté
program ends.

12
User Manual
BRAISE
Use Braise to brown foods at medium-high heat, then simmer to cook
through at lower heat.
Choose from these settings in the Braise Smart Program:
Setting Default Minimum Maximum
Cooking time
2 hours
(02:00)
1 hour
(01:00)
4 hours
(04:00)
Cooking
temperature
Browning:
110° C / 230° F
Simmering:
85° C to 96° C /
185° F to 205° F
NA NA
How to braise
Prep
Cut, chop, season or marinate your ingredients according to your recipe.
Preheat
1. Place the cooking pot onto the cooker base. The display shows Ready.
2. Press Braise. The cooking time blinks.
To use the default cooking time, skip to step 3.
3. Use the Control Dial to increase or decrease cooking time.
4. Press Start to start preheating. The display shows Preheating.
Cook
1. When display shows Add Food, add ingredients and place the lid on
the cooking pot. The display shows Braise and counts down the time.
2. When timer ends, display shows End.
3. Press Cancel if you want to finish cooking before timer runs out.
The display shows Ready.
If you stop cooking at this point, the system will not enter Keep Warm mode.

13
User Manual
Keep Warm
1. When cooking ends, the cooker automatically enters Keep Warm
mode for up to 3 hours. The display shows Keep Warm.
Press Keep Warm anytime before or during cooking to cancel automatic
Keep Warm.
2. When you’re ready to serve, press Cancel. The display shows Ready.

14
User Manual
SLOW COOK
Use Slow Cook to simmer foods at lower heat for longer periods
of time.
Choose from these settings in the Slow Cook Smart Program:
Setting Default Minimum Maximum
Cooking time
4 hours
(04:00)
3 hours
(03:00)
12 hours
(12:00)
Cooking
temperature
95° C / 203° F NA NA
How to slow cook
Prep
Cut, chop, season or marinate your ingredients according to your recipe.
Cook
1. Place the cooking pot onto the cooker base. The display
shows Ready.
2. Add the recipe ingredients and place the lid on the cooking pot.
3. Press Slow Cook. The cooking time blinks.
To use the default cooking time, skip to step 4.
4. Use the Control Dial to increase or decrease cooking time.
5. Press Start to start preheating. The display shows Slow Cook.
6. When timer ends, display shows End.
7. Press Cancel if you want to finish cooking before timer runs out.
The display shows Ready.
If you stop cooking at this point, the system will not enter Keep Warm mode

15
User Manual
Keep Warm
1. When cooking ends, the cooker automatically enters Keep Warm
mode for up to 3 hours. The display shows Keep Warm.
Press Keep Warm anytime before or during cooking to cancel automatic
Keep Warm.
2. When you’re ready to serve, press Cancel. The display shows Ready.

16
User Manual
MANUAL MODE
Use Manual Mode to cook your own recipes, with the precision
and even cooking temperatures your Instant Precision Dutch Oven
provides. Manual Mode has two options, so you can use the one that
works best for your recipe.
Manual Mode 1: for slow cooking, sous vide or dough proofing, at lower
temperatures with longer cooking times.
Manual Mode #1 Default Minimum Maximum
Cooking time
90 minutes
(01:30)
10 minutes
(00:10)
12 hours
(12:00)
Cooking
temperature
60° C / 140° F 25° C / 77° F 95° C / 203° F
Manual Mode 2: for faster cooking, at higher temperatures with
shorter cooking times.
Manual Mode #2 Default Minimum Maximum
Cooking time
30 minutes
(00:30)
10 minutes
(00:10)
3 hours
(03:00)
Cooking
temperature
149° C / 300° F 100° C / 212° F 204° C / 400° F
How to cook in Manual Mode
Prep
Cut, chop, season or marinate your ingredients according to your recipe.
Preheat
1. Place the cooking pot onto the cooker base. The display
shows Ready.
2. Press Manual. The cooking temperature blinks.
3. Press Manual to toggle between Manual Mode 1 and Manual Mode 2.
The message bar will display your choice.

17
User Manual
4. To change the cooking temperature, press Time/Temp. When the
cooking temperature blinks, use the Control Dial to increase or
decrease the temperature.
5. To change the cooking time, press Time/Temp. When the cooking
time blinks, use the Control Dial to increase or decrease the time.
6. Once you’ve selected the settings, press Start to start preheating.
The display shows Preheating.
Cook
1. When display shows Add Food, add ingredients and place the lid on
the cooking pot (optional, depending on the recipe). The display shows
Mode 1 Cooking or Mode 2 Cooking and counts down the time.
2. When timer ends, display shows End.
3. Press Cancel if you want to finish cooking before timer runs out.
The display shows Ready.
If you stop cooking at this point, the system will not enter Keep Warm mode
See ‘Keep Warm’ to learn how to add that function when the Sear-Sauté
program ends.

18
User Manual
KEEP WARM
Use Keep Warm to hold cooked foods at very low heat until you’re
ready to serve.
Prep
Before starting, have the cooked food in the cooking pot, with the lid on.
Warm
1. Place the cooking pot onto the cooker base. The display
shows Ready.
2. Press Keep Warm. The cooking time on the control panel blinks.
• To use the default cooking time, proceed to step 3.
• To change the cooking time, use the Control Dial to increase or
decrease the cooking time.
3. Press Start to start warming. The display shows Keep Warm and
counts down the time.
4. When you are ready to serve, press Cancel. The display
shows Ready.
Be careful: The Cooking Pot and Lid get very hot while using Keep
Warm. Use care when touching hot surfaces and when removing
food to avoid burns. Failure to follow the safety instructions may
result in personal injury and/or property damage.

19
User Manual
CLEANING
Clean your Instant Precision Dutch Oven after each use. Always unplug
the unit and let all parts cool to room temperature before cleaning.
Before use or storing, make sure all surfaces are dry.
Part Cleaning instructions
Cooking pot • To preserve the enamel coating, we
recommend hand washing if possible with
mild soap.
• Dishwasher safe.
• Wash after each use.
• If there is tough or burned food residue
at the bottom, soak in hot water for a few
hours for easy cleaning.
• Hard water staining may require a vinegar-
dampened sponge and some scrubbing
to remove.
• Make sure all exterior surfaces are dry
before placing in cooker base.
Lid • To preserve the enamel coating, we
recommend hand washing with mild soap.
Cooker base • Hand wash only. Do not use the dishwasher.
• Wipe the inside of the outer pot with
a barely damp cloth. Allow to dry
completely before inserting inner pot.
• Clean cooker base and control
panel with a soft, barely damp
cloth or sponge.
Power cord • Hand wash only. Do not use the dishwasher.
• Use a barely damp cloth to wipe any
particles off the cord.
*Some discoloration may occur after machine washing, but this will not affect the
cooker’s safety or performance.

20
User Manual
TROUBLESHOOTING
If you can’t resolve the problem yourself or if you have questions, get in
touch with Customer Care and we’ll be happy to help.
Email: support@instantpot.com
Problem Cause Solution
The display remains
blank after connecting
the power cord.s
Bad power connection or
no power.
Inspect power cord
for damage. If you
notice damage, contact
Customer Care.
Check outlet to make
sure it is powered.
Cooker’s electrical fuse
has blown.
Contact Customer Care.
E1 Error code appears
on the display.
Faulty sensor. Contact Customer Care.
Any other servicing must be performed by an authorized representative.

21
User Manual
LEARN MORE
There’s a whole world of Instant
®
cooking information and help just
waiting for you. Here are some of the most helpful resources.
Register your product
Instantpot.com/register
Contact Consumer Care
In the Instant Connect
™
App
Instantpot.com/customer-care-center
support@instantpot.com
Download the Instant Connect
™
App
Discover guided cooking and recipes
Available at iOS and Android app stores
Cooking charts and more recipes
Instantpot.com
How-to videos, tips and more
Instantpot.com
Replacement parts and accessories
Instantpot.com
Join the community
Product specifications
Model Volume Wattage Power
DOMC6000 6 Quarts
5.7 Litres
1500 W 120 V/
60 Hz

22
User Manual
WARRANTY
One (1) Year Limited Warranty
This One (1) Year Limited Warranty applies to purchases made from authorized retailers
of Instant Pot Brands by the original appliance owner and is not transferable. Proof of
original purchase date and, if requested by Instant Pot Brands, return of your appliance,
is required to obtain service under this Limited Warranty. Provided the appliance was
used in accordance with the use & care instructions, Instant Pot Brands will, in its sole
and exclusive discretion, either: (i) repair defects in materials or workmanship; or (ii)
replace the appliance. In the event that your appliance is replaced, the Limited Warranty
on the replacement appliance will expire twelve (12) months from the date of receipt.
Failure to register your product will not reduce your warranty rights. The liability of
Instant Pot Brands, if any, for any allegedly defective appliance or part will not exceed
the purchase price of a comparable replacement appliance.
What is not covered by this warranty?
• Products purchased, used, or operated outside of the United States and Canada.
• Products that have been modified or attempted to be modified.
• Damage resulting from accident, alteration, misuse, abuse, neglect, unreasonable
use, use contrary to the operating instructions, normal wear and tear, commercial
use, improper assembly, disassembly, failure to provide reasonable and necessary
maintenance, fire, flood, acts of God, or repair by anyone unless directed by an
Instant Pot Brands representative.
• Use of unauthorized parts and accessories.
• Incidental and consequential damages.
• The cost of repair or replacement under these excluded circumstances.
EXCEPT AS EXPRESSLY PROVIDED HEREIN AND TO THE EXTENT PERMITTED BY
APPLICABLE LAW, INSTANT POT BRANDS MAKES NO WARRANTIES, CONDITIONS
OR REPRESENTATIONS, EXPRESS OR IMPLIED, BY STATUTE, USAGE, CUSTOM OF
TRADE OR OTHERWISE WITH RESPECT TO THE APPLIANCES OR PARTS COVERED BY
THIS WARRANTY, INCLUDING BUT NOT LIMITED TO, WARRANTIES, CONDITIONS, OR
REPRESENTATIONS OF WORKMANSHIP, MERCHANTABILITY, MERCHANTABLE QUALITY,
FITNESS FOR A PARTICULAR PURPOSE OR DURABILITY.

23
User Manual
Some states or provinces do not allow for: (1) the exclusion of implied warranties of
merchantability or fitness; (2) limitations on how long an implied warranty lasts; and/or
(3) the exclusion or limitation of incidental or consequential damages; so these
limitations may not apply to you. In these states and provinces, you have only the implied
warranties that are expressly required to be provided in accordance with applicable
law. The limitations of warranties, liability, and remedies apply to the maximum extent
permitted by law. This limited warranty gives you specific legal rights, and you may also
have other rights which vary from state to state or province to province.
Product Registration
Please visit
www.instantpot.com/register to register your new Instant Pot Brands
appliance. Failure to register your product will not diminish your warranty rights. You will
be asked to provide the store name, date of purchase, model number (found on the back
of your appliance) and serial number (found on the bottom of your appliance) along with
your name and email address. The registration will enable us to keep you up to date with
product developments and recipes, and contact you in the unlikely event of a product
safety notification. By registering, you acknowledge that you have read and understand
the instructions for use, and warnings set forth in the accompanying instructions.
Warranty Service
To obtain warranty service, please contact our Consumer Care Department by email
to
support@instantpot.com. You can also create a support ticket online at
www.instantpot.com. If we are unable to resolve the problem, you may be asked to
send your appliance to the Service Department for quality inspection. Instant Pot Brands
is not responsible for shipping costs related to warranty service. When returning your
appliance, please include your name, mailing address, email address, phone number,
and proof of the original purchase date as well as a description of the problem you are
encountering with the appliance.

24
User Manual
NOTESNOTES

25
User Manual
NOTES

DO NOT place this
appliance on or close to
a gas or electric burner,
or inside an oven. Always
operate this appliance on
a stable, non-combustible,
level surface, such as a
kitchen countertop.
In Canada, distributed by
Instant Pot Brands
199 Bay Street, Suite 4000
Toronto, ON M5L 1A9 Canada
In U.S., distributed by
Instant Pot Brands
3025 Highland Parkway, Suite 700
Downers Grove, IL 60515 U.S.
instantpot.com
© 2024 Instant Pot Brands
140-0038-01, 140-0051-01, 140-0052-01,
140-0053-01, 140-0054-01, 140-0055-01
Art release date
04/23/2024
INSTANT is a
registered trademark
of Instant Pot Brands