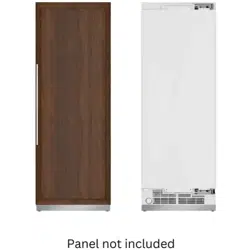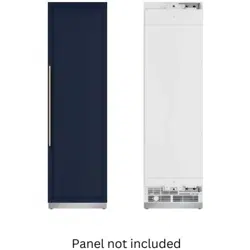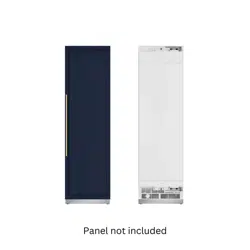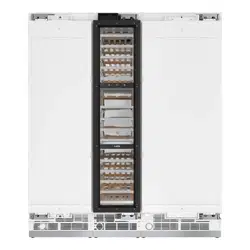
Panel Ready Refrigerator Column
Models: KM-PRC-F18, KM-PRC-F24, KM-PRC-R24,
KM-PRC-R30
Stay informed with the latest information for your
KoolMore Reserve Appliance.
Scan here for the latest version of your manual.
If you need any assistance or have questions, our customer support
team is here to help.
P- 718-576-6342 E- Suppor[email protected]
Please write down the model number and serial number below for future reference. Both numbers are located on the
rating label on the back of your unit or inside of the unit and are needed to obtain warranty service. You may also want to
staple your receipt to this manual as it is the proof of your purchase and may also be needed for service under warranty.
Model Number: ______________________________________
Serial Number: _______________________________________
Date of Purchase: ____________________________________
To better serve you, please do the following before contacting customer service:
If you received a damaged product, immediately contact the retailer or dealer that sold you the product.
Read and follow this instruction manual carefully to help you install, use, and maintain your unit.
Refer to the Troubleshooting section of this manual as it will help you diagnose and solve many common issues.

Contents
Safety .................................................................................. 4
Parts List ............................................................................... 8
Operation .............................................................................. 10
Display Panel ........................................................................................ 10
Parts Information ............................................................................... 15
Maintenance ...................................................................... 17
Troubleshooting ................................................................... 20
Warranty ................................................................................ 21

4
Safety
Please read this manual before using the product!
Dear Valued Customer,
We wish you to get the best results from your product that has been manufactured meticulously at
modern plants and tested with detailed quality control checks.
For this reason, we recommend that you read this user manual thoroughly before starting the product.
If you hand over the product to someone else, please remember to give the user manual as well.
This manual will help you use your appliance in a fast and safe way.
Please read this user manual carefully before installing and using the product.
Always follow the applicable safety instructions.
Keep the user manual in an easily accessible place for further use.
Please read all the other documents provided with the product.
Please keep in mind that this manual may apply to several product models.
This manual expressly indicates the differences between various models.
5
User Safety:
• Suitable for children aged 8 and older, and individuals with limited abilities, provided they under-
stand the safety instructions and are supervised.
• Children should not play with or clean the appliance without supervision.
Electrical Safety:
• Always ensure the appliance is plugged into a grounded outlet with the correct fuse rating.
• If the appliance malfunctions or encounters a failure, unplug it and do not
use it until it is repaired by an authorized service provider to avoid electric
shock.
• Avoid water contact with the appliance, especially when it’s operating or
plugged in, to prevent electric shock.
• Never handle the plug with wet hands or pull the cable to unplug; always
grasp the plug.
Usage and Maintenance:
• Unplug the appliance when not in use, or during cleaning, installation, or repair.
• Do not use it with a loose wall socket or connect it to energy-saving devices, as these could harm
the appliance.
• Ensure only authorized service providers perform installations and electrical connections.
Food Safety:
• Do not consume ice cream or ice directly from the freezer to avoid frostbite.
• Handle frozen food with dry hands to prevent it from sticking.
• Avoid freezing bottled or canned liquids as they might burst.
• Avoid Steam Cleaning: Never use steam or steam cleaners to clean or defrost the refrigerator.
Steam can contact electrical components, leading to short circuits or electric shock.
• Defrosting: Do not use mechanical devices or other means to accelerate the defrosting process,
other than those recommended by the manufacturer.
• Structural Integrity: Do not use the refrigerator’s parts, such as the door or drawers, as supports or
steps. This could cause the appliance to tip over or damage its components.
• Refrigerant Safety: Avoid damaging parts where the refrigerant circulates with drilling or cutting
tools. Leaking refrigerant can cause skin irritation or eye injuries.
• Ventilation: Do not cover or block the ventilation holes of the refrigerator with any objects.
• Storage of Liquids: Always store high-proof beverages tightly closed and in an upright position.
• Flammable Materials: Do not use or store ammable sprays, gases, or explosive materials near or
in the refrigerator, as there is a risk of re or explosion.
• Electrical Safety: Keep liquids away from electrical parts to prevent electric shock or re. Never
expose the refrigerator to rain, snow, direct sunlight, or wind.
• Temperature-Sensitive Items: Do not store items requiring precise temperature control (like vac-
cines, heat-sensitive medications, or scientic materials) in the refrigerator.
• Extended Non-Use: If not using the refrigerator for an extended period, unplug it and remove all
food.
• Optical Safety: If the refrigerator has a blue light, avoid looking at it with optical tools.
• Mechanical Controls: For refrigerators with mechanical thermostats, wait 5 minutes after unplug-
ging before plugging in again.
• Loading: Do not overload the refrigerator. Overloading can cause items to fall when the door is
opened, leading to injury or damage.
• Handling: If the refrigerator has a door handle, do not use it to move the appliance as it might be-
come loose.

6
• Moving Parts: Be cautious not to trap your hand or any body part in the moving parts of the refrig-
erator.
• Ice Machine: Do not insert your hand or any objects into the ice machine while it is operating.
Intended Use:
• Domestic Use: This product is designed for domestic use only and is not suitable for commercial
use or any purpose other than storing food.
• Manufacturer Responsibility: The manufacturer is not responsible for damages from improper use
or transportation.
• Spare Parts Availability: Original spare parts will be available for 10 years after the purchase date
of the product.
Children’s Safety:
Key Safety: If the refrigerator has a lock, keep the key out of children’s reach.
Play Warning: Do not allow children to play with the refrigerator.
Compliance with the WEEE Directive and Disposing the Waste Product:
WEEE Directive: This product adheres to the Waste Electrical and Electronic Equipment Directive
(WEEE Directive 2012/19/EU).
Disposal Instructions:
• Before Disposal: Remove the door, leave the shelves to prevent children from getting trapped in-
side.
• Recycling: The product contains recyclable materials; do not dispose of it as unsorted waste. In-
stead, take it to a designated recycling center for electrical and electronic equipment.
• Local Authorities: Consult local authorities for the nearest recycling center.
Additional Warning:
• Danger: There’s a specic warning before disposing of the old refrigerator or freezer to
ensure children’s safety by removing doors and shelves.
Packaging Information:
• Recyclable Packaging: The packaging materials are made from recyclable materials in line with
National Environmental Regulations.
• Disposal Instructions:
• Do not dispose of packaging materials with normal domestic waste or other waste types.
• Take these materials to a recycling point designated by local authorities.
Hydrocarbon (HC) Warning:
• Cooling System: The refrigerator’s cooling system contains R-600a, a hydrocarbon refrigerant.
• Attention Required:
• Handle and transport the product with care to avoid damaging the cooling system, which could
lead to HC leakage.
• If damaged, keep the product away from potential ignition sources to prevent re, and ventilate the
room.
• Repair should only be carried out by a licensed service personnel.
Additional Warning:
• Risk of Fire or Explosion:
• The refrigerator is ammable; do not use mechanical devices to defrost it.

7
• Do not use electrical appliances inside the refrigerator.
• Do not store products that emit ammable gases (e.g., sprays) in the refrigerator.
• Ensure that the refrigerator’s ventilation is not obstructed.
Safety Instructions:
Before Use: Read the instructions to ensure proper and safe operation.
During Use: Follow all safety instructions provided with the product.
Gas Safety Information:
• Gas Leak Warning: If the refrigerator is damaged and you detect a gas leak, avoid contact with the
gas. It can cause frostbite upon skin contact. Specically, if the cooling system contains R134a,
there’s a risk of frostbite.
• Gas Type Identication: The type of gas used in the refrigerator is indicated on a plate located on
the left wall inside the refrigerator.
• Disposal Warning: Never dispose of the refrigerator by throwing it into re, as this could lead to
hazardous situations.
Instructions for Products with a Water Dispenser/Ice Machine:
• Operating Pressure: Ensure the water pressure for the cold water inlet is between 1.5 to 5.5 bars
(80 psi). If the water pressure exceeds this range, install a pressure limiting valve to the main sys-
tem.
• Low Pressure Solution: If the main pressure is below 1 bar, consider using an auxiliary pump to
compensate.
• Water Pressure Check: If unsure about checking the water pressure, consult a professional plumb-
er.
• Installation Requirements:
• If there’s a risk of water hammer, use a water hammer protection device during installation.
• For installations with potential water impact, consult professional plumbers.
• Do not install on the hot water inlet to avoid damage.
• Ensure the water temperature is within the safe operating range of 0.6°C (33°F) to 38°C (100°F).
Additional Warning:
Water Connection: Never connect the refrigerator to a cold water supply with a pressure below 1.5
bars (80 psi).
8
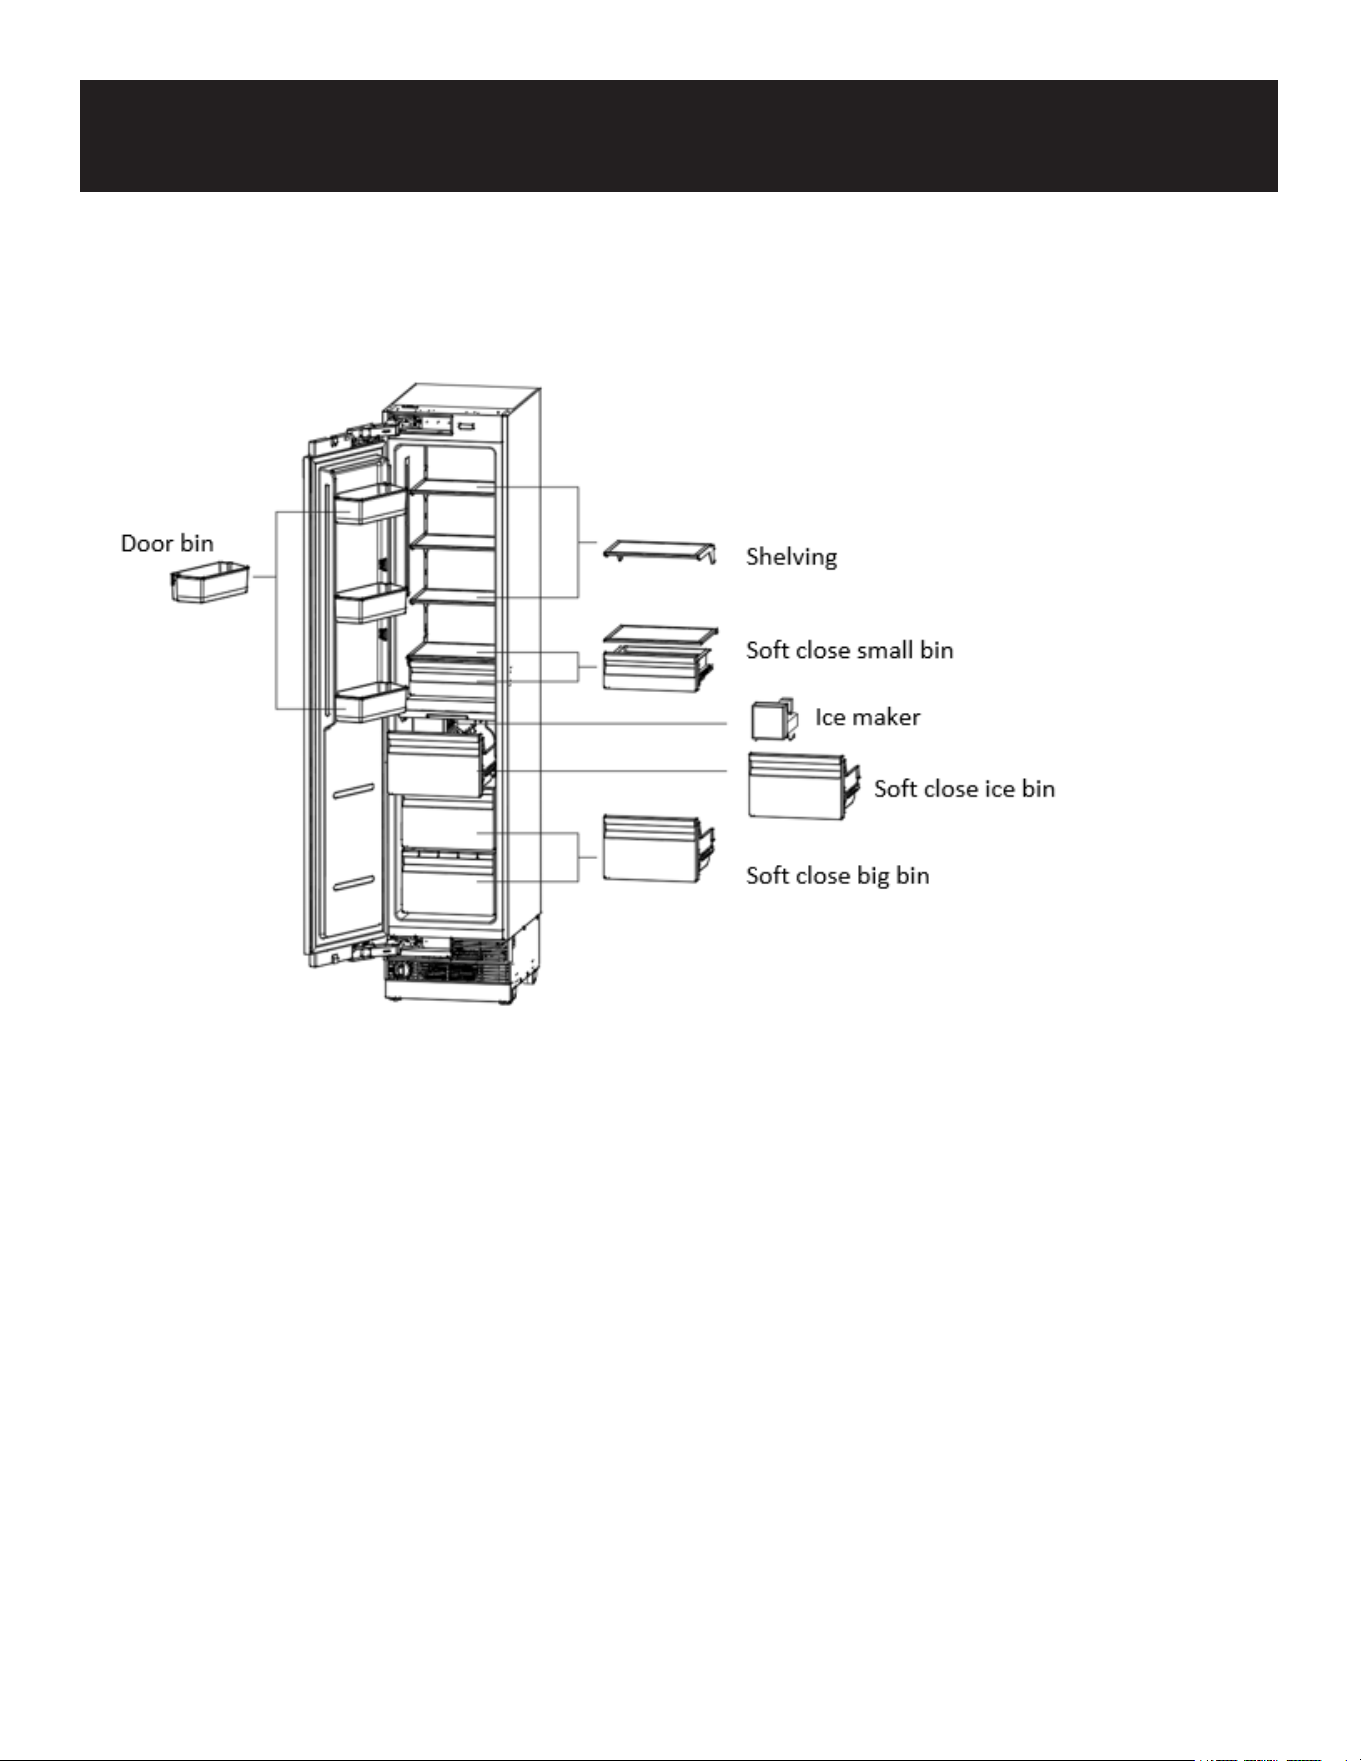
Freezer Components:
Shelving:
Features:
• Selectable shelf heights, allowing for customization of storage space.
• Made of heat-treated safety glass, ensuring durability and safety.
Ice Maker (if applicable):
Features:
• Removable ice container for easy access and cleaning.
• Comes with a hygienic ice scoop for serving ice safely.
Self Close Bins:
Features:
• Freezer bins have a self-closing mechanism, which ensures they close properly to maintain cold
temperatures and prevent frost build-up.
Door Bins:
Features:
• Adjustable and removable, allowing for exible storage options and easy cleaning or reorganiza-
tion.
Parts List
9
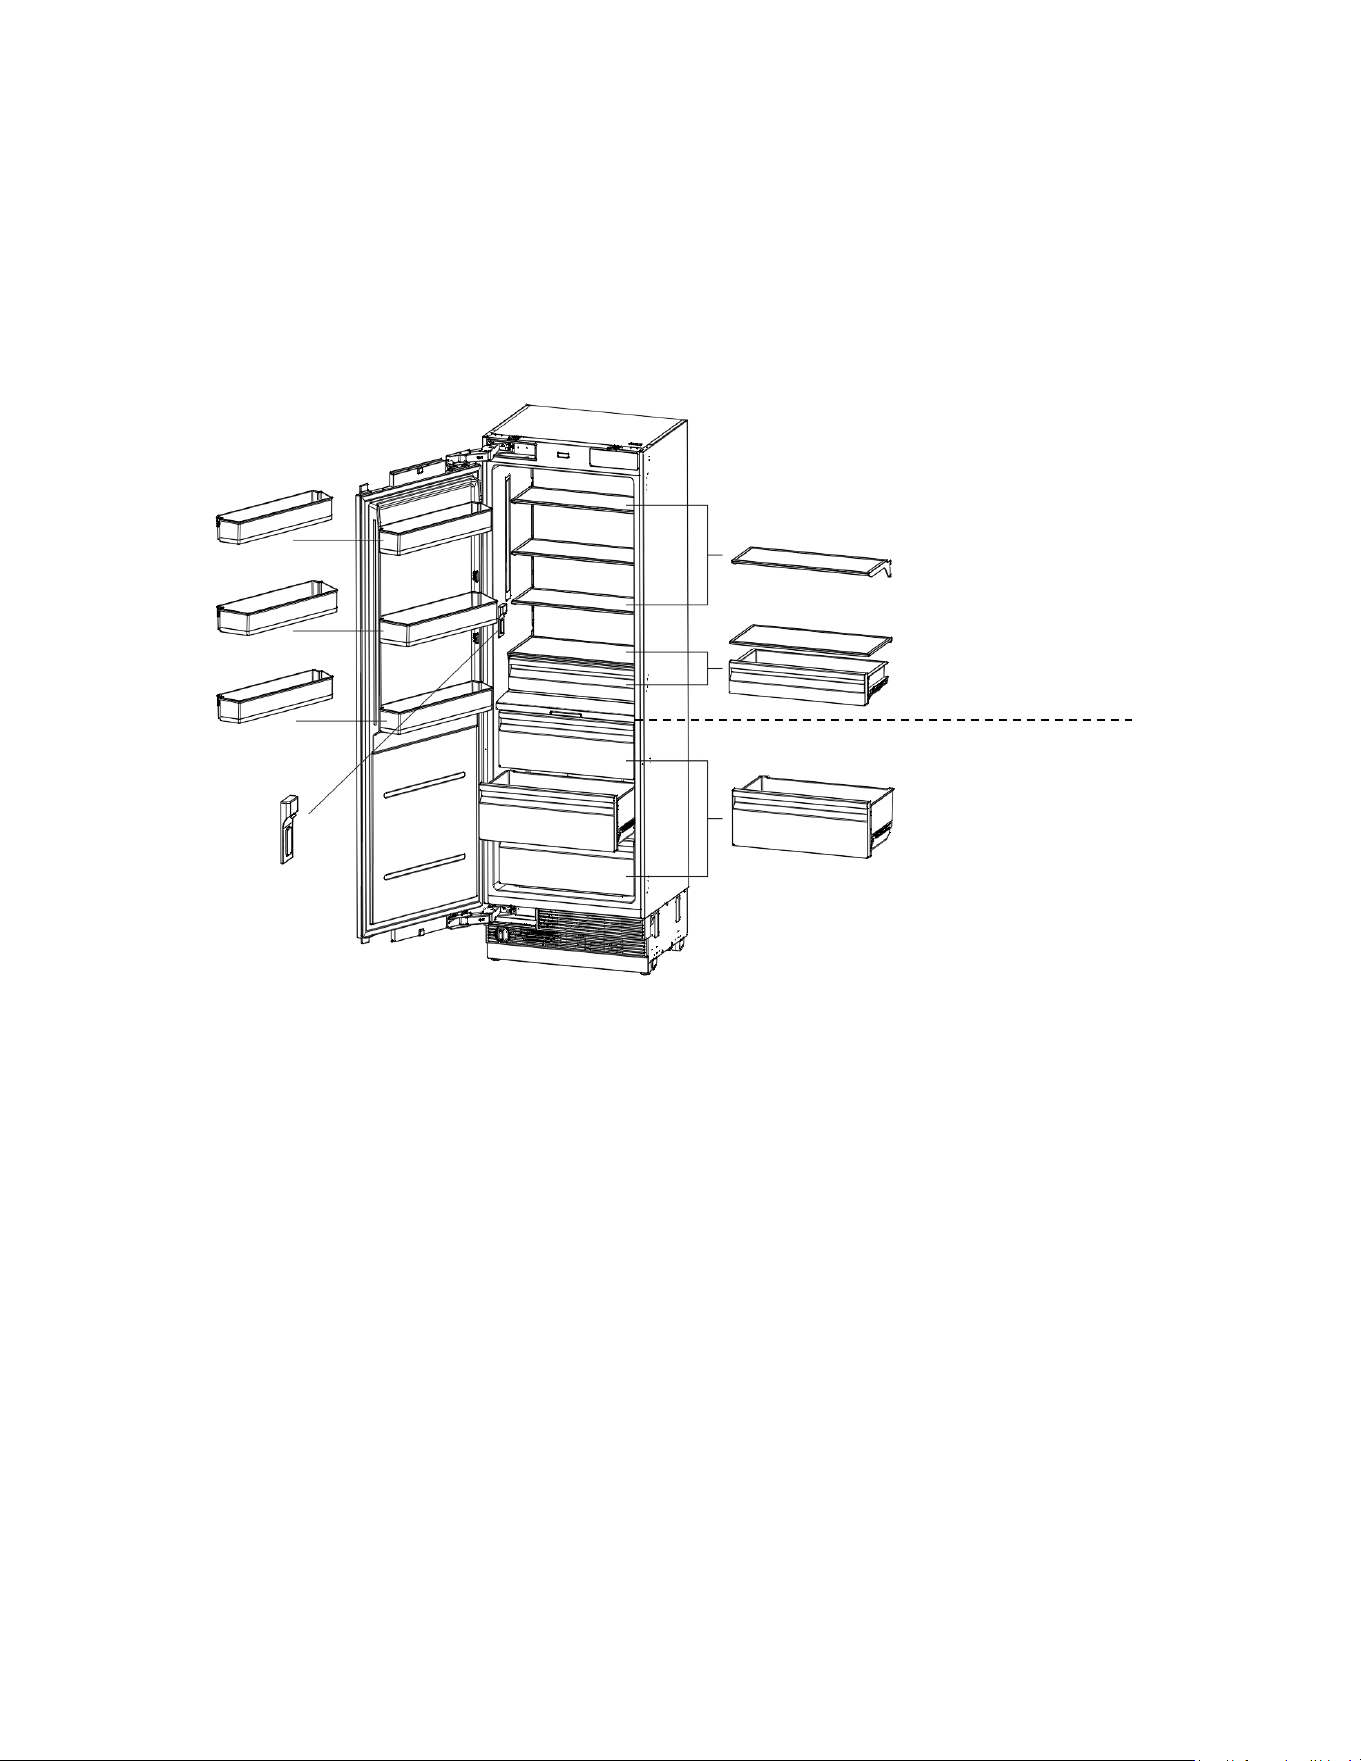
Refrigerator Components:
Shelving:
Features:
• Selectable shelf heights, allowing for customization of storage space.
• Made of heat-treated safety glass, ensuring durability and safety.
Water Dispenser (if applicable):
Features:
• Removable ice container for easy access and cleaning.
• Comes with a hygienic ice scoop for serving ice safely.
Soft Close Bins:
Features:
• Soft close mechanism that ensures bins close quietly and properly, enhancing the user experi-
ence by reducing noise and maintaining temperature consistency.
Door Bins:
Features:
• Adjustable and removable, providing exible storage options for different sizes of items.
• Includes a gallon bottle door bin, specically designed to accommodate larger containers like
gallon bottles.
Door bin
Gallon bottle door bin
Door bin
Shelving
Soft close small bin
SPE. TEMP. zone
Water
dispenser
Soft close big bin
REF. TEMP. zone
10
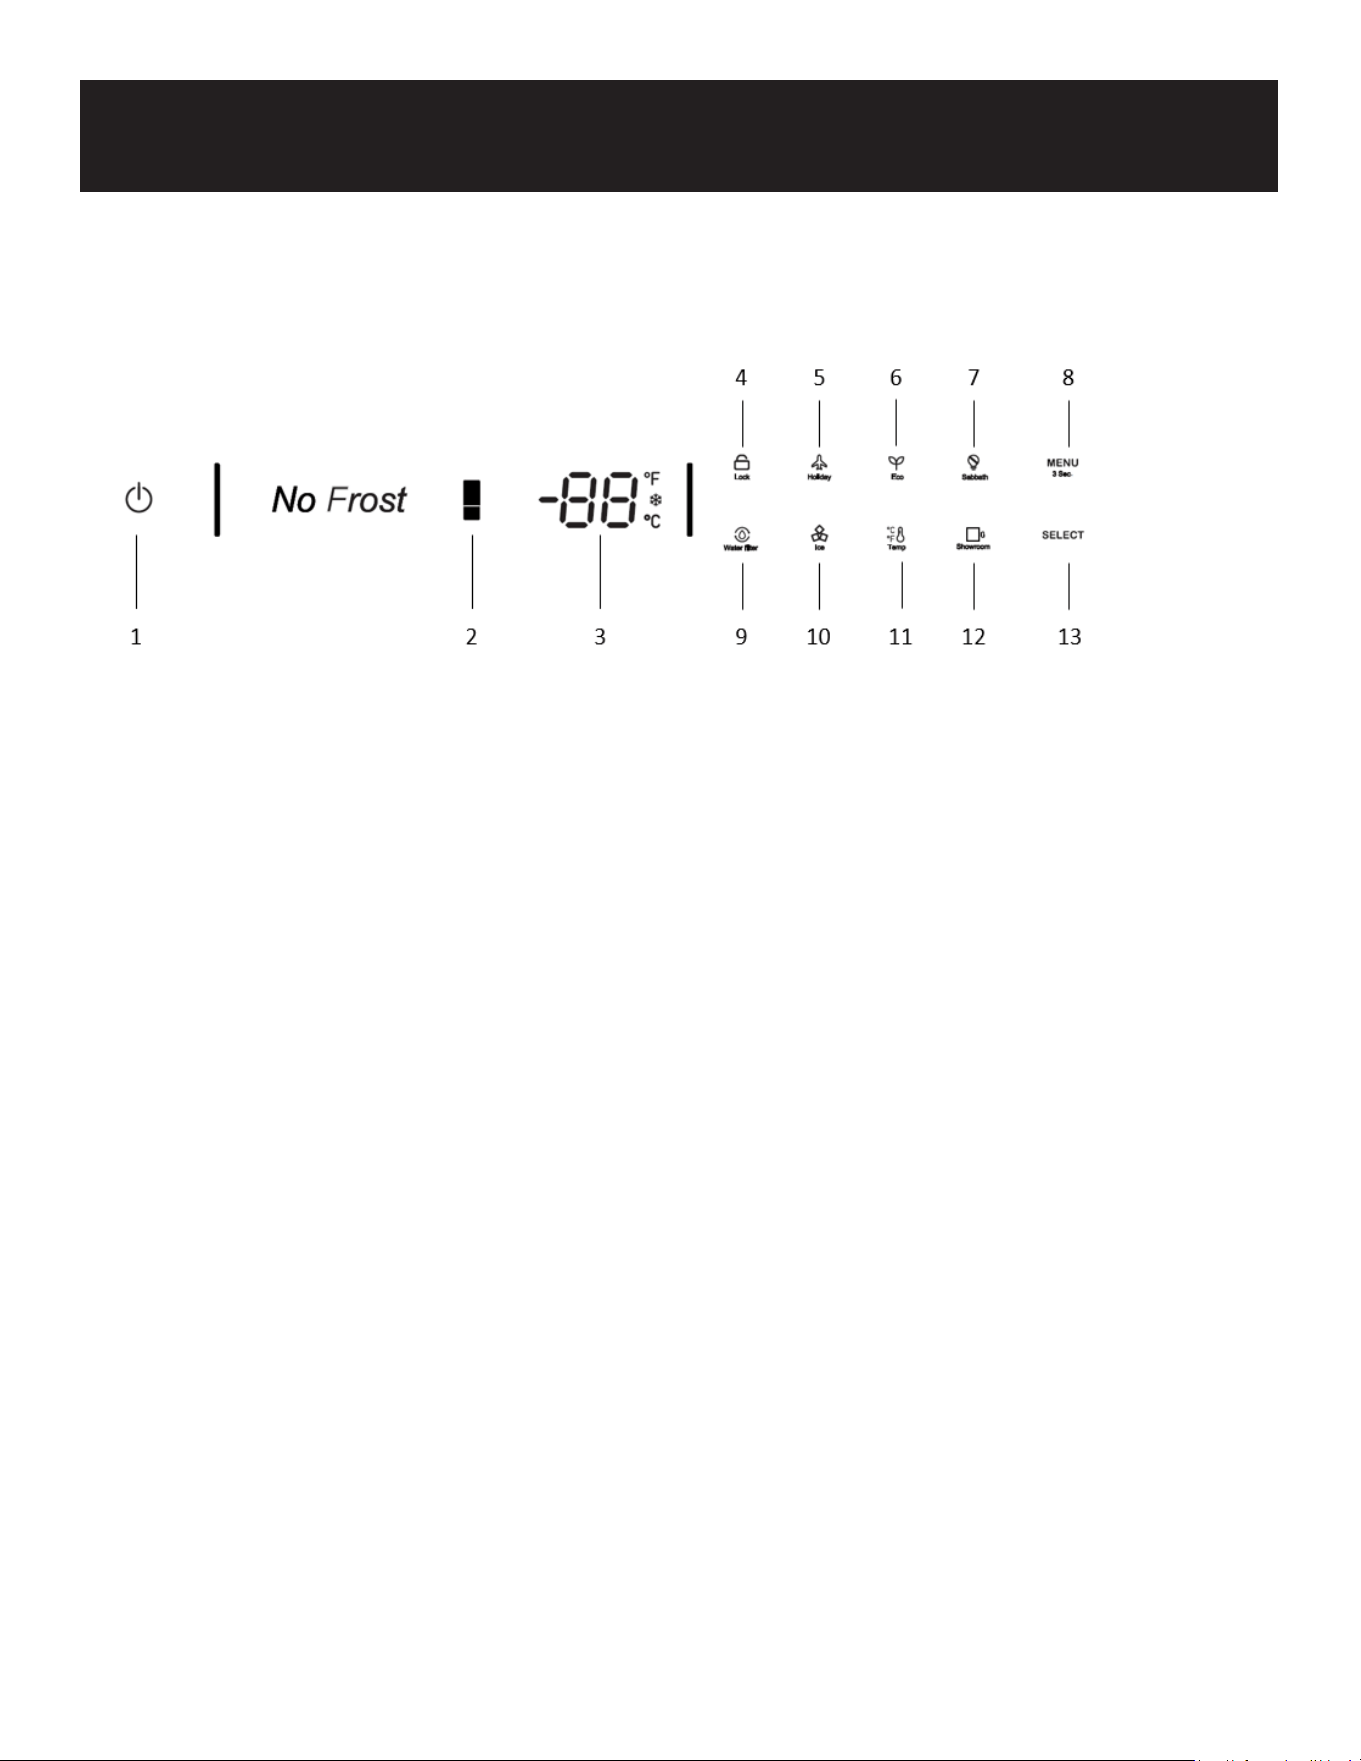
Display Panel
Freezer
1. On/Off button:
Serves to switch the whole appliance On and Off.
Press the button to switch on the product, the product will be switched on in 5 seconds.
Press the on/off button for 1.5 seconds to switch off.
2. Colder/Warmer button:
Press button to change the freezer compartment temperature from -7°F (-14°C) to -11°F (-24°C).
After regulation is stopped, the neon tube will ash for 5 seconds and then take effect.
Super freezing function will be enabled if key pressing after -11°F (-24°C) symbol illuminate on the
display.
The super freezing function will be enabled.
The super freezing feature assists with periods of high freezer use, full grocery loads, or temporarily
warm room temperatures/complete defrost.
After the super cool cycle to its previous setting.
3. Temp display:
Displays the set temperature of the freezer.
Fahrenheit, Celsius, Super freezer lamp illuminate.
4. Lock:
Press lock key continuously for 3 seconds and the lock icon will light up.
Press lock lock key for 3 seconds to unlock the icon.
All of the following operations must be performed in the unlocked state.
5. Vacation mode:
Press the MENU button till the holiday symbol illuminates, then press the SELECT button to enable the
function.
When the Holiday Mode function is enabled, the freezer temperature is set at 0°F (-18°C) automatical-
ly.
Before leaving:
Operation

11
Turn the ice maker to OFF on the control panel.
Shut off the water supply to the appliance.
Remove the water lter.
Discard the rst full bin of ice.
6. Eco mode:
Press the MENU button till the Eco Mode illuminates, then press the SELECT button to enable the
function.
When the Eco Mode function is enabled, the freezer temperature is set at 5°F (-15°C) automatically.
7. Shabbat Mode:
Press the MENU button till the Sabbath mode symbol illuminates, then press the SELECT button to
enable the function.
When the Sabbath mode function is enabled, all lights, buzzers, display panels will be switched off.
8. Menu/Child lock:
By pressing the MENU button for 3 seconds, you may lock/unlock the control panel.
The child lock is a feature for preventing children from changing the product settings.
9. Water lter (if applicable):
After the replacement is completed, the water lter symbol ashes and beeps to advise the user to
replace the water lter.
Press the SELECT button for 3 seconds to reset.
The set replacement time is 180 days.
10. Ice Making (if applicable):
Press the MENU button till the ice making symbol illuminates, then press the SELECT button to enable
the function.
When the ice making function is enabled, the ice maker will automatically start making ice.
Note: Prepare the water lter for use before using the ice maker for the rst time.
After connecting the freezer to a water source or after replacing the water lter, the rst full container
of ice must be discarded.
11. Temperature unit:
Press the MENU button till the Celsius and Fahrenheit selection symbols illuminate to change be-
tween Celsius and Fahrenheit. After that, press the SELECT button to conrm.
12. Show room mode:
Press the MENU button till the show room symbol illuminates, then press the SELECT button to en-
able the function.
This mode is used when the refrigerator is on display in a retail store or if you want to turn the cooling
off and deactivate all other functions except interior lighting.
Note: Do not store any food items while in show room mode, as the appliance then remains at room
temperature.
13. Select:
After selecting the menu, then press the SELECT button to conrm the function.
Note:Recommended operating temperature Freezer : 0°F (-18 °C)
12
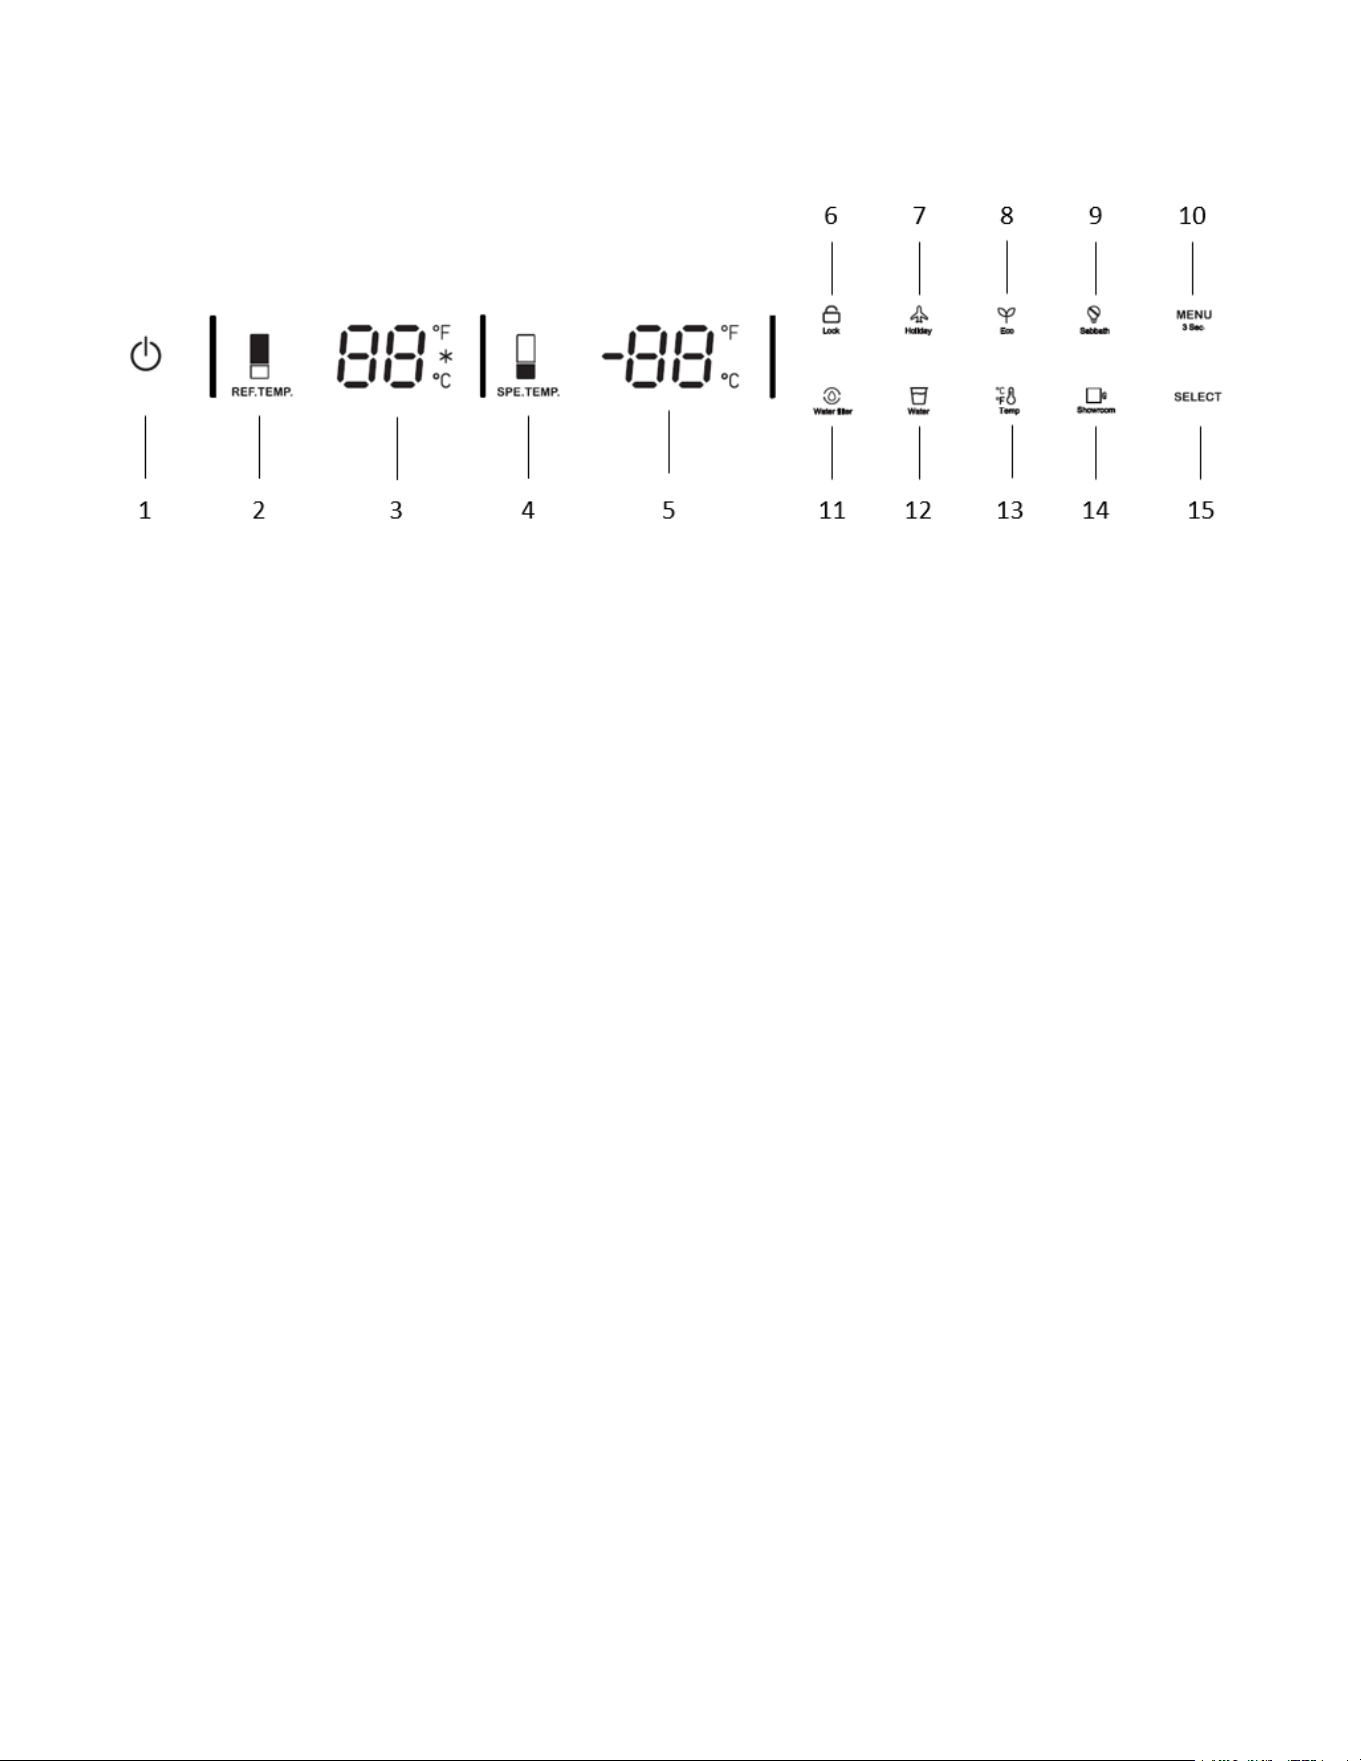
Display Panel
Refrigerator
1. On/Off button:
Serves to switch the whole appliance On and Off.
Press the button to switch on the product, the product will be switched on in 5 seconds.
Press the on/off button for 1.5 seconds to switch off.
2. REF. TEMP. zone Colder/Warmer Button:
Press REF. TEMP. button to adjust temperature from 36°F (2°C) to 46°F (8°C).
After the temperature regulation is stopped, the nixie tube will ash for 5 seconds and take effect.
Super cooling function will be enabled if keep pressing after 36°F (2°C).
When the snow symbol illuminate on the display, the super cooling function will be enabled.
The super cooling feature assists with periods of high refrigerator use, full grocery loads, or temporar-
ily warm room temperatures/complete defrost.
After the super cool cycle completes, the refrigerator will return to its previous setting.
3. Temp. display:
Displays the set temperature of the REF. TEMP. zone Fahrenheit, Celsius. Super cooling lamp illumi-
nate.
4. SPE. TEMP. zone Colder/Warmer Button:
Press SPE. TEMP. button to adjust temperature from 30°F (-1°C) to 41°F (5°C).
After the temperature regulation is stopped, the nixie tube will ash for 5 seconds and take effect.
5. Temp. display:
Displays the set temperature of the SPE. TEMP. zone Fahrenheit, Celsius.
6. Lock:
Press the lock key continuously for 3 seconds and the lock icon will light up. Press the lock key for 3
seconds to unlock the icon. All the following operations must be performed in the unlocked state.
7. Vacation mode:
Press the MENU button till the holiday symbol illuminates, then press the SELECT button to enable the
function.
When the Holiday Mode function is enabled, the REF. TEMP. and SPE. TEMP. will be set at 63°F (17°C)
automatically.

13
Note: Do not place food in the fresh food compartment when Holiday Mode is enabled.
8. Eco mode:
Press the MENU button till the Eco Mode illuminates, then press the SELECT button to enable the
function.
When the Eco Mode function is enabled, the REF. TEMP. will be set at 41°F (5°C), automatically the
SPE. TEMP. will be set at 41°F (5°C).
9. Shabbat Mode:
Press the MENU button till the Sabbath mode symbol illuminates, then press the SELECT button to
enable the function.
When the Sabbath Mode function is enabled, all lights, buzzers, display panels will be switched off.
10. Menu/Child lock:
By pressing the MENU button for 3 seconds, you may lock/unlock the control panel.
The child lock is a feature for preventing children from changing the product settings.
11. Water lter (if applicable):
The water lter symbol ashes and beeps to advise the user to replace the water lter.
After the replacement is completed, press the SELECT button for 5 seconds to reset.
The set replacement time is 180 days.
12. Water dispenser (if applicable):
Press the MENU button till the water dispenser symbol illuminates, then press the SELECT button to
enable the function.
When the water dispenser is enabled, fresh water can be provided from the dispenser tted on the
internal wall.
Note: Prepare the water lter for use before using the water dispenser.
After connecting the refrigerator to a water source or after replacing the water lter, ll and discard
two full containers of water.
13. Temperature unit:
Press the MENU button till the Celsius and Fahrenheit selection symbol illuminates to change be-
tween Celsius and Fahrenheit. After that, press the SELECT button to conrm.
14. Show room mode:
Press the MENU button till the show room symbol illuminates, then press the SELECT button to en-
able the function.
This mode is used when the refrigerator is on display in a retail store or if you want to turn the cooling
off and deactivate all other functions except interior lighting.
Note: Do not store any food items while in show room mode, as the appliance then remains at room
temperature.
15. Select:
After selecting menu, then press SELECT button to conrm the function.
Note: Recommended operating temperature REF. TEMP. : 39°F (4°C) SPE. TEMP. : 34°F(1°C)

14
Before Using the Refrigerator
Things to do for energy saving
Connecting your refrigerator to systems that save energy is dangerous as they may cause damage on
the product.
• Do not leave the doors of your refrigerator open for a long time.
• Do not put hot food or drinks in your refrigerator.
• Do not overload the refrigerator. Cooling capacity will fall when the air circulation in the refrigerator
is hindered.
• Do not place the refrigerator in places subject to direct sunlight.
• Install the product at least 1 ft away from heat sources such as hobs, ovens, heater units and
stoves and at least 2 inches away from electrical ovens.
• Pay attention to store your food in refrigerator in closed containers.
• You can remove the drawer shelf of the freezer compartment to ll the freezer compartment with
maximum amount of food.
• The given energy consumption value of the refrigerator has been determined with the freezer com-
partment shelf or the drawer removed and the refrigerator lled with maximum amount of food.
• There is no harm in using a shelf or drawer according to the shapes and sizes of food to be frozen.
• Thawing the frozen foods in the fridge compartment both saves energy and reserves the quality of
the foods.
• Temperature of the room where your refrigerator is located should be at least 50°F. Operating your
refrigerator under cooler conditions is not recommended with regard to its eciency.
• If two coolers are to be installed side by side, there should be at least 2 inches distance between
them.
Recommendations About the Fresh Food Compartment
Make sure that the food does not touch the temperature sensor in fresh food compartment.
To allow the fresh food compartment to keep its ideal storage temperature, the sensor must not be
hindered by food.
Do not place hot foods or beverages inside the product.
Initial Use
Before using the product, make sure that all preparations have been made in accordance with the
instructions given in the “Important Instructions Regarding Safety and Environment” and “Installation
Instructions” chapters.
Clean the interior of the refrigerator as recommended in the “Maintenance and Cleaning” section.
Before you start the refrigerator, make sure that the interior is dry.
Plug the refrigerator in a grounded socket. The interior illumination is lit when the door of the refriger-
ator is open.
Operate the refrigerator for 6 hours without placing any food in it and do not open its door unless it is
necessary.
You will hear a noise when the compressor starts up. The liquids and gases sealed within the refriger-
ator system may also give rise to noise, even if the compressor is not running and this is quite normal.
WARNING
!
15
Front edges of the refrigerator may feel warm. This is normal. These areas are designed to be warm
to avoid condensation.
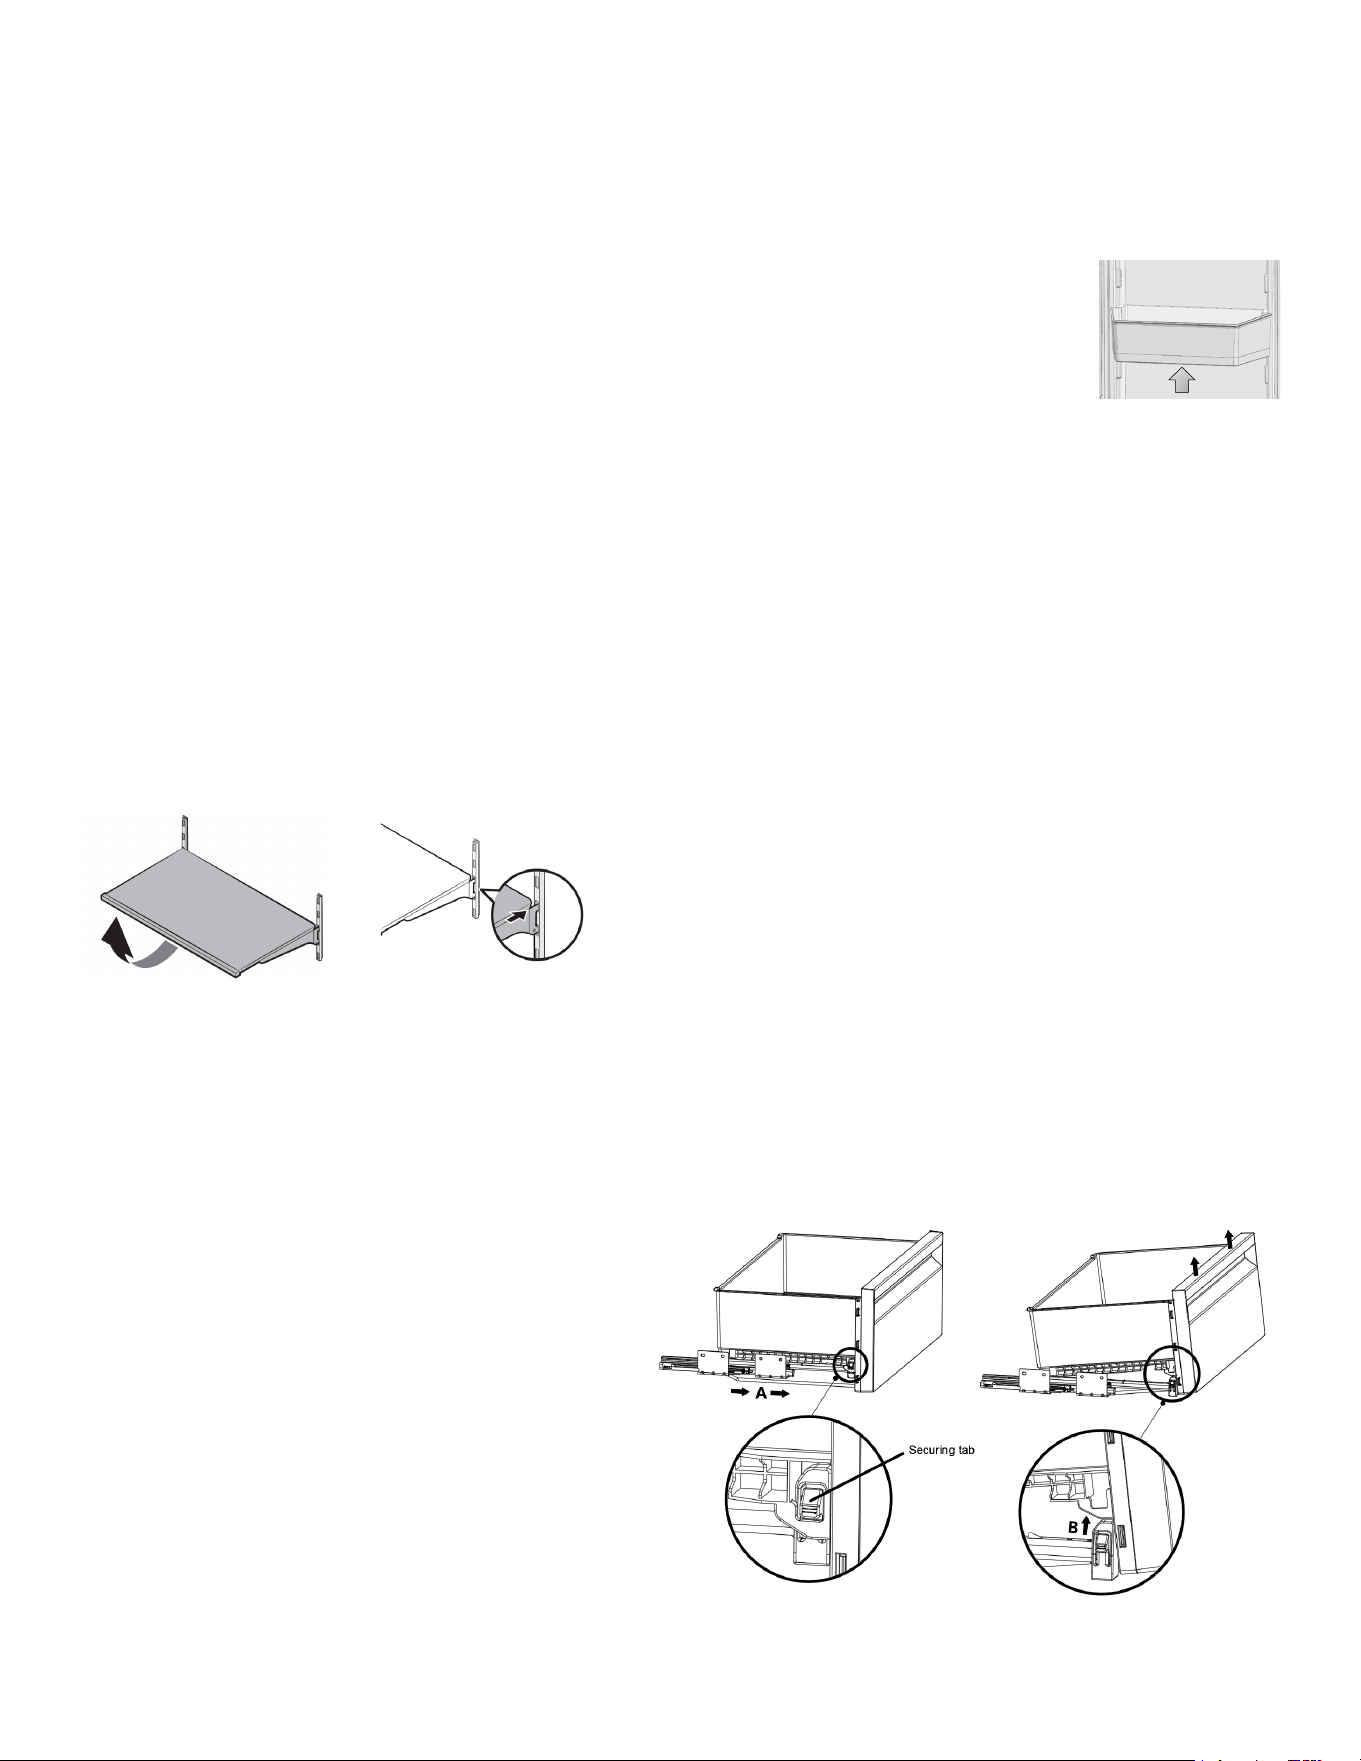
Door Bin
To remove:
Lift up the door bin and then pull out straight.
Glass Shelves
To remove a shelf:
Fully open the corresponding door.
Hold the front of the shelf, and then gently lift up and slide out.
To reinsert:
Hold the shelf at an angle so the front is higher than the back, and then insert the top hook into the
top shelf notch.
Push down the front slightly.
IMPORTANT NOTE:
Use care when handling glass shelves to prevent breakage or scratching the interior.
ATTENTION:
You must wait for the glass shelves to reach room temperature before immersing them in water for
cleaning.
Bins
To remove the bin
• Pull the bin until it stops.
• Slightly unclip the front section of the bin
and take it out completely.
To install the bin
• Pull the rails completely.
• Place the gap at the rear corners of the bin
to the detail located at the rear corners of
the rails.
• Push the bin slowly down until you feel it
clip front onto the rails.
•
Note: Make sure that the details at the right and
left-hand sides are xed when installing the bin.
16
SPE. TEMP. zone compartment
You can control the temperature in this section to store your food
such as sh, meat, delicatessen products.
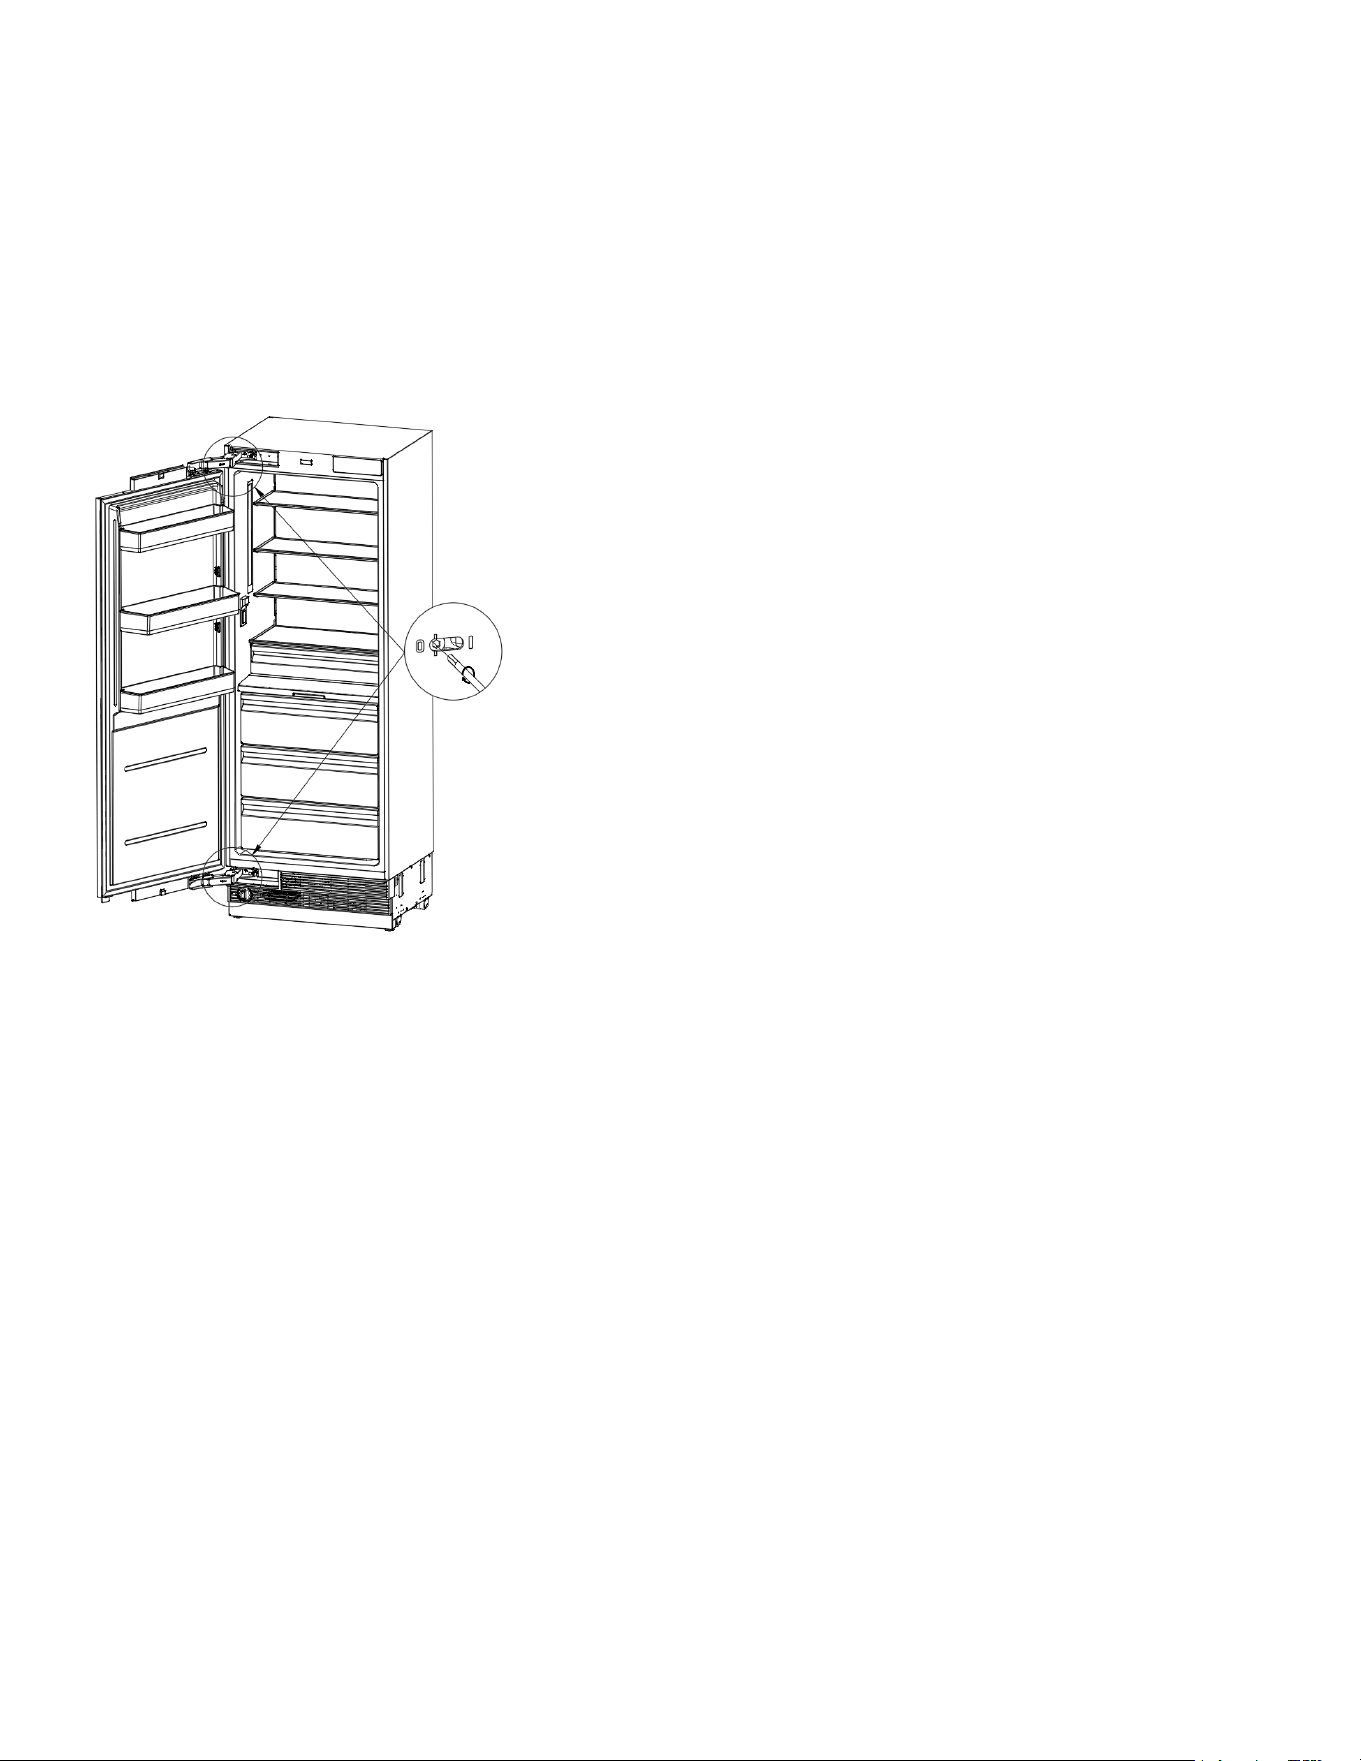
Hinge Adjustment
When adjusting the hardness of the hinge: Hardness of the lower and upper door hinges of the fresh
food compartment is performed with the help of a drill. Set the hinge adjustment screw to position
“1” from position “0”.
Changing the Direction of the Door
Please see the installation instructions provided in the bag.

17
Care and Cleaning
Service life of the product will extend and frequently encountered problems will decrease if the prod-
uct is cleaned periodically.
Never use gasoline, benzene or similar substances for cleaning purposes.
Do not use sharp abrasive instruments, soap, household cleaners, detergent or wax polish for clean-
ing.
Dissolve one teaspoon of carbonate in half liter of water. Soak a cloth in the solution and wring it thor-
oughly. Wipe the interior of the refrigerator with this cloth and then dry thoroughly.
Make sure that no water enters the lamp housing or other electrical parts.
If you will not use the refrigerator for a long time, unplug it, remove all food inside, clean it and leave
the door ajar.
Check regularly that the door gaskets are clean. If not, clean them.
Take out all items in the product to remove the door and body shelves. Remove the door shelves by
pulling them up. Slide the shelves downward to remove them after cleaning.
Do not use chloric cleaning agents or water to clean outer surfaces or chrome-coated parts of the
product. Chlorine causes abrasion on such metal surfaces.
Avoiding Bad Odors
Materials that may cause odor are not used in the production of our refrigerators. However, odor
may be emitted if foods are stored improperly or if the inner surface of the product is not cleaned as
required.
To avoid this problem:
Ensure that the refrigerator is kept clean.
Keep foodstuffs in closed vessels.
For this reason, clean your refrigerator with carbonate solved in water every 15 days.
Never use detergents or soap.
Keep foods in closed vessels. Microorganisms emitted from vessels without a cover may cause un-
pleasant odors.
Never keep expired or spoiled foods in your refrigerator.
Protecting the Plastic Surfaces
Do not put liquid oils or oil-cooked meals in your refrigerator in unsealed containers as they damage
the plastic surfaces of your refrigerator.
If oil is spilled or smeared onto the plastic surfaces, clean and rinse the relevant part of the surface
with warm water immediately.
Switch off the product before cleaning.
Maintanence
WARNING
!
18
Cleaning the Inner Surface
To clean the inner surfaces and all removable parts, wash them with a mild solution comprising soap,
water, and carbonate. Rinse and dry thoroughly.
Prevent the water from contacting the lighting means and control panel.
Stainless Steel Outer Surfaces
Use a stainless steel cleaning agent that is non-abrasive and apply it with a lint-free, soft cloth.
For polishing, wipe the surface softly with a damp microber cloth and use dry wash leather.
Always follow the strands of the stainless steel.
ATTENTION:
Do not use vinegar, rubbing alcohol or other alcohol-based cleaning agents on any of the inner surfac-
es.
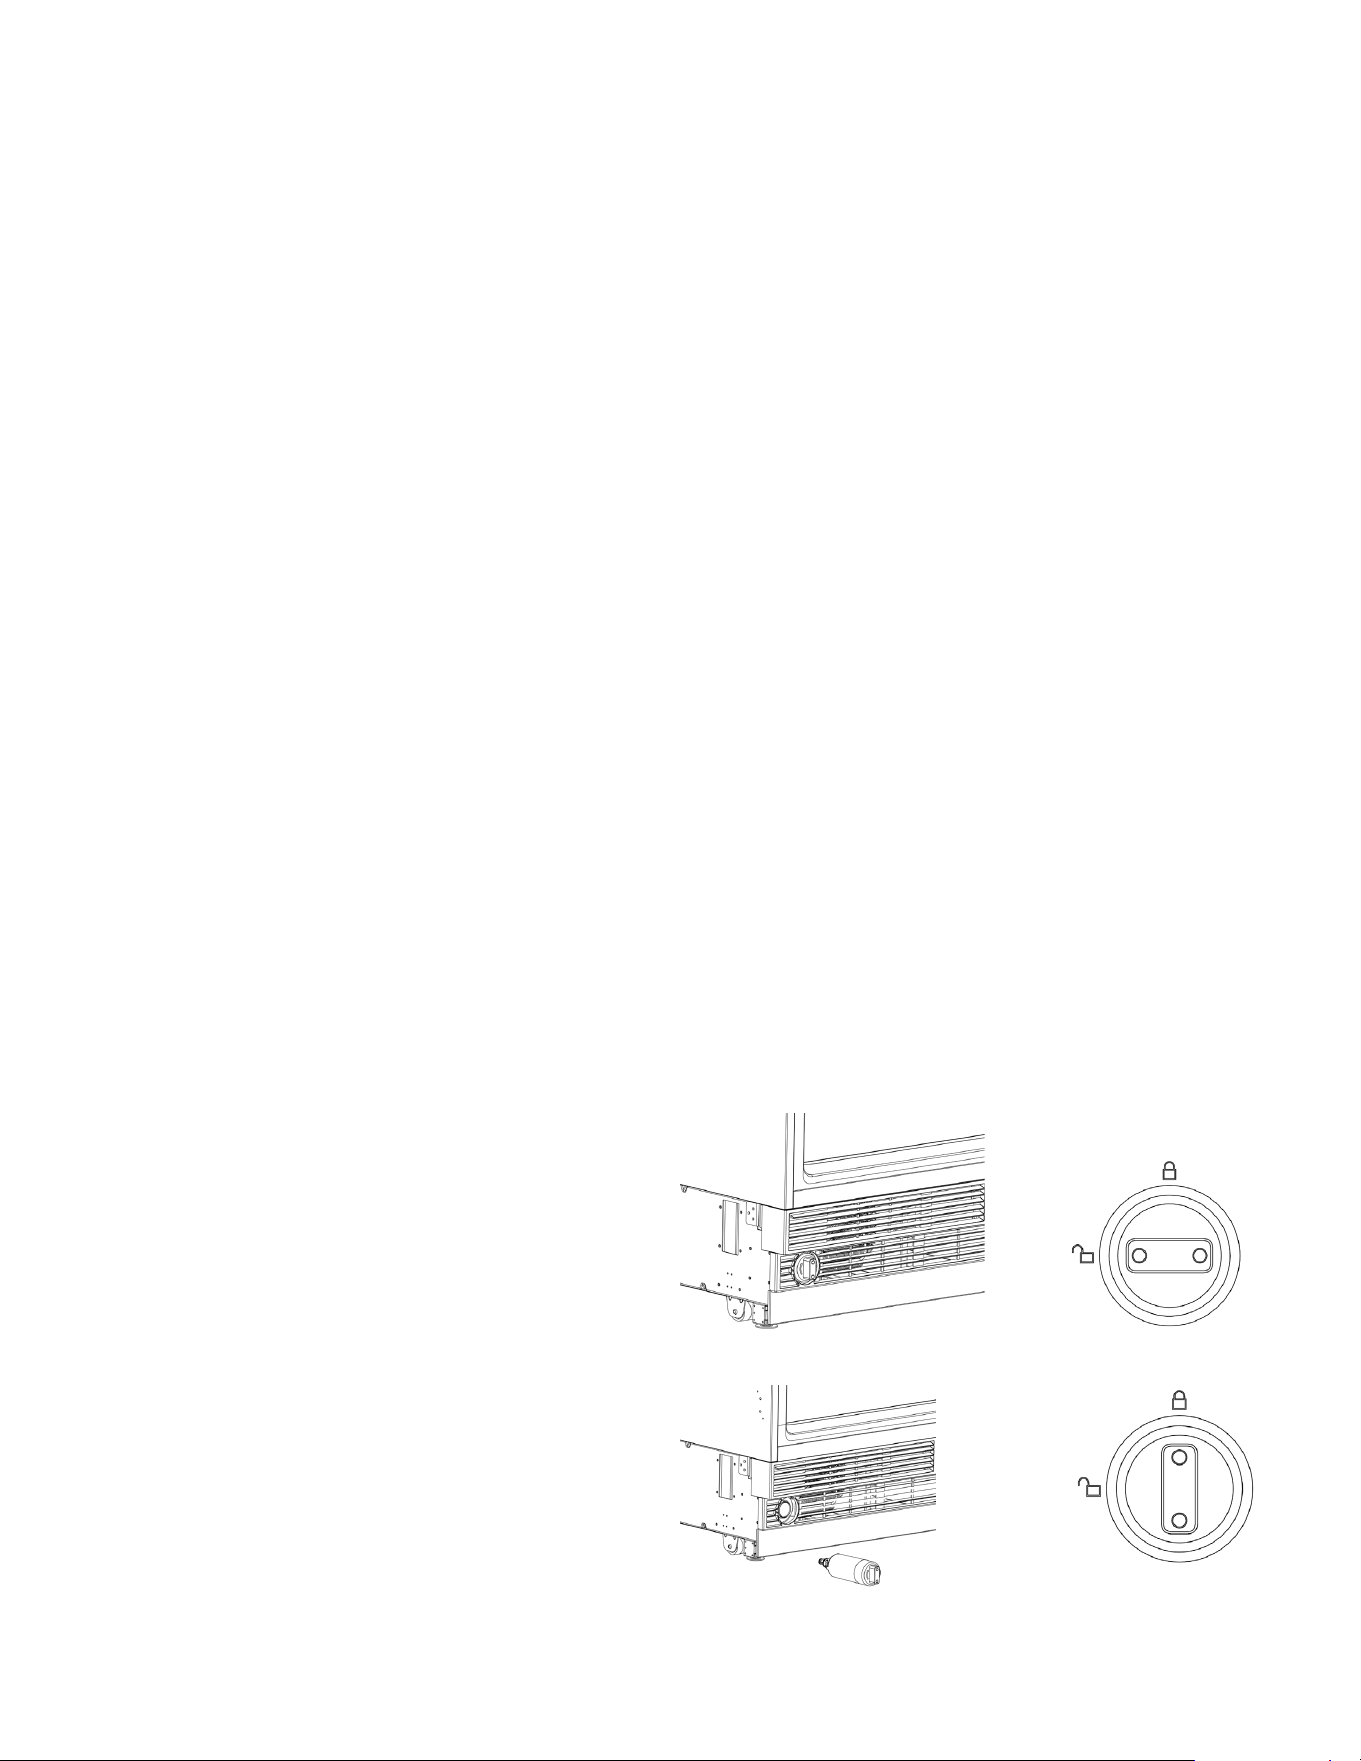
Replacement Water Filter
Water Filter Cartridge
The water lter cartridge is located in the bottom part of the unit.
Regarding as replace the lter cartridge:
The lter cartridge should be replaced every six months or earlier if 170 gallons of water have been
dispensed or the ow of water to the dispenser or icemaker decreases.
The main refrigerator/freezer control panel will display a “Replace Water Filter” lamp when the water
lter has reached 90% of its life.
Water Filter Alarm
• The water lter alarm ashes and beeps to advise the user to replace the water lter.
• After the replacement is completed, press the SELECT button for 5 seconds to reset.
• The set replacement time is 130 days.
Changing the Water Filter Cartridge
• To remove the water lter cartridge, turn it
counterclockwise and remove it.
• Rotate 90° counterclockwise.
• Insert the water lter — with the knobs at the
front in a horizontal position — as far as it will
go, and then turn clockwise until it snaps in.
• Rotate 90° clockwise.
Rotate 90°counter-clockwise
Rotate 90°clockwise

19
Replacement Water Filter
When after replacing the lter cartridge
• In refrigerators, run 2 gallons of water to remove air from the system. A newly installed lter car-
tridge will cause water to spurt and dribble until the air is out of the system.
• In freezers, the icemaker may not immediately produce ice. Initial ice may be irregularly shaped.
Discard the rst bin of ice to allow air to purge from the system. A newly installed lter cartridge
will cause water to spurt into the icemaker body, which could lead to ice droplets around the ice-
maker area.
• To reset the water lter usage, press the SELECT button for 5 seconds to reset.
Note: It is normal for these droplets and initial ice production to appear discolored during the initial
system ush.
Ice color will return to normal after the rst bin of ice production.
20
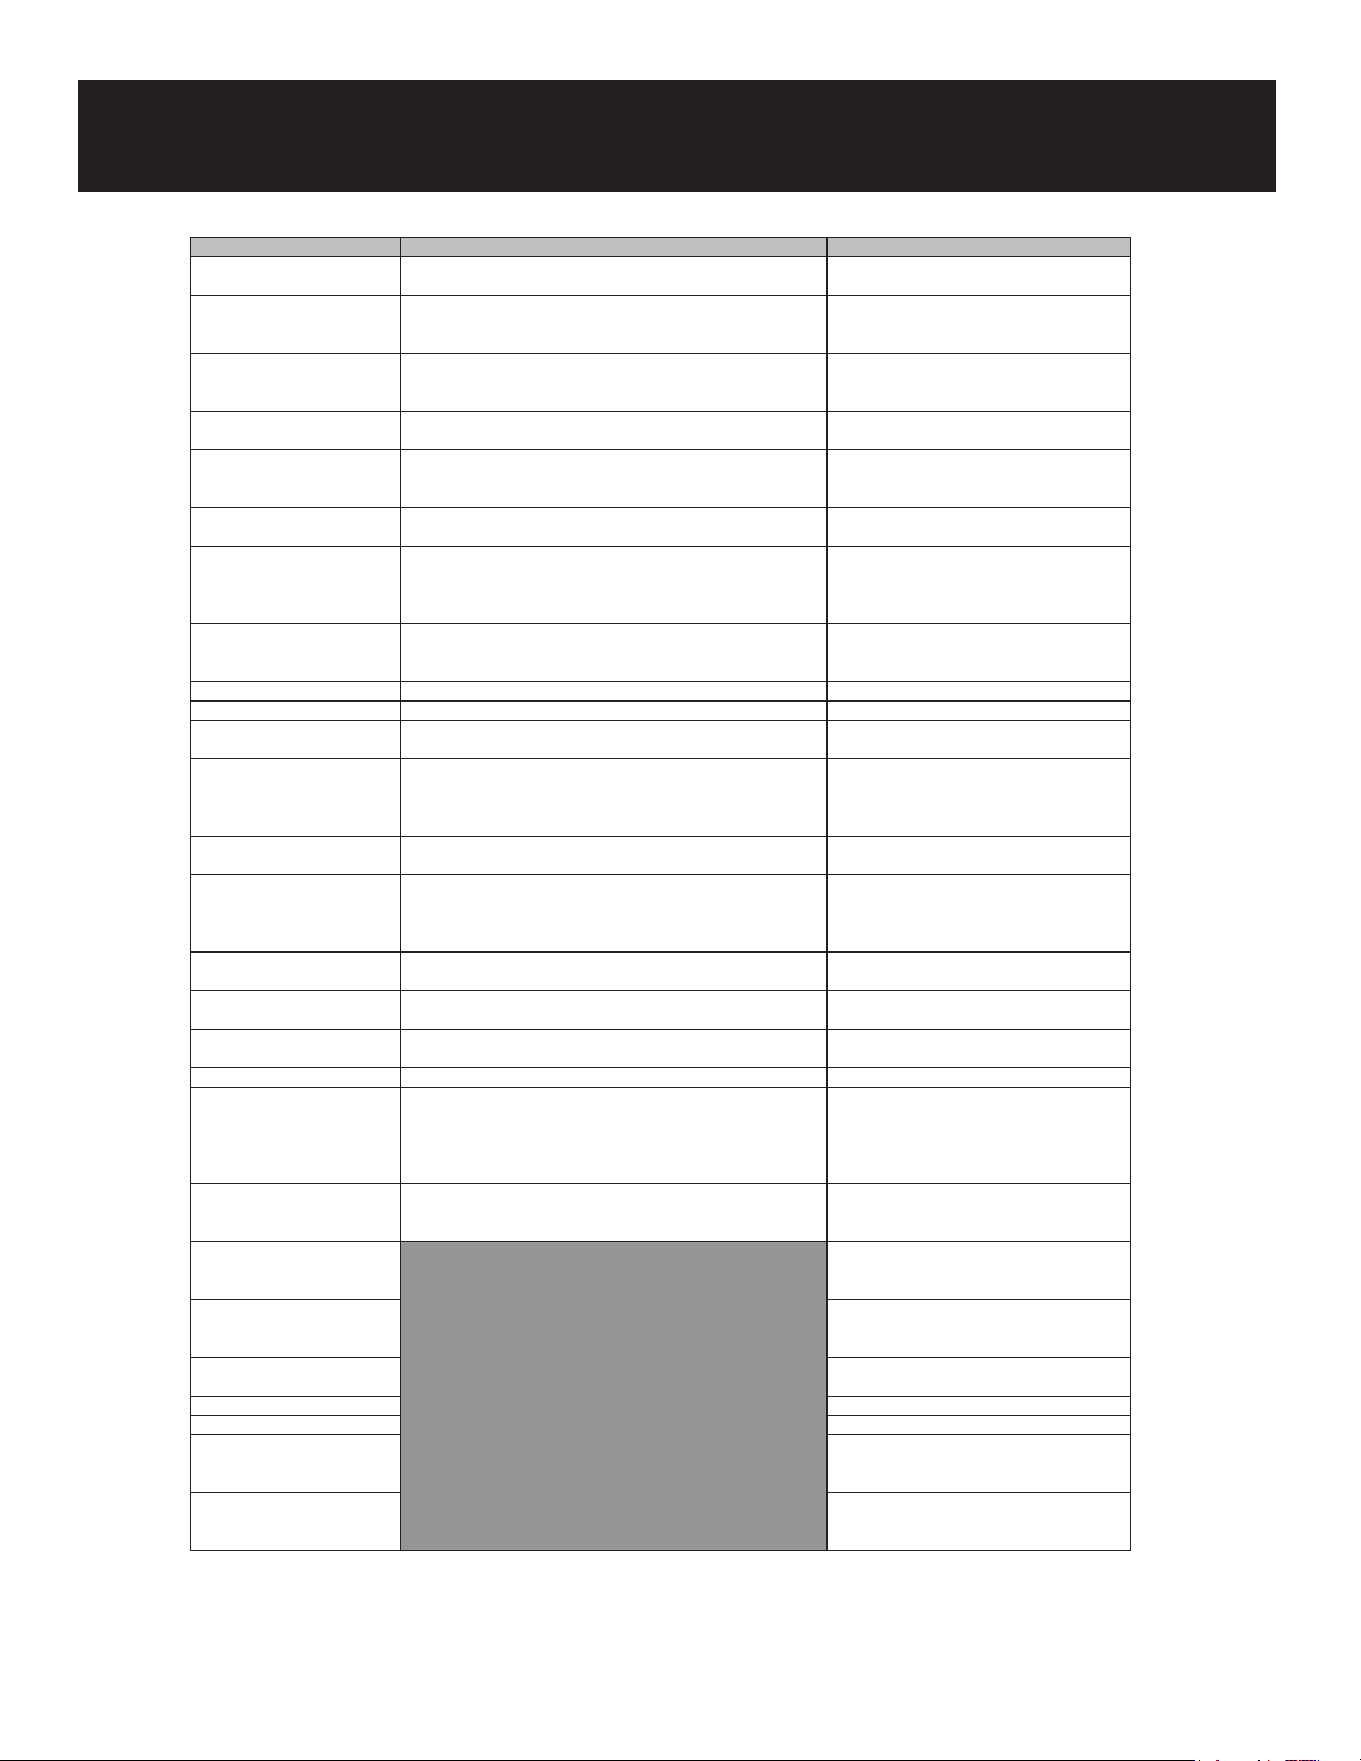
Troubleshooting
Problem Possible Cause Solution/Note
The refrigerator is not
operating
- It may not be plugged in properly. Plug in the product properly.
- The fuse of the socket to which your refrigerator is connected
or the main fuse may have blown.
Check the fuse.
The condensation on the fridge
compartment
- The door may have been opened/closed frequently. Do not open/close the refrigerator door
frequently.
- The environment may be too humid. Do not install the refrigerator at locations
with a very high level of humidity.
- Foods containing liquid may have been placed into the
refrigerator in vessels without covers.
Do not place foods containing liquid into the
refrigerator in unsealed vessels.
- The refrigerator door may have been left ajar. Do not leave the door of your refrigerator
open for a long time.
The compressor is not
operating
- The compressor protector will work during sudden power
failures or plug-out plug-in as the refrigerant pressure in the
cooling system of the refrigerator has not been balanced yet.
Note: The refrigerator will start running
approximately after 6 minutes.
- The freezer is in defrosting cycle. Note: This is normal for a refrigerator that
performs full-automatic defrosting. Defrosting
cycle is performed periodically.
- The refrigerator may not be plugged in. Make sure that the plug ts the socket.
- Temperature settings may be incorrect. Select the correct temperature value.
- Possible power failure. Note: The refrigerator will start to operate
normally when power restores.
Vibration or noise - The oor may not be stable or level. If the refrigerator shakes when moved
slightly, feed to balance it. Make sure that
the oor is level and capable of carrying the
refrigerator.
- Objects placed onto the refrigerator may cause noise. Remove the objects on the refrigerator.
There are noises coming from
the refrigerator like liquid
spilling or spraying.
- Liquid and gas ows occur in accordance with the operating
principles of the refrigerator.
This is normal and not a fault.
Whistle is heard from the
refrigerator.
- There are fans that are used to cool the refrigerator.
Dew condensation - Hot and humid weather increases icing and condensation.
- The doors may have been opened frequently or left ajar for a
long time.
Do not open the door frequently. Close the
doors, if open.
- The door may have been left ajar. Close the door completely.
Dew condensation occurs
on the outer surface of the
refrigerator or between the
doors.
- Air might be humid. This is quite normal in humid weather.
Condensation will disappear when humidity
level decreases.
- There might be external condensation at the section between
the two doors of the refrigerator if you use your product rarely.
This is normal. Condensation will disappear
upon frequent use.
No regular cleaning may have
been performed.
Clean the inside of the refrigerator. Sponge,
lukewarm water or carbonated water.
Some vessels or packaging
materials may cause the odour.
Use another vessel, or packaging materials
from another brand.
Note: Foods may have been placed into the
refrigerator in vessels without covers.
Store the foods in closed vessels.
Note:
Microorganisms emitted from vessels without
a cover may cause unpleasant odors.
Expired or spoiled foods may
be inside the refrigerator.
Take out expired or spoiled foods from the
refrigerator.
21