User Guide
All Refrigerator
FDREIC7240L - FDREIC7240R - FDREIC7300L - FDREIC7300R
FDREIC7360L - FDREIC7360R
All Freezer
FDFZIC7180L - FDFZIC7180R - FDFZIC7240L - FDFZIC7240R
FDFZIC7300L - FDFZIC7300R - FDFZIC7360L - FDFZIC7360R
Bottom Mount
FDBMIC7360L - FDBMIC7360R

2

EN
3
CONTENTS
1.
IMPORTANT SAFETY AND ENVIRONMENTAL INFORMATION 6
1.1. For your safety ...................................................................................................................................................................................6
1.2. In daily use ..........................................................................................................................................................................................7
1.3. Caring for the environment ...........................................................................................................................................................8
1.4. Cleaning, sanitization and maintenance of the ice and/or water dispenser (if present) ...........................................8
1.5. Information for regulatory authorities .........................................................................................................................................9
1.6. To save energy ..................................................................................................................................................................................9
2. INSTALLATION 10
2.1. Installation ...........................................................................................................................................................................................10
2.2. Connection to the water system ..................................................................................................................................................10
2.3. Connection to the electrical power supply ..............................................................................................................................11
2.4. Refrigerant ...........................................................................................................................................................................................11
3. BEFORE STARTING 12
3.1. Getting started ...................................................................................................................................................................................12
3.2. Manufacturer’s liability ..................................................................................................................................................................... 12
3.3. Technical support .............................................................................................................................................................................12
3.4. Product plate ......................................................................................................................................................................................12
3.5. Electronic Control .............................................................................................................................................................................14
3.6. Main control panel ............................................................................................................................................................................14
4. TURNING THE PRODUCT ON 15
4.1. Turning on and o ............................................................................................................................................................................15
5. COMPARTMENT TEMPERATURE SETTING 18
5.1. How to adjust the temperature to meet dierent needs .....................................................................................................18
5.2. Information and malfunction messages on the display ........................................................................................................19
6. FUNCTIONS AND SETTINGS 20
6.1. Functions .............................................................................................................................................................................................20
6.2. Settings ................................................................................................................................................................................................27
7.1. Positioning, adjusting and internal drawers removal. ...........................................................................................................33
7. LAYOUT 33
8.1. Activation and use of the Ice Maker ...........................................................................................................................................34
8. ACTIVATING AND USING THE ICE MAKER 34
8.2. Internal water filter ............................................................................................................................................................................ 35
8.3. External water filter for freezer colu
mn Ice Maker .........................................................................................................................35
9. LIGHTING 36
9.1. Compartment
lighting .................................................................................................................................................................................36
10. CONSERVATION OF FOODS 36
10.1. General directions ............................................................................................................................................................................36
10.2. How to maintain good food quality ...........................................................................................................................................37
10.3. Tips for food storage .......................................................................................................................................................................38
11.1. Care and Cleaning ...........................................................................................................................................................................41
11. CARE AND CLEANING 41
11.2. Internal cleaning ................................................................................................................................................................................41
11.3. Cleaning of the ventilation grill, filter and condenser ...........................................................................................................42
11.4. Condenser Cleaning .......................................................................................................................................................................43
12. TROUBLESHOOTING GUIDE 44
12.1. Troubleshooting Guide ...................................................................................................................................................................44
12.2. Malfunction messages appearing on the display ..................................................................................................................46
4
IMPORTANT SAFETY INSTRUCTIONS
This manual contains operational instructions for the users of the appli-
ance. Keep this manual in an easily accessible place for future reference.
Improper installation, adjustment, alteration, service or maintenance can
cause property damage, injury, or death.
Read the installation, operating, and maintenance instructions thoroughly
before installing or servicing this equipment.
To reduce risk of fire, electric shock, or injury to persons when using your appliance,
follow basic precautions, including the following:
> Children should be supervised to ensure that they do not play with the appliance.
>
This appliance is not intended for use by persons (including children) with reduced
physical, sensory or lack of experience and knowledge unless they have been given
supervision or instruction concerning use of the appliance by a person responsible for
their safety.
>
This appliance is designed to refrigerate beverages and foods and is intended for domestic
use.
> This appliance is intended to be used in household and similar applications such as:
sta kitchen areas in shops, oces, and other working environments; farm houses and
by clients in hotels, motels, and other residential-type environments; bed and breakfast-
type environments; and catering and similar non-retail applications.
> Do NOT use an extension cord or adapter.
> Plug into a grounded 3 prong outlet.
> Do not remove ground prong.
> If available, ice make kit can be added to some models. See serial tag inside the food
compartment of appliance for ice maker kit model information.
> A qualified service technician must connect ice maker (if available) and the appliance to
the water supply system (if the appliance has water load included).
> If present, clean the ice bucket or drawer regularly but using only drinking water.
> The appliance should be supplied only with drinkable water (if is --- a water connection).
In the event of a power failure, do not attempt to operate this
appliance.
Keep the appliance area free and clear from combustibles or
flammable materials and vapors.
Keep ventilation openings, in the appliance enclosure or in the
built-in structure, clear of obstruction. Do not obstruct the air
intake or exhaust openings of the appliance.
Do not store explosive substances such as aerosol cans with a
flammable propellant in this appliance.
Do not use electrical appliances inside the food storage com-
partments of the appliance, unless they are of the type recom-
mended by the manufacturer.
This is the safety alert symbol. This symbol alerts you to potential hazards that can kill or
hurt you and others. All safety messages will follow the safety alert symbol and either the
word “DANGER” or “WARNING.”
These
words mean:
You can be killed or seriously injured if you don’t follow instruc-
tions.
DANGER
You can be killed or seriously injured if you don't immediately fol-
low instructions.
All safety messages will tell you what the potential hazard is, tell you how to reduce the chance
of injury, and tell you what can happen if the instructions are not followed.
SAVE THESE INSTRUCTIONS!
EN
5
IMPORTANT SAFETY INSTRUCTIONS FOR MAINTENANCE AND
CARE
DANGER
Risk of fire or explosion due to puncture of refrigerant tubing; fol-
low handling instructions carefully. Flammable refrigerant used.
To b
e repaired only by trained service personnel.
Use only manufacturer-authorized service parts, Do not use
replacement parts that have not been recommended by the manufacturer (e.g,
parts made at home using a 3D printer). If power supply cord is damaged, it must be
replaced by the manufacturer, its service agent, or a similarly qualified person in or
-
der to avoid a hazard. Any repair equipment used must be designed for flammable
refrigerants. Follow all manufacturer repair instructions. Use nonflammable cleaner.
Do not puncture refrigerant tubing, do not damage the refriger-
ant circuit.
Do not use mechanical devices or other means to accelerate
the defrosting process, other than those recommended by the
manufacturer.
TIP OVER HAZARD
Refrigerator is top heavy and tips easily when not completely
installed; to avoid a hazard due to instability of the appliance, it
must be fixed in accordance with the instructions (see instruction manual provided).
Keep doors taped closed until refrigerator is completely installed.
Use two or more people to move and install refrigerator.
Failure to do can result in death or serius injury.
IMPORTANT SAFETY INSTRUCTIONS FOR PROPER DISPOSAL OF
YOUR OLD REFRIGERATOR
Suocation Hazard
Remove doors or lid from your old appliance.
Failure to do so can result in death or brain damage.
Risk of child entrapment.
Before you throw away your old refrigerator or freezer:
> Take o the doors.
> Leave the shelves in place so that children may not easily climb inside.
> IMPORTANT: Child entrapment and suocation are not problems of the past. Junked
or abandoned refrigerators are still dangerous, even if they will sit for "just a few days."
If you are getting rid of your old refrigerator, please follow these instructions to help
prevent accidents.
Important information to know about disposal of refrigerants:
Dispose of refrigerator in accordance with federal and local regulations. Refrigerants
must be evacuated by a licensed. EPA-certified refrigerant technician in accordance with
established procedures.

6
1. IMPORTANT SAFETY AND ENVIRONMENTAL INFORMATION
1.1. For your safety
> If this appliance is replacing an existing appliance
which must be removed or disposed of, make sure
that it does not become a dangerous trap for chil
-
dren.
> This appliance is designed to refrigerate bever-
ages and foods and is intended for domestic use.
> This appliance is for refrigeration and conser-
vation of fresh and frozen foods in the home. Any
other use is considered inappropriate.
> This appliance is not designed to operate with
external timers or with remote-control systems.
> The appliance must be installed by following the
instructions in the Installation Guide, particular care
should be taken not to obstruct the vent openings
of the appliance and of the built-in units.
> The appliance features a concentrated lighting
system with LED lamps. Do not stare at these lamps
when they are on, as this could damage your vision.
This warning is also included on the label attached
to the inside of the refrigerator door.
> When the freezer is operating, do not touch the
interior stainless steel surfaces with wet or damp
hands, as skin may stick to the very cold surfaces.
> Do not use any type of electrical equipment inside
the appliance.
> Do not use any type of electrical equipment in-
side the food storage compartments.
> When positioning the shelves, do not place fin-
gers in the shelf slide guides.
> Never attempt to extinguish a flame/fire with wa-
ter: unplug the appliance from the outlet and cover
the flame with a fireproof blanket.
> Do not position containers of flammable liquids
near the appliance.
> Completely switch o the appliance and unplug
the power supply cable during cleaning operations.
If the plug is not easily reached, it is a good idea to
turn o the circuit breaker that corresponds to the
outlet which the unit is plugged into.
> Packaging materials can be dangerous for chil-
dren: do not allow children to play with plastic bags,
plastic film or polystyrene.
> Any repairs must be performed by a qualified
service technician.
> This appliance is not intended for use by persons
(including children) with reduced physical, sensory
or mental capabilities or lack of experience and
knowledge unless they have been given supervi-
sion or instruction concerning the use of the appli-
ance by a person responsible for their safety. Chil-
dren should be supervised to ensure that they do
not play with the appliance.
> Do not damage the appliance’s refrigerant circuit
tubing.
> Do not store explosive substances, such as aero-
sol cans with a flammable propellant, inside this ap-
pliance.
> The amount of refrigerant gas contained in your
appliance is indicated on the identification plate lo-
cated inside the appliance. If the power cord of this
appliance is damaged, it must be replaced by the
manufacturer, customer service or a similarly quali-
fied person.
> Improper installations and repairs may put the
user at considerable risk.
> Repairs must be carried out by the authorized
customer service.
> Only original spare parts from the manufacturer
can be used. Only with the use of these compo-
nents does the manufacturer guarantee that the
safety requirements of the product are complied
with.
> Repairs may be performed by the manufacturer,
authorized customer service or a similarly qualified
person only.
> Plug the appliance into a grounded 3-poles out-
let.
> Do not remove the ground pole.
> Do not use an adapter.
> Do not use an extension cord.
> Disconnect power to all units before servicing.
> If the POWER CORD is damaged, it must be re-
placed by the manufacturer, an authorized service
centre or a similar qualified person in order to avoid
any hazards.
> Children must be supervised to make sure they
do not play with the appliance.
> Do not modify this appliance.
> Do not insert pointed metal objects (kitchen
utensils or tools) into the slots in the appliance.
> Do not touch (especially with wet hands) frozen
products or put them in your mouth directly.
> Do not store flammable, explosive or volatile sub-
stances inside the appliance.
> Do not store explosive substances, such as spray
bottles with flammable propellants, in the appliance.
> Bottles containing beverages with a high alcohol
content must be tightly closed and stored vertically.
> Organic compounds, acids and essential oils can

EN
7
corrode the seals and plastic surfaces if left in con-
tact with them for extended periods.
> Do not pull on the cable to unplug the appliance.
1.2. In daily use
> Cleaning and maintenance meant to be per-
formed by the user must not be carried out by unsu-
pervised children.
> Never defrost or clean the appliance with a steam
cleaner! The steam may penetrate electrical parts
and cause a short-circuit. Risk of electric shock!
> Do not use pointed or sharp-edged implements
to remove frost or layers of ice. You could damage
the refrigerant tubes.
Leaking refrigerant may cause eye injuries or ignite.
> Do not misuse the plinth, pull-out drawers, doors,
etc. as a point of support or as a support.
> Take care that no objects get stuck in the doors.
> Before cleaning the appliance, pull out the power
cord plug or turn o the safety switch. Do not pull out
the power cord plug by tugging on the power cord.
> Store high-percentage alcohol tightly closed and
standing up.
> Keep plastic parts and the door seal free of oil
and grease. Greases attack the plastic material and
the door seal becomes brittle and porous.
> Never cover or block the appliance’s ventilation
openings.
> Do not damage the cooling circuit (if can be ac-
cessed).
> Do not use electrical appliances inside the ap-
pliance.
> In the event of damage to the cooling circuit, avoid
the use of open flames and ventilate the area prop
-
erly.
> Do not use the appliance or parts of it in any way
other than those specified in this manual.
> Keeping the door open for long periods can
cause the temperature in the appliance compart-
ments to rise considerably.
> Perform cleaning of surfaces that may come into
contact with food and accessible drainage systems
regularly.
> Store raw meat and fish in suitable containers in
the refrigerator, so that it does not come into contact
with other food or drip onto it.
> If the appliance is left empty for long periods of
time, switch it o, defrost it, clean it, dry it and leave
the door open to prevent the development of mold
inside.
> Never place sharp metal objects such as knives,
forks, spoons and lids on the appliance during use.
> Do not use abrasive or corrosive cleaning agents
(e.g. scouring powders, stain removers or metallic
scouring pads and sponges) on glass parts.
> Do not sit on the appliance.
> Do not sit or lean on the door or on any open
drawers.
> Do not put pressure on the door or handle to
move the appliance.
> Do not use electrical appliances (e.g. hair dryers)
or sprays for defrosting which may ruin the plastic
parts.
> Do not use the appliance to cool rooms for any
reason.
> Always unplug the appliance in the event of a
malfunction or when performing cleaning or mainte
-
nance.
> Do not keep liquids in tins or glass containers in
the freezer.
> Do not place heavy objects on top of the appli-
ance.
8
1. IMPORTANT SAFETY AND ENVIRONMENTAL INFORMATION
Symbols used in the Guide:
Note
Tips for the correct use of the appliance
Important
Directions to avoid appliance damage
Warning
Directions to prevent injury
1.3. Caring for the environment
This appliance must be disposed of separately from
other waste at the end of its service life. Refer to local
laws and regulations.
This appliance does not contain substances in quanti
-
ties sucient to be considered hazardous to health
and the environment.
Make sure you dispose properly of all packing materi
-
als and refer to local laws and regulations.
Electric voltage | Electrocution hazard
Disconnect the mains power supply. Un-
plug the appliance.
> The appliance must not be disposed of with
other waste. Contact local waste disposal centres
about how to dispose of recyclable waste.
> Prior to disposal, cut the power supply cord and
remove the door and/or drawers.
> During disposal, avoid damage to the refrigera-
tion circuit.
> Neither the refrigeration circuit nor the insulation
contain substances that are damaging to the ozone
layer
> Our appliances are packaged in non-polluting
and recyclable materials.
> Deliver the packing materials to the appropriate
recycling centre.
Plastic packaging | Choking hazard
Do not leave the packaging or any part of
it unattended.
Do not let children play with plastic bags.
1.4. Cleaning, sanitization and
maintenance of the ice and/or water
dispenser (if present)
Failure to follow the instructions regarding sanitis-
ing can compromise the hygienic safety of the water
dispensed.
> When using the appliance for the first time and
every time the filter is changed, it is recommended to
let the water flow in the circuit using the “Circuit man
-
ual cleaning” function (see chap. 8) Circuit manual
cleaning (not on Refrigerator models) on page 25).
> If the water dispenser has not been used for more
than 4/5 days, it is advisable to clean the circuit and
run o the first litre (0,26 gal) of water.
> Reposition the removable water dispenser (if pre
-
sent), ensuring your hands are hygienically clean.
> Clean the ice bucket or drawer regularly using only
drinking water.
> The filter must be changed when indicated on the
control panel or when the ice/water dispenser has
not been used for more than 30 days.
> With each filter replacement, sanitize the ice and/
or water dispensing system using a food grade dis
-
infectant (with sodium hypochlorite), which does not
alter the characteristics of the materials. Rinse with at
least 2 litres (0,53 gal) of water before use.
> Only original spare parts supplied by the manufac
-
turer should be used when replacing components in
the ice and water dispenser.
> Any work on the appliance must be carried out by
a qualified technician or the Viking Service.
Warning
To avoid contamination of food, please re-
spect the following instructions:
> Opening the door for long periods can
cause a significant increase in tempera-
ture inside the appliance compartments.
> Perform regular cleaning of surfaces
that may come in contact with food and
of accessible drainage systems.
> Store raw meat and fish in suitable con-
tainers in the refrigerator, so that it does
not come into contact with other food or
drip onto it.
> Two-star frozen-food compartments
are suitable for storing pre-frozen food,
storing or making ice cream and making
ice cubes.

EN
9
Warning
> Two-star frozen-food compartments
are suitable for storing pre-frozen food,
storing or making ice cream and making
ice cubes.
> One-, two- and three-star compart-
ments are not suitable for the freezing of
fresh food.
> If the refrigerator is left empty for a long
period, switch it o, defrost, clean and dry it,
and leave the door open to prevent mold de
-
veloping within the appliance.
1.5. Information for regulatory
authorities
> Ventilation requirements, dimensions and mini-
mum space from the rear wall are provided in the
“Installation” chapter of this manual.
> Contact the manufacturer for additional informa-
tion.
1.6. To save energy
> Correct use of the appliance, correct packaging
of foodstus, a constant temperature and food hy-
giene all have eects on the quality of storage.
> Keep the number of times that the doors are
opened and the length of time they remain open to
a minimum to avoid excessive warming.
> Clean the condenser periodically to prevent the
appliance from losing eciency (see page 43).
> Defrost frozen food in the refrigerator compart-
ment in order to make use of the cold stored in the
frozen foods.
10
2. INSTALLATION
2.1. Installation
Make sure that installation is performed correctly,
adhering to all of the instructions in the specific in
-
stallation guide provided with the appliance.
Warning
If any model has water connections, make
them before connecting the machine to
the electrical system.
> The appliance must be connected to ground in
compliance with local electrical code.
> Position the appliance with the aid of a second
person.
> Never use the open door to lever the appliance
into position.
> Avoid exerting too much pressure on the door
when open.
> The appliance must not be installed near heat
sources. If this is not possible, suitable insulation
must be used.
> The appliance must not be exposed to direct
sunlight.
> Do not use the appliance outdoors.
> Installation and servicing should be carried out
by qualified personnel in compliance with current
standards.
> Ensure that an a licensed electrician performs
the electrical connection.
> If the power supply cable is damaged, to avoid
any danger, contact an authorized servicer imme-
diately and they will replace it, so as to prevent
any risk.
> Always put on the necessary Personal Pro-
tective Equipment (PPE) before performing any
work on the appliance (installation, maintenance,
positioning or handling).
> Before performing any operation involving the
appliance, switch o the circuit breaker.
> If installed near another refrigerator, refer to
the installation guide.
> Do not try to repair the appliance yourself con-
tact an authorized servicer.
> Do not install/use the appliance outdoors.
> WARNING: Make sure that the power supply
cable does not become caught or damaged when
positioning the appliance.
> To prevent instability of the appliance, install
and secure it correctly as indicated in the instruc-
tions provided in this manual.
> This device can be used up to a maximum
height of 6000 feet/2000 meters above sea level.
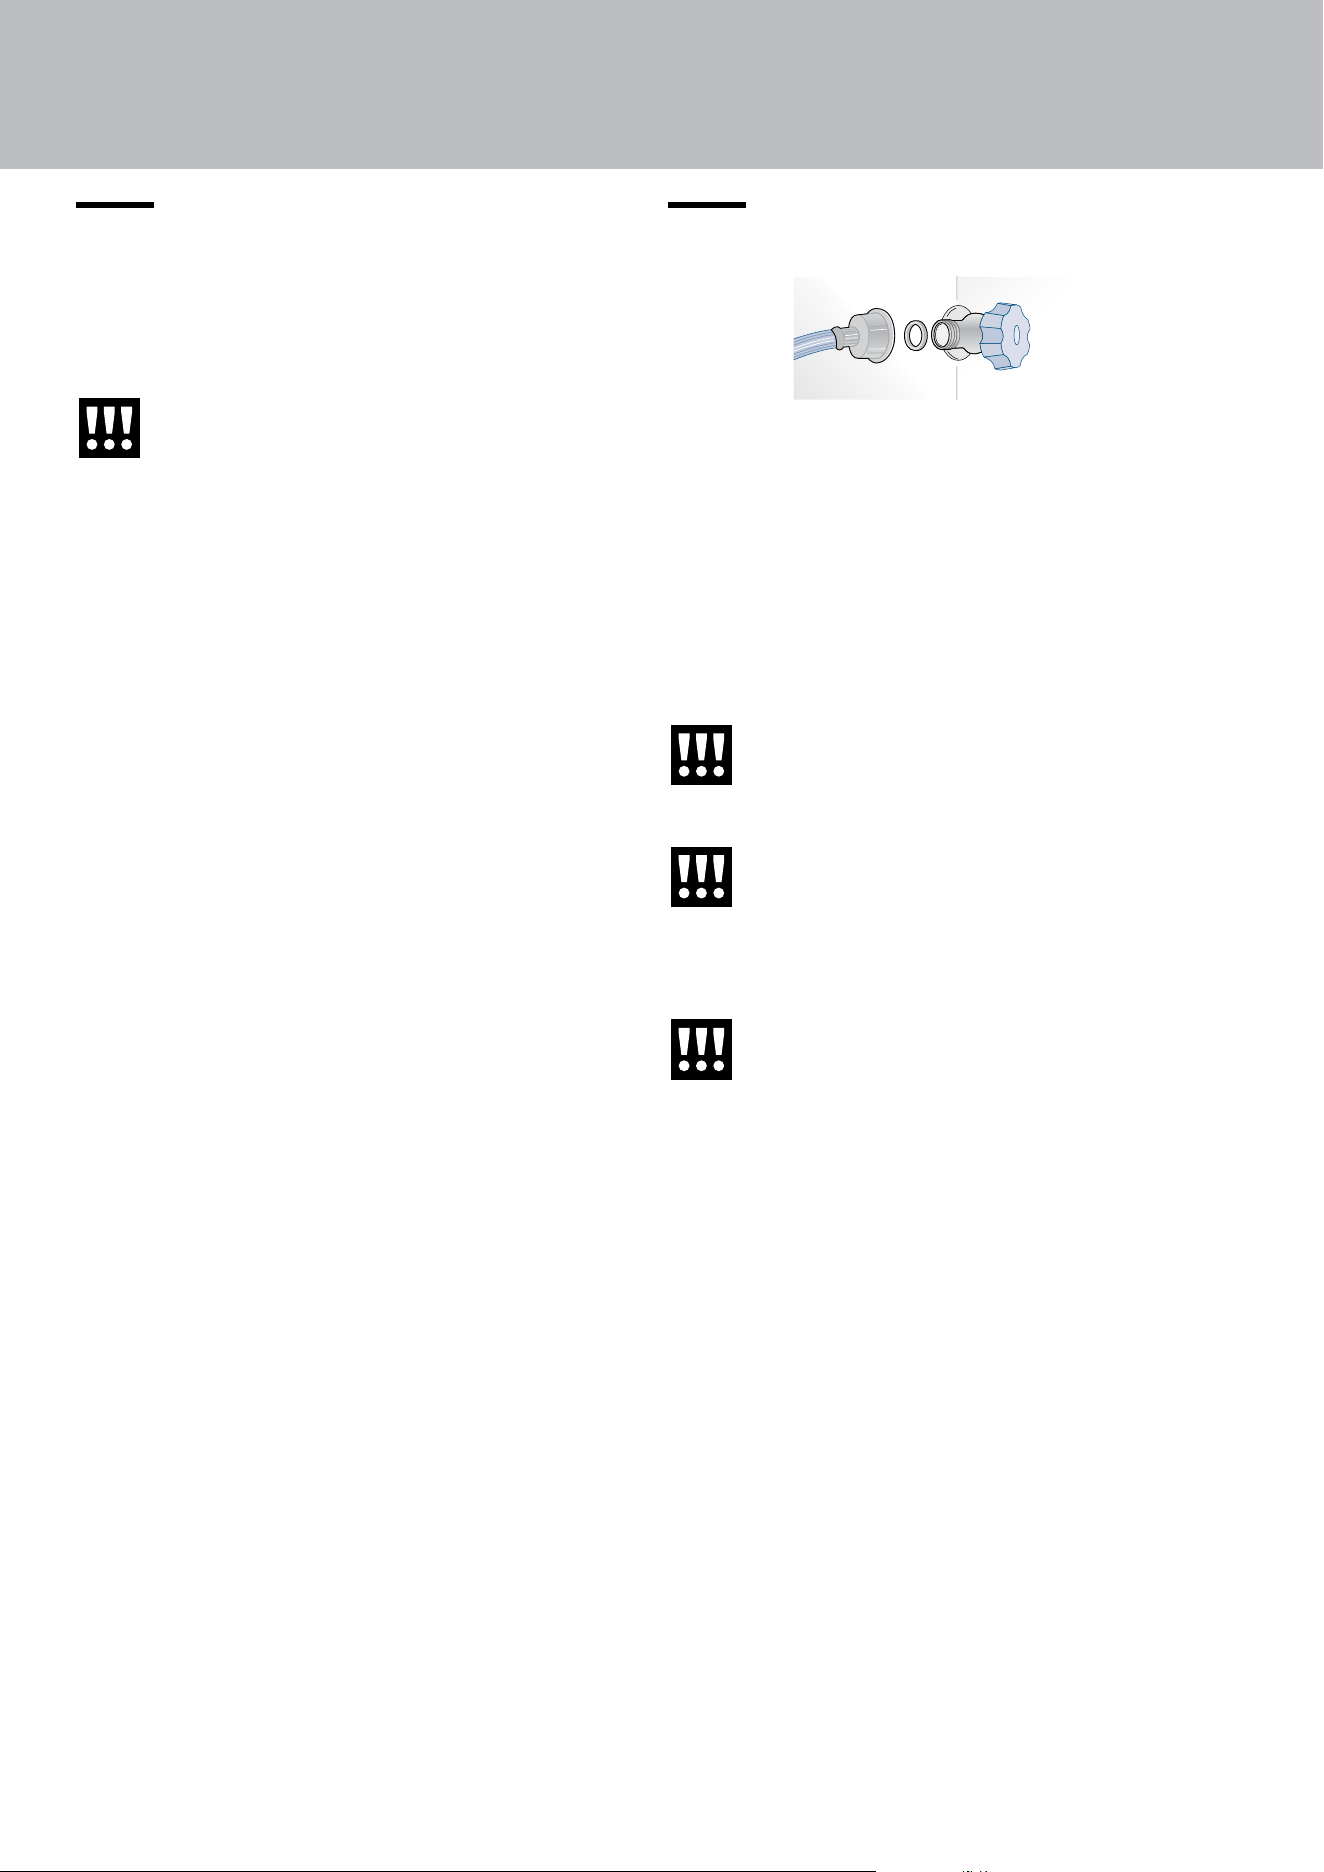
2.2. Connection to the water system
Models equipped with an Ice Maker require a con-
nection to the domestic water supply system.
It must be carried out using only the supplied new
water inlet hose with ¾” thread (do not use or reuse
previously used tubing).
The system pressure must be between 0.05 MPa
and 0.5 MPa (between 0.5 bar and 5 bar).
Any pressure outside of this range may cause the
water system to malfunction or leak.
Important
Do not use extension cords and/or multi-
ple adapters for connection.
Warning
Make sure that installation is performed
correctly and in accordance with all of
the instructions in the specific installation
manual provided with the appliance.
Warning
Do not attempt to use a locally-sourced
threaded garden hose adapter or braided
supply line. It will strip the threads on the
appliance’s water connection solenoid.
EN
11
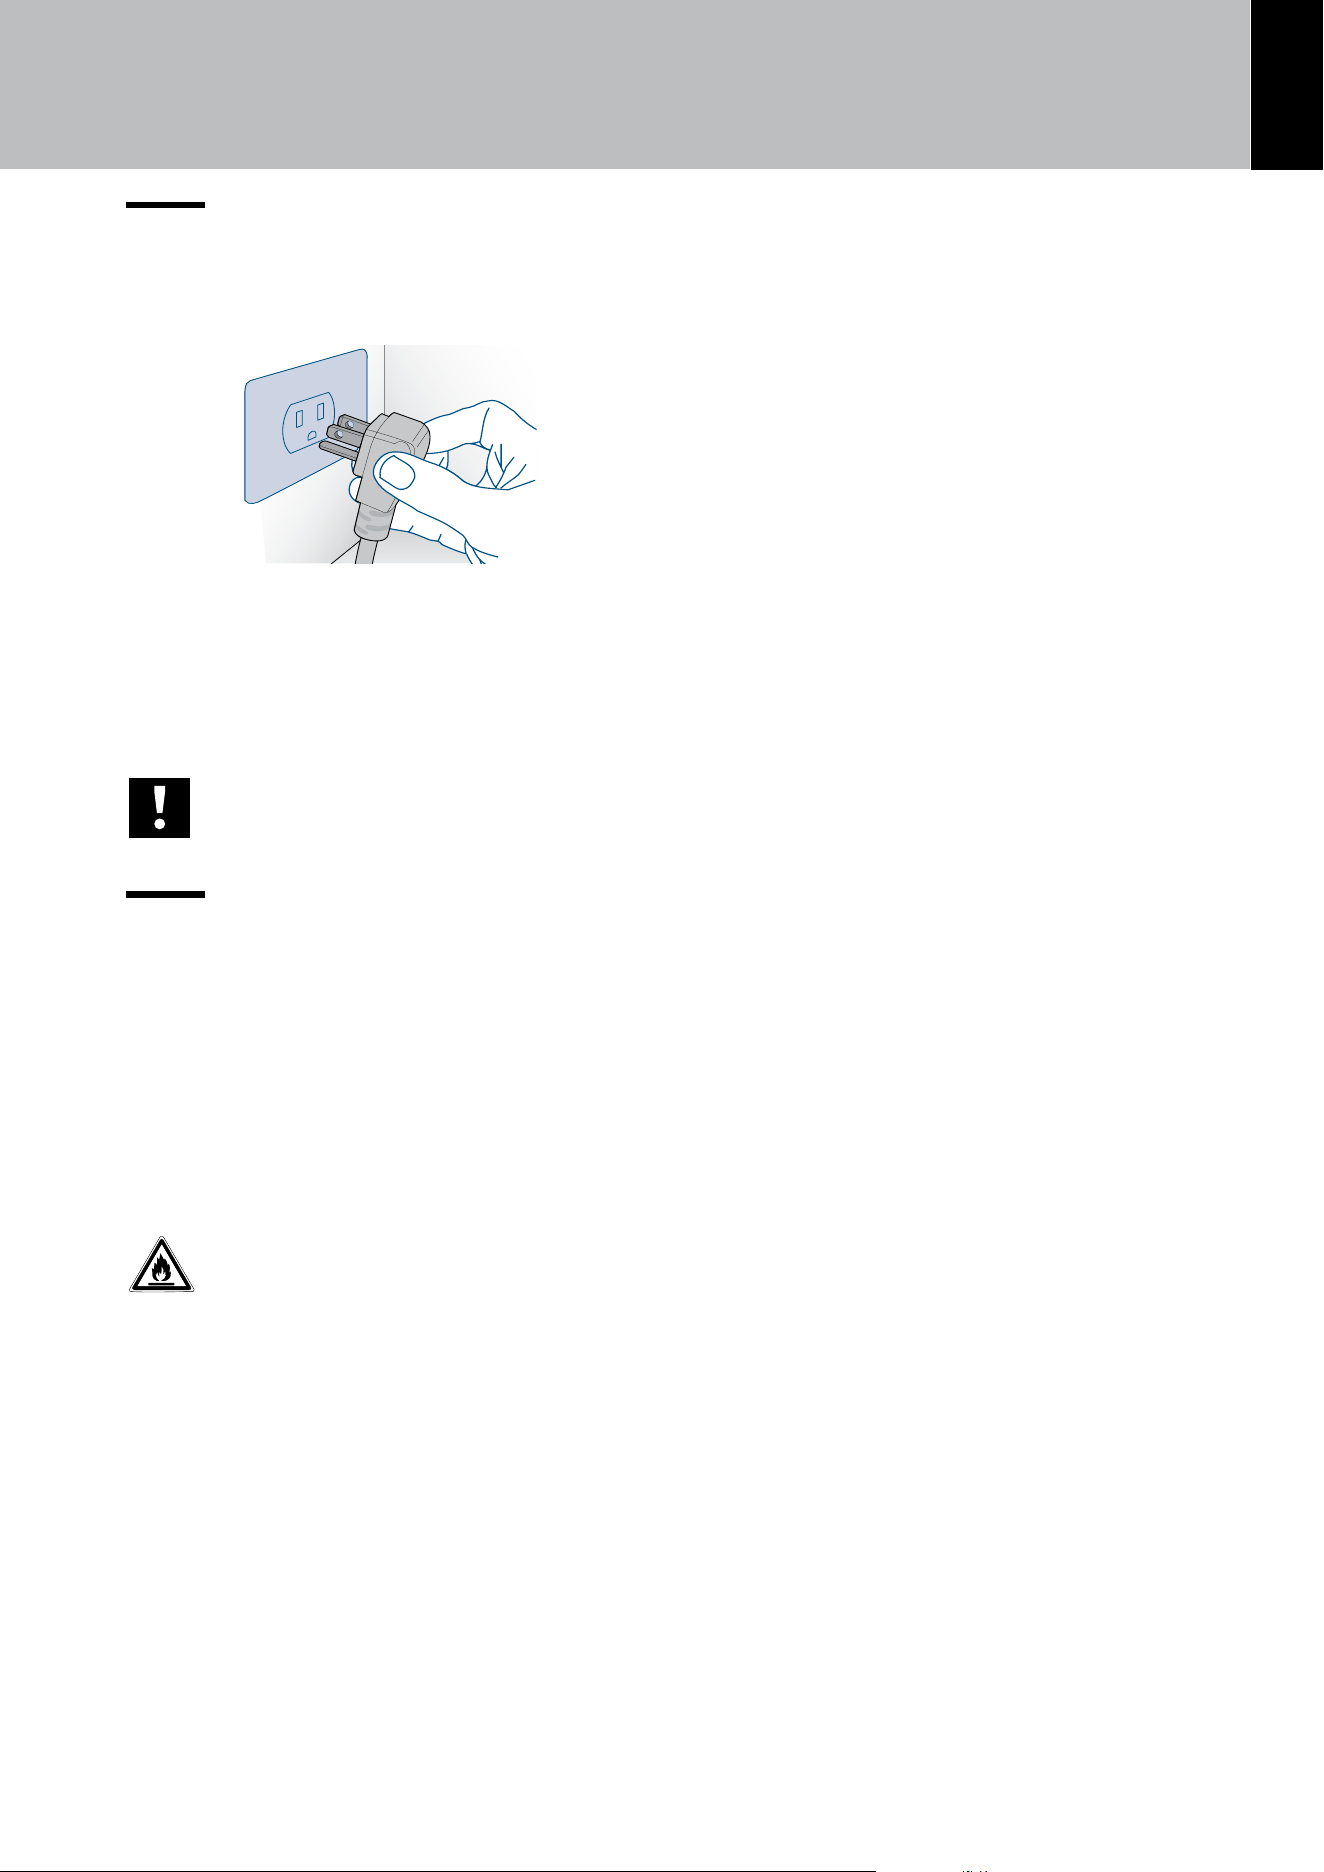
2.3. Connection to the electrical power
supply
The appliance operates at 115 V AC, 60Hz
and in equipped with a power supply cord
with a 3-prong grounded plug, whith must
be connected to a correspondig 3-prong
(15 Amp) grounding-type wall receptacle.
Important
Do not use extension cords and/or multi-
ple adapters for connection.
2.4. Refrigerant
The refrigerant isobutane (R600a) is contained with-
in the refrigerant circuit of the appliance, a natural
gas with a high level of environmental compatibility,
which is nevertheless flammable.
> If the refrigerant circuit should become dam-
aged, make sure that no flames and sparks de-
velop in the room. Thoroughly ventilate the room
in which the appliance is situated.
ISO 7010 W021
Warning
Fire hazard / Flammable materials.
Use special care during transportation,
installation and/or cleaning so as to avoid
damaging the refrigeration circuit.
3,50
Refrigerator-Fr
GREENWOOD,
MISSISSIPPI 38930
VIKING
RANGE, LLC
MODEL/MODELE
NUMBER/NUMERO
SERIAL/SERI
E
NUMBER/NUMERO
REFRIGERANT
TYPE
BLOWING
AGENT
TOTAL
GROSS VOLUME (L)
FREEZING
CAPACITY
REFRIGERANT
CHARGE
(oz) (gms)
VKFDBMIC7360RA
2525001050001
HFO-1336mzz(Z)
(60,00)
(48,00)
575
CLIMATE CLASS
REFRIGERANT TOTAL MASS
(REFRIGERATOR/FREEZER)
MAX. RATED CURRENT (A)
CURRENT COOLING SYSTEM
ICE MAKER ELEMENT WATTS
DEFROST SYSTEM WATTS
VOLTS/FREQUENCY
LISTED HOUSEHOLD REFRIGERATOR
R600a
213
115/60
FF
FZ
1,70 2,10
(0,23 lbs (108 gms))
WATER SUPPLY IN Mpa (bars),Min 0.15 (1.5)-Max 1
12
3. BEFORE STARTING
3.1. Getting started
Congratulations on purchasing your new Viking re-
frigerator! From now on you can use our innovative
storage system, which will allow you to store all of
your food in the best possible way. This manual will
answer most of your questions about the product’s
features.
3.2. Manufacturer’s liability
Viking declines all liability for damage to persons or
property caused by:
> uses of the appliance other than those specified;
> failure to comply with the instructions in the user
manual;
> tampering with any part of the appliance;
> use of non-original spare parts.
3.3. Technical support
> In the event of appliance failure, contact techni-
cal support and have the repair carried out by quali-
fied personnel only.
> Make sure you have the model and serial num-
ber on hand (located on the identification plate).
> Use only original spare parts.
> Do not try to repair the appliance yourself or with-
out the assistance of a qualified technician; this has
safety repercussions and may void the warranty.
> Detailed information on the duration of the war-
ranty and the warranty conditions in each country
can be found from Viking Customer Support, your
dealer or on our website.
> If you need further information, do not hesitate to
contact the Technical Assistance Centre:
Viking Range, LLC
111 Front Street
Greenwood, Mississippi 38930 USA
(662) 455-1200
For product information, call 1-888-(845-4641)
or visit the our web site at vikingrange.com
Important
Before calling, make a note of the appli-
ance’s serial number located inside the
refrigerator compartment on the side op-
posite the door opening.
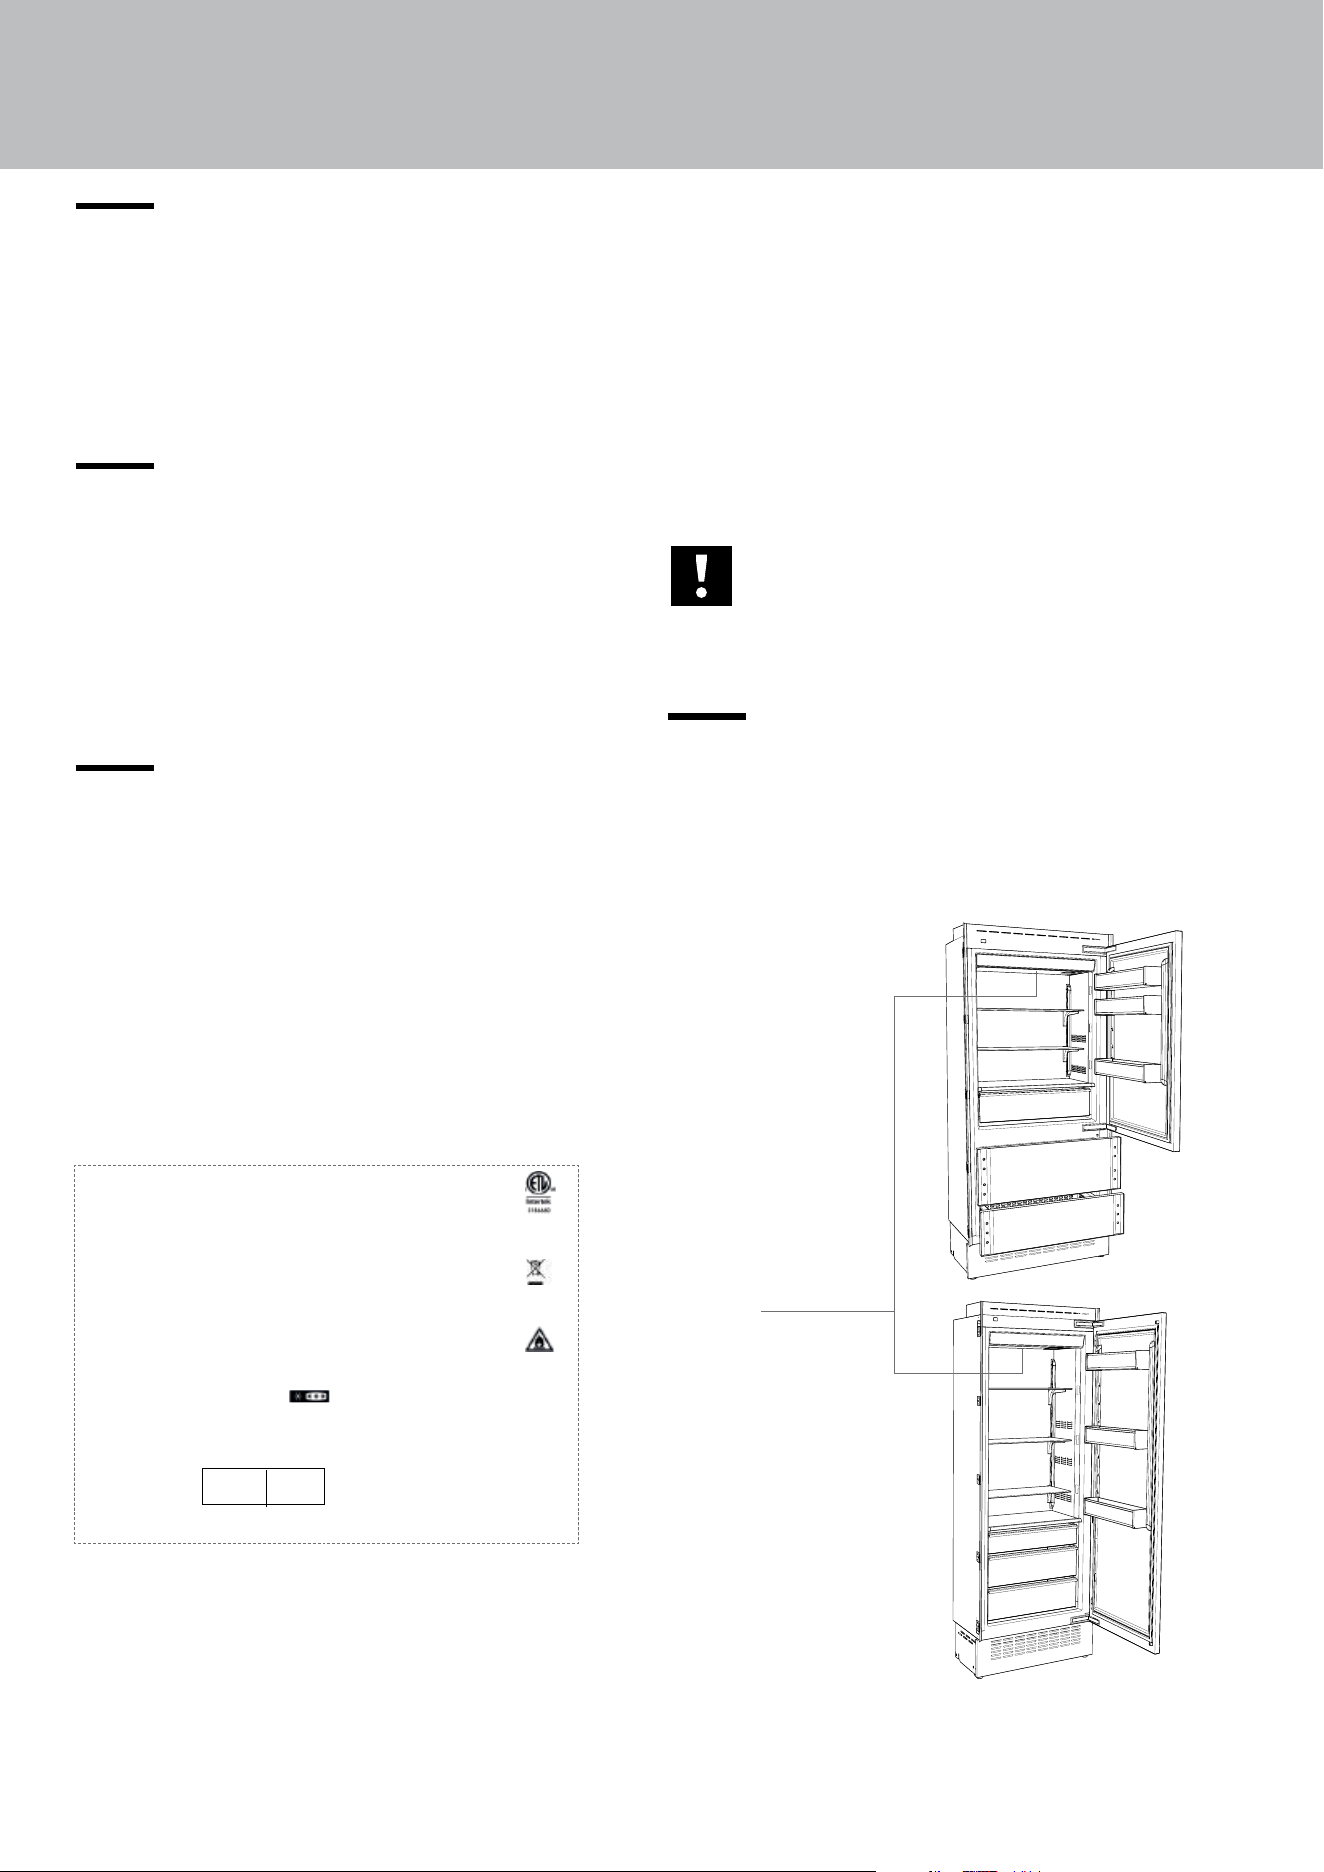
3.4. Product plate
The product plate shows the technical data, the se-
rial number and the model. The product plate must
never be removed or damaged.
Conservation Tips
> SN (Subnormal) from +50°F to +90°F (+10° to +32°C).
> N (Normal) from +61°F to +90°F (+16° to +32°C.
> ST (Subtropical) from +64°F to +100°F (+18°C to +38°C).
> T (Subtropical) from +64°F to +109°F (+18°C to +43°C).
The product plate is
positioned
on the side opposite
door opening.
Refrigerator
+46/+35°F
(+7°C/+1°C)
Fresh Select
5°F/-8°F
(-13°C/-23°C)
EN
13
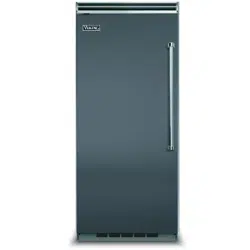
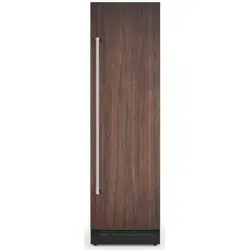
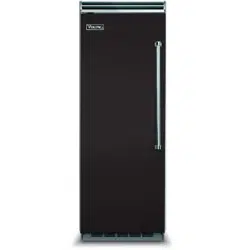
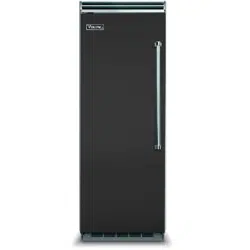
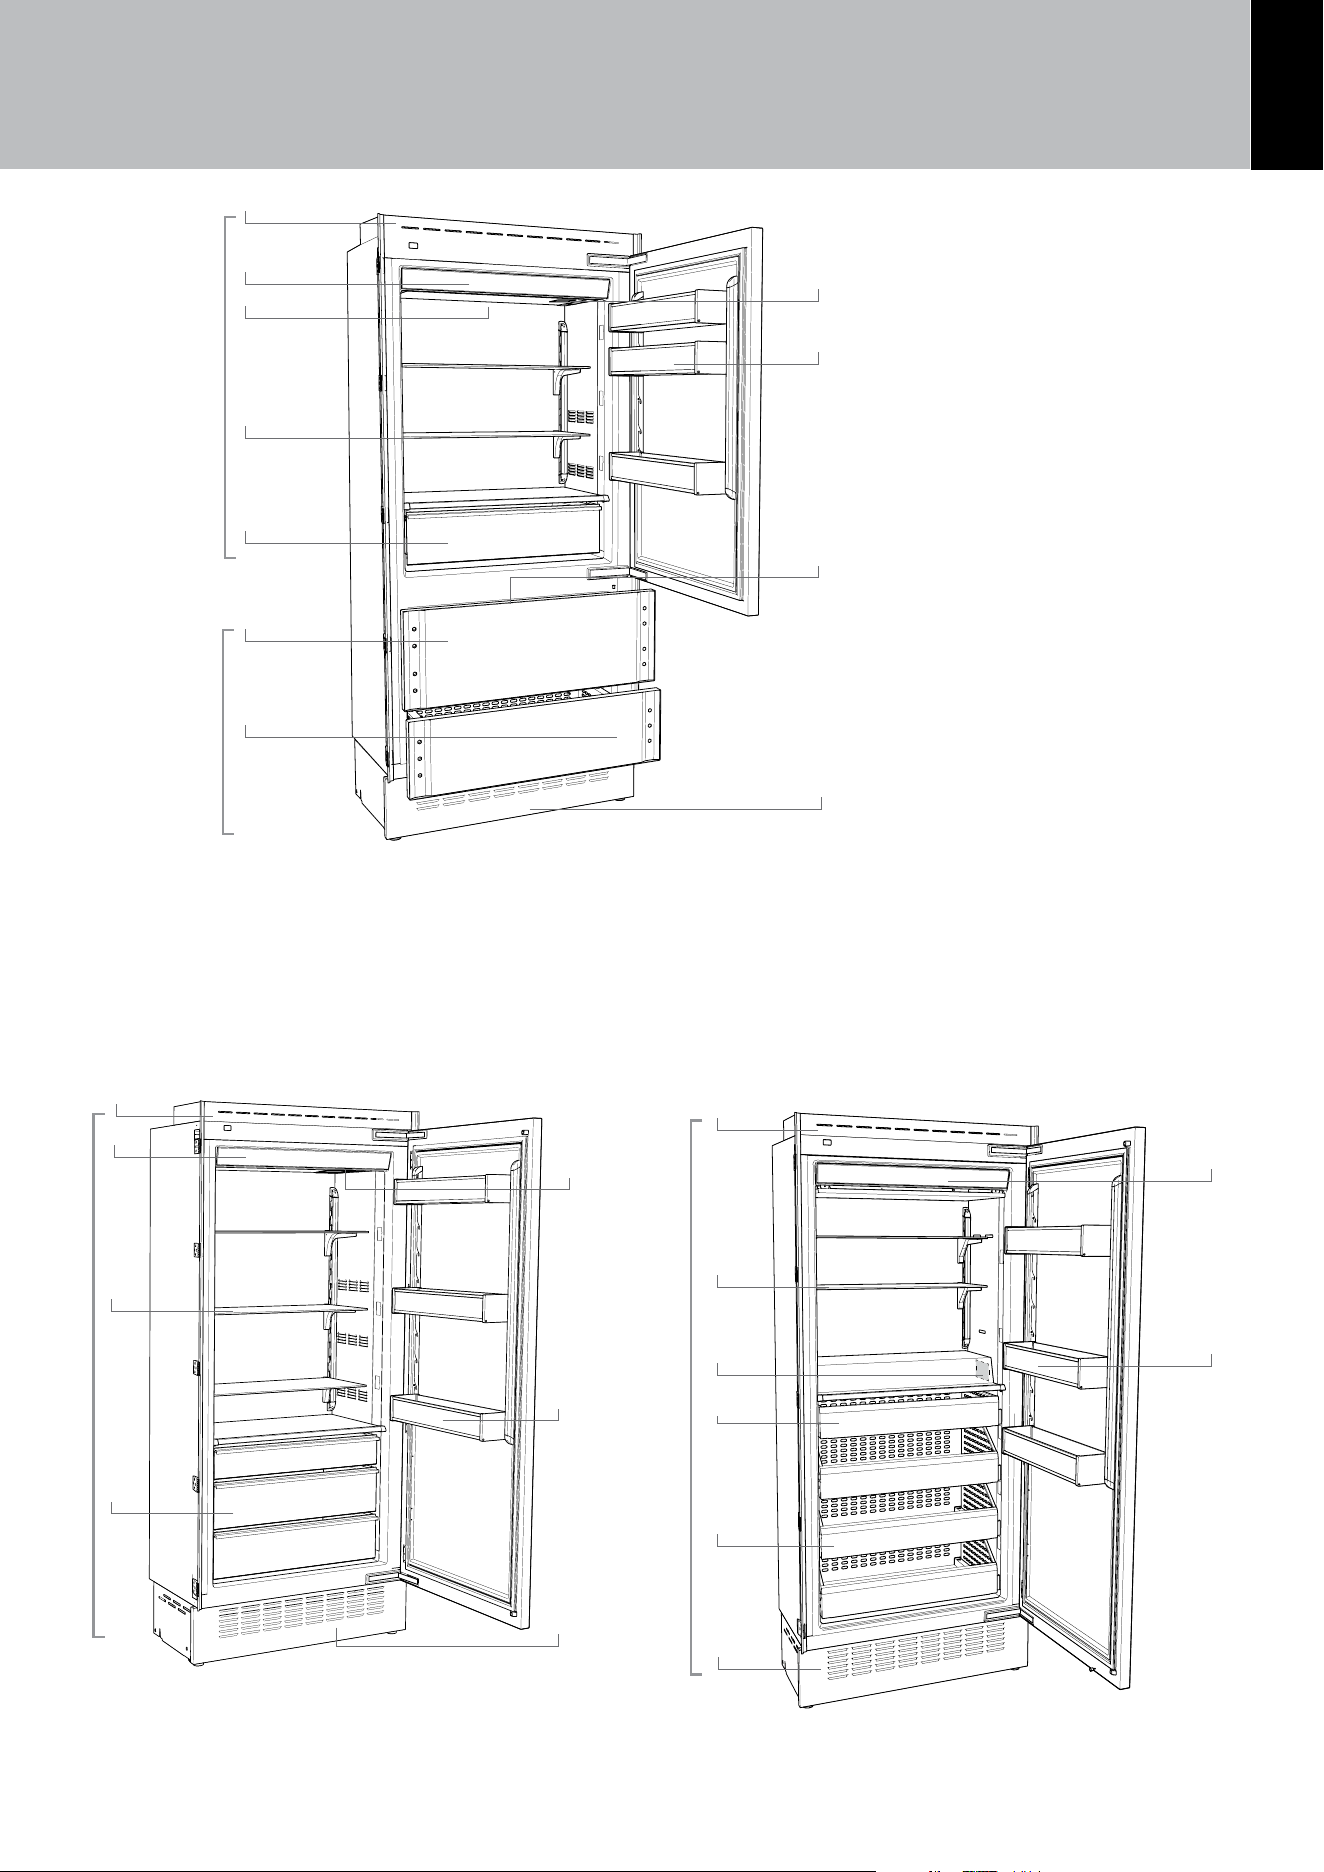
1) Stainless steel body.
2) Interactive control panel.
3) Water filter.
4) Patented shelf positioning
system.
5) Refrigerator compartment
drawers.
6) Ice maker container.
7) Door bins.
8) LED lights for the freezer
compartment drawers.
9) Freezer compartment drawer
convertible into Refrigerator
or Fresco compartment (Fresh
Select function).
10) AISI 304 stainless steel
drawers.
11) Removable grill (condenser)
12) Product plate
Refrigerator Models Freezer Models
Refrigerator
+46/+35°F
(+7°C/+1°C)
Fresh Select
5°F/-8°F
(-13°C/-23°C)
Refrigerator
+46/+35°F
(+7°C/+1°C)
Freezer
5°F/-8°F
(-13°C/-23°C)
3. BEFORE STARTING
1
8
2
3
4
5
6
Bottom Models
1
4
5
7
12
9
11
11
11
2
7
12
1
2
7
4
12
10
6
Serigraa B02919200 VETRO USER 599 LCD2.8 - FHIABA
Limite per graca parti retro-illuminate - la parte bianca è trasparente
Testo e graca
00
°C+
Impostazioni
Funzioni
00
°C+
00
°C-
Colore SMEG
colore C71
Serigraa B02919200 VETRO USER 599 LCD2.8 - FHIABA
Limite per graca parti retro-illuminate - la parte bianca è trasparente
Testo e graca
00
°C+
Impostazioni
Funzioni
00
°C+
00
°C-
Colore SMEG
colore C71
Serigraa B02919200 VETRO USER 599 LCD2.8 - FHIABA
Limite per graca parti retro-illuminate - la parte bianca è trasparente
Testo e graca
00
°C+
Impostazioni
Funzioni
00
°C+
00
°C-
Colore SMEG
colore C71
Serigraa B02919200 VETRO USER 599 LCD2.8 - FHIABA
Limite per graca parti retro-illuminate - la parte bianca è trasparente
Testo e graca
00
°C+
Impostazioni
Funzioni
00
°C+
00
°C-
Colore SMEG
colore C71
Serigraa B02919200 VETRO USER 599 LCD2.8 - FHIABA
Limite per graca parti retro-illuminate - la parte bianca è trasparente
Testo e graca
00
°C+
Impostazioni
Funzioni
00
°C+
00
°C-
Colore SMEG
colore C71
14
3.5. Electronic Control
The innovative electronic control system designed by Viking maintains constant temperature in the
compartments and visualizes it on the control panel display. It also allows user interaction making it
possible to personalize settings of the various functions and to receive sound and/or visual messages
should any malfunction occur in the appliance.
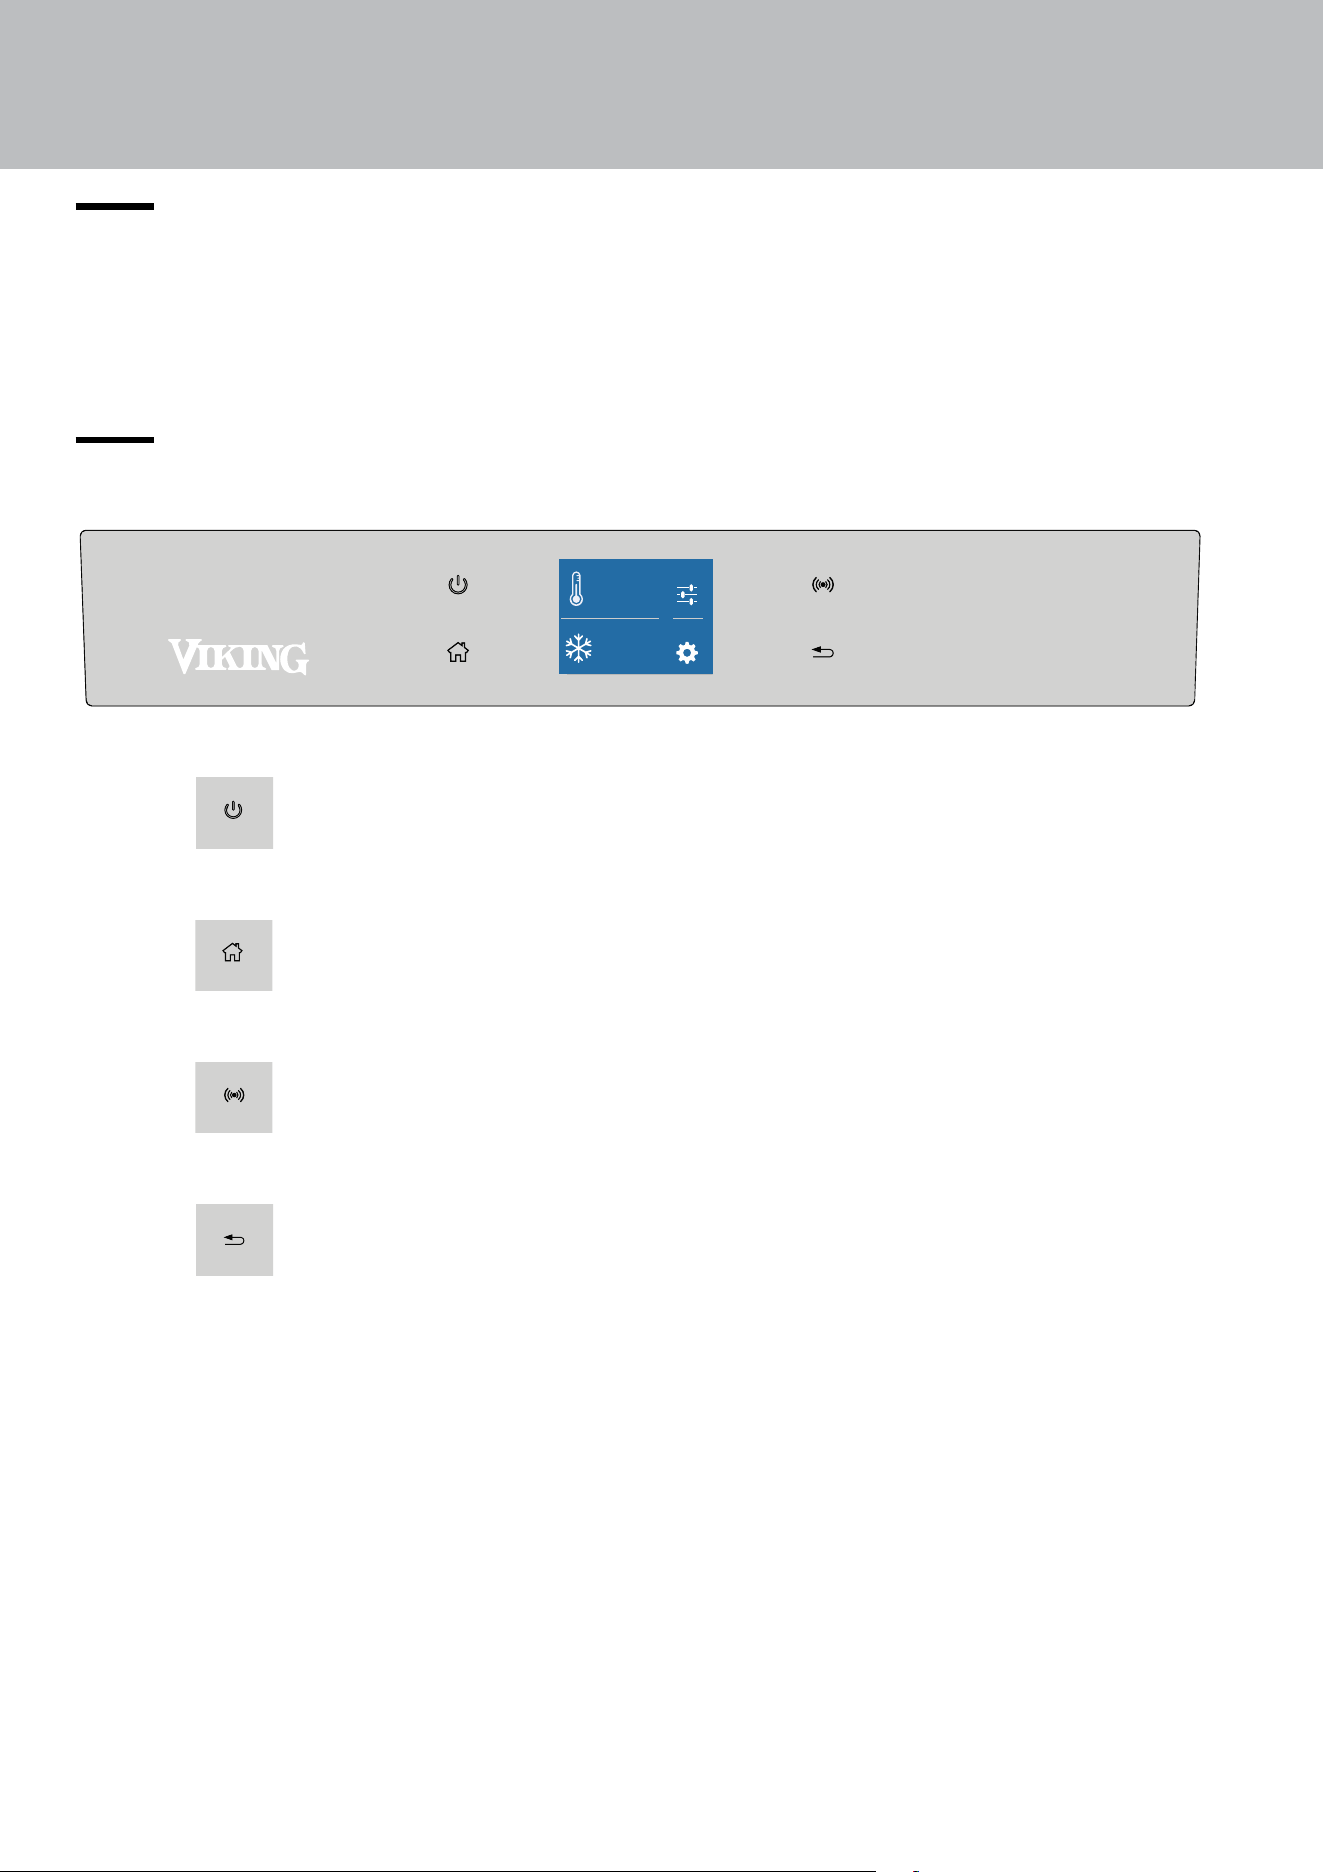
3.6. Main control panel
Turning On/O
Touch the icon to turn the unit on or o.
Home
Touch the Home icon to go back to the home screen.
Alarm
Touch the icon to view the alarm tone functions and to deactivate them.
Back
Touch the arrow icon to go back to the previous screen.
Settings
Functions
°F
1
-
42
°F
+
3. BEFORE STARTING
EN
15
4. TURNING THE PRODUCT ON
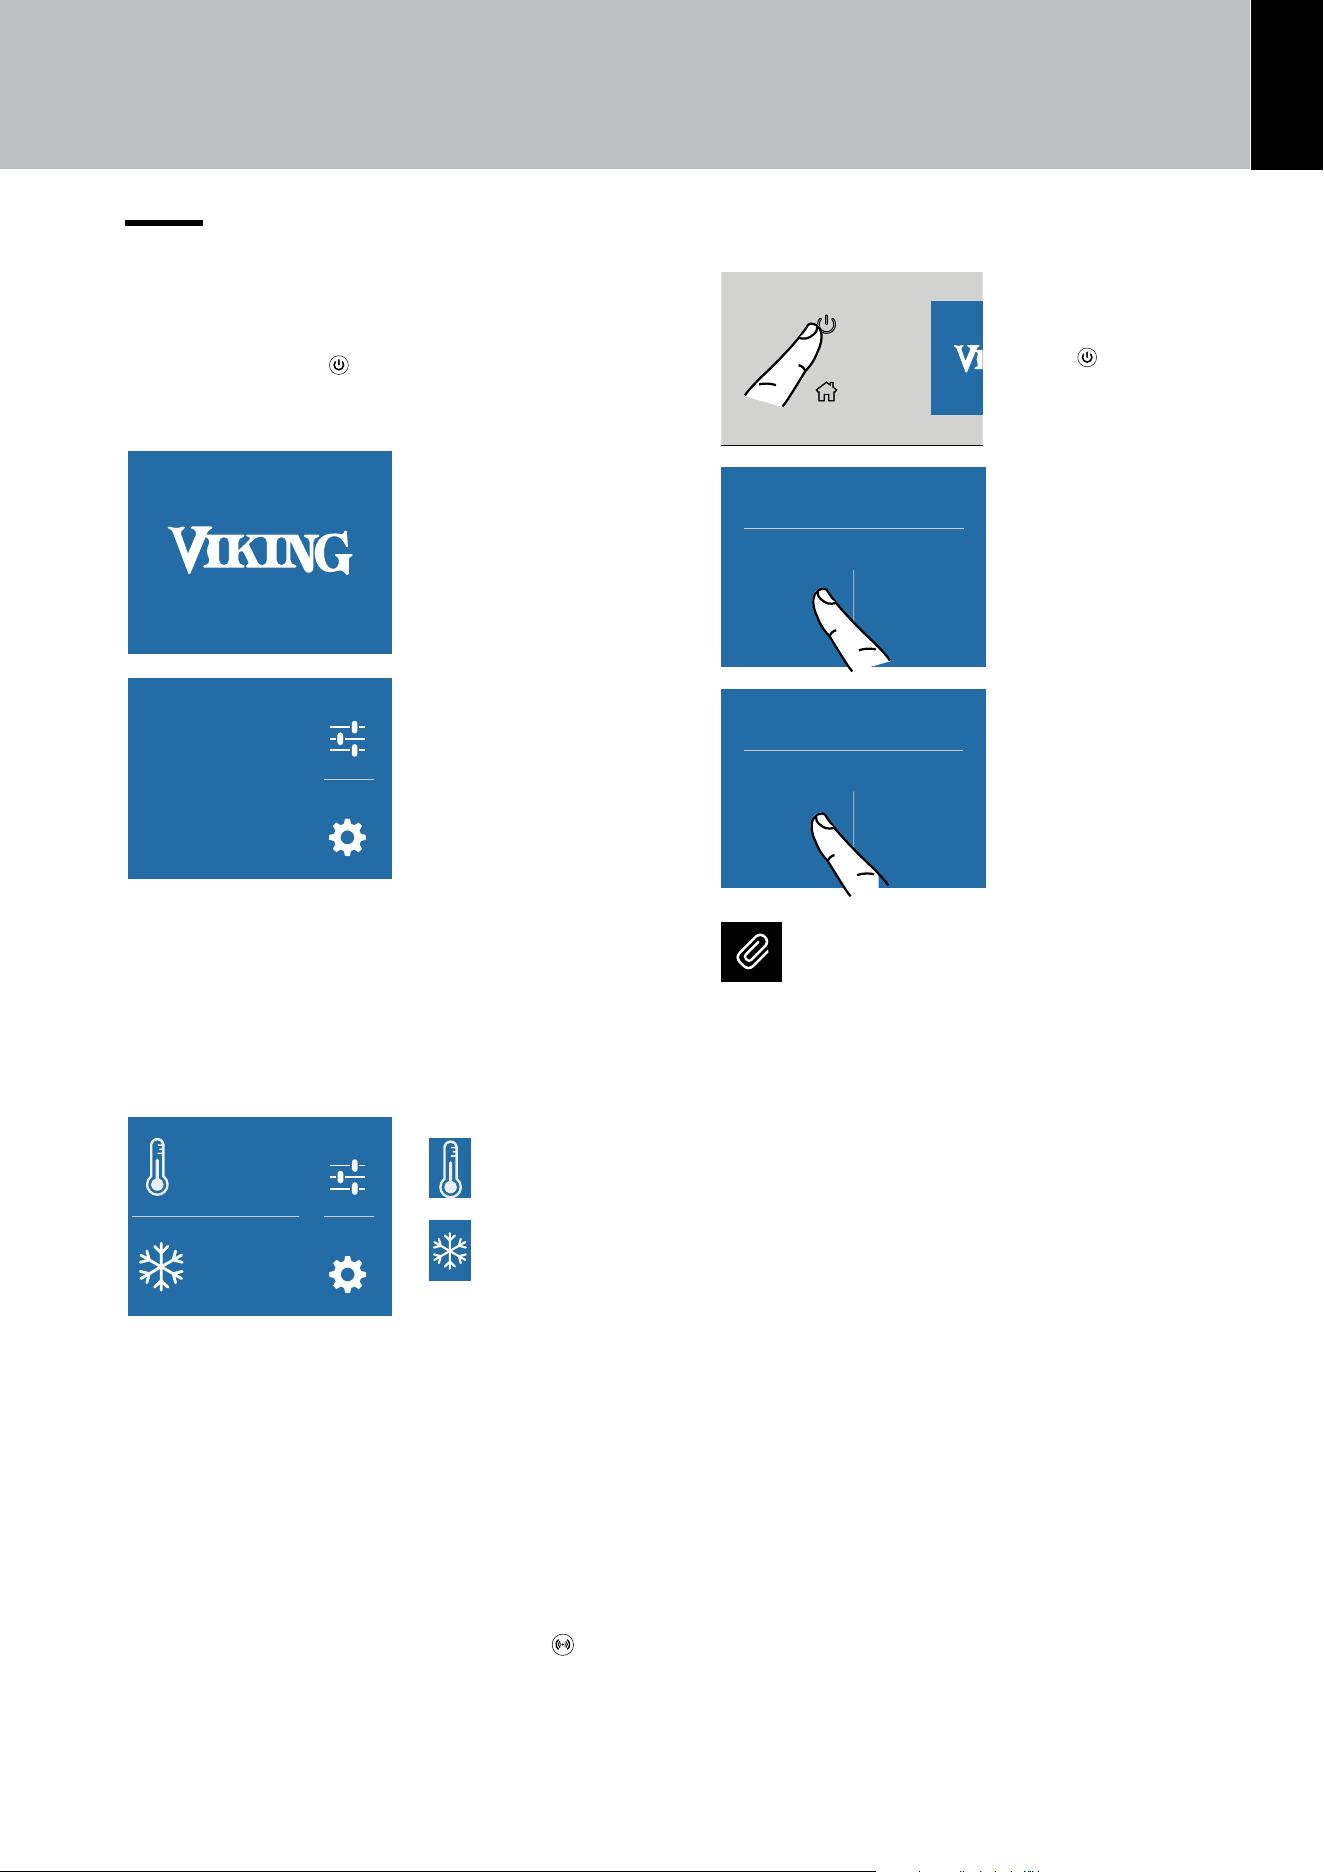
4.1. Turning on and o
First startup
Touch the ON/OFF . The display shows the fol-
lowing launch screens:
1) Viking logo
Settings
Functions
Initial test …
please wait.
2) Initial test
(lasts 3 minutes).
3) The display shows the main screen with the ambi-
ent temperature measured from the cellar inside the
compartments. Automatically the unit start to cool
down until reaching the set temperatures.
Settings
Functions
°F
1
-
42
°F
+
4)
Home screen (*).
Settings
Functions
°F
1
-
42
°F
+
Refrigerator
compartment
[ +41°F (+5°C)]
Settings
Functions
°F
1
-
42
°F
+
Fresh select
compartment
[0°F (-18°C)]
(*) The home screen varies
depending on the models;
The Fresh Select compartment is set in the freezer
mode [ 0°F (-18°C)]. To change this setting see chap.
5) Fresh Select (only for Combi and Freezer mod-
els) on page 29.
When the appliance is first turned on, it is recom-
mended to wait at least 12 hours before placing any
food inside the unit. During this time, deactivate any
error messages by touching the ALARM button.
Turning o the appliance
Serigraa B02919200 VETRO USER 599 LCD2.8 - FHIABA
Limite per graca parti retro-illuminate - la parte bianca è trasparente
Testo e graca
00
°C+
Impostazioni
Funzioni
00
°C+
00
°C-
Colore SMEG
colore C71
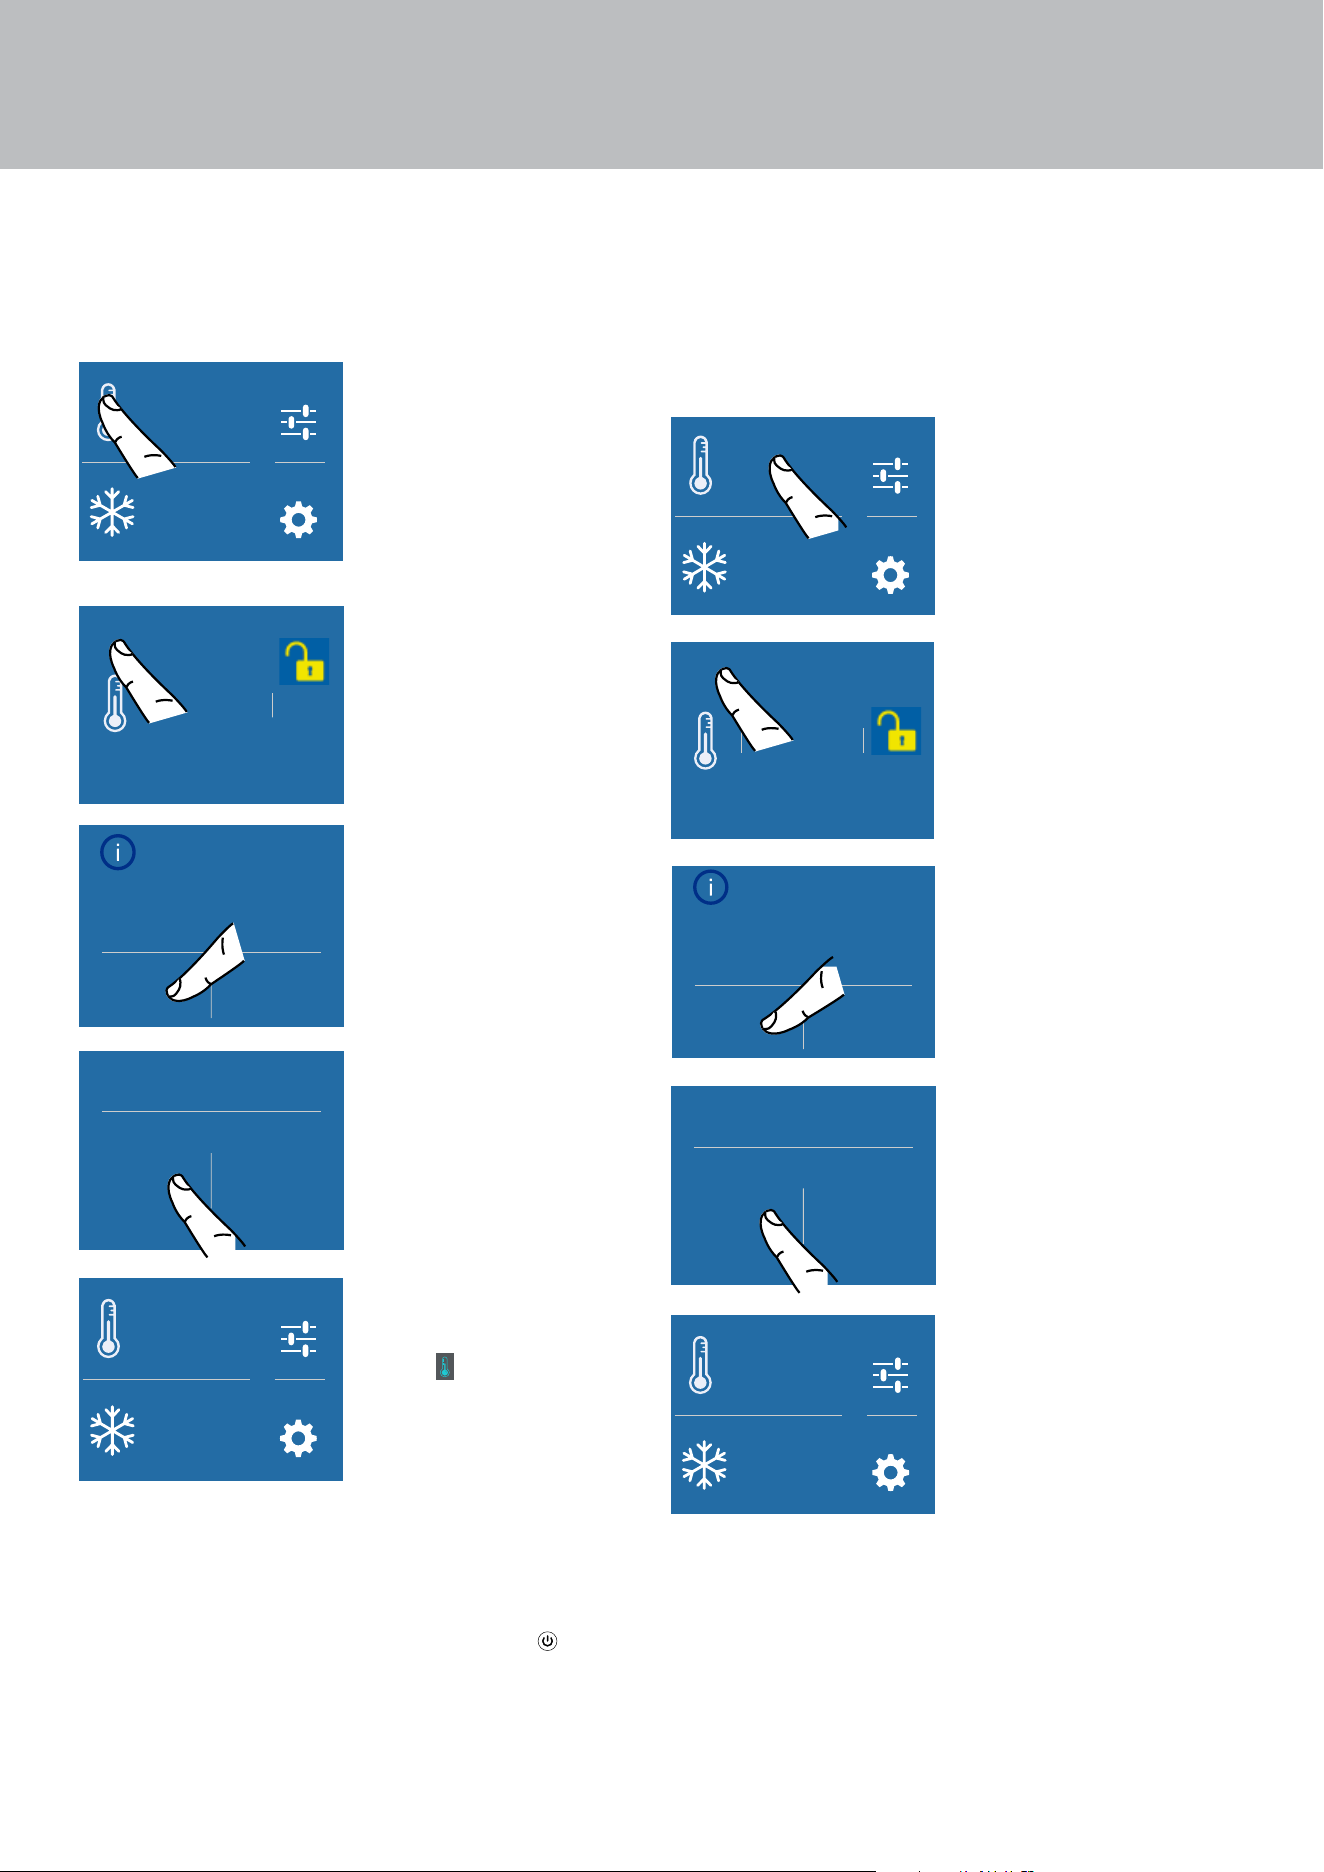
1) Touch the ON/
OFF
button to
switch o.
Are you sure you want to
power o this compartment?
Yes No
2) Confirm the
shutdown touching
the YES icon.
Are you sure?
Yes No
3) Confirm shutdown
again touching the
YES icon.
Note
When the unit is o there are no warning
lights to show that the appliance is plugged
into a socket.
16
4. TURNING THE PRODUCT ON
Refrigerator compartment shutdown
The refrigerator compartment, can be turned o
individually whereas the Fresh Select drawer can
be turned o only if the whole unit is turned o.
Settings
Functions
°F
1
-
42
°F
+
1) HOME screen.
To turn o the
refrigerator
compartment
or the Fresco
compartment, touch
the corresponding
icon.
+ 42 °F
+ 40
+ 41
+ 44
+ 43
OK
OFF
2) Touch the OFF
icon.
Turn Compartment
OFF?
Yes No
3) Confirm the
shutdown touching
the YES icon.
Are you sure?
Yes No
4) Confirm shutdown
again touching the
YES icon.
Settings
Functions
°F
1
O
5) On the home
screen, the OFF
icon
appears,
indicating that
the Refrigerator
compartment is o.
Turning the appliance back on
To turn the unit back on, press the ON/OFF but-
ton. The display will turn on and the start screen and
the home screen will be shown, once again display-
ing the temperature measured inside the refrigera-
tor compartments. The refrigerator will start cooling
until it reaches the set temperatures.
Turning the compartments back on
If the refrigerator compartment must be switched
back on, follow this procedure:
Settings
Functions
°F
1
O
1) Home screen.
To turn back on an
o compartment,
touch the OFF
compartment next
to it.
+ 42 °F
+ 40
+ 41
+ 44
+ 43
OK
ON
2) Touch the ON
icon.
Turn Compartment
ON?
Yes No
3) Confirm the
turning on touching
the YES icon.
Are you sure?
Yes No
4) Confirm the
turning on again
touching the YES
icon.
Settings
Functions
°F
1
-
42
°F
+
5) The refrigerator
compartment
switches back on
and the HOME
screen is displayed.

EN
17
Turning o for long periods
During long periods of absence it is recommend-
ed that the appliance is turned o by pressing the
ON/OFF
button and disconnecting the elec-
trical plug or the breaker controlling the socket.
Empty the refrigerator completely, clean and dry it
and leave the doors and drawers partially open to
prevent unpleasant odours.
Note
If at the first startup the Viking message
does not appear, but another message ap-
pears, it means that the appliance has al-
ready started the cooling process.
During the first startup, it will not be pos-
sible to use the Menu to modify the factory
settings until the preset temperature has
been reached. It is however possible to set
the time and date immediately; these pa-
rameters are required to activate some of
the special functions.
4. TURNING THE PRODUCT ON
18
5. COMPARTMENT TEMPERATURE SETTING
5.1. How to adjust the temperature to
meet dierent needs
Each model has been carefully tested before
leaving the factory and is adjusted in such a way to
ensure high performance and low consumption.
Usually, it is not necessary to modify the settings.
Settings
Functions
°F
1
-
42
°F
+
Settings
Functions
°F
1
-
42
°F
+
Refrigeration
compartment
Refrigeration
compartment
Freezer
compartment
(Fresh Select).
Freezer
compartment
(Fresh Select).
Preset
temperatures
Preset
temperature
Preset
temperature
Bottom Mount
Refrigerator Model
Freezer Model
Home screen in the various models:
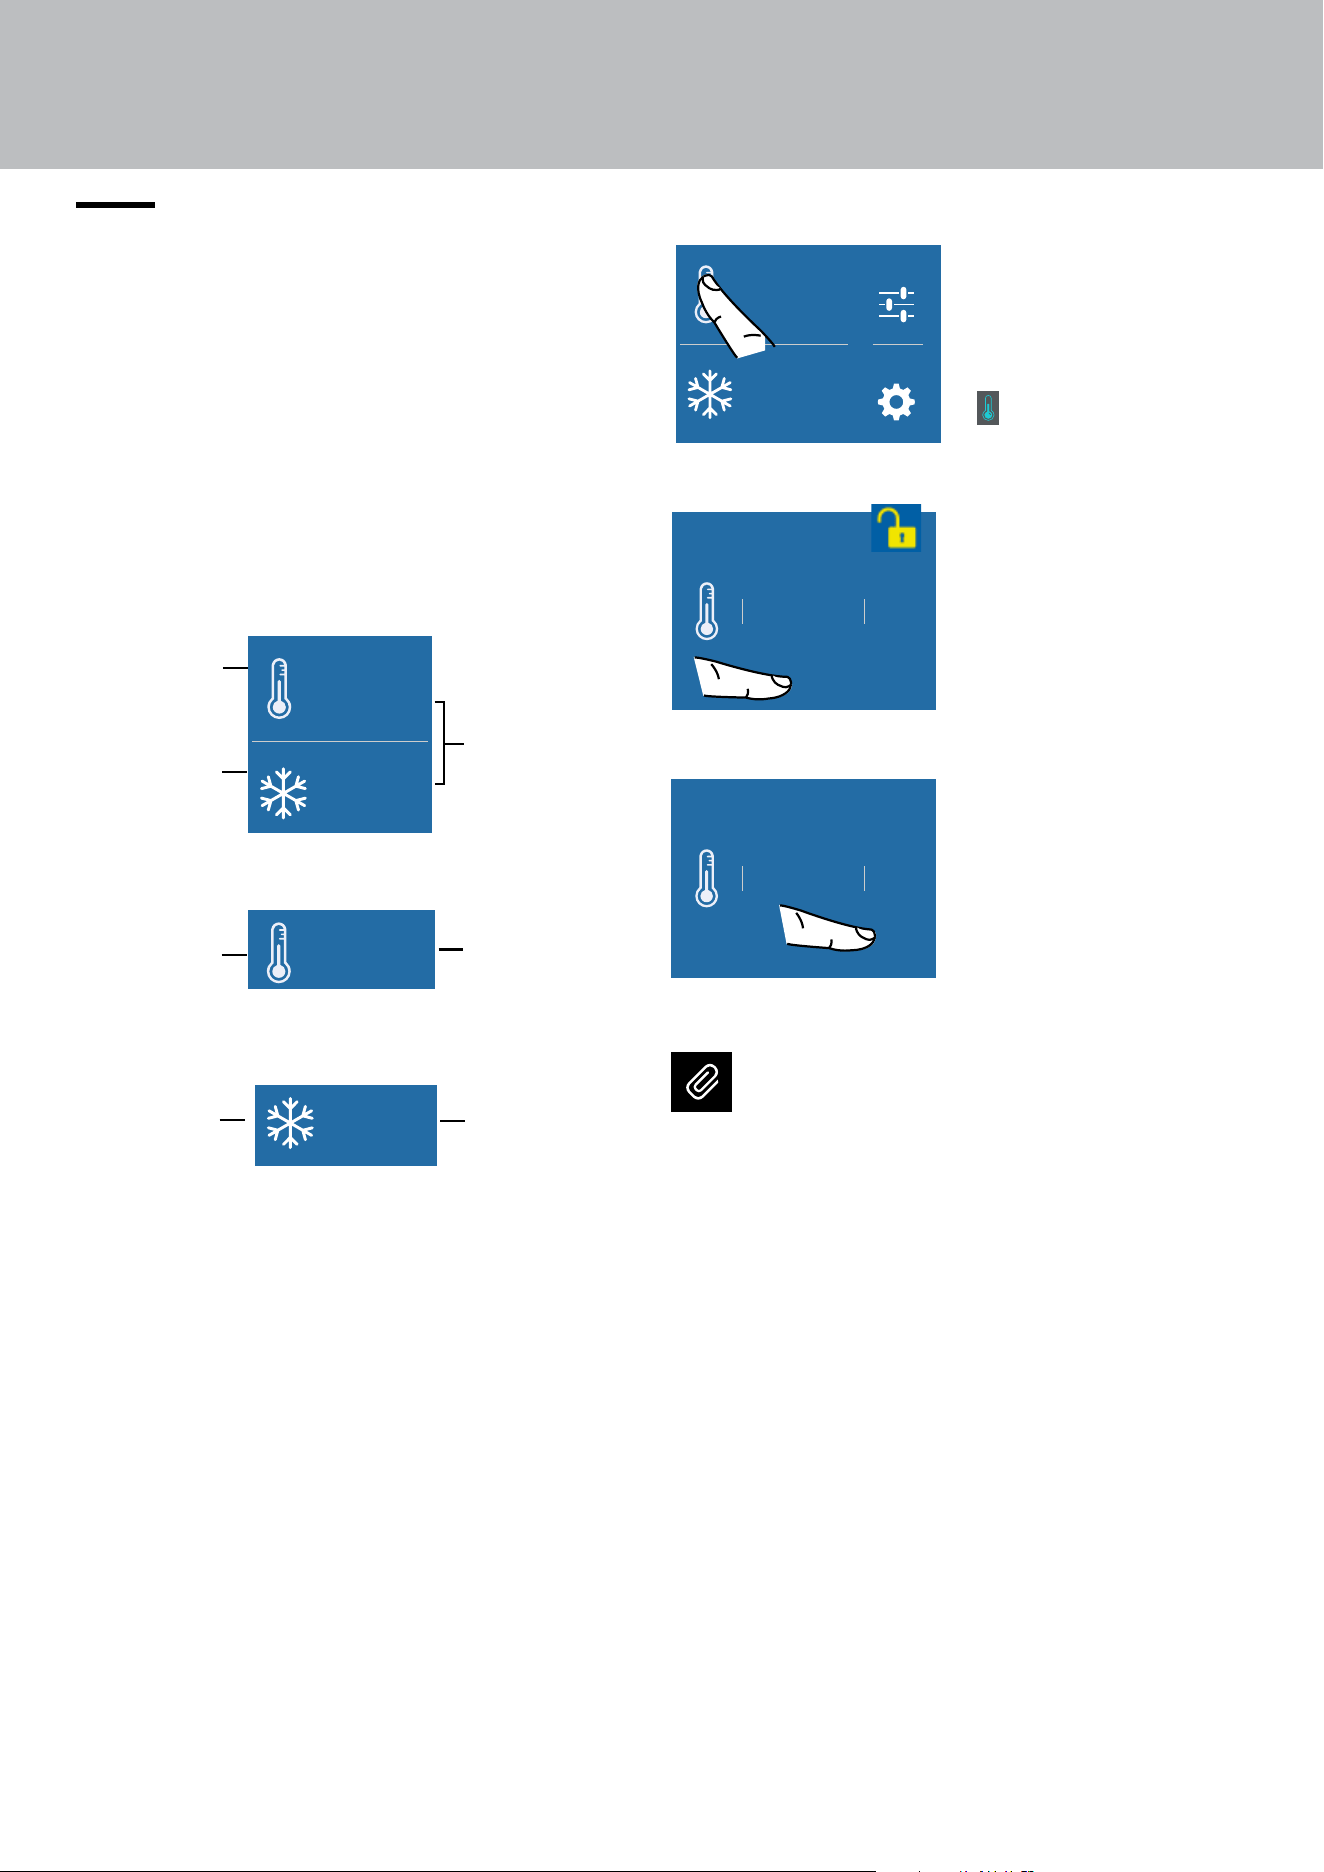
Modifying the compartment temperatures
Settings
Functions
°F
1
-
42
°F
+
1) Home screen.
Touch the
refrigerator
compartment icon
for example.
+ 42 °F
+ 40
+ 41
+ 44
+ 43
OK
ON
2) Scroll the values
up or down to
select the desired
temperature
(in the case of
the Refrigerator
compartment the
temperature can be
set from 36°F (+2°C)
to 46°F (+8°C)
+ 42 °F
+ 40
+ 41
+ 44
+ 43
OK
ON
3) Touch the OK
icon to confirm
the selected
temperature.
Note
The displayed temperature may vary slight-
ly with respect to the set temperature if the
doors are continuously opened or if large
quantities at ambient temperature are in
-
serted.
It takes 6 to 12 hours to reach the selected
temperature.
Settings
Functions
°F
1
-
42
°F
+
EN
19
5.2. Information and malfunction
messages on the display
Serigraa B02919200 VETRO USER 599 LCD2.8 - FHIABA
Limite per graca parti retro-illuminate - la parte bianca è trasparente
Testo e graca
00
°C+
Impostazioni
Funzioni
00
°C+
00
°C-
Colore SMEG
colore C71
A built-in control sys-
tem provides informa-
tion using warning
lights or text notifica-
tions, shown on the
display.
The voiced notification
that accompanies some of the warning notifica-
tions can be turned o by touching the ALARM
button on the main control panel.
The list of the anomalies can be found at the end
of this manual (see paragraph Troubleshooting
Guide page 44).
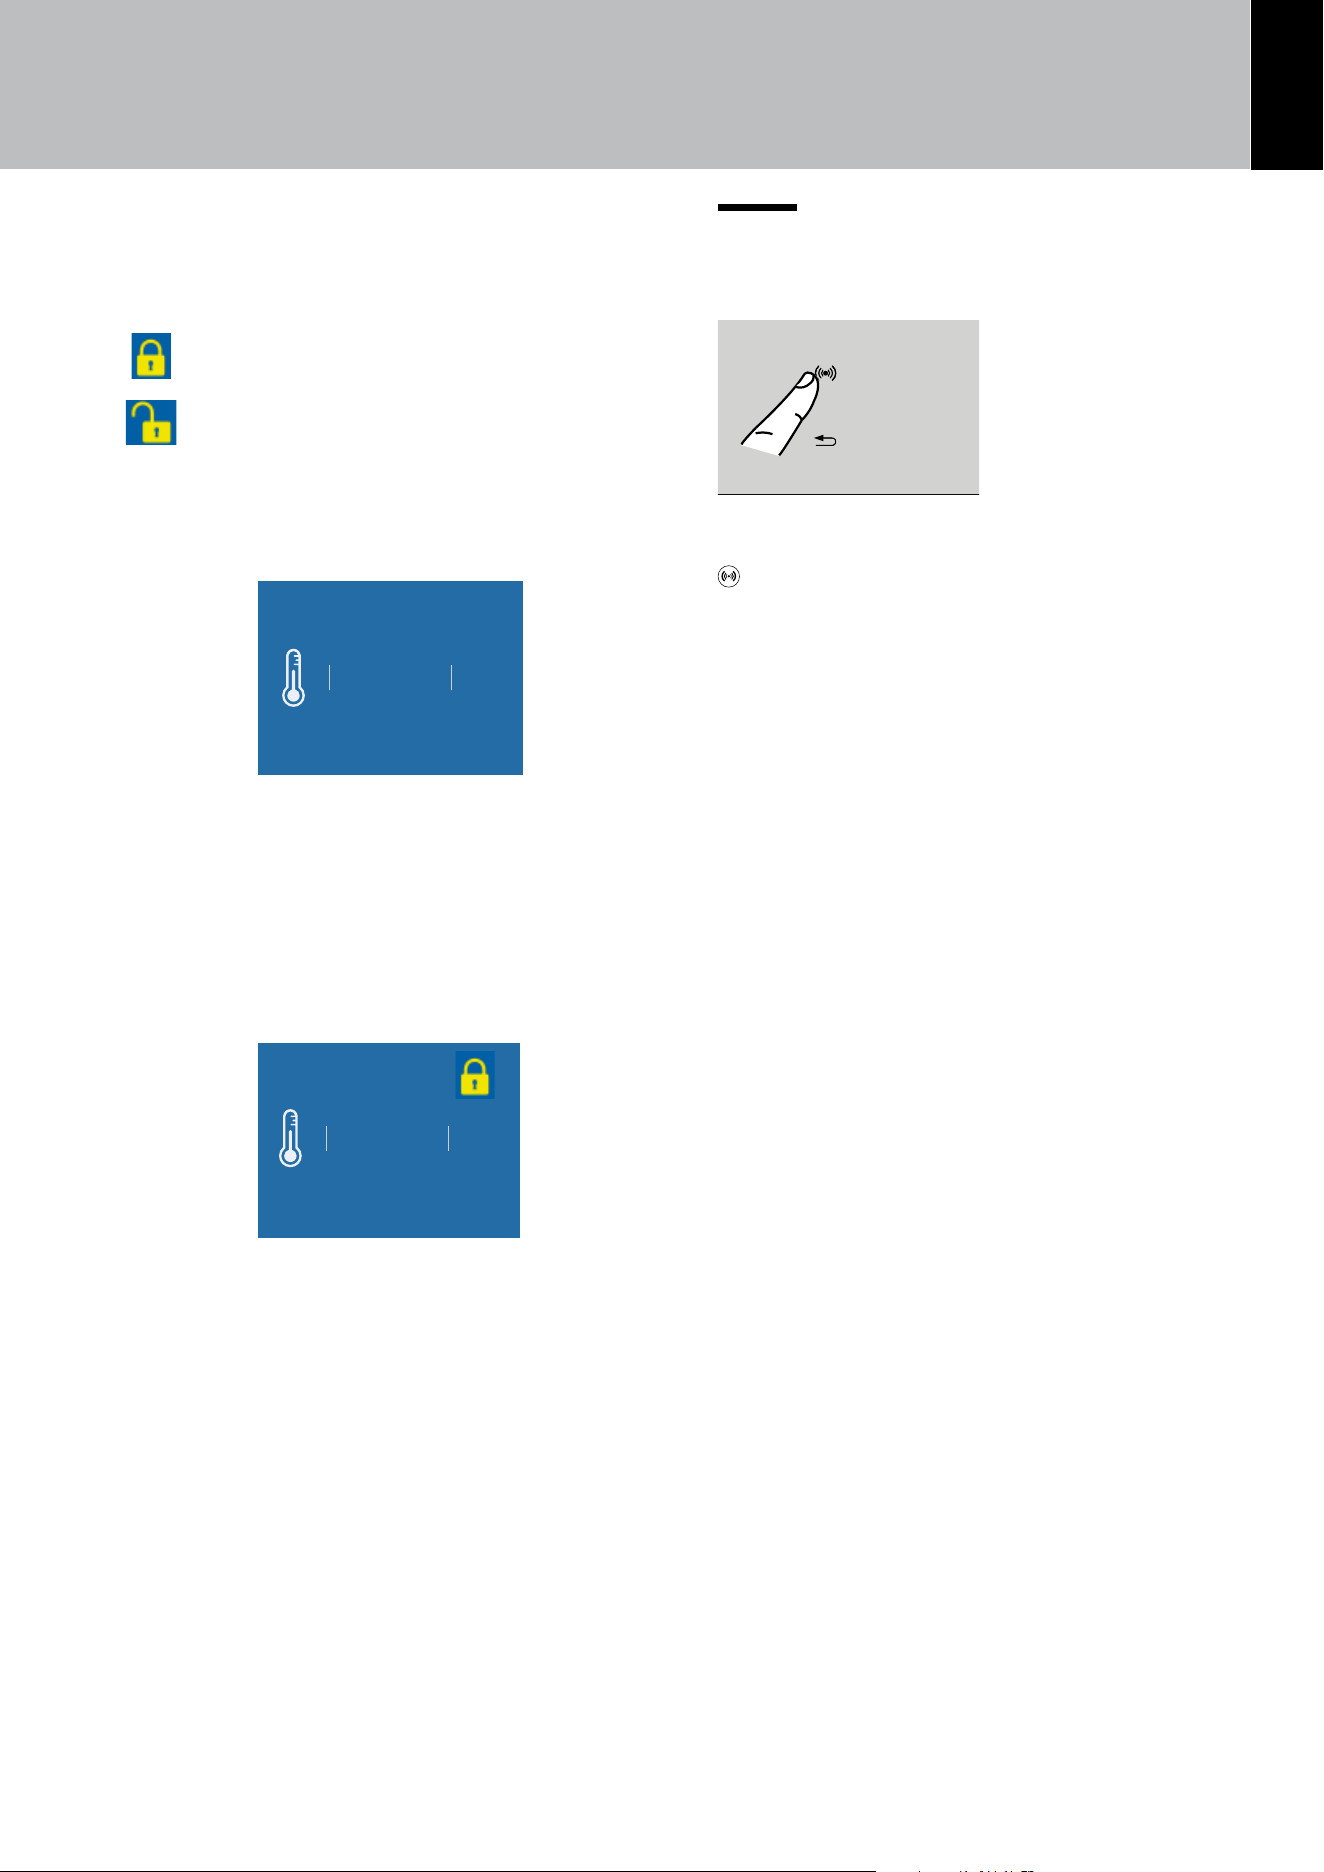
Padlock icon
The padlock icon appears when the temperatures
are set up.
The padlock:
open means that you can modify the
compartment temperatures.
closed means that you cannot modify
the compartment temperatures.
Usually an open yellow padlock is displayed; in this
case you can scroll up or down on the display, select
the desired temperature and press OK to confirm.
+ 42 °F
+ 40
+ 41
+ 44
+ 43
OK
ON
The padlock will instead be closed if the user has
activated some functions (described in par. “6.
FUNCTIONS AND SETTINGS” on page 20);
in this situation, the user will no longer be able to
change the temperatures of the compartments until
the function is completed or if it is disabled manu-
ally.
+ 42 °F
+ 40
+ 41
+ 44
+ 43
OK
ON
5. COMPARTMENT TEMPERATURE SETTING
20
6. FUNCTIONS AND SETTINGS
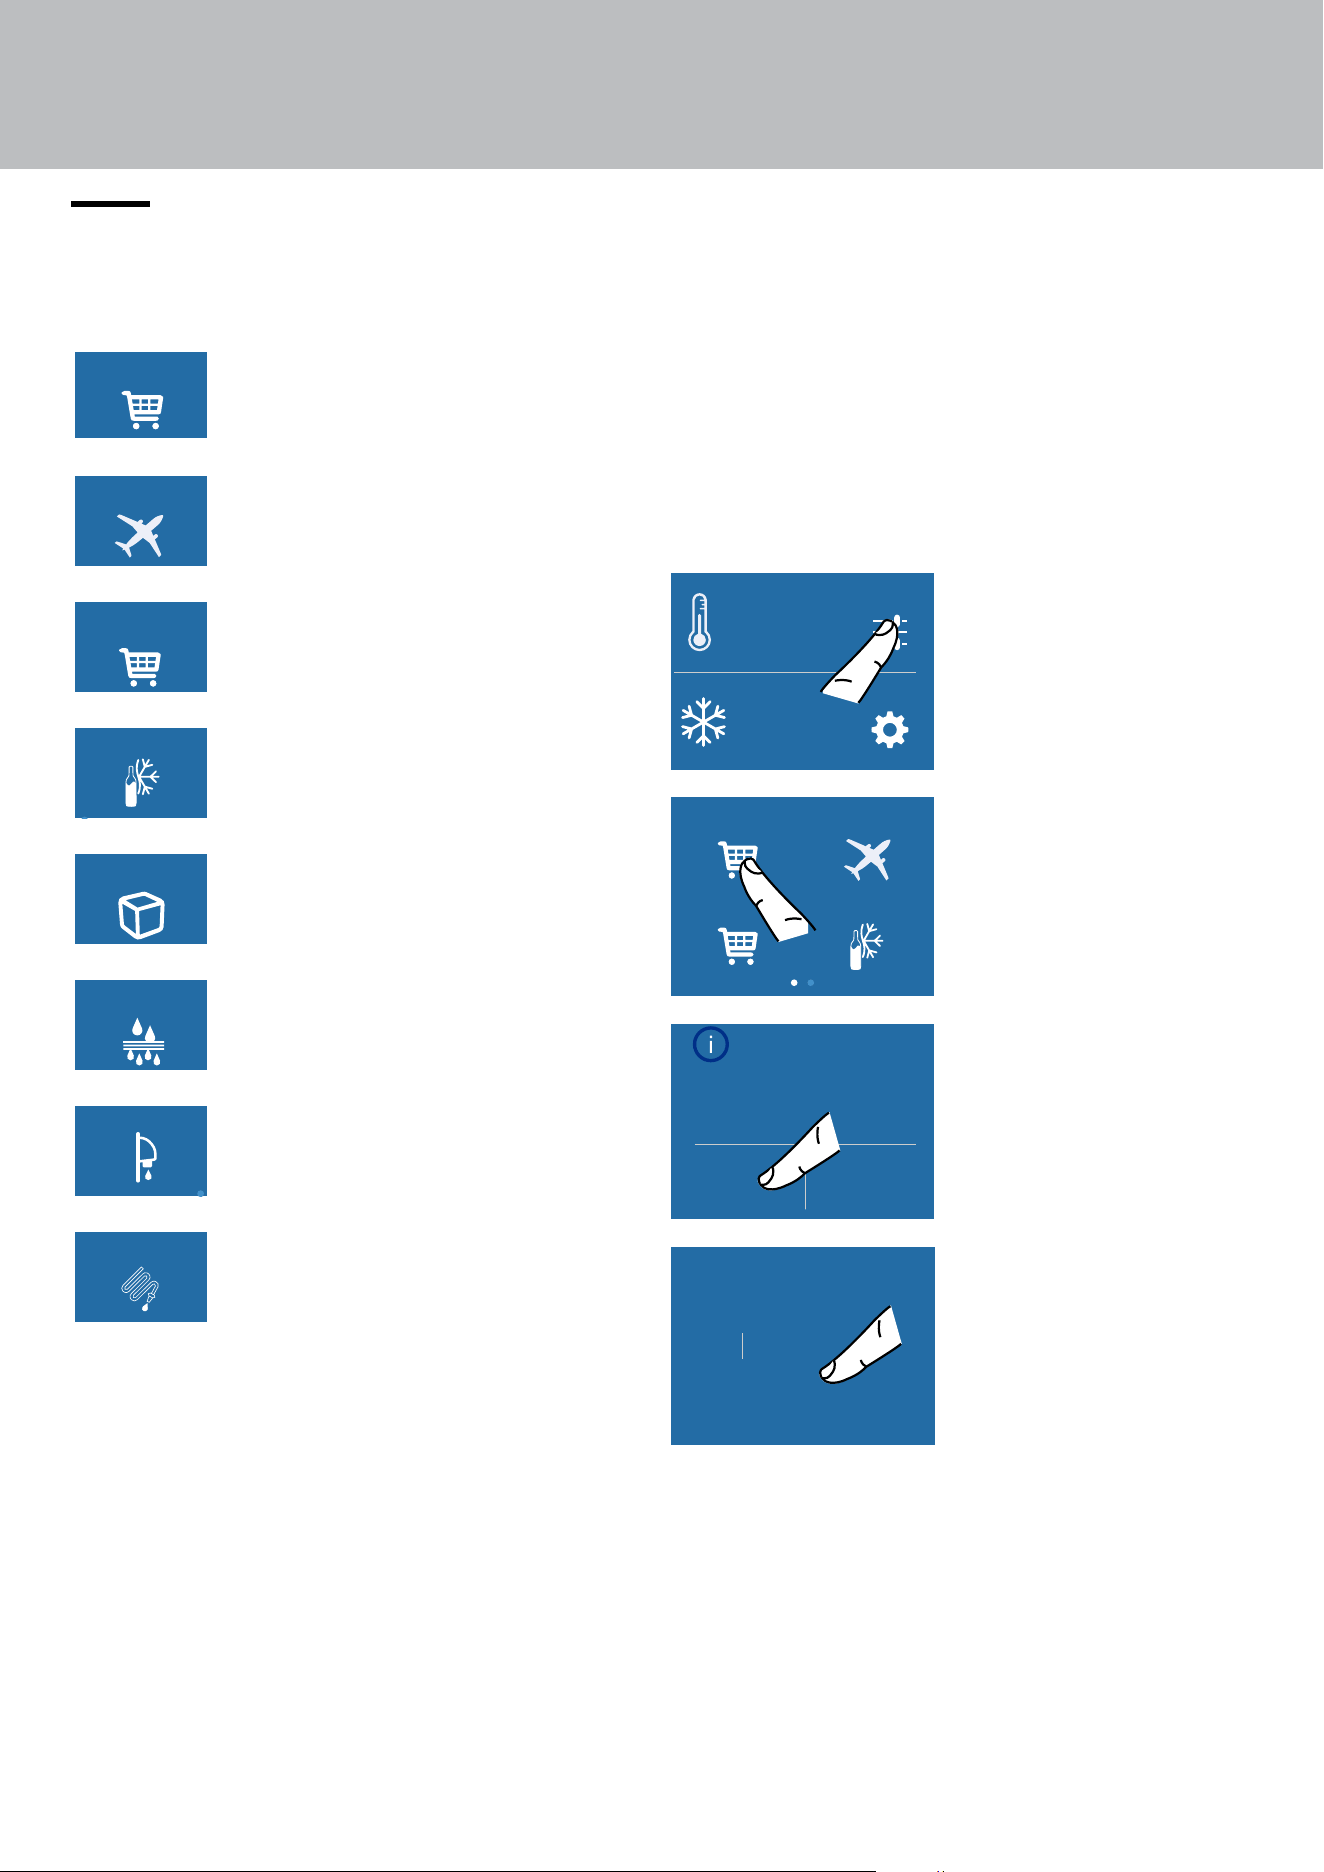
6.1. Functions
Tailor the operation of the unit to suit the dier-
ent ways in which you might want to use it.
Holiday Mode
MaxCool Mode:
Fridge
Beverage Cooler
MaxCool Mode:
FreshSelect
1) Max Refrigerator
(Max Freezer in Freezer models)
Holiday Mode
MaxCool Mode:
Fridge
Beverage Cooler
MaxCool Mode:
FreshSelect
2) Vacation Mode
Holiday Mode
MaxCool Mode:
Fridge
Beverage Cooler
MaxCool Mode:
FreshSelect
3)
MaxCool Mode FreshSelect
(Freezer models only).
Holiday Mode
MaxCool Mode:
Fridge
Beverage Cooler
MaxCool Mode:
FreshSelect
4) Bottle chiller | cooling bottles
(Freezer models only).
Ice Maker
Water Filter
Water System
Purge
Water Dispencer
5) Ice Maker.
(Freezer models only).
Ice Maker
Water Filter
Water System
Purge
Water Dispencer
6) Water Filter
Ice Maker
Water Filter
Water System
Purge
Water Dispencer
7) Water Dispenser
(All refrigerator models).
Ice Maker
Water Filter
Water System
Purge
Water Dispencer
8) Water System Purge
(Freezer models only).
1) Max Refrigerator (Max Freezer in Freezer
models)
This feature lowers the refrigerator temperature
to 36°F (+2°C) for 12 hours, allowing a more rap-
id cooling of the food that has just been placed
inside. At the end of the 12 hours, the function
deactivates automatically, and the previously set
temperature is restored.
It is possible to program timed activation of this
function. After a prolonged interruption of the
electrical power, it is necessary to reactivate the
function.
Settings
Functions
°F
1
-
42
°F
+
A) Home screen.
Touch the
FUNCTIONS icon.
Holiday Mode
MaxCool Mode:
Fridge
Beverage Cooler
MaxCool Mode:
FreshSelect
B) Touch the
MAXCOOL MODE
icon.
Activate MaxCool
Mode: Fridge?
(up to 24 hours)
Yes No
C) Touch the YES
button to activate
the function.
10hour
12
11
8
9
OK
D) Scroll up/down to
set the desired time
(in hours) and then
press OK.
EN
21
3) Max Freezer (available in freezer models)
This function must be activated at least 24 hours
before inserting room temperature items into the
freezer or several hours before putting into the
freezer previously frozen items that have been
subjected to a slight temperature rise.
This function is automatically deactivated when
the programmed time period is up. It is possible
to programme timed activation of this function.
After a prolonged interruption of the electrical
power, it is necessary to reactivate the function.
It is possible to program the function with a delay
of 1 to 12 hours.
Settings
Functions
°F
1
-
42
°F
+
A) Home screen.
Touch the
FUNCTIONS icon.
Holiday Mode
MaxCool Mode:
Fridge
Beverage Cooler
MaxCool Mode:
FreshSelect
B) Touch the
MAXCOOL MODE
FRESHSELECT icon.
Activate MaxCool
Mode: FreshSelect?
(up to 24 hours)
Yes No
C) Touch the YES
button to activate
the function.
10hour
12
11
8
9
OK
D) Scroll up/down to
set the desired time
(in hours) and then
press OK.
2) Vacation
This function (recommended in case of pro-
longed absences since it allows considerable
energy savings) brings the refrigerator compart-
ment temperature to 57.2°F (+14°C).
It is possible to program the duration, or it can
be manually deactivated upon re-entry after a
period of absence. This function remains active
even if, during the period of absence, there is an
extended interruption of electrical power.
It is possible to program a period from 1 to 90
days.
Settings
Functions
°F
1
-
42
°F
+
A) Home screen.
Touch the
FUNCTIONS icon.
Holiday Mode
MaxCool Mode:
Fridge
Beverage Cooler
MaxCool Mode:
FreshSelect
B) Touch the
VACATION icon.
Activate
Holiday Mode ?
Yes No
C) Touch the YES
icon to activate
the function.
25day
27
26
23
24
OK
D) Scroll to set the
desired time (in days)
and then press OK.
6. FUNCTIONS AND SETTINGS
22
6. FUNCTIONS AND SETTINGS
4) Bottle Chiller (bottle cooling) (Freezer
models only)
This function can be activated when it is
necessary to cool o beverages quickly by
placing them inside the freezer compartment.
It is possible to select a duration of 1 to 45 min-
utes. A signal will sound to notify you when the
optimal temperature has been reached.
After removing the beverages, deactivate the
sound signal by pressing the ALARM
button.
Settings
Functions
°F
1
-
42
°F
+
A) Home screen.
Touch the
FUNCTIONS icon.
Holiday Mode
MaxCool Mode:
Fridge
Beverage Cooler
MaxCool Mode:
FreshSelect
B) Touch the
BEVERAGE
COOLER icon.
Activate Rapid
Beverage Cooler?
Yes No
C) Touch the YES
button to activate
the function.
37min
39
38
35
36
OK
D) Scroll to set the
desired time (in
Minutes) and then
press OK.
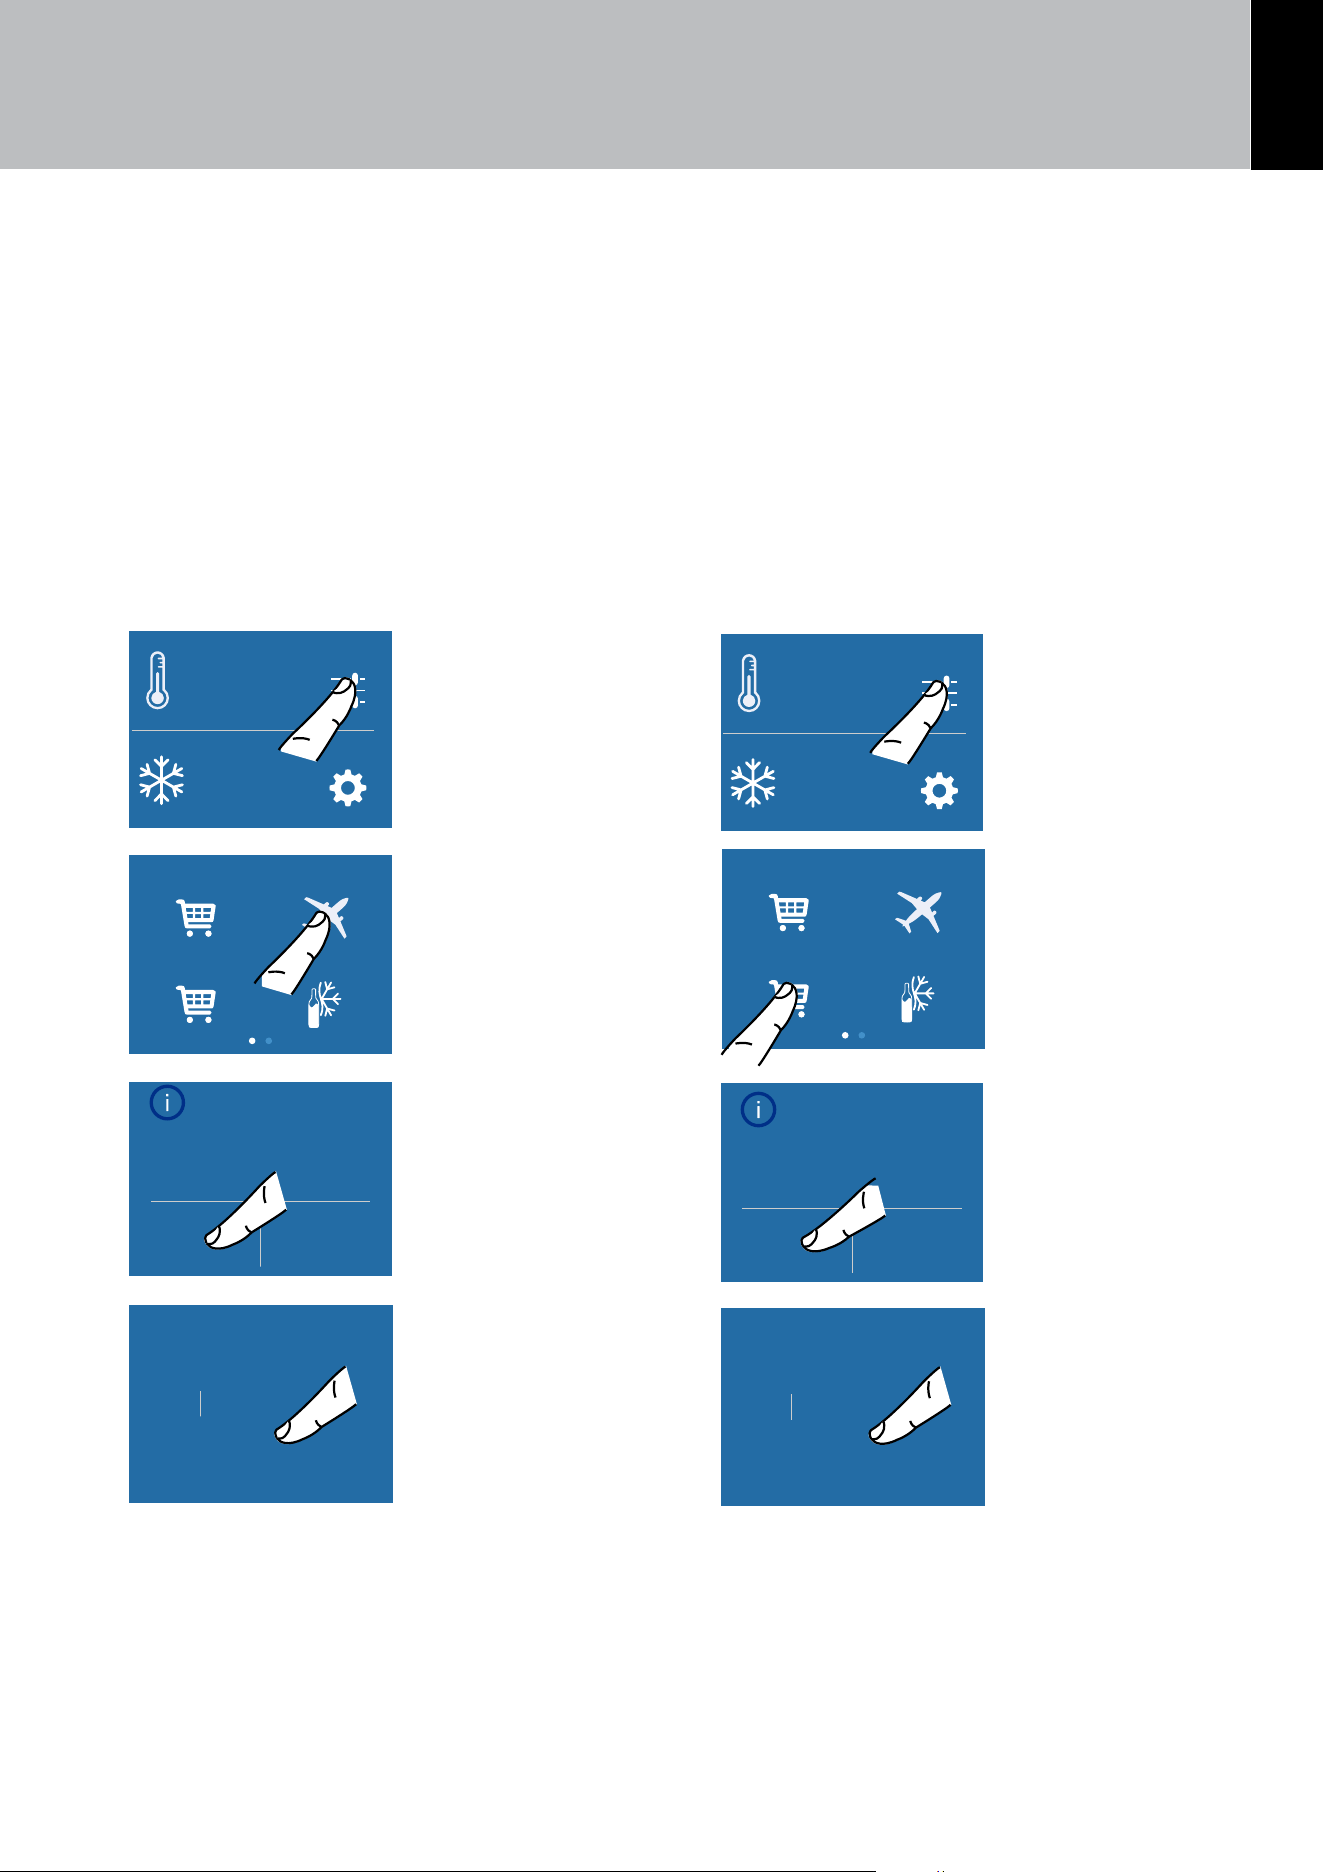
5) Ice maker activation/deactivation (only in
Combi and Freezer models)
Before activating the Ice Maker for the first time,
make sure that the water filter cartridge has been
installed, and perform an initial washing of the
hydraulic circuit (see chap. 8) Circuit manual clean-
ing (not on Refrigerator models) on page 25.
After a few minutes the Ice Maker can be activated.
Important
Do not activate the Ice Maker unless
the appliance is connected to the water
mains.
Settings
Functions
°F
1
-
42
°F
+
A) Home screen.
Touch the
FUNCTIONS icon.
Ice Maker
Water Filter
Water System
Purge
Water Dispencer
B) Scroll right twice
and then touch the
ICE MAKER icon.
Ice Maker
Yes No
C) Touch the ON
button to activate
the function, touch
the OFF button
to deactivate the
function (for instance
if it is necessary
to disconnect the
appliance from the
water mains).
EN
23
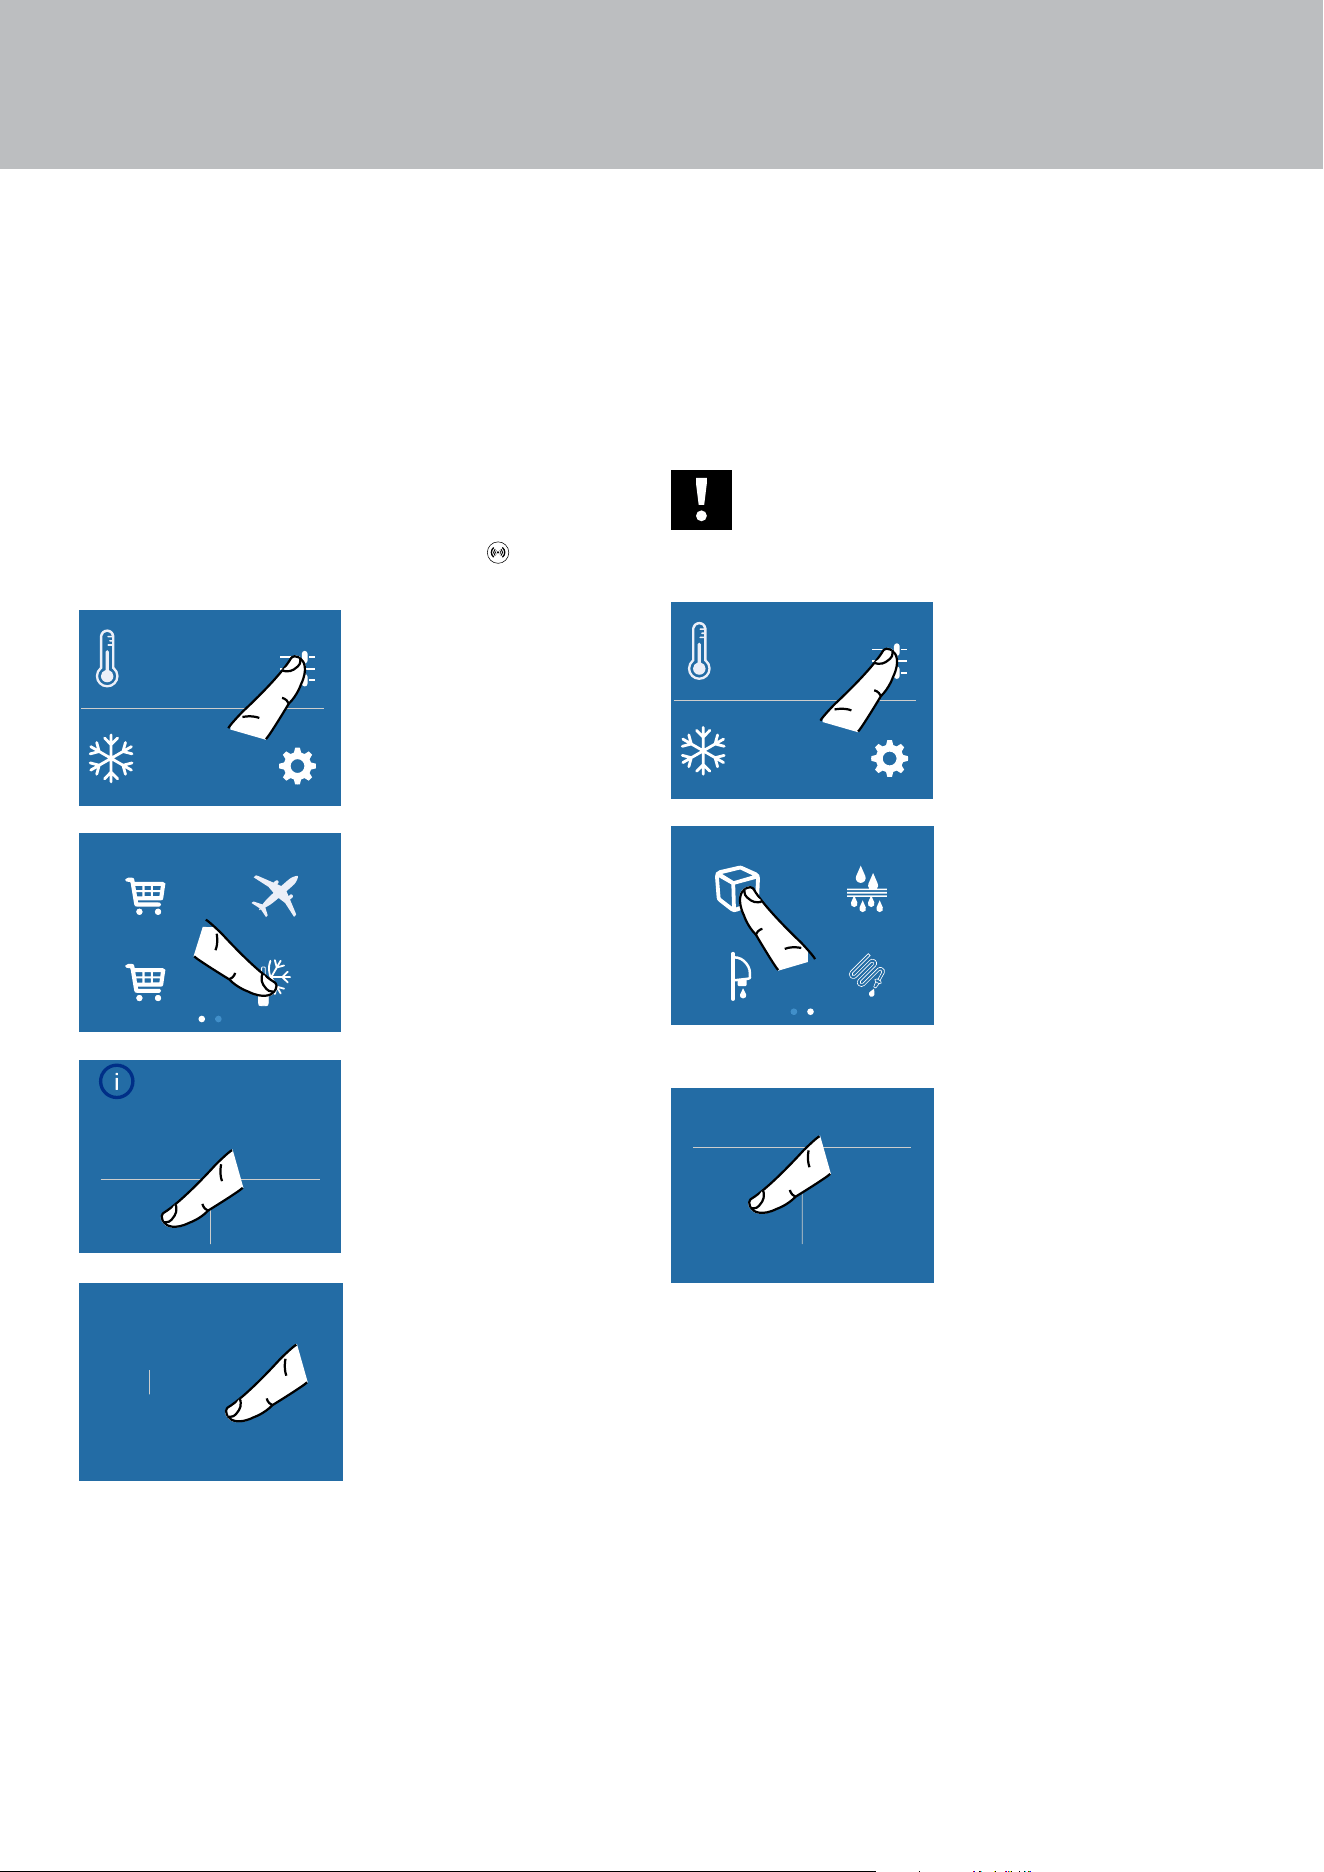
Setting the ice cubes size and Max Ice function
The ICE MAKER function allows selecting the size
of the ice cubes, choosing between large (base
setting) or medium, and activate the MAX ICE
function, which increases the quantity of produced
ice. The MAX ICE function deactivates automati-
cally after 24 hours.
Settings
Functions
°F
1
-
42
°F
+
A) Home screen.
Touch the
FUNCTIONS icon.
Ice Maker
Water Filter
Water System
Purge
Water Dispencer
B) Scroll right twice
and then touch the
ICE MAKER icon.
Fast Ice
Set Cube Size
Ice Maker
C) Touch the ice
SIZE icon.
Set Cube Size
Medium Large
D) Select the
desired ice cube size
(MEDIUM or LARGE).
Fast Ice
Set Cube Size
Ice Maker
E) To increase the
quantity of ice
produced (up to
1.5 kg of ice a day),
touch the MAX ICE
icon.
Fast Ice Mode
(24 hrs)
Yes No
F) Confirm the
function touching
the YES button.
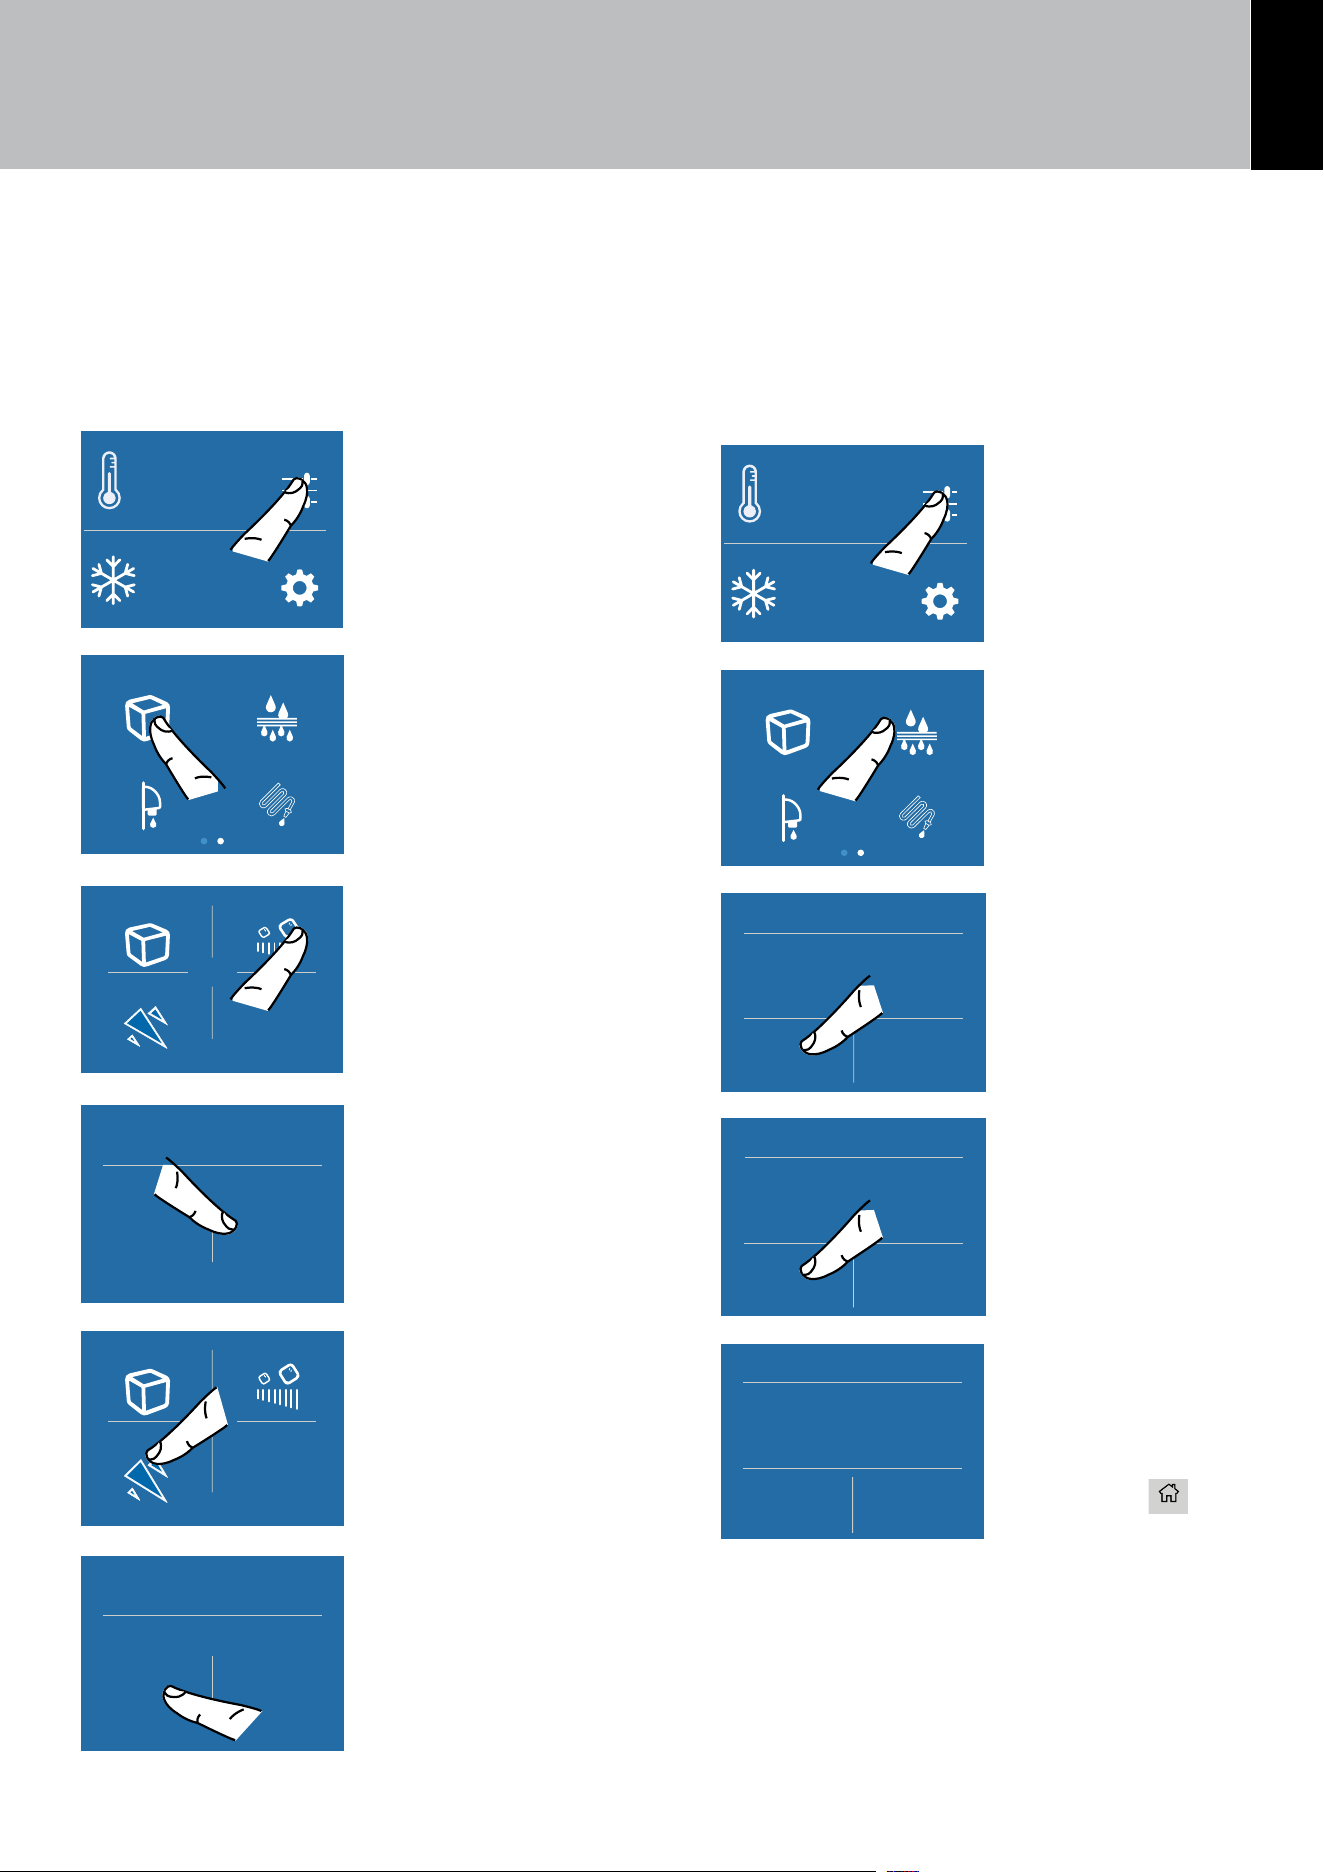
6) Water filter - activation
The water filter is essential for the purification of
the water used for making ice, for cleaning the
circuit or for supplying water for the Refrigerator
compartment (water dispenser available on the
Refrigerator models).
The display allows viewing the time left before
the filter needs to be replaced.
Settings
Functions
°F
1
-
42
°F
+
A) Home screen.
Touch the
FUNCTIONS icon.
Ice Maker
Water Filter
Water System
Purge
Water Dispencer
B) Scroll right twice
and then touch the
WATER FILTER icon.
Are you sure?
On
Water Filter
C) Confirm the
function touching
the YES icon.
Enable reminder
countdown timer?
Yes No
Water Filter
D) Confirm the
function again
touching the YES
icon.
This way you will
be warned when
the filter needs to
be changed.
Next reminder…
left 365 days
O Reset
Water Filter
E) Here are
indicated the days
left before the due
date for the filter
replacement. Touch
the HOME
Serigraa B02919200 VETRO USER 599 LCD2.8 - FHIABA
Limite per graca parti retro-illuminate - la parte bianca è trasparente
Testo e graca
00
°C+
Impostazioni
Funzioni
00
°C+
00
°C-
Colore SMEG
colore C71
screen.
6. FUNCTIONS AND SETTINGS

24
6a) Water filter - deactivation
To deactivate a filter-reminder countdown, follow
these steps:
Settings
Functions
°F
1
-
42
°F
+
A) Home screen.
Touch the
FUNCTIONS icon.
Ice Maker
Water Filter
Water System
Purge
Water Dispencer
B) Scroll right twice
and then touch the
WATER FILTER icon.
Next reminder…
left XXX days
O Reset
Water Filter
C) Press OFF
to deactivate
the water filter
reminder.
Reset reminder
countdown?
Yes No
Water Filter
D) Touch YES to
proceed.
Next reminder…
left 365 days
O Reset
Water Filter
E) Confirm the
function again
touching the OFF
icon.
Touch the HOME
Serigraa B02919200 VETRO USER 599 LCD2.8 - FHIABA
Limite per graca parti retro-illuminate - la parte bianca è trasparente
Testo e graca
00
°C+
Impostazioni
Funzioni
00
°C+
00
°C-
Colore SMEG
colore C71
screen.
6a) Reset Filter
The Reset Filter function resets to zero the
time left before the filter needs to be replaced.
The meter must be reset to zero each time the
cartridge is replaced.
Settings
Functions
°F
1
-
42
°F
+
A) Home screen.
Touch the
FUNCTIONS icon.
Ice Maker
Water Filter
Water System
Purge
Water Dispencer
B) Scroll right twice
and then touch the
WATER FILTER icon.
Next reminder…
left XXX days
O Reset
Water Filter
C) Press RESET.
Reset reminder
countdown?
Yes No
Water Filter
D) Touch the YES
button to proceed.
Next reminder…
left 365 days
O Reset
Water Filter
E) Here are
indicated the days
left before the due
date for the filter
replacement. Touch
the HOME
Serigraa B02919200 VETRO USER 599 LCD2.8 - FHIABA
Limite per graca parti retro-illuminate - la parte bianca è trasparente
Testo e graca
00
°C+
Impostazioni
Funzioni
00
°C+
00
°C-
Colore SMEG
colore C71
screen.
6. FUNCTIONS AND SETTINGS
EN
25
7) Water dispenser (only for Refrigerator
models)
The function water dispenser ia available in re-
frigerator models and enables the supply of cold
filtered water.
Settings
Functions
°F
1
-
42
°F
+
A) Home screen.
Touch the
FUNCTIONS icon.
Ice Maker
Water Filter
Water System
Purge
Water Dispencer
B) Scroll right twice
and then touch the
WATER DISPENSER
icon.
Water Dispenser
OOn
C) Touch the ON
icon to confirm
activation.
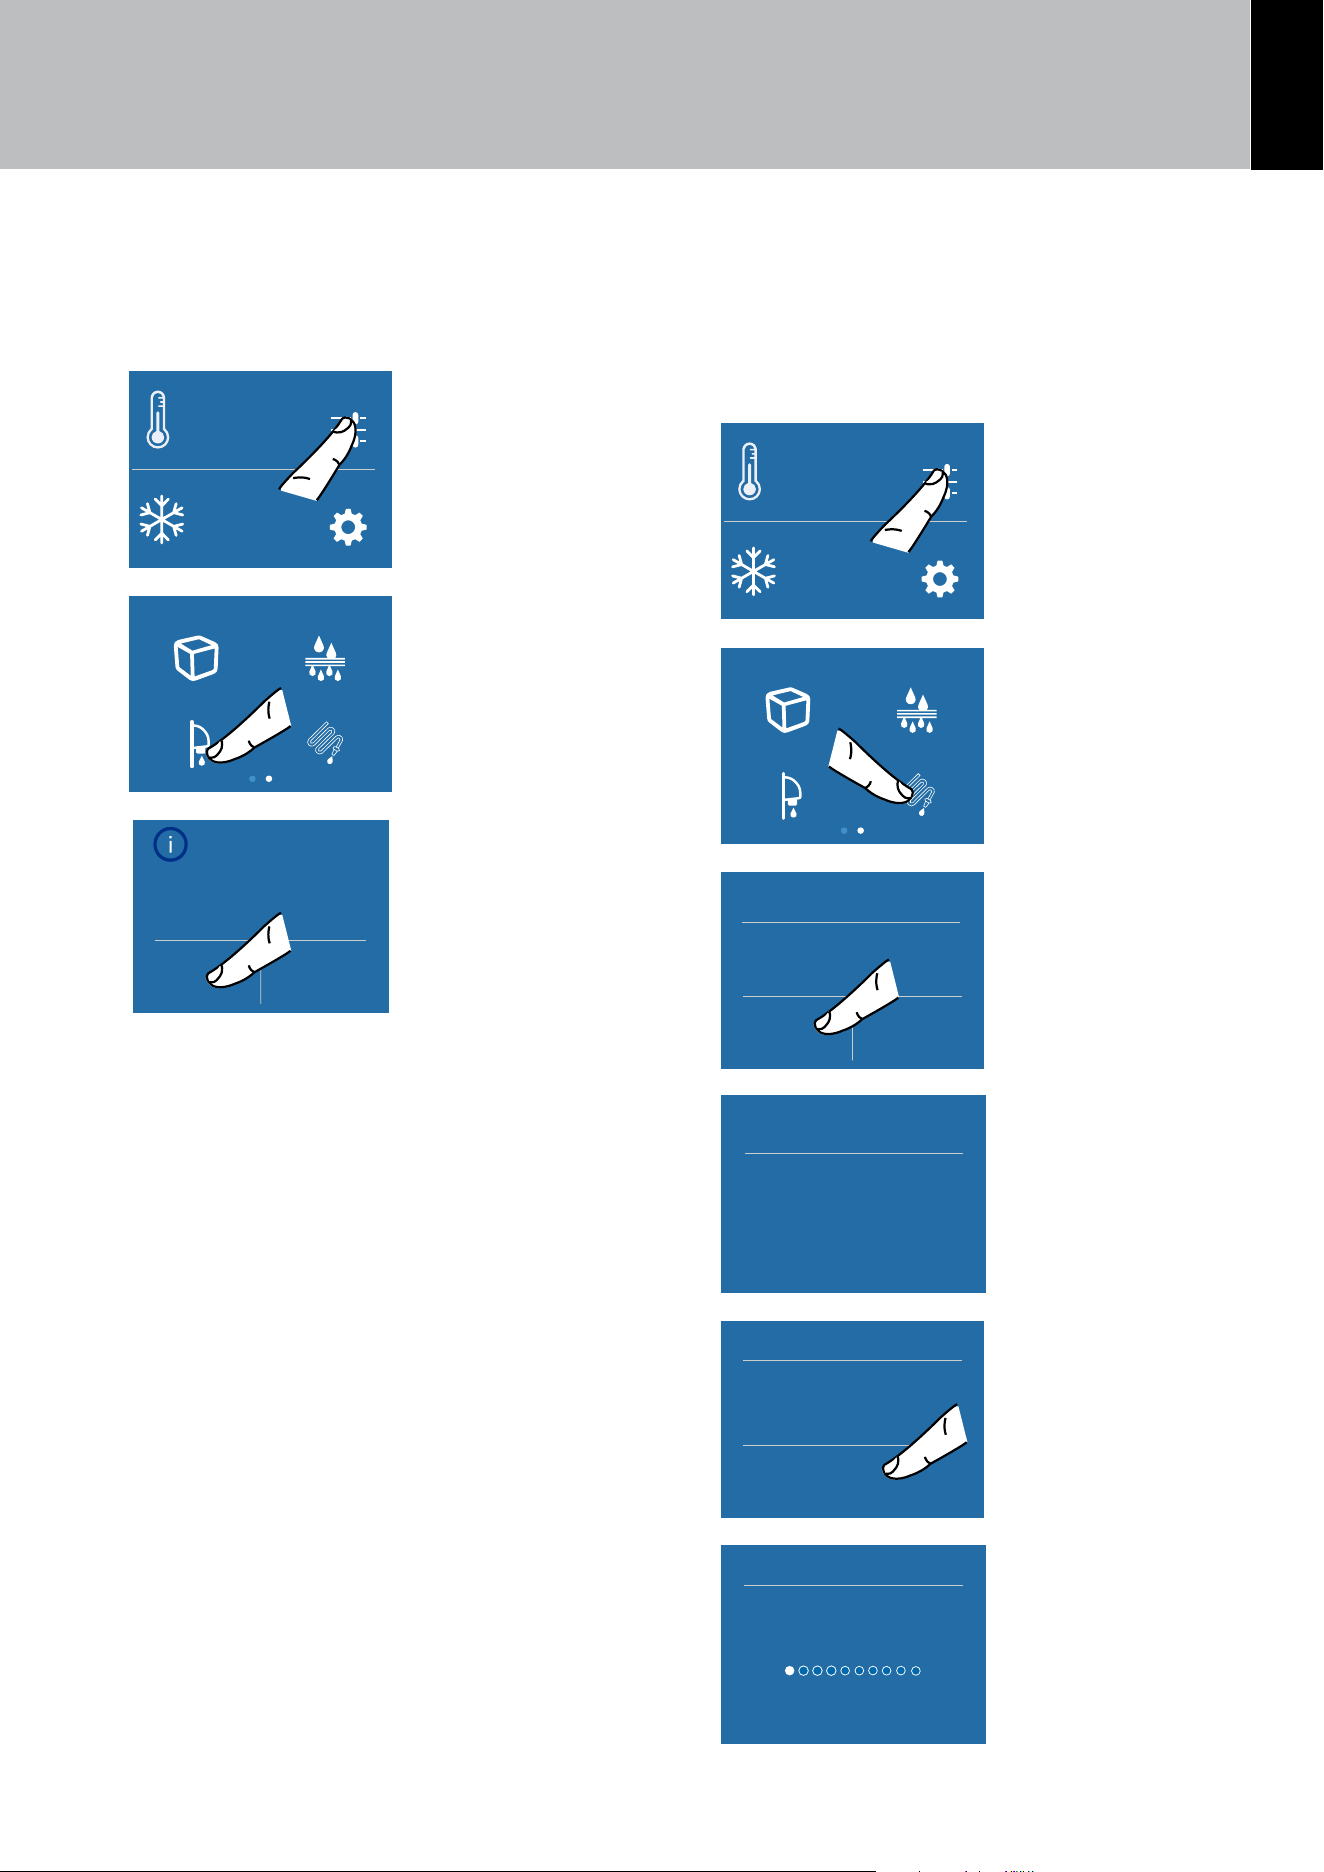
8) Circuit manual cleaning (not on Refrigerator
models)
If ice production has been switched o or
remained unused for a long period, it is recom-
mended that you run the Manual Cleaning func-
tion. Before proceeding, it is important to turn
o the Ice Maker.
Settings
Functions
°F
1
-
42
°F
+
A) Home screen.
Touch the
FUNCTIONS icon.
Ice Maker
Water Filter
Water System
Purge
Water Dispencer
B) Scroll right twice
and then touch the
WATER SYSTEM
PURGE icon.
Yes No
Manual Clean
C) Touch the YES
icon to confirm the
cleaning.
Cleaning started
Please wait...
D) Wait...
Enter
Manual Clean
Start Cleaning
E) Touch the
ENTER icon to start
the washing.
Manual Clean
Cleaning running
F) Washing in
progress
6. FUNCTIONS AND SETTINGS

26
Manual Clean
OK
Empty water from ice bin
Replace ice bin and press OK
G) When the
washing is
complete, press
OK and empty the
bowl.
Cleaning completed
Please wait...
H) Wait for a few
seconds to return
to the main menu
screen
Repeat the cleaning until the water in the ice
compartment tray is clean.
Position the ice tray or a suitable bowl for
collecting any water correctly beneath the
Ice Maker and then close the drawer. When
the process is complete, clean the ice tray.
Bypass filter
The built-in filtration system can be bypassed
when the home water system provides water of
excellent quality.
Simply remove the water filter from the adapter
and the system will automatically bypass the
cartridge.
6. FUNCTIONS AND SETTINGS
EN
27
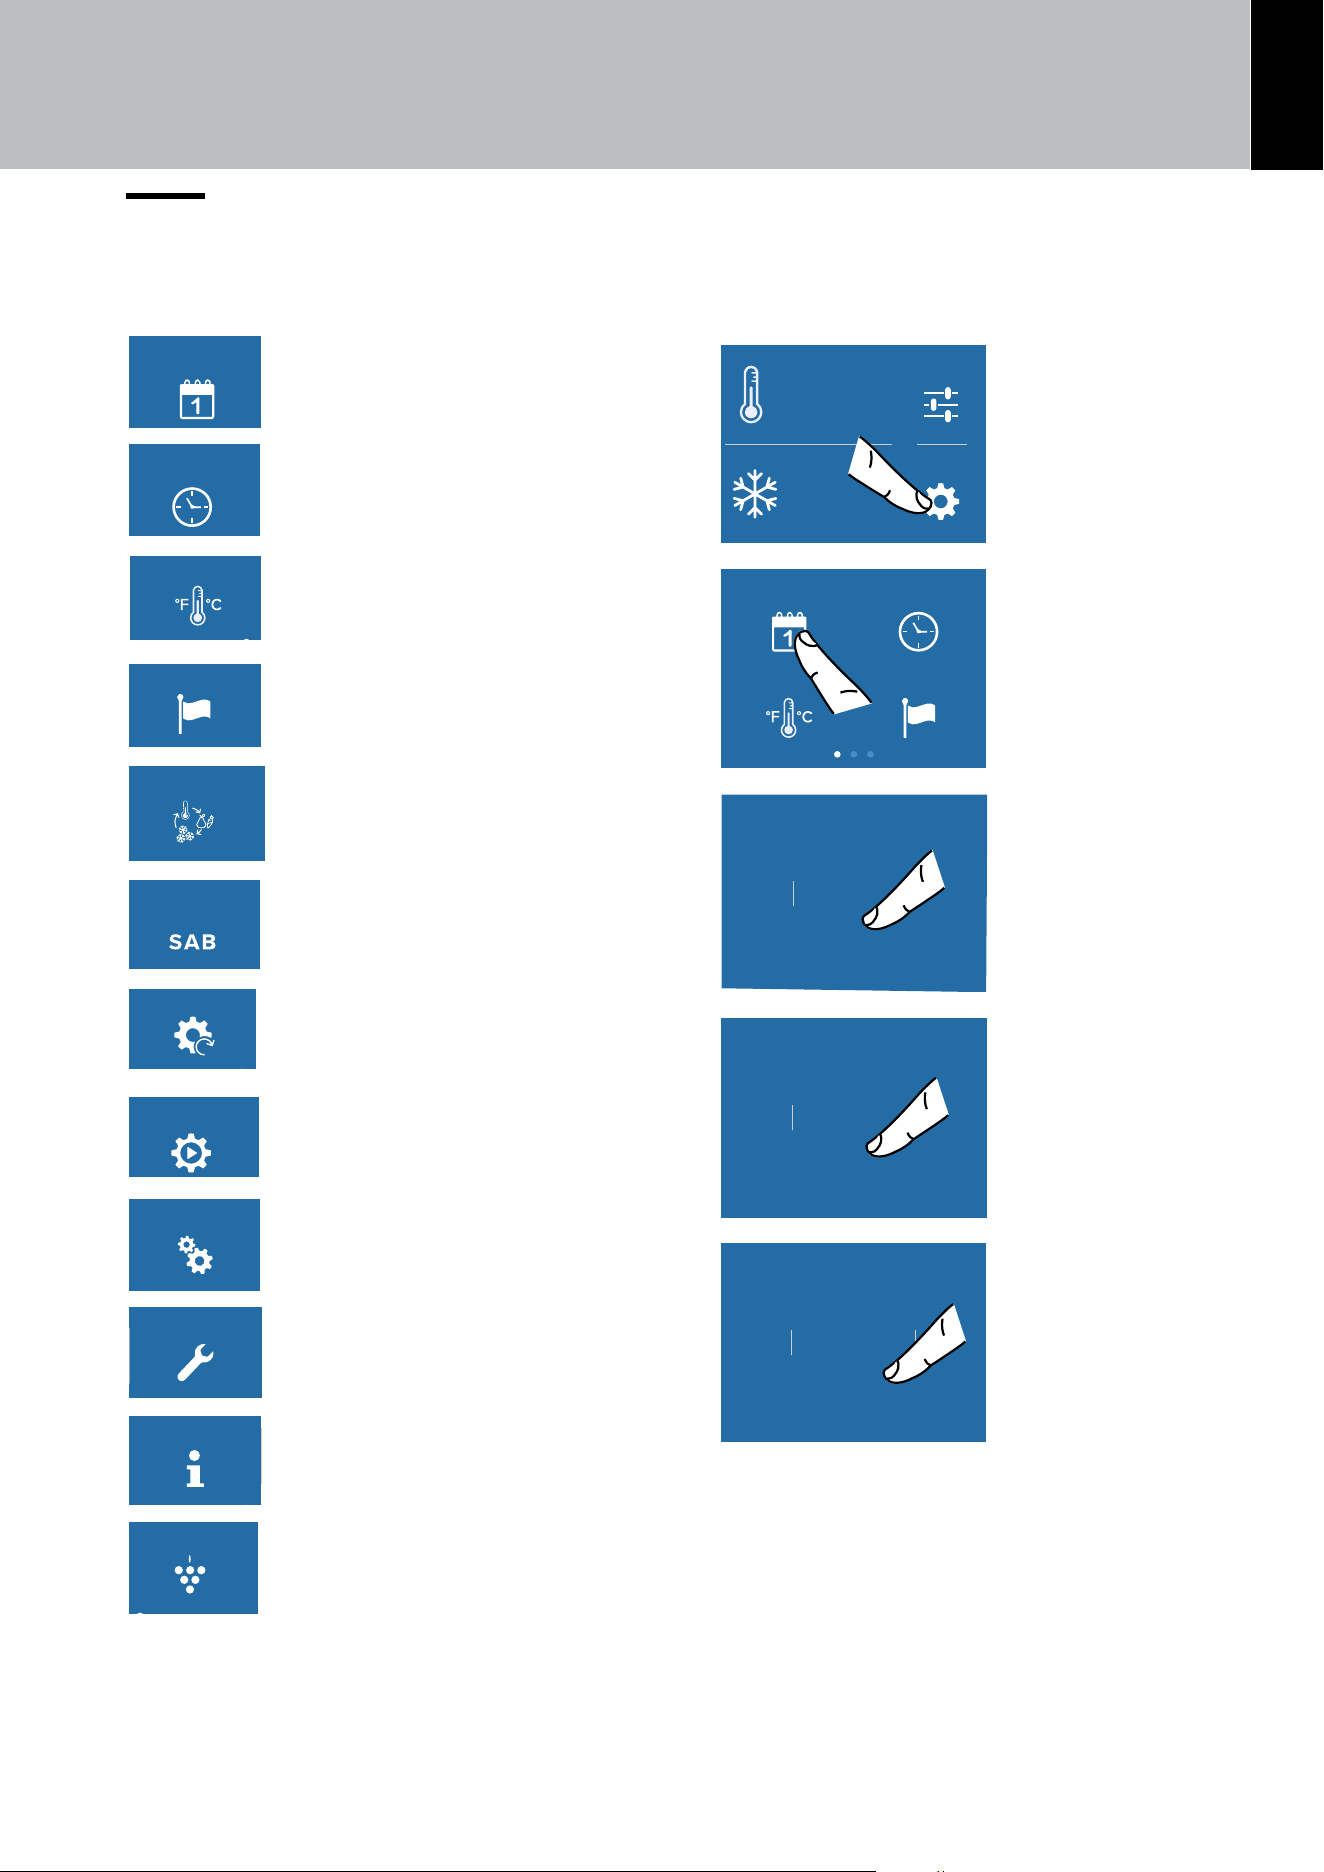
6.2. Settings
It is possible to customize the settings of your appli-
ance to adapt it to your dierent requirements.
TimeDate
Language°C / °F
1) Date.
TimeDate
Language°C / °F
2) Time.
TimeDate
Language°C / °F
3) Degrees Celsius and
Fahrenheit.
TimeDate
Language°C / °F
4) Language
FreshSelect Sabbath
Demo ModeReset
5) Fresh Select (only for Combi
and Freezer models)
FreshSelect Sabbath
Demo ModeReset
5) Sabbath.
FreshSelect Sabbath
Demo ModeReset
6) Reset.
FreshSelect Sabbath
Demo ModeReset
7) Demo Mode.
Maintenance Service
Plasmacluster
Info System
on
8) Maintenance.
Maintenance Service
Plasmacluster
Info System
on
9) Service.
Maintenance Service
Plasmacluster
Info System
on
10) InfoSystem.
Maintenance Service
Plasmacluster
Info System
on
11) Plasmacluster (only for
Combi and Refrigerator models)
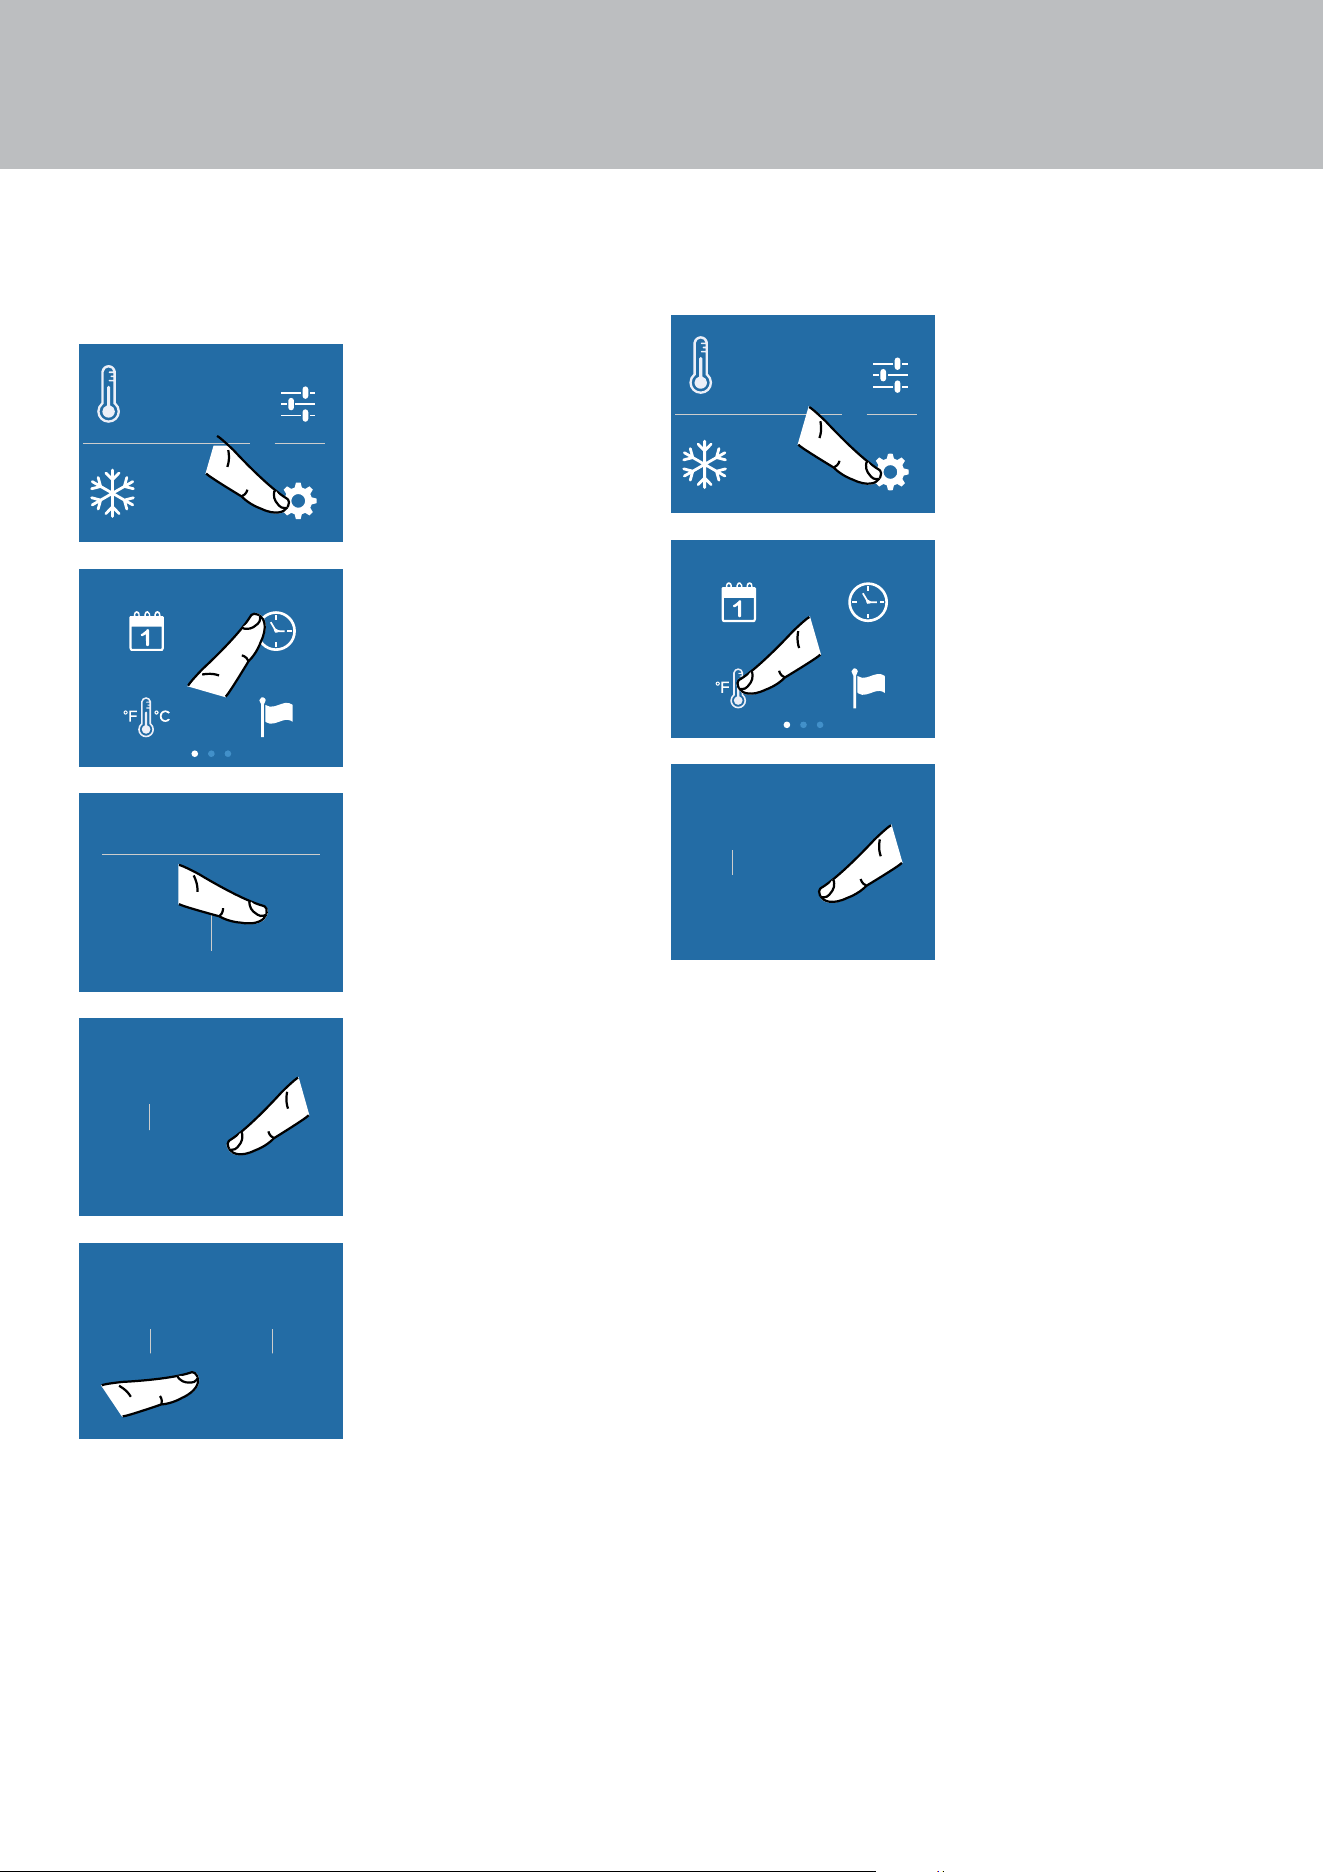
1) Date
The display will show the date in the format
(day:month:year).
You can modify the settings by touching the display.
Settings
Functions
°F
1
-
42
°F
+
A) Home screen.
Touch the
SETTINGS icon.
TimeDate
Language°C / °F
B) Touch the DATE
icon.
25day
27
26
23
24
OK
C) Scroll up and
down to select the
desired day and
touch OK.
9month
11
10
7
8
OK
D) Scroll up or down
to select the desired
month, then touch
OK.
2020year
2022
2021
2018
2019
OK
E) Scroll up or down
to select the desired
year, then touch OK.
6. FUNCTIONS AND SETTINGS
28
2) Time
The display shows the hours and minutes in the for-
mat hh:mm. This function allows you to select a 12 or
24 hr. clock mode.
Settings
Functions
°F
1
-
42
°F
+
A) Home screen.
Touch the
SETTINGS icon.
TimeDate
Language°C / °F
B) Touch the TIME
icon.
Hour?
12 24
C) Select the mode
in which you want to
see the time: 12 or
24 hr.
10hour
12
11
8
9
OK
D) Scroll up or down
to select the time
and then touch OK.
37min
39
38
35
36
OK
E) Scroll and select
the minutes and then
touch OK.
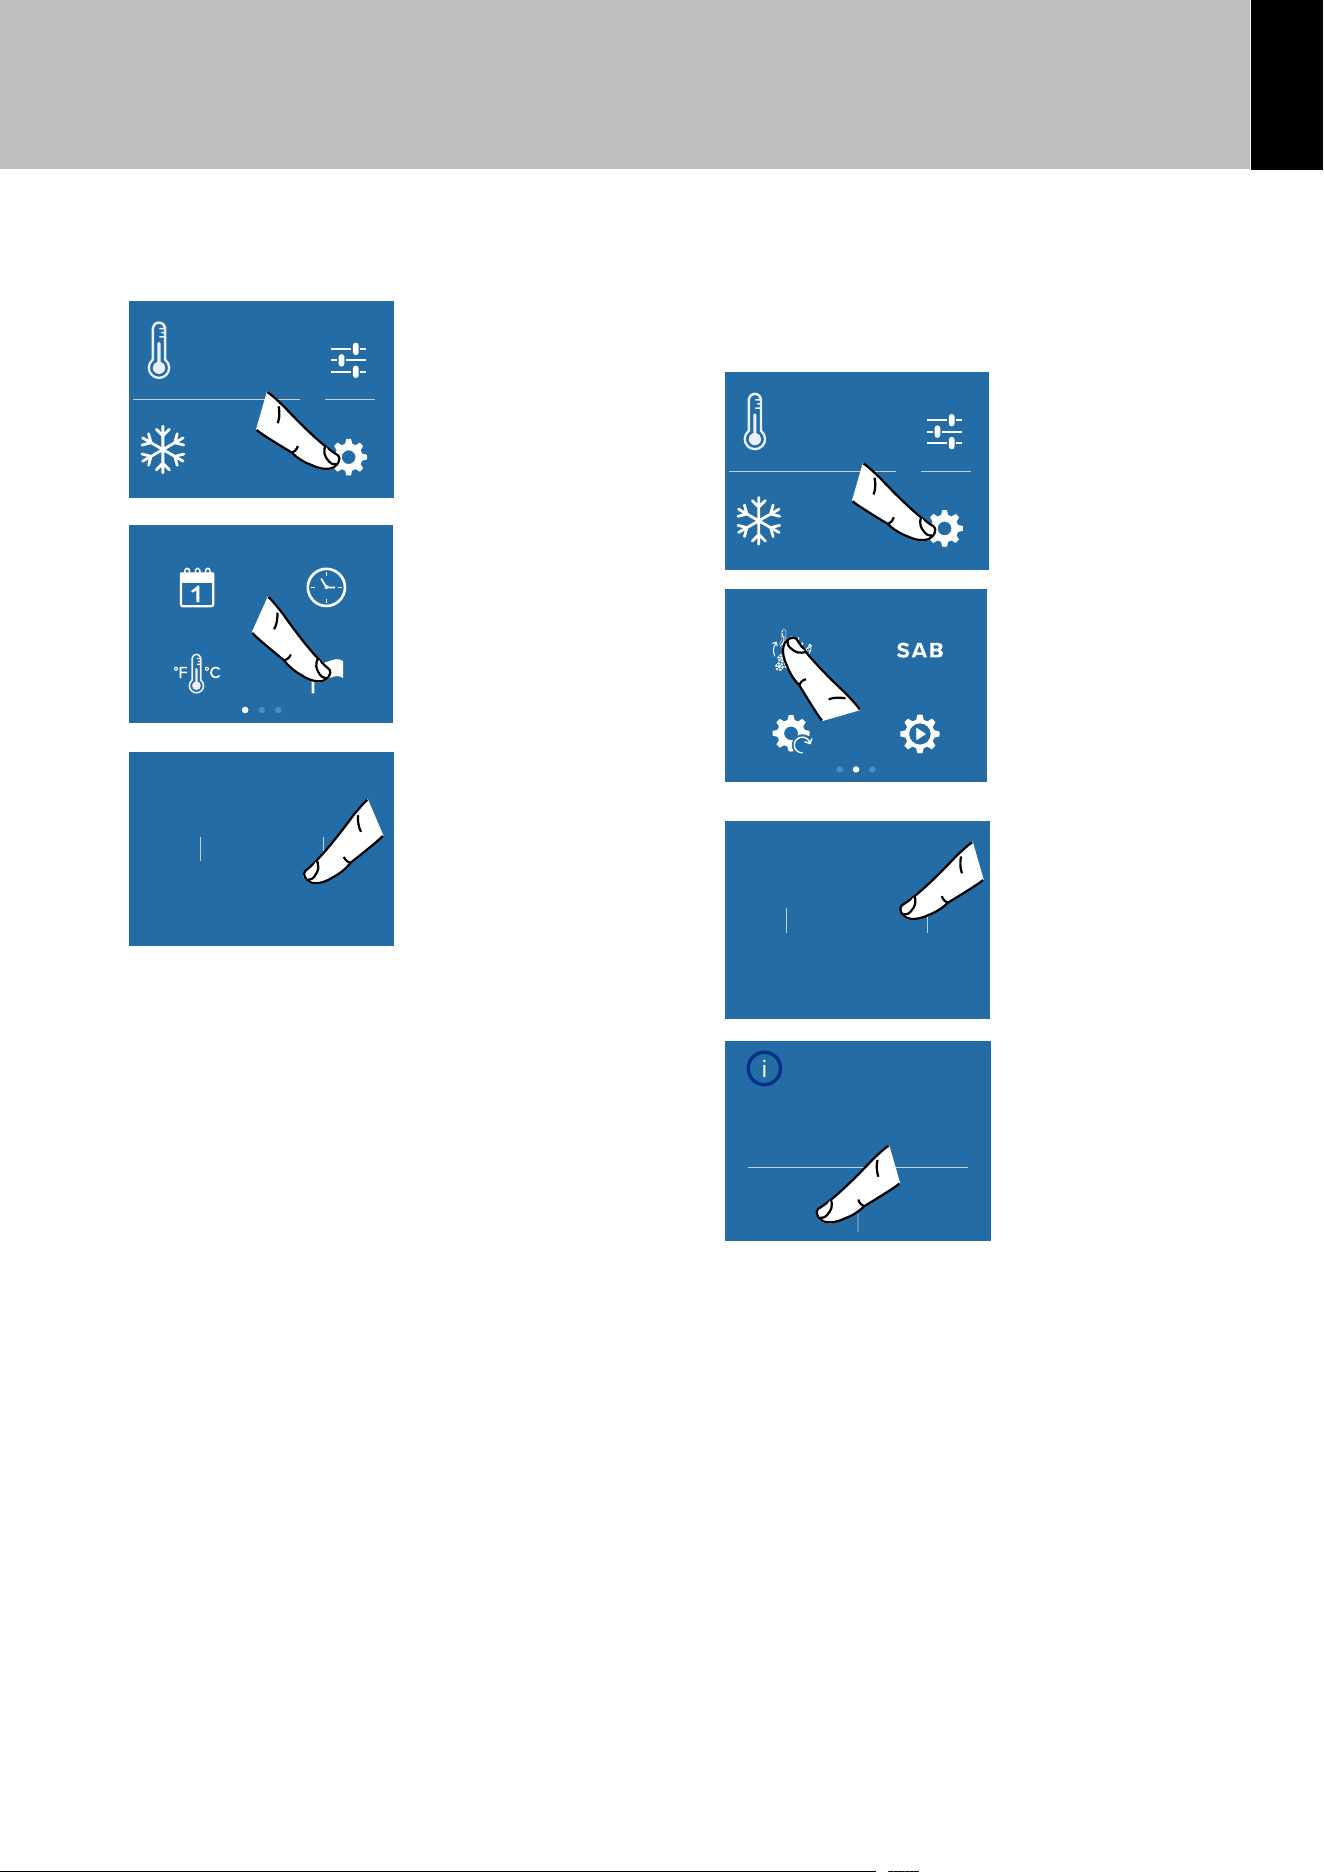
3)°F/°C
This function allows visualizing the temperature in
degrees Fahrenheit (default) or Centigrade.
Settings
Functions
°F
1
-
42
°F
+
A) Home screen.
Touch the
SETTINGS icon.
TimeDate
Language°C / °F
B) Touch the°F/°C
icon.
°C
°F
OK
C) Scroll up or
down to select
the degrees in
Centigrades or
Fahrenheit and
press OK.
6. FUNCTIONS AND SETTINGS
EN
29
4) Language
To set the language of the appliance, simply follow
the procedure.
Settings
Functions
°F
1
-
42
°F
+
A) Home screen.
Touch the
SETTINGS icon.
TimeDate
Language°C / °F
B) Touch the
LANGUAGE icon.
Français
Español
Italiano
English
OK
C) Scroll up or
down to select the
desired language
and press OK.
5) Fresh Select (only for Combi and Freezer
models)
The freezer compartment can, if required, be
converted to the refrigeration or Fresco operat-
ing mode
.
Settings
Functions
°F
1
-
42
°F
+
A) Home screen.
Touch the
SETTINGS icon.
FreshSelect Sabbath
Demo ModeReset
B) Scroll twice
right and touch the
TRIMODE button.
ExtendFresh
Freezer
Fridge
OK
C) Scroll up/down,
select one of the
three functions and
press OK.
Configure FreshSelect
as ExtendFresh?
Yes No
D) Touch YES
to confirm the
function.
6. FUNCTIONS AND SETTINGS
30
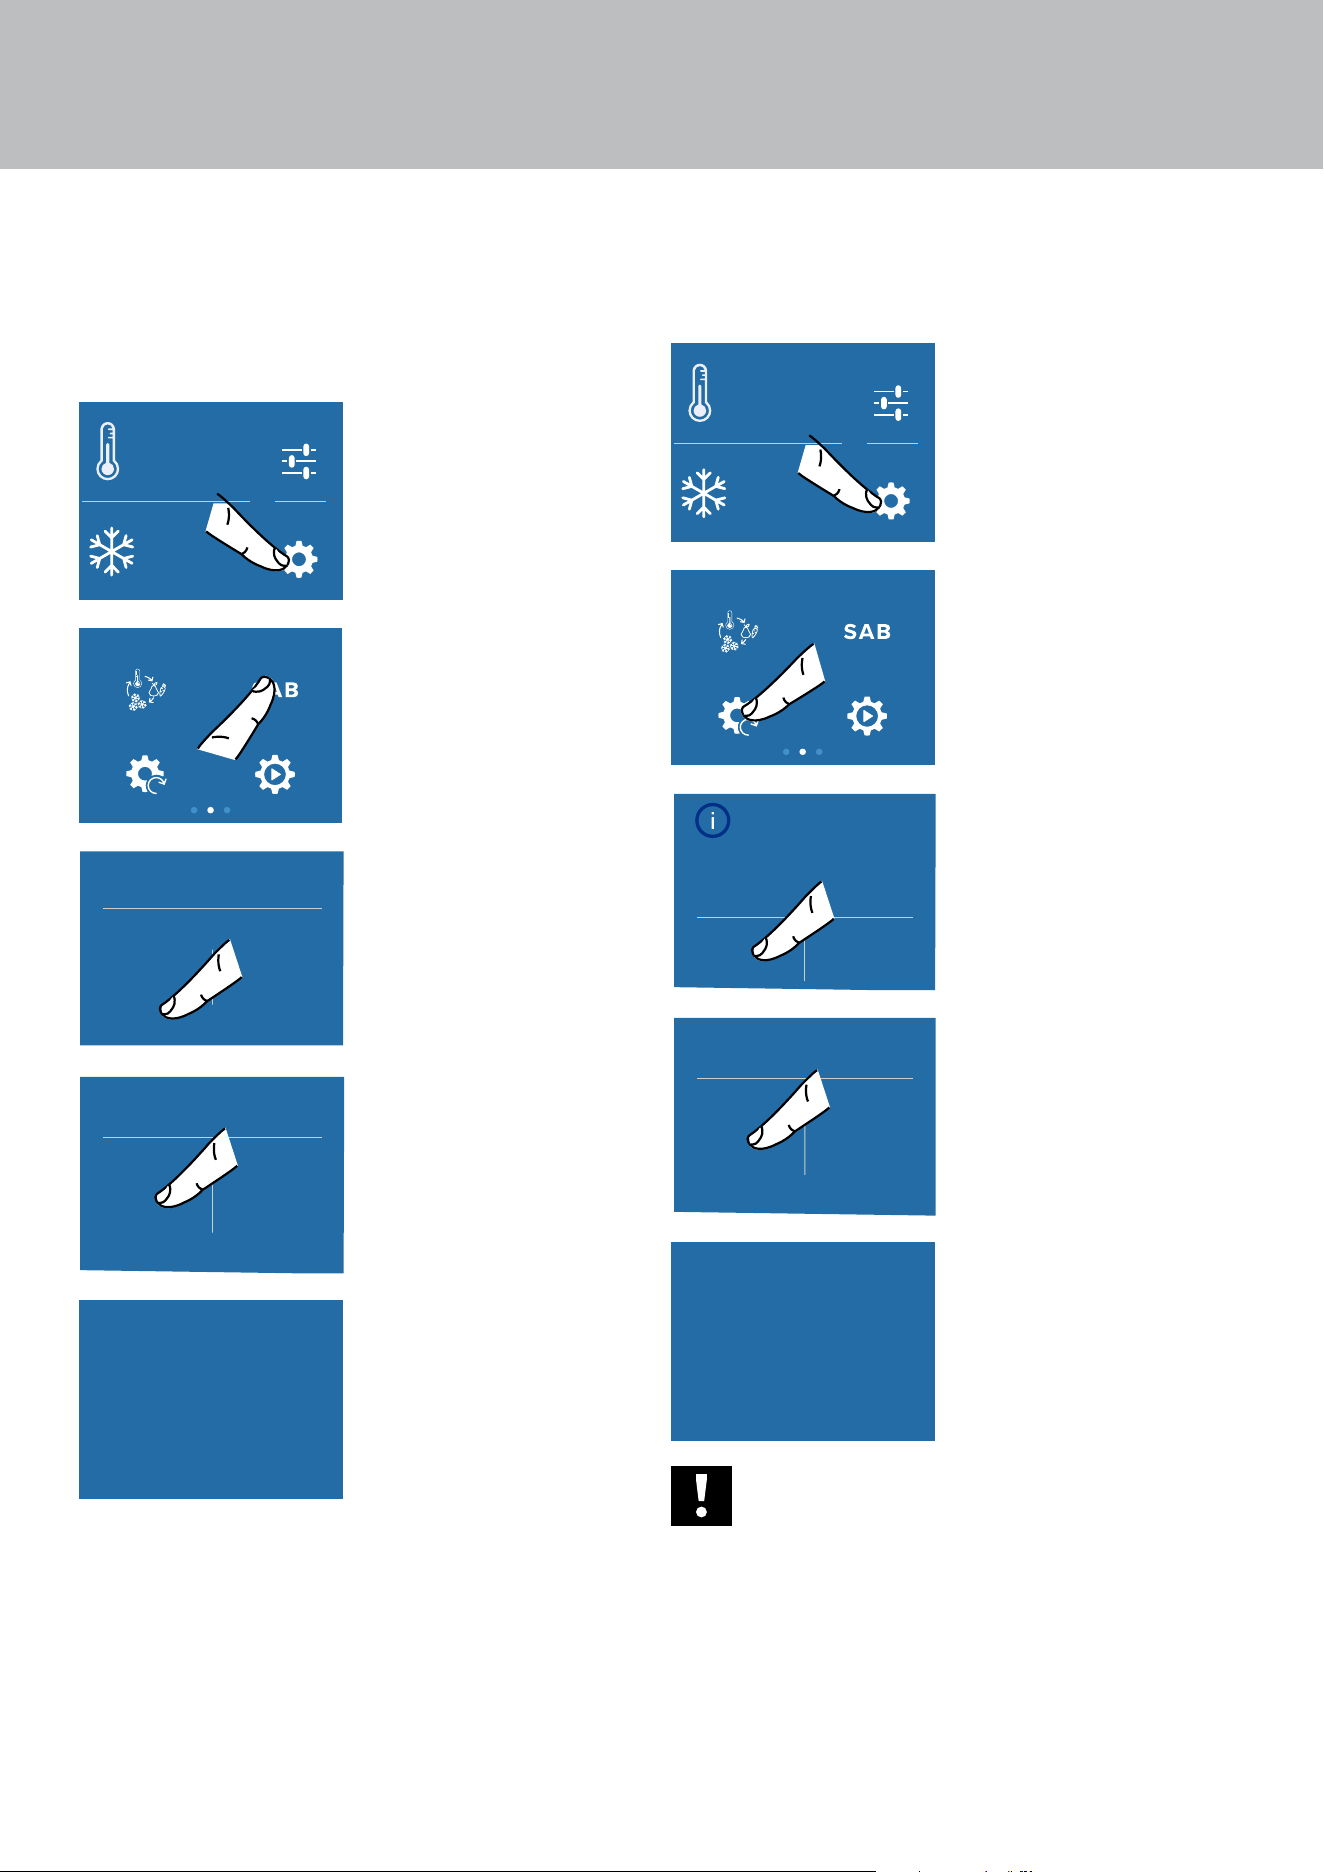
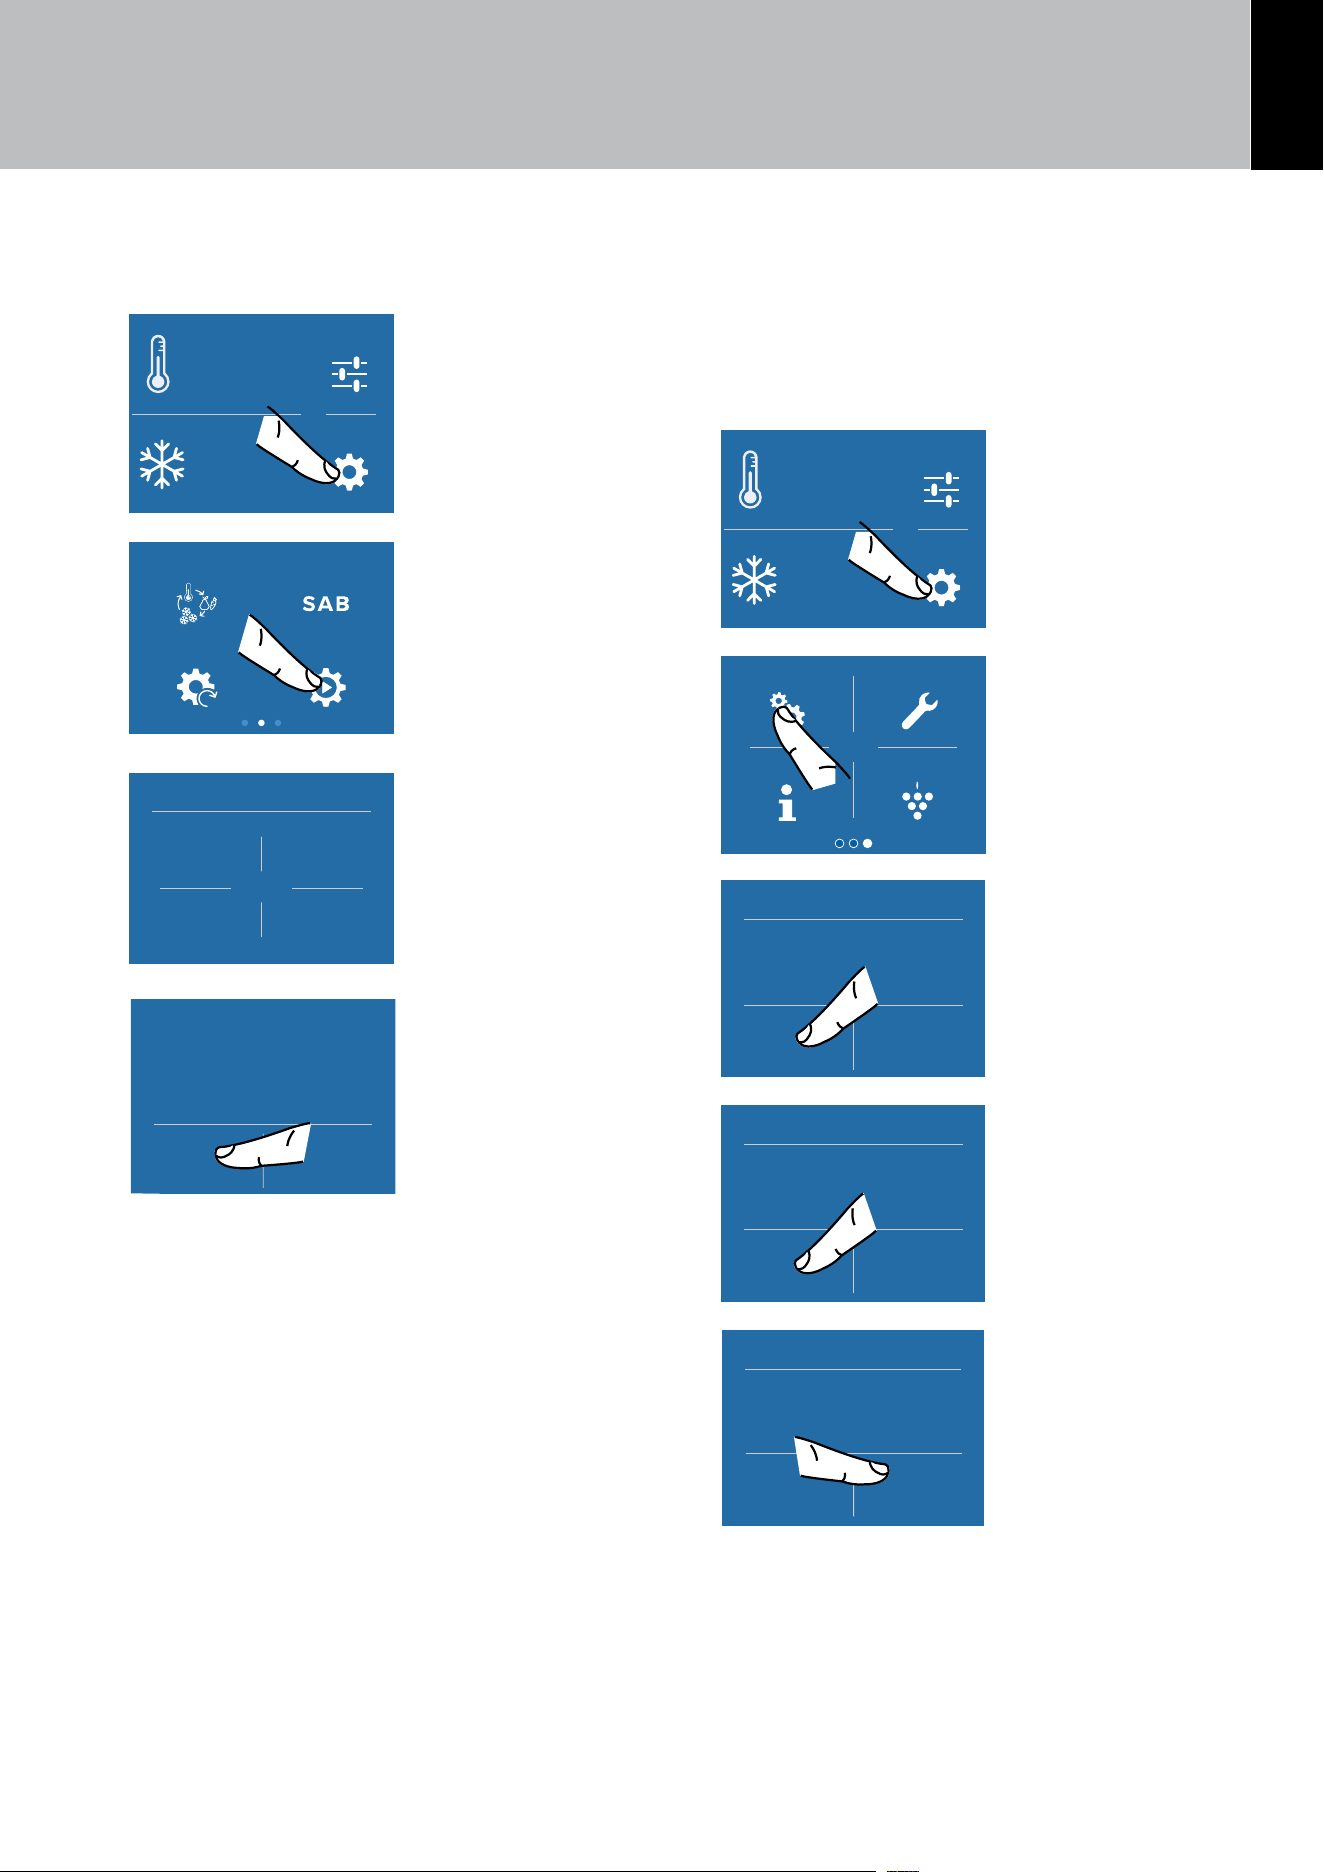
5) Sabbath Mode
The function makes it possible to comply to certain
religious observances requiring that the operation
of the appliance is not aected by the opening or
closing of the doors (the thermostatic control, the
inner lighting and the ice maker are deactivated).
Settings
Functions
°F
1
-
42
°F
+
A) Home screen.
Touch the
SETTINGS icon.
FreshSelect Sabbath
Demo ModeReset
B) Scroll right twice
and touch the
SABBATH icon.
Sabbath
Yes No
C) Touch the ON
button to activate
the function.
Are you sure?
Yes No
D) Touch the YES
button to activate
the function.
Sabbath Mode
E) The appliance will
work according to
this configuration.
6) Reset
It gives the possibility to restore the base settings
that were set in the factory, cancelling all the chang-
es that has been made from there onward.
Settings
Functions
°F
1
-
42
°F
+
A) Home screen.
Touch the
SETTINGS icon.
FreshSelect Sabbath
Demo ModeReset
B) Scroll right twice
and select the
RESET icon.
Confirm resetting
to factory
default settings?
Yes No
C) Touch the YES
button to reset.
Reset
Yes No
D) Touch the YES
button.
Reset complete
E) The reset has
been performed.
The appliance
factory settings have
been restored.
Important
If you restore the base settings (“reset”),
it is necessary to set again the choice of
the functioning of the trimode drawer
that has been made, in case they were set
before as Refrigerator or fresco.
6. FUNCTIONS AND SETTINGS
EN
31
7) Demo Mode
It is possible to simulate the functioning of the prod-
uct, for showroom display.
Settings
Functions
°F
1
-
42
°F
+
A) Home screen.
Touch the
SETTINGS icon.
FreshSelect Sabbath
Demo ModeReset
B) Scroll right twice
and select the
DEMO MODE icon.
Demo Mode
1
3
2
4
C) Enter the
PASSWORD
necessary to
activate, that must
be requested from
the Manufacturer.
Default password:
1-2-3-4
Demo Mode
On O
D) Touch the ON or
the OFF button.
9) Maintenance
In order for the unit to operate correctly, the ventila-
tion grill, filter and condenser must be cleaned peri-
odically. See the instructions on page 41.
The recurring cleaning every 12 months is reminded
by an acoustic and optical signal on the display.
Settings
Functions
°F
1
-
42
°F
+
A) Home screen.
Touch the
SETTINGS icon.
Maintenance Service
Plasmacluster
Info System
on
B) Scroll right twice
and select the
MAINTENANCE
icon.
Are you sure?
On
Clean Condenser
C) To enable it,
touch the ON icon.
Enable reminder
countdown timer?
Yes No
Clean Condenser
D) To enable the
reminder, touch
the YES icon.
Next reminder…
365 days left
Clean Condenser
O Reset
E) However, if
you want to reset
the previously set
warning, touch the
RESET icon.
6. FUNCTIONS AND SETTINGS
32
6. FUNCTIONS AND SETTINGS
Disable reminder?
Yes No
Clean Condenser
F) The alert can
be disabled and
the time left before
the next cleaning
viewed touching the
YES button.
9) Service
The Service
Maintenance Service
Plasmacluster
Info System
on
function is reserved for Viking Cus-
tomer Service.
10) Info System
The Info System function displays the product data,
such as the software code, the serial number and
the appliance factory codes.
Settings
Functions
°F
1
-
42
°F
+
A) Home screen.
Touch the
SETTINGS icon.
Maintenance Service
Plasmacluster
Info System
on
B) Touch the INFO
SYSTEM icon.
SK Power
SK User
HW: 0504
SW: 0518
HW: 1002
SW: 1069 - G1011
C) Information about
the appliance is
displayed.
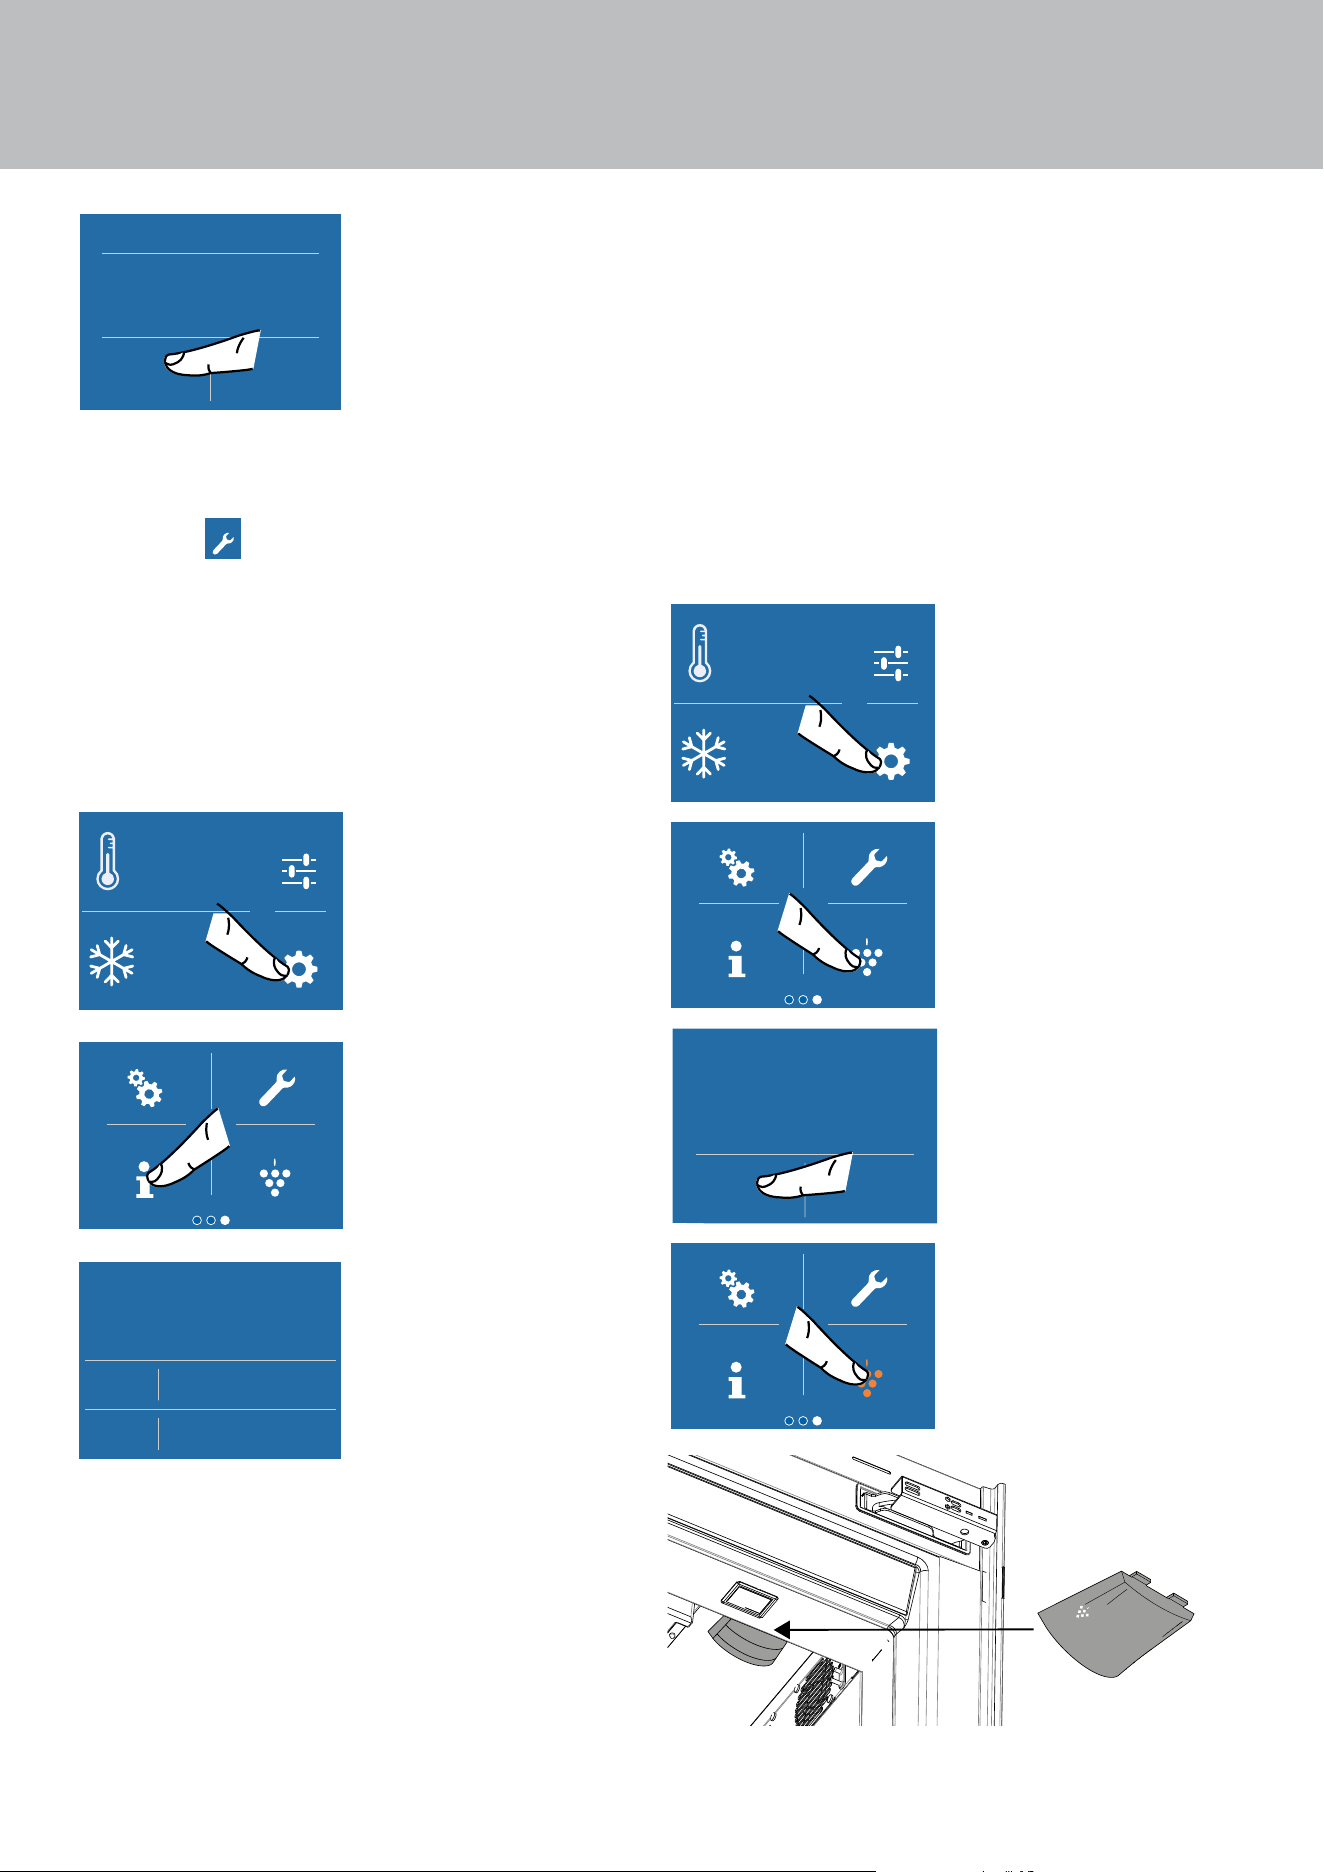
11) Plasmacluster (only for Combi and
Refrigerator models)
The ionizer inside the refrigerator releases clusters
of ions—groups of positive and negative ions—into
both the freezer and refrigerator compartments.
These ion clusters help reduce the formation of
mold and bacteria. You may notice some mild odors
in the refrigerator; this is the smell of ozone, which
is generated by the ionizer. The amount of ozone is
minimal and it quickly decomposes within the com-
partment. The Plasmacluster remains active only
when the refrigerator door is closed.
Settings
Functions
°F
1
-
42
°F
+
A) Home screen.
Touch the
SETTINGS icon.
Maintenance Service
Plasmacluster
Info System
on
B) Touch the
PLASMACLUSTER
icon.
Plasmacluster
On O
C) Touch the ON or
the OFF button.
Maintenance Service
Plasmacluster
Info System
on
D) The icon light
turns orange when
the function is active.
on
P
l
a
s
m
a
c
l
u
s
t
e
r
EN
33
7. LAYOUT
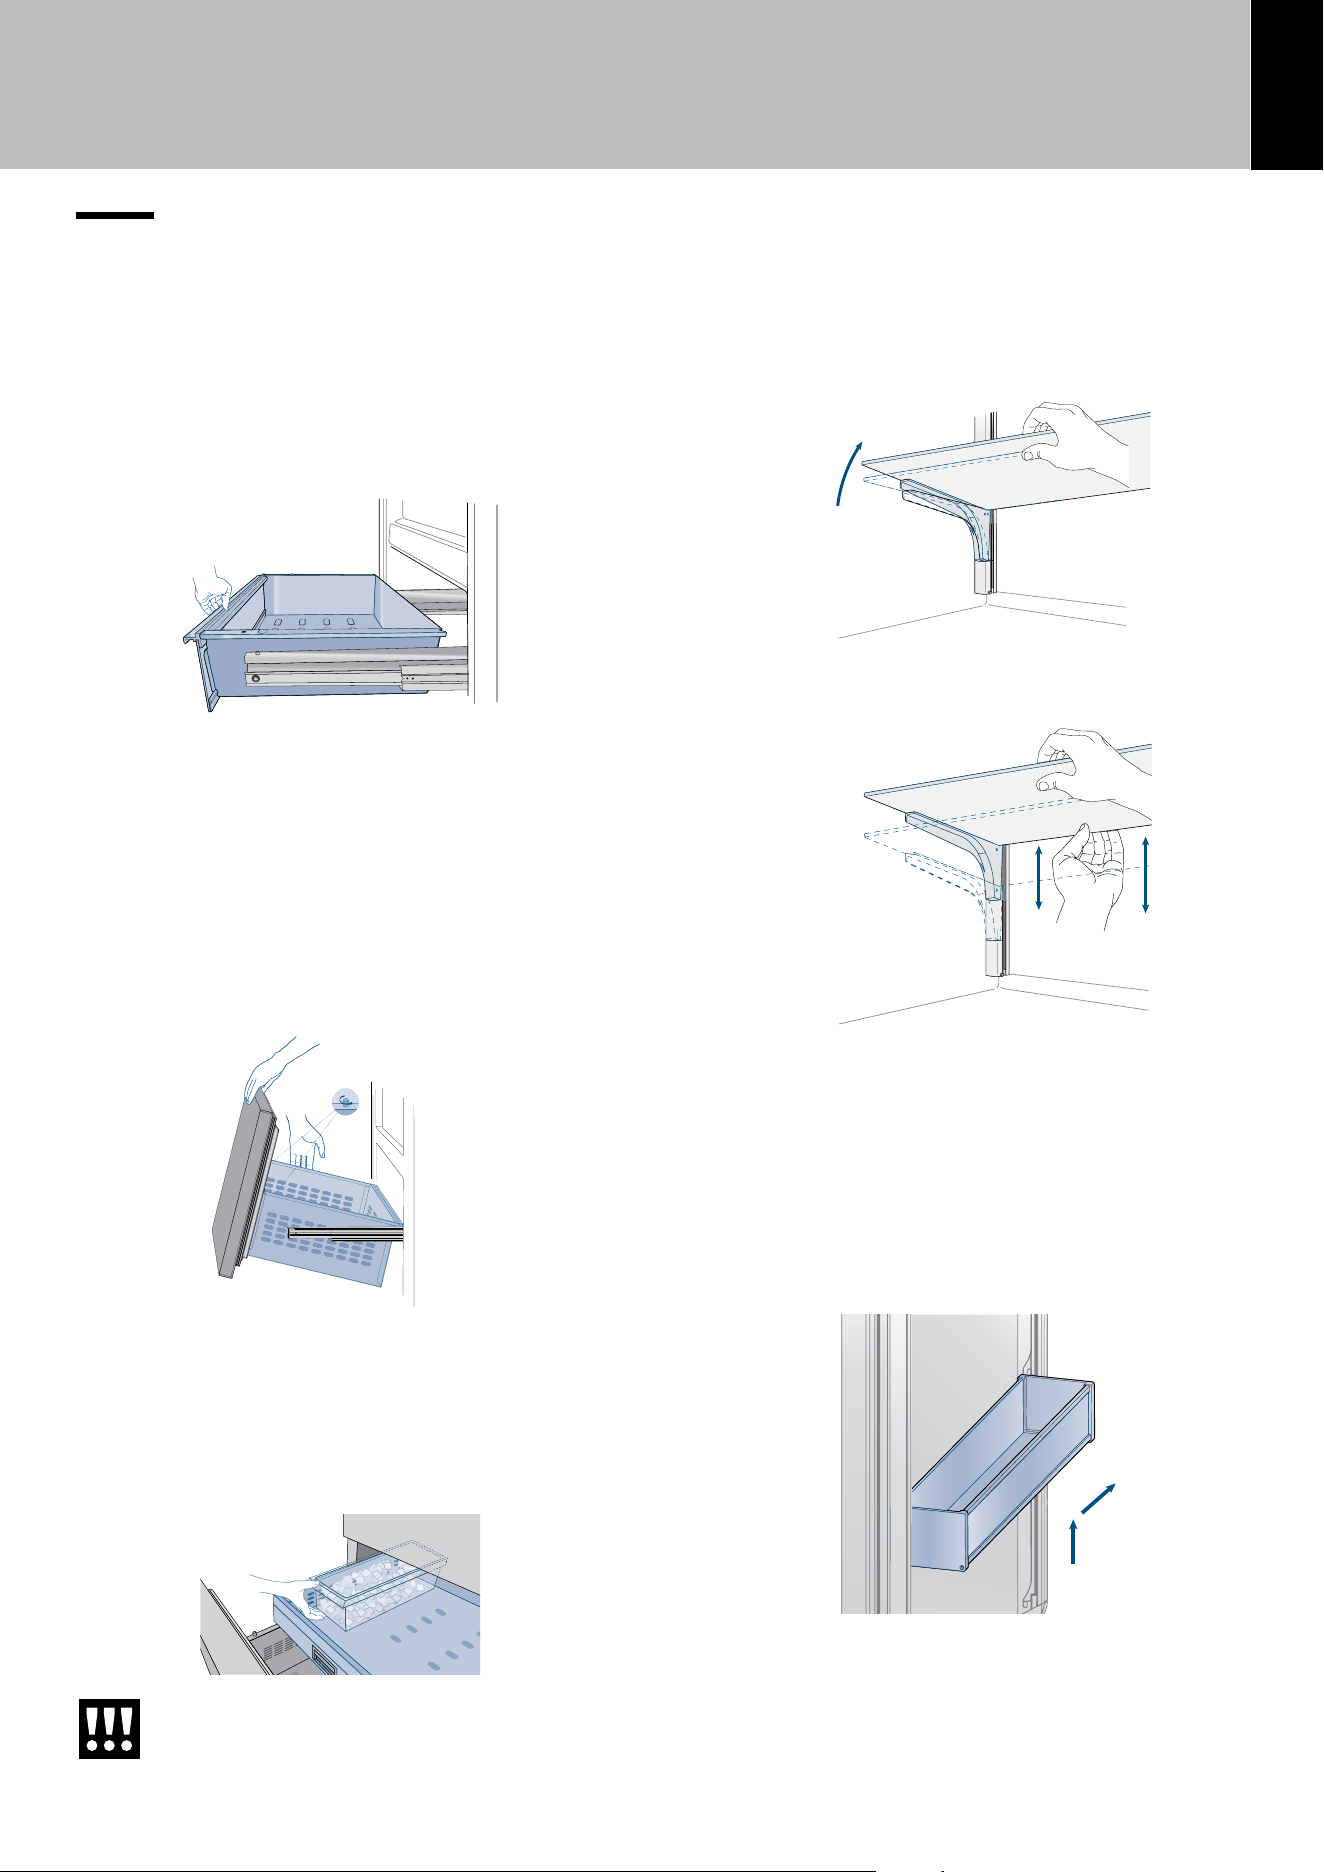
7.1. Positioning, adjusting and internal
drawers removal.
Fresco drawer
It is positioned on the slides; to remove the draw-
er, take it out completely and unscrew the two side
thumbscrews, lift it and take it out.
Fresh Select drawer
The upper Fresh Select can be removed using the
same method used for the Fresco drawer. To re-
move the inner Fresh Select drawer unscrew the
thumbscrews.
When replacing the drawers, make certain the
back of the drawers engage under the clips on the
slide guides.
Ice Bin
The ice bin is located in the upper drawer of the
freezer compartment (on some models it is fixed
with locking panels). After removal, make sure to re-
position it correctly.
Careful, do not place hands or fingers
near the Ice Maker when it is in operation.
Internal glass shelves
The shelves are sliding and can be easily re-posi-
tioned by the user as follows:
> Release the locking knob by turning it anti-clockwise
> Lift the front of the shelf and tilt it slightly.
> To remove a shelf, you must first slide it up and
then take it out.
Door Bins
The door bins can be easily removed for cleaning.
> Grasp the sides of the door shelves and push
them upwards to release them from their seats,
then pull them outwards.
> Refit them operating in reverse order.
1
2
34
8. ACTIVATING AND USING THE ICE MAKER
to 1.5 kg (3.0 lbs.) a day) while with the ICE SIZE
Fast Ice
Set Cube Size
Ice Maker
function you can select the size of the cubes
produced (see also chap. Setting the ice cubes size
and Max Ice function on page 23).
Any problems encountered
Does the ice give o an unusual smell?
Ice is a porous material which can absorb odors
from its surrounding environment. Ice cubes which
have been in the ice cube container for a long time
may absorb odours, stick together and slowly be-
come smaller.
We recommend that old ice cubes not be used.
Other means of preventing odours:
> The ice cube container should be cleaned oc-
casionally with warm water. Make sure that you
switch o the ice maker before clearing the con-
tainer. Rinse it out and wipe it dry.
> Check the contents of the freezer for spoiled
or out-of-date food. All odorous foods should be
wrapped thoroughly or stored in airtight contain-
ers to prevent the odors from accumulating.
> The water filter has to be replaced periodically.
> In some cases the quality of the water connec-
tion in the house should be checked.
Operating noises
> Hum: the refrigerator unit is running. The fan in
the air recirculation system is running.
> Bubbling, humming or gurgling noises: refrig-
erant is flowing through the tubes.
> Clicking: motor is switching on or o. Solenoid
valve on the water connection is opening/closing.
> Rumbling: ice cubes are falling into the ice
cube container.
The Bottom-freezer model is powered by
two independent compressors. It is there-
fore normal to always have one of the two
compressors in operation.
Warning
Do not place any bottles or food in the ice
cube container for rapid cooling. The ice
maker may become blocked and be dam
-
aged.
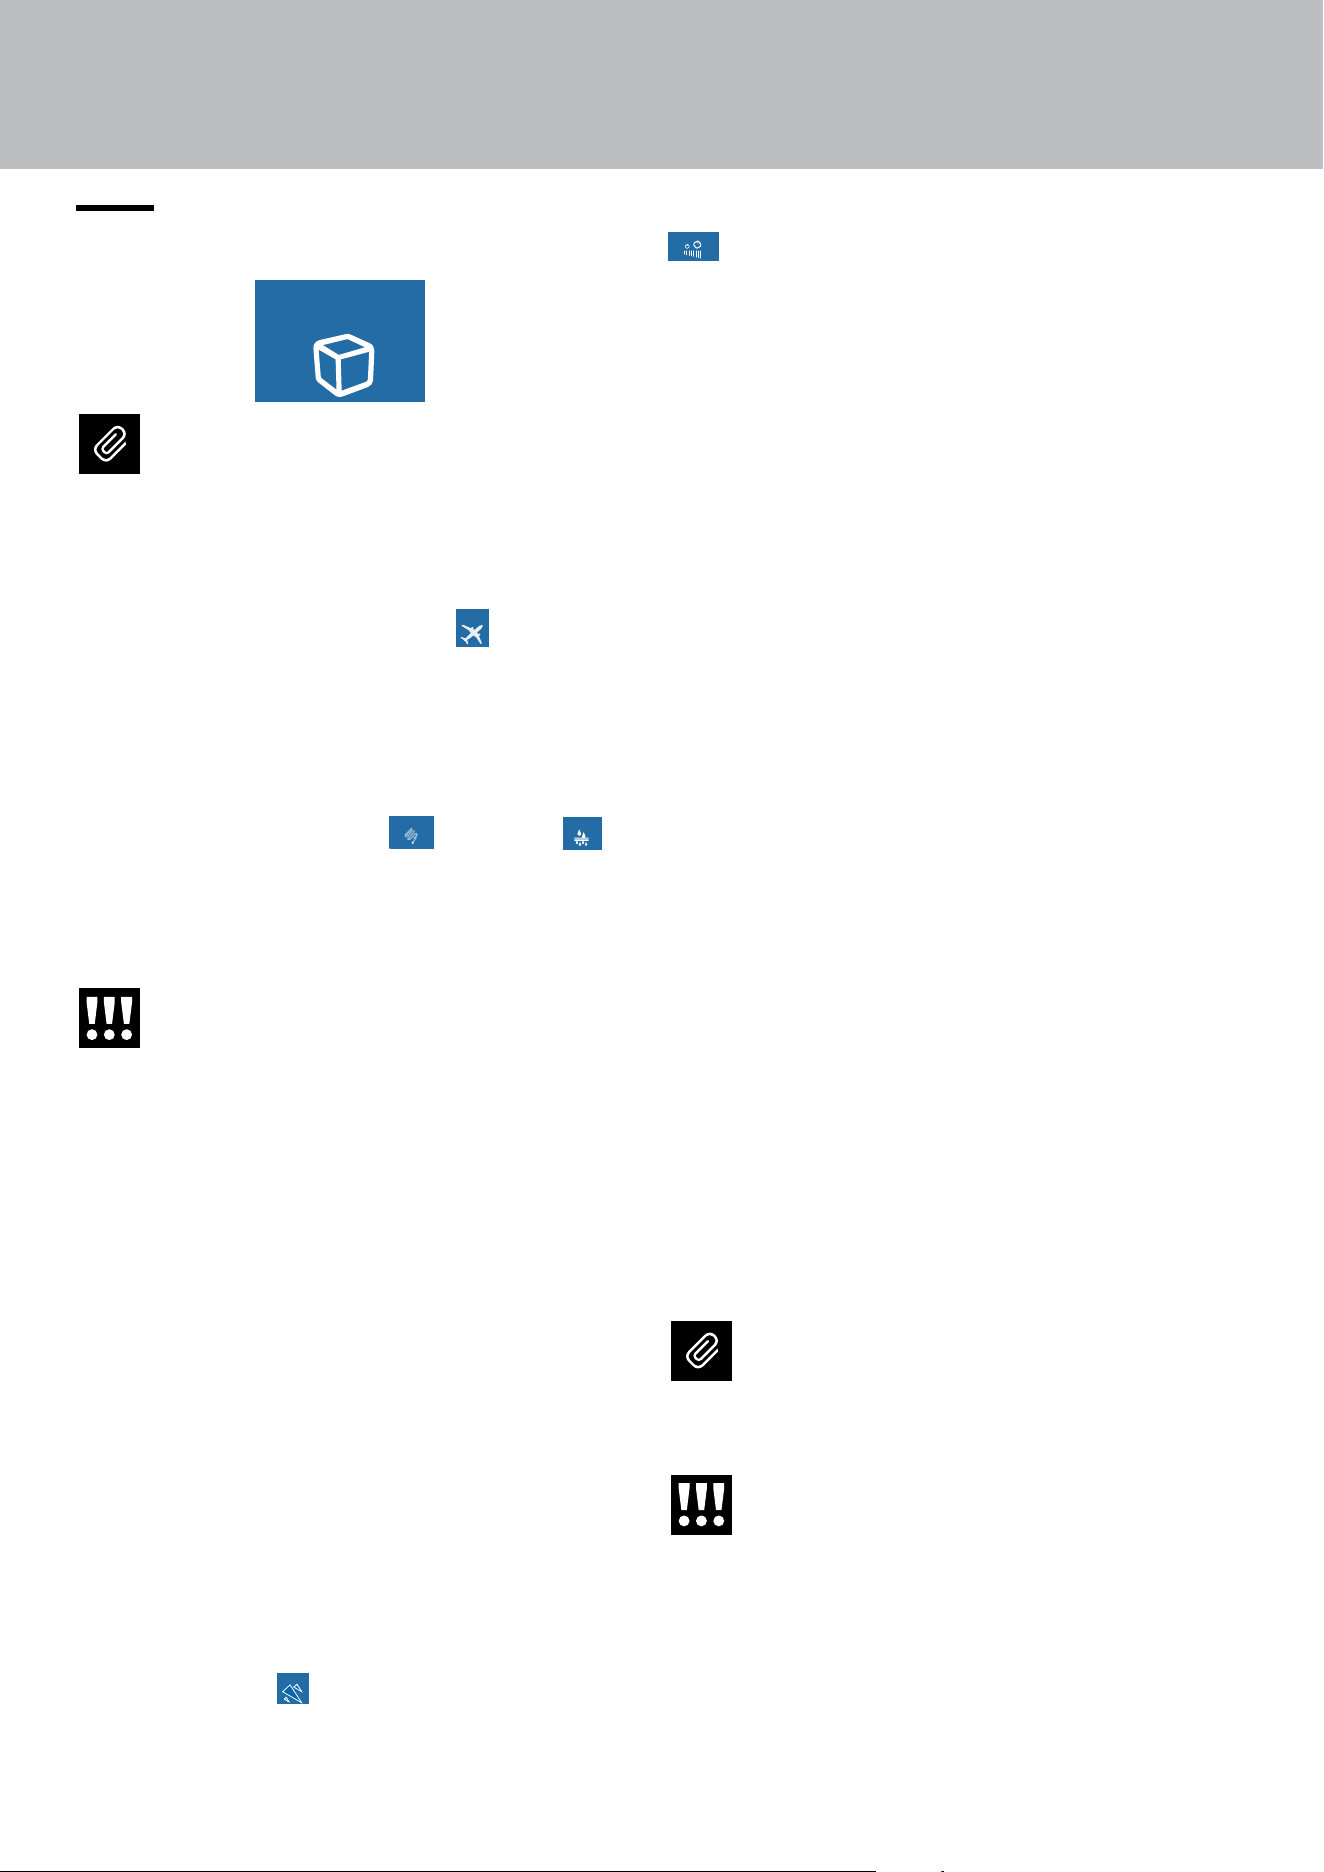
8.1. Activation and use of the Ice Maker
Ice Maker
Water Filter
Water System
Purge
Water Dispencer
Notes
>
If the ice is not used frequently is advisable
to empty the ice bin once every 8-10 days.
If the ice is not frequently used, the older
cubes can become opaque, will have a
strange flavour and become smaller.
> The Ice maker automatically switches
o if the Vacation function
Holiday Mode
MaxCool Mode:
Fridge
Beverage Cooler
MaxCool Mode:
FreshSelect
is activat-
ed.
> When the Ice maker is started for the
first time, do not use the first ice produced
(dispose of the first bucket of ice)
> If the appliance has been switched o
for a month or more, it is recommended
to perform a water
Ice Maker
Water Filter
Water System
Purge
Water Dispencer
and filter
Ice Maker
Water Filter
Water System
Purge
Water Dispencer
cleaning cycle.
> The Ice maker produces ice only if the
Fresh Select compartment is set to Freez-
er mode.
Warning
The Ice Maker will continue to operate
even if the ice bin is not in position.
Activating/Deactivating the Ice maker
To activate the Ice maker after the installation of
the appliance, 5) Ice maker activation/deactivation
(only in Combi and Freezer models) on page 22.
If the appliance is operating without being con-
nected to the water system, make sure that the Ice
maker is deactivated.
Productivity and cubes size
Once the Ice maker has been activated, it will take
between 12 and 24 hours to have the automatic pro-
duction of ice. Ice will be produced until the bin is
full. Once the maximum allowed level is reached,
production will stop automatically.
The production is 10 cubes about every two hours
(for a total of 10 cycles over 24 hours).
The yield depends on the temperature set in the
freezer, the ambient temperature and how frequent-
ly the door is opened.
With the MAX ICE
Fast Ice
Set Cube Size
Ice Maker
function, it is possible to in-
crease the quantity of ice produced in 24 hours (up
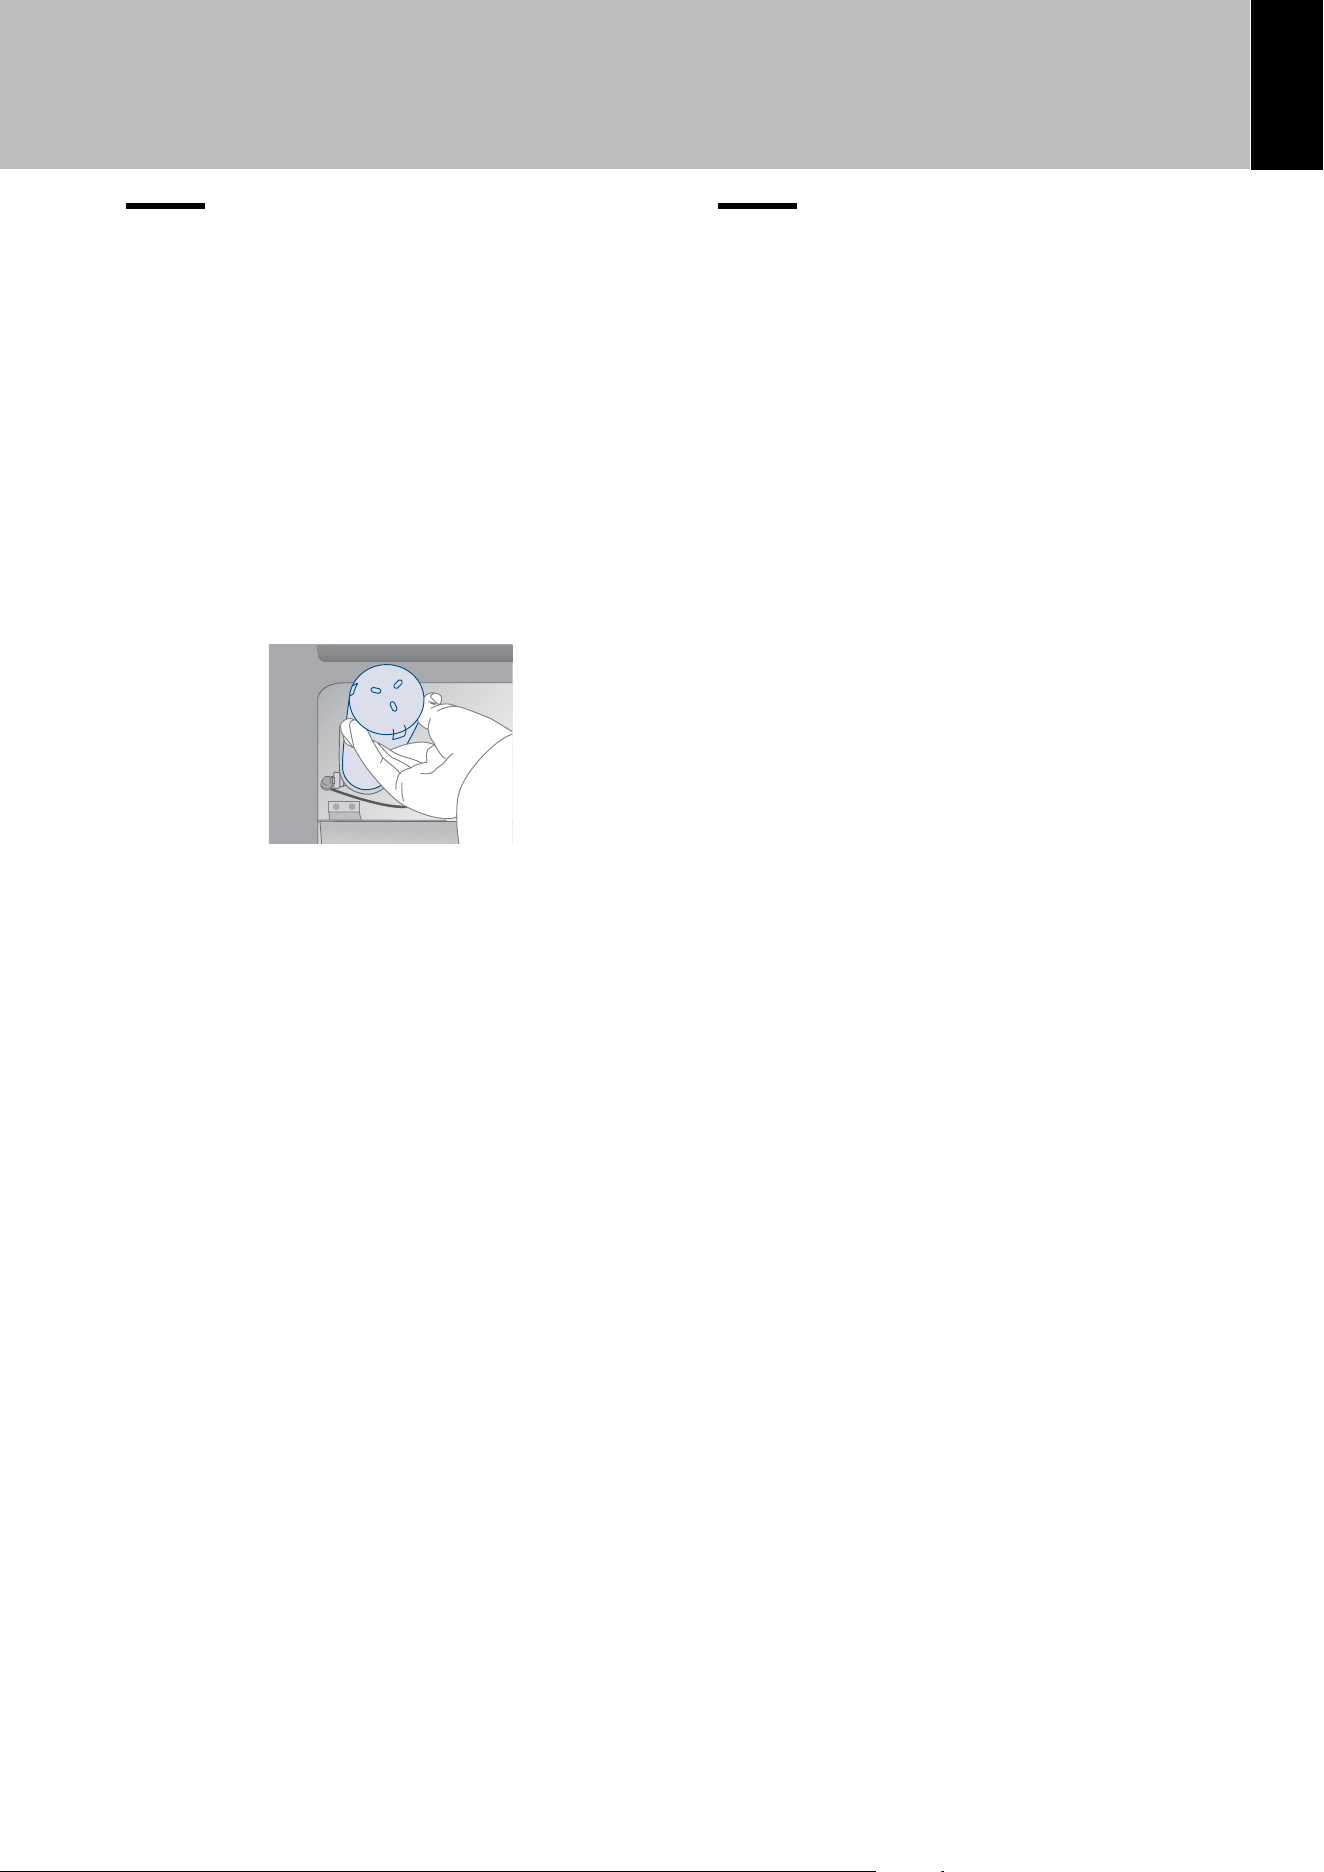
EN
35
8. ACTIVATING AND USING THE ICE MAKER
8.2. Internal water filter
The internal water filter ensures superb quality and
purification of the water used for the production of
ice cubes; its filtering duration is up to 3,000 litres
(792,6 gal) and for a maximum time of 12 months.
Filter
replacement
The filter is located inside the refrigerator compart-
ment, above the top glass panel.
Before changing the filter, deactivate the Ice maker
temporarily (see chap. 5) Ice maker activation/deac-
tivation (only in Combi and Freezer models)on page
22.
Pull both levers on the front of the glass to release
the locking mechanism and pull the glass down, then
carefully rotate the filter cartridge a quarter of a turn
counterclockwise until it is released from its seat (it
is normal for a small amount of water to come out).
Remove the cap from the new cartridge and insert
it in its housing by gently rotating it clockwise for
one quarter rotation until it locks into place, without
forcing it.
After replacing the filter
> Clean the circuit following the instructions in
chap. 8) Circuit manual cleaning (not on Refrig-
erator models) on page 25;
> Remove the water from the ice container and
dry it.
8.3. External water filter for freezer
colu
mn Ice Maker
When the water filter needs replacing, the home
screen will display an alert.
1. Remove the metal top guard that is held by
magnets.
2. Rotate the old filter counterclockwise until it re-
leases from the filter head, then pull the filter all
the way out.
3. Remove the new filter from its box, remove all
packaging, and insert the new filter in the filter
head, then rotate it half a turn.
4. Reinstall the metal top guard.
5. Press Reset on the Water Filter icon to reset
the water filter timer, then press Yes to confirm.
Filter activation/deactivation
See chap. 6) Water filter - activation on page 23.
If you choose NOT to use the water filter (for in-
stance because the appliance is connected to an
already filtered water source) then we suggest you
disable the warning to avoid receiving reminders
to change the filter (that you are not using)
.
For further details on how to access this function
setting, follow the instructions in chap. 6a) Water fil-
ter - deactivation on page 24).
After every annual replacement of the water filter
cartridge, it is necessary to reset the count of the
quantity of filtered water and of the time elapsed
since the last replacement following the instruc-
tions in chap. 6a) Reset Filter on page 24.
8. ACTIVATING AND USING THE ICE MAKER
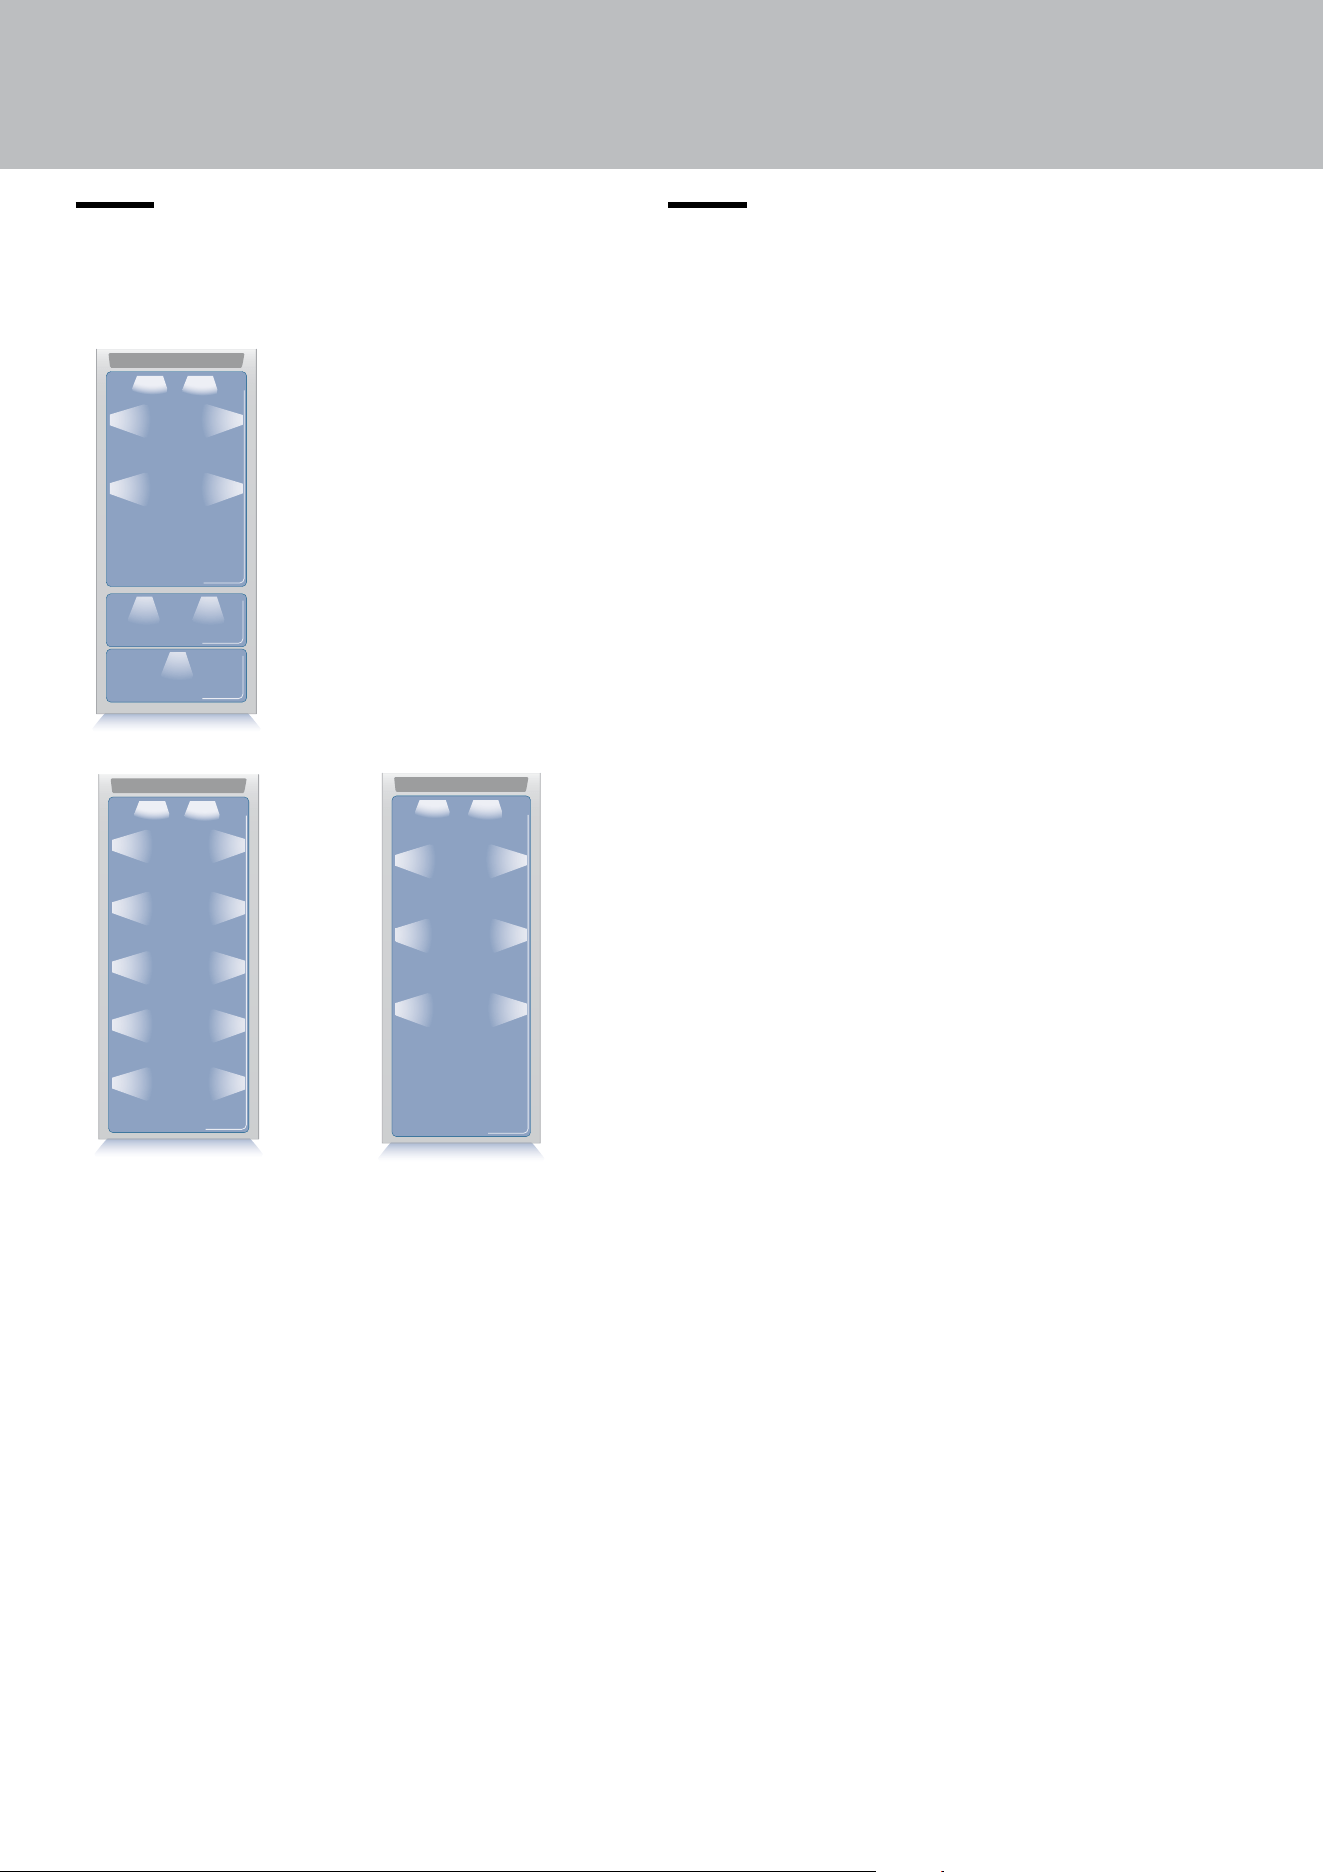
Bottom Freezer
Freezer
Refrigerator
36
9. LIGHTING
9.1. Compartment
lighting
10. CONSERVATION OF FOODS
10.1. General directions
Your appliance is designed to ensure constant
accurate temperatures and appropriate humidity
levels in all compartments. In addition, the double
refrigeration ensures that frozen foods and ice do
not absorb the odor of fresh foods and that the hu
-
midity in the refrigerator does not freeze, resulting
in frost build-up.
Nevertheless, to properly preserve all of your foods,
it is not enough to have an excellent refrigerator. It
is also necessary to know the rules of correct cold
food storage.
Bear in mind that all foods will inevitably change
their characteristics with the passage of time.
This change begins long before the food is con-
sumed, since foods contain micro-organisms which
multiply and can cause deterioration.
This process occurs more rapidly in the case of im-
proper handling and of incorrect storage tempera-
tures and humidity levels.
Follow the instructions provided below which will
allow use of your refrigerator/freezer in the safest
and most eective manner, to keep your foods in
the best possible way for as long as possible.
Periodically check that all foods are in a proper state
of preservation. It is usually quite clear when a food
item has deteriorated, due to mold, an unsavoury
odour and an unpleasant aspect.
Nevertheless, there are cases in which these condi-
tions are not so evident.
If you believe that a food item has been kept for an
excessive period of time and may have deteriorat-
ed, do not consume this item or even taste it, even if
it still seems to be well preserved, since the bacteria
that cause deterioration in food can also cause poi-
soning and illness. When in doubt, throw the food
away.
To provide optimum interior lighting, LED lights il-
luminate the refrigerator compartment from the top
and sets of LED lights directly illuminate dierent ar-
eas of the refrigerator compartment, and the freezer
drawer.
In case of malfunction and/or wearing out of the
lighting system, the repair should be carried out by
a qualified Viking Service technician.

Warning
After a prolonged interruption of electri-
cal power, once the electrical power is
reactivated, an signal will indicate if the
temperature has raised above normal
levels. In addition to this the display will
show for one minute the highest temper-
ature detected inside the compartments,
to allow the user to decide how to better
use the food items.
EN
37
10.2. How to maintain good food
quality
When buying groceries
Always take the following precautions:
> Place packages containing raw meat, fish or
poultry in containers suitable for food storage.
> Buy meat, poultry and fish last. Do not leave your
groceries in a warm car after shopping.
> Keep a freezer bag in your car and use it in case
of very high temperatures or long trips.
> Check the production and expiration dates on
foods to make sure they are fresh.
> Buy fresh food in quantities that you can con-
sume in 1-2 days.
> Leave hot foods at room temperature for at least
two hours before placing them in the refrigerator.
When placing foods in
Check the refrigeration temperature of the various
compartments on the control panel:
> Follow the recommendations regarding storage
times and temperatures indicated in the tables be-
low.
> Keep raw meat, fish and poultry separate from
other foods and avoid any possible drippings.
> When placing in the refrigerator your meat, fish
or poultry, leave these in their original packaging,
unless the packaging is ripped or punctured.
> Repeated handling could introduce bacteria into
these foods.
> To keep food in the freezer it is a good idea to
use freezer containers.
> Label and date the packages.
> Be careful to correctly position the food items on
the shelves in a way that does not obstruct the cold
air circulation vents inside the compartment.
10. CONSERVATION OF FOODS

38
Food storage
> Food must be stored in closed containers or
properly packaged and must not emit or absorb
odours and humidity.
> Follow the recommendations regarding storage
times and temperatures given in the table below.
10.3. Tips for food storage
Temperatures
The appliance working temperatures are set at
the recommended degrees of +41°F (+5°C) for the
refrigerator, 32°F (0°C) for Fresco drawers and 0°F
(-18°C) for the freezer.
Food arrangement
Refrigerator compartment door bins:
> Keep eggs, butter, cheese etc. in the upper and
central parts.
> Keep drinks, bottles, cans etc. in the lower part.
Refrigerator compartment:
> Keep preserves, wine, biscuits etc. in the upper
part.
> Keep dairy products, pre-prepared foods,
pastries, fruit juices, beer, etc. in the central part.
Upper drawer
> Keep fresh fruit, tropical food, vegetables, car
-
rots, potatoes, onions... Lower drawer
> Keep meats, cold cuts etc...
Freezer compartment
We recommend you use the rear part of the upper
basket for rapid freezing of products with the follow
-
ing indications:
> Use small packs and if possible already cold.
> The quantity of fresh food that can be frozen at
the same time is described on the characteristic
plate positioned in the cell.
> Use special freezing bags, aluminium foil, food
grade polyethylene film and freezing containers.
> Do not use paper bags, cellophane bags not for
food use, shopping bags or bags for freezing that
have already been used.
> Prevent frozen food coming into contact with
fresh food to be frozen.
10. CONSERVATION OF FOODS

EN
39
FRESH FOODS CONSERVATION AREA TIME
Cooked meat
Boiled and roasted meats
Refrigerator Compartment
2 days
Meat-based sauces
Refrigerator Compartment
6 days
Other
Soups and broths
Refrigerator Compartment
2 days
Pasta
Refrigerator Compartment
2 days
Fresh cheeses
Refrigerator Compartment
2-3 days
Well protected aged cheeses
Refrigerator Compartment
Several months
Eggs (fresh and unwashed)
Refrigerator Compartment
2 weeks
Opened containers
Refrigerator Compartment
2-3 days
Raw vegetables (in perforated bags)
Refrigerator Compartment
1 week
FROZEN FOODS CONSERVATION AREA TIME
Beef, veal, lamb and goat Freezer Compartment (steaks)
6-12 months
Beef, veal, lamb and goat Freezer Compartment
(Meat with bone in)
4-6 months
Ground beef Freezer Compartment 1-2 months
Pork Freezer Compartment (Without bone) 4-6 months
Pork Freezer Compartment (With bone) 2-3 months
Ground pork Freezer Compartment 1-2 months
Meat leftovers Freezer Compartment 2-3 months
10. CONSERVATION OF FOODS

40
FROZEN FOODS CONSERVATION AREA TIME
Whole chicken and turkey Freezer Compartment
8-12 months
Goose, duck and pheasant Freezer Compartment 4-8 months
Fish Freezer Compartment 1-2 months
Crustaceans Freezer Compartment 2-3 months
Cooked foods Freezer Compartment 1-2 months
Vegetables Freezer Compartment
8-12 months
Fruit Freezer Compartment
6-12 months
Desserts and cakes Freezer Compartment 2-3 months
10. CONSERVATION OF FOODS
EN
41
11. CARE AND CLEANING
11.1. Care and Cleaning
To clean parts and surfaces made of steel, use a
microfiber cloth and the sponge provided in the kit
with the appliance.
Always use the cloth and sponge in the direction of
the steel’s satin finish.
Every now and then, to polish the steel, wipe with a
slightly damp microfibre cloth.
Do not use the sponge on aluminium parts, such as
the handles and the edging on the glass shelves.
Take special care to keep the ventilation openings
in the appliance or in the cabinet that houses it free
of obstructions.
Note
Clean the inside of the appliance with a
cloth, soap and water.
Warning!
The use of chlorine-based cleaning prod-
ucts or other products that contain chlo-
rine should be avoided (bleach, hypochlo-
rite, etc.).
11.2. Internal cleaning
Clean the interior of the appliance and its remov-
able parts by cleaning them with a solution of luke-
warm water mixed with a small amount of dishwash-
ing detergent.
Rinse and dry right away.
Do not use mechanical devices or other methods to
speed up defrosting.
Warning!
The use of chlorine-based cleaning
products or other products that contain
chlorine should be avoided (bleach, hy-
pochlorite, etc.).
Warning!
Do not use water on the electrical parts,
lights or control panel.
Do not bring cold glass parts into contact
with hot water.
Do not wash any parts of the refrigerator
in a dishwashing machine since this could
damage or irreparably deform the parts.

42
11. CARE AND CLEANING
11.3. Cleaning of the ventilation grill,
filter and condenser
In order for the unit to operate correctly, the ven-
tilation grill, filter and condenser must be cleaned
periodically.
A reminder for this periodic cleaning, to be per-
formed every 6 months, is provided through sound
alerts and a notification shown on the display.
To activate or deactivate this warning signal and
display the time left to the next cleaning, see chap.
“9) Maintenance“ on page 31).
The condenser is located behind the lower front
ventilation grille, (see page 43).
To clean it use a vacuum cleaner with a soft brush
attachment at maximum power, sweeping it along
the vent slits.
In the event of significant dust build up, the
ventilation grill can be removed to allow a
more thorough cleaning of the condenser.
After cleaning the condenser, touch the RESET
icon to rest the warning after 12 months’ time.
If you do not want the warning cleaning signal of
the condenser any more, touch the OFF icon (see
chap. “9) Maintenance“ on page 31).
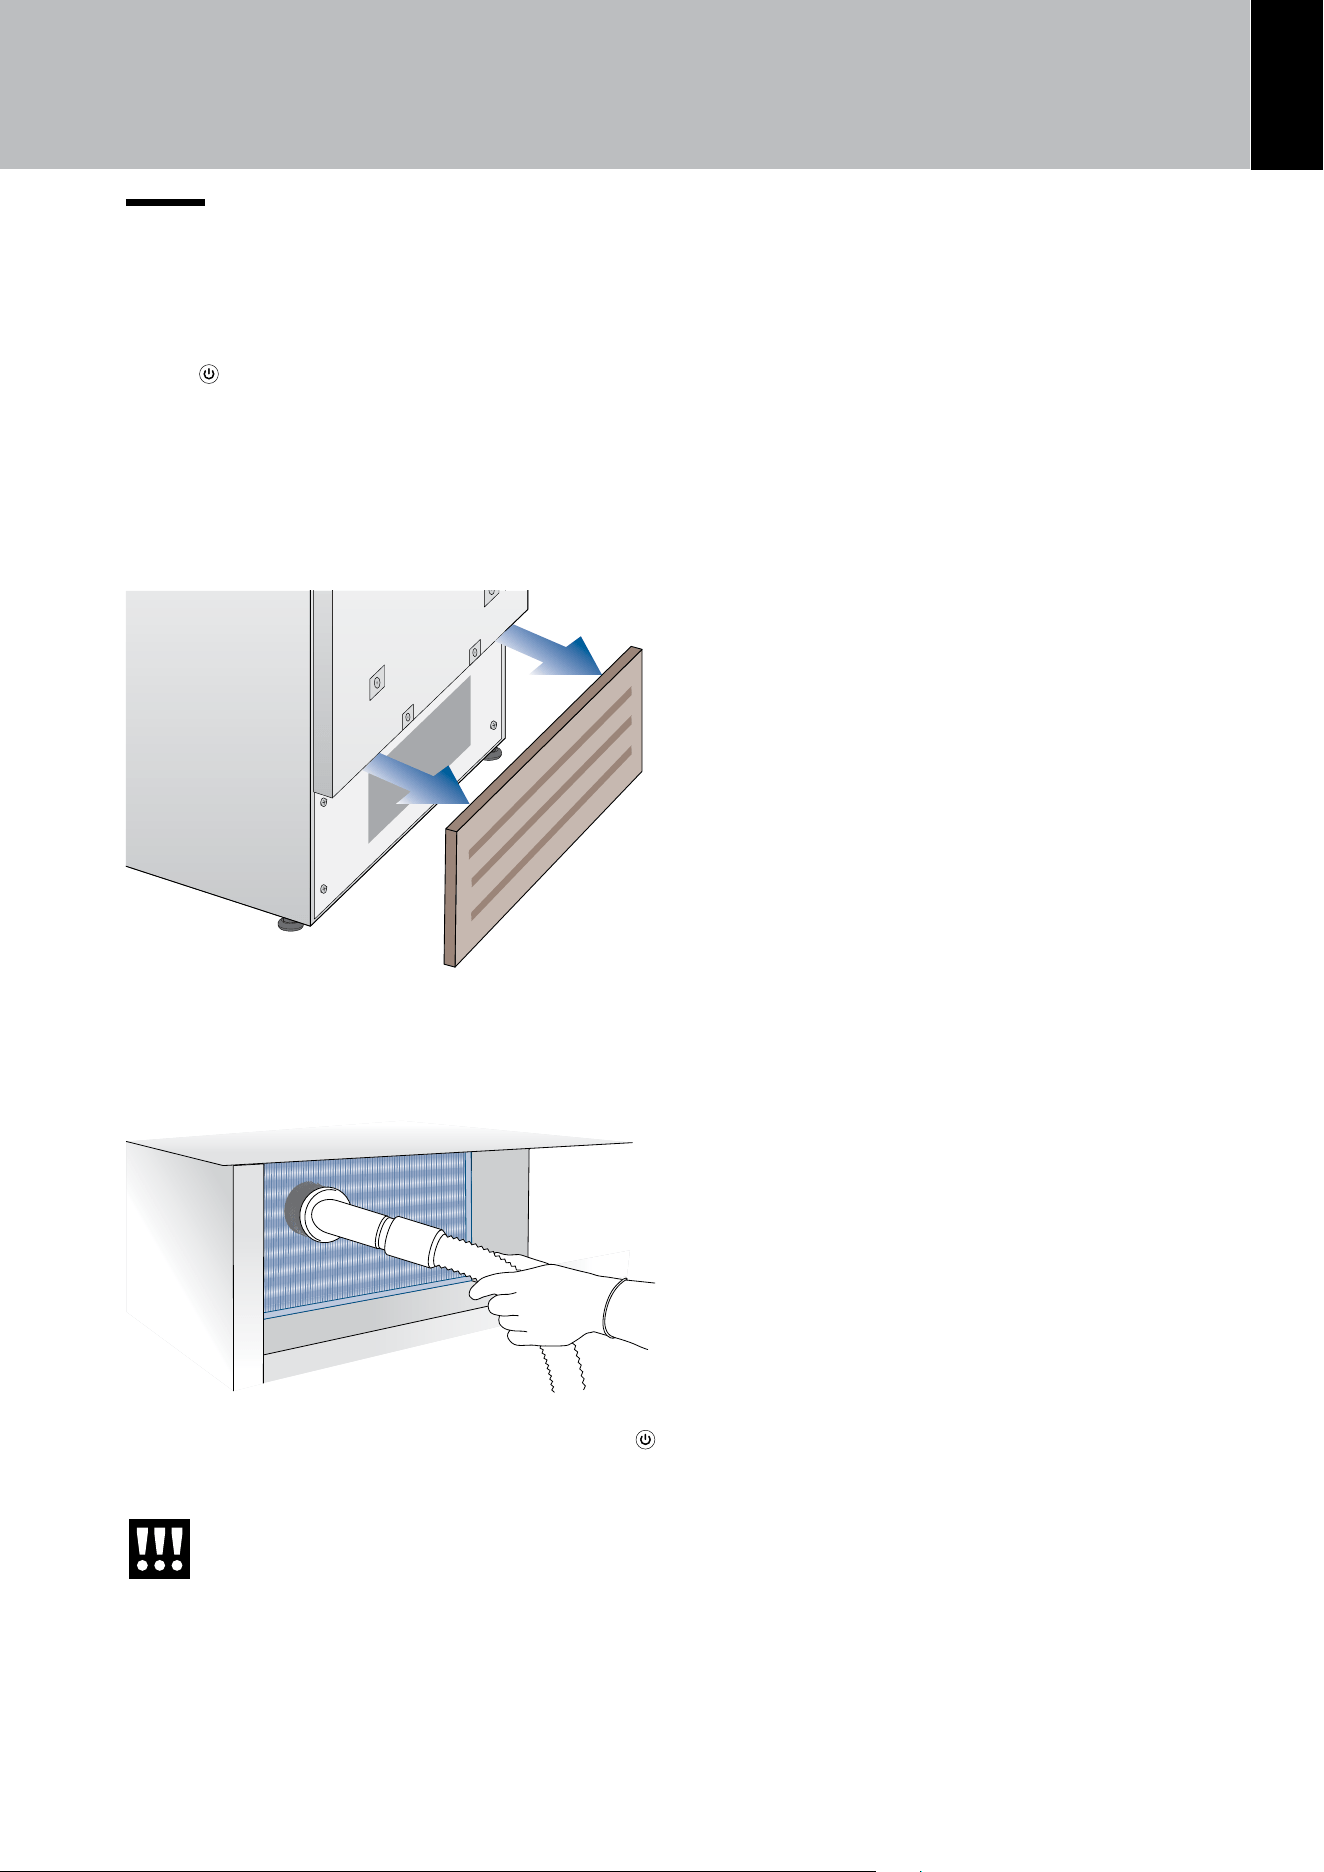
EN
43
11.4. Condenser Cleaning
To clean the condenser follow the instructions:
> Turn o the appliance by pressing the ON/OFF
button
on the main control panel for approx 3
seconds.
> Wait approx. 30 minutes, until the condenser
cools down to ambient temperature.
> Remove the removable grille under the door.
> Clean the condenser thoroughly from all dust
deposits as shown in the figure, taking care not to
damage it.
> Restart the appliance acting on the ON/OFF
button again for about 3 seconds.
Warning!
The edges of the condenser are sharp,
therefore use suitable protection for
your hands and arms when cleaning
the condenser.
11. CARE AND CLEANING

44
12.1. Troubleshooting Guide
If you notice any malfunctioning of your appliance,
use this guide before calling for service. This guide
can help you to solve the problem on your own or
could provide important information that you can
convey to the Service technician in order to ensure
rapid and eective repair.
Display message and audible alarms.
A malfunction is usually indicated on the display.
The problems that cannot be solved by the user
are signaled through a malfunction code. Keep in
mind, however, that these may appear in messages
or alarms under particular conditions of use or dur-
ing start-up. In such an event, deactivate the sound
alert by pressing the ALARM
button, leave the
appliance running and open the doors as infre-
quently as possible for 10-12 hours.
The refrigerator or the freezer does not work
Is the appliance connected to the electrical power
supply?
Is electrical power being supplied from the electrical
socket?
Is the ON/OFF
button activated?
Is the unit in ‘DEMO’ mode? If you suspect your ap-
pliance is in DEMO mode, please contact your point
of purchase for assistance with disabling this feature
(see also page 31)
The refrigerator or the freezer is warmer than
usual
Does the display show a malfunction code?
Is the temperature adjusted correctly?
Were the doors or drawers open for a long period
of time?
Were large quantities of food recently placed in-
side?
Is the unit in ‘DEMO’ mode? If you suspect your ap-
pliance is in DEMO mode, please contact your point
of purchase for assistance with disabling this feature
(see also page 31)
The compressor is on for a long time period
Bear in mind that during very hot weather and with
very high temperatures in the room it is normal for
the compressor to remain on for extended periods
of time.
Were the doors or drawers open for a long period
of time?
Were large quantities of food recently placed in-
side? Check that the doors are closed and that the
food or containers do not obstruct the perfect clo-
sure of the door.
Are one or more of the compartments in SHOP-
PING mode? (see page 20)
If you hear strange noises
It is normal to hear noise from the fans or compres-
sors during the defrost phase. Noise could be more
marked depending on the position of the appliance
and the surrounding environment.
Condensation inside and outside of the
refrigerator
If the climate is very humid, the formation of con-
densation is normal. Opening the door or drawers
for extended periods of time can contribute to the
formation of condensation.
In any case, make sure that the doors are always
fully closed.
Ice or frost build up inside the refrigerator or
freezer
Did you leave the doors open for a long period of
time?
Are the doors closing completely? If the doors do
not fully close, check the placement of the products
inside the compartment. Contact your installer. In
case of frost or ice build up in the Crisper-Fresco
compartment, due to frequent and prolonged open-
ing of the doors, deactivate the Crisper-Fresco func-
tion via the button on the control panel. Wait until the
frost or ice melt, then remove the drawer and dry
the sides and bottom of the compartment.
Unpleasant odours inside the refrigerator
Clean the appliance thoroughly according to the in-
structions. Hermetically cover all of the food. Do not
store food for extended periods of time.
The doors are dicult to open
The appliance was designed to permit hermetic clo-
sure. When the door is closed, a vacuum condition
can be created: in such an event, it is necessary to
wait a few seconds until the pressure balances be-
fore opening the door.
The appliance is cooling but lights and display
are not working
Check to see if the appliance was accidentally put
into SABBATH mode (see page 30).
The Ice Maker does not work
Make sure that the Ice Maker is on ( icon).
12. TROUBLESHOOTING GUIDE

EN
45
To turn it on, see chap. 5) Ice maker activation/deac-
tivation (only in Combi and Freezer models).
Make sure that the appliance is connected to the
water supply.
If the filter has not been replaced for a long time, the
water flow may be limited.
The Ice Maker does not produce sucient
amounts of ice
On average, the production is about 10 cubes every
two hours (for a total of 10 cycles over 24 hours).
The ice cubes freeze into one block
If the ice is not used frequently, it is possible that
blocks of ice may form. It is recommended that you
remove the block of ice cubes and then let the Ice
Maker fill the ice tray again.
The ice has an unusual flavor or color
When the Ice maker is started for the first time, do
not use the first ice produced (dispose of the first
bucket of ice)
If the refrigerator was switched o for more than one
month or if the cartridge was not changed for more
than six months, it could be necessary to replace
the filter cartridge.
Contact a plumber or a water treatment expert to
make sure that the problem is not due to the water
supply.
If the unit you purchased was used as
a showroom model, it may be in a spe-
cial energy-saving mode called Demo
Mode, in which the appliance appears to
be operating (lights work and false tem-
peratures are displayed) but no cooling
actually takes place. If you suspect your
appliance is in Demo mode, please con-
tact your point of purchase for assistance
with disabling this feature (see also page
31)
12. TROUBLESHOOTING GUIDE
46
12.2. Malfunction messages appearing on the display
> In the event of a malfunction, touch the ALARM button and the display will show the fault mes-
sage with its error code (see following table).
> The message will be shown for 3 seconds, then it will go back to the HOME screen.
> To block the message on the screen, press the INFO button
Modalità
Bottle Cooler
On O
on the display. The message will re-
main on the screen for 30 seconds, then it will go back to the HOME screen.
> In the event that there is more than one error message, the display will show the dierent fault mes-
sages in chronological order.
Display message Malfunction description
Power Failure!!
Extended interruption of electrical power
The appliance starts up again automatically and indicates the highest
recorded temperatures. Press the ALARM
button to deactivate the sound
alarm
Upper unit open
Refrigerator door open
This message appears when the door has been open for a few minutes.
Lower unit open
Freezer door open
This message appears when the door has been open for a few minutes.
Replace filter
Replace water filter cartridge
message appears: every 12 months after the reset
Upper unit too warm
Refrigerator too warm
See Troubleshooting Guide
Upper unit too cold
Refrigerator too cold
wait for 12 hours: if the malfunction persists, call Customer Service for advice.
Lower unit too warm
Freezer too warm
See Troubleshooting Guide
Lower unit too cold
Freezer too cold
wait for 12 hours: if the malfunction persists, call Customer Service for advice.
Error Code...
Functional problems
Contact Customer Support. Check the conditions of use (high food loads,
frequent door opening). Press the ALARM
button to deactivate the sound
alarm.
Check condenser
Check Condenser
Every 6 months the display shows the message “CHECK COND.”, clean the
condenser and press and hold the ENTER button
for 5 seconds to reset.
12. TROUBLESHOOTING GUIDE

Viking Range, LLC
111 Front Street
Greenwood, Mississippi 38930 USA (662) 455-1200
For product information, call 1-888-(845-4641)
or visit the our web site at vikingrange.com
080725