
Marine Washer

1
2
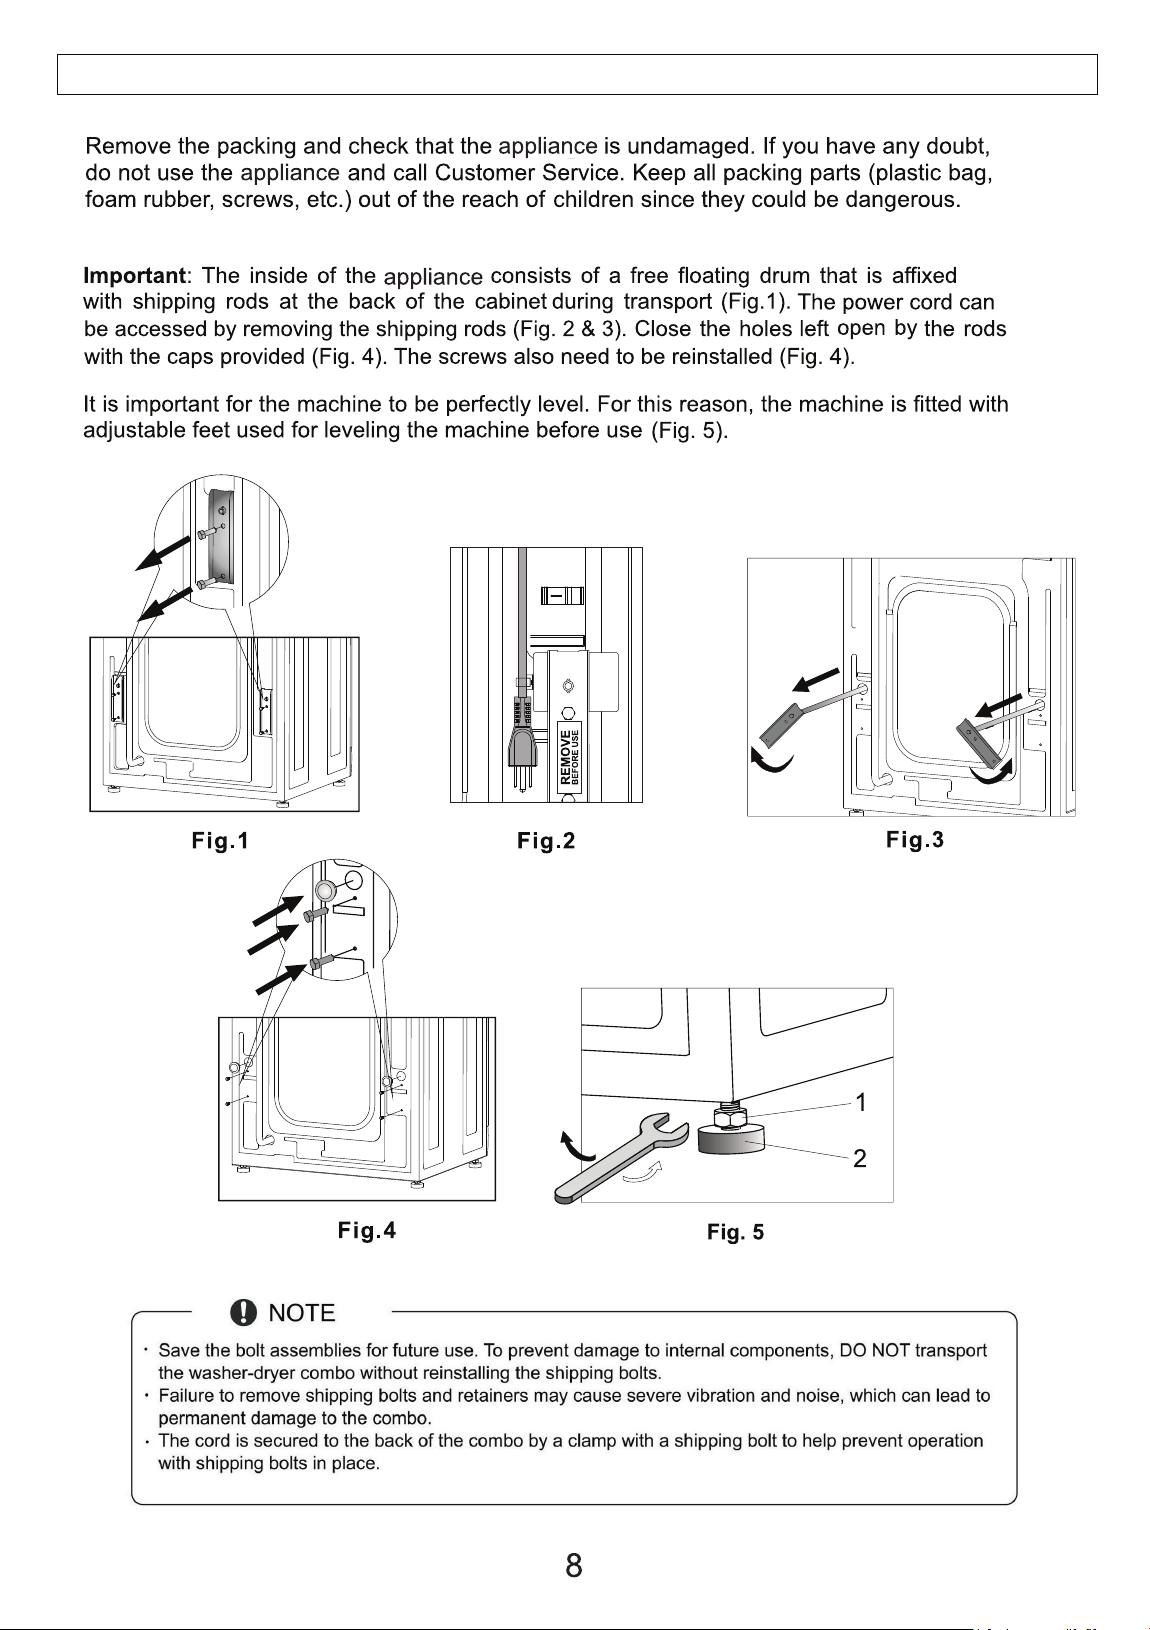
4
5
7
8
9
10
11
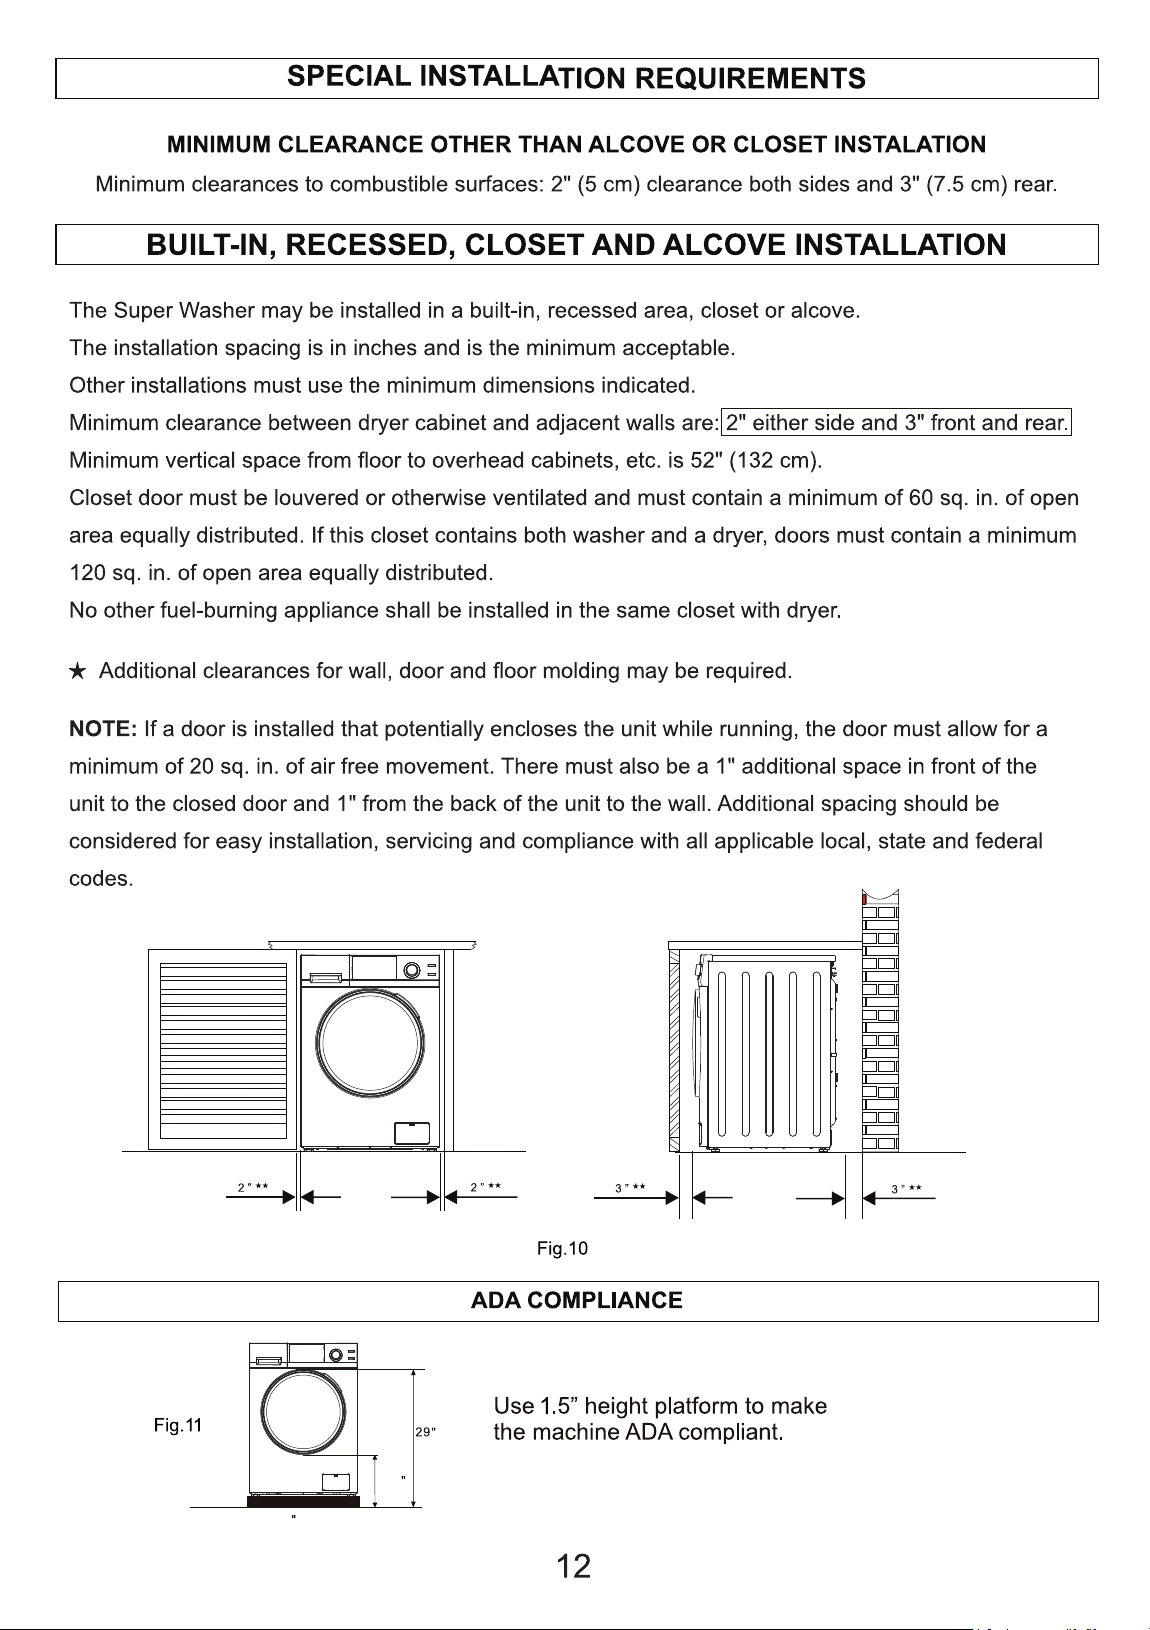
12
13
15
17
20
21
Features
Warranty
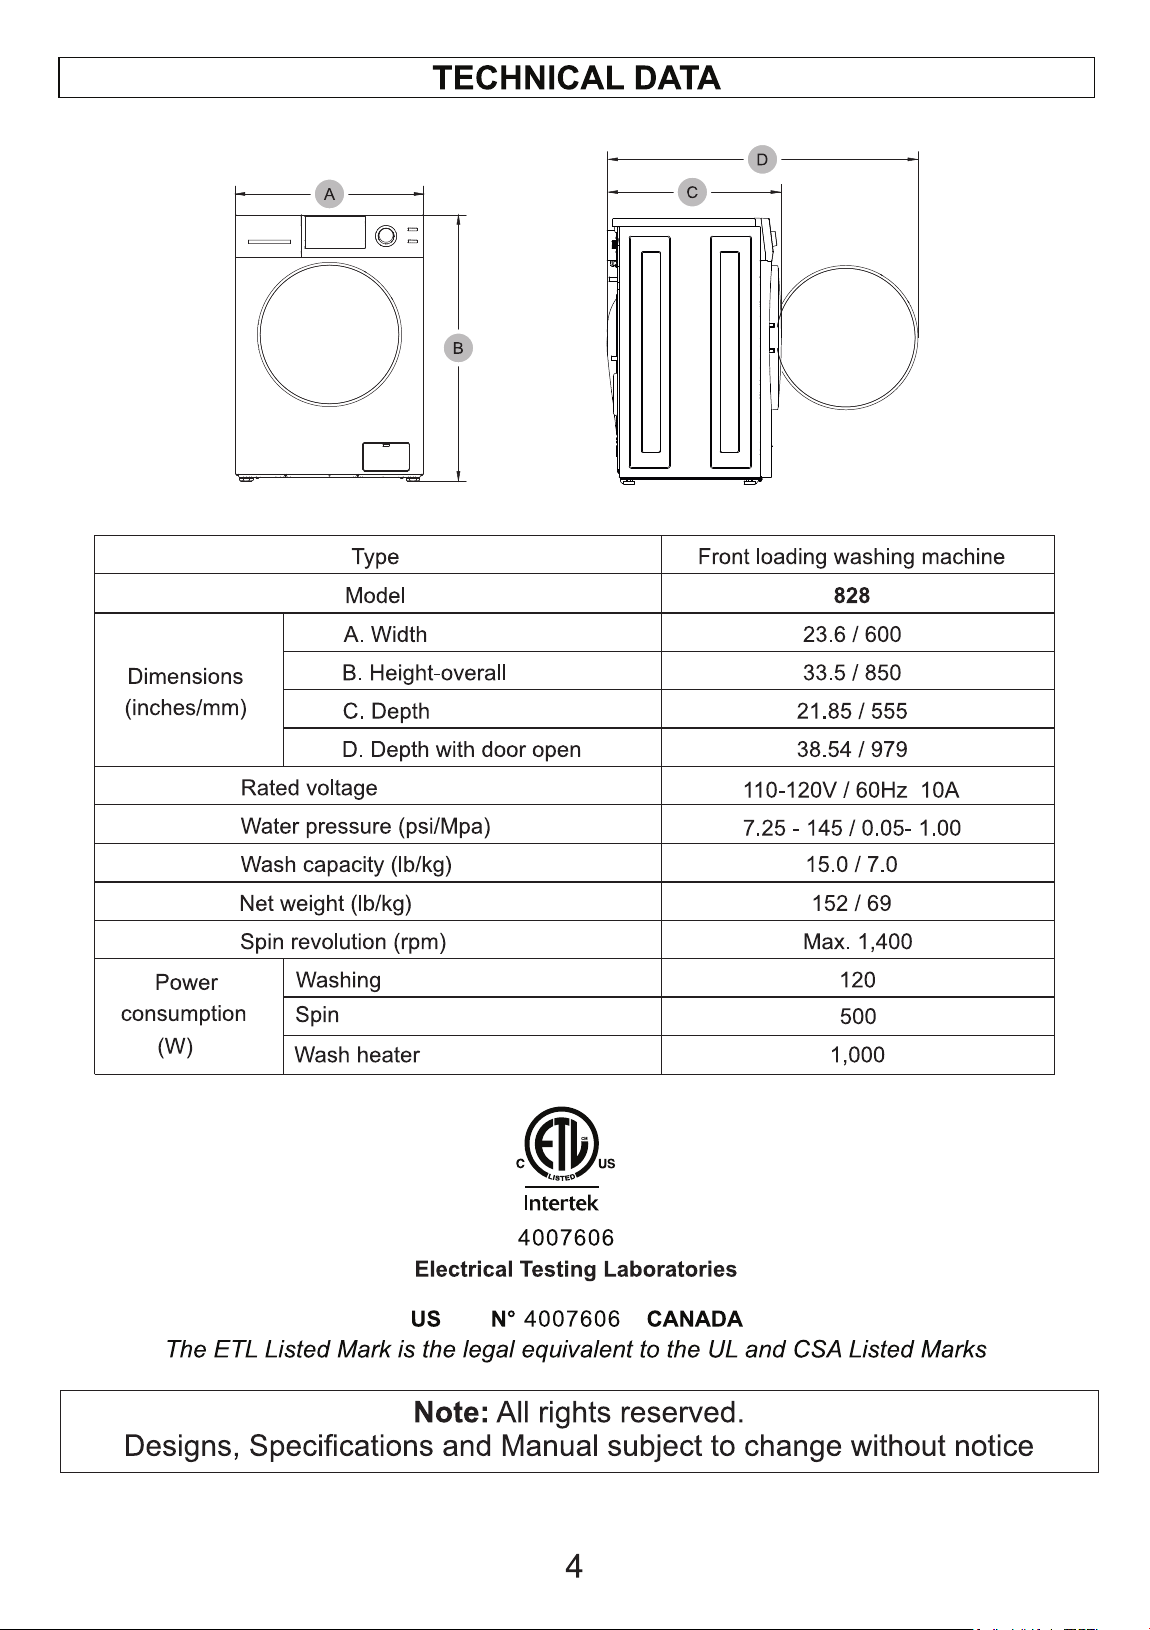
Technical Data
Important Safety Instructions
Diagram of the Washer
Handling and Placement
Installation Instructions
Electrical
Plumbing
Special Installations Requirements
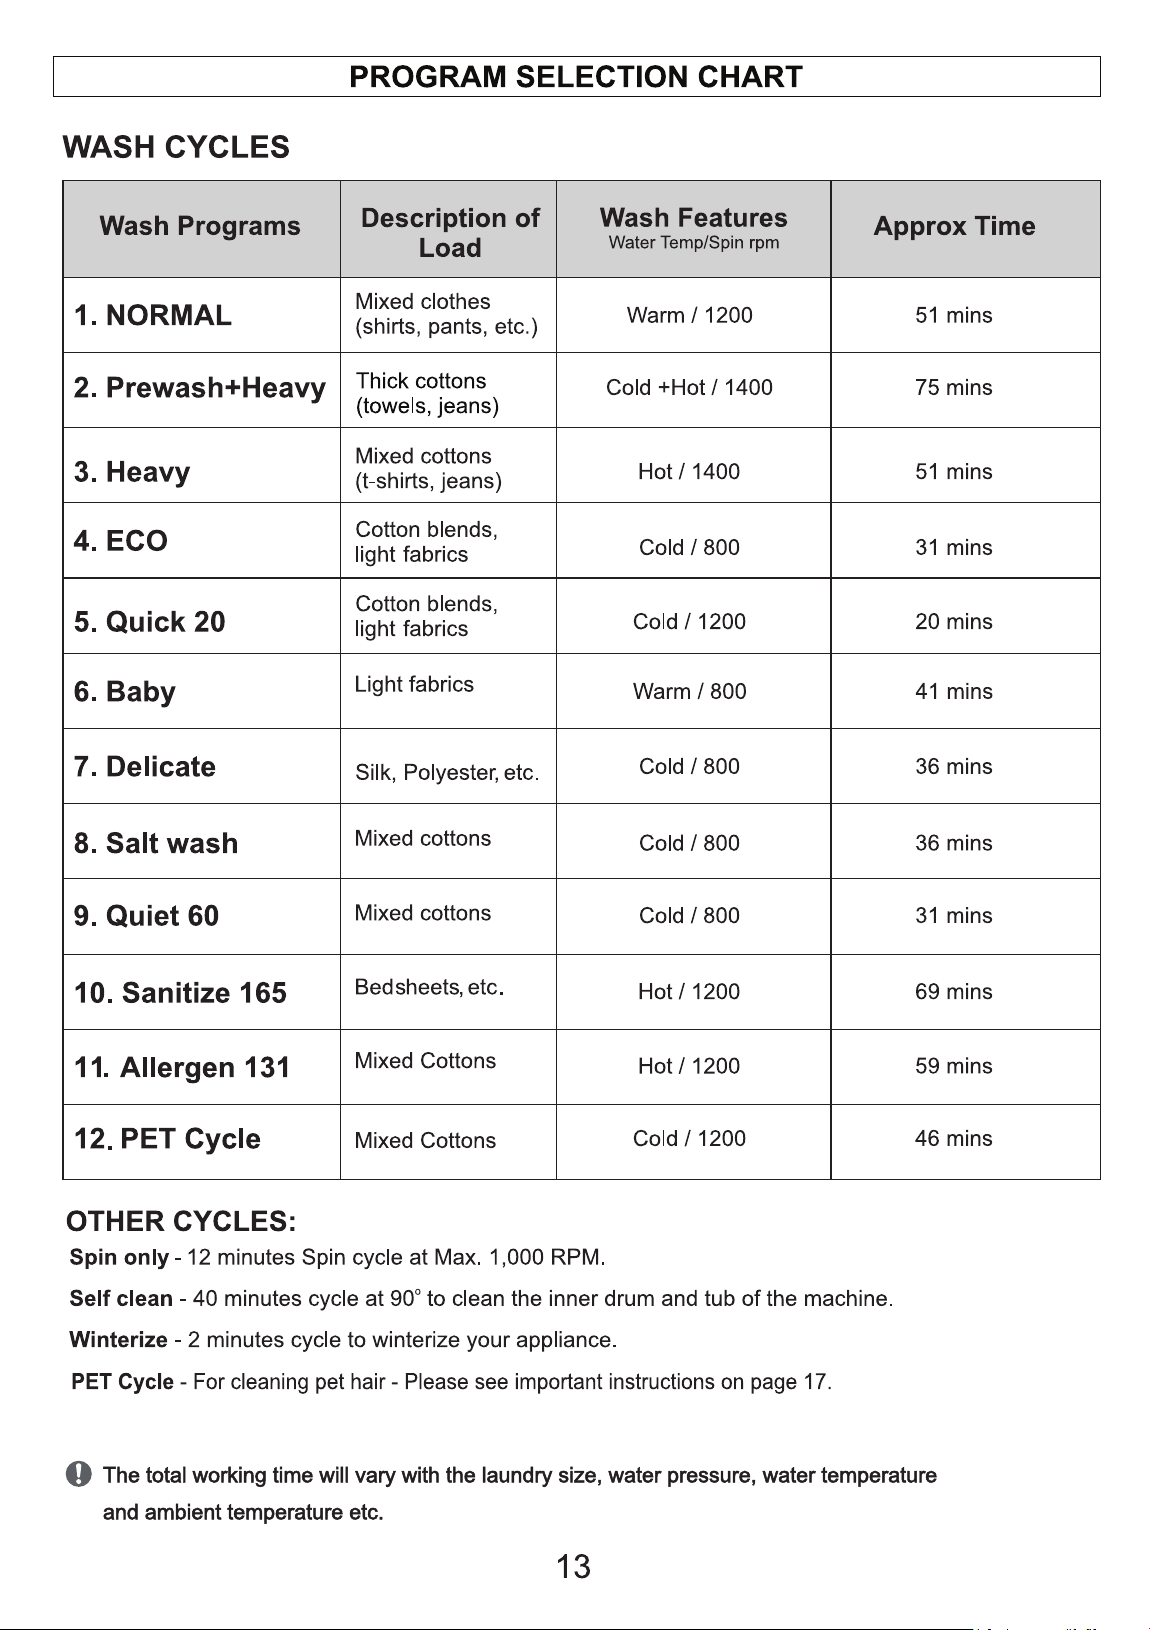
Program Selection Chart
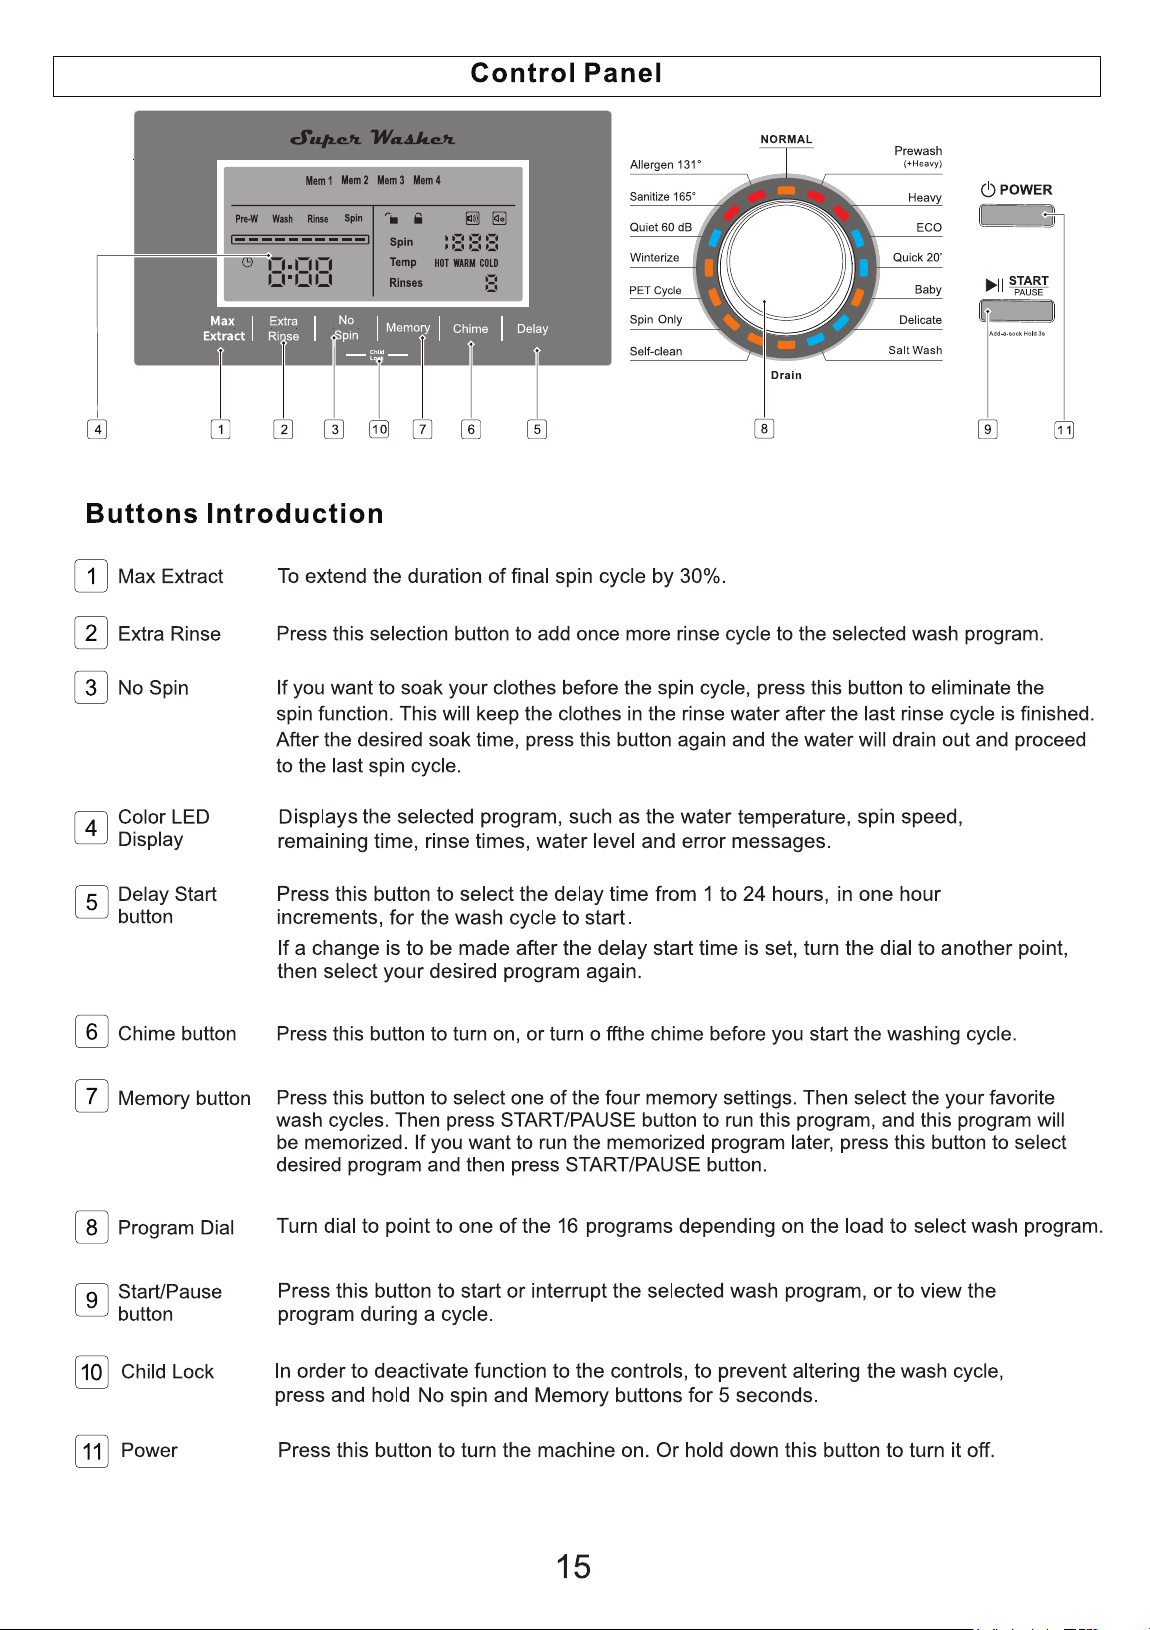
Control Panel
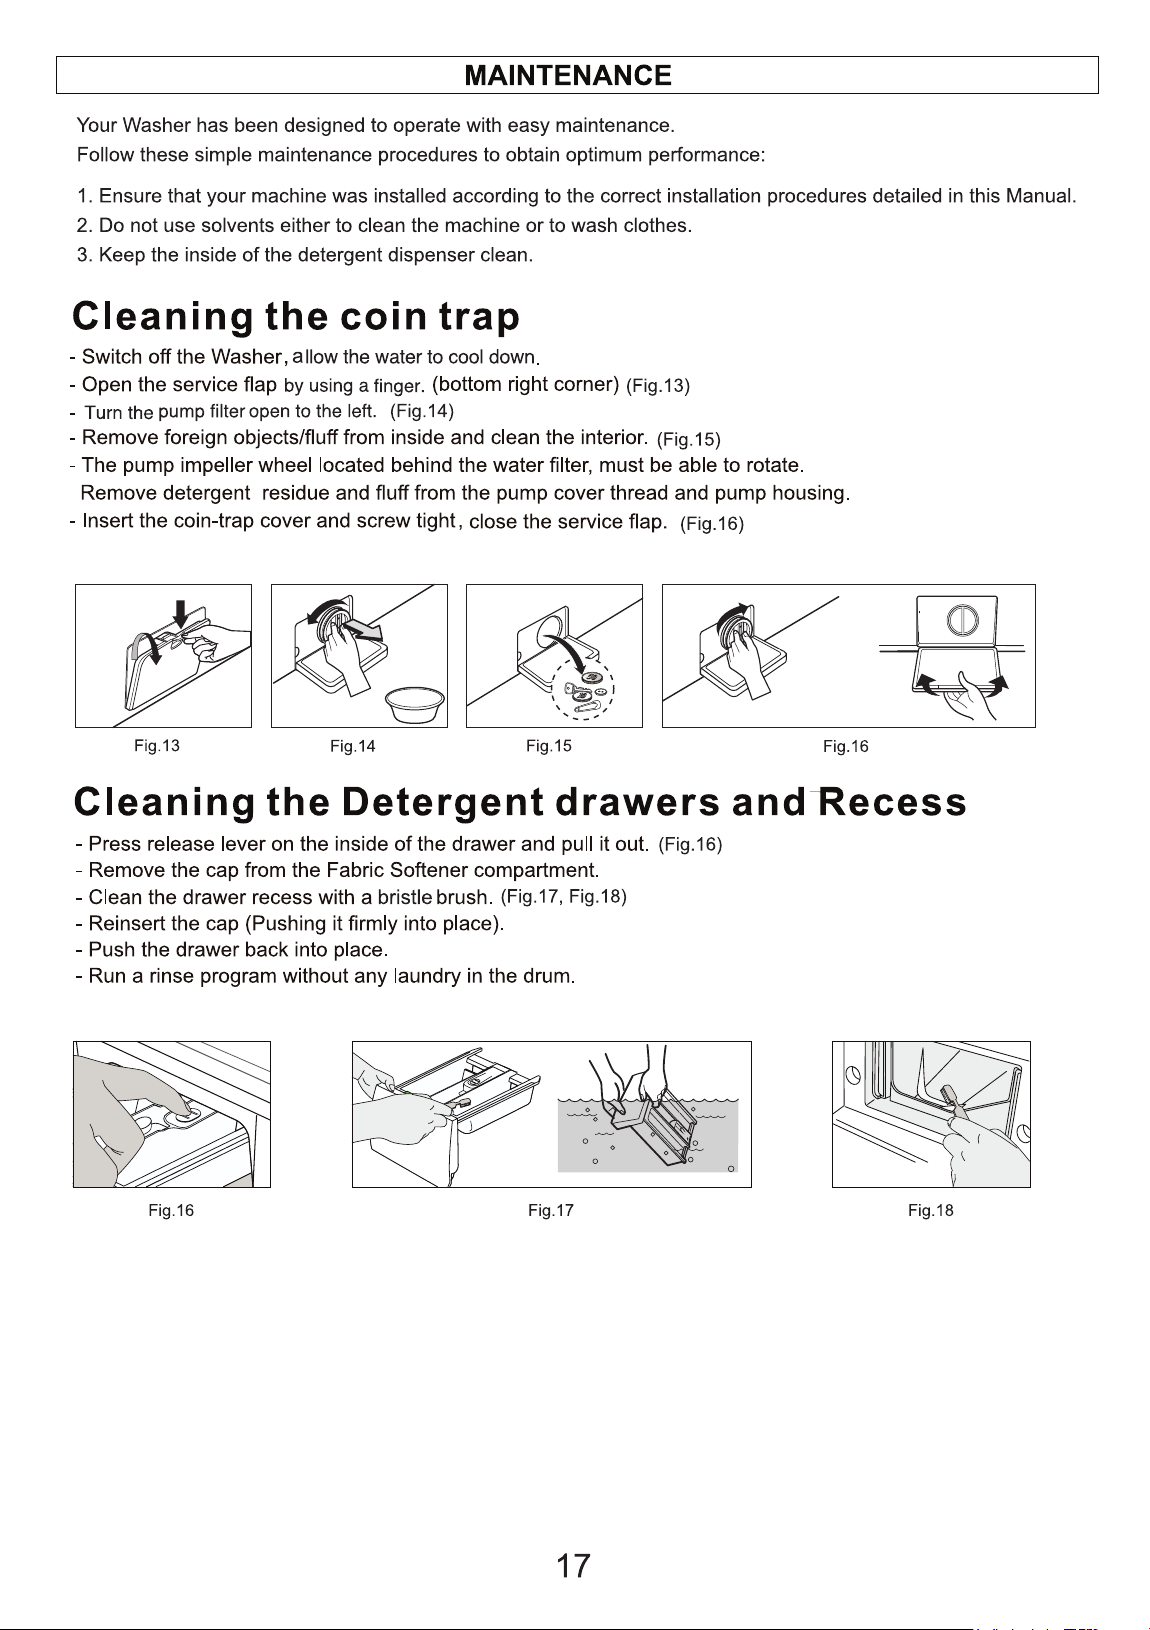
Maintenance
Troubleshooting
Error Codes
This appliance is engineered to provide valuable energy saving when compared to
other washers
FEATURES
Nuts, Bolts, Screws, Clamps - Stainless steel grade 316
Terminals and Connecters - Conformal coating to prevent moisture build-up
Cabinet - Galvanized steel with phosphate treatment and painted, to prevent rust
Upgraded Accessories Included:
1. Stainless Steel Inlet hoses (2)
2. Floor Bracket (2)
Spider wheel (Containing Bearings): Conformal coating to prevent rust
1.
2.
3.
4.
Tub Enamel: 2 coats of enamel on tub to prevent rust
5.
Congratulations on your new Marine Washer!
In addition to its contemporary design, this is a highly sophisticated
engineered product that will give you many years of satisfaction.
Here are some of the best reasons for buying your Marine Washer
1. Scan QR Code
Open Smart Phone
Open Camera
Click the Link
2. Register online at ApplianceDesk.com/Warranty
3. QR Code is also used to obtain Product Information, Manuals and Updates
1 Year (Parts and Labor), 2 Years (Motor) and 5 Years (Rust Only)
and limited commercial use (90 days) in USA and Canada.
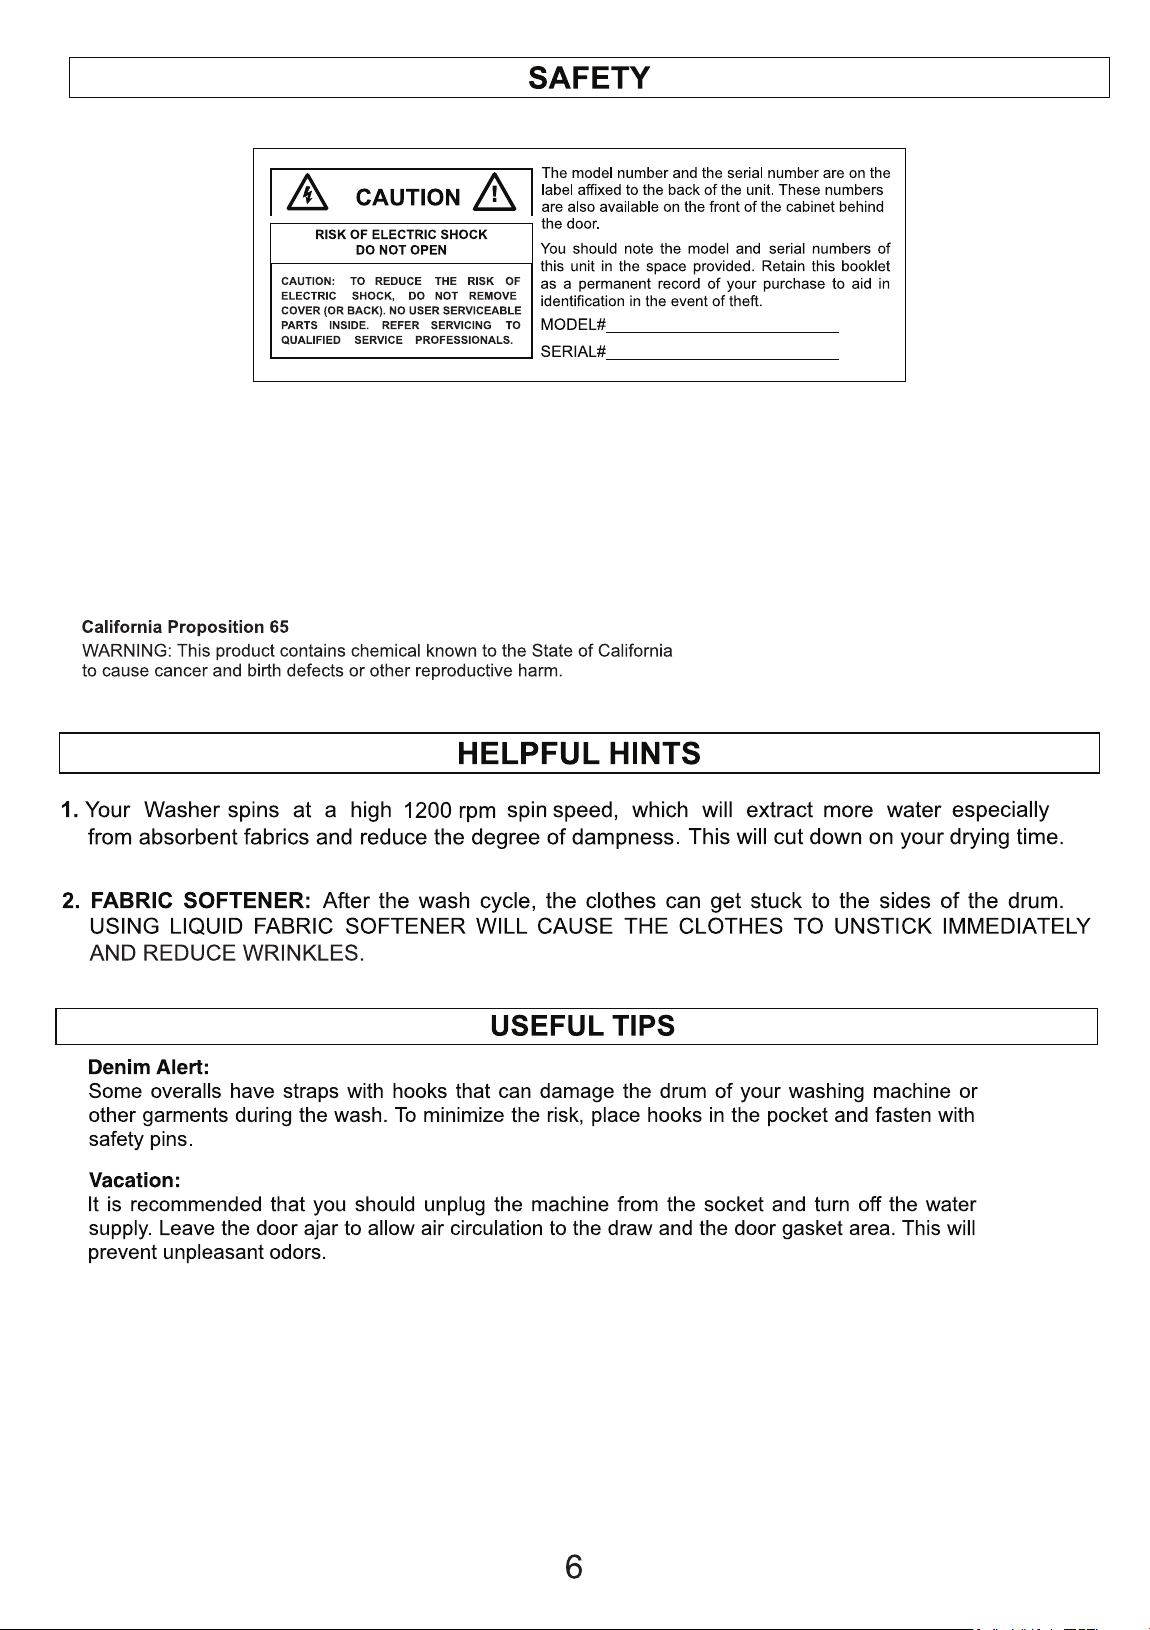
Safe Disposal
Before discarding the appliance, please remove the door to prevent risk of child entrapment.
Keep children away from the shipping carton and packing components.
Please dispose off this appliance and all packaging material in accordance with
local regulations.
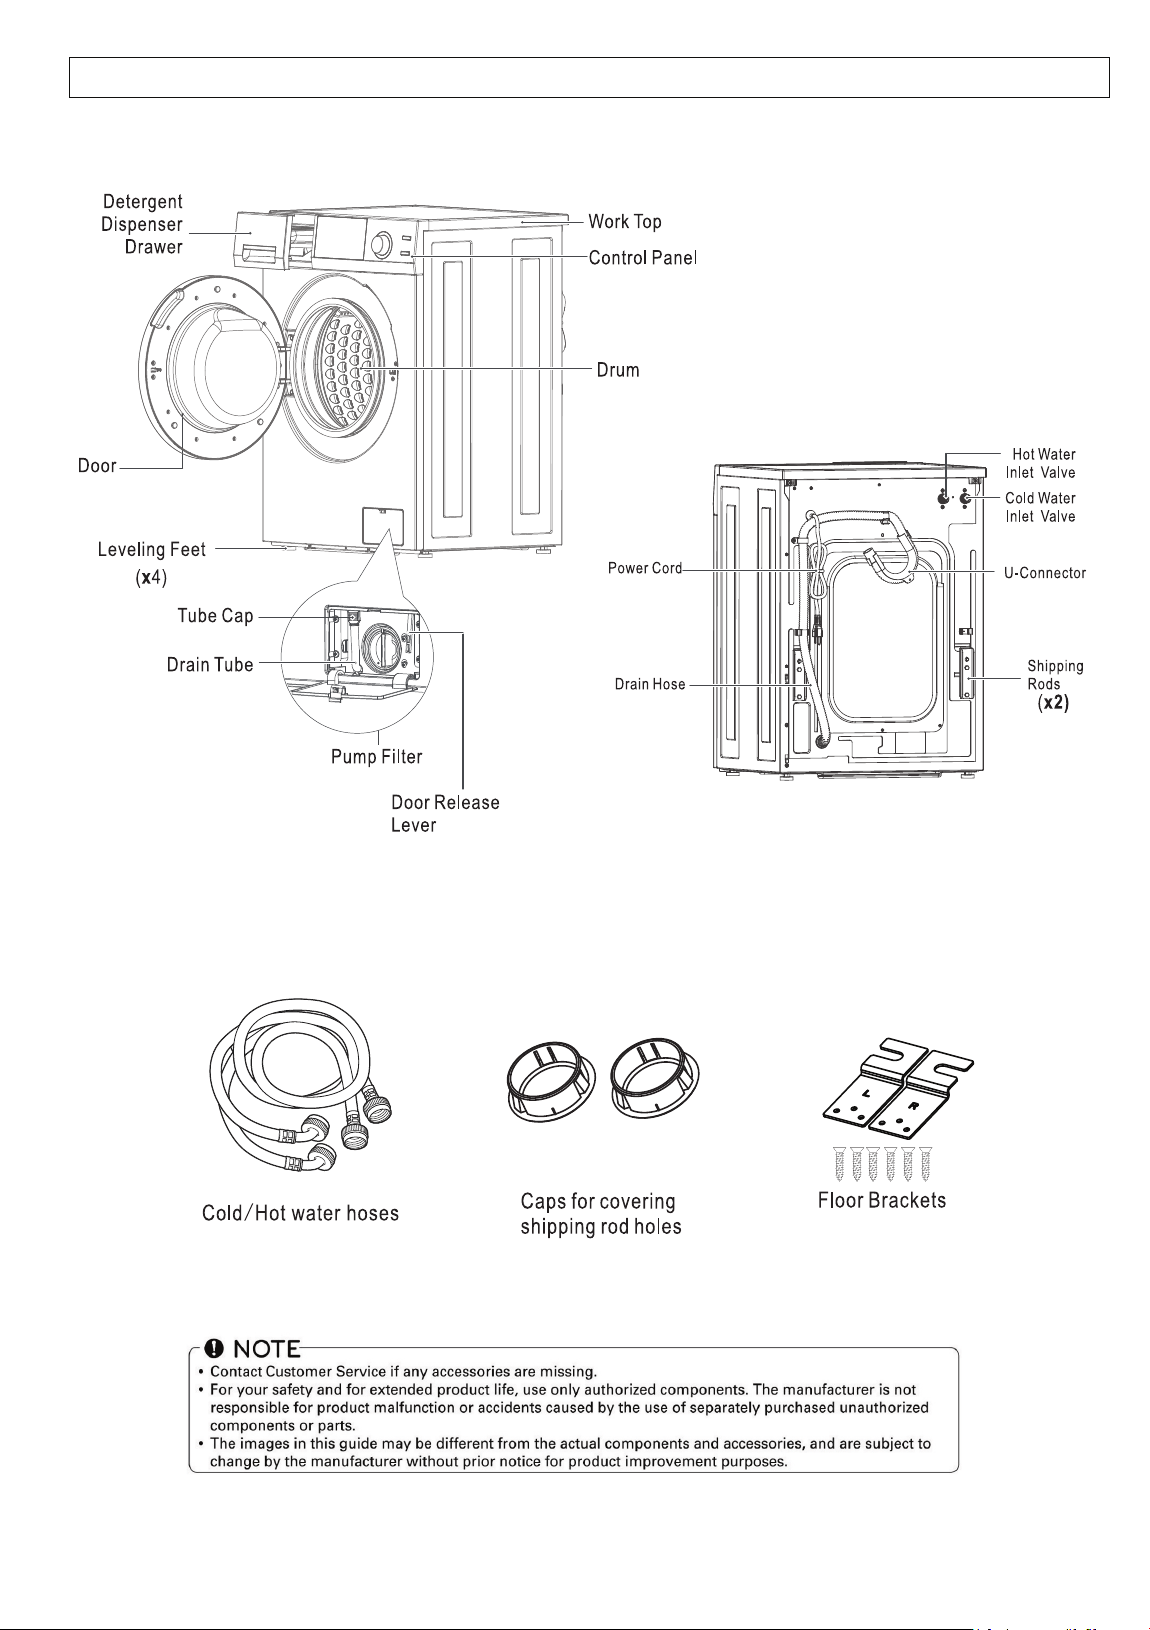
DIAGRAM OF WASHER
Factory supplied accessories
7
with screws (x6)
HANDLING AND PLACEMENT
INSTALLATION INSTRUCTIONS
9
Left Leveling Leg
2 Screws
Right Leveling Leg
2 Screws
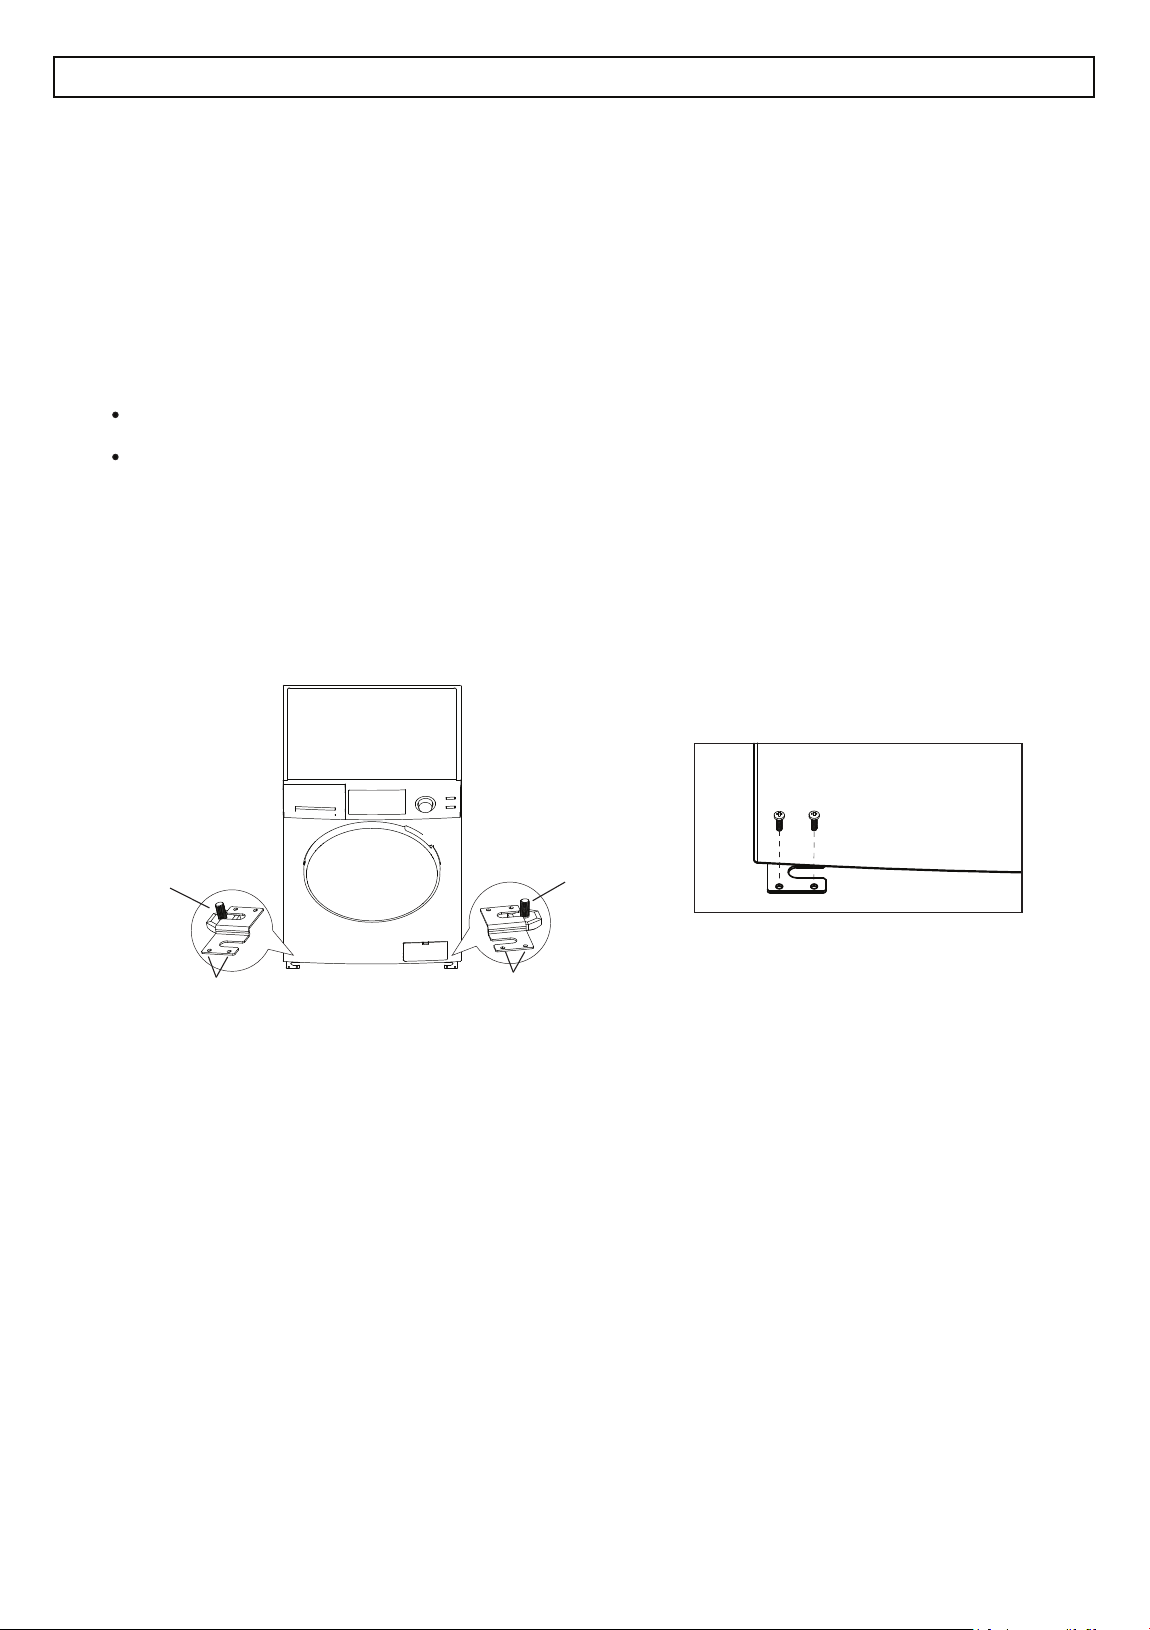
Secure the appliance to the floor using the floor brackets provided.
1. Level the appliance
Tighten the two back feet so they are all the way in.
2. Place the brackets around the front feet (Fig.6).
3. Secure both brackets to the floor using a drill and 2 screws each (Fig.7).
Fig. 6 Fig. 7
Do not drag the appliance
Do not hold protruding parts when lifting.
Install the appliance on a firm level surface.
Ensure the appliance is placed in a dry, well ventilated area.
Do not install the appliance outdoors where it can be exposed to freezing conditions.
Note: Any residual moisture inside the drum is due to the final testing
which every appliance undergoes before leaving the factory.
Tilt the appliance back. Then adjust the two front feet up or down so the
appliance does not rock side to side, or front to back when upright.
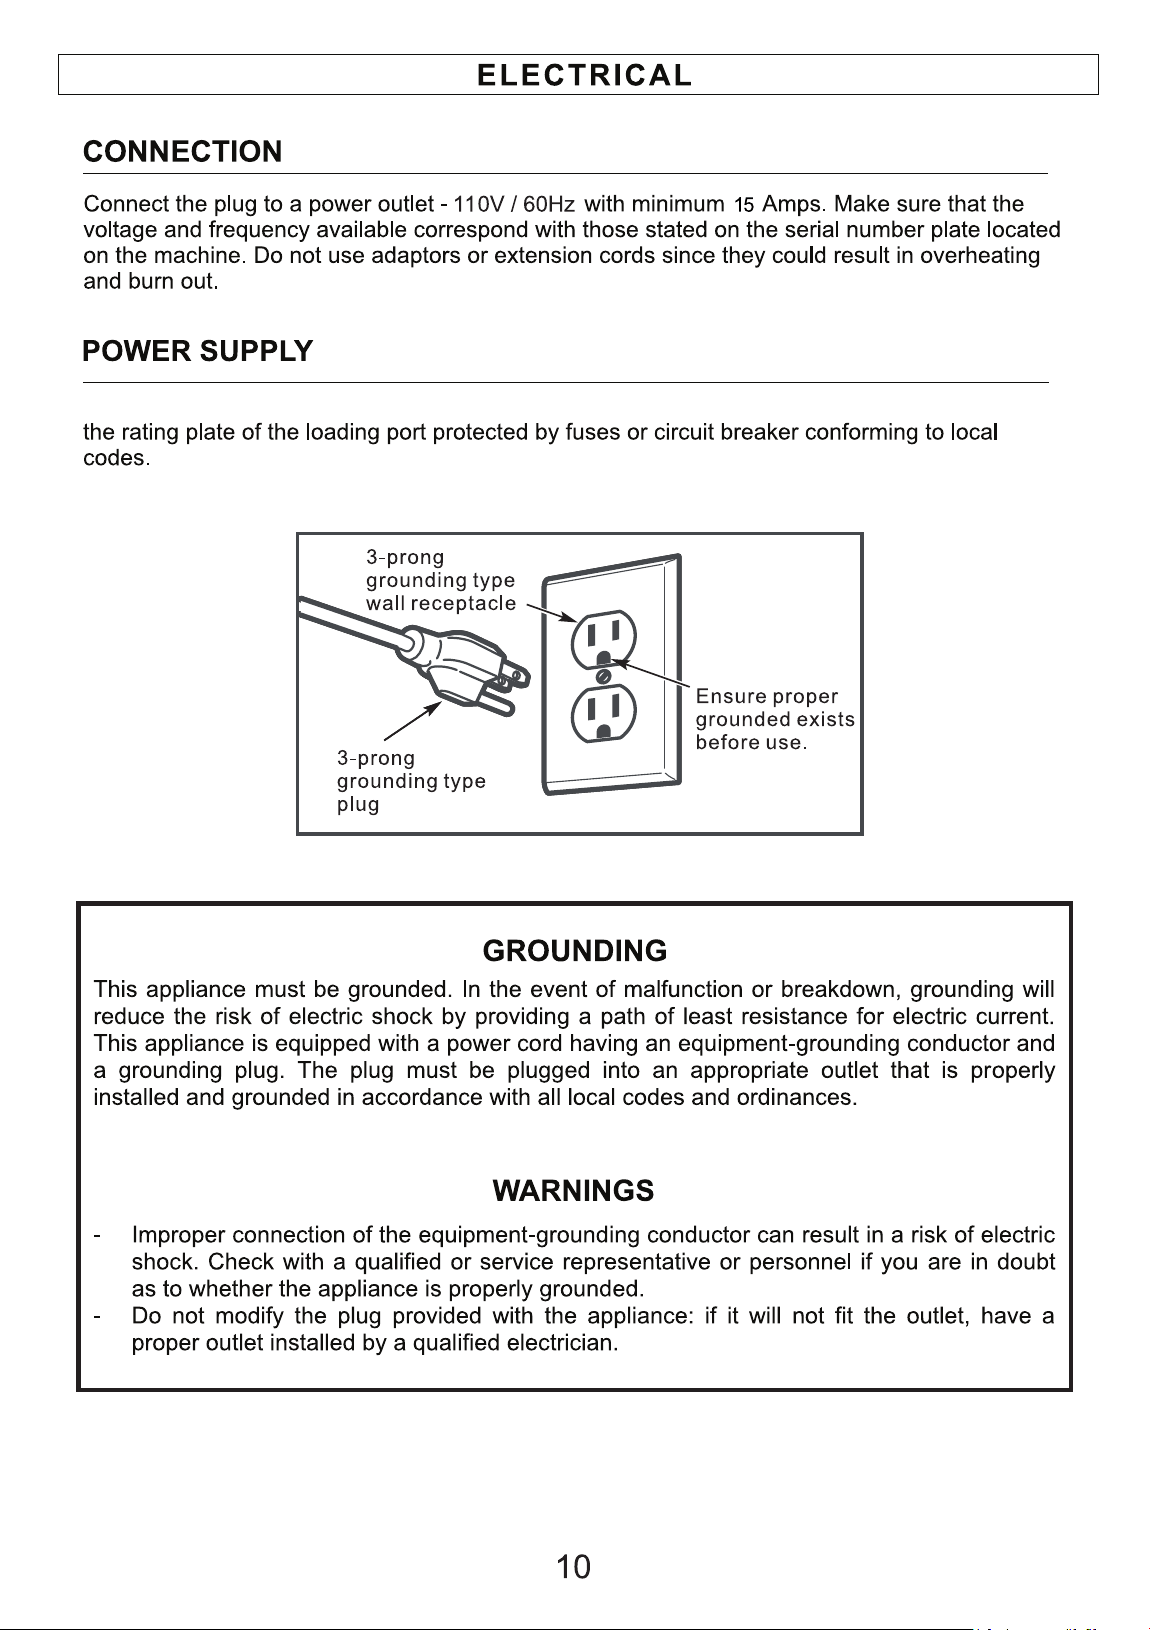
Note: If the electrical power supply does not meet the specifications listed above,
please call a licensed electrician.
This Marine Washer must be connected to an individual circuit identical to the one specified on
10.5
1.5 Platform
Salt Wash - 5 minute initial rinse before wash cycle begins to remove salt from clothing.
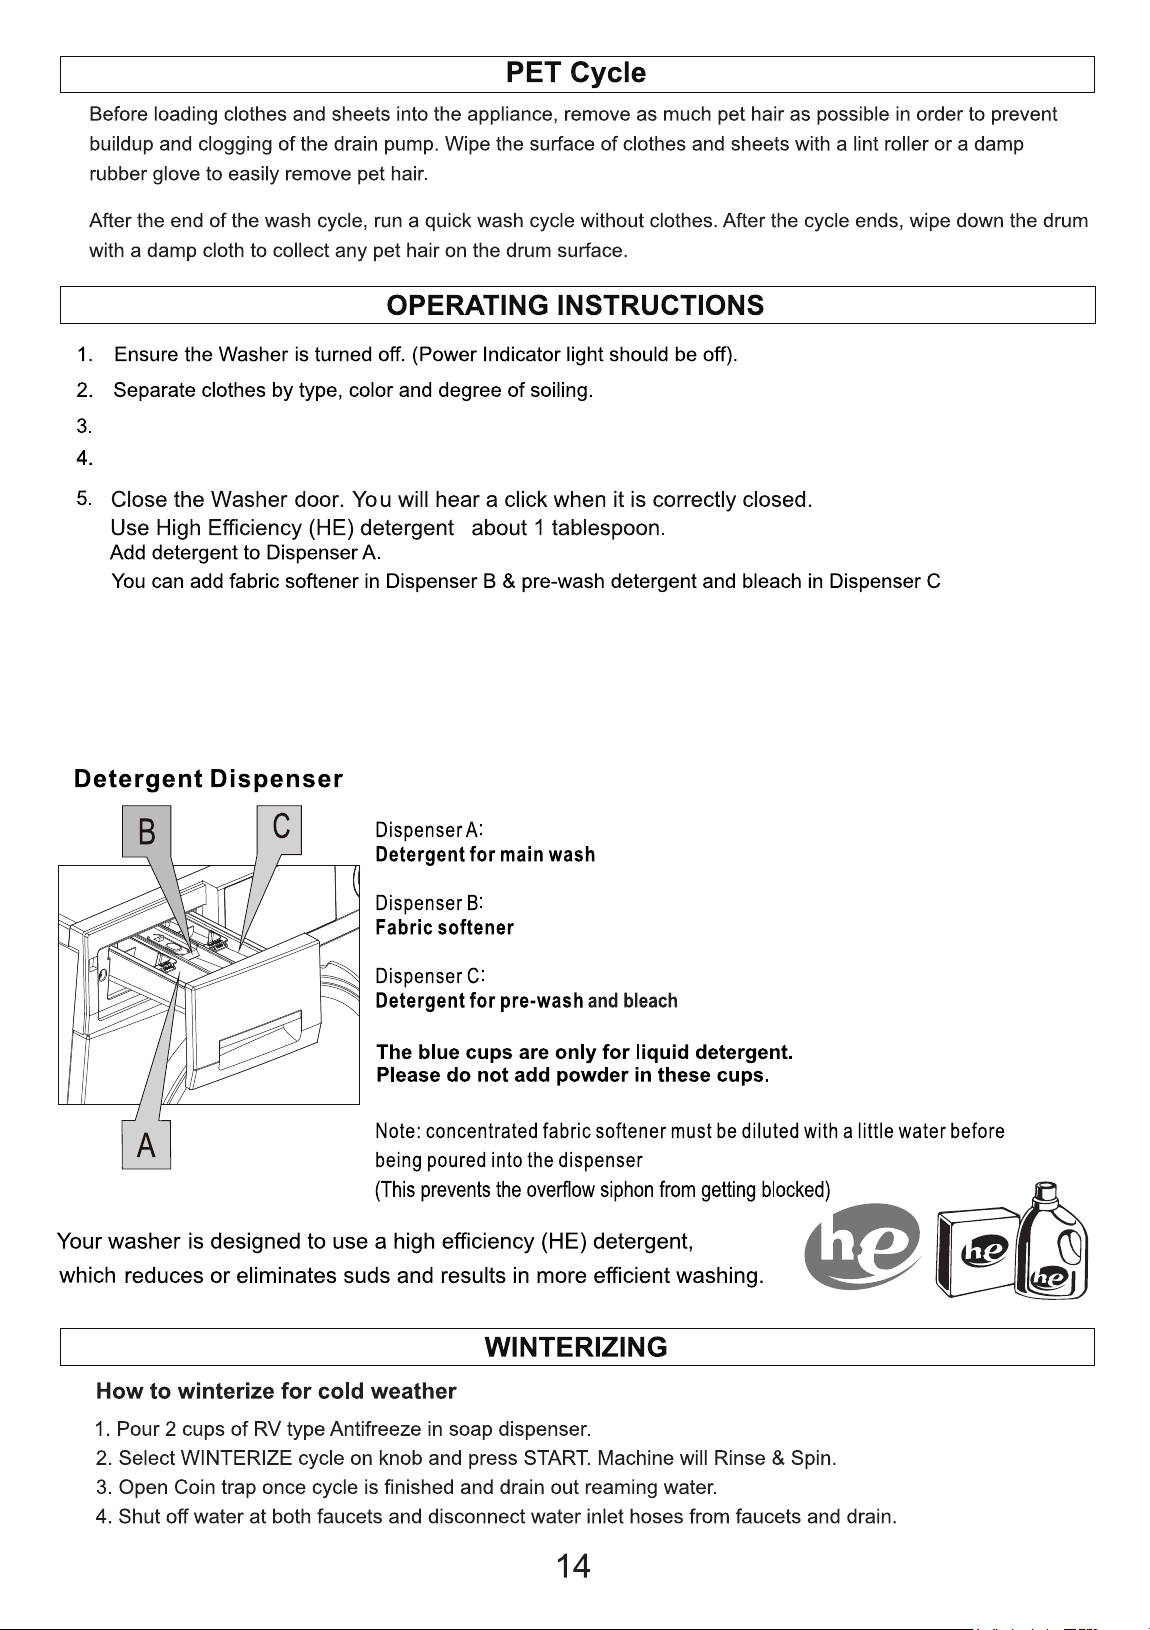
Fig. 12
(Fig. 12).
For small items use a mesh bag.
Note: The washer is designed to be used with a full and balanced load. If a small or half load
of clothes is put in the washer, it will be unbalanced causing the drum to rotate slowly during
the spin cycle and will not extract sufficient water. This will result in wet clothes at the end of
the cycle and will not be ready to put in the dryer.
Load clothes of the selected type loosely into the drum. Ensure to put in a full load of clothes.
-

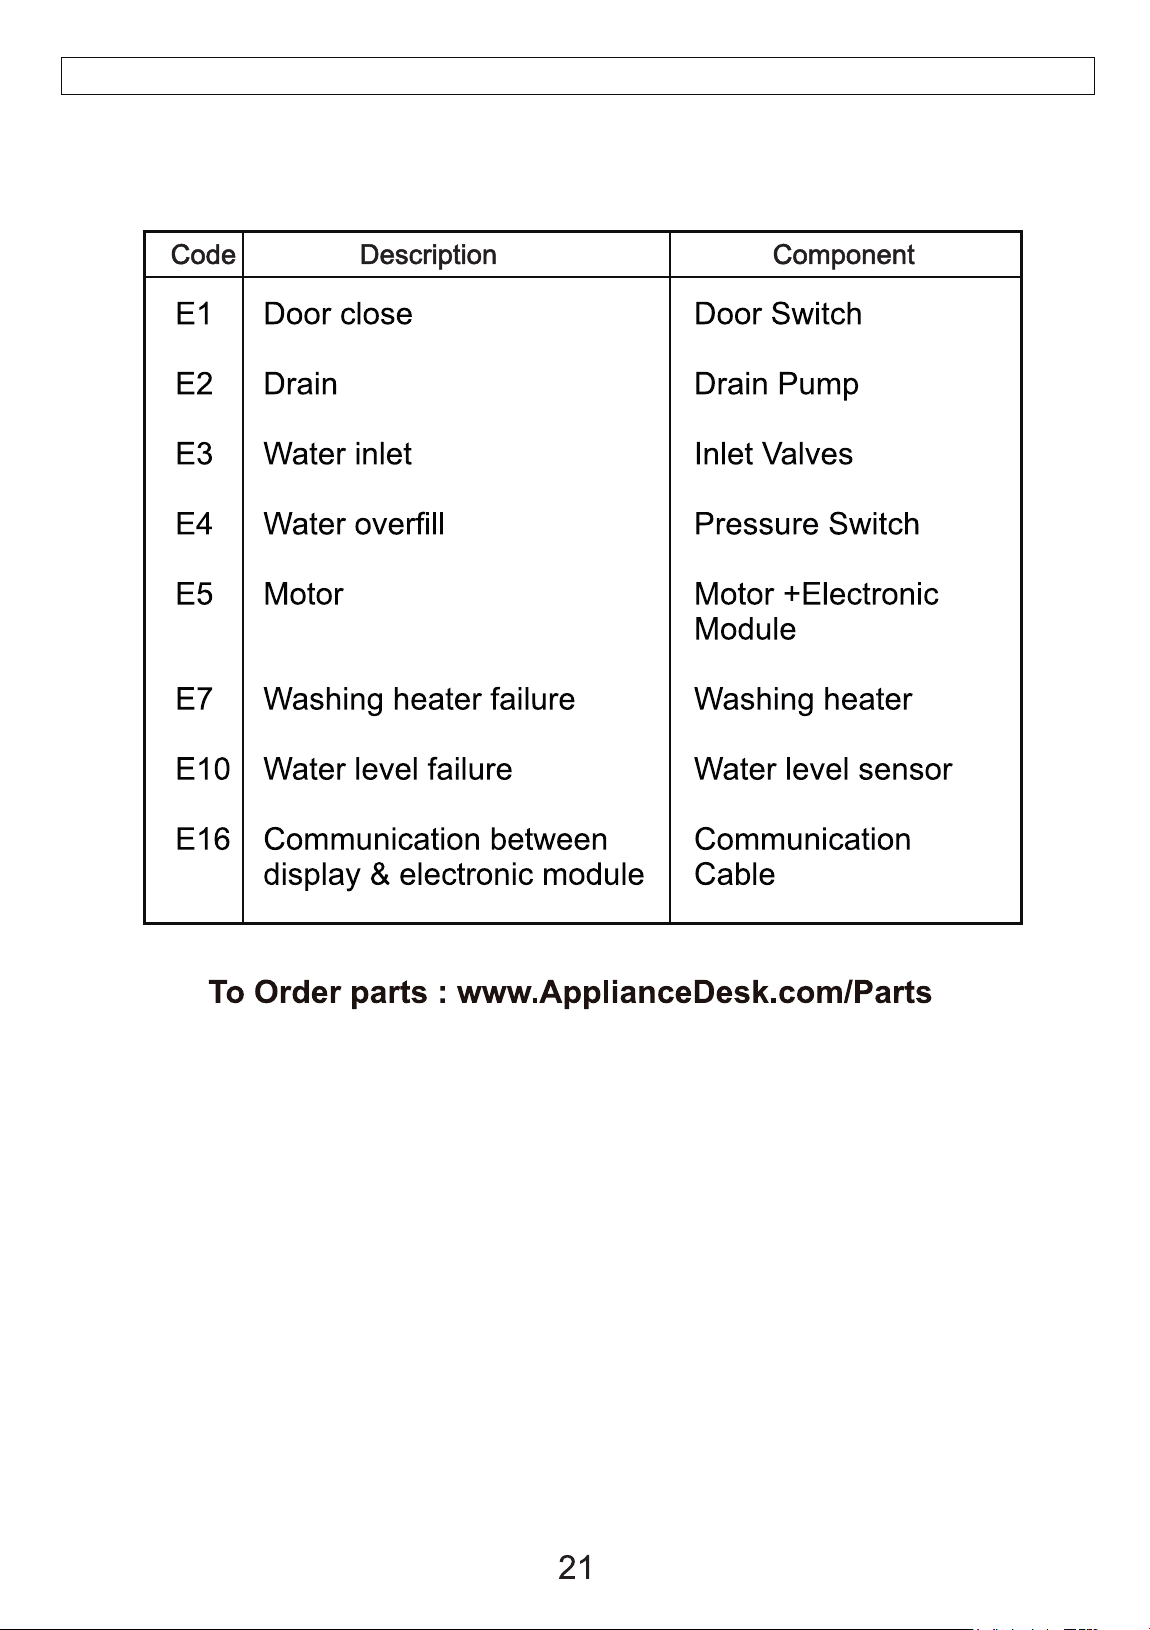
ERROR CODES