
Technical Support and E-Warranty Certificate
www.vevor.com/support
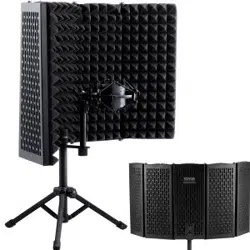
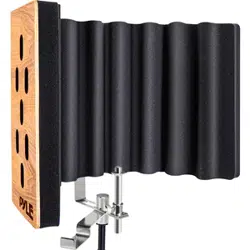
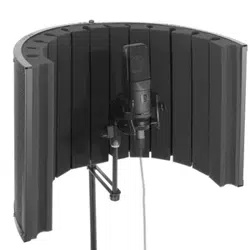
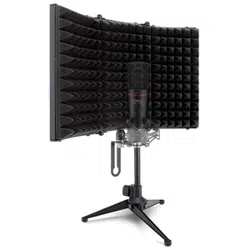
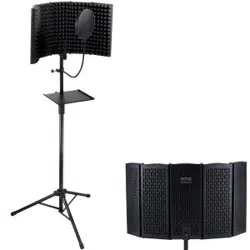
Microphone isolation shield
Instructions
MODEL: AK-V3
We continue to be committed to provide you tools with competitive price.
"Save Half", "Half Price" or any other similar expressions used by us only represents an
estimate of savings you might benefit from buying certain tools with us compared to the major
top brands and does not necessarily mean to cover all categories of tools offered by us. You
are kindly reminded to verify carefully when you are placing an order with us if you are
actually saving half in comparison with the top major brands.


- 3 -
MODEL: AK-V3
Have product questions? Need technical support? Please feel free to
contact us:
Technical Support and E-Warranty Certificate
www.vevor.com/support
NEED HELP? CONTACT US!
This is the original instruction, please read all manual instructions
carefully before operating. VEVOR reserves a clear interpretation of our
user manual. The appearance of the product shall be subject to the
product you received. Please forgive us that we won't inform you again if
there are any technology or software updates on our product.
Microphone isolation shield

- 4 -
Warning-To reduce the risk of injury, user must read
instructions manual carefully.
COMPONENTS INFORMATION

- 5 -
SPECIFICATIONS AND PARAMETERS
Model
AK-V3
Microphone blowout prevention function
Microphone U-type
blowout preventer
Shield size
590*285*100mm
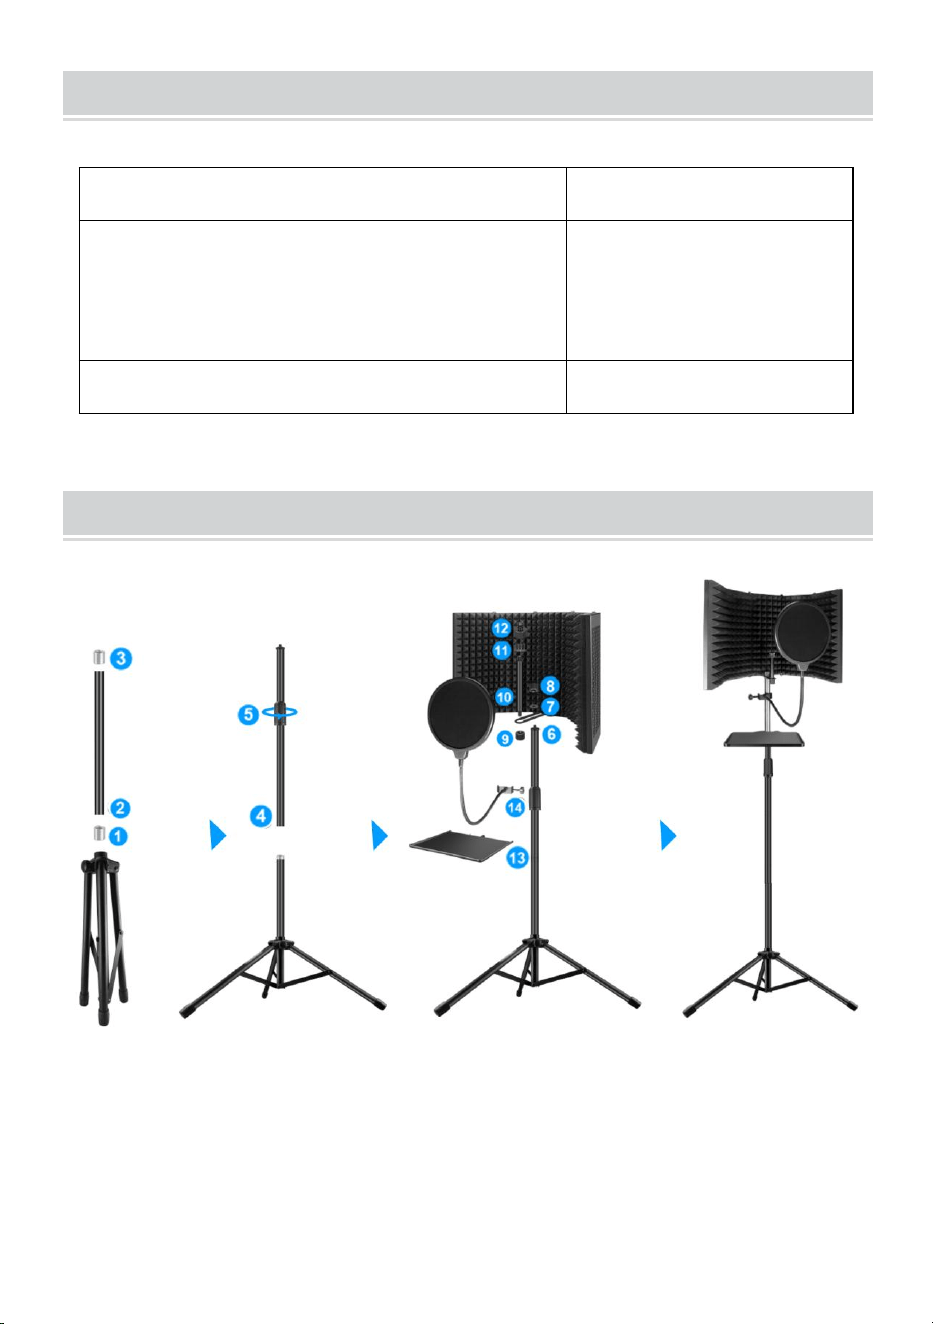
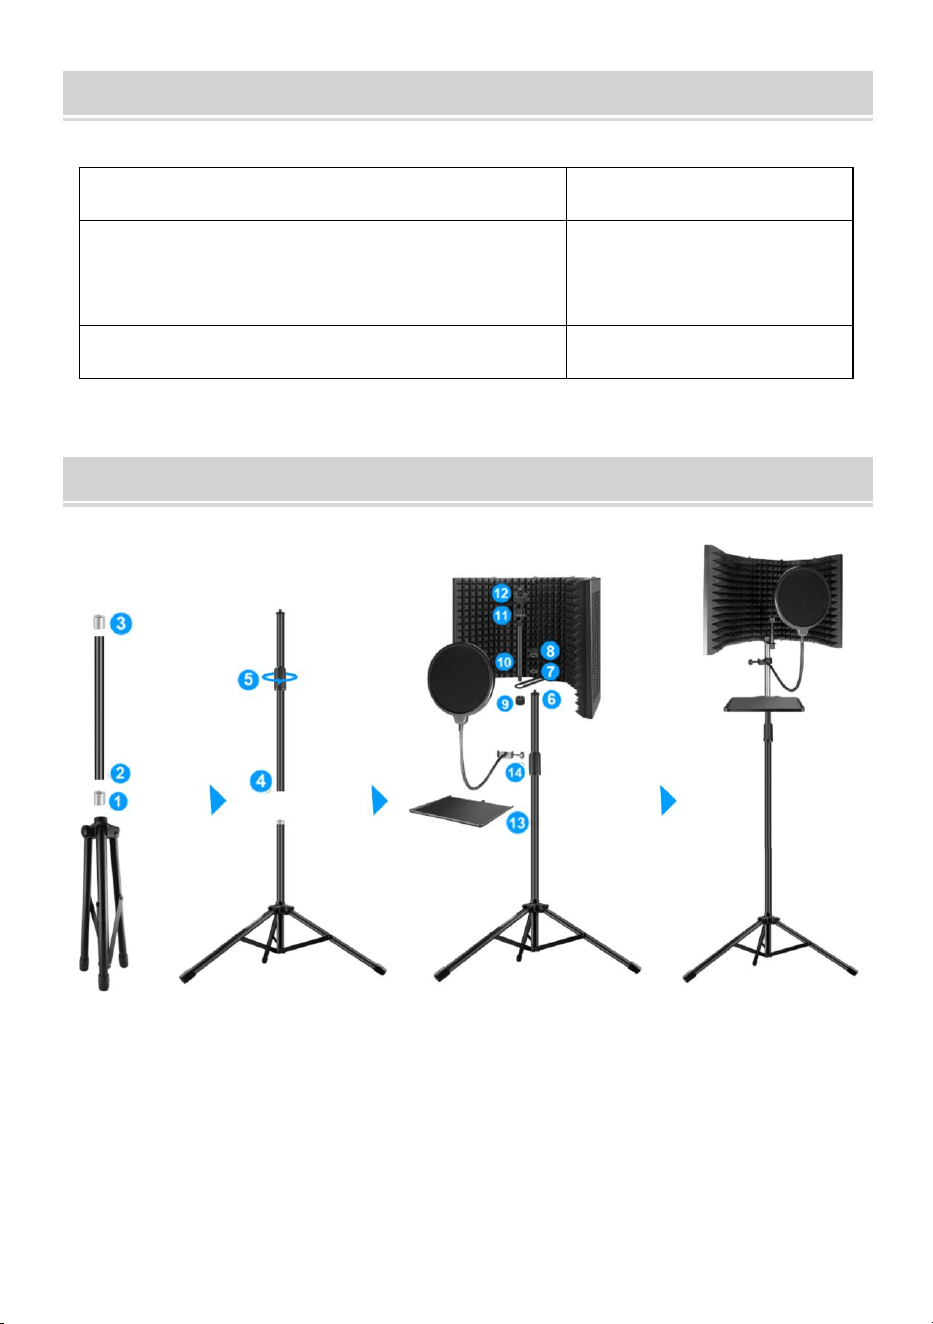
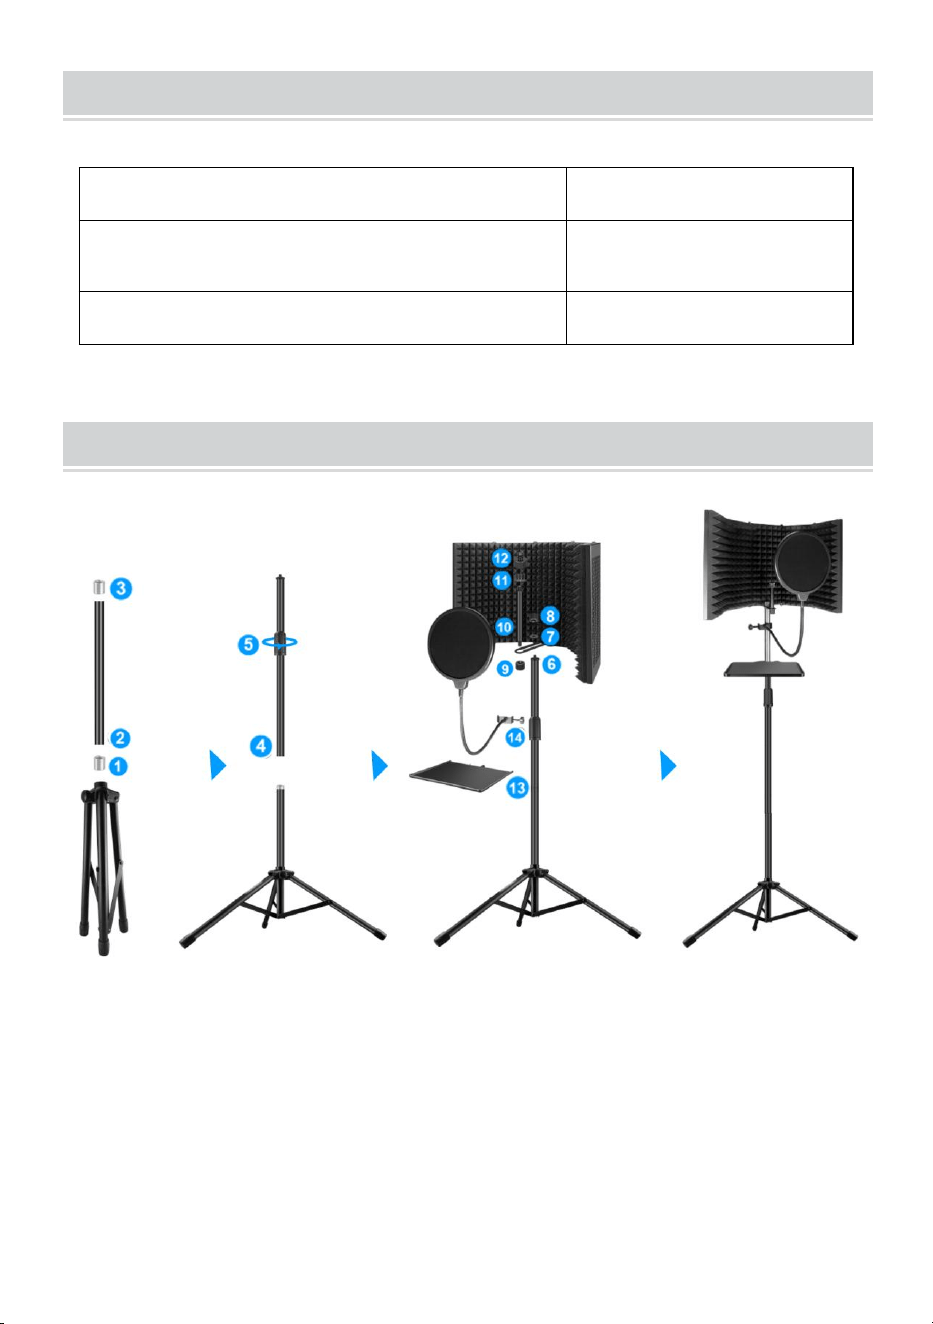
METHOD OF ERECTION
As shown in the picture:
1. Rotate and tighten the connector on the floor support.
2. Rotate and tighten the connecting rod on the ground support and
connecting head.
3. Connect the other end of the connecting rod to the connecting head.
4. Connect the connecting rod to the connecting rod of the connector head.
- 6 -
5. Loosen the adjusting head of the connecting rod, pull out the hiding rod,
and tighten the adjusting head.
6. Connect the connecting rod to the sound enclosure.
7. Put on spacers.
8. Screw on the nut.
9. Connecting rod and sound enclosure.
10. Screw on the nut.
11. Screw on the adapter.
12. Turn on the screws.
13. Install the tray.
14. Install the blowout preventer net.
FAILURE RECOVERY
Problem
Causes
Quomodo
Product shaking.
1. The base nut is not
tightened.
2. The tripod is not flat.
Adjust the nut tightness
at the base and the
tripod development
Angle.
Imported to USA: Sanven Technology Ltd, Suite 250. 9166 Anaheim
Place, Rancho Cucamonga, CA 91730
Made In China


Technique Assistance et certificat de garantie électronique
www.vevor.com/support
Bouclier d'isolation du microphone
Instructions
MODÈLE: AK-V3
We continue to be committed to provide you tools with competitive price.
"Save Half", "Half Price" or any other similar expressions used by us only represents an
estimate of savings you might benefit from buying certain tools with us compared to the major
top brands and does not necessarily mean to cover all categories of tools offered by us. You
are kindly reminded to verify carefully when you are placing an order with us if you are
actually saving half in comparison with the top major brands.


- 4 -
MODÈLE: AK-V3
Have product questions? Need technical support? Please feel free to
contact us:
Technical Support and E-Warranty Certificate
www.vevor.com/support
NEED HELP? CONTACT US!
This is the original instruction, please read all manual instructions
carefully before operating. VEVOR reserves a clear interpretation of our
user manual. The appearance of the product shall be subject to the
product you received. Please forgive us that we won't inform you again if
there are any technology or software updates on our product.
Microphone isolation shield

- 5 -
Avertissement : Pour réduire le risque de blessure, l'utilisateur
doit lire attentivement le manuel d'instructions.
COMPONENTS INFORMATION

- 6 -
SPECIFICATIONS AND PARAMETERS
Modèle
AK-V3
Fonction anti-éclatement du microphone
Obturateur de
microphone de type U
Taille du bouclier
590*285*100mm
METHOD OF ERECTION
Comme le montre l'image :
1. Faites pivoter et serrez le connecteur sur le support au sol.
2. Faites pivoter et serrez la bielle sur le support au sol et la tête de
connexion.
3. Connectez l'autre extrémité de la bielle à la tête de connexion.
4. Connectez la bielle à la bielle de la tête du connecteur.

- 7 -
5. Desserrez la tête de réglage de la bielle, retirez la tige de cache et
serrez la tête de réglage.
6. Connectez la bielle à l'enceinte acoustique.
7. Mettez des entretoises.
8. Vissez l'écrou.
9. Bielle et enceinte sonore.
10. Vissez l'écrou.
11. Vissez l'adaptateur.
12. Allumez les vis.
13. Installez le plateau.
14. Installez le filet anti-éruption.
FAILURE RECOVERY
Problème
Causes
Q uomodo
Produit secoué.
3. L'écrou de base n'est
pas serré.
4. Le trépied n'est pas
plat.
Ajustez le serrage des
écrous à la base et
l'angle de
développement du
trépied.
Importé aux États-Unis : Sanven Technology Ltd, Suite 250 . 9166
Anaheim Place, Rancho Cucamonga, CA 91730
Fabriqué en Chine


Technisch Support- und E-Garantiezertifikat
www.vevor.com/support
Mikrofon-Isolationsschirm
Anweisungen
MODELL: AK-V3
We continue to be committed to provide you tools with competitive price.
"Save Half", "Half Price" or any other similar expressions used by us only represents an
estimate of savings you might benefit from buying certain tools with us compared to the major
top brands and does not necessarily mean to cover all categories of tools offered by us. You
are kindly reminded to verify carefully when you are placing an order with us if you are
actually saving half in comparison with the top major brands.


- 4 -
MODELL: AK-V3
Have product questions? Need technical support? Please feel free to
contact us:
Technical Support and E-Warranty Certificate
www.vevor.com/support
NEED HELP? CONTACT US!
This is the original instruction, please read all manual instructions
carefully before operating. VEVOR reserves a clear interpretation of our
user manual. The appearance of the product shall be subject to the
product you received. Please forgive us that we won't inform you again if
there are any technology or software updates on our product.
Microphone isolation shield

- 5 -
Warnung: Um das Verletzungsrisiko zu verringern, muss der
Benutzer die Bedienungsanleitung sorgfältig lesen.
COMPONENTS INFORMATION

- 6 -
SPECIFICATIONS AND PARAMETERS
Modell
AK-V3
Funktion zur Verhinderung von
Mikrofonausbrüchen
Mikrofon-U-Typ-Blowout-Preventer
Schildgröße
590*285*100mm
METHOD OF ERECTION
Wie im Bild gezeigt:
1. Drehen Sie den Stecker an der Bodenstütze und ziehen Sie ihn fest.
2. Drehen Sie die Verbindungsstange an der Bodenstütze und am
Verbindungskopf und ziehen Sie sie fest.
3. Verbinden Sie das andere Ende der Pleuelstange mit dem
Verbindungskopf.
- 7 -
4. Verbinden Sie die Pleuelstange mit der Pleuelstange des
Verbindungskopfes.
5. Lösen Sie den Einstellkopf der Pleuelstange, ziehen Sie die
Versteckstange heraus und ziehen Sie den Einstellkopf fest.
6. Verbinden Sie die Verbindungsstange mit der Schallschutzhaube.
7. Distanzstücke anbringen.
8. Mutter aufschrauben.
9. Pleuel und Schallschutzgehäuse.
10. Mutter aufschrauben.
11. Adapter anschrauben.
12. Drehen Sie die Schrauben an.
13. Installieren Sie das Fach.
14. Installieren Sie das Blowout-Preventer-Netz.
FAILURE RECOVERY
Problem
Ursachen
Quomodo _
Produkt schüttelt.
5. Die Basismutter ist
nicht festgezogen.
6. Das Stativ ist nicht
flach.
Passen Sie den Anzug
der Mutter an der Basis
und den
Entwicklungswinkel des
Stativs an.
In die USA importiert: Sanven Technology Ltd, Suite 250 . 9166 Anaheim
Place, Rancho Cucamonga, CA 91730
In China hergestellt


Tecnico Supporto e certificato di garanzia elettronica
www.vevor.com/support
Schermo isolante per microfono
Istruzioni
MODELLO: AK-V3
We continue to be committed to provide you tools with competitive price.
"Save Half", "Half Price" or any other similar expressions used by us only represents an
estimate of savings you might benefit from buying certain tools with us compared to the major
top brands and does not necessarily mean to cover all categories of tools offered by us. You
are kindly reminded to verify carefully when you are placing an order with us if you are
actually saving half in comparison with the top major brands.


- 4 -
MODELLO: AK-V3
Have product questions? Need technical support? Please feel free to
contact us:
Technical Support and E-Warranty Certificate
www.vevor.com/support
NEED HELP? CONTACT US!
This is the original instruction, please read all manual instructions
carefully before operating. VEVOR reserves a clear interpretation of our
user manual. The appearance of the product shall be subject to the
product you received. Please forgive us that we won't inform you again if
there are any technology or software updates on our product.
Microphone isolation shield

- 5 -
Avvertenza: per ridurre il rischio di lesioni, l'utente deve
leggere attentamente il manuale di istruzioni.
COMPONENTS INFORMATION
- 6 -
SPECIFICATIONS AND PARAMETERS
Modello
AK-V3
Funzione di prevenzione scoppio del
microfono
Dispositivo di
prevenzione dello
scoppio del microfono di
tipo U
Dimensione dello scudo
590*285*100mm
METHOD OF ERECTION
Come mostrato nell'immagine:
1. Ruotare e serrare il connettore sul supporto a pavimento.
2. Ruotare e serrare la biella sul supporto a terra e sulla testa di
connessione.
3. Collegare l'altra estremità della biella alla testa di connessione.
- 7 -
4. Collegare la biella alla biella della testa del connettore.
5. Allentare la testa di regolazione della biella, estrarre l'asta nascosta e
serrare la testa di regolazione.
6. Collegare l'asta di collegamento alla cabina insonorizzata.
7. Indossare i distanziatori.
8. Avvitare il dado.
9. Biella e cabina insonorizzata.
10. Avvitare il dado.
11. Avvitare l'adattatore.
12. Attivare le viti.
13. Installare il vassoio.
14. Installare la rete anti-esplosione.
FAILURE RECOVERY
Problema
Cause
Q uomodo
Agitazione del
prodotto.
7. Il dado della base
non è serrato.
8. Il treppiede non è
piatto.
Regolare il serraggio
del dado alla base e
l'angolo di sviluppo del
treppiede.
Importato negli Stati Uniti: Sanven Technology Ltd, Suite 250 . 9166
Anaheim Place, Rancho Cucamonga, CA 91730
Made in China


Técnico Certificado de soporte y garantía electrónica
www.vevor.com/support
Escudo de aislamiento del micrófono
Instrucciones
MODELO: AK-V3
We continue to be committed to provide you tools with competitive price.
"Save Half", "Half Price" or any other similar expressions used by us only represents an
estimate of savings you might benefit from buying certain tools with us compared to the major
top brands and does not necessarily mean to cover all categories of tools offered by us. You
are kindly reminded to verify carefully when you are placing an order with us if you are
actually saving half in comparison with the top major brands.


- 4 -
MODELO: AK-V3
Have product questions? Need technical support? Please feel free to
contact us:
Technical Support and E-Warranty Certificate
www.vevor.com/support
NEED HELP? CONTACT US!
This is the original instruction, please read all manual instructions
carefully before operating. VEVOR reserves a clear interpretation of our
user manual. The appearance of the product shall be subject to the
product you received. Please forgive us that we won't inform you again if
there are any technology or software updates on our product.
Microphone isolation shield

- 5 -
Advertencia: para reducir el riesgo de lesiones, el usuario
debe leer atentamente el manual de instrucciones.
COMPONENTS INFORMATION
- 6 -
SPECIFICATIONS AND PARAMETERS
Modelo
AK-V3
Función de prevención de explosión del
micrófono
Micrófono preventor de
explosiones tipo U
Tamaño del escudo
590*285*100mm
METHOD OF ERECTION
Como se muestra en la imagen:
1. Gire y apriete el conector en el soporte del piso.
2. Gire y apriete la biela en el soporte del suelo y el cabezal de conexión.
3. Conecte el otro extremo de la biela al cabezal de conexión.
4. Conecte la biela a la biela del cabezal del conector.
- 7 -
5. Afloje el cabezal de ajuste de la biela, extraiga la varilla oculta y apriete
el cabezal de ajuste.
6. Conecte la biela a la caja de sonido.
7. Colocar espaciadores.
8. Atornille la tuerca.
9. Biela y envolvente acústica.
10. Atornille la tuerca.
11. Atornille el adaptador.
12. Gire los tornillos.
13. Instale la bandeja.
14. Instale la red de prevención de reventones.
FAILURE RECOVERY
Problema
Causas
q uomodo
Sacudida del
producto.
9. La tuerca de la base
no está apretada.
10.El trípode no es
plano.
Ajuste la tensión de la
tuerca en la base y el
ángulo de desarrollo
del trípode.
Importado a EE. UU.: Sanven Technology Ltd, Suite 250 . 9166 Anaheim
Place, Rancho Cucamonga, CA 91730
Hecho en china


Techniczny Certyfikat wsparcia i e-gwarancji
www.vevor.com/support
Osłona izolująca mikrofon
Instrukcje
MODEL: AK-V3
We continue to be committed to provide you tools with competitive price.
"Save Half", "Half Price" or any other similar expressions used by us only represents an
estimate of savings you might benefit from buying certain tools with us compared to the major
top brands and does not necessarily mean to cover all categories of tools offered by us. You
are kindly reminded to verify carefully when you are placing an order with us if you are
actually saving half in comparison with the top major brands.


- 4 -
MODEL: AK-V3
Have product questions? Need technical support? Please feel free to
contact us:
Technical Support and E-Warranty Certificate
www.vevor.com/support
NEED HELP? CONTACT US!
This is the original instruction, please read all manual instructions
carefully before operating. VEVOR reserves a clear interpretation of our
user manual. The appearance of the product shall be subject to the
product you received. Please forgive us that we won't inform you again if
there are any technology or software updates on our product.
Microphone isolation shield

- 5 -
Ostrzeżenie — aby zmniejszyć ryzyko obrażeń, użytkownik
musi uważnie przeczytać instrukcję obsługi.
COMPONENTS INFORMATION

- 6 -
SPECIFICATIONS AND PARAMETERS
Model
AK-V3
Funkcja zapobiegania wydmuchaniu
mikrofonu
Zabezpieczenie przed
wydmuchem mikrofonu
typu U
Rozmiar tarczy
590*285*100mm
METHOD OF ERECTION
Jak pokazano na rysunku:
1. Obróć i dokręć złącze na wsporniku podłogowym.
2. Obróć i dokręć korbowód na podstawie podstawy i głowicy łączącej.
3. Podłącz drugi koniec korbowodu do głowicy łączącej.
4. Połączyć korbowód z korbowodem główki złącza.
- 7 -
5. Poluzuj głowicę regulacyjną korbowodu, wyciągnij drążek ukrywający i
dokręć głowicę regulacyjną.
6. Podłącz korbowód do obudowy dźwiękowej.
7. Załóż przekładki.
8. Dokręć nakrętkę.
9. Korbowód i obudowa dźwiękowa.
10. Dokręć nakrętkę.
11. Przykręć adapter.
12. Wkręć śruby.
13. Zainstaluj tacę.
14. Zamontuj siatkę przeciwerupcyjną.
FAILURE RECOVERY
Problem
Powoduje
Q uomodo
Produkt się trzęsie.
11.Nakrętka podstawy
nie jest dokręcona.
12.Statyw nie jest płaski.
Wyreguluj dokręcenie
nakrętki u podstawy i
kąt rozwinięcia statywu.
Import do USA: Sanven Technology Ltd, Suite 250 . 9166 Anaheim Place,
Rancho Cucamonga, Kalifornia 91730
Wyprodukowano w Chinach


Technisch Ondersteuning en e-garantiecertificaat
www.vevor.com/support
Isolatiescherm voor microfoon
Instructies
MODEL: AK-V3
We continue to be committed to provide you tools with competitive price.
"Save Half", "Half Price" or any other similar expressions used by us only represents an
estimate of savings you might benefit from buying certain tools with us compared to the major
top brands and does not necessarily mean to cover all categories of tools offered by us. You
are kindly reminded to verify carefully when you are placing an order with us if you are
actually saving half in comparison with the top major brands.


- 4 -
MODEL: AK-V3
Have product questions? Need technical support? Please feel free to
contact us:
Technical Support and E-Warranty Certificate
www.vevor.com/support
NEED HELP? CONTACT US!
This is the original instruction, please read all manual instructions
carefully before operating. VEVOR reserves a clear interpretation of our
user manual. The appearance of the product shall be subject to the
product you received. Please forgive us that we won't inform you again if
there are any technology or software updates on our product.
Microphone isolation shield

- 5 -
Waarschuwing-Om het risico op letsel te verminderen, moet
de gebruiker de handleiding zorgvuldig lezen.
COMPONENTS INFORMATION

- 6 -
SPECIFICATIONS AND PARAMETERS
Model
AK-V3
Functie ter voorkoming van
microfoonuitbarsting
Microfoon U-type
eruptiepreventie
Schild maat
590*285*100mm
METHOD OF ERECTION
Zoals weergegeven op de afbeelding:
1. Draai de connector op de vloersteun en draai deze vast.
2. Draai de drijfstang op de grondsteun en verbindingskop en draai deze
vast.
3. Sluit het andere uiteinde van de drijfstang aan op de verbindingskop.
4. Sluit de drijfstang aan op de drijfstang van de aansluitkop.

- 7 -
5. Maak de stelkop van de drijfstang los, trek de verbergstang eruit en
draai de stelkop vast.
6. Sluit de drijfstang aan op de geluidsbehuizing.
7. Breng afstandhouders aan.
8. Moer erop draaien.
9. Drijfstang en geluidsomkasting.
10. Moer erop draaien.
11. Adapter vastschroeven.
12. Draai de schroeven aan.
13. Installeer de lade.
14. Installeer het eruptiepreventienet.
FAILURE RECOVERY
Probleem
Oorzaken
Quomodo _
Product schudden.
13.De basismoer is niet
vastgedraaid.
14.Het statief is niet plat.
Pas de moerspanning
aan de basis en de
ontwikkelingshoek van
het statief aan.
Geïmporteerd in de VS: Sanven Technology Ltd, Suite 250 . 9166
Anaheim Place, Rancho Cucamonga, CA 91730
Gemaakt in China


Teknisk Support och e-garanticertifikat
www.vevor.com/support
Mikrofonisoleringssköld
Instruktioner
MODELL: AK-V3
We continue to be committed to provide you tools with competitive price.
"Save Half", "Half Price" or any other similar expressions used by us only represents an
estimate of savings you might benefit from buying certain tools with us compared to the major
top brands and does not necessarily mean to cover all categories of tools offered by us. You
are kindly reminded to verify carefully when you are placing an order with us if you are
actually saving half in comparison with the top major brands.


- 4 -
MODELL: AK-V3
Have product questions? Need technical support? Please feel free to
contact us:
Technical Support and E-Warranty Certificate
www.vevor.com/support
NEED HELP? CONTACT US!
This is the original instruction, please read all manual instructions
carefully before operating. VEVOR reserves a clear interpretation of our
user manual. The appearance of the product shall be subject to the
product you received. Please forgive us that we won't inform you again if
there are any technology or software updates on our product.
Microphone isolation shield

- 5 -
Varning - För att minska risken för skada måste användaren
läsa instruktionerna noggrant.
COMPONENTS INFORMATION
- 6 -
SPECIFICATIONS AND PARAMETERS
Modell
AK-V3
Mikrofonförebyggande funktion
Mikrofon U-typ
utblåsningsskydd
Sköldstorlek
590*285*100mm
METHOD OF ERECTION
Som visas på bilden:
1. Vrid och dra åt kontakten på golvstödet.
2. Vrid och dra åt vevstaken på markstödet och kopplingshuvudet.
3. Anslut den andra änden av vevstaken till kopplingshuvudet.
4. Anslut vevstaken till vevstaken på kopplingshuvudet.
5. Lossa vevstakens justeringshuvud, dra ut döljsstången och dra åt
justerhuvudet.
- 7 -
6. Anslut vevstaken till ljudkåpan.
7. Sätt på distansbrickor.
8. Skruva på muttern.
9. Vevstång och ljudkapsling.
10. Skruva på muttern.
11. Skruva på adaptern.
12. Sätt på skruvarna.
13. Installera facket.
14. Installera utblåsningsskyddsnätet.
FAILURE RECOVERY
Problem
Orsaker
Q uomodo
Produkten skakar.
15.Basmuttern är inte
åtdragen.
16.Stativet är inte platt.
Justera mutterns
åtdragning vid basen
och stativets
utvecklingsvinkel.
Importerad till USA: Sanven Technology Ltd, Suite 250 . 9166 Anaheim
Place, Rancho Cucamonga, CA 91730
Tillverkad i Kina