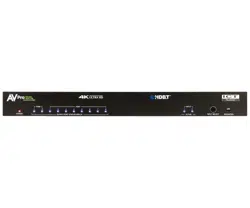
2x 10 18Gb p s 4k60 (4:4:4) Distribution Amplifier
ac-da210-hdbt
Quick Start Guide
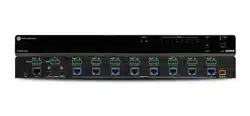
AVProEdge’s 2x10 HDBaseT Distribution Amplier offers full 18Gbps distribution to multiple displays
using the unit’s two HDMI outputs and eight HDBaseT outputs. This is ideal for bars, restaurants, digital
signage, or anywhere you would like to watch one source on multiple displays. If distribution for more
than 10 displays is needed, multiple units can be daisy-chained together via the HDMI output ports. This
Quick Start Guide will walk you through the installation and conguration of the AC-DA210-HDBT. We
will cover:
• Installation
• EDID Management
• Audio Extraction
• IR Extension
INSTALLATION
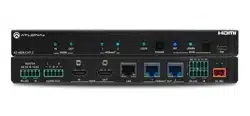
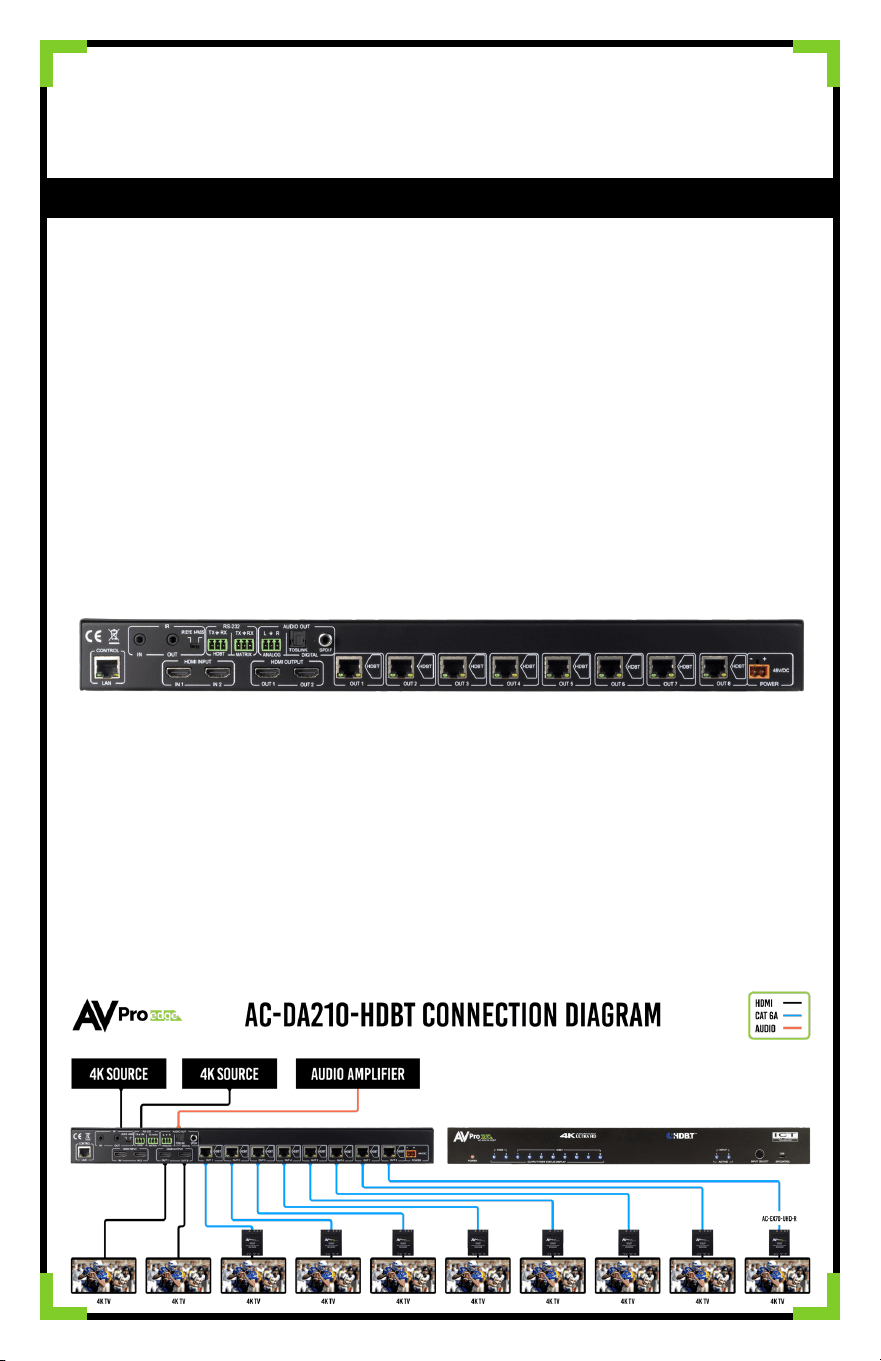
1. Connect the HDMI input sources to the AC-DA210-HDBT.
2. Connect the HDMI output devices to the AC-DA210-HDBT with an HDMI cable.
3. Connect the HDBaseT Receivers to the HDBaseT Outputs using Category Cable (T568B
Terminated Cat 6 UTP/STP Recommended). Compatible receivers from AVPro are the AC-EX70-
UHD-R & AC-EX70-444-RNE.
4. Power on the sources.
5. Connect the power supply into the AC-DA210-HDBT.
6. Turn on output devices/displays.
7. You may now use the front panel button to switch the distribution amplier’s input
• RS232 Extension
• USB Connection
• Troubleshooting

Web OS:
Full control is available on the internal WebOS. Simply plug the matrix into the network and punch in the
default IP (192.168.1.239) to connect to a full control system. AVPro Edge’s WebOS is designed with mobile
devices in mind, so feel free to use you phone or tablet for real-time control.
EDID Management:
Setting and managing EDID is very easy, just follow the steps below. EDID management will ensure you get
the signal you want from any source connected.
Steps to Setting EDID
1. Switch the AC-DA210-HDBT to the input you would like to manage.
2. Hold the Input Select Button for 5 Seconds, all output lights will ash.
3. Looking at HDBaseT output lights 3-8, quick press the Input Select Button to cycle through EDIDs -
(Refer to gure below)
4. Once the output lights match the desired EDID, hold the Input Select Button for 5 seconds to set
EDID, HDMI input lights will ash
Available EDID options are listed below. Additionally, you can copy an EDID from a display:
Audio Extraction:
Extracting digital audio via this unit’s Toslink or SPDIF (via Coax) or balanced analog using the 3 pin phoenix
output ports is easy. You can use these audio ports to distribute audio signals to an AVR or Multi-zone
Amplier.
1. 1080P_2CH 000000
2. 1080P_6CH 000001
3. 1080P_8CH 000010
4. 1080P_3D_2CH 000011
5. 1080P_3D_6CH 000100
6. 1080P_3D_8CH 000101
7. 4K30HZ_3D_2CH 000110
8. 4K30HZ_3D_6CH 000111
9. 4K30HZ_3D_8CH 001000
10. 4K60HzY420_3D_2CH 001001
11. 4K60HzY420_3D_6CH 001010
12. 4K60HzY420_3D_8CH 001011
13. 4K60HZ_3D_2CH 001100
14. 4K60HZ_3D_6CH 001101
15. 4K60HZ_3D_8Ch 001110
16. 1080P_2CH_HDR 001111
17. 1080P_6CH_HDR 010000
18. 1080P_8CH_HDR 010001
19. 1080P_3D_2CH_HDR 010010
20. 1080P_3D_6CH_HDR 010011
21. 1080P_3D_8CH_HDR 010100
22. 4K30HZ_3D_2CH_HDR 010101
23. 4K30HZ_3D_6CH_HDR 010110
24. 4K30HZ_3D_8CH_HDR 010111
25. 4K60HzY420_3D_2CH_HDR 011000
26. 4K60HzY420_3D_6CH_HDR 011001
27. 4K60HzY420_3D_8CH_HDR 011010
28. 4K60HZ_3D_2CH_HDR 011011
29. 4K60HZ_3D_6CH_HDR 011100
30. 4K60HZ_3D_8CH_HDR 011101
31. User EDID 1 011110
32. User EDID 2 011111
33. User EDID 3 100000
34. Copy from HDMI Out1 100001
35. Copy From HDMI Out2 100010
36. Copy from HDBT Out1 100011
37. Copy from HDBT Out2 100100
38. Copy from HDBT Out3 100101
39. Copy from HDBT Out4 100110
40. Copy from HDBT Out5 100111
41. Copy from HDBT Out6 101000
42. Copy from HDBT Out7 101001
43. Copy from HDBT Out8 101010
To use Audio Extraction follow these steps:
1. Locate the “AUDIO OUT” connections on the side of the AC-DA210-HDBT
2. Connect the appropriate cable type to the “AUDIO OUT” port
3. Connect the other end of the cable to the input of an AVR or Multi-zone Amplier
IR Extension:
The AC-DA210-HDBT can extend IR signals bi-directionally using HDBaseT allowing for signals to be sent to
and from the display.
IR IN: Choose IR Receiver Type using the dipswitch located on the back of the DA. IR broadcasts to all HDBaseT
Outputs.
• I-Pass: IR Direct from a Control System
• IR Eye: Receive IR using an IR Receiving Eye
IR OUT: Emits IR signals sent back through HDBaseT
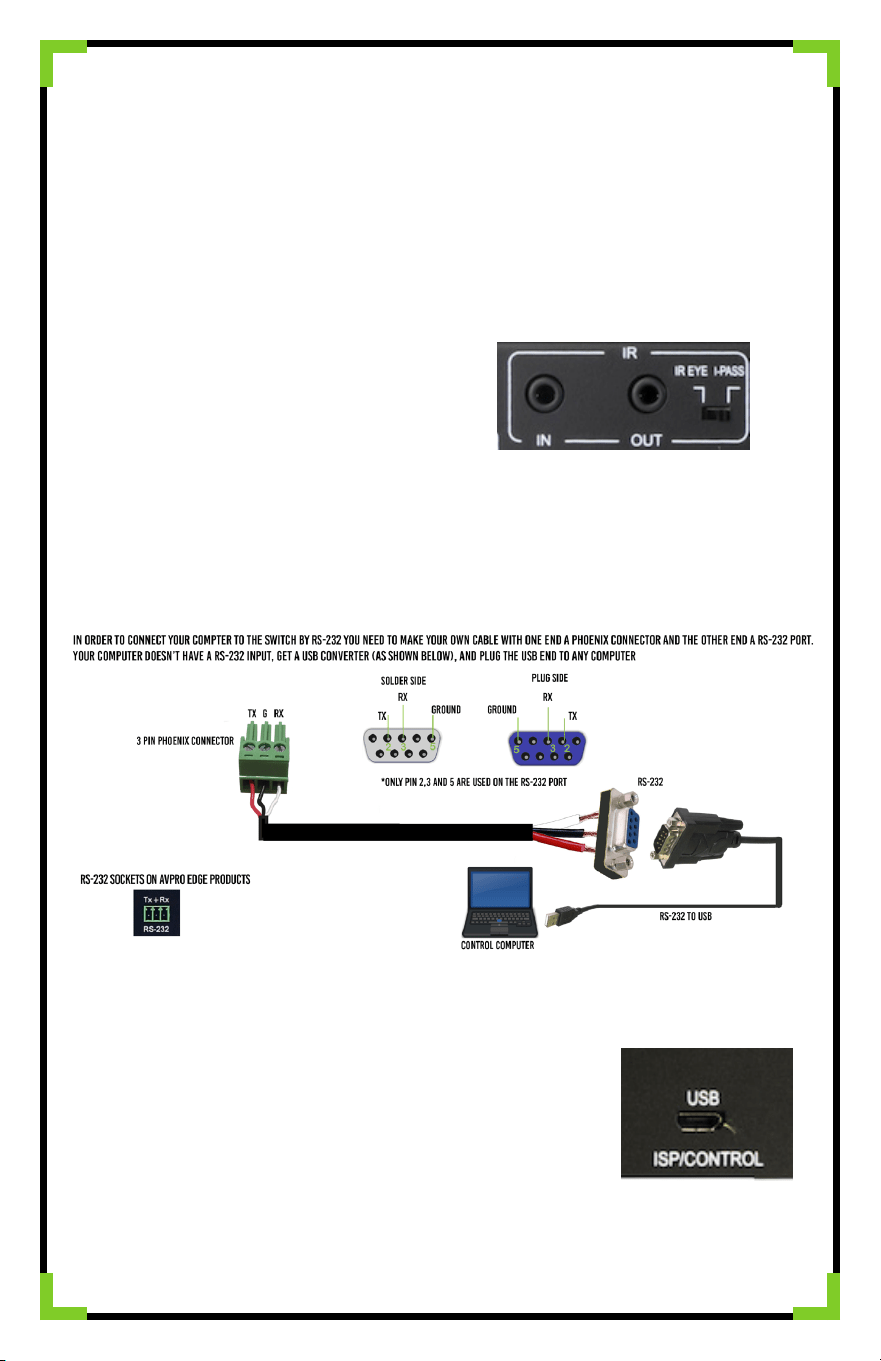
RS-232 Control:
In order to connect your computer to the switch by RS-232 you need to make your own cable with one end
a phoenix connector and the other end RS-232. If your computer doesn’t have a RS-232 input, get a USB
converter (as shown below), and plug the USB end into any computer. Connect the RS-232 3 Pin Phoenix to
the Matrix RS-232 Input.
RS-232 can be extended over HDBaseT as well. Commands can be passed through the Matrix RS-232 input or
use the HDBaseT 3 Pin Phoenix to broadcast directly to your HDBaseT Outputs.
USB Connection:
Used for rmware updates or control. For a full list of the commands please
see the owner’s manual.

Have a question or need assistance?
Don’t hesitate to contact us!
SUPPORT: +1 605-274-6055
USA TOLL FREE: 877-886-5112
EMAIL: support@avproedge.com
Troubleshooting:
Having problems? Here are some general troubleshooting tips that may help:
1. Be sure that all of the HDMI cables in a 4k/HDR system are rated for 18Gbps.
2. Ensure displays are as capable as EDID selected.
3. If using short HDMI cables (.5m, 1m) try a longer cable. Some short HDMI cables do not sync well.
4. No Signal from HDBaseT runs? Verify category termination and HDBaseT Light Status.
5. Getting no picture or sound? Power down the entire system. Power it back up starting with the
display rst and work your way back to the source.
6. If you are still having issues after troubleshooting, feel free to contact our Tech Support department.