Register
your product
www.kaercher.com/welcome
9.808-363.0-F 06/21/24
TRAILER 3500E HDS 4.7/35
TRAILER 3500H HDS 4.
7/35
Operator Manual
English 02
TO
REDUCE
T
HE
RISK
OF
INJU
R
Y
,
RE
A
D
OP
-
E
R
A
T
I
N
G
I
N
STRU
C
TIONS
C
A
REF
U
L
L
Y
B
E
FOR
E
US
I
NG
.
T
his
machin
e
is
to
be
us
e
d
only
b
y
quali
¿
ed o
p
erato
r
s.
LIR
E
L
E
M
A
NUE
L
DE
L
'OPER
A
T
EUR
AV
AN
T
UTI
L
IS
A
TION
.
C
e
t
appare
i
l
doit
être
uti
l
ise
p
a
r
des operat
e
urs q
u
ali
¿
es
.
LE
A
EL
MA
N
UAL
O
PERACIO
N
ANTE
S
DE
U
S
-
AR
S
E
.
Este
eq
u
ipo
de
b
e
ser
u
sado
s
o
lam
e
nt
e
por
o
p
erador
e
s c
a
li
¿
ca
d
os
.
RISK
OF
ASPHYXI
A
TION.
Use
this
product
only in a well ventilated area.
RISQUE
D'ASPHYXIE.
Utiliser
dans
un
en-
droit bien aéré.
RIESGO
DE
ASFIXIA.
Use
el
producto
en
un
area de ventilación adecuada.
RISK
OF
EXPLOSION.
Operate
only
where
open
À
ame
or
torch
is
pe
r
-
mitted.
Do
not
spray
À
ammable
liquids.
RISK
OF
FIRE.
Do
not
add
fuel
when the machine is operating.
RISQUE
D'E
X
PLOS
I
O
N
.
Uti
l
iser
a
u
x
e
nd
r
oits
où
un
e
À
amm
e
n
ue
es
t
pe
r
-
mise.
Ne
pas
vapo
r
is
e
r
d
e
liq
u
ides
in
À
a
mmabl
e
s.
RISQUE
DE
FE
U
.
N
e
p
a
s ajo
u
te
r
d
e ca
r
bu
r
a
n
t d
i
esel p
e
n
d
ant
q
u
e la machin
e
e
st en o
p
é
r
ation
.
R
I
E
S
GO
D
E
E
XP
L
OS
I
ON
Us
e
el
p
ro
d
uc
to
e
n
á
r
e
as
d
on
d
e
e
l
fu
eg
o
o
l
l
a
m
a
sea
n
permitid
o
s.
No
r
o
cie
l
iq
ui
d
o
s
i
n
À
a
m
abl
e
s
.
RIE
S
GO
DE
F
UEG
O
.
N
o
añadir
gasoli
n
a cu
a
nd
o
l
a
m
á
g
u
i
n
a
e
ste
tr
a
b
a
j
a
ndo
.
RISK
OF
INJECTION
OR
SEVERE
INJU
R
Y
TO
PERSONS.
Keep
clear
of
nozzle.
HOT
DISCHARGE
FLUID.
Do
not
touch
or
direct
discharge
stream at persons.
RISQUE
D
E
B
L
E
SSU
R
ES
.
Se
t
e
nir
loin
d
e
s
buses
.
EAU
CH
A
UDE
S
O
U
S
PRESSION
A
L
A
S
O
R
TI
E
.
Ne p
a
s
d
irige
r
l
e
j
e
t
d
'
e
au vers
des personnes
.
RIESGO
DE
PENETRACIÓN
O
LESIONES
SEVERAS
A
PERSONAS.
Man-
téngase
fuera
del
alcance
de
boquilla.
DESCARGA
DE
AGUA
CALIENTE
A
A
L
T
A
PRESION.
No
toque
ni
dirija
el
À
ujo
del
agua
o
otras
personas.
RISK
OF
IN
U
R
Y
.
P
ROTEC
T
I
V
E
EYEWEAR
A
N
D
OTHER
PRO
T
ECT
I
V
E
CLOTHING MU
S
T B
E
WO
R
N
w
h
en oper
a
ting
t
his
machi
n
e
.
RISQUE
D
E
B
L
E
SSU
R
E.
Port
e
z
d
e
s
l
u
n
e
ttes
d
e
p
rot
e
cti
o
n
et
v
ê
teme
n
t
s
protect
e
urs qua
n
d vous
u
tilisez cett
e
m
achi
n
e
.
RIESGO
DE
L
ESIONES.
Us
e
lentes
de
segur
i
dad
y
p
r
o
t
e
j
a
su
cu
e
rpo
a
d
ec
-
u
a
da
m
ent
e
cua
n
do op
e
re est
e
e
qui
p
o
.
W
ARNING /
A
VE
R
TISSEMENT /
PREC
A
UCION
RISK
OF
INJU
R
Y
.
HOT
SUR
F
ACES
CAN
CAUSE
BURNS
.
Use
only
designed
gripping
areas
of
spray gun and wand.
SUR
F
ACES
CHAUDES.
T
oucher
seulement
les
parties
isolées
des
poignée
pistolets
et
lances.
SUPERFICIES
CALIENTES.
Use
solamente
las
áreas aisladas del gatillo y la lanza.
SPR
A
Y
G
UN
K
I
C
K
S
BA
C
K
.
H
ol
d
wi
th
b
ot
h
han
ds
.
LA
POIGNEE
PISTOLET
REPOUSSE
.
T
enir
à
deux mains.
LA
PISTOLA
SE
MUEVE
CON
LA
PRESIÓN.
Sostenga con las dos manos
.
RISK
OF
ELECTROCUTION.
Keep
all
connections
d
r
y
and
off
the
ground. Keep spray away from electrical wiring and components.
RIS
QUE
D'ELECTROCUTION.
T
ous
les
¿
ls
doivent
être
maintenus
secs
et
être
suspendus.
Ne
jamais
projeter
d'eau
sur
les
composantes
et
¿
ls électriques.
RIESGO
DE
ELECTROCUCIÓN.
Mantenga
todas
las
connecciones
se-
cas y arriba del suelo. No rocie componentes eléctricos
.
D
ANGER
8.923-560.0
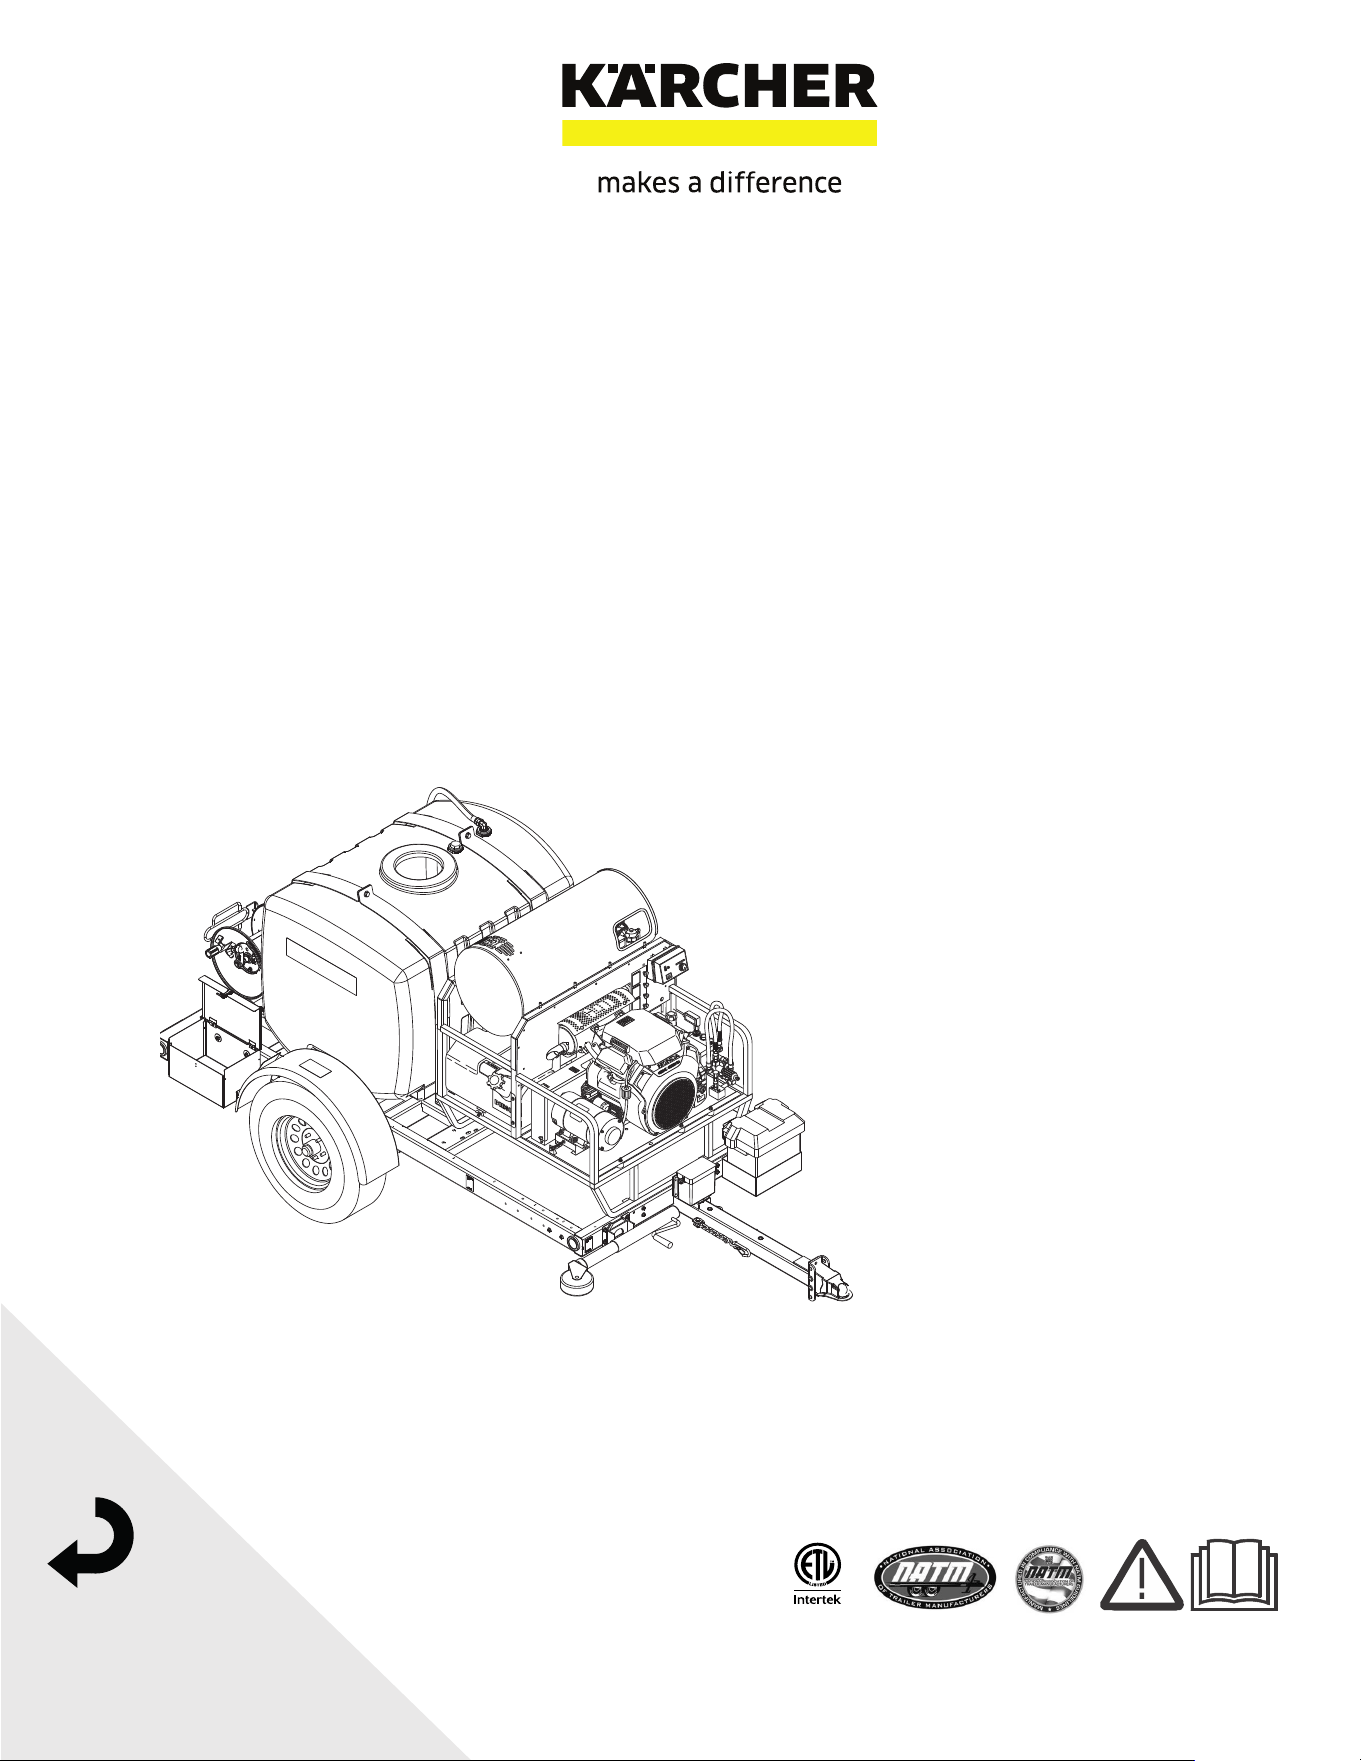
2 Karcher Trailer 3500E/H HDS 4.7/35 Operator’s Manual 9.808-363.0 - F
Machine Data Label
MODELS: 1.103-850.0 Trailer Karcher 3500E HDS 4.7/35
1.103-851.0 Trailer Karcher 3500H HDS 4.7/35
Introduction
Thank you for purchasing this Pressure Washer. We reserve the right to make changes at any time
without incurring any obligation.
Owner/User Responsibility:
The owner and/or user must have an understanding of the manufacturer’s operating instructions and warnings
before using this pressure washer. Warning information should be emphasized and understood. If the operator is
not fluent in English, the manufacturer’s instructions and warnings shall be read to and discussed with the operator
in the operator’s native language by the purchaser/owner, making sure that the operator comprehends its
contents. Owner and/or user must study and maintain for future reference the manufacturers’ instructions.
Save These Instructions
This manual should be considered a permanent part of the machine and should remain with it if machine
is resold. When ordering parts, please specify model and serial number. Use only identical replacement
parts.This machine is to be used only by trained operators.
Notice
This trailer is equipped to meet applicable U.S. Federal safety standards. Check local and state requirements
regarding brakes and any additional equipment that may be required. Any modifications or additions including load-
equalizing hitches, without written factory consent: usage in an abnormal manner including overloading voids all
manufacturers’ warranties and liability.
WARNING: This Owner's Manual contains safety information and instructions for your trailer.
You must read this manual before loading or towing your trailer.
You must follow all safety precautions and instructions.
AVERTISSEMENT: Ce manuel de l'utilisateur contient des informations en matière de sécurité et des
instructions pour la remorque. Lire le présent manuel avant de charger ou de remorquer la remorque.
Suivre toutes les précautions de sécurité et les directives.

3
Table of Contents
Machine Data Label . . . . . . . . . . . . . . . . . . . . . . . . . .2
Introduction . . . . . . . . . . . . . . . . . . . . . . . . . . . . . . . .2
Table of Contents .
. . . . . . . . . . . . . . . . . . . . . . . . . .3
How To Use This Manual .
. . . . . . . . . . . . . . . . . . . .4
Safety
Important Safety Information. . . . . . . . . . . . . . . . . . .5
Reporting Safety Defects . . . . . . . . . . . . . . . . . . . . . 8
Checklist - Before Your First Trip .
. . . . . . . . . . . . . .8
Referencing the Utility Trailer in this Manual .
. . . . .9
Tire Safety. . . . . . . . . . . . . . . . . . . . . . . . . . . . . . . . .9
Basic Tire Maintenance . . . . . . . . . . . . . . . . . . . . . .9
Understanding Tire Pressure and Load Limits .
. . . .9
Maintaining Proper Tire Pressure . . . . . . . . . . . . . . .9
Never Tow the Trailer Before Checking:.
. . . . . . . .10
Tow Vehicles. . . . . . . . . . . . . . . . . . . . . . . . . . . . . . 10
Trailer Ball & Couplers .
. . . . . . . . . . . . . . . . . . . . .11
Before Towing. . . . . . . . . . . . . . . . . . . . . . . . . . . . .11
Variable Height Bracket: .
. . . . . . . . . . . . . . . . . . . .11
Bolting Instructions:.
. . . . . . . . . . . . . . . . . . . . . . . .11
Hitch Maintenance . . . . . . . . . . . . . . . . . . . . . . . . .11
Hitch Operation .
. . . . . . . . . . . . . . . . . . . . . . . . . . .11
Hitch Coupler Troubleshooting . . . . . . . . . . . . . . . .12
Coupler & Ball Engagement . . . . . . . . . . . . . . . . . .12
Safety Chains .
. . . . . . . . . . . . . . . . . . . . . . . . . . . .12
Load-Carrying Capacity .
. . . . . . . . . . . . . . . . . . . .13
What To Check and How to Check it
Proper Weight Distribution & Tongue Weight . . . . .14
Tongue Weight . . . . . . . . . . . . . . . . . . . . . . . . . . . .14
Tire Pressure . . . . . . . . . . . . . . . . . . . . . . . . . . . . .14
Wheels . . . . . . . . . . . . . . . . . . . . . . . . . . . . . . . . . .14
W
heel Lugs .
. . . . . . . . . . . . . . . . . . . . . . . . . . . . . .14
Correct Ball Seating . . . . . . . . . . . . . . . . . . . . . . . .15
Ball Coupler Hitches .
. . . . . . . . . . . . . . . . . . . . . . .15
Tires . . . . . . . . . . . . . . . . . . . . . . . . . . . . . . . . . . . .15
Breakaway Switch & D.O.T. Wet Cell Battery.
. . . .16
Breakaway Switch Mounted on an A-Frame. . . . . .16
Brakes. . . . . . . . . . . . . . . . . . . . . . . . . . . . . . . . . . .16
B
urnishing the Brakes. . . . . . . . . . . . . . . . . . . . . . .16
Maintenance
Brake Adjustment . . . . . . . . . . . . . . . . . . . . . . . . . . 17
Brake Cleaning & Inspection. . . . . . . . . . . . . . . . . .17
Pressure Washer Troubleshooting .
. . . . . . . . . . . .20
Oil Change Record . . . . . . . . . . . . . . . . . . . . . . . . .24
Preventative Maintenance .
. . . . . . . . . . . . . . . . . .25
Axles, Hubs and Brakes .
. . . . . . . . . . . . . . . . . . . .25
Karcher Trailer 3500E/H HDS 4.7/35 Operator’s Manual 9.808-363.0 - F
4
How To Use This Manual
This manual contains the following sections:
• How to Use This Manual
• Safety
• What and How to Check
• Maintenance
The HOW TO USE THIS MANUAL section will tell you
ho
w to find important information for ordering correct
repair parts.
Parts may be ordered from authorized dealers. When
pl
acing an order for parts, the machine model and
machine serial number are important. Refer to the
MACHINE DATA box which is filled out during the
installation of your machine. The MACHINE DATA box
is located on the inside of the front cover of this manual.
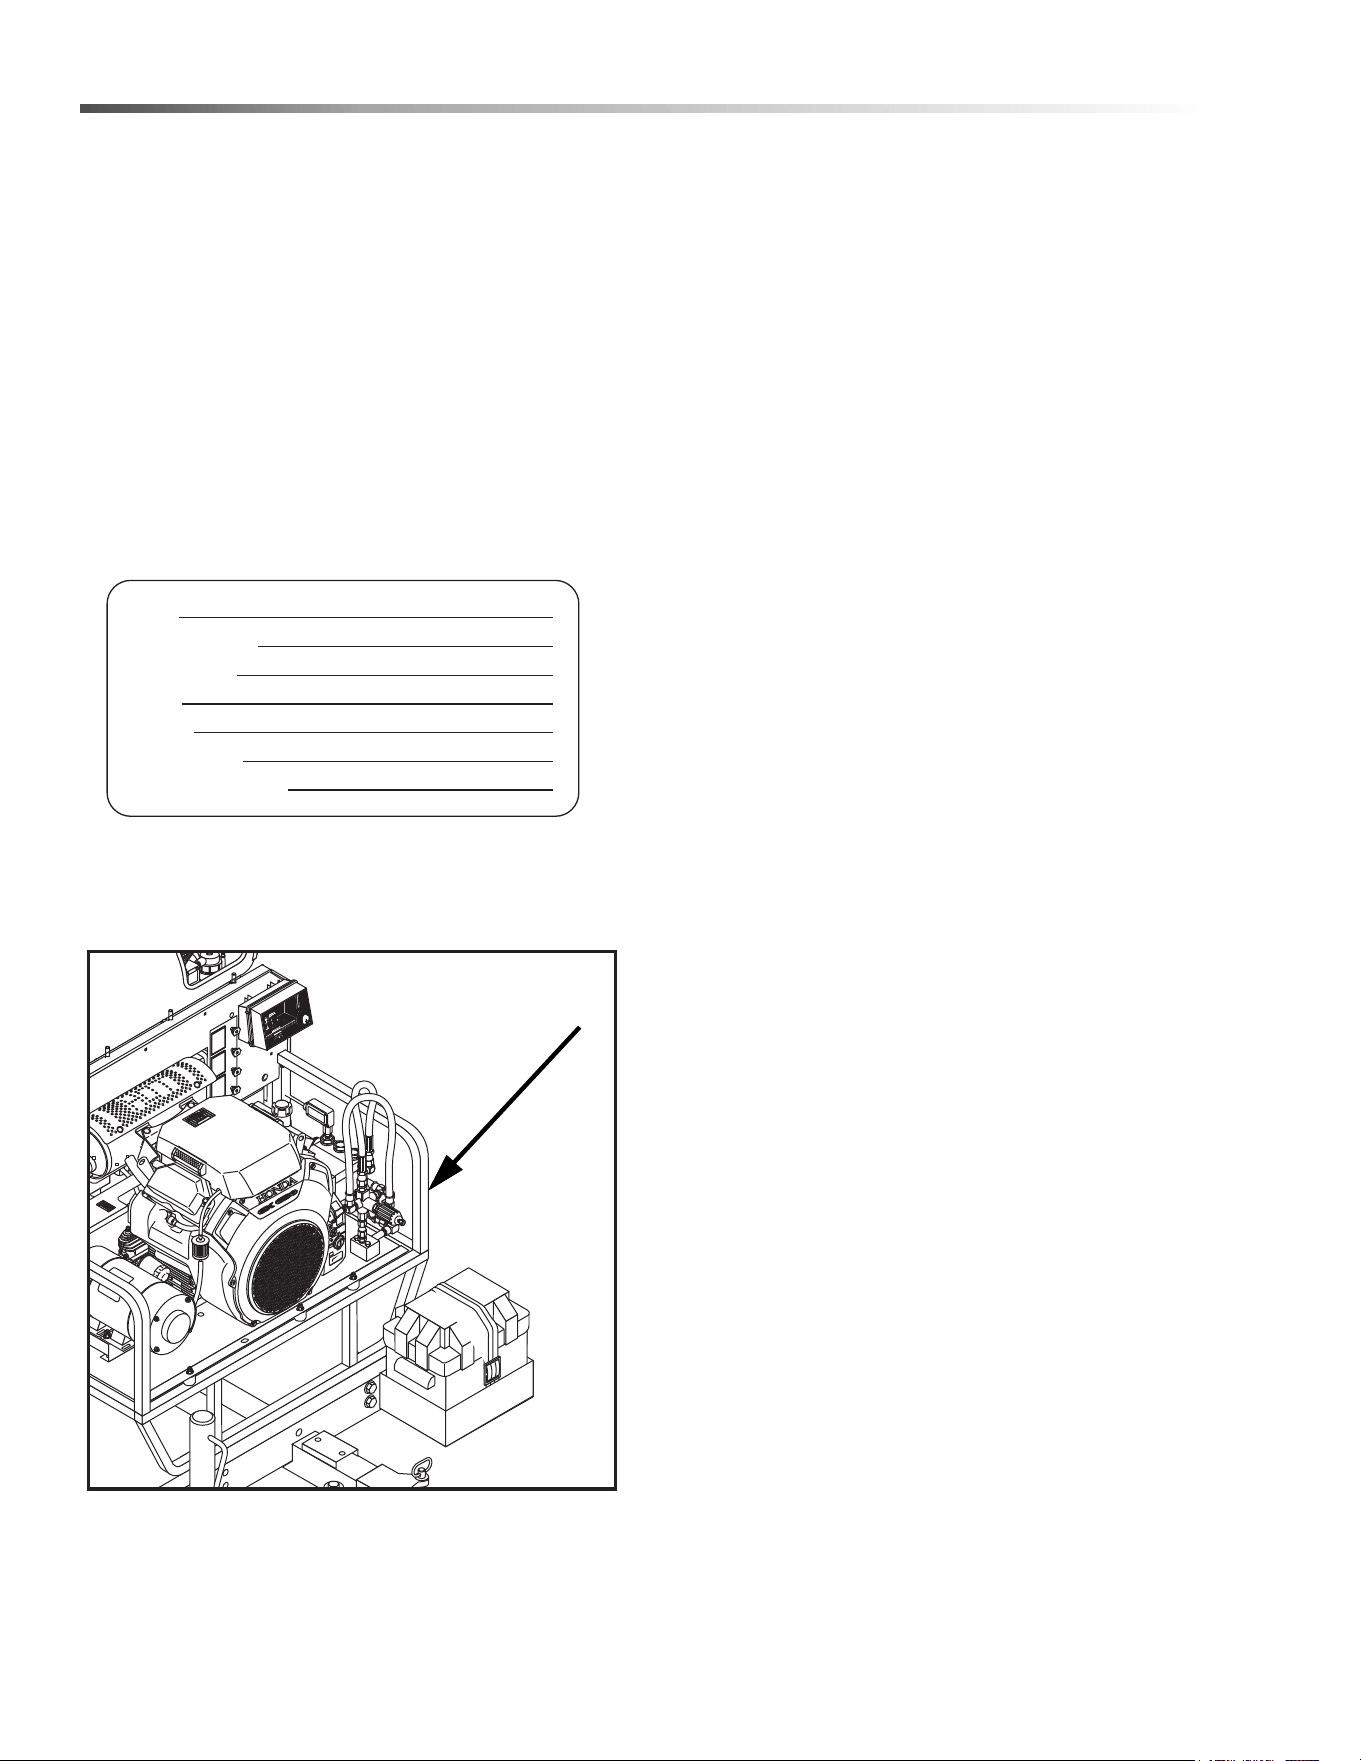
The model and serial number of your machine is
lo
cated on the right side of the machine, facing the
hitch.
The SAFETY section contains important information
re
garding hazardous or unsafe practices of the
machine. Levels of hazards are identified that could
result in product damage, personal injury, or severe
injury resulting in death.
The WHAT AND HOW TO CHECK section is to famil-
iarize the operator with the operation and function of
th
e machine.
The MAINTENANCE section contains preventive main-
tenance to keep the machine and its components in
go
od working condition. They are listed in this general
order:
• Troubleshooting
• Preventative Maintenance
NOTE: If a service or option kit is installed on your
machine, be sure to keep the KIT INSTRUCTIONS
which came with the kit. It contains replacement parts
numbers needed for ordering future parts.
NOTE: The manual part number is located on the
lower right corner of the front cover.
Model:
Date of Purchase:
Serial Number:
Dealer:
Address:
Phone Number:
Sales Representative:
Karcher Trailer 3500E/H HDS 4.7/35 Operator’s Manual 9.808-363.0 - F
5
Safety
Important Safety Information
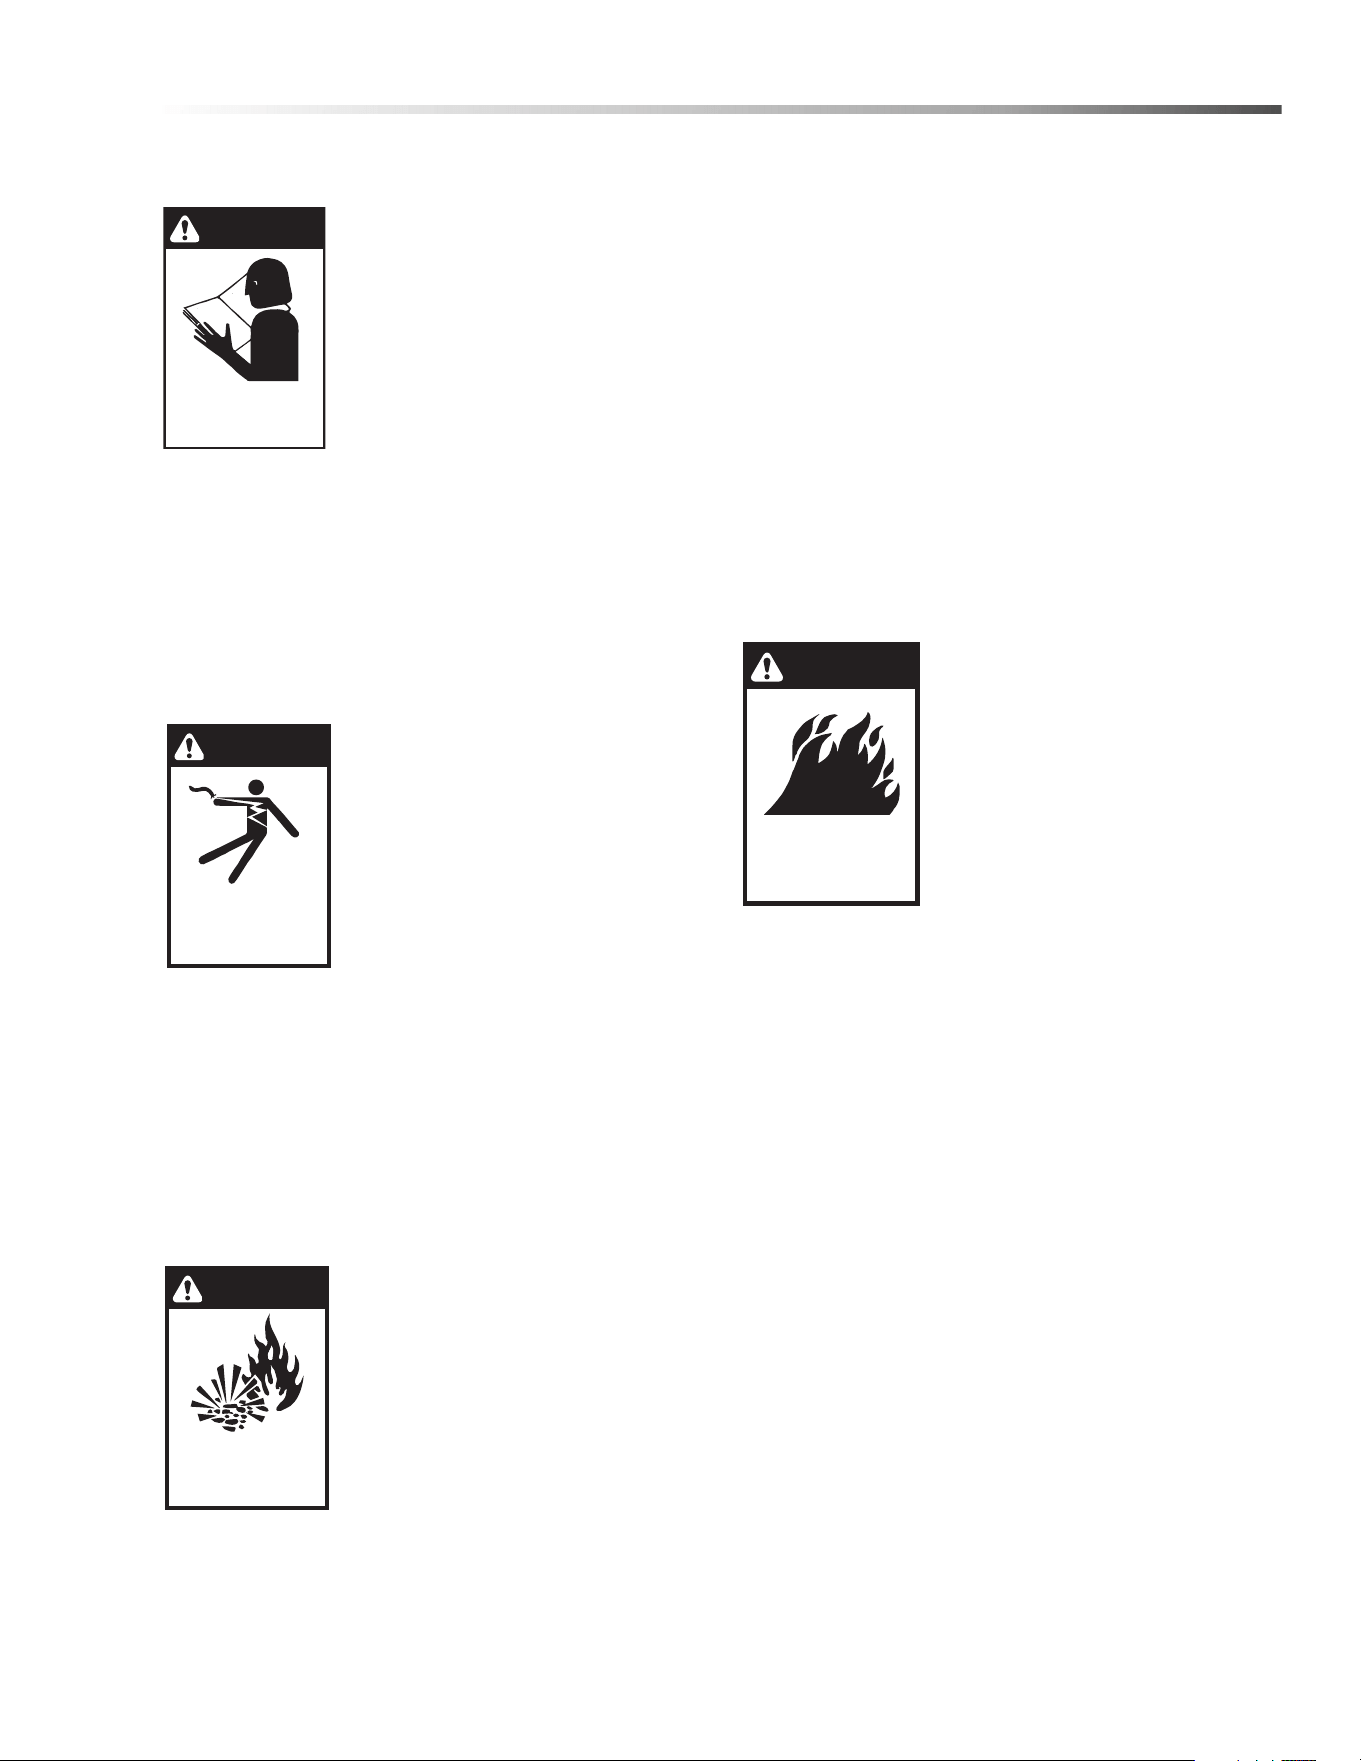
WARNING: To reduce the risk of
injury, read operating
in
structions carefully before
using.
AVERTISSEMENT: Pour réduire
le
risque de blessures, lire
attentivement les instructions de
fonctionnement avant
l'utilisation.
1.Read the owner's manual thor-
oughly. Failure to follow instructions could cause
malfunction of the machine and result in death,
serious bodily injury and/or property damage.
2. Know how to stop the machine and bleed pressure
quickly. Be thoroughly familiar with the controls.
3. Stay alert — watch what you are doing.
DANGER: Keep wand, hose, and
water spray away from electric
wi
ring or fatal electric shock may
result.
DANGER: Garder la lance, le
bo
yau et le jet d'eau à l'écart de
tout câblage électrique ou des
chocs électriques mortels
pourraient survenir
WARNING: Flammable liquids can create fumes
wh
ich can ignite, causing property damage or
severe injury.
AVERTISSEMENT:Des liquides inflammables
pe
uvent produire des vapeurs qui peuvent
s'enflammer, causant ainsi des dommages à la
propriété ou des blessures graves.
WARNING: Risk of explosion —
Operate only where open flame
or
torch is permitted.
AVERTISSEMENT: Risque
d'
explosion — Utiliser unique-
ment dans des endroits où l'utili-
sation d'une flamme nue ou
d'
une torche est permise.
4. Follow engine fuel recommendation in the
engine manual provided.
5. Use only kerosene, No. 1 home heating fuel, or
diesel for the hot water burner. If diesel is used,
add a soot remover to every tankful.
WARNING: Gasoline is highly flammable and
ex
plosive. You can be seriously injured when
refueling.
AVERTISSEMENT: L'essence est très inflammable
et
explosive. Le ravitaillement en carburant peut
présenter des risques de blessures graves.
• Stop engine and keep heat sparks and flame
away.
• Refuel only outdoors.
• Wipe up spills immediately.
WARNING: Risk of fire — Do
not add fuel when the product
is
operating or still hot.
AVERTISSEMENT: Risque
d'
incendie — Ne pas ajouter de
carburant pendant que la
machine fonctionner ou est
encore chaude.
WARNING: Do not use gasoline
cr
ankcase draining or oil
containing gasoline, solvents or alcohol. Doing so
will result in fire and/or explosion.
AVERTISSEMENT: Ne pas utiliser d'essence, de
dr
ainage du carter de moteur ou d'essence
contenant de l'huile, de solvants ou de l'alcool. Agir
de la sorte risquerait de créer un incendie et/ou une
explosion.
6. Operate only in locations where combustible dusts
and flammable gases or vapors are not present.
Do not store or use gasoline near this machine.
7. Do not allow acids, caustic or abrasive fluids to
pass through the pump.
8. Never run pump dry or leave spray gun closed
longer than 1-2 minutes.
9. Keep operating area clear of all persons.
WARNING
READ OPERATOR’S
MANUAL THOROUGHLY
PRIOR TO USE.
OPERATIONS
SAFETY
MAINTENANCE
DANGER
KEEP WATER
SPRAY AWAY FROM
ELECTRICAL WIRING.
WARNING
RISK OF EXPLOSION:
OPERATE ONLY WHERE
OPEN FLAME OR TORCH
IS PERMITTED
WARNING
RISK OF FIRE.
DO NOT ADD FUEL
WHEN OPERATING
MACHINE.
Karcher Trailer 3500E/H HDS 4.7/35 Operator’s Manual 9.808-363.0 - F
6
Safety
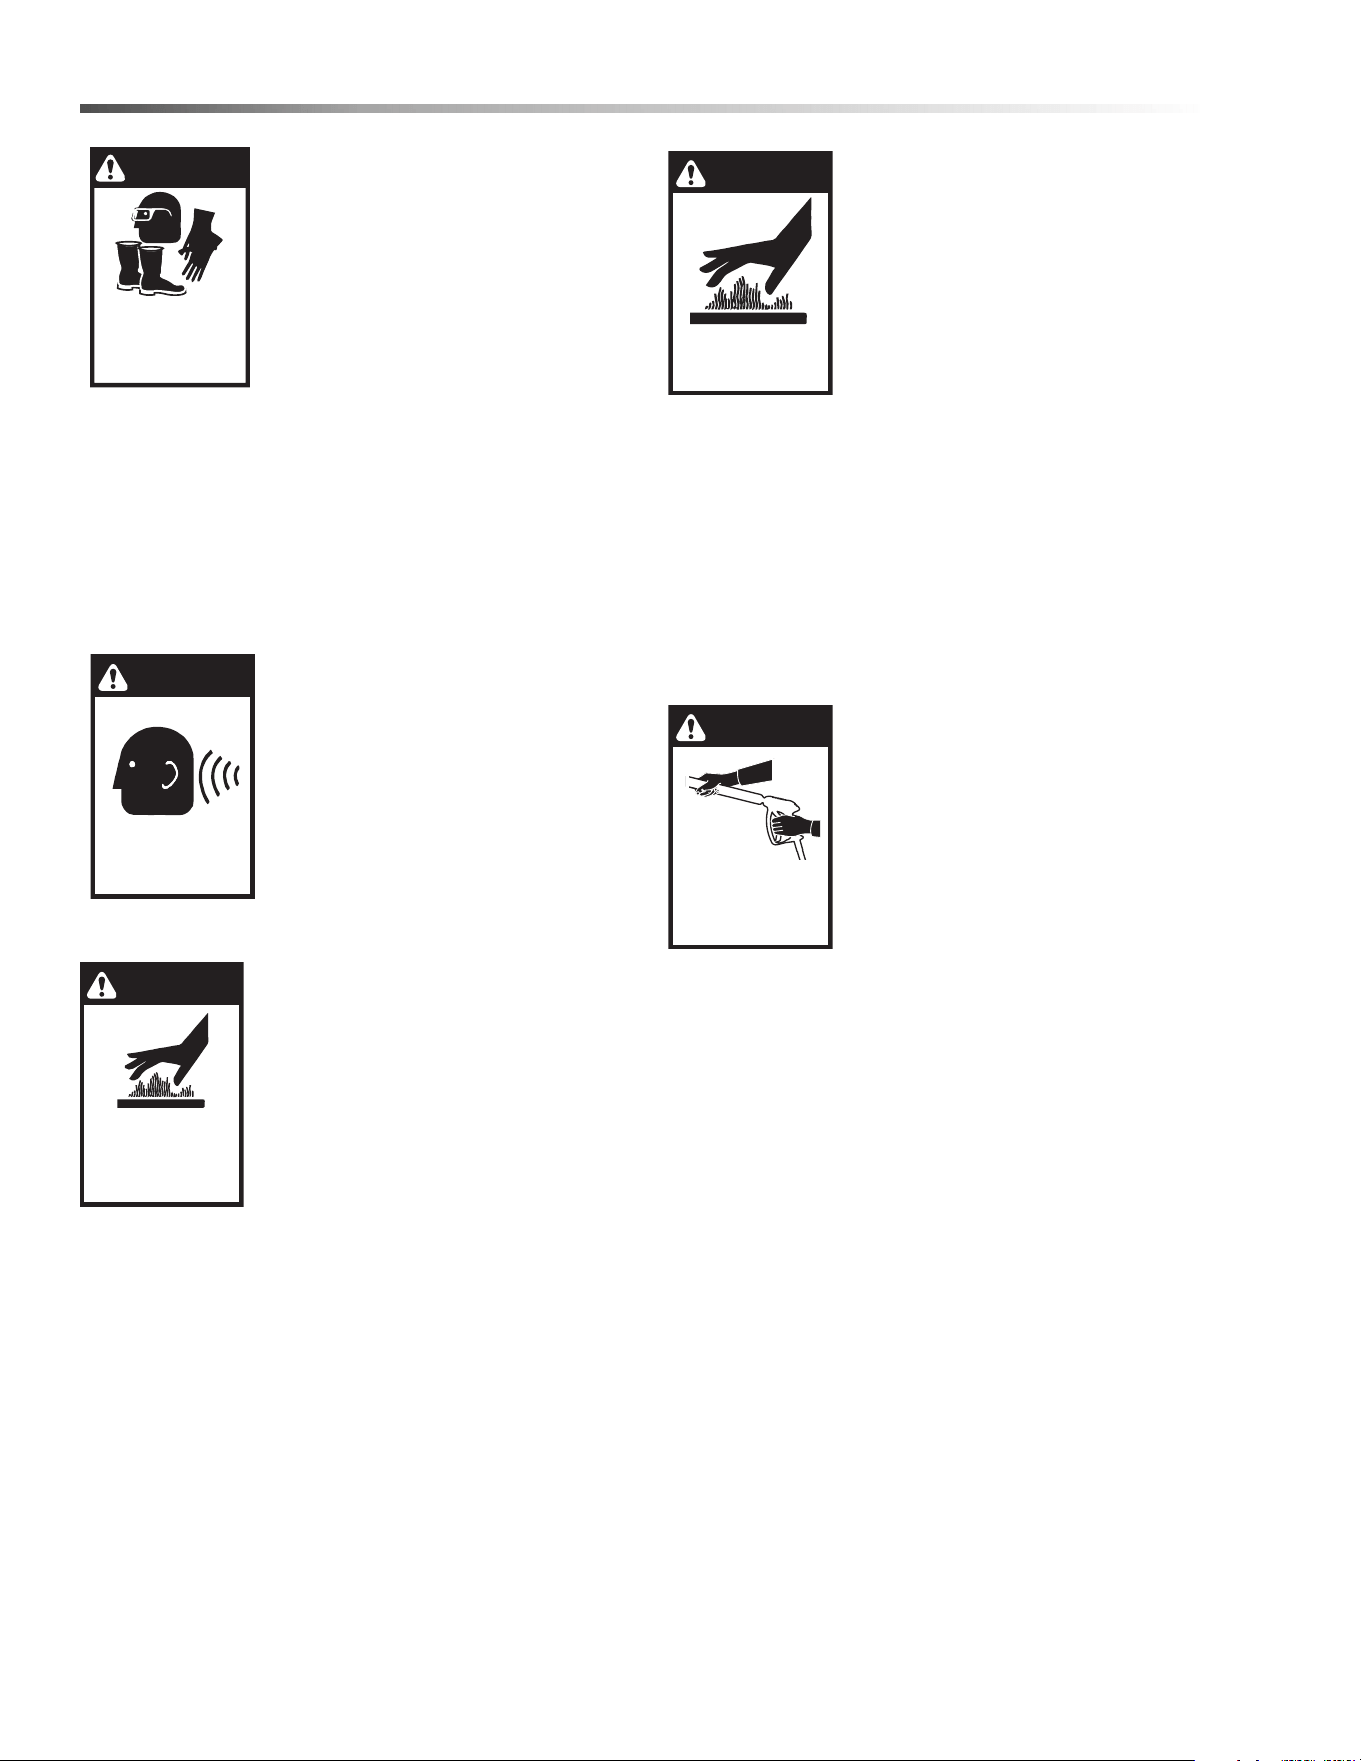
WARNING: High pressure spray
can cause paint chips or other
particles to become airborne and
fly at high speeds. To avoid
personal injury, eye, hand and
foot safety devices must be
worn.
AVERTISSEMENT: Un jet haute
pr
ession peut écailler la peinture
ou provoquer l'émission d'autres
particules dans l'air et leur
projection à hautes vitesses. Pour éviter les
blessures corporelles, il faut porter des dispositifs
de sécurité pour les yeux, les mains et les pieds.
10. Always wear properly rated eye protection such as
safety goggles or face shield while spraying.
Safety glasses do not provide full protection.
WARNING: This machine
exceeds 85 dB. Appropriate ear
pr
otection must be worn.
AVERTISSEMENT: Cette
ma
chine excède 85 dB et une
protection de l'ouïe appropriée
doit être portée.
WARNING: Hot discharge fluid.
Do not touch or direct discharge
st
ream at persons or animals.
AVERTISSEMENT: Liquide de
dé
charge chaud. Ne pas diriger le
débit de décharge vers des
personnes ou des animaux.
WARNING: This machine
pr
oduces hot water and must
have insulated components
attached to protect the operator.
AVERTISSEMENT: Cette machine produit de l'eau
ch
aude et doit comporter des composants isolés
attachés pour protégerl'opérateur
.
WARNING: Risk of injury. Hot
surfaces can cause burns. Use
only designated gripping areas
of spray gun and wand. Do not
place hands or feet on non-
insulated areas of the pressure
washer.
AVERTISSEMENT: Les surfaces
ch
audes peuvent causer des
brûlures. Utiliser uniquement les
zones de prise désignées du
pistolet pulvérisateur et de la lance. Ne pas placer
les mains ou les pieds sur des endroits non isolés
de la laveuse à pression.
11. To reduce the risk of injury, close supervision is
necessary when a machine is used near children.
Do not allow children to operate the pressure
washer. This machine must be attended during
operation.
WARNING: Grip cleaning wand
securely with both hands before
st
arting. Failure to do this could
result in injury from a whipping
wand.
AVERTISSEMENT: Agripper la
la
nce de nettoyage avec les deux
mains avant de commencer. Le
non-respect de cette consigne
pourrait mener à des blessures
causées par le mouvement
violent de la lance.
12. Never make adjustments on machine while in
operation.
13. Be certain all quick coupler fittings are secured
before using pressure washer.
WARNING
USE PROTECTIVE
EYE WEAR
AND CLOTHING
WHEN OPERATING
THIS EQUIPMENT.
WARNING
EAR PROCTION
MUST BE WORN
CAUTION
HOT DISCHARGE FLUID:
DO NOT TOUCH OR
DIRECT DISCHARGE
STEAM AT PERSONS
OR ANIMALS.
WARNING
RISK OF INJURY.
HOT SURFACES
CAN CAUSE BURNS
WARNING
TRIGGER GUN KICKS
BACK — HOLD WITH
BOTH HANDS
Karcher Trailer 3500E/H HDS 4.7/35 Operator’s Manual 9.808-363.0 - F
7
Safety
WARNING: High pressure
developed by these machines
will cause personal injury or
equipment damage. Keep clear of
nozzle. Use caution when
operating. Do not direct
discharge stream at people or
animals, or severe injury or death
will result.
AVERTISSEMENT: La haute
pr
ession générée par ces
machines causera des lésions corporelles ou des
dommages à l'équipement. Se tenir à l'écart de la
buse. Ne pas décharger directement le jet vers des
personnes ou des animaux, car cela risquerait de
causer des blessures graves ou même la mort.
WARNING: Protect machine from
freezing.
AVERTISSEMENT: Protéger la
ma
chine contre le gel.
14. To keep machine in best operating conditions, it is
important you protect machine from freezing.
Failure to protect machine from freezing could
cause malfunction of the machine and result in
death, serious bodily injury, and/or property
damage. Follow storage instructions specified in
this manual.
15. Inlet water must be clean fresh water and no hotter
then 90°F.
WARNING: Risk of asphyxiation.
Use this product only in a well
v
e
ntilated area.
AVERTISSEMENT: Risque
d'
asphyxie : Utiliser ce produit
uniquement dans un endroit bien
ventilé.
16.Avoid operating machines in
small areas or near exhaust fans.
Adequate oxygen is needed for
combustion or dangerous carbon monoxide will
result.
17. Manufacturer will not be liable for any changes
made to our standard machines or any compo-
nents not purchased from us.
18. The best insurance against an accident is precau-
tion and knowledge of the machine.
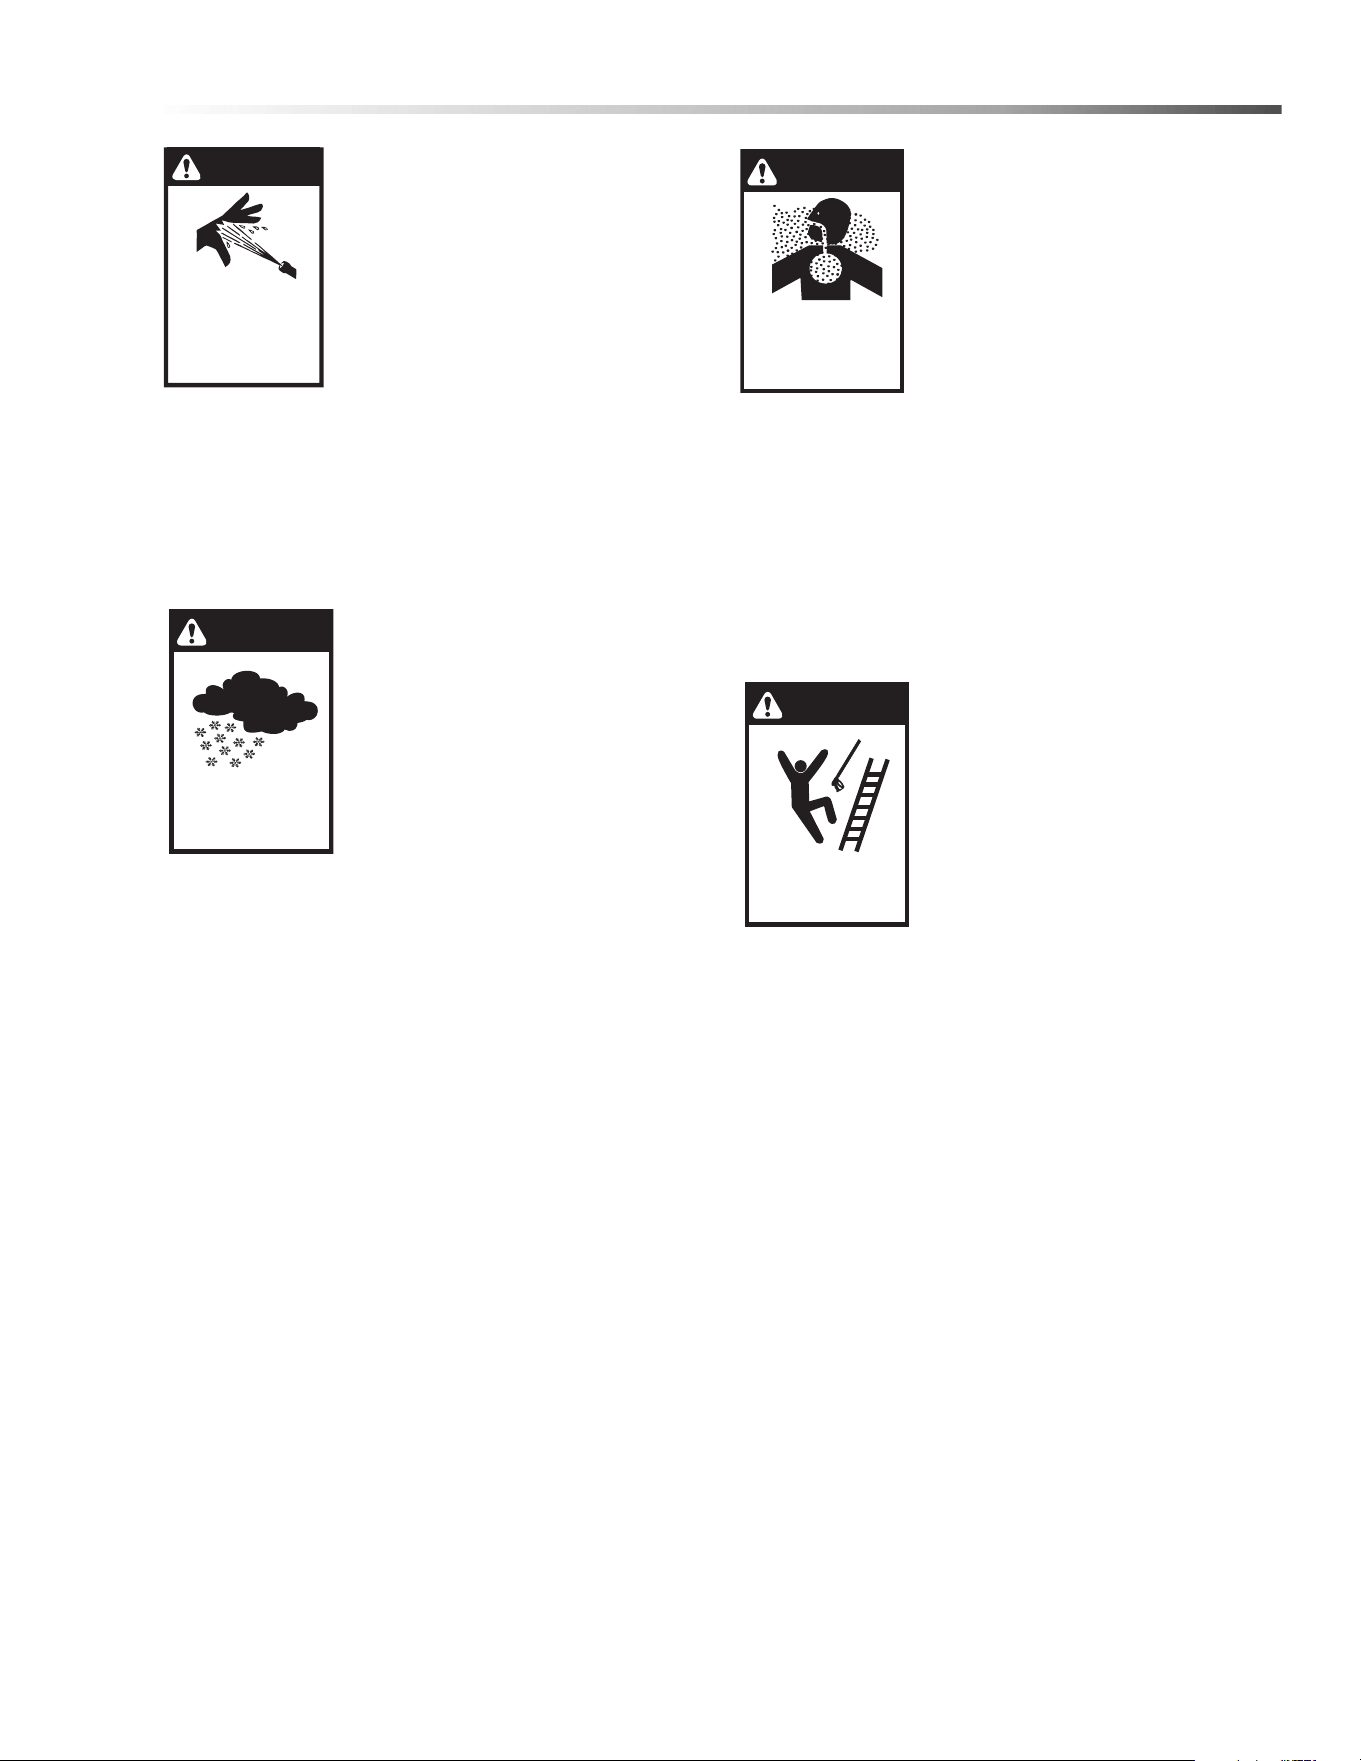
WARNING: Be extremely careful
when using a ladder, scaffolding
or
any other relatively unstable
location. The cleaning area
should have adequate slopes
and drainage to reduce the
possibility of a fall due to
slippery surfaces.
AVERTISSEMENT: Faire preuve
d'
une extrême prudence au
moment d'utiliser une échelle,
des échafaudages ou toute autre surface relative-
ment instable. La zone de nettoyage doit avoir une
pe
nte et un drainage adéquats pour réduire la
possibilité d'une chute due à une surface glissante.
WARNING
RISK OF INJECTION
OR SEVERE INJURY
TO PEOPLE
OR ANIMALS. KEEP
CLEAR OF NOZZLE.
WARNING
PROCTECT FROM
FREEZING
WARNING
RISK OF
ASPHYXIATION.
USE THIS PRODUCT
ONLY IN A WELL
VENTILATED AREA.
WARNING
RISK OF INJURY
FROM FALLS WHEN
USING LADDER.
Karcher Trailer 3500E/H HDS 4.7/35 Operator’s Manual 9.808-363.0 - F

8
Safety
19. Do not overreach or stand on unstable support.
Keep good footing and balance at all times.
20. Do not operate this machine when fatigued or
under the influence of alcohol, prescription medica-
tions, or drugs.
21. Before disconnecting discharge hose from water
outlet, turn burner off and open spray gun to allow
water to cool below 100° before stopping the
machine. Then open the spray gun to relieve
pressure. Failure to properly cool down or maintain
the heating coil may result in a steam explosion.
Follow the maintenance
instructions specified in the manual
Reporting Safety Defects
If you believe that your vehicle has a defect which could
cause a crash or could cause injury or death, you
should immediately inform the National Highway Traffic
Safety Administration (NHTSA) in addition to notifying
the trailer manufacturer.
If NHTSA receives similar complaints, it may open an
in
vestigation, and if it finds that a safety defect exists in
a group of vehicles, it may order a recall and remedy
campaign. However, NHTSA cannot become involved
in individual problems between you, your local dealer.
To contact NHTSA, you may either call the Auto Safety
Ho
tline toll-free at 1-888-327-4236 (TTY: 1-800-424-
9153) or write to:
NHTSA, U.S. Department of Transportation,
1200 New Jersey Avenue SE,
Washington, DC
20590.
You can also obtain other information about motor
ve
hicle safety from http://www.safercar.gov.
Checklist - Before Your First Trip
• Tire Pressure and Tire Condition
• Wheel Lugs*
• Bearing Lube and Tightness
• Burnish Brakes
• Brakes/Brake Controllers
• Breakaway Battery Charge
• Hitch
• Safety Chains
• 12V Running Lights
• Distribution and Security
• All Jacks “Up” in Travel Position
* Check lug nuts for tightness before initial trip, at 10
m
i
les, 25 miles and 50 miles. Recheck every 3 months
or 3000 miles.
Your local Dealer, in all probability, checked each of
th
ese points before you took delivery. However, these
are key things you should recheck before taking your
trailer on the road for the first time.
Karcher Trailer 3500E/H HDS 4.7/35 Operator’s Manual 9.808-363.0 - F

9
Important Trailer Safety Information
Referencing the Utility Trailer in this
Manual
All references to the trailer or component parts to either
left or right are made with the assumption that you are
standing behind the trailer facing forward. Your left hand
or right hand is the equivalent on the trailer.
Tire Safety
The most common cause of trailer tire failure is under-
inflation. Therefore, it is important that you always
maintain the specified air pressure as indicated by the tire
manufacturer on the tire's side-walls. This information can
also be found on the tire label or the air pressure molded
on the tire side-wall.
The most important things you can do to maintaining
proper
tire pressure are observe all tire and trailer
maximum carrying capacities, avoid road hazards, and
inspect the tires for cuts, slashes and other irregularities.
These practices, along with other care and maintenance,
can improve handling, help protect you and others from
avoidable breakdowns and accidents, improve fuel
economy, and increase the life of your tires.
Make tire safety a regular part of your trailer maintenance
routi
ne. The time you spend is minimal compared to the
amount of time, inconvenience, and potential safety
hazards that can occur from a flat tire or failure.
Basic Tire Maintenance
Properly maintained tires improve the load-carrying
capability of your trailer. You can help avoid flat tires and
tire failures by maintaining proper tire pressure, observing
tire and trailer capacity limits, avoiding road hazards, and
inspecting your tires regularly.
Identifying Your Recommended Tire
Pressure and Maximum Load Carrying
Capacity for Your Trailer
Both the tire placard and the VIN label are permanently
attached on top of the frame of your trailer and have the
required information printed on them. They also list the
maximum load that can be placed on the trailer without
exceeding the load limits of the tires or the trailers other
components. These labels indicate the manufacturer’s
information including:
• Recommended tire size.
• Recommended tire inflation pressure.
• The maximum weight the trailer is designed to
carry.
• Gross vehicle weight rating of the trailer.
• Gross axle weight rating of the trailer.
Understanding Tire Pressure and Load
Limits
Tire inflation pressure is the level of air in the tire that
provides it with the load-carrying capacity and affects the
overall performance of the trailer. The tire inflation
pressure is a number that indicates the amount of air
pressure that is inside the tire. It is measured in pounds
per square inch (PSI). The tire must be inflated to the air
pressure as designated on the labels. Also listed on the
labels is the air pressure in kilo Pascals (kPa), which is a
metric measurement. Tire manufacturers determine the air
pressure to maximize the amount of weight the tires can
safely carry. The proper tire pressure for your trailer tires is
referred to as the “recommended cold inflation pressure.”
It is difficult to obtain the recommended tire pressure if
your tires are not cold when the reading is taken because
the air will expand when it is warmed by towing down the
road, thus increasing the air pressure inside. If air is added
to a tire that is low the air pressure should never exceed
the recommended pressure.
It is important to check your trailer’s tire pressure at least
once a m
onth for the following reasons:
Most tires will naturally lose air over time.
Tires can lose air suddenly if driven over an object that
punctur
es or cuts the tire. Sometimes a sharp blow from a
pothole or curb can knock the tire loose from the rim
causing immediate deflation.
Maintaining Proper Tire Pressure
Locate the recommended tire pressure on the trailer's tire
information placard or owner's manual.
Record the tire pressure of all tires. If the tire pressure is
too high i
n any of the tires, slowly release air by gently
pressing on the tire valve stem with the edge of your tire
gauge until you get the correct pressure.
If the tire pressure is too low, note the difference between
the meas
ured tire pressure and the correct tire pressure.
These “missing” pounds of pressure are what you will
need to add.
Add the missing pounds of air pressure to each tire that is
under i
nflated.
Check all tires to make sure they have the same air
pres
sure.
If you have been towing your trailer and think that a tire is
under i
nflated, fill it to the recommended cold inflation
pressure indicated on your trailer's tire label placard or the
VIN label. You can also check the sidewall of the tire for a
correct tire inflation pressure. Your tire will have a slightly
lower air pressure because the tire is warm when you are
inflating it, but it will be much better than to continue to tow
it with the under inflation it may have had. Once the trailer
has been parked long enough to allow the tires to cool
down, recheck the tire pressure and add additional air to
return the tire pressure to the recommended level.
Karcher Trailer 3500E/H HDS 4.7/35 Operator’s Manual 9.808-363.0 - F

10
Important Trailer Safety Information
Tire Size
To maintain the trailer's carrying capacity and safety,
purchase only the same size tires as what were origi-
nally supplied on the trailer.
Safety Tips
Slow down if you have to go over a pothole or other
object in road.
Do not run over curbs and try not to strike the curb
wh
en parking.
For a free brochure visit:
www. nhtsa.dot.gov
FOR SAFETY: Before towing this trailer be sure
to read the instructions and warnings supplied in
this manual. Also read the information supplied
with your tow vehicle so you know and
understand it's limitations.
Never Tow the Trailer Before Checking:
• Coupler and latch assembly show no signs of
wear or damage.
• Coupler hitch and hitch ball are of the same
size.
• Coupler and safety chains are safely secured to
the hitch.
• Check all fasteners for proper tightness.
• Load is securely tied down to the trailer.
• Wheel lug nuts are properly tightened to the
right torque.
• Wheel bearings are properly adjusted and
maintained.
• Load is within the maximum load carrying
capacity of trailer.
• Tires are properly inflated and are road worthy.
• All trailer lighting is working properly.
• Tire pressure and tire condition
• Wheel lugs*
• Bearing lube and tightness
• Hitch
• Safety chains
• 12V running lights
• Distribution and security
• Caster up in travel position
* Check lug nuts for tightness before initial trip, at 10
mi
les, 25 miles and 50 miles. Recheck every 3 months
or 3000 miles.
NOTE: Checking all of the above steps before every
trip is key for safety.
IMPORTANT: The load must be distributed equally
on
the bed of the trailer if possible. Heavy, concen-
trated loads may cause damage or possible failure of
th
e trailer.
WARNING: Loads placed on the trailer must be
se
curely tied to the trailer. Always use appropriate
tie downs designed to restrict loads from moving
when properly attached. Failure to do so will allow
shifting of the load causing potential trailer failure
and/or loss of the load and personal injury.
AVERTISSEMENT: Les charges placées sur la
re
morque doivent être solidement attachées à la
remorque. Toujours utiliser des arrimages
appropriés conçus pour empêcher les charges de
bouger lorsqu'elles sont bien attachées. Le
nonrespect de cette consigne permettra le
mouvement de la charge, entraînant une défaillance
potentielle de la remorque et/ou une perte de la
charge et des lésions corporelles.
This trailer is equipped to meet all applicable federal
sa
fety standards in effect the day of manufacture. Check
local and state requirements regarding any additional
equipment that may be required.
The addition of optional equipment to your trailer may in-
crease the total weight of your trailer package to where it
now exceeds the maximum load carrying capacity of the
trailer.
Tow Vehicles
WARNING: Serious injury or property damage can
result if the total weight of your loaded trailer
exceeds the capacity of the hitch and/or your tow
vehicle.
AVERTISSEMENT: Des blessures graves ou de
do
mmages à la propriété peuvent survenir sir le
poids total de la remorque chargée excède la
capacité de l'attelage et/ou du véhicule remorqueur.
It is very important that you know and understand the
towing capabilities of your tow vehicle. This is especially
true with the braking abilities of the tow vehicle. You
should check with your authorized dealer to see what the
capabilities are for the total towing load and the maximum
allowable tongue weight for the vehicle you plan on using
for towing.
It is also important that the lighting system in the tow
vehi
cle has sufficient capacity support the additional load
the trailer lighting will add to the system.
A heavy duty flasher may be required to make your turn
si
gnals function properly.
Karcher Trailer 3500E/H HDS 4.7/35 Operator’s Manual 9.808-363.0 - F
11
Important Trailer Safety Information
Trailer Ball & Couplers
WARNING: Failure to properly engage the hitch ball
in the coupler ball socket and securely lock the
coupler latch mechanism can cause the trailer to
become detached from the tow vehicle while trav-
eling, which may cause serious injury or property
da
mage.
AVERTISSEMENT: Le non-respect d'engager
co
rrectement la boule d'attache dans la cavité de la
boule de l'attelage et de verrouiller solidement le
mécanisme du loquet de l'attelage pourrait mener la
remorque à se détacher du véhicule remorqueur
pendant le déplacement, ce qui pourrait causer des
blessures graves ou des dommages à la propriété
Ball diameter for which rating (GVWR) shall not exceed
th
e gross trailer weight marked on the trailer coupler.
The hitch balls have the rated load they are capable of
to
wing stamped Into the top of the ball.
Make sure the ball that you use to tow your trailer has the
sa
me capacity rating as the coupler.
Do not use a different size ball than the size the coupler
is
designed to use
.
Before Towing
Check mounting bracket hardware for wear and proper
tightness. Replace bent, broken, or worn hardware.
Tighten hardware to 75-94 ft. lbs. Use only the hardware
provided with the Trailer. If replacement hardware is
needed, order replacement
kit 8.924-356.0.
Make sure that the trailer safety chains are properly
co
nnected to the towing vehicle and trailer according to
SAE J684. See Safety Chain information in your manual.
Make sure that all trailer lighting is hooked up and
wo
rking properly.
Warning: Failure to follow all installation
instructions could result in coupler failure
AVERTISSEMENT: Le non-respect de toutes les
di
rectives d'installation pourrait entraîner une panne
du coupleur.
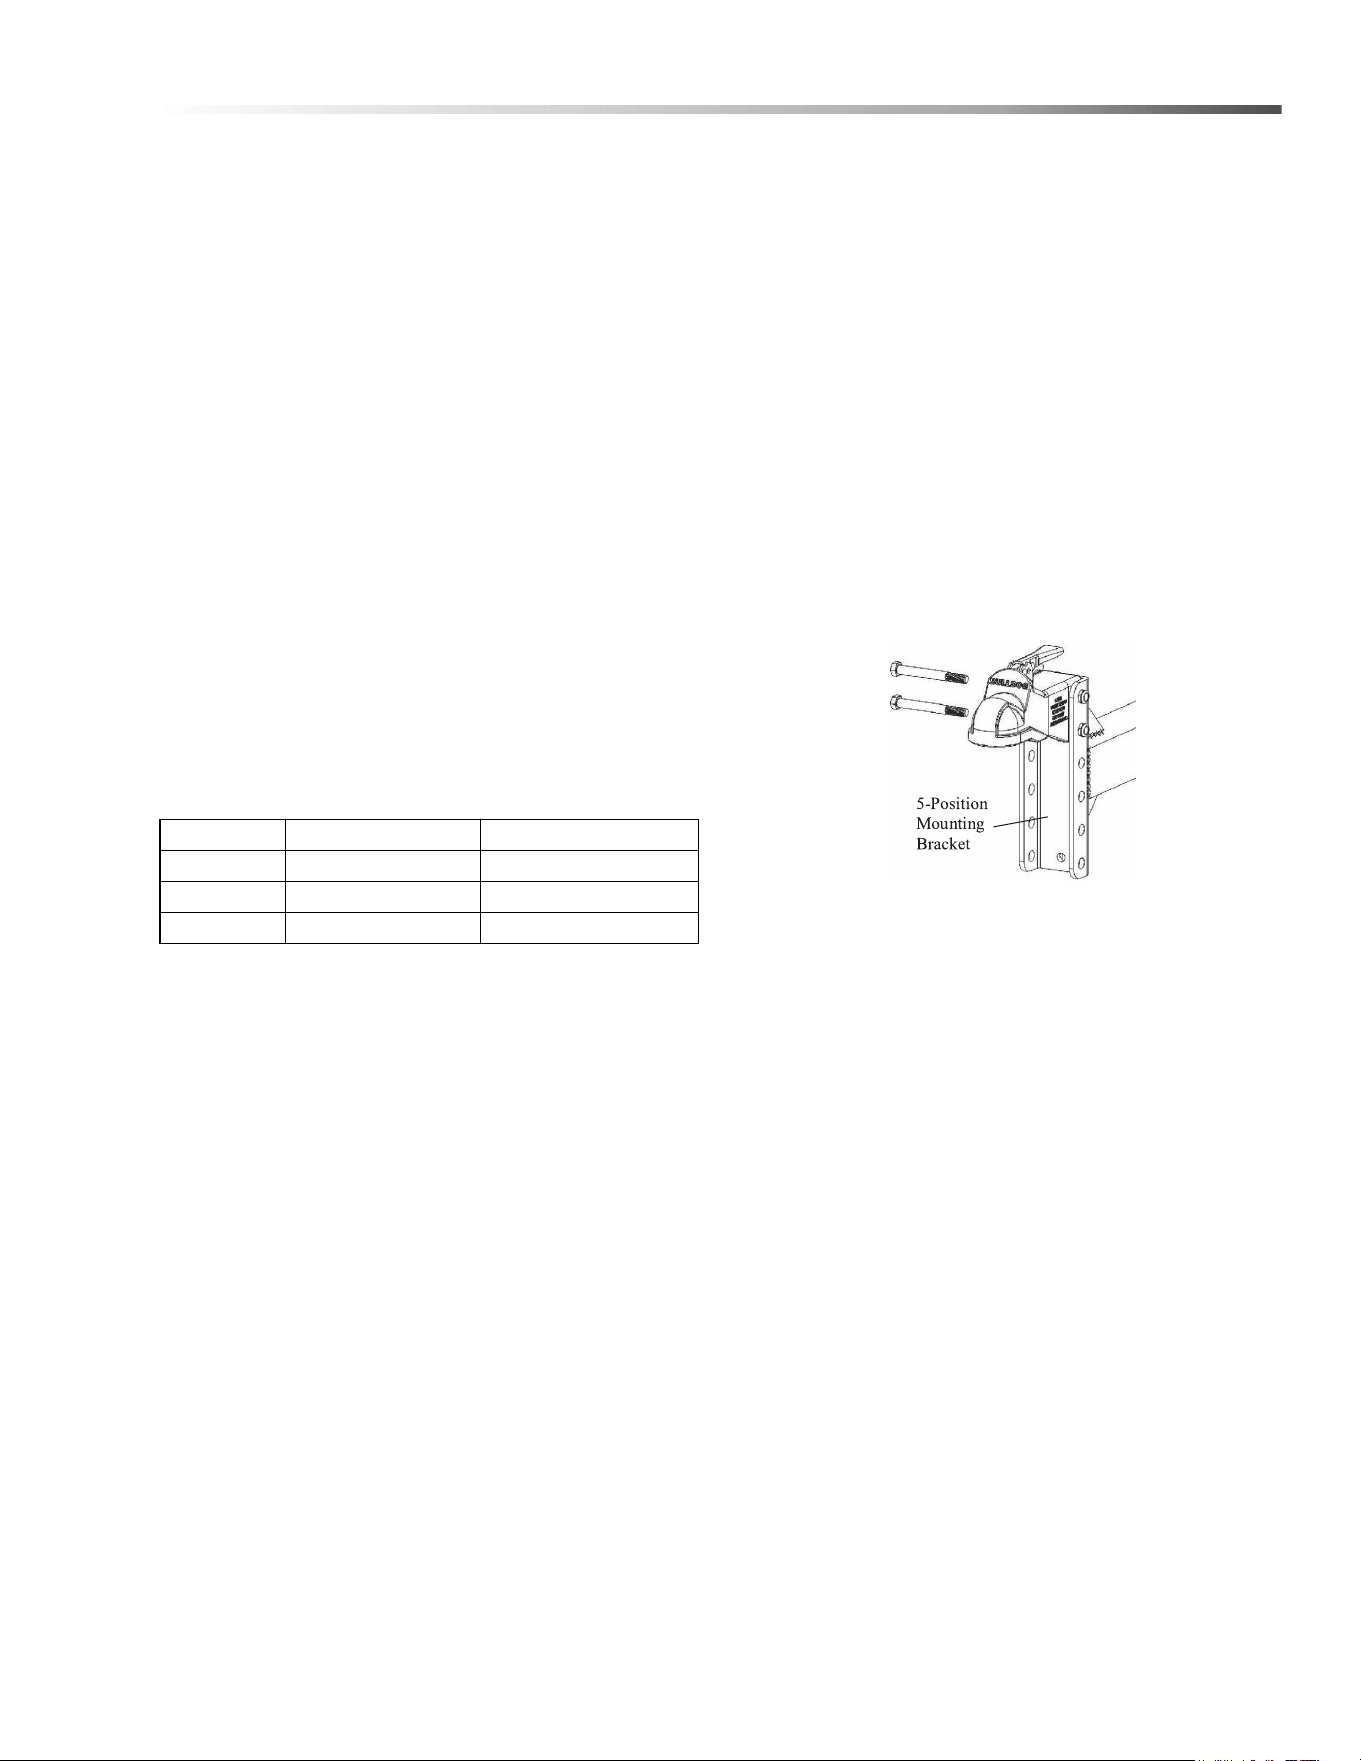
Variable Height Bracket:
Coupler operation must not be impaired in any way. Do
not use if coupler operation is impaired.
Bolting Instructions:
Align holes in coupler and mounting bracket.
NOTE: Coupler must be secured to mounting bracket
using two sets of holes in the mounting bracket.
Insert two (2) 5/8”x4.5”, grade 5 bolts through desired
m
o
unting bracket holes and coupler. For each bolt, Place
one (1) washer at the bolt head side and another at the
bolt thread side before assembling the nuts. Tighten lock
nuts to 90-96 ft. lbs. After installation, ensure coupler
operation is not impaired in any way. Do not use if
coupler operation is impaired. The hardware provided
with the trailer has a self-lubricating coating which is
taken into account for the tightening torque above, and is
lower than standard hardware and also is more consis
-
tent with re-torque specifications to first-torque than
st
andard hardware. Order replacements with the 8.924-
356.0 replacement kit, or consult your hardware vendor
for applicable, higher, torques for the application
.
Hitch Maintenance
Keep ball pocket and mechanism clean. The following
procedures should be performed at least annually:
• Check set screw torque Grease ball pocket
• Oil pivot points with SAE 30 wt. motor oil
Inspect retaining pin and replace if necessary.
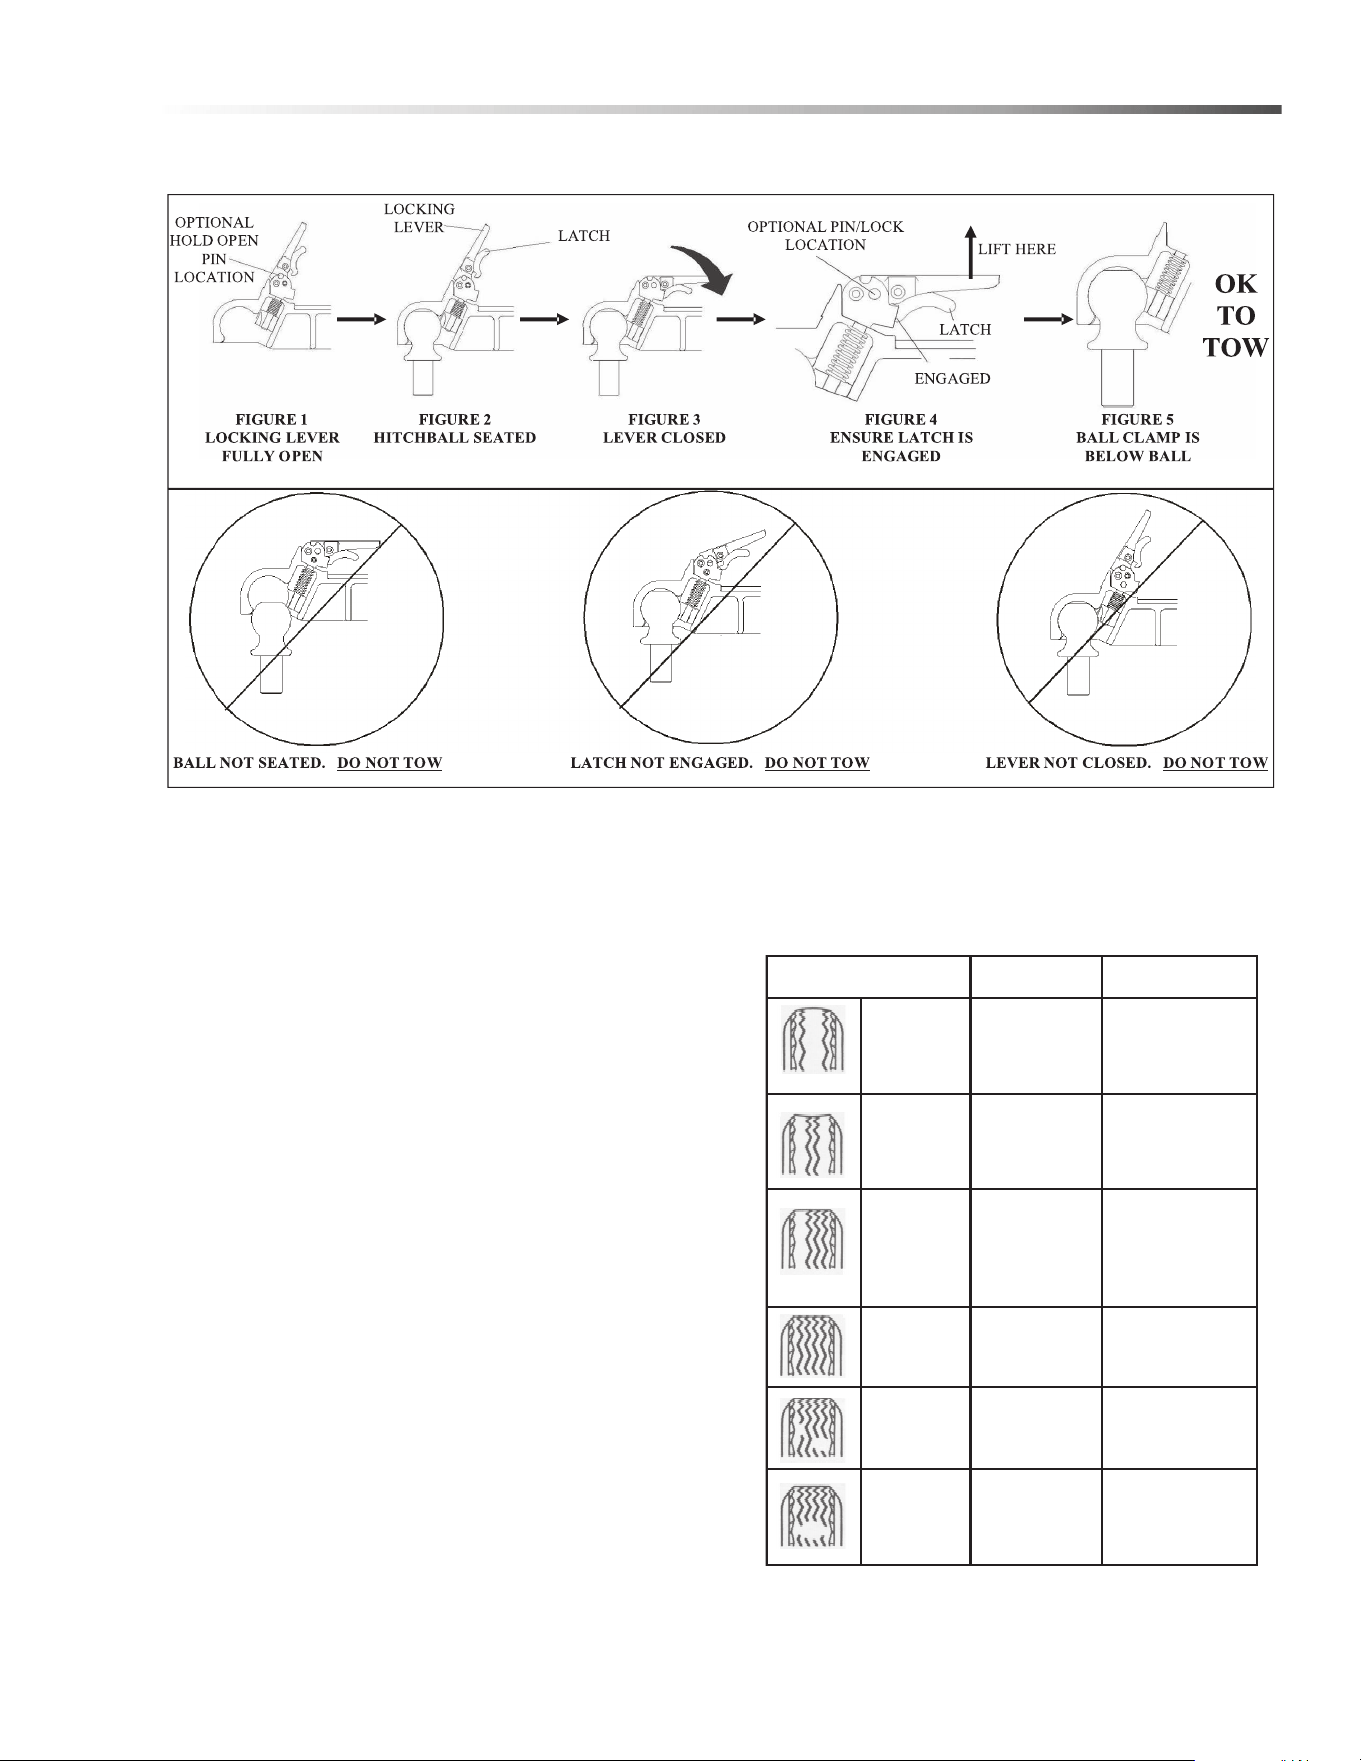
Hitch Operation
To Couple:
1. Block trailer wheels.
2. Align hitch ball beneath coupler.
3. Open coupler locking lever. While holding locking
lever open, lower the coupler over the hitch ball until
ball is fully seated into the ball pocket.
4. If locking lever is pinned open, remove pin. Move
locking lever to the closed position. Check that the
latch is engaged by lifting up on back of locking
lever. Also, check that the hitch ball is fully seated
and ball clamp is below the ball. If the ball is not
seated with lever in the closed position and latch
engaged, DO NOT TOW.
Class Coupler Ball Diameter
II
3,500# GVWR
2”
III
5,000# GVWR
2”
IV 8,000# GVWR 2 5/16”
Karcher Trailer 3500E/H HDS 4.7/35 Operator’s Manual 9.808-363.0 - F

12
Safety
Repeat the above steps.
5. OPTIONAL: Place a 5/16” pin or lock in hole shown
To Uncouple:
1. Block trailer wheels.
2. Open locking lever. While holding locking lever fully
open, raise trailer off of hitch ball.
NOTE: A 5/16” diameter pin can be used to hold the
locking lever open.
Hitch Coupler Troubleshooting
If the coupler becomes damaged it must be repaired or
replaced before towing. When the coupler is placed on
the ball, the latch should close firmly. Keep the latch
mechanism lightly oiled and clean. Items to check for are
as follows:
1. Latch does not grasp ball securely:
• Check the ball size. Make sure the ball and
coupler are the same size.
2. Latch does not snap into full latch position:
• Check adjustment. Latch mechanism may be too
tight.
• Check to see that the coupler housing has not
been damaged, keeping the ball hitch from fitting
completely into the housing as designed.
3. Keep the tongue blocked up when not in use so the
coupler and mechanism are not in the ground being
exposed to dirt and moisture.
4. Apply a small amount of an automotive grease to the
ball before hitching coupler to prevent wear of the
two parts during towing.
5. Make sure the latch safety pin is in position before
towing.
Coupler & Ball Engagement
If the coupler and towing ball resist attempts to make
engagement, do not force latch assembly. Instead, check
the ball diameter to verify that it conforms to Society of
Automotive Engineers (SAE) specifications. Standard
two-inch diameter ball should be within the limits of
2.000-inches to 1.970-inches. Balls larger than 2.000-
inches will not readily fit the coupler. A two-piece coupler
ball is not recommended.
If the coupler becomes damaged it must be repaired or
re
placed before towing. When the coupler is placed on
the ball, the latch should close firmly. Keep the latch
mechanism lightly oiled and clean.
Improper engagement of the coupler and ball can cause
da
mage if the vehicles separate in transit, thus, caution
must be exercised to insure a secure hook-up. Lower
the coupler onto the ball with the coupler latch in the
vertical position. Continue to lower the trailer tongue until
the jack clears the ground, then flip the coupler latch to
its locked (horizontal) position. At this point visually
observe that the ball is fully engaged in the ball hitch. An
even better check to make sure the two are fully
engaged is to raise the tongue of the trailer again using
the jack. Raise until the ball hitch connection starts to
raise the rear of the tow vehicle. If the connection was
not properly made, the ball and socket will separate as
the tongue of the trailer is raised.
Safety Chains
Listed in the chart below are the different class sizes of
safety chains and the rated load each chain must be
capable of withstanding. Your trailer is equipped with
safety chains that meet the requirements of D.O.T Regu-
lation 393.70.
WARNING: Failure to properly attach safety chains
b
e
tween the trailer and tow vehicle can result in a
runaway trailer.
AVERTISSEMENT: Le non-respect de fixer
co
rrectement les chaînes de sécurité entre la
remorque et le véhicule remorqueur peut mener à
l'emballement de la remorque.
WARNING: To avoid accidents, before trailering:
• Hitch only to ball size marked on coupling.
• Ball clamp must capture ball and lever or
hand wheel is fully clamped.
• Cross safety chains under coupling.
• Allow only enough slack for turns.
AVERTISSEMENT: Pour éviter les accidents avant de
p
r
océder à un remorquage :
• Atteler uniquement à une boule dont la taille
correspond à celle indiquée sur l'attelage.
• La boule de serrage doit capturer la boule et
le levier ou le volant à main est complètement
serré.
• Croiser les chaînes de sécurité sous
l'attelage.
• Croiser les chaînes de sécurité sous
l'attelage..
Trailer
C
l
ass
Trailer Weight
GVWR in LBS
Minimum Braking
Strength in LBS.
I to 2,000 2,000
II 2,000 to 3,500 3,500
III 3,500 to 5,000 5,000
IV 5,000 to 7,000 7,600
Karcher Trailer 3500E/H HDS 4.7/35 Operator’s Manual 9.808-363.0 - F
13
Safety
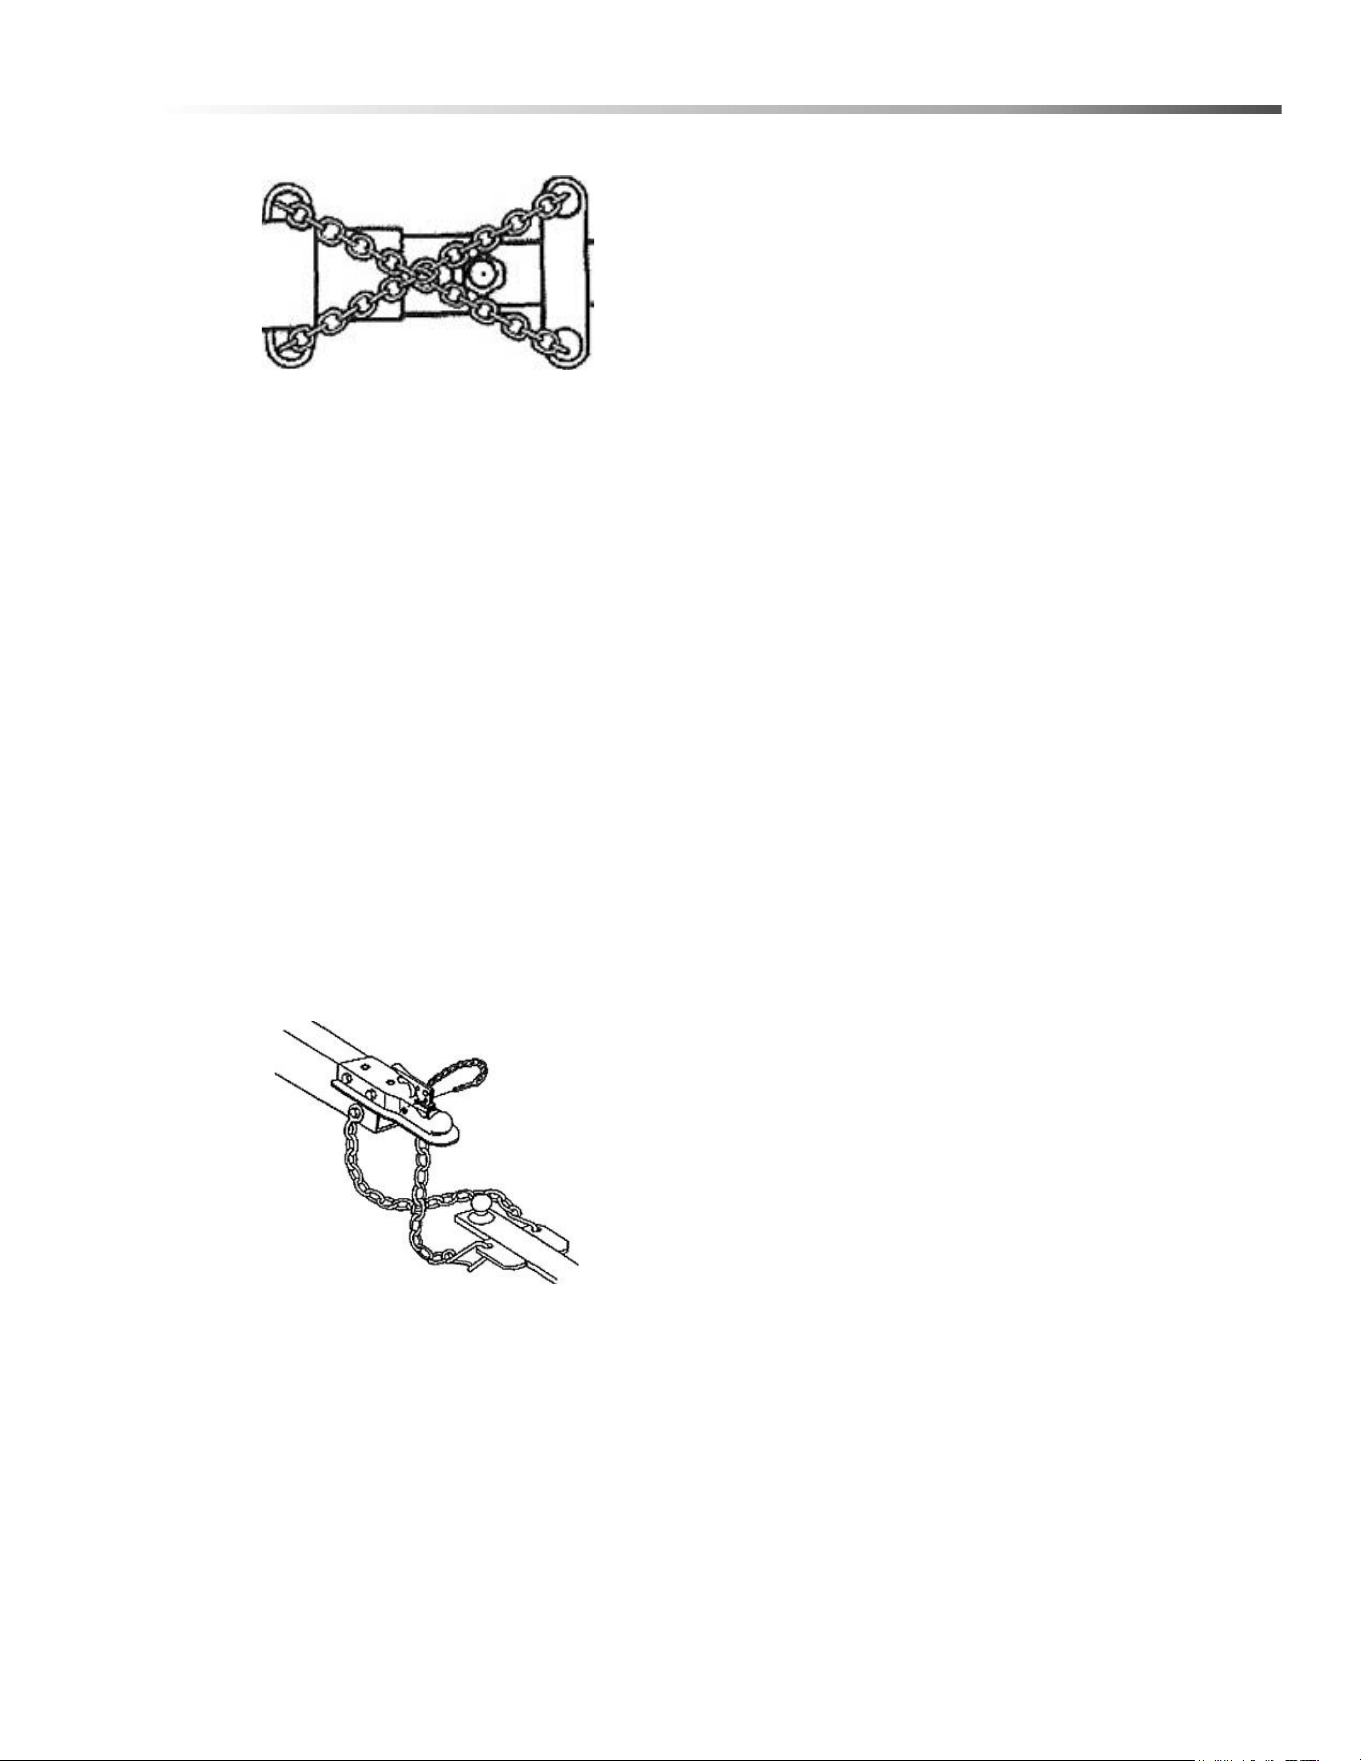
Bottom View
The safety chains on your trailer are an added insurance
that it will not become detached from the tow vehicle. All
safety chains are provided with an added clasp to keep
them from becoming accidentally detached from the tow
vehicle. Your trailer hitch on the tow vehicle should have
two attaching holes or rings for attaching the safety
chains, preferably one on each side of the ball hitch.
Crisscross the chains under the tongue, the chain on the
left side of the trailer tongue attached to the right side of
the ball hitch, the chain on the right side of the trailer
tongue attached to the left side of the ball hitch.
This prevents the trailer tongue from dropping to the road
sh
ould the coupler or ball hitch fail. The chains should be
rigged as tight as possible with just enough slack to allow
tight turns to be made. This can be accomplished by
twisting the chain hook in a clockwise or counterclock
-
wise direction thus twisting the link spacing and making
th
e chain shorter. Also by keeping your chains as short
as possible you prevent them from dragging on the road
and wearing the chain links. If for any reason you find it
necessary to replace a safety chain, use only original
equipment.
Load-Carrying Capacity
Located on the front left-hand side of the frame, (either the
inside or the outside) is the VIN (Vehicle Identification
Number) tag. It will show the GVWR (Gross Vehicle
Weight Rating) which is the maximum load that can be
applied to the tires on the trailer. The GVWR and the
carrying capacity of the trailer are based on the tire size
installed on the trailer.
The GVWR is the maximum carrying capacity of the trailer
wi
th its respective tires. It may not necessarily equal the
total GVWR of the trailer less the empty weight of the
trailer because there may be another controlling factor
such as frame strength that reduces the carrying capacity
to what is listed on the VIN tag.
The tire label will list the tire size that was installed on the
trai
ler as original equipment when it was sold to you, the
consumer. It also lists the maximum carrying capacity of
the trailer.
IMPORTANT: The total weight of the load must never
exceed t
he weight of cargo listed on the tire label and/
or the maximum load carrying capacity listed on the
VIN tag on your trailer. The GVWR (Gross Vehicle
Weight Rating) listed is the maximum total weight of
the trailer with accessories and all cargo allowable to
be carried on the tires that are installed on the trailer.
WARNING: Fishtailing caused from improper tongue
weig
ht on the tow vehicle hitch ball can cause loss of
control of the tow vehicle and resulting serious injury
or property damage.
AVERTISSEMENT: Une embardée causée par un
po
ids de l'attelage inapproprié sur la boule d'attache
du véhicule remorqueur peut causer une perte de
contrôle du véhicule remorqueur et causer des
blessures graves et des dommages à la propriété.
CAUTION: The maximum load applied to the trailer
mu
st never exceed the carrying capacity of the trailer
as stated on the VIN label and/or the tire placard.
Doing so may cause failure of one or more component
parts of the trailer causing potential damage to the
trailer and/ or a potential accident. All concentrated
loads must be spread over as large an area as
possible to eliminate potential damage to the decking.
ATTENTION: Risque de blessures causées par une
bu
se mal verrouillée. Agir de la sorte risquerait de
causer une défaillance d'une ou plusieurs
composantes de la remorque, causant des dommages
potentiels à la remorque et/ou un accident potentiel.
Toutes les charges concentrées doivent être réparties
sur une surface aussi large que possible pour
éliminer tout dommage potentiel au patio.
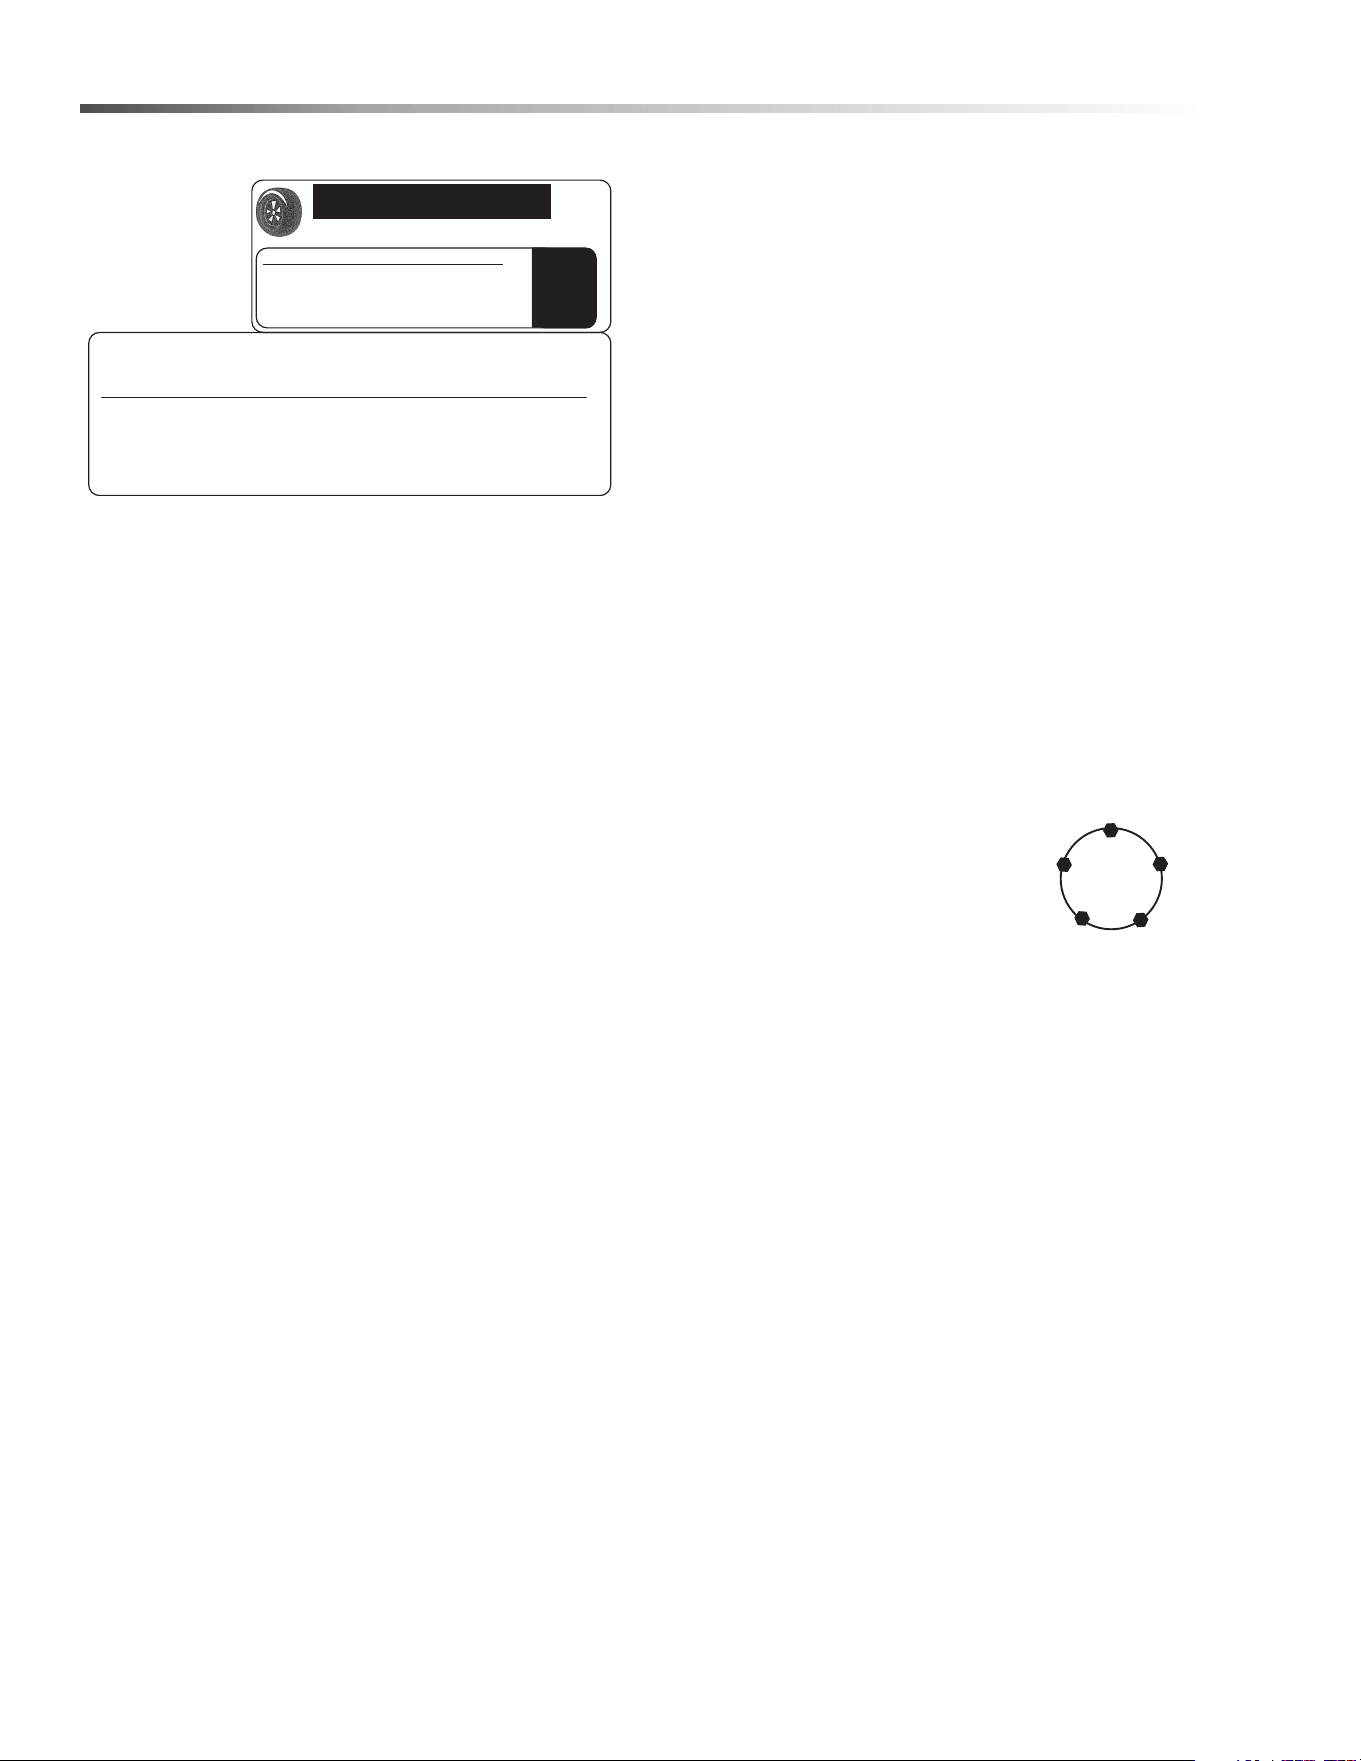
Shown next is an example of the tire label that is placed on
your
trailer showing the items just discussed above. Once
you have familiarized yourself with the information
supplied on the example tire label and VIN tag, check the
tire size and capacity of your trailer as shown on the VIN
tag on your trailer.
Karcher Trailer 3500E/H HDS 4.7/35 Operator’s Manual 9.808-363.0 - F
14
What To Check and How to Check it
Proper Weight Distribution & Tongue
Weight
Ensuring that your trailer has the proper GVWR is very
important. Once that has been established and you
have the load on the trailer it is equally important that
you have proper weight distribution.
Tongue Weight
The tongue weight on your trailer is 10%-15% of the
total weight of the trailer and all the cargo that it is
carrying. This is the amount of weight that is then
transferred to the tow vehicle through the ball hitch.
Example: The total weight of the trailer with load is
25
00 pounds. The tongue weight should not be less
than 250 pounds (10%).
Too light of tongue weight can cause the trailer to “fish-
tail” (sway Weight Rating) as you travel down the
hi
ghway. This creates excessive strains on the tow
vehicle, hitch and on the trailer itself. It can very easily
lead to an accident.
To adjust for too light of a tongue weight the load must
be shifted for-ward with respect to the axle. This will
increase the weight that is transferred to the tongue.
Adjustments should be made until the tongue weight
falls within 10% -15% recommended range. Likewise, if
you have too much tongue weight adjust the weight
backwards with respect to the axle until the tongue
weight falls in the recommended range
Tow vehicles vary on how much tongue weight they can
support for proper towing.
Tire Pressure
Proper air pressure for your tires is printed on the
sidewall. Check pressure while tires are cold. Do not
raise or lower pressure to meet load. Pressure other
than recommended pressure will lead to excessive tire
wear or tire failure. Balancing recommended.
Wheels
Check wheels for hole
elongation or “out of round”. This condition can be
ca
used by lug nuts not being tight or being too tight.
Trailer wheels can be damaged by chuck holes or curb
jumping. You may not be aware of the road shock to the
wheels without periodic checks. Replace any wheel
that is bent. Replace any wheel if you see elongation of
the bolt holes.
Wheel Lugs
Wheel lug nuts must be tightened with a torque wrench.
Refer to the chart below for proper torque.
1. Start all bolts or nuts by hand to prevent cross
threading.
2. Tighten bolts or nuts following
sequence at right.
3. The tightening of the fasteners
should be done in stages.
Following the recommended
sequence, tighten fasteners per
wheel torque chart below.
4. Wheel nuts/bolts should be torqued before first
road use and after each wheel removal. Check and
re-torque after the first 10 miles, 25 miles and
again at 50 miles. Check periodically thereafter.
TIRE AND LOADING INFORMATION
RENSEIGNEMENTS SUR LES PNEUS ET LE CHARGEMENT
The weight of cargo should never exceed
XXXX kg or XXXX lbs
TIRE SIZE COLD TIRE PRESS.
REAR XXXXXXX XXX KPA (XX PSI)
INTER XXXXXXXXX
FRONT XXXXX
SPARE XXXXX
SEE OWNER’S
MANUAL FOR
ADDITIONAL
INFORMATION
VOIR LE MANUAL
DE L’USAGER
POUR PLUS DE
RENSEIGNEMENTS
MANUFACTURED BY: KARCHER NORTH AMERICA INC. DATE OF MFG.:XX/XXXX
GAWR (EACH AXLE)
V.I.N. : TYPE : TRAILER
TRX-XXXX
WITH TIRES RIMS AT COLD
XXXX KG (XXXX LB) XXXX XXXX XXX KPA (XX PSI) SINGLE
THIS VEHICLE CONFORMS TO ALL APPLICABLE U.S. FEDERAL MOTOR VEHICLE SAFETY STANDARDS
IN EFFECT ON THE DATE OF MANUFACTURE SHOWN ABOVE.
XXXXXXXXXXXXXXXXX
GVWR (XXXX KG (XXXX LB)
Wheel Torque Requirements
Wheel Size
Torque Sequence
1st Stage 2nd Stage 3rd Stage
15” 20-25 50-60 80-90
Karcher Trailer 3500E/H HDS 4.7/35 Operator’s Manual 9.808-363.0 - F
1
2
3
4
5
15
What to Check and How to Check
Correct Ball Seating
Ball Coupler Hitches
Coupler assembly includes a latch lever and latch lever
safety pin or hitch pin. Be sure the latch lever is locked
and the pin properly secured before moving your trailer.
The pin can be engaged fully only if ball is properly
seated in the coupler.
Tires
Before mounting tires onto wheels make certain that
the rim size and contour is approved for the tire as
shown in the Tire and Rim Association Yearbook or the
tire manufacturer’s catalog. Also make sure the tire will
carry the rated load. If the load is not equal on all tires
due to trailer weight distribution, use the tire rated for
the heaviest wheel position.
Note: The capacity rating molded into the sidewall of
th
e tire is not always the proper rating for the tire if used
in a trailer application. Use the following guideline:
1. LT and ST tires: use the capacity rating molded into
the tire.
2. Passenger Car Tires: Use the capacity rating
molded into the tire sidewall divided by 1.10.
Use tire mounting procedures as outlined by the
Ru
bber Manufacturer’s Association or the tire manufac-
turers.
NOTE: Tire wear should be checked frequently
because once a wear pattern becomes firmly
established in a tire it is difficult to stop, even if the
underlying cause is corrected.
WEAR PATTERN CAUSE ACTION
ACTION
Center
Wear
Over
Inflation
Adjust pressure
to particular
load per tire
catalog.
Edge
Wear
Under
Inflation
Adjust pressure
to particular
load per tire
catalog.
Side Wear
Loss of
camber or
overloading
Make sure load
doesn't exceed
axle rating.
Align at
alignment shop.
Toe Wear
Incorrect
toe-in
Align at
alignment shop.
Cupping
Out of
balance
Check bearing
adjustment and
balance tires.
Flat
Spots
Wheel
lockup & tire
skidding
Avoid sudden
stops when
possible and
adjust brakes.
Karcher Trailer 3500E/H HDS 4.7/35 Operator’s Manual 9.808-363.0 - F
16
What to Check and How to Check
Breakaway Switch & D.O.T. Wet Cell
Battery
After hitching to the tow vehicle, pull the safety pin on
the breakaway switch. Check to see if system is
operational. Push safety pin back in to its original
po
sition.
Check battery fluid level every 60-90 days. Remove
co
ver. There are two fill caps. Refill with distilled water
only.
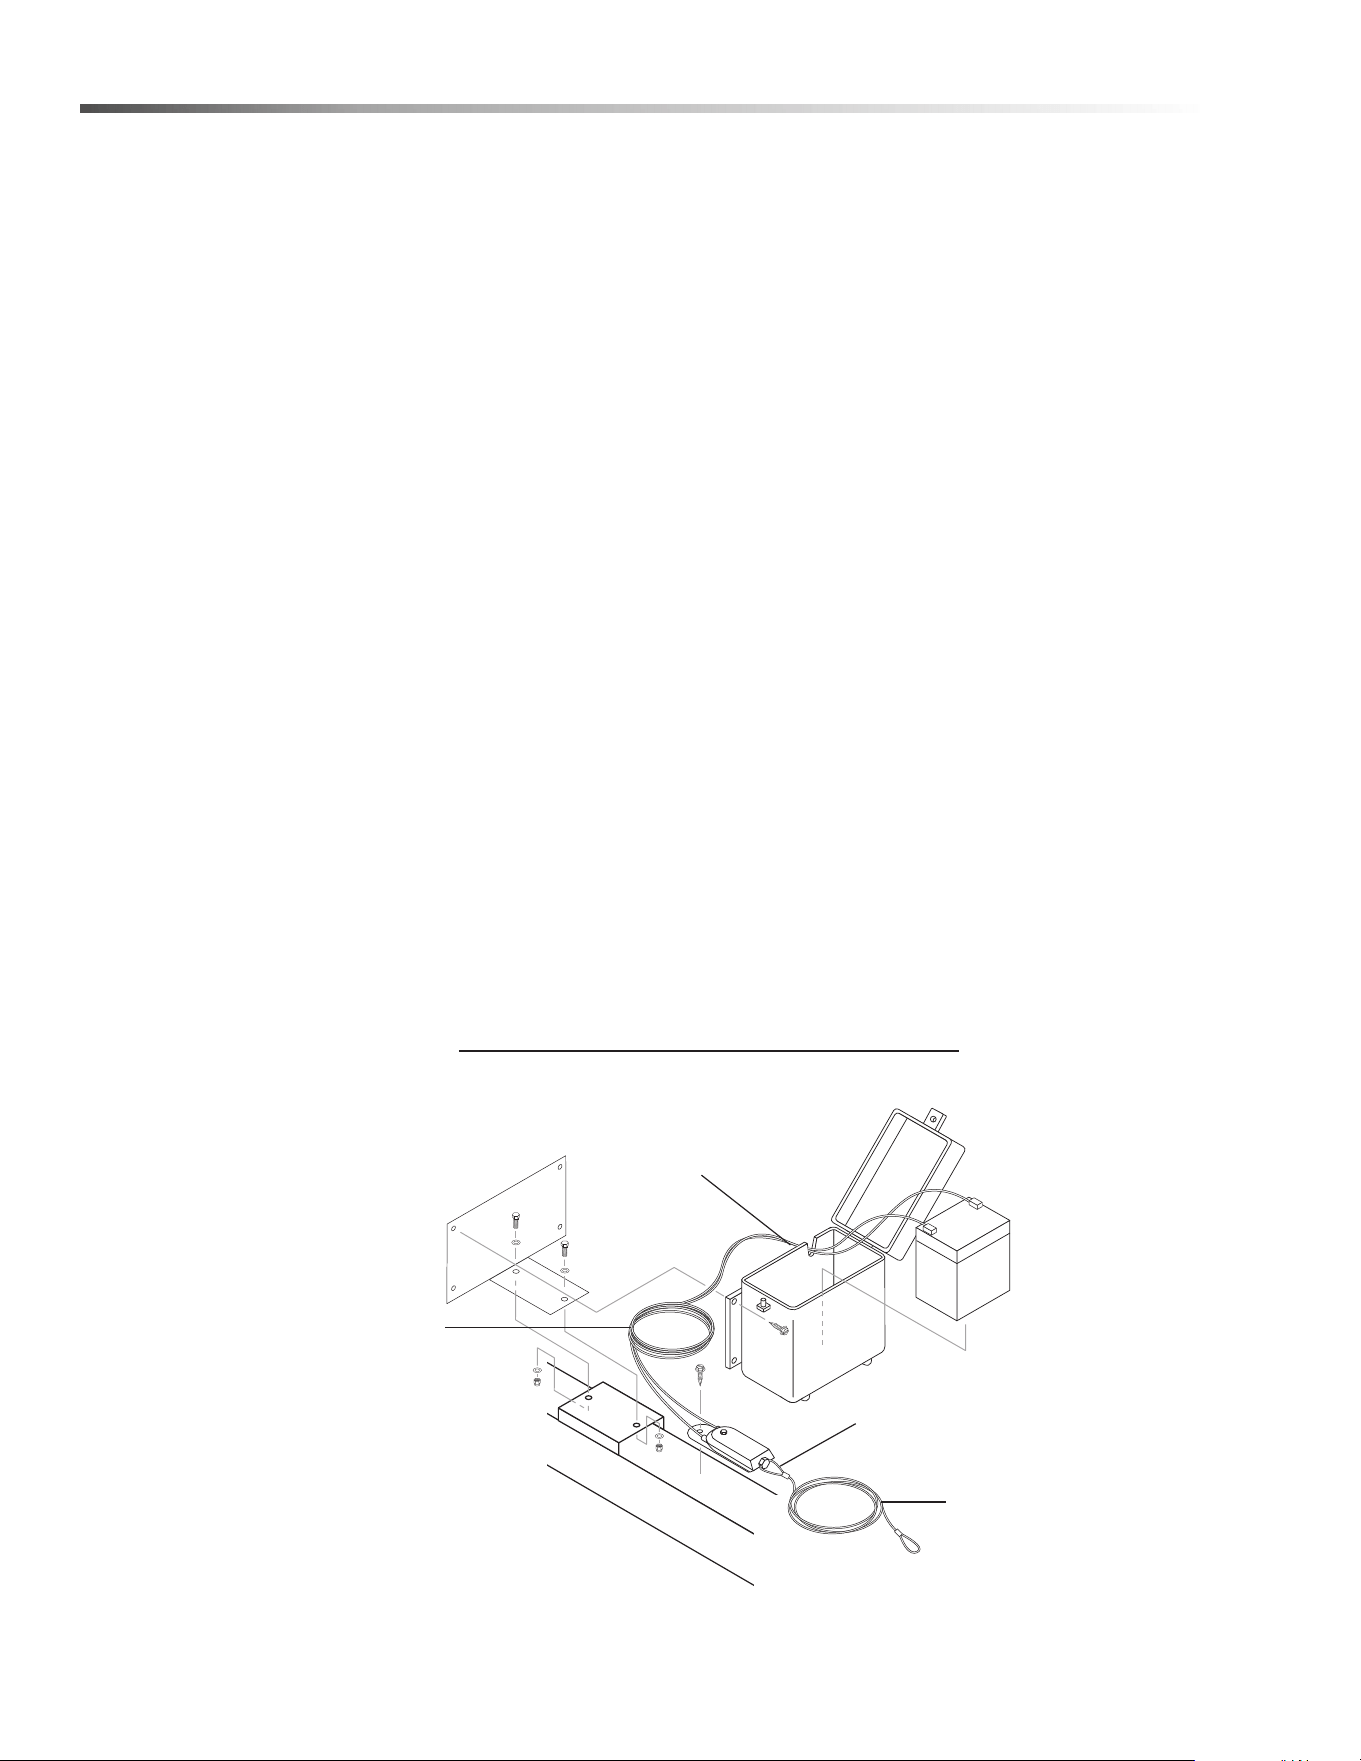
Breakaway Switch Mounted on an A-
Frame
Attach breakaway switch cable securely in a straight
line to the tow vehicle. Locate attachments so little
“slack” is left in the cable, but enough slack to allow for
turning without disengaging the pin. The cable will
activate brakes the instant a trailer becomes disen-
gaged. Brake adjustment is critical to stopping a disen-
gaged trailer.
Check Breakaway System & Brakes Before
Each Trip
1. Disconnect 12V plug from tow vehicle.
2. Pull breakaway pin.
3. While pin is pulled, move tow vehicle forward.
Brake should be on and wheels locked.
4. Replace pin and secure to tow vehicle. Do not loop
over hitch ball.
5. Plug 12V connector into tow vehicle receptacle.
6. Test brakes with brake controller.
NOTE: When disconnecting trailer from tow vehicle,
make sure to replace safety pin.
Brakes
Your trailer is equipped with electric brakes.
Complete service and repair information for the electric
br
akes is found in the Axle Break Service Manual that
is furnished with your trailer,
Note: It is important to strictly adhere to the axle break
in
structions for brake service and repair. In this way,
you are protecting the validity of all applicable warran-
ties.
Burnishing the Brakes
Brakes on a new trailer may tend to “grab” or pulsate.
This is normal. To correct the situation, pull the trailer
with the trailer brake control slightly engaged a short
distance (about 1000 ft or until trailer does not grab or
pull to one side anymore). This action smooths down
the brake bands.
NOTE: Do not lock up the wheels
Karcher Trailer 3500E/H HDS 4.7/35 Operator’s Manual 9.808-363.0 - F
Breakaway Battery
(Two fill caps
underneath cover)
P
ower Cable
Breakaway
Pin
Cable to Vehic
le
Breakaway Battery on A-Frame

17
Maintenance
Brake Adjustment
Brakes should be adjusted (1) after the first 200 miles
of operation after the brake shoes and drums have
“seated”, (2) at 3000 mile intervals and (3) as use and
performance require. The brakes should be adjusted in
the following manner:
1. Jack up trailer and secure on adequate capacity
jack stands. Check that wheel and drum rotate
freely.
2. Remove adjusting hole cover from adjusting slot on
bottom of brake backing plate.
3. With screwdriver or standard adjusting tool, rotate
the starwheel of the adjuster assembly to expand
the brake shoes. Adjust the brake shoes out until
the pressure of the linings against the drum makes
the wheel very difficult to turn.
NOTE: With drop spindle axles, a modified adjusting
tool with about an 80 degree angle should be used.
4. Then rotate starwheel in opposite direction until
wheel turns freely with slight lining drag.
5. Replace the adjusting hole cover and lower wheel
to ground.
6. Repeat above procedure on all brakes.
CAUTION: Never crawl under your trailer unless it
is
resting on properly placed jack stands.
ATTENTION: Ne jamais se glisser sous la remorque
à
moins qu'elle ne repose correctement en place
sur des chandelles.
Do not lift or place supports on any part of the
suspension system.
Brake Cleaning & Inspection
Your trailer brakes must be inspected and serviced at
yearly intervals or more often as use and performance
require. Magnets and shoes must be changed when
they become worn or scored thereby preventing inade-
quate vehicle braking.
Clean the backing plate, magnet arm, magnet and
br
ake shoes. Make certain that all the parts removed
are replaced in the same brake and drum assembly.
Inspect the magnet arm for any loose or worn parts.
Check shoe return springs, hold down springs and
adjuster springs for stretch or deformation and replace
if required.
CAUTION: Asbestos Dust Hazard. Since some
br
ake shoe friction materials contain asbestos,
certain precautions need to be taken when
servicing brakes:
ATTENTION: Risque lié à la poussière d'amiante.
Ét
ant donné que les matériaux de friction de
certains segments de frein contiennent de
l'amiante, certaines mesures de précaution doivent
être prises au moment de procéder à des opéra-
tions d'entretien des freins.
1. Avoid creating or breathing dust.
2. Avoid machining, filing or grinding the brake
linings.
3. Do not use compressed air or dry brushing for
cleaning. (Dust can be removed with a damp
brush).
Karcher Trailer 3500E/H HDS 4.7/35 Operator’s Manual 9.808-363.0 - F

18
Maintenance
Trailer Storage
Preparation
If your trailer is to be stored for an extended period of
time or over the winter, it is important that the trailer be
prepared properly.
1. Remove the emergency breakaway battery and
store inside, out of the weather. Charge the battery
at least every 90 days.
2. Jack up the trailer and place jack stands under
trailer frame so that the weight will be off the tires.
Never jack up or place jack stands on the axle tube
or on the equalizers.
3. Lubricate mechanical moving parts that are
exposed to weather, such as the hitch and suspen-
sion parts.
NOTE: On oil lubricated hubs the upper part of the
roller bearings are not immersed in oil and are subject
to potential corrosion. For maximum bearing life it is
recommended that you revolve your wheels
periodically (every 2-3 weeks) during periods of
prolonged storage.
After Prolonged Storage — Inspection
Procedures
Before removing trailer from jack stands:
1. Remove all wheels and hubs or brake drums. Note
which spindle and brake that the drum was
removed from so that it can be reinstalled in the
same location.
2. Inspect suspension for wear.
3. Check tightness of hanger bolt, shackle bolt and U-
bolt nuts per recommended torque values.
4. Check brake linings, brake drums and armature
faces for excessive wear or scoring.
5. Check brake magnets with an ohmmeter. The
magnets should check 3.2 ohms. If shorted or worn
excessively, replace.
6. Lubricate all brake moving parts using a high
temperature brake lubricant. (Lubriplate or equiva-
lent).
CAUTION: Do not get grease or oil on brake linings
or
magnet face.
ATTENTION: Ne pas permettre à de la graisse ou de
l'
huile d'entrer en contact avec les garnitures de
frein ou l'aimant.
7. Remove any rust from braking surface and
armature surface of drums with fine emery paper or
crocus cloth. Protect bearings from contamination
while so doing.
8. Inspect oil or grease seals for wear or nicks.
Replace if necessary.
9. Lubricate hub bearings. Refer to procedure in
manual.
10. Reinstall hubs and adjust bearing per instructions
in manual.
Karcher Trailer 3500E/H HDS 4.7/35 Operator’s Manual 9.808-363.0 - F

19
Notes
Karcher Trailer 3500E/H HDS 4.7/35 Operator’s Manual 9.808-363.0 - F

20
Maintenance
Pressure Washer Troubleshooting
Problem Possible Cause Solution
LOW OPERATING
PR
ESSURE
Faulty pressure gauge Install new gauge.
Insufficient water supply
Use larger supply hose; clean filter at water
in
let.
Old, worn or incorrect spray nozzle
Match nozzle number to machine and/or
re
place with new nozzle.
Belt slippage Tighten or replace; use correct belt.
Plumbing or hose leak
Check plumbing system for leaks. Re-tape
le
aks with Teflon tape.
Faulty or mis-adjusted unloader valve
Adjust unloader for proper pressure. Install
re
pair kit when needed.
Worn packing in pump Install new packing kit.
Fouled or dirty inlet or discharge valves in
pu
mp
Clean inlet and discharge valves.
Worn inlet or discharge valves Replace with valve kit.
Obstruction in spray nozzle Remove obstruction.
Leaking pressure control valve Rebuild or replace as needed.
Slow engine RPM Set engine speed at proper specifications.
Pump sucking air
Check water supply and possibility of air
se
epage.
Valves sticking Check and clean or replace if necessary.
Unloader valve seat faulty Check and replace if necessary.
BURNER WILL
NO
T LIGHT
Little or no fuel Fill tank with fuel.
Improper fuel or water in fuel Drain fuel tank and fill with proper fuel.
Clogged fuel line Clean or replace.
Plugged fuel filter Replace as needed.
Mis-adjusted burner air bands Readjust air bands for clean burn.
Little or no fuel pressure from fuel pump
Increase fuel pressure to specification and/
or
replace fuel pump. Test with pressure
gauge.
Faulty burner transformer
Test transformer for proper arc between
co
ntacts. Replace as needed.
Disconnected or short in electrical wiring
All wire contacts should be clean and tight.
No
breaks in wire.
Flex coupling slipping on fuel pump shaft or
burner motor shaft
Replace if needed.
On-Off switch defective
Check for electrical current reaching burner
as
sembly with burner switch on.
Heavy sooting on coil and burner can cause
in
terruption of air flow and shorting of elec-
trodes
Clean as required.
Improper electrode setting
Check and reset according to diagram in
Op
erator's Manual.
Fuel not reaching combustion chamber
Check fuel pump for proper flow. Check
so
lenoid flow switch on machines with spray
gun control, for proper on-off fuel flow
control.
Karcher Trailer 3500E/H HDS 4.7/35 Operator’s Manual 9.808-363.0 - F

21
Maintenance
BURNER WILL
NOT LIGHT
Clogged burner nozzle Clean as required.
Thermostat faulty or slow engine speed Increase engine RPM to increase voltage.
Flow switch malfunction
Remove, test for continuity and replace as
needed.
Flow solenoid malfunction Replace if needed.
FLUCTUATING
PR
ESSURE
Valves worn Check and replace if necessary.
Blockage in valve Check and replace if necessary.
Pump sucking air
Check water supply and air seepage at
jo
ints in suction line.
Worn piston packing Check and replace if necessary.
Gasoline engine altitude
The gasoline engine is preset for operation
at
altitudes below 1000 ft above sea level. If
operated at higher altitudes, it may be
necessary to install a high altitude main jet in
the carburetor. Contact your local authorized
engine sales and service center for details.
MACHINE
SM
OKES WHILE
BURNER UNIT IS
RUNNING OR UNIT
SMOKES AT
COLD-START
ONLY WHEN
BURNER IS OFF
Improper fuel or water in fuel Drain tank and replace contaminated fuel.
Improper air adjustment Readjust air bands on burner assembly.
Fuel pressure is low <140 psi for burner Adjust fuel pump pressure to specifications.
Burner nozzle is plugged or dirty
Replace nozzle. Check parts breakdown for
no
zzle size.
Burner nozzle spray pattern is faulty
Replace nozzle. Check parts breakdown for
no
zzle size.
Heavy accumulation of soot on coils and
burner assembly
Remove coils and burner assembly, clean
thoroughly or Call local dealer.
Misaligned electrode setting Realign electrodes to specifications
Obstruction in smoke stack
Check for insulation blockage or other
fo
reign objects
Low engine RPM Increase RPM
Fuel Pressure is too high for clean burn (fuel
PS
I above 140 and below 200) and smokes
when burner is off
Reduce fuel pressure PSI/Increase air band
se
t for cleaner without max water heat loss
LOW WATER
TE
MPERATURE
Improper fuel or water in fuel Replace with clean and proper fuel.
Low fuel pressure Increase fuel pressure.
Weak fuel pump
Check fuel pump pressure. Replace pump if
ne
eded.
Fuel filter partially clogged Replace as needed.
Soot build-up on coils not allowing heat
tr
ansfer
Clean coils.
Improper burner nozzle See Burner Specifications.
Problem Possible Cause Solution
Karcher Trailer 3500E/H HDS 4.7/35 Operator’s Manual 9.808-363.0 - F

22
Maintenance
Pressure Washer Troubleshooting
Problem Possible Cause Solution
WATER
TE
MPERATURE
TOO HOT
Incoming water to machine warm or hot Lower incoming water temperature.
Fuel pump pressure too high See specifications for proper fuel pressure.
Fuel pump defective Replace fuel pump.
Detergent line sucking air
Tighten all clamps. Check detergent lines for
holes.
Defective temperature switch Replace.
Incorrect fuel nozzle size See specifications for proper fuel nozzle.
Insufficient water supplied Check water G.P.M. to machine.
Restricted water flow Check nozzle for obstruction, proper size.
PUMP NOISY
Air in suction line
Check water supply and connections on
s
u
ction line.
Broken or weak inlet or discharge valve
sp
rings
Check and replace if necessary.
Excessive matter in valves Check and clean if necessary.
Worn bearings Check and replace if necessary.
PRESENCE OF
WA
TER IN OIL
Oil seal worn Check and replace if necessary.
High humidity in air Check and change oil twice as often.
WATER DRIPPING
FR
OM UNDER
PUMP
Piston packing worn Check and replace if necessary.
O-Ring plunger retainer worn Check and replace if necessary.
Cracked piston Check and replace if necessary.
Pump protector
Lower water supply pressure. Do not run
w
i
th spray gun closed longer than 2 minutes.
OIL DRIPPING Oil seal worn Check and replace if necessary.
EXCESSIVE
VI
BRATION IN
DELIVERY LINE
Irregular functioning of the valves Check and replace if necessary.
DETERGENT NOT
DR
AWING
Air leak
Tighten all clamps. Check detergent lines for
ho
les.
Restrictor in float tank is missing
Replace restrictor. Check for proper orifice
in
restrictor.
Filter screen on detergent suction hose
pl
ugged
Clean or replace.
Dried up detergent plugging metering valve Disassemble and clean thoroughly.
High viscosity of detergent Dilute detergent to specifications.
Hole in detergent line(s) Repair hole.
Low detergent level Add detergent, if needed.
Karcher Trailer 3500E/H HDS 4.7/35 Operator’s Manual 9.808-363.0 - F

23
Maintenance
PUMP RUNNING
NORMALLY BUT
PRESSURE LOW
ON INSTALLATION
Pump sucking air
Check water supply and possibility of air
se
epage.
Valves sticking Check and clean or replace if necessary.
Nozzle incorrectly sized
Check and replace if necessary (See serial
pl
ate for proper size).
Unloader valve seat faulty Check and replace if necessary.
Worn piston packing Check and replace if necessary.
BURNER MOTOR
WI
LL NOT RUN
Fuel pump seized Replace fuel pump.
Burner fan loose or misaligned Position correctly, tighten set screw.
Defective control switch Replace switch.
Loose wire Check and replace or tighten wiring.
Defective burner motor Replace motor.
RELIEF VALVE
LE
AKS WATER
Relief valve defective Replace or repair
Problem Possible Cause Solution
Karcher Trailer 3500E/H HDS 4.7/35 Operator’s Manual 9.808-363.0 - F

24
Maintenance
This pressure washer was produced with the best available materials and quality craftsmanship. However, you as
the owner have certain responsibilities for the correct care of the equipment. Attention to regular preventative
maintenance procedures will assist in preserving the performance of your equipment. Contact your dealer for
maintenance. Regular preventative maintenance will add many hours to the life of your pressure washer. Perform
ma
intenance more often under severe conditions.
Oil Change Record
Check pump oil level before first use of your new Power Washer. Change pump oil after first 50 hours and every 3
months or 500 hours thereafter. Use SAE 10W-40 weight oil, non-detergent.
Maintenance Schedule
Engine Oil
Inspect Daily
Change Every 25 hours
Filter Every 50 hours
Air Cleaner
Inspect Every 50 hours or monthly
Clean Every 3 months
Battery Level Check monthly
Engine Fuel Filter 500 hours or 6 months
Spark Plug Maintenance 500 hours or 6 months
Clean Fuel Tank(s) Annually
Replace Fuel Lines Annually
Pump Oil (Non-
de
tergent SAE
10W-40)
Inspect Oil level daily
Change
After first 50 hours, then every 500 hours or
an
nually
Clean Burner Filter Monthly (More often if fuel quality is poor)
Remove Burner Soot Annually
Burner Adjustment/Cleaning Annually
Replace Burner Nozzle Annually
Descale Coil Annually (More often if required)
Replace High Pressure Nozzle Every 6 months
Replace Quick Connects Annually
Clean Water Screen/Filter Weekly
Replace HP Hose Annually or as needed
Diverter Valve Cable Lube Cable Weekly
Rupture Disk Replace every 2 years
Date Oil Changed
Mo
nth/Day/Year
No. of Operating Hours
Since Last Oil Change
Brand Name & Type of Oil (see above)
Karcher Trailer 3500E/H HDS 4.7/35 Operator’s Manual 9.808-363.0 - F

25
Maintenance
Preventative Maintenance
This trailer was produced with the best available materials and quality craftsmanship. However, you as the owner,
have certain responsibilities for the correct care of the equipment. Attention to regular preventative maintenance
procedures will assist in preserving the performance of your equipment.
Axles, Hubs and Brakes
Maintenance for axles, hubs and brakes is extremely important for protecting the longevity of your trailer. It is
extremely important for your personal safety and the protection of others.
Never shortcut axle, hub and brake service and maintenance
MAINTENANCE SCHEDULE
Tire Air Pressure Inflate to proper pressure indicated on sidewall Every Trip
Wheel Lugs, Bolts & Nuts Tighten to proper torque specifications Every 3000 mi or 3 mos.*
Wheel Check for damage and or out-of-round Every 6000 mi or 6 mos.
Coupler Ball
Check for sufficient lube.
Check lock mechanism.
Check for unusual wear.
Every trip
Safety Chains at Hitch Ball
Check for abrasion, distortion and general integrity
o
f
links.
Every trip
Coupler
Check for proper fastening & hitch pin in position
an
d secure.
Every trip
Brakes Check for proper adjustment & operation Every trip
Breakaway Switch Test switch operation and connections Every trip
Breakaway Battery Pull switch pin, check charge indicator light Every trip
Load Distribution Check load distribution & security Every trip
Leveling Jacks Check fastenings. Lube. Every trip
Welds Check all weld beads for cracks or separations Every 6000 mi. or 6 mos.
Hinges Grease zerks with a Lithium complex grease Every 3000 mi. or 3 mos.
Tie Down Devices
Check for fracturing, distortion and improper
anchoring.
Every 3000 mi., or 3 mos.
Electrical: Lights & Signals
Check to make sure all are working properly.
Replace burned out bulbs.
Every trip
* Check lug nuts for tightness before initial trip, at 10 miles, 25 miles and 50 miles. Recheck at least every 3
mo
nths or 3000 miles
Karcher Trailer 3500E/H HDS 4.7/35 Operator’s Manual 9.808-363.0 - F
Registrieren Sie Ihr Prudukt und Sie von vielen Vorteilen.
Register your product and benefit from many advantages.
Enregistrez votre produit et bénéficiez de nombreux avantages.
Registre su producto y aproveche de muchas ventajas.
Bewerten Sie Ihr Produkt und sagen Sie uns Ihre Meinung.
Rate your product and tell us your opinion.
Évaluez votre produit et donnez-nous votre opinion.
Reseña su producto y díganos su opinión.
www.kaercher.com/welcome
www.kaercher.com/dealersearch
Kärcher North America
6398 N Kärcher Way
Aurora, CO 80019
Phone: +1 800 444-7654
DANKE!
THANK YOU!
MERCI!
GRACIAS!
!