Installation & User Guide
Installer please leave this with homeowner
Outdoor Kitchen Assembly & Installation
View an
installation video
on YouTube
Legend
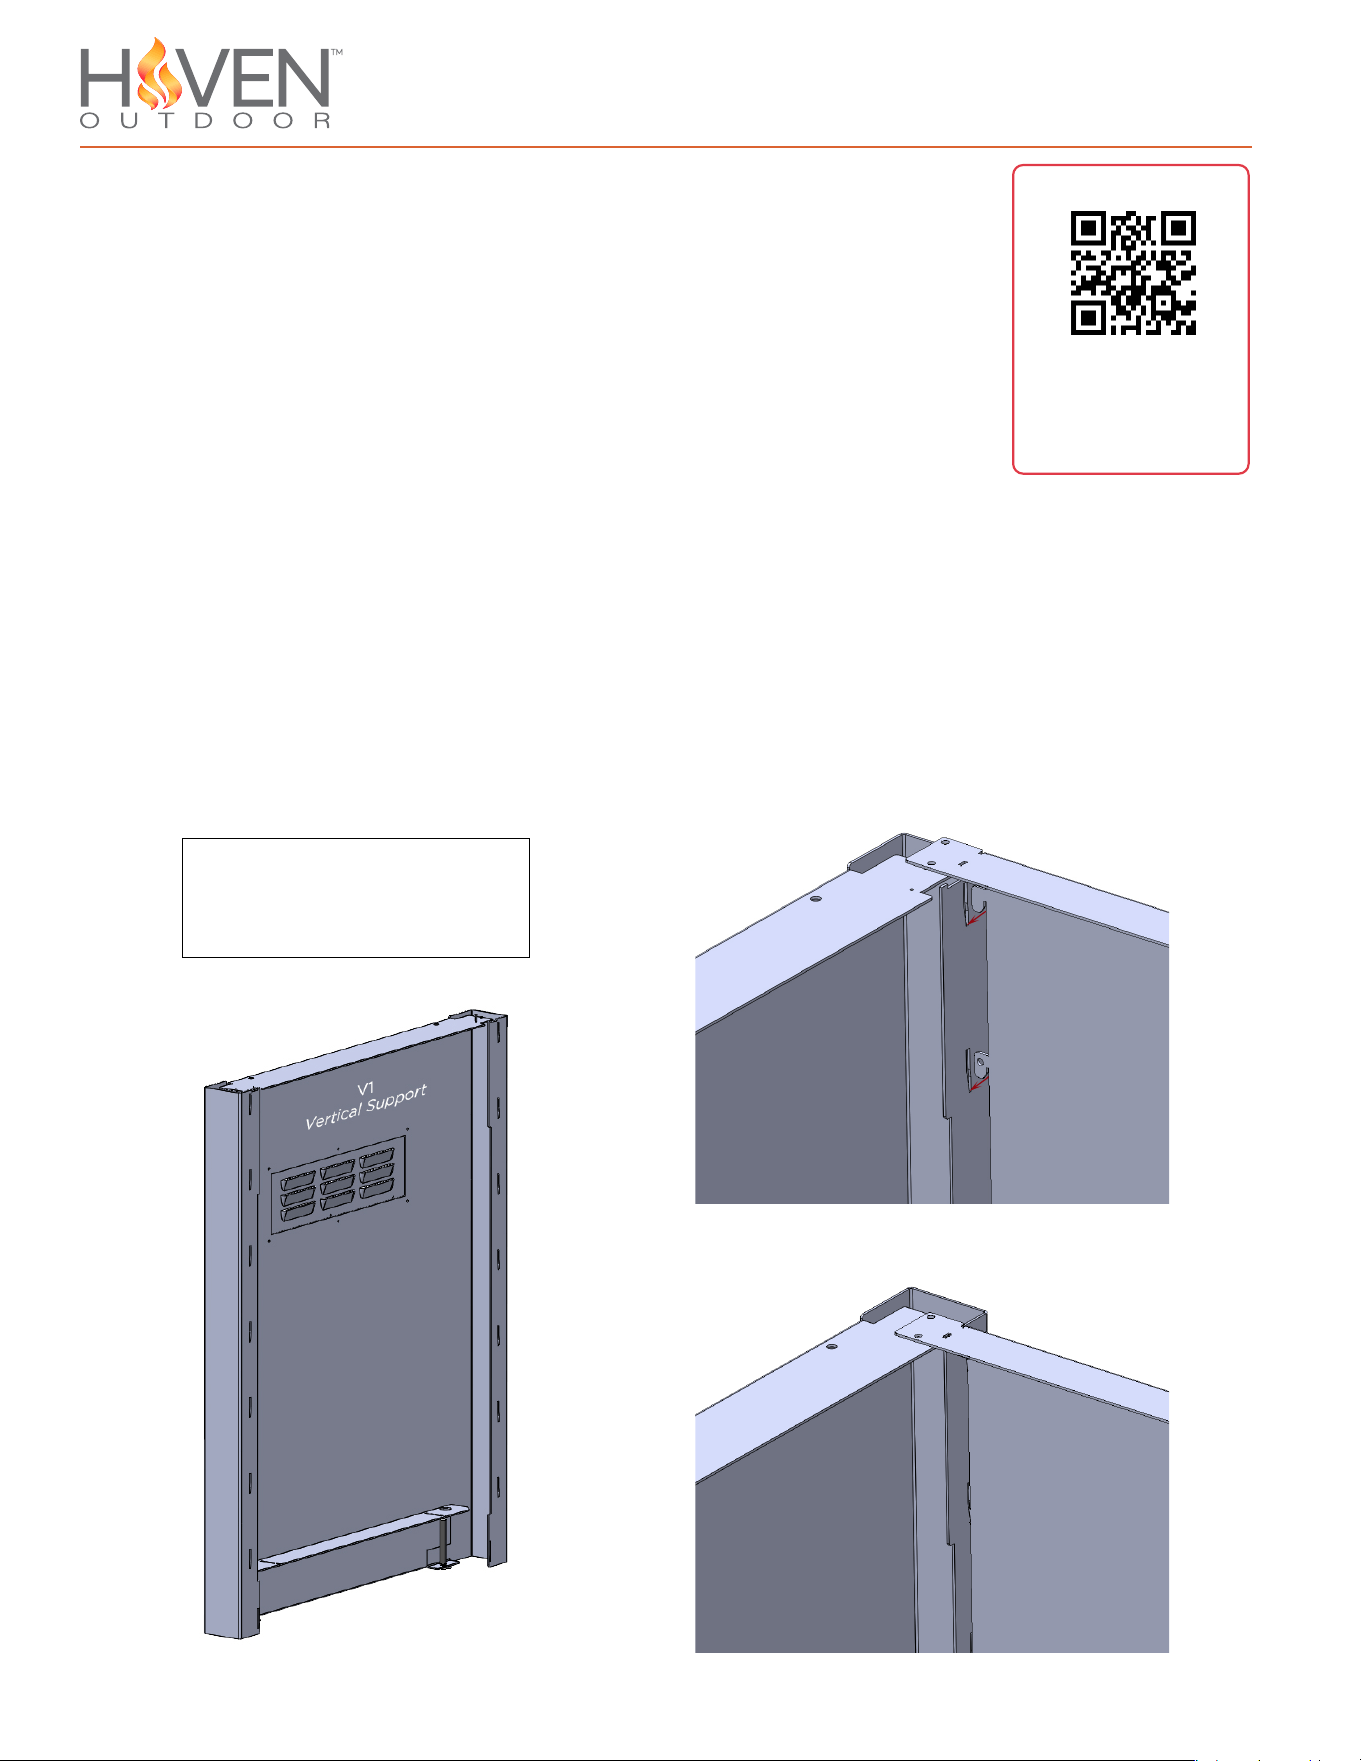
Vertical Support: V1, V2, Etc
Back Panel: B1, B2, Etc
Front Panel: F1, F2, Etc
Included Parts for Installation
Screws: 100
Allen Wrench: 1
Storm Tie-down Straps: 4
Shell Construction
Construction of the shell is a process of connecting vertical supports to the front and back
panels.
The primary fastening mechanism is a slot and cleat system that is laser cut in the
supports and panels. The vertical supports will have slots cut in them that correspond with
cleats that are cut in the front and back panels.
Construction will begin on the left side with vertical support 1, labeled V1. (See legend
below) Connect panels B1 and F1 through the appropriate slots. Using a rubber mallet,
ensure cleats are fully seated in the corresponding slots.
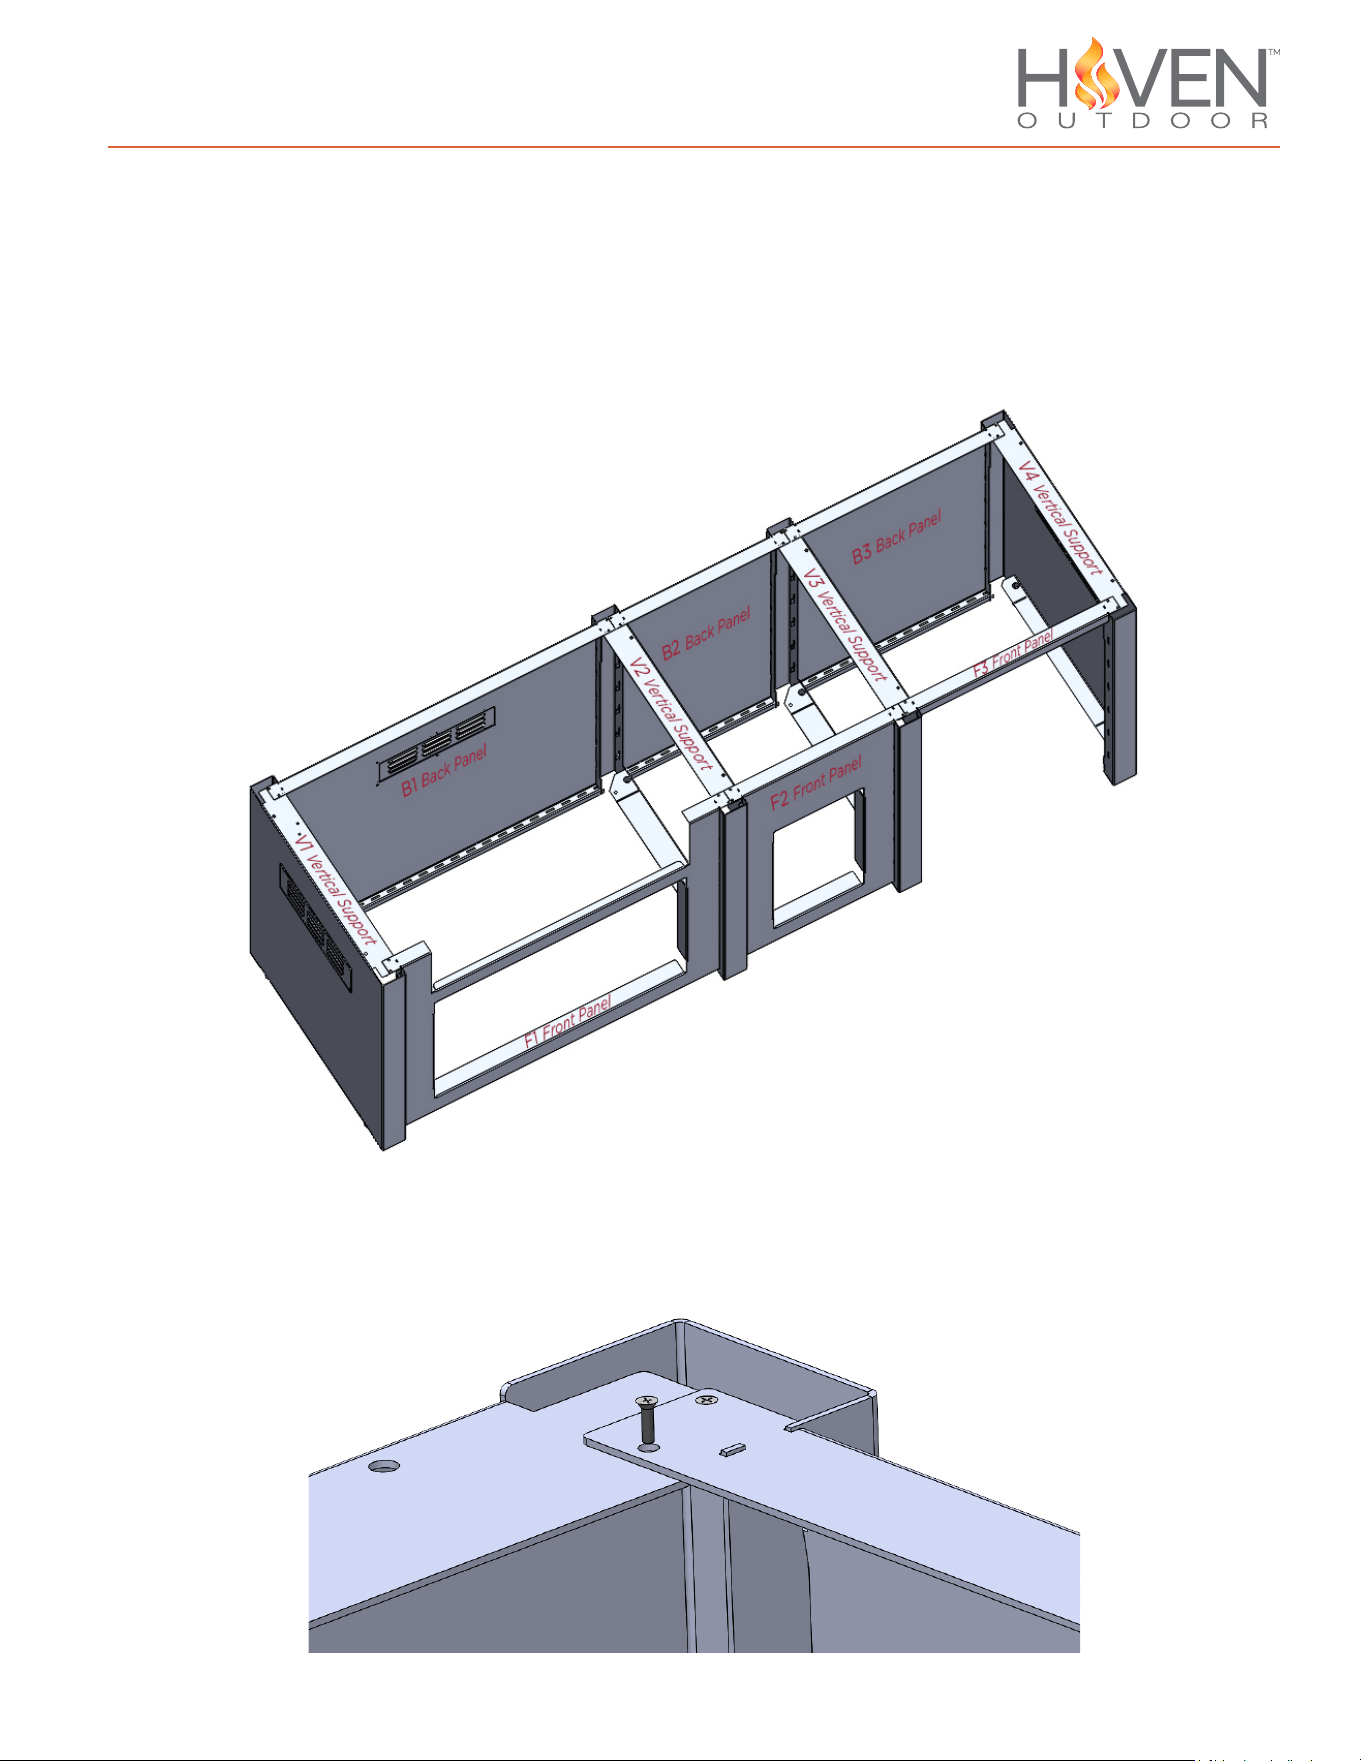
Using the provided screws, fasten each Support and Panel together in the corners of each
section.
Shell Contruction Continued
After finishing the first section, continue assembly following the next numbers in sequence
(V2, B2, etc). Although your kitchen design and layout may vary, always follow this
sequence of numbers for the next section. Repeat this process until all of the Vertical
Supports and Panels are connected.
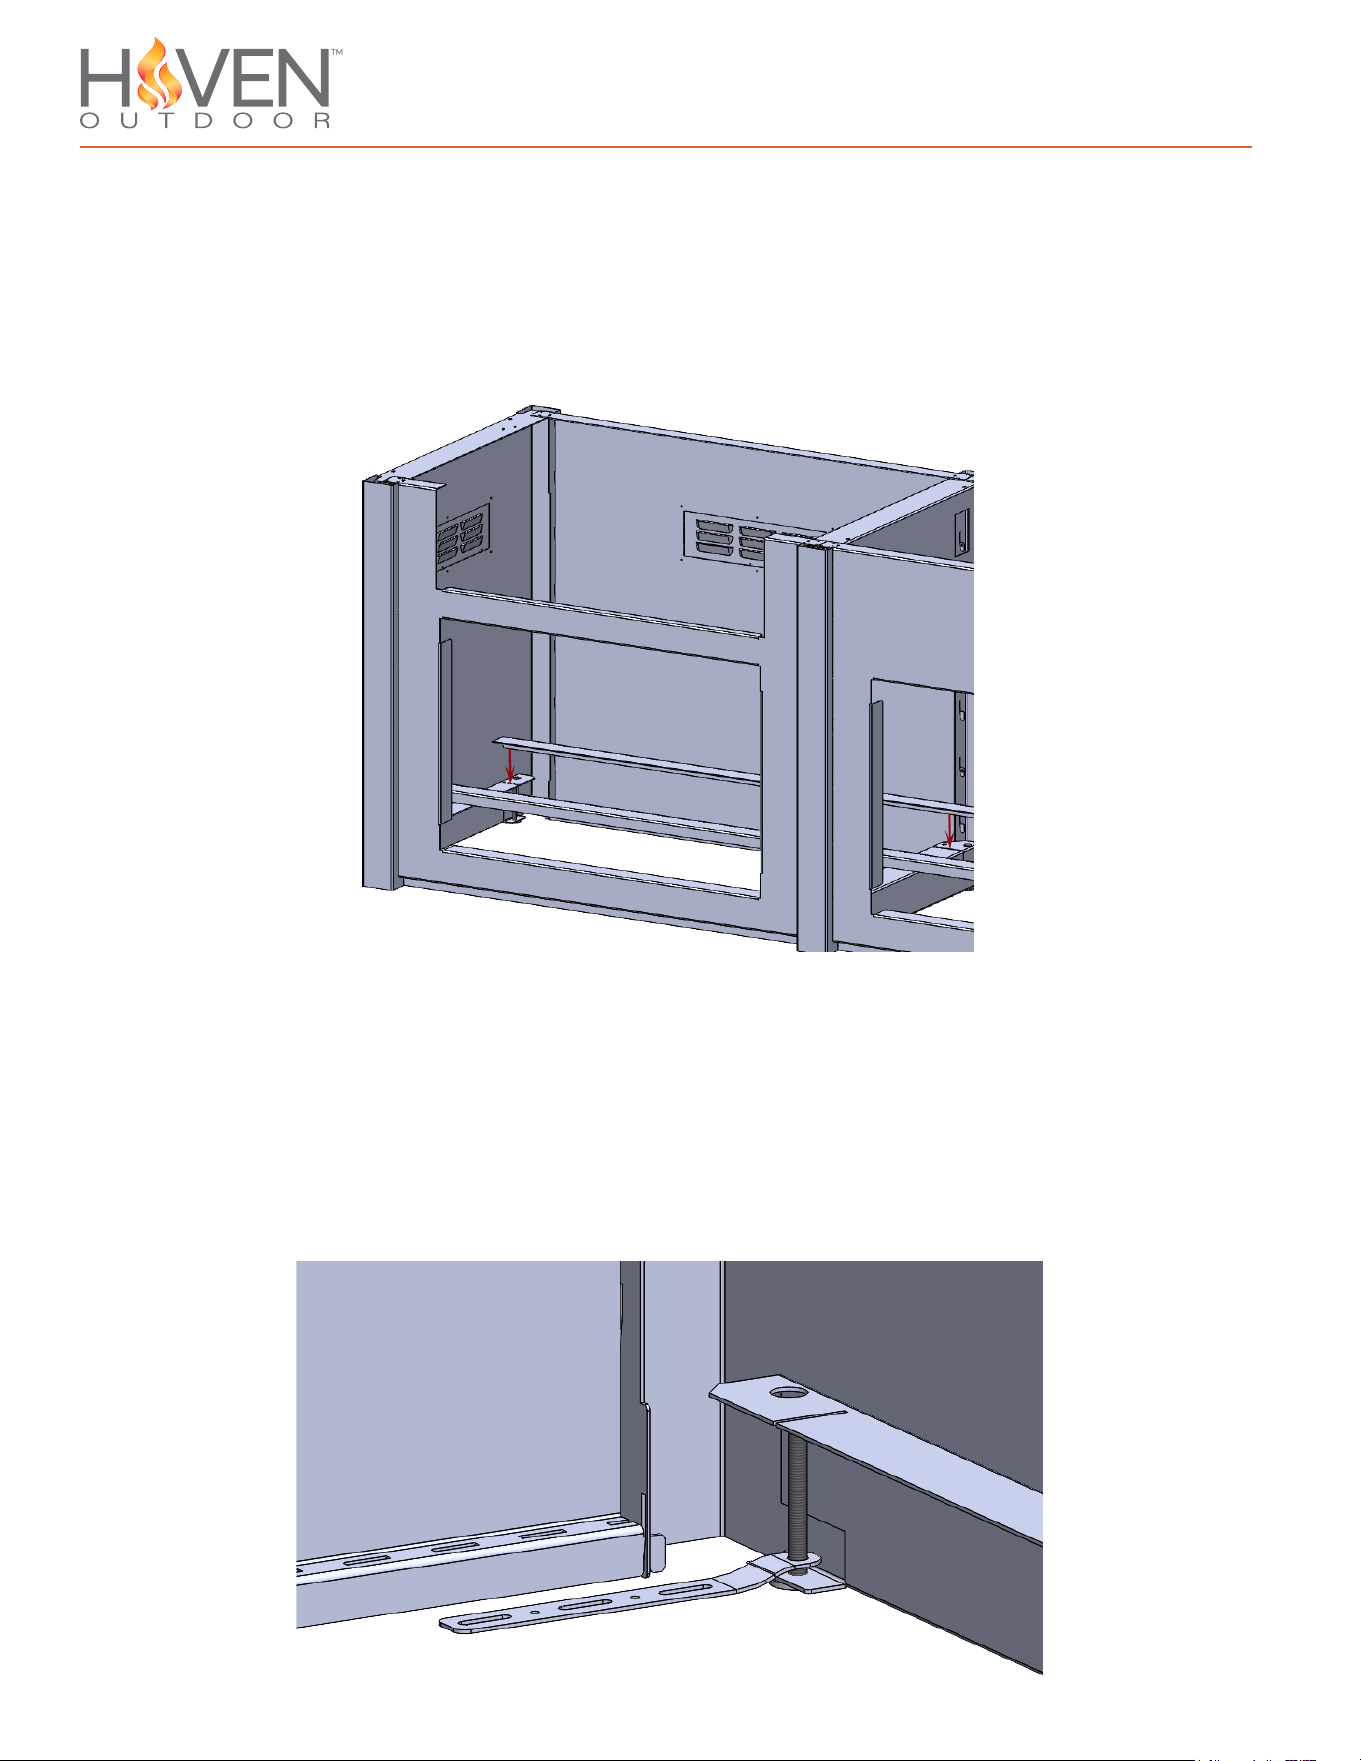
Horizontal Rail Installation
On the left end of the Island, install the long Horizontal Rails by sliding them into the
appropriate slots in the bottom of each vertical support. Ensure that each Horizontal Rail
is pointing inwards as shown below. If using optional accessories panel, install the small
Horizontal Rails for that section as well.
Leveling System
Each unit will come with an adjustable leveling kit pre-installed. If desired, adjust with the
included allen wrench as needed to achieve level. Using the leveling feet will be at the
discretion of the installer, Stoll Industries does not require that the feet be used to elevate
the product.
If desired, insert storm tie-down straps over leveling legs, and secure in place with the
appropriate fasteners (not included)
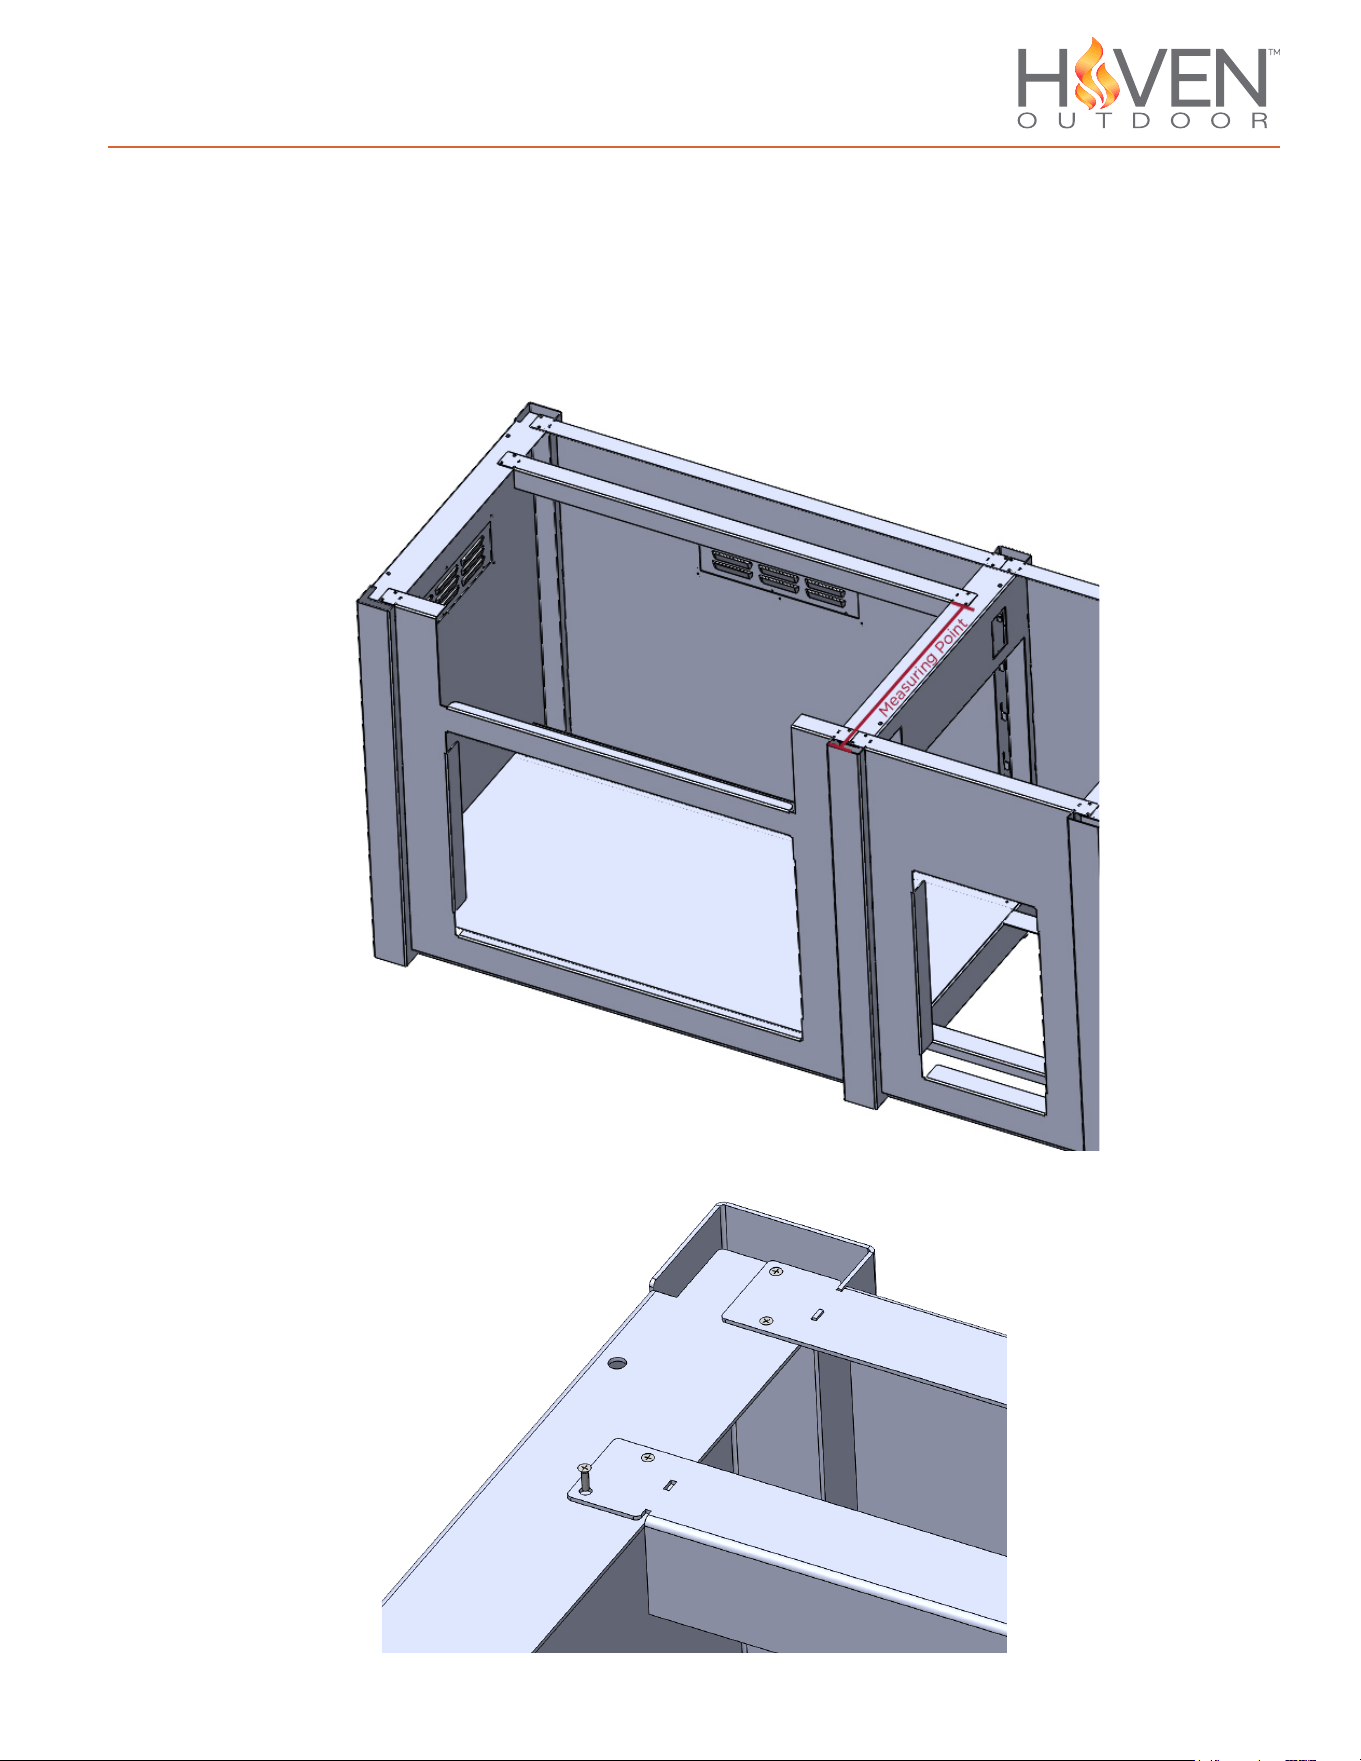
Grill Support Installation
Measure the depth of your grill cutout in your countertop, and place the grill
support accordingly in the appropriate section of the Island. (Make sure to measure
from the outward-most point of the vertical support, see drawing below). Using the
provided screws, secure the grill support in place.
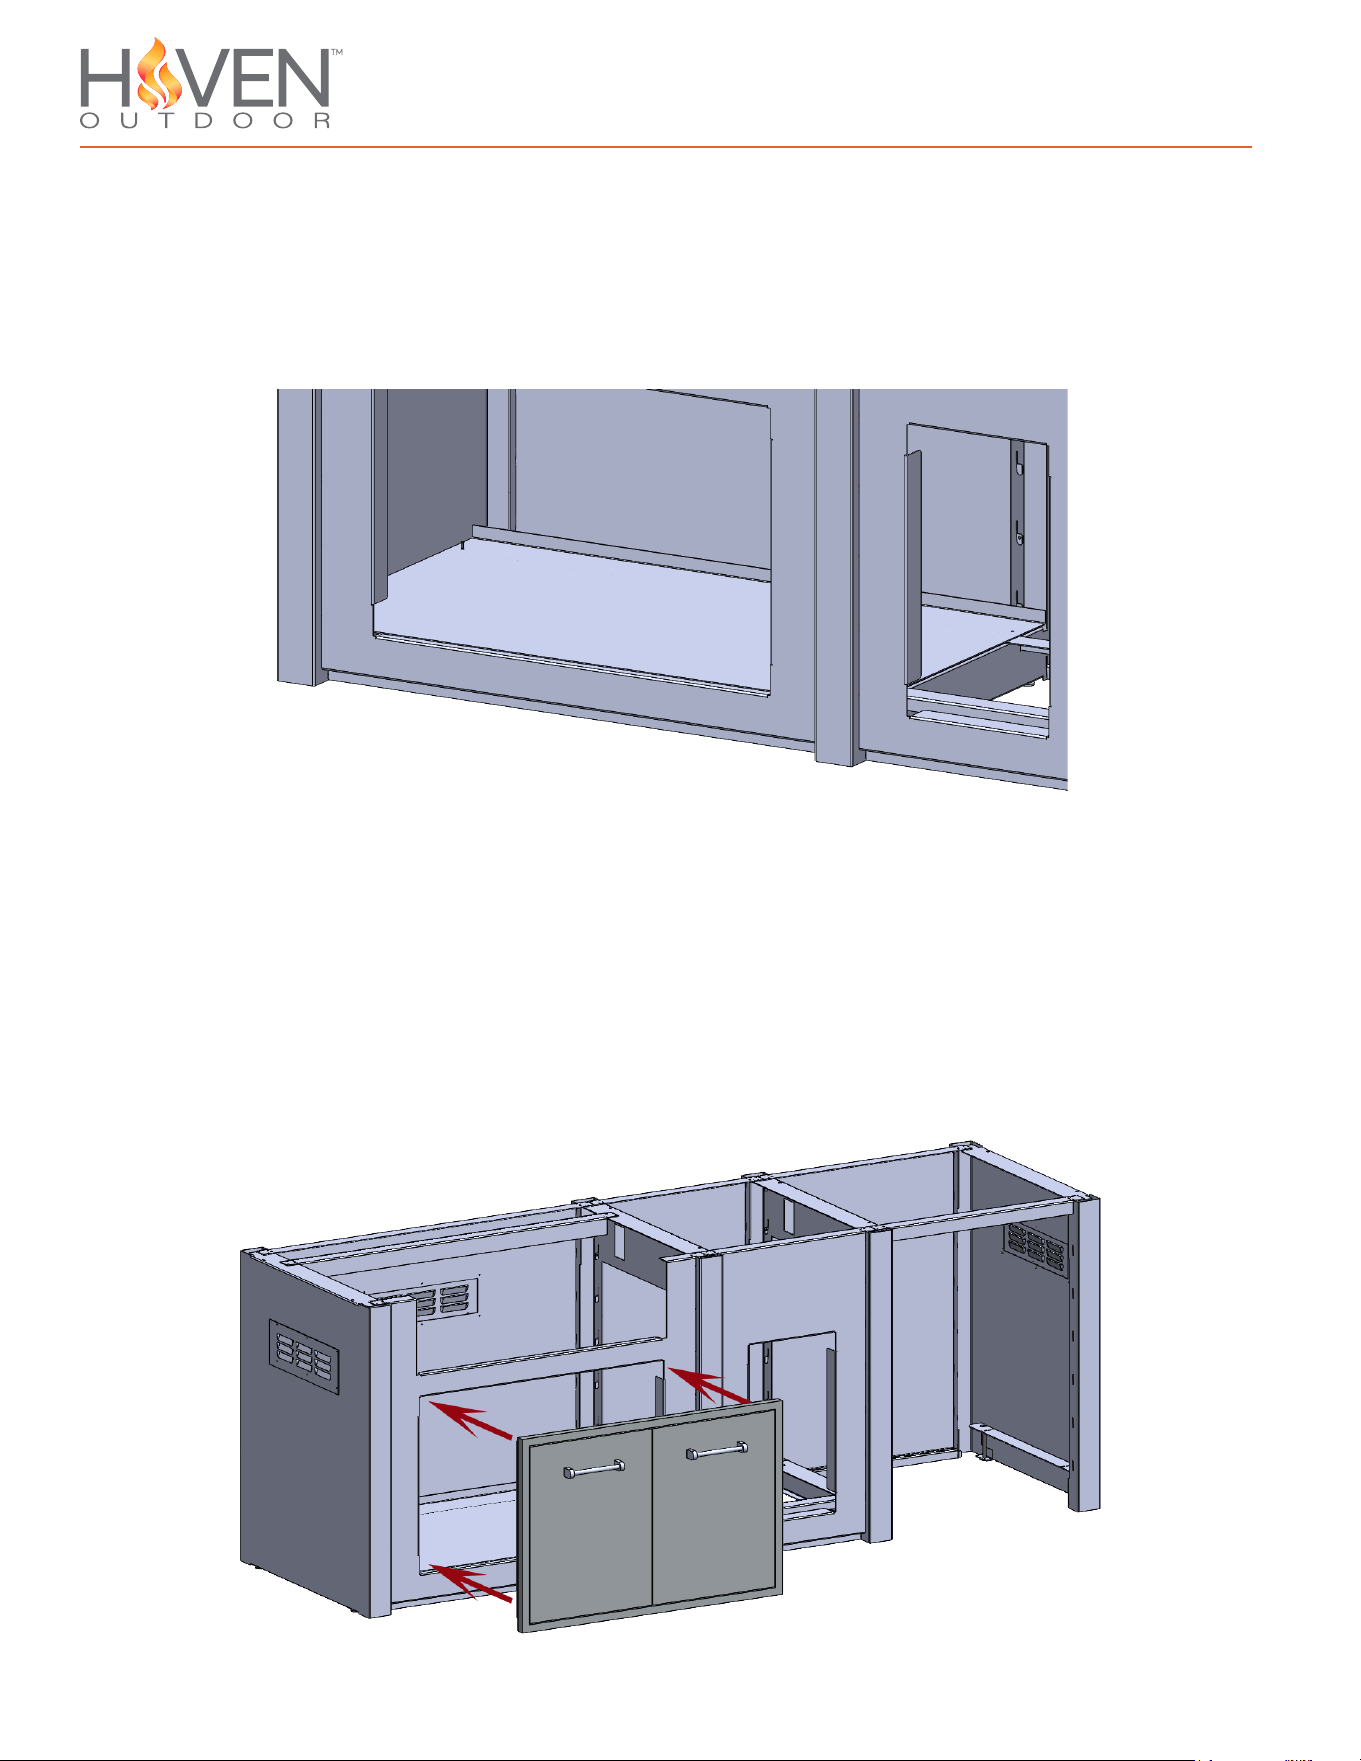
Component Installation
Following any specific instructions from the manufacturer of your components, install your
components into the kitchen framework.
Floor Panel Installation
Install the Floor Panel in section 1 (far left section). Insert through top of kitchen, with
raised lip up and towards the back. Screw in place with provided screws through the pre-
drilled holes.
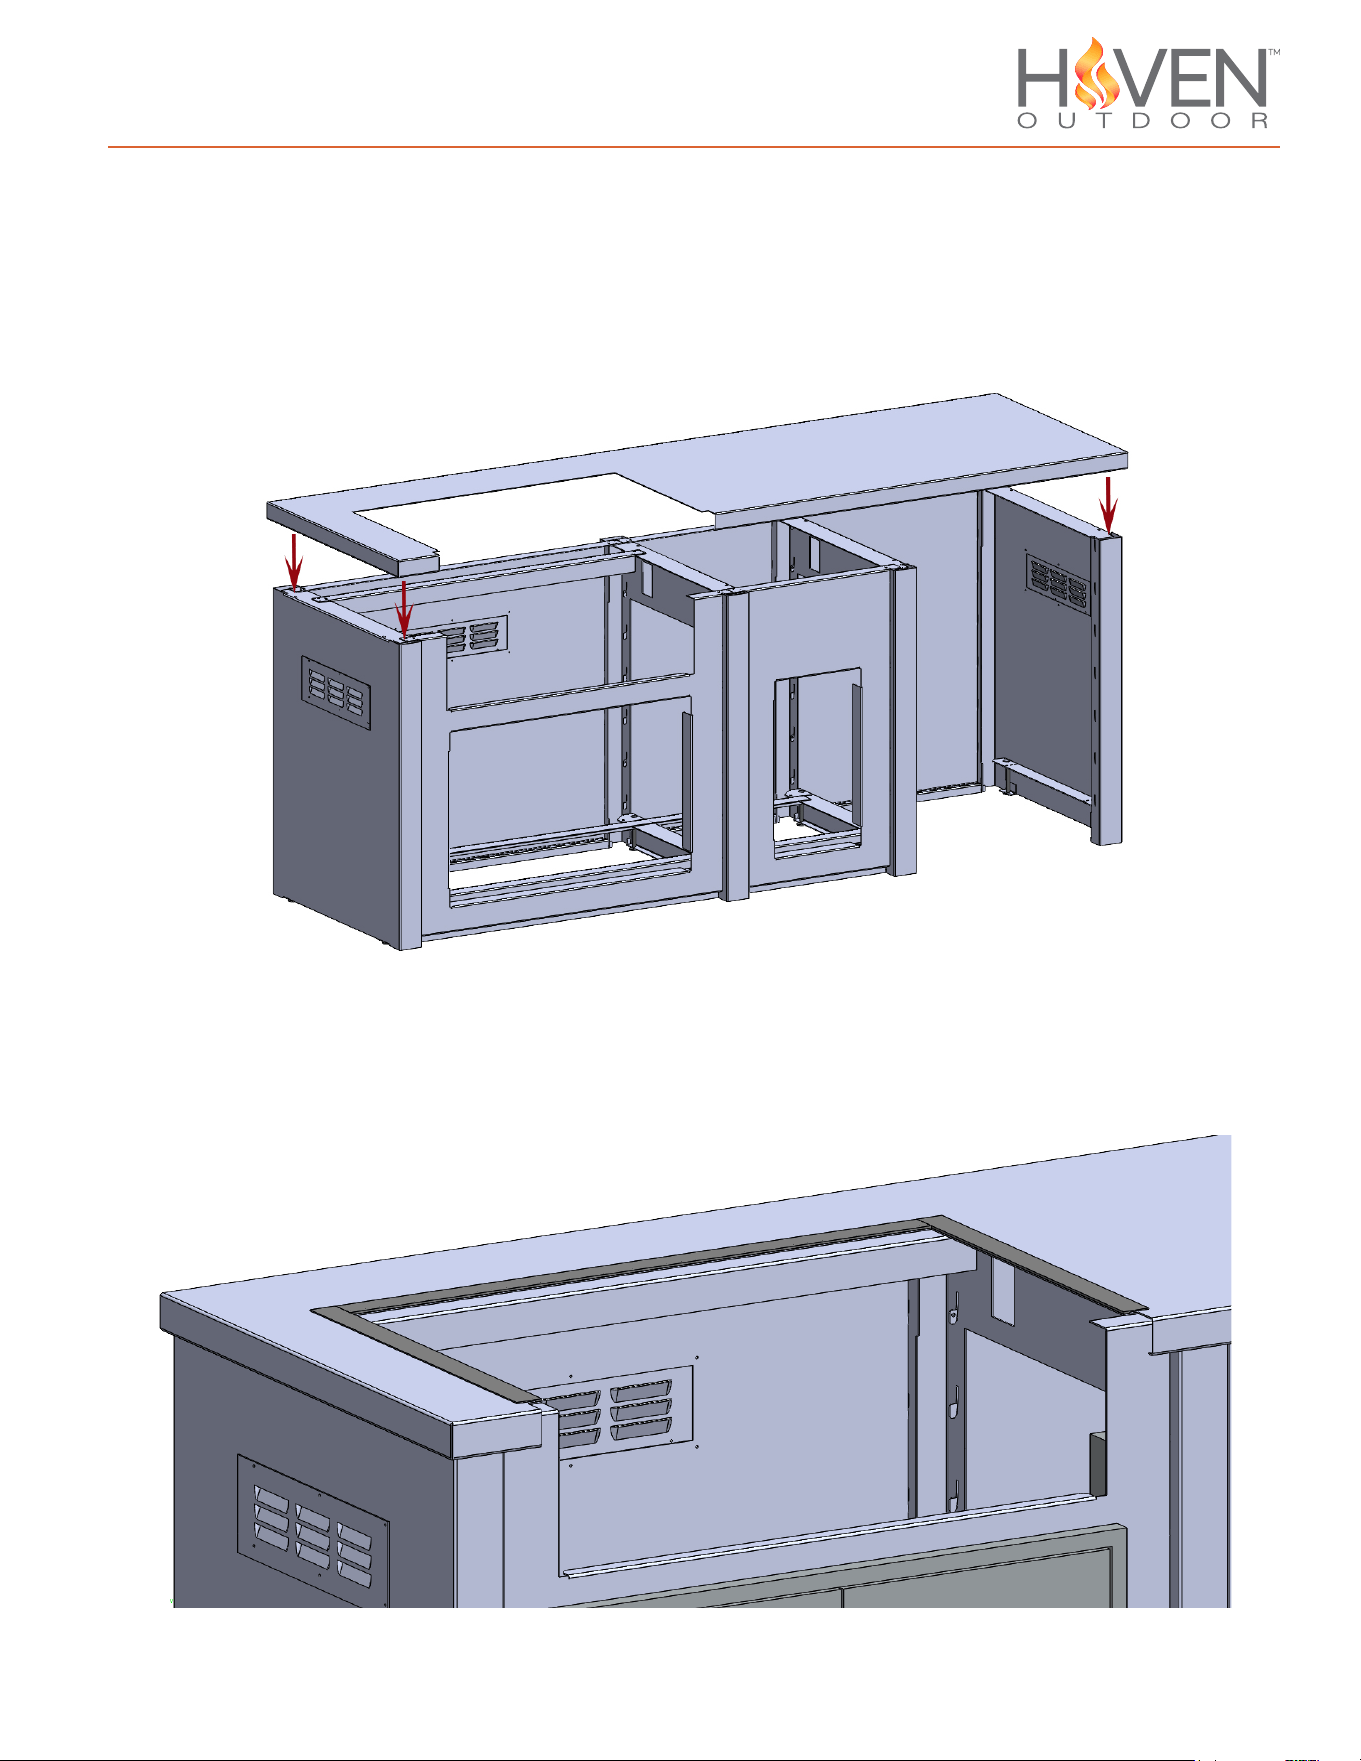
Countertop Installation
Lower the countertop into place on top of the kitchen. The countertop should cover the
top of the kitchen shell, and overlap downwards several inches on all sides. Glue or
silicone may be used to secure the countertop, but will make it very difficult to remove in
the future to replace panels or disassemble the kitchen.
Grill Installation
Following the manufacturers instructions for your particular model, install your grill into
the countertop. If desired, trim any excess gasket that is visible around your grill.

This product can expose you to chemicals
including Carbon Black, which is known to
the state of California to cause Cancer.
For more information go to
www.P65Warnings.ca.gov
Operation & Maintenance
To ensure a lifetime of use, and extend the longevity and beauty of your product, we
recommend regular care and cleaning of your Outdoor Kitchen.
Routine cleaning can be accomplished by rinsing away dirt and debris, and then gently
wiping with a damp, non-abrasive cloth or sponge using warm water. Towel drying will
help prevent water spotting. If additional cleaning is necessary, mild household cleaners
can be used. The use of solvents or abrasive cleaners may damage the product’s finish,
always test any cleaning solution in an inconspicuous area before applying to the entire
product.
Storing objects on the surface for extended periods of time may trap moisture and debris,
and dis-color or damage the finish.
Placing hot items directly on any surface of your outdoor kitchen may damage the finish.
Hot ashes and exposure to ash debris over long periods of time may also cause damage.
Appliance and stainless steel cleaning solvents should never come in contact with your
outdoor kitchen surface. Spray the solvent onto a cloth and wipe only on the appliance
surface to help eliminate over-spray.
Light or superficial scratches to the finish are likely to occur during normal use and do not
affect the integrity of the product. Using your outdoor kitchen surfaces as a cutting board
for food, or sliding items such as grilling tools, utensils, and abrasive or ceramic items
across the surface may also cause wear and tear.