USER MANUAL
Before using, please read the operating instructions carefully to
ensure proper application and achieve satisfactory results.
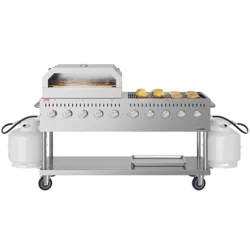
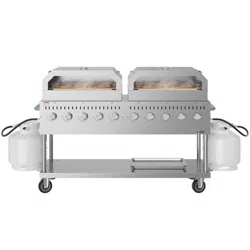
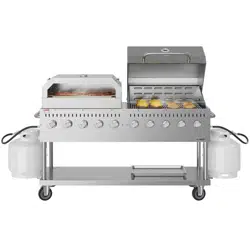
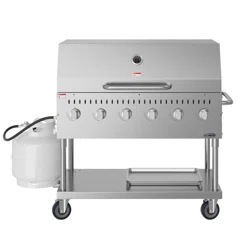
KoolMore Stainless Steel Commercial
Mobile Outdoor Grill Stainless Steel
Models: KM-CGM-36 | KM-CGM-48 | KM-CGM-60 | KM-CGM-72
OUTDOOR GRILL
KM-CGM-36

Stay informed with the latest information
for your KoolMore Appliance.
If you need any assistance or have questions, our customer
support team is here to help.

For Outdoor Use Only (outside any enclosure)
DO NOT use gas grill for indoor cooking or heating.
TOXIC fumes can accumulate and cause asphyxiation.
Do not use in or on boats or recreational vehicles.
SAVE THESE INSTRUCTIONS FOR FUTURE REFERENCE. IF YOU ARE ASSEMBLING THIS UNIT FOR
SOMEONE ELSE, LEAVE THE MANUAL WITH THE UNIT FOR FUTURE REFERENCE.
Improper installation, adjustment, alteration, service or maintenance could cause injury or property
damage. Read the installation, operation, and maintenance instructions thoroughly.
*EMPYVIXSJSPPS[XLIWIMRWXVYGXMSRWGSYPHVIWYPXMRƼVISVI\TPSWMSRXLEXGSYPHGEYWITVSTIVX]HEQEKI
personal injury, or death.
If you smell gas:
1. Shut off gas to the appliance.
2. )\XMRKYMWLER]STIRƽEQI
3. Open lid.
4. -JSHSVGSRXMRYIWOIITE[E]JVSQXLIETTPMERGIERHMQQIHMEXIP]GEPP]SYVKEWWYTTPMIVSV]SYVƼVI
department.
(SRSXWXSVISVYWIKEWSPMRISVSXLIVƽEQQEFPIPMUYMHWSVZETSVWMRXLIZMGMRMX]SJXLMWSVER]SXLIV
appliance.
An LP cylinder not connected for use shall not be stored in the vicinity of this or any other appliance.
FOR YOUR SAFETY
(S238WXSVISVYWIKEWSPMRISVER]SXLIVƽEQQEFPIZETSVWERHPMUYMHW[MXLMRJIIXSJXLMWSV
any other appliance.
;LIRGSSOMRK[MXLSMPKVIEWIHSRSXEPPS[XLISMPKVIEWIXSI\GIIHq*(SRSXWXSVISVYWI
extra drip cups in the vicinity of this or any other appliance.
%R04G]PMRHIVRSXGSRRIGXIHJSVYWIWLSYPHFIWXSVIHEQMRMQYQSJJIIXE[E]JVSQXLMWSVER]
SXLIVETTPMERGI2IZIVƼPPXLIG]PMRHIVFI]SRHGETEGMX]-JXLIEFSZIMRJSVQEXMSRMWRSXJSPPS[IH
I\EGXP]EƼVIGEYWMRKHIEXLSVWIVMSYWMRNYV]QE]SGGYV
WARNING
WARNING
DANGER
DANGER

SAFETY
NOTE: The use and installation of this product must conform to local codes. In absence of local codes, use the National Fuel
Gas Code, ANSI Z223.1/NFPA54, Natural Gas and Propane Installation Code, CSA B149.1, or Propane Storage and Handling
Code, B149.2.
Read and understand all warnings and precautions prior to operating your grill.
1. This grill is for use with propane gas only (propane gas cylinder not included).
2. Never attempt to attach this grill to the self-contained propane system of a camper trailer, motor home or house.
3. 2IZIVYWIGLEVGSEPSVPMKLXIVƽYMH[MXLXLIKEWKVMPP
4. Do not use gasoline, kerosene or alcohol for lighting. The LP-gas supply cylinder must be constructed and marked in
EGGSVHERGI[MXLXLIWTIGMƼGEXMSRWJSVTVSTERIKEWG]PMRHIVWSJXLI97(ITEVXQIRXSJ8VERWTSVXEXMSR(38'*6
3VXLI2EXMSREP7XERHEVHSJ'EREHE'%2'7%&']PMRHIV7TLIVIWERH8YFIWJSV8VERWTSVXEXMSRSJ(ERKIVSYW
Goods. This grill is not intended to be used in or installed on recreation vehicles and/or boats.
Do not attempt to move the grill while it is lit.
6. Do not use the grill unless it is completely assembled and all parts are securely fastened and tightened.
7. /IITEPPGSQFYWXMFPIMXIQWERHWYVJEGIWEXPIEWXMRGLIWGQE[E]JVSQKVMPPEXEPPXMQIW
DO NOT use this grill or any gas product near unprotected combustible materials.
Do not use in an explosive atmosphere. Keep grill area clear and free from combustible materials, gasoline and other
ƽEQQEFPIZETSVWERHPMUYMHW
(SRSXXSYGLQIXEPTEVXWSJKVMPPYRXMPMXLEWGSQTPIXIP]GSSPIHEFSYXQMRYXIWXSEZSMHFYVRWYRPIWW]SYEVI[IEV-
ing protective gear (grill mitt, pot holders, etc.)
11. Do not alter this grill in any manner.
12. Clean and inspect the hose before each use. If there is evidence of abrasion, wear, cuts, or leaks, the hose must be
VITPEGIHTVMSVXSSTIVEXMRKXLIETTPMERGI8LIVITPEGIQIRXLSWIEWWIQFP][MPPFIXLEX[LMGLMWWTIGMƼIHF]XLIQERY-
facturer.
13. Move gas hoses as far away as possible from hot surfaces and dripping hot grease.
14. 2IZIVOIITEƼPPIHGSRXEMRIVMRELSXGEVSVGEVXVYRO,IEX[MPPGEYWIXLIKEWTVIWWYVIXSMRGVIEWI[LMGLQE]STIR
the relief valve and allow gas to escape.
Keep the grill's valve compartment, burners and air passages clean. Inspect the grill before each use.
This grill is for outside use only, and should not be used in a building, garage, or any other enclosed area.
The use of alcohol, prescription or non-prescription drugs may impair the operator’s ability to properly assemble or safely
operate the grill.
1. Always open grill lid slowly and carefully as heat and steam trapped within the grill can burn you severely.
2. Always place your grill on a hard, level surface far away from combustibles.
3. Do not leave a lit grill unattended. Keep children and pets away from the grill at all times.
4. Do not place this grill on any type of tabletop surface.
Do not use the grill in high winds.
DANGER:
1NVZNIUWTUFSJLFXNXܫFRRFGQJFSIMF_FWITZXNKMFSIQJINRUWTUJWQ^
0ST\NYXHMFWFHYJWNXYNHXGJKTWJZXNSLFS^UWTUFSJUWTIZHY
• Propane Characteristics: Flammable, explosive under pressure, heavier than air and settles in pools and low areas.
• Contact with propane can cause frostbite to skin.
• This grill is shipped from the factory for propane gas use only.
• Never use a propane cylinder with a damaged body, valve, collar or footing.
• Dented or rusted propane cylinders may be hazardous and should be checked by your propane gas supplier.
CAUTION
WARNING
General Information and Instructions
=SYVRI[+VMPPLEWFIIRHIWMKRIHERHQERYJEGXYVIHXSLMKLUYEPMX]WXERHEVHW-X[MPPTVSZMHI]SY[MXLQER]]IEVWSJIRNS]-
ment with a minimal amount of maintenance. Please keep in mind the following:
FOR YOUR SAFETY
OPERATION
1. =SYVKEWKVMPPVIUYMVIWVIEWSREFPIGEVIHYVMRKSTIVEXMSR-X[MPPFILSXHYVMRKGSSOMRKERHGPIERMRK=SYWLSYPHRIZIV
leave the grill unattended or move the grill when in use.
2. Children should never use your gas grill. Keep young children and pets away when in use.
3. Only use your gas grill outside in a well-ventilated area. Never use indoors in any building, garage, shed, or under any
X]TISJƽEQQEFPIGERST]SVSZIVLERK
4. Ensure your grill is on level ground and the locking casters are locked before use.
Turn all gas valves off if the burners go out when cooking.
6. (SRSXPIERSZIVXLIKVMPPSVXSYGLXLIIHKIWSJXLIƼVIFS\[MRHWGVIIRSVKVMHHPIXST[LIRMRYWI
7. 8YVRXLIFYVRIVWSJJERHWLYXSJJXLI04G]PMRHIVMJEKVIEWIƼVISGGYVW
(SRSXSFWXVYGXXLIƽS[SJGSQFYWXMSRERHZIRXMPEXMSREMVXSXLMWKVMPP
/IITXLISYXHSSVKVMPPEVIEGPIEVERHJVIIJVSQGSQFYWXMFPIQEXIVMEPWKEWSPMRIERHSXLIVƽEQQEFPIZETSVWERH
PMUYMHW
Keep the ventilation openings of the cylinder enclosure free and clear from debris.
11. (SRSXTYXEKVMPPGSZIVSVSXLIVƽEQQEFPIQEXIVMEPMRXLIWXSVEKIEVIESJXLMWKVMPP
12. (SRSXYWIGLEVGSEPFVMUYIXXIWPEZEVSGOSVER]X]TISJGIVEQMGTVSHYGXMRXLIKEWWIGXMSRSJXLMWKVMPP
13. Do not install or use on or in a recreational vehicle and/or boats.
LP Gas and Cylinder Information
=SYVRI[KEWKVMPPSTIVEXIWSR040MUYMH4IXVSPIYQ+EW-XMWSHSVPIWWGSPSVPIWWERHRSRXS\MG[LIRTVSHYGIH=SYGER
smell LP gas as it has been given an odor similar to rotten cabbage for your safety.
Your grill uses the newest and safest LP Gas Cylinder.
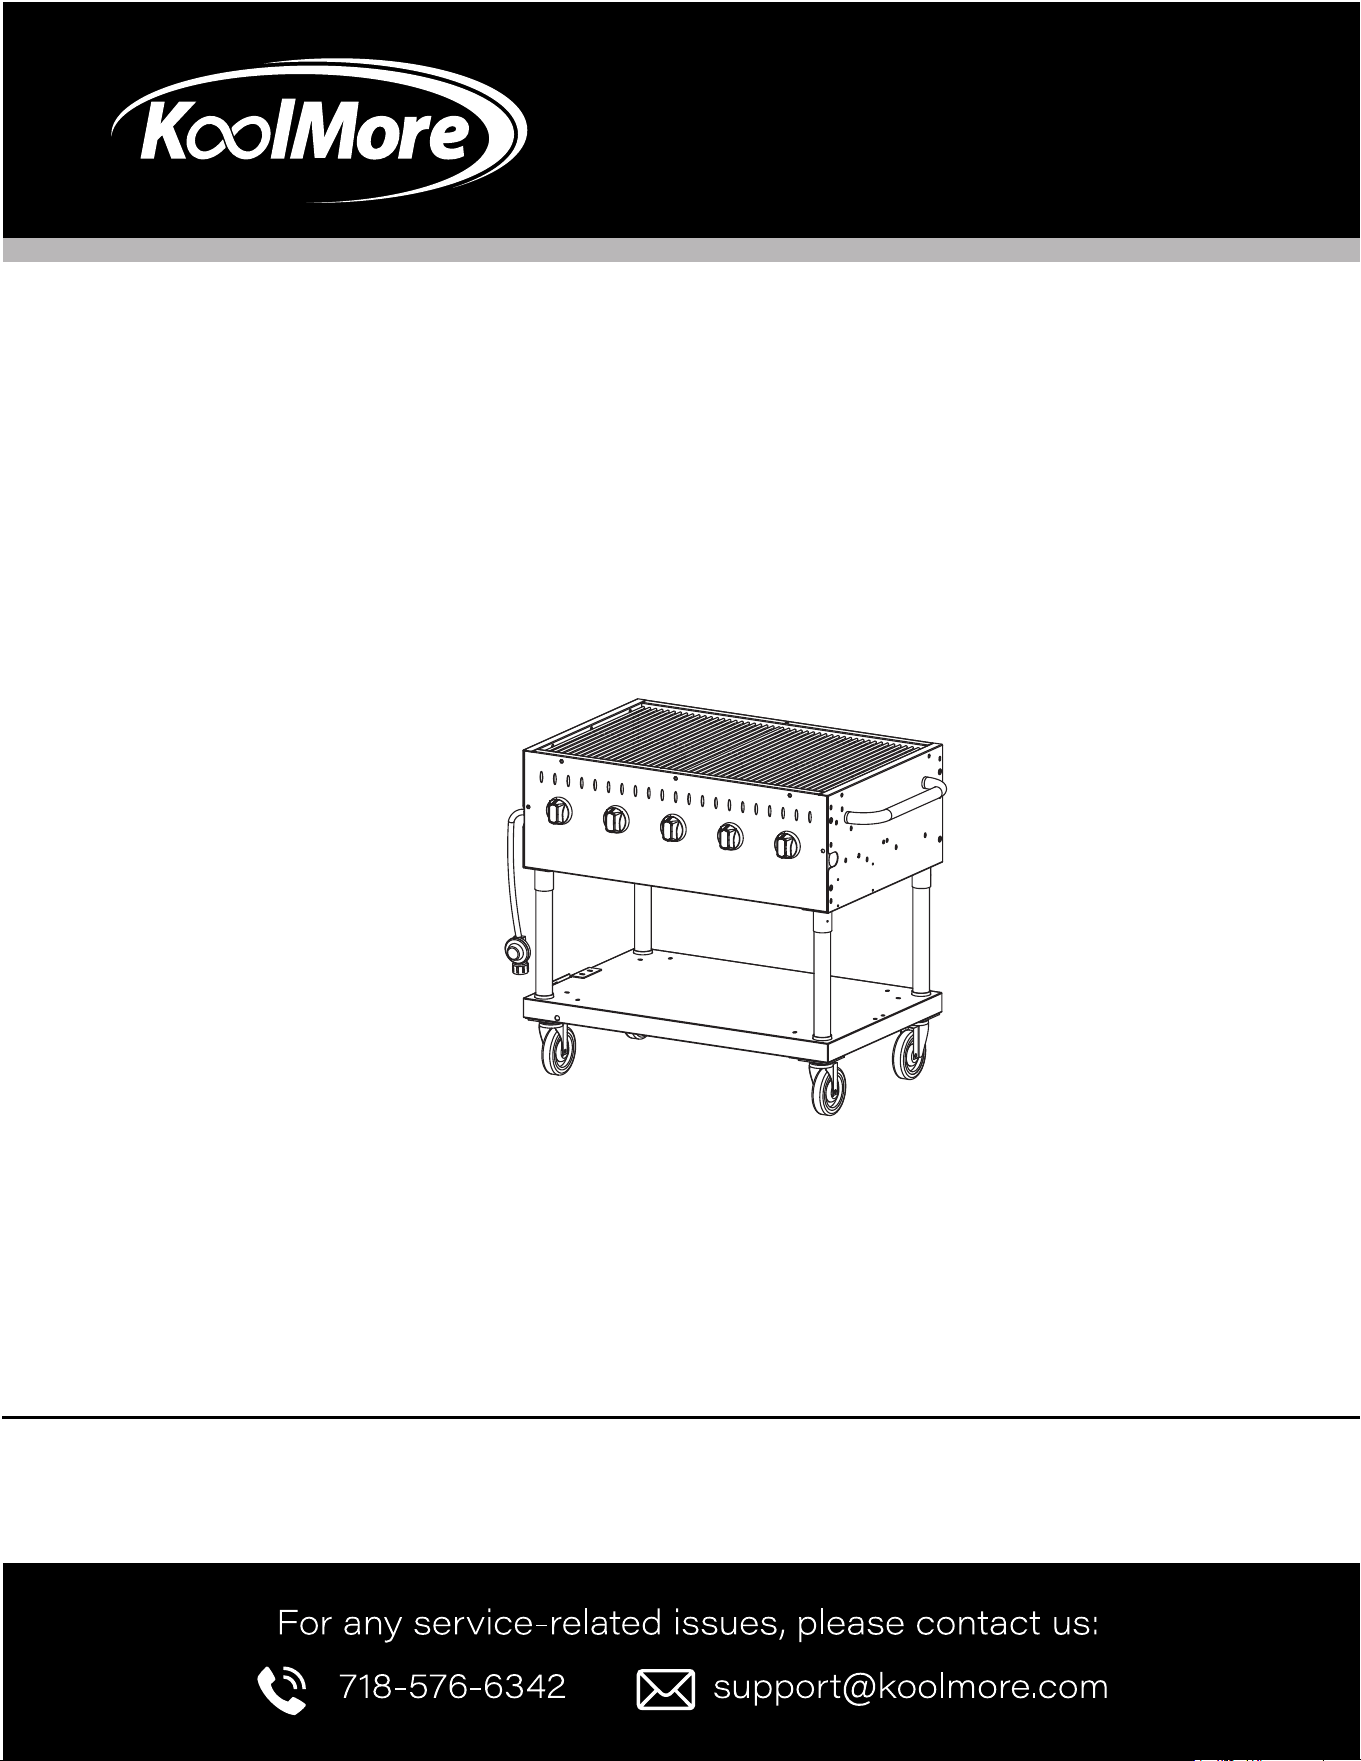
34(3ZIVƼPP4VSXIGXMSR(IZMGIƂTVIZIRXWEGGMHIRXEPKEWPIEOWGEYWIHF]SZIVƼPPMRKSJXLI
XERO)EGLXEROGSRXEMRWEƽSEXXLEXPSWIWXLIMRTYXZEPZI[LIRXLIXEROMWJYPP8LMWEPPS[W
more for the LP gas to expand in hot temperatures. A triangular hand wheel distinguishes this
type of tank.
3''8]TI5YMGO'SRRIGX:EPZIƂTVSZMHIWJEWXXEROLSSOYTWERHVIUYMVIWSRP]XSFIXMKLXIRIHF]LERH
TRANSPORTATION AND STORAGE
1. The cylinder used must include a collar to protect the cylinder valve.
2. Do not store a spare LP-gas cylinder under or near this appliance.
3. 2IZIVƼPPXLIG]PMRHIVFI]SRHTIVGIRXJYPP
4. -JXLIMRJSVQEXMSRMRƈƉERHƈƉMWRSXJSPPS[IHI\EGXP]EƼVIGEYWMRKHIEXLSVWIVMSYWMRNYV]QE]SGGYV
Always transport in an upright position.
6. Do not smoke when transporting your cylinder.
SETUP

7. Place dust cap on cylinder valve outlet whenever the cylinder is not in use. Only install the type of dust cap on the
cylinder valve outlet that is provided with the cylinder valve. Other types of caps or plugs may result in leakage of prop.
CYLINDER SPECIFICATIONS:
When purchasing or exchanging a cylinder for your gas grill, it must be constructed and marked in accordance with the
WTIGMƼGEXMSRWJSV04KEWG]PMRHIVWSJXLI97(ITEVXQIRXSJ8VERWTSVXEXMSR(38SVXLI2EXMSREP7XERHEVHSJ'EREHE
'%2'7%&']PMRHIVW7TLIVIWERH8YFIWJSV8VERWTSVXEXMSRSJ(ERKIVSYW+SSHWERH'SQQMWWMSREWETTPMGEFPI
ERHTVSZMHIH[MXLEPMWXIHSZIVƼPPMRKTVIZIRXMSRHIZMGI34(ERHTVSZMHIH[MXLEG]PMRHIVGSRRIGXMSRHIZMGIGSQTEXMFPI
with the connection for outdoor cooking appliances.
• 4VSZMHIH[MXLEPMWXIHSZIVƼPPMRKTVIZIRXMSRHIZMGI
• Provided with a cylinder connection device compatible with connection for outdoor cooking appliances.
8LIG]PMRHIVQYWXEPWSFIIUYMTTIH[MXL
• A shut-off valve terminating in a Type 1 gas cylinder valve outlet
• %8]TIZEPZIXLEXTVIZIRXWKEWƽS[YRXMPETSWMXMZIWIEPMWSFXEMRIH
• An arrangement for vapor withdrawal
• A collar to protect the cylinder shut-off valve
• A safety relief device having direct communication with the vapor space of the cylinder
• %PMWXIHSZIVƼPPMRKTVIZIRXMSRHIZMGI34(
WARNING
%JVSWX]G]PMRHIVZEPZIMRHMGEXIWTSWWMFPIKEWSZIVƼPP
Close the LP valve and call your dealer immediately.
A safety relief device having direct communication with the vapor space of the cylinder
%PMWXIHSZIVƼPPMRKTVIZIRXMSRHIZMGI34(
LP GAS CYLINDER (NOT SUPPLIED WITH THIS GRILL)
The LP cylinder is available for purchase at the same location the grill was purchased.
8LI040MUYMH4VSTERIKEWG]PMRHIVWTIGMƼGEPP]HIWMKRIHXSFIYWIH[MXLXLMWKVMPPQYWXLEZIEPFOKGETEGMX]
MRGSVTSVEXMRKE8]TIG]PMRHIVZEPZIERHERSZIVƼPPMRKTVSXIGXMSRHIZMGI34(
8LMWKVMPPMWHIWMKRIHXSƼX;SVXLMRKXSR1ERGLIWXIVSV714'FVERHPFOKG]PMRHIV
3XLIVFVERH(38G]PMRHIVWQE]ƼXXLMWKVMPPMJXLIG]PMRHIVLEWWMQMPEVHMQIRWMSRWSJXLIXSTERHFSXXSQVMRKW
• (3238GSRRIGXXLMWKVMPPXSERI\MWXMRK430G]PMRHIVZEPZI[MXL0IJX,ERHXLVIEHW8LI8]TIZEPZIGERFIMHIR-
XMƼIH[MXLXLIPEVKII\XIVREPXLVIEHWSRXLIZEPZISYXPIX
• DO NOT connect to a propane cylinder exceeding this capacity.
• DO NOT connect to a cylinder that uses any other type of valve connection device.
Other cylinders may be acceptable for use with this appliance, provided they are compatible with the appliance retaining
means and accompanied by illustration depicting the cylinder mounted to the appliance utilizing the cylinder retention
means and the point of contact between the cylinder and the prop.
LP CYLINDER LEAK TEST
%PIEOXIWXWLSYPHFIHSRIIEGLXMQIEG]PMRHIVMWVIƼPPIHSVI\GLERKIH(SRSXWQSOISVYWIER]X]TISJƽEQQEFPIQEXI-
rial in the area during this leak test.
(SRSXYWIERSTIRƽEQIXSGLIGOJSVPIEOW
1. Test outside in a well-ventilated area.
2. 9WIETEMRXFVYWLERHEWSPYXMSRSJPMUYMHWSETERH[EXIV(SRSXYWIGPIERMRKEKIRXW8LI]GERHEQEKIXLI
fuel supply parts.
3. &VYWLPMUYMHSRXSEVIEWLMKLPMKLXIH[MXLEVVS[W
4. Growing bubbles indicate a leak.
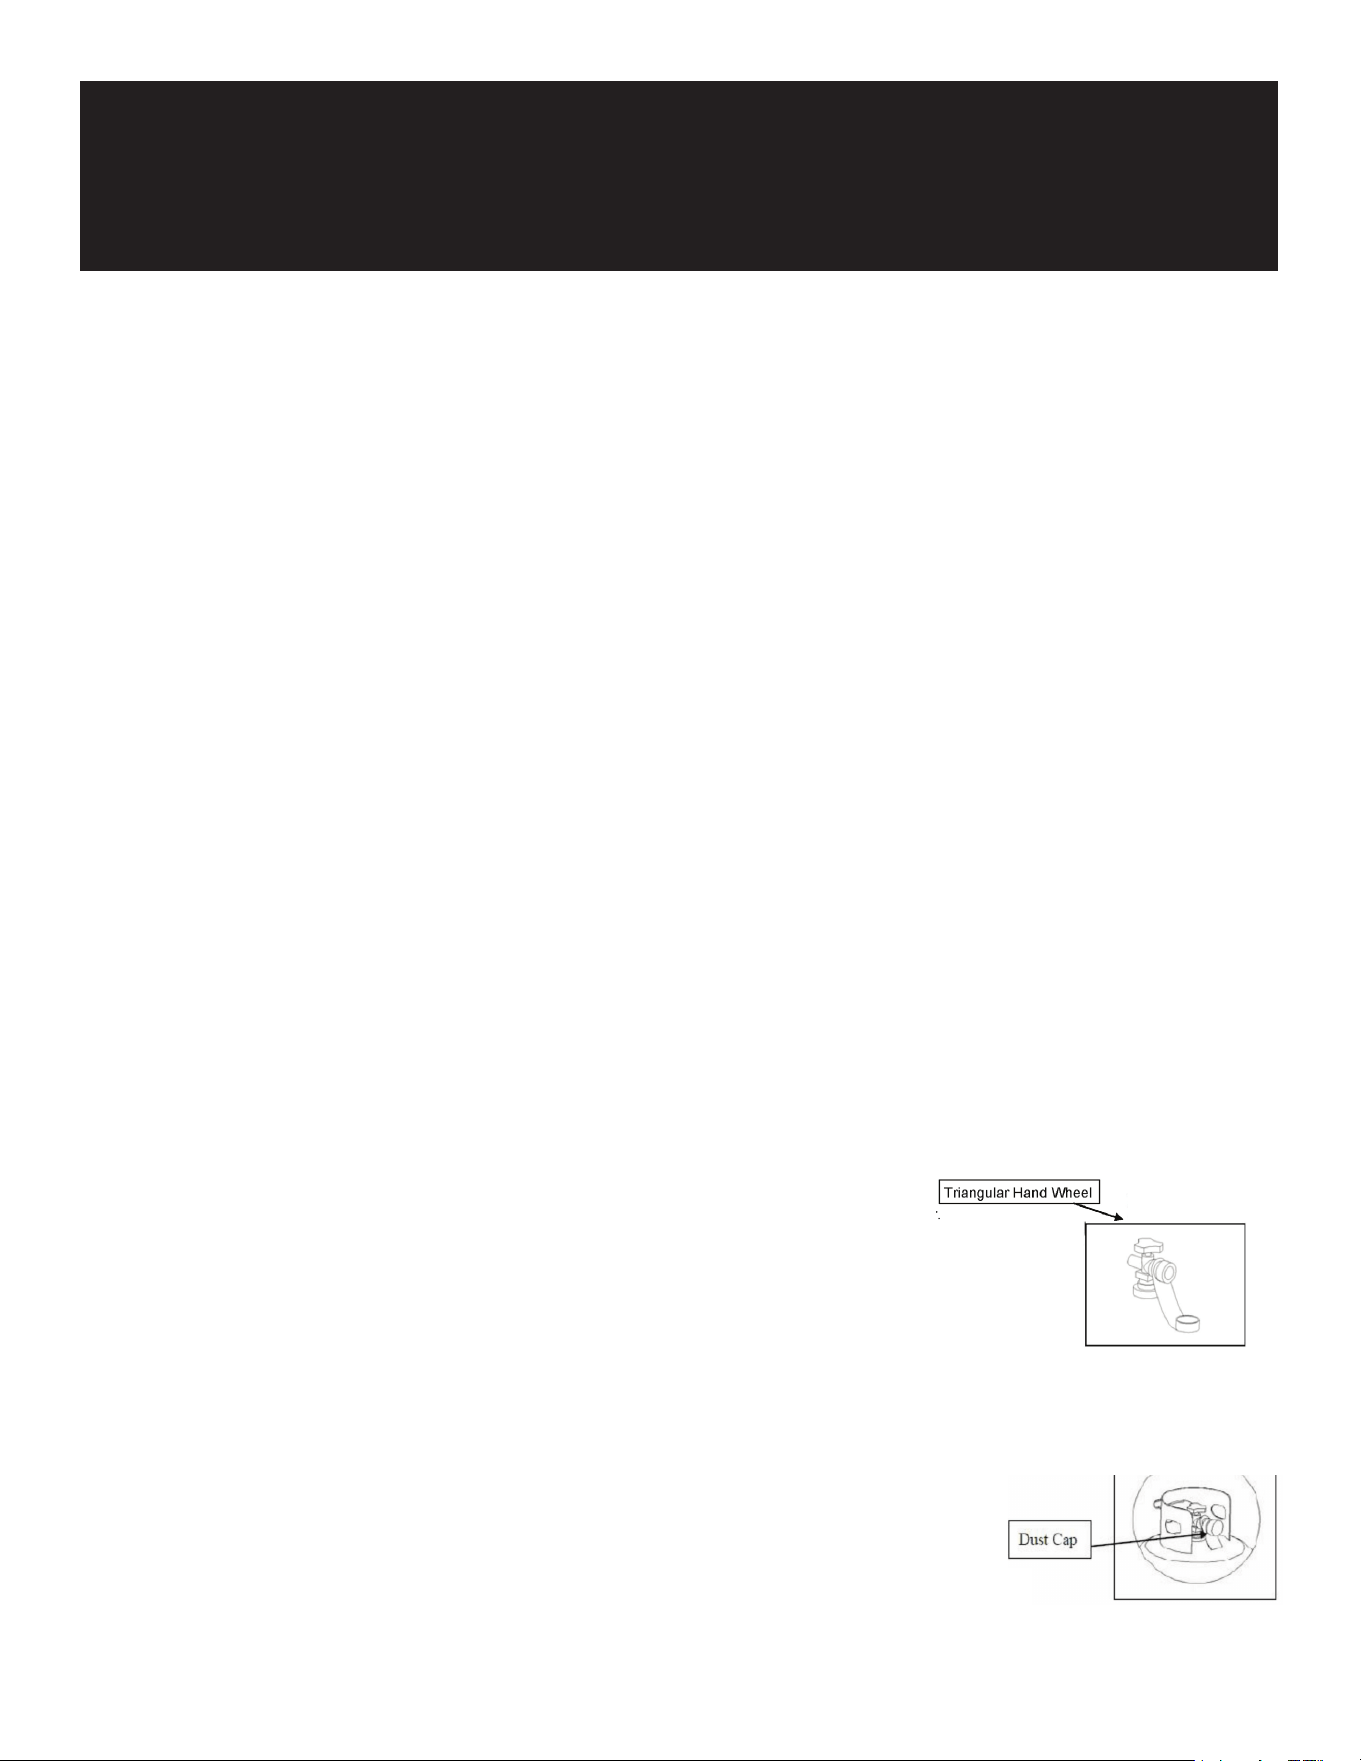
Regulator and LP Cylinder Connections
CAUTION
The gas pressure regulator provided with this outdoor cooking appliance must be used. This
regulator is set for an outlet pressure of 11 inches water column.
=SYVVIKYPEXSVMWIUYMTTIH[MXLE5''8]TIUYMGOGSRRIGXW]WXIQ-X[MPPRSXEPPS[KEWXSƽS[YRXMPETSWMXMZIWIEPLEW
FIIRQEHI-XLEWEXLIVQEPIPIQIRXXLEX[MPPWLYXSJJXLIKEWƽS[MJXLIXIQTIVEXYVIVIEGLIWHIKVIIW*HIKVIIW
'-XEPWSLEWEƽS[PMQMXMRKHIZMGIXLEX[MPPVIWXVMGXXLIƽS[SJKEWXSGYFMGJIIXTIVLSYVGYFMGQIXIVWTIVLSYV
Before each use, check the gas hose for excessive abrasion or wear, or cuts. Replace a hose assembly showing those
WMKRW[MXLXLILSWIEWWIQFP]WTIGMƼIHMRXLITEVXWPMWXFIJSVIYWMRKXLIKVMPP
TO CONNECT THE CYLINDER TO THE REGULATOR AND HOSE
1. Be sure the LP cylinder is “OFF” by turning the hand wheel clockwise until it stops.
2. Place the cylinder on the hook beside the body with the valve facing outward. See Assembly Instructions to secure.
3. Be sure all burner controls are turned to the “Off” position.
4. Remove the safety cap from the cylinder valve.
Center the nipple of the regulator into the cylinder valve.
6. Turn the black nut clockwise until it stops.
Hand Tighten Only. Do Not Use A Wrench.
1. Do not connect this grill to any unregulated sources of propane.
2. Before each use, check the gas hose for excessive abrasion, wear, or cuts. Replace a hose assembly showing those
WMKRW[MXLXLILSWIEWWIQFP]WTIGMƼIHMRXLITEVXWPMWXFIJSVIYWMRKXLIKVMPP
3. %P[E]WTIVJSVQXLI0IEO8IWXPMWXIHFIPS[FIJSVIYWMRK]SYVKVMPPJSVXLIƼVWXXMQIEJXIVXLIG]PMRHIVLEWFIIRGLERKIH
ER]KEWGSQTSRIRXWLEZIFIIRGLERKIHXLIVIKYPEXSVƽS[PMQMXMRKHIZMGILEWFIIREGXMZEXIHSVEJXIVEPSRKTIVMSH
of non-use.
4. Do not attempt to connect this grill to the LP system of a motor home or trailer.
LEAK TESTING THE REGULATOR, VALVES, HOSES, AND CONNECTIONS
1. Ensure the LP cylinder valve and all burners are “Off”.
2. Ensure the LP cylinder is connected to the regulator.
3. -JXLIMRJSVQEXMSRMRMWRSXJSPPS[IHI\EGXP]EƼVIGEYWMRKHIEXLSVWIVMSYWMRNYV]QE]SGGYV
4. 1M\EWSPYXMSRSJ[EXIVERHPMUYMHHMWLWSET(SRSXYWIER]LSYWILSPHGPIERMRKWSPYXMSR
WARNING
Open the LP tank valve by turning the hand wheel counterclockwise one turn. If you hear a rushing sound, turn the gas
off immediately. In that case, there could be a leak at the connection. Reconnect the cylinder to the regulator.
6. Spray or brush on the solution covering the following areas: regulator and cylinder connection, gas hose connections
to the regulator, all gas hoses, all gas hose connections to the burners, including the main and side burners.
7. Growing bubbles on any of the parts and connections listed above indicate a gas leak. Immediately shut off the LP
tank valve by turning the valve clockwise. Re-tighten the connections or order replacement parts as needed. Continue
to test as necessary until no leaks are detected.
Close the LP tank valve by turning the hand wheel clockwise.
1. DO NOT USE THE GRILL if you cannot stop the leaks. Be sure the LP cylinder valve is closed. If the LP cylinder is still
PIEOMRKGSRXEGX]SYV04HIEPIVSVPSGEPƼVIHITEVXQIRX
2. (SRSXYWIER]QEXGLSVSTIRƽEQISVWQSOIHYVMRKPIEOXIWXMRK
3. Do not light a burner during leak testing.
4. 8LIVITPEGIQIRXLSWIEWWIQFP]QYWXFIXLISRIMHIRXMƼIH
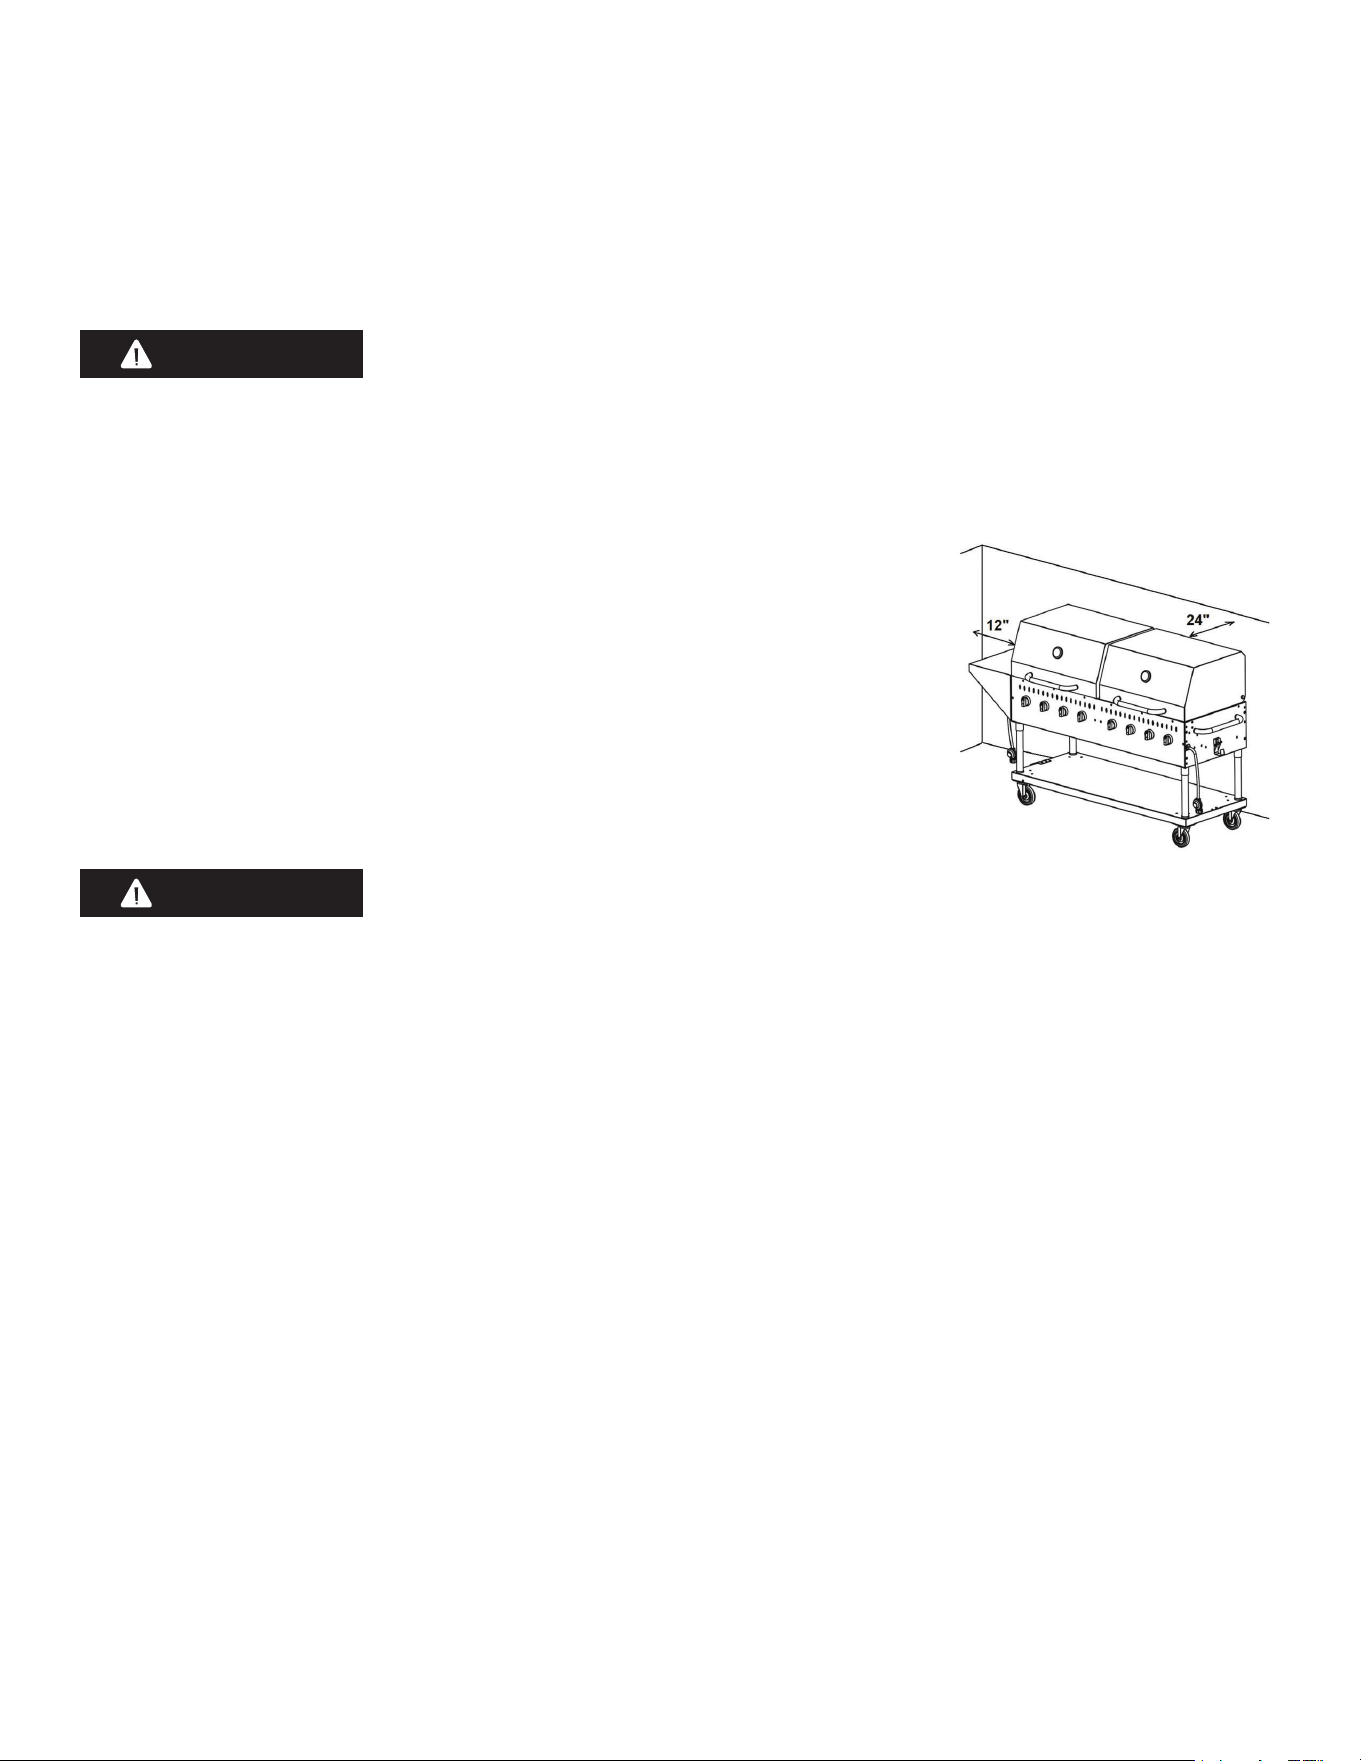
FOR YOUR SAFETY
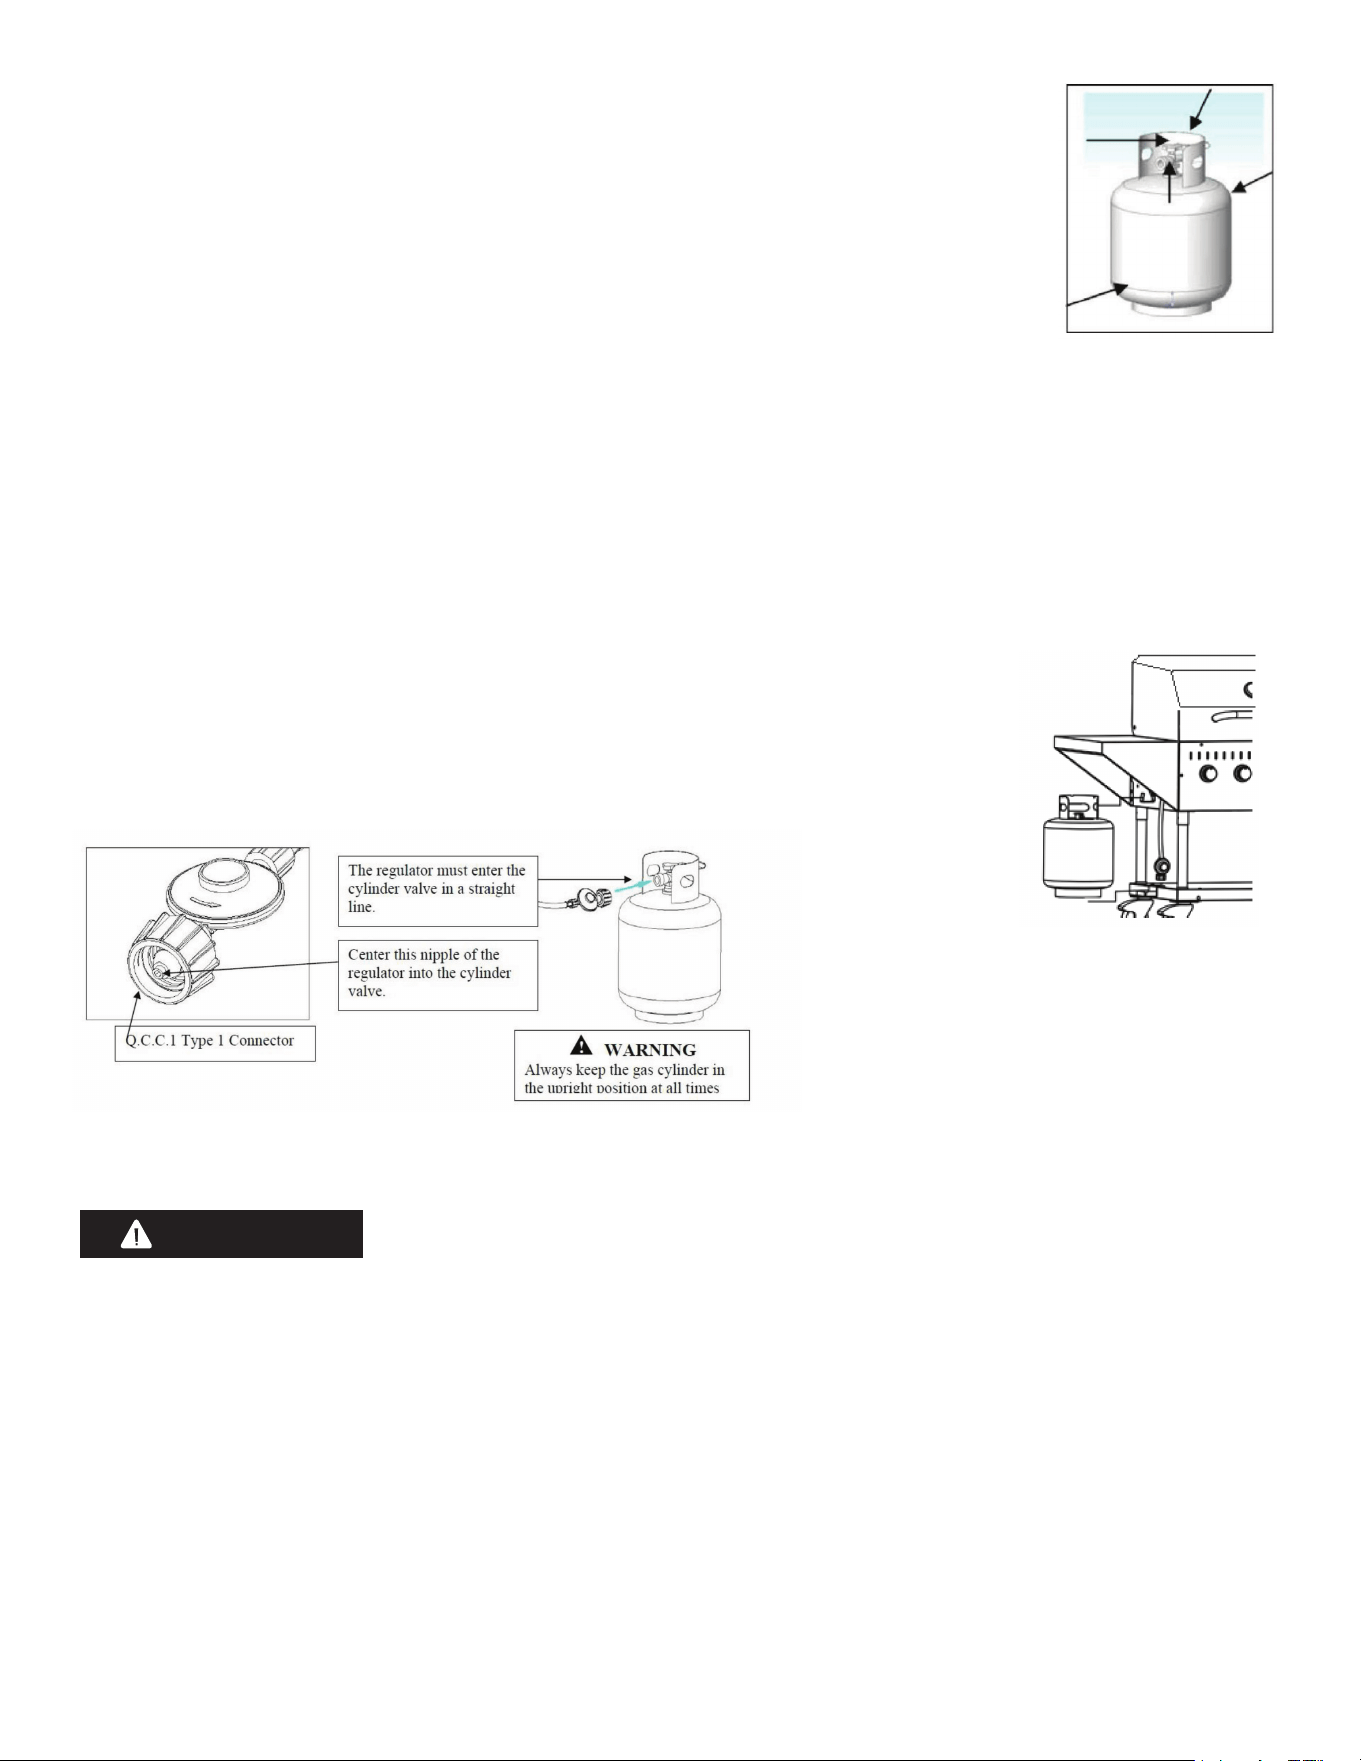
1. Minimum clearance from sides and back of unit to adjacent combustible
construction below top of unit, 12 inches from sides and 24 inches from back.
2. Do not locate this outdoor cooking gas appliance under overhead unprotect-
ed combustible surfaces.
APARTMENT RESIDENTS
Check with your apartment manager regarding your regulations for grills.
1. Do not use this grill in any enclosed area, garage, shed, or under any type of overhead structure or canopy.
2. Operate this grill only in a well-ventilated area.
Keep any electrical supply cord and the fuel supply hose away from any heated surfaces and water.
Do not face the grill directly into the wind.
WARNING
WARNING

OPERATION
LIGHTING
Always visually inspect your grill before lighting. Replace any hoses that are frayed or cracked before lighting your grill.
Look for anything that may be blocking spaces for ventilation and remove.
%JXIVPMKLXMRKEP[E]WGLIGOXLIƽEQIXSIRWYVI]SYLEZIEKSSHƽEQIEPPEPSRKIEGLFYVRIV-JRSXEFPIXSPMKLXSVXLI
ƽEQIMWRSXIZIREPSRKXLIIRXMVIFYVRIVWXLIRWIIXLI8VSYFPIWLSSXMRK
WARNING
1. Read instructions before lighting.
2. -JMKRMXMSRHSIWRSXSGGYVMRWIGSRHWXYVRXLIFYVRIVGSRXVSPWSJJ[EMXQMRYXIWERHVITIEXXLIPMKLXMRKTVSGIHYVI
LIGHTING THE MAIN BURNERS USING ELECTRONIC IGNITION
1. Ensure all burner control knobs are in the “Off” position.
2. Turn on the LP gas by turning the hand wheel on the cylinder valve counter-clockwise.
3. 8YVRSRIFYVRIVGSRXVSPORSFQEVOIH[MXLERMKRMXIVƽEQIXSƈ,MKLƉ
4. Depress the electronic ignition button and hold down. You should hear a clicking sound, which shows the electronic
ignition is working.
-JXLIFYVRIVHSIWRSXPMKLX[MXLMRWIGSRHWXYVRXLIFYVRIVGSRXVSPORSFXSƈ3JJƉ;EMXQMRYXIWJSVXLIKEWXSGPIEV
and repeat the above procedure. Use the manual directions if it still will not light.
6. When lit, turn the control knob to the desired setting.
MANUALLY LIGHTING THE BURNERS WITH A MATCH
1. Ensure all burners are in the “Off” position.
2. Slowly turn on the gas at the LP tank valve if it is not already on.
3. Place a match in the Match Holder. This is located in the top center drawer of the grill cabinet underneath the right
main burner.
4. Use the holder to slide the lit match through the cooking grates and the front of the heat tent to the left of the burner
you wish to light.
4VIWWERHXYVRXLIFYVRIVGSRXVSPORSFXSƈ,-0-+,8Ɖ'SRXMRYIXSTYWLMRERHLSPHYTXSWIGSRHWSVYRXMPXLIFYVRIV
lights.
6. -JXLIFYVRIVHSIWRSXPMKLX[MXLMRWIGSRHWXYVRXLIFYVRIVGSRXVSPORSFXSƈ3**Ɖ;EMXQMRYXIWJSVKEWXSGPIEV
and try again.
7. When lit, turn the control knob to the desired heat setting.
TURNING OFF YOUR GRILL
1. Turn off the gas supply at the LP tank by turning the valve clockwise.
2. Turn all burner control knobs to the “Off” position.
CLEANING YOUR GRILL
WARNING
1. Do not clean any part of your grill in a self-cleaning oven.
2. Do not use oven cleaners, abrasive kitchen cleaners, cleaners that contain citrus products, or mineral spirits.
3. Do not use any type of steel bristled brush.

4. 'PIER]SYVKVMPPVIKYPEVP]XSTVSLMFMXKVIEWIFYMPHYTWERHEZSMHEKVIEWIƼVISVI\GIWWMZIƽEVIYTW
Always allow the grill to cool down prior to cleaning.
78%-20)7778))0Ƃ'PIER[MXLQYPXMTYVTSWIPS[EFVEWMZIRSRTLSWTLSVSYWQIXEPSVWXEMRPIWWWXIIPTSPMWLERHEWSJX
cloth. Always polish in the direction of the lines. Do not allow grease and dirt to accumulate. In addition, the following
TVSHYGXWERHREXYVEPP]SGGYVVMRKWYFWXERGIWMRXLISYXHSSVW[MPPHEQEKIEPPWXEMRPIWWWXIIPƼRMWLIW9WIGEYXMSRWSXLEX
they do not come in contact with your Gas Grill. Immediately wash them off and dry the stainless steel should they ever
come in contact with your Gas Grill. This includes, but is not limited to, Pool Chemicals (chlorine and bromine), Lawn Fer-
tilizer, Ice Melting Salts, Sea or Salt Water, Urine, Bird Droppings, and Tree Sap.
38,)6)<8)6-36796*%')7Ƃ;EWL[MXLEQMPHHMWLWSETERH[EVQ[EXIV%GPSXLWSJXFVYWLSVTPEWXMGGPIERMRKTEH
can be used. Rinse thoroughly and wipe dry.
'33/-2++6%8)7%2(,)%8(-**97)67Ƃ9WIEWXMJJFVEWWFVYWL;EWL[MXL[EVQ[EXIVERHQMPHHMWLWSETEWRIIHIH
rinse, and dry.
+6)%7)4%2%2(86%=Ƃ'LIGOEJXIVIEGLYWI6IQSZIERHIQTX]XLIXVE][LIRLEPJJYPP6IQSZIERHGPIERXLITEREW
grease builds up. Both can be washed with warm water and mild dish soap.
WARNING
Small insects, such as spiders, are able to access the burner tubes. Sometimes they will build nests or spin webs. In either
GEWIXLMWGERFPSGOSVVIHYGIXLIEQSYRXSJKEWƽS[MRKXLVSYKLXLIFYVRIV=SY[MPPYWYEPP]WIIEWQEPPIVƽEQISVE
ƽEQIXLEXMWQSWXP]]IPPS[VEXLIVXLERFPYIGSQMRKJVSQXLIFYVRIV[LIRXLMWLETTIRW3XLIVWMKRWMRGPYHIXLIKVMPPRSX
LIEXMRKIZIRP]RSXVIEGLMRKXIQTIVEXYVISVFYVRIVWRSXMKRMXMRK-RGEWIW[MXLWIZIVIFPSGOEKIXLMWGERGEYWIXLIƽEQI
to burn backwards, and outside of the burner tubes, which can cause damage to your grill and/or personal injury. IMMEDI-
ATELY SHUT OFF THE FLOW OF LP GAS AT THE CYLINDER BY TURNING THE HAND WHEEL CLOCKWISE SHOULD THIS
HAPPEN. Wait for the grill to cool, and then clean all burners.
CLEANING THE BURNERS
1. Ensure the LP gas is turned off at the LP cylinder.
2. 6IQSZIXLIGSSOMRKKVEXIWƽEQIXEQIVERHKVIEWIXVE]
3. Remove the cotter pins located underneath the back end of each burner.
4. Lift each burner up and out.
Clean the inside of the burner using a stiff wire. A straightened coat hanger is one suggested tool. An alternative way
to clean the inside of the burner is using compressed air. Always wear eye protection if using this method. Never en-
large the burner ports during cleaning.
6. Brush the outer surface of the burner.
7. Ensure all ports (holes) are free of all debris.
Inspect the burner. Replace if any cracks or enlarged holes.
6IMRWXEPPXLIFYVRIVWQEOMRKWYVIXLIFYVRIVWWIEXSZIVXLIZEPZIWEWWLS[RMRXLIƼKYVIXSXLIVMKLX
WARNING
4VSTIVP]PSGEXMRKXLIFYVRIV[MXLVIWTIGXXSXLISVMƼGIMWZMXEPJSVWEJIX]
1. 7IGYVIXLIFEGOSJXLIFYVRIVWXSXLIƼVIFS\[MXLXLIGSXXIVTMRW
2. 6ITPEGIXLIKVIEWIXVE]ƽEQIXEQIVERHGSSOMRKKVEXIW
3. Perform a Leak Test described earlier in this guide.
BURNER FLAMES
%P[E]WMRWTIGXXLIFYVRIVƽEQIEJXIVPMKLXMRK%KSSHƽEQIWLSYPHFITVMQEVMP]FPYI[MXLE]IPPS[XMTERHLEZIEQMRMQEP
amount of noise. Some yellow tips are OK if under one inch. New burners sometimes have oil residue, which will cause
]IPPS[ƽEQI[LIRFYVRMRKSJJ:EVMEXMSRWMRKEWWYTTP]EPXMXYHI[IEXLIVERHSXLIVJEGXSVWGEREPPMQTEGXFYVRIVTIVJSV-
QERGI3PHIVKVMPPWGEREPWSWLS[QSVI]IPPS[ƽEQIEWJSSHHITSWMXWSMPWERHJEXWFYMPHYT
ALWAYS
1. /IITXLIKVMPPMRKEVIEGPIEVERHJVIIJVSQGSQFYWXMFPIQEXIVMEPWKEWSPMRIERHSXLIVƽEQQEFPIZETSVWERHPMUYMHW
2. (SRSXSFWXVYGXXLIƽS[SJGSQFYWXMSRERHZIRXMPEXMSREMV
Keep the ventilation openings of the cylinder enclosure free and clear from debris.

GRILL STORAGE
1. Clean your grill before storage.
2. Storage of a gas grill indoors is permissible only if the cylinder is disconnected and removed from the gas grill.
3. Cover the grill.
4. Perform a Leak Test before use after storage.
Grilling With Your New Grill
Welcome to the world of grilling. Whether you’re already an established griller, or just starting out, your new grill should
bring you much enjoyment and satisfaction, to say nothing of some phenomenal meals. We encourage you to experiment
XSƼRH]SYVS[RJEZSVMXIVIGMTIW
The control panel is labeled “HI / LIGHT”, “LOW”, and “OFF” for each burner control knob. Simply push in on the tem-
perature control knobs and turn to the desired heat setting. A thermometer is placed in the hood so that you can see the
cooking temperature inside the grill.
The heat diffusers are designed to help evenly distribute heat throughout the grill. They are also designed to catch and
WQSOIXLIVMKLXEQSYRXSJHVMTTMRKWEHHMRKQSVIƽEZSVWXS]SYVQIEP
DIRECT VS. INDIRECT COOKING
Food cooked on the grill is either done using direct or indirect cooking. Direct cooking is when the food is cooked directly
over the heat. Food is placed in-between the burners for indirect cooking.
DIRECT—used for preheating and searing
9WIHMVIGXGSSOMRKXSWIEVQIEXW8LMWLIPTWXSOIITJSSHQSMWXF]PSGOMRKMRNYMGIW7SQIJSSHWYGLEWWXIEOMWƼVWX
WIEVIHYWMRK(MVIGXGSSOMRKERHXLIRƼRMWLIHGSSOMRKYWMRKXLI-RHMVIGXQIXLSH8LMWMWKIRIVEPP]YWIHJSVUYMGOIVGSSO-
MRKJSSHW4VILIEXXLIKVMPPXSq*q'=SYGERWLYXSJJSRISVQSVIFYVRIVWMJ]SYHSRSXRIIHXSYWIXLIIRXMVI
KVMPPMRKWYVJEGISRGI]SYVIEGLSZIVq*q'
=SYGEREPWSYWIEQIHMYQLMKLLIEXSJq*SVQSVIF]XYVRMRKXLIFYVRIVWHS[RWPMKLXP]4PEGIXLIJSSHHMVIGXP]SZIV
the heat source. Remain vigilant when grilling using this method, as it’s easy to overcook.
INDIRECT—how most food is cooked on a gas grill
Indirect cooking is used for foods that take longer to cook, including large cuts of meat such as roasts. It’s also used for
GSSOMRKQSVIHIPMGEXIJSSHXLEXGERHV]SYXUYMGOP]WYGLEWƼWLERHTSYPXV]JSVJEXXMIVJSSHWXSVIHYGIƽEVIYTWERH
[LIRKVMPPMRKYWMRKEVSEWXMRKTERSVEPYQMRYQJSMP4VILIEXXLIKVMPPXSq*q'8LIRXYVRWSQIFYVRIVWSJJERH
others to medium to low depending on the temperature you want to maintain.
Generally, turn the center burner off for a 3-burner model and the 2 inside burners off on a 4-burner model. Grills with more
XLERFYVRIVW[MPPZEV]HITIRHMRKSR[LEX]SYEVIGSSOMRK+IRIVEPP]]SY[ERXXSOIITXLIXIQTIVEXYVIEVSYRHq*(S
not place the food directly over any burners when using this grilling method.
GRILLING TIPS AND TRICKS
1. Always “Preheat” your grill before cooking. Light all main burners, turn to “HI”, and close the lid until the thermometer
VIEHWSZIVq*q'[LMGLWLSYPHXEOIQMRYXIW8LIREHNYWXXLIFYVRIVGSRXVSPORSFWXSXLITVSTIVXIQTIVE-
ture. Note that no preheating is necessary for the side burner.
2. The thermometer measures the temperature at the top of the lid. The temperature down by the cooking grates is gen-
erally somewhat warmer.
3. Mother Nature can impact your grilling times. Allow more cooking time for cold, wind, and higher altitudes.
We recommend you place the grill in an area protected from too much wind.
4. 8VMQE[E]ER]I\GIWWJEXJVSQQIEXXSVIHYGIƽEVIYTW

Keep similar size portions together so that they cook more evenly.
6. Generally, the more food on the grill, the longer the cooking time.
7. Be aware when using the Direct cooking method, as food can easily become overcooked, burned, or dry out. Food may
VIUYMVIQSVIXYVRMRKSVWSQIXMQIWQE]RIIHXSFIQSZIHSJJXLIƽEQI
0EVKIVTMIGIWSJQIEXKIRIVEPP]VIUYMVIQSVIGSSOMRKXMQITIVTSYRHXLERWQEPPIVTMIGIWSJQIEX
-JEQENSVƽEVIYTSVXSSQER]ƽEVIYTWSGGYVXYVRSJJXLIKEWQSZIXLIJSSHE[E]JVSQXLIƽEVIYTERHGPSWIXLI
LSSH6IWXEVXXLIKVMPPSRGIXLIƽEVIYTLEWHMIHHS[R
8YVRJSSHWMRJVIUYIRXP]+IRIVEPP]SRP]XYVREWXIEOSRGIHYVMRKGSSOMRK
11. Use tongs rather than a fork when turning the food on the grill. Less juice will be lost that way.
FOOD SAFETY
1. Always use safe food handling and preparation when using this grill.
2. Wash all poultry, seafood, and vegetables before cooking.
3. Use separate platters, plates, and utensils for uncooked and cooked foods.
4. Leave all meat, poultry, and seafood in the refrigerator until ready to cook.
9WIEQIEXXLIVQSQIXIVXSIRWYVIJSSHWEVIEHIUYEXIP]GSSOIH

BURNER WILL NOT LIGHT
1. Gas supply is turned off. Turn on gas at LP tank.
2. Out of propane. Check to be sure you still have propane in your tank.
3. Regulator is not properly seated into the tank valve. Remove and reattach. Hand tighten only.
4. Crimped fuel supply hose. Inspect and straighten.
Regulator failure or damaged hose. Order replacement part and replace.
6. Make sure you can hear the electronic igniter clicking. If not, replace the battery with an “AA” size. Inspect the elec-
trode to be sure it’s not coated in grease or dirt. If so, clean with rubbing alcohol. Check the distance from the elec-
XVSHIXMTXSXLIFYVRIV8LIXMTSJXLIIPIGXVSHIWLSYPHFIƉXSƉJVSQXLIQEMRFYVRIVERHƉXSƉJVSQXLI
side burner. Adjust if necessary. Inspect the electrodes to be sure they are not cracked or broken. If so, order replace-
ment parts and replace.
7. Blockage in the gas system. Inspect the burners to be sure insects, spider webs, etc. do not block them.
IRREGULAR FLAME OR YELLOW FLAME
1. New burner may have residual oil, which will burn off.
2. Tubes in burners are blocked. Remove and clean.
3. Burners have a high grease or dirt build-up. Remove and clean.
4. Burners are not aligned properly with the valves. Inspect under the control panel.
SUDDEN DROP IN GAS PRESSURE OR FLAMES BLOW OUT
1. Out of gas. Check to be sure you still have propane in your tank.
=SYVI\GIWWMZIJYIPƽS[ZEPZILEWXVMTTIHXLIVIF]VIHYGMRKXLIƽS[SJKEW8YVRSJJEPPFYVRIVW[EMXWIGSRHWERH
relight grill. If problem persists, turn off all burners. Disconnect regulator from tank.
;EMXQMRYXIW6IGSRRIGXVIKYPEXSVERHPIEOXIWX7PS[P]XYVRSR04XEROERHVIPMKLXKVMPP3XLIV[E]WXLIƽS[PMQMXMRK
device can be activated include:
a. A ruptured gas hose. Inspect, perform a leak test, and replace as necessary.
F3TIRMRKXLIGSRXVSPORSFWFIJSVIXYVRMRKSRXLI04KEWEXXLIXERO8YVRSRXLIKEWEXXLI04XEROƼVWXFIJSVIXYVRMRK
on a control knob to light.
G-QTVSTIVTYVKMRKSJXEROFIJSVIMX[EWƼPPIH7II]SYV04KEWHIEPIV
3. Wind could be blowing out your burner. Turn front of grill to face wind or move out of the wind.
EXCESSIVE FLARE-UPS
1. Flame tamer, inside of grill, grates, and burners need to be cleaned.
2. Grease tray needs to be cleaned and emptied.
3. Using too high of heat to cook. Reduce control knob setting.
4. (MVIGXGSSOMRKQIXLSH[MPPTVSHYGIQSVIƽEVIYTWXLERMRHMVIGX-JYWMRKHMVIGXQIXLSHXV]YWMRKMRHMVIGX
FIRE BEHIND CONTROL PANEL
Immediately shut off LP tank valve and allow grill to cool.
1. Check burners for obstructions and clean.
2. inspect under the control panel to be sure the burners are aligned properly with valve.
3. Gas is leaking from a faulty connection or damaged hose. Perform a leak test and inspect for leaks. Tighten or replace
parts as necessary.
TROUBLESHOOTING

WARRANTY
Koolmore Supply, Inc. extends a limited warranty to the original purchaser, guaranteeing that this Koolmore
product is free from manufacturing defects in material or workmanship for one year from the date of
purchase.
Should you discover any such defect within the warranty period, Koolmore Supply, Inc., reserves the right to
repair or replace the product without charge, or to cover the cost of replacement parts and repair labor needed
to correct defects present at the time of purchase or resulting from regular usage, when the appliance has been
installed, operated, and maintained as per the instructions provided.
At its sole discretion, Koolmore Supply Inc. may decide to replace the product. In such an event, your replace-
ment
appliance will carry the warranty for the remaining term of the original unit's warranty period.
This warranty is valid exclusively to the original purchaser of the product and only applicable within the United
States. The warranty commences from the date of original consumer purchase. Proof of the original purchase
date will be required to obtain service under this warranty.
Under this limited warranty, your sole and exclusive remedy will be product repair, as outlined above. All
services must be provided by a Koolmore-designated service company.
To claim warranty or request repair service:
Email support@koolmore.com. Please include your name, address, phone number, warranty repair request,
and a copy of your proof of purchase receipt. Alternatively, visit koolmore.com and use the contact us page. A
Koolmore customer service representative will promptly arrange service for your appliance.
We thank you for choosing Koolmore.
This limited warranty will not cover:
1. Failure of the product to perform during power failures or interruptions,
or due to inadequate electrical service.
2. Damage incurred during transportation or handling.
3. Damage caused by accidents, vermin, lightning, winds, re, oods, or acts of God.
4. Damage resulting from accidents, alterations, misuse, abuse, improper installation, repair, or maintenance.
This includes using any external device that alters or converts the voltage or frequency of
electricity.
5. Unauthorized product modications, repairs by unauthorized centers, or use of non-approved
replacement parts.
6. Abnormal cleaning and maintenance not aligned with the user's manual.
7. Use of incompatible accessories or components.
8. Any costs associated with repairs or replacements under these excluded circumstances shall be the
responsibility of the consumer.