TAFA3
Wireless Home Speaker
User manual
Register your product and get support at:
www.philips.com/support

5 Connect Philips Fidelio FA3
speakers and FT1 turntable 15
Auracast
TM
connection 16
Bluetooth
®
in & out connection 18
Wired connection (via RCA audio
cable) 19
6 Philips Entertainment App 20
App download 20
Pair the App with your speaker 21
Choose your sound 21
Select source 22
Receive unencrypted Auracast
TM
broadcast 22
Receive encrypted Auracast
TM
broadcast 23
Remote control 23
User guide 23
Firmware Upgrade 24
7 Product speci�cations 25
8 Troubleshooting 26
1 Important 2
Safety 2
Notice 3
Trademarks 4
2 Your wireless home speaker 4
Introduction 4
What's in the box 4
Speaker cover installation 4
Overview of the speaker 5
Overview of the remote control 8
3 Get started 9
Connect power 9
Prepare the remote control 9
Turn On / Off 10
Adjust volume 10
Choose your sound 10
4 Connect 10
Speaker connection 10
Bluetooth
®
connection 11
Auracast
TM
receiver connection 12
Connect to HDMI ARC 13
Connect to Optical socket 14
Connect to USB Audio 14
Connect to Auxiliary input 15
Factory reset 15
Contents
1EN
1
Important
Safety
Read and understand all instructions before
you use this micro music system.
If damage is caused by failure to follow the
instructions, the warranty does not apply.
This 'bolt of lightning' indicates uninsulated
material within the device may cause an
electrical shock. For the safety of everyone in
your household, please do not remove the
covering.
The 'exclamation mark' calls attention to
features for which you should read the
enclosed literature closely to prevent operating
and maintenance problems.
WARNING: To reduce the risk of �re or electric
shock, the device should not be exposed to rain
or moisture and objects �led with liquids, such
as vases, should not be placed on the device.
CAUTION: To prevent electric shock, fully insert
the plug. (For regions with polarized plugs: To
prevent electric shock, match wide blade to
wide slot.)
• Do not block any ventilation openings.
• Do not install near any heat sources such as
radiators, heat registers, stoves, or other
apparatus (including ampli�ers) that
produce heat.
• Keep this product away from direct sunlight,
naked �ames or heat.
• The product shall not be exposed to dripping
or splashing.
• Place this product on a �at, hard and stable
surface.
• Do not place any source of danger on the
product (e.g. liquid �lled objects, lit candles).
• Only use attachments/accessories speci�ed
by the manufacturer.
• Never remove the casing of this product,
refer all servicing to quali�ed service
personnel. Servicing is required when the
product has been damaged in any way, such
as power-supply cord or plug is damaged,
liquid has been spilled or objects have fallen
into the apparatus, the apparatus has been
exposed to rain or moisture, does not
operate normally, or has been dropped.
• Battery usage CAUTION -to prevent battery
leakage which may result in bodily injury,
property damage, or damage to the product:
- Install all batteries correctly, + and - as
marked on the unit.
- Remove batteries when the unit is not
used for a long time.
- The battery (packed or installed) shall not
be exposed to excessive heat such as
sunshine, �re or the like.
- Replacement of a battery with an
incorrect type may defeat a safeguard;
- Disposal of a battery into �re or a hot
oven, or mechanically crushing or cutting
of a battery, may result in an explosion;
- Leaving a battery in an extremely high
temperature surrounding environment,
such as sunshine, �re, or hot surface may
result in an explosion or the leakage of
�ammable liquid or gas;
CAUTION
RISK OF ELECTRIC SHOCK
DO NOT OPEN
CAUTION: TO REDUCE THE RISK OF ELECTRIC SHOCK, DO NOT
REMOVE COVER (OR BACK).NO USER-SERVICEABLE PARTS
INSIDE. REFER SERVICING TO OUALIFIED SERVICE PERSONNEL.
Warning
• Never remove the casing of this apparatus.
• Never lubricate any part of this apparatus.
• Never place this apparatus on other electrical
equipment.
• Keep this apparatus away from direct sunlight,
naked �ames or heat.
• Ensure that you always have easy access to the
power cord, plug or adaptor to disconnect the
apparatus from the power
2 EN
- A battery subjected to extremely low air
pressure may result in an explosion or the
leakage of �ammable liquid or gas.
- Do not mix old and new batteries. Do not
mix alkaline, standard (carbon-zinc), or
rechargeable (ni-cad, ni-mh, etc.)
batteries.
- Batteries contain chemical substances.
They should be disposed of properly.
- If you suspect that a battery has been
swallowed or placed inside any part of the
body, seek immediate medical attention.
- When you change the batteries, always
keep all new and used batteries out of
reach of children.
- Ensure that the battery compartment is
completely secure after you replace the
battery.
- If the battery compartment cannot be
completely secured, discontinue use of the
product. Keep out of reach of children and
contact the manufacturer.
• This product shall not be exposed to
dripping or splashing.
• Where the MAINS plug or an appliance
coupler is used as the disconnect device, the
disconnect device shall remain readily
operable.
• Please use the product safety in an
environment with temperature between 0°C
and 40°C.
Read and understand all instructions before
you use this micro music system.
If damage is caused by failure to follow the
instructions, the warranty does not apply.
This 'bolt of lightning' indicates uninsulated
material within the device may cause an
electrical shock. For the safety of everyone in
your household, please do not remove the
covering.
The 'exclamation mark' calls attention to
features for which you should read the
enclosed literature closely to prevent operating
and maintenance problems.
WARNING: To reduce the risk of �re or electric
shock, the device should not be exposed to rain
or moisture and objects �led with liquids, such
as vases, should not be placed on the device.
CAUTION: To prevent electric shock, fully insert
the plug. (For regions with polarized plugs: To
prevent electric shock, match wide blade to
wide slot.)
• Do not block any ventilation openings.
• Do not install near any heat sources such as
radiators, heat registers, stoves, or other
apparatus (including ampli�ers) that
produce heat.
• Keep this product away from direct sunlight,
naked �ames or heat.
• The product shall not be exposed to dripping
or splashing.
• Place this product on a �at, hard and stable
surface.
• Do not place any source of danger on the
product (e.g. liquid �lled objects, lit candles).
• Only use attachments/accessories speci�ed
by the manufacturer.
• Never remove the casing of this product,
refer all servicing to quali�ed service
personnel. Servicing is required when the
product has been damaged in any way, such
as power-supply cord or plug is damaged,
liquid has been spilled or objects have fallen
into the apparatus, the apparatus has been
exposed to rain or moisture, does not
operate normally, or has been dropped.
• Battery usage CAUTION -to prevent battery
leakage which may result in bodily injury,
property damage, or damage to the product:
- Install all batteries correctly, + and - as
marked on the unit.
- Remove batteries when the unit is not
used for a long time.
- The battery (packed or installed) shall not
be exposed to excessive heat such as
sunshine, �re or the like.
- Replacement of a battery with an
incorrect type may defeat a safeguard;
- Disposal of a battery into �re or a hot
oven, or mechanically crushing or cutting
of a battery, may result in an explosion;
- Leaving a battery in an extremely high
temperature surrounding environment,
such as sunshine, �re, or hot surface may
result in an explosion or the leakage of
�ammable liquid or gas;
3EN
Notice
Any changes or modi�cations made to this
device that are not expressly approved by
MMD Hong Kong Holding Limited may void
the user’s authority to operate the product.
Hereby, TP Vision Europe B.V. declares that this
product is in compliance with the essential
requirements and other relevant provisions of
RED Directive 2014/53/EU and UK Radio
Equipment Regulations SI 2017 No 1206. You
can �nd the Declaration of Conformity on
www.philips.com/support.
This product complies with the radio
interference requirements of the
European Community.
This product is designed and
manufactured with high-quality
materials and components, which can
be recycled and reused.
This symbol means the product must
not be discarded as household waste
and should be delivered to an
appropriate collection facility for
recycling. Follow local rules and never
dispose of the product with normal
household waste.
Correct disposal of old products helps
prevent negative consequences for
the environment and human health.
This symbol means that the product
contains covered by European
Regulation 2023/1542 which cannot
be disposed of with normal house-
hold waste. Inform yourself about the
the local separate collection system
for electrical and electronic collection
system for electrical and electronic
products. Follow local rules and never
dispose of the product with normal
household waste. Correct disposal of
old products helps prevent negative
consequences for the environment
and human health.
Compliance
- A battery subjected to extremely low air
pressure may result in an explosion or the
leakage of �ammable liquid or gas.
- Do not mix old and new batteries. Do not
mix alkaline, standard (carbon-zinc), or
rechargeable (ni-cad, ni-mh, etc.)
batteries.
- Batteries contain chemical substances.
They should be disposed of properly.
- If you suspect that a battery has been
swallowed or placed inside any part of the
body, seek immediate medical attention.
- When you change the batteries, always
keep all new and used batteries out of
reach of children.
- Ensure that the battery compartment is
completely secure after you replace the
battery.
- If the battery compartment cannot be
completely secured, discontinue use of the
product. Keep out of reach of children and
contact the manufacturer.
• This product shall not be exposed to
dripping or splashing.
• Where the MAINS plug or an appliance
coupler is used as the disconnect device, the
disconnect device shall remain readily
operable.
• Please use the product safety in an
environment with temperature between 0°C
and 40°C.
4 EN
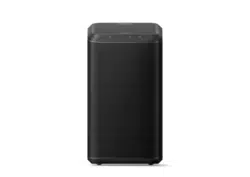
2
Your wireless
home speaker
Congratulations on your purchase, and welcome
to Philips! To fully bene�t from the support that
Philips offers, register your product at
www.philips.com/support.
Introduction
With this wireless home speaker, you can
• Play audio from Bluetooth, Auracast
TM
receiver,
HDMI ARC, �ber input, USB audio input, RCA
AUX input.
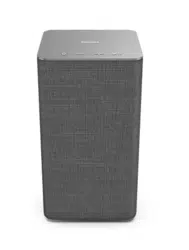
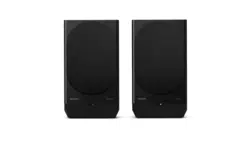
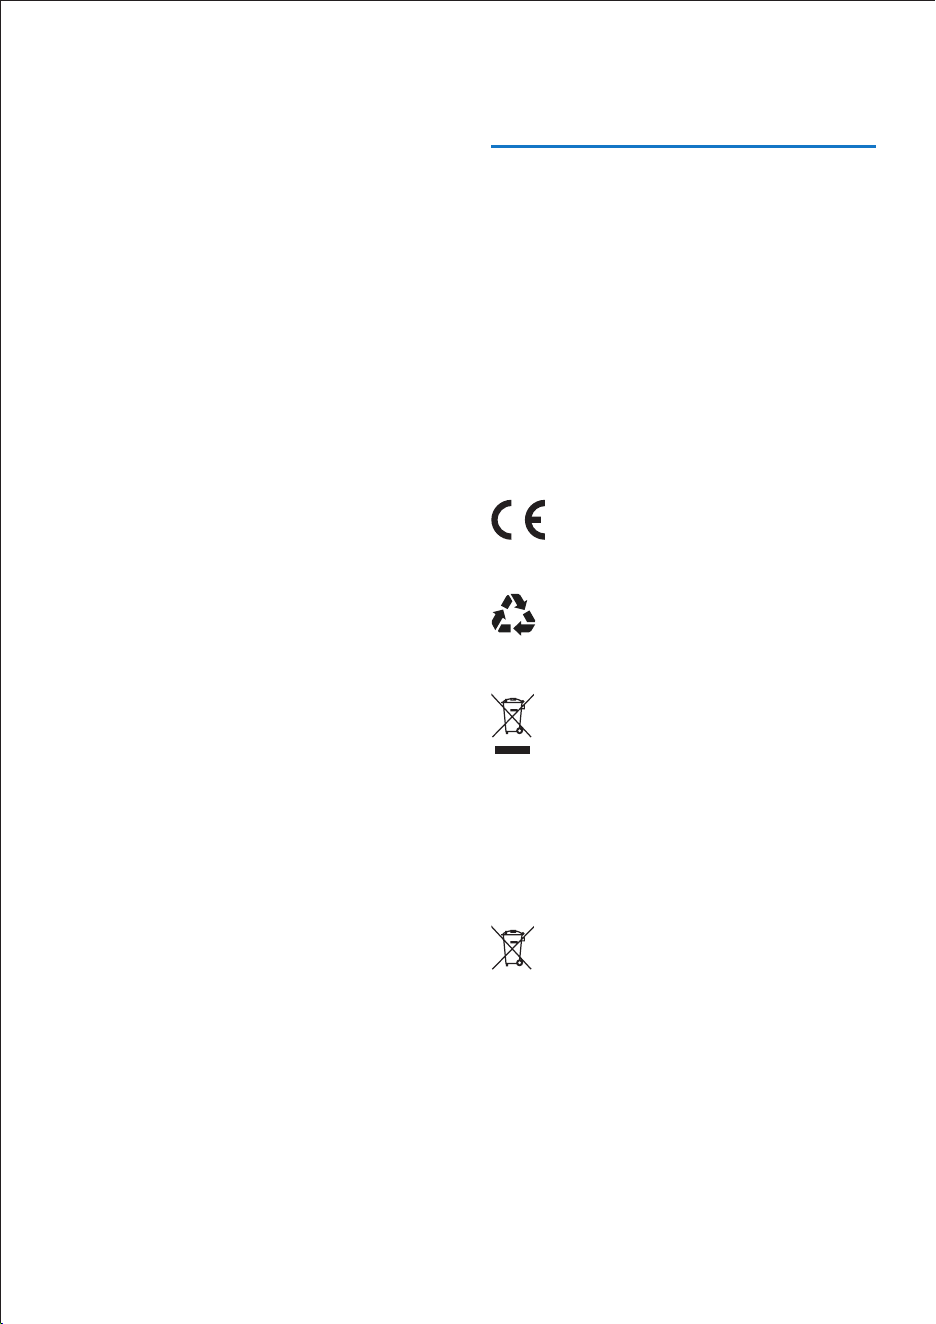
What's in the box
Check and identify the contents of your package:
• Speakers x2
• Speaker covers x2
• Remote control
• AAA Batteries x2
• AC power cords x4
• Safey sheet
• Quick start guide
• Warranty
Note
• Images, illustrations and drawings shown on this
user manual are for reference only. Actual
product may vary in appearance.
Safety
information
x2
x2 x2
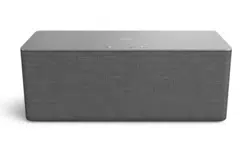
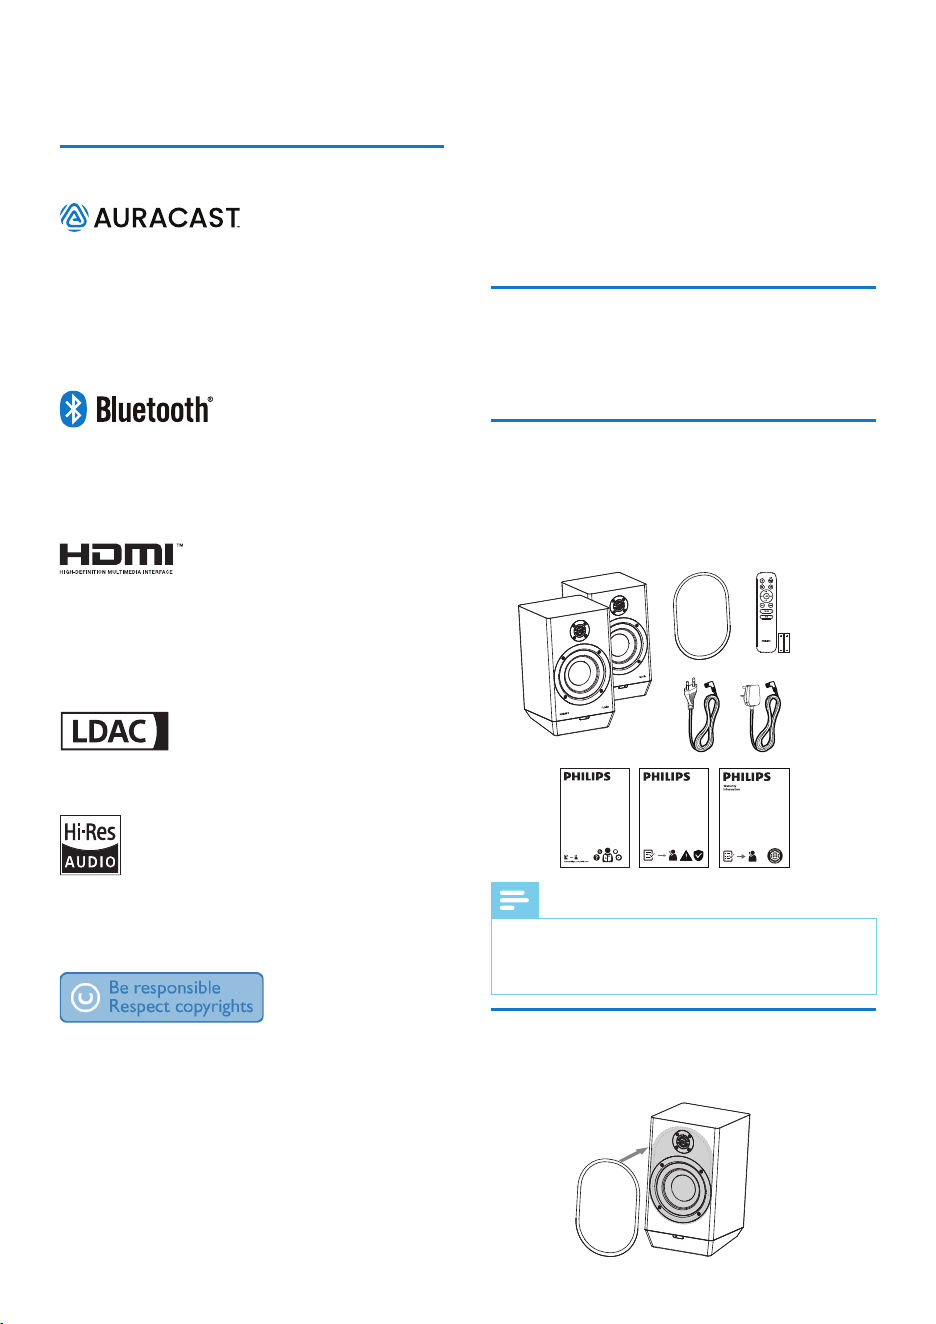
The speaker cover is equipped with a magnet,
which can be directly attached to the speaker.
Speaker cover installation
The Auracast
™
word mark and logos are
trademarks owned by Bluetooth SIG, Inc. and
any use of such marks by MMD Hong Kong
Holding Limited is under license.
Other trademarks and trade names are those
of their respective owners.
The Bluetooth
®
word mark and logos are
registered trademarks owned by Bluetooth SlG,
Inc. and any use of such marks by MMD Hong
Kong Holding Limited is under license.
The terms HDMI, HDMI High-De�nition
Multimedia Interface, HDMl trade dress and
the HDMI Logos are trademarks or registered
trademarks of HDMI Licensing Administrator,
Inc.
LDAC and LDAC logo are trademarks of Sony
Corporation.
"Hi-Res Audio" Logo and “Hi-Res Audio
Wireless" Logo are used under license from
Japan Audio Society.
The making of unauthorized copies of
copy-protected material, including computer
programs, �les, broadcasts and sound
recordings, may be an infringement of
copyrights and constitute a criminal offence.
This equipment should not be used for such
purposes.
Trademarks
5EN
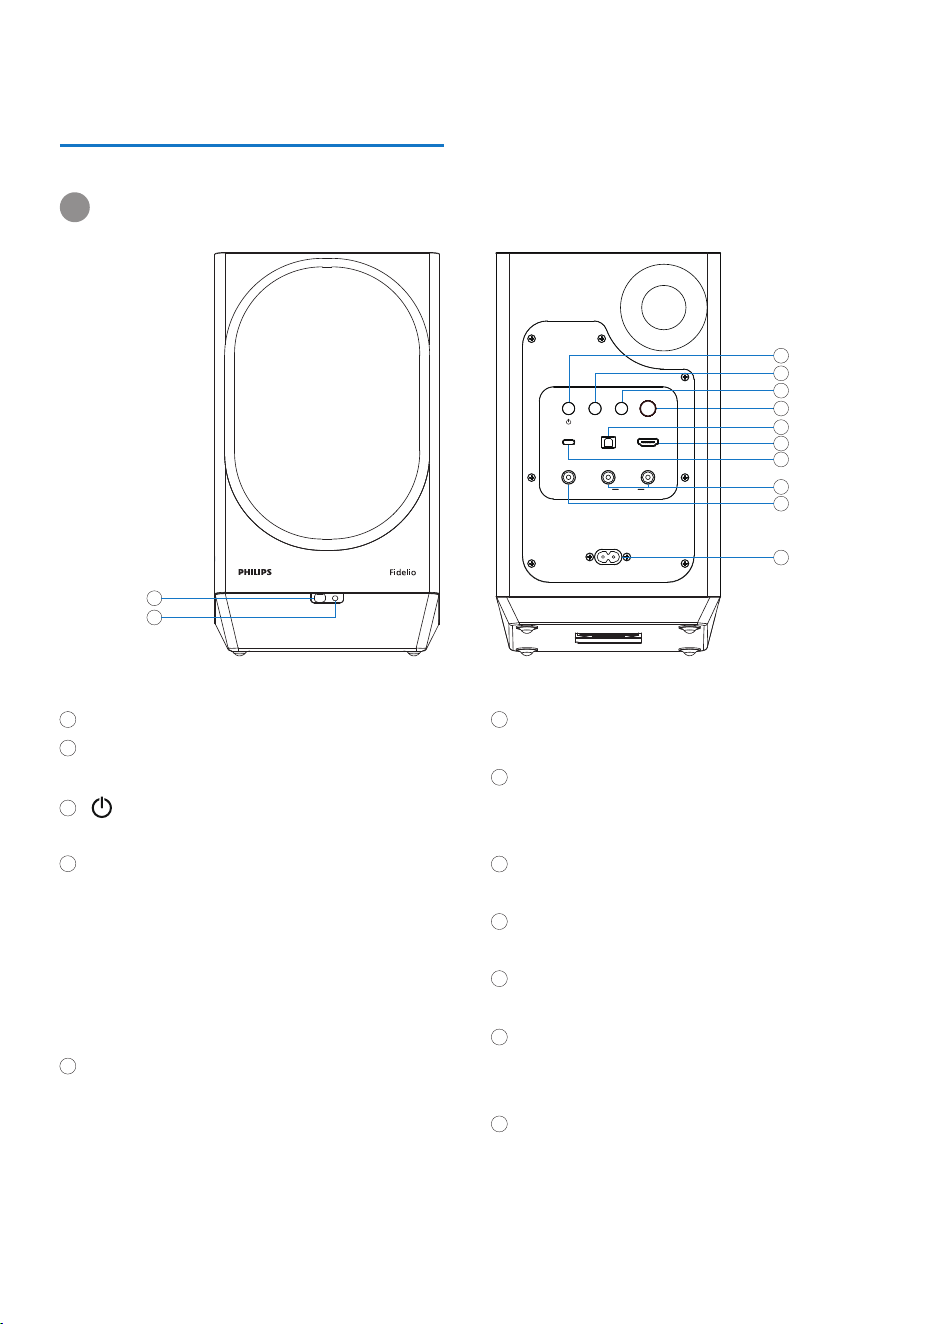
Overview of the speaker
Primary speaker
1
2
L
10
11
12
2
1
6
9
3
4
8
7
5
HDMI ARCUSB AUDIO OPTICAL IN
SOURCE
AC IN~
SECONDARY
PAIRING
COAXIAL TO
SECONDARY
VOLUME
L R
AUX IN
PRIMARY
Designed in the Netherlands
5
Remote sensor
LED indicator
• Function status (see below table).
• Turn on/off the unit.
SOURCE
• Switch to BT/Auracast
™
receiver/
HDMI ARC/Optical in/USB audio/AUX in
source.
• BT pairing.
• Clear BT pairing history.
• Rescan Auracast
™
TX channels.
SECONDARY PAIRING
• Press to enter the pairing mode to
the secondary speaker.
• Switch to next Auracast
™
TX channel.
4
3
6
7
8
9
10
12
11
VOLUME
• Adjust volume.
OPTICAL IN
• Connect to an optical audio output on
the TV or a digital device.
HDMI ARC
• Connect to the HDMI input on the TV.
USB AUDIO
• Connect to laptop or PC.
L-AUX IN-R
• Connect an external audio device.
COAXIAL TO SECONDARY
• Use the coaxial cable to connect the
secondary speaker.
AC IN~
• Connect the AC power cord.

6 EN
Standby
Power off
Pairing
Connected
Disconnected
Scanning mode
Connected
HDMI ARC
Optical in
USB audio
AUX in
Pairing
Connected
Disconnected
Connected
Playing High Resolution Audio
Function status
Power
Bluetooth
Auracast
™
Other sources
Wireless speaker connection
Wired speaker connection
Pattern
Solid Red
Off
Blink Blue (fast)
Solid Blue
Blink Blue (slowly)
Blink Cyan (slowly)
Solid Cyan
Solid Orange
Solid Olive
Solid Lime
Solid Pink
Blink White (fast)
Solid White (10sec)
Blink White (slowly)
Solid Green (10sec)
Solid Yellow (10sec)
7EN
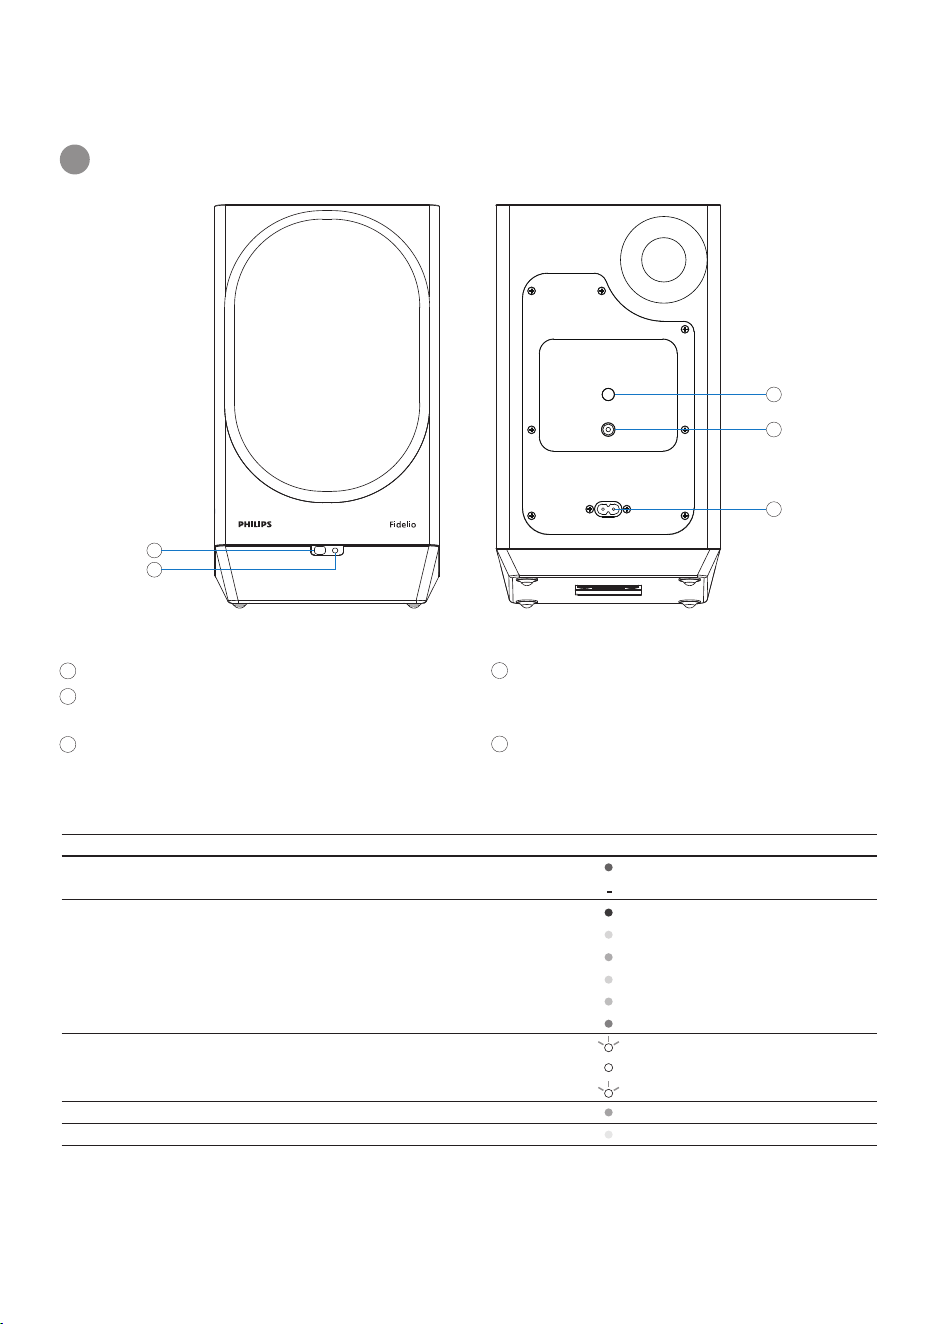
Secondary speaker
2
1
3
4
5
COAXIAL TO PRIMARY
AC IN~
PRIMARY PAIRING
SECONDARY
Designed in the Netherlands
Remote sensor
LED indicator
• Function status (see below table).
PRIMARY PAIRING
• Press to enter the pairing mode to
primary speaker.
1
2
3
4
5
R
Standby
Power off
Bluetooth
Auracast
™
receiver
HDMI ARC
Optical in
USB audio
AUX in
Pairing
Connected
Disconnected
Connected
Playing High Resolution Audio
Function status
Power
Source
Wireless speaker connection
Wired speaker connection
Pattern
Solid Red
Off
Solid Blue
Solid Cyan
Solid Orange
Solid Olive
Solid Lime
Solid Pink
Blink White (fast)
Solid White (10sec)
Blink White (slowly)
Solid Green (10sec)
Solid Yellow (10sec)
COAXIAL TO PRIMARY
• Use the coaxial cable to connect the
primary speaker.
AC IN~
• Connect the AC power cord.
7EN
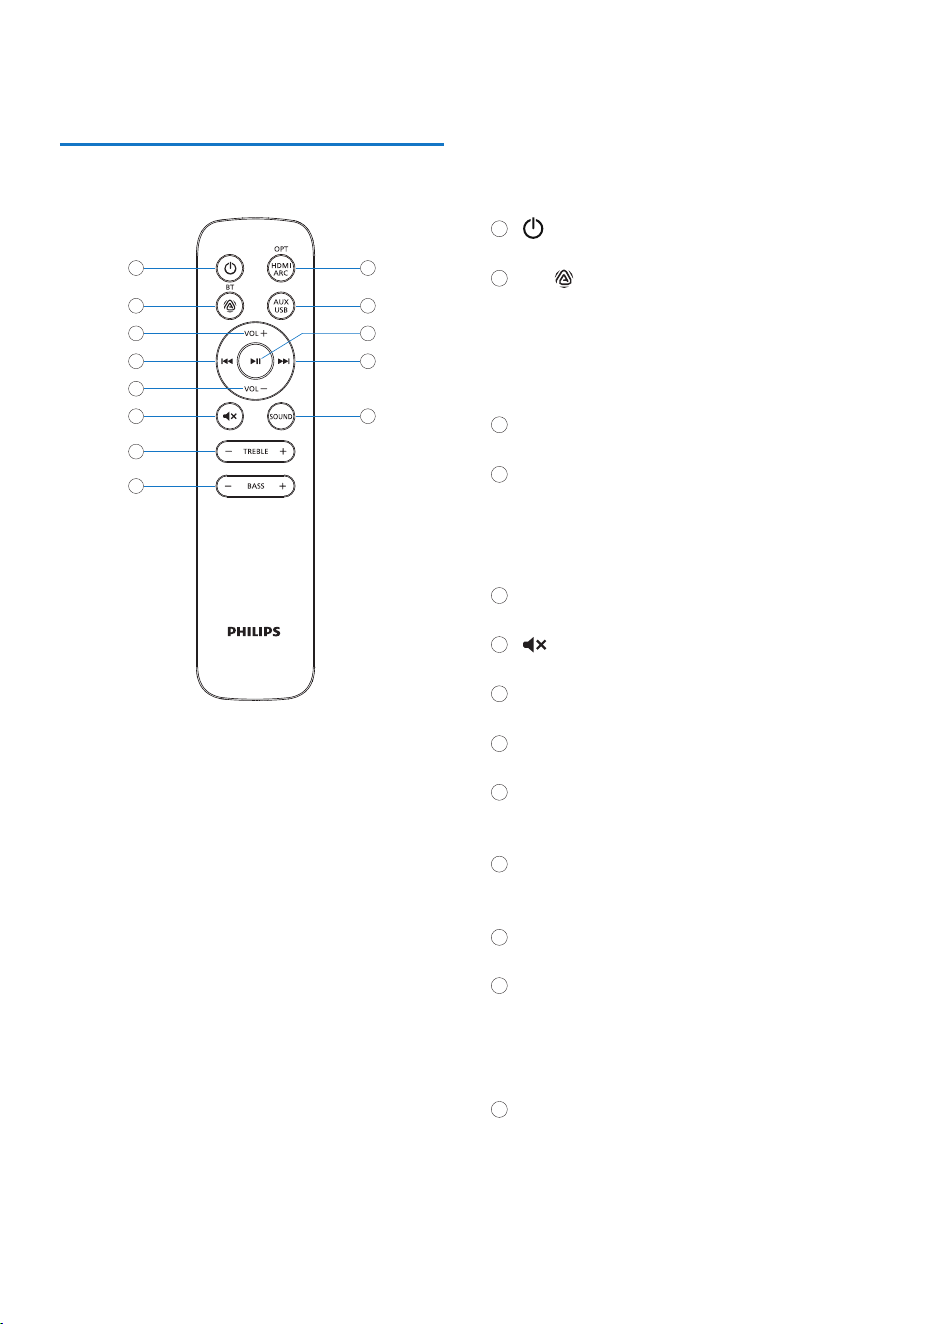
• Turn on/off the unit.
BT/
• Press to select Bluetooth or Auracast
receiver mode.
• Press and hold for more than 3 seconds
to activate / deactivate Auracast
broadcast mode.
VOL +
• Increase volume.
H
• Skip to the previous track
• In Auracast mode, switch to the previous
unencrypted broadcast.
• Press and hold to fast backward.
VOL -
• Decrease volume.
• Mute or restore volume.
- TREBLE +
• Adjust treble level.
- BASS +
• Adjust bass level.
OPT/HDMI ARC
• Press to select Optical in or HDMI ARC
source.
AUX/USB
• Press to select AUX in or USB audio in
source.
BF
• Start or pause play.
G
• Skip to the next track.
• In Auracast mode, switch to the next
unencrypted broadcast.
• Press and hold to fast forward.
SOUND
• Select sound setting (Balanced/Warm/
Bright/Powerful/Clear/Custom).
Overview of the remote control
1
2
3
4
5
6
7
8
9
10
12
13
11
10
11
12
13
1
2
3
4
6
7
8
5
9
8 EN
9EN
3 Get started
Always follow the instructions in this chapter in
sequence.
Prepare the remote control
• The provided remote control allows the unit
to be operated from a distance.
• Even if the remote control is operated within
the effective range19.7 feet (6m), remote
control operation may be impossible if there
are any obstacles between the unit and the
remote control.
• If the remote control is operated near other
products which generate infrared rays, or if
other remote control devices using infra-red
rays are used near the unit, it may operate
incorrectly. Conversely, the other products
may operate incorrectly.
Precautions Concerning Batteries
• Be sure to insert the batteries with correct
positive " " and negative " " polarities.
• Use batteries of the same type.
Never use different types of batteries
together.
• Either rechargeable or non-rechargeable
batteries can be used. Refer to the
precautions on their labels.
• Be aware of your �ngernails when removing
the battery cover and the battery.
• Do not drop the remote control.
• Do not allow anything to impact the remote
control.
• Do not spill water or any liquid on the
remote control.
• Do not place the remote control on a wet
object.
• Do not place the remote control under direct
sunlight or near sources of excessive heat.
• Remove the battery from the remote control
when not in use for a long period of time, as
corrosion or battery leakage may occur and
result in physical injury, and/or property
damage,and/or �re.
• Do not use any batteries other than those
speci�ed.
• Do not mix new batteries with old ones.
• Never recharge a battery unless it is
con�rmed to be a rechargeable type.
Prepare the remote control
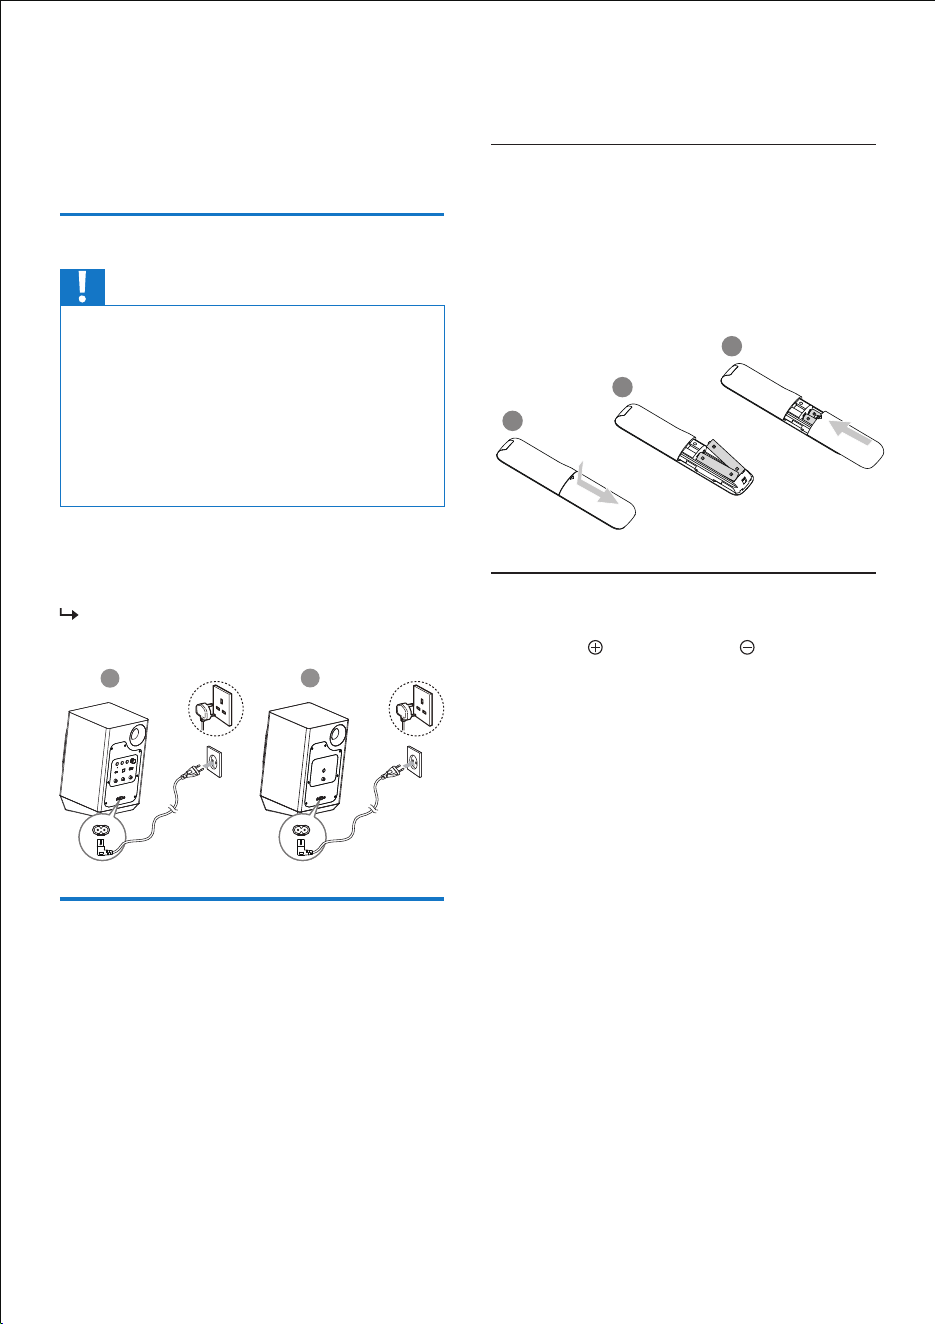
Caution
• Risk of product damage! Ensure that the power
supply voltage corresponds to the voltage
printed on the back or the underside of the unit.
• Risk of electric shock! Before you plug the AC
power cord, make sure that the plug is �xed
securely, when you unplug the AC power cord,
always pull the plug, never pull the cord.
• Before you connect the Ac power cord, make
sure that you have completed all the other
connections.
Connect power
Connect the AC IN~ socket on the speaker to
power plug on the wall outlet
by using the
provided
AC power cord.
When connect the speaker to the AC
power, LED is solid red.
HDMI ARCUSB AUDIO OPTICAL IN
SOURCE
AC IN~
SECONDARY
PAIRING
COAXIAL TO
SECONDARY
VOLUME
L R
AUX IN
Designed in the Netherlands
PRIMARY
AC IN~
L
AC IN~
PRIMARY PAIRING
COAXIAL TO PRIMARY
Designed in the Netherlands
SECONDARY
AC IN~
R
To insert the remote control battery:
1
Open the battery compartment.
2
Insert the supplied AAA batteries with
correct polarity (+/-) as indicated.
3
Close the battery compartment.
1
3
2
AAA/1.5V
AAA/1.5V
10 EN
2
Press again SECONDARY PAIRING and
PRIMARY PAIRING at the back of the
speakers to con�rm pairing.
You will hear a prompt sound.
3
When the connection is successful, LED on
both primary and secondary speakers turn
solid white.
While listening, press VOL+/- on the remote
control or rotate VOLUME at the back of the
primary speaker to adjust volume.
Adjust volume
Note
• The speaker switches to standby mode after 15
minutes inactive.
• Press to turn the unit on.
The speaker switches to the last selected
source.
• Press to switch the unit to Standby.
LED is solid red.
Turn On / Off
You can choose the ideal sound for your music.
Select Equalizer (EQ) Effect
Press SOUND on the remote control to select
prede�ned sound modes to suit your music:
Balanced/Warm/Bright/Powerful/Clear/
Custom.
Sound enhancement settings
In Balanced EQ:
- press -TREBLE+ on the remote control to
adjust the intensity of the treble output
sound.
- press -BASS+ on the remote control to adjust
the intensity of the bass output sound.
If the adjustment reaches the maximum
value, you will hear a prompt sound.
In CUSTOM EQ, you can manually customize
the sound on the app based on your
preferences.
Choose your sound
4
Connect
Tips
• Do not press PRIMARY PAIRING or SECONDARY
PAIRING button on the rear of the speakers,
except for manual pairing.
1
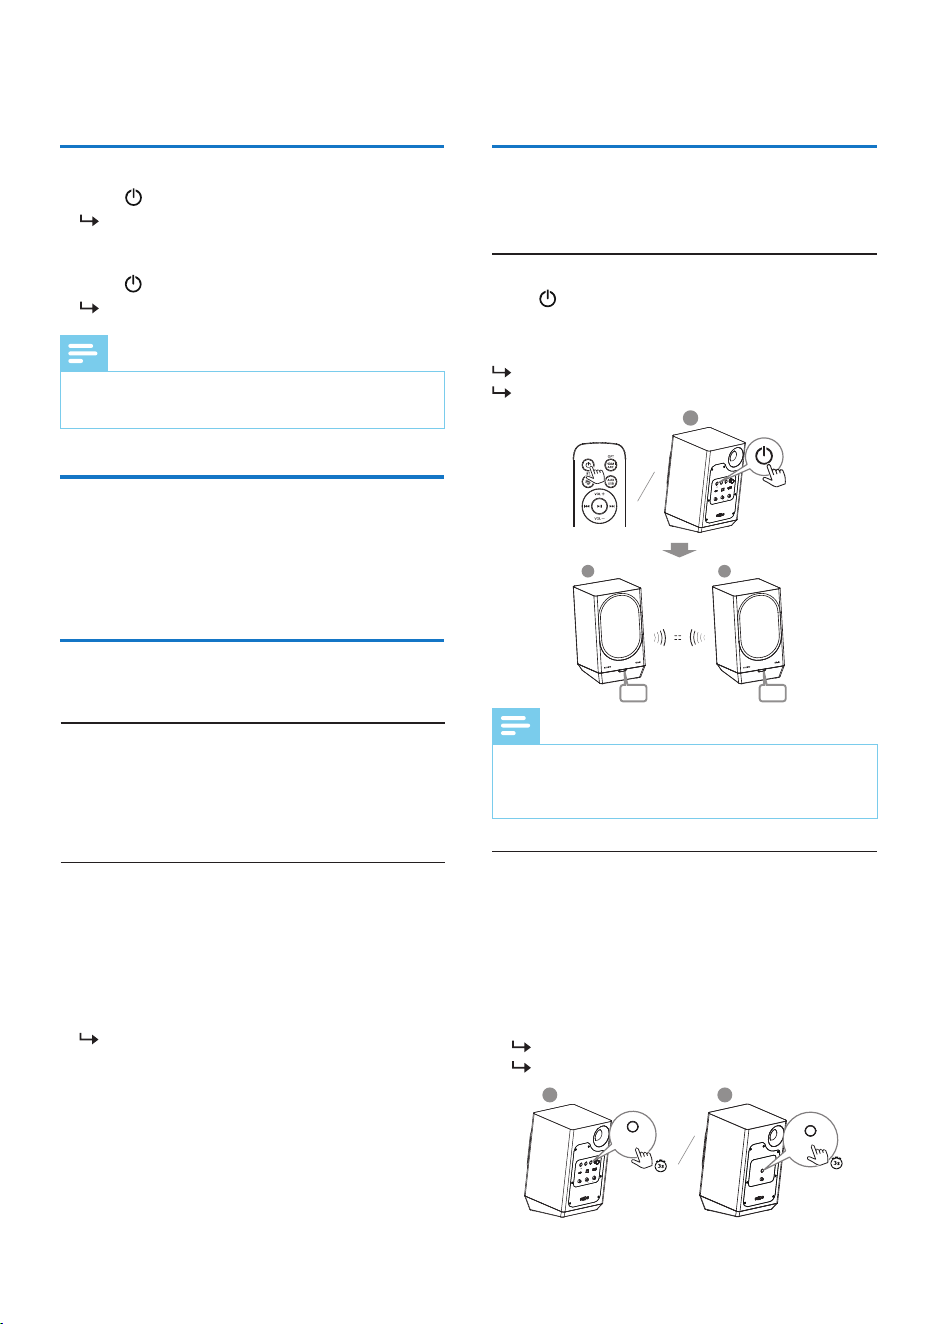
Turn the unit on, press and hold SECOND-
ARY PAIRING at the back of the primary
speaker for 3 seconds and PRIMARY
PAIRING at the back of secondary speaker
for 3 seconds to enter pairing mode of
primary and secondary speaker.
You will hear a prompt sound.
LED blinks white.
Use one of the following methods to connect
the speakers.
Press to turn the primary speaker on, the
primary and secondary speakers will
automatically pair with each other.
You will hear a prompt sound.
LED blinks white.
Automatic pairing
Manual pairing
HDMI ARCUSB AUDIO OPTICAL IN
SOURCE
AC IN~
SECONDARY
PAIRING
COAXIAL TO
SECONDARY
VOLUME
L R
AUX IN
Designed in the Netherlands
PRIMARY
L
White White
RL
R
AC IN~
PRIMARY PAIRING
COAXIAL TO PRIMARY
Designed in the Netherlands
SECONDARY
PRIMARY PAIRING
L
HDMI ARCUSB AUDIO OPTICAL IN
SOURCE
AC IN~
SECONDARY
PAIRING
COAXIAL TO
SECONDARY
VOLUME
L R
AUX IN
Designed in the Netherlands
PRIMARY
SECONDARY
PAIRING
Speaker connection
11EN
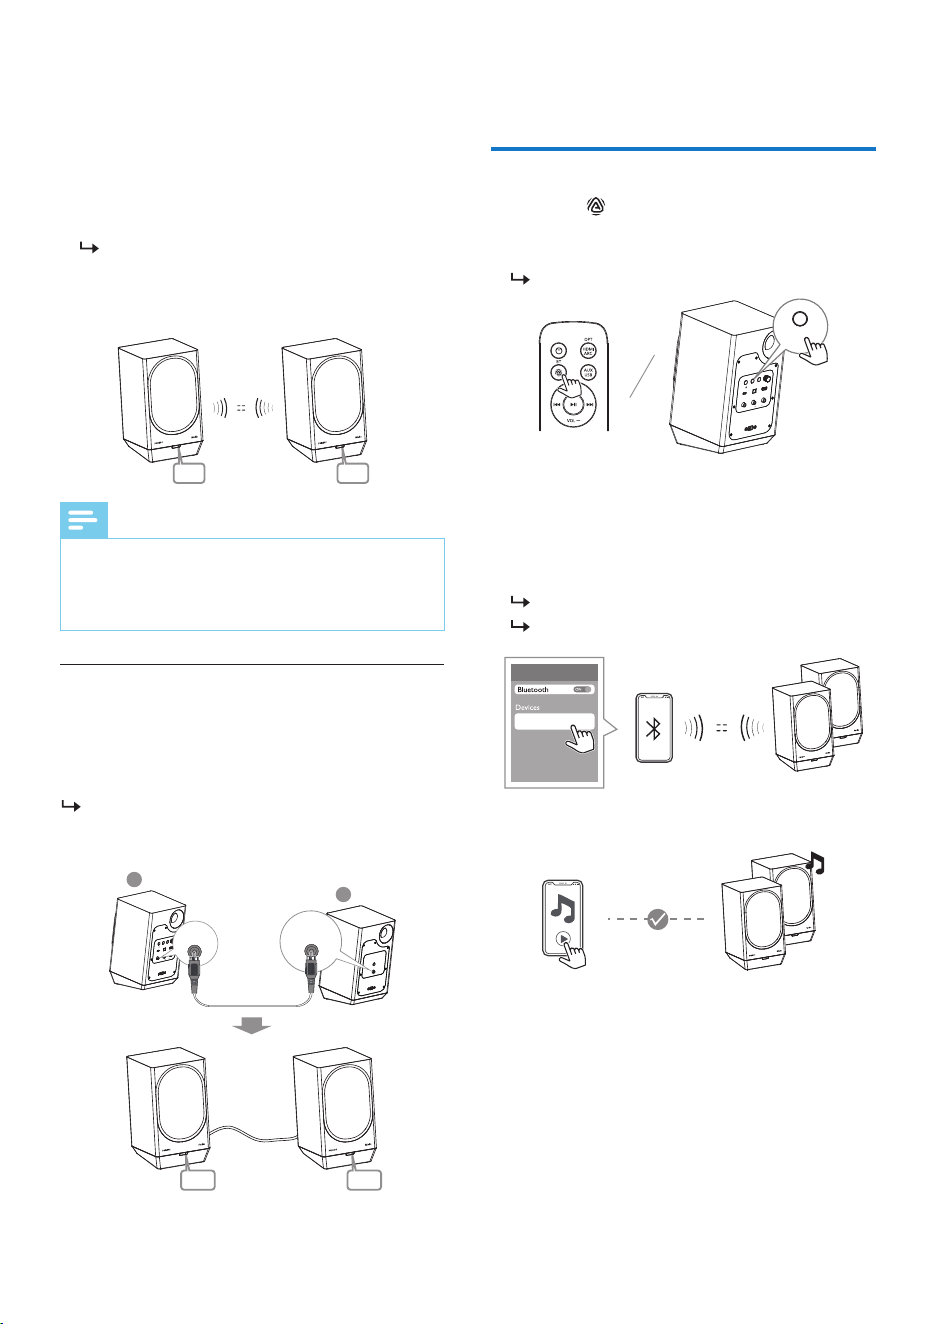
1
Press BT/ on the remote control or
SOURCE at the back of the primary speaker
to select Bluetooth mode.
LED blinks blue.
2
On your Bluetooth device, switch on
Bluetooth, search for [Philips Fidelio FA3] to
start connection.
3
Select [Philips Fidelio FA3].
If connected successfully:
You will hear a prompt sound.
LED turns solid blue.
4
Play music via your device.
Use the supplied remote control to control
play.
• To increase or decrease the volume, press
VOL+/-.
• To pause/resume playback, press BF.
• To skip to a track, press G/H.
Bluetooth
®
connection
HDMI ARCUSB AUDIO OPTICAL IN
SOURCE
AC IN~
SECONDARY
PAIRING
COAXIAL TO
SECONDARY
VOLUME
L R
AUX IN
Designed in the Netherlands
PRIMARY
SOURCE
Philips Fidelio FA3
Note
• When the primary and secondary speakers are
paired wirelessly, the speakers will reconnect
automatically once they are restarted (powered
on/off).
Connect COAXIAL TO SECONDARY at the back
of the primary speaker and COAXIAL TO
PRIMARY at the back of the secondary speaker
with a coaxial audio cable (not provided).
When the primary and secondary speaker
are wired connected, LED on both speakers
turn green.
Wired connection
2
Press again SECONDARY PAIRING and
PRIMARY PAIRING at the back of the
speakers to con�rm pairing.
You will hear a prompt sound.
3
When the connection is successful, LED on
both primary and secondary speakers turn
solid white.
White White
L
R
HDMI ARCUSB AUDIO OPTICAL IN
SOURCE
AC IN~
SECONDARY
PAIRING
COAXIAL TO
SECONDARY
VOLUME
L R
AUX IN
Designed in the Netherlands
PRIMARY
AC IN~
PRIMARY PAIRING
COAXIAL TO PRIMARY
Designed in the Netherlands
SECONDARY
COAXIAL TO
SECONDARY
COAXIAL TO PRIMARY
Green Green
1
Turn the unit on, press and hold SECOND-
ARY PAIRING at the back of the primary
speaker for 3 seconds and PRIMARY
PAIRING at the back of secondary speaker
for 3 seconds to enter pairing mode of
primary and secondary speaker.
You will hear a prompt sound.
LED blinks white.
12 EN
Note
• The effective operation range between this unit
and your Bluetooth enabled device is
approximately 10 meters (free space).
• Compatibility with all Bluetooth
®
devices is not
guaranteed.
• Any obstacle between the device and the unit
can reduce operational range.
• Keep this unit away from other electronic devices
that may cause interference.
• The unit will also be disconnected when your
device is moved beyond the operational range.
• Switch to another source on the unit.
• Disable the function from your Bluetooth
®
device.
• Press and hold BT/ on the remote control
for 3 seconds or SOURCE at the back of the
primary speaker for 3 seconds to disconnect
Bluetooth connection.
If disconnected successfully:
You will hear a prompt sound.
LED blinks blue.
Disconnect Bluetooth
®
• Press and hold SOURCE at the back of the
primary speaker for 8 seconds in disconnect
mode.
Clear Bluetooth
®
pairing records
HDMI ARCUSB AUDIO OPTICAL IN
SOURCE
AC IN~
SECONDARY
PAIRING
COAXIAL TO
SECONDARY
VOLUME
L R
AUX IN
Designed in the Netherlands
PRIMARY
SOURCE
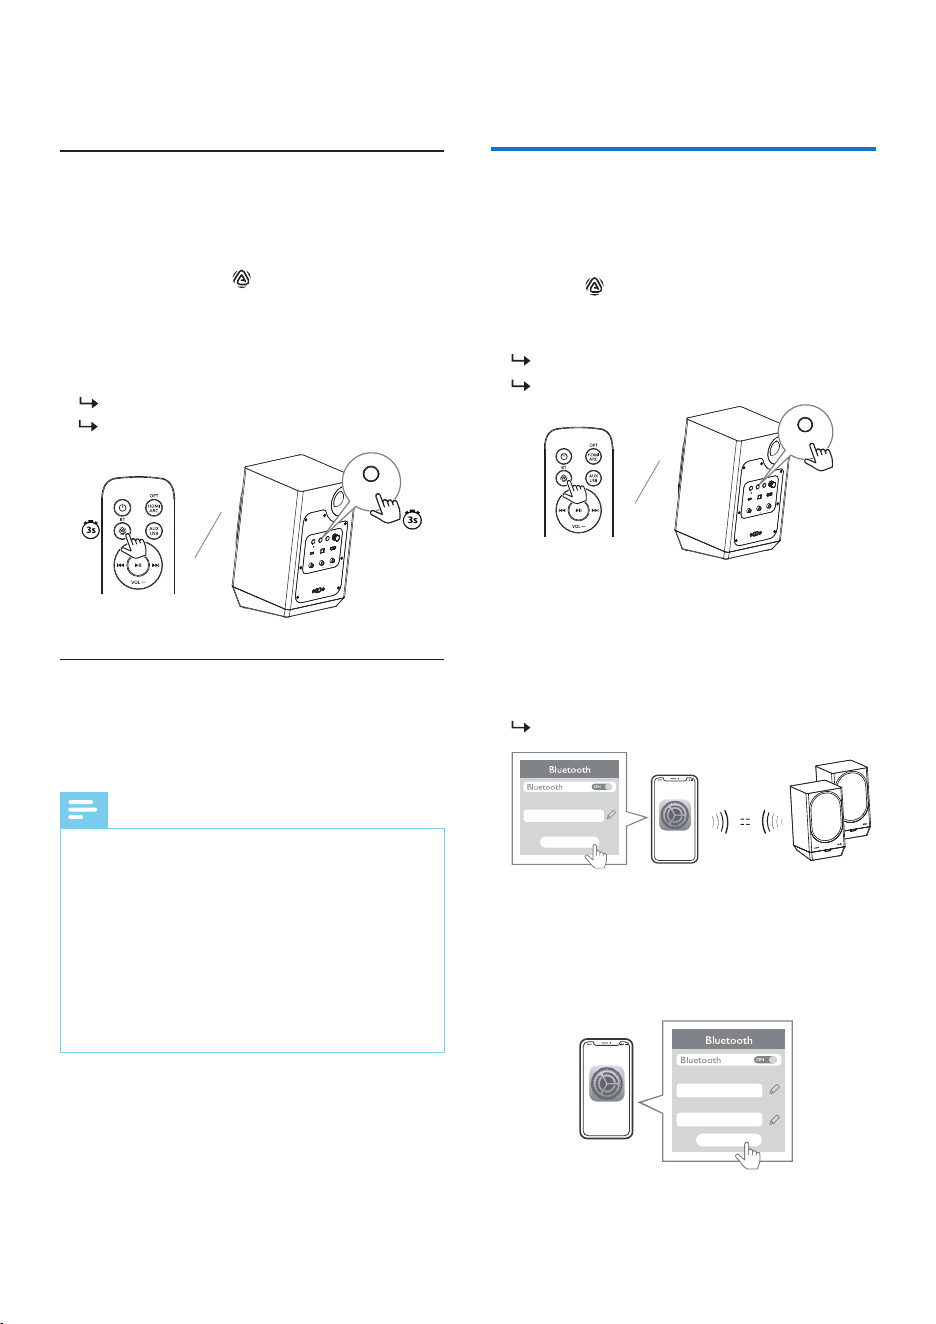
1
On your device that supports Auracast
™
broadcast, follow the instructions to enable
Auracast
™
broadcast.
2
Press BT/ on the remote control or
SOURCE at the back of the primary speaker
to select Auracast
™
receiver mode.
You will hear a prompt sound.
LED blinks cyan.
3
If the speaker is switched on to Auracast
™
receiver mode for the �rst time or the station
list is empty, the speaker will automatically
start scanning, then the unencrypted
broadcast with the strongest signal is
broadcast automatically.
LED turns solid cyan.
4
If you want to receive encrypted broadcasts
on your Auracast
™
broadcast device, follow
the instructions for your Auracast
™
broadcast
device and enter the password for your
Auracast
™
broadcast device.
Auracast
™
receiver connection
HDMI ARCUSB AUDIO OPTICAL IN
SOURCE
AC IN~
SECONDARY
PAIRING
COAXIAL TO
SECONDARY
VOLUME
L R
AUX IN
Designed in the Netherlands
PRIMARY
SOURCE
Settings
Broadcast name
Unencrypted Auracast
Start broadcast
Settings
Broadcast name
Password
Encrypted Auracast
****
Start broadcast
5
Use the supplied remote control to control
play.
• To increase or decrease the volume, press
VOL+/-.
13EN
1
On your device that supports Auracast
™
broadcast, follow the instructions to enable
Auracast
™
broadcast.
2
Press BT/ on the remote control or
SOURCE at the back of the primary speaker
to select Auracast
™
receiver mode.
You will hear a prompt sound.
LED blinks cyan.
3
If the speaker is switched on to Auracast
™
receiver mode for the �rst time or the station
list is empty, the speaker will automatically
start scanning, then the unencrypted
broadcast with the strongest signal is
broadcast automatically.
LED turns solid cyan.
4
If you want to receive encrypted broadcasts
on your Auracast
™
broadcast device, follow
the instructions for your Auracast
™
broadcast
device and enter the password for your
Auracast
™
broadcast device.
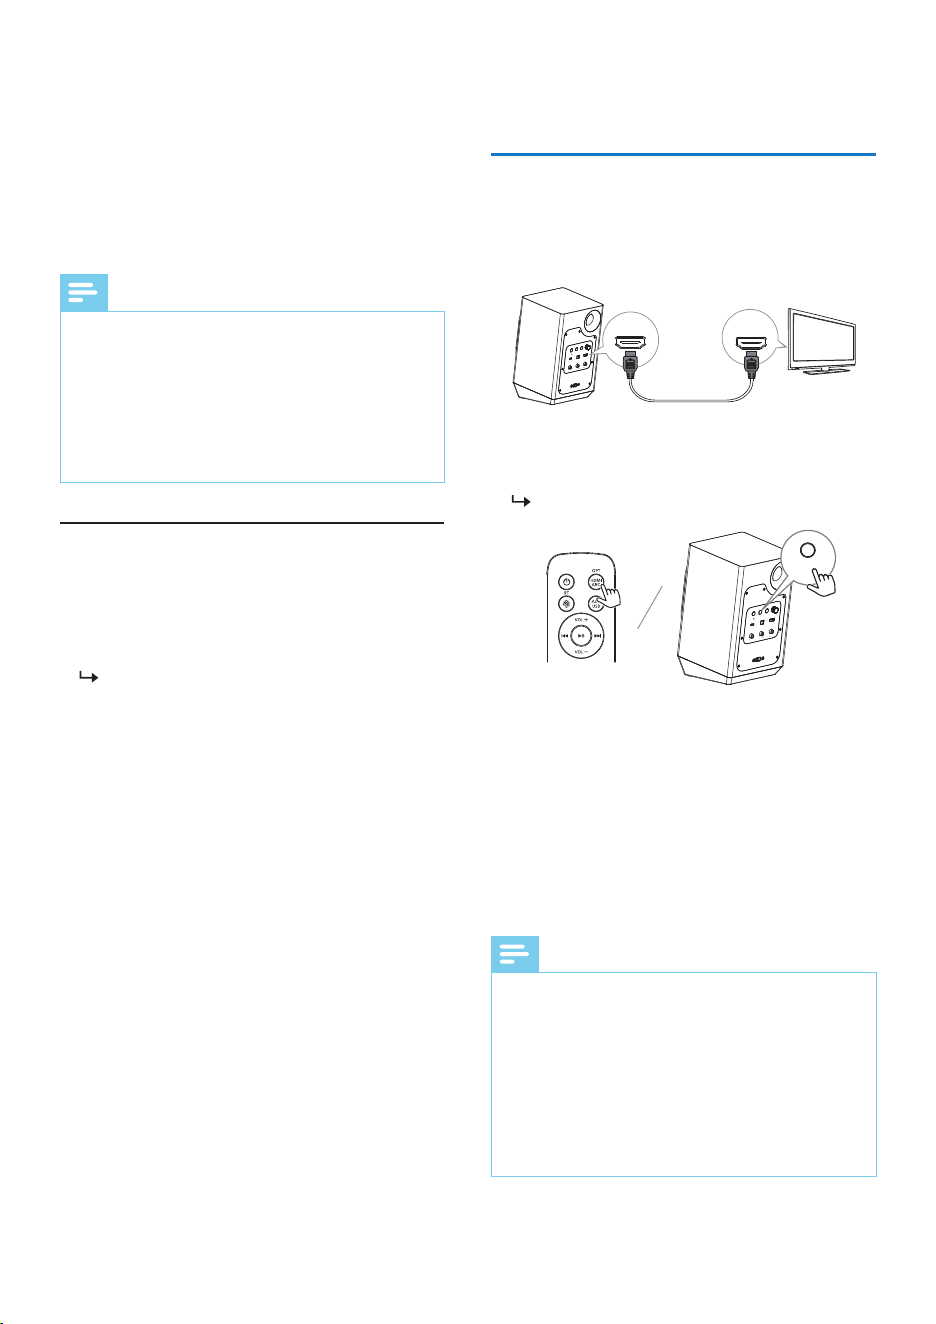
1
Connect HDMI ARC socket at the back of the
primary speaker to HDMI OUT socket on the
TV with an HDMI cable (not provided).
2
Press HDMI ARC on the remote control or
SOURCE at the back of the primary speaker
to select HDMI ARC mode.
LED indicator turns solid orange.
3
On your TV, turn on HDMI-CEC operations.
For details, see the TV user manual.
• The HDMI ARC connector on the TV might
be labeled differently. For details, see the
TV user manual.
4
Using a high speed HDMI cable, connect the
HDMI ARC connector at the back of the
primary speaker to the HDMI ARC connector
on the TV.
Connect to HDMI ARC
HDMI ARCUSB AUDIO OPTICAL IN
SOURCE
AC IN~
SECONDARY
PAIRING
COAXIAL TO
SECONDARY
VOLUME
L R
AUX IN
Designed in the Netherlands
PRIMARY
SOURCE
HDMI ARCUSB AUDIO OPTICAL IN
SOURCE
AC IN~
SECONDARY
PAIRING
COAXIAL TO
SECONDARY
VOLUME
L R
AUX IN
Designed in the Netherlands
PRIMARY
HDMI ARC HDMI OUT
Note
• Your TV must support the HDMI-CEC and ARC
function. HDMI-CEC and ARC must be set to On.
• The setting method of HDMI-CEC and ARC may
differ depending on the TV. For details about
ARC function, please refer to your TV user
manual.
• Make sure to use the HDMl cables can support
the ARC function.
• Please use HDMI cable with a length not
exceeding 3M.
• Switch to another source on the unit.
• Deactivate Auracast
™
broadcast on your
Auracast
™
broadcast device.
If the disconnection is successful,
LED blinks cyan.
Disconnect Auracast
™
receiver
Note
• When Auracast
™
receiver is connected, press
SOURCE at the back of the primary speaker for 3
seconds to rescan Auracast
™
broadcast channels.
• When Auracast
™
receiver is connected to multiple
Auracast
™
receiver channels, press SECONDARY
PAIRING button at the back of the primary
speaker to switch to the next unencrypted
Auracast
™
broadcast channel.
5
Use the supplied remote control to control
play.
• To increase or decrease the volume, press
VOL+/-.
14 EN
1
Using an optical cable (not provided) to
connect OPTICAL IN socket at the back of
the primary speaker to OPTICAL OUT socket
on the external audio device.
2
Press OPT on the remote control or SOURCE
at the back of the primary speaker to select
optical mode.
LED indicator turns solid olive.
Connect to Optical socket
HDMI ARCUSB AUDIO OPTICAL IN
SOURCE
AC IN~
SECONDARY
PAIRING
COAXIAL TO
SECONDARY
VOLUME
L R
AUX IN
Designed in the Netherlands
PRIMARY
SOURCE
HDMI ARCUSB AUDIO OPTICAL IN
SOURCE
AC IN~
SECONDARY
PAIRING
COAXIAL TO
SECONDARY
VOLUME
L R
AUX IN
Designed in the Netherlands
PRIMARY
OPTICAL OUT
OPTICAL IN
AUDIO IN
Note
• Please use an optical cable with a length not
exceeding 3M.
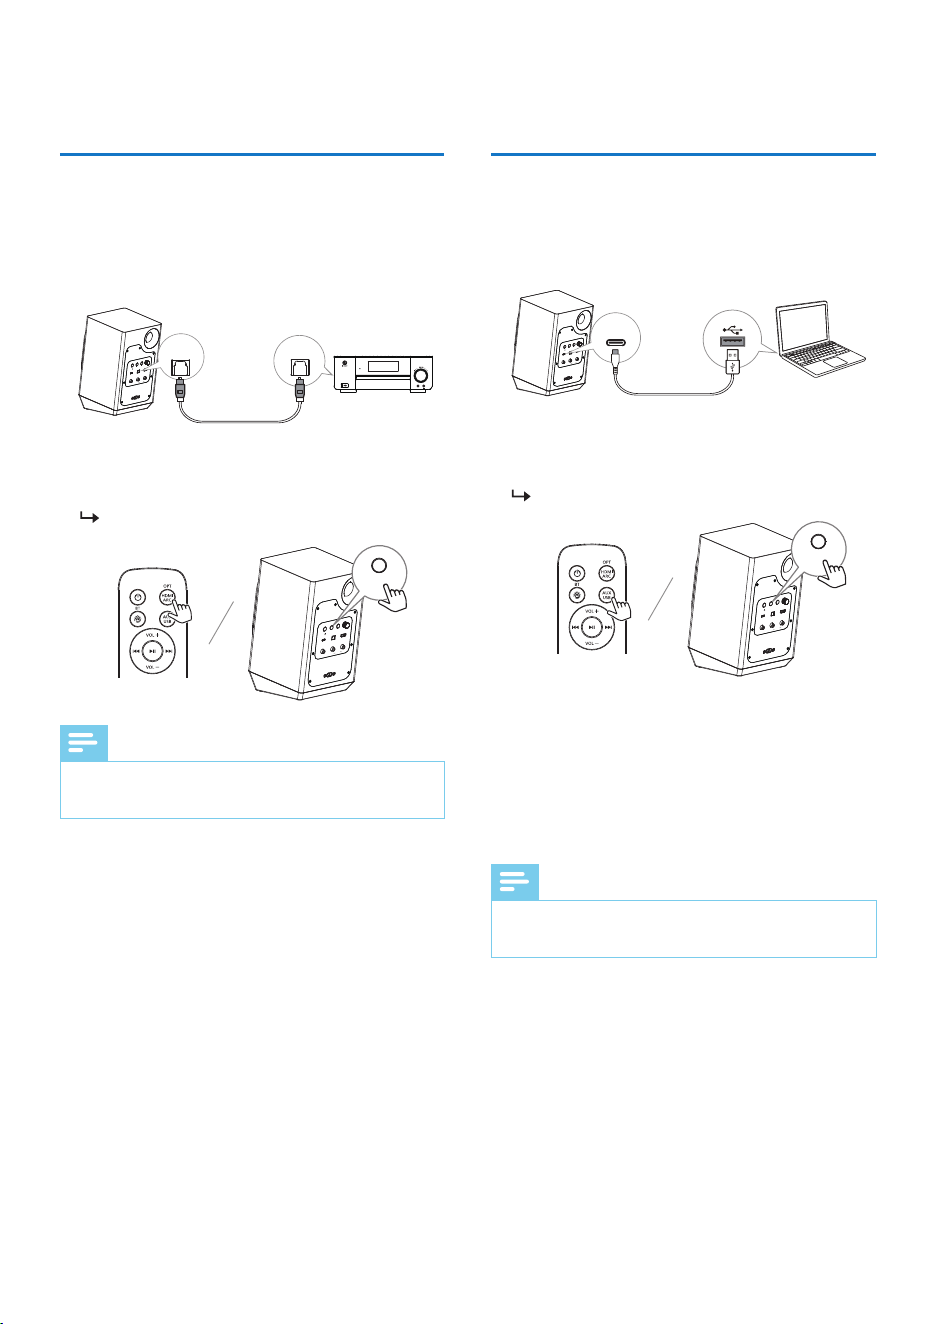
1
Connect USB AUDIO port at the back of the
primary speaker to USB port on the
laptop/PC with USB cable (not provided).
2
Press USB on the remote control or SOURCE
at the back of the primary speaker to select
USB audio mode.
LED is solid lime.
3
Use the supplied remote control to perform
basic controls of the speakers.
• To increase or decrease the volume, press
VOL+/-.
• To pause/resume playback, press BF.
• To skip to a track, press G/H.
Connect to USB Audio
HDMI ARCUSB AUDIO OPTICAL IN
SOURCE
AC IN~
SECONDARY
PAIRING
COAXIAL TO
SECONDARY
VOLUME
L R
AUX IN
Designed in the Netherlands
PRIMARY
SOURCE
HDMI ARCUSB AUDIO OPTICAL IN
SOURCE
AC IN~
SECONDARY
PAIRING
COAXIAL TO
SECONDARY
VOLUME
L R
AUX IN
Designed in the Netherlands
PRIMARY
USB AUDIO
Note
• Please use USB cable with a length not
exceeding 3M.
15EN
Connect to Auxiliary input
1
Connect L-AUX IN-R sockets at the back of
the primary speaker to AUX OUT sockets on
external audio devices with RCA cable (not
provided).
2
Press AUX on the remote control or SOURCE
at the back of the primary speaker to select
AUX in mode.
LED turns solid pink.
HDMI ARCUSB AUDIO OPTICAL IN
SOURCE
AC IN~
SECONDARY
PAIRING
COAXIAL TO
SECONDARY
VOLUME
L R
AUX IN
Designed in the Netherlands
PRIMARY
SOURCE
HDMI ARCUSB AUDIO OPTICAL IN
SOURCE
AC IN~
SECONDARY
PAIRING
COAXIAL TO
SECONDARY
VOLUME
L R
AUX IN
Designed in the Netherlands
PRIMARY
L - AUX IN - R
L - AUX OUT - R
Note
• Please use RCA cable with a length not
exceeding 3M.
Reset device to default setting.
When the speaker is power on, press and hold
SOURCE and SECONDARY PAIRING buttons at
the back of the primary speaker for 5 seconds.
You will hear a prompt sound.
The speaker is restored to factory defaults
and enters standby mode.
Note
• Manually pairing the speakers is required after
restoring factory settings.
Factory reset
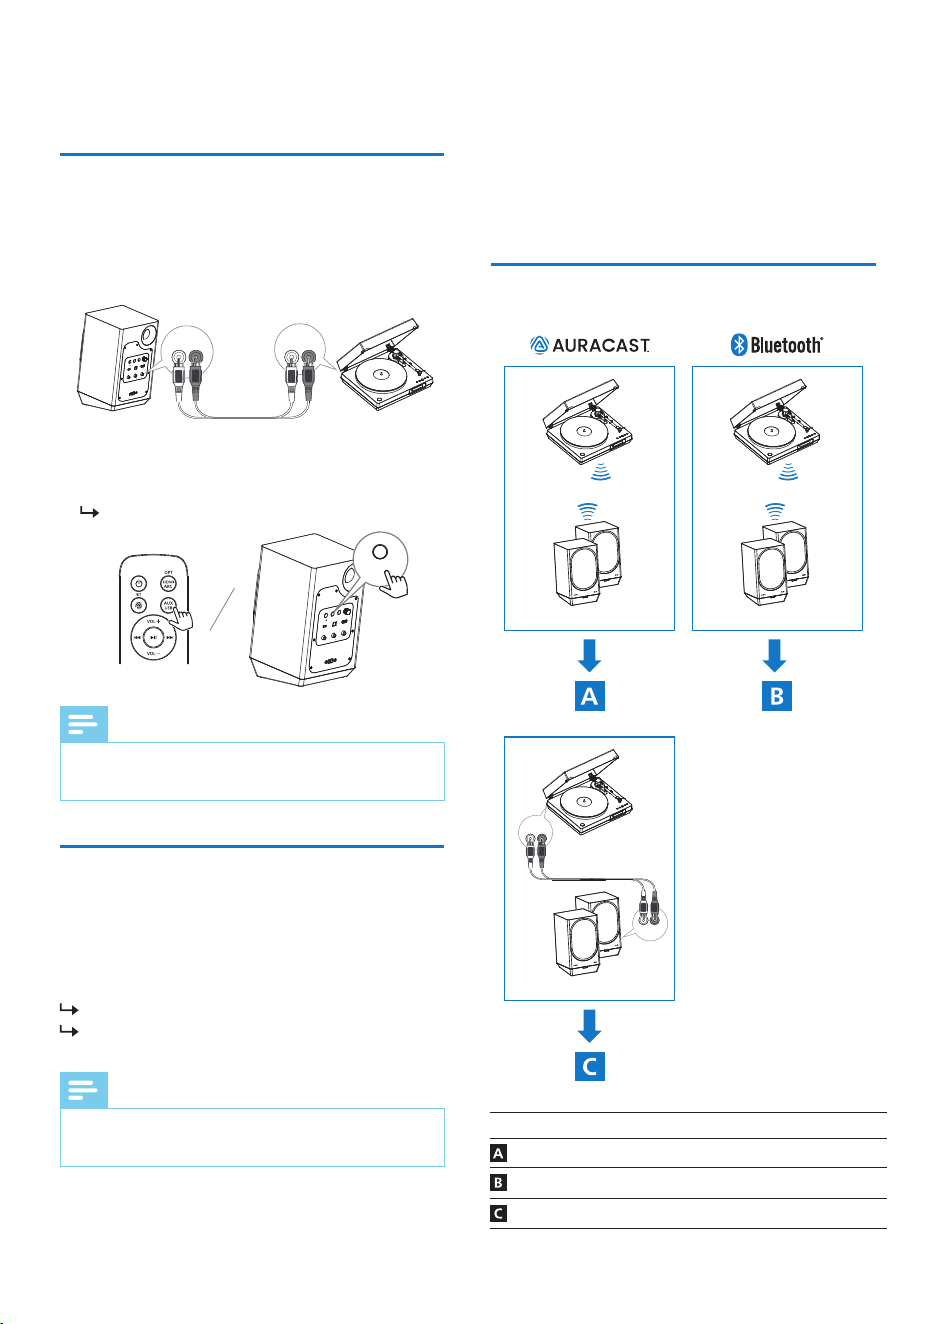
5 Connect Philips
Fidelio FA3
speakers and FT1
turntable
This section helps you connect Fidelio FT1
turntable and FA3 speakers.
Connection Go to page
Auracast
™
connection 16
Bluetooth In & out connection 18
Wired connection 19
Fidelio FT1
Fidelio FA3
Fidelio FT1
Fidelio FA3
L - AUX OUT - R
Fidelio FT1
Fidelio FA3
L - AUX IN - R
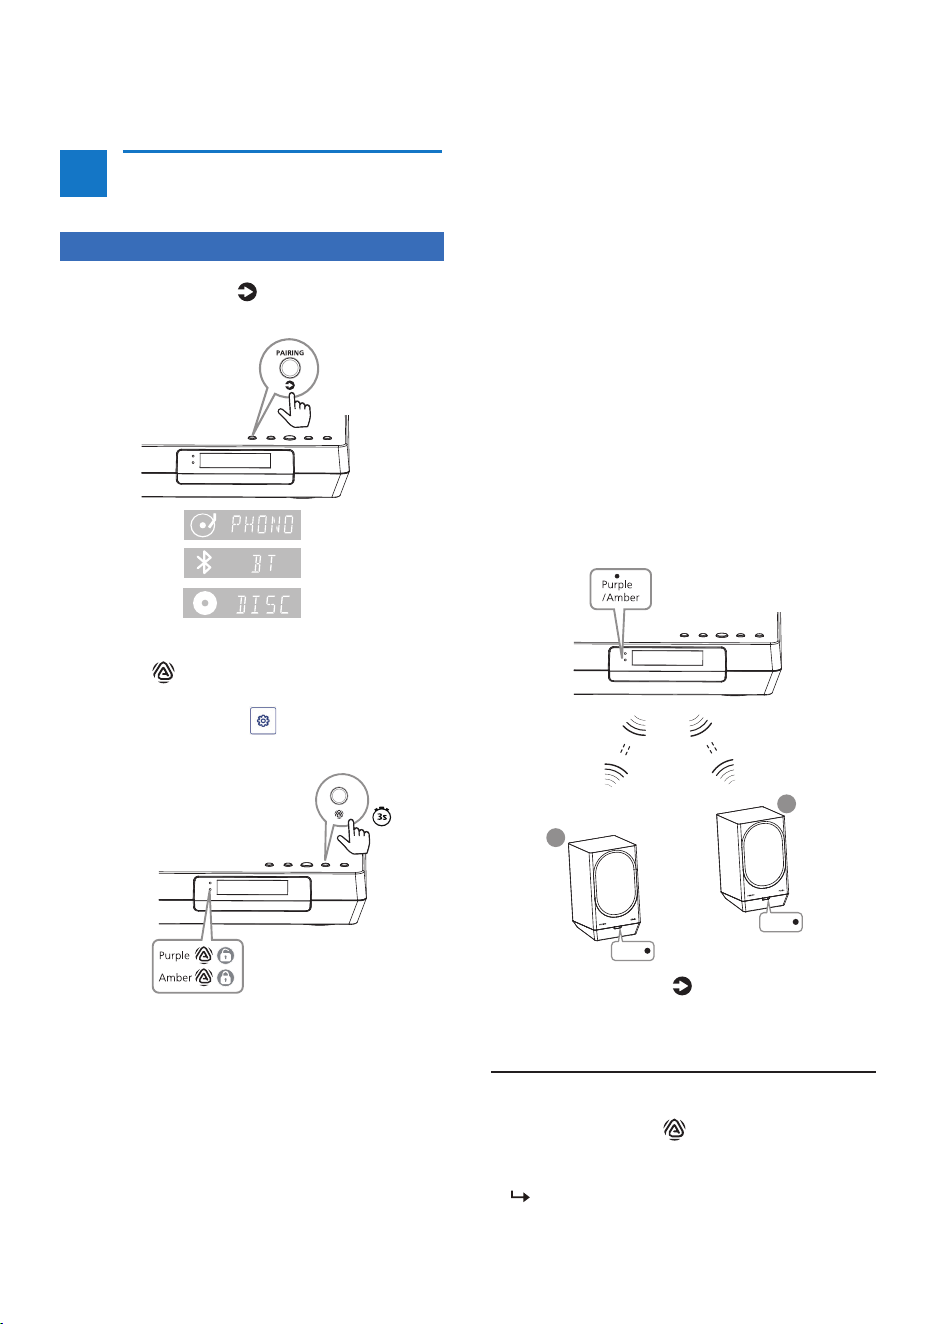
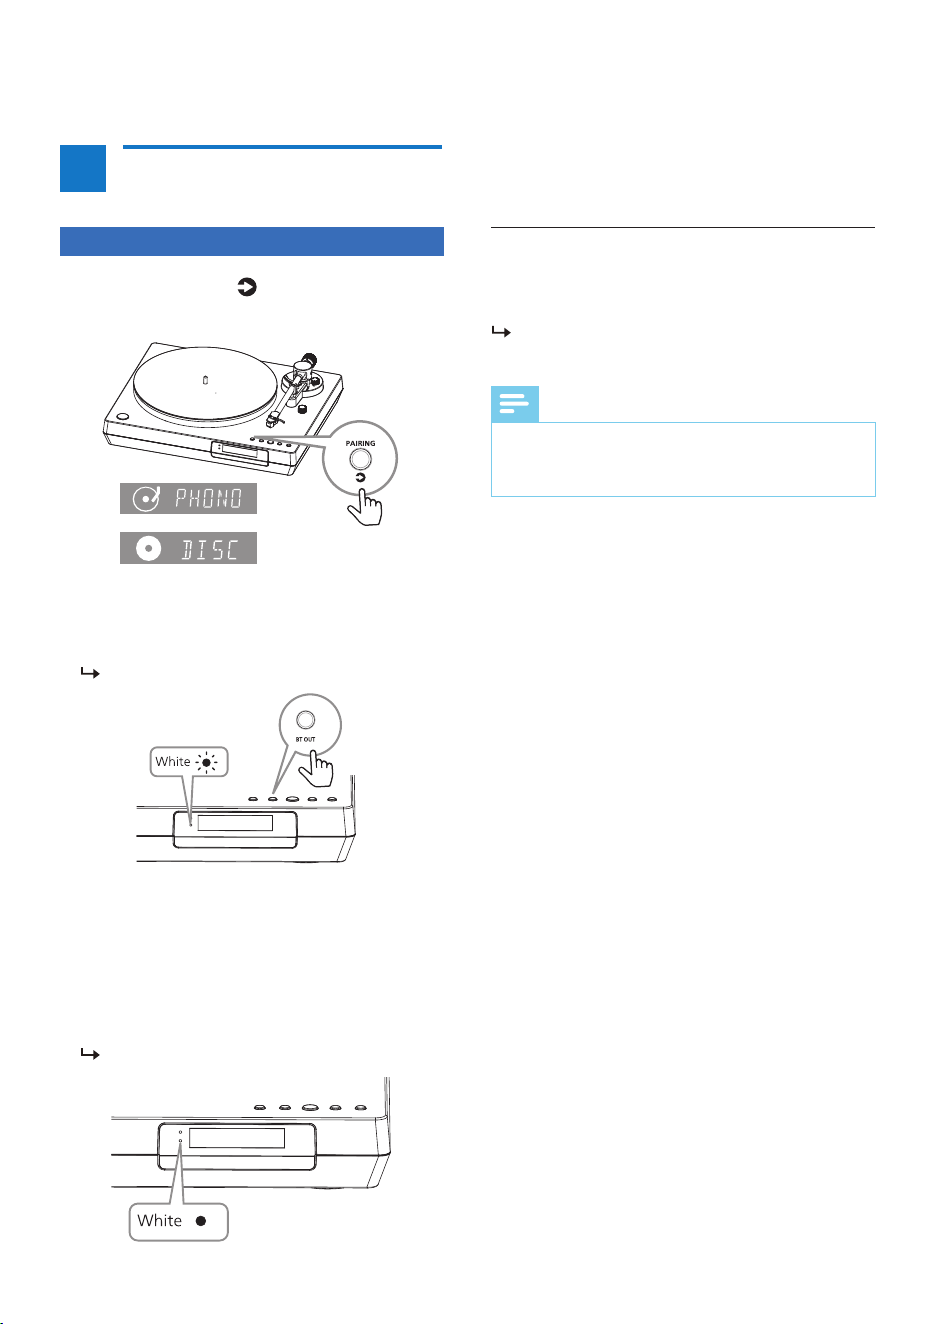
• When encrypted broadcast is selected, LED
2 turns solid amber and you will hear the
prompt sound from your turntable.
3
You can broadcast to any number of
Auracast
™
enabled products.Follow the
instruction to enable Auracast
™
connection.
4
If Auracast broadcast channel is encrypted,
Auracast recceiver products are required to
enter the password in order to listen to it.
• Once connected, LED on Auracast
™
enabled products (Fidelio FA3) will turn
solid Cyan.
5
Press the PAIRING/ button to switch
between Phono/Disc/Bluetooth to play
different audio sources.
16 EN
1
Press the PAIRING/ button to switch to
Phono/Bluetooth/Disc source.
2
In Phono/Bluetooth/Disc source, press and
hold the button on your turntable for 3
seconds or select Source Control on Philips
Entertainment App ( /Auracast
™
broadcast) to enter into Auracast
™
broadcast.
On Philips Entertainment App, enter General
Settings, select Public (unencrypted broadcast)
or Personal (encrypted broadcast) from
Auracast
™
broadcaster.
• When unencrypted broadcast is selected,
LED 2 turns solid purple and you will hear
the prompt sound from your turntable.
Auracast
™
connection
A
FT1
• Press and hold the button on your
turntable for 3 seconds to exit Auracast
broadcast from your turntable.
LED 2 blinks purple or amber.
Disconnect Auracast
™
broadcast
Fidelio FA3
L
Cyan
R
Cyan
1
On your device that supports Auracast
™
broadcast, follow the instructions to enable
Auracast
™
broadcast.
2
Press BT/ on the remote control or
SOURCE at the back of the primary speaker
to select Auracast
™
receiver mode.
You will hear a prompt sound.
LED blinks cyan.
3
If the speaker is switched on to Auracast
™
receiver mode for the �rst time or the station
list is empty, the speaker will automatically
start scanning, then the unencrypted
broadcast with the strongest signal is
broadcast automatically.
LED turns solid cyan.
4
If you want to receive encrypted broadcasts
on your Auracast
™
broadcast device, follow
the instructions for your Auracast
™
broadcast
device and enter the password for your
Auracast
™
broadcast device.
HDMI ARCUSB AUDIO OPTICAL IN
SOURCE
AC IN~
SECONDARY
PAIRING
COAXIAL TO
SECONDARY
VOLUME
L R
AUX IN
Designed in the Netherlands
PRIMARY
SOURCE
Settings
Broadcast name
Unencrypted Auracast
Start broadcast
Settings
Broadcast name
Password
Encrypted Auracast
****
Start broadcast
• Switch to another source on the unit.
• Deactivate Auracast
™
broadcast on your
Auracast
™
broadcast device.
If the disconnection is successful,
LED blinks cyan.
Disconnect Auracast
™
receiver
Note
• When Auracast
™
receiver is connected, press
SOURCE at the back of the primary speaker for 3
seconds to rescan Auracast
™
broadcast channels.
• When Auracast
™
receiver is connected to multiple
Auracast
™
receiver channels, press SECONDARY
PAIRING button at the back of the primary
speaker to switch to the next unencrypted
Auracast
™
broadcast channel.
5
Use the supplied remote control to control
play.
• To increase or decrease the volume, press
VOL+/-.
FA3
17EN
18 EN
Note
• If the pairing fails, press BT OUT button again to
perform the scanning of Bluetooth enabled
devices.
Press and hold BT OUT button on the turntable
for 3 seconds.
LED 2 turns from solid white to blinking
white.
Disconnect BT-OUT
1
Press the PAIRING/ button to switch to
Phono/Disc source.
2
In Phono/Disc source, press BT OUT
button to enter Bluetooth out pairing
mode
.
LED1 blinks white.
3
Ensure your Bluetooth enabled device is in
pairing mode.
4
The turntable starts to scan and pair to the
nearest Bluetooth enabled device or device
with the strongest signal automatically.
5
Once connected, you will hear the prompt
sound from the turntable.
LED2 turns solid white .
B
FT1
Bluetooth In & out
connection
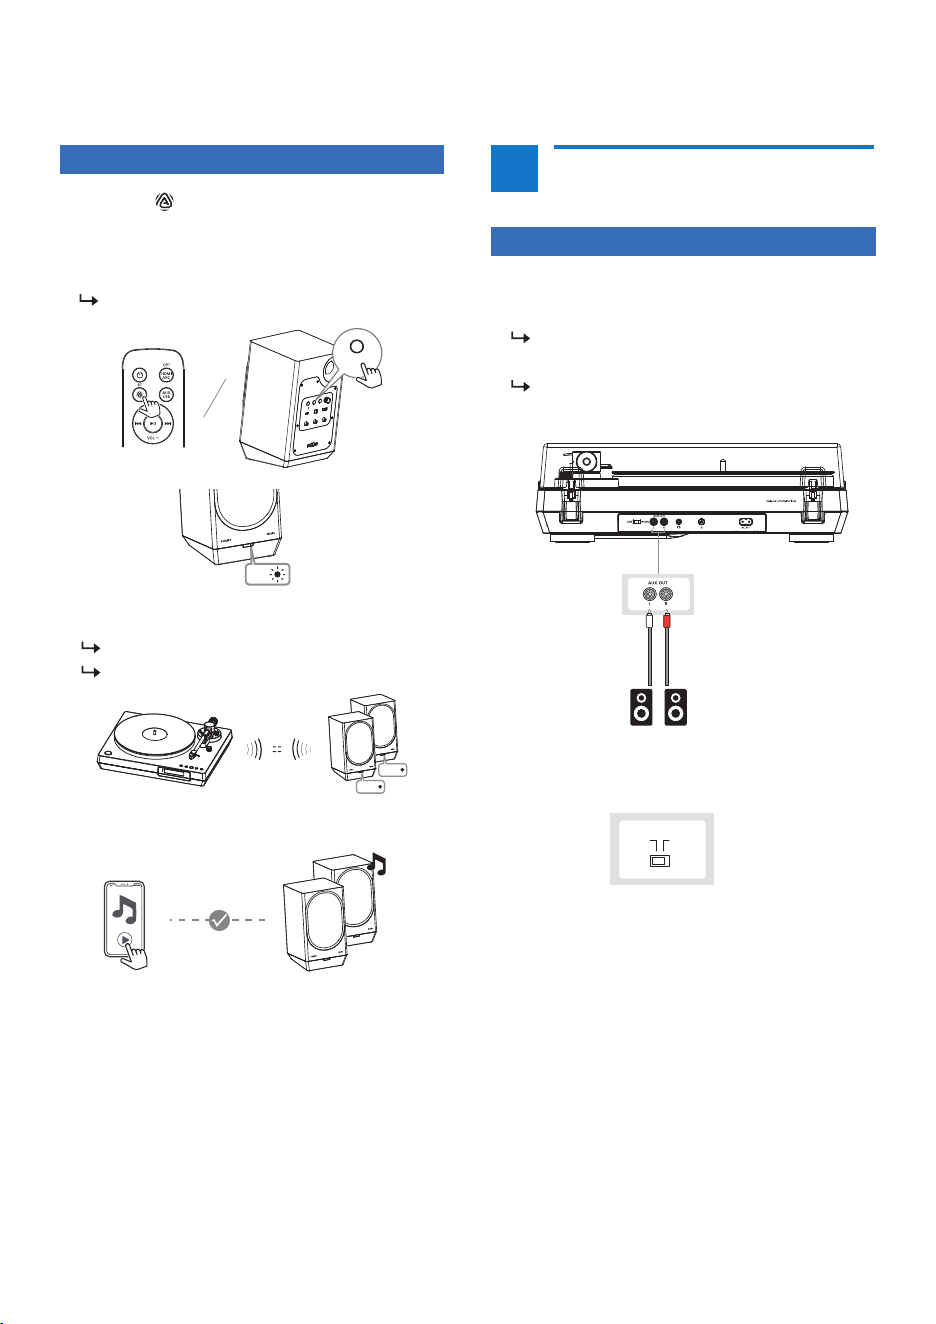
1
Connect the RCA cable (not included) to the
external speaker.
RED plug - Plug into the R-channel
output.
WHITE plug - Plug into the L-channel
output.
2
Set the switch to LINE output at the back of
Fidelio FT1 as below.
C
FT1
Wired connection
(via RCA audio cable)
LINE PHONO
19EN
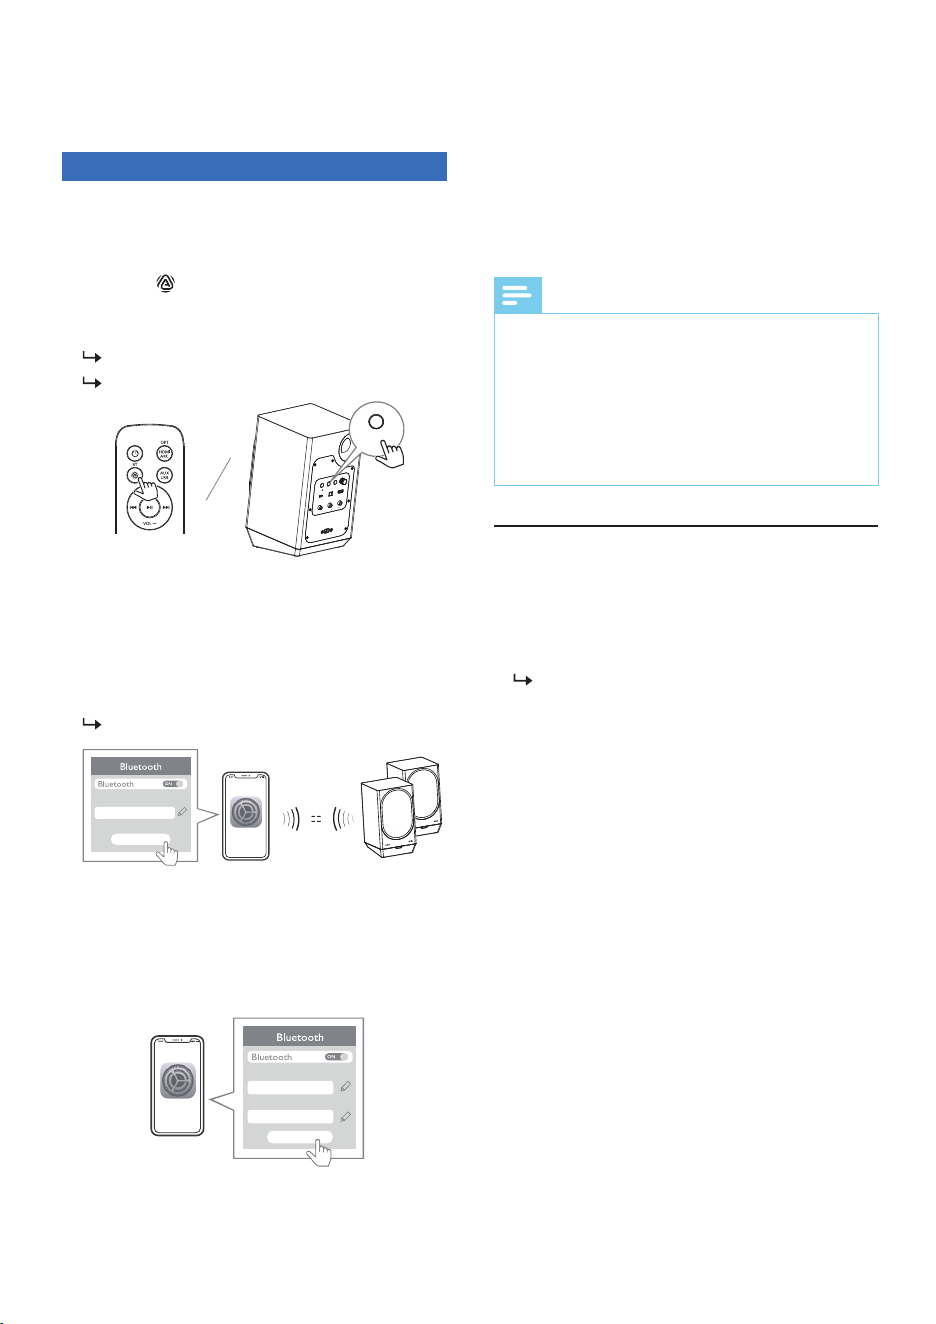
1
Press BT/ on the remote control or
SOURCE at the back of the primary speaker
to select Bluetooth mode and enter pairing
mode.
LED blinks blue.
2
If connected successfully:
You will hear a prompt sound.
LED turns solid blue.
3
Play music via your device.
Use the supplied remote control to control
play.
• To increase or decrease the volume, press
VOL+/-.
• To pause/resume playback, press BF.
• To skip to a track, press G/H.
Blue
Blue
HDMI ARCUSB AUDIO OPTICAL IN
SOURCE
AC IN~
SECONDARY
PAIRING
COAXIAL TO
SECONDARY
VOLUME
L R
AUX IN
Designed in the Netherlands
PRIMARY
SOURCE
Blue
FA3
1
Connect L-AUX IN-R sockets at the back of
the primary speaker to AUX OUT sockets on
Fidelio FT1 with an RCA cable (not provided).
2
Press AUX on the remote control or SOURCE
at the back of the primary speaker to select
AUX in mode.
LED turns solid pink.
3
Use supplied remote control to perform
basic controls of the speakers.
• To increase or decrease the volume, press
VOL+/-.
20 EN
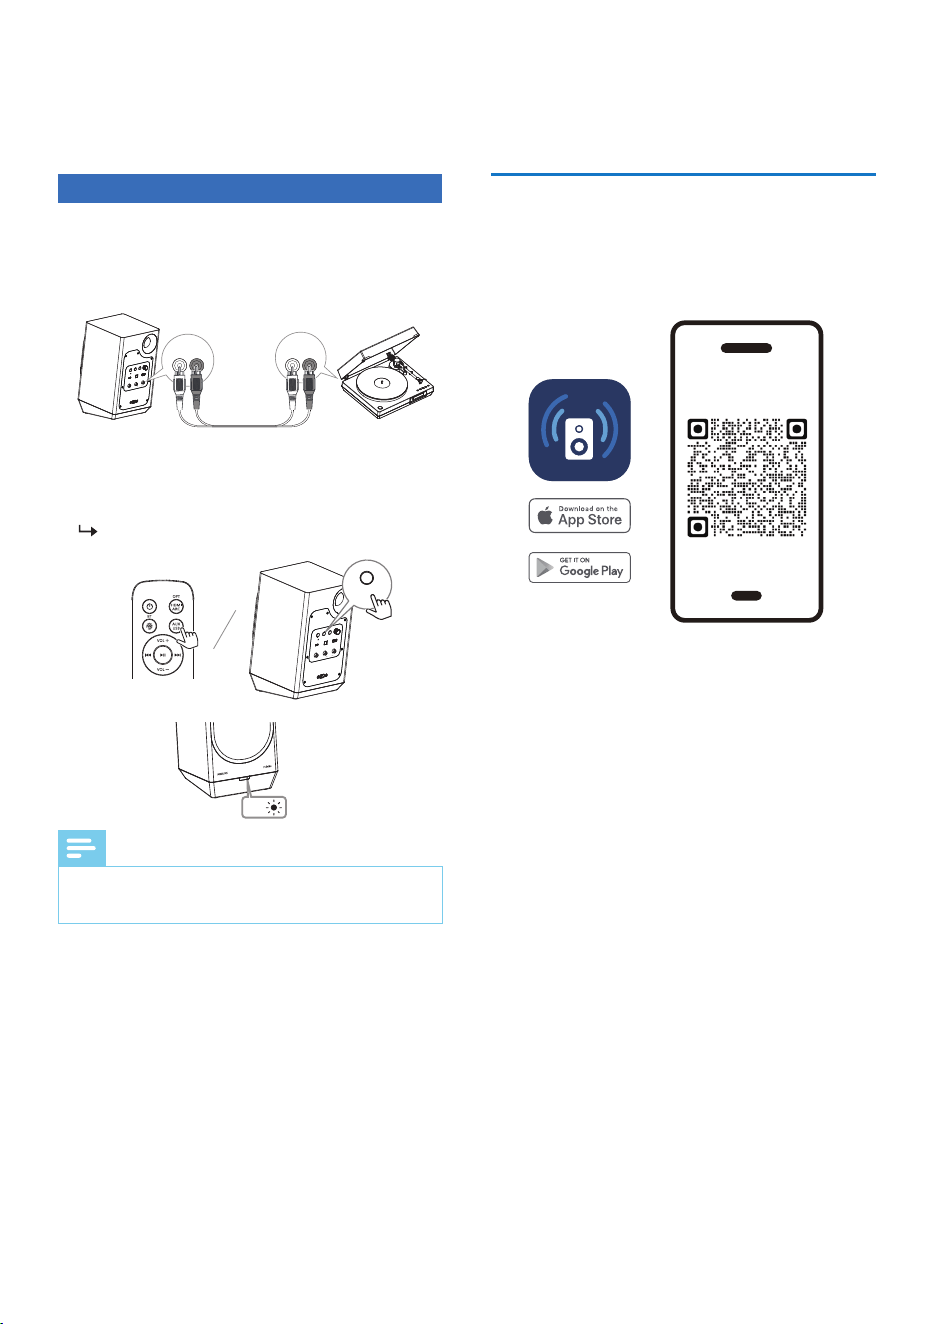
Scan the QR code and press "Download"
button, or search "Philips Entertainment" in the
Apple App Store or Google Play to download
the app.
The Philips Entertainment App puts you in
charge of the music you are listening to. You
can use your smart device to easily choose the
sound style you want, switch between sources,
and more.
6
App download
Philips
Entertainment App
philips.to/entapp
HDMI ARCUSB AUDIO OPTICAL IN
SOURCE
AC IN~
SECONDARY
PAIRING
COAXIAL TO
SECONDARY
VOLUME
L R
AUX IN
Designed in the Netherlands
PRIMARY
L - AUX IN - R
L - AUX OUT - R
HDMI ARCUSB AUDIO OPTICAL IN
SOURCE
AC IN~
SECONDARY
PAIRING
COAXIAL TO
SECONDARY
VOLUME
L R
AUX IN
Designed in the Netherlands
PRIMARY
SOURCE
Note
• Please use RCA cable with a length not
exceeding 3M.
FA3
Pink
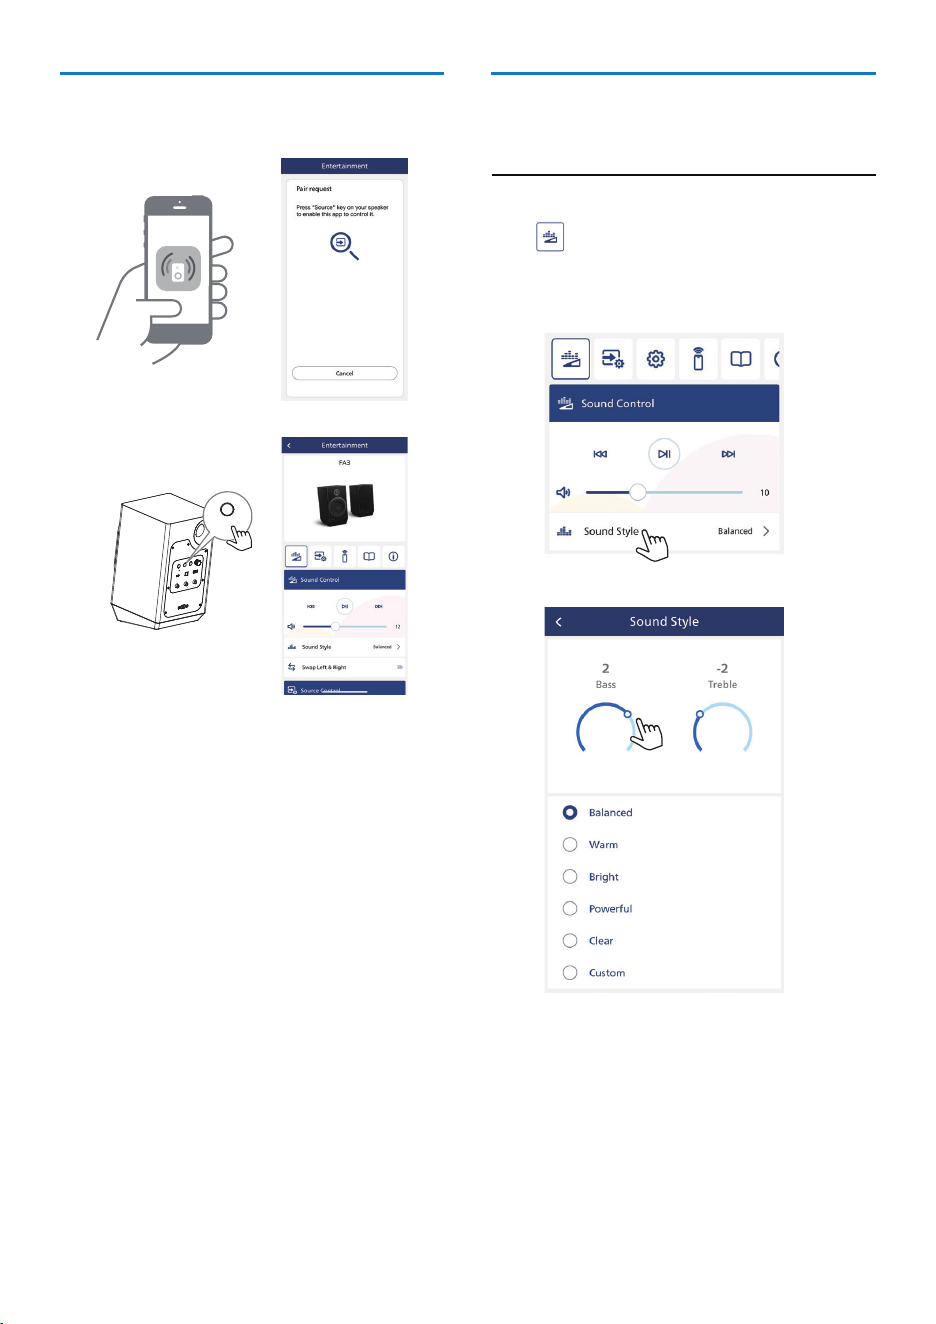
You can choose the ideal sound for your music.
Choose your sound
Select Equalizer (EQ) Effect
Press icon on the App to select prede�ned
sound modes to suit your music:
Balanced/Warm/Bright/Powerful/Clear/
Custom.
1
Launch the Philips Entertainment App on
your mobile device.
2
Make sure your mobile device is enabled the
Bluetooth setting.
3
If you connect the Philips Entertainment App
with your speaker for the �rst time, you are
asked to pair the App with your speaker.
4
Press SOURCE at the back of the primary
speaker to enable the App to discover and
control it.
Pair the App with your speaker
HDMI ARCUSB AUDIO OPTICAL IN
SOURCE
AC IN~
SECONDARY
PAIRING
COAXIAL TO
SECONDARY
VOLUME
L R
AUX IN
Designed in the Netherlands
PRIMARY
SOURCE
21EN
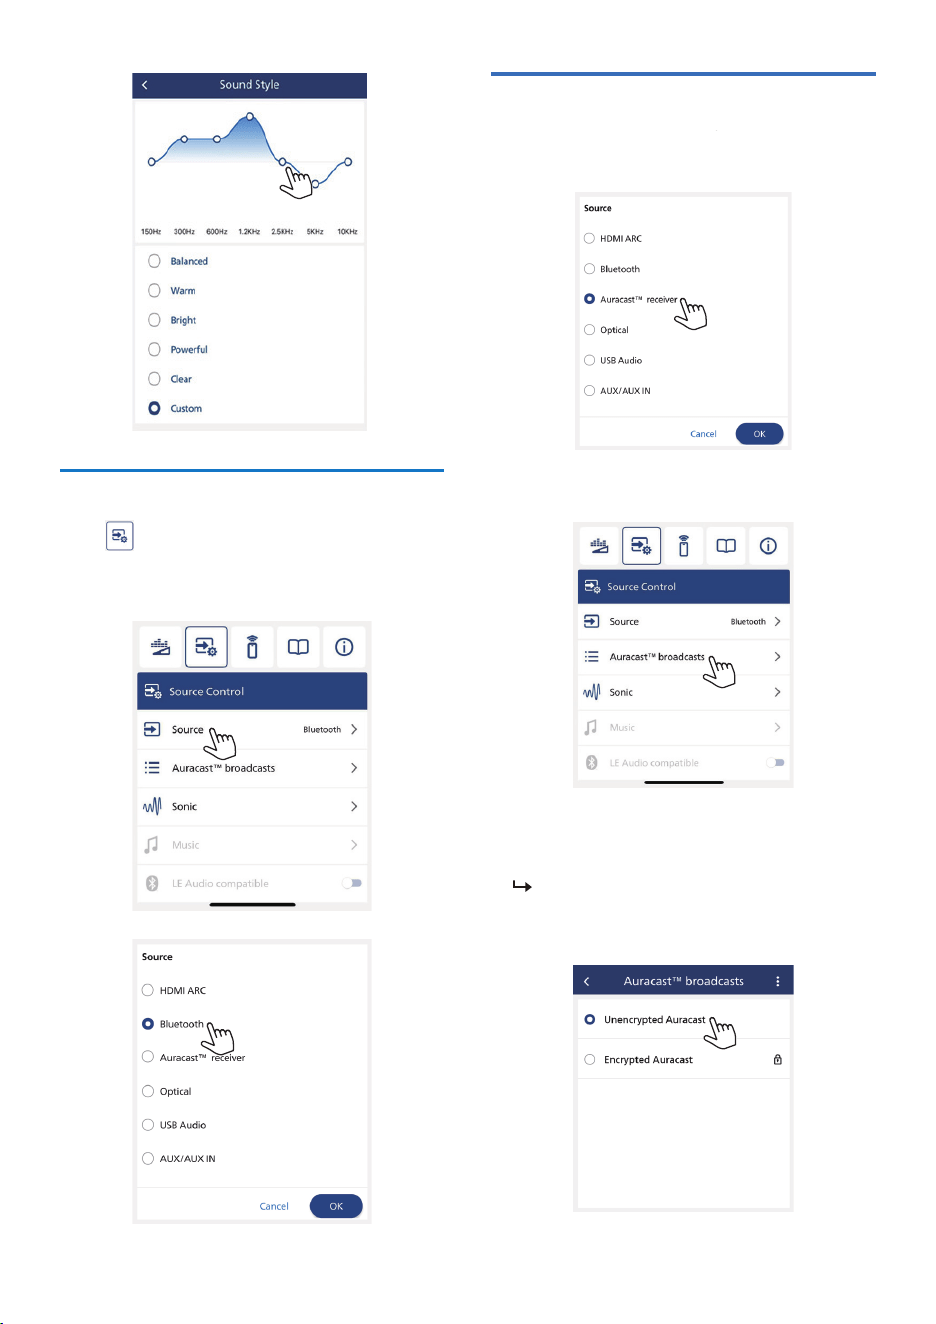
Press icon on the App to select
HDMI ARC/Bluetooth/Auracast
™
receiver/Optical/USB Audio/AUX In.
Select source
Receive unencrypted
Auracast™ broadcast
1
Select Auracast
™
receiver source.
2
Press [Auracast
™
broadcasts] to enter
Auracast
™
broadcast list.
3
When an unencrypted playback source from
mobile phone or dongle is selected, the
speaker will search and connect to it.
Make sure to activate Auracast
™
broadcast on your mobile phone, dongle
or product.
22 EN
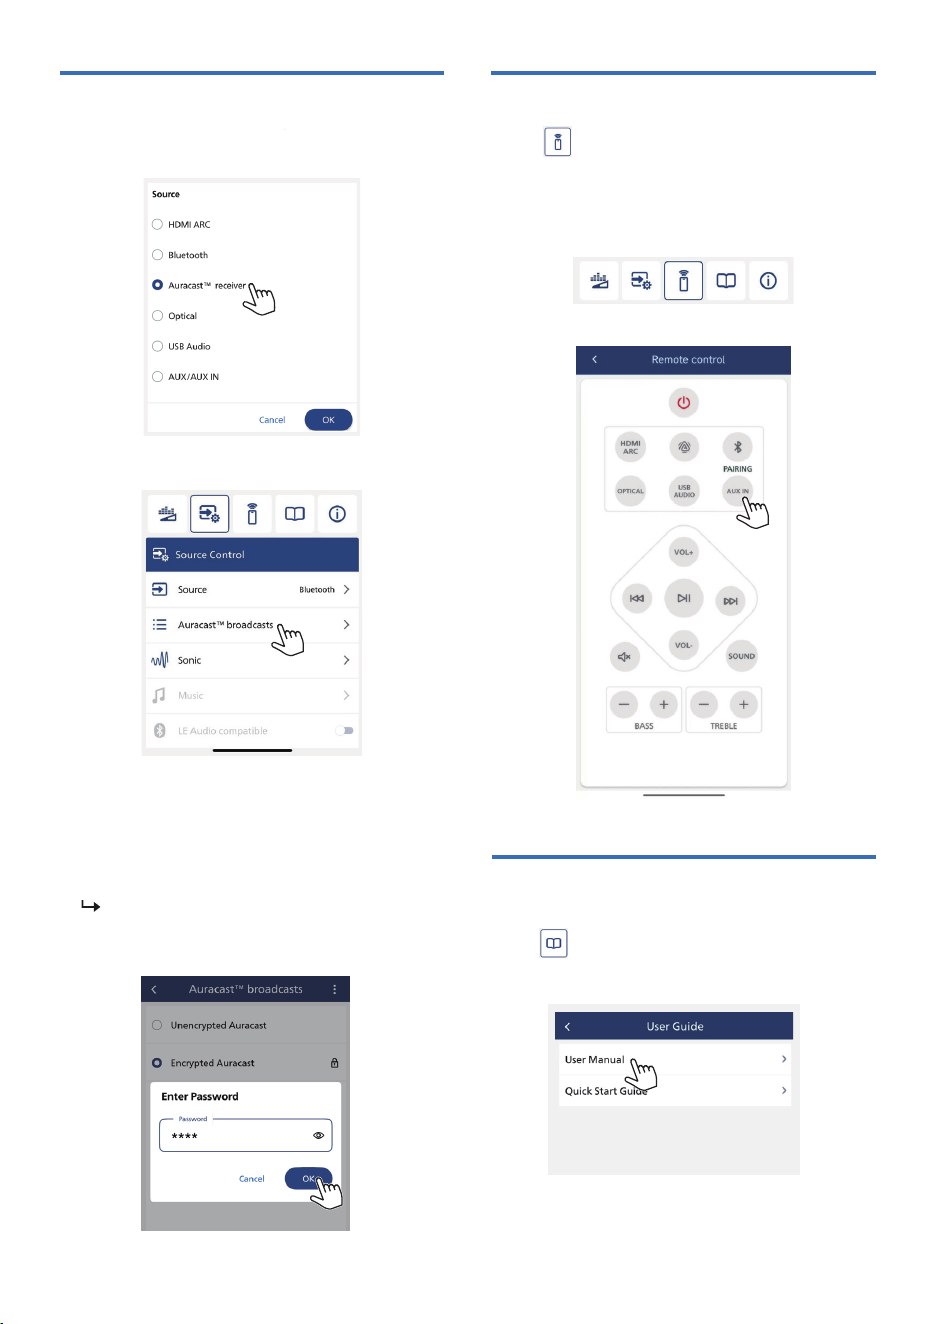
23EN
Receive encrypted Auracast™
broadcast
1
Select Auracast
™
receiver source.
2
Press [Auracast
™
broadcasts] to enter
Auracast
™
broadcast list.
3
When an encrypted playback source from
mobile phone, dongle or product is selected,
you will be asked to input a password.
Entering the same password that you input
when setting up Auracast
™
broadcast from
your mobile phone, dongle or product.
Make sure to activate Auracast
™
broadcast on your mobile phone, dongle
or product.
For more information about using this unit,
press icon on the App you can �nd [User
Manual] and [Quick Start Guide].
Press icon to enter and use your
mobile device via Philips Entertainment
App as a remote control to operate the
speaker.
Remote control
User guide
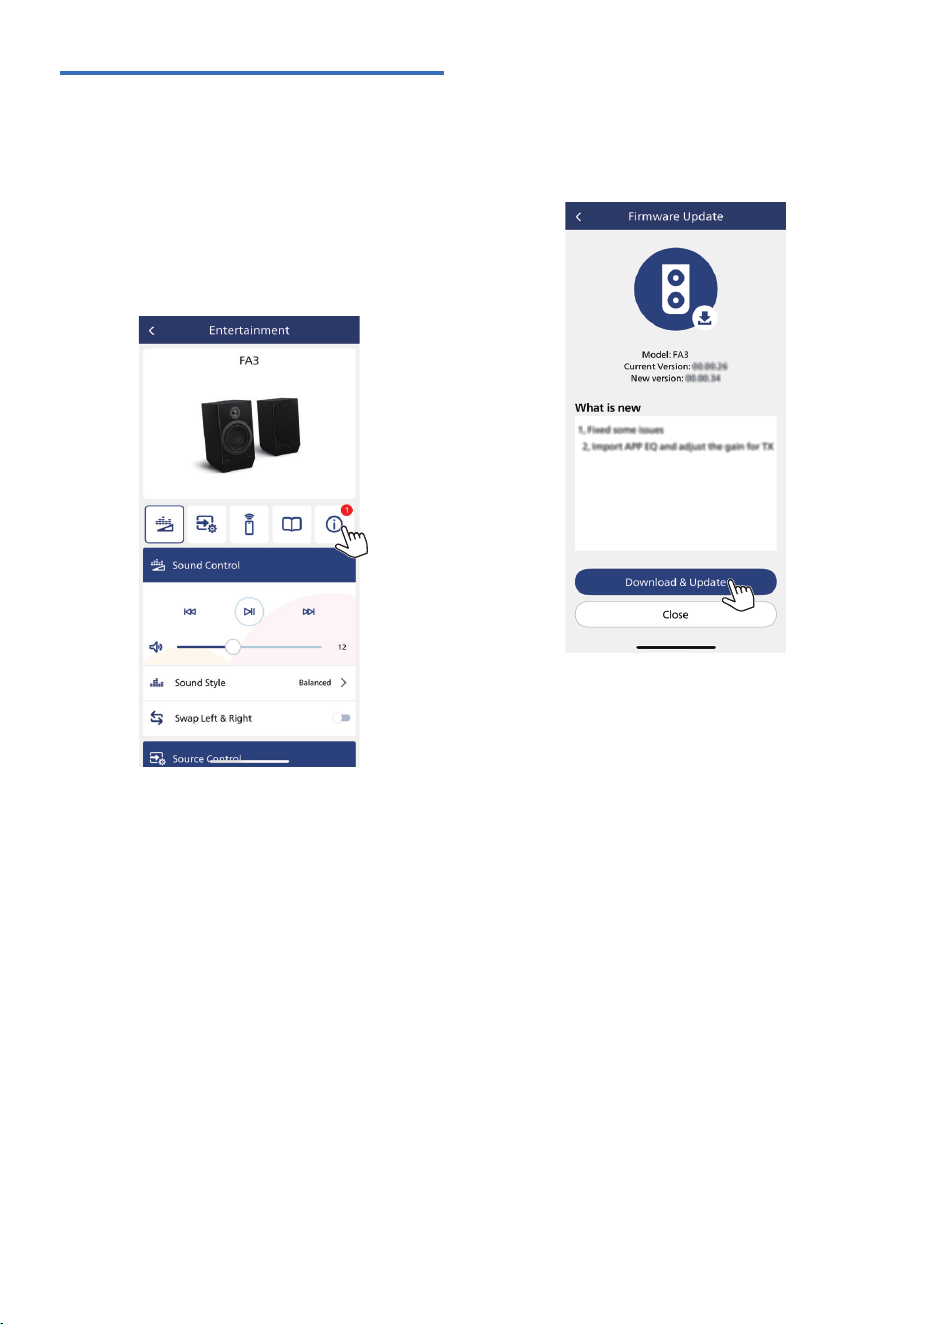
Firmware Upgrade
To get the best features and support, update
your unit with the latest �rmware version.
The �rmware for MCU can be upgraded to the
latest version via Philips Entertainment app.
Please go to Firmware Update and press
Download & Update. If the upgrade is
released, the Download & Upgrade icon can
be pressed to proceed automatically.
Once this product is connected to Philips
Entertainment app, it can receive over-the-air
�rmware update. Always upgrade with the
latest �rmware version to improve the
performance of this unit.
24 EN

Note
• Product information is subject to change without prior
notice
.
7 Product
speci�cations
PCM 44.1KHz, 48KHz, 96KHz
PCM 44.1KHz, 48KHz, 96KHz
SBC, AAC, LC3, LDAC
2.4 GHz
Coaxial audio cable
6m/30°
AAA (1.5Vx2)
100-240V~ 50/60Hz
<30W
<0.5W
170x303x211 mm
6.798Kg
0-40
º
C
2x50W RMS (2x100W Max.)
15W RMS (30W Max.)/Ch.
35W RMS (70W Max.)/Ch.
40Hz-40KHz
>75db
≤1%
8Ω (Tweeter)
4Ω (Bass)
1" Titanium Dome
Tweeter with Rear
Chamber
5" Glass Fiber Cone
V5.4
A2DP, AVRCP
2402-2480 MHz
≤9 dBm
approx.10m
General information
Power supply
Power consumption
ECO power consumption
Dimensions (W x H x D)
Weight (Main unit)
Operating temerature
Ampli�er
Total output power
Tweeter output power
Mid-woofer output power
Freguency response
Signal to Noise Radio
Total harmonic distortion
Speaker
Impedence
Tweeter
Mid-Woofer
Bluetooth
®
Bluetooth
®
version
Bluetooth
®
pro�les
Bluetooth
®
frequency band
Maximum transition power
Bluetooth
®
range
Supported Audio formats
HDMI ARC
Optical ln
Bluetooth
®
Speaker connection
Wireless connection
Wired connection
Remote control
Distance/Angle
Battery type
25EN

Music playback is unavailable on this unit even
after successful Bluetooth connection
• The device cannot be used to play music
through this unit wirelessly.
Bluetooth device cannot be connected with this
unit
• The device does not support the pro�les
required for this unit.
• The Bluetooth function of the device is not
enabled. Refer to the user manual of the
device to �nd out how to enable the function.
• This unit is not in pairing mode.
• This unit is already connected with another
Bluetooth-enabled device. Disconnect that
device and then try again.
The paired mobile device connects and
disconnects constantly
• The Bluetooth reception is poor. Move the
device closer to this unit or remove any
obstacle between them.
• Some mobile phones may connect and
disconnect constantly when you make or end
calls. This does not indicate any malfunction of
this unit.
• For some devices, the Bluetooth connection
may be deactivated automatically as a
power-saving feature. This does not indicate
any malfunction of this unit.
Warning
• Never remove the casing of the product.
8
Troubleshooting
No power
• Make sure that the AC power cord of the
device is connected properly.
• Make sure that there is power at the AC outlet.
• As a power-saving feature, the system switches
off automatically 15 minutes after track play
reaches the end and no control is operated.
No sound or poor sound
• Adjust the volume.
• Adjust the volume on the connected device.
• Make sure that your Bluetooth device is within
the operational range.
No response from the unit
• Disconnect and reconnect the AC power plug,
then turn on the unit again.
• As a power-saving feature, the system switches
off automatically 15 minutes after track play
reaches the end and no control is operated.
Remote control does not work
• Before you press any function button, �rst
select the correct source with the remote
control instead of the main unit.
• Reduce the distance between the remote
control and the unit.
• Insert the battery with its polaritie: (+/- signs)
aligned as indicated.
• Replace the battery.
• Aim the remote control directly at the sensor
on the front of the unit.
The audio quality is poor after connection with
a Bluetooth-enabled device
• The Bluetooth reception is poor. Move the
device closer to this speaker or remove any
obstacle between them.
To keep the warranty valid, never try to repair the
device yourself. If you encounter problems when
using this device, check the following points
before requesting service. If the problem remains
unsolved, go to the Philips webpage
www.philips.com/support. When you contact
Philips, make sure that the device is nearby and
the model number and serial number are
available.
26 EN

TAFA3_UM_V1.0