Owner’s Manual
Model No: 30601
PIC
®
Precision Induction Cooktop
DOUBLE
Master Your PIC Double
Scan the code to find recipes,
how-to vidoes and more!
Questions or Concerns?
Amazon Purchases: support@nuwavenow.com All Other Purchases: help@nuwavenow.com
1-888-502-7805 1-877-689-2838
Mon-Fri 7:30am-4:30pm CST

2 | nuwavenow.com
Register Today!
Use your smartphone or device to scan the QR code located on the back
of your unit to register your product, or visit nuwavenow.com/register.
Connect with Us!
#nuwavenow
Visit nuwavenow.com to see other great products and accessories.
THANK YOU!
Congratulations on your Nuwave® purchase. We know there are many options available
and sincerely appreciate the trust you have placed in us.
For the last 30 years, we have committed to introducing products that promote healthy
living at affordable prices. By combining the highest quality designs with cutting edge
technology, we have always strived to blend feature, function, and innovation into every
product we make. We hope you will agree.
We would love to hear from you. Please feel free to reach out with any feedback or
comments that could improve your experience. We would also enjoy hearing about your
successes. Scan the QR code below to email us.
For Amazon Purchases
support@nuwavenow.com
For All Other Purchases
support@nuwavenow.com

nuwavenow.com | 3
TABLE OF CONTENTS
Safeguards and Information......................................................................4–6
Electrical Information ....................................................................................5
FCC Information ...........................................................................................6
Induction Cooking ......................................................................................7
PIC Double Features ..................................................................................8
Getting Started ............................................................................................9
Basic Functions ..........................................................................................10–14
To Start Cooking ...........................................................................................10
Setting the Clock ..........................................................................................10
Setting the Cooking Temperature .................................................................11
Changing the Temperature Format ...............................................................11
Setting the Cooking Time .............................................................................11
The Pause/Clear Function ............................................................................11
The Stage Function ......................................................................................12
The Warm Function ......................................................................................12
The End Time Function ................................................................................12
The Wattage Function ..................................................................................13
The Program Function ..................................................................................13
Total Cooking Time .......................................................................................13
Saving Your Presets .....................................................................................14
The Lock Function ........................................................................................14
Cooking Tips.......... .......................................................................................14
Care and Maintenance ...............................................................................15–16
Cleaning Instructions ....................................................................................15
Troubleshooting and Alerts ...........................................................................16
Limited Warranty ........................................................................................17–18
Notes............................................................................................................19

4 | nuwavenow.com
WARNING: When using the PIC, always
follow basic safety precautions:
1. There may be residual heat on the
cooking surface. Do not touch.
2. To protect against electrical shock, do
not immerse cord, plugs, or the PIC in
water or other liquids.
3. Do not operate the PIC with a damaged
cord, plug, after the appliance
malfunctions, or has been damaged in
any manner. Return appliance to the
nearest authorized service facility for
examination, repair, or adjustment.
4. Close supervision is necessary when
the PIC is used near children. This
appliance is not intended for use
by persons (including children) with
reduced physical, sensory or mental
capabilities, or who lack experience
or knowledge, unless they have
been given supervision or instruction
concerning use of the appliance by a
person responsible for their safety.
5. The use of accessories not
intended for use with the PIC is not
recommended. Doing so may damage
the PIC and can cause accidents.
6. FOR HOUSEHOLD USE ONLY.
NOT INTENDED FOR OUTDOOR
USE.
7. Do not use the PIC for any purpose
other than its intended use.
8. Do not let cord hang from tables or
countertops, touch hot surfaces, or
come into contact with sharp edges.
9. Do not place the PIC on or near a hot
gas, electric burner, in a heated oven,
or on a stovetop.
10. Never use the cooktop in the proximity
of open res or other heat sources, on
ammable surfaces (e.g., tablecloth,
carpet, etc.), close to any ammable
materials, heating units, or in wet
areas.
11. Do not move the PIC while in
operation, especially with any pots or
pans containing hot oil or other hot
liquids. Remove these from the PIC
and allow it to cool before moving.
12. To disconnect, turn the PIC off and
then remove the plug from the outlet.
13. When removing the plug, do so by
the head, not the cord.
14. Never put the PIC against the wall or
other appliances. There should be at
least 3 inches of free space for the
back, sides, and the top of the PIC.
15. Unplug the PIC from outlet when not in
use and before cleaning. Allow the PIC
to cool before cleaning, putting on or
taking off parts.
16. It is normal for some smoke to escape
the PIC when heating for the rst time.
17. If a lot of smoke is escaping from the
air vent during operation, unplug the
PIC immediately and contact Customer
Service at
support@Nuwavenow.com.
18. Place the cooktop on a stable, level,
non-metallic surface.
19. The cooktop’s surface is designed
with temperature-resistant glass. In
the event that damage to the PIC is
observed, even a small crack on the
glass surface, immediately disconnect
the PIC from the power supply.
20. Never use a towel or other material
or object to block the air vents. Do
not block the ventilation slots of the
induction cooktop. This may cause the
PIC to overheat.
21. Make sure the cord is not compressed
beneath the PIC.
22. Do not place devices or objects that
are sensitive to magnetic elds on
top of or next to the PIC, e.g., credit
cards, cellphones, radios, TVs, etc.
23. Prior to connecting the PIC, conrm
SAFEGUARDS & INFORMATION
HOUSEHOLD USE ONLY • READ ALL INSTRUCTIONS BEFORE USE

nuwavenow.com | 5
SAFEGUARDS & INFORMATION
HOUSEHOLD USE ONLY • READ ALL INSTRUCTIONS BEFORE USE
that the voltage needs indicated
in this manual correspond to the
voltage supply in your home. A wrong
connection may lead to the PIC’s
damage and possible injury to persons.
24. If any trouble arises during operation,
any service MUST be done by Nuwave
LLC or authorized by the manufacturer
for repairs.
25. The appliance is not intended to be
operated by means of an external timer
or separate remote-control system.
26. Do not disassemble the PIC or replace
any parts without prior written consent
from the manufacturer.
27. Make sure the PIC is always clean prior
to cooking.
28. Use extreme caution when operating
the PIC or any other appliance.
IMPORTANT - FCC Information:
WARNING
In case of malfunction,
immediately unplug the PIC and
contact Nuwave’s Customer
Service Department.
SEE CARE & MAINTENANCE
BEFORE USE
SAVE THESE INSTRUCTIONS
Read and understand the entire manual
before using the PIC.
THE FAILURE TO FOLLOW THESE
SAFEGUARDS AND INSTRUCTIONS IS A
MISUSE OF YOUR PIC THAT CAN VOID
YOUR WARRANTY AND CREATE THE
RISK OF SERIOUS INJURY.
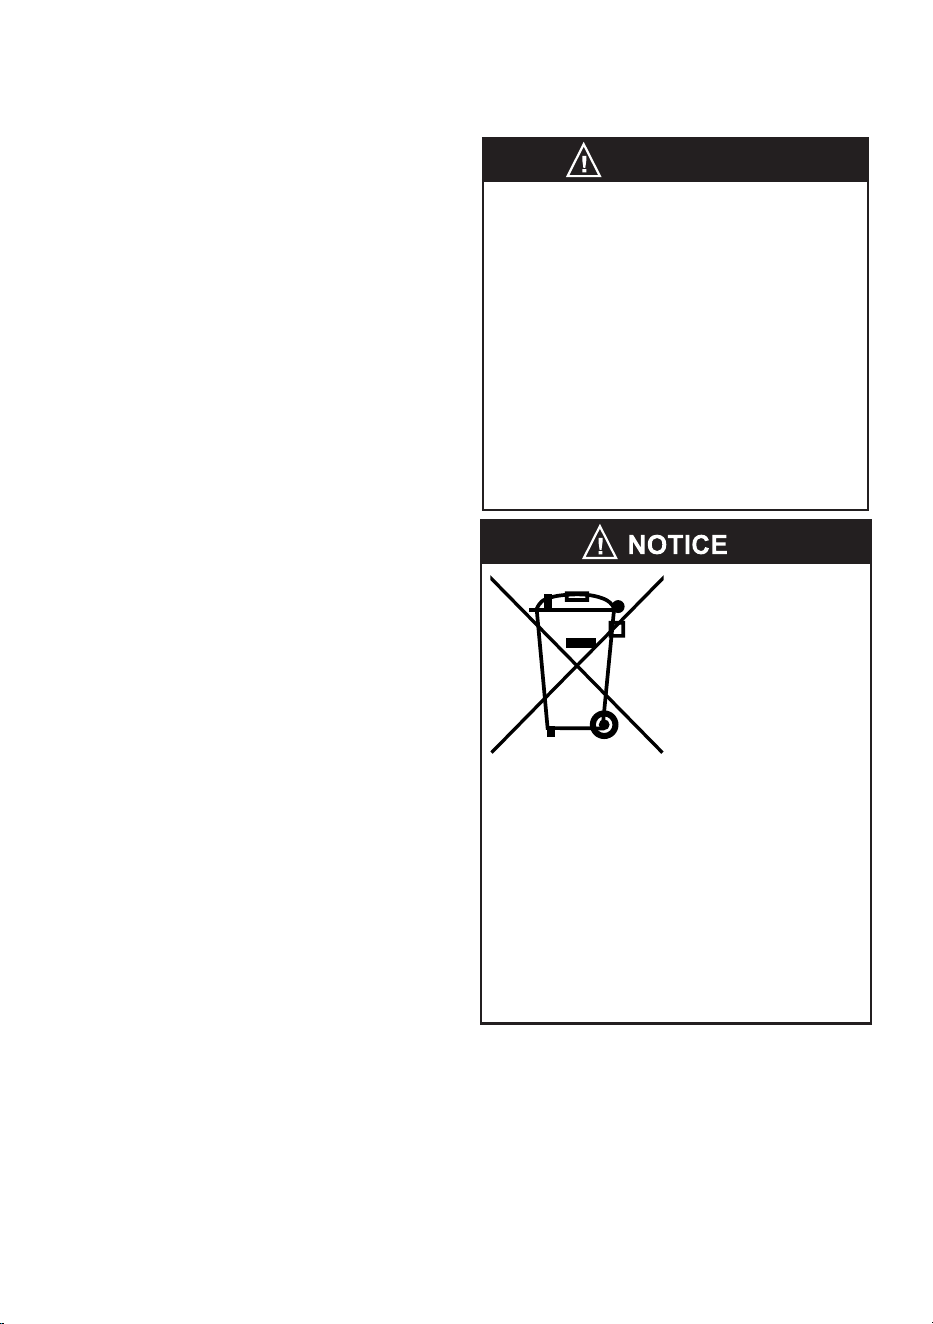
NOTICE
This appliance is intended for normal
household use. It is not intended to
be used in environments such as staff
kitchens/cafeterias of shops, ofces,
farms, or other work environments, nor is
it intended to be used by clients in hotels,
motels, bed and breakfasts, and non-
residential environments.
Electrical Information
A short power-supply cord is provided to
reduce the risk resulting from becoming
entangled in or tripping over a longer cord.
Longer detachable power-supply cords or
extension cords are available and may be
used if care is exercised in their use. If a
longer detachable power-supply cord or
extension cord is used:
1. The marked electrical rating of the
extension cord should be at least as
great as the electrical rating of the
appliance.
2. The longer cord should be arranged
so that it will not drape over the
countertop or tabletop where it
could be pulled on or tripped over
unintentionally. The PIC should be
operated on a separate electrical
outlet from other operating
appliances due to wattage limitations.
The appliance has a polarized plug
(one blade is wider than the other).
To reduce the risk of electric shock,
this plug is intended to fit into a
polarized outlet only one way. If the
plug does not fit fully into the outlet,
reverse the plug. If it still does not
fit, contact a qualified electrician. Do
not attempt to modify the plug in any
way.
6 | nuwavenow.com
Warning: Changes or modications to this
unit not expressly approved by the party
responsible for compliance could void the
user’s authority to operate the equipment.
Note: This equipment has been tested
and found to comply with the limits for a
consumer ISM equipment, pursuant to
Part 18 of the FCC Rules. These limits
are designed to provide reasonable
protection against harmful interference in
a residential installation. This equipment
generates, uses, and can radiate radio
frequency energy and, if not installed and
used in accordance with the instructions,
may cause harmful interference to radio
communications. However, there is no
guarantee that the interference will not
occur in a particular installation. If this
equipment does cause harmful interference
to radio or television reception, which can
be determined by turning the equipment
off and on, the user is encouraged to try to
correct the interference by one or more of
the following measures:
• Reorient or relocate the receiving
antenna.
• Increase the separation between the
equipment and receiver.
• Connect the equipment into an outlet
on a circuit different from that to which
the receiver is connected.
• Consult the dealer or an experienced
radio TV technician for help.
The device complies with part 18 of the
FCC rules. Operation is subject to the
following two conditions: (1) This device
may not cause harmful interference, and (2)
This device must accept any interference
received, including interference that may
cause undesired operation.
WARNING
Electric shock hazard. Use with adequate
electrical system. Do not use if cord or
plug is damaged.
WARNING: All items on the cooktop can
get very hot during cooking. Please be
careful when removing these items from
the unit. Always wear oven mitts or use
pot holders. Cooktop may retain residual
heat after cookware has been removed.
Allow everything to cool completely
before cleaning.
SAFEGUARDS & INFORMATION
FCC INFORMATION • CORRECT PRODUCT DISPOSAL
Correct Disposal
of this Product
This marking
indicates that this
product should not
be disposed of with
other household
wastes throughout
the EU. To prevent possible harm to
the environment or human health from
uncontrolled waste disposal, recycle it
responsibly to promote the sustainable
reuse of material resources. To return
your used device, please use return and
collection systems or contact the retailer
where the product was purchased.
They can handle environmentally safe
recycling.

nuwavenow.com | 7
INDUCTION COOKING
WHAT IS INDUCTION COOKING? • INDUCTION-READY COOKWARE
What is Induction Cooking?
The Nuwave PIC Double uses induction
coils that generate magnetic elds to
produce a warming reaction in steel and
iron-based pots and pans. This generates
heat in the cookware, not on the cooktop
surface, which offers a number of great
benets:
• Energy Conservation: The magnetic
field, generated by each copper coil,
causes invisible molecules in the
cookware to begin vibrating rapidly,
creating heat, so the cookware itself
heats the food. The Nuwave PIC
Double is one of the most energy-
efcient cooktops available today,
which means that cooking with the PIC
Double can translate into savings on
your monthly utility bills.
• Safety: The Nuwave PIC Double’s
design uses no red hot coils or open
ames, essentially eliminating the risk
of re. Automatic shut-off features
enhance the cooktop’s safety. Simply
Touch and Go! Users can also take
the ice cube challenge! Induction
technology warms the pan, but the
surface remains cool to the touch.
• Fast Cooking: Heating is immediate
and temperature is precise with the
Nuwave PIC Double. Features 6
different temperature settings that are
adjustable in 5-degree increments.
There’s no guessing!
• Easy to Clean: Spills won’t burn and
stick to the cooktop surface. Just wipe
and go!
Induction-Ready Cookware
Induction technology is based on a magnetic
eld distributing heat through ferrous (iron-
based, magnetic) metal. Some cookware
is made of naturally magnetic metals (such
as pure iron), while others are rendered
magnetic by “sandwiching” a thin layer of a
ferrous metal within the base. Examples of
compatible cookware include:
• All Nuwave Cookware, Nuwave
Duralon
®
Healthy Ceramic Non-Stick
Cookware
• Cast iron
• Enameled iron and steel
• Stainless-steel with a magnetic base
Incompatible cookware includes:
• Copper
• Glass
• Aluminum
• Pottery-type vessels
Checking Induction Compatibility
There are three simple ways to check
if your existing pots and pans, or future
cookware purchases, are compatible with
the PIC Double:
1. A magnet is typically a great indicator.
If it sticks to the bottom of a piece of
cookware, this typically means the pot
or pan is induction-ready. However,
sometimes a cooking vessel’s magnetic
properties are not strong enough to
work efficiently with the PIC Double.
2. Place a small amount of water in a
pot or pan and place it on the PIC
Double while operating. If it is induction
compatible, water will begin to boil.
3. An induction-ready symbol may be
printed on the bottom of the cookware.
8 | nuwavenow.com
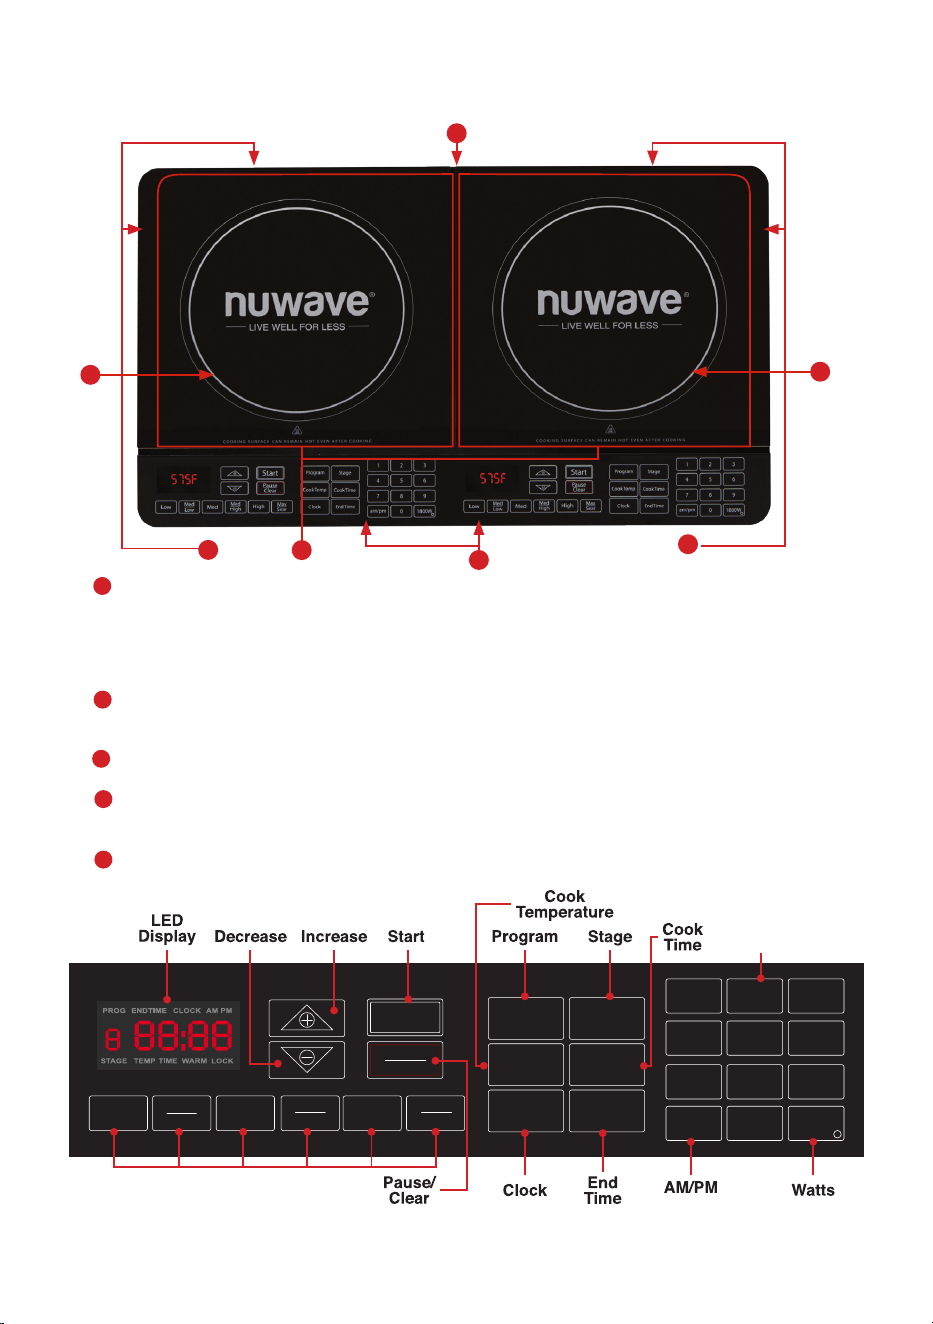
PIC DOUBLE FEATURES
1
2
3
1
5
4
4
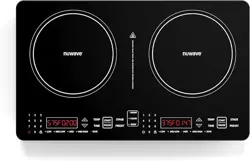
Ventilation: Air vents are located on the sides and back of the product to
allow any heat generated by the heating element to escape. This design
feature prevents the PIC from overheating and ensures efcient performance
of the unit.
Surface: The unit’s heat-resistant glass surface stays cool
to the touch and cleans easily with the simple wipe of a damp cloth.
Control Panel with LED Display: Clearly lit, easy-to-read control panels.
Plate (Heat Source): Electromagnetic coils located below each of the glass
surfaces transfer generated heat directly to induction-ready cookware.
On/Off Switch: The unit has an On/Off switch located
on the back of the PIC .
1
2
3
4
5
Low
Med
Low
Med High
Cook Temp
Clock
Program
Cook Time
End Time
am/pm
1800W
Stage
1
4
7
2
5
8
0
3
6
9
Start
Med
High
Pause
Clear
Max
Sear
Low-Max/Sear
Numeric
Touchpad
Control Panel
LED Display should read “0” when program is clear or power is on.
nuwavenow.com | 9
GETTING STARTED
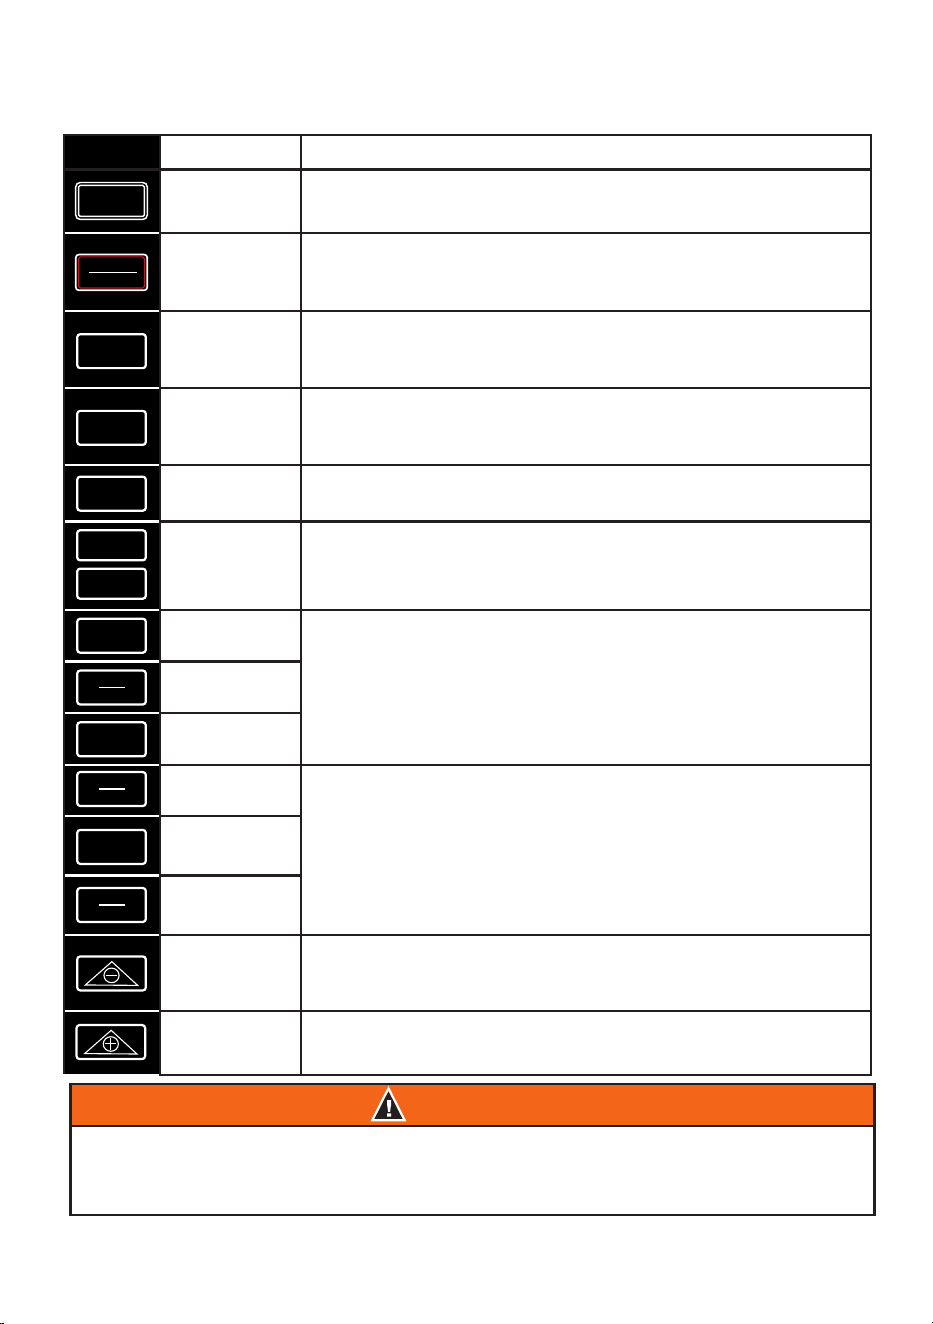
Control
Function
Start
Press Start to begin cooking. If you have paused cooking,
pressing Start will begin the cooking process again.
Pause/
Clear
Press Pause/Clear to pause cooking. To clear out a set
cooking sequence, press Pause/Clear a second time.
Program
Access presets 1–50, and program and save your own
presets 51–200.
Stage
Set up to 10 cooking stages.
1800W
Controls the wattage of your PIC. The default wattage is
1800W. Press 1800W to adjust from 1800W to 900W.
Time
Allows you to adjust the cooking time before and during the
cooking process.
Low
Left side set temperature buttons: Low (100°F), Med/Low
(175°F), and Med (275°F). Use the - or + keys to further adjust
the cooking temperature in 5°F increments.
Med/Low
Med
Med/High
Right side set temperature buttons: Med/High (375°F), High
(425°F), and Max/Sear (575°F). Use the - or + keys to further
adjust the cooking temperature in 5°F increments.
High
Max/Sear
(–)
Allows you to decrease the cooking temperature and time
before and during the cooking process.
(+)
Allows you to increase the cooking temperature and time
before and during the cooking process.
CAUTION
While the PIC Double is in operation, do not touch the cooking surface as it may
become very hot, leading to the risk of burns. The cooktop may retain residual heat
after cookware has been removed.
Start
Program
Stage
1800W
Low
Med
High
Cook Time
End Time
Pause
Clear
Med
Low
Med
High
Max
Sear

10 | nuwavenow.com
BASIC FUNCTIONS
Preset Temperatures
Press Button Temperature Panel Display Examples
Low 100°F 100F Warm
Med/Low 175°F 175F Simmer
Med 275°F 275F Steam
Med/High 375°F 375F Stir/Deep-Fry
High 425°F 425F Boil/Saute
Max/Sear 575°F SEAR Sear
Display temperature represents temperature of 1.5L of oil in the Nuwave 3.5-quart Stainless-steel Pot.
The thermometer location for test is the origin (middle) of the Pot with an equidistant length between the
pot base and top of the oil. The minimum is 100F while the maximum temperature reaches 575F.
To Start Cooking
There are several ways to begin cooking with your Nuwave
®
PIC Double with the default
cooking temperature and time being Max/Sear (575˚F) for 1 hour:
• Select the temperature (Low–Max/Sear), then press Start.
• Press Cook Temp, then press Start.
• Press Cook Temp. “Temp” will blink and the default “575F” will be displayed. Set the
cooking temperature using the numeric touchpad and press Start.
• Press Cook Time. “Time” will blink and “00:00” will be displayed. Set the cooking time
using the numeric touchpad and press Start.
• Set the temperature and time using the numeric touchpad, then press Start.
The unit will automatically stop cooking once time has expired and beep three times to
alert users. The display will always show the current temperature during the cooking cycle.
To display time lapse, press Cook Time while cooking.
NOTE: After 3 seconds, the display will revert to the cooking temperature. Each plate must
be set separately.
Setting the Clock
1. Press Clock. “CLOCK” will ash on LED display, “AM” will light, and “00:00” will be
displayed.
2. Enter digits to match the current time.
• For example: 1:25 would be entered by pressing “1, 2, 5”.
3. Once entered, the time will be set to “AM” by default.
4. To change over to “PM”, press am/pm.
5. Press Clock again to set. “CLOCK” will stop ashing
• End Time feature will not work unless the clock is set.
• If the unit is cut from its power supply or turned off,
the clock must be reprogrammed.
Start

nuwavenow.com | 11
Setting Cooking Temperature
The Unit cooking temperature defaults to
Max/Sear (575˚F).There are two ways of
setting it:
1. Press Low–Max/Sear. The "TEMP"
indicator will flash and the temperature
range will appear on the display panel.
Then press Start.
2. Press Cook Temp. The "TEMP"
indicator will ash and "575F" will be
displayed. Set the desired cooking
temperature with the numeric touchpad.
If a number not ending in “5” or
“0” is entered, the PIC Double will
automatically set itself to the nearest
temperature ending in a “5” or “0”. For
example, when you press 2, 2, 2 for
cooking at 222˚F, the LED display will
read “220F” Then press Start.
• To raise or lower the temperature
in 5°F increments, press + and –
until the desired temperature is
displayed. Pressing and holding
these keys will speed up the
adjustment.
• Refer to the chart below for preset
temperatures. The minimum preset
temperature is 100°F, while the
maximum temperature is 575°F.
The desired cooking temperature
can be set by using the numeric
touchpad.
Temperature Format: ºF to ºC
The unit defaults to degrees Fahrenheit
for the cooking temperature, with “F”
appearing on the display panel. To switch
to Celsius(C), press Cook Temp and Cook
Time simultaneously. Repeat this to switch
back again.
To close the F/C conversion process, press
Pause/Clear until “0” or the current time
appears on the LED screen.
Setting the Cooking Time
1. Press Cook Time. “TIME” will ash
and “01:00” will be displayed.
2. Enter the time in hours and minutes
using the numeric touchpad.
• For example, 1 hour and 30
minutes would be entered by
pressing 1,3,0. The display panel
will show “1:30”.
• The time can be adjusted in
1-minute increments by pressing
– or +. Hold them to speed up the
adjustment.
• To check the time while cooking,
press Cook Time. The PIC will
revert to the temperature in 3
seconds.
• If the required time is in minutes,
you only need to enter one or two
numbers.
• For example, for 5 minutes, enter
5; for 46 minutes, enter 4, 6.
BASIC FUNCTIONS
3. If the number needs to be corrected,
clear the entry by pressing 0 until you
see “0:00” on the LED display.
• The blinking “TIME” indicates that
the time can be adjusted.
• The maximum programmable time
is 99 hours and 60 minutes.
• The display shows hours and
minutes, but not seconds.
The Pause/Clear Function
To interrupt cooking time, press Pause/
Clear once. This will pause the unit
regardless of cooking stage.
The temperature will remain listed in the
display panel for 45 minutes while the “F”
(or “C”) flashes. Settings may be adjusted
while cooking is paused.
To resume cooking, press Start.
To clear the cooking mode or display while
the PIC Double is in operation, press
Pause/Clear twice. The display will be
fully cleared and “0” will appear.

12 | nuwavenow.com
BASIC FUNCTIONS
The Warm Function
After the initial cooking is complete, the
cooktop can be used to keep the food
warm between 100°F–200°F. The default
settings are 120°F for 2 hours.
1. Press Low + Med/Low simultaneously
until the “WARM” indicator ashes.
2. “120F” will display. Press Start.
3. To change the warming time, press
Cook Time and enter the desired time
up to 100 hours.
4. To change the warming temperature,
press Cook Temp, then adjust the
temperature 100˚F–200˚F with the
preset temperature keys, the + or –
keys, or the numeric touchpad.
Once the initial cooking cycle is nished,
the PIC will switch to the Warm function.
Warm will always be the last stage.
• Warm is available for Presets, but it
works after cooking.
The End Time Function
The correct Clock time must be set before
the End Time function can be used (see
Setting Clock on page 10). This feature
is designed to allow cooking to end at a
specic time. It is possible to delay the end
of a program for up to 24 hours.
1. Press End Time. “AM” and “00:00” will
be displayed.
2. Use the numeric touchpad to input the
desired end time.
• For example, 5:00 would be
entered by pressing 5, 0, 0. Press
am/pm to change from “AM”
default if appropriate.
3. After programming the cooking
temperature and time, press Start.
If the End Time is earlier than the end of
the programmed cooking time, cooking
won’t start and the unit will beep for 3
seconds while “End Time” blinks. In that
case, reenter the correct End Time.
After starting the PIC, the remaining time
until cooking begins (delay time) shows on
the screen. The delay time ticks down while
“:” ashes.
The Stage Cooking Function
This function is used when programming
or cooking for more than one time and
temperature setting. You can program up to
9 stages and choose the wattage before or
after you program them. All the stages have
a default temperature of 575˚F.
1. Press Stage. “Stage” will ash and “1”
is displayed.
2. Enter the Cook Temp and Cook Time in
order for each stage. I.e. Stage1: Cook
Temp (Power level can be selected
instead of number)→Input→Cook
Time→Input→Stage (For Stage 2).
• Temperature is automatically
rounded to the nearest “0” or “5”.
• Stage number is increased one
number each stage, but stage
number can be selected.
• When Stage is pressed, “Stage 1”
is displayed and “STAGE” ashes.
• When Cook Temp is pressed,
“STAGE” becomes solidly lit,
“TEMP” ashes and 575F is
displayed. It may be changed by
the number or temperature keys.
• When Cook Time is pressed,
“TIME” ashes and “00:00” is
displayed. To set the Cooking
Time as 2 hours and 35 minutes,
press 2, 3, and 5 in sequence.
3. Cooking is executed according to the
stage sequence even if the input order
is different.
4. Before starting to cook, your stages
and settings can be saved for future
meals by pressing Program. “PROG”
will ash and you will then choose a
memory slot number (from 51–200)
and press Program again to save
your new Preset (“PROG” will become
solidly lit).

nuwavenow.com | 13
The Program Function
This gives you access to preset cooking
settings. Presets 1–50 are Preprogrammed
by Nuwave, while Preset slots 51–200 are
for your own creations. Wattage must be
set for 1800W and only 1 plate may be
used.
Program functions include Memory Entry
(the storage of frequently used stage
cooking programs), Memory Recall (retrieval
of stage cooking sequences), and Stage
Cooking Mode.
Using Existing Presets
1. Press Program. “PROG” indicator will
ash and “0” will appear on the display.
2. Enter the number of the preset you
wish to use with the numeric touchpad.
Ex: 3, 1 is 31.
3. Press Start.
BASIC FUNCTIONS
Programming Your Own Presets
1. Enter your stages with temperatures
and times, then press Program. Enter
the number you wish to save it as. Ex:
1, 3, 7 is 137.
2. Press Program to conrm the number
you selected.
• Up to 10 cooking stages can be
stored with each Memory Entry.
• If you are unsure of the remaining
cooking time at the current
stage while the unit is cooking,
press Cook Time to display
the remaining time.The display
will automatically revert to the
cooking temperature after several
seconds.
Total Cooking Time
Before starting a Preset, you can view the
total number of cooking stages and total
cooking time.
1. Press Program, then enter the
appropriate recipe number on the
numeric touchpad.
2. Press Program again. The total
number of cooking stages will be
displayed above “STAGE” and the total
cooking time will be displayed on the
LED display.
Individual stages may also be edited and
saved when displaying the total cooking
time.
1. Press Stage and the stage number to
select which stage to edit.
2. To change the temperature, press
Cook Temp and enter the desired
temperature using the numeric
touchpad or + and –. To change the
time, press Cook Time and enter
the desired time using the numeric
touchpad or + and –.
3. Press Start to begin your edited recipe.
You can also save your edited recipe.
1. Press Program, and “PROG” will ash
and a “0” will show on the screen.
2. Enter the desired number for your
program using the numeric touchpad or
+ and –.
3. Press Program again to save your new
preset.
The Wattage Function
The PIC Double operates on a default
of 1800 watts when using one plate. To
change the wattage to 900 watts, press
1800W. Repeat to switch back.
• Presets may only be operated with their
programmed wattage. Any wattage
changes will result in an error message.
Presets require 1800W.
• Each plate may be set to 900W or
1800W. When using both plates, the PIC
Double will switch to 900W for each.
Power and
Temperature
Setting
Wattage
(Based on 120V)
900W
7.5 Amps
1800W
15 Amps
Sear 575°F 900W 1800W
High 425°F 900W 1500W
Med/High 375°F 900W 1300W
Med 275°F 900W 1000W
Med/Low 175°F 600W 600W
Low 100°F 600W 600W

14 | nuwavenow.com
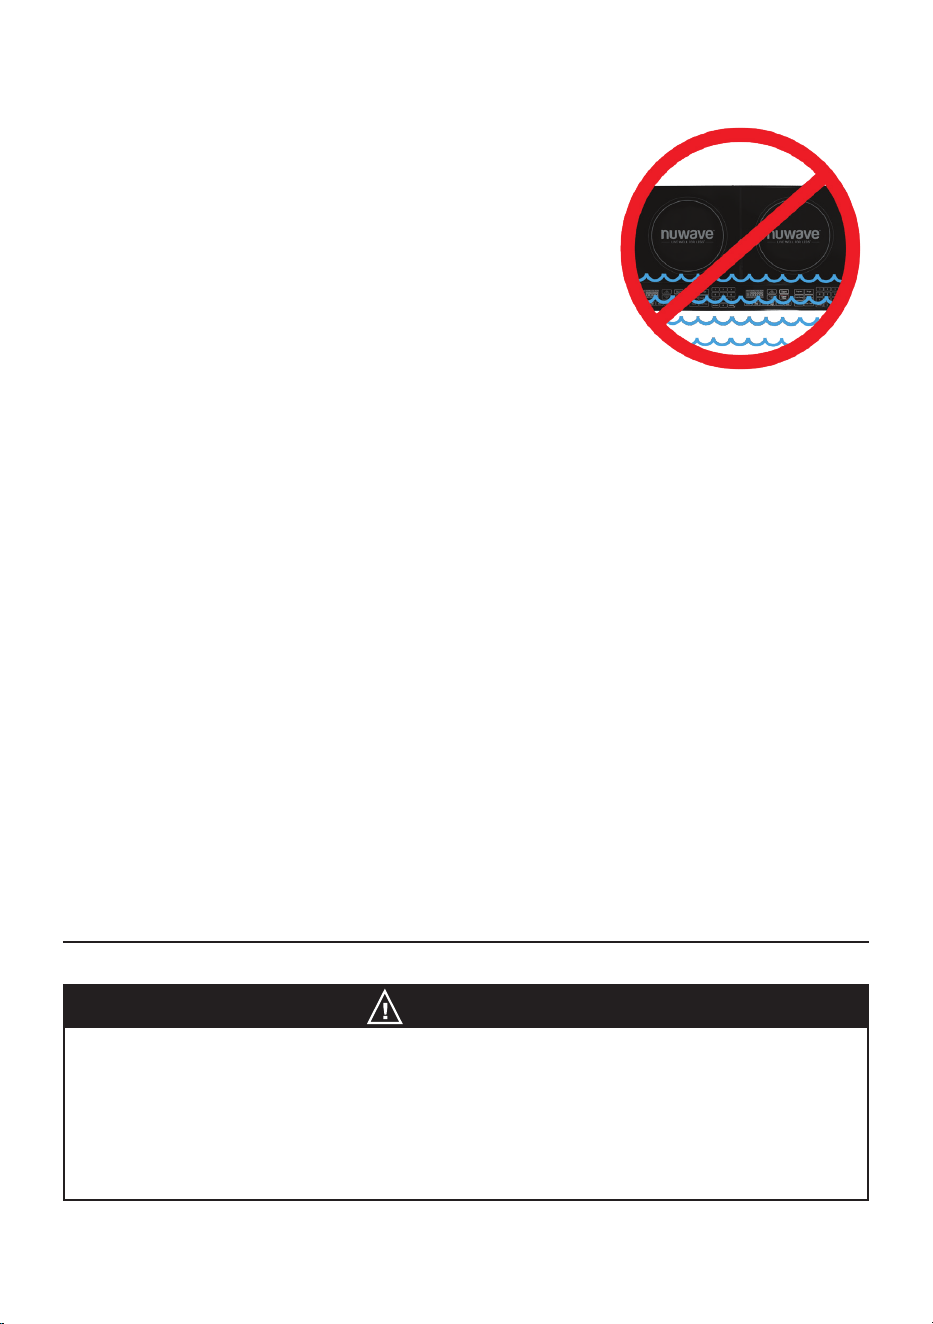
WARNING
Electric Shock Hazard
Do not immerse the PIC Double in water or attempt to cycle it through dishwasher.
The outer surface may be cleaned by wiping carefully with a damp dishcloth or
sponge. Make sure PIC has cooled completely prior to cleaning.
Saving Your Preset
You can adjust and save the cooking time
or temperature of an existing preset at any
point during the cooking process. Once
cooking is done, “SAVE” will be displayed
on the screen. At this point, you may
choose to save your new recipe into the
unit by pressing Program and entering
your desired preset number.
If you choose to save the adjusted preset
in a slot that is already taken by another
preset, the new one will override the old
one. THIS IS ONLY AVAILABLE FOR
PRESET SLOTS 51–200.
BASIC FUNCTIONS
Cooking Tips
Here are a few general suggestions
to help you start cooking:
• Place a small bowl next to your
cutting board for discarding food
scraps.
• Flexible cutting boards are very
• convenient. Just chop and lift–no
mess, no spills.
• Glass measuring cups are
preferred for liquids while plastic
measuring cups work well for
dried ingredients.
• After you have juiced lemons,
put them in the garbage disposal
to freshen the surrounding air.
• Pay close attention to butter as
it’s
• melting. Butter melts when its
internal temperature reaches
a range of 82.4°F–96.8°F. This
means it melts fast, so be pre-
pared to remove it from the PIC
quickly.
The Lock Function
The PIC Double’s controls can be locked by pressing and holding Low + Max/Sear
simultaneously until “LOCK” is displayed on the LED display. To unlock, press and hold Low
+ Max/Sear simultaneously until “LOCK” is no longer displayed on the LED display.
Each control panel locks and unlocks independently from the other.
nuwavenow.com | 15
Cleaning the PIC Double
Before rst use, wipe the cooking surface with a cloth damp
with warm, soapy water. Dry throughly before plugging the
PIC Double into any electrical outlet.
General Cleaning Instructions
1. Unplug the PIC before cleaning.
2. Clean after each use.
3. Make sure the PIC has cooled completely prior to
cleaning.
4. The outer surface may be cleaned by wiping carefully with a damp dishcloth or
sponge.
5. Remove the power plug prior to cleaning the Nuwave PIC. Do not use caustic cleaning
agents and water should not penetrate the interior of the induction cooktop.
6. Never immerse the PIC power cord or plug in water or other liquids.
7. Wipe the glass surface with a damp cloth or use a mild, non-abrasive soap solution.
8. Wipe casing and operating panel with a damp soft cloth and mild detergent.
9. Do not use oil-based cleansing products as their use may damage plastic parts or the
casing/operating panel.
10. Do not use flammable, acidic or alkaline materials or substances near the PIC, as
this may reduce the service life of the induction cooktop or pose a fire risk when the
induction cooktop is in use.
11. Ensure that the bottom of any cookware does not scrape the PIC’s glass surface,
although a scratched surface will not impair the use of the induction cooktop.
12. Properly clean the PIC before storing it in a cool, dry place.
13. For grease or grimy build-up, you can use Bar Keeper’s Friend
®
. Then rinse
thoroughly.
NOTICE
Check Your Electrical Outlets
Check your electrical outlets to ensure proper operation. Do not use in an outlet
where other major appliances are engaged. Check the wattage settings if the
PIC is cooking too slowly.
The electrical plug must be properly plugged into the outlet.
CARE & MAINTENANCE
16 | nuwavenow.com
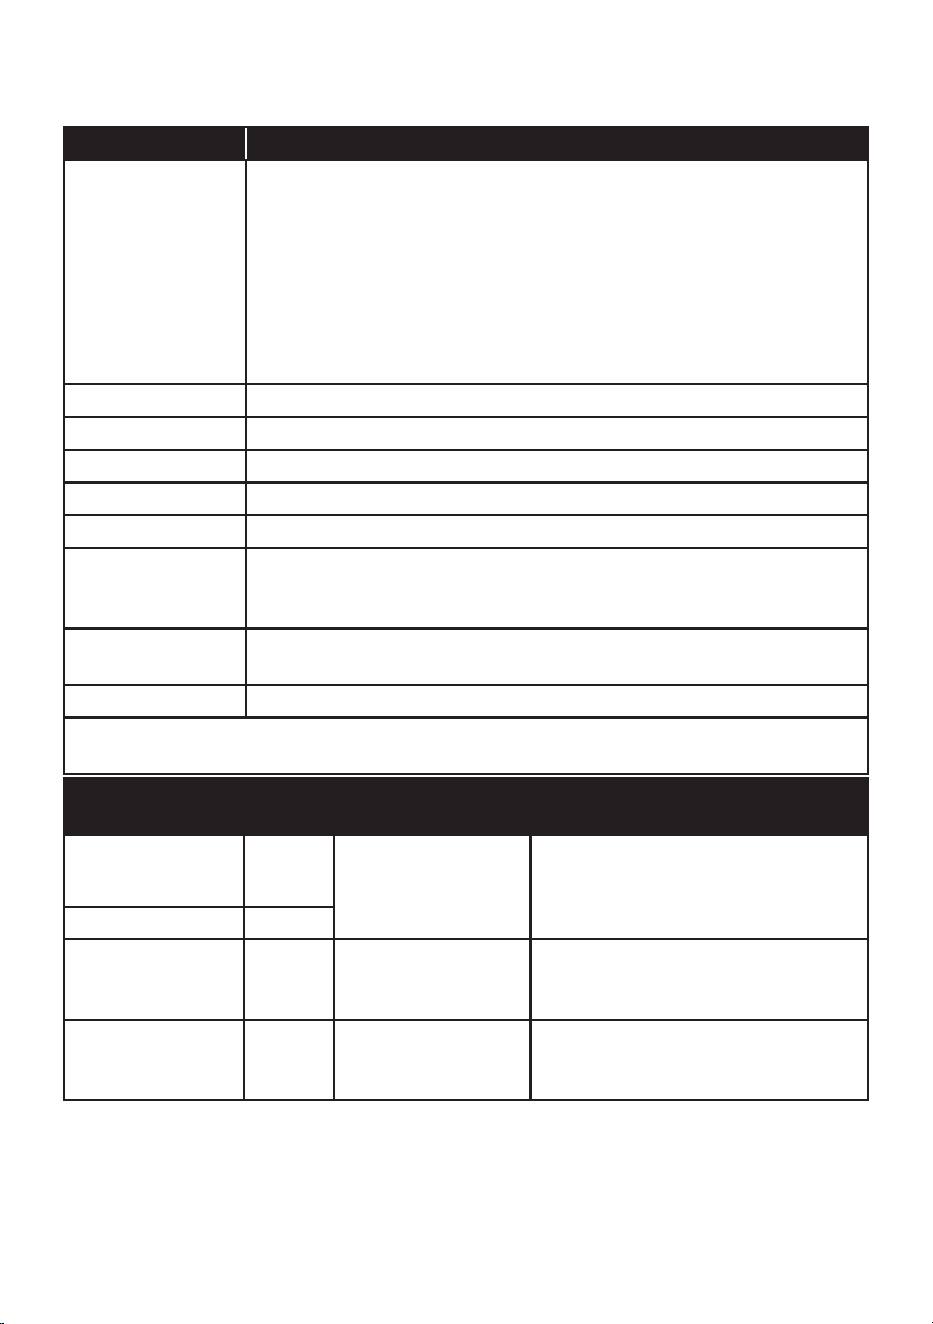
CARE & MAINTENANCE
Error Message: Solution(s):
E1
An E1 reading typically means the PIC Double does not detect
cookware on its surface. This can occur for one of two reasons:
1. The induction coils contained within the PIC Double will only
work when they are in direct contact with a piece of cookware.
To maintain your appliance’s effectiveness, always ensure that
it rests on a flat surface and that contact is consistent with your
cookware.
2. An E1 message may also occur if the chosen cookware is not
induction-ready.
E2 The PIC is malfunctioning. Contact Customer Service.
E3 The PIC’s voltage is too low. Minimum = 85 volts
E4 The PIC’s voltage is too high. Maximum = 144 volts
E5 The PIC is malfunctioning. Contact Customer Service.
E6 The PIC is malfunctioning. Contact Customer Service.
E7
Overheating, or air ventilation is obstructed. If internal temperature
exceeds 230F, operation will cease, and the PIC will beep. Press
Pause/Clear twice. Wait for the PIC to cool.
E8
Overheating, if PIC exceeds a temperature 20F higher than Sear,
the appliance will turn off. Contact Customer Service.
E9 The PIC is malfunctioning. Contact Customer Service.
Contact Customer Service at support@Nuwavenow.com.
After Removing
Cookware:
Beep
Sound:
Display: Reference:
Initial 1 Beep
Temperature or time
displays and “F” or
“C” or “:” flashes
within 10 seconds.
Return the cookware to the PIC
Double. Cooking will automatically
resume.
< 10 seconds None
11- 70 seconds Yes E1
If an error is displayed, return the
cookware to the PIC Double and
press Start to resume cooking.
After 70 seconds None 0
Cooking stops. Choose desired
temperature setting and press Start
to resume cooking.
TROUBLESHOOTING GUIDE
• When any error messages are displayed, the PIC will beep at least once.
• The fan will run up to a maximum of 60 seconds after pressing Pause/Clear or when
cooking has stopped. Press Start within 45 minutes to resume cooking. After that, it
will turn off if no buttons are pressed, displaying “0” when the program clears.

nuwavenow.com | 17
LIMITED WARRANTY
THE MANUFACTURER WARRANTS
Nuwave, LLC warrants that PIC Double will be free from manufacturer defects for 1 year from the date
of purchase, under normal household use, and when operated in accordance with the Manufacturer’s
written instructions. The Limited Warranty covers the Original Purchaser only. The Manufacturer will
provide the necessary parts and labor to repair the product at the Nuwave LLC Service Department.
After the expiration of the warranty, the cost of the parts and labor will be the responsibility of the
owner.
THE WARRANTY DOES NOT COVER
The Limited Warranty is voided if repairs are made by an unauthorized dealer, or the serial number
data plate is removed or defaced. Normal deterioration of nish due to use or exposure is not covered
by this Warranty. This Limited Warranty does not cover failure, damages, or inadequate performance
due to accident, acts of God (such as lightning), uctuations in electric power, alterations, abuse,
misuse, misapplications, corrosive-type atmospheres, improper installation, failure to operate in
accordance with the Manufacturer’s written instructions, abnormal use, commercial or rental uses, or
resold units. Nuwave LLC reserves the right to void the Limited Warranty, where allowable by law, for
products purchased from an unauthorized dealer.
TO OBTAIN SERVICE
The owner shall have the obligation and responsibility to pay for all services and parts not covered by
the warranty; prepay the freight to and from Service Department for any part or system returned under
this warranty; and carefully package the product using adequate padding material to prevent damage
in transit. The original container is ideal for this purpose. Include in the package the owner’s name,
address, daytime telephone number, a detailed description of the problem, and your Return Goods
Authorization (RGA) number. Email [email protected] to obtain the RGA number. Provide
the cooking system model & serial number and proof of date of purchase (a copy of the receipt) when
making claims under this warranty.
MANUFACTURER’S OBLIGATION
The Manufacturer’s obligation under this Limited Warranty is limited, to the extent allowable by law, to
repairing or replacing any part covered by this Limited Warranty which upon examination is found to
be defective under normal use. The Limited Warranty is applicable only within the continental United
States and only to the original purchaser of the manufacturer’s authorized channels of distribution.
THE LIMITED WARRANTY MAY NOT BE ALTERED, VARIED OR EXTENDED EXCEPT BY A
WRITTEN INSTRUMENT EXECUTED BY THE MANUFACTURER. THE REMEDY OF REPAIR
OR REPLACEMENT AS PROVIDED UNDER THIS LIMITED WARRANTY IS EXCLUSIVE. IN NO
EVENT SHALL THE MANUFACTURER BE LIABLE FOR ANY CONSEQUENTIAL OR INCIDENTAL
DAMAGES TO ANY PERSON, WHETHER OR NOT OCCASIONED BY NEGLIGENCE OF THE
MANUFACTURER, INCLUDING WITHOUT LIMITATION, DAMAGES FOR LOSS OF USE, COSTS
OF SUBSTITUTION, PROPERTY DAMAGE, OR OTHER MONEY LOSS.
Some states do not allow the exclusion or limitation of incidental or consequential damages, so the
above limitation exclusions may not apply. This Limited Warranty gives specic legal rights, and
there may also be other rights which vary from state to state. EXCEPT AS OTHERWISE EXPRESS-
LY PROVIDED ABOVE, THE MANUFACTURER MAKES NO WARRANTIES EXPRESSED OR
IMPLIED ARISING BY LAW OR OTHERWISE, INCLUDING WITHOUT LIMITATION, THE IMPLIED
WARRANTIES OF MERCHANTABILITY AND FITNESS FOR A PARTICULAR PURPOSE TO ANY
OTHER PERSON. READ YOUR OWNER’S MANUAL. IF YOU STILL HAVE ANY QUESTIONS
ABOUT OPERATION OR WARRANTY OF THE PRODUCT, PLEASE CONTACT Nuwave LLC.

18 | nuwavenow.com
LIMITED WARRANTY
DISPUTE RESOLUTION PROCEDURE
For disputes relating to use of the website or use or purchase of a Nuwave product or service (collec-
tively “Disputes”), you agree to rst contact Nuwave LLC at (877) 689-2838, or legal@Nuwavenow.
com. If we cannot resolve your dispute informally, any and all disputes shall be submitted to nal and
binding arbitration. You may start the arbitration process by submitting in writing a demand to the
American Arbitration Association (“AAA”) and sending a copy to Nuwave. Nuwave will pay all ling
costs. A single arbitrator of the AAA will conduct the arbitration in a location convenient to you or by
phone. The arbitrator’s award will be binding and may be entered as a judgment in a court of compe-
tent jurisdiction. The arbitration will be conducted in accordance with the provisions of AAA’s Commer-
cial Arbitration Rules and Mediation Procedures in effect at the time of submission of your demand
for arbitration. See https:// www.adr.org/sites/default/les/CommercialRules_Web.pdf. Except as may
be required by law as determined by an arbitrator, no party or arbitrator may disclose the existence,
content, or results of any arbitration hereunder without prior written consent of both parties.
A. WAIVER OF RIGHT TO SUE. By agreeing to arbitration, you understand that, to the maximum
extent permitted by law, you are agreeing to waive your right to le suit in any court, to a court
hearing, a judge trial, or a jury trial.
B. CLASS ACTION WAIVER. To the maximum extent permitted by law, you expressly agree to
refrain from bringing or joining any claims in any representative or class-wide capacity, including
but not limited to, bringing or joining any claims in any class action or class-wide arbitration.
C. OPT OUT PROCEDURE. To request to opt out of arbitration you must contact Nuwave LLC at
support@Nuwavenow.com. You will have 30 days from the date of product delivery to opt out of
arbitration with respect to any dispute arising out of or relating to use or purchase of any Nuwave
product. If more than 30 days have passed, you are not eligible to opt out of arbitration and will
have waived your right to sue or participate in a class action with respect to the dispute arising
out of your purchase or use of a Nuwave product. For any dispute arising out of your use of
Nuwave’s website, you have 30 days from the date you provided information to the website to opt
out of arbitration. If more than 30 days have passed, you are not eligible to opt out of arbitration
and you will have waived your right to sue and participate in a class action with respect to the
dispute arising out of your use of Nuwave’s website.
D. SOME MATTERS ARE NOT SUBJECT TO ARBITRATION. Notwithstanding the foregoing, the
following shall not be subject to arbitration and may be adjudicated only in the state and federal
courts of Illinois: (i) any dispute, controversy, or claim relating to or contesting the validity of our
intellectual property rights and proprietary rights, including without limitation, patents, trademarks,
service marks, copyrights, or trade secrets; (ii) an action by a party for temporary, preliminary, or
permanent injunctive relief, whether prohibitive or mandatory, or other provisional relief; or (iii)
interactions with governmental and regulatory authorities. You expressly agree to refrain from
bringing or joining any claims in any representative or class-wide capacity, including but not limit-
ed to, bringing or joining any claims in any class action or any class-wide arbitration.
READ YOUR OWNER’S MANUAL
If you still have any questions about operation or warranty of this product, please contact Nuwave LLC
at support@Nuwavenow.com.

nuwavenow.com | 19
STATE OF CALIFORNIA PROPOSITION 65
This product can expose you to chemicals including lead, which is known to the State of California
to cause cancer, and Bisphenol A (BPA) and lead, which are known to the State of California to
cause birth defects or other reproductive harm.
For more information go to: www.P65Warnings.ca.gov.
Este producto puede exponerle a químicos, incluídos el plomo, el cual es conocido en el Estado
de California por causar cáncer y Bisfenol A (BPA) y plomo, los cuales son conocidos en el Esta-
do de California por causar defectos de nacimiento u otros daños reproductivos.
Para mayor información, visite: www.P65Warnings.ca.gov.
WARNING
ADVERTENCIA
NOTES
NOTES

Item: BM30601
V17-YK
08-09-24
FOR HOUSEHOLD USE ONLY
120VAC, 60Hz, 1800 Watts
Model:
30601
For patent information please go to:
www.Nuwavenow.com/legal/patent
Designed & Developed in USA
Nuwave LLC
560 Bunker Ct.
Vernon Hills, IL 60061, U.S.A.
Made in China
©2024 Nuwave LLC • All Rights Reserved.
PIC
®
Precision Induction Cooktop
DOUBLE
Master Your PIC Double
Scan the code to find recipes,
how-to videos and more!
www.nuwavenow.com
Questions or Concerns?
Amazon Purchases: support@nuwavenow.com All Other Purchases: help@nuwavenow.com
1-888-502-7805 1-877-689-2838
Mon-Fri 7:30am-4:30pm CST