HOME USE TREADMILL
MODEL NO.: XM-Q1
Thank you very much for purchasing our product.
Please read this instruction carefully before using and keep the instruction in the proper place.
INSTRUCTION
◆1. Lubrication
We recommend that you use a special lubricant for your running belt every 300 km.
Note: Do not add too much dose each time.
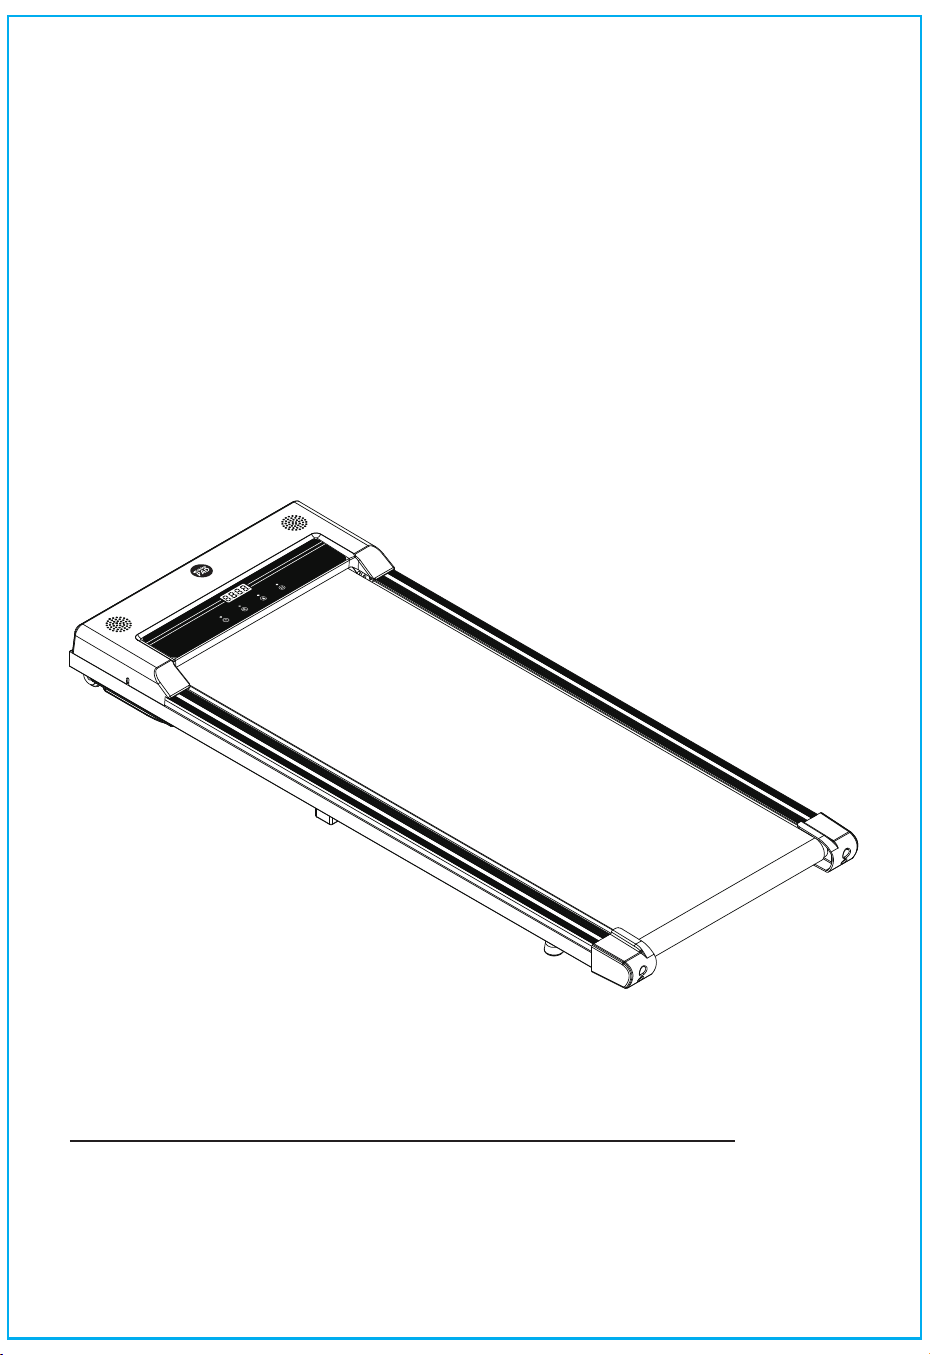
◆2. Check
Grasp the running belt,and touch the back central area of
the running belt as much as possible. If there is silicone oil on
the belt (or it feels a little wet),it means no lubrication is
needed. If you feel that the running board is dry and there is
no silicone oil on your hand,you need to add silicone oil .
Measure the center position of the running belt and spray
silicone oil on the inside of the running belt.
((refer to the right figure))
After that,run the treadmill at a speed of 1km to evenly smear
silicone oil,and light press the running belt from left to right.
After about a minute,silicone oil will be absorbed by the running belt .
◆3. Belt Elasticity Adjustment
All treadmills have adjusted the tightness of the running belt before leaving the factory,
but after a period of use, the running belt will inevitably loosen. When the belt slips while
running, it is necessary to adjust the bolts of the running belt (left and right synchronously)
in the clockwise direction in units of half turns.
Note: When adjusting the running belt, do not adjust the running belt too tightly, otherwise
it will accelerate the aging of the running belt, increase the load on the motor, then shorten
the service life of the treadmill.
◆4. Running Belt Deviation Adjustment
All treadmills have adjusted the deviation of the running belt before leaving the factory,
but after a period of use, the deviation of the running belt may occur, which may be caused
by the following conditions:
(1) The main part is placed unstable.
(2) The user's feet are not in the center of the running belt when exercising.
(3) The user's feet are unevenly stressed.
The deviation caused by human factors will automatically return to normal after a few
minutes of load-free operation.
For some deviations that cannot be recovered automatically, the belt screw can be adjusted.
The specific operation is as follows:
1. Daily Maintainance
1
2
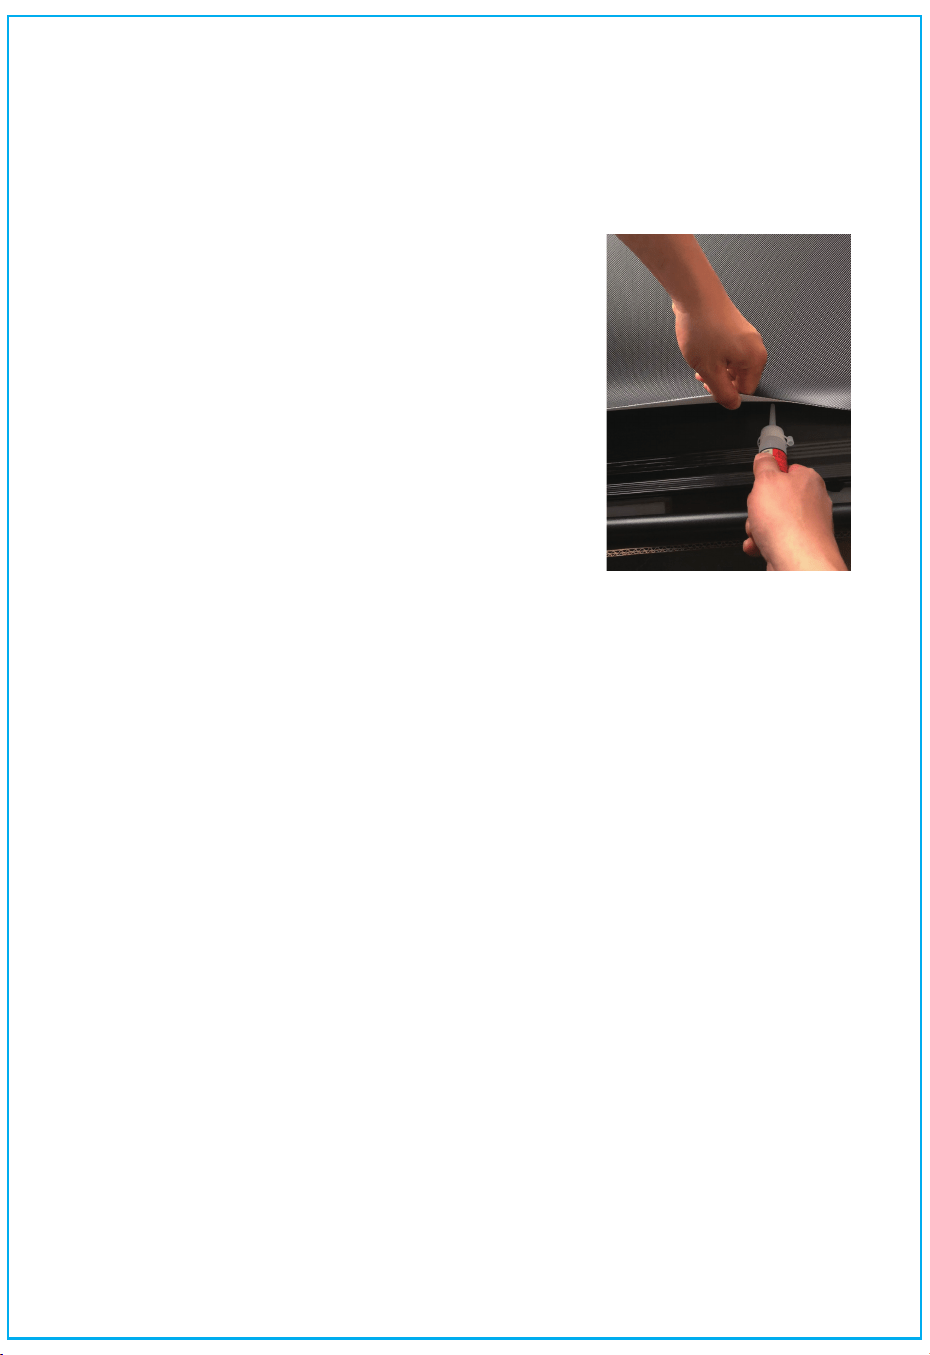
To determine left-right orientation, stand at the rear of the treadmill, facing the display.
Use the provided hex wrench to make all belt adjustments on the rear bolt.
If the running belt is off center to the Left,
step1:
turn the left bolt clockwise ¼ circle
step2:turn the right bolt counterclockwise ¼ circle
to make the running belt move to the right.
If the running belt is off center to the Right,
step1:
turn the right bolt clockwise ¼ circle
step2:turn the left bolt counterclockwise ¼ circle
to make the running belt move to the left.
Important:
1. Do not turn the bolt more than ¼ turn at a time, otherwise overtightening the bolt
could damage the treadmill.
2. Check the alignment of the drive belt by repeatedly running the treadmill.
Note: The deviation of the transmission belt is not covered by the warranty,
and it is mainly maintained and maintained by the user according to the instructions.
The deviation will seriously damage the running belt and affect its service life,
so please adjust it in time when it occurs.
off center to the LEFT off center to the RIGHT
Tighten
clockwise
Tighten
clockwise
Loosen
counterclockwise
Loosen
counterclockwise
Note: Step 2 is only necessary if Step 1 cannot solve the problem.
Otherwise, we only need to follow Step 1.
E6
E5
E2
E1
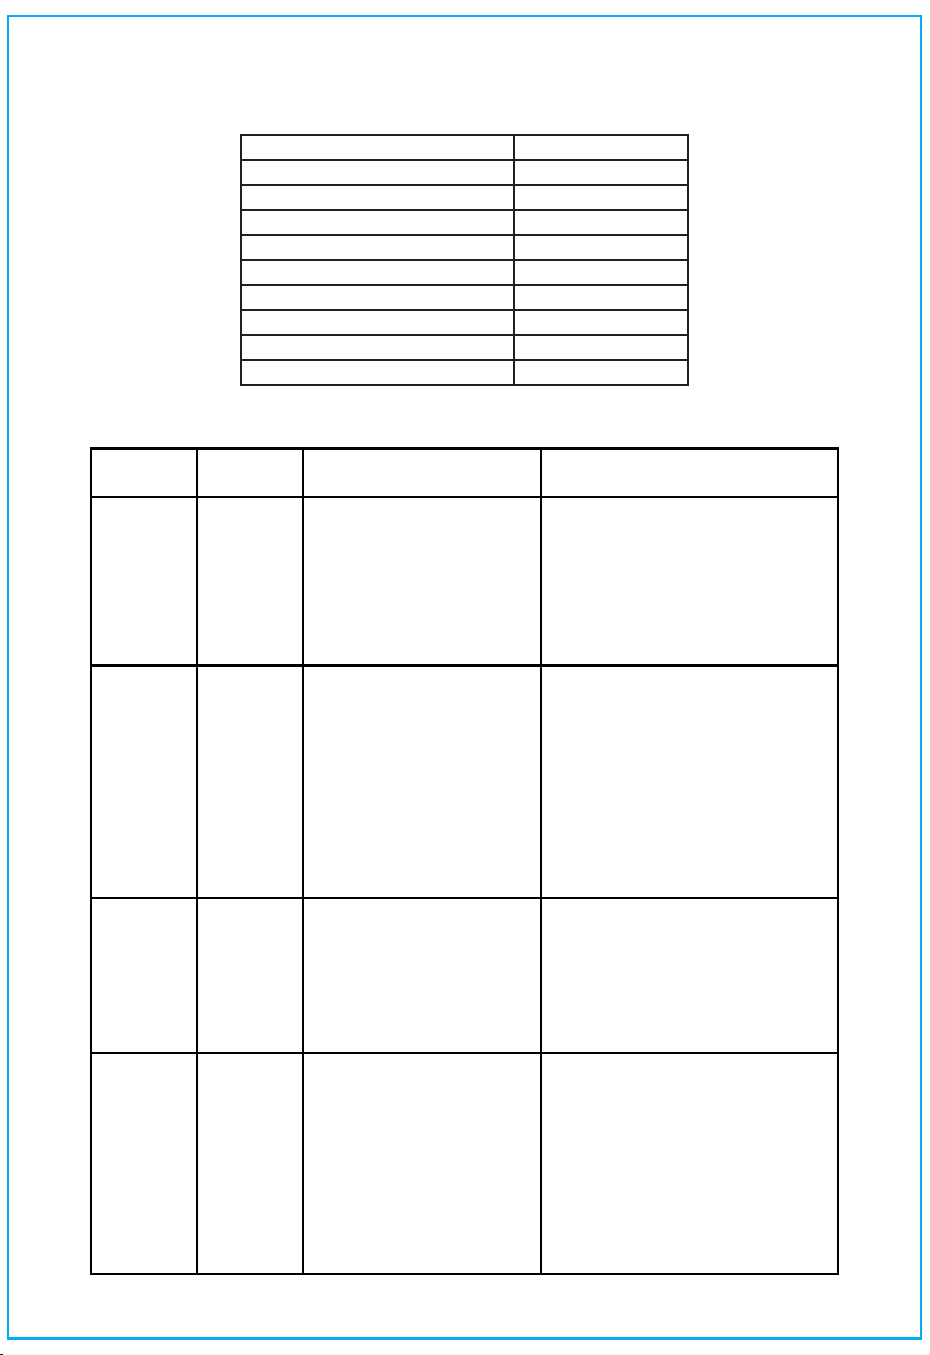
Error judgmentErrorError code Solution
1. The user's power grid or
voltage is unstable, and the
peak voltage is too high;
2. The wheel diameter value
was set incorrectly;
3. Controller damage
1. Excessive load;
2. The motor or roller is stuck
with foreign objects;
3. The roller is not lubricated
enough, and the resistance
increases;
4. The motor is damaged and
the resistance increases
1. The motor wire is not
connected or loose;
2. Carbon brush cover for
motor is damaged;
3. The motor is damaged;
1. The interface of the upper
and lower control main
connection lines is loose;
2. The main connection line
of the upper and lower
control is damaged;
3. The monitor is damaged;
4. The controller is damaged;
Motor
over-voltag
protection
Over-current
protection
Motor
damaged
Connection
error
1. Add an external filter regulator;
2. Re-set the wheel diameter value
so as not to exceed the rated voltage
of the motor;
3. Replace the controller
1. Reduce the load and try not to
exceed the rated load;
2. Remove the stuck object;
3. Add lubricant;
4. Replace the motor;
1. Reinforce the motor cable;
2. Replace the carbon brush cover
for motor
3. Replace the motor;
1. Reinforce the cable interface;
2. Replace the main connecting
cable of the upper and lower control;
3. Replace the monitor;
4. Replace the controller;
2. Technical Parameters
3. Trouble Shooting
3
Model XM-Q1
Operating Voltage 110V~120V-50Hz
Maximum Load 320POUNDS
Outline Dimension 1145*500*120MM
Effective Running Area 980*390MM
Peak Motor Power 1.5HP
Continuous Output Power 0.65CHP
Speed 0.6-3.8MPH
Functions Walking/Running
Protection Level Against Electric Shock Level I
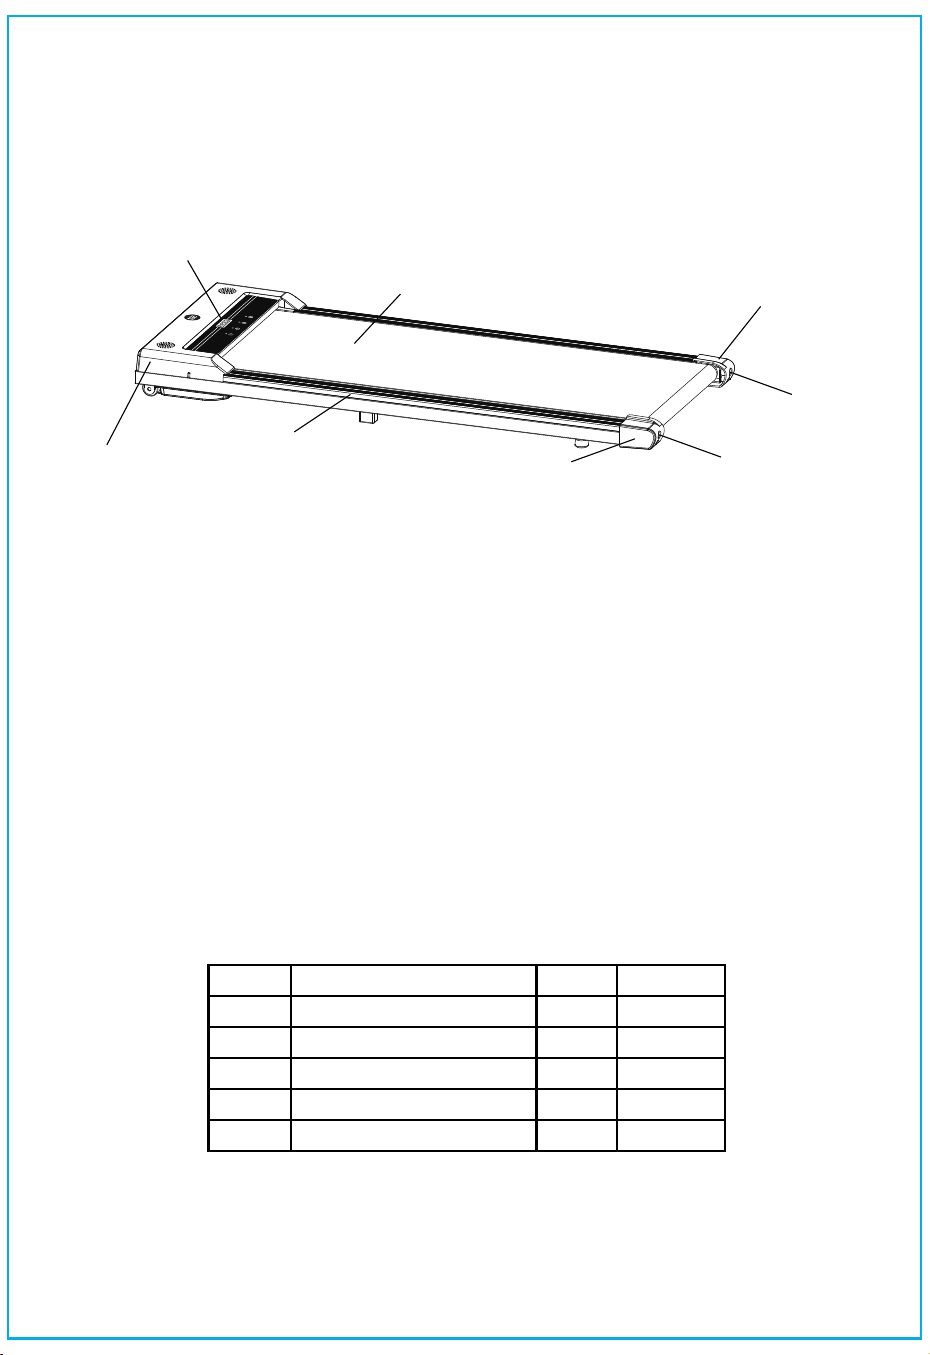
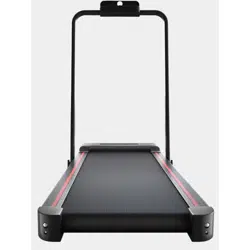
4. About The Product
The names of all parts of the model are shown as follow:
Caution
Notice:
Please read the assembly instructions carefully before assembling. If you encounter any
problems during assembly, please consult our customer service.
If the product failure is caused by improper or forced assembly, returns and exchanges
are not accepted!
The product will be returned or exchanged together with the main product and
accessories in the original packaging. If there are any human factors that lead to missing
parts (outer boxes or spare parts), compensation shall be made at the original price.
To ensure safety, when the machine is running,
it is strictly forbidden to move the body at will, so as not to accidentally pinch fingers
or other parts of the body. We are not responsible for improper use.
Safety area: 1000mm*1000mm behind the equipment,
The left and right sides of the equipment are 500mm each.
Please read this manual carefully before use.
Please keep this manual in a safe place for future use.
The color or surface pattern of the product is subject to the actual situation.
Our products are constantly being updated and are subject to change without notice.
Packing list
No. Item Unit Quantity
1 Main body set 1
2 Bottled silicone oil bottle 1
3
Hex wrench set 1
4 Remote control set 1
5 Instruction manual copy 1
4
Left bolt
Right bolt
Right rear cap
Motor top cap
Display
Strake
Left rear cap
Running belt

1.CAUTION
To avoid any hurts, please read this manual carefully before using.
2.SAFETY NOTICE
■ Please put the machine on flat ground.
It is unsuitable to put the machine in the following places:
1 Outdoors. (The machine is specially designed for indoor use only)
2 Slant ground or slant places on balcony.
3 Sunlight area or near heater.
4 Big noisy places.
■ Error may appear if the power is not stable.
Please do not use the same socket together with the computer、air conditioner, etc.
■ It is suggested to wear sports shoes when using the machine.
■ Please increase or decrease speed slowly.
■ Be careful of children or other objects while folding and unfolding the machine.
■ Do not put the machine near to wet object. An error may be caused by water drops.
3. CAUTION DURING THE USE
■ If you do not feel well before using, please consult with your doctor or coach.
■ It is not our company's responsibility for any improper use
by users to cause body injured.
■ Please switch off all functions and pull out the plug after use.
■ Please pull out the plug for any movement or change parts for the machine.
■ Children, elders, and pregnant women are prohibited to use the machine.
Patients need a doctor's consultant before using.
■ Water-drop is prohibited to run into the machine,
especially to the motor, power line, and plug.
■ Danger may cause if wearing long dresses or other unsuitable dresses during use.
■ Enclose spaces, air-uncirculated places,
and flammability places are prohibited to use the machine.
■ Do not put any objects on the machine.
■ Put away the plug from a heated place or fire seat.
■ Please do not stand directly on the belt while starting the machine
■ Do not disassemble the machine without the conduct of a professional person.
■ Please make sure the running belt is fastened before using.
5. Safety Precautions And Warning Instructions
5
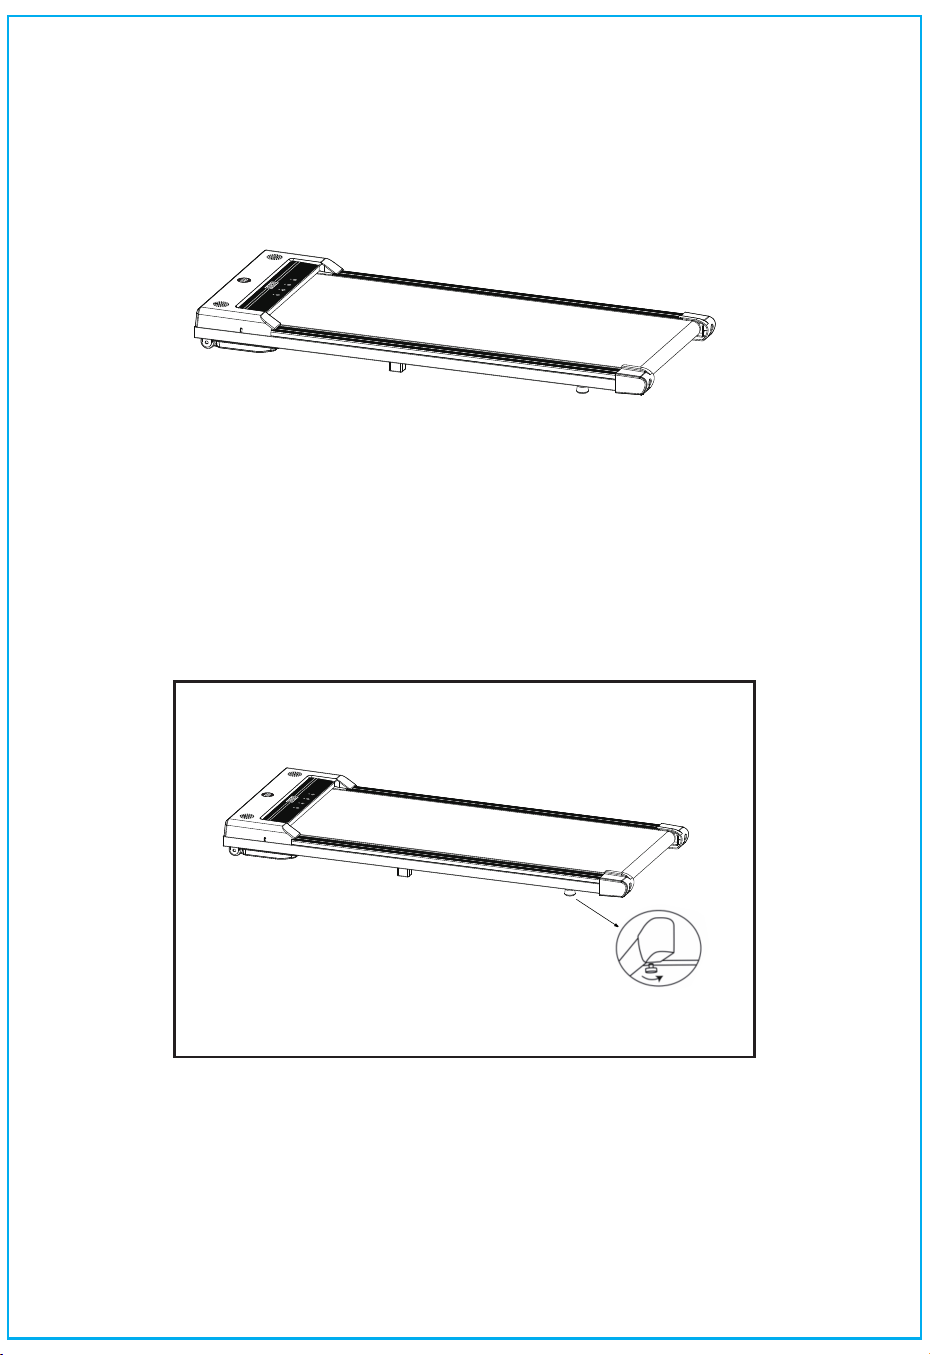
6. Assembly Instruction
6
Step1. Open the package,
take out the assembly materials in the box,
and lay the main part on the ground.
Step2. Plug in the power and turn on the power switch at the front of the machine.
Step3.Using the remote control to start the treadmill.
Attention:
if the Treadmill wobbles,
adjust two adjustable knobs under the treadmill base.
Machine Level Adjustable Knob
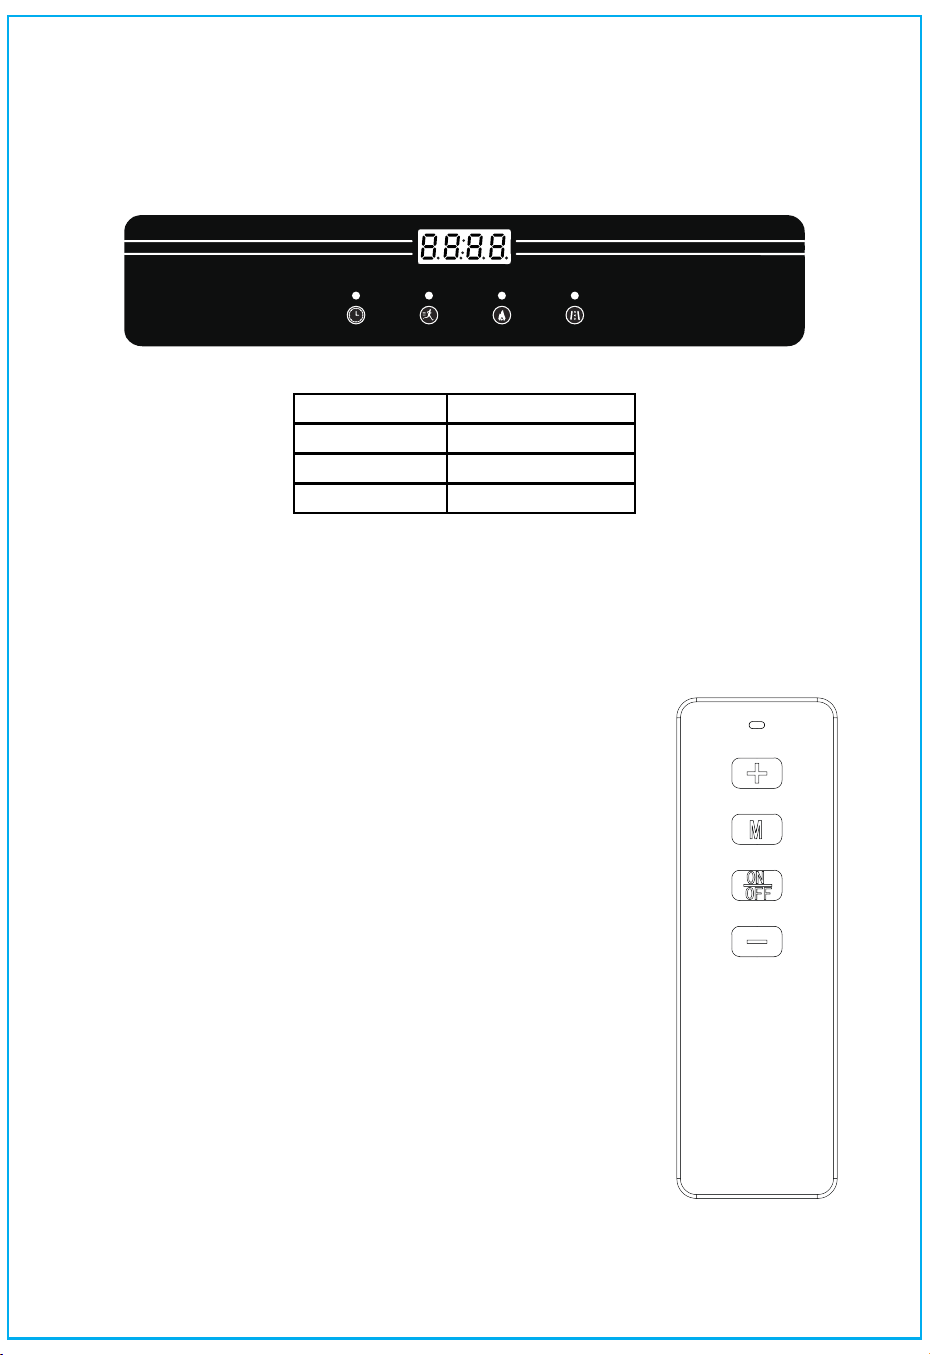
7. Function Description
TIME 0:00~99:59MIN
SPEED 0.6~3.8MPH
DISTANCE 0.00~99.99MILES
CALORIES 0.0~999.9 CAL
7
1.Window display
2.Remote button function:
1.Press " ON/OFF " key,the machine will start by 0.6MPH after 3 seconds.
And when you press this key again,the machine will stop.
2.Press"+"key for speed up and "-"key for slow down.
The fastest speed is 3.8 MPH and lowest is 0.6 MPH.
3. The scanning light will light according to
speed, calories, time, and distance every 5 seconds.
4.Countdown function
Step 1: Turn on the power switch of the treadmill.
Step 2: In standby mode,press the " M " key
to enter three countdown modes:
Time , Distance, and Calorie.
During the mode select,
the indicator light for the current mode will always be on.
Then select one of the modes you want,
and press the "+" and "-" keys can be used to
increase and decrease the value of the countdown function.
Step 3: After setting the countdown value,press " ON/OFF " to run.
Step 4: When you want to quit the countdown function,
press " ON/OFF " again to stop.
8. Exercise Advice and Guidelines
According to the principle of step by step.
Muscle soreness is normal during the first few days of training.
As long as you keep on training, the pain will go away.
◆
Diet
In order to protect the digestive system,
exercise one hour after a meal or eat at least half an hour after training.
Drink a small amount of water during exercise, especially avoid drinking a
lot of water, otherwise it will increase the burden on the heart and kidneys.
◆
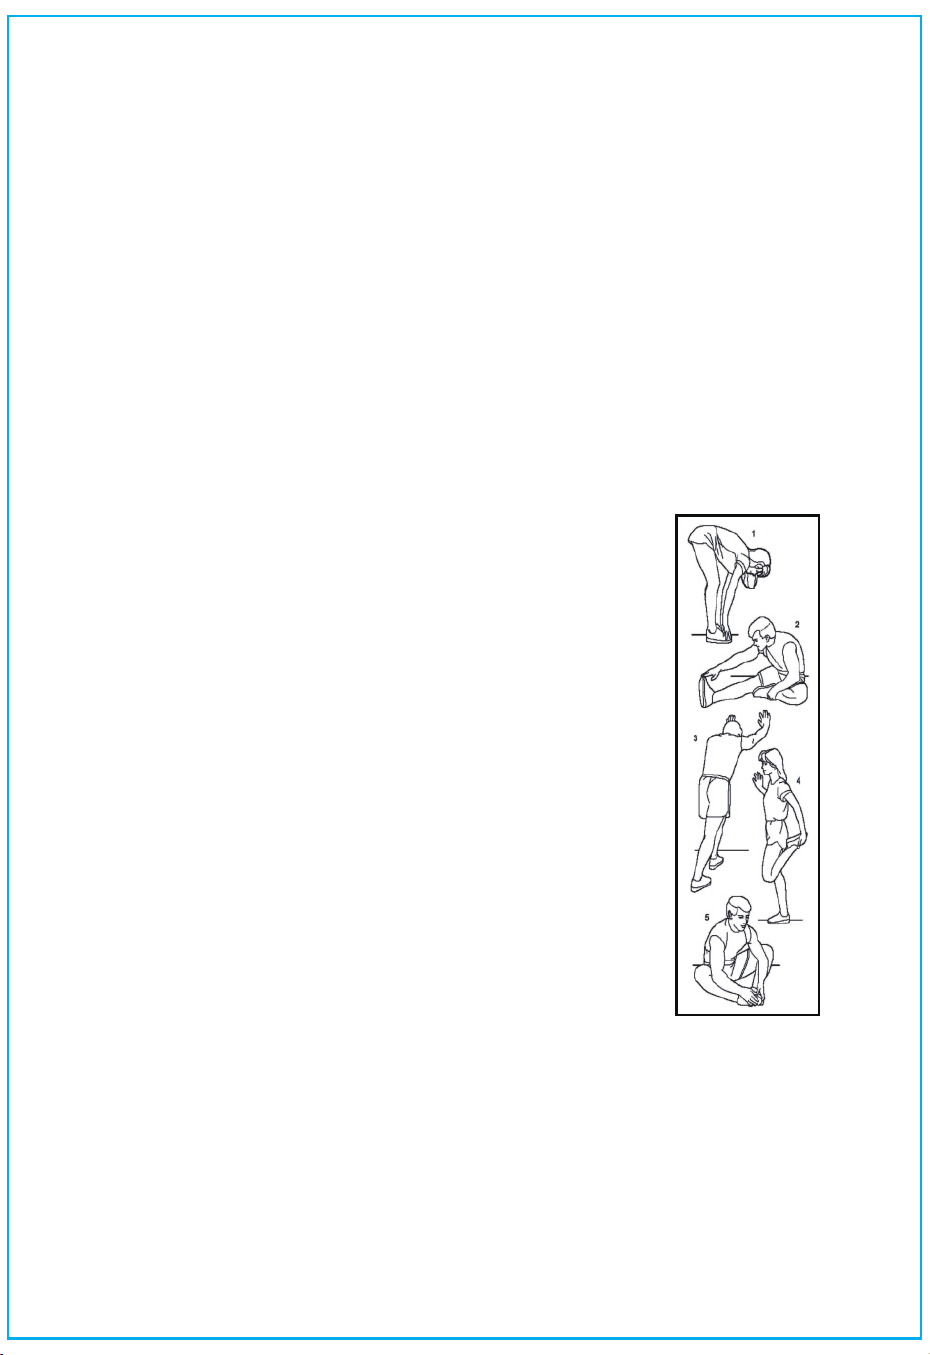
Stretching
No matter how fast you're running, it's a good idea to stretch before you run.
Muscles are easier to stretch after you warm up.
Do five stretches as follows, one or more times for 10 seconds on each leg,
and repeat at the end of the session.
1. Stretch down
Bend your knees slightly, bend over slowly, relax your back,
measure and touch your toes with your shoulders and
hands, hold for 10-15 seconds, then relax, repeat 3 times
(As shown in Figure 1)
2. Hamstring Stretch
Sit on a clean mat, straighten one leg and bend the other inward,
and try to touch Grasp toes with hands, hold for 10-15 seconds,
then release, repeat 3 times on each leg.
(As shown in Figure 2)
3. Calf and heel tendon stretch
Stand with your hands on a wall or table and one foot behind you.
Keeping the back leg upright, with the heel on the ground,
lean toward the wall or table for 10-15 seconds, then relax,
repeating three times with each leg.
(As shown in Figure 3)
4. Quadriceps Stretch
Stand near a wall or a piece of sturdy exercise equipment for support.
Grasp your foot and gently pull it up and back until you feel a stretch in the front of your
thigh .Tighten your stomach muscles to prevent your stomach from sagging outward,
and keep your knees close together. Hold for about 30 seconds. Switch legs and repeat.
(As shown in Figure 4).
5. Adductor stretch
Sit on the floor. Pull your heels in toward your groin, as close as is comfortable
Put your hands on your knees, and gently push them closer to the floor.
Hold for 30 to 60 seconds.
(As shown in Figure 5).
8

For assistance under the product warranty, please contact the seller via Amazon Messages.
The above warranty period and warranty service are for information only and the information is subject
to change. If there is a discrepancy between the warranty card and the information contained.
This shall apply with respect to the product and information shown above,
including the warranty card and information about the product.
The warranty period starts from the first day of product purchase.
In order to receive warranty service,
original proof of purchase is required and any serial numbers on the product must be intact.
The warranty covers defects in materials and workmanship.
The warranty may not apply to items contained in or contained in consumable products,
which may have a reduced or no warranty period.
The warranty card and warranty information accompanying the product will state specific exceptions
to the warranty (for example, defects caused by misuse or unauthorized product repair)
to check before requesting warranty service.
Tips:
1. Keep children away from this machine.
2. If you have joint problems, high blood pressure, bronchitis, heart disease or diabetes, or
If you are pregnant, extremely obese, middle ear infection, have osteoporosis, or stomach problems
or are using a pacemaker, or have other medical conditions,
we recommend seeking medical advice before using this machine.
3. Don't put all your weight on one side of the treadmill.
4. This product is for exercise use only. Other uses are prohibited.
Warranty Card
Thanks for your purchase!
9