Instruction Manual
Manual de instrucciones
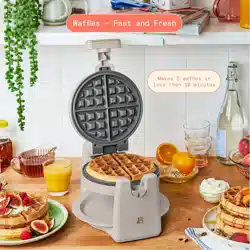
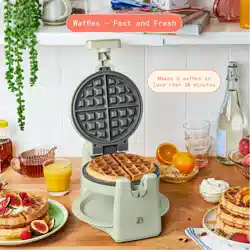
Rotating Waffle Maker
Waflera Belga Rotativa
®
19393_19427_19428_19429_19430_19451_BTFL_WUS_RotatingWaffleMaker_IM_V3_R0.indd 119393_19427_19428_19429_19430_19451_BTFL_WUS_RotatingWaffleMaker_IM_V3_R0.indd 1 2023-11-06 3:11 PM2023-11-06 3:11 PM
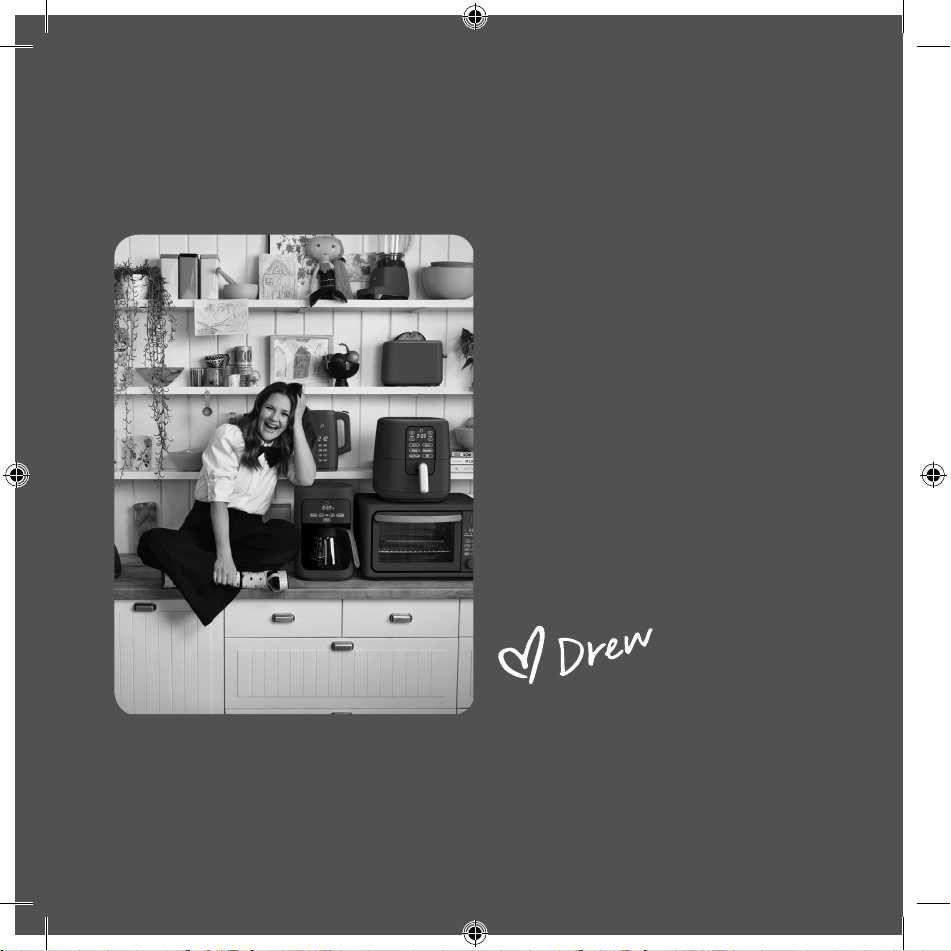
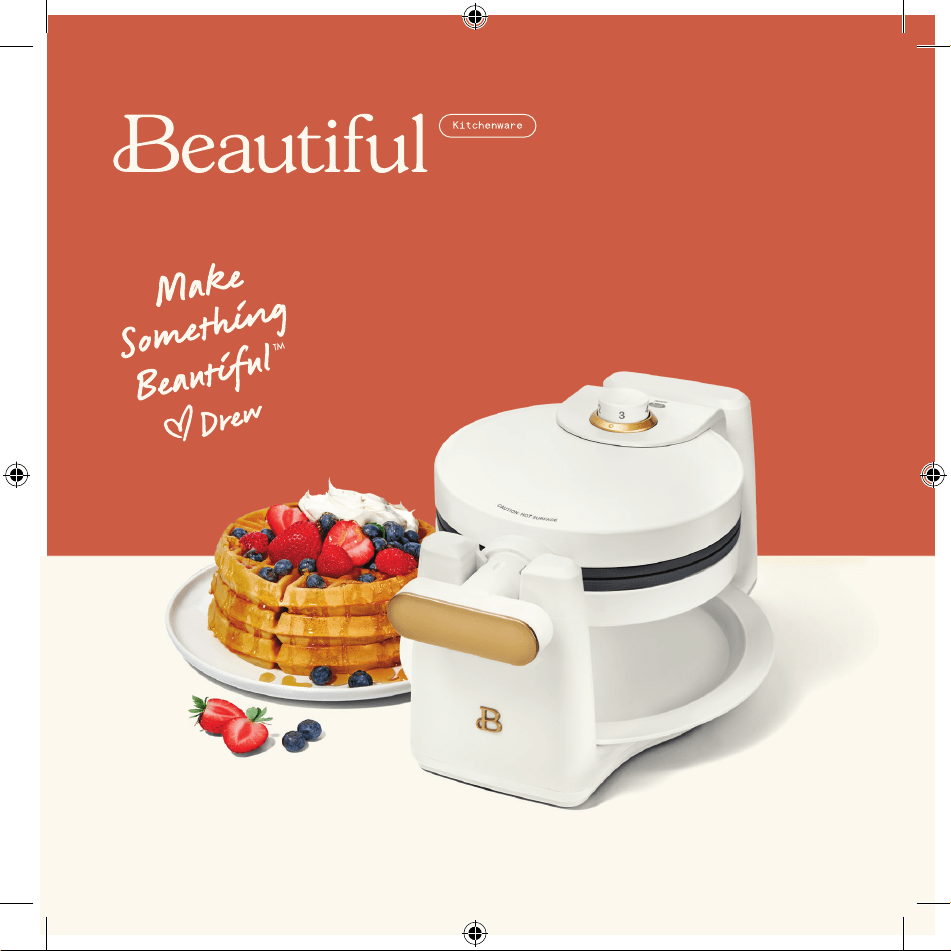
The kitchen is my family’s happy
place. It’s where we cook and eat
and bake and laugh and share our
most beautiful moments together.
That’s what inspired the creation
of Beautiful, my new collection
of easy-to-use kitchenware that
you’ll want to keep out on your
kitchen counter. So whether
your kitchen has flour all over
the place from a kid's baking
session or you’re throwing an adult
dinner party, I hope every step will
be simple, delicious and beautiful!
www.beautifulbydrew.com
19393_19427_19428_19429_19430_19451_BTFL_WUS_RotatingWaffleMaker_IM_V3_R0.indd 219393_19427_19428_19429_19430_19451_BTFL_WUS_RotatingWaffleMaker_IM_V3_R0.indd 2 2023-11-06 3:11 PM2023-11-06 3:11 PM

Section 1: Safety
Important Safeguards ............................................ 6-8
Additional Important Safeguards ................................... 8
Notes on the Cord .............................................. 8-9
Notes on the Plug ................................................ 9
Plasticizer Warning .............................................. 10
Electric Power ................................................... 10
Section 2: Instructions
Getting to Know Rotating Belgian Wafe Maker .................... 12
Before First Use ................................................. 13
Operating instructions ....................................... 13-14
Wafe Baking Tips ............................................. 15-16
User Maintenance Instructions ................................... 17
Care & Cleaning Instructions .................................... 17
Storing Instructions ............................................. 18
Warranty ...................................................... 19-20
Table of Contents
19393_19427_19428_19429_19430_19451_BTFL_WUS_RotatingWaffleMaker_IM_V3_R0.indd 319393_19427_19428_19429_19430_19451_BTFL_WUS_RotatingWaffleMaker_IM_V3_R0.indd 3 2023-11-06 3:11 PM2023-11-06 3:11 PM

Sección 1: Seguridad
Medidas importantes de seguridad ............................. 22-24
Medidas importantes de seguridad adicionales .................. 24-25
Notas sobre el cable ............................................ 25
Notas sobre el enchufe .......................................... 26
Advertencia sobre el acabado .................................... 26
Alimentación eléctrica ........................................... 26
Sección 2: Instrucciones
Conozca su waera belga rotativa ................................ 28
Antes del primer uso ............................................ 29
Instrucciones de funcionamiento ............................... 29-30
Consejos para hornear waes................................... 31-33
Instrucciones de mantenimiento para el usuario ................... 33
Cuidado y limpieza............................................ 33-34
Almacenamiento ................................................... 34
Garantía ...................................................... 35-36
Índice
19393_19427_19428_19429_19430_19451_BTFL_WUS_RotatingWaffleMaker_IM_V3_R0.indd 419393_19427_19428_19429_19430_19451_BTFL_WUS_RotatingWaffleMaker_IM_V3_R0.indd 4 2023-11-06 3:11 PM2023-11-06 3:11 PM
Section 1
Safety
1
19393_19427_19428_19429_19430_19451_BTFL_WUS_RotatingWaffleMaker_IM_V3_R0.indd 519393_19427_19428_19429_19430_19451_BTFL_WUS_RotatingWaffleMaker_IM_V3_R0.indd 5 2023-11-06 3:11 PM2023-11-06 3:11 PM

6
IMPORTANT SAFEGUARDS
When using electrical appliances, basic safety precautions
should always be followed, including the following:
1. READ ALL INSTRUCTIONS.
2. The cord to this appliance should be plugged into a
120V AC electrical outlet only.
3. To protect against risk of electric shock, do not
immerse the cord,plug or cooking unit in water or any
other liquid.
4. Do not touch hot surfaces. Use handles or knob.
5. Close supervision is necessary when any appliance is
used by or near children.
6. Unplug from wall outlet when not in use and before
cleaning.Allow to cool before cleaning or storing
this appliance.
7. Never yank the cord to disconnect the cooking unit
from the outlet. Instead, grasp the plug and pull to
disconnect.
8. Do not operate any appliance with a damaged cord or
plug or after the appliance malfunctions, or has been
damaged in any manner. Return appliance to the nearest
authorized service facility for examination, repair or
adjustment.
9. The use of accessories or attachments not recommended
19393_19427_19428_19429_19430_19451_BTFL_WUS_RotatingWaffleMaker_IM_V3_R0.indd 619393_19427_19428_19429_19430_19451_BTFL_WUS_RotatingWaffleMaker_IM_V3_R0.indd 6 2023-11-06 3:11 PM2023-11-06 3:11 PM

7
by the manufacturer may cause re, electrical shock
or injury.
10. Do not use outdoors or for commercial purposes.
11. Do not use this appliance for purposes other than
the one for which it was designed.
12. Do not let the electrical cord hang over the edge
of the table or countertop, or touch hot surfaces
13. Do not place on or near a hot gas or electric burner
or in a heated oven
14. Use on a heat-resistant, at level surface only.
15. Use extreme caution when moving any appliance
containing hot food, water, oil or other liquids.
16. To disconnect, remove plug from outlet.
17. Always unplug after use. The appliance will remain
ON unless unplugged.
18. CAUTION HOT SURFACES: This appliance generates heat
during use. Proper precautions must be taken to prevent
the risk of burns, re or other damage to persons or
property.
19. When using this appliance, provide adequate ventilation
above and on all sides for air circulation. Do not
allow this appliance to touch curtains, wall coverings,
clothing, dish towels or other ammable materials
during use.
19393_19427_19428_19429_19430_19451_BTFL_WUS_RotatingWaffleMaker_IM_V3_R0.indd 719393_19427_19428_19429_19430_19451_BTFL_WUS_RotatingWaffleMaker_IM_V3_R0.indd 7 2023-11-06 3:11 PM2023-11-06 3:11 PM

8
FOR HOUSEHOLD USE
ONLY
SAVE THESE
INSTRUCTIONS
ADDITIONAL IMPORTANT
SAFEGUARDS
CAUTION: this appliance is hot during operation and
retains heat for some time after plugging out. Always use
oven mitts when handling hot materials and allow metal
parts to cool before cleaning. Do not place anything on top
of the appliance while it is operating or while it is hot.
1. All users of this appliance must read and understand
this Instruction Manual before operating or cleaning
this appliance.
2. Do not leave this appliance unattended during use.
NOTES ON THE CORD
A. A short power-supply cord (or detachable power-supply
cord) should be used to reduce the risk resulting from
becoming entangled in or tripping over a longer cord.
19393_19427_19428_19429_19430_19451_BTFL_WUS_RotatingWaffleMaker_IM_V3_R0.indd 819393_19427_19428_19429_19430_19451_BTFL_WUS_RotatingWaffleMaker_IM_V3_R0.indd 8 2023-11-06 3:11 PM2023-11-06 3:11 PM

9
B. Longer detachable power-supply cords or extension cords
are available and may be used if care is exercised in
their use.
C. If a longer detachable power-supply cord or extension
cord is used:
1. The marked electrical rating of the cord set or
extension cord should be at least as great as the
electrical rating of the appliance;
2. The cord should be arranged so that it will not drape
over the countertop or tabletop where it can be pulled
on by children or tripped over unintentionally; and
3. If the appliance is of the grounded type, the cord
set or extension cord should be a grounding-type
3-wire cord.
NOTES ON THE PLUG
This appliance has a polarized plug (one blade is wider
than the other). To reduce the risk of electric shock,
this plug will t in a polarized outlet only one way.
If the plug does not t fully into the outlet, reverse
the plug. If it still does not t, contact a qualied
electrician. Do not modify the plug in any way.
19393_19427_19428_19429_19430_19451_BTFL_WUS_RotatingWaffleMaker_IM_V3_R0.indd 919393_19427_19428_19429_19430_19451_BTFL_WUS_RotatingWaffleMaker_IM_V3_R0.indd 9 2023-11-06 3:11 PM2023-11-06 3:11 PM

10
PLASTICIZER WARNING
CAUTION: To prevent Plasticizers from migrating from the
nish of the counter top or table top or other furniture,
place NON-PLASTIC coasters or place mats between the
appliance and the nish of the counter top or table top.
Failure to do so may cause the nish to darken; permanent
blemishes may occur or stains can appear.
ELECTRIC POWER
If the electrical circuit is overloaded with other
appliances, your appliance may not operate properly.
It should be operated on a separate electrical circuit
from other appliances.
19393_19427_19428_19429_19430_19451_BTFL_WUS_RotatingWaffleMaker_IM_V3_R0.indd 1019393_19427_19428_19429_19430_19451_BTFL_WUS_RotatingWaffleMaker_IM_V3_R0.indd 10 2023-11-06 3:11 PM2023-11-06 3:11 PM
Section 2
Instructions
2
19393_19427_19428_19429_19430_19451_BTFL_WUS_RotatingWaffleMaker_IM_V3_R0.indd 1119393_19427_19428_19429_19430_19451_BTFL_WUS_RotatingWaffleMaker_IM_V3_R0.indd 11 2023-11-06 3:11 PM2023-11-06 3:11 PM

12
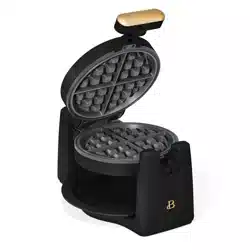
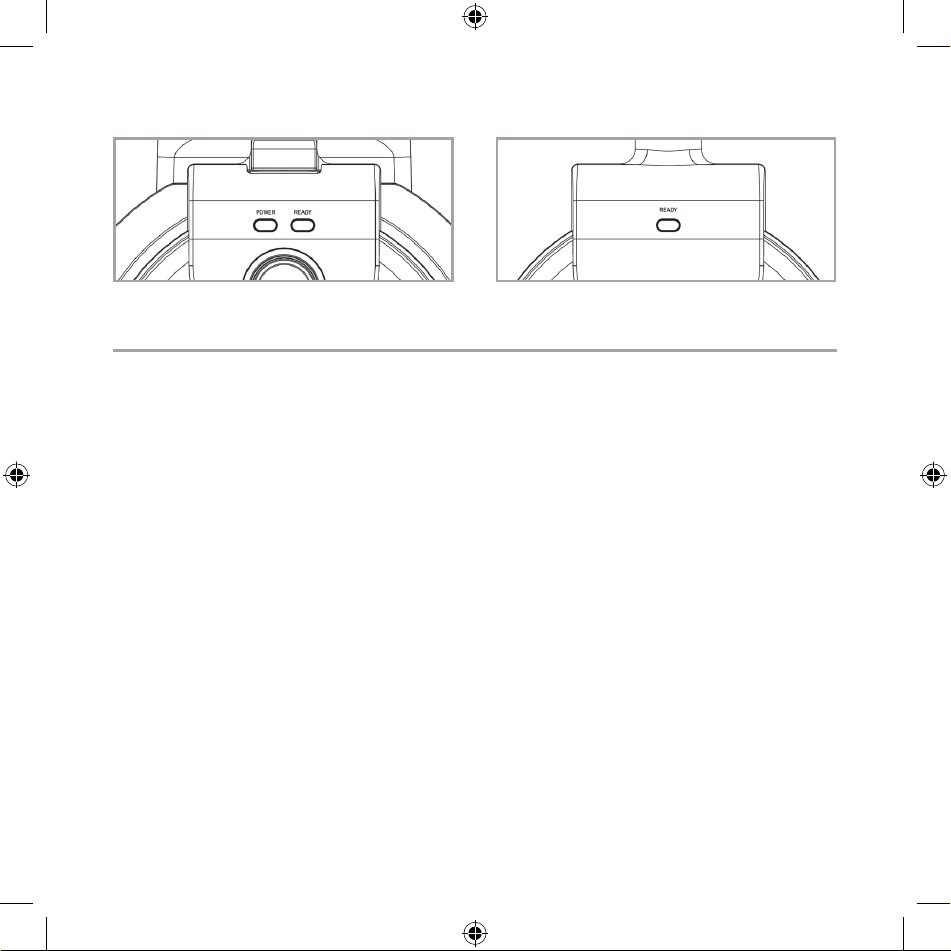
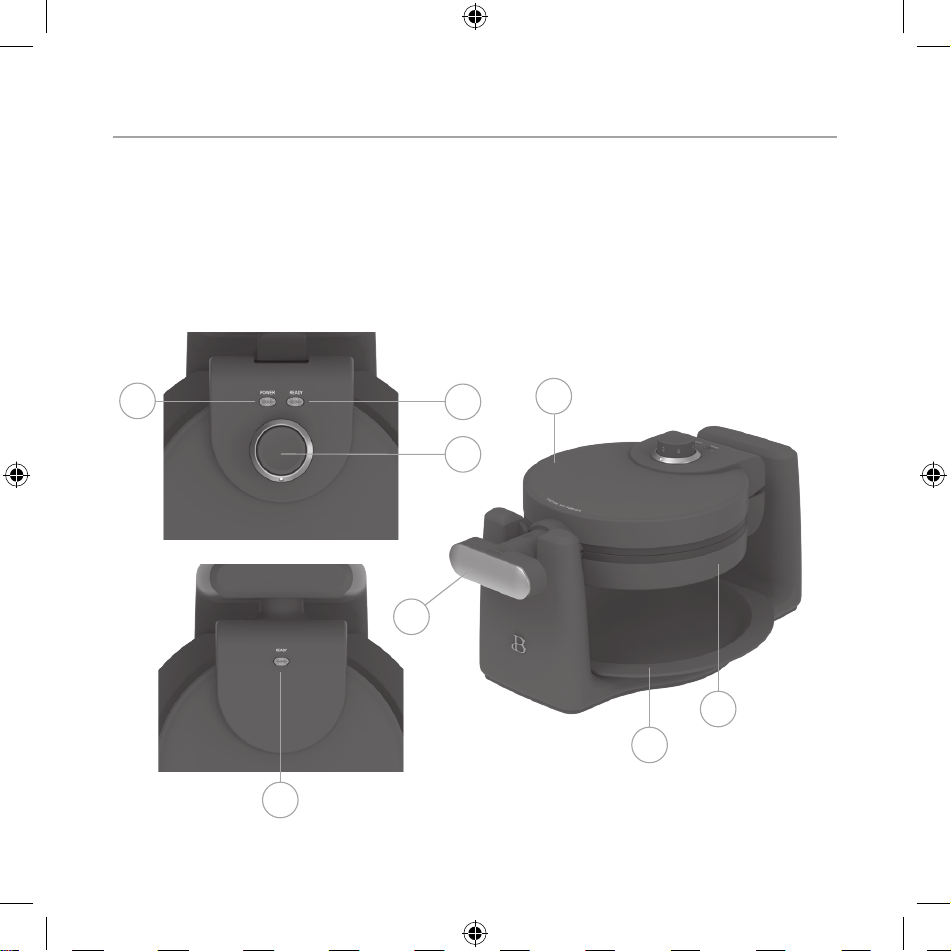
Getting to Know Your Rotating Belgian Waffle Maker
Product may vary slightly from illustrations
1. Temperature Control Dial
(Top View)
2. READY Light (Top)
3. POWER Light
4. Top Nonstick Cooking Plate
5. Bottom Nonstick Cooking Plate
6. Removable Drip Tray
7. Cool Touch Rotating Handle
8. READY Light (Bottom)
9. Power Cord with Polarized Plug
(not shown)
10. Cord Wrap (not shown)
1
2
3
4
6
5
8
7
19393_19427_19428_19429_19430_19451_BTFL_WUS_RotatingWaffleMaker_IM_V3_R0.indd 1219393_19427_19428_19429_19430_19451_BTFL_WUS_RotatingWaffleMaker_IM_V3_R0.indd 12 2023-11-06 3:11 PM2023-11-06 3:11 PM

13
Before Using for the First Time
1. Carefully unpack the Rotating Belgian Wafe Maker and remove all
packaging and materials.
2. Before using your Wafe Maker for the rst time, wipe the cooking plates
with a damp cloth to remove all dust, and then dry. Wipe outer surfaces
with a slightly damp, soft cloth or sponge.
CAUTION: Take care to prevent water from running into the appliance.
Never immerse Rotating Belgian Wafe Maker unit in water or any other
liquids!
3. Set the appliance on a dry, clean and at surface.
Operation
1. Lift top cooking plate. Make sure the Rotating Belgian Wafe Maker’s
bottom cooking plate is positioned at and locked into a stable
position. Before baking the rst wafes of the day, use a pastry brush
to lightly coat the top and bottom wafe plates with vegetable oil.
Do not use non-stick sprays as they can cause build-up on the cooking
plates.
2. Plug unit into a 120 V AC electrical outlet. The POWER light will
illuminate and remain lighted during use.
NOTE: When your Rotating Belgian Wafe Maker is heated for the rst
time, it may emit slight smoke or odor. This is normal and should
disappear after one or two uses. This does not affect the safety of
the appliance. However, as it may affect the avor of the rst wafes
prepared in the Wafe Maker, it is recommended that these be discarded.
3. Turn the temperature control dial to the MAX (+) setting to preheat.
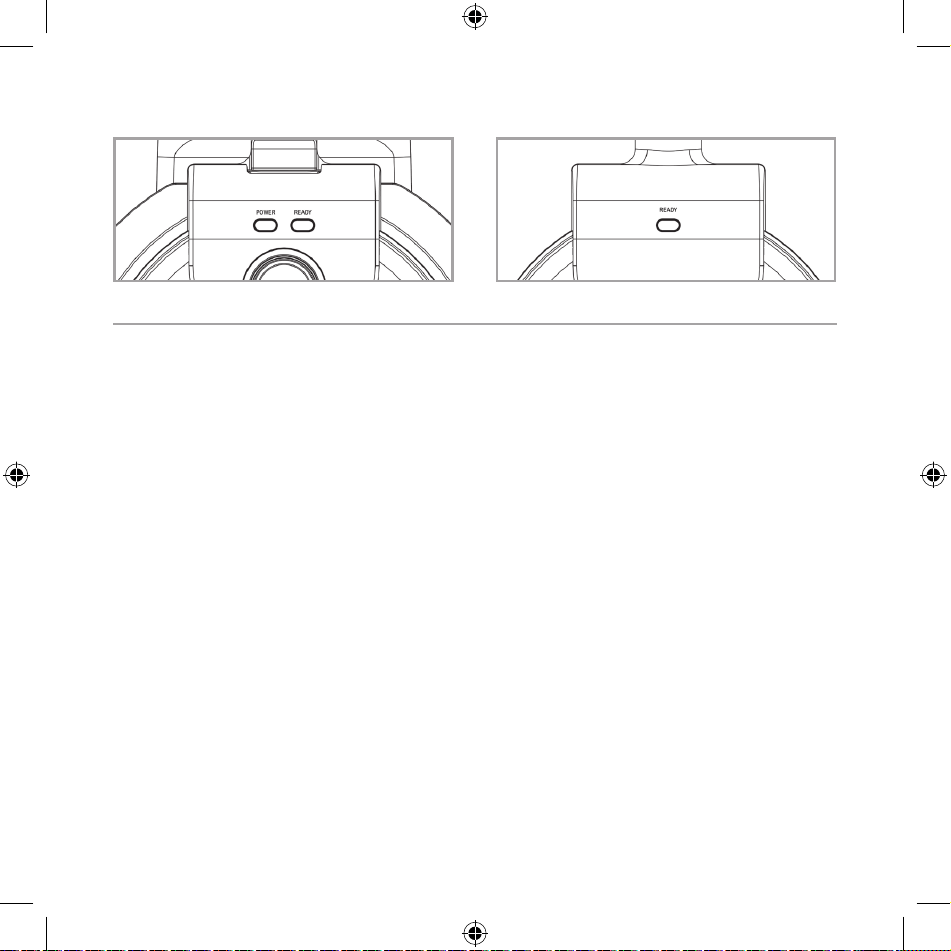
4. While preheating, prepare wafe batter. (Figure 1)
5. After approximately 4 minutes, the READY light will illuminate,
indicating the unit is preheated and is ready for use. (Figure 2)
6. Set the wafe temperature control to the desired setting. A lower
setting produces a lighter browned wafe, while wafes made at a
higher setting are darker and crispier. When preparing a recipe for
the rst time, set the control to the middle; then adjust according to
preference. Recipes will vary in cook time and brownness; batters with
19393_19427_19428_19429_19430_19451_BTFL_WUS_RotatingWaffleMaker_IM_V3_R0.indd 1319393_19427_19428_19429_19430_19451_BTFL_WUS_RotatingWaffleMaker_IM_V3_R0.indd 13 2023-11-06 3:11 PM2023-11-06 3:11 PM

14
more sugar will brown quicker. Note the perfect setting for each batter
recipe for future use.
7. Pour 3/4 to 1 cup batter onto the bottom cooking plate. Add just enough
batter to ll lower grid so that the peak area is covered. If necessary,
use a spatula to spread the batter in to the corners of the plate. Try
not to overll, batter will expand when cooked. The drip tray will catch
any spilled-over batter.
8. The READY light will turn off as the baking cycle begins.
9. Lower the top cooking plate to close the Rotating Belgian Wafe Maker
and rotate unit 180° to the bottom side.
10. The Rotating Belgian Wafe Maker will cook until the READY light
(on the backside of the Wafe Maker) illuminates. Rotate Wafe
Maker 180° to the top side, until it is at and locked into a stable
position.
11. Lift the top cooking plate gently; if it pulls, continue cooking for
1 minute and test again. Wafes should be baked according to the
temperature control setting chosen. If the wafes need to bake to a
darker nish, close the lid and continue baking until the desired color
is achieved.
12. Remove wafes from the cooking plates using non-metallic utensils.
NOTE: If additional wafes are to be baked, keep the Rotating
Belgian Wafe Maker closed to retain heat. Always be sure the
green light is illuminated before baking more wafes.
NOTE: Wafes made later will bake faster because extra heat has
been retained.
13. When baking is complete, unplug the power cord from electric
outlet. Lift top cooking plate and allow to cool. Make sure the
Rotating Belgian Wafe Maker’s bottom cooking plate is positioned at
and locked into a stable position.
14. Do not clean until unit has been fully cooled.
15. Use the cord storage to wrap the cord at the base of the unit.
19393_19427_19428_19429_19430_19451_BTFL_WUS_RotatingWaffleMaker_IM_V3_R0.indd 1419393_19427_19428_19429_19430_19451_BTFL_WUS_RotatingWaffleMaker_IM_V3_R0.indd 14 2023-11-06 3:11 PM2023-11-06 3:11 PM
15
Waffle Baking Tips
• Sift all dry ingredients together. It is not necessary to beat egg yolks
and milk separately.
• Beat egg whites until they form stiff peaks. Stir 1/4 of the beaten
whites into the batter to lighten it, and then gently fold in the rest.
There should be white streaks in the batter. Do not over-mix batter when
adding egg whites.
• Some recipes may be doubled. Do not make large batches of batter when
whipped egg whites have been used to lighten the wafe.
• Do not open the Rotating Belgian Wafe Maker during the rst minute
of baking or the wafe will separate. Completely bake wafes before
removing.
• When preparing wafe batter with gluten our, do not over-mix or wafes
will be tough. Stir batter only until large lumps of dry ingredients
disappear.
• The optimal amount of batter to produce a full-shaped wafe, without
overowing, will vary with different wafe batters. Pouring batter from
a measuring cup will help to gauge how much batter to use each time.
Fill bottom cooking plate of Rotating Belgian Wafe Maker with enough
batter to cover peak areas. Begin with 1 scant cup (1/4 cup per quarter
wafe). Add more if needed.
• For more evenly shaped wafes, spread thick batters to the outer edge
of the cooking plate using a heat-proof rubber spatula or other non-
metallic utensil before closing the lid.
• To retain crispness, move baked wafes to a wire cooling rack. To keep
Figure 1 Figure 2
19393_19427_19428_19429_19430_19451_BTFL_WUS_RotatingWaffleMaker_IM_V3_R0.indd 1519393_19427_19428_19429_19430_19451_BTFL_WUS_RotatingWaffleMaker_IM_V3_R0.indd 15 2023-11-06 3:11 PM2023-11-06 3:11 PM

16
wafes warm, place on an ovenproof dish on an oven rack and warm at
about 200-250 °F (90-120 °C). Wafes will keep for about 20 minutes
before they begin to dry out.
• Baked wafes freeze well. Cool completely on a wire rack. Store in a
plastic freezer bag or in a covered container, separating wafes with
wax paper.
• Reheat frozen wafes in a microwave, toaster oven, convection or
conventional oven or toaster until hot and crisp.
FOR GLUTEN-FREE WAFFLES:
• Use gluten-free baking mixes.
• Use gluten-free our.
• Replace our in recipes with combinations of: coconut our,
rice our, almond our, oat our, corn meal.
FOR LOWER FAT, LOWER CHOLESTEROL WAFFLES:
• Use skim milk.
• Replace full fat milk with nut or seed milks: almond, cashew,
soy, ax, or hemp seed milk.
• Use whites only, eliminate the egg yolk.
• Always use liquid vegetable oils such as canola, coconut,
corn or sunower, instead of butter.
• Replace 1 egg with 3 tablespoons cold water + 1 tablespoon
ground ax seed.
• Replace 1 egg with 3 tablespoons cold water + 1/2 tablespoon
ground chia seed.
FOR HIGHER FIBER WAFFLES:
• Substitute 1/2 cup or more of white our with whole-wheat our.
• Substitute 1/4 cup of white our with wheat or oat bran.
• Replace 1 egg with 3 tablespoons cold water + 1 tablespoon
ground ax seed.
• Replace 1 egg with 3 tablespoons cold water + 1/2 tablespoon
ground chia seed.
19393_19427_19428_19429_19430_19451_BTFL_WUS_RotatingWaffleMaker_IM_V3_R0.indd 1619393_19427_19428_19429_19430_19451_BTFL_WUS_RotatingWaffleMaker_IM_V3_R0.indd 16 2023-11-06 3:11 PM2023-11-06 3:11 PM

17
User Maintenance Instructions
This appliance requires little maintenance. It contains no user serviceable
parts. Do not try to repair it yourself. Any servicing requiring disassembly
other than cleaning, must be performed by a qualied appliance repair
technician.
Care & Cleaning Instructions
CAUTION: unplug from electrical outlet and allow to cool thoroughly before
cleaning.
1. The Rotating Belgian Wafe Maker does not disassemble for cleaning.
2. If batter has dripped onto the drip tray, remove drip tray immediately
after use and rinse with warm water. Wash with mild dishwashing
liquid. Remove stubborn stains with a plastic mesh puff or pad.
Do not use steel wool or coarse scouring pads.
3. Never immerse appliance in water or other liquids. Never place
Rotating Belgian Wafe Maker in dishwasher.
4. The wafe cooking plates should be cleaned and conditioned before
each heating.
5. Brush cooking plates with a clean, soft pastry brush or cloth.
To condition plates, lightly coat the cooking surfaces with solid
vegetable shortening or vegetable oil. Carefully follow suggested
cleaning procedures below. After a time, if wafes show signs of
sticking, recondition as needed.
6. To protect the premium quality non-stick surfaces, use only plastic,
nylon or wooden utensils.
7. To remove any batter baked onto the cooking plates, pour a small
amount of cooking oil onto the hardened batter. Allow to set for
5 minutes, then wipe softened batter off with a paper towel or soft
cloth. Remove stubborn stains with a plastic mesh puff or pad. For
best results, use only products with directions stating that it is
safe for cleaning non-stick cooking surfaces.Do not use steel wool
or coarse scouring pads.
8. The exterior nish should be cleaned with a non-abrasive cleaner and
a soft, damp cloth. Dry thoroughly.
19393_19427_19428_19429_19430_19451_BTFL_WUS_RotatingWaffleMaker_IM_V3_R0.indd 1719393_19427_19428_19429_19430_19451_BTFL_WUS_RotatingWaffleMaker_IM_V3_R0.indd 17 2023-11-06 3:11 PM2023-11-06 3:11 PM

18
Storing Instructions
Make sure unit is unplugged and fully cooled. Never wrap cord tightly
around appliance. Do not put any stress on cord where it enters unit, as
this could cause cord to fray and break.
19393_19427_19428_19429_19430_19451_BTFL_WUS_RotatingWaffleMaker_IM_V3_R0.indd 1819393_19427_19428_19429_19430_19451_BTFL_WUS_RotatingWaffleMaker_IM_V3_R0.indd 18 2023-11-06 3:11 PM2023-11-06 3:11 PM

Limited Two-Year Warranty
Sensio Inc. dba Made by Gather™
hereby warrants that for a period
of TWO YEARS from the date of
purchase, this product will be free
from mechanical defects in material
and workmanship, and for 90 days in
respect to non-mechanical parts. At
its sole discretion, Sensio Inc. dba
Made by Gather™ will either repair
or replace the product found to be
defective, or issue a refund on the
product during the warranty period.
The warranty is only valid for
the original retail purchaser from
the date of initial retail purchase
and is not transferable.
Keep the original sales receipt,
as proof of purchase isrequired
to obtain warranty validation.
Retail stores selling this product
do not have the right to alter,
modify, or in any way revise the
terms and conditions of the warranty.
Exclusions:
The warranty does not cover normal
wear of parts or damage resulting
from any of thefollowing: negligent
use of the product, use of improper
voltage or current, improper routine
maintenance, use contrary to the
operating instructions, disassembly,
repair, or alteration by anyone
other than qualied Sensio Inc.
dba Made by Gather™ personnel.
Also, the warranty does not cover
Acts of God such as re, oods,
hurricanes, or tornadoes.
Sensio Inc. dba Made by Gather™ shall
not be liable for any incidental or
consequential damages caused by the
breach of any express or implied
warranty. Apart from the extent
prohibited by applicable law, any
implied warranty of merchantability
or tness for a particular purpose
is limited in time to the duration
of the warranty. Some states,
provinces or jurisdictions do not
allow the exclusion or limitation
of incidental or consequential
damages, or limitations on how
long an implied warranty lasts,
and therefore, the above exclusions
or limitations may not apply to you.
The warranty covers specic legal
rights which may vary by state,
province and/or jurisdiction.
19
19393_19427_19428_19429_19430_19451_BTFL_WUS_RotatingWaffleMaker_IM_V3_R0.indd 1919393_19427_19428_19429_19430_19451_BTFL_WUS_RotatingWaffleMaker_IM_V3_R0.indd 19 2023-11-06 3:11 PM2023-11-06 3:11 PM

20
How To Obtain Warranty Service
You must contact Customer Service at
our toll-free number: 1-877-775-3564.
A Customer Service Representative
will attempt to resolve warranty
issues over thephone. If the
Customer Service Representative
is unable to resolve the problem,
you will be provided with a case
number and asked to return the
product to Sensio Inc. dba
Made by Gather™ Attach a tag to the
product that includes: your name,
address, daytime contact telephone
number, case number, and description
of the problem.
Also, include a copy of the original
sales receipt. Carefully package
the tagged product with the sales
receipt, and send it (with shipping
and insurance prepaid) to SENSIO
Inc.’s address. Sensio Inc.
dba Made by Gather™ shall bear
no responsibility or liability
for the returned product while
in transit to Sensio Inc.
dba Made by Gather™ Customer
Service Center.
®
19393_19427_19428_19429_19430_19451_BTFL_WUS_RotatingWaffleMaker_IM_V3_R0.indd 2019393_19427_19428_19429_19430_19451_BTFL_WUS_RotatingWaffleMaker_IM_V3_R0.indd 20 2023-11-06 3:11 PM2023-11-06 3:11 PM
21
Sección 1
Seguridad
1
19393_19427_19428_19429_19430_19451_BTFL_WUS_RotatingWaffleMaker_IM_V3_R0.indd 2119393_19427_19428_19429_19430_19451_BTFL_WUS_RotatingWaffleMaker_IM_V3_R0.indd 21 2023-11-06 3:11 PM2023-11-06 3:11 PM

22
MEDIDAS IMPORTANTES
DE SEGURIDAD
ADVERTENCIA: Al usar aparatos eléctricos, siempre se deben
seguir las precauciones básicas de seguridad, incluidas
las siguientes:
1. LEA TODAS LAS INSTRUCCIONES.
2. El cable de este aparato se debe conectar solamente a
un tomacorriente de 120 voltios de CA.
3. Para protegerse de descargas eléctricas, no sumerja el
cable, el enchufe o la unidad de cocción en agua u otro
líquido.
4. No toque las supercies calientes. Use las asas o las
perillas.
5. Es necesaria una estrecha supervisión cuando cualquier
aparato es utilizado por niños o cerca de ellos.
6. Desenchufe el aparato del tomacorriente cuando no lo
utilice y antes de limpiarlo. Espere a que el aparato
se enfríe antes de limpiarlo o guardarlo.
7. Nunca tire del cable para desconectar la unidad de
cocción del tomacorriente. En su lugar, sujete el
enchufe y tire para desconectarlo.
8. No utilice un aparato con un cable o enchufe dañados,
después de una avería, de una caída o si se ha dañado
de cualquier manera. Devuelva el aparato al centro
19393_19427_19428_19429_19430_19451_BTFL_WUS_RotatingWaffleMaker_IM_V3_R0.indd 2219393_19427_19428_19429_19430_19451_BTFL_WUS_RotatingWaffleMaker_IM_V3_R0.indd 22 2023-11-06 3:11 PM2023-11-06 3:11 PM

23
de servicio técnico autorizado más cercano para su
revisión, reparación o ajuste.
9. El uso de accesorios no recomendados por el fabricante
puede causar incendios, descargas eléctricas o
lesiones.
10. No usar al aire libre o con nes comerciales.
11. No utilice este aparato para otro uso que no sea el
indicado.
12. No deje que el cable cuelgue sobre el borde de una mesa
o una encimera, o que toque supercies calientes.
13. No lo coloque sobre o cerca de un quemador de gas o
eléctrico caliente o en un horno caliente.
14. Utilizarlo solo sobre supercies niveladas, planas y
resistentes al calor.
15. Tenga mucho cuidado al mover aparatos que contengan
alimentos, agua, aceite u otros líquidos calientes.
16. Para desconectar, saque el enchufe del tomacorriente.
17. Desenchufe el aparato siempre después de usarlo.
El aparato permanecerá ENCENDIDO a menos que se lo
desenchufe.
18. PRECAUCIÓN SUPERFICIES CALIENTES: Este aparato genera
calor durante el uso. Deben tomarse las medidas
correspondientes para evitar el riesgo de quemaduras,
incendios u otros daños a personas o a la propiedad.
19. Durante el uso, asegúrese de que haya una ventilación
19393_19427_19428_19429_19430_19451_BTFL_WUS_RotatingWaffleMaker_IM_V3_R0.indd 2319393_19427_19428_19429_19430_19451_BTFL_WUS_RotatingWaffleMaker_IM_V3_R0.indd 23 2023-11-06 3:11 PM2023-11-06 3:11 PM

24
adecuada sobre el aparato y a su alrededor para que el
aire pueda circular. Asegúrese de que este aparato no
toque cortinas, revestimientos de paredes, vestimenta,
toallas de vajilla u otros materiales inamables
mientras está funcionando.
SOLO PARA USO
DOMÉSTICO
GUAR DE ESTAS
INSTRUCCIONES
AMEDIDAS DE
SEGURIDAD
IMPORTANTES
ADICIONALES
PRECAUCIÓN: Este aparato se calienta durante el
funcionamiento y retiene el calor por un tiempo después
de desenchufarlo. Use siempre guantes de horno cuando
manipule materiales calientes y deje que las piezas de
metal se enfríen antes de limpiarlas. No coloque objetos
19393_19427_19428_19429_19430_19451_BTFL_WUS_RotatingWaffleMaker_IM_V3_R0.indd 2419393_19427_19428_19429_19430_19451_BTFL_WUS_RotatingWaffleMaker_IM_V3_R0.indd 24 2023-11-06 3:11 PM2023-11-06 3:11 PM

25
encima del aparato mientras esté funcionando o se encuentre
caliente.
1. Todos los usuarios de este aparato deben leer y
comprender el manual de instrucciones antes de utilizar
o limpiar el aparato.
2. No deje este aparato sin supervisión mientras está en
uso.
NOTAS SOBRE EL CABLE
a) Se debe utilizar un cable de alimentación corto (o un
cable de alimentación desmontable) para reducir el
riesgo de enredarse o tropezar con un cable más largo.
b) Se dispone de cables de alimentación o cables
de extensión desmontables más largos que pueden
utilizarse si se tiene cuidado al utilizarlos.
c) Si se utiliza un cable de alimentación desmontable
más largo o un cable de extensión:
1) La clasicación eléctrica marcada del juego de
cables o del cable de extensión debe ser al menos tan
grande como la clasicación eléctrica del aparato;
2) El cable debe colocarse de manera que no cuelgue
sobre la encimera o la mesa donde los niños puedan tirar
de él o tropezar involuntariamente; y
3) Si el aparato es del tipo con conexión a tierra, el
juego de cables o el cable de extensión debe ser un
cable de 3 hilos con conexión a tierra.
19393_19427_19428_19429_19430_19451_BTFL_WUS_RotatingWaffleMaker_IM_V3_R0.indd 2519393_19427_19428_19429_19430_19451_BTFL_WUS_RotatingWaffleMaker_IM_V3_R0.indd 25 2023-11-06 3:11 PM2023-11-06 3:11 PM

26
NOTAS SOBRE EL ENCHUFE
Este aparato posee un enchufe polarizado (una clavija es
más ancha que la otra). Para reducir el riesgo de descarga
eléctrica, este enchufe encajará en un tomacorriente
polarizado de una sola manera. Si el enchufe no entra
completamente en el tomacorriente, gire el enchufe. Si
aun así no encaja, contacte a un técnico electricista
calicado. No modique el enchufe de ninguna manera.
ADVERTENCIA SOBRE EL ACABADO
PRECAUCIÓN: Para evitar que el acabado de las encimeras,
mesas u otros muebles se dañe, ponga posavasos o tapetes
que NO sean plásticos entre estos y el aparato. No hacerlo
puede provocar el oscurecimiento del acabado, provocar
desperfectos permanentes o causar la aparición de manchas.
ALIMENTACIÓN ELÉCTRICA
Si el circuito eléctrico está sobrecargado con otros
aparatos, este aparato podría no funcionar correctamente.
Debe utilizarse en un circuito eléctrico diferente al de
otros electrodomésticos.
19393_19427_19428_19429_19430_19451_BTFL_WUS_RotatingWaffleMaker_IM_V3_R0.indd 2619393_19427_19428_19429_19430_19451_BTFL_WUS_RotatingWaffleMaker_IM_V3_R0.indd 26 2023-11-06 3:11 PM2023-11-06 3:11 PM
Sección 2
Instrucciones
2
19393_19427_19428_19429_19430_19451_BTFL_WUS_RotatingWaffleMaker_IM_V3_R0.indd 2719393_19427_19428_19429_19430_19451_BTFL_WUS_RotatingWaffleMaker_IM_V3_R0.indd 27 2023-11-06 3:11 PM2023-11-06 3:11 PM
28
Conozca Mejor A Su Waflera Giratoria Belga
El producto puede diferir ligeramente del que aparece en las ilustraciones
1. Perilla de control de temperatura
(Vista superior)
2. Luz READY (Superior)
3. Luz POWER (Alimentación)
4. Placa de cocción antiadherente
superior
5. Placa de cocción antiadherente
inferior
6. Bandeja de goteo extraíble
7. Asa giratoria con aislamiento
térmico
8. Luz READY (Inferior)
9. Cable de alimentación con enchufe
polarizado (no se muestran)
10. Soporte del cable (no se muestra)
1
2
3
4
6
5
8
7
19393_19427_19428_19429_19430_19451_BTFL_WUS_RotatingWaffleMaker_IM_V3_R0.indd 2819393_19427_19428_19429_19430_19451_BTFL_WUS_RotatingWaffleMaker_IM_V3_R0.indd 28 2023-11-06 3:11 PM2023-11-06 3:11 PM

29
Antes Del Primer Uso
1. Desembale con cuidado la Waera Giratoria Belga y retire todo el
embalaje y los materiales.
2. Antes de usar su waera por primera vez, limpie las placas de cocción
con un paño húmedo para eliminar todo el polvo y luego séquelas.
Limpie las supercies exteriores con un paño suave o una esponja apenas
húmedos.
PRECAUCIÓN: Se debe tener cuidado para evitar que entre agua en el
aparato.
¡Nunca sumerja la unidad de la Waera Giratoria Belga en agua u otros
líquidos!
3. Coloque el aparato sobre una supercie seca, limpia y plana.
Instrucciones De Funcionamiento
1. Levante la placa de cocción superior. Asegúrese de que la placa inferior
de cocción de la Waera Giratoria Belga esté plana y bloqueada sobre
un posición estable. Antes de hornear los primeros waes del día, use
una brocha de repostería para cubrir ligeramente las placas de cocción
superior e inferior con aceite vegetal. No use aerosoles antiadherentes
ya que pueden generar acumulaciones en las placas de cocción.
2. Enchufe la unidad en un tomacorriente de 120 V de CA. La luz POWER se
encenderá y estará iluminada durante el uso.
NOTA: Cuando su Waera Giratoria Belga se calienta por primera vez,
puede emitir un ligero humo u olor. Esto es normal y debería desaparecer
después de usarla una o dos veces. Esto no afecta la seguridad del
aparato. Sin embargo, ya que puede afectar el sabor de los primeros
waes preparados en la Waera, se recomienda desecharlos.
3. Gire el dial de control de temperatura al ajuste MAX (+) para
precalentar.
4. Mientras se precalienta, prepare la masa para wae. (Figura 1)
5. Después de aproximadamente 4 minutos, se encenderá la luz READY,
indicando que la unidad está precalentada y lista para usar. (Figura 2)
6. Fije el control de temperatura de cocción de la waera a la temperatura
deseada. Un ajuste más bajo produce un wae dorado más claro, mientras
que los waes hechos con un ajuste más alto son más oscuros y
19393_19427_19428_19429_19430_19451_BTFL_WUS_RotatingWaffleMaker_IM_V3_R0.indd 2919393_19427_19428_19429_19430_19451_BTFL_WUS_RotatingWaffleMaker_IM_V3_R0.indd 29 2023-11-06 3:11 PM2023-11-06 3:11 PM

30
crujientes. Al preparar una receta por primera vez, coloque el control
en la mitad; luego haga su ajuste según sus preferencias. Las recetas
variarán en cuanto a tiempo de cocción y dorado; las pastas con más
azúcar se dorarán más rápido. Anote la temperatura y ajuste de tiempo
ideales para cada receta para usos en el futuro.
7. Vierta de 3/4 a 1 taza de la masa en la placa de cocción inferior.
Agregue masa suciente para llenar la placa inferior de manera que el
área de los picos quede cubierta. Si es necesario, use una espátula para
esparcir la masa hacia las esquinas de la placa. Evite sobrellenarla,
pues la masa se expande con la cocción. La bandeja de goteo recogerá los
derrames de la masa.
8. La luz READY se apaga al comenzar el ciclo de horneado.
9. Baje la placa superior para cerrar la Waera Giratoria Belga y rote la
unidad 180° hacia el lado inferior.
10. La Waera Giratoria Belga horneará hasta que se encienda la luz READY
(en la parte trasera de la waera). Gire 180° el lado superior de la
waera, hasta que esté plano y bloqueado en una posición estable.
11. Levante suavemente la placa de cocción superior; si siente que jala,
continúe cocinando durante 1 minuto y vuelva a probar. Los waes se
deben hornear según el ajuste de control de temperatura elegido. Si los
waes necesitan un acabado más dorado, cierre la tapa y siga cocinando
hasta alcanzar el color deseado.
12. Extraiga los waes de la placa de cocción con utensilios que no sean
metálicos.
NOTA: Si va a hornear más waes, mantenga cerrada la Waera Giratoria
Belga para retener el calor. Asegúrese siempre de que la luz verde esté
encendida antes de hornear más waes.
NOTA: Los waes que se hagan después se hornearán más rápido porque se
ha retenido un calor adicional.
13. Al terminar de hornear, desenchufe el cable de alimentación del
tomacorriente. Levante la placa superior de cocción y déjela enfriar.
Asegúrese de que la placa inferior de cocción de la waera giratoria
belga esté plana y bloqueada sobre un posición estable.
14. No la limpie hasta que la unidad se haya enfriado por completo.
15. Utilice el soporte para enrollar el cable en la base de la unidad.
19393_19427_19428_19429_19430_19451_BTFL_WUS_RotatingWaffleMaker_IM_V3_R0.indd 3019393_19427_19428_19429_19430_19451_BTFL_WUS_RotatingWaffleMaker_IM_V3_R0.indd 30 2023-11-06 3:11 PM2023-11-06 3:11 PM
31
Consejos Para Hornear Wafles
• Cernir todos los ingredientes secos juntos. No es necesario batir las
yemas de huevo y la leche por separado.
• Batir las claras hasta que formen picos rígidos. Agregue 1/4 de las
claras batidas a la masa para aligerarla y luego incorpore suavemente
el resto. Deben quedar rayas blancas en la masa. No mezcle demasiado la
masa al agregar las claras de huevo.
• Algunas recetas se pueden duplicar. No haga grandes lotes de masa cuando
se hayan usado claras de huevo batidas para aligerar el wae.
• No abra la waera giratoria belga durante el primer minuto de horneado o
el wae se soltará. Hornee completamente los waes antes de retirarlos.
• Cuando prepare la masa para waes con harina con gluten, no mezcle
demasiado o los waes quedarán duros. Revuelva la masa solo hasta que
desaparezcan los grumos grandes de ingredientes secos.
• La cantidad óptima de masa para producir un wae con forma completa, sin
que se desborde, variará según las diferentes masas para waes. Verter
la masa con una taza medidora ayudará a medir la cantidad de masa a usar
cada vez. Rellene la placa inferior de cocción de la waera giratoria
belga con la cantidad suciente de masa para cubrir las áreas de los
picos. Comience con 1 taza no muy llena (1/4 taza por cuarto de wae).
Agregue más según sea necesario.
• Para obtener waes con una forma más uniforme, esparza las masas espesas
hasta el borde exterior de la placa de cocción usando una espátula
plástica resistente al calor u otro utensilio no metálico antes de
cerrar la tapa.
Figura 1 Figura 2
19393_19427_19428_19429_19430_19451_BTFL_WUS_RotatingWaffleMaker_IM_V3_R0.indd 3119393_19427_19428_19429_19430_19451_BTFL_WUS_RotatingWaffleMaker_IM_V3_R0.indd 31 2023-11-06 3:11 PM2023-11-06 3:11 PM

32
• Para conservar la textura crujiente, coloque los waes horneados en
una rejilla para enfriar. Para mantener los waes calientes, colóquelos
en una fuente apta para el horno sobre una rejilla y caliéntelos a
aproximadamente 200-250 °F (90-120 °C). Los waes se conservarán durante
unos 20 minutos antes de que comiencen a endurecerse.
• Los waes horneados se congelan bien. Dejarlos enfriar completamente
sobre una rejilla. Guárdelos en una bolsa plástica para congelador o en
un recipiente tapado, separando los waes con papel encerado.
• Vuelva a calentar los waes congelados en un microondas, horno tostador,
horno de convección o convencional o tostador hasta que estén calientes
y crujientes.
PARA WAFLES SIN GLUTEN:
• Use mezclas para hornear sin gluten.
• Use harina sin gluten.
• Sustituya la harina en las recetas con mezclas de: harina de coco,
harina de arroz, harina de almendras, harina de avena, harina de maíz.
PARA WAFLES BAJOS EN GRASAS Y EN COLESTEROL:
• Use leche descremada.
• Sustituya la leche entera con leches de nueces o de semillas: leche de
almendras, anacardos, soja, lino o semillas de cáñamo.
• Use solo las claras, elimine la yema de los huevos.
• Siempre use aceites vegetales líquidos como canola, coco, maíz o
girasol, en lugar de mantequilla.
• Sustituya 1 huevo con 3 cucharadas de agua fría + 1 cucharada de
semillas de lino molidas.
• Sustituya 1 huevo con 3 cucharadas de agua fría + 1/2 cucharada de
semillas de chía molidas.
PARA WAFLES CON MÁS FIBRA:
• Sustituya 1/2 taza o más de harina blanca por harina de trigo integral.
• Sustituya 1/4 taza de harina blanca por salvado de trigo o avena.
• Sustituya 1 huevo con 3 cucharadas de agua fría + 1 cucharada de
19393_19427_19428_19429_19430_19451_BTFL_WUS_RotatingWaffleMaker_IM_V3_R0.indd 3219393_19427_19428_19429_19430_19451_BTFL_WUS_RotatingWaffleMaker_IM_V3_R0.indd 32 2023-11-06 3:11 PM2023-11-06 3:11 PM

33
semillas de lino molidas.
• Sustituya 1 huevo con 3 cucharadas de agua fría + 1/2 cucharada de
semillas de chía molidas.
Instrucciones De Mantenimiento Del Usuario
Este aparato requiere poco mantenimiento. No contiene piezas que el usuario
pueda reparar. No intente repararla por cuenta propia. Cualquier mantenimiento
que requiera desarmarlo, aparte de la limpieza, debe ser realizado por un
técnico calicado en reparación de electrodomésticos.
Cuidado Y Limpieza
PRECAUCIÓN: Desenchúfelo del tomacorriente y deje que se enfríe completamente
antes de limpiarlo.
1. La Waera Giratoria Belga no se desmonta para limpiarla.
2. Si la masa se derramó sobre la bandeja de goteo, retírela inmediatamente
después de usarla y enjuáguela con agua tibia. Lave con un detergente
lavavajillas suave. Quite las manchas persistentes con una almohadilla o
esponja de malla. No use lana de acero o estropajos de metal.
3. Nunca sumerja el aparato en agua u otros líquidos. Nunca coloque la
Waera Giratoria Belga en el lavavajillas.
4. Las placas para cocinar wae deben limpiarse y acondicionarse antes de
cada calentamiento.
5. Cepille las placas de cocción con un cepillo de repostería o paño
suave y limpio. Para acondicionar las placas, cubra ligeramente las
supercies de cocción con manteca vegetal sólida o aceite vegetal. Siga
cuidadosamente los procedimientos de limpieza sugeridos a continuación.
Después de un tiempo, si los waes muestran signos de pegarse,
reacondicione según sea necesario.
6. Para proteger las supercies antiadherentes premium, use solo utensilios
de plástico, nailon o madera.
7. Para quitar la pasta pegada a las placas de cocción, vierta una pequeña
cantidad de aceite de cocción a la pasta endurecida. Espere unos 5
minutos, luego frote la pasta ablandada con una toalla de papel o un
19393_19427_19428_19429_19430_19451_BTFL_WUS_RotatingWaffleMaker_IM_V3_R0.indd 3319393_19427_19428_19429_19430_19451_BTFL_WUS_RotatingWaffleMaker_IM_V3_R0.indd 33 2023-11-06 3:11 PM2023-11-06 3:11 PM

34
paño suave. Quite las manchas persistentes con una almohadilla o esponja
de malla. Para obtener mejores resultados, use solo productos que
indiquen que son aptos para limpiar supercies de cocción antiadherentes.
No use lana de acero o estropajos de metal.
8. Debe limpiar el acabado exterior con un limpiador no abrasivo y un paño
suave y húmedo. Seque bien.
Almacenamiento
Asegúrese de que la unidad esté desenchufada y completamente fría. Nunca enrolle
el cable de forma que quede apretado alrededor del aparato. No ejerza fuerza
por la parte del cable que entra a la unidad, pues esto podría hacer que se
deshilache y se rompa.
19393_19427_19428_19429_19430_19451_BTFL_WUS_RotatingWaffleMaker_IM_V3_R0.indd 3419393_19427_19428_19429_19430_19451_BTFL_WUS_RotatingWaffleMaker_IM_V3_R0.indd 34 2023-11-06 3:11 PM2023-11-06 3:11 PM

Garantía limitada de dos años
Mediante la presente, Sensio Inc.
dba Made by Gather™. garantiza que,
durante el plazo de DOS AÑOS a partir
de la fecha de compra, este producto
no presentará defectos mecánicos en
el material ni en la mano de obra, y
durante 90 días, no los presentará en
las piezas no mecánicas. A su entera
discreción, Sensio Inc. dba Made by
Gather™ que resulte defectuoso, o
emitirá un reembolso por el producto
durante el plazo de garantía.
Esta garantía es válida únicamente
para el comprador minorista
original a partir de la fecha de
compra minorista inicial y no es
transferible. Conserve el recibo
de compra original, ya que se exige
una prueba de compra para obtener
la validación de la garantía. Las
tiendas minoristas no tienen derecho
a alterar, modicar ni corregir
de ninguna manera los términos y
condiciones de la garantía.
Exclusiones:
La garantía no cubre el desgaste
normal de las piezas ni el daño
ocasionado por cualquiera de las
siguientes causas: uso negligente
del producto, uso de un voltaje o
corriente incorrectos, mantenimiento
de rutina inadecuado, uso
contrario al de las instrucciones
de funcionamiento, desarmado,
reparación o alteración a cargo
de personas que no sean miembros
del personal calicado de Sensio
Inc. dba Made by Gather™ Asimismo,
la garantía no cubre actos de
la naturaleza, como incendios,
inundaciones, huracanes o tornados.
Sensio Inc. dba Made by Gather™
no asumirá responsabilidad por
daños incidentales o resultantes
ocasionados por la violación
de cualquier garantía expresa
o implícita. Salvo en la medida
en que lo prohíban las leyes
aplicables, cualquier garantía
implícita de comerciabilidad o
aptitud para un propósito particular
se limita temporalmente a la
duración de la garantía. Algunos
estados, provincias o jurisdicciones
no permiten la exclusión ni la
limitación de daños incidentales
o resultantes, o limitaciones
sobre la duración de una garantía
implícita y, por lo tanto, es posible
que las exclusiones o limitaciones
mencionadas no le correspondan.
La garantía cubre derechos legales
especícos que pueden variar de
un estado, una provincia o una
jurisdicción a otros.
35
19393_19427_19428_19429_19430_19451_BTFL_WUS_RotatingWaffleMaker_IM_V3_R0.indd 3519393_19427_19428_19429_19430_19451_BTFL_WUS_RotatingWaffleMaker_IM_V3_R0.indd 35 2023-11-06 3:11 PM2023-11-06 3:11 PM

INSIDE back cover
36
Cómo obtener el servicio de garantía
Debe comunicarse con el Servicio
de atención al cliente a nuestro
número telefónico gratuito:
1-877-775-3564. Un representante
del Servicio de atención al cliente
intentará resolver los problemas
referidos a la garantía por
teléfono. Si este no puede resolver
el problema, le proporcionarán un
número de caso y le solicitarán que
devuelva el producto a Sensio Inc.
dba Made by Gather™ Adhiera una
etiqueta al producto que incluya:
su nombre, dirección, número
telefónico de contacto durante
el día, número de caso y descripción
del problema. Además, incluya una
copia del recibo de compra original.
Envuelva cuidadosamente el producto
etiquetado con el recibo de compra,
y envíelo (con el envío y el seguro
prepagados) a la dirección de
Sensio Inc. dba Made by Gather™.
Sensio Inc. dba Made by Gather™
no asumirá obligación ni
responsabilidad alguna por el
producto devuelto que esté en el
trayecto hacia el Centro de servicio
al cliente de Sensio Inc.
dba Made by Gather™
®
19393_19427_19428_19429_19430_19451_BTFL_WUS_RotatingWaffleMaker_IM_V3_R0.indd 3619393_19427_19428_19429_19430_19451_BTFL_WUS_RotatingWaffleMaker_IM_V3_R0.indd 36 2023-11-06 3:11 PM2023-11-06 3:11 PM

INSIDE back cover
19393_19427_19428_19429_19430_19451_BTFL_WUS_RotatingWaffleMaker_IM_V3_R0.indd 3719393_19427_19428_19429_19430_19451_BTFL_WUS_RotatingWaffleMaker_IM_V3_R0.indd 37 2023-11-06 3:11 PM2023-11-06 3:11 PM
19393, 19427, 19428, 19429, 19430, 19451 R0
Sensio Inc.
dba Made by Gather™
New York, NY 10016/USA
www.beautifulbydrew.com
19393_19427_19428_19429_19430_19451_BTFL_WUS_RotatingWaffleMaker_IM_V3_R0.indd 3819393_19427_19428_19429_19430_19451_BTFL_WUS_RotatingWaffleMaker_IM_V3_R0.indd 38 2023-11-06 3:11 PM2023-11-06 3:11 PM