
Technical Support and E-Warranty Certificate https://www.vevor.com/support
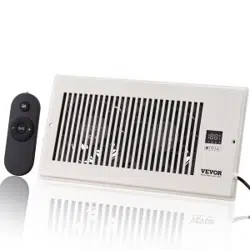
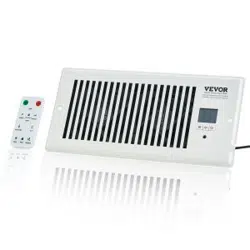
REGISTER BOOSTER FAN
USER MANUAL
We continue to be committed to provide you tools with competitive price.
"Save Half", "Half Price" or any other similar expressions used by us only represents an
estimate of savings you might benefit from buying certain tools with us compared to the
major top brands and doses not necessarily mean to cover all categories of tools offered by
us. You are kindly reminded to verify carefully when you are placing an order with us if you
are actually saving half in comparison with the top major brands.
- 1 -
Have product questions? Need technical support? Please feel free to
contact us:
CustomerService@vevor.com
NEED HELP? CONTACT US!
This is the original instruction, please read all manual instructions
carefully before operating. VEVOR reserves a clear interpretation of our
user manual. The appearance of the product shall be subject to the
product you received. Please forgive us that we won't inform you again if
there are any technology or software updates on our product.
REGISTER BOOSTER FAN
- 2 -
【 Contents 】
Ⅰ. SAFETY PRECAUTIONS
Ⅱ. TECHNICAL PARAMETER
Ⅲ. MECHINICAL DIMENSION
Ⅳ. Product Description
Ⅴ. PWM CONTROL FANS
Ⅵ. INSTALLATON
Ⅶ. INTELLIGENT PROGRAMMING
Ⅷ. PROGRAMMING GUIDE
Ⅸ. HOW TO PROGRAM
Ⅹ. HOW TO USE
Ⅺ. FAQ
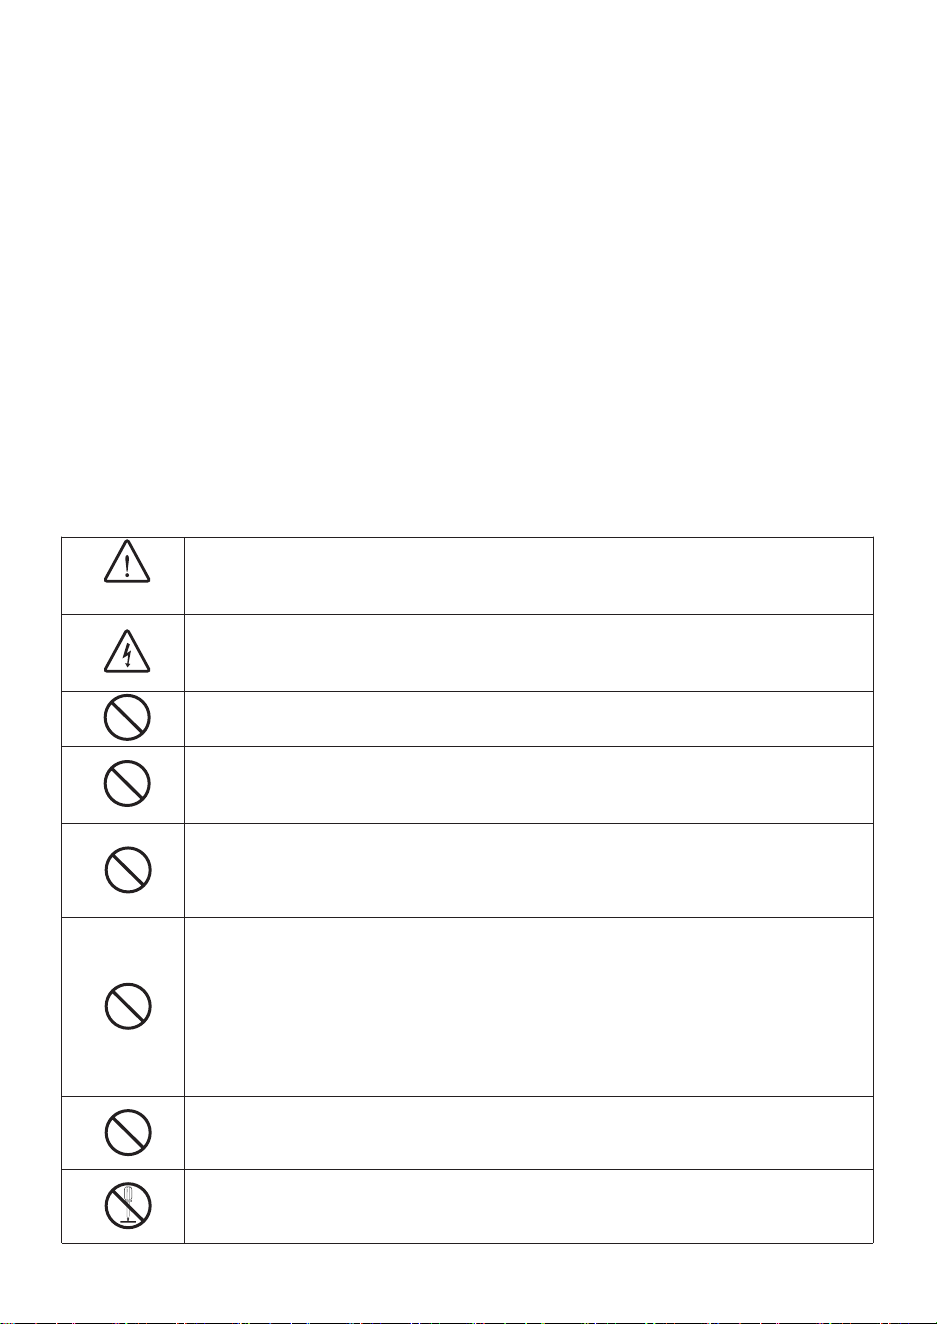
SAFETY PRECAUTIONS
WARNING
Improper operation may cause personal injury.
Improper operation may cause damage to the machine.
Improper operation may cause others to object damage.
The symbol indicates that the user should pay high attention to and
pay attention to the drawing shows the situation to be noted, and the
left figure shows "Be careful of electric shock"
Disconnect the fan when moving from one location to another.
Do not use a power supply that does not meet the rated voltage
The use of non-compliant power supplies can cause fire or electric
shock.
If the machine emits smoke, odor, motor noise, and other abnormal
conditions. Please do not use it. It may cause fire or electric shock.
This appliance can be used by children aged from 8 years and
above and persons with reduced physical, sensory or mental
capabilities or lack of experience and knowledge if they have been
given supervision or instruction concerning use of the appliance in a
safe way and understand the hazards involved. Children shall not
play with the appliance. Cleaning and user maintenance shall not be
made by children without supervision.
Children should be supervised to ensure they do not play with the
appliance
Do not disassemble, repair or rectify the machine during use.Doing
so may result in fire or electric shock and personal injury.
- 3 -
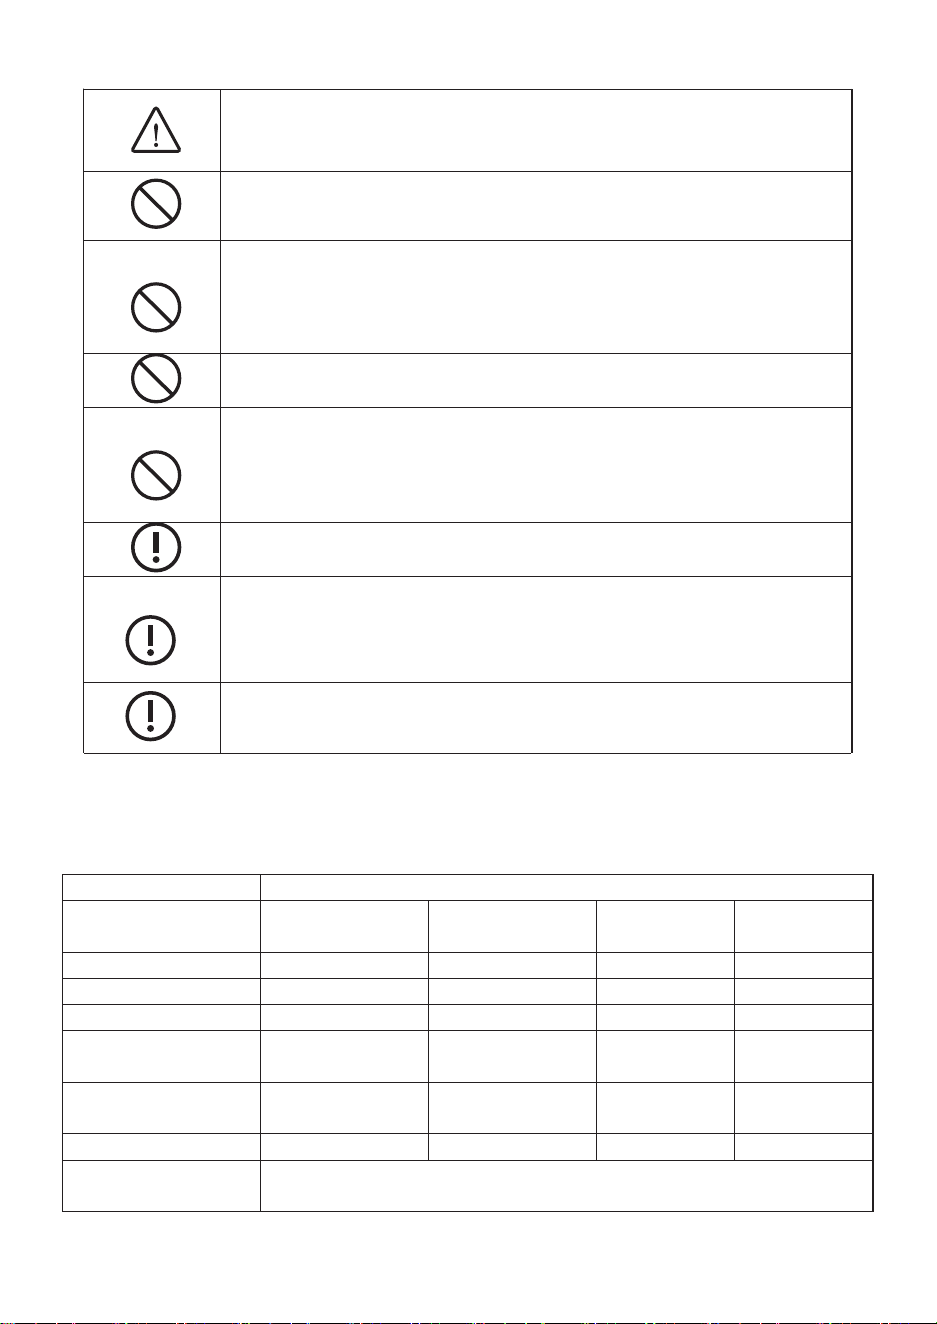
BE CAREFUL
DO NOT use the fan in a window. Rain may create an
electrical hazard.
Do not damage or arbitrarily change the original power cord,
and do not bend, forcibly pull, bind or press the power cord
under heavy objects. This will damage the power cord, causing
an electric leakage fire or electric shock.
If the machine is not used for a long time, please unplug the
power cord from the socket
If the power cord is damaged, contact your local service center
or a qualified electrician to install an appropriate replacement
cord to prevent any injury or damage
Never insert fingers, pencils, or any other object through the
guard when the fans is running.
When the power cord is unplugged from the socket, the plug
should be unplugged. Do not pull the power cord to forcibly
pull the wire, which may cause damage to the wire and lead to
leakage or electric shock
Please disconnect the power supply when cleaning.
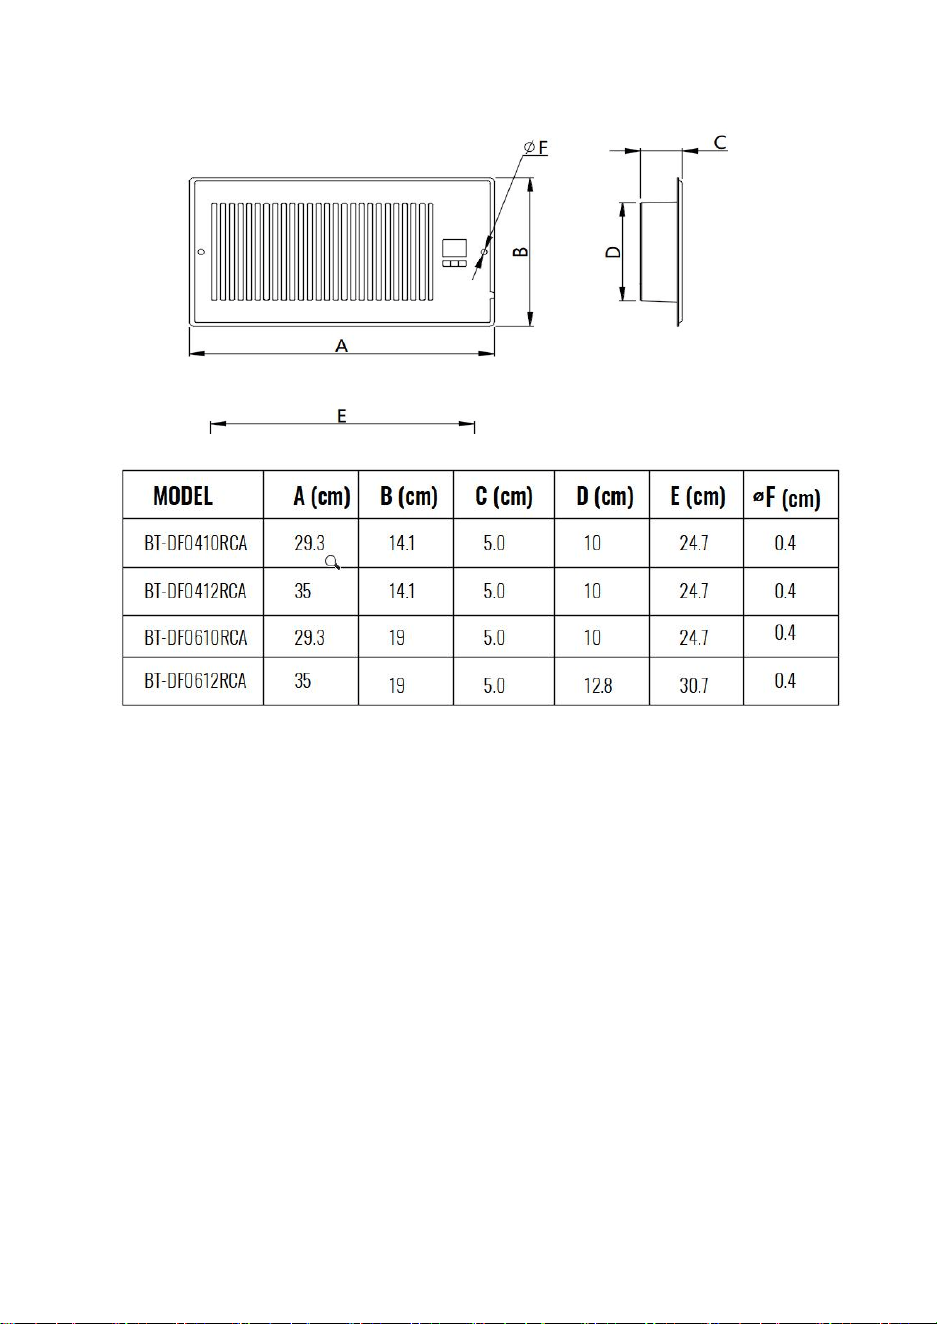
TECHNICAL PARAMETER
Brand
VEVOR
Model
BT-
DF0410RCA(B)
BT-
DF0412RCA(B)
BT-
DF0610RCA
BT-
DF0612RCA
Voltage
120 V
120 V
120 V
120 V
Frequency
60 Hz
60 Hz
60 Hz
60 Hz
Power
6 W
6 W
12 W
12 W
Power Cord
Length
1.7 M
1.7 M
1.7 M
1.7 M
Working Ambient
Temperature
-10~ 45 ℃
-10~ 45 ℃
-10~ 45 ℃
-10~ 45 ℃
Fits Register Sizes
4 X 10 in
4 X 12 in
6 X 10 in
6 X 12 in
Mounting
Positions
Horizontal or Vertical
- 4 -
MECHINICAL DIMENSIONS
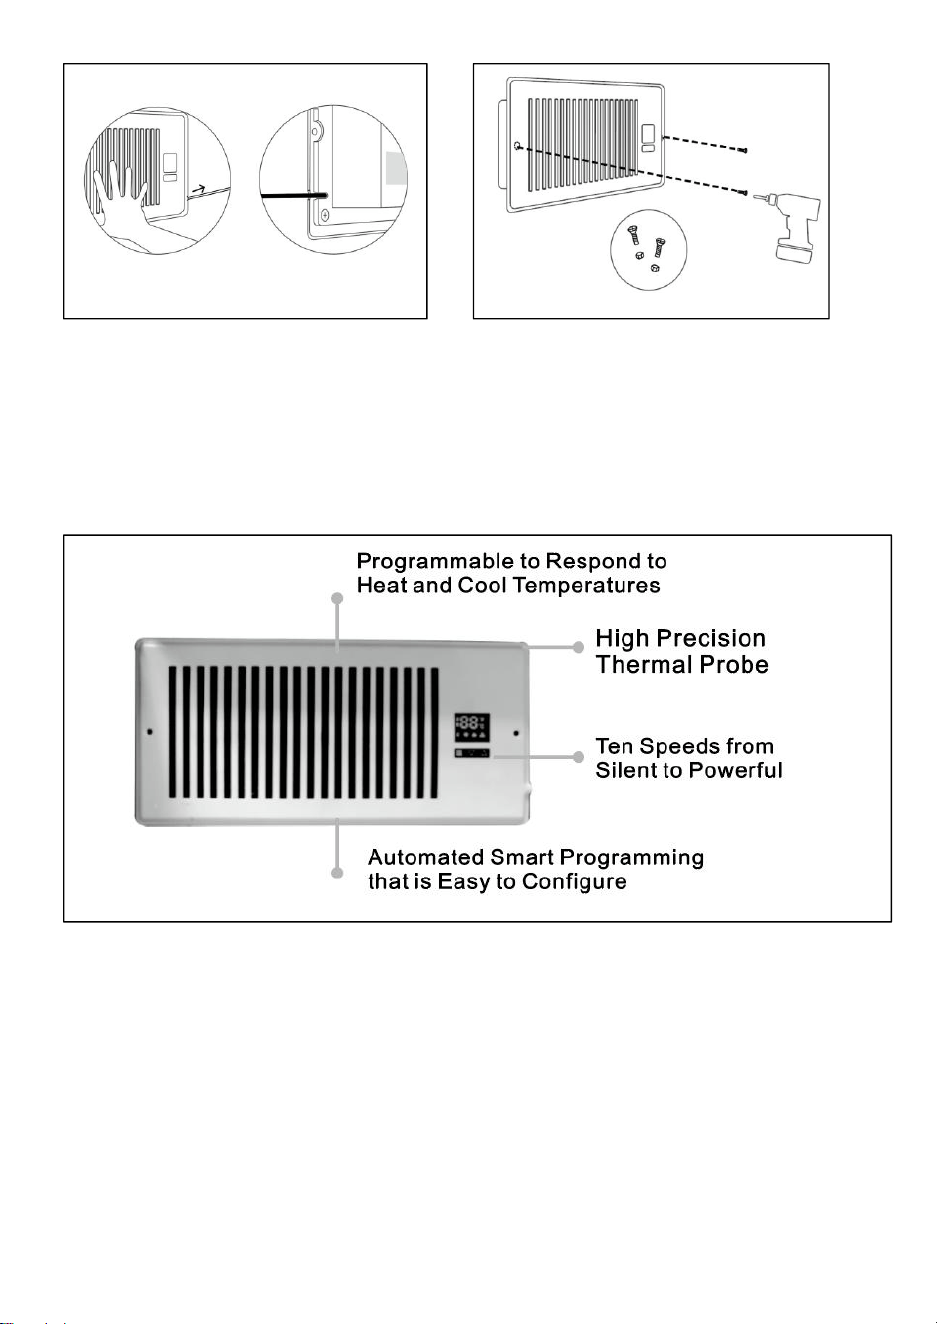
PRODUCT DESCRIPTION
A quiet fan system designed to be mounted onto wall or floor registers to boost
airflow. By increasing warm and cool air coming from weak registers, you can
increase room comfort and reduce energy costs. Features a LED display with
smart thermostat control and customizable fan speeds Features PWM control
fans that are designed for high static pressure applications such as ducting.
Includes hardware and power supply needed to secure the unit onto an existing
register opening and power it through an outlet.
The product designed with outstanding performance in quality and reliability. High
precision ball bearing system and rotor blade provides superb reliability and
achieve lower acoustic noise under high airflow and air pressure condition.
Programmable LED controller with heating and cooling thermostat, and automated
fan speeds.
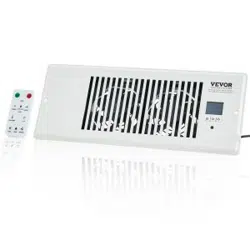
Ultra quiet: Dual-ball bearing fans use a PWM control system that is engineered
to minimize noise while delivering high airflow.
The product designed for improving wall and floor register airflow from HVAC
systems.
- 5 -
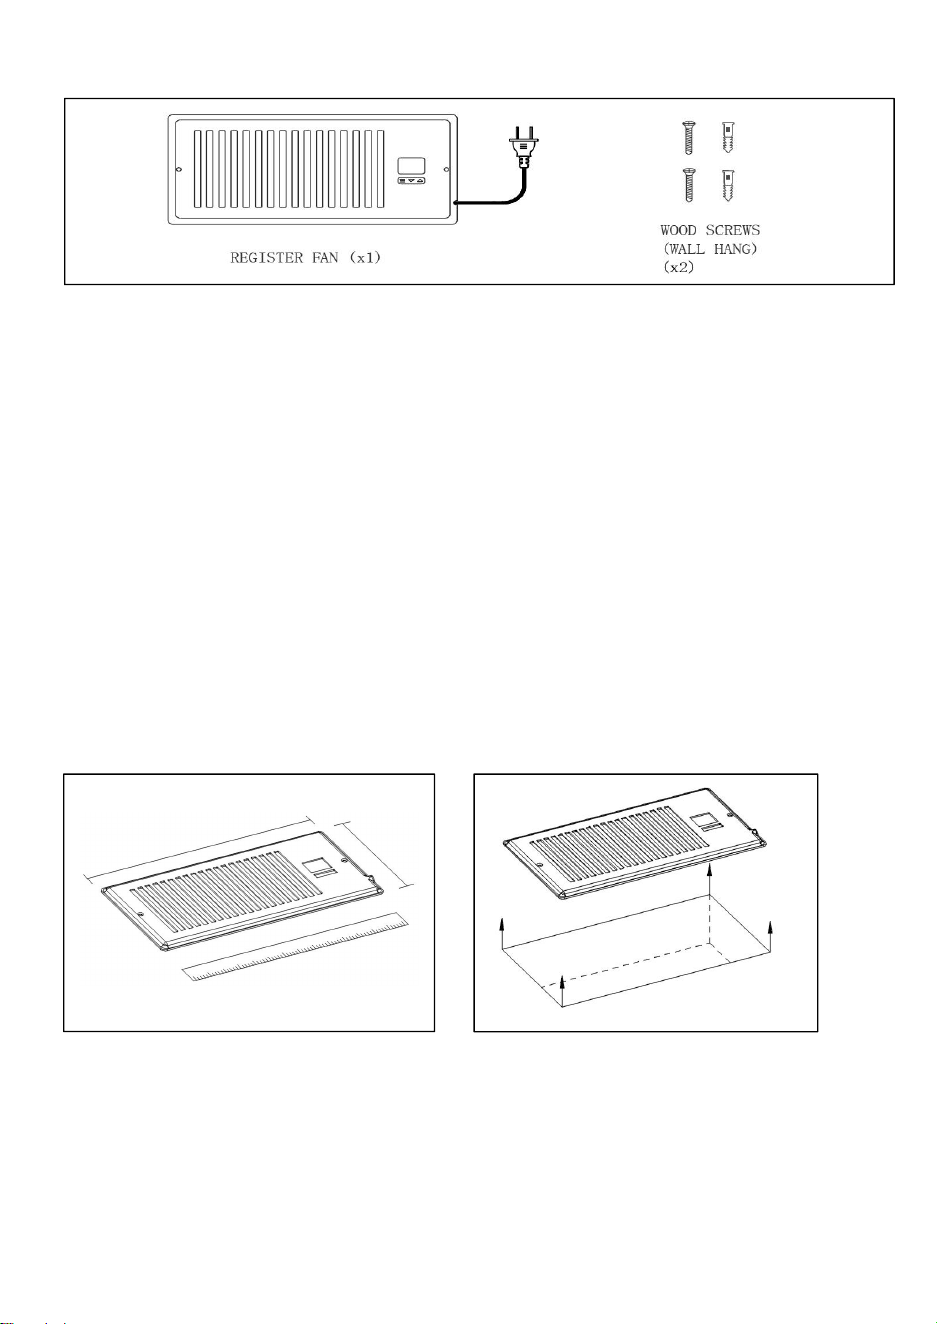
PRODUCT CONTENTS
PWM CONTROL FANS
The system utilizes high-performance DC-motors that are control using
PWM( Pulse Width Modulation) . This technology enables the dual fans to be able
to run smoothly at extremely low RPM speeds without generating motor or
electromagnetic noises. In addition, the fans feature a blade design with a high
static pressure rating, specialized for delivering airflow even in applications where
air movement is being restricted such as through duct work. The motor houses
allow the fan system to be mounted horizontally or vertically.
INSTALLATON
STEP1 :
Measure your fan vent to make sure this model will fit. Standard reference
mechanical dimensions.See the (Fig.0. & Fig.1.)
STEP 2:
Remove your fan grille. You may need to use a Philips screwdriver to remove the
mounting screws.See the (Fig.2.)
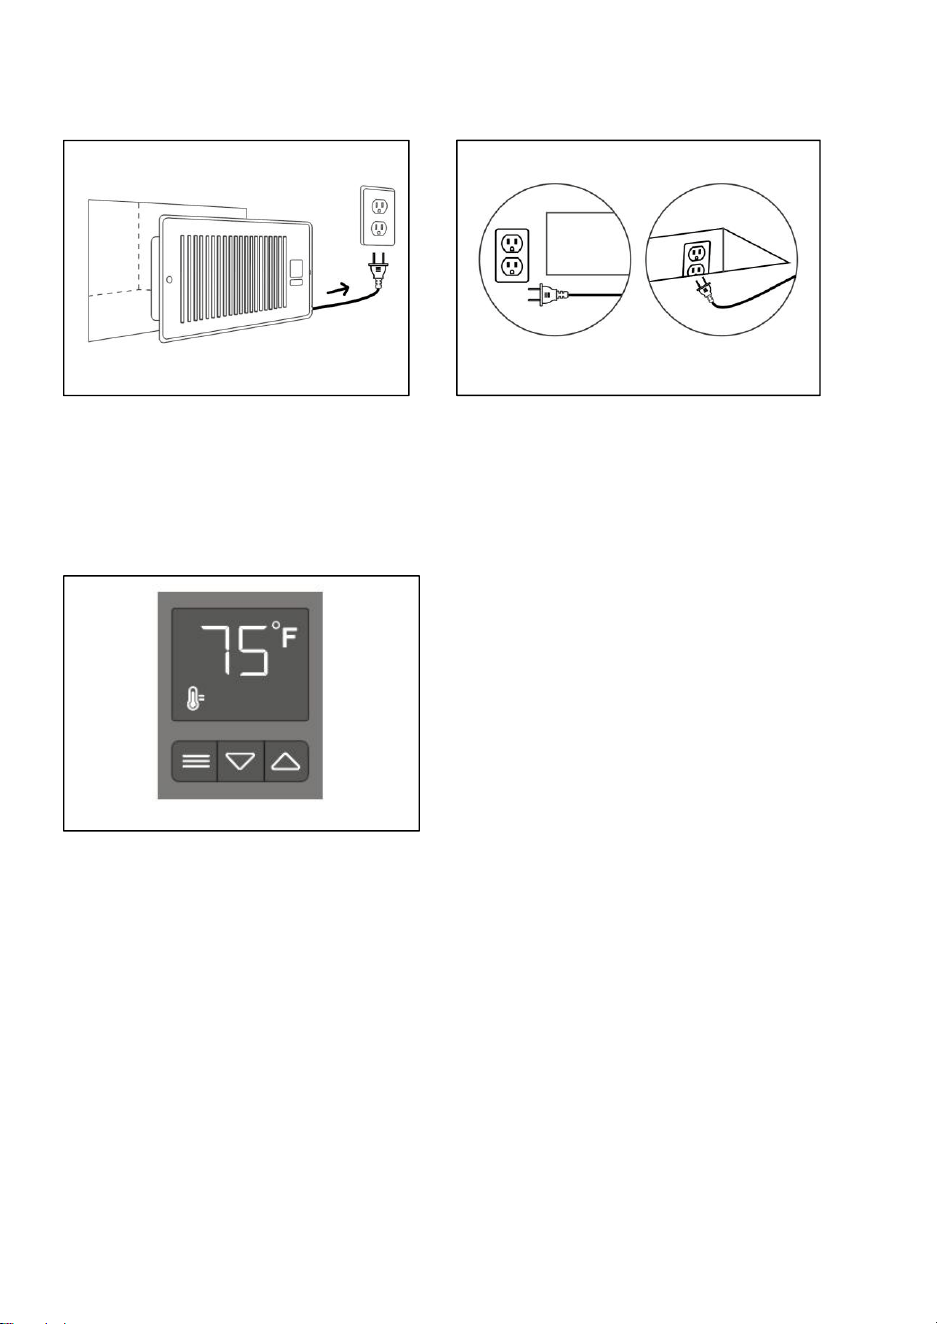
STEP 3:
Plug the power adapter into an outlet. This can be next to your register or inside
your register.See the (Fig.3.)
Fig.1.
Fig.2.
- 6 -
STEP 4:
If you are powering the register fan with an external outlet, Keep the power cord
in the same direction as the external power outlet.See the (Fig.4.)
STEP 5:
Check the display panel to see if it is lit and shows a number reading.See the
(Fig.5.)
STEP 6:
Position the register fan to be mounted. If the outlet is external. make sure the
cord runs through the gap between the wall and mounting plate.See the (Fig6.)
STEP 7:
Drill your existing screws into the mounting holes to secure the register fan. If
needed, use the screws included with your register fan. If the screw holes do not
align, you may need to drill new holes into your wall.See the (Fig.7.)
Fig.3.
Fig.4.
Fig.5
.
- 7 -
INTELLIGENT PROGRAMMING
The controller on each unit features active thermal monitoring that can trigger
fans to run for both cooling and heating temperatures you have set, as well as
automatically adjust fan speeds to respond to varying temperatures. The
controller can also be set to run continuously at speeds manually.
PROGRAMMING GUIDE
This in-depth guide will show you how to program the register booster fan,
featuring cooling and heating triggers that enhances airflow to improve your home
comfort. When programming your fan, it's important to note that the temperature
setting is the activation temperature. That is, it is NOT the temperature you want
your room to be; it triggers based on the airflow temperature coming through
your vents. The register vent booster fan does not adjust according to your
comfort level, nor does it adjust your central AC or heaters setting. Here is a
rundown of how the product works:
1. Your AC/ heater is on your preferred temperature setting.
2. Air blows through your duct, by the fan's probe, and out your register.
Fig.6.
Fig.7.
- 8 -
3. The probe reads the airflow temperature, activating the fan when a trigger is
tripped.
4. The register booster fan exhausts air from your duct to enhance AC/ heater
output.
5. will turn off when the probe detects a higher temperature than the cooling
trigger( lower temp. than the heating trigger).
We recommend establishing the two triggers one at a time to avoid confusion.
When both triggers are active, the vent booster fan can be activated by airflow in
temperatures not meant for your intended trigger For example, 67F may turn on
the fan via cooling trigger when you are just turning on your heater.
If you are using your air conditioner, turn off the heating trigger; if using your
heater, turn off the cooling trigger.
HOW TO PROGRAM
Follow these steps to calibrate your AC vent booster cooling trigger (skip to
heater):
1. Turn on your air conditioner.
2. Set it to a temperature you regularly use.
3. Let it run for a few minutes to let the fan system read a consistent temperature.
4. Press the mode button, then press the" UP Button " Button and “DOWN
Button”meantime, could switch the temperature unit between degrees Celsius( C)
and degrees Fahrenheit(F)
5. Press the mode button to navigate to the cooling trigger(snow- flake symbol).
6. Set the cooling trigger at or above the stabilized temperature indicated by the
temperature display mode.
To calibrate the air vent booster fan's heating trigger:
1. Turn on your heater.
2. Set it Lo a temperature you regularly use.
3. Let it run for a few minutes to let the AlRTAP read a consistent temperature
4. Press the mode button to navigate to the heating trigger( fire symbol). 5. Set the
heating trigger at or below the stabilized temperature indicated by the temperature
display mode.
6. Press the mode button to speed control mode( blade symbol) then press the
UP " DOWN fans speed could be adjust manually from 0 to 10.
- 9 -
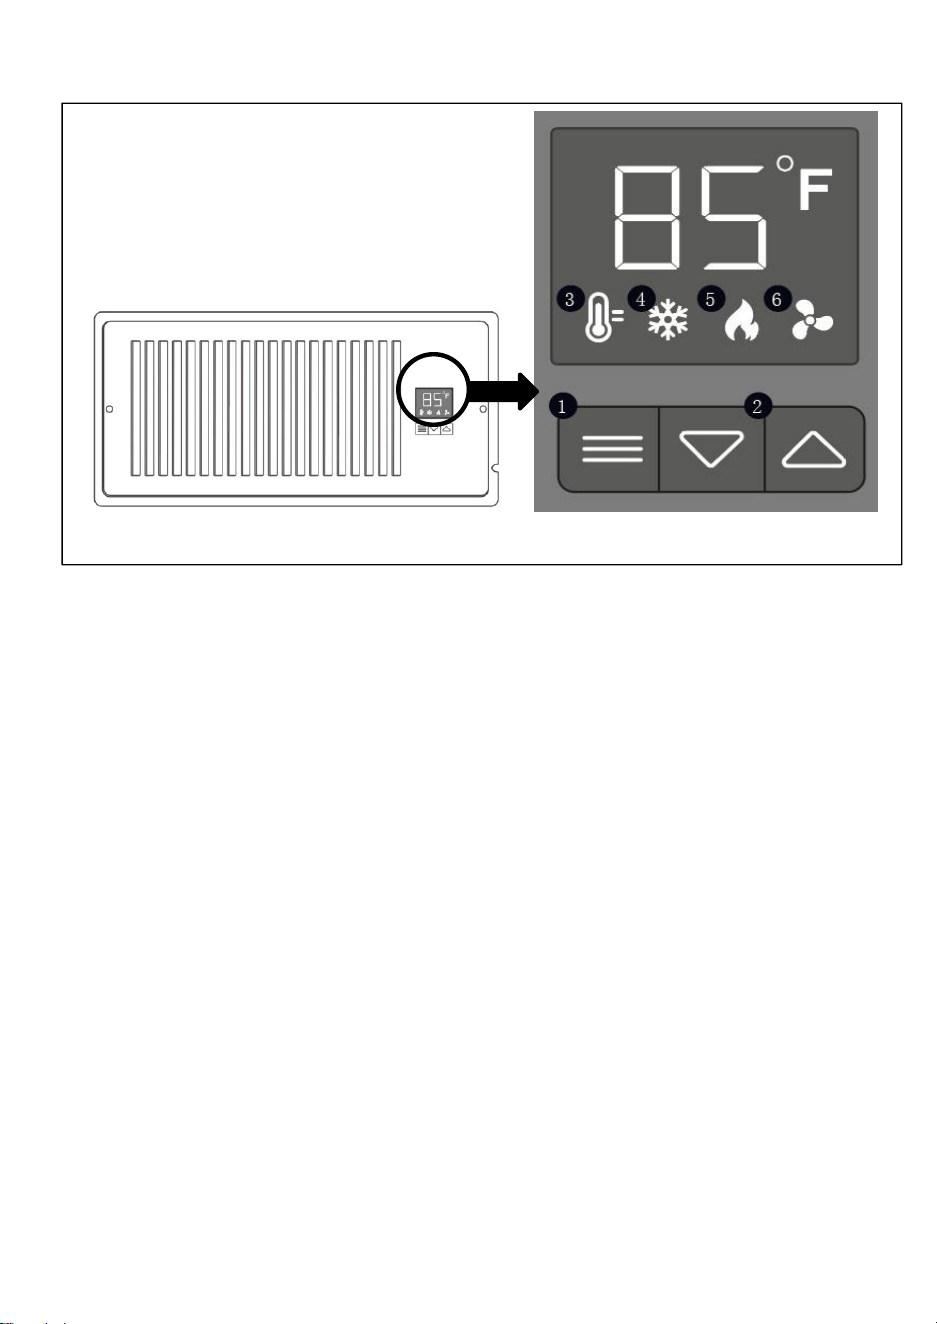
HOW TO USE
USING THE CONTROL PANEL (See the Fig.8.)
1.MODE BUTTON
Cycles through the unit's modes: temperature display, cooling trigger, heat
trigger, and fan speed.
2.UP/ DOWN BUTTON
Changes the temperature setting in the cooling trigger, the heating trigger, and
the fan speed.
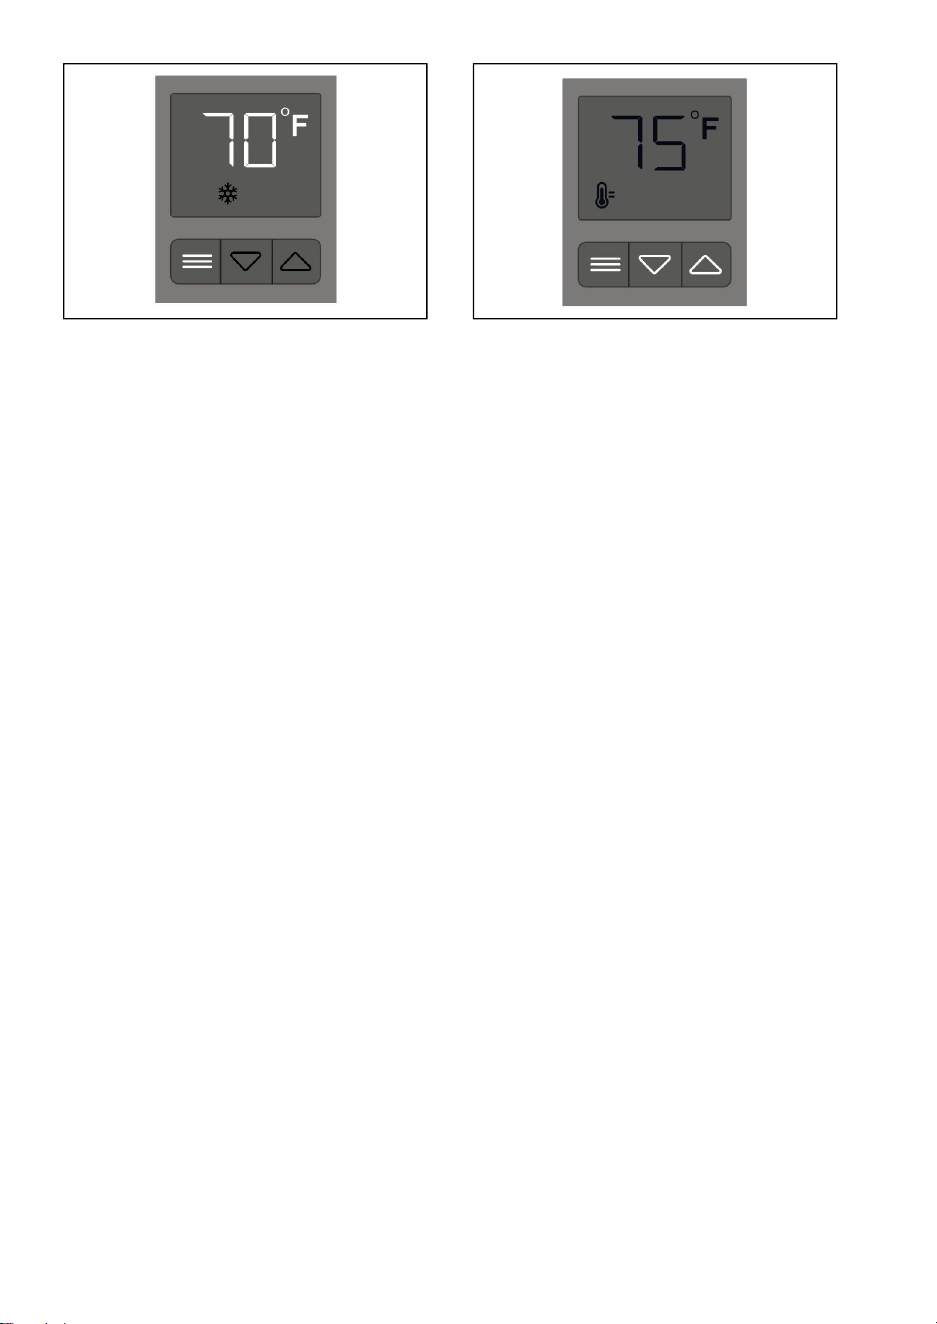
3.TEMPERATTURE DISPLAY
Displays the current temperature that is measured by the probe. Used as the
default display.
This mode displays the airflow temperature measured by the probe. While on this
display mode, the cooling and heating triggers, as well as the max fan speed
setting, are still active unless you disabled them.See the (Fig.9.)
Fig.8.
- 10 -
4.COOLING TRIGGER
Allows you to set a temperature trigger for the fans to run when your air
conditioner system on.
Use this mode to set the temperature trigger for your air conditioner. Please note
you are NOT setting your desired temperature.
In this mode, the fans will run if the probe temperature meets or falls below the
trigger’s cold temperature setting. It will not run if the probe temperature is above
the trigger’s cold temperature setting.Press the up or down buttons to set the
cooling trigger temperature. To calibrate your register booster fans, turn on your
AC and wait for a few minutes until the probe temperature stabilizes. Set your
cooling trigger to this number or higher.See the (Fig.10.)
To avoid confusion, we recommend disabling the cooling trigger when not using
your AC.We also recommend returning to the temperature display mode once you
finish adjusting your cooling trigger.
5.HEATING TRIGGER
Allows you to set a temperature trigger for the fans to run when your central
heating system is on.
Use this mode to set the temperature trigger for your heater. Please note you are
NOT setting your desired temperature.
In this mode, the fans will run if the probe temperature meets or rises above the
trigger’s hot temperature setting. It will not run if the probe temperature is below
the trigger’s hot temperature setting.
Press the up or down buttons to set the heating trigger temperature. To calibrate
your register booster fans, turn on your heater and wait for a few minutes until the
probe temperature stabilizes. Set your heating trigger to this number or lower.See
the (Fig.11.)
To avoid confusion, we recommend disabling the heating trigger when not using
your heater. We also recommend returning to the temperature display mode once
you finish adjusting your heating trigger.
Fig.9 .
Fig.10 .
- 11 -
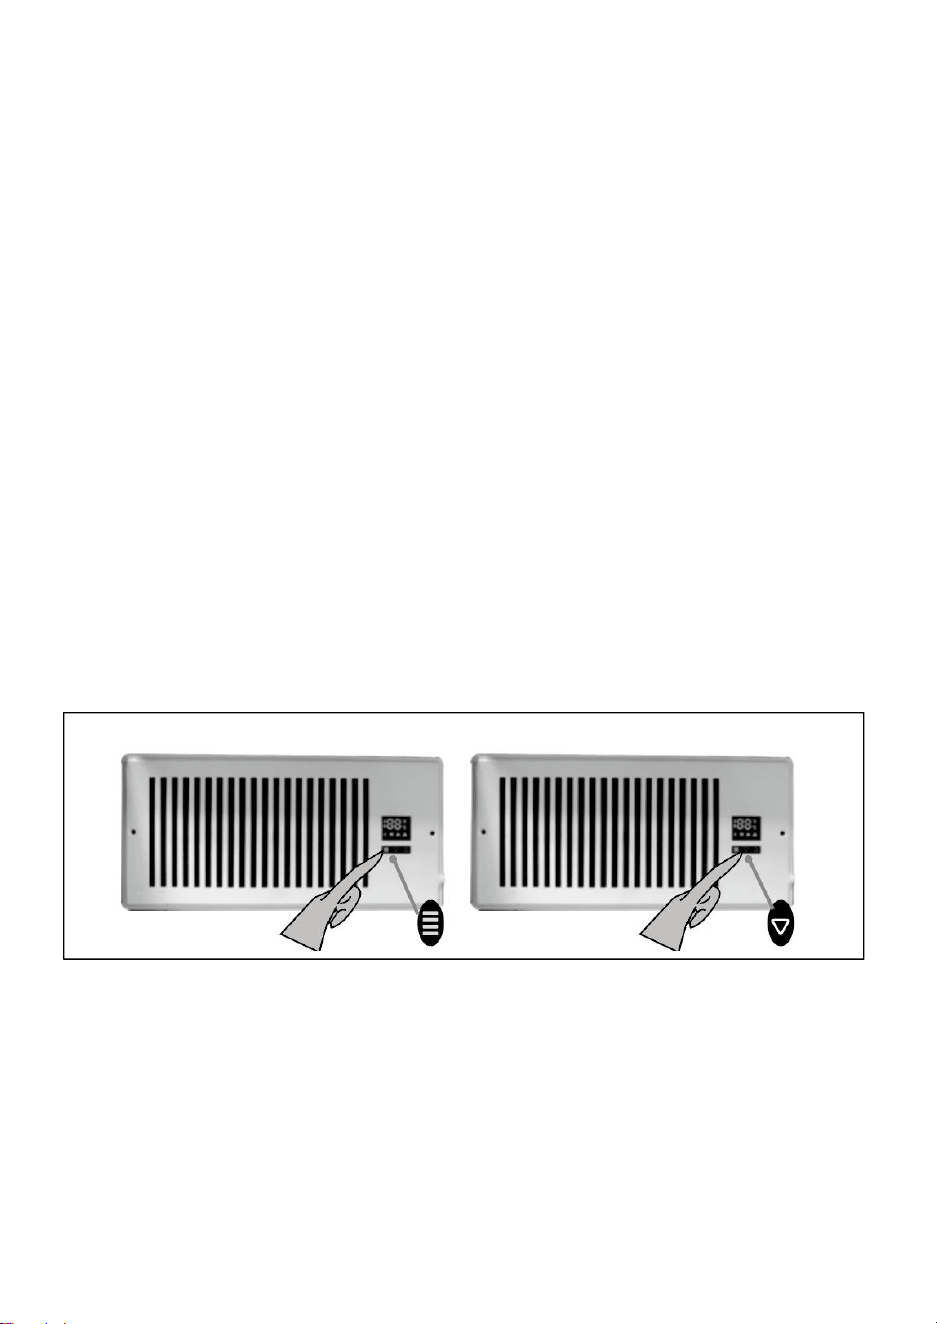
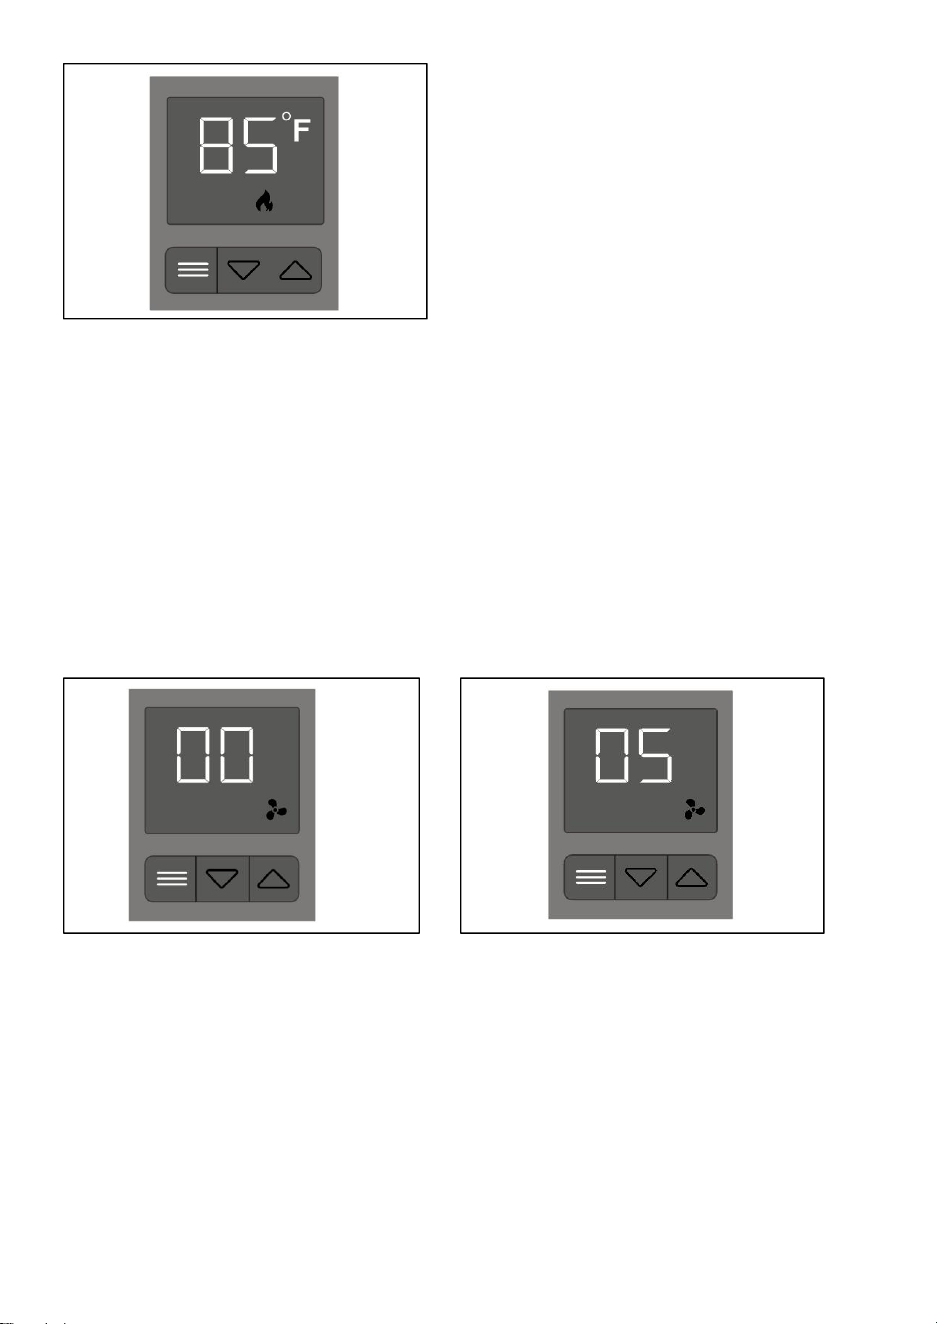
6. FAN SPEED
Sets the fans maximum running speed when the cooling or heating triggers are
tripped to run.
This mode allows you to set a maximum fan speed in which they will actively run
until you leave it. Pressing up or down will change the fan speed and determine
the level of airflow boosting. See the (Fig.12.)
Pressing up or down until the fan speed is 0, and the fan will stop running. See the
(Fig.13.)
Keep in mind the faster the fans spin, the louder they will be.
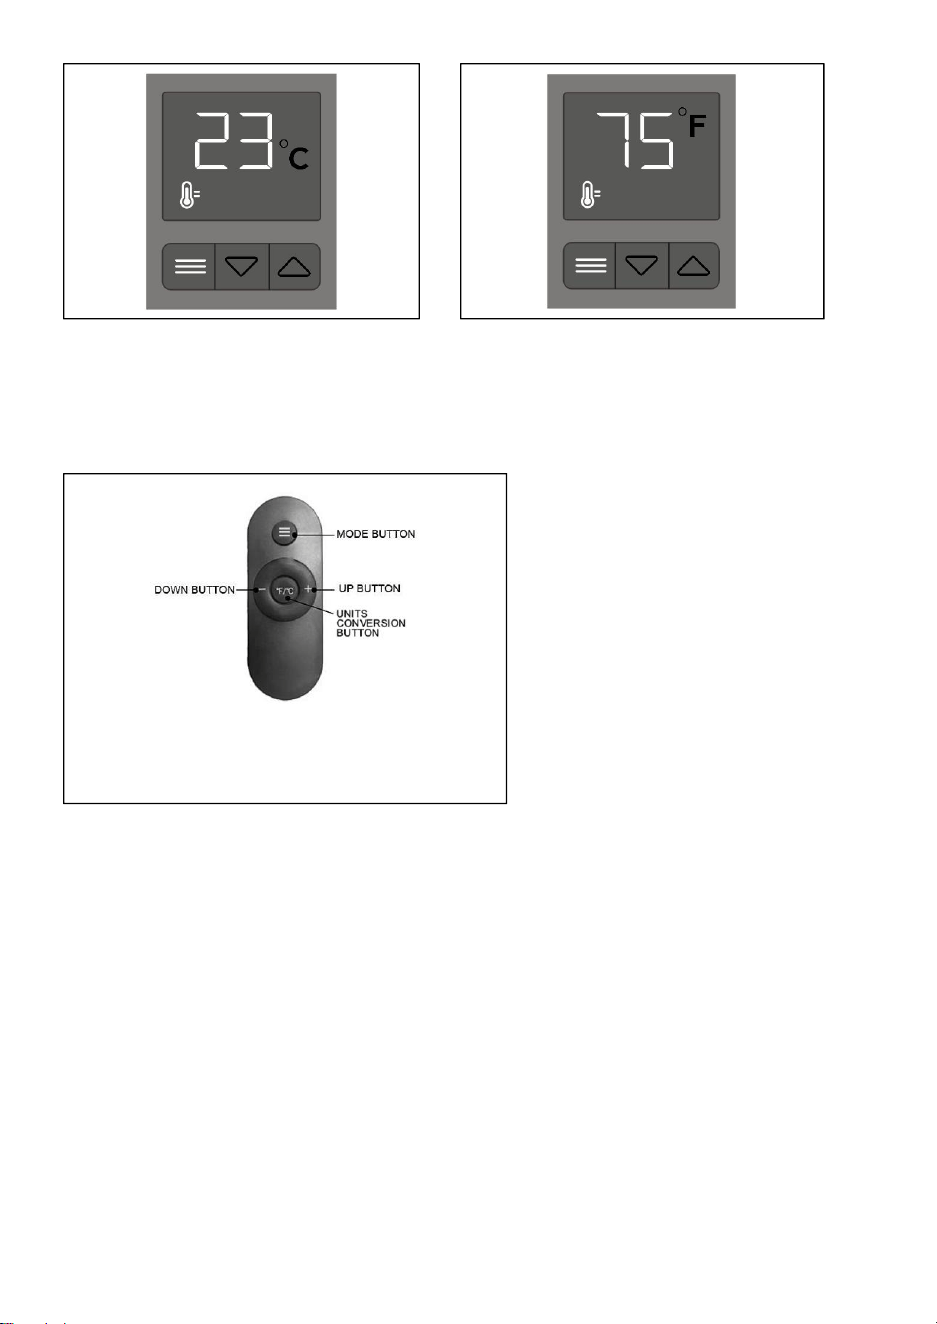
7.FAHRENHEIT OR CELSIUS
To change the temperature scale between Fahrenheit and Celsius, hold the up
and down buttons simultaneously until the letters change. All digits displayed will
be automatically converted to the designated scale.(Fig.14. & Fig.15.)
Fig.11.
Fig.12.
Fig.13.
- 12 -
8.USING THE REMOTE CONTROL
See the button functions as they appear on the remote control in: (Fig.16.)
TIPS : Code matching. The code can be operated normally.
1. MODE BUTTON: Switch mode key of panel key 1 corresponding to switch
mode key.
2. DOWN BUTTON: The remote control "-" corresponds to the second key "-" of
the panel key.
3. UP BUTTON: The "+" on the remote control corresponds to the third key "+" on
the panel key.
4. UNITS CONVERSION BUTTON: The middle key of the remote control
corresponds to the "° C" and "° F" switching keys, which correspond to the
function of pressing "-" and "+" simultaneously on the circuit board (Note that
switching between "° C" and "° F" is to press this key to switch when there is a
temperature display.)
Fig.16.
Fig.14.
Fig.15.

- 13 -
FAQ
Q : Will I be able to mount this fan on my ceiling?
A : For safety reasons, we do not recommend mounting the AIRTAP on your
ceiling.
Q : Will I be able to mount this fan on a baseboard style register?
A : No. Because of the tilted design, the AIRTAP will not have the clearance to be
properly mounted.
Q : My register is bigger than my fan's rear insert. How can I fit this fan onto my
register?
A : We can only recommend using the appropriately sized AIRTAP fan for your
register.
Q : Does this register booster fan have fittings to use a filter with?
A : This product is not specifically designed to be used with filters.
Q : Can I reverse this fan's airflow?
A : The AIRTAP's boosted airflow cannot be reversed, nor can the fans be flipped.
Q : What temperature is the register booster fan detecting?
A : The AIRTAP's backside probe reads the airflow temperature of your register
vent. Please note this temperature may vary from your home thermostat's reading.
Q : My register booster fan is too loud. How do I decrease the fan noise?
A : To minimize the noise coming from the AIRTAP, decrease the maximum fan
speed. Refer to FAN SPEED.
Q : My fan is constantly running when I don't need it to. How do I turn it off?
A : Disable the trigger you are not using by pressing up or down until the fan
speed is 0, and the fan will stop running.