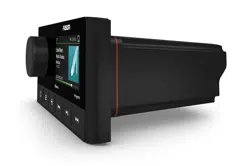

FUSION APOLLO
™
MS-ERX400
MARINE WIRED REMOTE

© 2020 Garmin Ltd. or its subsidiaries
All rights reserved. Under the copyright laws, this manual may not be copied, in whole or in part, without the written consent of Garmin. Garmin reserves the right to change
or improve its products and to make changes in the content of this manual without obligation to notify any person or organization of such changes or improvements. Go to
support.garmin.com for current updates and supplemental information concerning the use of this product.
Garmin
®
, Garmin BlueNet
™
, the Garmin logo, Fusion
®
, and the Fusion logo are trademarks of Garmin Ltd. or its subsidiaries, registered in the USA and other countries. Fusion
PartyBus
™
and Fusion Apollo
™
are trademarks of Garmin Ltd. or its subsidiaries. These trademarks may not be used without the express permission of Garmin.
Apple
®
and AirPlay
®
are trademarks of Apple Inc., registered in the U.S. and other countries. Android
™
is a trademark of Google Inc. BLUETOOTH
®
word mark and logos are owned by
the Bluetooth SIG, Inc. and any use of such marks by Garmin is under license. All rights reserved. Other trademarks and trade names are those of their respective owners.

Table of Contents
Getting Started................................. 1
Controls................................................... 1
Using the Dial to Select Items.............3
Entering Text........................................ 3
Remote Control Screen........................... 3
Naming the Device.................................. 4
Setting the Home Zone........................... 4
Selecting a Source.................................. 4
Adjusting the Backlight Brightness........ 4
Adjusting the Volume..............................5
Muting all Connected Stereos............ 5
Adjusting the Subwoofer Level........... 5
Maintaining Individual Zone Volume
Levels................................................... 5
Turning Off Devices on the Network...... 5
Fusion PartyBus Networking.............6
Creating a Group..................................... 6
Editing a Group........................................ 6
Leaving a Group...................................... 6
Grouped Stereo Functions...................... 7
Grouped Stereo Source
Considerations........................................ 7
Group Synchronization........................... 7
Enabling Group Synchronization........ 8
General Settings............................... 8
Update Options........................................8
Network Settings..................................... 8
Setting the Device as a DHCP
Client.................................................... 9
Setting a Static IP Address................. 9
Resetting Network Settings................ 9
More Information............................. 9
Registering Your Fusion Device............. 9
Cleaning the Device.................................9
Software Updates................................. 10
Updating the Remote Control Software
Using a USB Flash Drive....................10
Updating the Remote Control Software
Using the Fusion Audio App............. 11
Updating the Software as Part of a
Garmin Network Update................... 11
Troubleshooting.................................... 11
The stereo does not respond to key
presses...............................................11
Network Troubleshooting................. 12
Software Update Troubleshooting... 12
Specifications........................................13
Dimensions............................................ 14
Table of Contents i

Getting Started
WARNING
See the Important Safety and Product Information guide in the product box for product warnings and other
important information.
The ERX400 wired remote control is an optional accessory for compatible Fusion
®
stereos. For a list of
compatible stereos, go to garmin.com/account/register/ or consult your Fusion dealer.
To help you understand how the remote control works, this manual contains general operational instructions
and information about settings for the remote control. The available features and functions of the remote
control vary based on the stereo you are controlling and the types of sources connected to the stereo. For
specific information about your stereo, and instructions for controlling and customizing the sources on your
stereo, download the stereo owner's manual on the Fusion website.
NOTE: This remote control must be connected to a Fusion PartyBus
™
network or directly to a compatible Fusion
and configured correctly. See the installation instructions provided with the remote control and with the other
stereos on the network for network installation and configuration instructions.
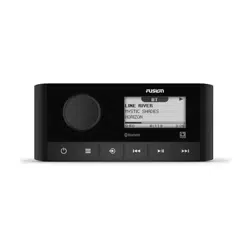
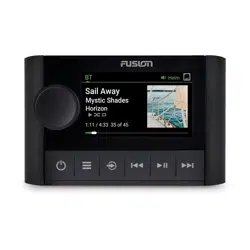
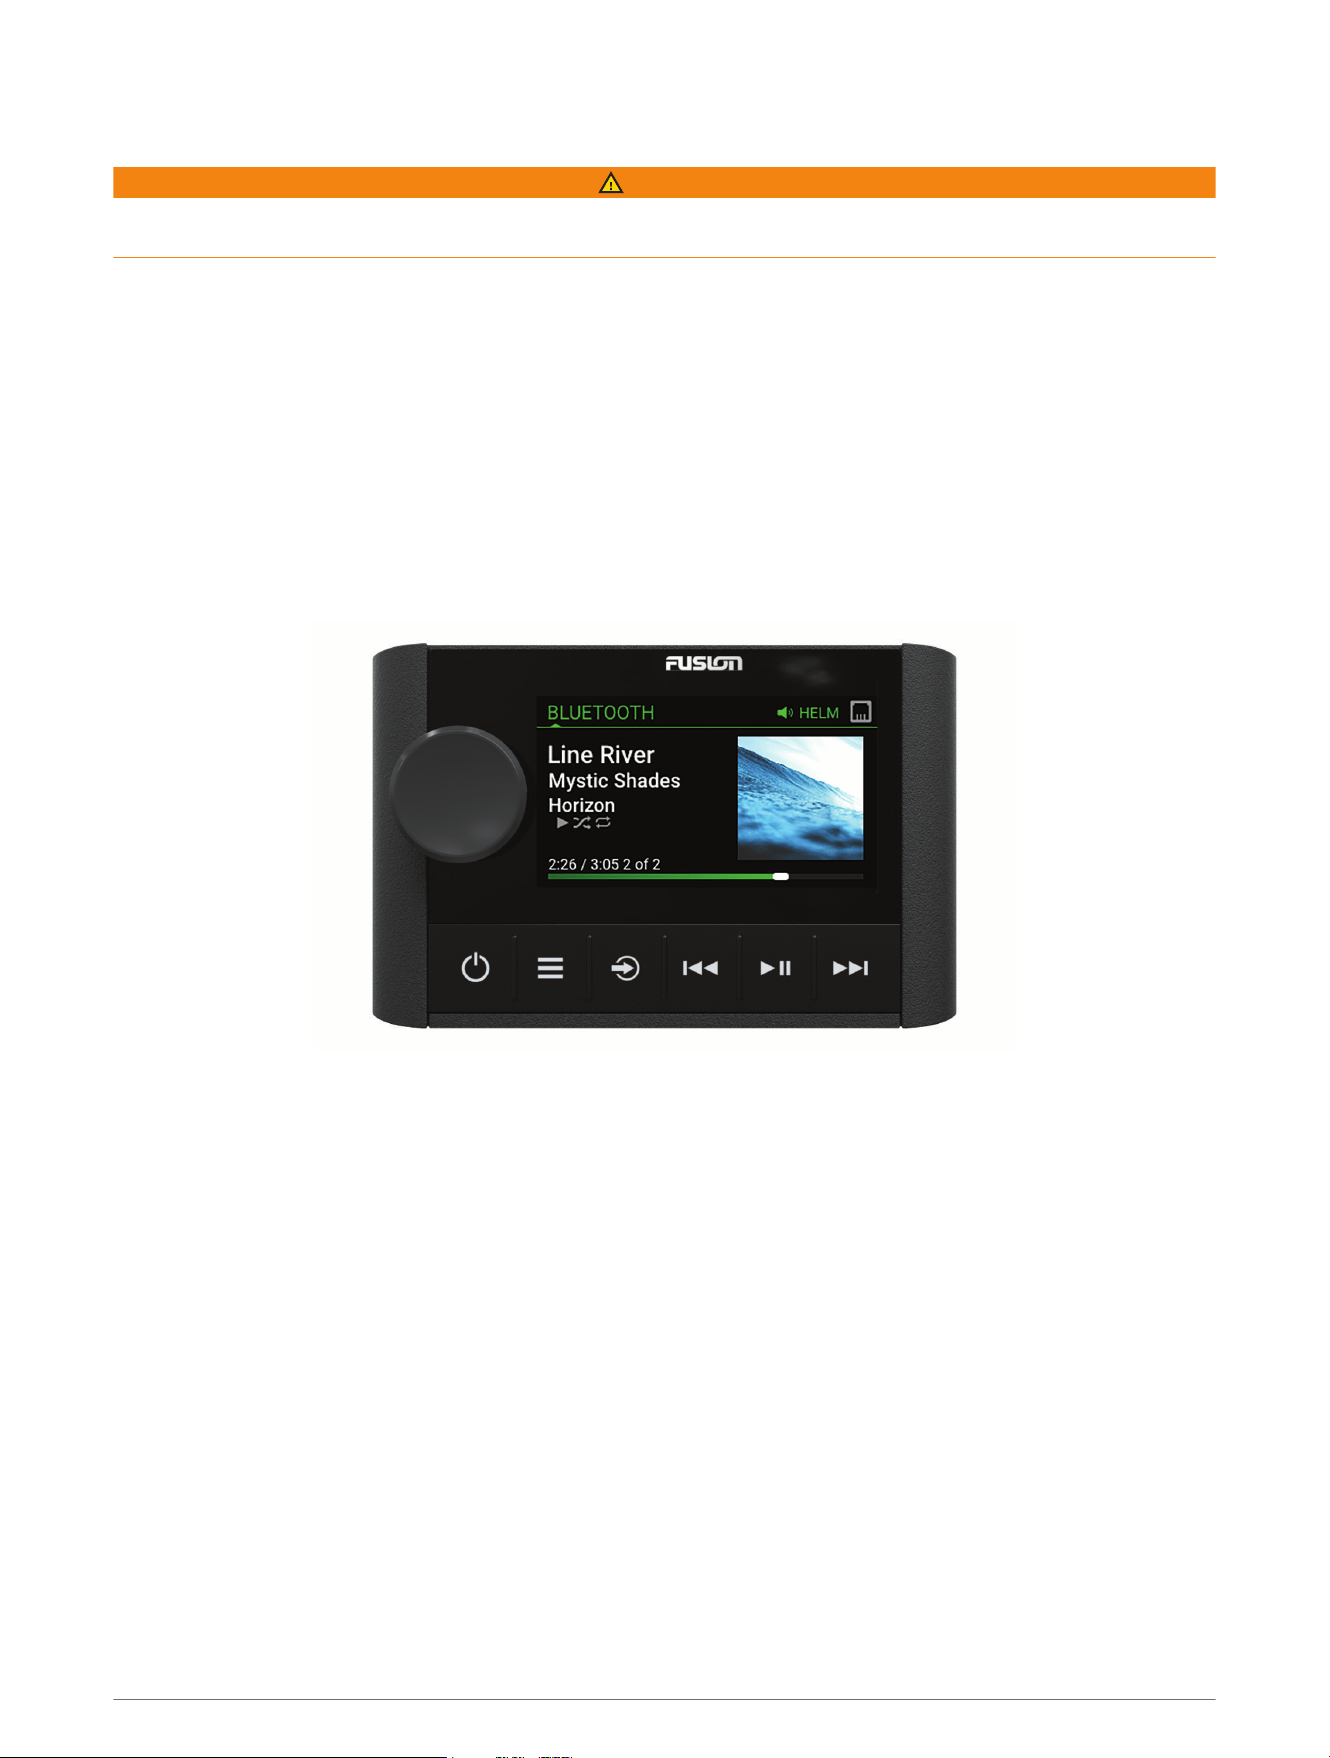
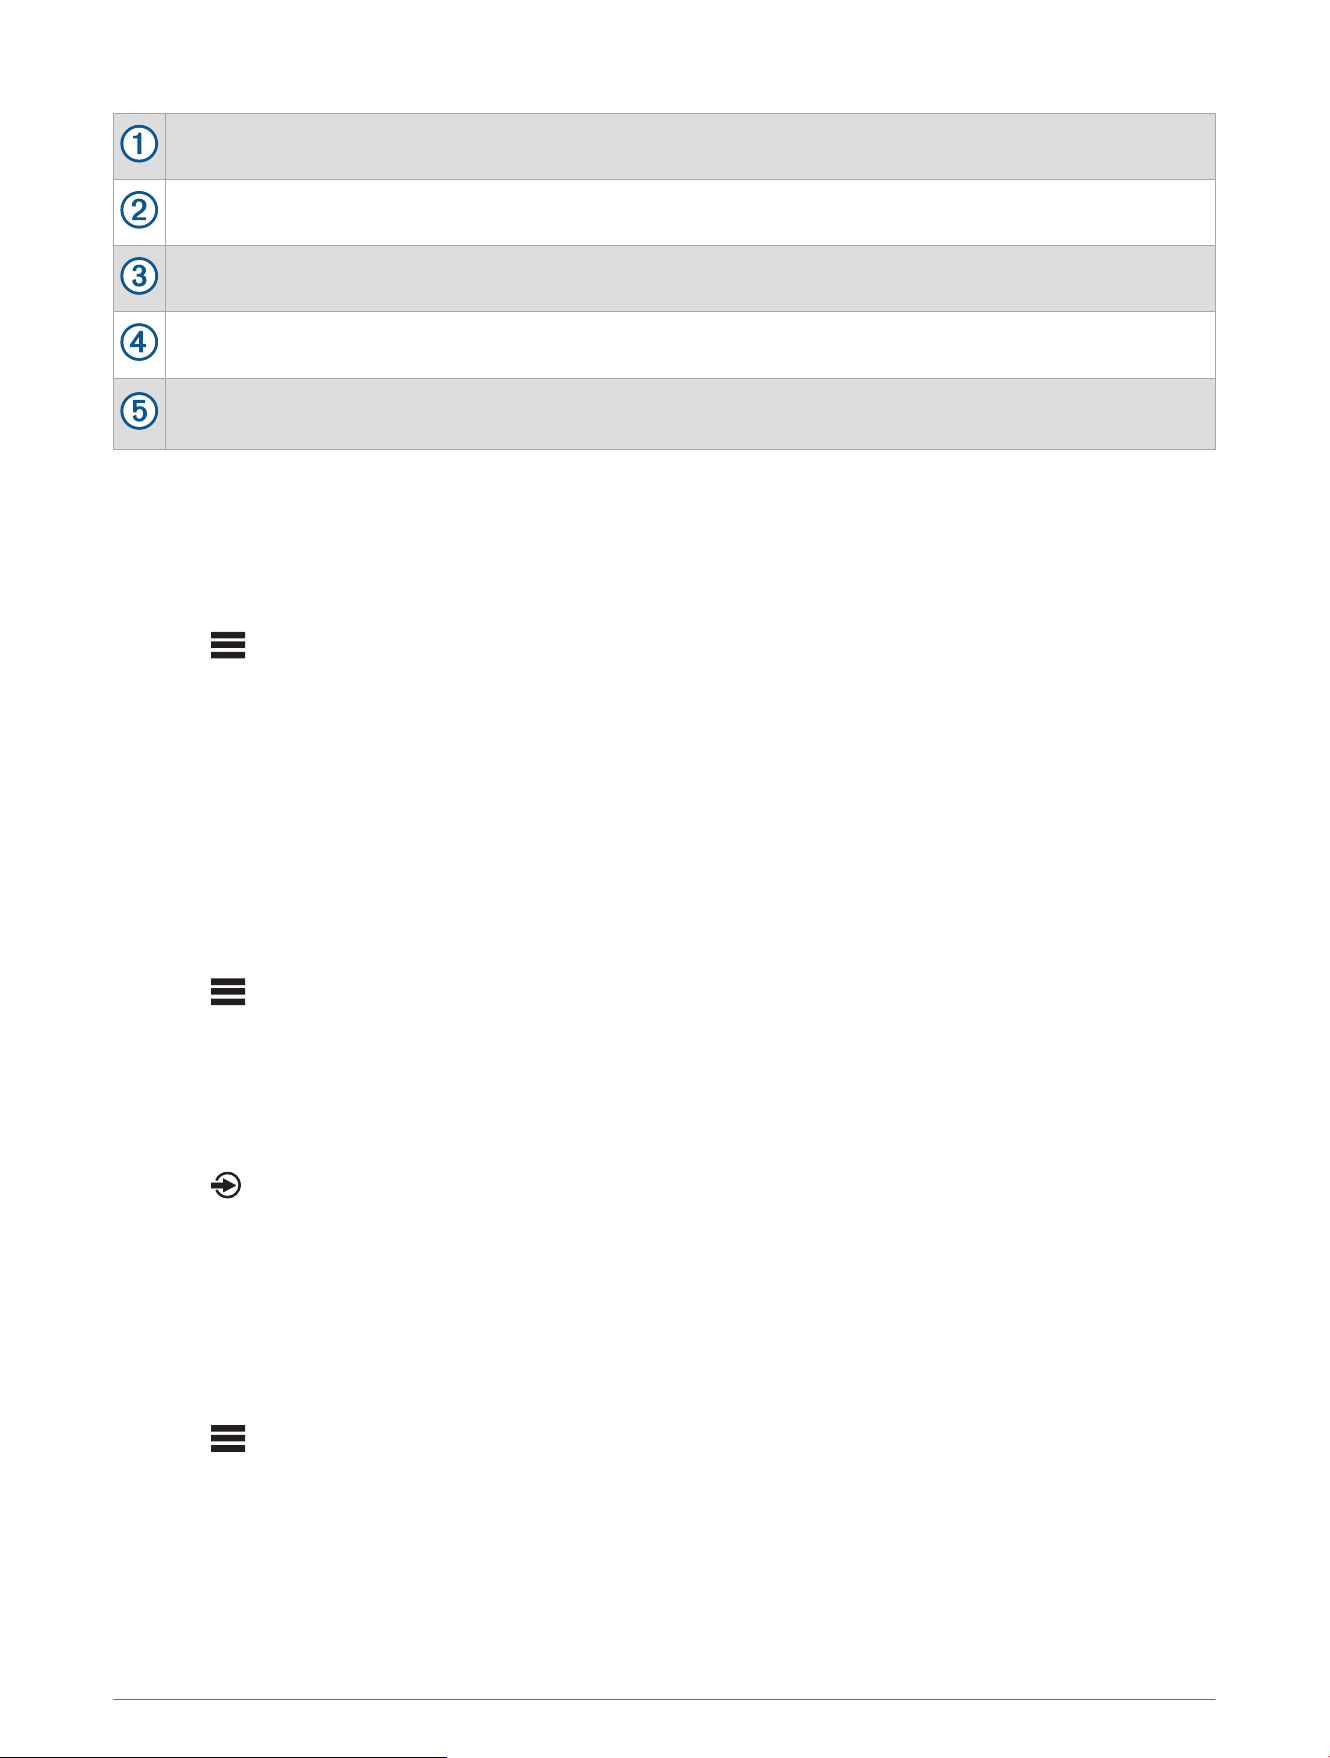
Controls
Getting Started 1
Dial
• Turn to adjust the volume.
• When adjusting the volume, press to switch between zones.
• Turn to move through the menus or adjust a setting.
• When in a menu, press to select the highlighted option.
• Press and hold to activate certain functions such as opening the radio presets or muting all connected
stereos from the mute screen (Muting all Connected Stereos, page5).
• Press to turn on the remote control.
• Press to mute and un-mute the audio.
• Press and hold to turn off the stereo or all stereos on the network.
• Press and hold for longer than 10 seconds to reset the remote control.
NOTE: The stereo turns on and off when you turn the connected remote control on or off.
• Press to open the menu.
• Press to return to the previous screen from the menu.
• Press and hold to exit the menu.
Press to select a source.
TIP: You can turn the dial to browse, and press the dial to select the source.
Press and hold to open the GROUPS menu when connected to a Fusion PartyBus network (Fusion
PartyBus Networking, page6).
• Press to skip to the previous track, when using an applicable source.
• Press and hold to rewind the track when using an applicable source.
• AM/FM:
◦ Press to tune to the previous station or preset.
◦ Press and hold for faster tuning (manual mode only).
• AUX: Press to decrease the gain.
• SIRIUSXM source:
◦ In Live Mode, press to tune to the previous station or preset.
◦ In Live Mode, press and hold for faster tuning, in Manual mode only.
◦ In Replay Mode, press to skip to the previous track.
◦ In Replay Mode, press and hold to rewind the current track.
• DAB source:
◦ Press to return to the previous DAB station in the ensemble. When you reach the beginning of the
current ensemble, the stereo automatically changes to the last available station in the previous
ensemble.
◦ Press and hold to return to the previous DAB ensemble.
• BLUETOOTH or USB: Press to pause or resume the current track.
• AM/FM:
◦ Press to cycle through the tuning modes (auto, manual, and presets).
◦ Press and hold to save the current station as a preset.
• SIRIUSXM source:
◦ Press and hold to switch between Replay Mode and Live Mode.
◦ In Live Mode, press to cycle through the tuning modes (Manual, Category, and Preset).
◦ In Replay Mode, press to pause and play.
• DAB:
◦ Press to switch between manual tuning mode and presets.
◦ Press and hold to scan for DAB stations.
• Press to skip to the next track, when using an applicable source.
• Press and hold to fast-forward the track when using an applicable source.
• AM/FM:
2 Getting Started
◦ Press to tune to the next station or preset.
◦ Press and hold for faster tuning (manual mode only).
• AUX: Press to increase the gain.
• SIRIUSXM source:
◦ In Live Mode, press to tune to the next station or preset.
◦ In Live Mode, press and hold for faster tuning, in Manual mode only.
◦ In Replay Mode, press to skip to the next track, if applicable.
◦ In Replay Mode, press and hold to fast-forward the current track, if applicable.
• DAB source:
◦ Press to advance to the next DAB station in the ensemble. When you reach the end of the current
ensemble, the stereo automatically changes to the first available station in the next ensemble.
◦ Press and hold to advance to the next DAB ensemble.
Using the Dial to Select Items
You can use the dial to highlight and select items on the screen.
• Turn the dial to highlight an item on the screen.
• Press the dial to select the highlighted option.
Entering Text
1 In a field that allows you to enter text, select to erase the existing characters.
2 If necessary, select or to use numerals, symbols, or lower-case letters when available.
3 Turn the dial to choose a character, and press the dial to select it.
4 Select to save the new text.
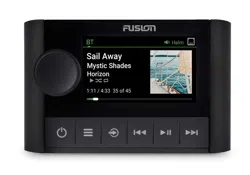
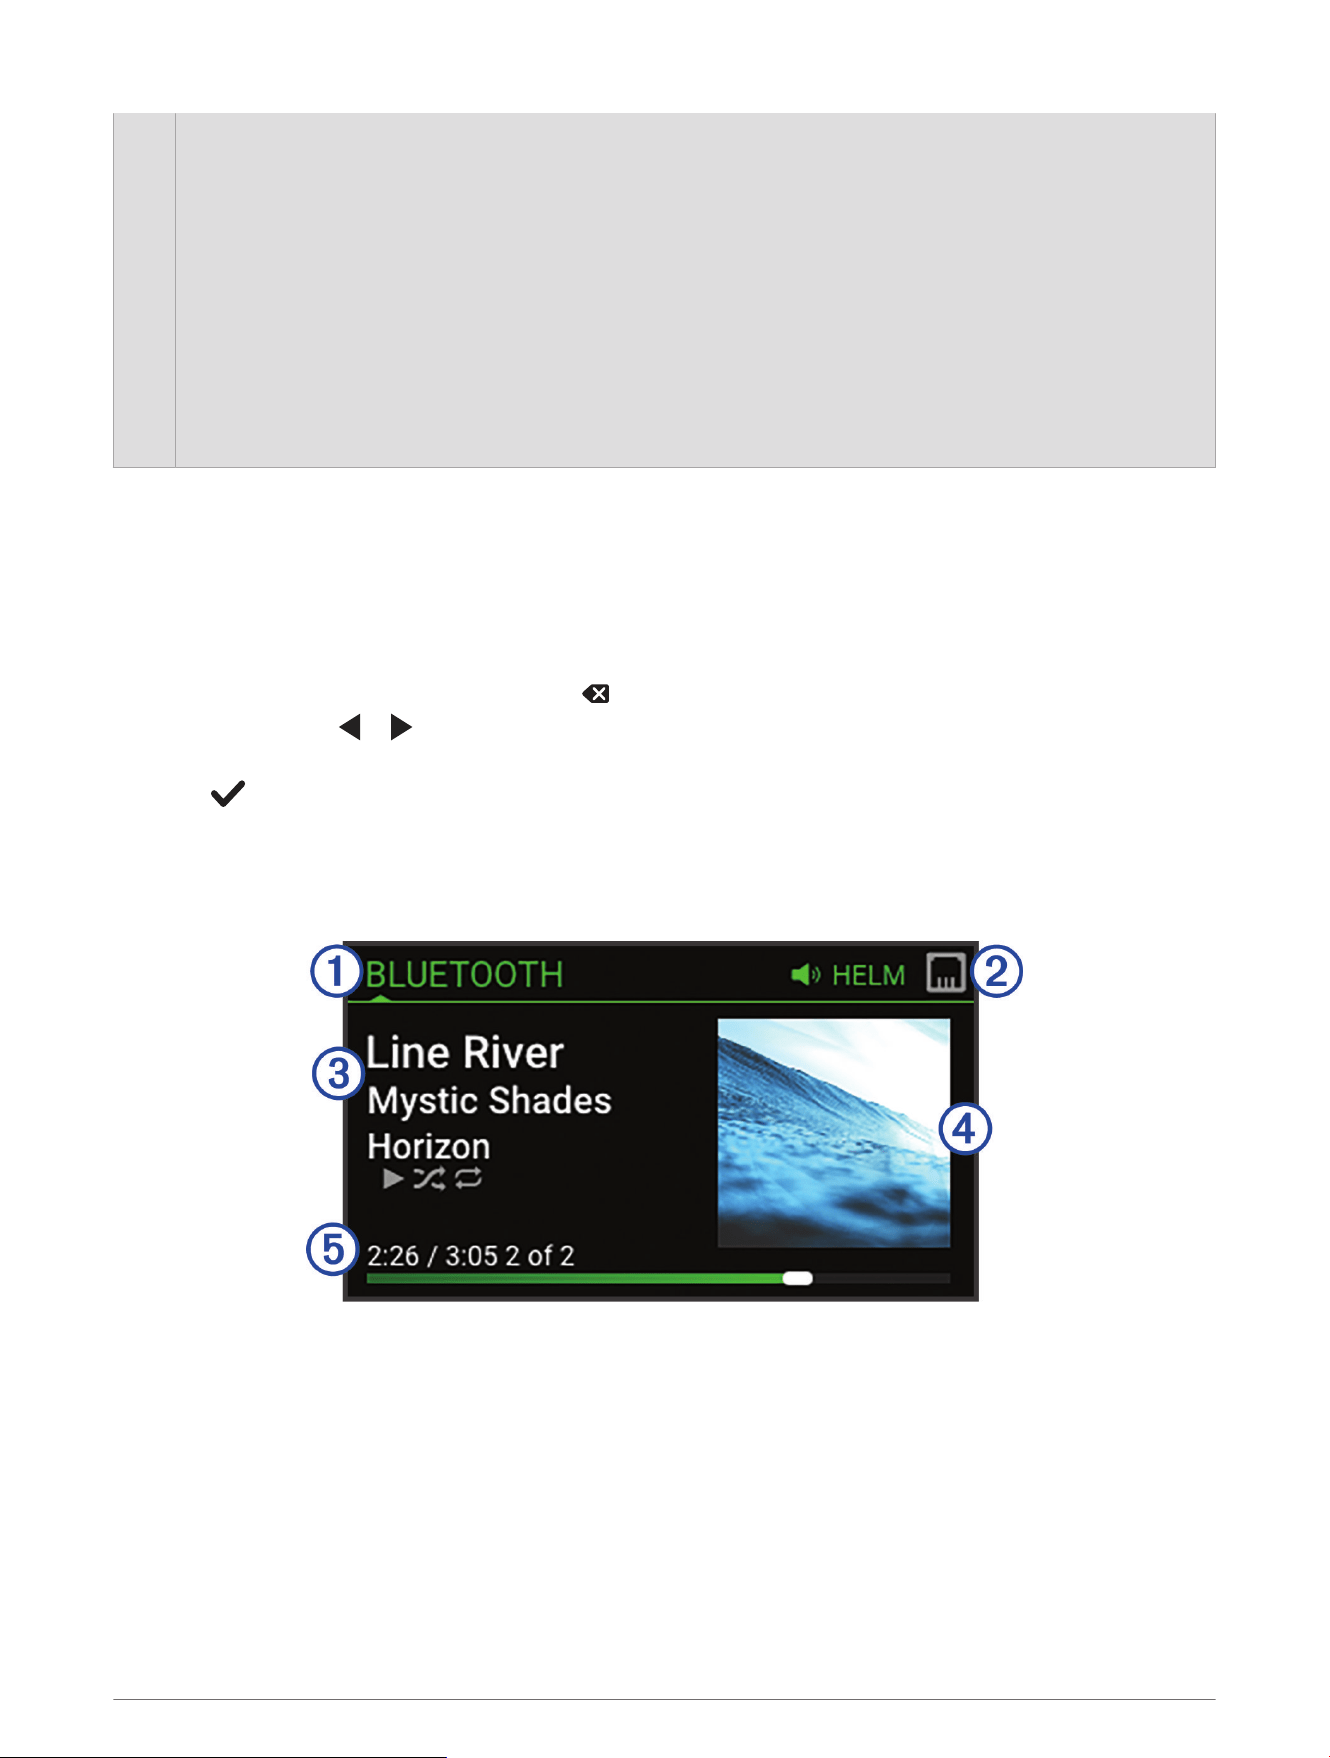
Remote Control Screen
The information displayed on the screen varies depending on the source selected. This example shows a track
playing on a device connected using Bluetooth
®
wireless technology.
Getting Started 3
Source name
Active zone and status icons (Network Status Icons, page12)
Track details (if available)
Album art (if available from a compatible source)
Elapsed time, track duration, and the current track number out of the total number of tracks in the playlist
(if available)
Naming the Device
You should provide a unique name for this device so you can easily identify it when viewing devices on the
Fusion PartyBus network.
NOTE: For further customization, you can provide unique names for the sources on each stereo and turn off
unused sources. For more information, see the stereo owner's manual.
1 Select > SETTINGS.
2 Select the device to rename.
3 Select DEVICE NAME, and select an option:
• Select a pre-defined name from the list.
• Select CUSTOM NAME, and enter a unique name for the device.
Setting the Home Zone
The home zone is the speaker zone that you adjust by default when you turn the dial on the remote control.
The home zone can be assigned to any speaker zone on a compatible stereo on the Fusion PartyBus network.
When you set a home zone on the remote control, the remote control will be associated with that stereo for
playback control as the default.
1 Select > SETTINGS.
2 Select the name of this remote control.
3 Select ASSIGN HOME ZONE.
4 Select a zone.
Selecting a Source
1 Select .
2 Turn the dial to highlight a source.
NOTE: If the device is part of a group, continue turning the dial to access the sources on other devices in the
group (Fusion PartyBus Networking, page6).
If a source cannot be shared with the group, it will appear gray and you cannot select it.
3 Press the dial to select the source.
Adjusting the Backlight Brightness
1 Select > BRIGHTNESS.
2 Adjust the brightness level.
NOTE: You can adjust the backlight brightness on this remote control only. If you want to adjust the
brightness on other remote controls or stereos on the network, you must adjust the setting from each remote
control or stereo directly.
4 Getting Started

Adjusting the Volume
Using this remote control, you can control the volume of any zone on any stereo connected to the Fusion
PartyBus network.
1 Turn the dial to adjust the volume for the home zone on the stereo.
2 If necessary, press the dial to switch between zones.
NOTE: If a stereo is part of a group, you can adjust the volume of all stereos in the group or individual zones
on each stereo (Fusion PartyBus Networking, page6).
Muting all Connected Stereos
You can quickly mute the audio from this stereo or from all stereos connected to the Fusion PartyBus network
(Fusion PartyBus Networking, page6).
1 From any source, press .
The mute symbol appears and audio from this stereo is silenced.
NOTE: If the stereo is part of a group, the audio from all grouped stereos is silenced.
2 Press and hold the dial to select MUTE SYSTEM.
Audio from all connected stereos is silenced.
3 Press and hold the dial to select UNMUTE SYSTEM.
Audio is restored to all connected stereos.
Adjusting the Subwoofer Level
You can adjust the subwoofer level for each zone.
1 Press the dial, and select a zone with a connected subwoofer.
2 Press and hold the dial.
The SUB LEVEL adjustment for the zone appears.
3 Adjust the subwoofer level and press the dial to set it.
Maintaining Individual Zone Volume Levels
If you adjust the volume levels of individual zones so that some zones are louder than others, the individual
zone volume settings are all affected when you adjust the volume for ALL zones. By default, if you adjust the
volume for ALL to 00, this sets of the volume levels for all zones to 00 and resets all individual zone volume
adjustments. You can enable the KEEP VOLUME RATIOS option to retain individual zone volume adjustments
when you adjust the volume for ALL to 00.
NOTE: This setting applies to volume adjustments on the stereo or a connected ERX400 remote control only.
If you adjust the volume on the stereo using a connected chartplotter or NRX remote control, the volume levels
will still be reset.
TIP: For the best results when enabling this setting, you should set the power-on volume limit on the home zone
stereo to 24. See the stereo Owner's Manual for more information.
1 Select > SETTINGS.
2 Select the name of the remote control.
3 Select KEEP VOLUME RATIOS.
Turning Off Devices on the Network
You can turn off this remote control and home zone stereo or you can turn off all devices connected to the
network.
1 Hold .
2 Select an option:
• Select TURN OFF: to turn off this remote control and its assigned home zone stereo.
• Select ALL OFF to turn off all devices connected to the network.
Getting Started 5

Fusion PartyBus Networking
The Fusion PartyBus networking feature allows you to connect multiple compatible stereos together on a
network, using a combination of wired or wireless connections.
NOTE: When you connect a Fusion stereo to Garmin BlueNet
™
network or a Garmin
®
Marine Network, you are
limited to using only Garmin and Fusion devices. You may not be able to use third-party routers, storage devices,
or other network products with this stereo directly.
TIP: When the stereo is connected to a Garmin BlueNet network or a Garmin Marine Network, you can connect
a mobile device to a wireless access point on a connected Garmin chartplotter and use the Fusion Audio app to
control the stereo.
You can group a compatible stereo, such as the Fusion Apollo RA670 stereo, with other compatible stereos
connected to the Fusion PartyBus network. Grouped stereos can share available sources and control media
playback on all of the stereos in the group, which allows for a synchronized audio experience across the vessel.
You can quickly create, edit, and break up groups as needed from any compatible stereo or remote control on
the network.
You can use compatible stereos and remote controls, whether they are grouped or not, to adjust the volume of
the available speaker zones for any stereo on the network.
You should refer to the installation instructions provided with your remote control when constructing the Fusion
PartyBus network.
Creating a Group
Before you can create a group, you must connect multiple compatible stereos to the Fusion PartyBus network.
See the installation instructions provided with your stereo for information about installing and configuring the
network.
NOTE: There are some limitations and other considerations when using stereos in groups. See Grouped Stereo
Source Considerations, page7for more information.
1 Select > GROUPS.
TIP: You can hold from any screen to open the GROUPS menu.
2 Select the name of the stereo you want to be the primary stereo in the group.
3 Select the stereos you want to add to the group.
4 Select DONE.
From the source screen, you can select a source from any stereo in the group except a zone stereo, such as the
Fusion Apollo SRX400 stereo or any sources that are disabled for use on the Fusion PartyBus network.
Editing a Group
1 Select > GROUPS.
2 Select the group.
3 Select the stereos you want to add to or remove from the group.
4 Select DONE.
Leaving a Group
You can leave the Fusion PartyBus group to play local sources on the stereo.
1 Select > GROUPS.
2 Select the group you want to leave.
3 Select the stereos you want to remove from the group.
4 Select DONE.
6 Fusion PartyBus Networking

Grouped Stereo Functions
After you create a group of stereos, additional functions and options are available to all stereos in the group.
• After you create a group, all of the stereos in the group share the same synchronized display.
• You can select a source from any stereo in the group, with a few limitations (Grouped Stereo Source
Considerations, page7), and the source will play simultaneously on all stereos in the group (Selecting a
Source, page4).
• You can control playback (such as pausing and skipping tracks) on any stereo in the group, and it will affect
all stereos in the group.
• You can adjust the volume for any zone on any stereo in the group.
TIP: When adjusting the volume, you can select ALL to adjust the volume of all the stereos in the group at the
same time.
Grouped Stereo Source Considerations
When selecting sources to play over the network, you should observe these considerations.
• You cannot share an AirPlay
®
source with grouped stereos. Using AirPlay 2 software, you can play content on
multiple stereos on the network, but the stereos must not be grouped.
• When audio sources are streamed over a data network, there is a slight delay in the synchronized audio that
may be noticeable if you are also using an external audio source.
◦ If you have a television with an Optical Out connection to a stereo and you continue to use the television
speakers, there will be a delay between the audio from the television speakers and the optical audio
streamed on the grouped stereos.
◦ If you synchronize a radio station and tune that same radio station on a non-networked stereo, there will be
a delay between the audio from the non-networked stereo and the audio from the radio station streamed
on the grouped stereos.
◦ You can remove this delay by changing the GROUP ENABLED setting for the source, but the source cannot
be shared with grouped stereos.
NOTE: You cannot change the settings when a stereo is part of a group. You must remove the stereo from the
group before you can change any settings.
Group Synchronization
By default, groups you create are not maintained when you turn off stereos in the group. If you turn off a single
stereo added to the group, it leaves the group. If you turn off the primary stereo in the group, the group is
dissolved. You can enable group synchronization to preserve group membership for a stereo after turning it off.
Group synchronization behaves differently based on how you turn the stereos off and on.
• If you turn a synchronized stereo off and on by using either the power button on the stereo or a physical
switch on the ignition wire (the red wire), all of the synchronized stereos in the group turn off and on together.
This applies to all of the synchronized stereos in the group, whether or not a stereo is the primary stereo in
the group.
NOTE: Selecting ALL OFF from the power menu on a stereo turns off all stereos on the network, even if they
are not in a group or have group synchronization enabled.
• If you turn a synchronized stereo off and on using a physical switch on the power wire (the yellow wire), the
other synchronized stereos in the group behave differently:
◦ If the synchronized stereo is the primary stereo in the group and you turn it off using a physical switch on
the power wire, the other synchronized stereos in the group remain on, but leave the group. When you turn
the primary stereo back on again, the other synchronized stereos rejoin the group.
◦ If the synchronized stereo is not the primary stereo in the group and you turn it off and on using a physical
switch on the power wire, all of the other synchronized stereos in the group remain on and grouped, and
the stereo rejoins the group when you turn it on again.
Fusion PartyBus Networking 7

Enabling Group Synchronization
You must remove the stereo from an existing group before you can enable the GROUP SYNC setting. You
cannot update settings when a stereo is part of a group.
You must enable this setting on each stereo that you want to retain group settings after a power cycle.
1 Select > SETTINGS.
2 Select the name of the stereo.
3 Select POWER OPTIONS > GROUP SYNC.
The stereo retains group settings after a power cycle.
4 Repeat for additional stereos as needed.
NOTE: You must enable GROUP SYNC on all networked stereos for synchronization to work properly.
General Settings
Select , select the name of the remote control, and select SETTINGS.
NOTE: If you select the name of the currently-controlled stereo before you select SETTINGS, you can adjust the
settings of the stereo instead of the remote control.
When a stereo is in a group, you cannot change settings on that stereo.
The following setting descriptions apply to the remote control only. For information about stereo-specific
settings, see the stereo owner's manual.
DEVICE NAME: Assigns a name to the remote control for better identification on the network.
LANGUAGE: Sets the language used on the remote control.
POWER OPTIONS > POWER SAVE: Disables the LCD backlight after one minute of inactivity to save battery
power.
ASSIGN HOME ZONE: Assign the default zone on a connected stereo for the remote control.
NETWORK: Adjusts network settings (Network Settings, page8).
UPDATE: Update or reset the remote control (Update Options, page8).
ABOUT: Shows the software version for the remote control.
Update Options
Select , select the name of the device, and select SETTINGS > UPDATE.
ERX REMOTE: Updates the remote control from a stereo connected to the ETHERNET port or the Fusion
PartyBus network using a valid software update file on a USB flash drive connected to the stereo (Software
Updates, page10).
FACTORY RESET: Restores all settings to the factory default values.
Network Settings
NOTE: If a Garmin chartplotter is detected on the network, the stereo automatically switches to GARMIN
MARINE NETWORK mode, and all other network settings are disabled.
Select > SETTINGS, select the name of the remote control, then select NETWORK.
DHCP CLIENT: Sets the device as a DHCP client. This is the default setting for all devices that are not
configured to be a DHCP server.
STATIC IP: Allows you to set a static IP address for the device (Setting a Static IP Address, page9).
RESET: Resets the network configuration on the remote control to factory defaults.
DETAILS: Shows information about the network configuration.
SAVE: Allows you to save changes to the network settings.
8 General Settings

Setting the Device as a DHCP Client
This device is set as a DHCP client by default. When set as a DHCP client, the device is configured for use on
a network with a DHCP server. If no DHCP server is present on the network, the device assigns its own local IP
address after a short delay.
NOTE: Although the Fusion PartyBus devices can communicate with each other without a DHCP server on the
network, the devices take longer to connect to each other when you first turn them on. It is highly recommended
to have one properly-configured DHCP server on the network for the best results.
1 Select > SETTINGS.
2 Select the name of this device.
3 Select NETWORK > DHCP CLIENT > SAVE.
Setting a Static IP Address
If the stereo is configured as a static IP, it is automatically assigned the IP address of 192.168.0.1. You can
change this IP address.
If the stereo is a DHCP client on the network and you do not want the DHCP server to automatically assign an IP
address to the stereo, you can set a static IP address.
NOTE: Every device on the network must have a unique IP address. If you select a static IP address that is the
same as another IP address on the network, the devices will not work properly.
1 Select > SETTINGS.
2 Select the name of the remote control.
3 Select NETWORK > STATIC IP.
4 Select an option:
• To set the IP address, select IP, and enter the IP address.
• To set the subnet mask, select MASK, and enter the subnet mask.
NOTE: The subnet mask must match all other devices on the network to work properly. A typical subnet
mask is 255.255.255.0.
• To set the default gateway IP address, select GATEWAY, and enter the gateway IP address.
NOTE: The default gateway is typically set as the IP address of the DHCP server on the network.
5 Select SAVE.
Resetting Network Settings
You can reset all network settings for this remote control to the factory default values.
1 Select > SETTINGS.
2 Select the name of the remote control.
3 Select NETWORK > ADVANCED > RESET > YES.
More Information
Registering Your Fusion Device
Help us better support you by completing our online registration today.
• Go to garmin.com/account/register/.
• Keep the original sales receipt, or a photocopy, in a safe place.
Cleaning the Device
1 Dampen a soft, clean, lint-free cloth with fresh water.
2 Gently wipe the device.
More Information 9

Software Updates
You must update the software for this remote control using a connected compatible stereo or using the Fusion
Audio app.
For best results, you should update the software in all Fusion devices regularly.
Depending on your stereo and network connections, you may be able to use any or all of these update methods:
• If want to update only one or more remote controls (not stereos), and they are connected to a network with a
wireless access point, you can update the software using the Fusion Audio remote control app (Updating the
Remote Control Software Using the Fusion Audio App, page11).
• If want to update only one or more remote controls (not stereos), and you prefer to not use the remote
control app, you can update the software using an update file loaded onto a USB flash drive through a
connected stereo (Updating the Remote Control Software Using a USB Flash Drive, page10).
• If you have one or more remote controls and one or more stereos connected using Ethernet cables as part
of a Fusion entertainment network, you can update all of the connected stereos and remote controls using
an entertainment package network update file loaded onto a USB flash drive
1
(Updating the Remote Control
Software Using a USB Flash Drive, page10).
• If the remote control is connected to a network with a compatible Garmin chartplotter, you can update the
stereo using a network full marine package update downloaded from the Garmin website or from Garmin
Express
™
and loaded onto a memory card
1
(Updating the Software as Part of a Garmin Network Update,
page11).
Updating the Remote Control Software Using a USB Flash Drive
You can update the remote control software using a USB flash drive through a compatible stereo on the
network.
NOTICE
Do not turn off the device or disconnect the power during a software update. Turning off the power during a
software update may cause the device to become unresponsive.
NOTE:
• You cannot update the software using a USB flash drive formatted using the NTFS file system. If you
encounter problems updating the device, format the USB flash drive using FAT32 and try the update process
again.
• The device may restart a few times when updating. This is normal.
• You can program only newer versions of software on the device.
1 Go to the software page for your device on support.garmin.com, and download the update file.
2 Extract contents of the .zip file to the root of your USB storage device.
The contents of the software update are contained in a folder named Garmin.
3 Insert the USB storage device in the USB port of a compatible Fusion PartyBus stereo on the network.
4 On the ERX400, select > SETTINGS.
5 Select the name of the remote control.
6 Select UPDATE > ACCESSORIES > ERX REMOTE.
TIP: If the stereo with the USB storage device has a screen, you can also start the remote control update
process form the UPDATE settings menu of the stereo.
The stereo transfers the update file to the remote control over the network, the remote control updates the
software, and then restarts.
1
A remote control must be running SW version 6.20 or later to receive an update over the network, and the stereo initiating the update must be running SW
version 6.40 or later.
10 More Information

Updating the Remote Control Software Using the Fusion Audio App
If the Fusion PartyBus network has a Wi‑Fi
®
access point, you can update the remote control software using
the Fusion Audio app, available for compatible Apple
®
or Android
™
on the Apple App Store
SM
or the Google Play
™
store.
NOTICE
Do not turn off the remote control or disconnect the power during a software update. Turning off the power
during a software update may cause the remote control to become unresponsive.
NOTE:
• The remote control may restart a few times when updating. This is normal.
• You can program only newer versions of software on the remote control.
1 Connect your mobile device to a Wi‑Fi access point on the Fusion PartyBus network.
2 Open the Fusion Audio app, and verify that you can see the remote control in the app.
3 Disconnect the mobile device from the Wi‑Fi access point, and connect it to a different Wi‑Fi network with
internet access or to the wireless mobile data connection from your carrier.
NOTE: You must connect your mobile device to the internet in order to download the necessary software
update files.
TIP: If your Fusion PartyBus network is presently connected to a router with a modem or SIM card
that provides internet access, you can leave your mobile device connected to the network instead of
disconnecting and using the wireless mobile data connection from your carrier to download the update
files.
4 In the Fusion Audio app, select > CHECK FOR UPDATES > MS-ERX400 > Download.
The app downloads the software update file.
5 After the app finishes downloading the update file, reconnect the mobile device to the Wi‑Fi access point on
the Fusion PartyBus network.
6 In the Fusion Audio app, select the name of the remote control.
7 Select > GENERAL > Software Updates > Online Software Update.
The app transfers the software update to the remote control over the Wi‑Finetwork, the remote control
updates the software, and then it restarts.
Updating the Software as Part of a Garmin Network Update
If the remote control is connected to the same Garmin BlueNet network or Garmin Marine Network as a
compatible Garmin chartplotter, you can perform a network update on the chartplotter to update all of the
connected Garmin devices and Fusion Apollo devices.
NOTE: A remote control must be running software version 6.20 or later to receive an update over the network.
If your remote control is running an earlier software version, you should update it using a USB flash drive or the
Fusion Audio app before trying a network update.
1 If needed, go to garmin.com/manuals, and locate the latest version of the owner's manual for your
connected chartplotter.
2 Go to garmin.com/support/software/marine/ to download the latest marine update .
You must download the update and install it using a memory card on the chartplotter. Updating the marine
network using the ActiveCaptain
®
app does not update connected Fusion Apollo devices.
3 Follow the directions in the chartplotter owner's manual for performing a network update.
The software is updated on all of your connected devices, including the remote control.
Troubleshooting
The stereo does not respond to key presses
• Hold until the stereo turns off, and turn it on again to reset the stereo.
• Disconnect power to the stereo for two minutes to reset the stereo.
More Information 11
Network Troubleshooting
If you cannot see or connect to Fusion Apollo devices on the network, perform these steps.
• Verify that all Fusion Apollo stereos, remote controls, network switches, routers, and wireless access points
are connected to the network and turned on.
• Verify that only one device, either a stereo or a router, is configured as a DHCP server. If you are connected
to a Garmin chartplotter using a wired Garmin BlueNet or Garmin Marine Network connection, it acts as the
DHCP server for the network and no connected stereo should be configured as a DHCP server.
• Change the channel on your router or wireless access point to test for and correct interference.
You may experience wireless interference if there are many nearby wireless access points.
• Disconnect Bluetooth devices to test for and correct interference.
Connecting a Bluetooth device to a stereo configured as a wireless access point or client may reduce
wireless performance.
• If you configured static IP addresses, verify that every device has a unique IP address, that the first three sets
of numbers in the IP addresses match, and that the subnet masks on every device are identical.
• If you have made configuration changes that might be causing networking issues, reset all network settings
to the factory default values.
• If you connected the Fusion Apollo device to a Garmin chartplotter using a wired Garmin BlueNet or Garmin
Marine Network connection, the network settings on the device should change automatically to GARMIN
MARINE NETWORK.
If the network settings do not change as expected, reset the network settings on the device (Resetting
Network Settings, page9).
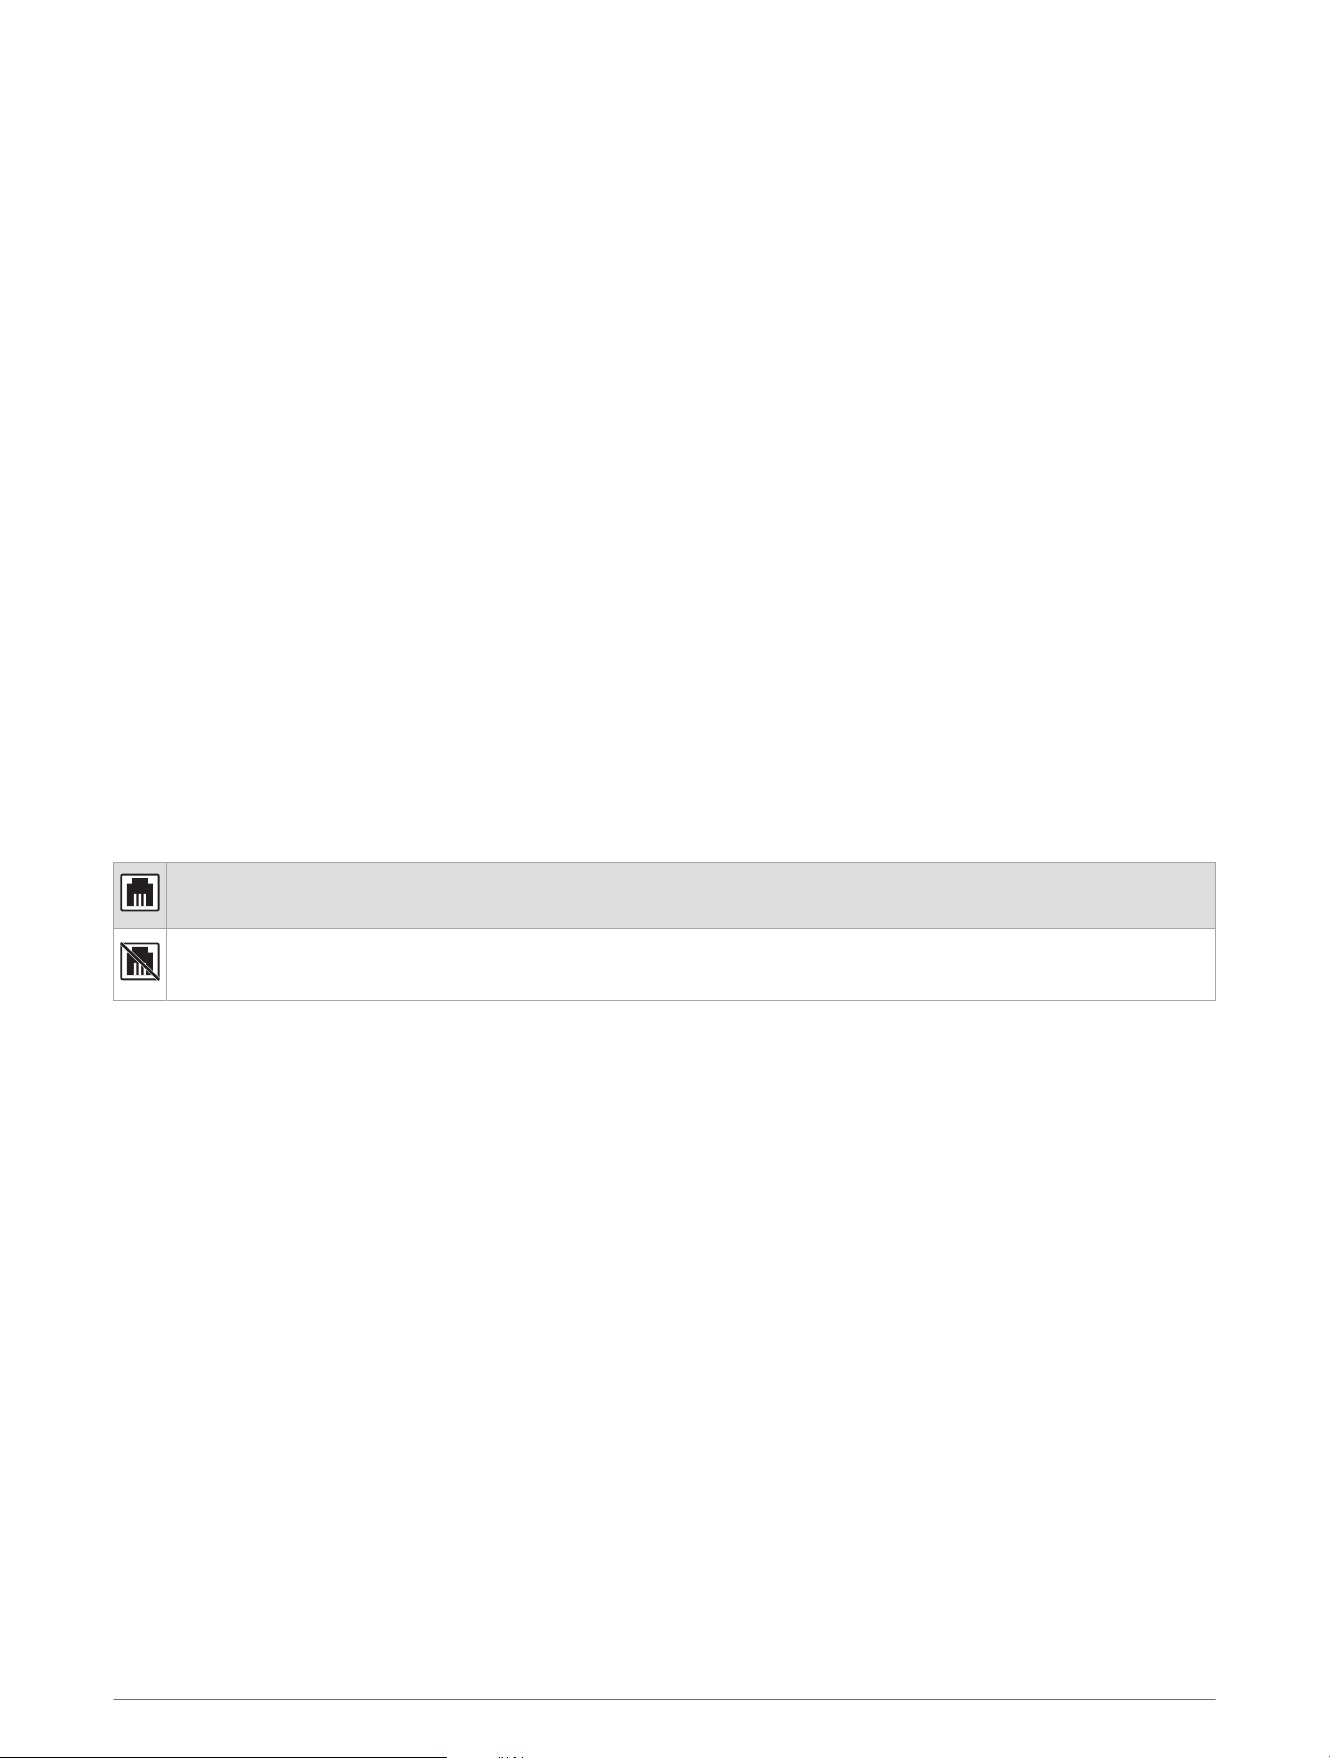
Network Status Icons
A network-status icon is shown on some screens of the device. You can refer to this table to understand the
appearance of the icon and help diagnose issues with the Fusion PartyBus network.
The device is connected correctly to a network.
The device cannot detect the network. An Ethernet cable may not be connected or there may be other
problems with the network.
Software Update Troubleshooting
If the downloaded remote control software update does not complete successfully, perform these steps.
• Make sure the update file you downloaded is intended for the remote control model you are updating. Only
software update files intended for the specific remote control will update it.
• Make sure the update file is a newer version than what is presently installed on the remote control. Only
newer software update files can be installed on a remote control.
• Make sure the update file was extracted from the .zip file and loaded onto the root of the USB flash drive.
When properly prepared, the USB flash drive will have a directory named Garmin containing the update files.
• Make sure the USB flash drive is formatted using the FAT32 file system. The stereo will not apply an update
from a USB flash drive formatted using the NTFS file system.
• If the remote control is part of a Fusion PartyBus network group, remove it from the group before starting the
update.
12 More Information

The remote control does not update as part of a Garmin network update
If you are attempting to update a remote control using a Garmin chartplotter on a network, and the remote
control software update does not complete successfully, perform these steps.
• Make sure that the remote control you want to update over the network is using software verison 6.20 or
later. If any connected remote controls are using an earlier software version, you must update it individually
using a USB flash drive or the Fusion app before it can be included in a network update.
NOTE: If you are initiating the software update from a Fusion stereo, it must be using software version 6.40
or later.
• If the network update fails the first time, try it again before further troubleshooting.
• Try disconnecting any Bluetooth devices, and try the update again.
• Make sure the remote control is connected properly to the to the Garmin chartplotter using an Ethernet cable.
• If your network contains both a Garmin BlueNet chartplotter and legacy Garmin Marine Network devices,
make sure the remote control is connected to either the Garmin BlueNet chartplotter or a Garmin BlueNet 20
switch. See garmin.com/manuals/bluenet for more information.
• Make sure that all stereos and remote controls connected to the network are set to GARMIN MARINE
NETWORK as the network type.
• Make sure that all the stereos connected to the network are set to WI-FI OFF.
• If you cannot change the network type or set WI-FI OFF, reset the network settings on the remote control or
stereo (Resetting Network Settings, page9).
Specifications
Dimensions (W × H) 11 × 7cm (4.32 × 2.76in.)
Dust cover dimensions (W × H) 11.8 × 8cm (4.66 × 3.15in.)
Weight (excluding cable) 100 g (3.5 oz.)
Input voltage From 10.8 to 32Vdc negative ground
Current (normal operation at 12Vdc) 150mA
Current (normal operation at 14.4Vdc) 125mA
Current (device off) Less than 50mA
Fuse 1A ATO blade-type
Compass-safe distance 15cm (6.1in.)
Operating temperature From 0 to 50°C (from 32 to 122°F)
Storage temperature From -20 to 70°C (from -4 to 158°F)
Water rating IEC 60529 IPX6 and IPX7
2
2
The device withstands incidental exposure to water of up to 1m for up to 30min, and is protected against powerful jets of water. For more information, go to
www.garmin.com/waterrating.
More Information 13
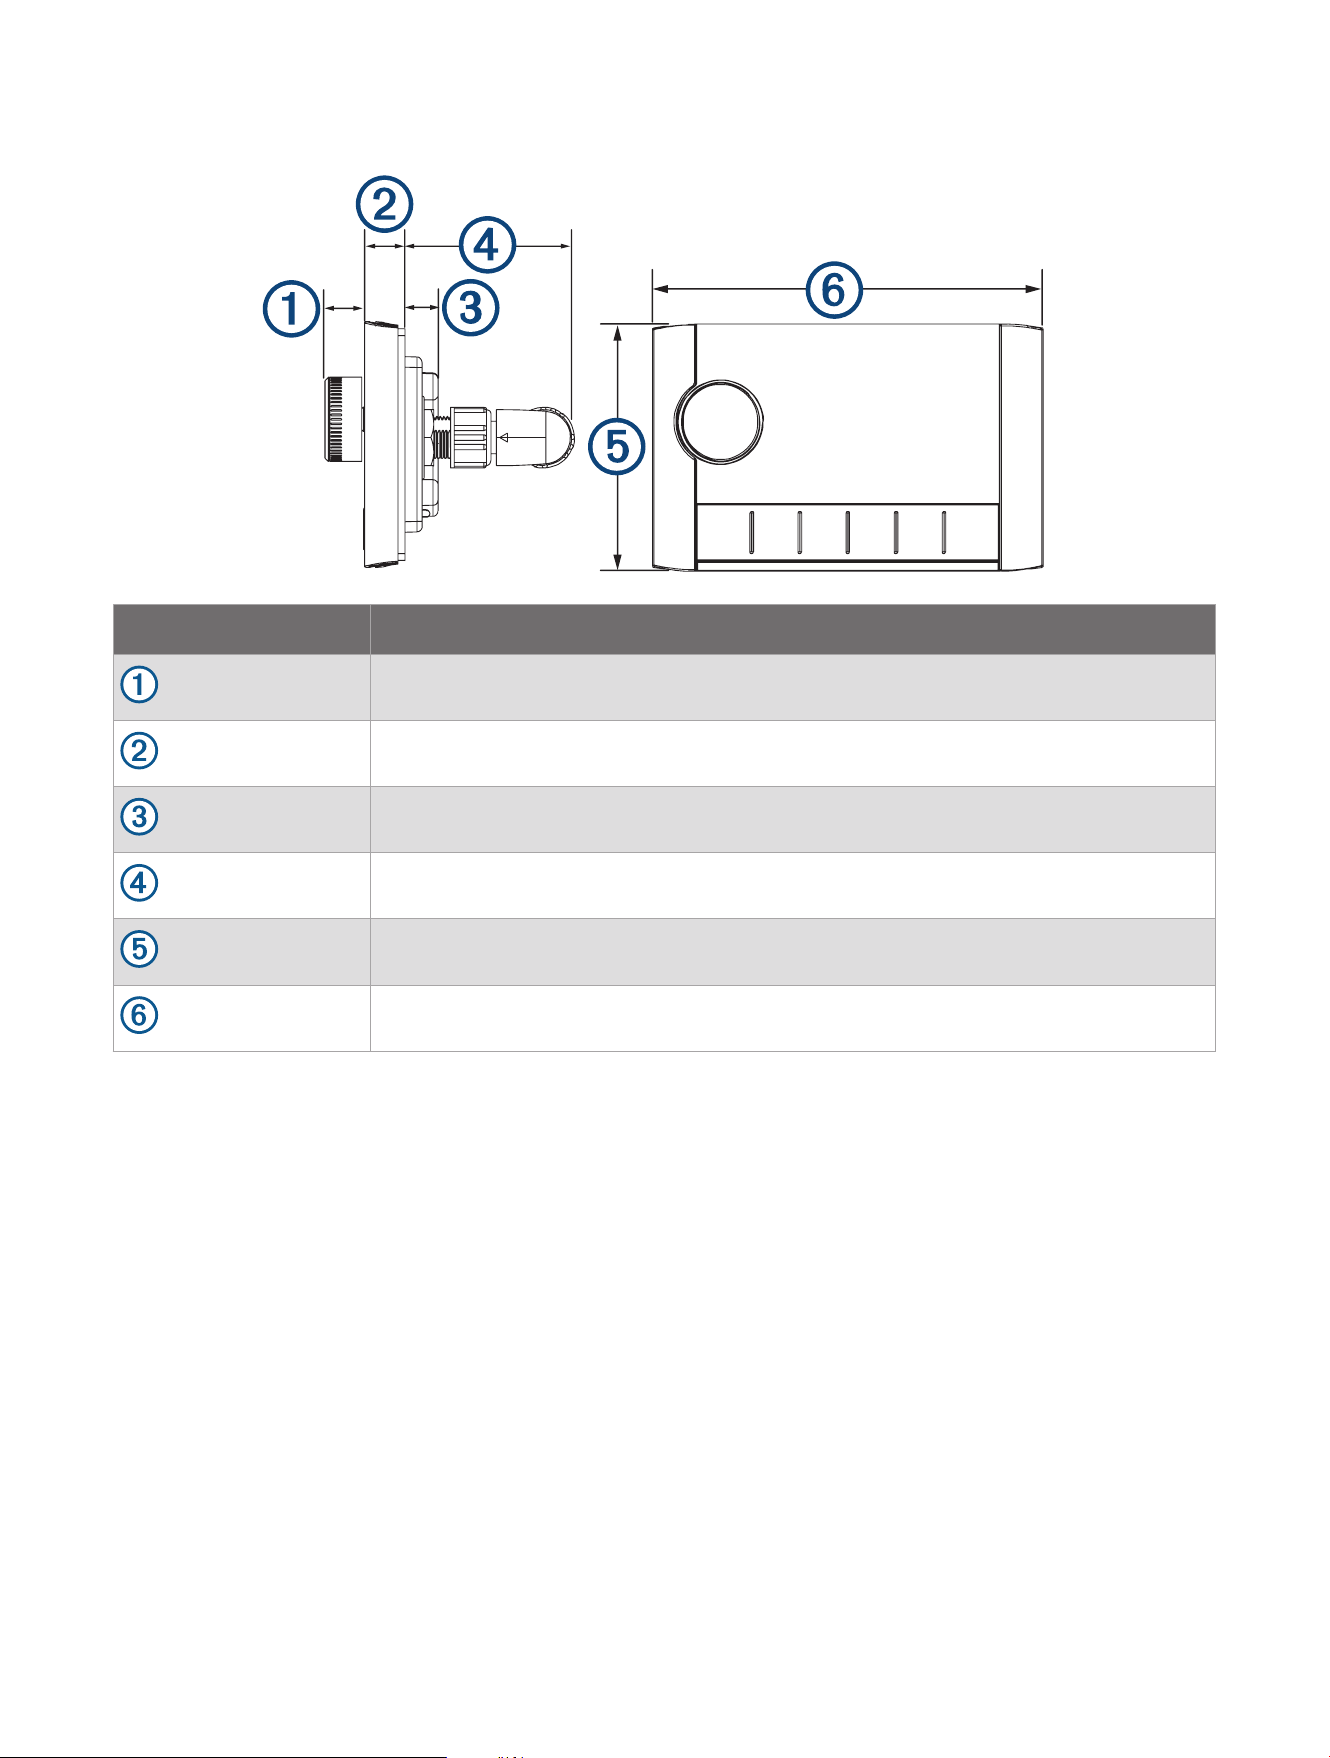
Dimensions
Item Measurement
12.3mm (0.48in.)
10mm (0.39in.)
10.9mm (0.43in.)
49.1mm (1.93in.)
70mm (2.76in.)
110mm (4.32in.)


support.garmin.com
GUID-BA6558B2-CE05-4971-B868-B34458D147CF v8January 2025