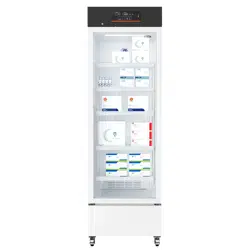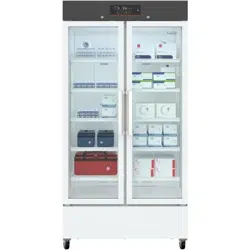
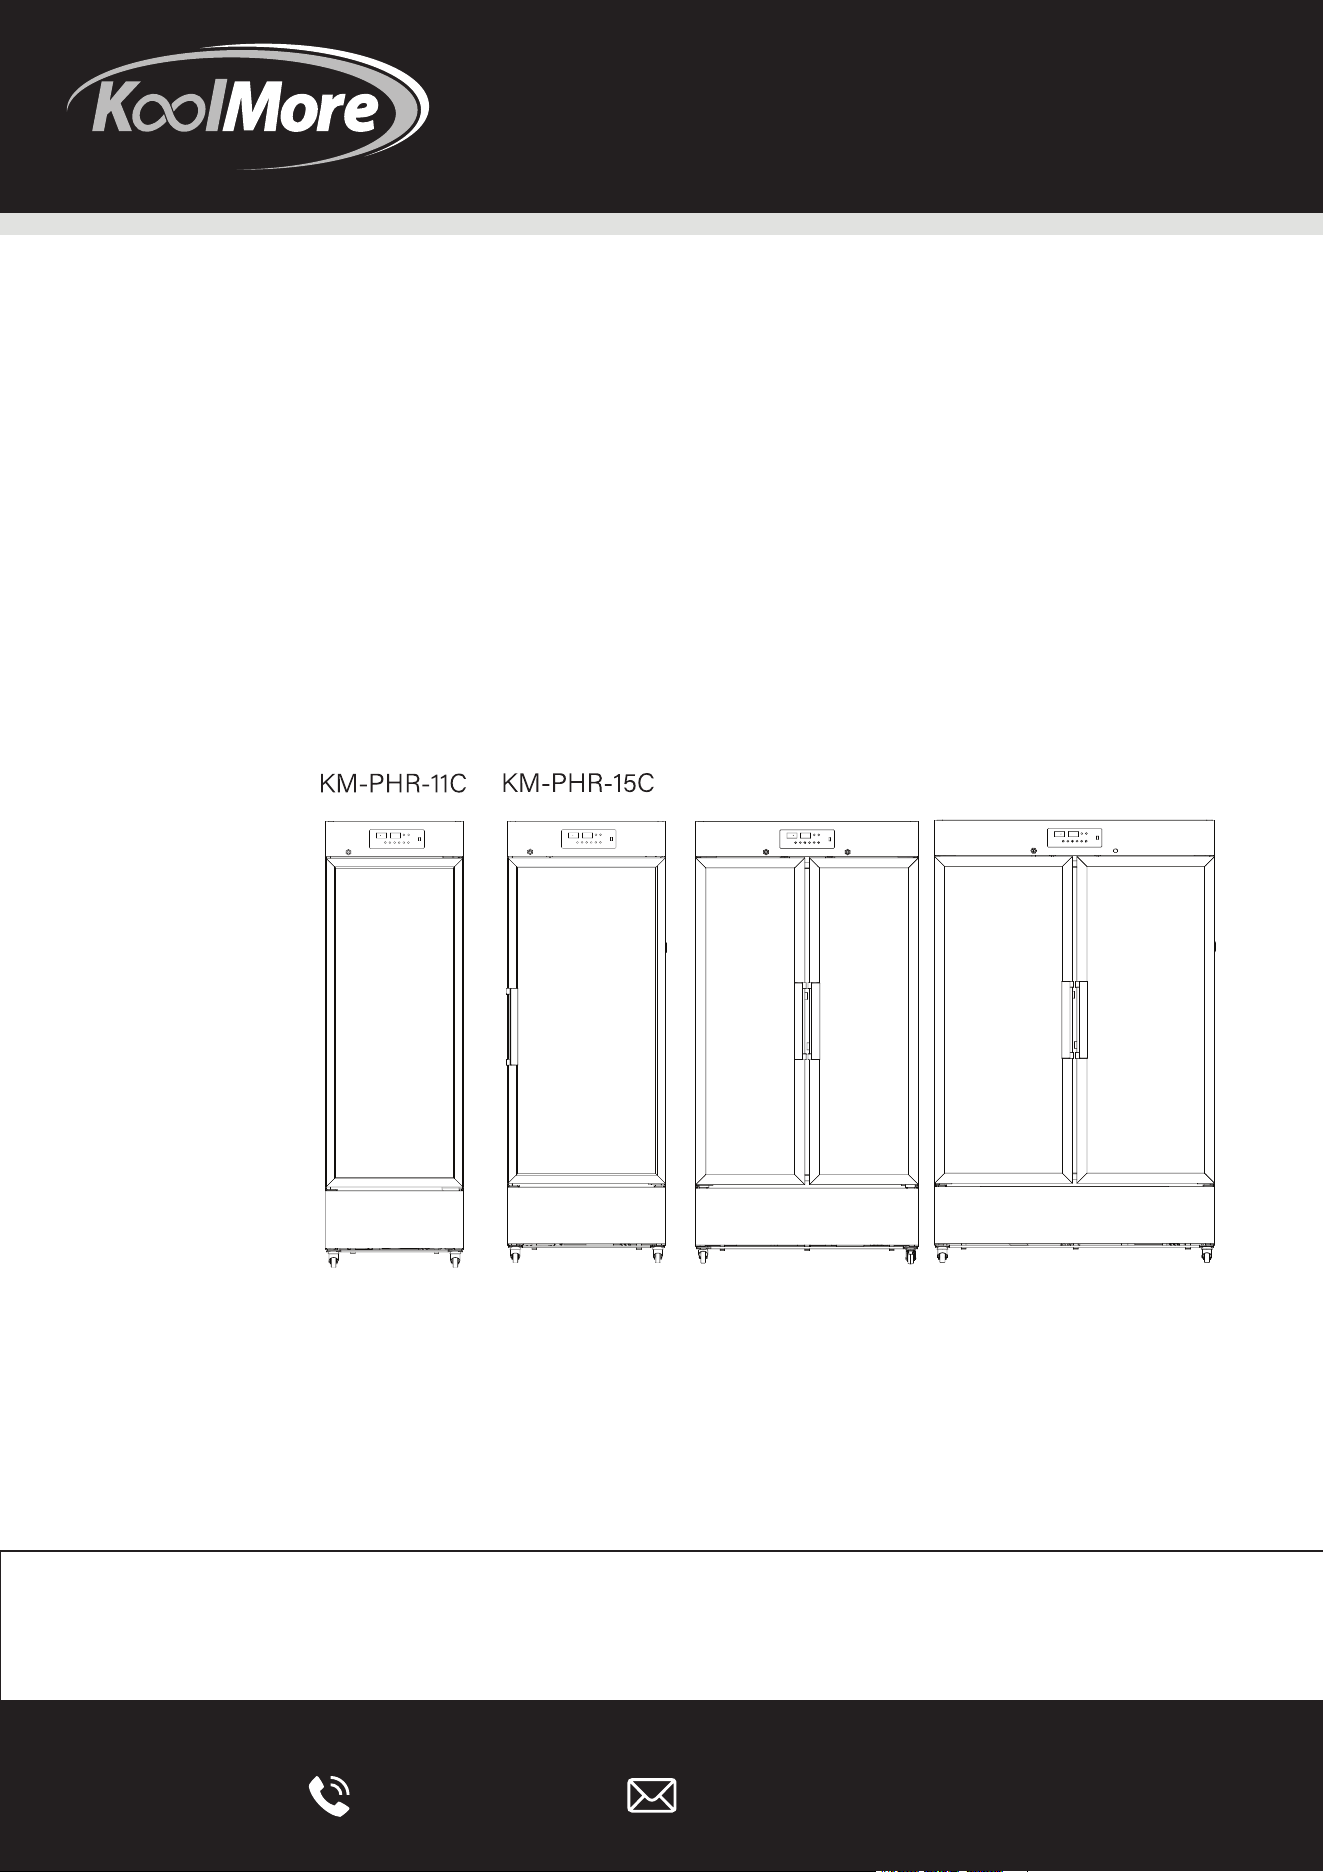
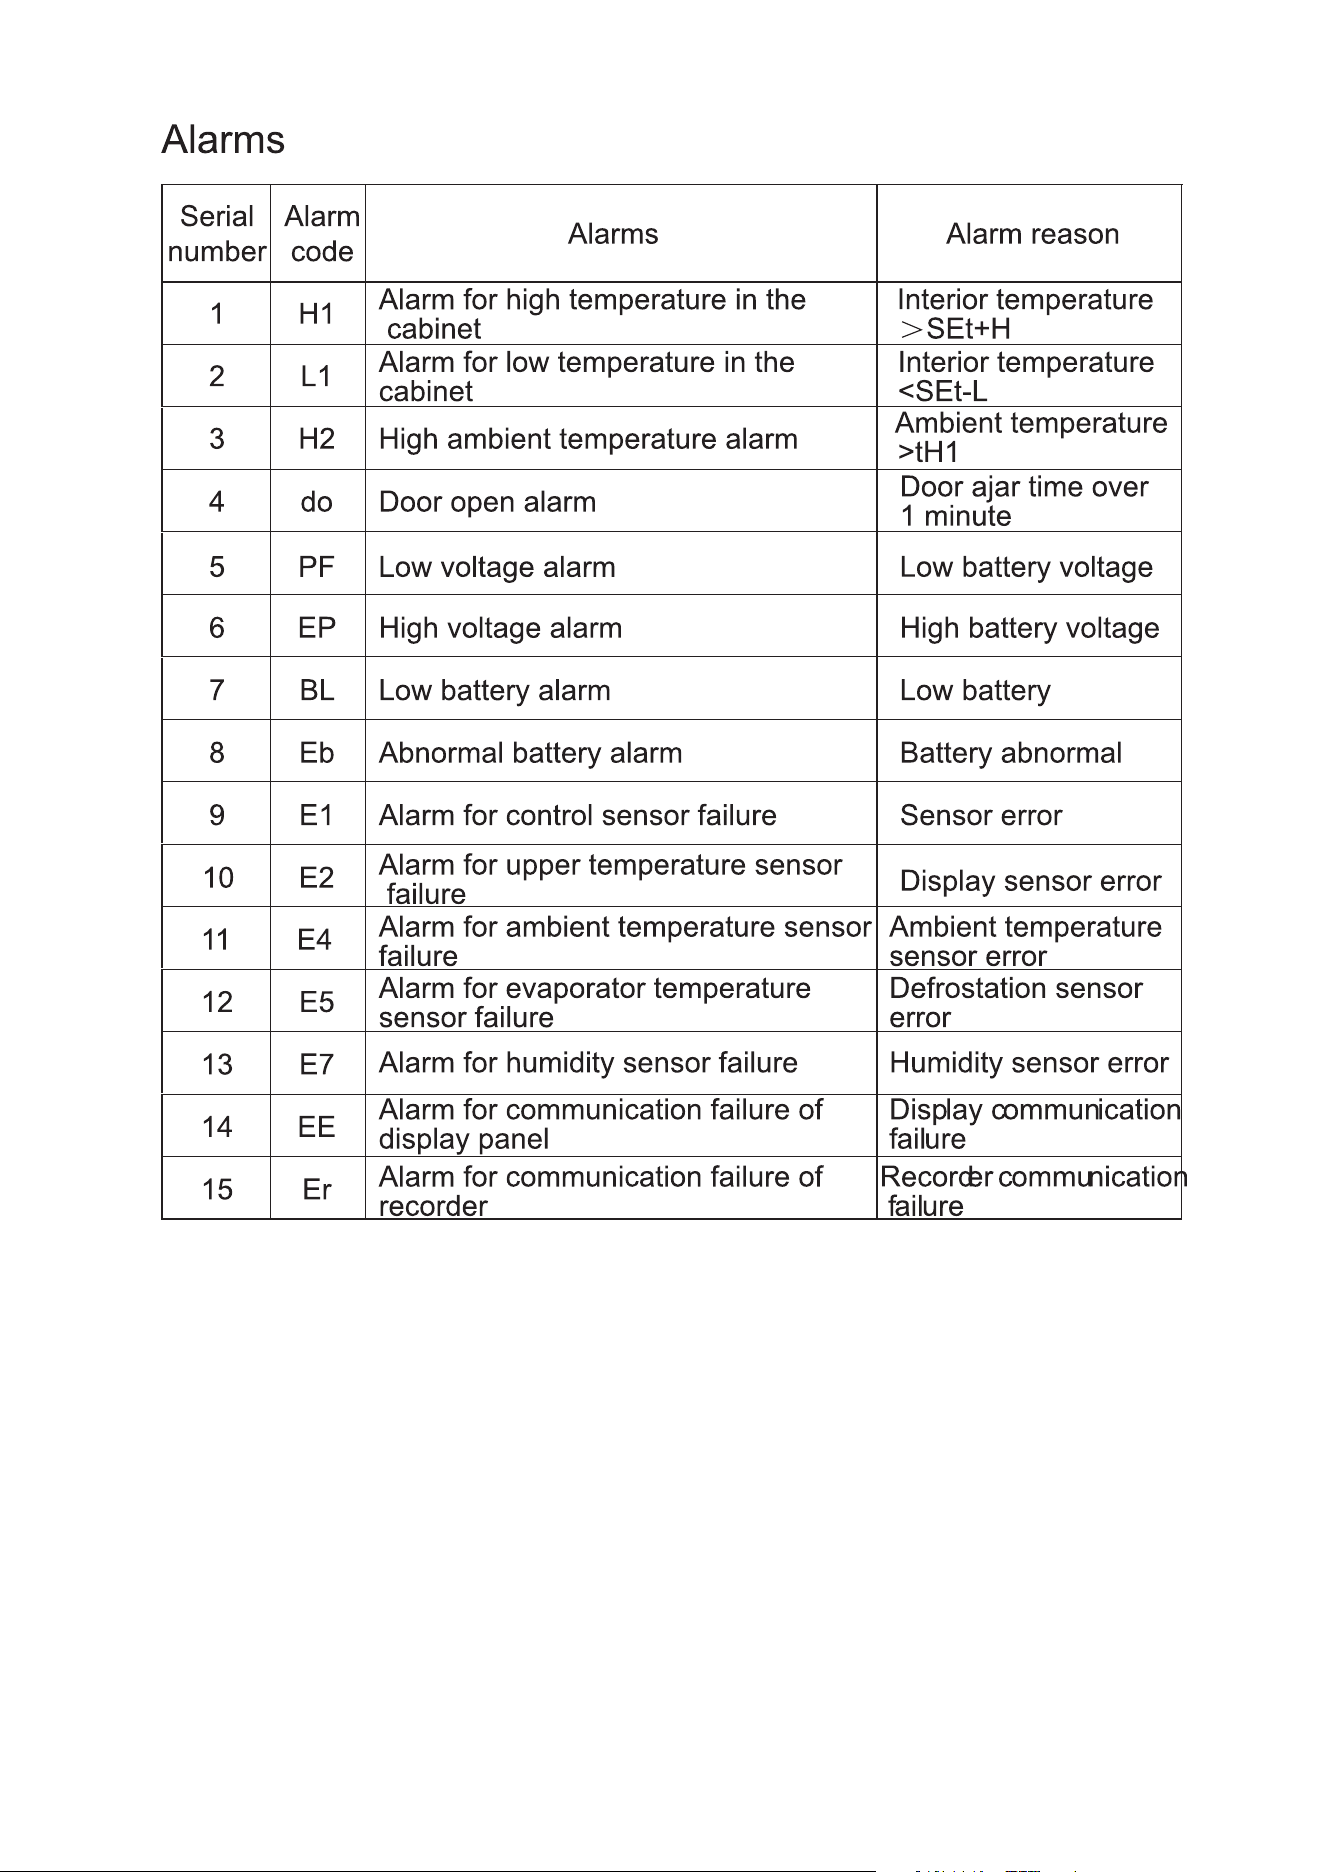
PHARMACY REFRIGERATOR
KM-PHR-27C KM-PHR-35C

718-576-6342 suppor[email protected]
Stay informed with the latest information
for your KoolMore Appliance.
If you need any assistance or have questions, our customer
support team is here to help.

5
6
7
10
12
19
21
22

Dear KoolMore users:
We appreciate your choice of the KoolMore medical cooler. We urge you to go through the
subsequent details for a comprehensive grasp of the User Manual, which will aid in safe
utilization of this device and minimize risks to both individuals and objects.
This equipment is intended for use in commercial, industrial, or institutional occupancies as
defined in the Safety Standard for Refrigeration Systems, ANSI/ASHRAE 15`.
Warning: Risk of fire/flammable materials
WARNING: Ensure all ventilation openings are not obstructed.
WARNING: Do not use mechanical devices or other means to accelerate the defrosting pro-
cess, other than those recommended by the manufacturer.
WARNING: Do not damage the refrigerant circuit
WARNING: In order to reduce flammability HAZARDS the installation of this equipment shall
only be carried out by a suitably qualified person.
DANGER – Risk Of Fire Or Explosion. Flammable Refrigerant Used. To Be Repaired Only By
Trained Service Personnel. Do Not Puncture Refrigerant Tubing.
CAUTION – Risk Of Fire Or Explosion. Flammable Refrigerant Used. Consult Repair Manual /
Owner's Guide Before Attempting To Install Or Service This Equipment. All Safety Precautions
Must Be Followed.
CAUTION – Risk Of Fire Or Explosion. Dispose Of Properly In Accordance With Federal Or
Local Regulations. Flammable Refrigerant Used.
CAUTION – Risk Of Fire Or Explosion Due To Puncture Of REFRIGERANT Tubing. Follow
Handling Instructions Carefully. FLAMMABLE REFRIGERANT Used
The installation and operating instructions shall indicate that component parts shall be
replaced with like components and that servicing shall be done by the manufacturer's autho-
rised personnel, so as to minimize the risk of possible ignition due to incorrect parts or
improper service.
REFRIGERANT and BLOW gas used for the appliance are flammable. Therefore, when the
appliance is scrapped, it shall be kept away from any fire source and be recovered by a special
recovering company without corroding qualification other than be disposed by combustion, so
as to prevent damage to the environment or any other harm.

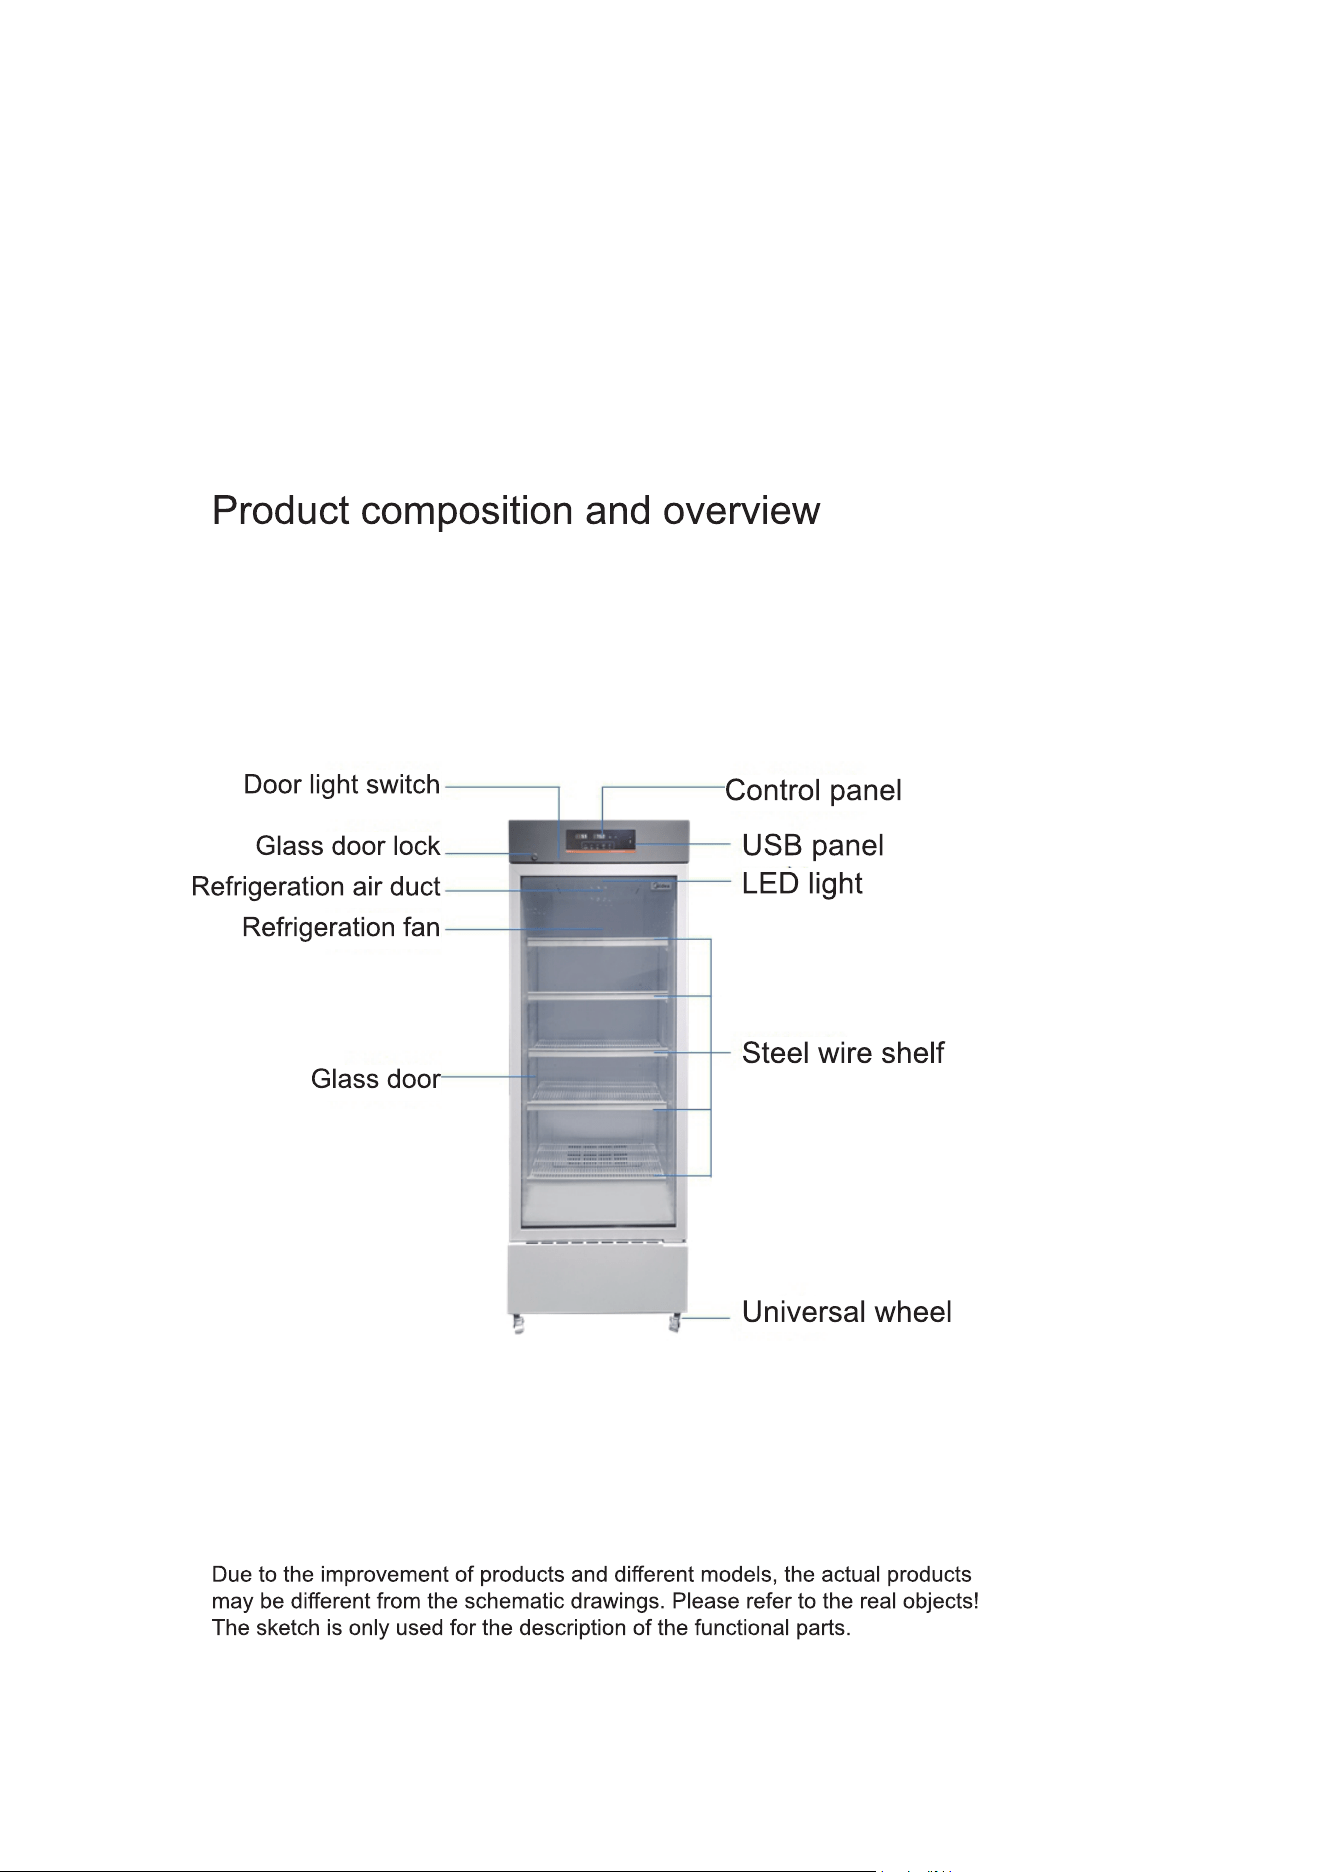
Category Description
Product Features
Can store medicines, vaccines, reagents, and
materials between 2°-8°C.
Accurate Temperature Control - Displays an accuracy of 0.1°C.
- Ranges from 2°C to 8°C with in-box fluctuations of
±2°C.
- USB interface allows temperature data storage at
any time.
Efficient Refrigeration
- High-efficiency fans for lasting performance and low
noise.
- Maintains a uniform temperature and efficient
cooling.
- Uses embedded air duct and air curtain
technologies.
Safety Features
- Alarms for high and low temperature, power failure,
and sensor issues.
- Customizable alarm temperatures.
- Safety door lock for sample protection.
User-Friendly Design
- Multi-layer encryption shelves and adjustable
heights.
- Energy-saving inner LED lights.
- Operates within a 115V±10% voltage range.

Product Handling:
• When transporting the pharmacy refrigerator, ensure it is moved with care, using the handcart
method shown in the accompanying image, cushioning the unit appropriately.
• Upon arrival at the desired location, remove all packing materials and the bottom cushion.
Relocate the refrigerator to its final placement within the house or facility.
• Once positioned, allow the unit to sit undisturbed for about 2 hours before turning the power on.
This allows it to acclimate to its new environment.
Installation Environment:
• The pharmacy refrigerator is designed exclusively for indoor usage. Ensure it is situated in an
area with no more than a pollution level of Class 2 and safeguard against over-voltage of Class
II.
• The ambient temperature where the refrigerator is placed should range between 60.8°F-89.6°F,
with an ideal temperature span of 64.4°F-77°F. If this temperature range is not naturally
achieved, consider utilizing an air conditioning system.
• Maintain an environmental humidity level below 80% relative humidity (RH) to ensure optimal
performance.
• To prevent disturbances, situate the refrigerator away from areas prone to significant dust or
mechanical vibrations.
• When deciding on placement, be mindful that the refrigerator's altitude doesn't exceed 6561 feet
above sea level.
• Ensure the working voltage remains within a 10% deviation of the designated requirement.
• The pharmacy refrigerator comes with an ingress protection rating of IPX0, which indicates a
lack of protection against water or dust ingress.
• This appliance is sensitive to ambient temperature variations. If installing in regions other than
those recommended, the refrigerator might not function optimally. Adjust the environment as
needed.
• Always place the pharmacy refrigerator in a dry environment. Exposure to moisture or wet
conditions can result in electric leakage or potential electric shock hazards.

Installation Site
• It's crucial not to place the device in cramped or confined spaces. Choose a location that
ensures easy access and minimizes the chance of goods blocking airflow or causing storage
issues.
• The installation location should be stable and free from flammable materials, ensuring the
appliance remains upright during operation and minimizing hazards.
• It's important to shield the device from direct sunlight as this could impact its performance.
• Ensure that each refrigerator has its own dedicated power outlet. Verify that the power connec-
tion uses a standard 110V outlet and that both the plug and socket are securely connected.
• Before operating the device, check the provided working voltage. In areas where voltage might
fluctuate, consider investing in a voltage stabilizer. If you decide to use one, its power capacity
should be greater than 400W, ensuring that the device's voltage needs are adequately met.
• Grounding the device is crucial for safety. If your power outlet isn't equipped with a ground, or if
you're unsure about its effectiveness, enlist the services of professional engineers or techni-
cians to ensure proper grounding.
Warnings:
For safety reasons, never attempt to ground the refrigerator using unconventional methods like gas
pipes, water pipes, telephone lines, or lightning rods. These methods could introduce the risk of
electrical shock.
Once installed, ensure the power plug remains easily accessible. This design allows for quick
disconnection in emergencies. Additionally, avoid placing objects near the refrigerator's vent to
ensure unobstructed airflow.
Alarm port: 30Vdc, 2A Max, to be connected to SELV circuit.
USB port: 5Vdc, 1A Max, to be connected to SELV circuit.
Notes:
Ambient temperature plays a significant role in the performance of the device. If the surrounding
temperature is outside the range of 104°F-140°F, the refrigerator may not function as expected. It's
important to note that the device uses an intermittent operating mechanism. Before use, adjust the
environment accordingly.
For storage and transportation purposes, it's advisable to maintain temperatures within the
104°F-140°F range and a relative humidity of 10%-90%.
Preparation Before Use
1. Begin by removing all the external packaging materials, including the protective foam inside the
box, to access the product.
4 INCHES
4 INCHES
4 INCHES
2. Ensure all accessories are present. Inspect the
box's contents, and if there are any discrepancies or
missing items, get in touch with the after-sales
service department promptly.
3. When deciding on placement for the pharmacy
refrigerator, it's crucial to allow a buffer of at least 4
inches around it. This space facilitates adequate
ventilation and helps dissipate heat efficiently.
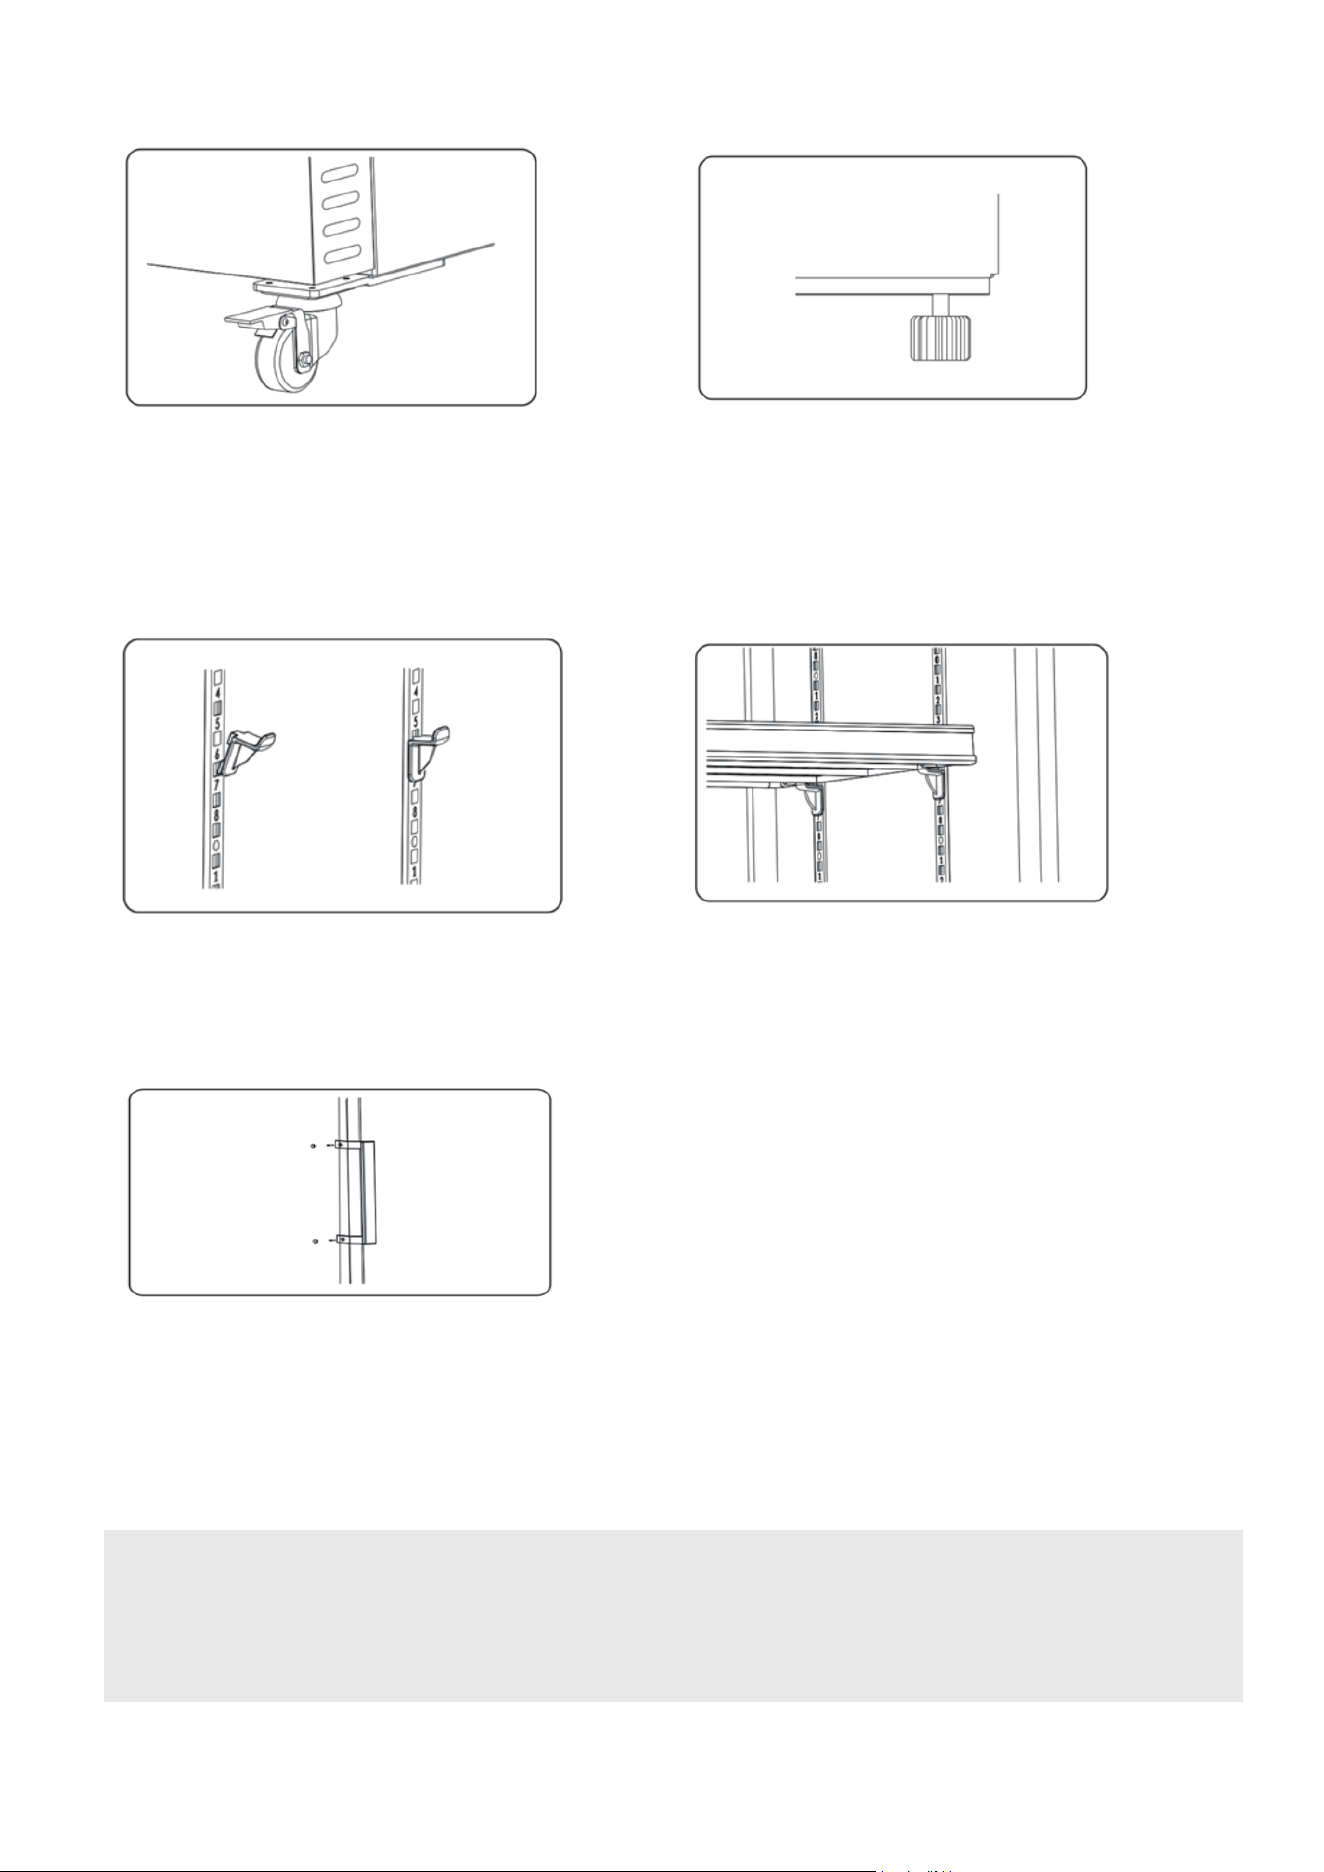
4. The refrigerator comes with front casters for mobility. Additionally, there are adjustable feet
(which are optional). To stabilize the unit, rotate these feet clockwise. This downward extension
ensures that the refrigerator remains steady and well-grounded during daily operations.
5. Depending on your storage requirements, you can adjust the internal spacing. Install or move
the shelves to best fit your items.
6. The unit may come with an optional door handle. If yours does, proceed with its installation.
7. At the rear of the pharmacy refrigerator, you'll find a back bracket. Securely attach this bracket to
the refrigerator's back plate using the provided screws.
Warning:
Safety first: Be cautious with the appliance's plastic bags. Always place them out of children's
reach to prevent the risk of suffocation accidents.

Initial Start-up Instructions
When setting up the appliance for the first time, follow these guidelines:
1. In a no-load condition, make sure to plug into the correct power outlet, ensuring that it doesn't
interfere with other connected appliances.
2. Switch on the device, and then promptly activate its battery switch.
3. The LED light will indicate the unit's power status. For detailed insights on power status,
consult the unit's data recording settings.
4. You can set the desired temperature intervals. By default, the temperature is set at 41°F. The
upper limit is 46.4°F, while the lower limit is 35.6°F. Check the user manual for specifics.
5. An alert labeled "H1" signifies an elevated temperature. This alarm ceases once the internal
temperature falls back within the safe range.
6. If you see a "L0" alert, it indicates the data recorder isn't operational. Please refer to the user
manual for troubleshooting.
7. A "L1" alert during the initial setup signifies low battery. The alarm will stop after 2-6 hours
once the battery regains its charge.
8. Ensure the equipment runs uninterrupted for at least 3 hours during the initial start-up.
Post-Power Outage Operations
If there's a power interruption, the appliance will revert to its last known settings once power is
restored.
Warning:
• If you switch off the refrigerator, wait for more than five minutes before restarting. An
immediate restart might harm the compressor or the system.
• For prolonged inactivity, it's recommended to disconnect the power and battery to avoid
electrical hazards.
• Always ensure that children don't have access to the refrigerator, especially when its door isn't
fully closed.
• A designated individual should oversee this product's operation, ensuring that the temperature
is checked and recorded daily. If the temperature inside the cabinet deviates too far from the
ideal, either being too hot or too cold, then items should be relocated to another safe storage
until the root of the problem is resolved.
• The recommended temperature range for this pharmacy refrigerator is between 35.6°F and
46.4°F. It's essential to ensure that this range aligns with the ambient conditions in the
pharmacy to prevent potential damages and economic losses.
• Please note that the display temperature and the actual temperature inside the product can
vary. Such variation is normal, and it doesn't imply a malfunction.
• Avoid placing items in the narrow space that exists between the pharmacy refrigerator's
bottom shelf and its floor to ensure proper air circulation.
• Given that the pharmacy refrigerators are designed for preservation, it's crucial not to
overload them. Overfilling can strain the compressor, leading to temperature fluctuations
that, over time, can reduce the compressor's lifespan. If the temperature starts to rise, it's
essential to progressively and methodically reduce the load inside until conditions stabilize.
• The device's refrigeration circuitry is vital and should be protected from damage.
• For safety reasons, the use of non-certified electrical devices inside the pharmacy
refrigerator is strictly prohibited.
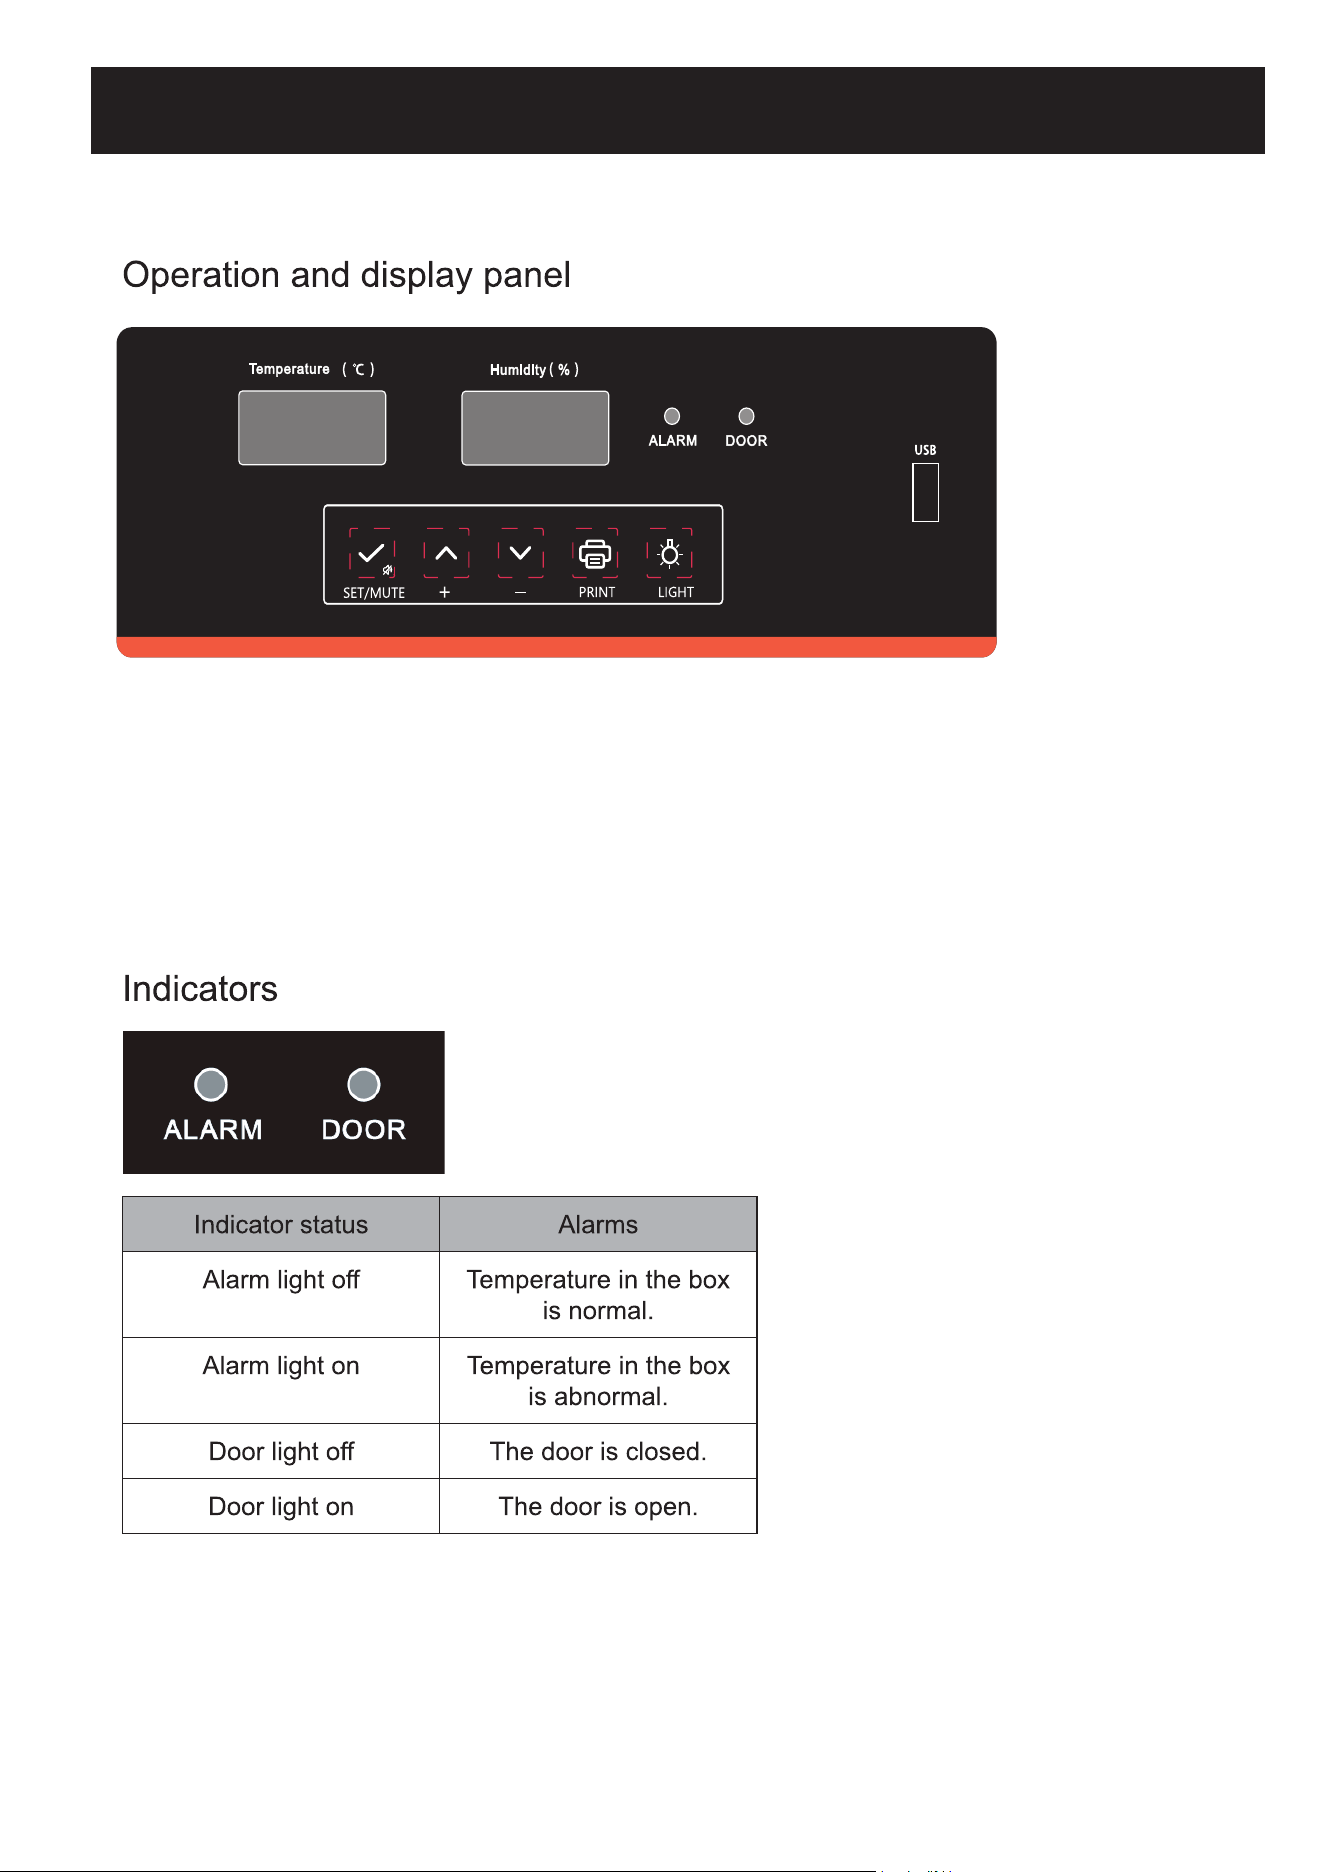
Digital tube display instructions:
• The right digital tube displays only humidity and maintains a consistent humidity readout.
• The left digital tube shows temperature, alarm codes, menu, parameters, and additional
details.
• References to the "digital tube" in "key operation" pertain to the left digital tube.
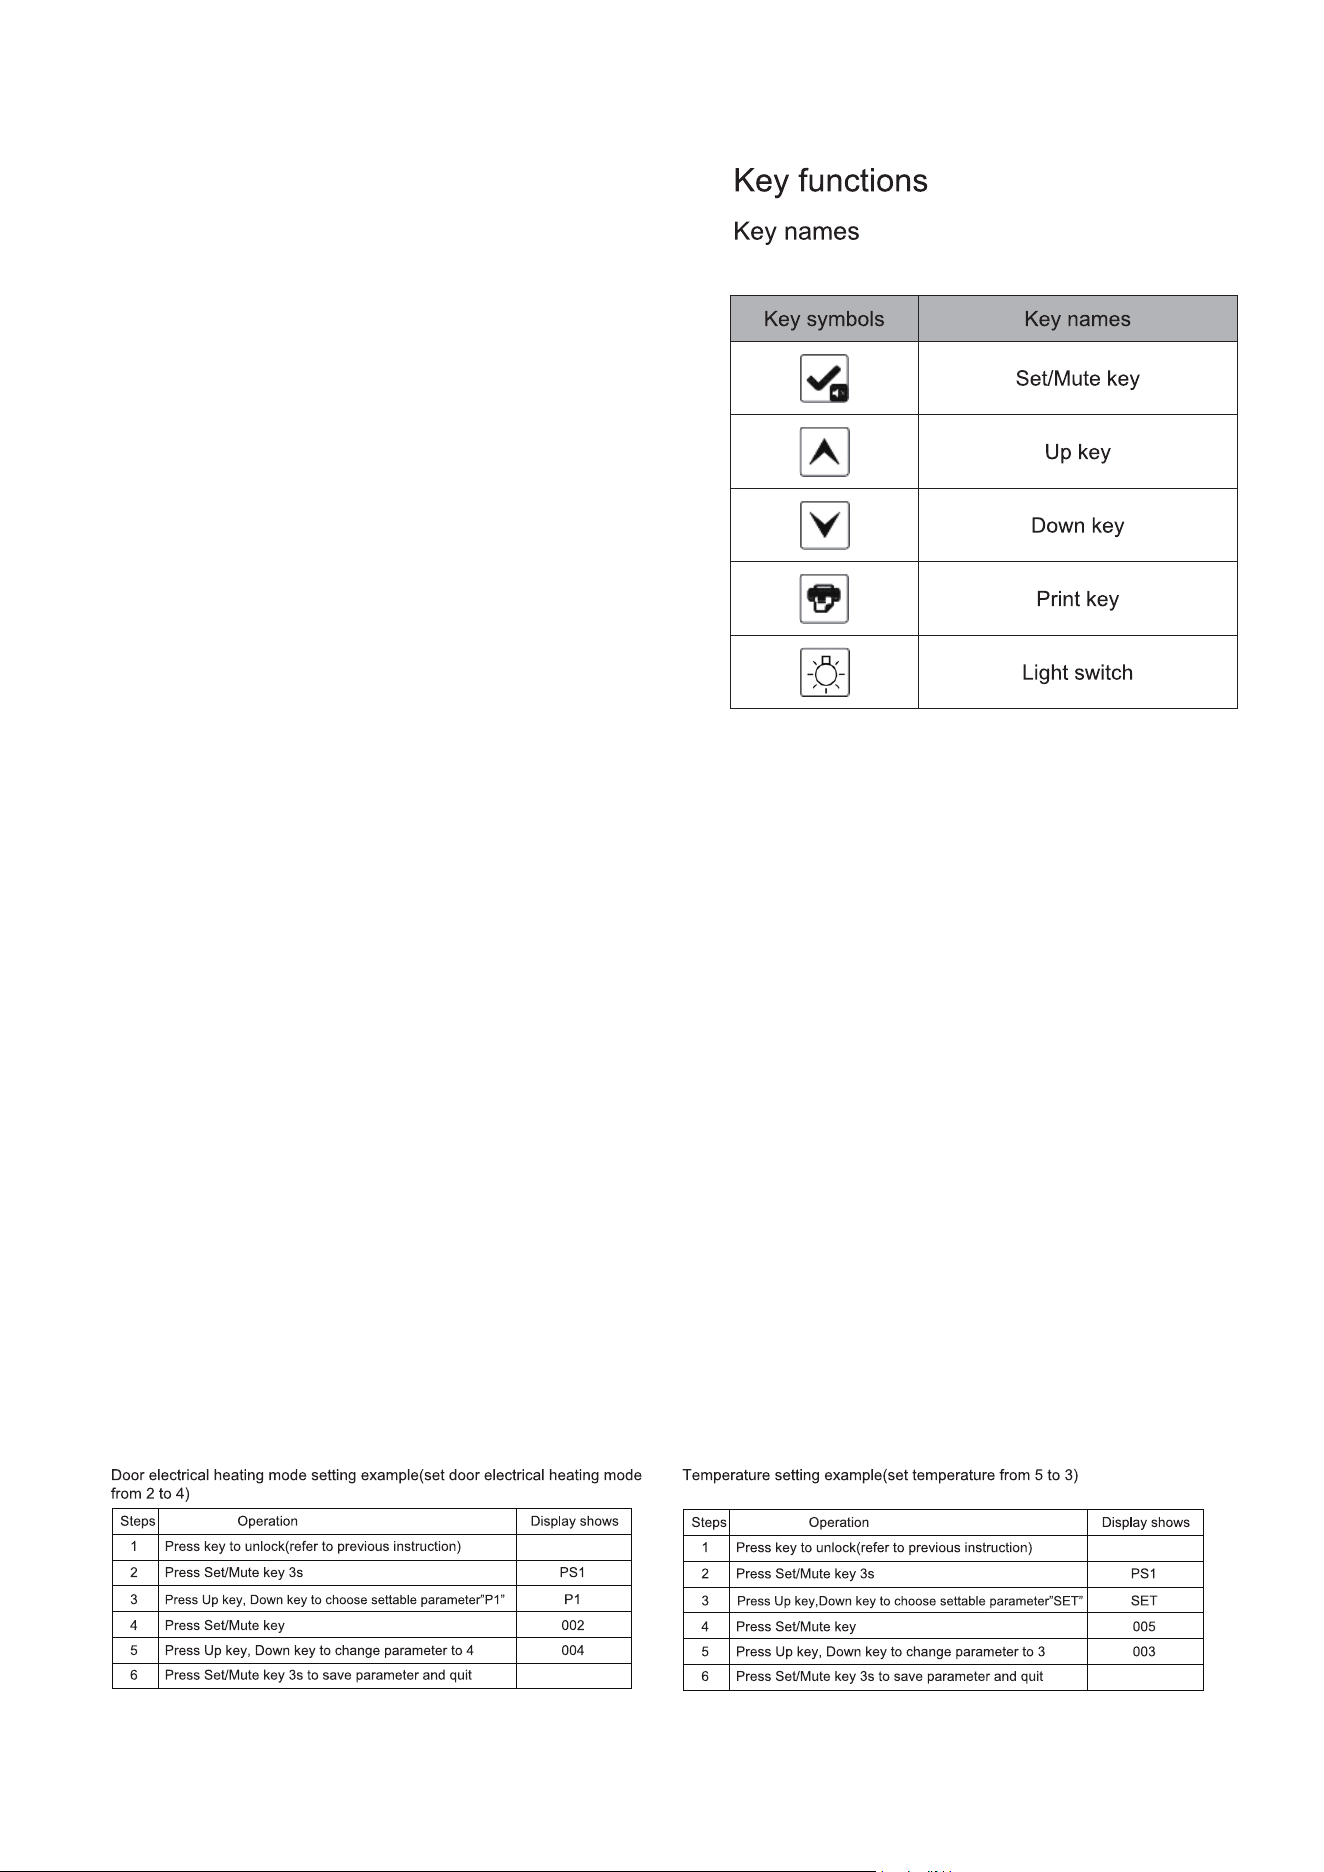
Key Operation:
Key Lock Function:
A) The key automatically locks if there's no
activity for 60 seconds or if both the Up and
Down keys are held for 3 seconds
simultaneously.
B) With a locked key, users can only view the
ambient temperature. Only the Mute and Light
switches are operable; all other keys remain
locked.
C) Steps to Unlock Key:
1. Press and hold both Up and Down keys for 3
seconds when locked. The display will show
"000".
2. Use the Up and Down keys to enter the
password (default is 005).
3. Confirm the unlock action by pressing the
Set/Mute key. The display returns to its
regular view, and the key lock deactivates.
User Parameter Setting:
To adjust user-specific parameters, follow these steps (more details can be found in the user
menu parameter table):
1. Ensure the key is unlocked. Hold the Set/Mute key for 3 seconds. The display will then show
"PS1".
2. Use the Up or Down keys to select the parameter you want to adjust.
3. Press the Set/Mute key to enter the parameter modification mode.
4. Use the Up or Down keys again to set the desired value for the parameter.
5. If there's no activity for 60 seconds or if the Set/Mute key is pressed for 3 seconds, the new
parameter value will be saved, and the system will exit the settings mode.
Starting the Recorder:
If the key is unlocked and the recorder hasn't started, the digital display will flash an "LoF" alarm.
To clear the alarm, press the Set/Mute and Up keys simultaneously for 3 seconds. The display
will then stop showing "LoF".
Setting the Recorder Time:
After a power outage, once the pharmacy refrigerator is powered on again, the display will
sequentially show numbers: 1, 2, 3... up to n.
Users can adjust parameters corresponding to each number (as detailed in a subsequent table)
when a specific number (n) is shown on the display.

Steps Operation
Display
shows
1 When the display shows "n" n
2 Use the up or down key to select "y" (desired parameter) y
3 Press the set/mute key 0
4
Use the up or down key to adjust to the desired month
value
5 Confirm by pressing the Set/Mute key for 3 seconds
Month Setting Example
(Other settings such as r, F, Pt, SCY also follow this example)
Note: Please finish setting in 2 minutes. If no operation is done within that time, the system will
automatically revert to its normal display. Before changing the recorder time and data recording
interval, ensure that the previous data is exported; otherwise, data might be lost.
Manually Generating PDF Files
If the key is unlocked and no file is being generated:
• Connect a USB flash disk.
• Press the Up key for 3s until "d01" is shown.
• Adjust with Up or Down key from “d00-d12”.
• Confirm with Set/Mute key. This action generates PDF files for past months where data is
recorded.
• When operating under standard voltage, press the Light switch to toggle light on or off.
Alarm Instructions
A) General Alarm:
When it beeps, press Set/Mute to silence.
If turned on, it signals the start of an ambient temperature check.
If turned off, it'll recheck the ambient temperature.
B) Temperature Alarm:
Press Set/Mute to silence and check ambient temperature.
If no key operation for 10 minutes, the alarm will sound again.
C) Checking Ambient Temperature:
When the key is locked, press Set/Mute to display ambient temperature. It will revert to normal
display after no key operation for 5s.
If the key is unlocked, the same operation will display the temperature and return to the default
view after 5s of inactivity.
Recording Temperature
The device records data every 10 minutes.
Exporting to USB Data
1. Instant Data Upload:
On connecting a USB flash drive, the device alerts with a beep and the display shows the "on"
code, indicating data transfer.
The system creates PDF files for both the current and the previous month.
Once the transfer completes, an "End" alert displays for 6 seconds before returning to its
normal display.
If data quantity is smaller, the "on" and "end" codes might not display.
2. Monthly Data Upload:
If the USB drive remains connected, data from the current month is transferred to the PDF every
alternate month.
A beep and the "on" display indicate the beginning of the transfer, especially for larger datasets.
Post transfer, an "End" alert appears briefly before the display returns to its normal state.
3. Manual Data Generation:
In instances where a USB drive connects but no automatic file generation occurs, PDFs for the
current month and the preceding 12 months can be created manually.
Note: Device features may vary. For specific configurations, refer to the accompanying manual.
Note: If the alarm remains active and does not cease, please reach out to costomer service
for assistance.
Note: It's important to recognize that the functional features of the product might dier
based on the specic model or version. Always refer to the exact specications and features
provided with your purchased product.

Menu l evel Menu Menu des c r i p� on
Se� ng
ra nge
Defa ul t Uni t
User menu
Op� onal MAX
Maximum temperature in the
current �me period
--- --- °F
Op�onal MIN
Minimum temperature in the
current �me period
--- --- °F
SET CLR
Clear the record of maximum and
minimum temperature in the
current �me period.
0: clear 1: not clear
SET H
Upper devia�on on high
temperature alarm
32.0–212.0 41 °F
SET L
Lower devia�on on low
temperature alarm
32.0–212.0 37.4 °F
SET n Check the current date - year --- --- year
SET y Check the current date - month --- --- month
SET r Check the current date - day --- --- day
SET S Check the current date - hour --- --- hour
SET F Check the current date - minute --- --- minute
Op� onal Pt Prin�ng interval 0–240 20 min
Op� onal th1 Ambient temperature alarm value 68.0–122.0 104 °F
Op� onal P1 Door hea� ng mode selec� on
1: automa�c hea�ng mode 1 1
2: automa�c hea�ng mode 2
3: automa�c hea�ng mode 3
4: the door keeps open
5: the door keeps closed
Op� onal P2 Display mode selec� on
1: average temperature 1
2: upper temperature
3: lower temperature
PS1 Password setting of user menu 000–999 005
Glass door electrical heating mode instruction:
Select 1 for glass door electrical heating mode P1:
• Heating for 3 minutes after the door is opened and closed.
• If the door is reopened and reclosed during the heating procedure, the heating timer will restart.
Select 2 for glass door electrical heating mode P1:
• Electrical heating activates while the compressor is in operation.
• Electrical heating turns off 1 minute after the compressor shuts down.
Select 3 for glass door electrical heating mode P1:
• Electrical heating activates when the interior humidity exceeds 80%.
• However, if the interior humidity drops below 60%, the electrical heating remains on, unless
there's a sensor error or shield.
Select 4 for glass door electrical heating mode P1:
• Electrical heating remains on.
Select 5 for glass door electrical heating mode P1:
• Electrical heating remains off.
Warning
• Always disconnect the power before conducting any repairs or maintenance to ensure
safety against electrical shock or potential injuries.
• Be cautious about inhaling any medications or suspended particles nearby to avoid health
risks.
Note
• Avoid sprinkling water directly on the unit, as this could affect the electrical components
and induce rust.
• Abstain from using hot water, harsh detergents, or organic solvents when cleaning the
cabinet.
• Do not place heavy items atop the device, which may cause it to deform or undergo undue
pressure.
Device Maintenance
Defrosting: The device features automatic defrosting for user convenience.
Cleaning:
• For optimal performance, cleanse the pharmacy refrigerator monthly.
• A damp cloth can be used to wipe minor external and internal dirt. If the refrigerator has
significant dirt, use a cloth soaked in a neutral detergent. Always ensure to rinse and then
dry with a clean cloth.
• Avoid storing items on or inside the refrigerator that could potentially harm the device or
disrupt its electrical insulation.
• The compressor and related mechanical components are sealed, eliminating the need for
lubrication.
Device Deactivation
• When storing the device in an unsupervised area for extended periods:
• Ensure it's off and unplugged.
• Clean both the interior and exterior using a warm, damp cloth followed by drying.
• Always lock the device to ensure child safety and prevent any unintentional access, reducing
risks like suocation.
End-of-Life Instructions
Once the device approaches its lifespans conclusion:
• It should be decommissioned and entrusted to certied recycling entities for appropriate scrap-
ping and disposal, in line with local guidelines and regulations.
• It's crucial that individuals without proper credentials refrain from taking apart or tampering
with the device unauthorizedly.
• Any discarded device should be allocated to specied zones, ensuring they remain out of
children's reach to prevent potential hazards.
Malfunction Troubleshooting
Refrigerator does not
work
- Check if the input power conforms to specifications.
- Verify the plug and socket connections are secure.
- Inspect for any issues in the input and control lines.
- Determine if the voltage is too low.
- Ensure the fridge isn't overcrowded with hot items.
The cooling effect is
unsatisfactory
- Ensure items inside are spaced out evenly.
- Keep the fridge away from direct sunlight or heat sources.
- Limit the frequency of opening the door.
- Verify if the surrounding temperature is unusually high.
- Ensure smooth air circulation without obstructions.
- Check if the fridge sits level and stable.
- Ensure the cabinet doesn't touch any external objects or
walls.
Excessive noise
- A slight noise variation can be due to ambient noise, open
do
ors, or the compressor.
The alarm keeps
beeping
- Items recently added can cause a temporary rise in
temperature. The alarm should stop after a short while.
- Make sure the door is properly closed.
- Check the battery status. Normal operation should resume
after some time.
- Verify that the temperature inside the fridge is within the
acceptable range.

LIMITED WARRANTY
Koolmore Supply, Inc. extends a limited warranty to the original purchaser, guaranteeing that this Koolmore
product is free from manufacturing defects in material or workmanship for one year from the date of
purchase.
Should you discover any such defect within the warranty period, Koolmore Supply, Inc., reserves the right to
repair or replace the product without charge, or to cover the cost of replacement parts and repair labor needed
to correct defects present at the time of purchase or resulting from regular usage, when the appliance has been
installed, operated, and maintained as per the instructions provided.
At its sole discretion, Koolmore Supply Inc. may decide to replace the product. In such an event, your replace-
ment appliance will carry the warranty for the remaining term of the original unit's warranty period.
This warranty is valid exclusively to the original purchaser of the product and only applicable within the United
States. The warranty commences from the date of original consumer purchase. Proof of the original purchase
date will be required to obtain service under this warranty.
Under this limited warranty, your sole and exclusive remedy will be product repair, as outlined above. All
services must be provided by a Koolmore-designated service company.
To claim warranty or request repair service:
Email support@koolmore.com. Please include your name, address, phone number, warranty repair request,
and a copy of your proof of purchase receipt. Alternatively, visit koolmore.com and use the contact us page. A
Koolmore customer service representative will promptly arrange service for your appliance.
We thank you for choosing Koolmore.
WARRANTY EXCLUSIONS
This limited warranty will not cover:
1. Failure of the product to perform during power failures or interruptions,
or due to inadequate electrical service.
2. Damage incurred during transportation or handling.
3. Damage caused by accidents, vermin, lightning, winds, fire, floods, or acts of God.
4. Damage resulting from accidents, alterations, misuse, abuse, improper installation, repair, or mainte-
nance. This includes using any external device that alters or converts the voltage or frequency of
electricity.
5. Unauthorized product modifications, repairs by unauthorized centers, or use of non-approved
replacement parts.
6. Abnormal cleaning and maintenance not aligned with the user's manual.
7. Use of incompatible accessories or components.
8. Any costs associated with repairs or replacements under these excluded circumstances shall be the
responsibility of the consumer.
WARRANTY
22