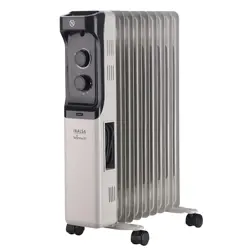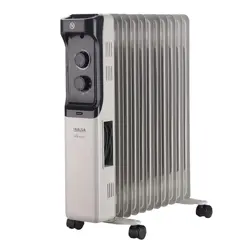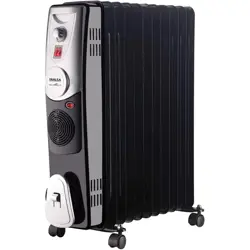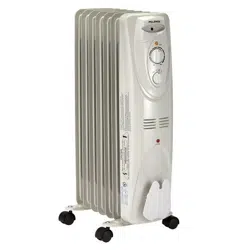
OIL-FILLED
RADIATOR HEATER
OWNER’S MANUAL
Model No. OH907R
WARNING
Read and understand this entire owner’s manual, including all safety information,
before
electric shock, or serious personal injury.
CAUTION
Keep this owner’s manual for future reference.
SKU No. 1014175683
2
2
Thank you for choosing a KONWIN Product. This owner’s manual
will provide you with valuable information necessary for the proper
care and maintenance of your new product. Thoroughly read the
instructions and familiarize yourself with all the operational aspects
of your new product.
IMPORTANT INSTRUCTIONS
1. Read ALL instructions before using this unit.
2. CAUTION: Risk of Electric Shock. DO NOT open or try
to repair the heater yourself.
3. This heater may get hot when in use. To avoid burns,
DO NOT let bare skin touch hot surfaces. If provided, use
handle(s) when moving this heater. DO NOT place it
against walls, furniture, curtains, etc.
4. Keep combustible materials, such as furniture, pillows,
bedding, paper, clothes, and curtains at least 3 ft from the
front of the heater and keep them away from the sides,
top, and rear. DO NOT place towels or other objects on
the heater.
5. Extreme caution is necessary when any heater is used.
6. DO NOT operate any heater with a damaged cord or
after the heater malfunctions, has been dropped or dam-
aged in any manner. Return heater to authorized service
facility for examination, electrical or mechanical adjust-
ment, or repair.
7. This heater is not intended for use in bathrooms, laundry
areas, showers or swimming pools and similar locations.
NEVER locate heater where it may fall into a bathtub or
other water container. To protect against electrical haz-
ards, DO NOT immerse in water or other liquids.
8. DO NOT touch the control panel or plug with a wet hand.
9. DO NOT run cord under carpeting. DO NOT cover cord
with throw rugs, runners, or similar coverings. Arrange
cord away from traf c area and where it will not be tripped
over.
When using this electric unit, basic safety precautions should
always be followed to reduce the risk of
re, electric shock, and
injury to persons, including the following:
3
Save These Instructions
shock or re, or damage the heater.
11. To prevent a possible re, DO NOT block the air intakes or
exhaust in any manner. DO NOT use on soft surfaces, like
a bed, where openings may become blocked.
12. A heater has hot and arcing or sparking parts inside. DO
NOT use in areas where gasoline, paint, explosive and/or
ammable liquids are used or stored. Keep unit away from
heated surfaces and open ames.
13. Always plug heaters directly into a wall outlet/receptacle.
Never use with an extension cord or relocatable power tap
(outlet/power strip).
14. To avoid re or shock hazard, plug the unit directly into a
120 V AC electrical outlet.
15. To disconnect heater, turn controls to OFF, then remove
plug from outlet. Pull rmly on the plug, DO NOT unplug
by pulling on the cord.
16. Always unplug the unit before moving or cleaning, or
whenever the heater is not in use.
17. Use only for intended household use as described in this
manual. Any other use not recommended by the manufac-
turer may cause re, electric shock, or injury to persons.
The use of attachments not recommended or sold by
unauthorized dealers may cause hazards.
18. Always use on a dry, level surface. Use on oor only.
19. DO NOT use outdoors.
20. WARNING: To reduce the risk of re or electric shock,
DO NOT use this unit with any solid-state speed control
device.
21. DO NOT attempt to repair or adjust any electrical or
mechanical functions on this unit. Doing so will void your
warranty. The inside of the unit contains no user service-
able parts.
22. Always use the product in an upright position.
10. DO NOT insert or allow foreign objects to enter any ven-
tilation or exhaust opening as this may ca
use an electric
Tip-Over Safety Feature
This heater is equipped with a shut-off safety feature. Once
the heater is tipped over, an internal switch will automatically
shut the heater off. Once the heater is restored to an upright
Overheat Safety Feature
This heater is equipped with an overheat safety feature. When
the heater’s internal components reach a certain temperature
that could cause overheating and possible
re, the heater will
automatically shut off.
It is normal for the power cord to feel warm to the touch; however, a
loose t between the outlet and the plug may cause overheating of the
plug. If this occurs, try inserting the plug into a different outlet. Contact
a quali ed electrician to inspect the original outlet for damage.
WARNING
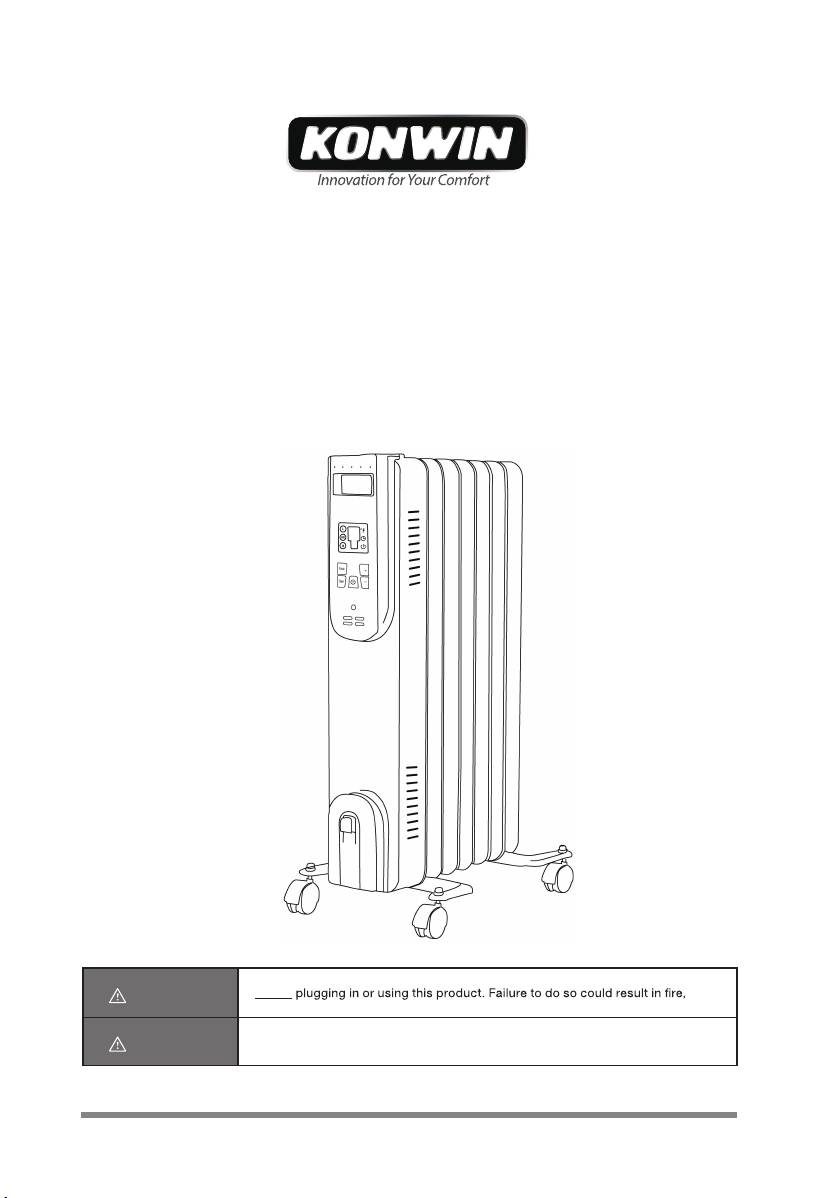
9.84in W x 13.39in D x 23.62 H
position, the heater will reset. To continue operation, press
the power button on the control panel.
5
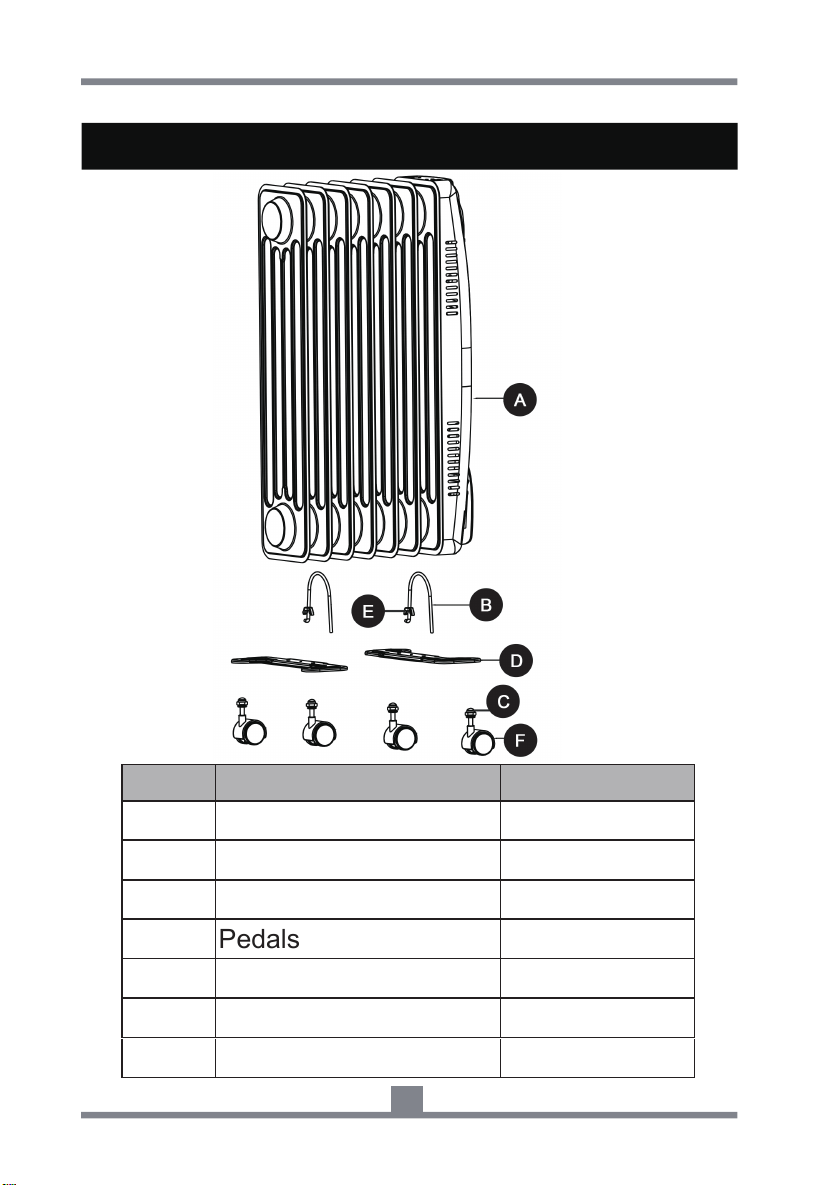
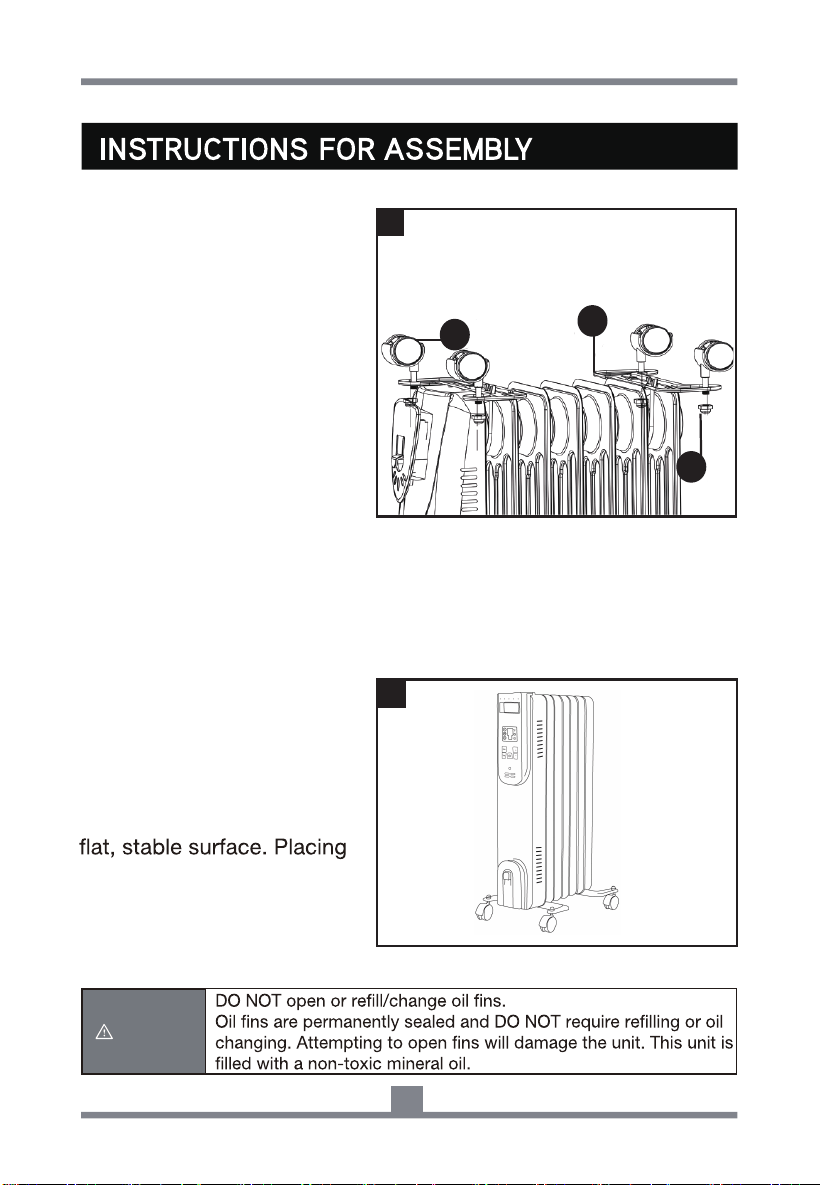
IN THE BOX
PART DESCRIPTION QUANTITY
A Heater 1
1
B Bolts 2
C Nuts 4
D Pedals
Butterfly Nuts
2
E 2
F
/
Casters
Owner’s Manual
4
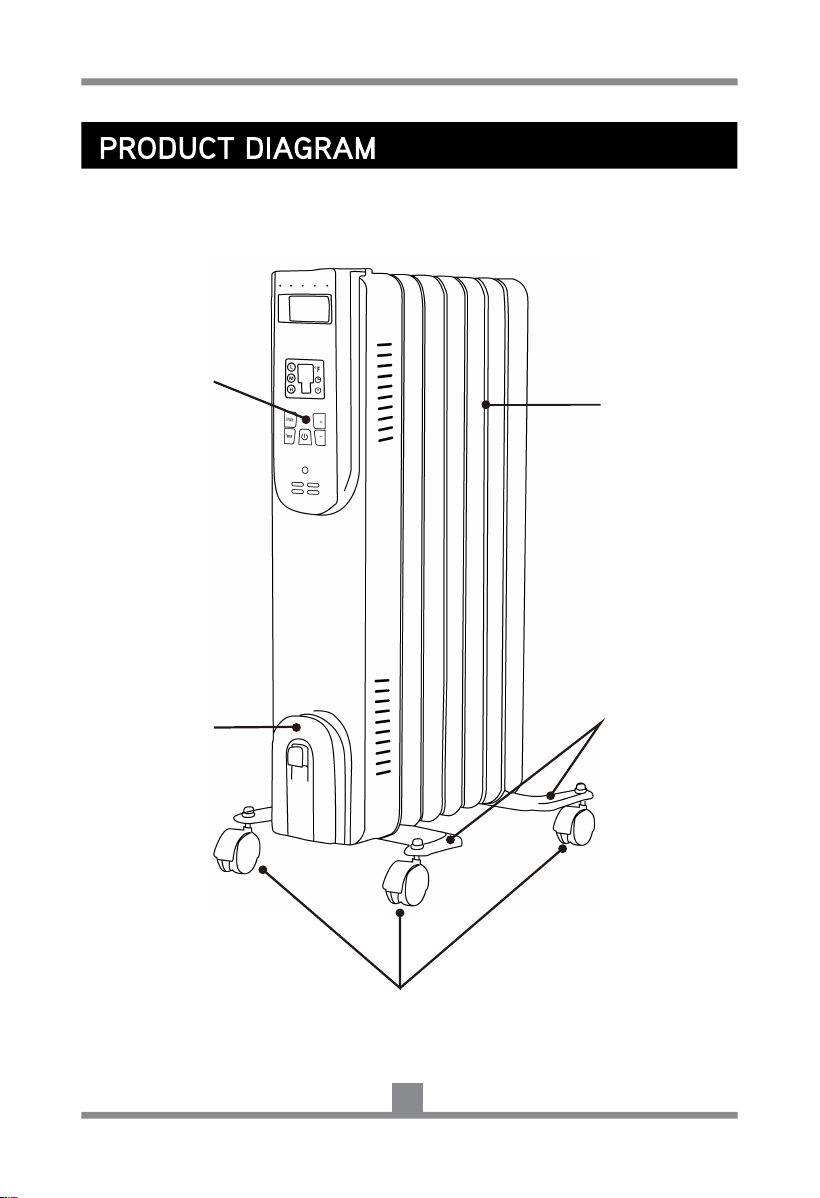
6
Cord Storage
Control Panel
Casters
Oil Filled Fins
Pedals
7
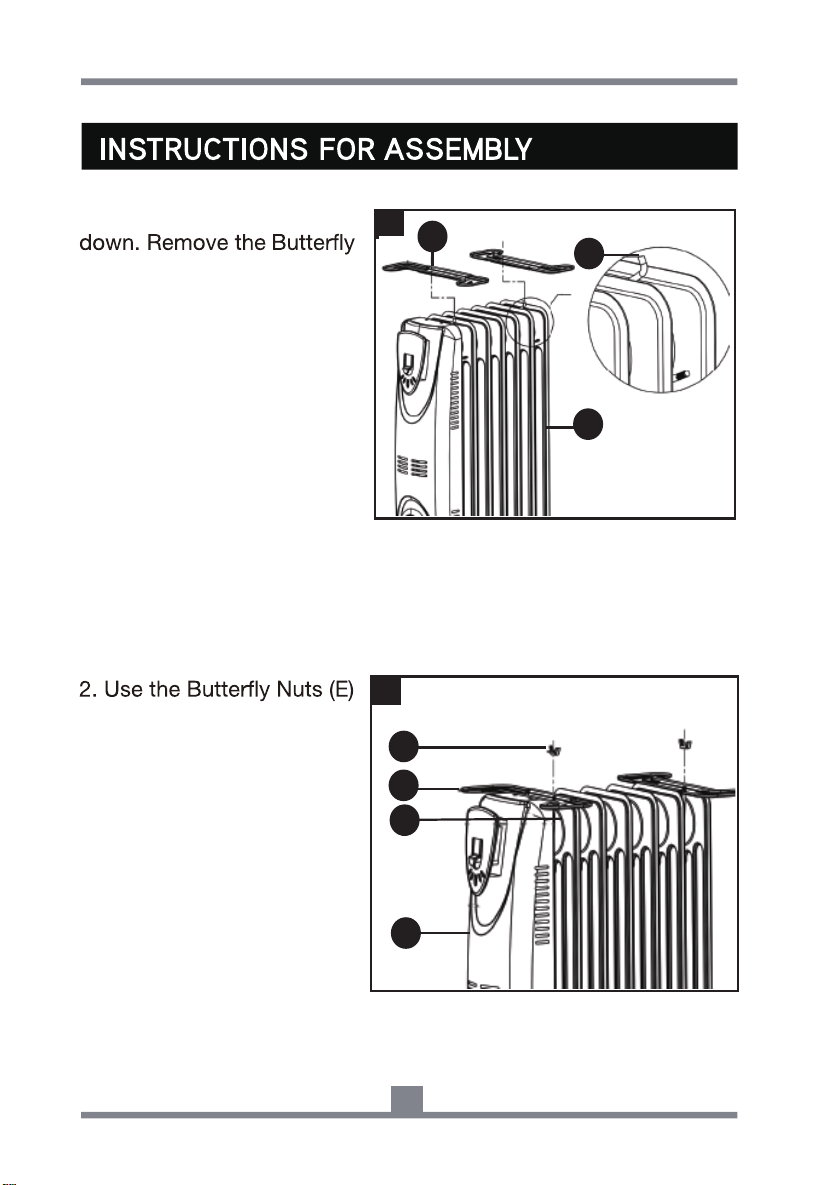
1
2
1. Turn the heater (A) upside
Nuts from the bolts (B).
Then insert the bolts (B) in
“U” direction into the heater
(A).
removed from Step 1 to
secure both pedals (D) to the
bolts (B).
A
B
D
E
D
B
A
8
3. Remove the Nuts (C)
preassembled to the Casters
(F). Insert the top of Casters
into the holes on the Pedals
(D). Use the removed Nuts to
secure the Casters to the
Nuts.
4. Turn the assembled unit
upright. Ensure the Casters
are installed correctly and
level.
Place the heater only on a
the heater on an incline can
cause damage to the heater
and lead to hazardous
situations.
4
3
WARNING
F
D
C
9
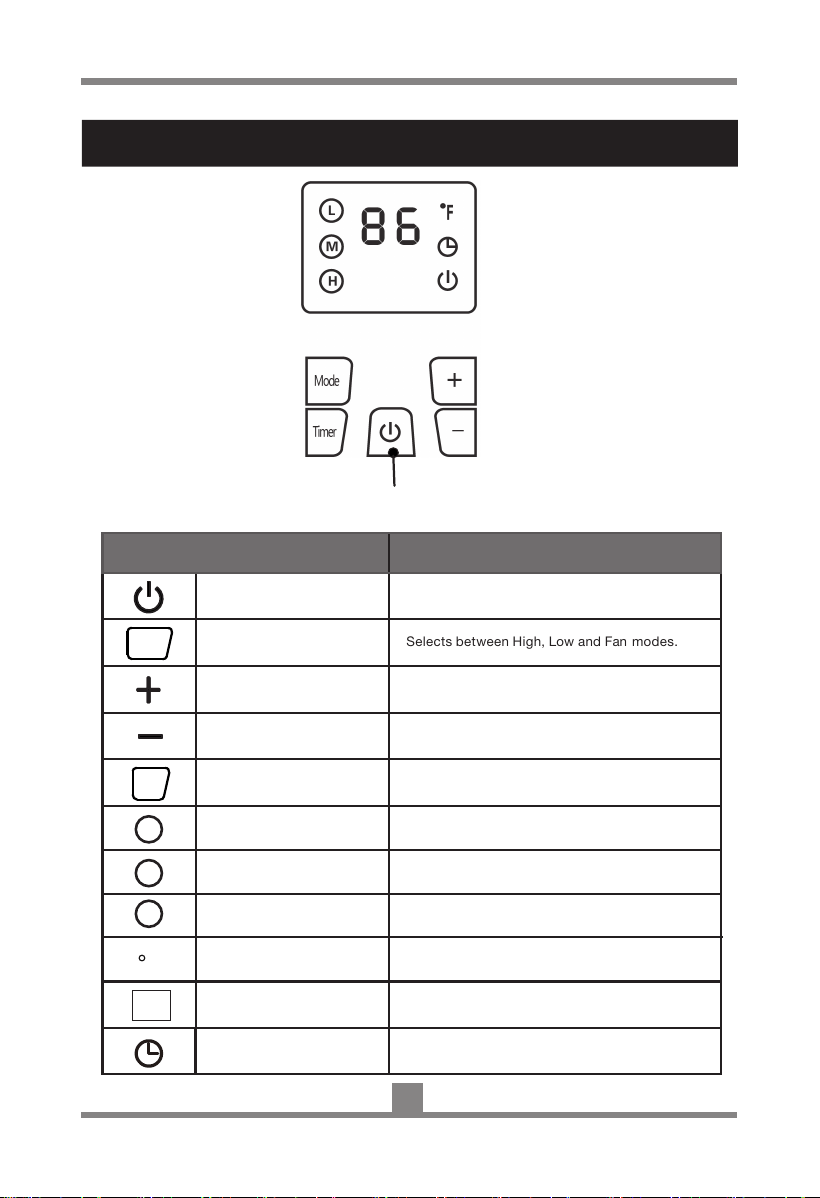
CONTROL PANEL BUTTONS/DISPLAY
CONTROLS/DISPLAY FUNCTION/DESCRIPTION
ON/OFF Turns the heater ON or OFF.
Mode
Selects between High, Low and Fan modes.
Temp Up Increases desired temperature.
Temp Down Decreases desired temperature.
Timer Sets hour value for the timer.
Control Buttons
F
Mode
Timer
Medium Mode Indicator
High Mode Indicator
Lit when Medium Heat mode is engaged.
Lit when High Heat mode is engaged.
Low Mode Indicator
Lit when Low Heat mode is engaged.
Timer Indicator Lit when the Timer mode is engaged.
Digital Display Indicates set room temperature or time.
Fahrenheit Indicator Lit when temperature displayed is in Fahrenheit.
86
L
M
H
10
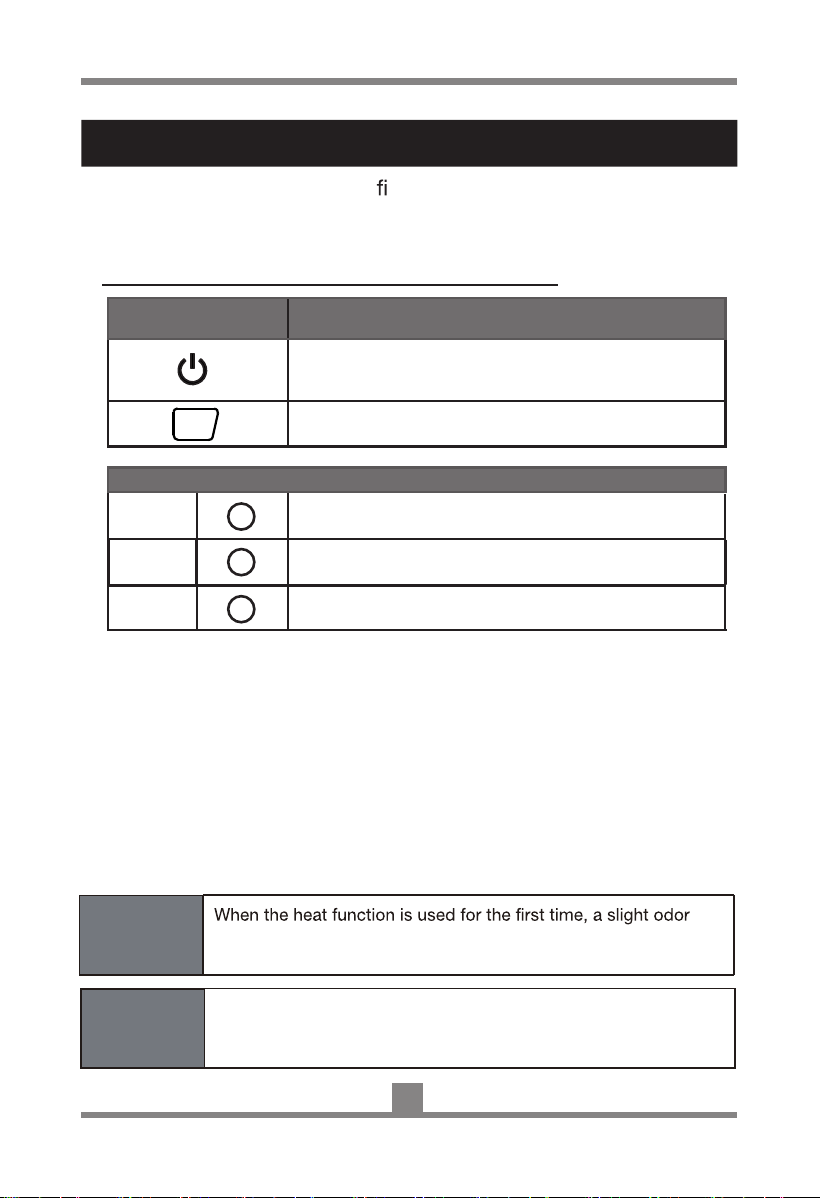
INSTRUCTIONS FOR USE
UNIT FUNCTION
1. Turn the heater ON by pressing the ON/OFF button.
2. Press the Mode button to toggle between the three heat
modes.
1. Place the product on a rm, level surface.
2. With the power in the OFF position, plug the unit directly
into a 120 V AC electrical outlet.
Heat Modes
High High Heat Mode uses 1500W N
Medium
Medium Mode uses 900W
Low Heat Mode uses 600W
Low
STARTING UNIT AND SELECTING HEAT MODE
It is normal for the heater to cycle ON and OFF as it maintains
the preset temperature. To prevent the unit from cycling, you
need to change the thermostat setting.
NOTICE
NOTICE
may be present. This is normal and should not occur again unless
the heater is not used for an extended period of time.
Mode
H
M
L
11
The Power OFF Timer function will allow for the heater to
power OFF after a certain set time, and can only be set
while the heater is in the ON mode.
NOTICE
UNIT
FUNCTION
1. Press the “+” and “-” button to adjust unit to the desired room
temperature.
2. Select temperature from 59°F to 95°F.
NOTE: Once you have chosen the desired temperature, the
heater will remain on until room temperature increases to the set
temperature on the LED display. The heater will cycle ON and OFF
to maintain set room temperature.
UNIT FUNCTION
1. Turn the heater ON.
2. Press the Timer button.
LED display changes from the “temperature” to the “hours” option
for the timer. Hour options for the timer are 0 to 12 hours
(in 1 hour increments).
3. Continue to press the timer button to change the number of
hours the heater will run before powering itself OFF.
SELECTING DESIRED TEMPERATURE
SETTING POWER OFF TIMER FUNCTION
59
60 95
0 1
02 1 2
F
Timer
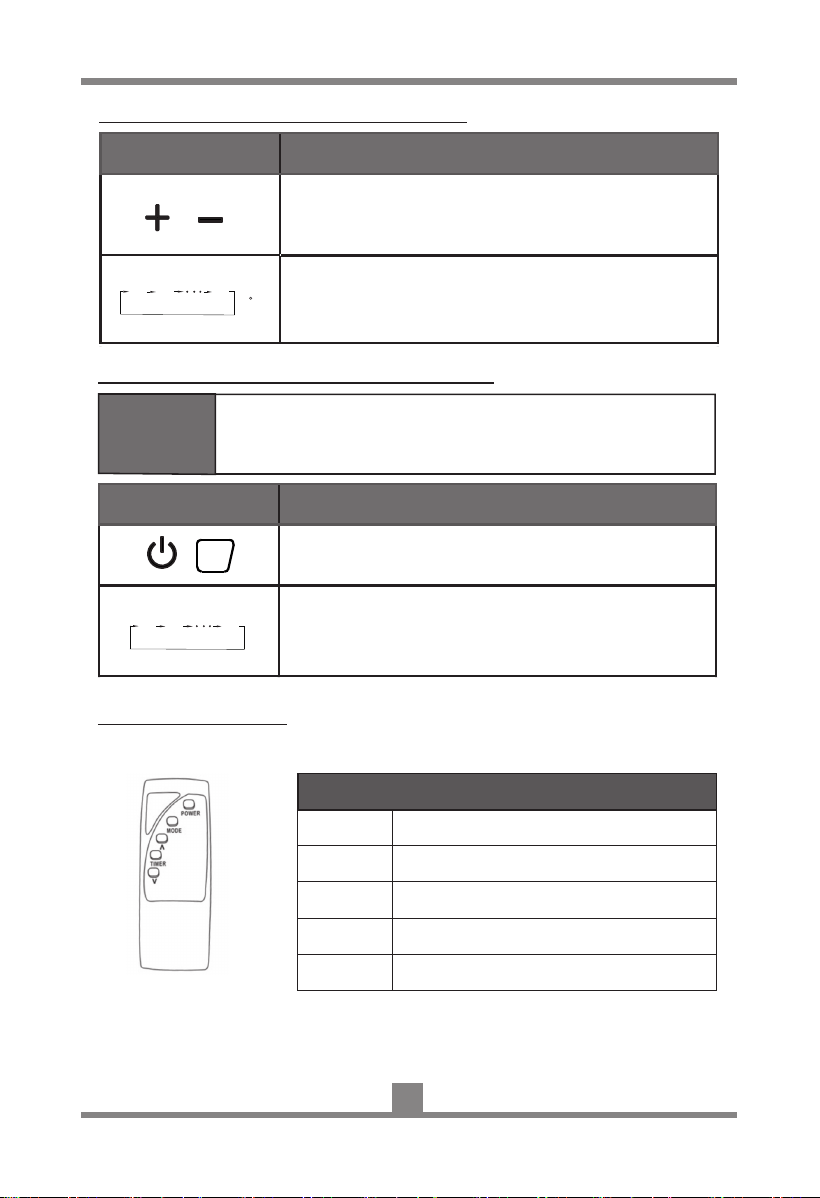
REMOTE CONTROL
The buttons on the remote allow the access to the same settings as the main
control panel.
REMOTE CONTROL INSTRUCTION
Power
Turns the heater ON or OFF.
Mode Selects between LOW, MED, HIGH modes.
Increases desired temperature.
Decreases desired temperature.
Timer Sets hour value for the timer.
>
>
Model: AAA/LR03
Voltage: DC 1.5V
Capacity: 1300mAh
This remote control uses two AAA /LR03 batteries (NOT INCLUDED)
WARNING: NEVER dispose of batteries in re. Failure to observe this precaution may result in an explosion.
Dispose of batteries at your local hazardous material processing center or per local laws.
12
MAINTENANCE
STORAGE
1. Turn the POWER OFF.
2. Unplug the unit and let it cool completely.
3. To keep the heater clean, the outer shell may be cleaned
with a soft, damp cloth. A mild detergent can be used if
necessary.
4. After cleaning, dry the unit with a soft cloth.
5. Wait until the unit is completely dry before use.
WARNING
• DO NOT let liquid enter the heater.
• DO NOT use alcohol, gasoline, abrasive powders,
furniture polish, or rough brushes to clean the heater.
This may cause damage or deterioration to the surface
of the heater.
•
•
•
•
•
•
D
The heater must not be located immediately below a socket
outlet.
Do not use this heater in the immediate surroundings of a
bath, a shower or a swimming pool.
This heater is lled with a precise quantity of special oil.
Repairs requiring opening of the oil container are only to be
made by the manufacturer or his service agent who should
be contacted if there is an oil leak.
When scrapping the heater, follow the regulations
concerning the disposal of oil.
O NOT immerse the heater in water.
1. Save the original box for off-season storage.
2. Clear the heater with a soft, damp cloth.
3. Remove the Base Feet.
4. Place the Radiator and Base Feet in the original box, and
store in a cool and dry place.
5. The heater is stored fully assembled, ensure it is covered to
protect from the dust.
13
If the heater will not operate, please check the following:
1. Check if the power cord is plugged into an electrical
outlet. If not, plug in unit to appropriate outlet.
2. Check if electricity to the outlet is working
3. Ensure power is turned to ON position.
4. Make sure heater is placed o
solid surface.
5. See SAFETY FEATURES section for additional information.
The product is equipped with tip-over switch inside. When the product
tips over abnormally during its use, it can cut off power automatically.
NOTICE
The product is equipped with an overheat safety feature
protector which will switch off the heater in case of accidental
over heating (ex. Obstruction of air intake and outlet grills).
NOTICE
14
To Obtain Warranty Support or Advice, Please Complete These
Easy Steps:
Customer Service and Support
Contact Konwin PRODUCTS Technical Support
E-mail: [email protected]
You will need to provide the unit's model number, serial number,
date of purchase, retailer of purchase, a daytime phone number,
and possibly a copy of your receipt.
Be Patient, Clear, and Concise.
Describe the issue and symptoms you have for, and about the
product. A certied Konwin Technical Support agent will give you
an evaluation of your issue and your resolution options. If the
answer is not available at that time, you will be referred to the
appropriate channels, or given a call back within 72 hours with an
answer or resolution.
If after speaking with Konwin Technical Support, it is determined
by one of our agents that your unit may need to be sent in to us to
be evaluated/repaired, our representative will provide you with a
reference number and provide you with details on how to send in
your unit for repair.