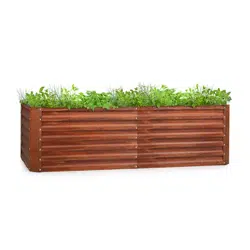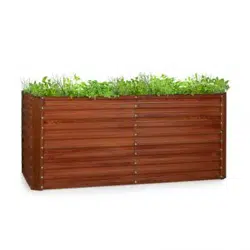

Altiplano Cubic
Hochbeet
Raised Bed
Maceta elevada
Platebande surélevée
Vaso rialzato
10033605


3
DE
Sehr geehrter Kunde,
wir gratulieren Ihnen zum Erwerb Ihres Gerätes.
Lesen Sie die folgenden Hinweise sorgfältig durch und
befolgen Sie diese, um möglichen Schäden vorzubeugen.
Für Schäden, die durch Missachtung der Hinweise und
unsachgemäßen Gebrauch entstehen, übernehmen wir
keine Haftung. Scannen Sie den folgenden QR-Code,
um Zugriff auf die aktuellste Bedienungsanleitung und
weitere Informationen rund um das Produkt zu erhalten.
Dear Customer,
Congratulations on purchasing this device. Please read
the following instructions carefully and follow them to
prevent possible damages. We assume no liability for
damage caused by disregard of the instructions and
improper use. Scan the QR code to get access to the
latest user manual and more product information.
Estimado cliente,
Le felicitamos por la adquisición de este producto.
Lea atentamente las siguientes instrucciones y sígalas
para evitar posibles daños. No asumimos ninguna
responsabilidad por los daños causados por el
incumplimiento de las instrucciones y el uso inadecuado.
Escanee el siguiente código QR para obtener acceso a
la última guía del usuario y más información sobre el
producto.
Chère cliente, cher client,
Toutes nos félicitations pour l’acquisition de ce nouvel
appareil. Veuillez lire attentivement et respecter les
instructions de ce mode d’emploi an d’éviter d’éventuels
dommages. Nous ne saurions être tenus pour responsables
des dommages dus au non-respect des consignes et à la
mauvaise utilisation de l’appareil. Scannez le QR-Code
pour obtenir la dernière version du mode d‘emploi et des
informations supplémentaires concernant le produit.
Gentile cliente,
La ringraziamo per aver acquistato il dispositivo. La
preghiamo di leggere attentamente le seguenti istruzioni
per l’uso e di seguirle per evitare possibili danni. Non ci
assumiamo alcuna responsabilità per danni scaturiti da
una mancata osservazione delle avvertenze di sicurezza
e da un uso improprio del dispositivo. Scansionare il
codice QR seguente, per accedere al manuale d’uso più
attuale e per ricevere informazioni sul prodotto.

4
DEDE
LIEFERUMFANG
1
Standbein
(4Stück)
2
Vorder- und Rückwand (2 Stück)
3
7
Seitenwände (2 Stück) Leiste (1 piece)
Schraube 3,5 x
30mm
(24 Stück)
Schraube 3,5 x
25mm
(2 Stück)
Nagel (16 Stück)

5
DE
4
Boden (1 Stück)
5
Ablage (1 Stück)
6
Innenteil (1 Stück)
6
DE
MONTAGE
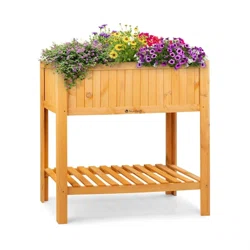
Schritt 1:
Montieren Sie die Vorder- und Rückwand (2) und die Seitenwände
(3) am oberen Ende der 4Standbeine (1) und schrauben Sie diese mit
16Schrauben (3,5mm x 30mm) fest.
Schrauben 3,5 x 30 mm (16 Stück)

7
DE
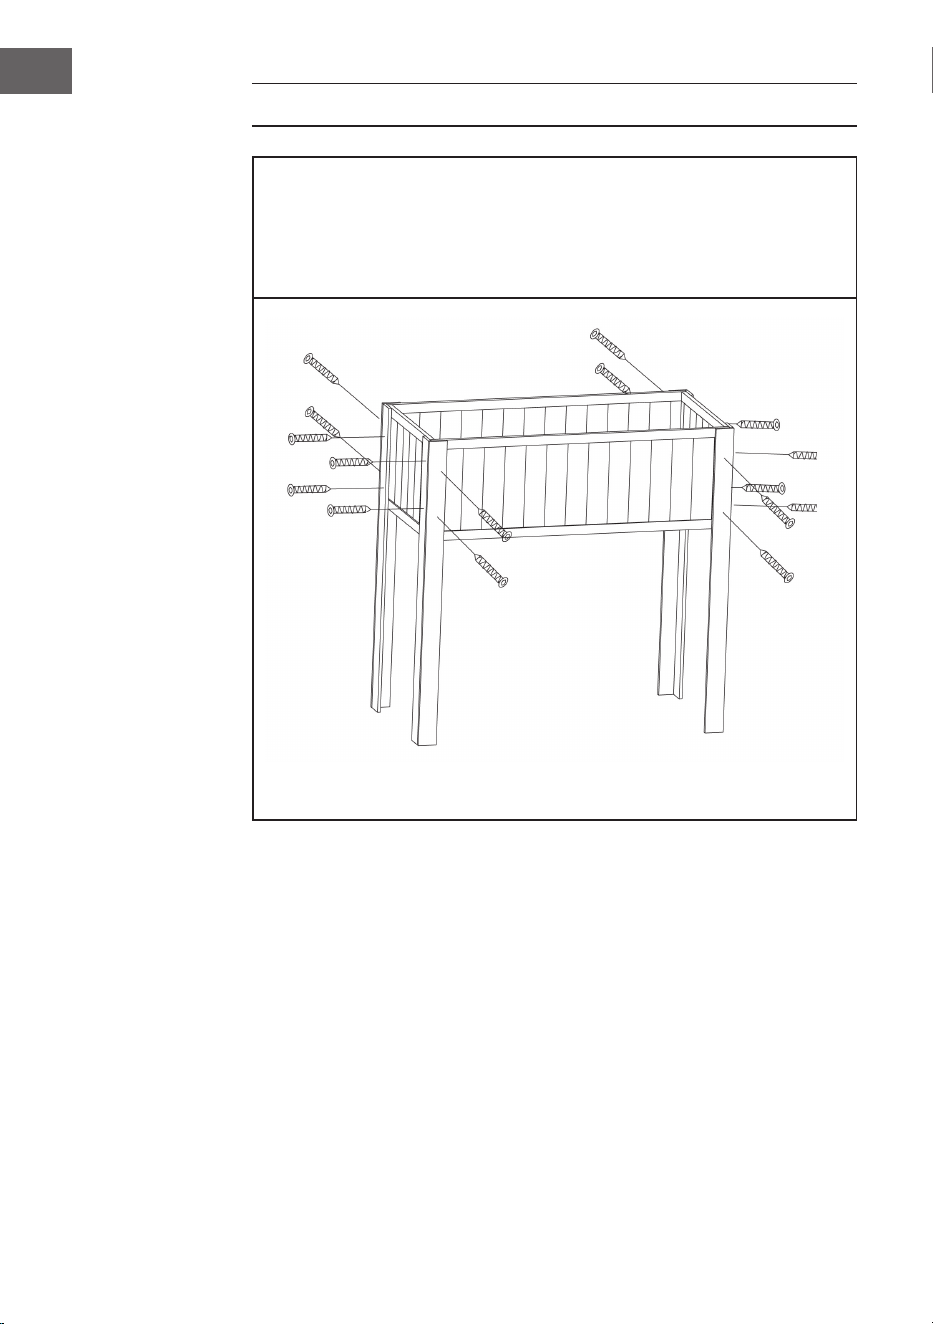
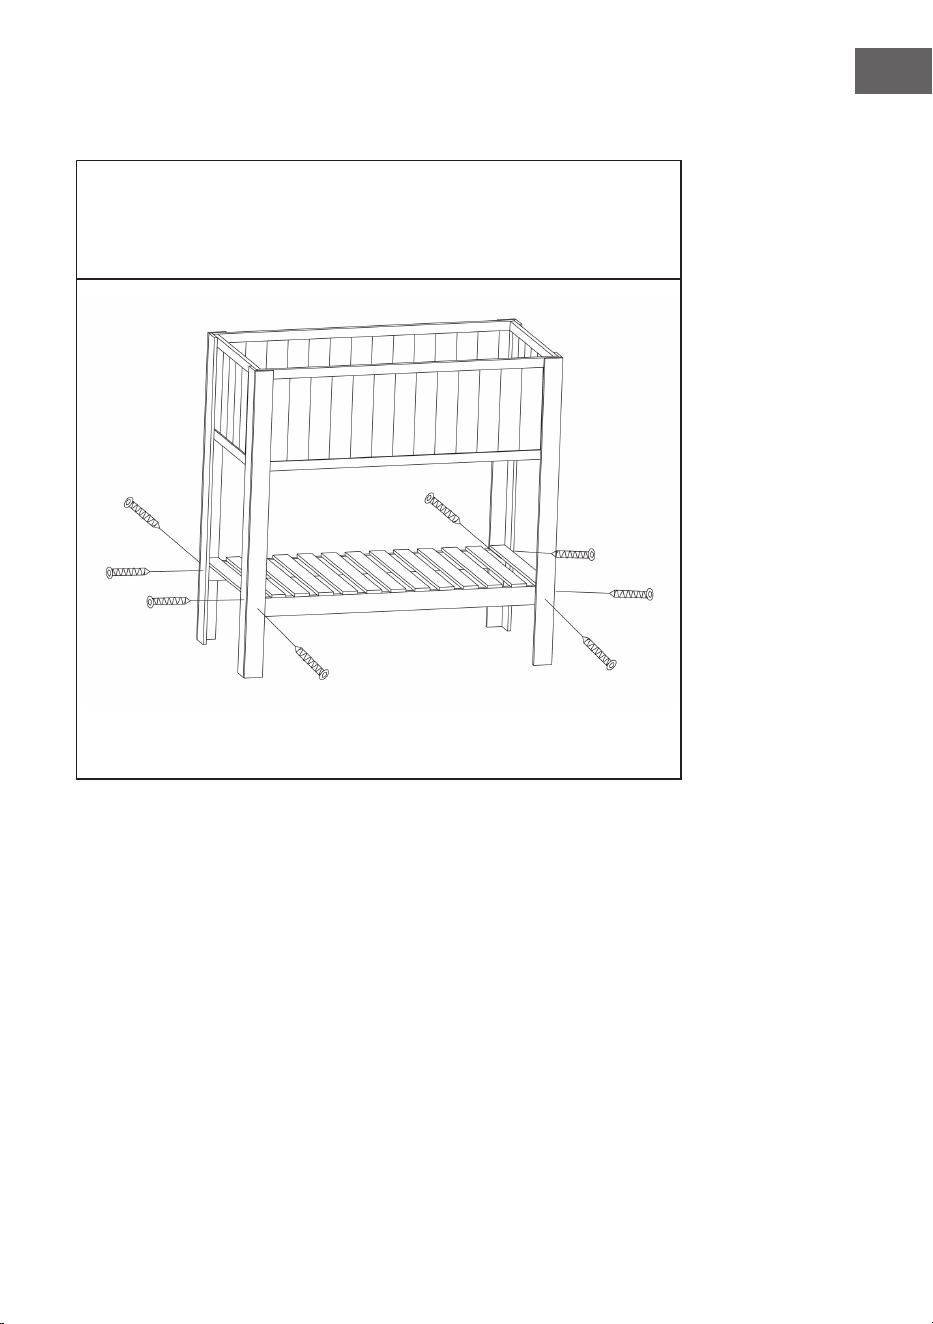
Schritt 2:
Montieren Sie die Ablage (5) im unteren Bereich der vier Standbeine (1)
und schrauben Sie diese mit 8Schrauben (3,5mm x 30mm) fest.
Schrauben 3,5 x 30 mm (8 Stück)

8
DE
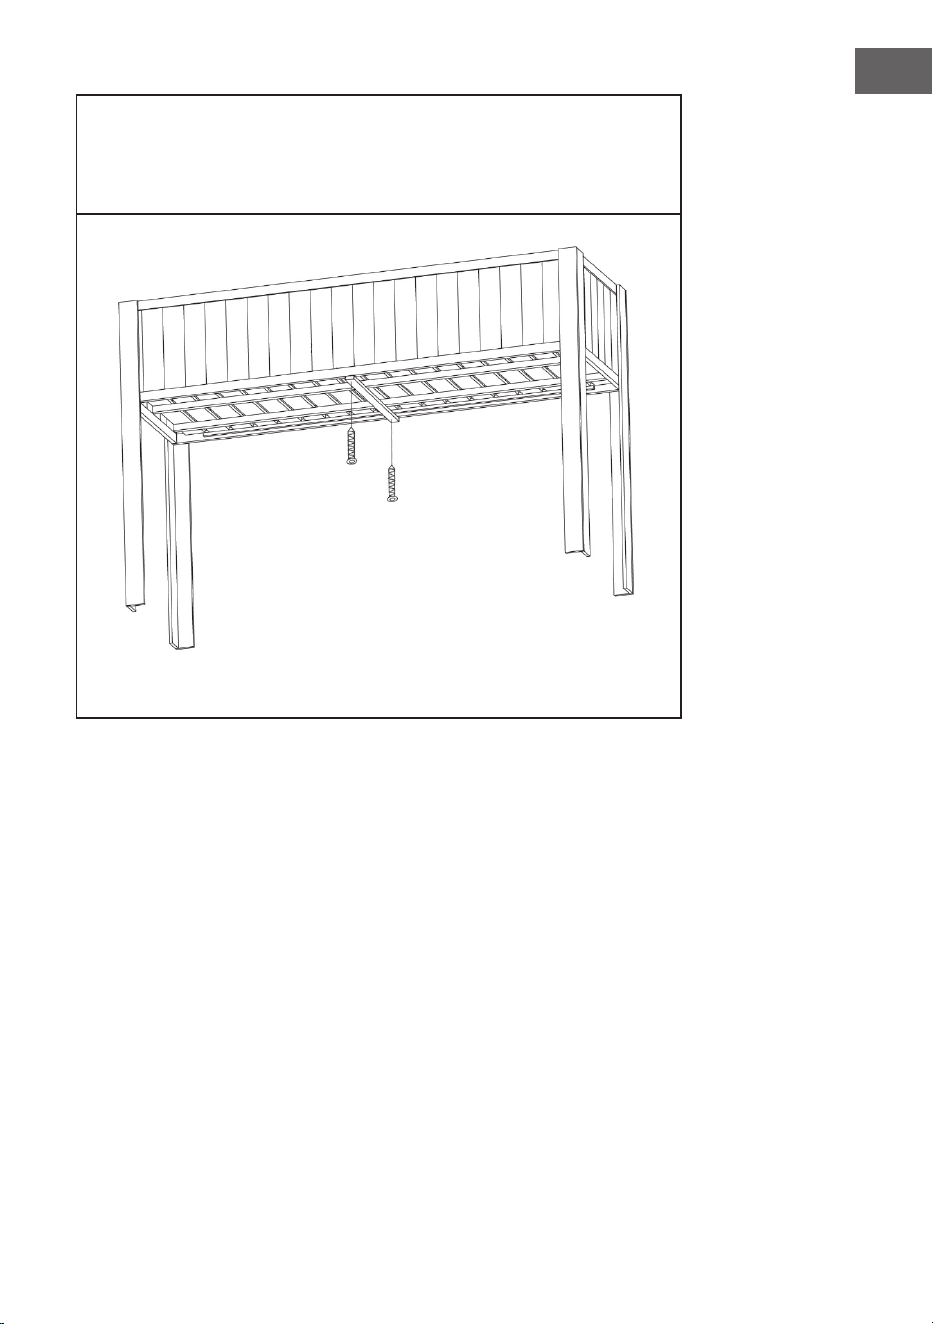
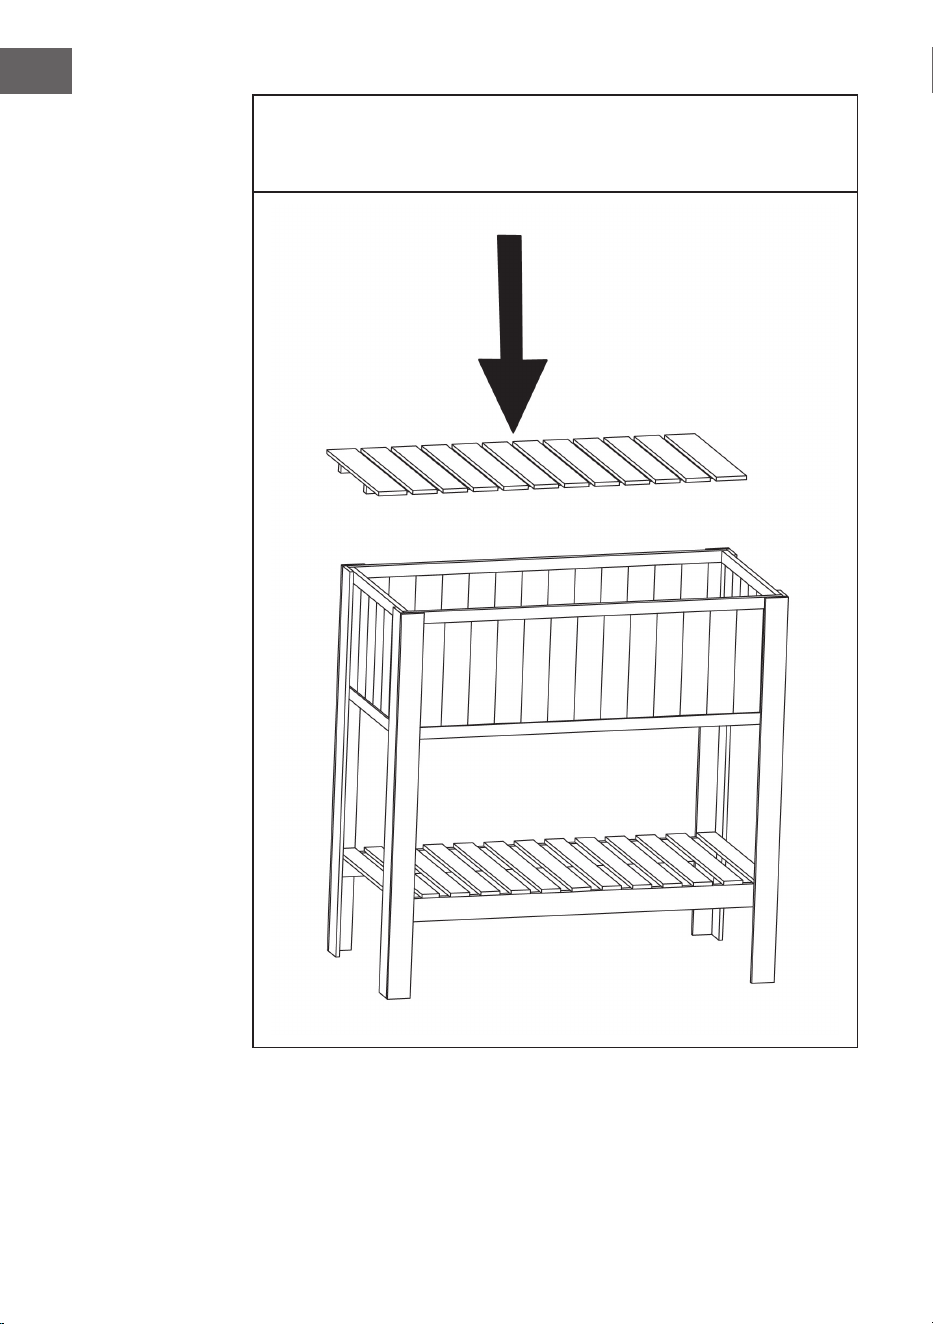
Schritt 3:
Legen Sie nun den Boden (4) von oben in das Hochbeet hinein.

9
DE
Schritt 4:
Befestigen Sie den Boden (4) mit der Leiste (7) von unten mit 2 Schrauben
(3,5 mm x 25 mm) am Hochbeet.
Schrauben 3,5 x 25 mm (2 Stück)

10
DE
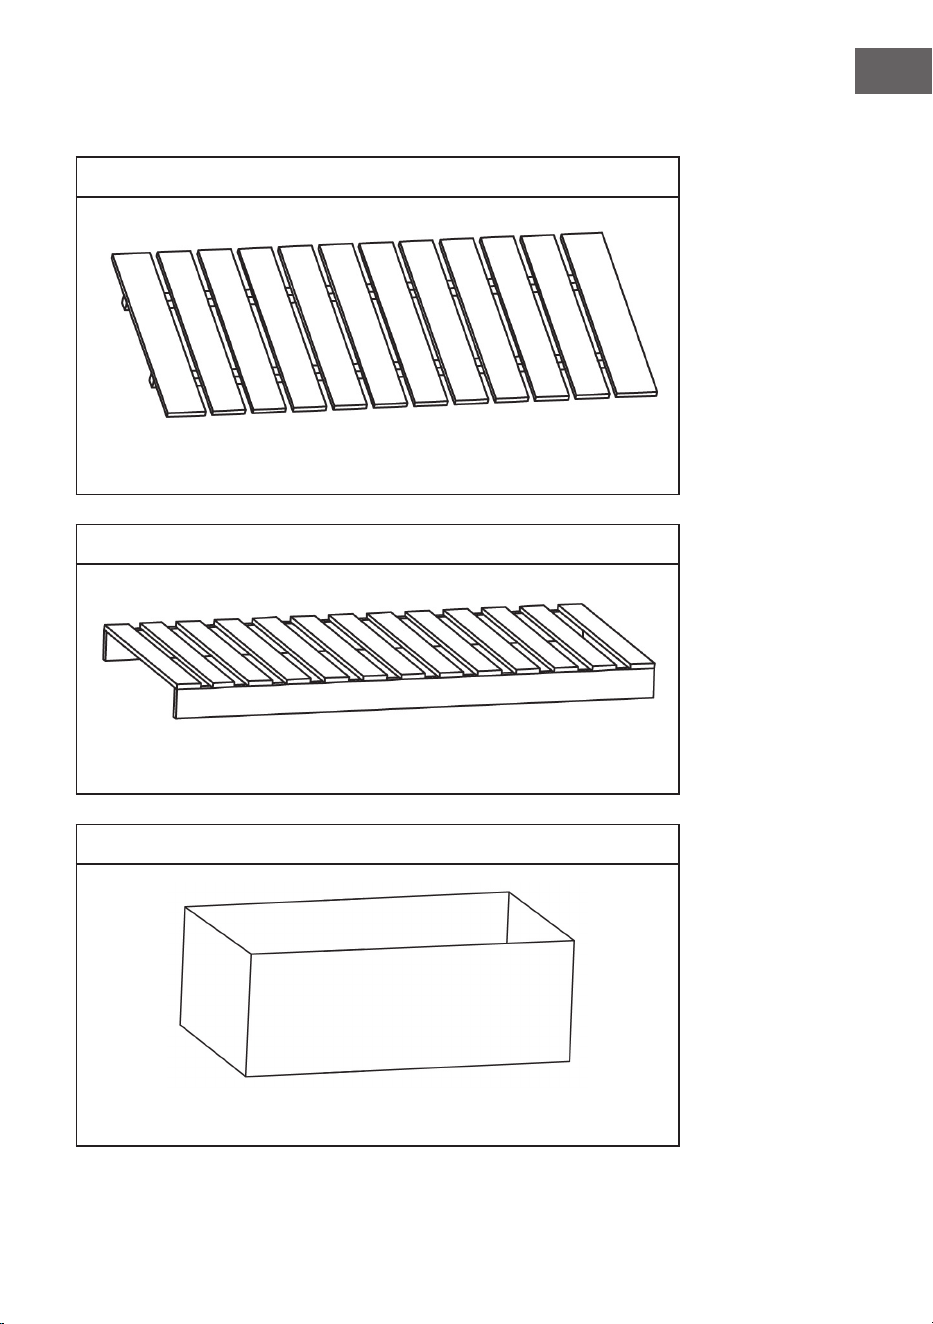
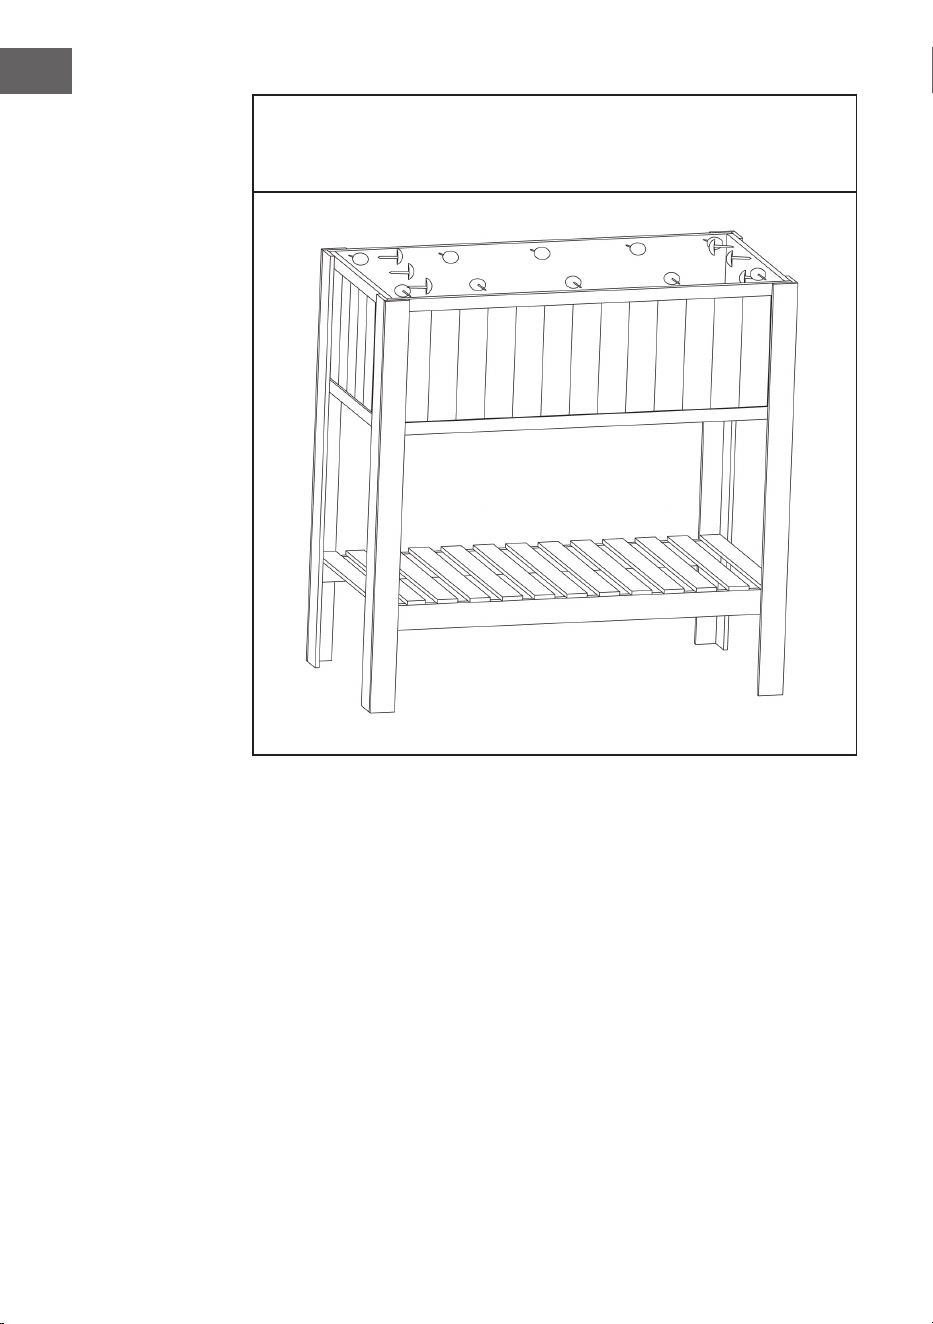
Schritt 5:
Befestigen Sie das Innenteil (6) mit 16 Nägeln im Hochbeet.

11
DE
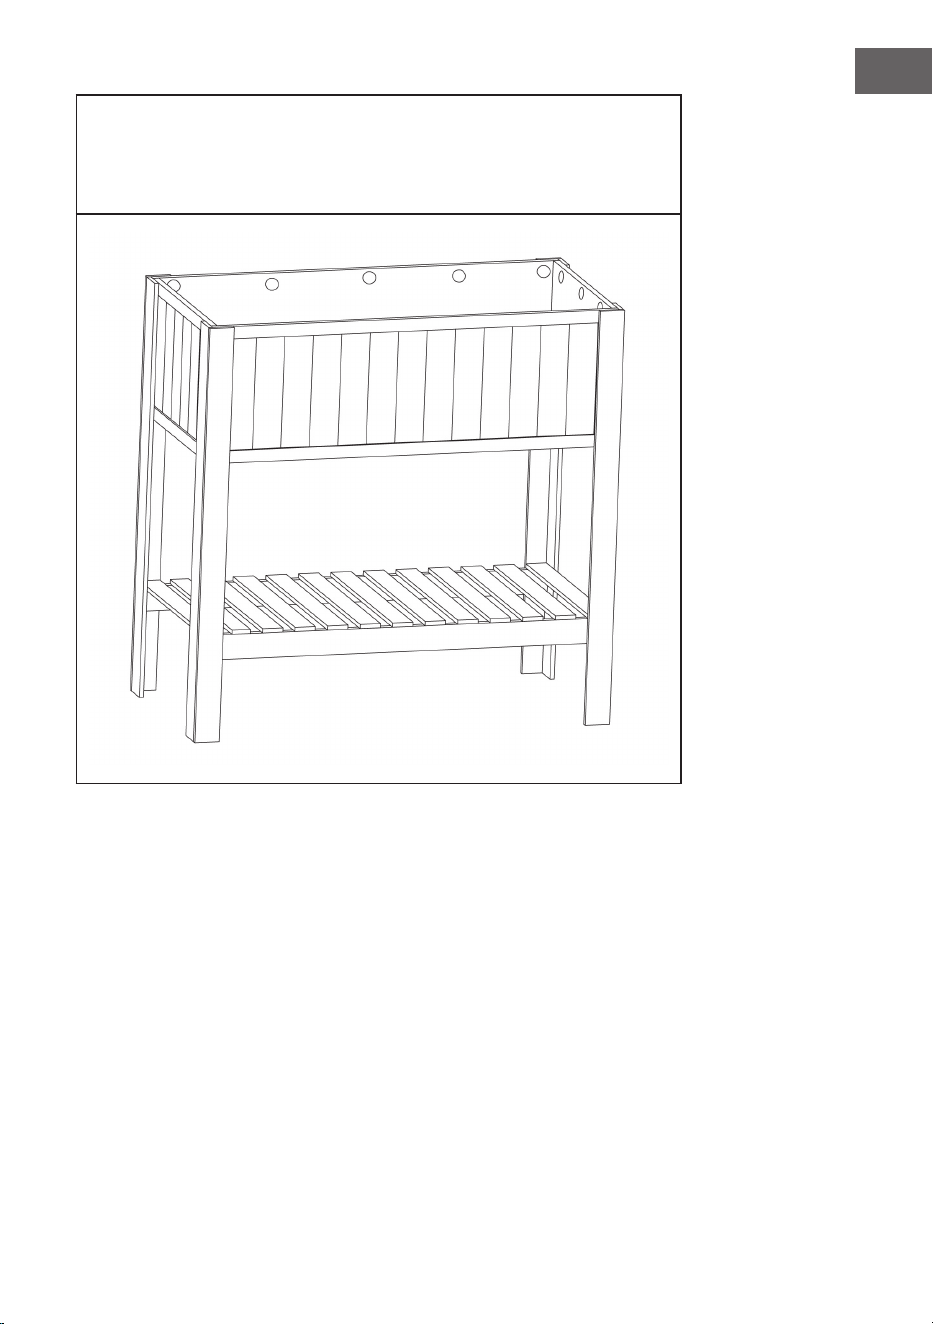
Ihr Hochbeet ist nun fertig montiert und einsatzbereit.

12
ENEN
SCOPE OF DELIVERY
1
Support leg
(4 pieces)
2
Front and rear wall (2 pieces)
3
7
Side walls (2 pieces) Bar (1 piece)
Screw (3.5 mm x
30 mm)
(24 pieces)
Screw (3.5 mm x 25
mm)
(2 pieces)
Nail (16 pieces)

13
EN
4
Bottom (1 piece)
5
Shelf (1 piece)
6
Inner part (1 piece)

14
EN
ASSEMBLY
Step 1:
Assemble the front and rear panels (2) and the side panels (3) to the
upper end of the 4 support legs (1) and screw them tight with 16 screws
(3.5 mm x 30 mm).
Screws 3.5 x 30 mm (16 pieces)

15
ENEN
Step 2:
Mount the shelf (5) in the lower area of the four support legs (1) and
screw it tight with 8 screws (3.5 mm x 30 mm).
Screws 3.5 x 30 mm (8 pieces)

16
EN
Step 3:
Now place the bottom (4) from above into the raised bed.
17
EN
Step 4:
Fasten the bottom (4) with the bar (7) to the raised bed from below with 2
screws (3.5 mm x 25 mm).
Screws 3.5 x 25 mm (2 pieces)

18
EN
Step 5:
Fasten the inner part (6) to the raised bed with 16 nails.

19
EN
Your raised bed is now fully assembled and ready for use.

20
ESES
CONTENIDO DEL ENVÍO
1
Patas
(4 piezas)
2
Pared delantera y trasera (2 piezas)
3
7
Paredes laterales (2 piezas) Tira (1 pieza)
Tornillo 3.5 x
30mm
(24 piezas)
Tornillo 3,5 x 25mm
(2 piezas)
Clavo (16 piezas)

21
ES
4
Suelo (1 pieza)
5
Estante (1 pieza)
6
Parte interior (1 pieza)

22
ES
MONTAJE
Paso 1:
Monte los paneles frontal y trasero (2) y los paneles laterales (3) en la
parte superior de las 4 patas (1) y atorníllelos con 16 tornillos (3,5 mm x
30mm).
Tornillos 3,5 x 30 mm (16 piezas)

23
ESES
Paso 2:
Monte el estante (5) en la parte inferior de las cuatro patas (1) y
atorníllelo con 8tornillos (3,5mm x 30 mm).
Tornillos 3,5 x 30 mm (8 piezas)

24
ES
Paso 3:
Ahora coloque el fondo (4) en la cama elevada desde arriba.

25
ES
Paso 4:
Fije el fondo (4) a la cama elevada desde abajo con el listón (7) utilizando 2
tornillos (3,5 mm x 25 mm).
Tornillos 3,5 x 25 mm (2 piezas)

26
ES
Paso 5:
Su lecho elevado está ahora completamente montado y listo para su uso.

27
ES
La cama elevada ya está montada y lista para usar.

28
FRFR
CONTENU DE L'EMBALLAGE
1
Pied
(4 pièces)
2
Panneaux avant et arrière (2 pièces)
3
7
Panneaux latéraux (2 pièces) Bande (1 pièce)
Vis 3,5 x 30mm
(24 pièces)
Vis 3,5 x 25mm
(2 pièces)
Clou (16 pièces)
29
FR
4
Fond (1 pièce)
5
Étagère (1 pièce)
6
Partie intérieure (1 pièce)

30
FR
MONTAGE
Étape 1 :
Assemblez les panneaux avant et arrière (2) et les panneaux latéraux (3)
à l'extrémité supérieure des 4 pieds (1) et vissez-les avec 16 vis (3,5 mm
x 30 mm).
Vis 3,5 x 30 mm (16 pièces)

31
FRFR
Étape 2 :
Montez l'étagère (5) dans la partie inférieure des quatre pieds (1) et
vissez-la avec 8 vis (3,5 mm x 30 mm).
Vis 3,5 x 30 mm (8 pièces)
32
FR
Étape 3 :
Placez maintenant le fond (4) par le haut dans le potager surélevé.

33
FR
Étape 4 :
Fixez le fond (4) avec la bande (7) au potager surélevé par le bas avec 2 vis
(3,5 mm x 25 mm).
Vis 3,5 x 25 mm (2 pièces)
34
FR
Étape 5 :
Fixez la partie intérieure (6) au potager surélevé avec 16 clous.
35
FR
Votre potager surélevé est maintenant entièrement assemblé et prêt
à l'emploi.

36
ITIT
VOLUME DI CONSEGNA
1
Piedi
d'appoggio
(4pezzi)
2
Pareti anteriore e posteriore (2 pezzi)
3
7
Pareti laterali (2 pezzi) Asta (1 pezzo)
Viti 3,5 x 30mm
(24 pezzi)
Viti 3,5 x 25mm
(2 pezzi)
Chiodi (16 pezzi)

37
IT
4
Pannello di fondo (1 pezzo)
5
Appoggio (1 pezzo)
6
Componente interno (1 pezzo)

38
IT
MONTAGGIO
1° passaggio:
Montare le pareti anteriore, posteriore (2) e laterali (3) all'estremità
superiore dei 4 piedi d'appoggio (1) e avvitarle saldamente con 16 viti (3,5
mm x 30 mm).
Viti 3,5 x 30 mm (16 pezzi)
39
ITIT
2° passaggio:
Montare l'appoggio (5) sulla parte inferiore dei quattro piedi d'appoggio
(1) e avvitarlo saldamente con 8 viti (3,5 mm x 30 mm).
Viti 3,5 x 30 mm (8 pezzi)

40
IT
3° passaggio:
Inserire dall'alto il pannello di fondo (4) nell'aiuola rialzata.

41
IT
4° passaggio:
Fissare dal basso il pannello di fondo (4) all'aiuola rialzata con l'asta,
utilizzando 2 viti (3,5 mm x 25 mm).
Viti 3,5 x 25 mm (2 pezzi)

42
IT
5° passaggio:
Fissare il componente interno (6) all'aiuola rialzata con 16 chiodi.

43
IT
L'aiuola rialzata è completamente montata e pronta all'uso.

HERSTELLER
Manufacturer | Fabricante | Fabricant | Produttore
Chal-Tec GmbH, Wallstraße 16, 10179 Berlin, Deutschland (Germany).
IMPORTEUR FÜR GROSSBRITANNIEN
Importer for Great Britain | Importador para Gran Bretaña | Importateur
pour la Grande Bretagne | Importatore per la Gran Bretagna
Berlin Brands Group UK Limited
PO Box 42
272 Kensington High Street
London, W8 6ND
United Kingdom