WWW.KUCHT.COM
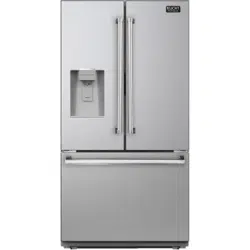
APPLICABLE MODEL: KR900X
INSTRUCTION MANUAL
PRO IN YOUR KITCHEN
REFRIGERATOR - FREEZER
KUCHT
Before using this product, please read this manual carefully and keep it for future reference.
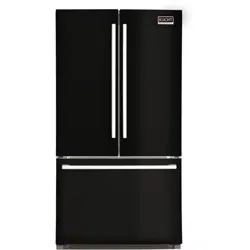
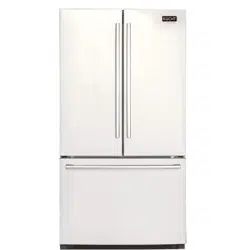
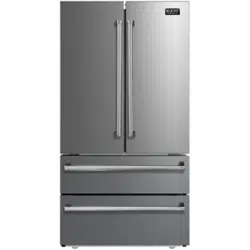
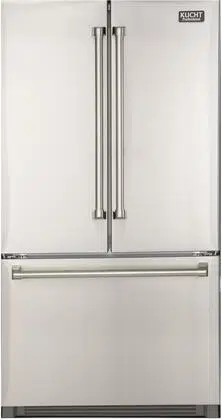
The design and specifications are subject to change without prior notice for product
improvement. Consult with your dealer or manufacturer for details. The diagram above is
just for reference. Please take the appearance of the actual product as the standard.
WARNING NOTICES
| TABLE OF CONTENTS
IMPORTANT SAFETY INSTRUCTIONS 2
5ENVIRONMENTAL PROTECTION
6
INSTALLATION INSTRUCTIONS
7
Installing the water line
8
Installing filter
8
Leveling feet
8
Leveling doors
9
Adjustment of the cantilever rack
9
Changing the light
9
Tips for energy saving
10
PRODUCT OVERVIEW
10
Parts and functions
11
OPERATION INSTRUCTIONS
16
MAINTENANCE AND CLEANING
18
TROUBLESHOOTING
11
Use and functions
14
Fetching water and Ice
15
Storing food
BEFORE SWITCHING ON THE APPLIANCE FOR THE FIRST TIME READ
THE FOLLOWING SAFETY HINTS!
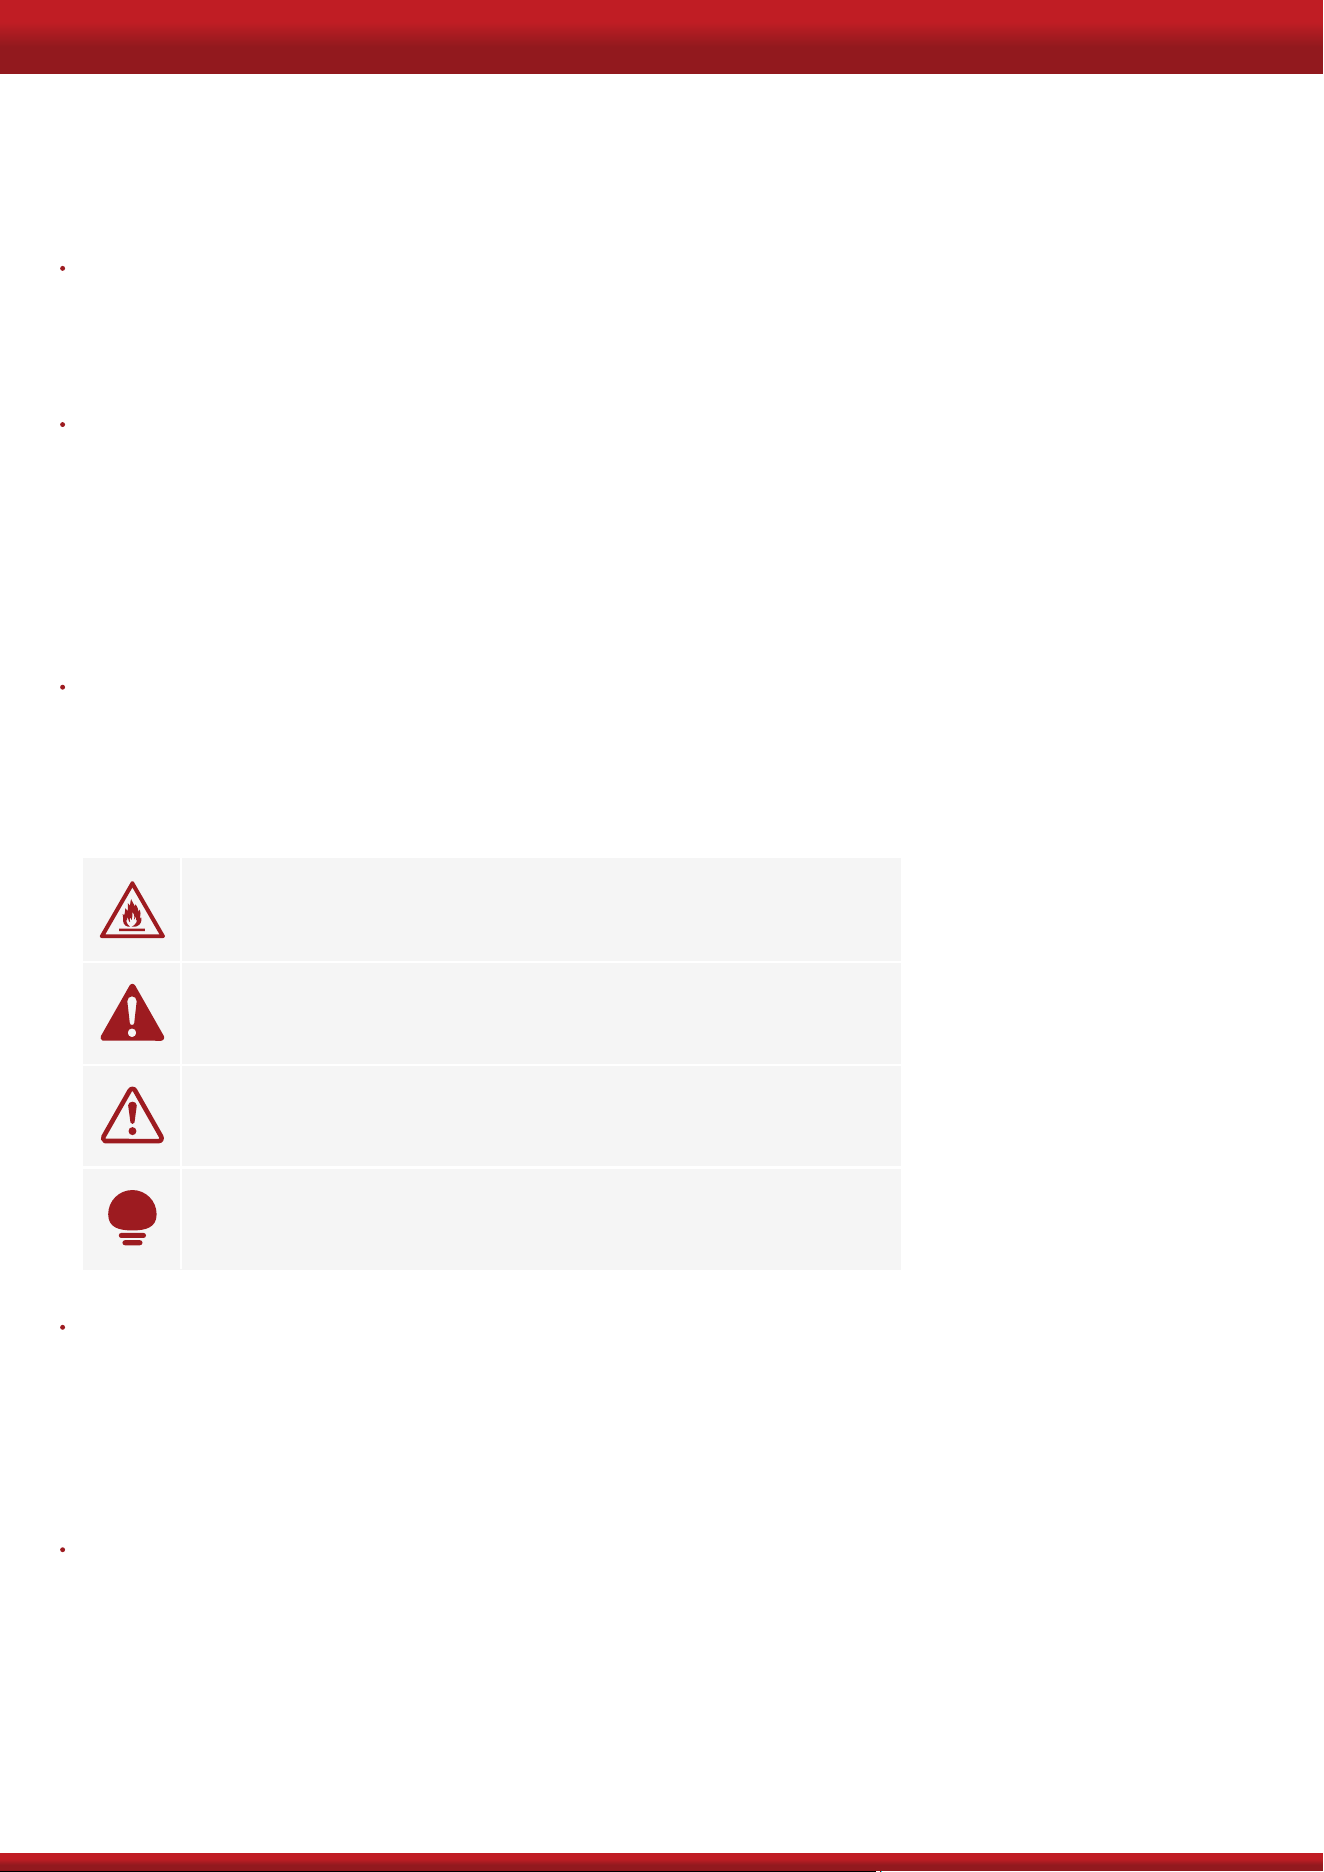
EXPLANATION OF TERMS/SYMBOLS
DANGER
This symbol indicates that there are dangers to the life and health of
persons due to extremely flammable gas.
WARNING
The signal word indicates a hazard with a medium level of risk which, if
not avoided, may result in death or serious injury.
CAUTION
The signal word indicates a hazard with a low degree of risk which, if not
avoided, may result in minor or moderate injury.
ATTENTION
The signal word indicates important information (e.g. damage to
property), but not danger.
Pay particular attention to messages that contain the words DANGER, WARNING or CAUTION.
These words are used to alert you to a potential hazard that can seriously injure you and others.
The instructions will tell you how to reduce the chance of injury and let you know what can
happen if the instructions are not followed.
IMPORTANT:
These operating instructions are general. This means that certain functions apply to your
refrigerator/freezer, while others do not. We are constantly working on the further
development and improvement of our appliance types and models. Therefore, we reserve
the right to make changes to the design, equipment and accessories of all types and
models without prior notice.
ATTENTION:
This appliance is intended to be used in household and similar residential applications and is
specifically certified for residential use. Warranty is void when the product is installed in
common areas where more than a single party has rightful access to its use or in locations
considered beyond normal residential use.
Warranty does not apply to products installed or used in commercial or non-residential
applications. Examples of excluded applications include, but are not limited to kitchen areas in
shops, offices and other working environments, daycare centers, schools, bed and breakfast
centers, churches, private clubs, fire stations, club houses, common areas in multi-family
dwellings, restaurants, bakeries, hotels, nursing homes, food service locations, catering and
similar non-retail applications and institutional food service locations or any similar
institutional or commercial activity.
The warranty does not cover deterioration of the product's appearance, or any cosmetic part
such as paint, porcelain, glass, dents, scratches, chips, rust or peeling.
For more information please visit: www.kucht.com/online/warranty/
GENERAL SAFETY
WARNING
| IMPORTANT SAFETY INSTRUCTIONS
READ AND SAVE THESE INSTRUCTIONS!
WARNING: Risk of fire / Flammable material
DANGER Risk of fire or explosion. Flammable refrigerant used. Do not use mechanical
devices to defrost refrigerator. Do not puncture refrigerant tubing.
DANGER Risk of fire or explosion. Flammable refrigerant used. To be repaired only by
trained service personnel. Use only manufacturer authorized service parts. Any repair
equipment used must be designed for flammable refrigerants. Follow all manufacturer
repair instructions. Do not puncture refrigerant tubing.
Children should be supervised to ensure that they do not play with the appliance.
If the supply cord is damaged, it must be replaced by the manufacturer, its service agent or
similarly qualified persons in order to avoid a hazard.
The appliance has to be unplugged after use and before carrying out user maintenance on the appliance.
Do not use extension cords or ungrounded (two prong) adapters.
To avoid a hazard due to instability of the appliance, it must be fixed in accordance with the instructions.
For a freestanding appliance: This refrigerating appliance is not intended to be used
as a built-in appliance.
2
The refrigerator must be disconnected from the source of electrical supply before attempting
the installation of accessory. Ensure that the power cable is not trapped by the refrigerator.
Do not step on the power cable.
WARNING: Keep ventilation openings, in the appliance enclosure or in the built-in structure,
clear of obstruction.
WARNING: Do not use mechanical devices or other means to accelerate the defrosting process,
other than those recommended by the manufacturer.
WARNING: Do not use electrical appliances inside the food storage compartments of the appliance,
unless they are of the type recommended by the manufacturer.
WARNING: Please abandon the refrigerator according to local regulators for it use flammable
blowing gas and refrigerant.
WARNING: Do not locate multiple portable socket-outlets or portable power supplies at the
rear of the appliance.
WARNING: When positioning the appliance, ensure the supply cord is not trapped or damaged.
WARNING: Do not damage the refrigerant circuit.
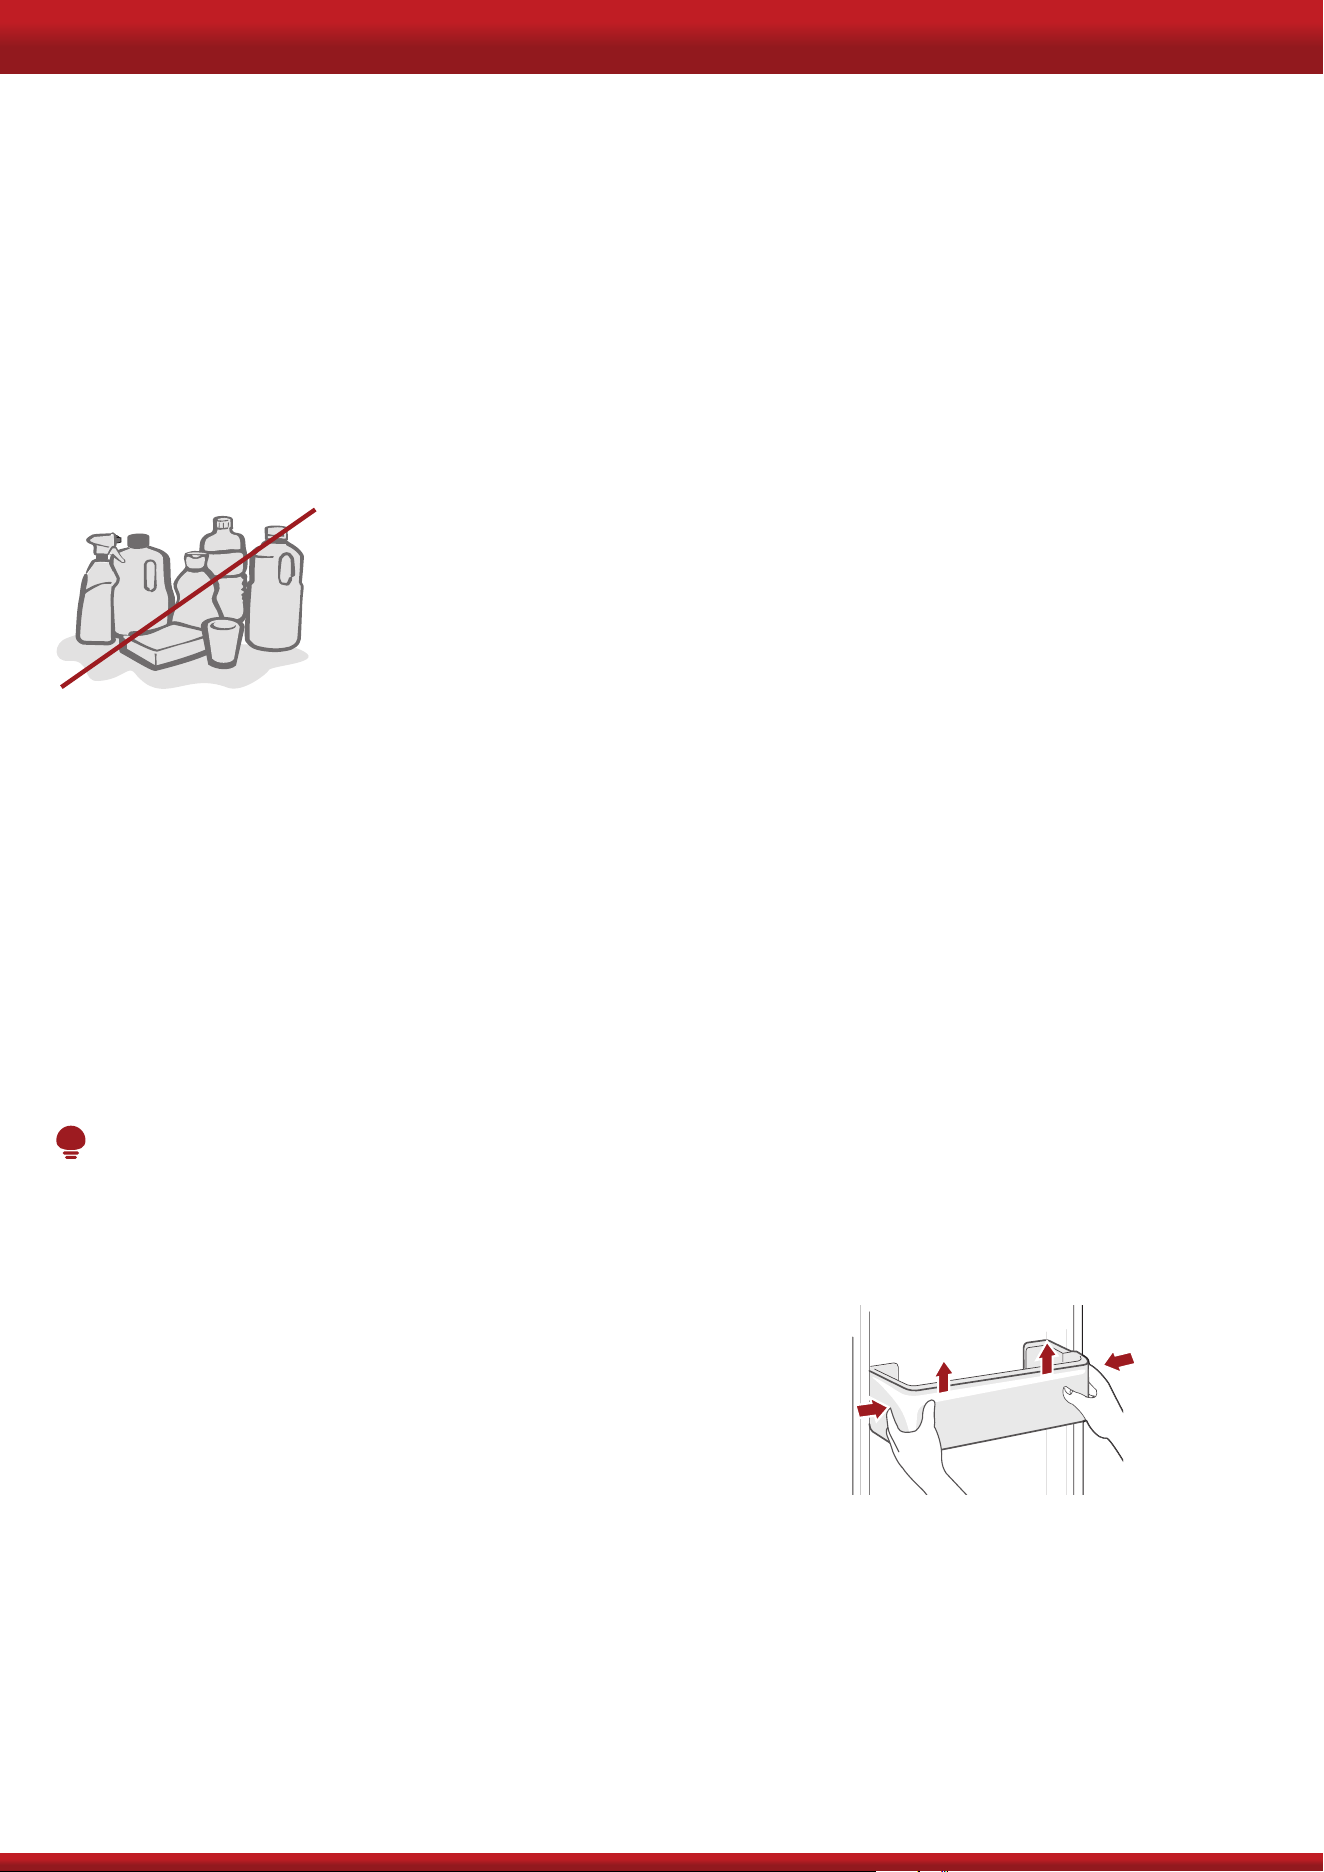
Do not store explosive substances such as aerosol cans with a flammable propellant in this appliance.

WARNING
3
DAILY USE
CAUTION
Do not pull the power cord when pulling the power plug of the refrigerator.
Please firmly grasp the plug and pull out it from the socket directly.
To ensure safe use, do not damage the power cord or use the power cord when it is damaged or worn.
The power plug should be firmly contacted with the socket or else fires might be caused.
Please ensure that the grounding electrode of the power socket is equipped with a reliable
grounding line.
Please turn off the valve of the leaking gas and then open the doors and windows in case of leakage
of gas and other flammable gases.
Do not unplug the refrigerator and other electrical appliances considering that spark may cause a fire.
Do not use electrical appliances on the top of the appliance, unless they are of the type recommended
by the manufacturer.
The gaps between refrigerator doors and between doors and refrigerator body are small, be noted not
to put your hand in these areas to prevent from squeezing the finger. Please be gentle when close the
refrigerator door to avoid falling articles.
Do not pick foods or containers with wet hands in the freezing chamber when the refrigerator is
running, especially metal containers in order to avoid frostbite.
Do not allow any child to get into or climb the refrigerator; otherwise suffocation or falling
injury of the child may be caused.
Do not place heavy objects on the top of the refrigerator considering that objectives may fall when
close or open the door, and accidental injuries might be caused.
Do not store beer, beverage or other fluid contained in bottles or enclosed containers in the freezing
chamber of the refrigerator; or otherwise the bottles or enclosed containers may crack due to freezing
to cause damages.
Connect to potable water supply only. (Suitable for ice cube maker) (*)
To prevent children from being entrapped, the keys must be keep out of reach of children and not in
the vicinity of chest freezer (or refrigerator) (suitable for products with locks) (*)
(*): This feature varies depending on the model purchased.
Do not put flammable, explosive, volatile and highly corrosive items in the refrigerator to prevent
damages to the product or fire accidents.
The refrigerator is intended for household use, such as storage of foods; it shall not be used
for other purposes, such as storage of blood, drugs or biological products, etc.
Do not place flammable items near the refrigerator to avoid fires.
Please use a dedicated power socket and the power socket shall not be shared with other electrical
appliances.

4
WARNING
State of California Proposition 65 Warnings:
This product can expose you to chemicals including lead, which is known to the State of California to
cause cancer, and bisphenol A (BPA) and lead which are known to the state of California to cause birth
defects or other reproductive harm. For more information go to www.P65Warnings.ca.gov.
WARNING: Fill with potable water only. (*)
WARNING: Connect to potable water supply only. (Suitable for ice making machine) (*)
(*): This feature varies depending on the model purchased.
WARNING
CAUTION
To avoid contamination of food, please respect the following instructions:
Opening the door for long periods can cause a significant increase of the temperature in the
compartments of the appliance.
Clean water tanks if they have not been used for 48h; flush the water system connected to a water
supply if water has not been drawn for 5 days. (*)
Clean regularly surfaces that can come in contact with food and accessible drainage systems.
WARNING
Risk of child entrapment. Before you throw away your old refrigerator or freezer:
Take off the doors.
Leave the shelves in place so that children may not easily climb inside.
CAUTION
This product is not recommended for use with sockets or main switch with the A/GFCI
function, otherwise it may cause false tripping.
1. It’s not supposed to be a safety risk when tripped.
2. If tripping persists, it is recommended to replace the sockets or main switch without A/GFCI function.
5
Disposing of old electrical devices in an environmentally-friendly manner
This product can expose you to chemicals including lead, which is known to the State of California to
cause cancer, and bisphenol A (BPA) and lead which are known to the state of California to cause birth
defects or other reproductive harm. For more information go to www.P65Warnings.ca.gov.
Old electrical products can contain hazardous substances so correct disposal of your old appliance will
help prevent potential negative consequences for the environment and human health. Your old appliance
may contain reusable parts that could be used to repair other products, and other valuable materials that
can be recycled to conserve limited resources.
Refrigerant and cyclopentane foaming material used for the refrigerator are flammable.
Therefore, when the refrigerator is scrapped, it shall be kept away from any fire source and be
recovered by a special recovering company with corresponding qualification other than be disposed
by combustion, so as to prevent damage to the environment or any other harm.
CAUTION
Packaging materials of the product are manufactured from recyclable materials in accordance with
our National Environment Regulations. Do not dispose of the packaging materials together with the
domestic or other wastes. Take them to the packaging material collection points designated by
the local authorities.
PACKAGE INFORMATION
| ENVIRONMENTAL PROTECTION
This crossed-out wheeled bin symbol indicates that waste electrical and electronic products
(WEEE) should be disposed of separately from the municipal waste stream.
Space requirement diagram
Dimensions in mm.
Dimensions in
inches.
Providing a proper power supply
CONNECTING THE APPLIANCE
2h
6
The refrigerator should always be plugged into its own
individual electrical outlet which has a voltage rating that
matches the rating plate. When positioning the appliance,
ensure the supply cord is not trapped ordamaged.
CAUTION
The cooling performance and power consumption of the refrigerator may be affected by the ambient
temperature, the door-oppening frequency, and the location of the refrigerator. We recommend
adjusting the temperature settings as appropriate.
ATTENTION
Before first use
Remove the exterior and interior packing, wipe the outside thoroughly with a soft dry cloth and the
inside with a wet, lukewarm cloth.
After installing the product, please let it stay for more than 2 hours before turning on the power,
otherwise it will lead to a decrease in cooling capacity or a damage to the product.
Allow the appliance to run empty for 24 hours so the compartment can cool to the
appropriate temperature.
If you have any doubts regarding installation, please turn to
the vendor, to our customer service or to the nearest
Authorised Service Centre.
Check your local power source. This refrigerator
requires a AC115 V, 60 Hz power supply.
Use a receptacle that accepts the grounding prong.
The power cord is equipped with a 3-prong (grounding)
plug which mates with a standard 3-prong (grounding)
wall outlet to minimize the possibility of electric shock
hazard from this refrigerator.
Avoid placing the cabinet in a narrow recess or near any heat source, direct sunlight, or moisture.
Keep the air circulation free around the cabinet. When installing the unit, ensure 3.5inches of free space
at both sides, 3.5inches at the top of the unit and not more than 2.9inches at the rear of the unit.
Before connecting your refrigerator to the power supply, check that the voltage stated on the rating
label of your appliance corresponds to the voltage in your home.
A different voltage could damage the appliance.
The appliance must be grounded. The manufacturer is not responsible for damages that may occur as
a result of usage without grounding.
| INSTALLATION INSTRUCTIONS
C
E
B
135 ˚
B
A
C1
D
A B C C1 D E
910 1775 862 745 1127 1596
35.83 69.9 33.9 29.3 44.4 62.83
INSTALLING THE WATER LINE
7
1. First, water tubes (supplied) insert into corresponding hole of water connector (supplied).
2. Second, water line installation kit (not included) inserts into another hole of water connector (supplied).
3. Turn water valve on and check for any leakage.
4. When moving the refrigerator, you can hang the power cord on the power cord hook.
Connecting the water line to the refrigerator.
There are several items that you need to purchase to complete this connection.
You will find these items sold as a kit at your local hardware store.
Cold water line
Pipe clamp
Shut off walve
Water line installation kit
WARNING: Connect to potable water supply only.
Water line installation kits are available as an additional accessory from your dealer or at
a local hardware store.
The minimum inlet water pressure: 276 kPa / 40 psi
The maximum inlet water pressure: 689 kPa / 99.9 psi
Connecting to the water supply line
1. First, shut off the main water supply line and turn the ice-maker off.
2. Locate the nearest cold water supply valve.
3. After connecting the water supply to the water valve, turn your main
water supply back on and flush several gallons of water to clear the water
supply line.
Connecting the water line to a drinkable water source
If your water line is NOT drinkable, please add an external water filter.
If you must repair or disassemble the water line, cut off the plastic tubing
to make sure you get a snug, leak-free connection.
Water tube
Water connector
Power cord hook
Water line
Water connector
8
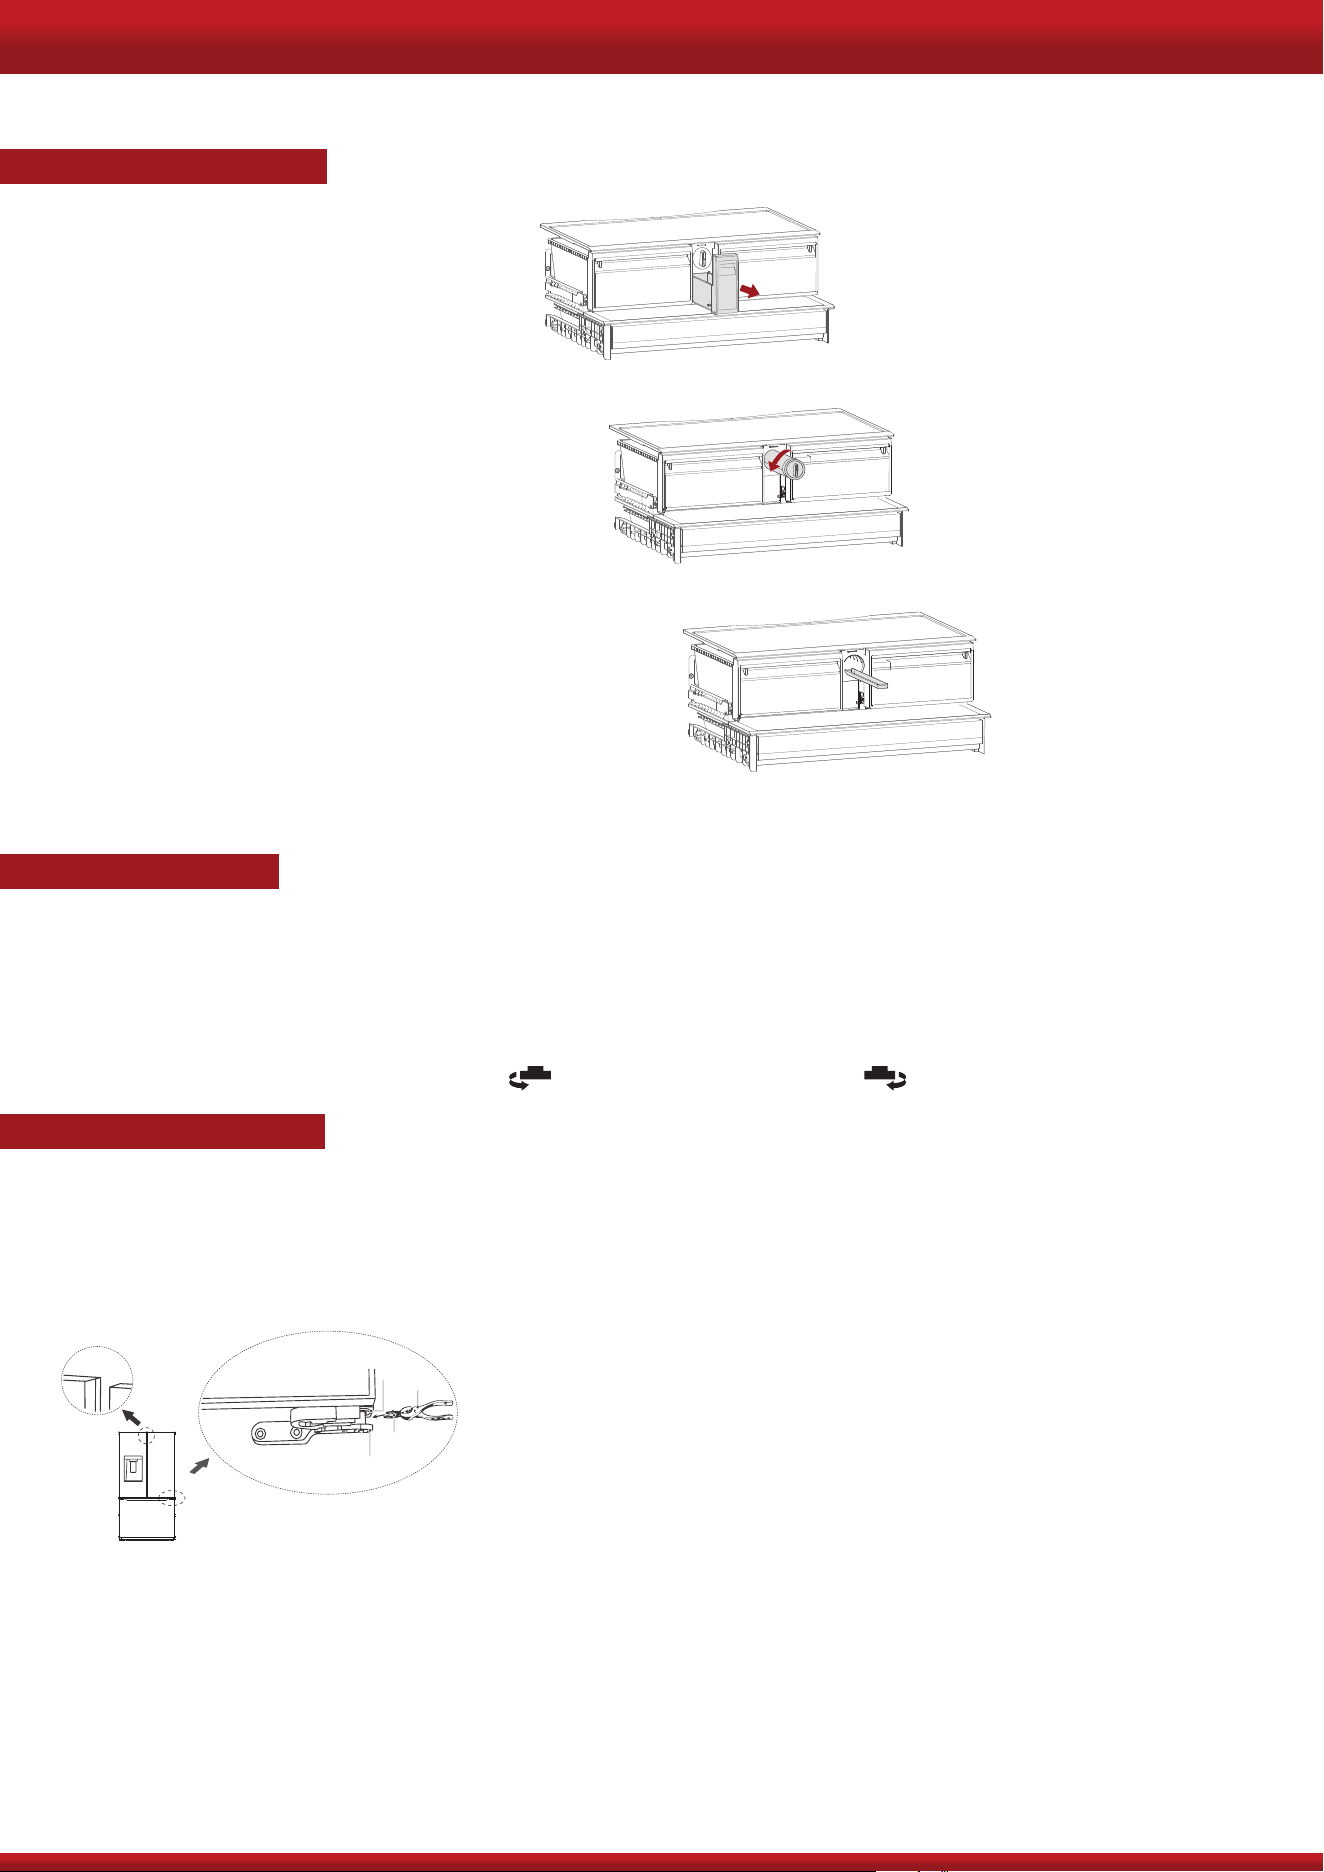
INSTALLING FILTER
1. Pull put the small drawer in the middle.
2. Press the filter knob and rotate 90°
counterclockwise, the filter will disengage from
the connector and the filter can be removed.
3. Check the water tray under the strainer with
your finger, take out and dump the overflow water.
LEVELING FEET
To avoid vibration, the appliance must be leveled.
If required, adjust the leveling feet to compensate for the uneven floor.
The front should be slightly higher than the rear to aid in door closing.
Leveling feet can be turned easily by tipping the cabinet slightly.
Turn the leveling feet counter clockwise to raise the unit, clockwise to lower it.
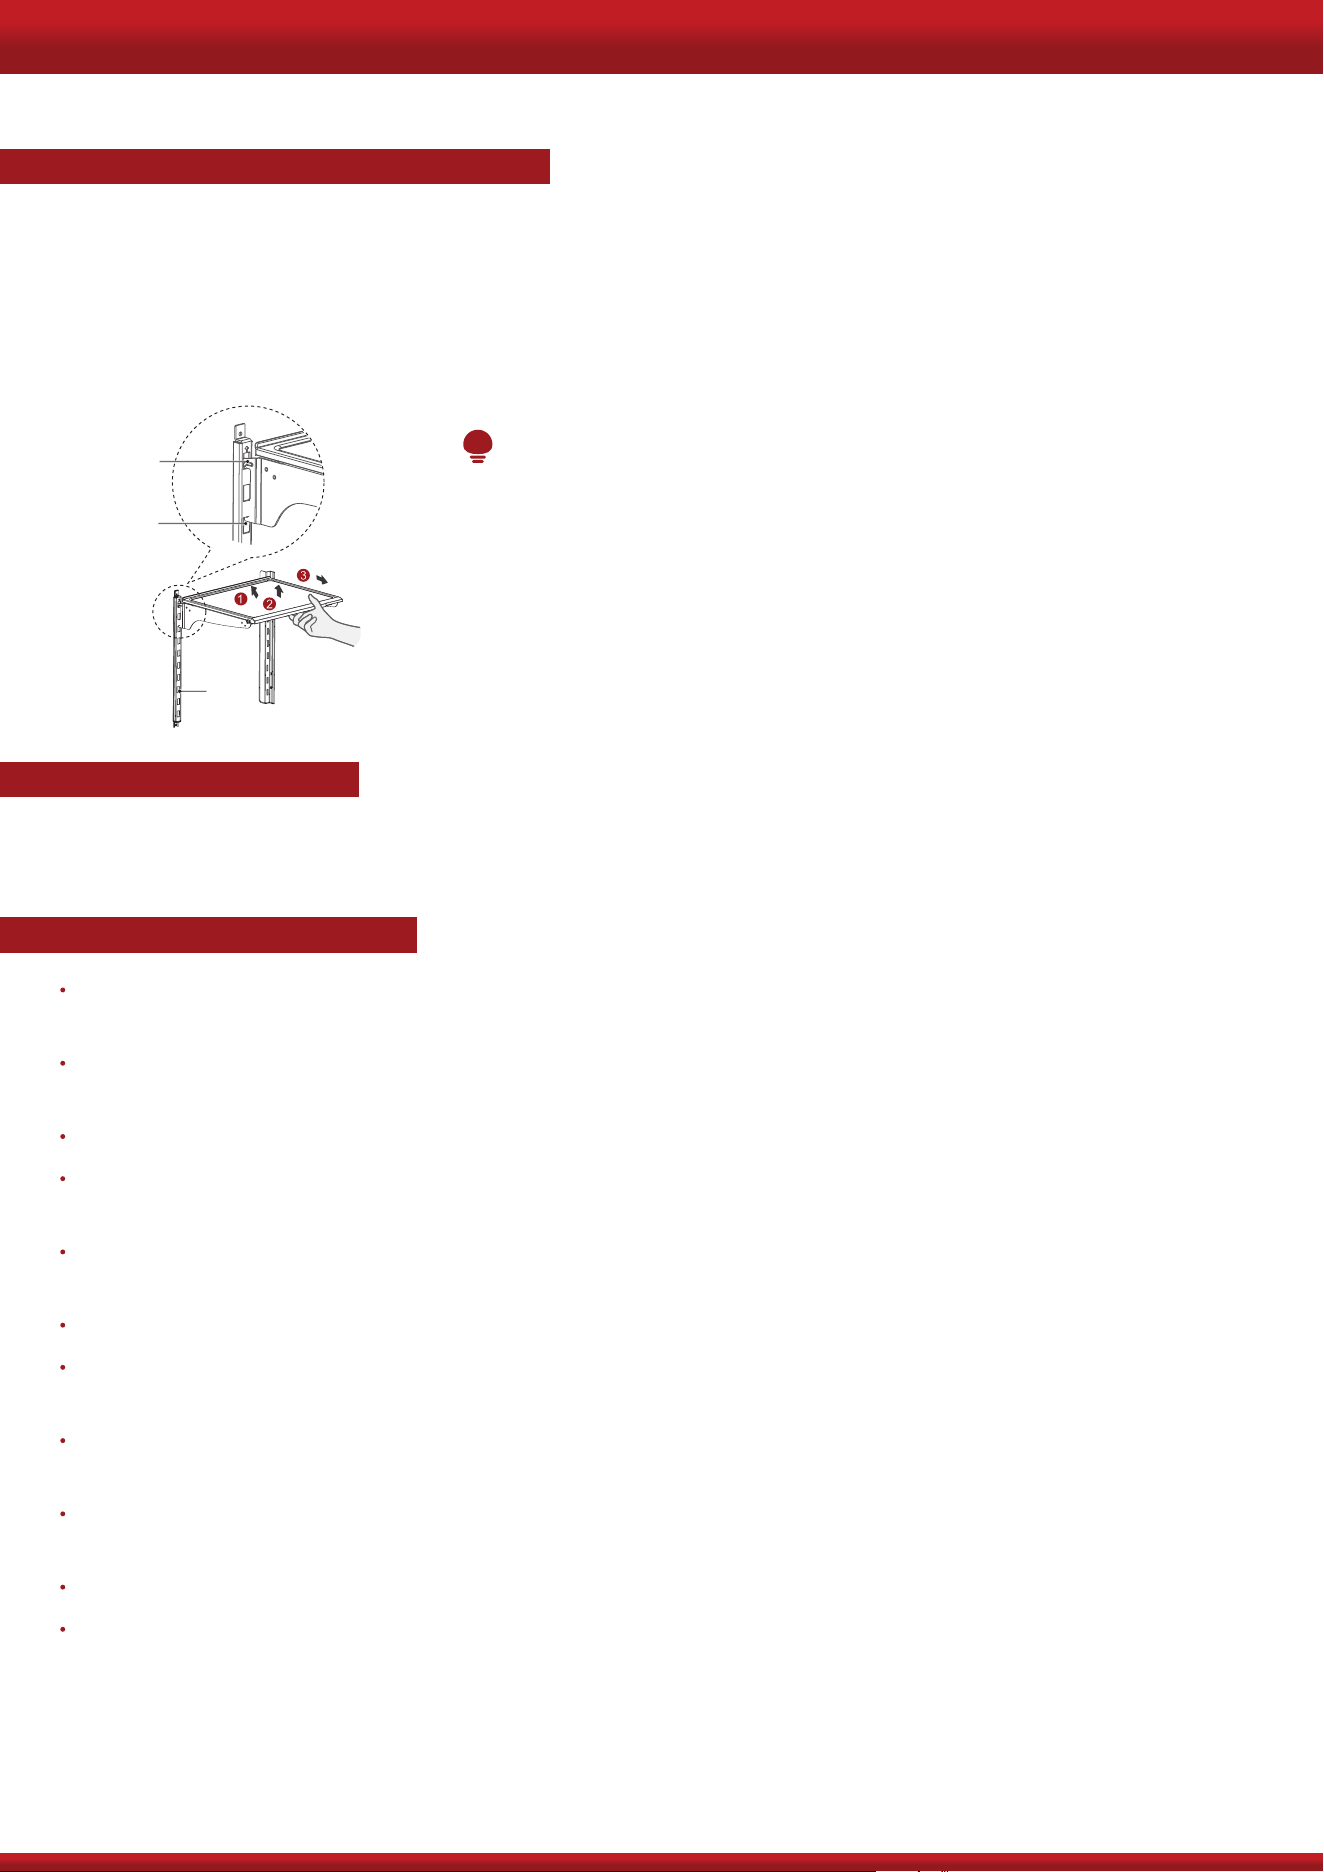
1. Raise the lower door up to the level of the higher door.
2. Insert the supplied fastener-ring by using plier in the gap between the hinge-grommet and the lower hinge.
The number of fasten-rings you will need to insert depends on the gap.
If the doors are not at the same height, the door can be adjusted with a spanner.
LEVELLING DOORS
Pliers
Fastener
ring
Lower
hinge
Hinge
grommet
9
Open the door only as briefly as necessary to minimise cold loss. Opening the door briefly and
closing it properly reduces energy consumption.
Setting the temperature no colder than necessary contributes to optimal energy use.
The door gaskets of your appliance must be perfectly intact so that the doors close properly
and energy consumption is not increased unnecessarily.
Please adjust the cantilever rack by following the arrows as shown in the diagram.
1. Raise it upward first and then take it out by tilting it upward.
2. During installation, put the upper end of the fixed leg into one of the upper slots on the supporting
iron first.
3. And then put the lower end of the fixed leg into the third slot on the lower part of the supporting iron.
ADJUSTMENT OF CANTILEVER RACK
The cantilever rack could be adjusted to the
proper height as required by food.
ATTENTION
Slot
Upper end
of fixed leg
Lower end
of fixed leg
Any replacement or maintenance of the LED lamps is intended to be made by the manufacturer,
its service agent or similar qualified person.
Do not place the appliance near cookers, radiators or other heat sources. If the ambient temperature is
high, the compressor will run more frequently and for longer, resulting in increased energy consumption.
Ensure that there is sufficient ventilation at the base of the appliance, on the sides of the appliance
and at the back of the appliance.
The arrangement of drawers, shelves and trays as shown in the product overview offers the most
efficient use of energy and should be retained as far as possible.
To obtain a larger storage space (e.g. for large refrigerated/frozen goods), the middle drawers and
shelves can be removed. The top and bottom drawers and shelves should be removed last if necessary.
Allow warm food to cool before placing it in the refrigerator/freezer compartment.
Food that has already cooled down increases energy efficiency.
Allow frozen food to defrost in the refrigeration compartment. The coldness of the frozen food reduces
the energy consumption in the refrigerator compartment and this increases the energy efficency.
An evenly filled refrigerator/freezer compartment contributes to optimal energy use.
Please also observe the spacing dimensions in the chapter “Installation”.
TIPS FOR ENERGY SAVING
CHANGING THE LIGHT
10
| PRODUCT OVERVIEW
For the most efficient use of energy, please keep the all internal items such as trays, drawers, shelves
and ice cube box on the position supplied by manufacturer.
This refrigerating appliance needs to be installed independently and cannot be used as a built-in.
Otherwise, it will cause problems such the performance and life of the appliance are reduced.
And the manufacturer does not provide basic appliance warrant.
Dierences: Due to technical changes and different models, some of the illustrations in this manual
may differ from your model.
ATTENTION
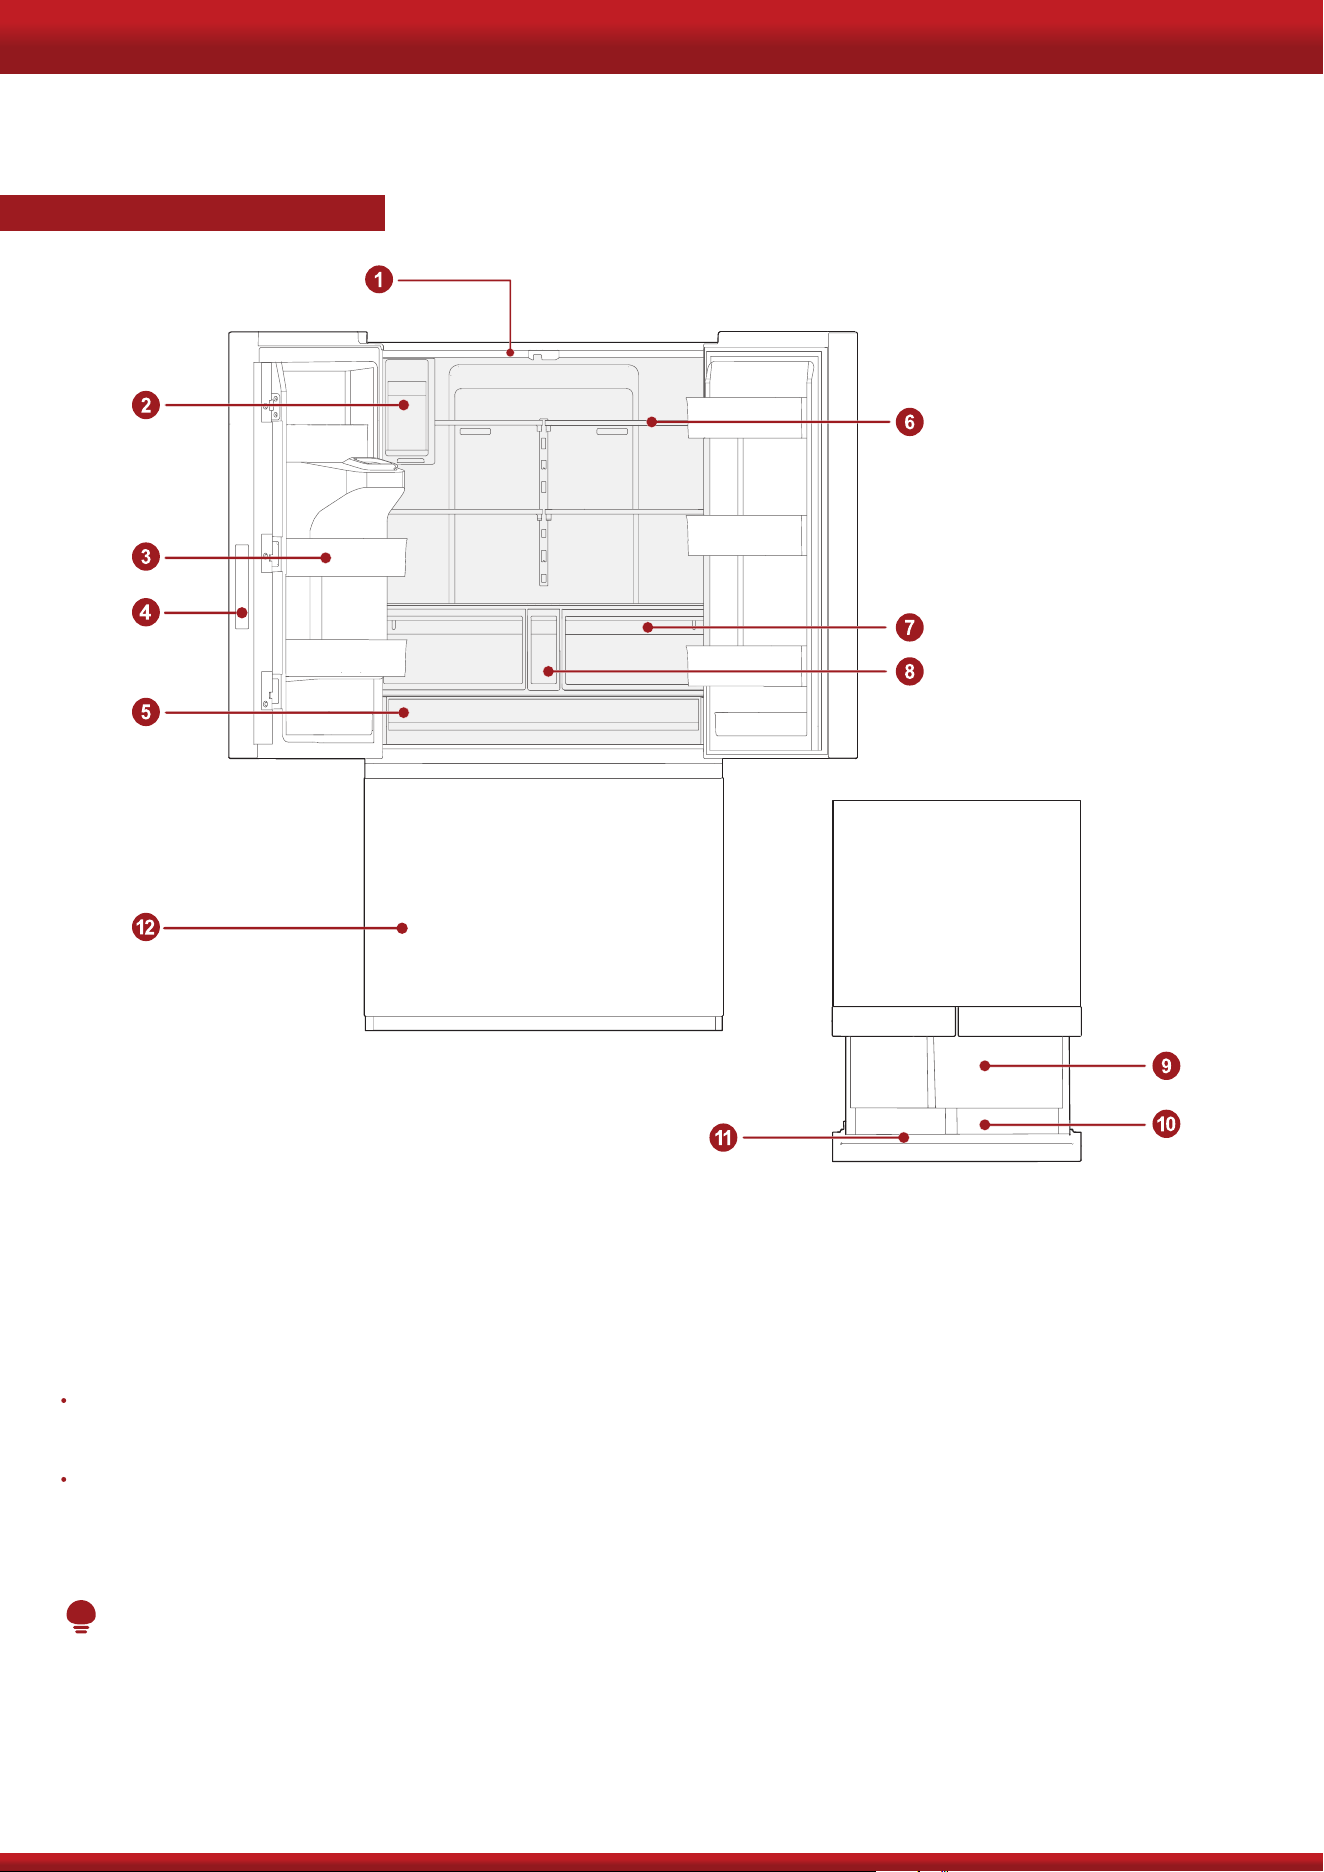
PARTS AND FUNCTIONS
1. Led light
2. Ice maker
3. Door tray
4. Control panel
5. Big drawer
6. Shelf
7. Crisper drawer
8. Small drawer
9. Upper freezer drawer
10. Lower freezer drawer
11. Freezer tray
12. Freezer drawer
11
The actual control panel may differ from model to model.
ATTENTION
| OPERATION INSTRUCTIONS
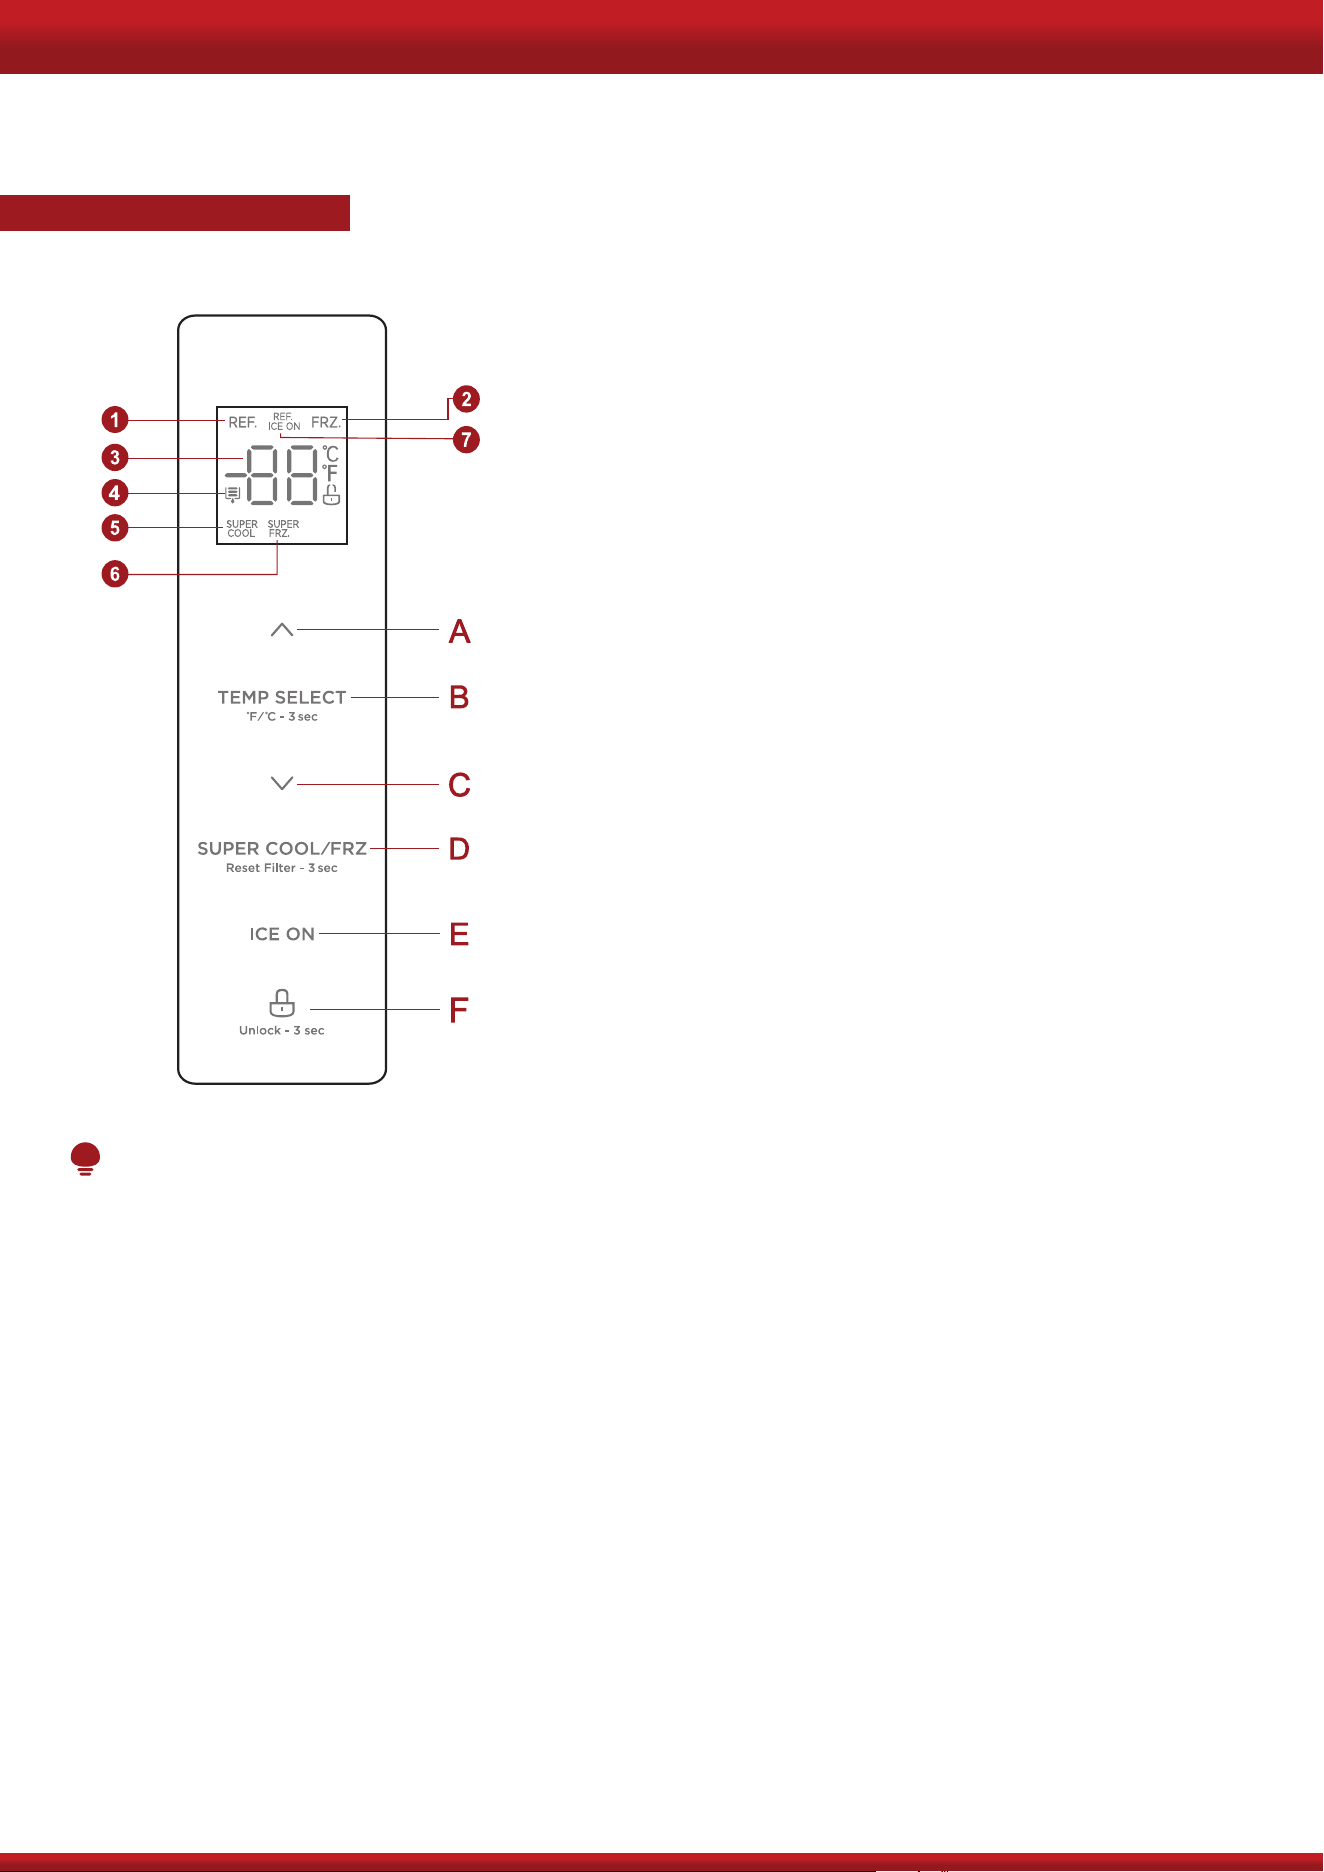
USE AND FUNCTIONS
Feature panel
1. Refrigerating
2. Freezer
3. Temperature display
4. Filter replacement reminder
5. Super cool
6. Super freeze
7. Refrigerating ice on
Display
A. Temperature up
B. Temperature zone selection
C. Temperature down
D. Super cool/Super freeze
E. Ice maker
F. Lock/Unlock
Button
12
Function Settings and Status
Display
When electrify the refrigerator, the display screen will totally display for 3
seconds, meanwhile the starting up bell rings, then the display screen enters
the normal display of operation. (If power on for first time, the default set
temperature of the refrigerator room and the freezer room is 39°F/ 0°F).
It will display the set temperature of both refrigerator and freezer rooms when
there is no fault.
Under normal circumstances, the display light will go out after 30 seconds in
lock state, button operation on display panel would wake up the display screen;
if the opening door action wakes up the display screen, the display light would
go out immediately when the door is closed; when the “fault code visible” type
of fault occurs, the display screen lights up, and will go out after 30 seconds.
Lock/Unlock
Refrigerator
temperature
setting
It will enter the lock state if there is no opening door action or any buttons
operation within 30 seconds.
The alarm sound can be stopped by pressing any one button in lock state, but all
other button operations need to be performed in unlock state.
In the unlock state, press and hold the button
lock state and the buzzer sound rings.
for 3 seconds to enter the
In the lock state, press and hold the button
unlock state and the buzzer sound rings.
for 3 seconds to enter the
Click the button to change the set temperature of refrigerator room,
each time click the
The temperature setting will take effect after the display panel is locked.
, the set temperature will drop 1°F or will rise 1°F.or
Long press the 4s to close or open the cold storage room.and
Freezer
temperature
setting
Click the button to change the set temperature of freezer room, each
time click the
The temperature setting will take effect after the display panel is locked.
, the set temperature will drop 1°F or will rise 1°F.or
Sabbath mode
cool mode, the set temperature of refrigerator room will go back to the set
temperature before super cool mode.
Press the button to start the super cool function. The refrigerator
icon shines. When exit the superroom is set at 34°F automatically, and the
freeze mode, the set temperature of freezer room will go back to the set
temperature before super freeze mode.
Press the button to start the super freeze function. The freezer
icon shines. When exit the superroom is set at -7°F automatically, and the
Press the switch button
When the function setting of the ice maker is effective, the indicator light
of the ice maker will be on, otherwise it will be off.
to set/cancel the function of the ice maker.
Mode setting
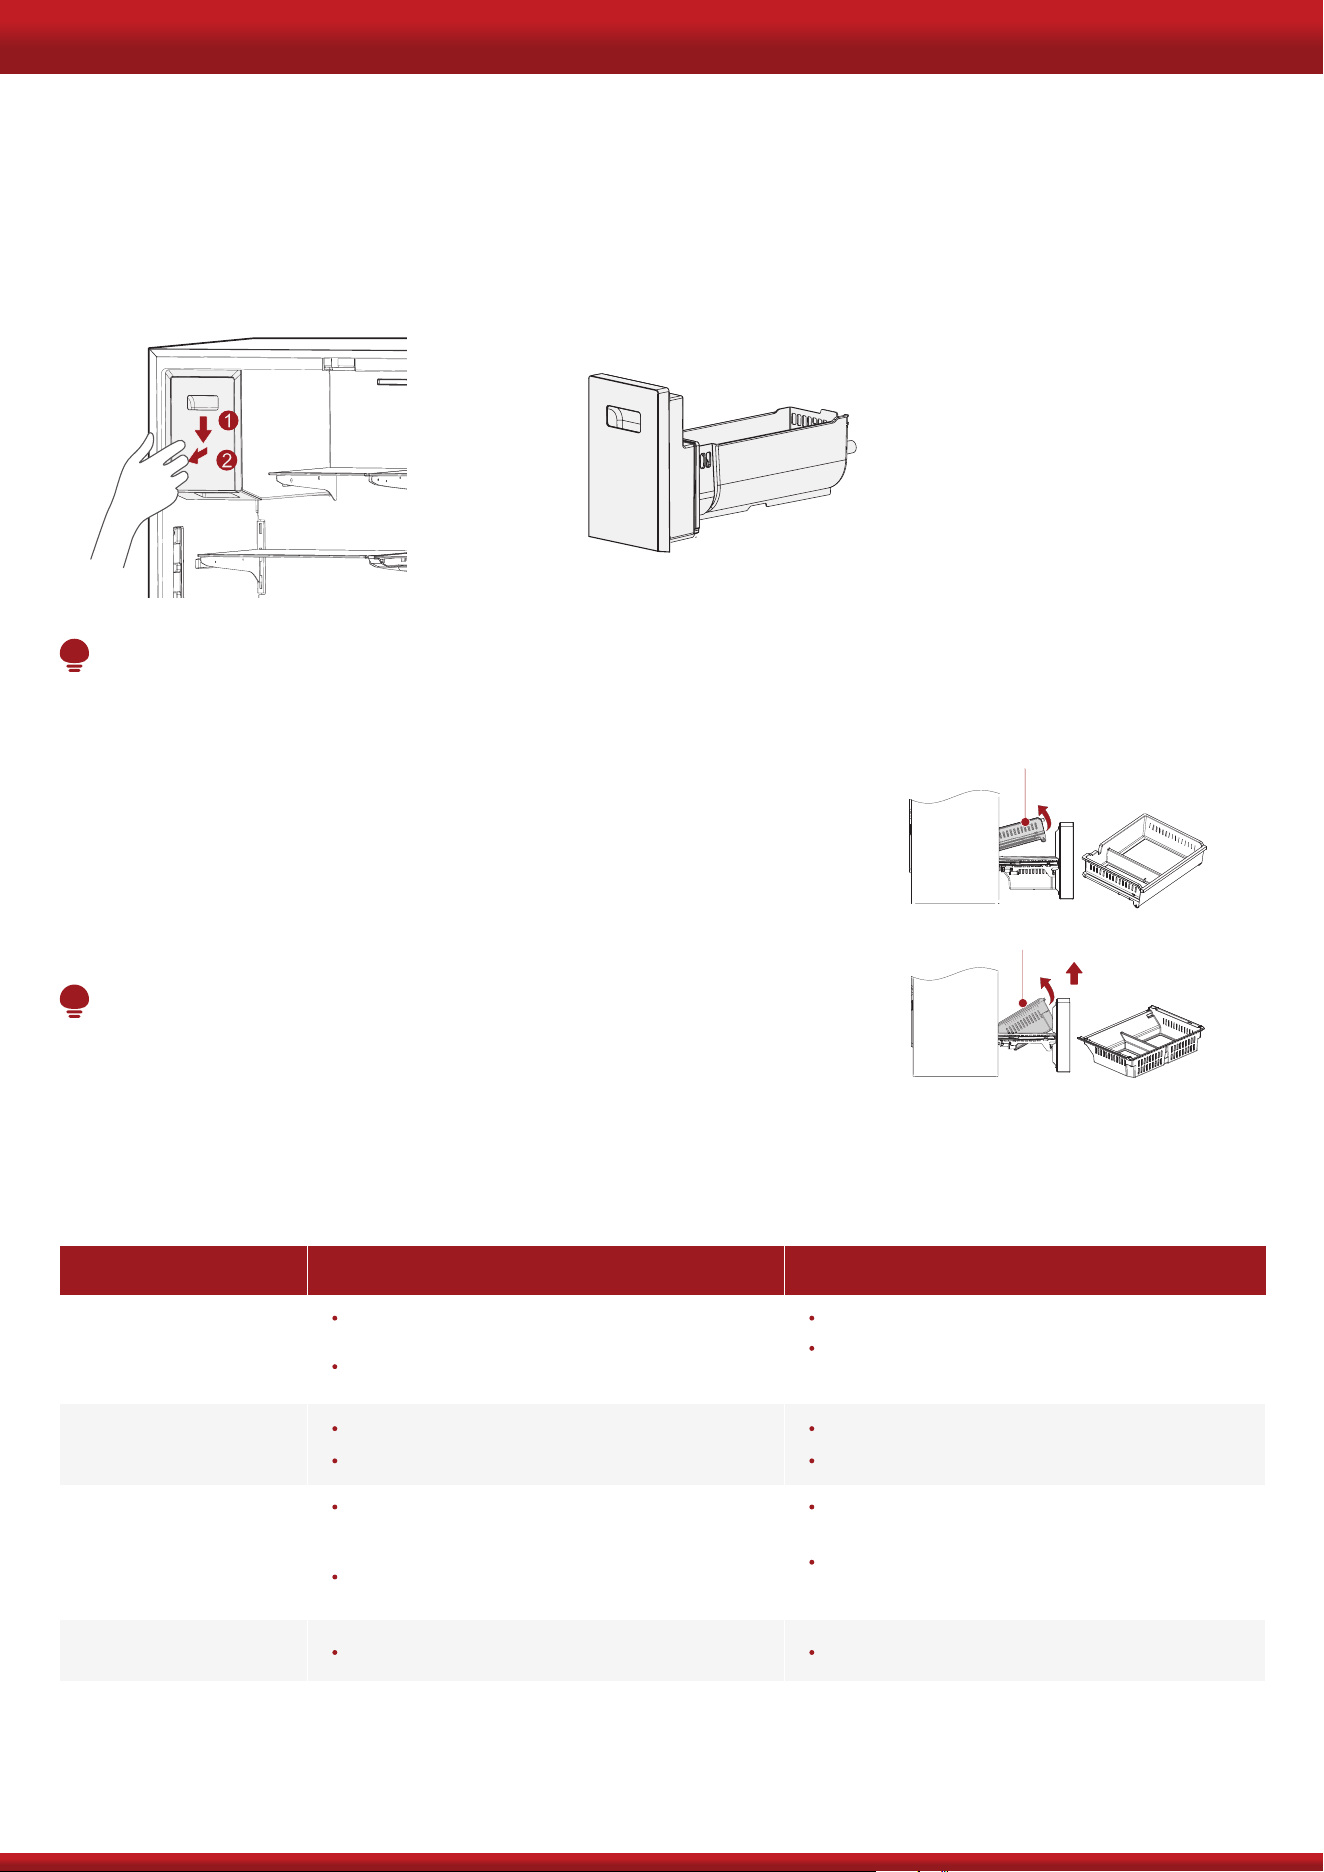
Hold down for 3 seconds to perform the “RESET FILTER” function.
6s after entering the Sabbath mode lock, the display goes out, the buzzer does not
sound, the door opening lamp does not light up, and the distributor only displays
the selected function in low brightness.
Press simultaneously the for 3s to enter or exit theand
Sabbath mode.
Celsius
transformation
Long press the 3s to achieve Celsius Fahrenheit conversion function.
At this time, the FILTER working data is cleared.
Filter element
time reset
If the rear door is not closed after power-on, the APP or machine will give an alarm, call three times
after exceeding 2 minutes, and then add one alarm every 1 minute.
13
ATTENTION
When the following tips to appear on the display screen, it indicates a problem with the refrigerator.
Although the refrigerator in the following fault case can still provide cool/freeze functions, but the user
should contact maintenance personnel, ensure the normal use of refrigerator.
Fault indication
Fault code Fault Description
E1 Temperature sensor failure of refrigerator room
E2 Temperature sensor failure of freezer room
E5 Defrost sensor error of freezer room
E6 Communication error
E7 Ambient temperature sensor error
EH The humidity sensor fails
F5 Refrigerating ice maker fails to turn over ice
F6 Initialization fault of refrigerating ice maker
CC The defrosting sensor in ice maker chamber fails
F4 The sensor at the bottom of refrigerating ice maker fails
CA The communication between main control board and ice making board fails
C9 The sensor in ice making chamber fails
function is successfully set.
press the button , and the anti-condensation heating wire shutdown
Press the for 4 seconds, the Fahrenheit icon flashes, and thenand
and
release the anti-condensation heating element off function.
for 4s, the Fahrenheit icon no longer flahes, press the button to
Under the above settings, unlock and enter again, continue to press the
Function Settings and Status
Anti-
condensation
heating element
on/o mode
Open door
prompt sound
switch
At the same time, press
prompt tone.
button 4s, close or open the doorand

14
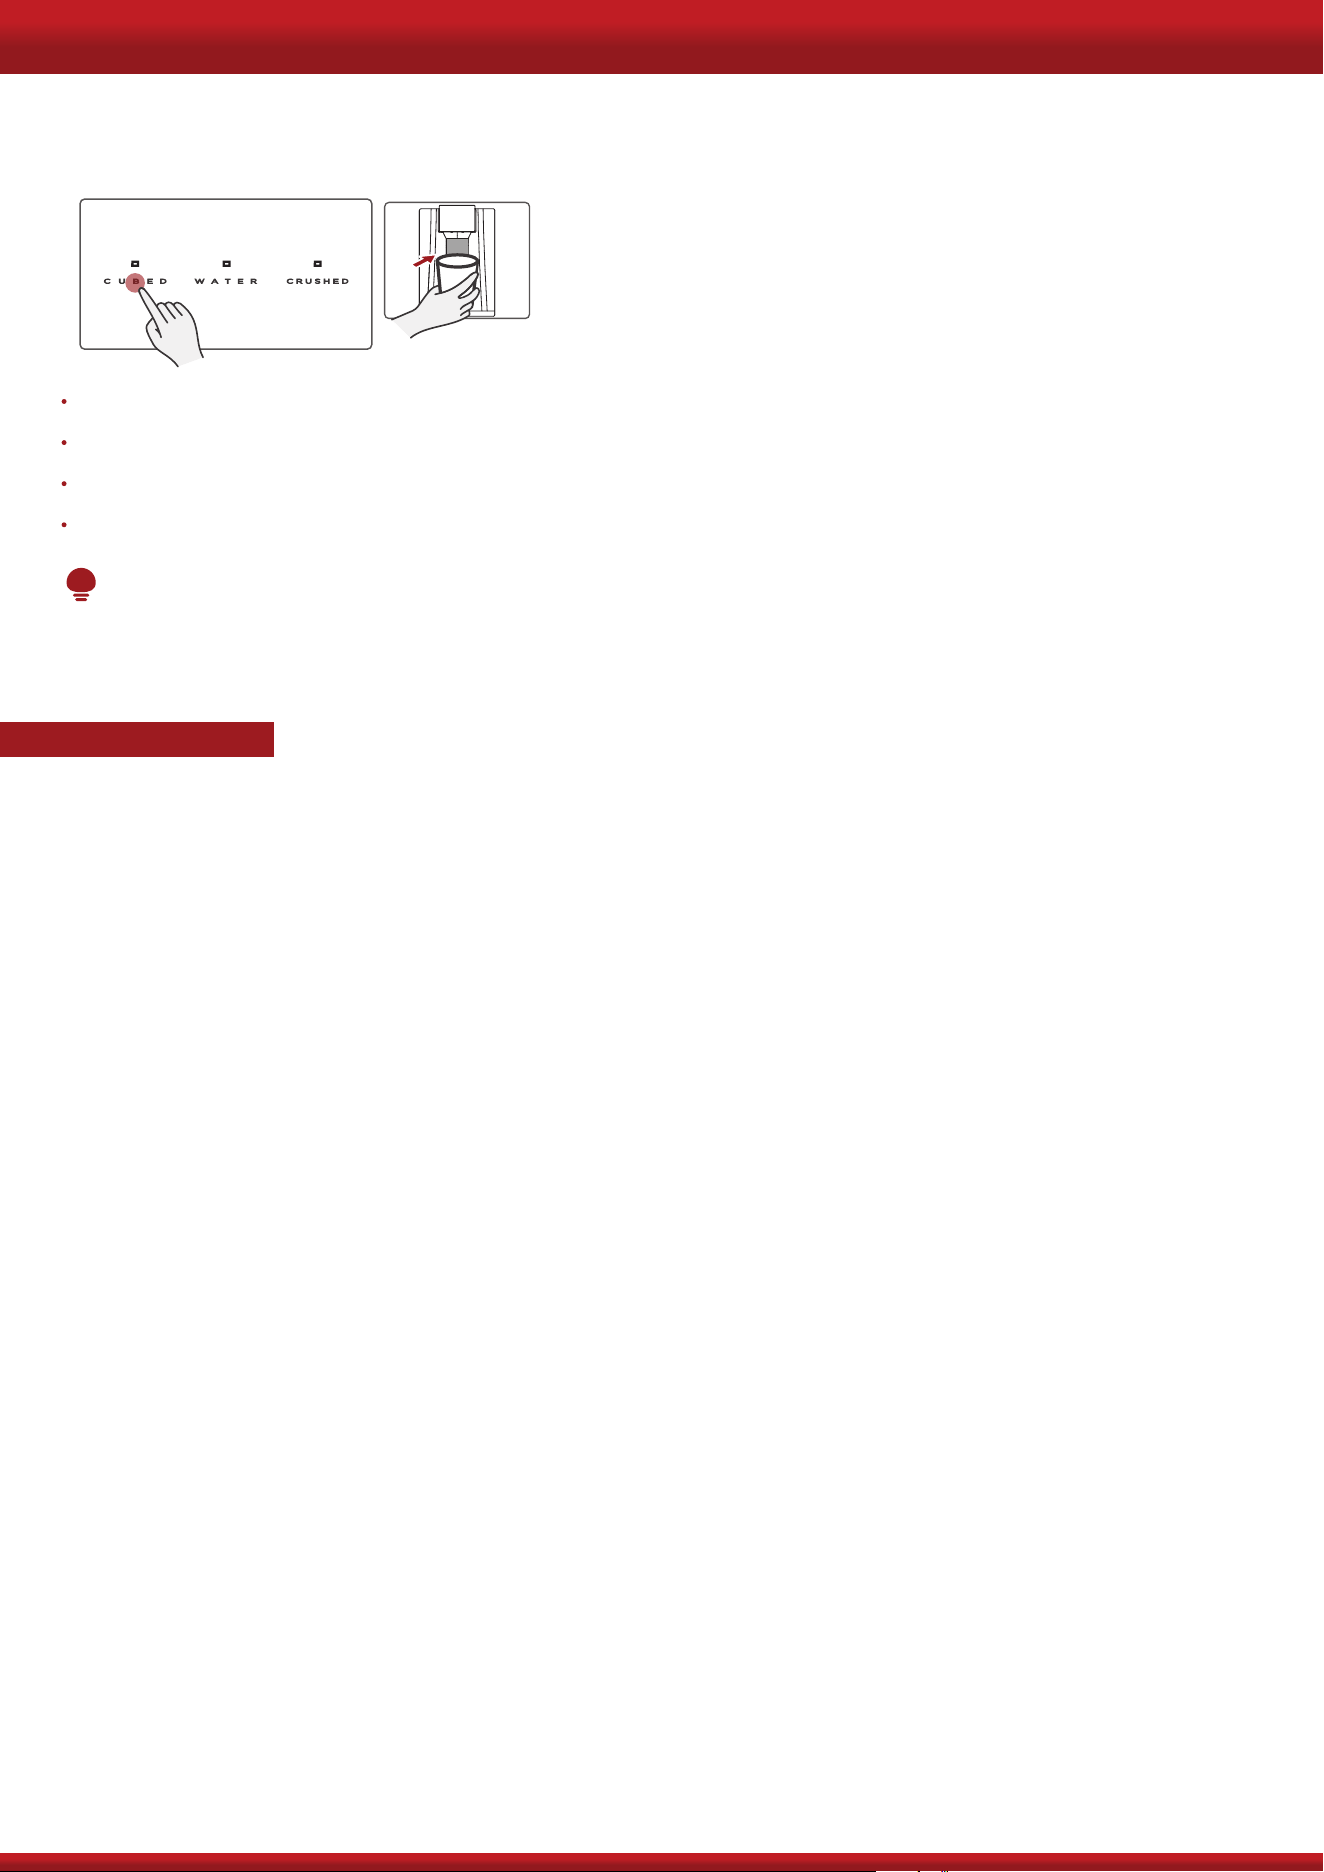
Keep pressing the buttons WATER until the indicator turns on.
Push the container in the direction of fetching water cushion, cold water starts to flow into
the container.
Remove the container from fetching water cushion and end the exporting of water.
Fetching cold water
Sounds will be produced during making ice cubes and crushed ice: water valve will produce buzzing
sounds; water’s flowing into ice vessel will produce sounds; grinding machine’s grinding ice into small
pieces or product ice’s falling into the container will produce sounds. Scratching noises may be produced
when taking out the ice cubes. Nothing to worry about this. The sounds are normal.
The ice in the container may be stuck together. In such cases, plase take out the ice container and
separate stuck ice into pieces by means of, for instance, using plastic or wooden spoons to push hard on
the ice carefully.
Please fetch the ice from the ice container if you need a lot of ice.
To prevent ice smell or bad taste of the ice, please clean the ice container regularly.
Ice and water can only be fetched when the door closed.
The ice/water dispenser is located on the outside of refrigerating chamber door. It offers a choice of cubed
or crushed ice, or cold water. The dispenser only works when the refrigerating chamber door is closed.
FETCHING WATER AND ICE
Keep pressing the buttons of CRUSHED until the signal turns up.
Make the container tight with mouth of water dispenser to prevent the side jet.
Press the container in the direction of fetching water cushion. Fill the container with crushed ice.
Remove the container from fetching water cushion and end the exporting of water.
Fetching crushed ice
15
Freezer compartment
The freezer compartment is designated for the low-temperature freezing of food, long-term
storage of frozen food, and for the production of ice cubes.
Do not put fresh and frozen food next to each other. The frozen food may thaw.
When freezing large amounts of fresh food (such as meat, fish or chopped meat), please divide
them into several small pieces before putting in, so that they can be quickly frozen and pick up easily.
Abide by the storage times recommended by food manufacturers on the packages, there is no
information on the packaging, food should not be stored frozen for longer than three months from
the date of purchase.
When purchasing frozen food, make sure that it was frozen at a suitable temperature and that the
packaging is not damaged.
Frozen food should be kept in suitable individual packages to ensure that adjacent food cannot
be contaminated. Consume thawed and defrosted foods immediately, do not refreeze them.
In case of prolonged power failure or malfunction of the appliance, remove the stored frozen food
and check whether they are still edible, then store them in a sufficiently cool place or in another appliance.
To defrost food, remove it from the freezer and let it defrost at room temperature or in the refrigerator.
To defrost food quickly, you can use the defrost function on your microwave, for example.
If you only want to defrost part of a pack, remove the portion you need and immediately close the rest
of the pack. In this way, you will avoid “freezer burn” and will reduce ice formation on the remaining foods.
Pay attention to the star classifications (4 star, 2 star and 1 star) in the freezer compartment and the
resulting storage periods for frozen food.
STORING FOOD
Keep pressing the button CUBED until the signal lights up.
Push the container in the direction of fetching water cushion.
Ice cubes start to fall into the container.
Remove the container from fetching water cushion and end the exporting of ice.
Fetching ice cubes
Dierences: Due to technical changes and different models, some of the illustrations in this manual
may differ from your model.
ATTENTION
Storage of too much food during operation after the initial connection to power may adversely
affect the freezing effect of the refrigerator.
ATTENTION
Cooling compartment
To reduce moisture and subsequent ice build-up, never put liquid into the fridge compartment in
unsealed containers. Frost tends to concentrate in the coolest parts of the evaporator.
Storing uncovered liquids results in a more frequent need for defrosting.
Never put warm foods in the fridge compartment. These should first cool down at room temperature and
then be placed so as to ensure adequate air circulation in the fridge compartment.
Foods or food containers should not touch the back wall of the fridge because they could freeze to the wall.
Do not keep regularly opening the door of the refrigerator.
Meat and clean fish (packed in a package or plastic foil) can be placed in the fridge compartment,
which can be used in 1–2 days.
Fruit and vegetables without packaging can be placed in the part designated for fresh fruit and vegetables.
Storage times and temperature
NOTE: Overlong storage or storage at inappropriate freezing temperature may cause a quality loss or
spoiled foods, which causes food waste, is inedible and may cause food poisoning.
The minimum temperature in most cases should be
-0.4°F or colder.
Follow the maximum recommended storage times below:
Stew, ice cream, sausages, bread: 2-6 months.
Fish, shrimp, lamb, meat: 4-8 months.
Vegetables, fruits, poultry, beef: 6-12 months.
| MAINTENANCE AND CLEANING
CAUTION
Disconnect the appliance from the electrical supply before undertaking any routine maintenance.
Allow at least 5 minutes before restarting the appliance, as frequent starting may damage the compressor.
Do not use mechanical devices or other means to accelerate the defrosting process, other than those
recommended by the manufacterer.
Do not try to repair, disassemble or modify the appliance by yourself. In case of repair please contact
our costumer service.
Check the door gasket regularly to make sure there are no debris. Clean the door gasket with a soft cloth
dampened with soapy water or diluted detergent.
The interior of the product should be cleaned regularly to avoid odor.
Use a soft cloth or sponge to clean the inside of the product, with two tablespoons of baking soda and a quart
of warm water. Then rinse with water and wipe clean. After cleaning, open the door and let it dry naturally before
turning on the power.
Eliminate the dust on the back of the unit at least once in the year to avoid hazard by fire, as well as increased
energy consumption.
16
Wipe the outer surface of the product with a soft cloth dampened with soapy water, detergent, etc.
and then wipe dry.
Do not use hard brushes, clean steel balls, wire brushes, abrasives (such as toothpastes), organic solvents
(such as alcohol, acetone, banana oil, etc.) boiling water, acid or alkaline items, which may damage the fridge
surface and interior. Boiling water and organic solvents such as benzene may deform or damage plastic parts.
Do not rinse directly with water or other liquids during cleaning to avoid short circuits or affect electrical
insulation after immersion.
For areas that are difficult to clean in the product (such as narrow sandwiches, gaps or corners), it is
recommended to wipe them regularly with a soft rag, soft brush, etc. and when necessary, combined with some
auxiliary tools (such as thin sticks) to ensure no contaminants or bacterials accumulation in these areas.
17
The appliance shall run continuously once it is started. Generally, the operation of the appliance shall
not be interrupted; otherwise the service life may be impaired.
ATTENTION
CAUTION! Don’t use sharp objects to remove frost from the freezer. Only after the interior completely dry
should the appliance be switched back on and plugged back into the mains socket.
Defrosting
1. Remove existing food and accessories baskets, unplug the appliance from the mains power and leave
the doors open. Ventilate the room thoroughly to accelerate the thawing process.
2. When defrosting is completed, clean your freezer as described above.
Although this appliance automatically defrosts, a layer of frost may occur on the freezer compartment’s interior
walls if the freezer door is opened frequently or kept open too long. If the frost is too thick, choose a time when
the supply of food stocks are low and proceed as follows:
Cleaning the glass shelf
Regarding the information pertaining to cleaning of glass shelf. Thanks to refer to the paragraph
“Adjustment of cantilever rack” of the manual.
Cleaning of door tray
According to the direction arrow in the figure below, use both hands
to squeeze the tray, and push it upward, then you can take it out.
After washing the tray having been taken out, you can adjust its
installing height in accordance with your requirement.
Problem
Fruits or vegetables
are frozen
Light not on
Not operate
Possible Causes
Has the food been placed at the back of the
fridge? The area near the back wall is where the
temperatures are coldest.
Fruits or vegetables are stored in the Fresh/Chill
zone.
The appliance is not powered on.
The light is broken.
The power supply is not turned on and the plug
is not firmly inserted.
Low voltage, power failure or part of the circuit
tripped.
Solution
Not placing food which may freeze easily at
the back of the fridge compartment.
The Fresh/Chill zone is only for meat/fish.
Unplug and re-plug the power cord.
Replace the light with a new one.
Insert the power cord plug firmly.
Check the power supply at home.
Fridge/freezer is
over-cooling
Temperature control is not set correctly.
Set the temperature higher.
18
Please remove the ice in time which falls in the ice making chamber during pulling out.
ATTENTION
Clean the ice storage box
Ice cubes in the ice container may block the outlet because of lumping or other reasons. In this case the ice
container needs cleaning or eliminating the blockage.
1. Hold the button of the ice storage box with your hand, press it gently, and then pull it out horizontally;
2. Push the ice storage box in slightly after cleaning.
| TROUBLESHOOTING
The following simple issues can be handled by the user. Please call the after-sale service department
if the issues are not solved.
NOTE: Don’t remove the lower freezer drawer if not necessary.
ATTENTION
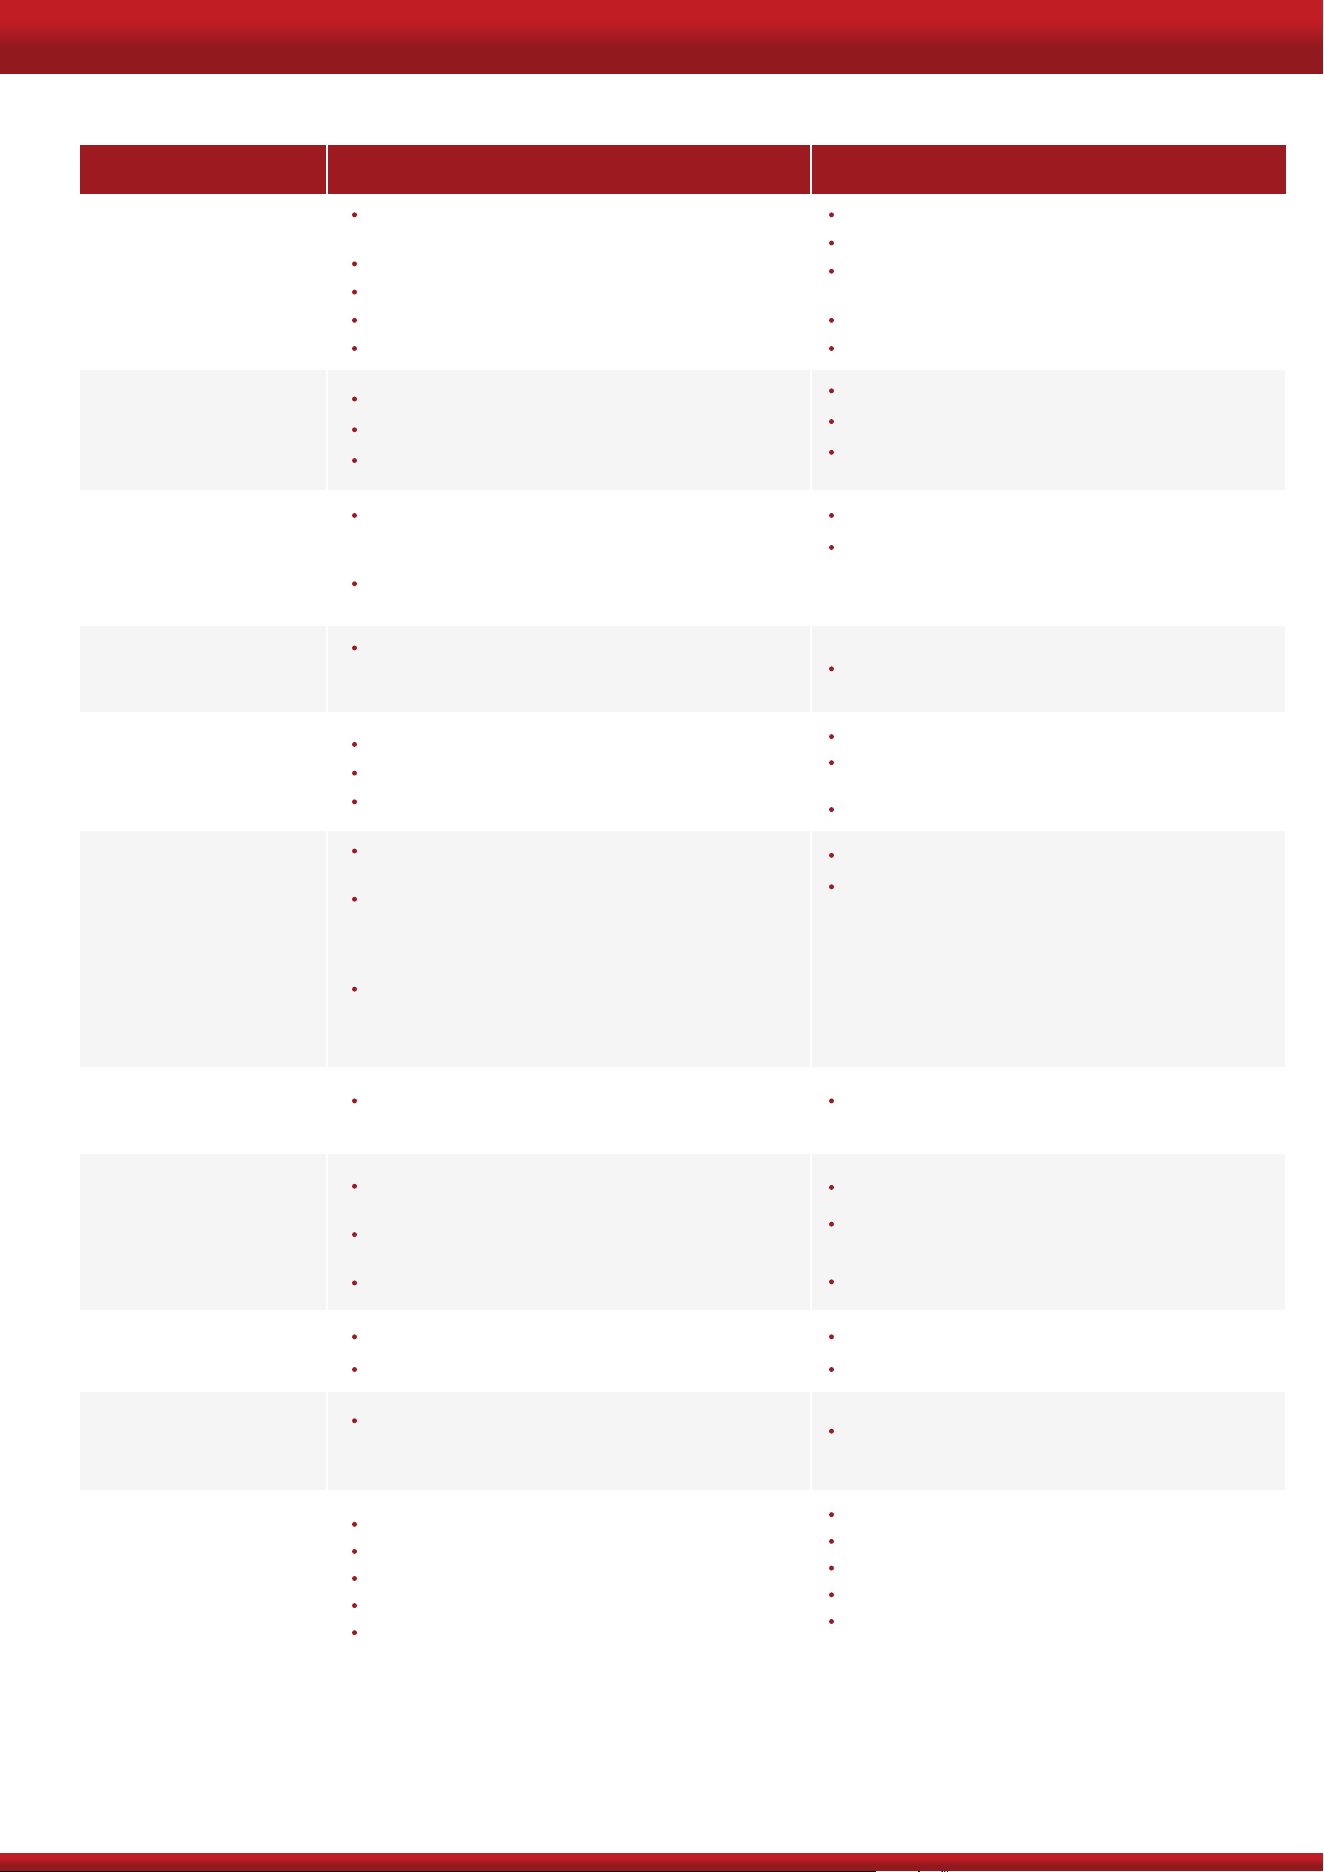
Cleaning of freezer drawer
Open the freezing chamber door to the maximum stroke, lift the tail of
the upper drawer of the freezing chamber, take out the upper freezer drawer.
Open the freezing chamber door to the maximum stroke, lift the end of
the lower freezer drawer and lift it up.
Upper freezer drawer
Lower freezer drawer
19
Odors
Spoiled food.
Food with strong odors.
The interior compartment is dirty.
Clean and remove any spoiled food.
Clean the interior compartment.
Make sure strong smelling food is wrapped
airtight.
The actual
temperature
diers from the
set temperature
This is normal.
Wait for some time before testing the actual
temperature.
Condensation forms
on the outside
Condensation may form when the humidity
in the room is high.
This is normal. Wipe off the condensation using
a dry cloth.
Condensation forms
inside the fridge and
drawers
The fridge maintains a high humidity to keep
vegetables and other food items fresh.
Humidity is too high in the room and doors have
been opened frequently.
The door gasket are not tight.
Wipe off the condensation using a dry cloth.
Do not open the doors as frequently or do not
keep them open too long.
Check the door gasket, clean or correct position.
Frost around the
vents
Door is not closed properly.
The door gasket are not tight.
Make sure food does not block the door.
Check the door gasket, clean or correct position.
Hard to open the door
Not making ice cubes
(Only models with ice
maker)
The difference in air pressure between the inside
and outside of the compartment may sometimes
make it hard to open the freezer door.
The ice making function not turned on.
The appliance is not being supplied with water.
The water pipe has kinks in it.
The water pipe connection is installed incorrectly.
Water pressure is too low.
Wait a few moments, and then try to open the
door slowly.
Switch on the ice maker.
Check whether the water supply is on.
Straighten out the kinks.
Check the water connection.
Check the pressure of the water supply, or
whether the filter is clogged.
When warm food is put in, the temperature will
rise temporarily.
After setting a new temperature, it will take some
time for the temperature in the compartment to
reach the set temperature when the door is not
opened.
After the temperature stability, the actual
temperatures at different locations within the
compartment are different, with a deviation of
about ±37.4°F.
Door does not close
properly
Compressor working
for a long time
Cross or vertical
beams are hot
Outer wall is hot
Door is stuck with objects.
Door gasket deformed.
Too much food in.
High ambient temperature causing long working
time.
Putting too much food in at one time.
Food is put in before it has cooled down.
Opening the door too often.
The frost layer inside is too thick.
There are metal tubes inside the beams, and
the heat released from the tubes prevents
condensation.
When the appliance is operating, heat is
dissipated to the outside through the metal
tubes inside the cabinet.
Higher ambient temperatures in the summer
cause the temperature of the outer wall to rise.
Do not put in too much food.
Heat the door gasket, then cool it for restoration
(with an electrical drier or hot water for heating).
Place the appliance stably.
This is normal.
Do not put too much food in at one time.
Wait until the food has cooled down before
putting it in.
Do not open the door too often.
Need to defrost.
This is normal.
Higher temperature on the outer wall is normal.
Increase the heat dissipation space, or put the
appliance in a ventilated and cool place.
Problem Possible Causes Solution

20
Certain sounds can be heard during normal use of the refrigerator, which do not aect its
correct operation.
Sounds, which can be easily prevented:
Noise caused by the appliance which is not level - adjust the position with the adjustable turn-in front feet.
Alternatively, place pads made of soft material under the rear rollers, especially when the appliance is placed
on tiles.
Touching the adjacent piece of furniture - move the refrigerator away.
Creaking of the drawers or shelves - take out and put back the drawer or shelf.
Sounds of clinking bottles - move bottles apart.
Sounds heard during normal use are mainly due to operation of the compressor (switching on) and cooling
system (thermal expansion and contraction of the radiator caused by flow of the cooling agent).

FOR MORE DETAILS AND INFORMATION, PLEASE VISIT OUR WEBSITE WWW.KUCHT.COM
DESIGN: LONDON DC - WWW.LONDON-DC.COM
WE TRANSFORM A SIMPLE KITCHEN INTO A PRO ONE.
THIS IS WHY WE CARE ABOUT MAKING VERY HIGH PERFORMANCE
RANGES AND HOODS, TO MAKE YOU FEEL LIKE A PRO AND STYLISH COOKER.