
Rraycom User Manual
(QW5)
aftersale@rraycom.com
Please email us:
Customer Service
Phone:
+1 2027384449
Facebook
Claim
warranty for your device
1-year
(Sun. - Thur. 8pm - 12pm)
01
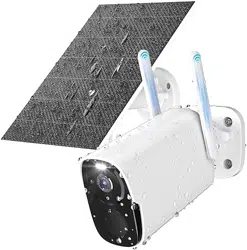
Camera *1
Bracket *1
USB Cable *1
User manual *1 Mounting Kit *1
④
③
⑤
① ②
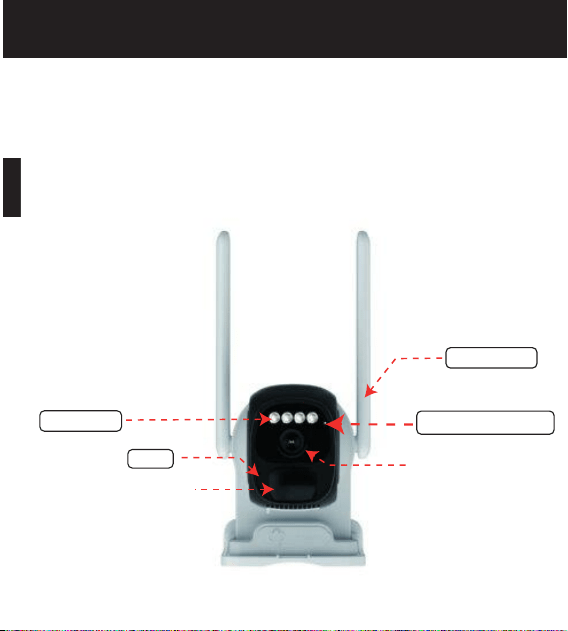
Lens
PIR
QW5
Packing List
Front
Spotlight
Antennas
MIC
Indicator light
02
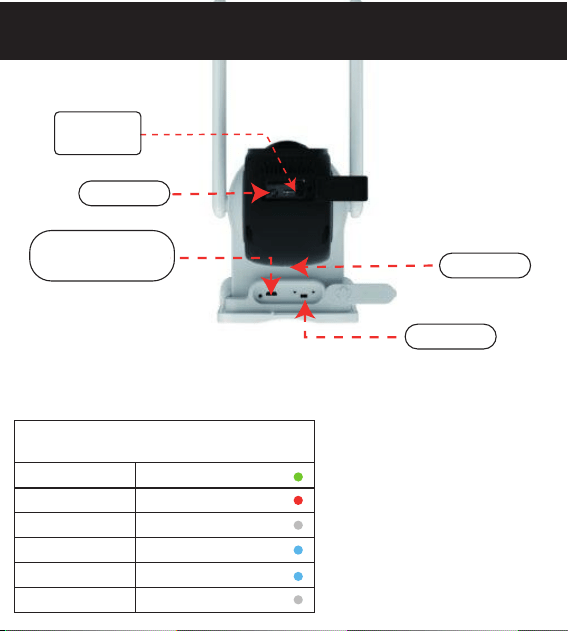
Speaker
Rear
Micro SD
Card Slot
USB
OFF
ON
Reset
OFF/ON
Reset Green light flashes
Indicator light definition
Charging Red light
Fully Charged Off
No network Blue light flashes
Wifi connected Blue (when it wakes up)
Sleep Off
Use a power adapter with a
power rating of 5V 1.5A or below.
Caution:
* 5V 1.5A Power
adaptor Only

Scan the QR code to download the APP.
Or search for "O-KAM" to download through the app store
(Google play/ APP Store).
03
Camera
O-KAM
Download the APP
Preparation
>>>
Press and hold the power button until you hear the
prompt, and the indicator light flashes blue slowly.
1.Enable the location service on your smartphone.
2.Connect your smartphone to your home Wi-Fi.
Smartphone
Press and hold the reset button for
about 3 seconds.
Reset
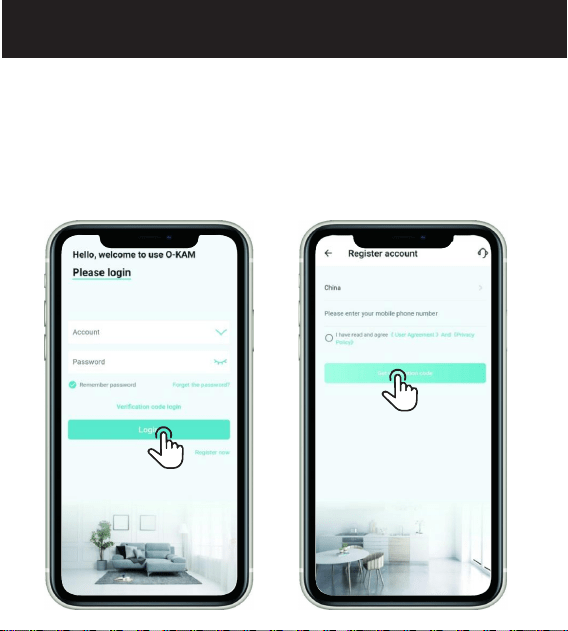
Click "Register now" at the login interface
-- Select the address
-- Enter your phone number
-- Get the verification code.
After entering the verification code
you need to set the password and click Finish.
04
①
②
>>> APP account registration
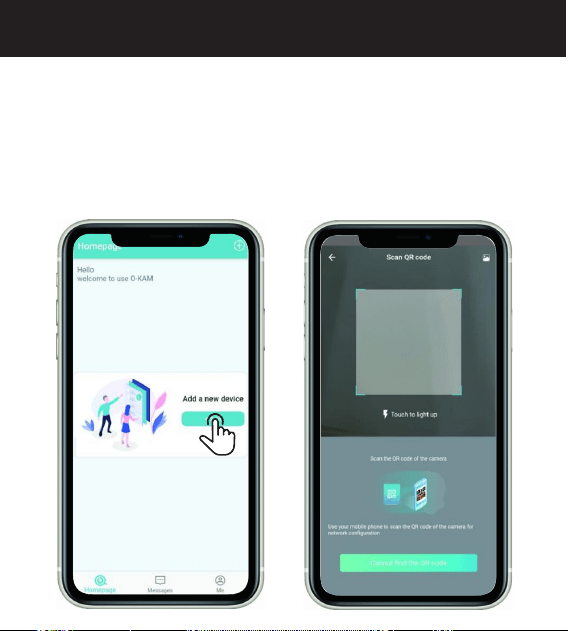
Log in and click "Add" button found at the "Home" interface
or click the " " in the upper right corner.
05
>>> Add cameras
①
At the QR code scanning interface, scan the QR code on the
camera.
06
>>>
Add cameras
②
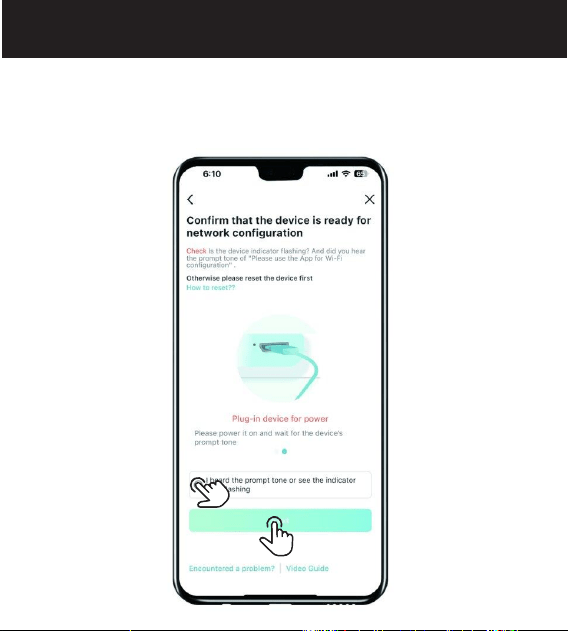
The camera is ready for WiFi configuration
when you hear the prompt. And click "Next".
07
>>>
Add cameras
➂
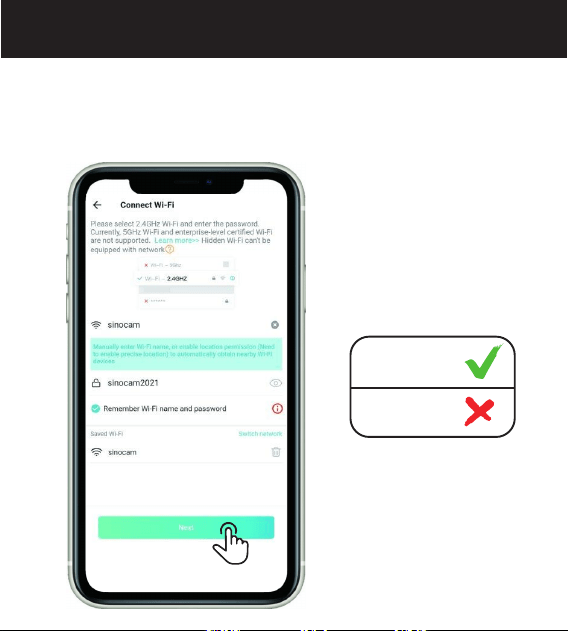
Please enter the passwords and double check if it’s correct. Then
tap “Next”.
* Make sure the Wi-Fi is 2.4Ghz. WiFi password case sensitive.
2.4Ghz
5 Ghz
08
>>>
④
Add cameras
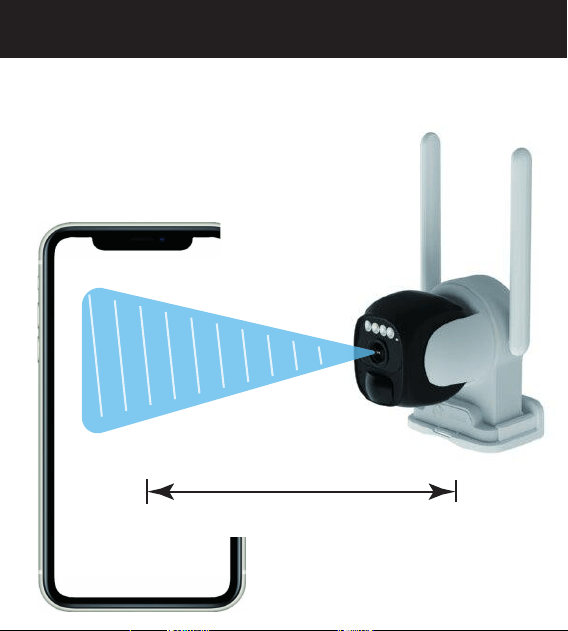
The APP will automatically generate a QR code. Point the camera
lens at the QR code and keep it at a distance of 6-8 inches. You'
ll hear a beep and voice prompt when it's scanned successfully.
09
6-8 INCHES
>>>
⑤
Add cameras
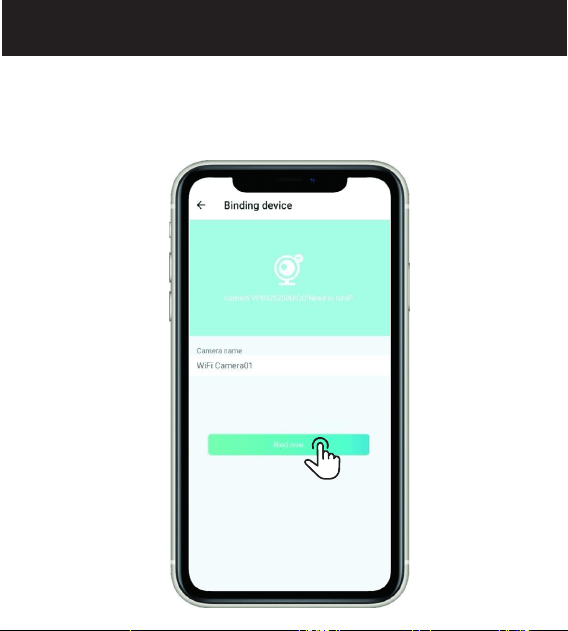
When the device is connected to the WiFi, name the camera
and click "Bind Now".
10
>>>
Add cameras
⑥
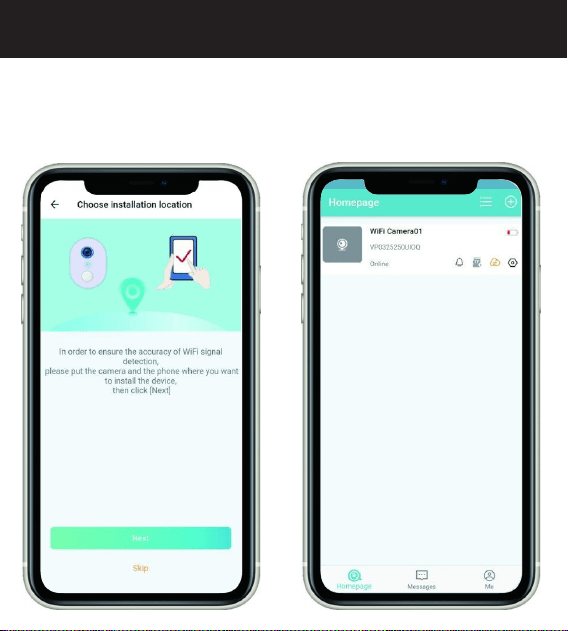
Please take the camera and phone to the location where
you're going to install the camera, and then click "Next" to
test the signal strength.
Make sure the Wi-Fi signal strength is strong at the location.
11
>>>
⑦
Add cameras
12
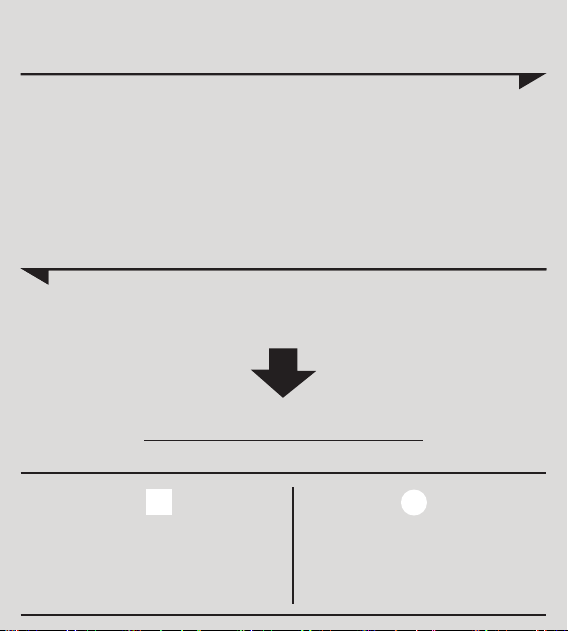
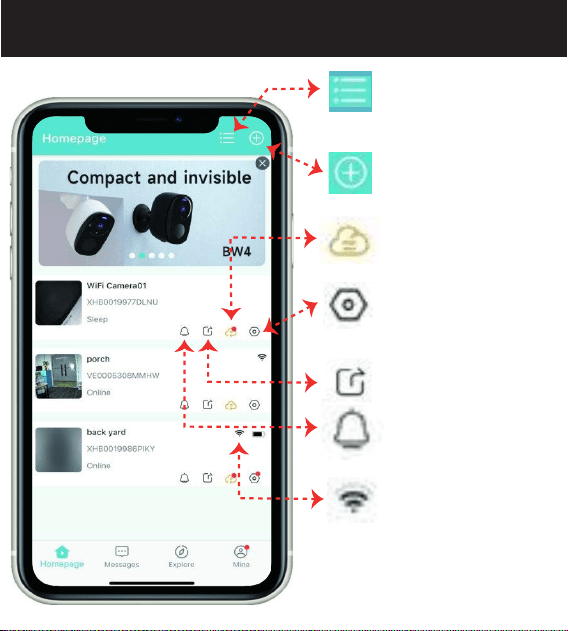
Homepage introduction.
①
>>>
APP function introduction
Multi-device view
Add device
System settings
Cloud service
Share camera
Do not disturb mode
WiFi display

13
Enter system settings "
Tap on “Firmware” to update. Please keep the firmware up to date.
"- Tap on Device Health
>>>
Firmware update
14
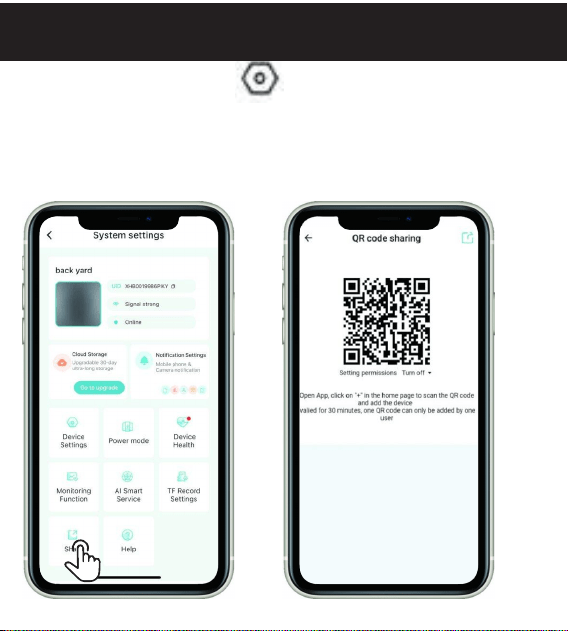
Enter the system settings "
Sharing method: Share the QR code to a user. The other user adds
the camera by scanning the QR code;The QR code is valid for 30
minutes, and one QR code can only be shared
with one user. Generate more QR codes for more members.
Maximum of 4 people can live view.
>>>
Share the device
15
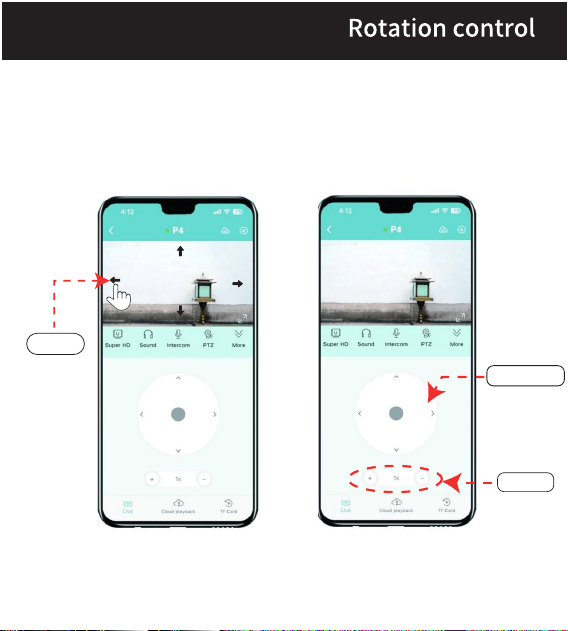
Slide
Rotation
Zoom
>>>
16
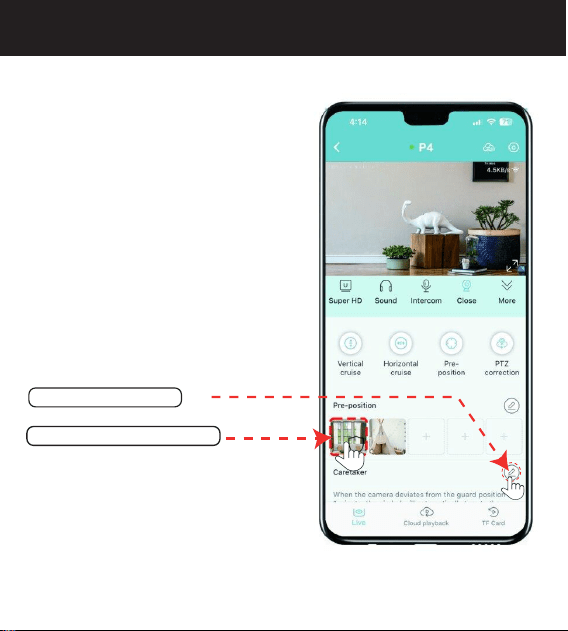
Quick 90° vertical cruise
Quick 180° horizontal cruise
Rotate to the guard position
PTZ position reset
How to set guard position?
1. Tap on the icon here
2. Choose your pre-positions
FYI: The guard position is the
default position of the camera,
which is the prior postion you
want the camera to keep an
eye on.
Cruise and Guard position
>>>

AI Function
>>>
17

Tutorial
Videos
Please scan the QR code below
18