Soft Heat
®
Brewer & Server
Use & Care Instructions
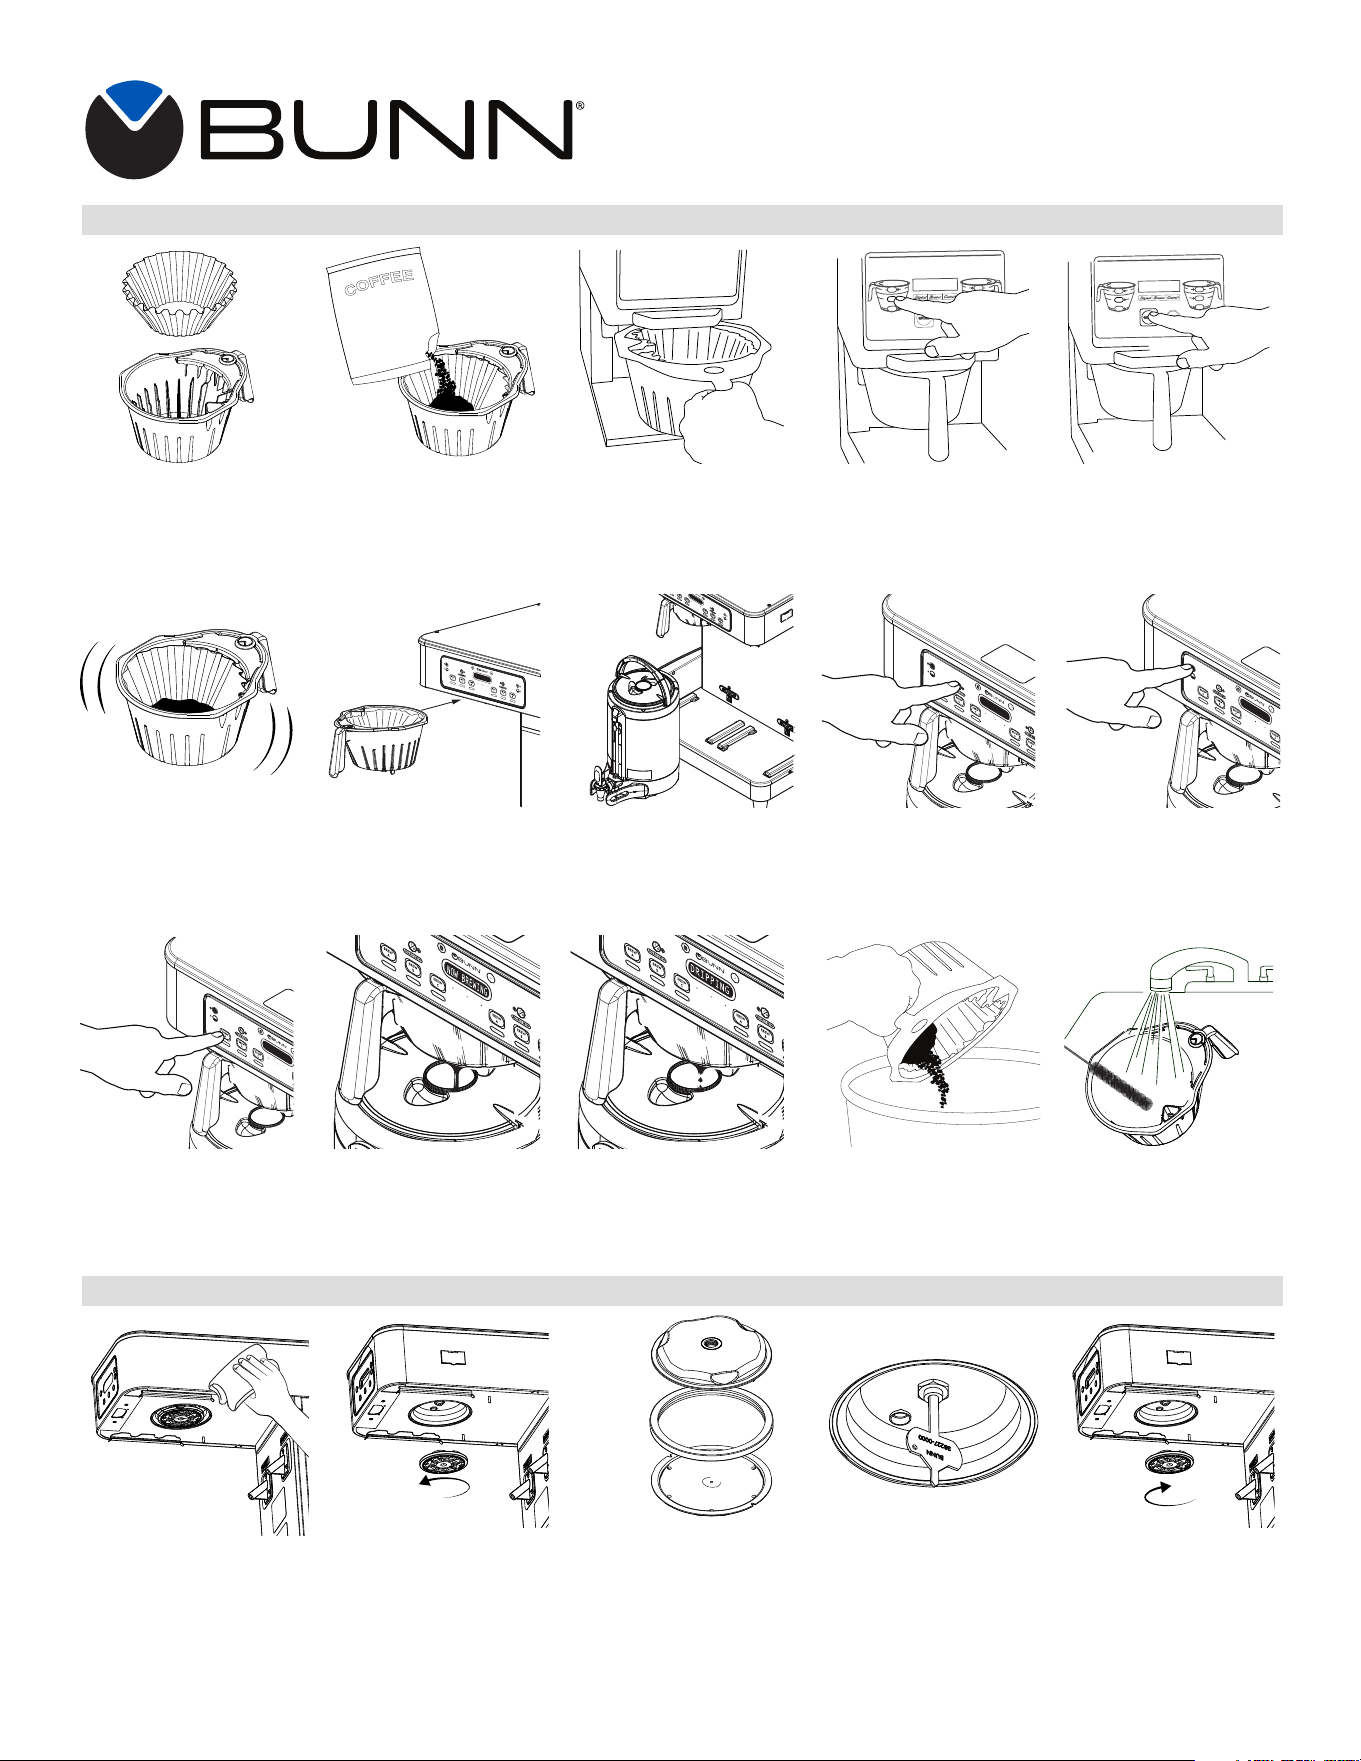
Slide the funnel into the
funnel rails of the brewer.
The display will read
NOW BREWING with the
remaining brew time.
The word DRIPPING will
read on the display.
Insert a BUNN filter into a
clean brew funnel.
For two hopper grinders,
select coffee type by
pressing “RIGHT” or
“LEFT” hopper.
If grinding fresh coffee,
place funnel in grinder.
Place an empty server
under the funnel. Rotate
handle forward to lock
the lid.
Press the GRIND button to
fill the funnel.
Press and release the
“ENABLE BREW” button.
Press the Batch Size button
according to the amount of
coffee in the filter.
Press the assigned BREW
button (A, B, or C).
When dripping has stopped,
discard the used grounds
and filter.
Clean and Sanitize the
funnel.
Gently shake funnel to
spread the grounds evenly.
If using pre-ground coffee,
simply pour fresh coffee
into filter.
Disassemble and thoroughly
rinse the sprayhead. The holes
must be open and clear of any
mineral deposits.
Once a week: Remove the
sprayhead by turning in a
counter-clockwise direction.
Re-assemble the
sprayhead and install
it onto the brewer.
Use the long end of the
sprayhead cleaning tool
to clean the sprayhead
outlet fitting.
Cleaning the Brewer
Brewing Coffee
Every Day: Wipe the
spreayhead panel and the
entire outside surface of
the brewer with a clean
damp cloth.
Page 1 of 2
54503.0000A 09/17 ©2017 Bunn-O-Matic Corporation
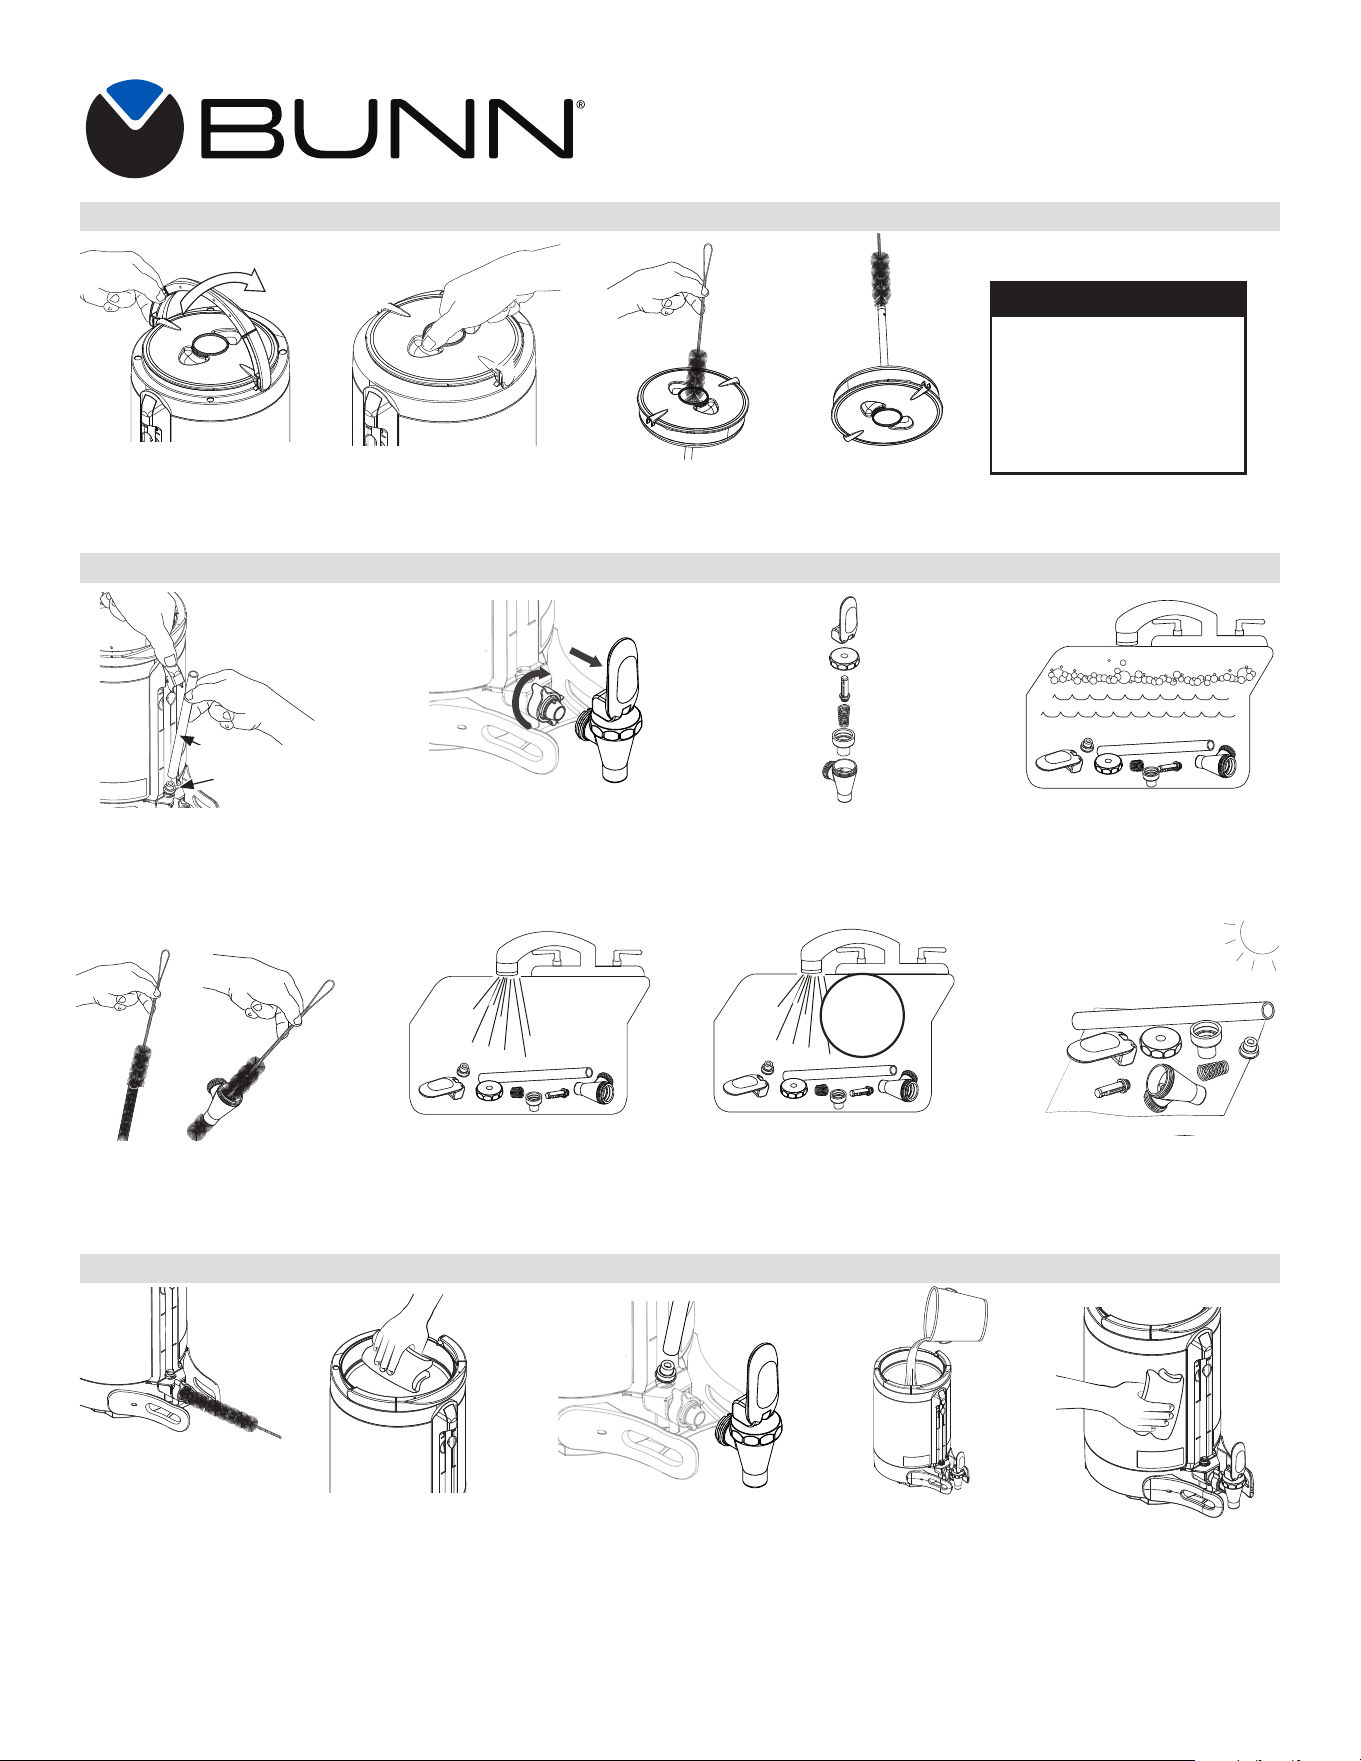
Fill the server with
non-chlorine sanitizing
solution, and let server sit
for five (5) minutes, then
drain through fully open
faucet.
Fill server with a wash
solution, and thoroughly
clean inside of server
using a SOFT,
Non-abrasive
cloth or brush. Drain and
thoroughly rinse using
fresh water.
Soft Heat
®
Brewer & Server
Cleaning Instructions
Clean the inlet tube with the supplied brush
(00675.0000) using a mild soap solution.
Rinse lid assembly thoroughly with clean water.
Grasp the lid by the
finger holds and lift the
lid assembly straight up.
Transfer the parts to a sink filled
with non-chlorine sanitizing
solution. Allow the parts to soak
in the sanitizing solution for a
minimum of five (5) minutes.
Clean the outside surface
of the server using a clean
damp cloth.
Re-install sight gauge seal and
sight gauge tube.
Re-attach faucet to server shank.
USE CAUTION: Do Not
over-tighten faucet wing nut -
HAND TIGHTEN ONLY.
Turn the faucet wingnut
clockwise to remove the
faucet from the dispenser.
Using supplied brush scrub the
faucet body and sight gauge
tube.
Rinse all parts in the second
sink with clean hot water.
Unscrew the faucet
cap and disassemble
all the faucet parts.
Clean the faucet shank
using the supplied
brush (00675.0000)
and cleaning solution.
Transfer the sight gauge and
faucet parts to a sink with a soap
solution using a mild, non-citrus,
non-abrasive, liquid detergent.
Remove the faucet parts from
the sanitizing solution, and allow
to air-dry overnight. Reassemble
faucet.
Press down on the sight gauge top
to release the sight gauge tube.
Remove the sight gauge tube and
bottom seal.
DO NOT submerge the
server in water.
Damage to internal
components may result.
CAUTION:
Cleaning the Lid Assembly
Cleaning the Faucet and Sight Tube
Cleaning the Server
Completely drain the server.
Rotate handle back to
release the lid lock.
5 min.
54503 092617
sight gauge tube
bottom seal
10 MIN.
Page 2 of 2