
IMPORTANT: Please read all safety warnings.
Ensur
Safety Instructions & Warnings 1
What’s Included & Installation 2
Orbit Adjustable Arm Installation 3
Warranty & Safety Warnings 4
Thank You!
For purchasing our tank mount bracket,
Please read all instructions.
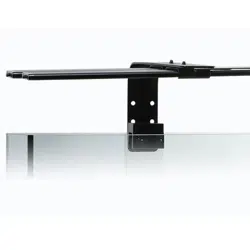
#4194 Orbit LED Adjustable
Tank Mount Bracket
Safety Instructions and Warnings
Page 1
Table of Contents
- Before installation, ensure you have all of the components included with the adjustable tank mount
bracket. If you’re missing any parts, please contact us at www.current-usa.com.
- This tank mount arm bracket is designed to only fit aquariums up to 1.5" thick or with a 1.5" frame and
will only work with Current-USA Orbit Marine IC, Orbit Marine IC PRO, Orbit Marine LED, Satellite Plus
Satellite Plus PRO and Orbit Marine PRO LED fixtures (visit our website for Orbit Marine PRO instructions.
- Use one arm bracket for 18”, 24” & 36” fixtures, for 48” & 72” fixtures, two arm brackets are required*.
- Use CAUTION when installing and using arm bracket. DO NOT PUSH, PULL or BEND bracket while
on tank. Doing so can cause the tank to crack.
- ALWAYS UNPLUG LIGHT and disconnect from power when removing from tank.
- ALWAYS disconnect from power and remove light for cleaning and/or maintenance.
AC Power
GFCI Outlet
12VDC
Power Supply
LOOP
Controller
Wave Pump
Manifold HUB
24VDC ONLY
P1
P3
P2
24VDC
Power Supply
SAVE THESE INSTRUCTIONS
L1
L2
LOOP IC Light
Manifold HUB
12V DC ONLY
eFlux Accessory
Wave Pump Add-on
Use only with GFCI
Protected AC Outlet
Keep fixture clean of
water and/or salt creep
Ensure use of drip
loop for all cables
DO NOT BEND, PUSH
or PULL BRACKET
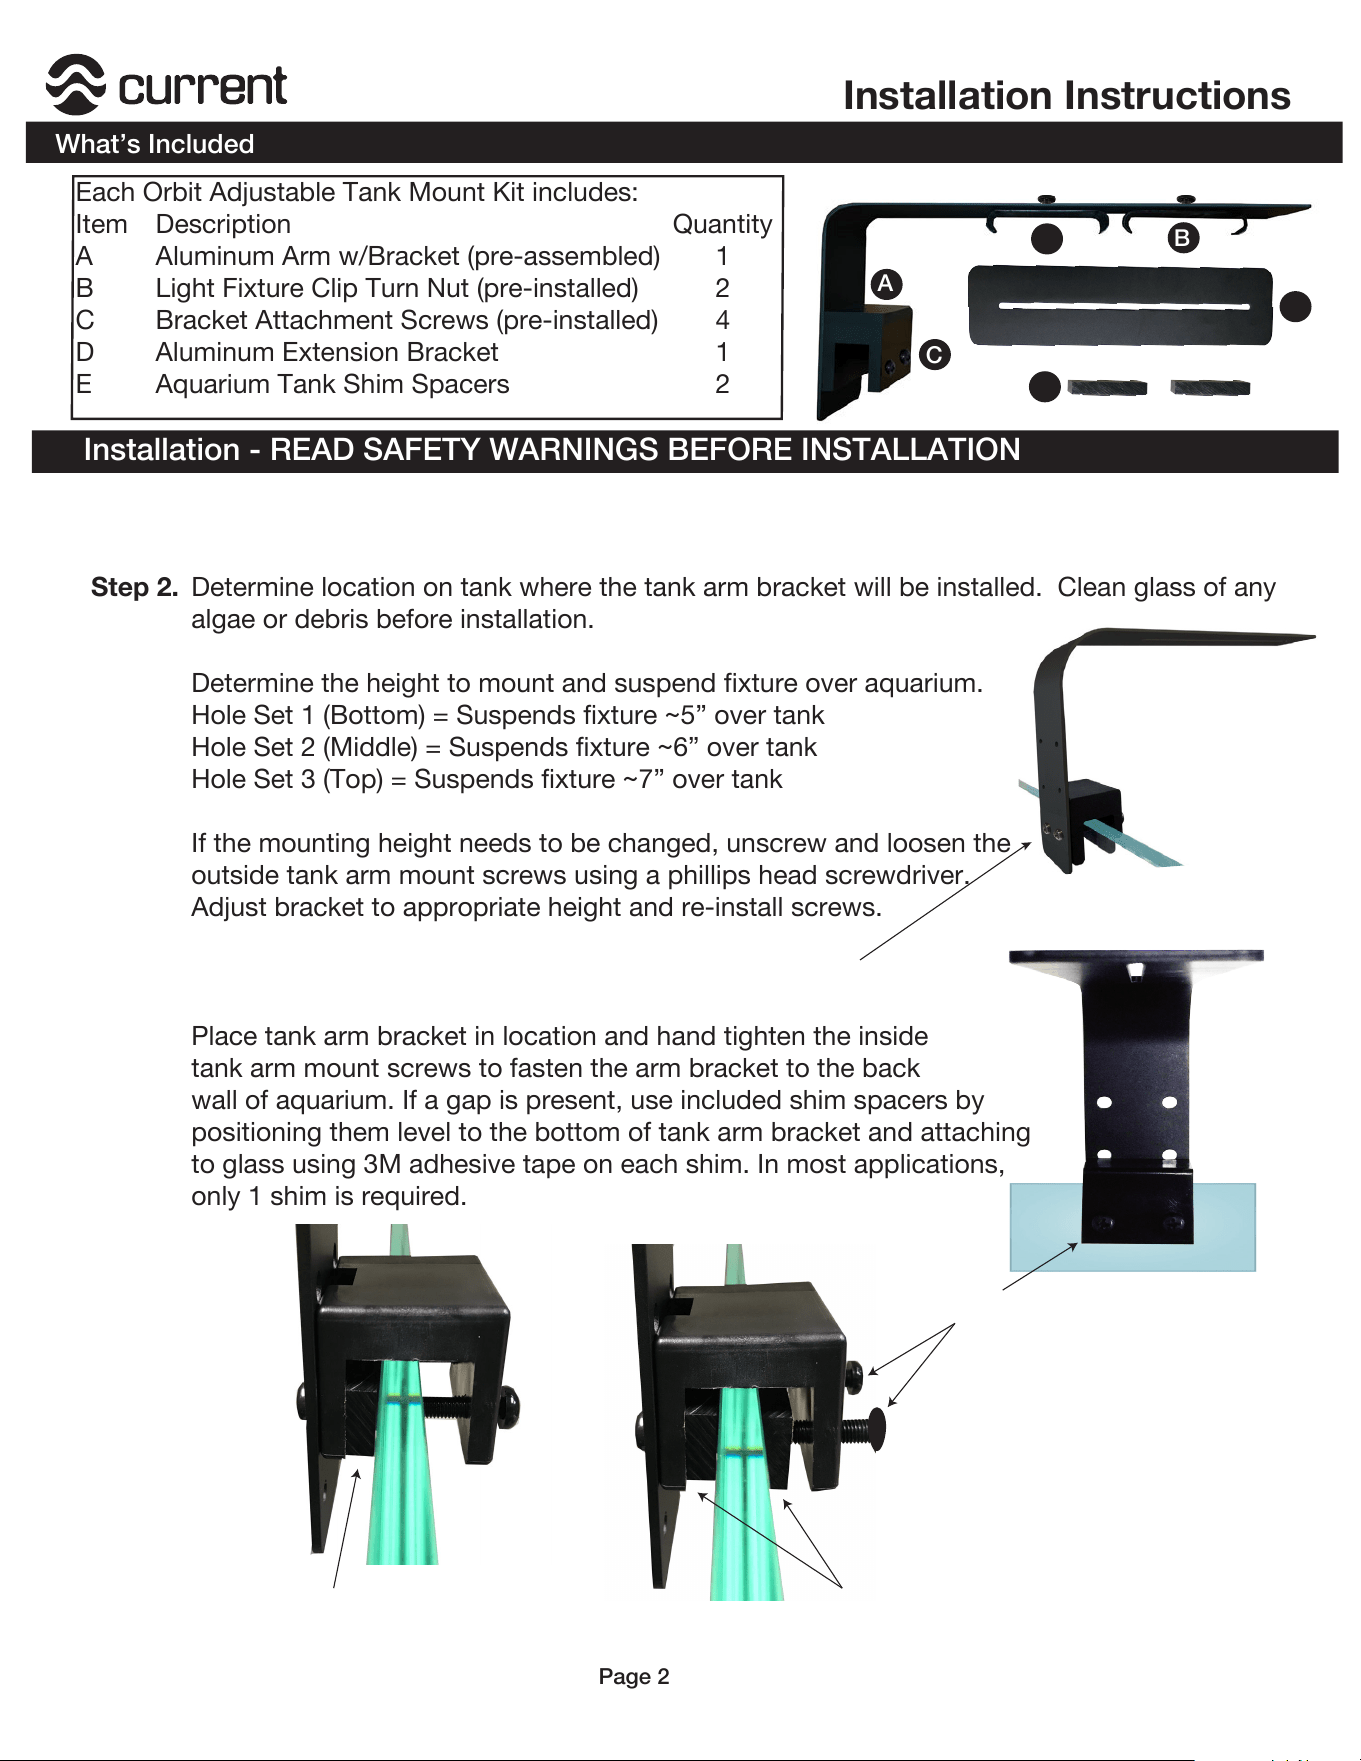
Step 2. Determine location on tank where the tank arm bracket will be installed. Clean glass of any
algae or debris before installation.
Determine the height to mount and suspend fixture over aquarium.
Hole Set 1 (Bottom) = Suspends fixture ~5” over tank
Hole Set 2 (Middle) = Suspends fixture ~6” over tank
Hole Set 3 (Top) = Suspends fixture ~7” over tank
If the mounting height needs to be changed, unscrew and loosen the
outside tank arm mount screws using a phillips head screwdriver.
Adjust bracket to appropriate height and re-install screws.
Place tank arm bracket in location and hand tighten the inside
tank arm mount screws to fasten the arm bracket to the back
wall of aquarium. If a gap is present, use included shim spacers by
positioning them level to the bottom of tank arm bracket and attaching
to glass using 3M adhesive tape on each shim. In most applications,
only 1 shim is required.
Installation - READ SAFETY WARNINGS BEFORE INSTALLATION
Each Orbit Adjustable Tank Mount Kit includes:
Item Description Quantity
A Aluminum Arm w/Bracket (pre-assembled) 1
B Light Fixture Clip Turn Nut (pre-installed) 2
C Bracket Attachment Screws (pre-installed) 4
D
E
Aluminum Extension Bracket
Aquarium Tank Shim Spacers
1
2
C
A
B
Installation Instructions
What’s Included
Page 2
B
Step 4.
Step 5.
Step 3.
Adjust & tighten outer bracket screws
Adjust & tighten inner
bracket screws
Step 1. Remove sliding docking mounts from fixture by pulling the mounts outwards (it can take some
pull.) Save docking mounts for future use, do not discard.
D
E
1 Spacer
Shim
2 Spacer
Shims
NOTE:
Normally, 1 shim spacer is required for
rimless aquariums, 2 Shim Spacers are
recommended for thinner glass aquariums
using wide tank support frames.
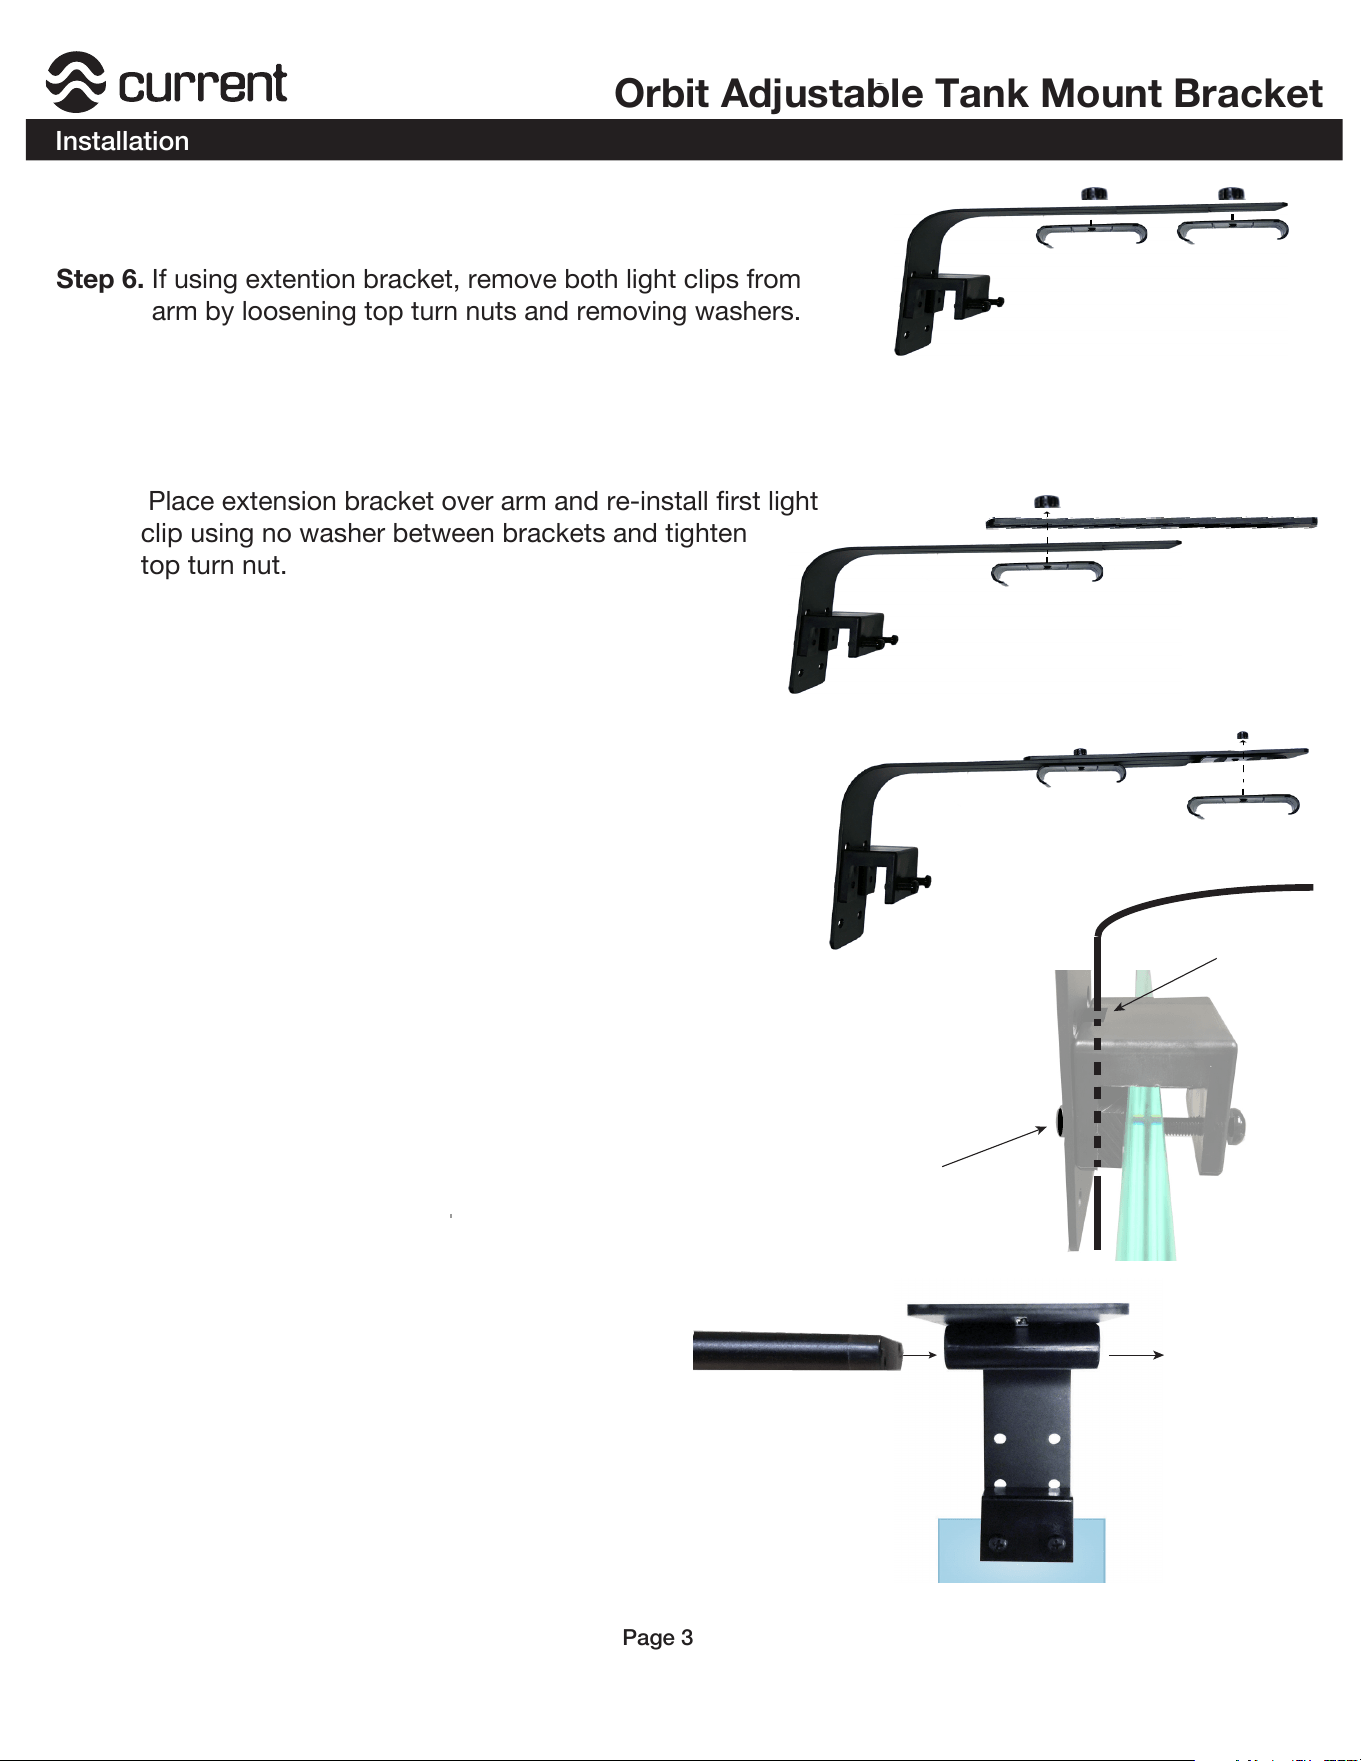
Step 6. If using extention bracket, remove both light clips from
arm by loosening top turn nuts and removing washers.
Place extension bracket over arm and re-install first light
clip using no washer between brackets and tighten
top turn nut.
Orbit Adjustable Tank Mount Bracket
Installation
Page 3
Step 7.
Re-install second light clip to the extension bracket
and tighten top turn nut when adjusted into place.
Step 8.
Step 9. The wide tank mount bracket features a built-in cable channel
on the bracket and can be used for lighting or wave pump
cables.
To organize lighting cable, loosen arm from bracket, position
light cable(s) in cable channel, and re-attach arm to bracket.
Step 10. . Slide light fixture(s) into clip(s) and postion
fixture(s) to acheive the desired light
spread over the aquascape.
Loosen and remove
both light clips
Note: Visit our website www.current-usa.com
for additional installation instructions and videos
including instructions for use with Orbit Marine PRO
Install extension bracket by re-installing
rst light clip using no washer
Install second ight clip
to extension bracket
Loosen arm from bracket
Re-install arm to bracket
Position light cable(s)
in bracket cable channel
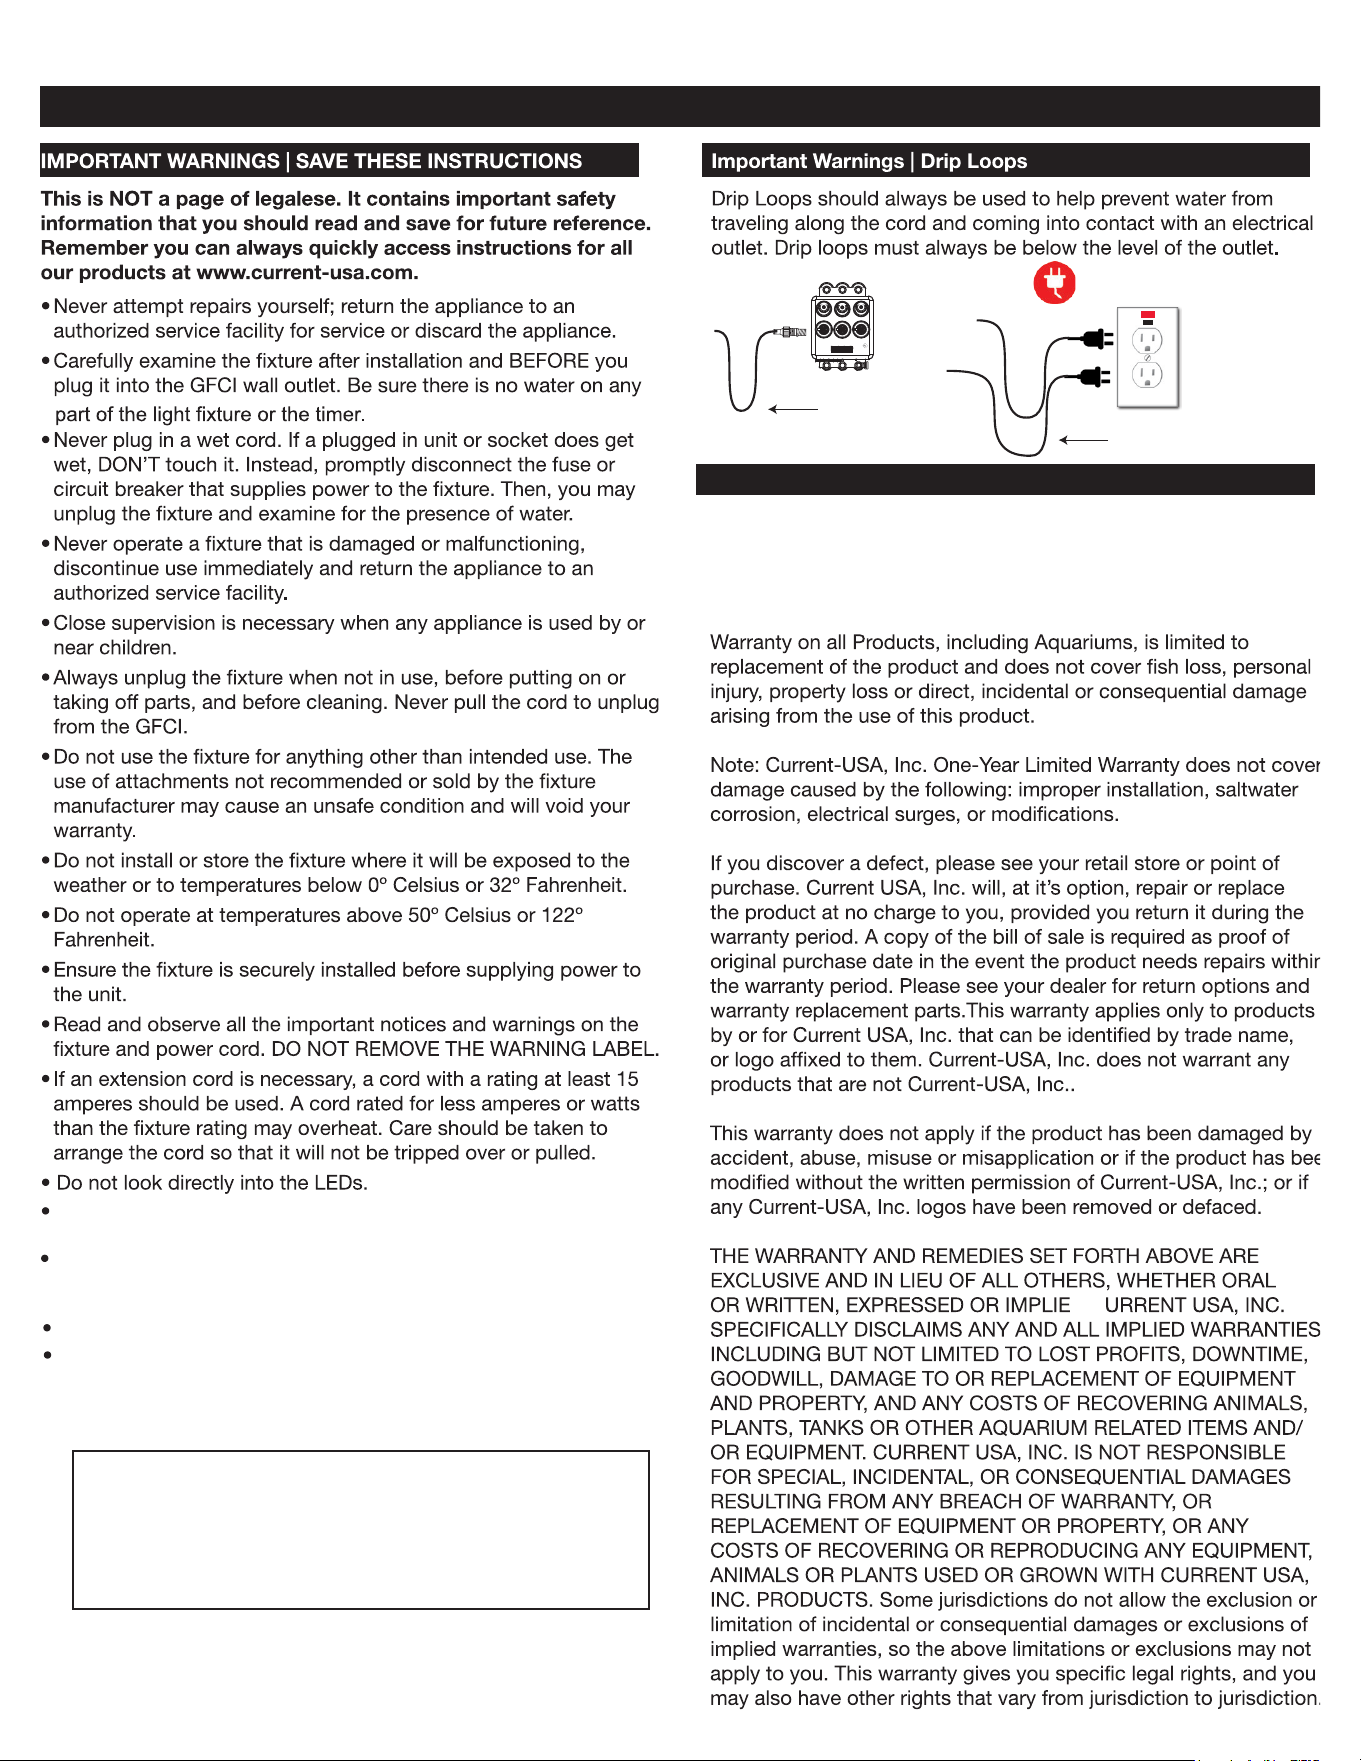
GFCI Outlet
Drip
Loop
P1P3
P2
Drip
Loop
D
C
Use one adjustable tank arm bracket for both 18” and 24”
fixtures. When using 36”, 48” or 72” fixtures, two brackets must
be used.
Disconnect from power and remove fixture from service whenever
performing any cleaning and/or maintenance.
Disconnect from power when adjusting fixture in any way.
Orbit Adjustable Tank Mount Bracket
This product MUST be purchased from an authorized Curr
ent-USA
reseller. Visit our website for a list of unauthorized resellers.
Current USA, Inc. warrants this product against defects in
materials and worksmanship for ONE (1) YEAR from the date of
original retail purchase and is none transferable.
Current-USA One Year Limited Warranty
Safety Warnings and Warranty
Page 4
This tank mount arm bracket is designed to fit rimmed aquariums
with a frame up to 1” or rimless with glass up to 1” thick only.
CAUTION - DO NOT BEND, PULL, PUSH or force the
bracket in anyway once installed on the aquarium.
Doing so may crack theglass panel. Use extreme
caution when adjusting the arms.